Embed Size (px)
Citation preview

• Engineering 1182
College of Engineering Engineering Education Innovation Center
Dimensioning with SolidWorks
Part 2 Alternate Instructor’s PowerPoint modified by R. Busick
Rev: 20140114, AJP Dimensioning in SolidWorks 1
• Engineering 1182
Formal Drawings
Formal Drawing Components: 1. Dimensions Part 2
• Size and Type of Features • Good Practices
Rev: 20140114, AJP Dimensioning in SolidWorks 2
Definition: Detailed multi-view representations of a finished part
• Engineering 1182
Review Basic Dimensioning
Dimensioning is used to define an object so that it could be manufactured and must: • Define the overall size of the
part in all 3 dimensions. • Define the size and location of
the features of the part in all 3 dimensions.
Dimensioning in SolidWorks 3 Rev: 20140114, AJP

• Engineering 1182
Review of Basic Dimensioning
1.Overall Size 2.Features Size and Location
.75
2
2
.25
1
Dimensioning in SolidWorks 4 Rev: 20140114, AJP
.5
1 R1
Ø1
1.Overall Size 2.Features Size and Location
Dimension Line
Extension Line

• Engineering 1182
Rev: 20140114, AJP Dimensioning in SolidWorks 5
Rule 1: Appropriate View
Each dimension should be placed in a descriptive or characteristic view without dimensioning to hidden lines

• Engineering 1182
Rev: 20140114, AJP Dimensioning in SolidWorks 6
Rule 2: Clarity
Dimensions should be located outside the boundaries of the object whenever possible and should be spaced far enough apart to be read clearly

• Engineering 1182
Rev: 20140114, AJP Dimensioning in SolidWorks 7
Rule 3: Location of Dimensions
Dimensions that are shared between two views should be located between those views

• Engineering 1182
Rev: 20140114, AJP Dimensioning in SolidWorks 8
Rule 4: Cylinders
• Positive cylinder (e.g. a rod) – dimension in a view where the side of the cylinder appears as a rectangle.
• Negative cylinder (e.g. a hole) – dimension in the view where the cylinder appears as a circle.
• A diameter symbol is always required before a numerical value.

• Engineering 1182
Rev: 20140114, AJP Dimensioning in SolidWorks 9
Rule 5: Amount of Dimensions
Do not over-dimension or under-dimension an object
• Engineering 1182
Rev: 20140114, AJP Dimensioning in SolidWorks 10
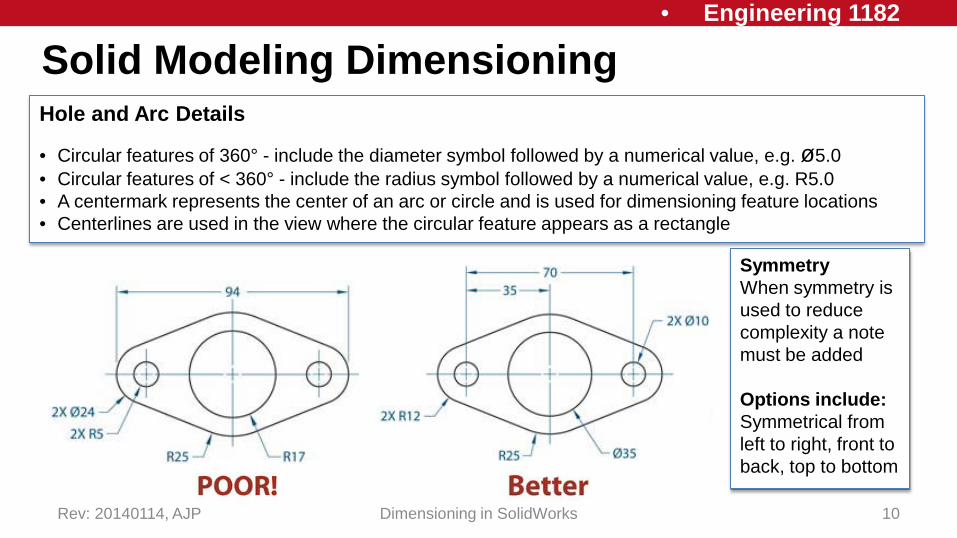
Hole and Arc Details
• Circular features of 360° - include the diameter symbol followed by a numerical value, e.g. ø5.0 • Circular features of < 360° - include the radius symbol followed by a numerical value, e.g. R5.0 • A centermark represents the center of an arc or circle and is used for dimensioning feature locations • Centerlines are used in the view where the circular feature appears as a rectangle
Symmetry When symmetry is used to reduce complexity a note must be added Options include: Symmetrical from left to right, front to back, top to bottom
Solid Modeling Dimensioning

• Engineering 1182 Review-SolidWorks: Adding Dimensions, Center Marks and Center Lines
Rev: 20140217, RCB Dimensioning in SolidWorks 11
Note that sometimes the Isometric needs to be re-scaled to allow adequate drawing space which
requires a NOTE.
Dimensions can be added using the
“Smart Dimension” feature
Notes can be added to reduce the number of dimensions by stating
symmetry or identifying fillet radii

• Engineering 1182
10 Basic Guidelines of Good Dimensioning*
Rev: 20140218, RCB Dimensioning in SolidWorks 12
* OVERALL CLARITY is the ultimate goal. However, if you do not follow any of the above guidelines, the results should be distinctly clearer than what you could achieve without violating the guidelines.
These guidelines can also be found on the EEIC 1182 website under Class 12 and Class 13
It is strongly recommended that you make a copy of the website word document and use it as a reference when you perform dimensioning.
• Engineering 1182
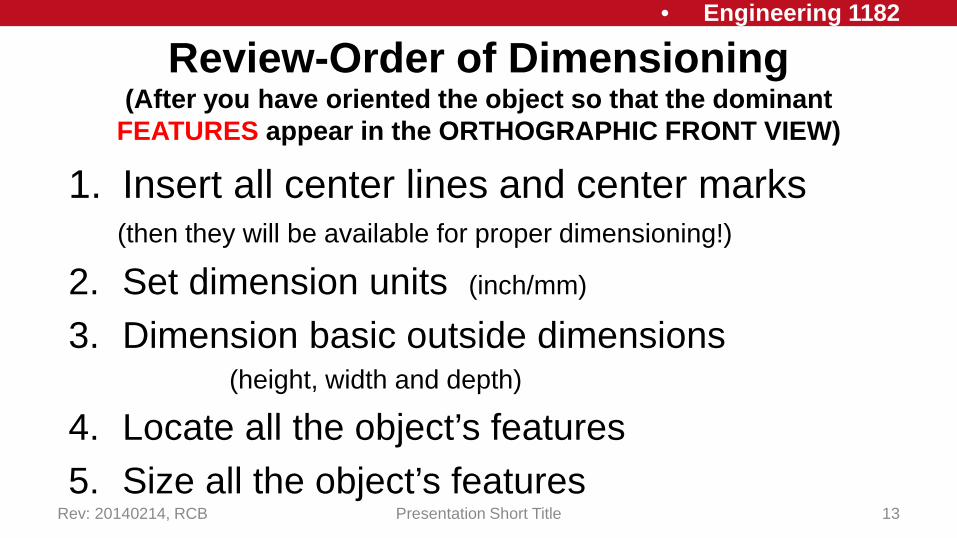
Review-Order of Dimensioning (After you have oriented the object so that the dominant
FEATURES appear in the ORTHOGRAPHIC FRONT VIEW)
1. Insert all center lines and center marks (then they will be available for proper dimensioning!)
2. Set dimension units (inch/mm)
3. Dimension basic outside dimensions (height, width and depth)
4. Locate all the object’s features 5. Size all the object’s features
Rev: 20140214, RCB Presentation Short Title 13

• Engineering 1182
Dimensions Wrap Up Rules of Dimensioning 1. Appropriate View 2. Clarity 3. Location of Dimensions 4. Cylinders 5. Amount of Dimensions
Homework Assignment Now dimension the part that was created for Extracted Drawings HW. (Hint: Use Notes for Symmetry and fillet radii)
Rev: 20140214, RCB Dimensioning in SolidWorks 14
NOTE: Per the home work instructions, do NOT implement the R4 fillets since then you will be unable to properly dimension the drawing.

• Engineering 1182
In-Class Assignment
Rev: 20140114, AJP Dimensioning in SolidWorks 15
Now complete the drawing started
previously by adding all necessary dimensions
and notes. (Hint: Notice Symmetry)
• Engineering 1182
The Following 3 slides show how to:
Rev: 20140114, AJP Dimensioning in SolidWorks 16
1. Control Dimension Precision ( how many decimal places)
2. Establish Proper Dimensioning Styles ( ANSI ) 3. Eliminate Tangent Edges
These slides should be shown in SLIDE SHOW MODE
• Engineering 1182
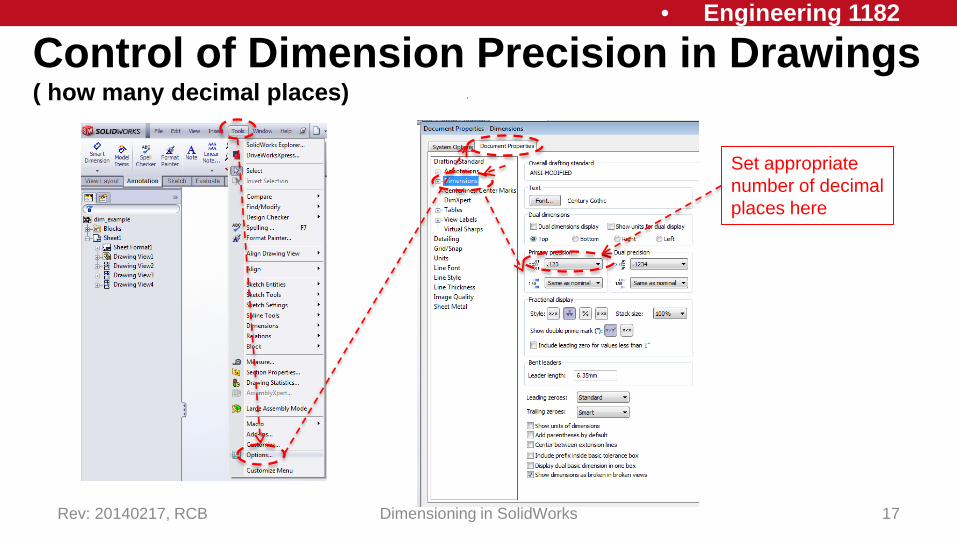
Control of Dimension Precision in Drawings ( how many decimal places)
Rev: 20140217, RCB Dimensioning in SolidWorks 17
Set appropriate number of decimal places here

• Engineering 1182
Modifying the Drawing Template for Proper Dimensioning
18
If after you bring up the OSU template and try to dimension a hole you find the following incorrect format:
To correct it, go to Tools/Options/Document Properties and even if you find ANSI (which is the desired format), open the menu using the down arrow and select anything else ( like ISO) and click OK.
Then return to Tools/Options/Document Properties and select ANSI and click OK. When you dimension the hole you find the correct format.
Rev: 20140218, RCB
• Engineering 1182
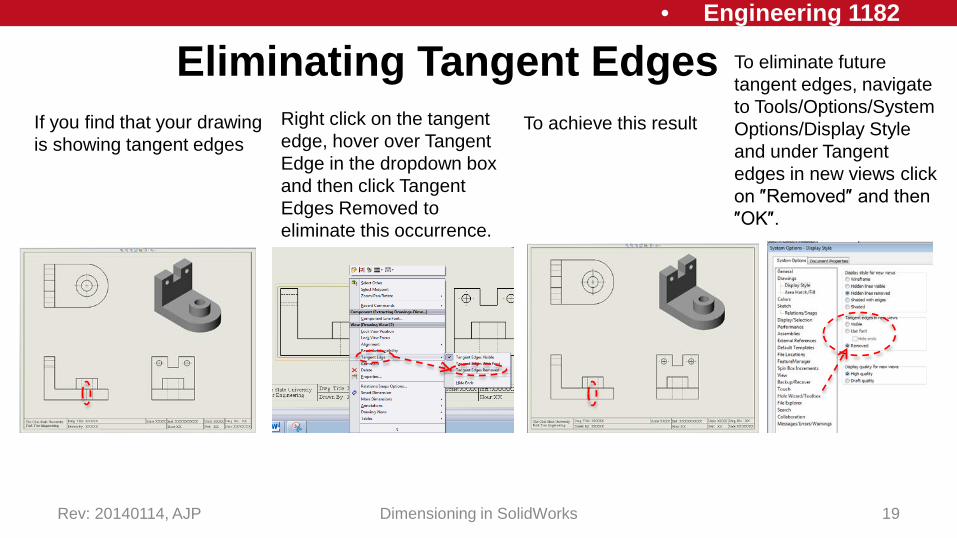
Eliminating Tangent Edges
Rev: 20140114, AJP Dimensioning in SolidWorks 19
If you find that your drawing is showing tangent edges
Right click on the tangent edge, hover over Tangent Edge in the dropdown box and then click Tangent Edges Removed to eliminate this occurrence.
To achieve this result
To eliminate future tangent edges, navigate to Tools/Options/System Options/Display Style and under Tangent edges in new views click on ″Removed″ and then ″OK″.