Embed Size (px)
Citation preview
1 Dell Demo Center – https://demos.dell.com | Dell Inc., 2016
Demo Lab Guide – Active Systems Manager
Active Systems Manager Deployment Walkthrough
Product Domain: Server
Author: Ian O’Gorman
Version: 1.01 Date: 21/01/2016

2 Dell Demo Center – https://demos.dell.com | Dell Inc., 2016
Table of Contents 1 Product Overview ............................................................................................................................................ 3
1.1 Lab Preparation Considerations and Caveats ................................................................................. 4
2 Introduction ...................................................................................................................................................... 5
2.1 Lab Topology and Essential Information .......................................................................................... 5
3 Active System Manager – Infrastructure Automation ............................................................................. 6
3.1.1 Infrastructure Provisioning ................................................................................................................. 6
3.2 Templates ............................................................................................................................................. 13
3.3 Advanced demonstrations ................................................................................................................ 15
3.3.1 Showing back end processes in consoles...................................................................................... 15
3.4 Deploying VMs on top of the initial demo ..................................................................................... 16
3 Dell Demo Center – https://demos.dell.com | Dell Inc., 2016
1 Product Overview
Dell Active System Manager (ASM) automates delivery of IT services to cut the time, cost and complexity
of data center management. Fast, efficient and flexible, Active System Manager is Dell’s unified
management and open automation solution that enables any IT administrator to provision new
infrastructure and workload services in minutes. ASM simplifies and accelerates the deployment,
provisioning, and lifecycle management of IT services.
4 Dell Demo Center – https://demos.dell.com | Dell Inc., 2016
1.1 Lab Preparation Considerations and Caveats
It is in your best interests to ensure the demo environment you will be demonstrating is clean & tidy
before you begin. For this reason we would recommend, where possible, you log in to your demo at
least 15 minutes prior to delivery and check the following;
1. Familiarize yourself with the environment during this time and check any specific features you are
expecting to demo.
2. Most importantly, be crystal clear with yourself on what it is you plan to show. A full demo of every
feature described below (with questions) can take several hours. If you only have a short time slot
be sure to focus on the key points that address the customer’s pain points and will drive value home
to them.
3. Ensure that you have scheduled the demo for sufficient time so as not to have the demo end before
you are finished with the customer.
Any other guidance on how the user should prepare for the lab can be added here. If there are
limitation or something the user should be aware of call out also.
5 Dell Demo Center – https://demos.dell.com | Dell Inc., 2016
2 Introduction
This demonstration is primarily aimed at the CIO/CFO level and IT management staff. It also provides a
useful quick introduction for staff that are not familiar with Dell Active System Manager (ASM). It is highly
recommended to have done an overview of ASM with the audience before you start the demo, as it will
be easier for them to follow if they understand the value proposition and feature set before they see a
demo. You can access the latest ASM presentation a:
http://salesedge.dell.com/doc?id=0901bc82807d5e74&ll=d&pm=111413830
Provisioning any production IT infrastructure from bare-metal to fully-functional infrastructure is a
complex task that typically requires a high-level technical resource operating full-time for an extended
period of time. This environment is a live environment, not simulated. Due to this fact, some processes
take time to complete, so don’t expect to be able to watch a deployment end to end in a quick demo.
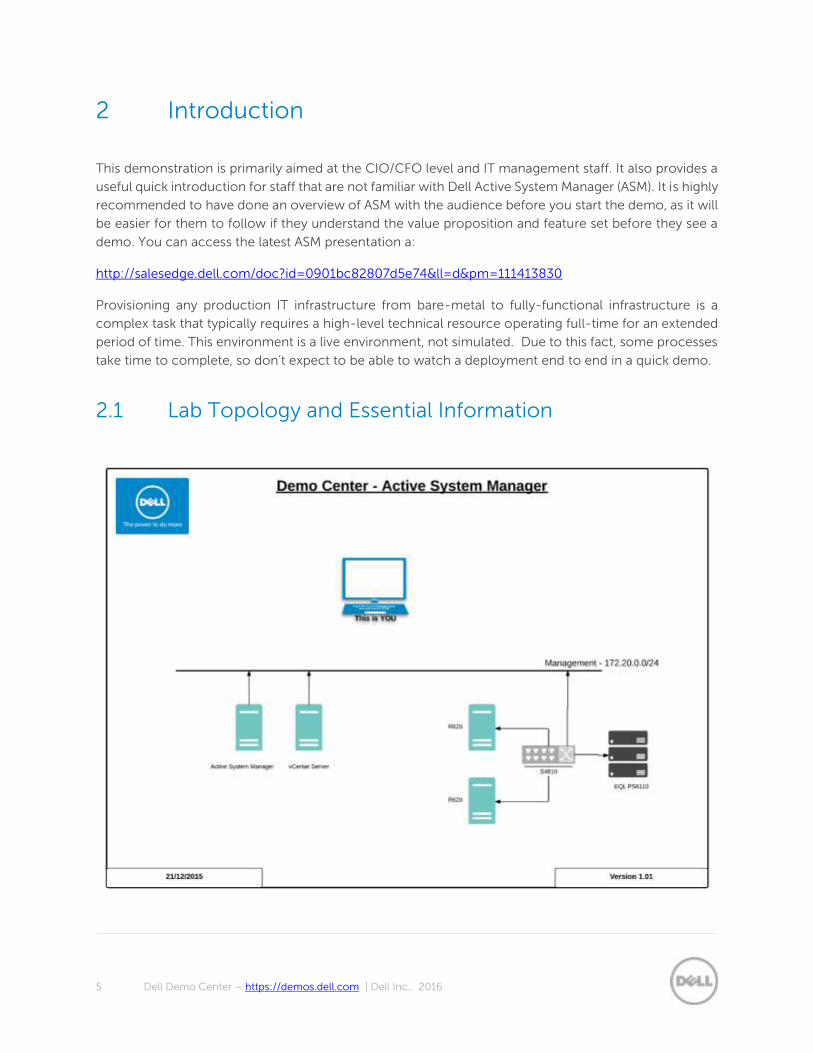
2.1 Lab Topology and Essential Information
6 Dell Demo Center – https://demos.dell.com | Dell Inc., 2016
3 Active System Manager – Infrastructure
Automation
Once the physical installation tasks; installing racks, storage, switches, cabling are done, it still takes a
day (or more) and 575 steps to configure hardware and deploy infrastructure, virtualization, Operating
Systems, and applications to do something such as a 4 node ESXi cluster.
ASM handles all of these tasks, delivering the same end result of this example of a fully configured ESXi
cluster. It automates and standardizes all of the associated tasks, ensuring speed and reliability with
dramatically-reduced hands-on time.
In this case we reduce the workload for an IT administrator or engineer from 575 steps and a whole day
to just a few steps, and a couple of minutes of admin time, making a more efficient process. And I’m
going to walk you through that with this demo.
A Solutions Architect has already defined the tasks and parameters of the installation. Active System
Manager (ASM) translates those tasks into an action where a Junior Administrator can complete the
process using the web console with a few clicks, and doesn’t have to involve other senior administrators
or architects.
All manual tasks are handled automatically, including registering hosts in VCenter, storage provisioning,
setup of cluster settings, IP-addressing, virtual networks, and so on.
This is just an example of how Active System Manager can significantly help by reducing the day-to-day
work for an Administrator.
3.1.1 Infrastructure Provisioning
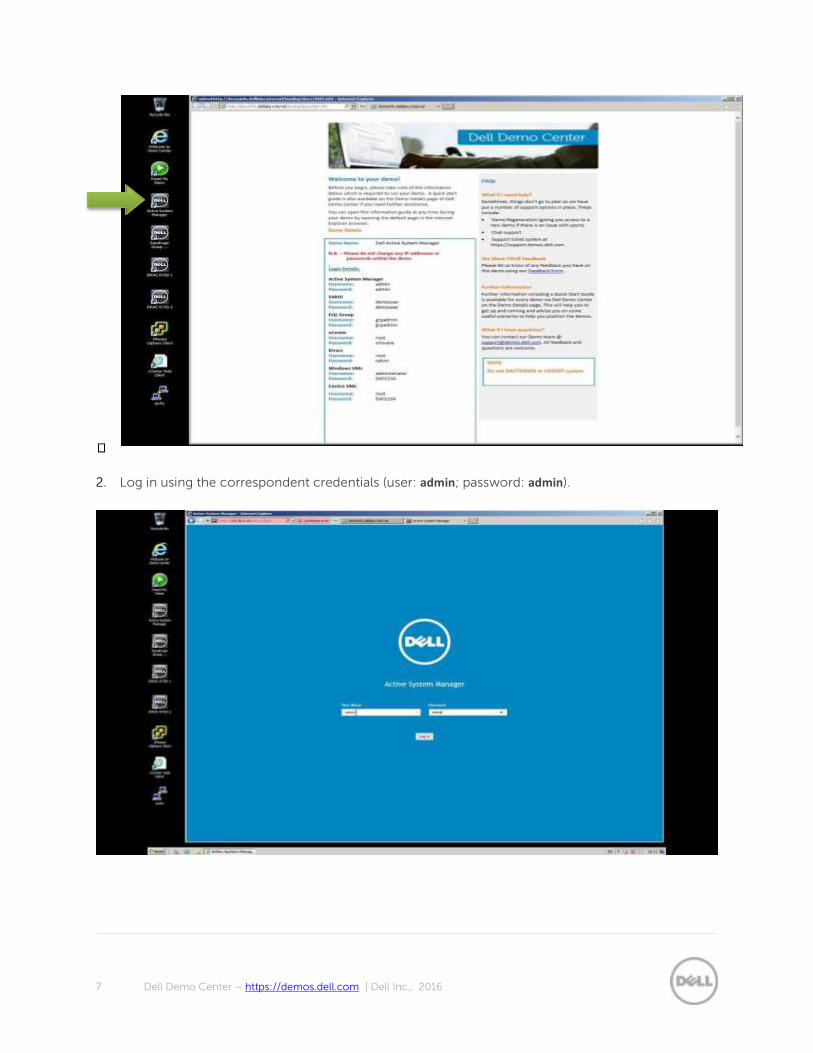
1. Launch the DSC ASM 7.6 Demo environment by double clicking the Active System Manager shortcut
on the desktop.
7 Dell Demo Center – https://demos.dell.com | Dell Inc., 2016
2. Log in using the correspondent credentials (user: admin; password: admin).
8 Dell Demo Center – https://demos.dell.com | Dell Inc., 2016
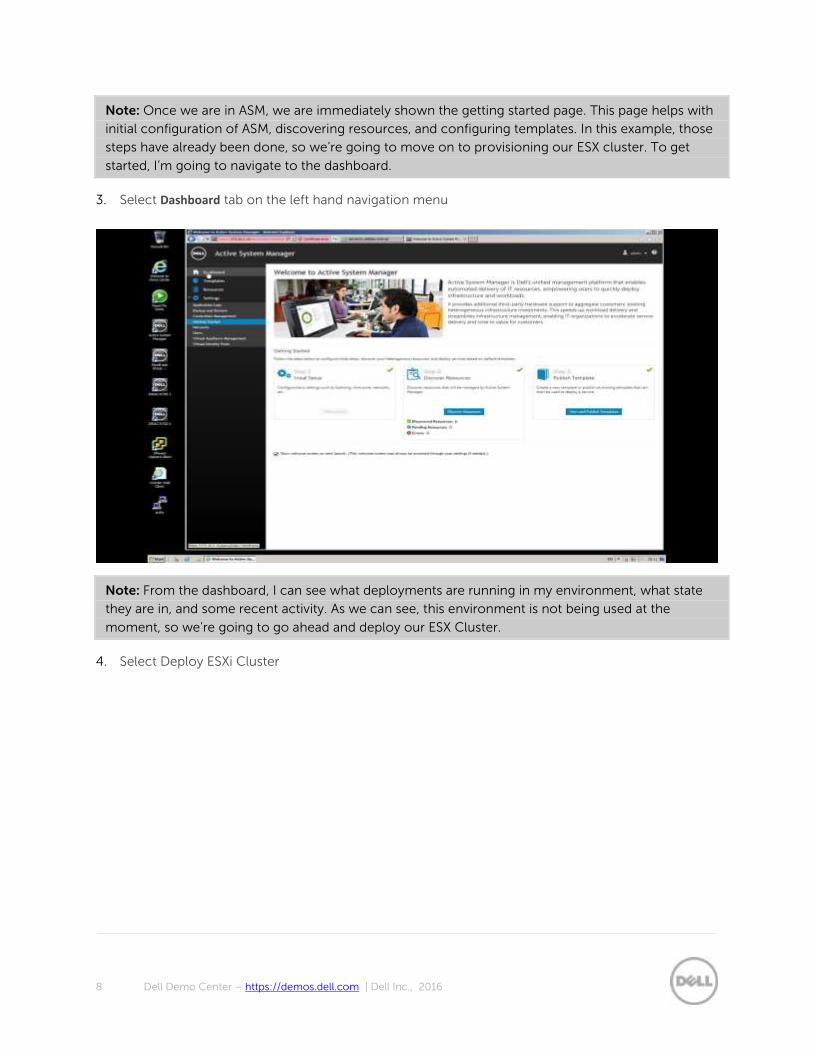
Note: Once we are in ASM, we are immediately shown the getting started page. This page helps with
initial configuration of ASM, discovering resources, and configuring templates. In this example, those
steps have already been done, so we’re going to move on to provisioning our ESX cluster. To get
started, I’m going to navigate to the dashboard.
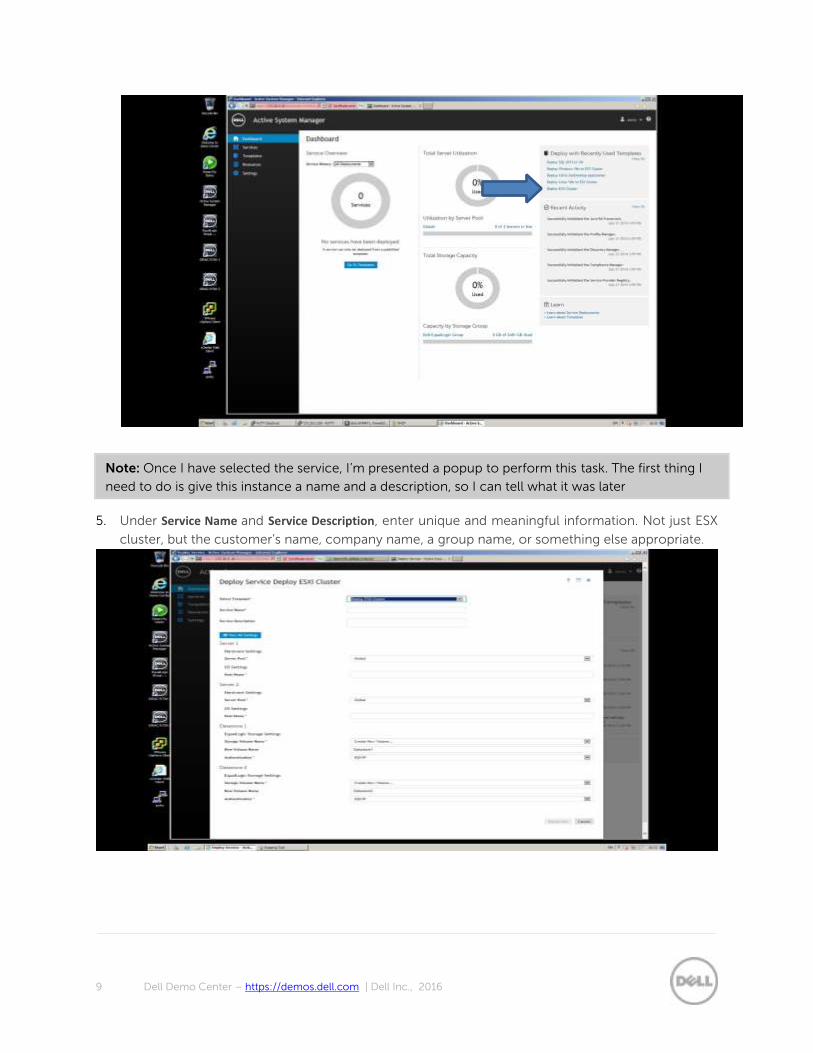
3. Select Dashboard tab on the left hand navigation menu
Note: From the dashboard, I can see what deployments are running in my environment, what state
they are in, and some recent activity. As we can see, this environment is not being used at the
moment, so we’re going to go ahead and deploy our ESX Cluster.
4. Select Deploy ESXi Cluster
9 Dell Demo Center – https://demos.dell.com | Dell Inc., 2016
Note: Once I have selected the service, I’m presented a popup to perform this task. The first thing I
need to do is give this instance a name and a description, so I can tell what it was later
5. Under Service Name and Service Description, enter unique and meaningful information. Not just ESX
cluster, but the customer’s name, company name, a group name, or something else appropriate.
10 Dell Demo Center – https://demos.dell.com | Dell Inc., 2016
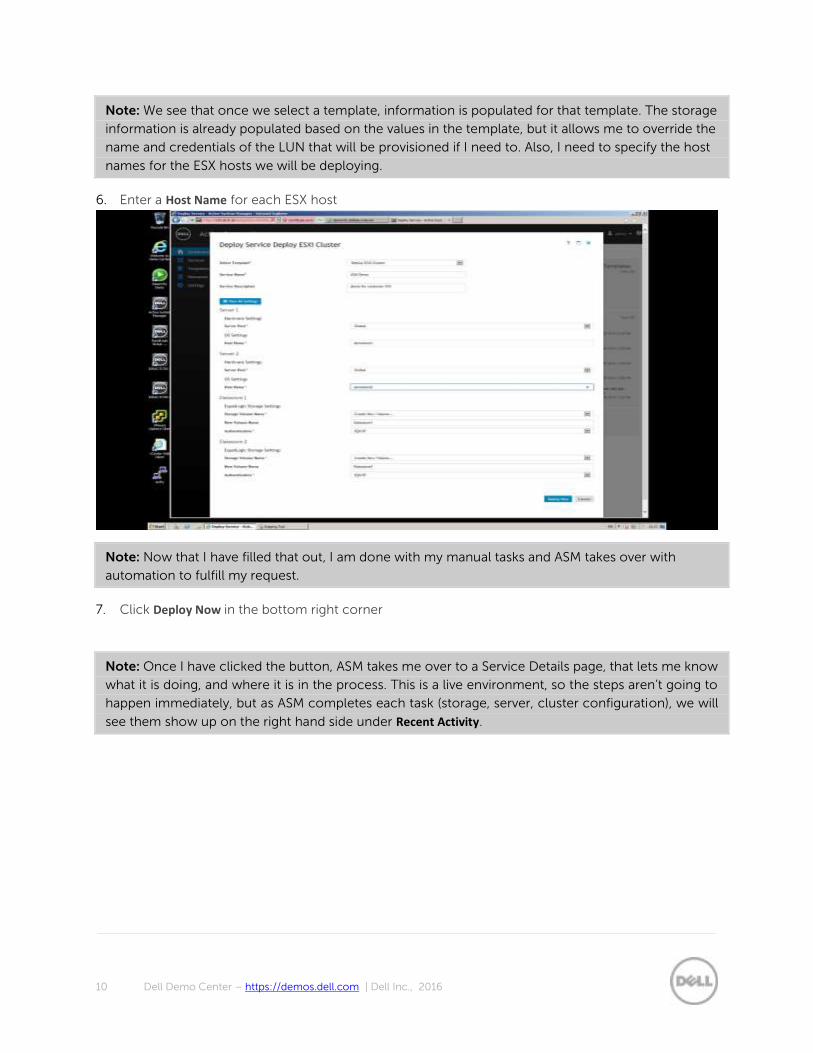
Note: We see that once we select a template, information is populated for that template. The storage
information is already populated based on the values in the template, but it allows me to override the
name and credentials of the LUN that will be provisioned if I need to. Also, I need to specify the host
names for the ESX hosts we will be deploying.
6. Enter a Host Name for each ESX host
Note: Now that I have filled that out, I am done with my manual tasks and ASM takes over with
automation to fulfill my request.
7. Click Deploy Now in the bottom right corner
Note: Once I have clicked the button, ASM takes me over to a Service Details page, that lets me know
what it is doing, and where it is in the process. This is a live environment, so the steps aren’t going to
happen immediately, but as ASM completes each task (storage, server, cluster configuration), we will
see them show up on the right hand side under Recent Activity.
11 Dell Demo Center – https://demos.dell.com | Dell Inc., 2016
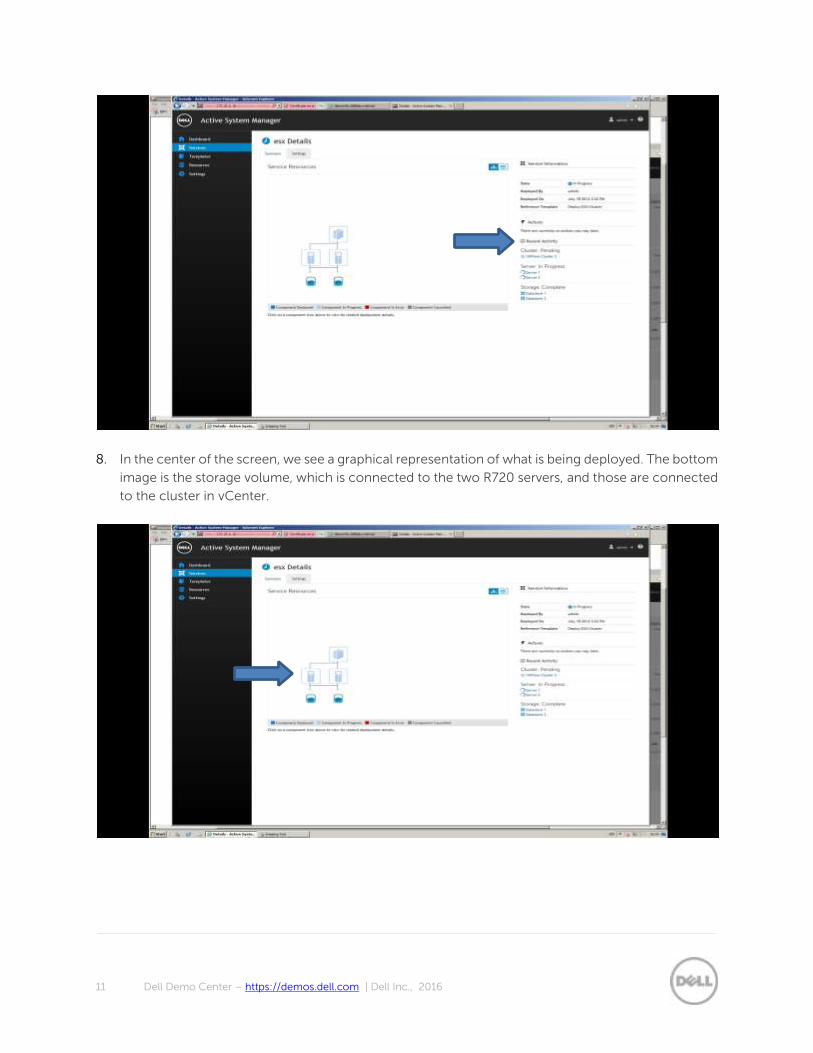
8. In the center of the screen, we see a graphical representation of what is being deployed. The bottom
image is the storage volume, which is connected to the two R720 servers, and those are connected
to the cluster in vCenter.
12 Dell Demo Center – https://demos.dell.com | Dell Inc., 2016
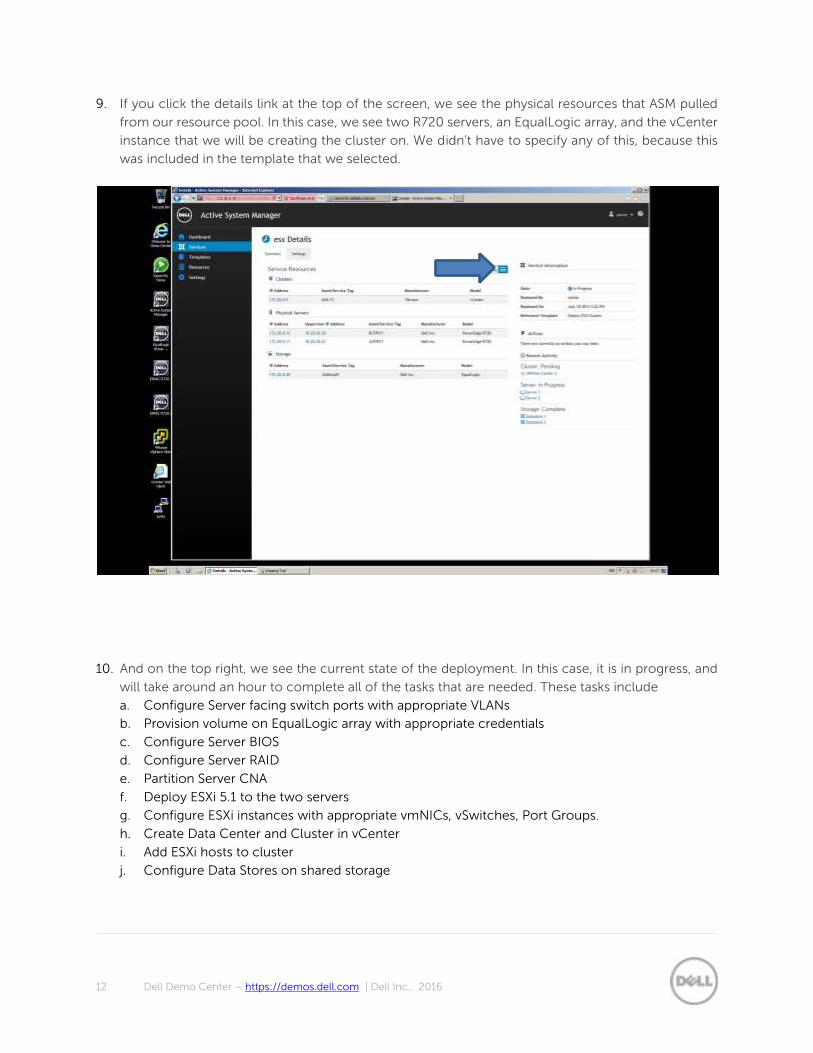
9. If you click the details link at the top of the screen, we see the physical resources that ASM pulled
from our resource pool. In this case, we see two R720 servers, an EqualLogic array, and the vCenter
instance that we will be creating the cluster on. We didn’t have to specify any of this, because this
was included in the template that we selected.
10. And on the top right, we see the current state of the deployment. In this case, it is in progress, and
will take around an hour to complete all of the tasks that are needed. These tasks include
a. Configure Server facing switch ports with appropriate VLANs
b. Provision volume on EqualLogic array with appropriate credentials
c. Configure Server BIOS
d. Configure Server RAID
e. Partition Server CNA
f. Deploy ESXi 5.1 to the two servers
g. Configure ESXi instances with appropriate vmNICs, vSwitches, Port Groups.
h. Create Data Center and Cluster in vCenter
i. Add ESXi hosts to cluster
j. Configure Data Stores on shared storage
13 Dell Demo Center – https://demos.dell.com | Dell Inc., 2016
This concludes a short, introductory demo of a regular use case of ASM. After seeing this, the audience
should understand how ASM can deliver value through time savings, simplification of process, and
standardization. It is not important to show all aspects of the product in the initial demo, but to
demonstrate these values and allow for a deeper dive into the product and its capabilities. The
deployment will not complete during this demo, but if the meeting will continue on, the deployment
will move along the process on the screen.
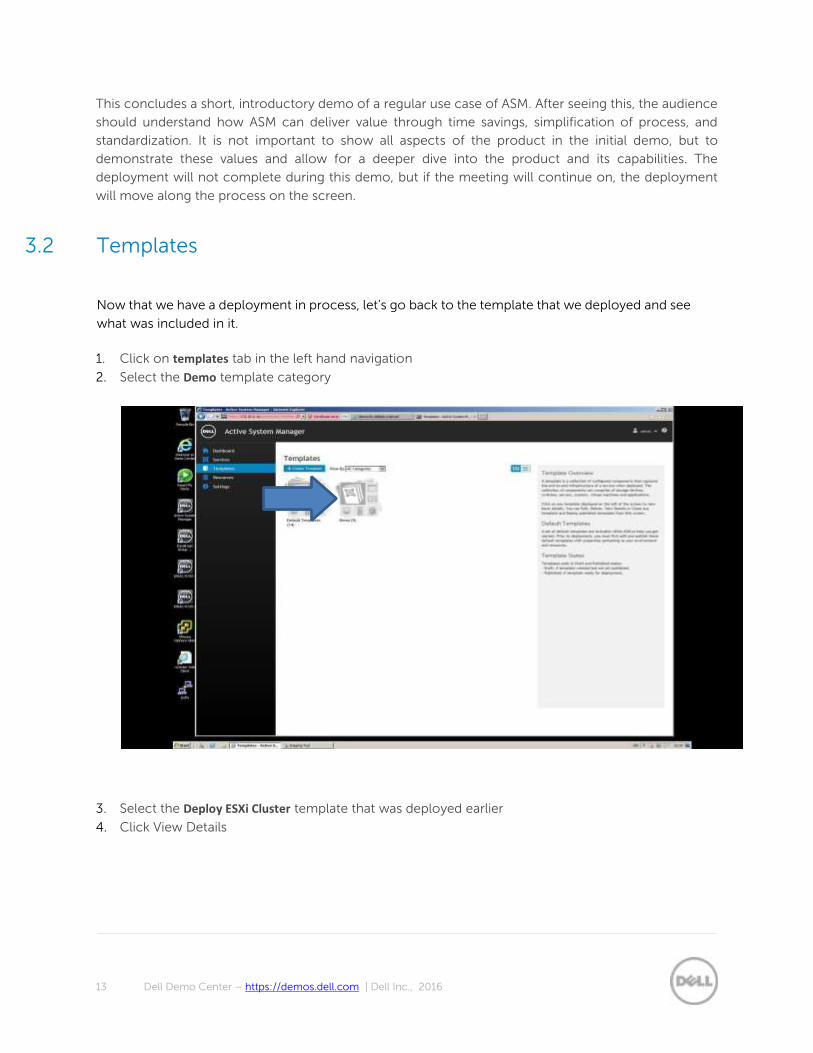
3.2 Templates
Now that we have a deployment in process, let’s go back to the template that we deployed and see
what was included in it.
1. Click on templates tab in the left hand navigation
2. Select the Demo template category
3. Select the Deploy ESXi Cluster template that was deployed earlier
4. Click View Details
14 Dell Demo Center – https://demos.dell.com | Dell Inc., 2016
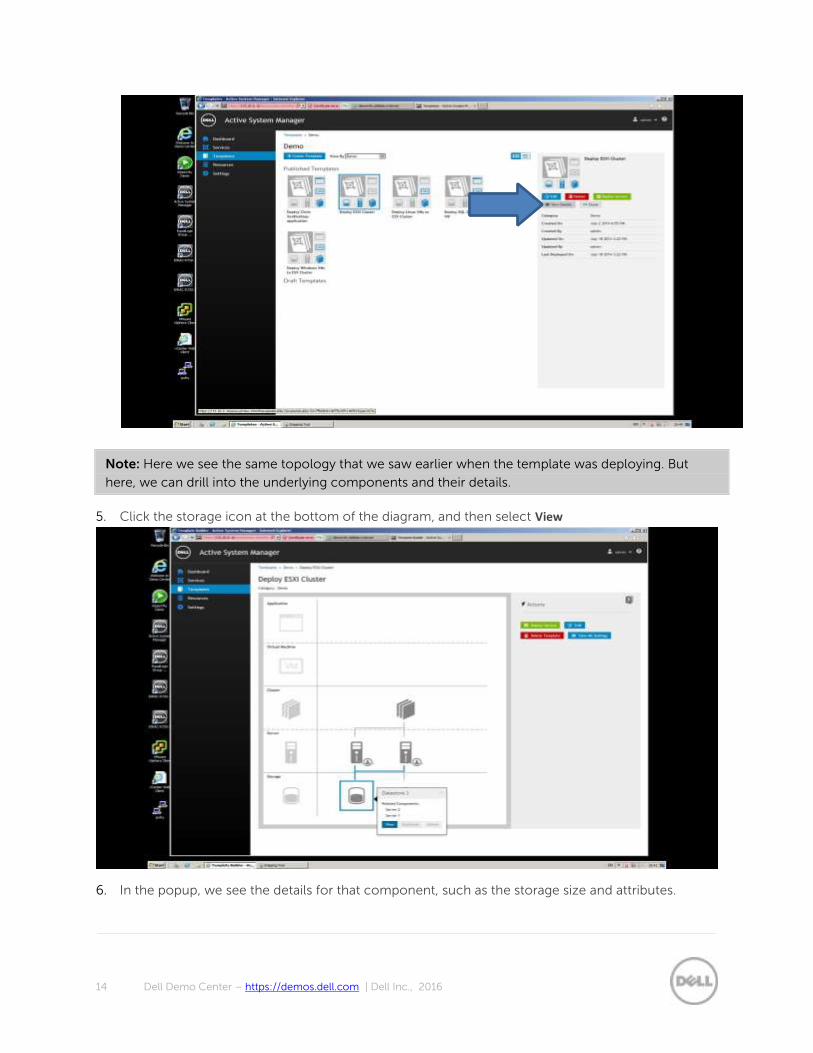
Note: Here we see the same topology that we saw earlier when the template was deploying. But
here, we can drill into the underlying components and their details.
5. Click the storage icon at the bottom of the diagram, and then select View
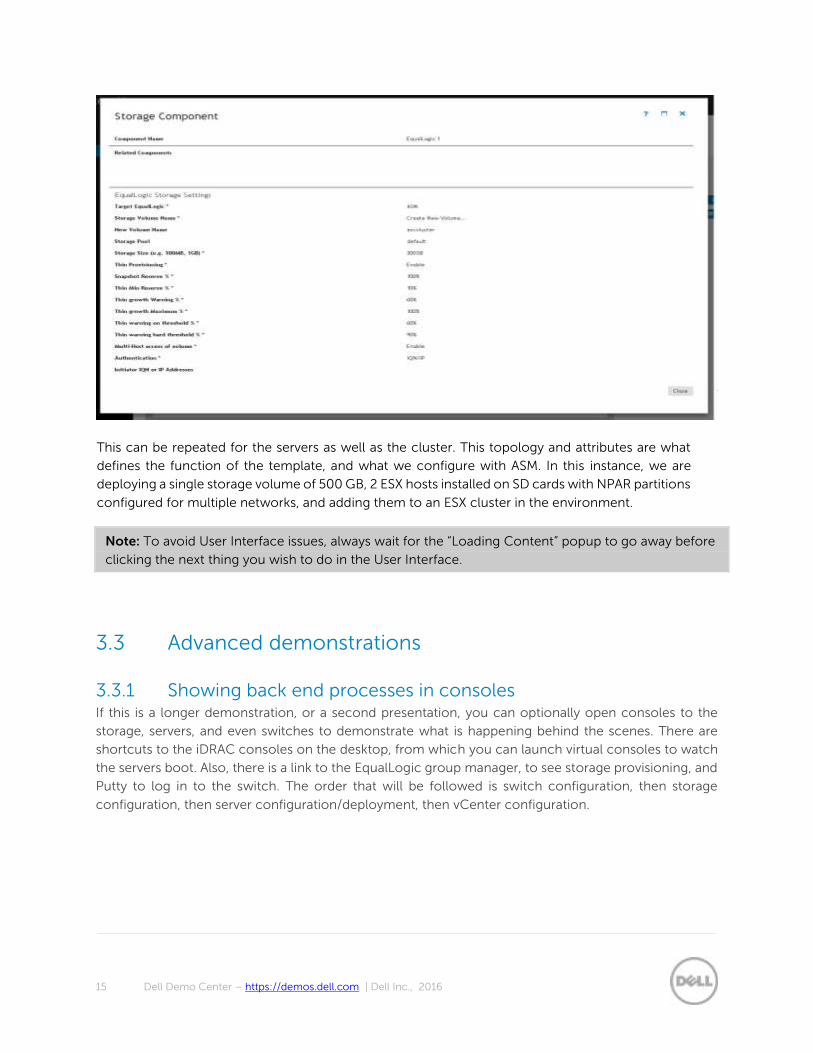
6. In the popup, we see the details for that component, such as the storage size and attributes.
15 Dell Demo Center – https://demos.dell.com | Dell Inc., 2016
This can be repeated for the servers as well as the cluster. This topology and attributes are what
defines the function of the template, and what we configure with ASM. In this instance, we are
deploying a single storage volume of 500 GB, 2 ESX hosts installed on SD cards with NPAR partitions
configured for multiple networks, and adding them to an ESX cluster in the environment.
Note: To avoid User Interface issues, always wait for the “Loading Content” popup to go away before
clicking the next thing you wish to do in the User Interface.
3.3 Advanced demonstrations
3.3.1 Showing back end processes in consoles If this is a longer demonstration, or a second presentation, you can optionally open consoles to the
storage, servers, and even switches to demonstrate what is happening behind the scenes. There are
shortcuts to the iDRAC consoles on the desktop, from which you can launch virtual consoles to watch
the servers boot. Also, there is a link to the EqualLogic group manager, to see storage provisioning, and
Putty to log in to the switch. The order that will be followed is switch configuration, then storage
configuration, then server configuration/deployment, then vCenter configuration.
16 Dell Demo Center – https://demos.dell.com | Dell Inc., 2016
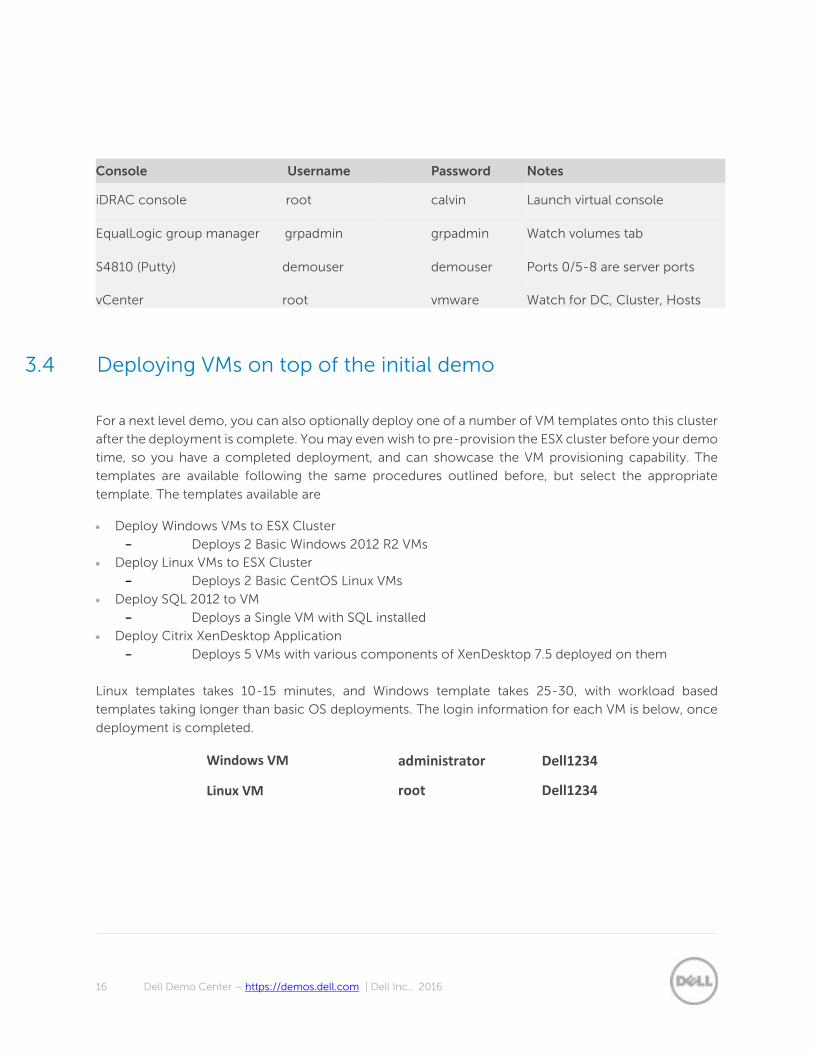
Console Username Password Notes
iDRAC console root calvin Launch virtual console
EqualLogic group manager grpadmin grpadmin Watch volumes tab
S4810 (Putty) demouser demouser Ports 0/5-8 are server ports
vCenter root vmware Watch for DC, Cluster, Hosts
3.4 Deploying VMs on top of the initial demo
For a next level demo, you can also optionally deploy one of a number of VM templates onto this cluster
after the deployment is complete. You may even wish to pre-provision the ESX cluster before your demo
time, so you have a completed deployment, and can showcase the VM provisioning capability. The
templates are available following the same procedures outlined before, but select the appropriate
template. The templates available are
Deploy Windows VMs to ESX Cluster
- Deploys 2 Basic Windows 2012 R2 VMs
Deploy Linux VMs to ESX Cluster
- Deploys 2 Basic CentOS Linux VMs
Deploy SQL 2012 to VM
- Deploys a Single VM with SQL installed
Deploy Citrix XenDesktop Application
- Deploys 5 VMs with various components of XenDesktop 7.5 deployed on them
Linux templates takes 10-15 minutes, and Windows template takes 25-30, with workload based
templates taking longer than basic OS deployments. The login information for each VM is below, once
deployment is completed.
Windows VM administrator Dell1234
Linux VM root Dell1234