Embed Size (px)
Citation preview

Dell Storage with Microsoft Storage Spaces Best Practices Guide
Notes, cautions, and warningsNOTE: A NOTE indicates important information that helps you make better use of your computer.
CAUTION: A CAUTION indicates either potential damage to hardware or loss of data and tells you how to avoid the problem.
WARNING: A WARNING indicates a potential for property damage, personal injury, or death.
Copyright © 2015 Dell Inc. All rights reserved. This product is protected by U.S. and international copyright and intellectual property laws. Dell™ and the Dell logo are trademarks of Dell Inc. in the United States and/or other jurisdictions. All other marks and names mentioned herein may be trademarks of their respective companies.
2015-06
Rev. A00

Contents
1 Introduction........................................................................................................... 5
2 Terminology...........................................................................................................6
3 Hardware best practices......................................................................................7SMB client servers..................................................................................................................................7
Recommended switches.......................................................................................................................7
Storage................................................................................................................................................... 7
Rack requirements................................................................................................................................ 8
4 Networking best practices ...............................................................................10IP address requirements......................................................................................................................10
Subnet requirements...........................................................................................................................10
Network Interface Cards......................................................................................................................11
Remote Direct Memory Access...........................................................................................................11
5 Windows Server 2012 R2 best practices.........................................................12MPIO configuration............................................................................................................................. 12
Windows Server 2012 R2 SMB considerations................................................................................... 12
UNMAP command...............................................................................................................................13
Configuring Windows Server updates................................................................................................ 13
6 Storage Spaces best practices..........................................................................14Storage pools.......................................................................................................................................14
Configuring storage pools for rebuilds.............................................................................................. 14
Virtual disks (Storage Spaces)..............................................................................................................15
Column count......................................................................................................................................17
Interleave size......................................................................................................................................20
Storage tiers......................................................................................................................................... 21
Enclosure awareness...........................................................................................................................25
Write-back cache................................................................................................................................26
Journal disks........................................................................................................................................26
Adding disk space to a storage pool...................................................................................................27
7 Cluster best practices........................................................................................ 29Cluster shared volumes...................................................................................................................... 29
Cluster shared volumes cache........................................................................................................... 29
Cluster quorum................................................................................................................................... 30
3

8 Scale-Out File Server best practices............................................................... 31Scale-Out File Share usage................................................................................................................. 31
Creating file shares.............................................................................................................................. 31
4

1IntroductionThis document describes the best practices for the Dell Storage with Microsoft Storage Spaces (DSMS) solution. The Dell Storage with Microsoft Storage Spaces solution is a software-defined storage (SDS) platform that uses Microsoft Storage Spaces and Dell servers, storage, and networking to create a scalable file server solution.
The solution uses the Scale-Out File Server (SOFS) role with clustered Storage Spaces in a disaggregated solution, where the compute workloads run on separate client servers from the storage nodes. The client servers use Server Message Block (SMB) to access SOFS file shares on the storage nodes.
5

2Terminology• Storage pools — A group of physical disks, which allows you to manage and use the combined disk
space of all physical disks in the pool.
• Storage Spaces — Virtual disks (VDs) created from free disk space in a storage pool. You can configure each Storage Space VD with a specific resiliency layout and storage tiers.
• Resiliency — Refers to the method by using which a VD is protected against physical disk failures. There are three types of resiliency layouts for Storage Spaces—Simple, Mirrored, and Parity.
– Simple VD — Data is striped across the physical disks and there is no resiliency provided. There is no protection against physical disk failures.
– Mirrored VD — Data is striped across physical disks and an extra one-or two copies of the data is also written to protect against disk failures. A two-way mirror can tolerate one physical disk failure, while a three-way mirror can tolerate up to two physical disk failures.
– Parity VD — Data is striped across the physical disk along with parity information. There are two types of parity layouts—single parity and dual parity. Single parity writes one copy of parity information protecting against one hard drive failure, while dual parity writes two copies and protects against two hard drives failures.
• Storage tiers — Enables increased performance by creating and managing two separate data tiers — one SSD tier and one HDD tier. Frequently accessed data is stored on the high-speed SSD tier and less frequently accessed data is stored on the HDD tier.
• Scale-Out File Server (SOFS) — A role that enables a cluster to act as an active-active file server, which increases performance and provides highly available SMB file shares.
• Storage node — A server which is a member of the SOFS cluster.
6

3Hardware best practices
SMB client servers
For more information about a list of the latest validated servers for SMB client communication, see Dell Storage with Microsoft Storage Spaces Support Matrix available at Dell.com/dsmsmanuals.
Recommended switches
This solution is intended to provide high availability (HA). When integrating the solution in to your switch infrastructure, ensure that there exists redundant network connections between the SMB clients and the SOFS storage nodes.
SMB client communication to the storage nodes must use 10 GbE-capable switches. This solution requires deploying two top-of-rack 10 GbE-capable switches to ensure path redundancy. You must configure the switches for jumbo frames with the MTU frame size set to the highest MTU that the switch supports, typically 9 KB. Also, you must enable flow control on the switch for receiving but not for data transmission.
Management and iDRAC communication can use 1 GbE-capable switches. Dell recommends you to deploy two 1 GbE-capable switches for redundancy, but is not required.
For more information about a list of the latest validated Dell switches for this solution, see Dell Storage with Microsoft Storage Spaces Support Matrix available at Dell.com/dsmsmanuals.
Storage
For optimal performance and redundancy, distribute SSDs evenly between each storage enclosure.
For example,
For a 4x4 configuration with four Dell PowerVault MD3060e enclosures and 48 total SSDs, each storage enclosure should contain 12 SSDs.
7

Rack requirements
When planning to deploy this solution, you must estimate the physical space requirements required in the rack. Dell recommends you to use a 48U rack with a depth of over 1000 mm when deploying this solution to ensure ease of cable management.
The four major components of this solution are the client servers, switches, storage nodes, and the storage enclosures. While the quantity of storage nodes and storage enclosures are defined on the basis of solution that was ordered, you can customize the client servers and switches to fulfill the application requirements. Each solution’s rack space requirements are listed in Table 1.
Table 1. Rack space requirements
Server or storage solution
2x2 2x3 3x3 2x4 4x4
Dell PowerEdge R630 or Dell PowerVault MD3060e
10U 14U 15U 18U 20U
Dell PowerEdge R730 or Dell Storage MD1400 series
8U 10U 12U 12U N/A
Dell PowerEdge R730 or Dell PowerVault MD3060e
12U 16U 18U 20U N/A
8

Figure 1. Example rack space usage
1. Two Switches—Dell Networking S4810
(1U each)
2. Two SMB Client Servers—Dell PowerEdge R630 (1U each)
3. Two Storage Nodes—Dell PowerEdge R730
(2U each)
4. Two Storage Enclosures—Dell PowerVault MD3060e (4U each)
9

4Networking best practices
IP address requirements
Dell recommends static IP addresses for all ports. There are seven IP addresses required for each storage node for this solution. This solution does not include the IP address requirements for the SMB clients.
Subnet requirements
Dell recommends you to use five distinct subnets for Scale-Out File Server configurations. Two high-speed storage networks are used for external client communication (L3–routable). Different two subnets are used for intra-cluster communication (do not require L3 routing).
The fifth subnet is used for cluster management and Active Directory integration. This subnet must leverage an existing network infrastructure, if required. You must have each redundant pair of subnets routed through two physically separate switches. Internal communication between storage nodes is performed by the dual 10 GbE ports on the Network Daughter Card (NDC) in the storage node.
Table 2. Subnet overview by port
Static or DHCP address
Subnet mask Gateway DNS Network
iDRAC server management
Either X X X Subnet 1 or existing network (L3–routable)
Cluster or server management
Either X X X Subnet 1 or existing network (L3–routable)
Either X X X Subnet 1 or existing customer network (L3–routable)
External communication to SMB clients
Static X X X Subnet 2 (Layer 3–routable)
Static X X X Subnet 3 (Layer 3–routable)
Internal communication
Static X Subnet 4
10

Static or DHCP address
Subnet mask Gateway DNS Network
between server cluster nodes
Static X Subnet 5
Network Interface Cards
Configure Network Interface Cards (NICs ) on all SMB clients and storage nodes for jumbo frames with the MTU frame size set to 9 KB. Also, ensure that flow control is enabled on every NIC.
Also, it is a best practice to rename all ports in Windows Server based on their function by using names such as Manage, External, and Internal.
Remote Direct Memory Access
Remote Direct Memory Access (RDMA) allows for significantly increased throughput, and low latency by performing direct memory transfers between servers. SMB direct is a feature of Windows Server 2012 R2 that enables the use of RDMA between SMB clients and the storage nodes.
SMB direct requires a network adapter, which supports the RDMA protocol. Also, both the storage nodes and the SMB clients must have RDMA adapters installed to use SMB direct. For more information about a list of supported RDMA adapters, see the Dell Storage with Microsoft Storage Spaces Support Matrix available at Dell.com/dsmsmanuals.
You must configure RDMA adapters on all SMB clients and storage nodes for jumbo frames with the MTU frame size set to 9 KB. Also, verify that flow control is enabled on every NIC.
Also, when adding supported RDMA adapters to the solution there are several steps required in Windows Server 2012 R2 to ensure SMB direct is enabled, existing SMB connections are refreshed, and SMB routing is configured (if supported by the adapter). For more information about configuring the RDMA adapters, see the Dell Storage with Microsoft Storage Spaces Deployment Guide available at Dell.com/dsmsmanuals.
11
5Windows Server 2012 R2 best practices
MPIO configuration
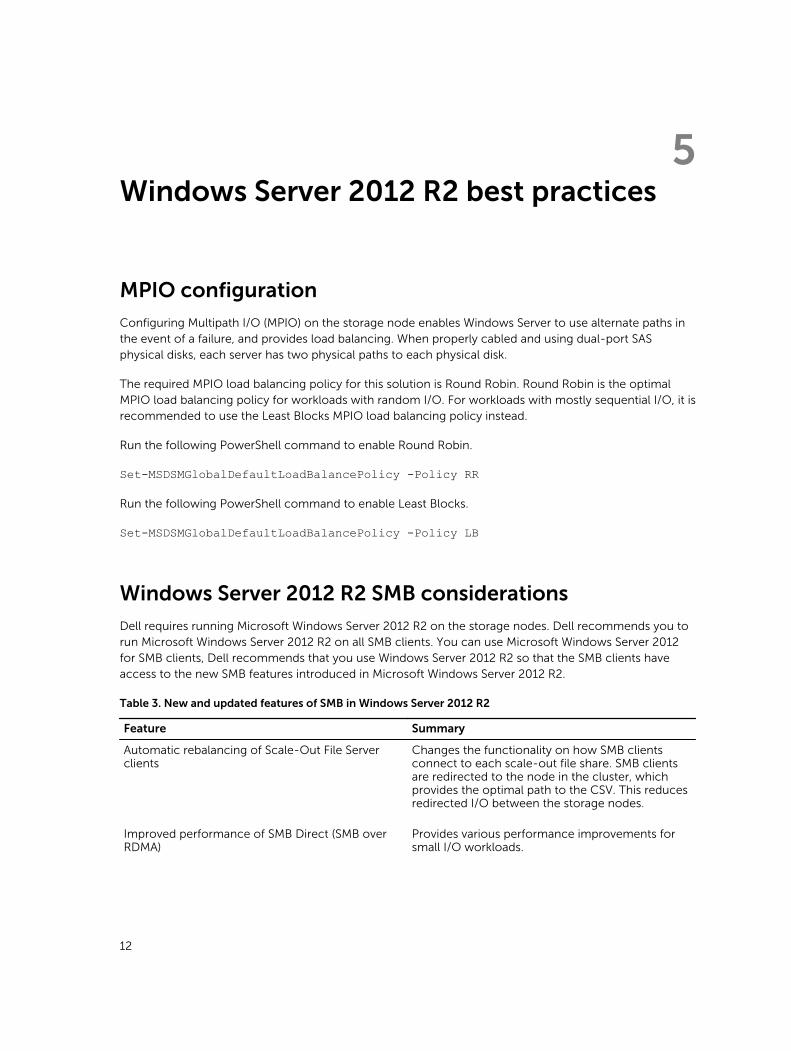
Configuring Multipath I/O (MPIO) on the storage node enables Windows Server to use alternate paths in the event of a failure, and provides load balancing. When properly cabled and using dual-port SAS physical disks, each server has two physical paths to each physical disk.
The required MPIO load balancing policy for this solution is Round Robin. Round Robin is the optimal MPIO load balancing policy for workloads with random I/O. For workloads with mostly sequential I/O, it is recommended to use the Least Blocks MPIO load balancing policy instead.
Run the following PowerShell command to enable Round Robin.
Set-MSDSMGlobalDefaultLoadBalancePolicy -Policy RR
Run the following PowerShell command to enable Least Blocks.
Set-MSDSMGlobalDefaultLoadBalancePolicy -Policy LB
Windows Server 2012 R2 SMB considerations
Dell requires running Microsoft Windows Server 2012 R2 on the storage nodes. Dell recommends you to run Microsoft Windows Server 2012 R2 on all SMB clients. You can use Microsoft Windows Server 2012 for SMB clients, Dell recommends that you use Windows Server 2012 R2 so that the SMB clients have access to the new SMB features introduced in Microsoft Windows Server 2012 R2.
Table 3. New and updated features of SMB in Windows Server 2012 R2
Feature Summary
Automatic rebalancing of Scale-Out File Server clients
Changes the functionality on how SMB clients connect to each scale-out file share. SMB clients are redirected to the node in the cluster, which provides the optimal path to the CSV. This reduces redirected I/O between the storage nodes.
Improved performance of SMB Direct (SMB over RDMA)
Provides various performance improvements for small I/O workloads.
12

Feature Summary
Improved SMB event messages Provides more information in the SMB event logging, which is used to assist in troubleshooting some network failure conditions.
Hyper-V Live Migration over SMB Enables the use of advanced SMB features for Live Migration, such as SMB Direct and SMB Multichannel.
Improved SMB bandwidth management Expands SMB bandwidth management capability to control different types of SMB traffic.
Support for multiple SMB instances on a Scale-Out File Server
Provides capability for each storage node to be able to segregate intra-cluster CSV and SMB traffic in separate instances.
UNMAP command
UNMAP is disabled for the Storage Spaces VDs to reduce the impact on the RHS cluster service.
Run the following PowerShell command to disable UNMAP.
Fsutil behavior set disabledeletenotify 1
Configuring Windows Server updates
Dell recommends you to enable automatic updates in Windows Update or Windows Server Update Services (WSUS) to ensure that you are receiving the latest knowledge base articles (KB), which may address many of the features in this solution.
For more information about required knowledge base articles, see Dell Storage with Microsoft Storage Spaces Support Matrix.
13

6Storage Spaces best practices
Storage pools
When setting up pools, ensure that the physical disks are spread evenly across all the enclosures by using multiple pools, rather than assigning a pool to one enclosure.
For example, if you have two Dell Storage MD1420 enclosures full of HDDs and SSDs. Each enclosure has 20 HDDs and four SSDs installed. 40 HDDs and eight SSDs are available for configuring in the pool. In this example, you require a minimum of two pools. Pool1 contains two SSDs and 10 HDDs from the first MD1420 and two SSDs and 10 HDDs from the second MD1420. Pool2 contains the remaining disks.
Figure 2. Distribution of physical disks across pools
Configuring storage pools for rebuilds
Storage Spaces automatically rebuilds VDs by using free disk space and does not require assigning hot-spares. If a physical disk fails, Storage Spaces regenerates the failed physical disk from free storage disk space without any user’s intervention. This means that the rebuild begins immediately limiting the exposure to additional physical disk failure while the VD is already running in a degraded state.
14
Dell recommends you to assign the storage solution to allow for automatic rebuilds.
Run the following PowerShell command to enable automatic rebuilds (configured for each pool).
Set-StoragePool –FriendlyName <poolName> -RetireMissingPhysicalDisks Always
NOTE: Before performing maintenance operations (when storage pools are configured to automatically rebuild), you must turn off the storage enclosure. Also, you must change the RetireMissingPhysicalDisks attribute of all affected storage pools to Never. Changing this
prevents the VDs from initiating rebuilds because of a perceived failure when the storage enclosure is turned off for maintenance. Ensure that you change RetireMissingPhysicalDisks back to
the original value after the maintenance operation is complete.
When you configure a storage pool to automatically rebuild, you must reserve enough free disk space in each pool such that VDs can automatically rebuild when a physical disk failure occurs. Maintain sufficient free disk space in each of the storage pools which is equal to 10 percent of the available HDD disk space for the HDD tier, and 10 percent of the SSD disk space for the SSD tier. Equations for sizing the HDD and SSD tiers while accounting for the 10 percent are specified in the Storage Tiers section in this document.
There are two types of rebuild methods — parallel and sequential. During a parallel rebuild process, the data required to rebuild is obtained from multiple physical disks in the pool. Parallel rebuilds are very fast and reduce the time a VD is in a degraded state. However, multiple physical disks are sourcing the repair data there is some impact to normal I/O during rebuilds. A sequential rebuild only sources repair data from one physical disk in the pool at a time. This means that there is less impact to normal I/O during rebuilds, however, the rebuild process takes a much longer time.
Dell recommends parallel rebuilds because it provides the fastest method to ensure all VDs return to their full resiliency. To optimize VD repairs the Microsoft November 2014 KB rollup (KB3000850) is required on all storage nodes. Also, you must perform the steps listed in this Microsoft article on each storage node: https://technet.microsoft.com/en-us/library/dn858079.aspx
Run one of the following PowerShell commands for configuring the rebuild method (configured for each pool).
Set-StoragePool –FriendlyName <poolName> –RepairPolicy Parallel
Set-StoragePool –FriendlyName <poolName> –RepairPolicy Sequential
Virtual disks (Storage Spaces)
When you configure a VD, there is an option to select from various resiliency types — simple, Two-way mirror, three-way mirror, single parity, or dual parity.
Dell recommends you to use two-way or three-way mirror VDs. Mirrored VDs are optimized and provide the best performance and resiliency for Hyper-V workloads.
Parity VDs are intended for workloads which are sequential, such as backup and archiving. Do not use parity VDs for random workloads, because this impacts performance.
Simple VDs are not recommended, because they provide no resiliency.
15

Table 4. Pool fault-tolerance and efficiency
Resiliency type Disk space efficiency Fault-tolerance for each storage pool
Example enclosures with 60 x 4 TB HDD (3.64 TiB)
Simple 100% 0 Disks 218.4 TiB raw disk space
218.4 TiB usable disk space
Two-way mirror 50% 1 Disk 218.4 TiB raw disk space
109.2 TiB usable disk space
Three-way mirror
33% 2 Disks 218.4 TiB raw disk space
72.07 TiB usable disk space
Parity 1 Disk Example with column count of 7:
218.4 TiB raw disk space
187.2 TiB usable disk space
Dual parity 2 Disks Example with column count of 7:
218.4 TiB raw disk space
124.8 TiB usable disk space
NOTE: Creating VDs with thin provisioning is not supported.
Fixed provisioning allows usage of storage tiers and failover clustering, neither of which are supported with thin provisioning.
Storage Space size is based on the number of disks and pools you have. You must spread the VDs evenly across all pools, and assign them evenly to the storage nodes in the cluster to allow for load balancing and resiliency.
You can run the New-VirtualDisk Powershell command for more advanced VD creation options.
For example,
16

A new VD called exampleVD1 was created in storage pool MyPool1. This VD was a Three-way mirror so the ResiliencySettingName attribute was set to Mirror and the PhysicalDiskRedundancy attribute
was set to 2. Because storage tiers are used, the disk space sizes of the tiers are specified as part of the VD.
New-VirtualDisk -FriendlyName “exampleVD1” -StoragePoolFriendlyName “MyPool1” -ProvisioningType Fixed -ResiliencySettingName Mirror -PhysicalDiskRedundancy 2 –StorageTiers $ssd_tier, $hdd_tier –StorageTierSizes 400GB, 40TB
NOTE: Dell recommends you to create Storage Spaces no larger than 10 TB. For more information, see the Dell Storage with Microsoft Storage Spaces Support Matrix.
Column count
The column count indicates the number of physical disks that Storage Spaces stripes data across. The column count has a direct correlation to performance as increasing the column count allows more physical disks to be striped and accessed in parallel during reads and writes.
You can only configure column count at VD creation by using PowerShell. You cannot set the column count by using the graphical user interface (GUI). Creating a VD in the GUI selects a default column count that may not be optimized for your solution. After a VD is created the column, count cannot be changed. For a VD that uses storage tiers, the column count of the SSD tier and HDD tier must be identical.
Run the following PowerShell command for creating VDs with a specified column count.
New-VirtualDisk -FriendlyName <vdName> -StoragePoolFriendlyName <poolName> -ProvisioningType Fixed -ResiliencySettingName <Simple| Mirror| Parity> -PhysicalDiskRedundancy <1|2> -NumberOfColumns <#ofColumns> -StorageTiers <ssdTierObject, hddTierObject> -StorageTierSizes <ssdTierSize , hddTierSize>
For example,
A new VD is created called exampleVD2 in the storage pool MyPool1. This VD is a Two-way mirror. The column count is six for this VD so the NumberOfColumns attribute is set to 6.
New-VirtualDisk -FriendlyName “exampleVD2” -StoragePoolFriendlyName “MyPool1” -ProvisioningType Fixed -ResiliencySettingName Mirror -PhysicalDiskRedundancy 1 –NumberOfColumns 6 –StorageTiers $ssd_tier, $hdd_tier –StorageTierSizes 100GB, 15TB
Table 5. Column count requirements
Resiliency type Minimum number of columns
Column-to-disk correlation
Minimum number of disks
Simple 1 1:1 1
Two-way mirror 1 1:2 2
Three-way mirror 1 1:3 5
Parity 3 1:1 3
17

Resiliency type Minimum number of columns
Column-to-disk correlation
Minimum number of disks
Dual Parity 7 1:1 7
When sizing the column count of a VD, consider the following.
Will the VDs be configured to automatically rebuild?
When a disk fails and an automatic rebuilds are enabled, the VD attempts to repair the degraded VD by using existing free disk space in the pool. However, for an automatic rebuild to occur, the VD must not only have free disk space, but also have at least enough free disks available to restore the intended resiliency level when also maintaining the original column count.
To account for this, the equations listed here for Two-way and Three-way mirrors subtract 1 or 2 respectively for the column count calculation. If you do not intend to enable automatic rebuilds for the VD subtracting is not necessary.
Is enclosure awareness enabled for the VD?
When enclosure awareness is enabled the data copies are spread across the enclosures to allow for failure of a complete enclosure, when also maintaining access to the data. Storage Spaces must have enough free disks to rebuild the VDs in the remaining enclosures, when also maintaining the original column count.
NOTE: Results from the column count equations must be rounded down to the nearest whole number. Also, any result where the column count is zero or less than zero indicates an invalid SSD configuration for the pool. Add more SSDs to the pool to achieve a valid column count layout.
For Two-way mirror VDs:
Without enclosure awareness
With enclosure awareness
18

For Three-way mirror VDs:
Without enclosure awareness
With enclosure awareness
For Dual parity VDs:
Without enclosure awareness
With enclosure awareness
For example, if you have three Dell PowerVault MD3060e storage enclosures each with 12 x SSDs and 48 x HDDs and decide to create two storage pools, MyPool1 and MyPool2, this is how you would calculate the column counts for the VDs in different scenarios.
Table 6. Two-Way Mirror without enclosure awareness example
Pool Name MyPool1
HDDs 72
SSDs 18
VD name columnExample1
Resiliency Two-way Mirror
Enclosure awareness No
Automatic rebuild Yes
Column count 8
19

Table 7. Three-Way Mirror with enclosure awareness example
Pool Name MyPool2
HDDs 72
SSDs 18
VD name columnExample2
Resiliency Three-way mirror
Enclosure awareness Yes
Automatic rebuild Yes
Column count 4
Interleave size
Storage Spaces optimizes performance by striping data across multiple physical disks. The stripe size (called interleave size) is set by default to 256 KB. This means that Storage Spaces stores 256 KB of data per stripe on each disk. You can configure the stripe size when creating a new VD but only by using PowerShell.
To maximize performance, ensure that the interleave size is as large as the most common I/O of your workload. I/O data that exceeds the interleave size is split into multiple stripes, turning one write into multiple writes and reducing performance. Interleave size is set in bytes.
Run the following PowerShell command to create a VD with a specific interleave size.
New-VirtualDisk -FriendlyName <vdName> -StoragePoolFriendlyName <poolName> -ProvisioningType Fixed -ResiliencySettingName <Simple| Mirror| Parity> -PhysicalDiskRedundancy <1|2> -NumberOfColumns <#ofColumns> –Interleave <#ofBytes> -StorageTiers <ssdTierObject, hddTierObject> -StorageTierSizes <ssdTierSize , hddTierSize>
For example,
A new VD is created called exampleVD3 in storage pool MyPool1. This VD is a Two-way mirror. The most common I/O size for the workload is 64 KB. For this VD, the Interleave attribute is set to 65536 (64
KiB converted to bytes).
New-VirtualDisk -FriendlyName “exampleVD3” -StoragePoolFriendlyName “MyPool1” -ProvisioningType Fixed -ResiliencySettingName Mirror -PhysicalDiskRedundancy 1 –NumberOfColumns 4 –Interleave 65536 –StorageTiers $ssd_tier, $hdd_tier –StorageTierSizes 50GB, 8TB
20

Storage tiers
Storage tiers enable the mixing of HDDs and SSDs in one pool and take advantage of the faster SSDs to maximize IOPS and throughput by using the SSDs as cache. Storage Spaces constantly analyzes data usage patterns and moves the most frequently used data from the HDD tier to the SSD tier to speed up access.
NOTE: Storage tiers are only supported with mirroring or simple spaces.
Storage Spaces creates a heat map based on the frequency that the data is used. Once in a day, an optimization process automatically runs and the most frequently accessed data (hot data) is moved to the SSD tier and less frequently accessed data (cold data) is moved to the HDD tier.
Because the data on the SSD tier is only updated once in a day (by default), if required, you can manually optimize data by running the following PowerShell command.
defrag.exe /C /H /K /G
You must run this command on all storage nodes in the cluster, because it only optimizes the VDs owned by the storage node where the command was run.
When validating the performance of your solution, ensure to perform benchmarks over the course of several days to allow the SSD tier to optimize for your workload, or you can manually optimize the SSD tier. Manually optimizing storage tier data by using the command above generates a Storage Tier Optimization Report. The Storage Tier Optimization report provides data on the storage tier, which can be used to identify methods to optimize performance.
You may want the ability to permanently place a frequently used file on the SSD tier, for example, a frequently accessed VHDX file that requires low latency and high throughput. You can accomplish this by pinning files to the SSD tier.
Consider the following before running the command:
• You must run the command from the storage node which owns the CSV where the file is stored.• You must use the local path of the CSV on the storage node.
Even after pinning the file, it will not move to the SSD tier until the next optimization (or if you run it manually).
Dell recommends you to use pin sparingly, because the primary goal of storage tiers is to allow the heat map process to optimize the tiers.
Run the following Powershell command to pin files to the SSD tier.
Set-FileStorageTier –FilePath <localFilePath> -DesiredStorageTierFriendlyName <ssdTierName>Run the following Powershell command to unpin files from the SSD tier.
Set-FileStorageTier –FilePath <localFilePath>Run the following PowerShell command to review all files currently pinned.
21

Get-FileStorageTier –VolumePath <csvVolumePath>Example:
Pinning a VHDX file called myVHDX, which is on exampleShare on a CSV labeled Volume3. The storage tier is called MyPool1_SSD.
Set-FileStorageTier –FilePath “C:\ClusterStorage\Volume3\Shares\exampleShare\myVHDX.vhdx” –DesiredStorageTierFriendlyName “MyPool1_SSD”
For a correctly designed storage pool, it is recommended that you evenly spread the SSDs and HDDs across the pools and enclosures. Storage tiers are configured for each storage pool and it is recommended to create one SSD tier and one HDD tier for each storage pool.
The following equations are for planning purposes when you start creating VDs in your storage pools. The values from the equations are used to understand the upper limit for capacity planning so that you are always leaving 10 percent of HDD raw disk space and 10 percent of SSD raw disk space free across the pool as you create and size each VD for automatic rebuilds. These are not intended to be equations to guide you about sizing the tiers of the individual VDs. If you are not using automatic rebuilds, multiplying by 0.9 is not necessary.
Raw SSD Usable Capacity Per Pool =(Number of SSDs in the pool)* SSD Capacity*(.9 for automatic rebuild space)
Raw HDD Usable Capacity Per Pool =(Number of HDDs in the pool)*HDD Capacity*(.9 for automatic rebuild space)
Tier size is the raw value modified by a resiliency factor depending on the type of Storage Space you are creating. For example, 1 for a Simple Space, 1/2 for a Two-way Mirror, and 1/3 for a Three-way mirror.
SSD Tier Per Pool = (Number of SSDs in the pool)*(SSD capacity)*(.9 for automatic rebuild space)*(Resiliency Factor)
HDD Tier Per Pool = (Number of HDDs in the pool)*(HDD capacity)*(.9 for automatic rebuild space)*(Resiliency Factor)
For example,
A pool is created with 48 x 4 TB and 12 x 800 GB disks called tierPool1. Only two VDs exist in this pool, one with Two-way mirroring called 2wayVD1 and one with Three-way mirroring called 3wayVD1.
2wayVD1 HDD tier was 41 TiB, which uses 82 TiB of the HDD tier because of the 50 percent resiliency overhead for Two-way mirroring. The SSD tier was 2.4 TiB in size, which uses 4.8 TiB of SSD tier because of resiliency overhead.
22
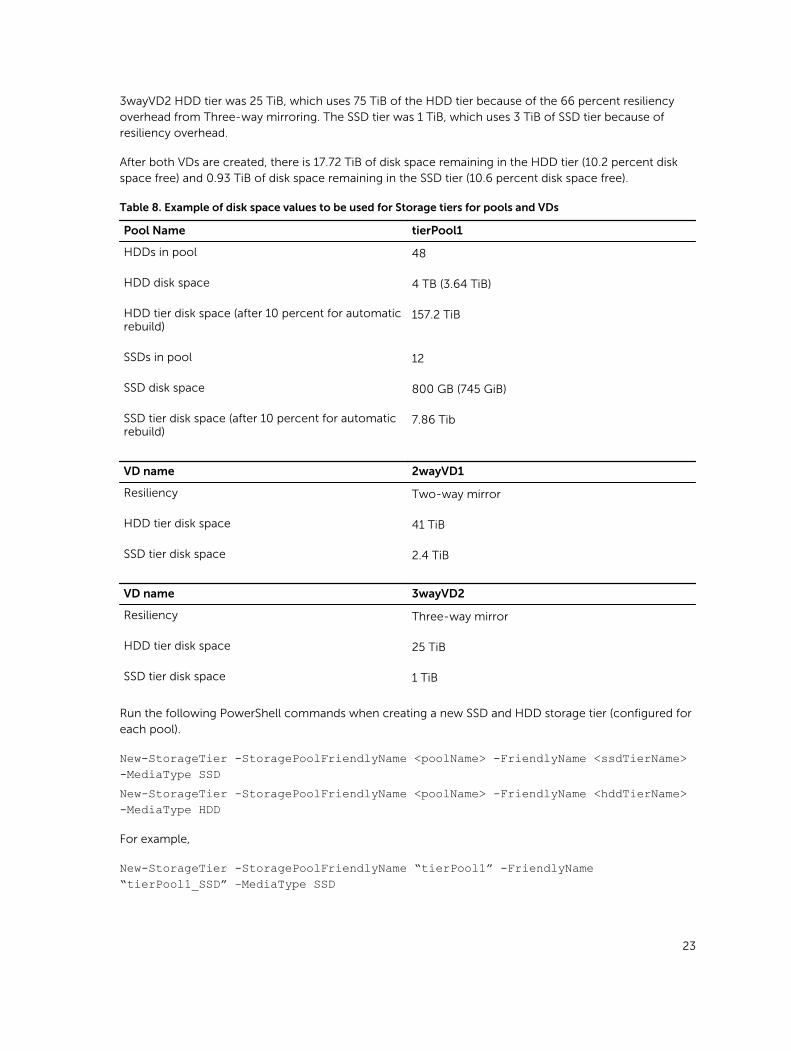
3wayVD2 HDD tier was 25 TiB, which uses 75 TiB of the HDD tier because of the 66 percent resiliency overhead from Three-way mirroring. The SSD tier was 1 TiB, which uses 3 TiB of SSD tier because of resiliency overhead.
After both VDs are created, there is 17.72 TiB of disk space remaining in the HDD tier (10.2 percent disk space free) and 0.93 TiB of disk space remaining in the SSD tier (10.6 percent disk space free).
Table 8. Example of disk space values to be used for Storage tiers for pools and VDs
Pool Name tierPool1
HDDs in pool 48
HDD disk space 4 TB (3.64 TiB)
HDD tier disk space (after 10 percent for automatic rebuild)
157.2 TiB
SSDs in pool 12
SSD disk space 800 GB (745 GiB)
SSD tier disk space (after 10 percent for automatic rebuild)
7.86 Tib
VD name 2wayVD1
Resiliency Two-way mirror
HDD tier disk space 41 TiB
SSD tier disk space 2.4 TiB
VD name 3wayVD2
Resiliency Three-way mirror
HDD tier disk space 25 TiB
SSD tier disk space 1 TiB
Run the following PowerShell commands when creating a new SSD and HDD storage tier (configured for each pool).
New-StorageTier -StoragePoolFriendlyName <poolName> -FriendlyName <ssdTierName> -MediaType SSDNew-StorageTier -StoragePoolFriendlyName <poolName> -FriendlyName <hddTierName> -MediaType HDD
For example,
New-StorageTier -StoragePoolFriendlyName “tierPool1” -FriendlyName “tierPool1_SSD” –MediaType SSD
23

New-StorageTier -StoragePoolFriendlyName “tierPool1” -FriendlyName “tierPool1_HDD” –MediaType HDD
Storage tiers are sized for each VD when the VD is created. You can size the SSD and HDD tiers in the GUI during VD creation or by using PowerShell.
Run the following PowerShell command for creating a VD using existing storage tiers.
New-VirtualDisk -FriendlyName <vdName> -StoragePoolFriendlyName <poolName> -ProvisioningType Fixed -ResiliencySettingName <Simple| Mirror| Parity> -PhysicalDiskRedundancy <1|2> -StorageTiers <ssdTierObject, hddTierObject> -StorageTierSizes <ssdTierSize , hddTierSize>
24

For example,
A new VD is created called 2wayVD1 in the storage pool tierPool1. This VD is configured as a Two-way mirror. The SSD and HDD tiers for this pool was created in the earlier example. Because the StorageTiers attribute requires objects as its input, the output of the Get-StorageTier PowerShell
command is assigned to the $ssd_tier and $hdd_tier variables, and then used when creating the VD.
The StorageTierSizes attribute is set to the size of each tier for which the VD uses the tier disk space.
$ssd_tier = Get-StorageTier -FriendlyName tierPool1_SSD$hdd_tier = Get-StorageTier -FriendlyName tierPool1_HDD
New-VirtualDisk -FriendlyName “2wayVD1” -StoragePoolFriendlyName “tierPool1” -ProvisioningType Fixed -ResiliencySettingName Mirror -PhysicalDiskRedundancy 1 –StorageTiers $ssd_tier, $hdd_tier –StorageTierSizes 2.4TB, 41TB
Enclosure awareness
Enclosure awareness provides an extra layer of fault-tolerance by ensuring that data copies are spread across the available enclosures, such that the loss of an entire enclosure still allows access to the data. Enclosure awareness requires at least three storage enclosures.
Table 9. Enclosure configurations for failure coverage
Resiliency level Storage enclosure failure coverage
Two storage enclosures Three storage enclosures
Four storage enclosures
Two-way mirror 1 disk 1 enclosure 1 enclosure
Three-way mirror 2 disks 1 enclosure + 1 disk 1 enclosure + 1 disk
Parity 1 disk 1 disk 1 disk
Dual parity 2 disks 2 disks 1 enclosure + 1 disk
Enclosure awareness is configured when you create a VD.
Run the following PowerShell command for enabling enclosure awareness.
New-VirtualDisk -FriendlyName <vdName> -StoragePoolFriendlyName <poolName> -IsEnclosureAware <$true|$false> -ProvisioningType Fixed -ResiliencySettingName <Simple| Mirror| Parity> -PhysicalDiskRedundancy <1|2> -StorageTiers <ssdTierObject, hddTierObject> -StorageTierSizes <ssdTierSize , hddTierSize>
For example,
A new VD is created with the name exampleVD3 in storage pool MyPool1. This VD uses enclosure awareness so the IsEnclosureAware attribute is set to $true.
New-VirtualDisk -FriendlyName exampleVD3 -StoragePoolFriendlyName MyPool1 -IsEnclosureAware $true -ProvisioningType Fixed -ResiliencySettingName Mirror -
25

PhysicalDiskRedundancy 1 -StorageTiers $ssd_tier, $hdd_tier -StorageTierSizes 20GB, 10TB
Write-back cache
Configuring write-back cache (WBC) allows Storage Spaces to use a portion of available disk space of the SSDs to provide low latency cache for incoming ‘write’ commands. All incoming ‘write’ requests are cached on SSDs and immediately respond back to the host with write completion status. Without write-back cache, the physical disks operate in write-through mode where incoming ‘write’ requests hit slower, traditional hard drives before responding with completion. Using WBC can make a significant performance improvement to almost all workloads.
To use WBC, you must have SSDs in a storage pool. The default disk space of WBC is 1 GB and can be changed when creating a VD. Dell recommends you to use the default WBC disk space.
Whenever you create a VD, as long as the SSD tier disk space is greater than either the default or specified WBC disk space and you have the minimum number of SSDs in the storage pool to enable WBC for the resiliency setting, then WBC is enabled for the VD.
Table 10. WBC Resiliency Setting
Resiliency setting
Simple Two-way mirroring
Three-way mirroring
Single parity Dual parity
Minimum number of SSDs for WBC (per pool)
1 SSD 2 SSDs 3 SSDs 2 SSDs 3 SSDs
Journal disks
Assigning dedicated journal disks to SSDs in the pool when using VDs with parity resiliency improves sequential write performance. Without dedicated journal disks, the journal disks reside on the same physical disks as the parity VD and this can cause increased seek times and reduce overall throughput of a parity VD.
When using a dedicated journal disk, ensure that the quantity of journal disks scales with the number of parity spaces in the pool. Dedicated journal disks can only be added using PowerShell.
PowerShell command for adding a dedicated journal disk to an existing pool.
Add-PhysicalDisk -StoragePoolFriendlyName <poolName> -PhysicalDisks <physicalDiskObject> -Usage Journal
For example,
A dedicated journal disk which is an SSD labeled PhysicalDisk5 is assigned to variable $pd. The disk is
then added to an existing pool MyPool1 with the Usage attribute set to Journal disk.
$pd = Get-PhysicalDisk –CanPool $true -FriendlyName PhysicalDisk5
26
Add-PhysicalDisk -StoragePoolFriendlyName "MyPool1" -PhysicalDisks $pd -Usage Journal
Adding disk space to a storage pool
When planning to add physical disk space to existing storage pools and VDs there are several considerations to be made before adding the additional physical disks or storage enclosures.
When adding a new storage enclosure to the SOFS cluster or just new physical disks to an existing storage enclosure follow these guidelines:
• For an up-to-date list of validated storage enclosures and physical disks to confirm that the new configuration is supported, see the Dell Storage with Microsoft Storage Spaces Support Matrix.
• For ensuring that you are following the proper cabling guidance, if adding a new storage enclosure, see the Dell Storage with Microsoft Storage Spaces Cabling Guide.
After verifying all newly added disks are available to the cluster, you can now create new or expand an existing storage pool or VD. Dell recommends when expanding a storage pool to add physical disks in a quantity equal to the column count multiplied by the number of data copies plus any additional disks required for automatic rebuilds. For example, for a Two-way mirror VD, if the column count is four, you would add a minimum of eight disks to the pool to expand the VD.
To find out the number of columns used by a specific VD, run the PowerShell command.
Get-VirtualDisk –FriendlyName <vdName> | FL NumberOfColumns
The reasoning for the recommendation is to safeguard against expansion of VDs, which are already very low on usable disk space. In order for a write to a VD to be successful, all data must be striped across the number of disks indicated by the column count. If you add fewer disks, there may be new free disk space now on the VD, there is still not enough disks available for a full stripe to be written.
For example,
A 2x3 configuration with three Dell Storage MD1400 storage enclosures each with eight HDDs and four SSDs. For example, all 24 HDDs and 12 SSDs are added to one storage pool called MyPool1. One VD is created using storage tiers in the pool — 2wayVD1, with Two-way mirroring and a column count of 5. The plan is to add an extra Dell Storage MD1400 enclosure with eight new HDDs and four new SSDs.
For this example, 2wayVD1 had data added so that almost no usable disk space is remaining in the HDD tier. In an effort to add new disk space, all eight of the new HDDs are added to MyPool1. 2wayVD1 has a column count of five, which means a total of 10 disks are required for a full stripe, one stripe across five disks for first data copy and one stripe across another five disks for the second data copy. However, because only eight HDDs were added to the pool, after the original disks in the pool are completely out of disk space there will now only be eight disks, and not the 10 required to write to 2wayVD1.
There is one more factor to consider when adding physical disks or storage enclosures with the intent of expanding existing VDs which were created with enclosure awareness. Enclosure awareness spreads the data copies of VDs across three or more storage enclosures. However, when adding new physical disks or storage enclosures, depending on the existing VD layout, VDs created on the newly added storage disk space may not be enclosure aware. This occurs if there is not sufficient free disk space or there are not
27
enough physical disks in existing storage enclosures to spread the new data copies in a method which satisfies the enclosure awareness requirements.
PowerShell command for adding a new physical disks to an existing pool.
Add-PhysicalDisk -StoragePoolFriendlyName <poolName> -PhysicalDisks <physicalDiskObject> -Usage AutoSelect
PowerShell command for extending a VD.
Resize-VirtualDisk –FriendlyName <vdName> -Size <newVDSize>
PowerShell command for extending a volume.
Resize-Partition –DiskNumber <diskNumber> -Size <newVolumeSize>
For example,
A physical disk which is labeled PhysicalDisk13 is assigned to variable $pd. The disk is then added to
an existing pool MyPool1 with the Usage attribute set to AutoSelect. A VD 2wayVD1 is 30 GB and
currently exists in the pool. The VD is extended to 60 GB. Finally, the volume must be extended to match the new VD size.
$pd = Get-PhysicalDisk –CanPool $true -FriendlyName PhysicalDisk13
Add-PhysicalDisk -StoragePoolFriendlyName "MyPool1" -PhysicalDisks $pd -Usage AutoSelect
Resize-VirtualDisk –FriendlyName 2wayVD1 –Size 60GB
$vd = Get-VirtualDisk -FriendlyName 2wayVD1
$diskNum = Get-Disk –VirtualDisk $vd
$partNum = Get-Partition –DiskNumber $diskNum.Number
$size = Get-PartitionSupportedSize –DiskNumber $diskNum.Number
Resize-Partition –DiskNumber $diskNum.Number –PartitionNumber $partNum.PartionNumber –Size $size.SizeMax
28
7Cluster best practices
Cluster shared volumes
You must have one cluster shared volume (CSV) for every VD. You must add CSVs in multiples of the storage nodes to allow for the CSVs to be load balanced across the cluster.
For example, if you have a 2x2 configuration, which has two storage nodes, you should create CSVs in multiples of 2 (for example 2, 4, 6, and 8 CSVs). If you have a 4x4 configuration which has 4 storage nodes, then you should create CSVs in multiples of 4 (for example 4, 8, 12, and 16 CSVs). For optimal performance, Dell recommends having at least twice the number of CSVs as storage nodes. In this example, at a minimum, a 2x2 configuration would optimally have four CSVs.
Cluster shared volumes cache
CSV cache allows you to allocate RAM on the storage node as a write-through cache. If you are using Storage Spaces with storage tiers, the CSV cache is not used and is not configured.
If you have VDs that are not using storage tiers or you are using VDs with parity resiliency, then Dell recommends that you enable CSV cache.
For optimal performance, the recommendation is to allocate 50 percent of the storage node memory for the CSV cache.
Run the following PowerShell command to set the CSV cache size.
(Get-Cluster).BlockCacheSize = <sizeInMB>
For example,
Using a 4x4 configuration with four Dell PowerEdge R630 as the storage nodes. Each storage node has 128 GB of RAM. CSV cache should be set to 64 GB.
(Get-Cluster).BlockCacheSize = 65536
29

Cluster quorum
A witness disk is used when there is a node or network communication failure where the nodes continue to operate but can no longer communicate between one another. The witness disk acts as part of the voting process to determine which nodes remain as part of the cluster to maintain quorum. Use witness disks on clusters with even number of storage nodes to ensure there is a vote majority in case of a split-brain situation.
There are two options for witness disks — disk witness and file share witness. Dell recommends you to use file share witness because a continuously available SMB share can be created on the SOFS cluster to host the witness disk. You can create the file-share witness disk on a small 3 GB, Two-way mirror VD without storage tiers.
There are different types of quorum modes:
• Node majority
– Recommended for SOFS clusters with an odd number of storage nodes (for example, 3x3)
– All nodes that are online and can communicate have a vote and the cluster is operational when votes are over 50 percent.
• Node and disk majority
– Each node and the witness disk, which is part of cluster, has a vote.
• Node and file share majority
– Recommended for SOFS clusters with an even number of storage nodes (for example, 4x4).
– Each node and the file share witness has a vote.
Run the following PowerShell command to create the cluster quorum disk.
Set-ClusterQuorum <Mode> <PathToResource>
For example,
A 3x3 configuration with three Dell PowerEdge R730 storage nodes. Setting quorum mode to node majority with no file share or disk witness on cluster named MYCLUSTER.
Set-ClusterQuorum –NodeMajority –Cluster MYCLUSTER
For example,
A 4x4 configuration with four Dell PowerEdge R630 storage nodes. Setting quorum mode to node and file share majority with a 1 GB VD setup as a SOFS file share. The cluster is named MYCLUSTER and file share is named FileShareWitness.
Set-ClusterQuorum -NodeAndFileShareMajority "\\MYCLUSTER\FileShareWitness"
30

8Scale-Out File Server best practices
Scale-Out File Share usage
Scale-Out File Server shares are intended for storage of Hyper-V virtual hard disks and SQL databases. Using Scale-Out File Server shares for end user file shares, containing unstructured data such as home folders, spreadsheets, or PDFs (defined by Microsoft as information worker workloads) is not recommended. Information worker workloads require substantial metadata changes (file open, close, rename, delete) typically from hundreds of users at once. Scale-Out File Server shares are continuously available which requires all nodes to synchronize metadata changes, which in the case of information worker workloads will result in a large performance overhead for these shares due to the large number of metadata changes.
If you require higher performance over high availability on file shares hosting information workloads there are two options:
Option 1: Create a new VM with Windows Server 2012 R2 and store it on a SOFS file share. Install the File Server role and configure it as a File Server for general use. Size the VHDX file appropriately for the amount of information worker data to be stored there. Create all file shares inside the VM.
Option 2: Create a new SMB file share on the SOFS, but uncheck Enable continuous availability.
Creating file shares
SMB scale-out file shares are created on CSVs. You can create any number of shares on the CSVs based on your requirements. However, the underlying CSV size dictates the total usable disk space available for the file shares. When creating the file share in the Failover Cluster Manager select SMB Share — Applications.
As part of the file share configuration, you have an option to select the Encrypt data access check box. Selecting this check box allows you to use SMB Encryption for the specified file share if you require. Using SMB encryption has a significant performance overhead.
31