Embed Size (px)
Citation preview

© Lake County Camera Club. No material may be reproduced in any manner without written permission of the Newsletter Editor or the material’s specific contributor.
Share Moments - Share Photography
December 2012 Volume 5, Issue 4
The Fine Print A Message From The Editor
The ultimate expression of a simply beautiful photograph may be found in the fine
print.
Smart Phones, tablets, digital frames, and other viewing devices all of have their
place in today’s complex world of digitally projected imagery, but a fine print still
carries an intrinsic value that’s unique in photography. A fine print has a philosophic
value, an “end in itself” and may be regarded as the ultimate goal in the art of
photography. The fine print has defined legacies, such as Ansel Adams. Making a
fine print is part of the art of photography.
This issue of Exposures is about some of the printers, papers, ink, photo
processing shops and tips which should assist you in your quest to make that fine
print.
It is no surprise that photographer’s most important tool is their camera, however in
order to create that fine print, you may need a printer that will do justice to your works of art. So, how do you choose
among the many different makes and models out there? Before you even start looking you need to think about the
features that are most important to you. Check out the article Choosing a Printer, which includes tidbits and research
from many different web sites.
One of the factors that people often overlook is the type of paper and ink they will be using. Choosing the right paper
and ink will ensure that your fine prints are of the best possible quality. Be sure to read the article Photographic Papers
Matter.
If a printer is not presently within your budget, you can upload your photographs online to a photo processing center.
Major chains are in a constant price war with one another in an effort to get us to use their photo processing services.
Very often they have kiosks where you can pop in a memory card and make your artwork right there in the store.
George Haasjes provides some suggestions and ideas regarding a selection of a photo processing center in his article,
Photo Printing Labs.
The cost of printing a competition sized image is a much different
experience than printing a bunch of 4x6 images of your recent holiday
party. While you can get larger prints on specialty paper from some of
the better processing sites, the flexibility of home printer materials may
have some bearing on your decision to invest in a home printer. The
article, Printing Costs will give you some insight regarding the basic
costs of competition size images. John Williams recently made the
transition from printing at a photo processing center to printing at home.
John shares some excellent insight on the reasons he made this
decision with his article, Printing My Own.
Whether you print at home or use a photo processing center to complete
that fine print, you should be very pleased to have and to hold a work of
art. I think you will all agree, the fine print is an excellent way to share
moments and share photography.
Inside This Issue
A Message From The President 2
Web Corner 2
Choosing a Printer 4
Photographic Papers Matter 6
Photo Printing Labs 9
Printing Costs 10
Printing My Own 11
Egon’s World 12
Accolades 13

© Lake County Camera Club. No material may be reproduced in any manner without written permission of the Newsletter Editor or the material’s specific contributor.
Exposures - December 2012 Volume 5, Issue 4 Page 2
A Message From President John Williams Happy December to everyone. How fast time flies when you’re having fun! This month we begin with a great excursion
going downtown to the Oriental Theater. Now is your opportunity to practice Architectural photography in a grand place!
Don’t forget your tripods and remote triggers; I predict some low light conditions will be a part of the day. Then our first
meeting will be our second competition of the club year! Remember to follow the rules for image submissions and ask
for help if you have any questions. It’s really fun to participate in or at least be there to observe, especially when you
remember it can be a great learning experience.
Ken selected a great subject in this newsletter for those members who print their own images, and just in time for the
next competition. If you are thinking about doing your own prints, or are using a lab service, the articles should be
helpful. Well, I need to figure out just what I’m going to do for a monochrome print this time. I wonder…should I go to a
different paper finish? Hey, that’s right; I just received a whole bunch of sample photo paper packs from Red River
Paper and will have them at the next meeting! If you are printing, be sure to pick one up.
Writing this at Thanksgiving time reminds me of how blessed and thankful I am to be a member of Lake County Camera
Club. On behalf of the entire Club, here is wishing you an abundance of friends, loving time with your family, happiness
and fun shooting this holiday season!!
Questions or comments about this newsletter?
Please contact Ken Johnson, Newsletter Editor at
We are proud members of the
Chicago Area Camera Clubs Association
and the Photographic Society of America.
Our mission is to promote, teach and share the ideals, skills, techniques and
good practices of the art of photography and the use of cameras and
photographic equipment.
Visit our website www.lakecountycameraclub.org.
We meet the first Thursday of every month at:
University Center. 1200 University Drive,
Grayslake IL.
Web Corner By John Rouse
We have made three major changes to the LCCC Website in the last few months.
1. We added four PSA Galleries. These galleries are different from all of our other galleries. We compete in four PSA competitions: Nature, Projected Image Division, Photojournalism and Travel. Members can submit two images for each competition. We are displaying only those images which have been selected for submittal to the four different competitions by the division coordinators and their teams. We update the captions for images receiving an award or honorable mention. Terry Ferguson is creating the PSA galleries.
2. The process for which members can request an email with their password has been changed to prevent web spiders (web crawlers) from running through our membership database. These nasty things can harvest email addresses and re-use them in different ways.
3. After submitting images through any of the Photo Submission pages, all of your images in the upload folder will be displayed above the input form. Your images will display anytime you enter the page until the images have been removed from the folder for competitions for gallery creations. You also have the option of deleting images from the server.

© Lake County Camera Club. No material may be reproduced in any manner without written permission of the Newsletter Editor or the material’s specific contributor.
Exposures - December 2012 Volume 5, Issue 4 Page 3
2012 - 2013
Board Members President John Williams
President Elect Mike Trahan
Past President Ron Meyers
Secretary Terry Ferguson
Treasurer Jim Ross
Vice President, External Operations Michelle Cox
Vice President, Internal Operations Bill Sullivan
2012 - 2013
Committee Chairpersons CACCA Representative Bob Kruzic
Competition Chair Bob Kruzic
Community Involvement Coordinator Open
Company Contact Coordinator Mike Styrna
Continuing Education Coordinator Jim Ross
DPI Competition Coordinator Steve Cullen
Facilities Coordinator Bill Sullivan
Historian Jerry Donahue
Hospitality Desk Margie Hurwich
Judge Procurement Tony Roma
Long Term Planning Mike Trahan
Mentoring Program Coordinator Tracy Castro
Membership Coordinator Terry Ferguson
Newsletter Editor Ken Johnson
Photo Excursion Coordinator Debra Olson
Program Coordinator Stevan Tontich
PSA Representative Michelle Cox
PSA Photo Travel Coordinator Birgit Tyrrell
PSA Photojournalism Coordinator Linda Kruzic
PSA Projected Image Coordinator Bob Marx
PSA Nature Coordinator Mike Trahan
Webmaster John Rouse
October, December and February Nature Prints
October, December and February Photojournalism Prints
November, January, and March Portrait Prints
November, January, and March Creative DPI
December Special Category DPI Smoke (be creative)
January Special Category DPI Simple and Uncluttered
February Special Category DPI Motion
March Special Category DPI Get Up Close
April Special Category DPI Street Shots
May Special Category DPI
A or B
A. Tell a Story in 30 sec.
Video and Sound
B. Cell Phone Image
March Postcard Competition
CACCA Individual Competitions
Every path has a puddle.
George Herbert

© Lake County Camera Club. No material may be reproduced in any manner without written permission of the Newsletter Editor or the material’s specific contributor.
Exposures - December 2012 Volume 5, Issue 4 Page 4
Choosing a Printer By Ken Johnson
A photographer’s most important tools may be a high-quality DSLR and a few great lenses. You spend time and money
honing your craft, and you practice the skills required to make an outstanding photograph. You may become proficient at
editing and admire your low resolution on-screen images, however your best photographs should not be confined to a
computer screen. They're made for printing! There are few things more satisfying than seeing your high-megapixel, high-
resolution images on paper as a fine print. The fine art of photography culminates in making fine prints—big, beautiful prints,
in color and black-and-white. Having a printed image in your hand carries an intrinsic weight and legitimacy that’s unique in
photography.
The last 8-years have seen amazing leaps in both photo printer and ink technology. Current technology has made
producing exhibition-quality prints easier than ever before. So, how do you know which printer to choose? It's a tough
question to answer, because it all depends on what you want to do with your printer. You need to think about the features
that are most important to you. You need to ask yourself what size prints will you be printing and will you mainly be printing
in black and white or color? Do you want an all-in-one workhorse, a compact photo printer, or a high-quality single-function
photo-only printer. There are many different makes and models out there to choose from, some you know well and some
you do not.
A Choice of Dye Or Pigment Inks
One of the first decisions you’ll need to make is whether you want to go with dye- or pigment-based inks. Dye sublimation or
thermal dye models are more typical of compact photo printers that produce 4 x 6 inch prints in a relatively small number of
consumer-level compact photo printers such as the Canon Selphy lineup and Polaroid's POGO series printers. They can
produce highly saturated colors and deep, rich blacks and are relatively inexpensive to produce. Dye sublimation offers the
advantage of producing photos with a clear overcoat that’s more resistant to smudging and moisture damage than
inkjet prints. The specialized media required for these printers is often brand-specific, and normally packaged as an
integrated paper/ink set which is loaded into the printer. The primary drawbacks to dye inks have been longevity—with print
life measured in a few years.
For photographers who are concerned about image stability and longevity, printer companies offer models that use pigment
inks. Pigments are more fade resistant in a greater variety of display environments than dyes. While the range of hues and
saturation pigments can produce has grown significantly in the last few years, they generally exhibit a smaller color gamut
than their dye-based counterparts. The chief advantages to pigments are long archival life—from 20 to 100-plus years,
depending on how and where photos are stored—and the wide range of paper media available to print on, from traditional
photo papers to the new baryta- and fiber-based papers, canvas, rags, films and more.
How Many Inks?
The basic ink set required for printing photographs consists of four colors: cyan, magenta, yellow and black. This color set is
popularly known as CMYK, with the 'K' representing black, the 'key' color for adding depth to the printed image.
Adding light cyan and light magenta cartridges to the four-ink set provides the six-ink set that is used in most photo printers.
These additional inks allow the printer to reproduce more subtle tonal nuances than the basic four-ink set, thereby improving
picture quality.
The holy grail of desktop printing has long been the ability to render beautiful black-and-white prints from a color printer.
Because multiple ink colors have to be combined to create 50 shades of gray - gray output has long been quite a challenge.
Pigment-based inkjet printers may now offer additional black and gray inks in some models specifically to improve the quality
of black-and-white prints they can produce.
Some high-end printers offer up to 10 or even 12 color choices. While the addition other inks can further increase the range
of hues and depth of color saturation in these colors, the usage of these inks is generally low, so they are not really
necessary for most home printers.
(continues on next page)

© Lake County Camera Club. No material may be reproduced in any manner without written permission of the Newsletter Editor or the material’s specific contributor.
Exposures - December 2012 Volume 5, Issue 4 Page 5
(continued from previous page)
Printer Technology
The overwhelming majority of dedicated photo printers on the market today are inkjets. These printers spray discrete, but tiny
droplets of ink onto specially coated papers via a print head that makes multiple passes across the print surface. With inkjet
printers, the illusion of smooth, photo-realistic tonal gradations is achieved by using extremely small ink droplets and
adjusting their size and spacing to produce darker or lighter areas of an image. Although these ink dots do not mix together
before being ejected onto the print surface, they are extremely small; so small that they're measured in picoliters (trillionths of
a liter). Complex dot placement algorithms known as dithering, along with paper coatings designed to maintain image
sharpness and vibrancy, are capable of producing literally millions of colors with tonal gradations that appear smooth to the
naked eye.
Inkjet printers come in a variety of forms. One approach, the thermal inkjet printer, uses heat to squeeze ink droplets out of
the print head and onto the paper. Thermal print heads typically offer a high density of nozzles per print head, which
increases print speeds. This is the preferred technology of Canon and HP. The other type of inkjet print head is called
piezoelectric, and it uses an electrical charge to mechanically push variably-sized droplets from a single nozzle position,
allowing for crisp, finely resolved image detail. This is the print head Epson uses. Although there are differences in regards to
production cost and usable lifespan, both thermal and piezoelectric print heads are capable of producing very high-quality
photographic prints.
Size Matters
Another variation in printer options is based on how large a sheet of paper can the printer handle? While almost all desktops
accept standard 8.5x11-inch paper, higher-end models up the paper size to 13 or even 17 inches wide. The ability to create
large prints makes pro-style desktop photo printers more flexible, more desirable and more expensive. Another benefit of the
larger pro-level desktop models is that they are designed to handle thicker, heavier fine art papers that can be difficult or
impossible to load reliably into letter-size printers. Purchase price aside, larger printers can actually be less expensive per-
print than letter size models making them less expensive to operate over the long-term. This is because they use larger
capacity ink cartridges.
Conclusion?
Because of the demand for digital photography printers, many printer companies are scrambling to build better products.
There are hundreds, if not thousands of different printers out in the market. Some people want a printer that does everything
and some of the digital photography printers available today are so packed with features you may wonder if they can make
your morning coffee. Choosing the best one could be a hard task. Each company produces different kinds of printers and
then goes all out in proclaiming it to be the best. What does the term “best” mean when you are selecting a digital
photography printer? This is as similar as asking, “What is the best camera?” Canon? Nikon? Sony?
Some people actually try to choose the best digital photography printer based on the cost. Some define “best” as being the
cheapest. They believe that if they find the lowest-priced digital photography printer available, they would have found the best
product for them. Yet, many agree quality is expensive—and you get what you pay for. As with most things in life, the term
“best” is relative. What’s best for you may not be the best for somebody else.
For me, the best conclusion was to obtain a printer with the specific task of making high quality photographs. I didn’t care if
the printing of text was marginal, or what kind of on-screen display the printer had. I didn’t need to print directly from a
camera or use automatic “red-eye” resolution. The ability to scan, copy, fax or make coffee was not important. I desired high
quality prints, both color and black and white up to 13 inches in width and the option of using many different photo papers. I
selected a single purpose Epson R1900 (now replaced by the R2000) and I am very happy with the results.
Remember that printers don’t make simply beautiful photographs any more than cameras make photographs. Cameras,
lenses, photo editing software and printers are just tools used in the fine art of photography. You must practice and learn the
strengths and weaknesses of each of these tools.
© Lake County Camera Club. No material may be reproduced in any manner without written permission of the Newsletter Editor or the material’s specific contributor.
Exposures - December 2012 Volume 5, Issue 4 Page 6
Photographic Papers Matter By Ken Johnson
Making the very best print is an art. We've all seen gorgeous prints of what you can accomplish with the newest photo-
quality inkjet printers. But getting those same results with your inkjet printer usually comes down to picking the right paper.
The choice of paper for your photographs can make as big an impact as the photo itself. In some cases, paper type can
influence image quality, print durability, and image permanence but the quality of a specific paper can have an even greater
effect. This article is about some of the papers that are available to you in your quest to make that fine print.
I would first like to share a brief history of photographic papers with portions of an article entitled “A Brief History of
Photopapers” from A Consumer Guide to Modern Photo Papers (January 2009 Created by Image Permanence Institute with
support from Sakura of America).
Papermaking was invented in China around 105 A.D. It didn’t make its way to Europe until over a thousand years later, and
it didn’t come to the Americas until the late seventeenth century. Paper is composed mainly of plant fibers. Today it is usually
made with wood fibers, but it may also be made with cotton or other materials. In wood pulping, wood chips are either
mechanically mashed into pulp (groundwood pulp) or soaked in chemicals to separate the fibers (chemical pulp). This pulp is
sometimes bleached to improve its whiteness. Finally, the pulp is mixed with water and spread thinly on a screen to form
sheets.
To improve the properties of paper, substances such as clay can be added to make the paper denser and more
opaque. Adding a chemical called sizing makes the paper water resistant and easier to write or print on. Paper can also be
pulled through heavy rollers to make the surface very smooth in a process called calendaring. It is from writing and
printing papers that photo papers were eventually manufactured.
For the last 150 years the term photo paper has been used to the describe light-sensitive papers used to create
photographic prints. Nineteenth-century photo papers were usually handmade. Plain papers or papers coated with a clear
binder layer were sensitized with special salts and silver nitrate. They could then be exposed to light either directly or
through a negative. The earliest papers didn’t need “development,” but they did need a chemical bath that fixed the image by
removing the light-sensitive salts in unexposed areas of the print. They were then washed to remove the fixing chemical and
prevent yellowing and staining of the photo over time. The difficulty of sensitizing papers by hand and the expertise required
usually limited photography to professionals and dedicated hobbyists.
Two advances near the end of the nineteenth century brought photography home to everyone. The first was the mass
manufacture of photo papers. Photo papers no longer needed to be sensitized by hand but could be purchased pre-
sensitized in a box. Secondly, new photo papers were invented that had to be chemically developed. This additional
processing step reduced exposure time from minutes to less than a second. Now photographs could be printed quickly in
large quantities; thus the commercial photo lab was born. Eventually, photo-paper technology advanced to include color
photography.
In the late sixties, photo papers began to be manufactured with a plastic (polyethylene) laminate on both sides of the sheet.
These papers are called resin-coated or “RC” papers. The laminate was added to keep the print flat after wet processing and
to reduce the processing time, as less wash is needed. The top layer of laminate is often pigmented white to make the image
very bright. The back layer is clear. Historically, the term RC print only referred to wet-processed photographs; today,
however, RC paper is also used in the manufacture of dye-sub and many inkjet photo papers. This is done to give these
digital printing papers the look and feel of photos of years past. With the advent of digital photography, the term photo paper
no longer exclusively means light-sensitive papers. It still includes them, but it also encompasses a variety of other papers,
all designed to have a pictorial image printed on them.
(continues on next page)

© Lake County Camera Club. No material may be reproduced in any manner without written permission of the Newsletter Editor or the material’s specific contributor.
Exposures - December 2012 Volume 5, Issue 4 Page 7
(continued from previous page)
When it comes to deciding which paper you will print your photographs on, there is no right answer. The choice is yours. It
all depends on the vision you have for your printed photograph. Think about the effect you want to achieve. Do you imagine
it gloss or matte? Black and white or color? There is always a subjective element with the effects achieved by different
kinds of inkjet photo papers but there is a paper to fit every imagination.
Since the world of inkjet printers is dominated by four companies, you may be buying paper from one of the same
companies. Canon, Epson, HP or Lexmark each has broad lines with several papers that are suitable for professional
photographers. One of the potential advantages of using the printer company’s paper is the peace of mind that comes from
knowing the paper will be compatible with your printer. This compatibility is much less of a problem today. Many third-party
papers offer a wider variety of weights, surface textures, colors and coatings. In addition, many offer better archival
performance than inkjet manufacturers’ own papers. Don’t be afraid to experiment.
Paper Characteristics That Make a Difference
Paper Weight or Caliper
The caliper of the paper refers to the thickness of the paper. Thicker paper is usually preferred when printing photos on an
inkjet printer. Heavier is thicker, which gives a more substantial, and professional, feel to your photos but it doesn’t
guarantee better print quality Thicker paper is more durable. The thicker the paper, the more expensive it will be. The
thickness of a paper, or caliper, is specified in mils (thousandths of an inch) and most inkjet photo papers are between 7 and
15 mil. The weight of these papers is typically between about 90gsm and 270gsm.
Paper Surface and Finish
Choosing your paper surface is another very personal, artistic decision based on the look you want to achieve. Finishes
vary like paint manufacturers with their high gloss, satin, eggshell, and matte paints. Inkjet photo papers are most readily
categorized by four basic finishes: Glossy, Satin or Semi-Matte, and Matte. There seem to be so many names now for
inkjet papers, often referring to the same finish, but the above four are the most common.
Glossy paper produces a slick, shiny print, similar to traditional photos. Many club members use glossy when they submit
competition images. Glossy papers are far more complex to manufacture with any number of chemicals added to create
the reflective surface. Glossy papers tend to have glares and reflections in the images that sometimes end up disturbing a
photograph.
Satin and Semi-Matte are less shiny, but still have a smooth look. These papers may also be called luster and a variety of
other names. For many photographers, luster finish photo paper has the color quality of a glossy paper with a softer finish
and less glare. Satin and luster papers have a light texture on a photo base substrate. Porous resin-coated photo paper
actually refers to three sub-types: macro-, micro-, and Nano-porous. All three have small pores that absorb ink, but they
differ in the composition of the coating and size of the pore. Generally speaking, Nano-porous photo paper appears glossier
than the macro or micro papers. Smaller pores are difficult to produce, though, which is why Nano-porous paper often costs
more. You've seen this look from a photo lab print. The texture causes satin and luster papers to have lower reflection
potential. Limited or no reflection from a print will help the viewer to focus on the details of the image.
Matte and fine art papers have no shine at all, which some people feel gives their photos the most artsy look. This paper
is often best used for black and white photos because the blacks are always richer, and more details are often uncovered in
the prints. Matte papers are the best choice when you want an economical paper with the smoothest surface and the best
photographic output. Matte photo papers are better suited for well-lit environments or situations where you want the widest
viewing angles. Many professionals prefer matte papers because they don’t have the reflective sheen which can easily be
seen even when framed behind glass. Matte photo paper can also make an image appear older. Fine art papers are often
thicker and heavier than plain matte papers, with a variety of surface textures including smooth, satin, velvet and watercolor.
Fine art papers are a step above regular matte papers and lend a certain characteristic to the print and feel more luxurious
in a potential customer’s hands. As a rule, they are more expensive than regular matte papers—sometimes considerably
more.
(continues on next page)

© Lake County Camera Club. No material may be reproduced in any manner without written permission of the Newsletter Editor or the material’s specific contributor.
Exposures - December 2012 Volume 5, Issue 4 Page 8
(continued from previous page)
Color Brilliance
The level of whiteness in a photograph is important because the color of the paper will be the color of the pure white
areas of your photograph. The brighter or whiter the paper, the better the photograph is a commonly held belief, but not
always true. Inkjet papers can be objectively classified as warm or cool in tonality. Cool, papers are brighter white,
while warm (soft white) inkjet paper has more of a natural yellowish look. Choosing between warm and cool is of
course subjective and will depend on the overall look you want for a print. Nature and landscape photography tend to
favor warmer paper so that colors are more natural and less stark. However, a scene where you want the most contrast
and cleanest whites may benefit from a cooler tone inkjet paper. There are two scales to measure the brightness or
light reflectivity of paper: the ISO Brightness scale and the TAPPI scale. The higher the brightness rating, the whiter the
paper will appear, which yields photos with proportionately higher contrast and more accurate color. Photo paper tends
to be at a rating of 90 and above.
Opacity may be something to consider. Most photo papers always have a high opacity, meaning they are hardly seen-
through. Lower opacity papers tend to be more translucent when used to print a brochure, newsletter, or anything else
that would need to be printed on both sides. Inkjet photo papers usually have an opacity rating of 94 to 97.
When printing digital images from a home computer, your software editor will usually offer a variety of printer settings to
ensure good print quality. These settings tell the printer what type of file is being printed, what size the paper to use,
and the type of paper is being used. The computer uses this information to apply the correct scheme, mixture of colors,
and volume of ink to the paper.
Printer and paper instructions should also be followed for dry times for inkjet prints. The inks are liquids whose
solvents need to evaporate before prints are handled or put in an album. This dry time will vary, generally from instantly
to about 24-hours, and is usually specified on the paper packaging. Even if a print is supposed to be instant dry, it may
be a good idea to let it dry longer before putting it inside an album, sleeve, or envelope, especially if that enclosure is
plastic.
Paper Choices
Epson and Canon are the major players in the photo printing world, and are really good at producing their own papers.
While your best choice may be to stick with your printer manufacturer's own papers, there are many third party options.
Again, don’t be afraid to experiment. I have used papers from Red River and ILFORD and I am very pleased with
their specialty papers. You might also look into Harman, Canson and Hahnemuehel.
You can use the following links for additional research:
Red River Paper http://www.redrivercatalog.com/
ILFORD http://www.ilford.com/en/products/photo-inkjet/
Harman http://www.harman-inkjet.com/home.asp
Canson http://www.canson-infinity.com/en/index.asp
Hahnemuehle http://www.hahnemuehle.com/site/en/169/home.html

© Lake County Camera Club. No material may be reproduced in any manner without written permission of the Newsletter Editor or the material’s specific contributor.
Exposures - December 2012 Volume 5, Issue 4 Page 9
Photo Printing Labs By George Haasjes
In this article, I hope to provide some information on outside photo printing labs along with a few suggestions to get you
started. If you plan to consider an outside printer, the first thing you need to do is to make sure your monitor is color
corrected. If it is not, there is no telling what your going to get. When working with your images keep them as a RAW,
PSD or TIFF until your editing is finished and then send them a JPG or JPEG, which is the same thing in my book.
What you send them is usually a JPG image at a resolution of 300 PPI (Pixels Per Inch). Photo Processing Labs often
have certain requirements for submissions and have a delivery system for receiving images. Quite a few of them use
ROES, which you can download and place your images in at the required size.
A little tip here. If you have an image and don't want to change the original size of the image you can use Elements or
another editing program to create the proper sized image. Let’s say your original image is cropped to 12.63 x 9.25.
Create a second blank image of any color at 14 x 11 and place your original image in to this second image without
changing the crop. Then submit it as an 14 x 11. When you get it back just cut the colored part of the paper off, no big
deal, and mount as usual.
I am using WHCC (White House Custom Color) for prints on metallic. They offer mounting for competition, if you want,
which is nice. If they screw it up, they pay for a reprint. The nice thing for me is WHCC does not charge for shipping
whereas Mpix and others may add an additional charge. These charges will vary according to image size and vendor.
I have used the Shipping Point in Gurnee which does a fine job and you get your work back within the time frame you
specify. They do excellent work and prices are fair, however they don’t offer 16 x 20 glossy or metallic.
As with all things when being creative you must remember that everything is subjective to the whims of the public and
people you know. If it looks good to you, that's all that counts Follow the basics of image submission and you'll be fine.
If Everett C. Buckbottom isn't happy with your stuff—to bad—it's your name on your creation, and no one will take your
birthday away.
I am including a list of outside vendor links with which may help make up your mind if you decide to try one of them.
Whether your submissions are 4 x 6 or 30 x 40, it makes no difference. You can surely ask for opinions, but that's just
it, an opinion. For the most part prices are competitive from one printer to the other, unless you going to print on
custom paper, whether it's a rag or cotton or something else, then the prices change.
Digital Photo Printing Review 2013 | Online Photo Printing | Print Digital Photos - TopTenREVIEWS
WHCC - White House Custom Colour
Shutterfly | Online Photo Labs | About Our Online Digital Photo Labs
Photo Printing, Photo Cards, Holiday Cards, Announcements, Photo Books : Mpix.Com
Professional Photo Lab | CPQ
Professional Photo Labs Chicago
Professional Photo Lab, Photo Printing, Photo Lab | H&H Color Lab
Bay Photo Lab, ROES
Nations Photo Lab - Professional Photo Printing and Digital Photo Finishing Services Online
LustreColor Professional Photo Lab Services, Online Web Hosting, Pro Lab Press Printing, Photo Books
Photo Sharing. Your Photos Look Better Here. | SmugMug
Miller’s Professional Imaging
Print Photos and Photo Enlargements | Walgreens Photo | Walgreens Photo Center

© Lake County Camera Club. No material may be reproduced in any manner without written permission of the Newsletter Editor or the material’s specific contributor.
Exposures - December 2012 Volume 5, Issue 4 Page 10
Printing Costs By Ken Johnson
When it comes to printing digital photos, many people wonder if it is better to use a printing service or printing at home.
Major chains such as Wal-Mart, Walgreens, CVS Drugs and Costco are in a constant price war with one another in an effort
to get us to use their photo processing services. When the cost of a 4x6 print is as low as $.12 when you walk in the store or
as low as $.09 if one orders prints online, why would anyone consider printing photos at home? The larger prints used
during our club competitions are quite a bit higher. Many club members including Bob and Linda Kruzic have used White
House Custom Color (WHCC). Bob and Linda provided this price schedule from WHCC.
WHCC claims that they are the
number one choice for professional
photographers. Their full service
lab offers 100% color accuracy,
quality-assured prints and first-class
finishing services. The pricing to the
left is a sample of their current price
list. Please note that here is a
$12.00 minimum for every order.
The “true cost of inkjet printing” is a source of constant debate in the media and on web forums. With claims of ink costing
five to ten thousand dollars per gallon, it’s not a mystery why the debate continues. Major printer manufacturers such as
Epson, HP, Canon and Lexmark have been forced to recognize that if ink cartridges continue to be considered an
"investment" as opposed to standard office supply purchase, consumers will be very selective on what and when they print
at home. This has resulted in the recent release of high yield cartridges, whose pricing makes home printing more
economical.
Red River Paper estimates that an 11x14 print will use about $1.25 worth of ink. Given potential sources of error, using this
figure could be applicable. The cost of an 11x14 sheet of photo paper is around $1.50, so this brings the cost of a 11x14
print to about $2.75. Recent reports have this cost even lower. This brings the cost per print to be quite low. Of course, this
doesn't include the original cost of the printer.
The final cost of ink jet printing can always spark more discussion and debate about the merits of inkjet printing. Do the
majority of end users simply not care about the cost, or do they know something that is missing from the discussion?
Ken Rockwell claims that inkjet printers are dead. “We can get much better prints on real, light-sensitive, chemically-
processed photo paper at almost any lab including Wal-Mart, Costco and Target. They have all bought the $50,000 and up
machines required to print electronically onto real photo paper. Adorama Lab's printers cost $150,000 each and the ones
at Calypso cost about $500,000. Inkjet printer makers today spend tons on promotion and seminars to keep you thinking
you need one. Nikon and Canon never needed to try to keep you stuck in film. Inkjets aspired to "photo quality," but never
got there for me. I love the ultra glossy, vivid wet-look prints I get on Fuji Super Gloss.” To read the full article go here:
http://www.kenrockwell.com/tech/printers.htm
Inkjet printer sales continue to increase and studies indicate this trend will continue in the short and mid-term and some
ratings say that quality of the quality inkjet printer rivals or may exceed a $50,000 photo lab printer.
Ever since I started printing at home, I have had the thought that every photographer should take the time to print their own
work. It’s a special experience that’s hard to describe. Taking the extra step to print an image yourself and have control of
the creative process from the moment of capture to the final output takes the phrase “making photographs” to the next level.
For me, this is very much like the commercial we are quite familiar with. Printer—$300.00. Ink—$1.25. Paper—$1.50. The
ability to make a print at home—priceless.
This decision is and always has been a very personal and controversial subject. The value one places on print quality,
convenience, speed, control, and media availability is what determines if inkjet is right for you.
Matte or Glossy
9x12 = $3.80
10x13 = $3.90
11x14 = $4.40
10x15 = $4.40
12x12 = $4.15
11x16 = $6.30
12x18 = $6.30
Metallic
9x12 = $4.56
10x13 = $3.90
11x14 = $4.40
10x15 = $5.28
12x12 = $4.98
11x16 = $7.56
12x18 = $7.56
© Lake County Camera Club. No material may be reproduced in any manner without written permission of the Newsletter Editor or the material’s specific contributor.
Exposures - December 2012 Volume 5, Issue 4 Page 11
Printing My Own By John Williams
After sending out my photos to a pro lab for several years, (WHCC who was one of our sponsors for the PhotoExpo,
and I recommend them highly!), I decided to go ahead and buy a good printer. I have always been impressed with the
quality images from several members whom I know have been printing their own, so that helped make the decision for
me. One of the great things about lab printing was how easy they made the process and the fast service and super
quality of the printing. The frustrating thing about sending them out was the occasional disappointment after receiving
the print images and realizing that if only I could have changed the exposure, or contrast, or sharpening, or saturation a
little bit, the image could have been better. So that is why I decided to start printing my own.
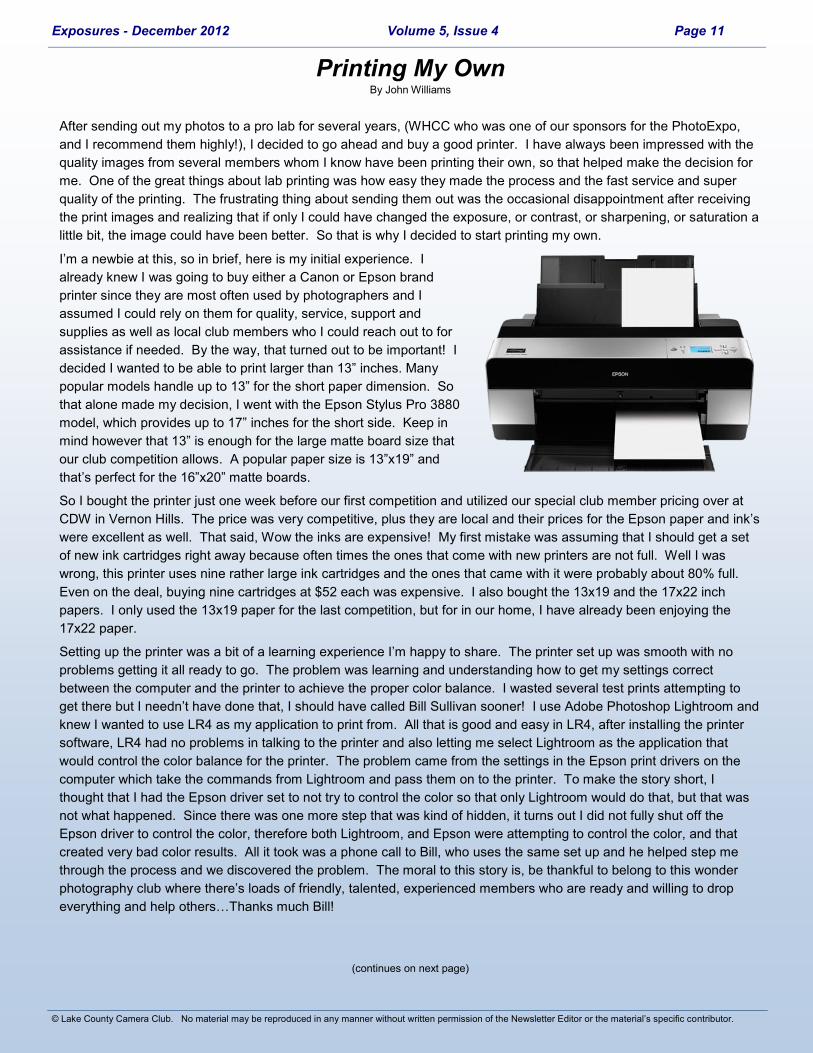
I’m a newbie at this, so in brief, here is my initial experience. I
already knew I was going to buy either a Canon or Epson brand
printer since they are most often used by photographers and I
assumed I could rely on them for quality, service, support and
supplies as well as local club members who I could reach out to for
assistance if needed. By the way, that turned out to be important! I
decided I wanted to be able to print larger than 13” inches. Many
popular models handle up to 13” for the short paper dimension. So
that alone made my decision, I went with the Epson Stylus Pro 3880
model, which provides up to 17” inches for the short side. Keep in
mind however that 13” is enough for the large matte board size that
our club competition allows. A popular paper size is 13”x19” and
that’s perfect for the 16”x20” matte boards.
So I bought the printer just one week before our first competition and utilized our special club member pricing over at
CDW in Vernon Hills. The price was very competitive, plus they are local and their prices for the Epson paper and ink’s
were excellent as well. That said, Wow the inks are expensive! My first mistake was assuming that I should get a set
of new ink cartridges right away because often times the ones that come with new printers are not full. Well I was
wrong, this printer uses nine rather large ink cartridges and the ones that came with it were probably about 80% full.
Even on the deal, buying nine cartridges at $52 each was expensive. I also bought the 13x19 and the 17x22 inch
papers. I only used the 13x19 paper for the last competition, but for in our home, I have already been enjoying the
17x22 paper.
Setting up the printer was a bit of a learning experience I’m happy to share. The printer set up was smooth with no
problems getting it all ready to go. The problem was learning and understanding how to get my settings correct
between the computer and the printer to achieve the proper color balance. I wasted several test prints attempting to
get there but I needn’t have done that, I should have called Bill Sullivan sooner! I use Adobe Photoshop Lightroom and
knew I wanted to use LR4 as my application to print from. All that is good and easy in LR4, after installing the printer
software, LR4 had no problems in talking to the printer and also letting me select Lightroom as the application that
would control the color balance for the printer. The problem came from the settings in the Epson print drivers on the
computer which take the commands from Lightroom and pass them on to the printer. To make the story short, I
thought that I had the Epson driver set to not try to control the color so that only Lightroom would do that, but that was
not what happened. Since there was one more step that was kind of hidden, it turns out I did not fully shut off the
Epson driver to control the color, therefore both Lightroom, and Epson were attempting to control the color, and that
created very bad color results. All it took was a phone call to Bill, who uses the same set up and he helped step me
through the process and we discovered the problem. The moral to this story is, be thankful to belong to this wonder
photography club where there’s loads of friendly, talented, experienced members who are ready and willing to drop
everything and help others…Thanks much Bill!
(continues on next page)

© Lake County Camera Club. No material may be reproduced in any manner without written permission of the Newsletter Editor or the material’s specific contributor.
Exposures - December 2012 Volume 5, Issue 4 Page 12
(continued from previous page)
So after that was taken care of, I must say that I am very excited about my new printer and now I can finesse an image
until I get the results I’m looking for. It’s easy to take an image you have selected and try the settings by first printing the
image at a smaller size, like 4x6 or 5x7. Then make any number of adjustments and small prints before going to the full
size. We edit our images on backlit monitors which have quite different characteristics than reflective light off of paper.
Naturally the printed result, even when the monitor is color balanced and you’re using color profiles for the paper, is not
the same look. Printing from Lightroom really helps, not only does it make easy the option of adding a border and
properly sizing the image to the paper size, it also allows you to easily make adjustments to the exposure, contrast and
sharpening just at output for the printing process. Additionally, at times I have made decisions to adjust the color
saturation after seeing the printed image. And don’t forget that by printing directly from Lightroom, you are printing from
the RAW file, not a JPG. So all in all, I’m now very happy to be able to print my own images. It completes the entire
process from start to finish and puts you in control of every step.
Egon’s World

© Lake County Camera Club. No material may be reproduced in any manner without written permission of the Newsletter Editor or the material’s specific contributor.
Exposures - December 2012 Volume 5, Issue 4 Page 13
Accolades
This past August, the Lake County Camera Club recognized members whom made considerable contributions to our club
during the 2011-2012 season. The Most Participation Award is based on statistics and the remainder are from nominations
made by club members.
Most Participated Award is awarded to an individual who participates the most throughout LCCC's season by attending
club meetings, Shutter Cafe's, photo excursions and CACCA competitions.
Photographer of the Year is awarded to an individual having the highest average score in all divisions combined..
Ambassador Award is awarded to an individual who brings value to LCCC by best promoting the club as an ambassador
for new members, presenters and activities.
Contribution Award is awarded to an individual who has added value to LCCC based on a single significant contribution.
Distinguished Service Award is awarded to an individual for outstanding contributions and overall service to LCCC for the
year.
Will Fletcher Award is awarded to an individual who best exemplifies the spirit and efforts of Will Fletcher in mentoring or
teaching members of LCCC.
Congratulations to these 2011—2012 winners:
Most Participation Award: Jim Ross
Photographer of the Year: Paul Kurek
Ambassador Award: Don Chen
Contribution Award: John Rouse
Distinguished Service Award: Ron Meyers
Will Fletcher Award: Don Chen
November 29 Club DPI Due
CACCA Special Category Due:
"Smoke, Be Creative"
November 30 “Favorite Color” Challenge Due
December 1 Photo Excursion: Oriental Theater
December 6 Competition Night @ University Center. Starts at 6:45 pm. All printed entries must be submitted by 6:30 pm.
December 8 CACCA Meeting
December 15 Shutter Café 8:00am @ Hillside Restaurant
December 22 PSA: Projected Image Division (PID) Due
December 27 CACCA Special Category Due:
“Simple and Uncluttered”
December 31 “Simplicity” Challenge Due
January 3 7:00 pm Program Night - A Night with Paul Natkin
Dates To Remember