Embed Size (px)
Citation preview

Can You Stand on Me?
Printable ResourcesStop Stomping on Me
Appendix A: Pre/Post-Test
Appendix B: Pre/Post Test ANSWER KEY
Appendix C: Teacher Advanced Preparation Instructions
Appendix D: Brazil Brochure
Appendix E: Russia Brochure
Appendix F: World Cup Venn-Diagram
Appendix G: Engineering Design Challenge
Appendix H: Engineering Design Process
Appendix I: Field Design Rubric
Appendix J: Research: Soil, Water, and Growing Optimal Soccer Fields
Appendix K: Team Roles
Appendix L: Testing Individual Soils
Appendix M: Decision Analysis Matrix
Appendix N: Procedures for Creating and Testing Team Subsoil Designs
Appendix O: Subsoil Design Testing
Appendix P: Subsoil Redesign Testing
Appendix Q: Cost Analysis
Appendix R: Written Proposal Outline
Appendix S: Written Proposal Rubric
Page 1

Can You Stand on Me?
Appendix A: Pre/Post-TestName __________________________________ Date ____________ Period ______
1. When it rains, the soil on a soccer field holds water well and becomes moist and sticky. The soil on the field probably contains a large amount of A. sandB. gravelC. clayD. silt
2. Water that falls onto Earth’s surface is either soaked into the ground or travels on the surface until it reaches a body of water. Water that is absorbed into the ground is referred to as groundwater. Soil and rock that allow the water to soak into the ground by passing through them are calledA. compacted.B. runoff.C. groundwater.D. permeable.
3. The rate at which water flows through soil and rock is dependent upon theA. quality of water flowing through the soil or rock.B. porosity and permeability of the soil or rock.C. temperature of the soil or rock.D. contamination of the soil or rock.
4. Prove that the following scientific statements are factual using evidence from any research and experimentation you have done. (2 points)
Properties in soil that are useful in soil identification include texture, color, composition, permeability and porosity. Observing and identifying soil horizons are based upon
understanding the different properties of soil and when the properties change.
5. How much does it cost to buy 45,000 cm3 of sand that costs 3¢ per 100 cm3? Show your work, expressing the results in dollars, in the space provided below. (2 points)
6. A 500 mL bottle of water cracks and begins leaking at a constant rate. The bottle is empty after 3 minutes. How many milliliters of water leaked every second? Show your work in the space provided below. (2 points)
Page 2

Can You Stand on Me?
7. Using the following formula, calculate the volume of a cylinder with a height of 10cm and diameter of 11cm. Show your work in the space provided below. (2 points)
V (cylinder) =π r2h where π = 3.14
8. Kylah is comparing erosion of different materials. First, she arranges various materials into piles of equal size and shape. Next, she slowly pours equal amounts of water over each pile. Finally, she measures the height of each pile and records the results in the data table below.
Erosion of Materials due to Addition of WaterMaterial Initial Pile Height Final Pile HeightGravel 100 mm 92 mmSand 100 mm 68 mm
Pebbles 100 mm 83 mmSoil 100 mm 56 mm
According to the data table, which pile of material demonstrates the greatest amount of erosion? Support your answer with evidence from the data. (2 points)
9. Jamie is planning to plant a fern in a 2000 cm3 pot, but has two types of soils from which to choose. Regular potting soil costs 12.4¢ per 100cm3. Potting soil with fertilizer added is 18.5¢ per 100 cm3. How much more will Jamie pay to use potting soil with fertilizer than regular potting soil? Show your work below, expressing your answer in dollars. (2 points)
10. Fill in the blanks with the word equal or varying in the following scenario. Note: each word may be used multiple times or not at all. (2 points)
Students in Mrs. Smith’s class want to know if porosity of soil affects the growth of
plant seedlings (young plants). To figure this out, the students need to design an
experiment in which seedlings are planted in soils with _________________ levels
of porosity and with ______________________ levels of permeability.
Page 3
Can You Stand on Me?
11. Study the above hydrologic cycle illustration, and choose 3 of the numbered sections. Describe each of the 3 sections roles in the hydrologic cycle. Then, provide an example of ways in which each section could become polluted. Draw upon your prior knowledge, and also refer to the illustration to support your answer with scientific evidence. (6 points)
Section Role in Hydrologic Cycle Pollution Cause
Page 4
Hydrologic Cycle
http://web.mit.edu/civenv/K12Edu/activities/water.html

Can You Stand on Me?
Appendix B: Pre/Post Test ANSWER KEY
1. A: clay.
2. D: permeable.
3. B: porosity and permeability of the soil or rock.
4. Answers will vary. Except reasonable responses, supported by proof from research and experimentation.
5. Cost of sand: 1350¢=$13.50
6. 3minutes=180 seconds, so amount of water that leaked is: 500÷180=2.777mm /sec
7. V (cylinder)=3.14∗5.52∗10=949.85 cm3
8. The soil eroded the most. Because the height of the start was 100mm−56mm (the height of the pile after pouring the water) ¿44mm. This amount is greater than all the other materials from beginning to end. Gravel: 100−92mm=8mm; sand: 100−68mm=32mm; pebbles: 100−83mm=17mm.
9. Potting soil would cost $2.48 and potting soil with fertilizer would cost $3.70, so potting soil with fertilizer would cost $1.22 more than regular potting soil to fill the 2000cm3 pot.
10. To figure this out, the students need to design an experiment in which they plants seedlings in soils with VARYING levels of porosity and EQUAL levels of permeability.
11. Explanation for ways in which pollution can affect each section may vary greatly; accept reasonable responses. Possible answers for describing water cycling through each section:
Section Number Description of Water Cycling Through Section
1 Water evaporates from lakes and ocean surfaces. The evaporated water forms clouds that may travel over vast distances.
2 Precipitation as mist, rain, snow or ice falls over the land and the sea.
3 Some groundwater may emerge as a spring or may enter lakes and oceans.4 Some water sinks into the ground, becoming part of the groundwater.
5 Plants and animals use water and return it to the environment through transpiration, perspiration, or urination.
6 Surface water runoff enters streams, rivers, lakes and oceans
Page 5

Can You Stand on Me?
Appendix C: Teacher Advanced Preparation InstructionsStudents may also complete preparation.
Materials:Drill (1 per teacher)Drill Bit: 1/4 in. (1 per teacher)Drill Bit: 3/32 in. (1 per teacher)Jigsaw or Router (if using plywood for circular solid shape: 1 per teacher)2-Liter Bottles (4 per team)Water Bottle: 500 mL (1 per team)Brillo Pad: cut into a circle to fit into 2-liter bottle; about 4.24 in. diameter (1 per team)Circular Solid Disk: 4 in. diameter (1 per team)-
Suggestion: one piece of plywood: ¼ to ½ in. thick; cut circular with a 4 in. diameter
Preparing 2-Liter Bottles:1. Remove and discard the caps and labels from each 2-liter bottle. A hair-dryer works
well for this to melt the glue on the label.2. Cut the top off each 2-liter bottle 20 cm from the base; both pieces will be used.3. About 3 cm from the cut, drill one 3/32 in. hole into the side of the base of 2-liter bottle to
allow airflow during testing.4. Drill five 1/4 in. holes into the bottom of three 2-liter bottles for each team.
Note: each team will need three 2-liters WITH holes, and one 2-liter bottle WITHOUT holes drilled into the bottom.
Preparing 4 in. Diameter Circular Solid Disk - if using Plywood Pieces:1. Use a jigsaw or router to cut out circles with a 4 in. diameter.
Note: the circular plywood piece will be used for compression testing. It will be place on top of the Brillo pad. A brick will then be placed on the plywood, and left overnight. Amount of soil compression will be observed the following day
Preparing 500 mL Water Bottles:1. Drill a 3/32 in. hole into the middle of the bottle’s cap.2. Drill one 3/32 in. hole centered on the bottom each water bottle.
Assembling Testing Stations:1. Place an inverted top portion into the bottom portion of a 2-liter bottle
WITHOUT holes in the bottom.2. Place a coffee filter into the inverted portion of the 2-liter bottle.3. Place a bottom portion of a 2-liter bottle WITH holes in the bottom into the
inverted top portion of the 2-liter bottle.
Note: Construction of each team’s subsoil will be in this uppermost portion. The Brillo pad will be placed on top, acting as the soccer field’s grass. When teams pour water onto the Brillo pad, it will run through their subsoil, drain through the bottom holes, into the coffee filter, and finally into the bottom, which acts as a catch basin for the water.
Page 6

Can You Stand on Me?
Appendix D: Brazil Brochure
Page 7

Can You Stand on Me?
Page 8

Can You Stand on Me?
Appendix E: Russia Brochure
Page 9

Can You Stand on Me?
Page 10

Can You Stand on Me?
Appendix F: World Cup Venn-DiagramName __________________________________ Date ____________ Period ______
Page 11

Can You Stand on Me?
Appendix G: Engineering Design Challenge
Name __________________________________ Date ____________ Period ______
Engineering Design Challenge
Our city has been chosen to host part of the upcoming World Cup soccer tournament. The challenge is to engineer a world-class soccer stadium for this
highly prestigious competition. The city requires that the field be as environmentally sustainable as possible to protect the city's precious
groundwater while still meeting the needs of the professional players. Your team is going to be given the task of designing the best layered soil arrangement for underneath the field. The bed will need to allow a given rate of rainfall without
having standing water on the field or polluting the aquifer running underneath the stadium. Your team will have a variety of materials to use to construct the
optimal layered arrangement and test its performance withstanding rainfall and compaction simulating use of the field. A combination of soil types will be
necessary to meet performance levels. Your team will then be responsible for developing a cost analysis for your model and proposing your plan to the class.
Available Materials and Cost Table
Available Materials Costper 100 cm3
Small Pebble 2.00¢Top Soil 1.33¢Top Soil with Vermiculite 2.22¢Peat Moss 1.44¢Top Soil with Fertilizer 3.22¢Sand 2.44¢
System Design Constraints Must be environmentally safe. Must contain at least 3 layers, with the top being soil (a Brillo pad will be place
on top to simulate grass). Must measure 10 cm high in addition to a 3 cm base composed of sandstone Must withstand 500 mL of water (flowing from a water bottle) without pooling
on the surface
Page 12

Can You Stand on Me?
Appendix H: Engineering Design Process
Page 13

Can You Stand on Me?
Appendix I: Field Design Rubric
Name __________________________________ Date ____________ Period ______
Team Name _______________________________________Individual Score
4 3 2 1
Soil and Hydrologic
Cycle Research
3 or more resources were used.
All questions are answered in-depth with key vocabulary and important points that go above and beyond requirements.
Minimum of 3 resources were used.
All questions are answered completely with key vocabulary and important points.
Minimum of 2 resources were used.All questions are partially answered. Missing key vocabulary or important points.
Only 1 resource for research was used.Answers are incomplete. Missing key vocabulary or important points.
Team Score
Initial Design
Each of the 4 design constraints (safety, layers, height, water flow) is considered in the design plan.All recorded data is complete, accurate, and analyzed for use in identifying design successes and failures.
Each of the 4 design constraints (safety, layers, height, water flow) is considered in the design plan.All recorded data is complete and accurate.
Three of the 4 design constraints (safety, layers, height, water flow) are considered in the design plan.Recorded data is incomplete or inaccurate.
Less than 3 of the 4 design constraints (safety, layers, height, water flow) are considered in the design plan.Recorded data is incomplete or inaccurate.
Redesign
Each of the 4 design constraints (safety, horizons, height, water flow) is considered in the design plan.All recorded data is complete, accurate, and analyzed for use in identifying design successes and failures.
Each of the 4 design constraints (safety, horizons, height, water flow) is considered in the design plan.All recorded data is complete and accurate.
Three of the 4 design constraints (safety, horizons, height, water flow) are considered in the design plan.Recorded data is incomplete or inaccurate.
Less than 3 of the 4 design constraints (safety, horizons, height, water flow) are considered in the design plan.Recorded data is incomplete or inaccurate.
Cost Analysis
All calculations are complete and accurate. Connections are made to real-world design costs.
All calculations are complete and accurate.
All calculations are complete with minor errors.
All calculations are complete with major errors.
Hydrologic Cycle /
Contamination Connection
In-depth, accurate connections to the hydrologic cycle and contamination were made not only to the design, but also to the real world.
Accurate connections to the hydrologic cycle and contamination were made to the design.
Accurate connections to the hydrologic cycle OR contamination was made to the design.
The hydrologic cycle and/or contamination were mentioned, but no connections made to the design.
Page 14

Can You Stand on Me?
Appendix J: Research: Soil, Water, and Growing Optimal Soccer Fields Name __________________________________ Date ____________ Period ______
Research and take notes from least 3 different resources. Cite your sources.
List various properties of the 3 different types of soils.
Resource(s):
Describe the porosity and permeability of each of soils and rocks. Explain how rate at which water flows through soil and rock is dependent upon the porosity and permeability
Resource(s):
Soil forms in layers known as horizons. Explain how soil horizons can be identified based upon different properties of soil.
Resource(s):
Describe how groundwater and soil are affected as water cycles through the lithosphere, biosphere, hydrosphere and atmosphere (hydrologic cycle). Include two ways in which groundwater and soil could be contaminated during this cycle.
Resource(s):
Page 15

Can You Stand on Me?
Name at least two career professionals that design soccer fields, and describe their responsibilities?
Resource(s):
What types of soil and rocks are used to create the horizons of a soccer field? Explain the reasons for using these.
Resource(s):
Describe the types of grass used on soccer fields. Explain the reasons for using these.
Resource(s):
Describe the root-zone; include 4 important aspects.
Resource(s):
Explain optimal drainage rates for a soccer field, and name at least one additive used in root-zones for more efficient drainage.
Resource(s):
Page 16

Can You Stand on Me?
Appendix K: Team Roles
Testing EngineerAssigned to: ______________________
Responsible for leading the team in the testing of the drainage, compaction, and sediment of the subsoil as well as the pH of the water.
Data AnalystAssigned to: ______________________
Responsible for recording all the data collected from the testing. Also responsible for making sure the data is accurate.
Project ManagerAssigned to: ______________________
Responsible to make sure the team is following the correct steps in making and testing the subsoil. Also, makes sure the team stays focused and completes the project on time.
Materials EngineerAssigned to: ______________________
Responsible for leading the discussion on the materials that will be used in the construction of the soccer field subsoil. Also, leads the creation of the subsoil layers.
Page 17

Can You Stand on Me?
Appendix L: Testing Individual SoilsEach team is responsible for testing one of five different soils available for completing the challenge. Preform tests to determine how well water drains (porosity and permeability), amount of sediment collected, changes in the water’s pH, and amount of soil compaction (settling). Complete the following procedures, and record results in the table.
Materials2-Liter Bottle: Bottom Section (WITH holes in bottom) 2-Liter Bottle: Bottom Section (WITHOUT holes in bottom)
Top Section of 2-liter Bottle Soil (assigned to team)Pebbles Coffee FilterWater Bottle: 500 ml (with hole in cap and bottom) Circular Brillo PadCircular Solid Disk Rags or Paper TowelsBrick pH Strips (2 pieces)500 ml Beaker Graduated CylinderCompaction Tool (block of wood) RulerPermanent Marker StopwatchCalculator Digital Scale
Procedures1. Fill the bottom of a 2-Liter bottle, WITH holes in the bottom, with 3 cm of pebbles.2. Place 10 cm of your team’s assigned soil on top of the pebbles. 3. Place the circular Brillo pad on top of the topsoil horizon. This is to represent field Astroturf.4. Invert a 2-Liter bottle’s top section and place it into a bottom section of a 2-Liter bottle
WITHOUT holes in the bottom. Then, place a coffee filter into the inverted section. The empty bottom section is to represent your system’s aquifer.
5. Place the bottle containing pebbles and soil into the inverted top (with the coffee filter in it).6. Dip a pH strip into clean water. Measure and record the water’s pH.7. Place your finger over the hole on the bottom of the water bottle, and fill it with water.
Continue covering the hole as you place a cap on the bottle, and turn the water bottle upside down over the soil.
8. As another team member starts the timer, remove your finger from the hole, allowing all of the water to flow onto the soil. Record the time it took for all of the water to flow through the soil and collect into the bottom bottle.
9. Take the inverted top and the bottle with soil off, and place them on a towel. 10. Measure and record the amount of water that collected in the bottom bottle by pouring it into
a graduated cylinder. If the graduated cylinder becomes full, transfer the water to a beaker, and continue measuring.
11. Determine the rate at which the water flowed through the subsoil mL per second. 12. Retest and record the water’s new pH.13. Use a sharpie to make mark the bottle where the top of the Brillo pad is. 14. Place the circular solid disk on top of the Brillo pad. Then, place a brick on top of the circular
solid disk to compress the soil. Allow the brick to remain there overnight so that a soil compression measurement can be taken tomorrow.
15. Allow the coffee filter dry overnight so that the mass of sediment collected by the filter can be taken and recorded tomorrow.
On the Following Day:16. Measure and record your initial design’s soil compression results. Do this by measuring from
the top of the subsoil to the sharpie mark made yesterday. 17. Remove the brick and plywood disk.18. Using a digital scale, measure and record the mass (g) of sediment collected in the filter.
Page 18

Can You Stand on Me?
19. As a team, analyze your team’s recorded results. Discuss successes and failures of your team subsoil design.
Page 19

Can You Stand on Me?
Name __________________________________ Date ____________ Period ______
Team Name _______________________________________
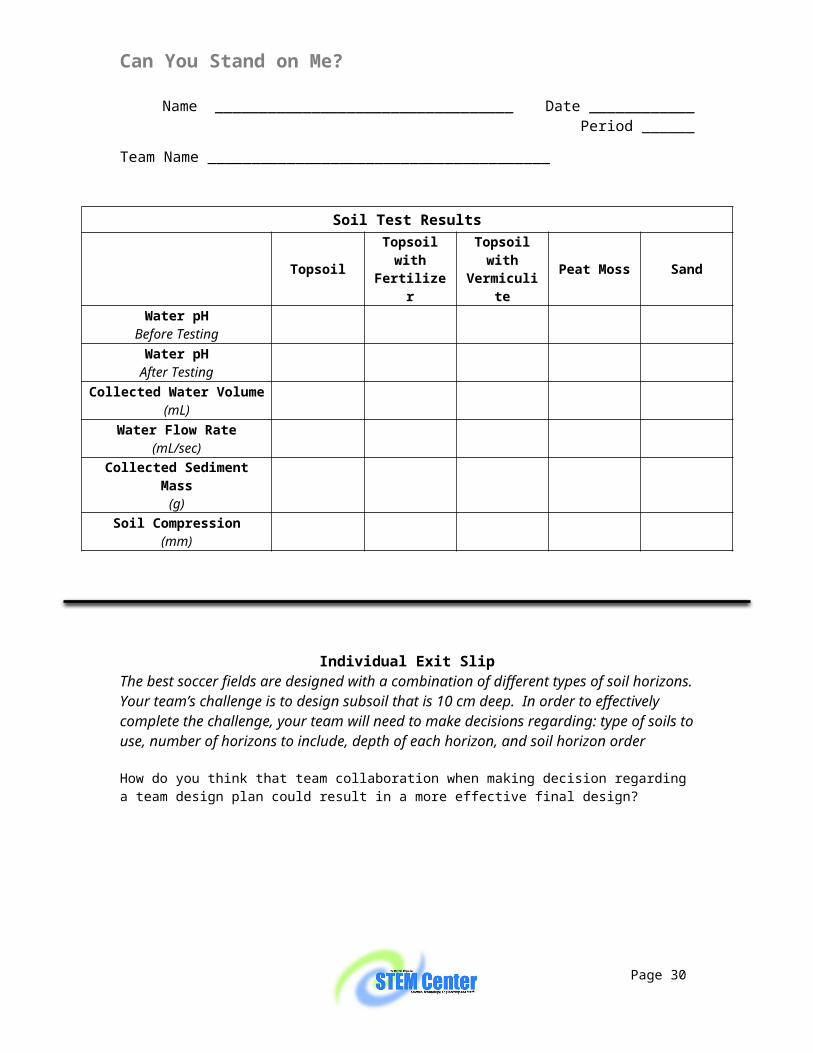
Soil Test Results
Topsoil Topsoil with Fertilizer
Topsoil with Vermiculite Peat Moss Sand
Water pHBefore Testing
Water pHAfter Testing
Collected Water Volume (mL)
Water Flow Rate(mL/sec)
Collected Sediment Mass(g)
Soil Compression(mm)
Individual Exit SlipThe best soccer fields are designed with a combination of different types of soil horizons. Your team’s challenge is to design subsoil that is 10 cm deep. In order to effectively complete the challenge, your team will need to make decisions regarding: type of soils to use, number of horizons to include, depth of each horizon, and soil horizon order
How do you think that team collaboration when making decision regarding a team design plan could result in a more effective final design?
Page 20

Can You Stand on Me?
Individual Design Plan:Sketch your individual design plan ideas below. You will share your design plan proposals with your team tomorrow. List the type of soil and its depth for each horizon (layer). Also, write notes around your design to explain your reasoning for each idea. Consider explaining: reasoning for choosing certain soils, but not others; reasoning for choosing depth of each soil horizon; reasoning for choosing soil horizon ordering.
Sketch
Page 21

Can You Stand on Me?
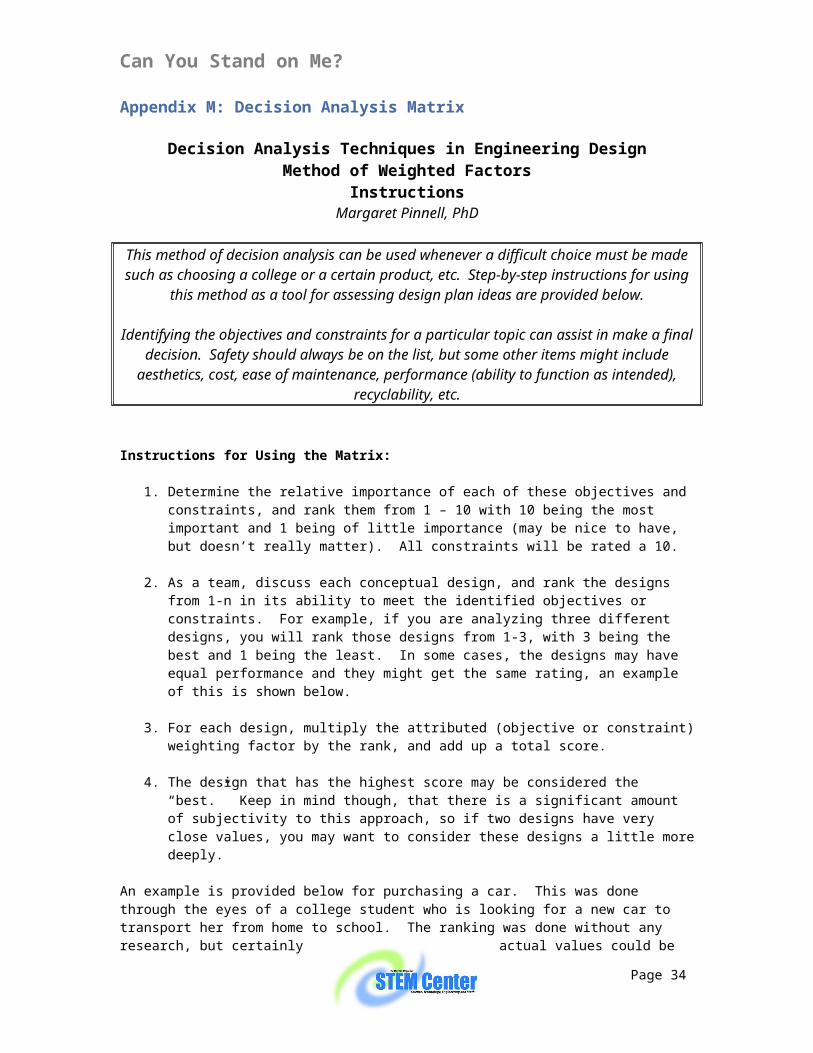
Appendix M: Decision Analysis Matrix
Decision Analysis Techniques in Engineering DesignMethod of Weighted Factors
InstructionsMargaret Pinnell, PhD
This method of decision analysis can be used whenever a difficult choice must be made such as choosing a college or a certain product, etc. Step-by-step instructions for using
this method as a tool for assessing design plan ideas are provided below.
Identifying the objectives and constraints for a particular topic can assist in make a final decision. Safety should always be on the list, but some other items might include
aesthetics, cost, ease of maintenance, performance (ability to function as intended), recyclability, etc.
Instructions for Using the Matrix:
1. Determine the relative importance of each of these objectives and constraints, and rank them from 1 – 10 with 10 being the most important and 1 being of little importance (may be nice to have, but doesn’t really matter). All constraints will be rated a 10.
2. As a team, discuss each conceptual design, and rank the designs from 1-n in its ability to meet the identified objectives or constraints. For example, if you are analyzing three different designs, you will rank those designs from 1-3, with 3 being the best and 1 being the least. In some cases, the designs may have equal performance and they might get the same rating, an example of this is shown below.
3. For each design, multiply the attributed (objective or constraint) weighting factor by the rank, and add up a total score.
4. The design that has the highest score may be considered the “best.” Keep in mind though, that there is a significant amount of subjectivity to this approach, so if two designs have very close values, you may want to consider these designs a little more deeply.
An example is provided below for purchasing a car. This was done through the eyes of a college student who is looking for a new car to transport her from home to school. The ranking was done without any research, but certainly actual values could be obtained from reliable resources regarding relative safety, cost, gas mileage etc. If this information is available, this research should be done, but this is just a quick example. The college student, with input from her parents, identified the following factors that would help her decide which car to purchase. They decided that safety was, by far, the most important factor.
Since this was for a college student, cost-related issues including price of the car, cost of upkeep/maintenance and gas mileage were all very important as well. The student didn’t really have more than a suitcase that she would need to carry, so cargo room was not that important, but would be nice to have in case she did have some larger things to bring home. Also, since she only needed the car to last her through her 4 (or 5) years in college, the “life span” of the car was only marginally important. The college student protested regarding aesthetics, after all, she wanted a cool ride, so aesthetics were pretty important to the student. The student considered three cars available at a dealer close to her home.
Page 22

Can You Stand on Me?
(Decision Analysis Matrix Instructions Continued)
Resultant Sheet:
Results of this decision analysis suggest that car 1 is the best choice for the student. However, had these factors been weighted differently, the results might have changed.
Page 23

Can You Stand on Me?
Name __________________________________ Date ____________ Period ______
Team Name _______________________________________
Preparing a Decision Analysis Matrix for the Soccer Stadium Layering System
1. As a team, review the list of design constraints from your engineering design challenge (requirements that must be met) for your soccer field.
System must be safe System must contain a total of 10 cm of ground horizons above the
pebbles System must allow water to flow to the underlying aquifer System must be composed of at least 3 horizons, in addition to
pebbles System must have soil as the top horizon
2. As a team, develop at least four design objectives (attributes that your team would like your soccer field to have, based on your background research)
3. Determine the relative importance of each of the constraints and objectives in numbers 1 and 2 above, by assigning them a weight from 1-10, with 10 being the most important and 1 being of little importance (may be nice to have, but doesn’t really matter). Write the weight your team decides next to the constraint or objective. All constraints should be assigned a weight of 10 since they are required. Safety should always be included with a weight of 10!
4. After your team has assigned a weight to each objective, the Project Manager should record them on your Decision Analysis Matrix table.
Page 24

Can You Stand on Me?
Design 1
__________________Name
Design 2
__________________Name
Design 3
__________________Name
Design 4
__________________Name
Goals(Constraints and
Objectives)Weight Score Value
(weight x score) Score Value(weight x score) Score Value
(weight x score)Score Value
(weight x score)
Safe
TOTAL VALUESum of values:
_______
Sum of values:
_______
Sum of values:
_______
Sum of values:
_______
1. After all group members have presented their design ideas, use the numerical system below to score each design against the constraints and objectives.
3 = totally meets the goal 2 = somewhat meets the goal 1 = does not meet the goal2. Add the values for each design to determine a total score. The design with the highest score may be considered the “best.” Keep in mind
though, that some of the scoring is based on opinion, so if two designs have close values, you may want to consider these designs a little more deeply, or combine their best attributes.
Page 25

Appendix N: Procedures for Creating and Testing Team Subsoil Designs
Materials2-Liter Bottle: Bottom Section (WITH holes in bottom) 2-Liter Bottle: Bottom Section (WITHOUT holes in bottom)
Top Section of 2-liter Bottle Soil (5 types)Pebbles Coffee Filter (1 per team)Water Bottle: 500 ml (with hole in cap and bottom) Circular Brillo PadCircular Solid Disk Rags or Paper TowelsBrick (standard-size) pH Strips (2 pieces)500 ml Beaker Graduated CylinderCompaction Tool (block of wood) RulerPermanent Marker StopwatchCalculator Digital Scale
Procedures1. Fill the bottom of a 2-Liter bottle, WITH holes in the bottom, with 3 cm of pebbles.2. Begin creating your team subsoil design. As soils are added, measure each horizon’s depth
before adding another soil horizon. Remember the total subsoil depth should be 10 cm.3. Place the circular Brillo pad on top of the topsoil horizon. This is to represent field Astroturf.4. Invert a 2-Liter bottle’s top section and place it into a bottom section of a 2-Liter bottle
WITHOUT holes in the bottom. Then, place a coffee filter into the inverted section. The empty bottom section will act as your systems aquifer.
5. Place the bottle containing pebbles and soil into the inverted top (with the coffee filter in it).6. Dip a pH strip into clean water. Measure and record the water’s pH.7. Place your finger over the hole on the bottom of the water bottle, and fill it with water.
Continue covering the hole as you place a cap on the bottle, and turn the water bottle upside down over the soil.
8. As another team member starts the timer, remove your finger from the hole, allowing all of the water to flow onto the soil. Record the time it took for all of the water to flow through the soil and collect into the bottom bottle.
9. Take the inverted top and the bottle with soil off, and place them on a towel. 10. Measure and record the amount of water that collected in the bottom bottle by pouring it into
a graduated cylinder. If the graduated cylinder becomes full, transfer the water to a beaker, and continue measuring.
11. Determine the rate at which the water flowed through the subsoil mL per second. 12. Retest and record the water’s new pH.13. Use a sharpie to make mark the bottle where the top of the Brillo pad is. 14. Place the circular solid disk on top of the Brillo pad. Then, place a brick on top of the circular
solid disk to compress the soil. Allow the brick to remain there overnight so that a soil compression measurement can be taken tomorrow.
15. Allow the coffee filter dry overnight so that the mass of sediment collected by the filter can be taken and recorded tomorrow.
On the Following Day:16. Measure and record your initial design’s soil compression results. Do this by measuring from
the top of the subsoil to the sharpie mark made yesterday. 17. Remove the brick and plywood disk.18. Using a digital scale, measure and record the mass (g) of sediment collected in the filter.19. As a team, analyze your team’s recorded results. Discuss successes and failures of your
team subsoil design.

Stop Stomping on MeAppendix O: Subsoil Design TestingName __________________________________ Date ____________ Period ______
Team Name _______________________________________1. Before Testing: In the box below, create a table showing the horizons of subsoil, depth of
each horizon (cm), and type of soil your team plans to place in each horizon.
2. During Testing: Follow the procedures for creating your team subsoil. Record results below.Initial Subsoil Design: Test Results
Topsoil Topsoil with Fertilizer
Topsoil with Vermiculite Peat Moss Sand
Water pHBefore Testing
Water pHAfter Testing
Collected Water Volume (ml)
Water Flow Rate(ml/sec)
Collected Sediment Mass(g)
Soil Compression(mm)
Draft: 5/6/2023 Page 27

Stop Stomping on Me
3. As a team, brainstorm ways to improve and redesign your team subsoil. Sketch your team redesign plan ideas below. List the type of soil and its depth for each horizon. Also, write notes around your design to explain your reasoning for each design plan idea.
Sketch
4. Redesign Explanation: List changes made to your team’s initial design and why they were made. Which testing results are you hoping to see improvements upon?
Draft: 5/6/2023 Page 28

Stop Stomping on MeAppendix P: Subsoil Redesign Testing Name __________________________________ Date ____________ Period ______
Team: ____________________________________________________
1. Before Testing: In the box below, create a table showing the horizons of subsoil, depth of each horizon (cm), and type of soil your team plans to place in each horizon.
2. During Testing: Record results in data table below.Redesigned Subsoil: Test Results
Topsoil Topsoil with Fertilizer
Topsoil with Vermiculite Peat Moss Sand
Water pHBefore Testing
Water pHAfter Testing
Collected Water Volume (ml)
Water Flow Rate(ml/sec)
Collected Sediment Mass(g)
Soil Compression(mm)
Draft: 5/6/2023 Page 29
Stop Stomping on MeReflection
1. Prove that the following scientific statement is factual using evidence from your research as well as examples from the subsoil test results.
Groundwater and surface water quality are important components of the hydrologic cycle.
2. Prove that the following scientific statement is factual using evidence from your research as well as examples from the subsoil test results.
The porosity and permeability of rock and/or soil can affect the rate at which the water flows.
3. Prove that the following scientific statement is factual using evidence from your research as well as examples from the subsoil test results.
Movement of water in the hydrologic cycle can move contamination through the hydrosphere, biosphere, atmosphere, and lithosphere.
Draft: 5/6/2023 Page 30

Stop Stomping on MeAppendix Q: Cost AnalysisName __________________________________ Date ____________ Period ______
Team: ____________________________________________________
Determine the cost of your team’s subsoil design, which is dependent on its volume. Your 2-liter bottle is in the shape of a cylinder; therefore, the following formula is needed:
Volume (cylinder) ¿Πr2hwhere: r=¿radius of the bottle (5.5 cm), h=¿ height (depth) of soil, and Π ≈3.14
Because the 2-liter bottle’s radius is 5.5 cm, and the entire subsoil depth is 10 cm, the entire subsoil volume is: Volume(cylinder )=3.14 x5.52 x10≈950 cm 3
Table of Costs:
Cost Analysis: Initial Design Subsoil Horizon Horizon
Depth(cm)
Volume CalculationVolume (cylinder) ¿Πr2h (Π ≈3.14∧r=5.5cm)
Volume(cm3)
Soil Type Cost(per 100 cm3)
Total Cost(per Layer)
Base 3 cm 3.14 ∙5.52∙3 285 cm3 Pebbles 2.00¢ 5.7¢
1
2
3
4
5
6
7
8
9
10
Total
Draft: 5/6/2023 Page 31
Material Cost per 100 cm3
Pebble Sand 2.00¢Top Soil 1.33¢Top Soil with Vermiculite 2.22¢Peat Moss 1.44¢Top Soil with Fertilizer 3.22¢Sand 2.44¢

Stop Stomping on MeCost Analysis: Redesigned Subsoil
Horizon Horizon Depth
(cm)
Volume CalculationVolume (cylinder) ¿Πr2h (Π ≈3.14∧r=5.5cm)
Volume(cm3)
Soil Type Cost(per 100 cm3)
Total Cost(per Layer)
Base 3 cm 3.14 ∙5.52∙3 285 cm3 Pebble Sand 2.00¢ 5.7¢
1
2
3
4
5
6
7
8
9
10
Total
1. Analyze and compare the cost of your two designs. Which has a greater cost? Why? Cite evidence from the cost analysis results to support your answer.
2. A FIFA soccer field is 100 meters by 64 meters. Use the cost of your subsoil to calculate the cost of the subsoil for an entire soccer field.
a. The subsoil of the soccer field will be in the shape of a rectangular prism. The formula to find volume of a rectangular prism is V=lwh.
b. Since the volume your team’s subsoil is measured in cm3, your need to first convert the dimensions of the soccer field into centimeters.
1. 100 meters = _________cm and 64 meters = _________cm 2. What is the volume of the subsoil of an entire soccer field (remember the
subsoil is 10 cm deep)? _______________________________________3. Using the cost and volume of your team’s subsoil, determine the cost for an
entire soccer field. Show all calculations to justify your answer.
Draft: 5/6/2023 Page 32

Stop Stomping on MeAppendix R: Written Proposal OutlineName __________________________________ Date ____________ Period ______
Team: ____________________________________________________
Write a five-paragraph essay as a proposal to the city officials. Each paragraph should contain specific information. Use the boxes below to help you write your paper.
Introductory Paragraph: Use research to explain to city officials the need for layering the material above the city's aquifer in order to both keep the water clean and maintain optimal playing conditions. Cite at least 2 pieces of specific information from the research to support your explanation. (See your graphic organizer from the power point on Day 1)
a. Hook: write a powerful opening that will draw the city officials into your proposal. This should make them want to read more.
b. Purpose: State your company name and explain that you are writing to propose a layering system for the World Cup stadium above the city aquifer. This should be a 1 or 2 sentence.
c. Explain system testing and ways in which the design incorporates soccer player preferences and protects the aquifer from contamination. This should include 1-2 sentences.
d. Thesis Statement: copy the thesis statement below into your proposal:
___________________(company’s name) has the optimal soccer field model because its soil horizon design helps avoid pooling, utilizes earth-friendly filtration materials, and is cost-effective.
Draft: 5/6/2023 Page 33
Stop Stomping on MeAdd 3 body paragraphs to support your thesis statement. Remember to begin each paragraph with an introductory sentence, followed by supporting details.
1st Body Paragraph: Explain why a horizon system is the optimal choice above the city’s aquifer. Cite at least two pieces of research to justify the need for a soil horizon system. Note: utilize research from the first day and needs to only explain, in general, why a horizon system is a good choice. Do not reference your specific system at this point.
2nd Body Paragraph: Include information about the particular materials and horizon order your team chose to use. Justify reasoning for use of your materials by citing specific data (such as flow rates and affects on the groundwater’s pH).
Draft: 5/6/2023 Page 34

Stop Stomping on Me3rd Body Paragraph: Include details about your team’s cost analysis. Include the final cost of your model design. Justify your team’s reasons for choosing to use more expensive or less expensive materials. Refer specifically to at least 2 specific materials usded. Include an explanation how the cost of your field model changed in your redesign process. (Did it become more or less expensive? Why did you choose to make this change?)
Conclusion Paragraph: Wrap up your appeal to the city. Restate your thesis statement, and make final connections to your research and your specific design proposal.
STOP: Check for teacher approval before submitting your draft.
Draft: 5/6/2023 Page 35

Stop Stomping on MeAppendix S: Written Proposal Rubric
Name __________________________________ Date ____________ Period ______
Criteria 4 3 2 1
Introductory Paragraph
Contains in-depth, professionally stated hook, supporting statements, and thesis.
Contains a clearly, and professionally states purpose and the name of team’s company.
Contains a hook, supporting statements, and a thesis.
Contains a clearly stated purpose and the name of team’s company.
Contains two of the following: hook, supporting statements, and a thesis.
Contains either a clearly stated purpose or the name of team’s company.
Contains only one of the following: hook, supporting statements, and a thesis.
Purpose is vaguely stated, but includes the name of team’s company.
First Body Paragraph
States why a soil horizon system is optimal and cites at least three pieces of research.
States why a soil horizon system is optimal and cites at least two pieces of research.
States why a soil horizon system is optimal and cites one piece of research.
Either states why a soil horizon system is optimal or cites one piece of research
Second Body Paragraph
Contains an in-depth explanation for the horizon system, materials, and cites data and research to support explanations.
Contains an explanation for the horizon system, materials, and data to support explanations.
Contains the proposed layered system and at least one piece of data
Contains either the proposed layered system or justification for the materials using data
Third Body Paragraph
Includes the final cost of the design and explains how the cost changed in the redesign process.
Includes a justification, supported by testing results and/or data for the use of at least two materials that may be more or less expensive than other materials.
Includes the final cost of the design and explains how the cost changed in the redesign process.
Includes a justification for the use of at least two materials that may be more or less expensive than other materials.
Includes the final cost of the design or explains how the cost changed in the redesign process.
Includes a justification for the use of one material that may be more or less expensive than other materials
Final cost calculations are incorrect or missing and the change of cost in the redesign process is incorrect
Includes a material that may be more or less expensive, but not a justification for choosing to use the material
Conclusion Paragraph
Thesis is clearly, and professionally restated and research is cited to connect the use of soil horizons not only to the specific design proposal, but also to real-world field designs.
Thesis is clearly restated and research is cited to connect the use of soil horizons to the specific design proposal.
Thesis is clearly restated and a connection is made between the specific design proposal and the need for soil horizons, but research citation is missing.
The paragraph is either missing a restated thesis or a reiteration of their specific design proposal and the need for soil horizons.
Mechanics
The writer makes few or no errors in grammar, spelling, and punctuation. Overall composition is written above grade-level expectations.
The writer makes few or no errors in grammar, spelling, and punctuation.
The writer may include minor errors in grammar, capitalization, spelling, and punctuation, but they generally do not interfere with understanding.
The writer includes many errors in grammar, spelling, punctuation, and capitalization. These errors impede understanding.
Draft: 5/6/2023 Page 36