Embed Size (px)
Citation preview

Revision Date August 2010
CWS/CMS Quick Guides
for New Users
Central CA Training Academy
559-278-5757
Terry Luna, CWS/CMS Project Coordinator

1
CWS/CMS NEW USER
Quick Reference Guide Page 2
General Hints Page 3
Searching for CPS History & Opening Cases/Referrals Page 4-6
Creating a Referral Page 7
Creating Collaterals, Adding Clients & Allegations Page 8
Disposing a Referral Page 9
Recording Education Information Page 10
Creating the Health & Education Passport Page 11
Identifying an Indian Child Page 12
Recording Contacts, Services & Visits Page 13,14
Recording Family Finding Efforts Page 15
Creating the Eligibility Forms Page 16
Non-Foster Care Placement Page 17
Foster Care Placement Page 18
Ending a Placement or a Placement Episode Page 19
Using the Collateral Notebook to Record NREFM Assessment Page 20
Relative Placement Page 21
Court Process in CWS/CMS Page 22
Creating and Updating Petitions Page 23
Creating Court Reports and Worker’s Court Calendar Page 24
Creating a Court Report When No Hearing is Scheduled Page 25
Things to Check before Beginning Case Plan Page 26
Creating a New Case Plan Page 27
Case Plan Update Page 28
Accessing County Templates Page 29
Importing Documents into a Child’s Case or Referral Page 30
Ending a Case Page 31

2
CWS/CMS Control Panel
A B C D E F G H
A. Caseload E. LIS
B. Client Services F. CDS
C. Resource Management G. MEDS
D. SOC 158 H. System Information
Client Services Notebook Map
Referral
ManagementReferral
Info
Allegation Cross
Report
Reminder Document -
Referral
Client Collateral Education Education
Provider
Health Family
Information
Medi-Cal
Application
FC2
Eligibility
Application
SAWS1
Application
Contact Service
Provider
Case
Info
Case
Plan
Document –
Case Plan
Reminder Document –
Case
Client
Management
Service
Management
Placement
Management
Court
Management
Case
Management
Referral
Case
Document –
Client
Placement Placement
Home
Adoptive
Placement
Home
Study
Document –
Placement
Hearing Petition Court
Report
Document –
Court
Client
Services
Legend
Referral
Case
Referral
ManagementReferral
Info
Allegation Cross
Report
Reminder Document -
Referral
Client Collateral Education Education
Provider
Health Family
Information
Medi-Cal
Application
FC2
Eligibility
Application
SAWS1
Application
Contact Service
Provider
Case
Info
Case
Plan
Document –
Case Plan
Reminder Document –
Case
Client
Management
Service
Management
Placement
Management
Court
Management
Case
Management
Referral
Case
Document –
Client
Placement Placement
Home
Adoptive
Placement
Home
Study
Document –
Placement
Hearing Petition Court
Report
Document –
Court
Client
Services
Legend
Referral
Case
Caseload Notebook Map SOC 158 Notebook Map
Bulletin Supervisor Caseload Referral Case Reminder
Caseload
SOC 158 Client Placement Placement Document – Home Placement

3
Hints that work in all Cases and Referrals
Date Fields Use Calendar to select date.
Highlight field, type in date.
Double click to enter today’s date.
Time Fields Highlight field, type in time.
Type over a.m./p.m.
Double click for current time.
Not military time – but must be 4 digits.
Text Fields Will accept numbers / letters
Limited amount of text
Radio Buttons Choose only one.
Information Grids Purpose is to collect history.
To add history, use plus sign to add a numbered row.
Never change an existing row – you will lose history!
Context Specific Help Put cursor in the field, then press F1.
Will work on any field in CWS/CMS.
Edit – View Audit Put cursor in the field, then press View Audit. This can tell you who created the field, and who
last updated the field.
Open Case or Referral with 19 digit number Under the File menu, select FIND FOLDER – choose Case or Referral, then enter the 19 digit
serial number.
Open Associated Referrals/Cases from existing Case/Referral When you are in a case or referral you can access all previous referrals and cases from
Client Management section (blue) – open any client notebook. Then choose Open Associated Cases or Referrals from the menu bar.

4
SEARCHING FOR CPS History & Opening Cases / Referrals
SEARCH – Start Search
Enter Search criteria here:
Search Results will display possible matches.
Choose the best one and double click to bring up the Abstract.

5
The ‘Client Abstract’ is a snapshot of the client – you can use the abstract to determine if this is the
client you are looking for.
Use the ‘Referral History’ page to determine if client has history with Child Welfare Services.

6
Use the ‘Case History’ page to determine if the client has or has ever had a case open in Child Welfare
Services.
Use the ‘Open Associated Referrals or Cases’ to open any existing referrals or cases. You can only open
your own counties cases or referrals. Sealed or sensitive cases/referrals can only be opened by
individuals with that privilege.

7
QUICK GUIDE TO CREATING A REFERRAL
Create New Referral
, ,
Begin the referral here.......record as much information
as is known on these pages, and complete all mandatory
fields. Be sure the referral is assigned to screener.
Some county’s record their referral narrative in the
‘Screener Alerts’ section on the bottom of the ID page.
Create New Document - Screener Narrative
This step is optional if your county chooses to record the
initial narrative in the ‘Screener Alerts’ section on the
bottom of the ID page.
Search for Clients
Search the database to see if the clients are known to
CWS/CMS. Double click on clients you wish to
review.
Attach Clients and Review and Update Client Notebooks
, ,
Bring the referral back in ‘focus’ (you will find it under
Window). Use the Attach Existing Clients command
to attach any clients you have found to your referral.
Open the existing clients, and review and update their
notebooks with current information. Update any
applicable PERIWINKLE fields.
Create New Clients
, , ,
Only use the Create New Client icon to create any
clients that you did not find in your search of the
database.
Complete all YELLOW fields and any applicable
PERIWINKLE fields.
Create New Allegation(s)
Record the allegation(s) here. If the ‘date alleged abuse
began’ is known, be sure to complete this
PERIWINKLE field.
If Perpetrator is SCP/Residential Facility Staff – include
the type of Placement Facility abuse occurred in.
Create Cross Report (Suspected Child Abuse Report)
After using the Create New Cross Report icon, then
select Print Report from the File menu to actually print
the document. Complete the ‘Referral Incident” dialog
box, print the report and close or minimize Word.
If your county does not send a cross report – be sure to
check the box ‘report not sent’ in the Notebook and do
not print*.
Determine Response and Print Referral Document
Under the Action menu, use the ‘Determine Response’
command to record response time of the referral.
Request pending approval for the referral and print the
document. Close or minimize Word.
Assign Referral to Investigating Worker
Bring the referral back in focus by ‘opening the existing
referral’. Use the assignment page to assign the referral
to the next responsible worker or supervisor.
SAVE TO DATABASE

8
QUICK GUIDE TO CREATING COLLATERALS
A collateral is a person who has specific knowledge of an incident of alleged abuse, or has relevant
information about a client. It is important to record them in the Collateral Notebook, so that they will be able
to be selected in other notebooks throughout CWS/CMS.
Create New Collateral:
A collateral is a person who has specific
knowledge of an incident of alleged abuse, or
relevant information about a client.
A collateral may also be a relative that is
being considered for placement.
Complete these three pages with as much
information as you have.
Once you have created a collateral for your
referral/case, you will be able to select that
collateral as a ‘participant’ in a contact.
ADDING ADDITIONAL CLIENTS AND ALLEGATIONS
Search for Clients
Search the database to see if the clients are known
to CWS/CMS. Double click on clients you wish
to review.
Attach Clients and Review and Update Client Notebooks
, ,
Bring the referral back in ‘focus’ (you will find it under
Window). Use the Attach Existing Clients command to
attach any clients you have found to your referral. Open the
existing clients, and review and update their notebooks with
current information. Update any applicable PERIWINKLE
fields.
Create New Clients
, , ,
Only use the Create New Client icon to create any clients
that you did not find in your search of the database.
Complete all YELLOW fields and any applicable
PERIWINKLE fields.
Create New Allegation(s)
Record the allegation(s) here. Be sure to indicate ‘Added
by Investigator’. If the ‘date alleged abuse began’ is
known, be sure to complete this PERIWINKLE field.
If Perpetrator is SCP/Residential Facility Staff – include the
type of Placement Facility abuse occurred in.
SAVE TO DATABASE

9
QUICK GUIDE TO DISPOSING A REFERRAL
Open Existing Referral
Open the referral you want to record the results of an
investigation.
Create New Document - Investigative Narrative
An Investigative Narrative - a freeform Word document –
can be created to record the results of an investigation in
‘narrative fashion’. Spellcheck, Save, Print, Close.
*This step is optional - if the worker chooses to record all
narratives in Contact Notebook*
Create New Contact
At least one completed/attempted, In Person contact
must be recorded, for the purpose of Investigating the
Referral.
Conclude the Allegation(s)
,
Open the existing allegation(s), and enter the “date alleged
abuse began” if known on the ID page. Use the Conclusion
page to record whether the allegation was substantiated,
inconclusive, or unfounded.
Create Cross Report (Child Abuse Summary Report)
AKA - DOJ
After using the Create New Cross Report icon, then select
Print Report from the File menu to actually print the
document. Close Word.
*This step not required if allegation is General Neglect or
Substantial Risk * or if allegations were Unfounded.
Check under ‘Reminders’ if you are not sure whether or
not to report!
Client Disposition Under the Action Menu, select ‘Client Disposition’ and
dispose of each child individually. Request pending
approval for each.
Create New Document - Letter to Mandated Reporter
*This step is required only if Mandated Reporter requires
written feedback*
Select the Response to the Mandated Reporter, and Word
automatically creates the letter which can be added to,
modified, and spell checked. Save, print and close or
minimize Word.
Under ‘Feedback Details’, record the date that the
Response to the Mandated Reporter was sent.
Check Reminders. Click on Filter to make sure all
reminders available. Only if all reminders have
disappeared,
SAVE TO DATABASE

10
QUICK GUIDE TO THE EDUCATION NOTEBOOK
Record the school child is attending:
Before you can record education information for
a child, you must SEARCH for the school that the
child is attending.
SEARCH TIPS:
You must select ‘School Category’ and at least one other
identifying factor. The easiest method is to choose your
county, the under the ‘school’ drop down, all schools in
your county will appear – then select the one you want
from the list.
Create New Education (One Notebook per School)
After using the plus button – to Create New
Education notebook for a child:
Highlight the child’s name you want to place
in school, then highlight the school child is
attending. Click OK.
Use this page to record the date the child began
attending this school. Complete GREEN fields
if appropriate.
Use this page to record child’s grade level
and attendance records, progress, report
cards, IEP, associated with that grade level.
Always use the plus button (+) to add history.
SAVE TO DATABASE
Once the child has been recorded as attending school, additional information gathered at each contact
can be recorded in the child’s ‘Existing Education Notebook’.
Open the child’s existing education notebook
in order to add additional education
information.
Complete GREEN fields if appropriate.
Use the appropriate page to record the
information you have gathered.
SAVE TO DATABASE
Remove a child from school:
Open the child’s existing education notebook,
and record the end date and reason child is no
longer attending this school.
SAVE TO DATABASE

11
CREATING THE HEALTH & EDUCATION PASSPORT
The Health & Education Passport is populated from several Notebooks throughout CWS/CMS.
Information cannot be entered directly onto the Passport. There can only be one passport per child in
the case.
Client Notebook – several pages of this notebook populate the passport with basic child information.
The ‘service provider’ page will populate past and present health service providers of the child.
Education Notebook – this notebook populates the passport with past and present educational
information for the child.
Health Notebook – this notebook populates the passport with all relevant health history for a child,
including ‘diagnosed conditions’, ‘medications’, ‘hospitalizations’, ‘immunizations’, etc.
Contact Notebook – The Associated Services page of the contact notebook must be used to document
CHDP – Physical & Dental information. Only Well Child exams with an HEP indicator will populate
to the passport.
Placement Notebook – Use the ID page of this notebook to document the ‘date SCP informed of the
CHDP program and that brochure was given’; if ‘SCP requests CHDP services’; and ‘date SCP was
given the HEP and informed of it’s purpose’.
Use the ‘Create New Document-Client’ Notebook to generate the Passport.
Select the Time Frame parameters from the next dialog box.
This will create the Passport in Microsoft Word. It can be Saved and Printed, but CANNOT be edited!
Any changes must be made in the Notebooks, then the passport can be removed – and re-created.
The Health & Education Passport should be re-created frequently to be sure that it is current.
SAVE TO DATABASE

12
Identifying an Indian Child in CWS/CMS OPEN CHILD’S CLIENT NOTEBOOK
Open the child’s Client Notebook that you are
identifying as an Indian child.
Indian Ancestry – if child is a descendent of an
Indian, check this box.
Use the +plus sign to record the date county was
informed of Indian Ancestry in the grid below
this indicator.
Primary Ethnicity or Other Ethnicity – if the
child’s ethnicity is American Indian, record it
here.
ICWA Eligibility – if the child is or may be an
Indian child, record the appropriate ICWA
status.
This page will be populated with information
entered on this child’s parents ICWA page.
Membership status information for child can be
entered here once parent information entered.
OPEN PARENT’S CLIENT NOTEBOOK
SAVE TO DATABASE
Open the Parent’s Client Notebook that you want
to record Tribal Membership information for.
Use the plus + sign to activate the page.
Tribal Membership section:
Choose: Location
Tribe
Tribal Organization
Ancestor Section:
Choose: Relative type and record as much
information about that relative as possible.
You can choose mother, father and grandparents.
Information recorded on this page will populate
to the child’s ICWA page.

13
QUICK GUIDE TO RECORDING CONTACTS , SERVICES AND VISITS
Create New Contact:
RECORD A CASE MANAGEMENT
SERVICE WITHIN THIS CONTACT:
Use the Contact Notebook to record every
contact (narrative) that is made on behalf of a
child. If more than one child is selected – then
that narrative will go to all selected children’s
cases.
Be sure to complete all YELLOW fields.
Use the ‘Spell Check’ command under the Edit
menu once narrative has been entered.
If Social Worker provided any type of a case
management service for child or family, be sure to
select service type under ‘Case Management
Service Type’.
This will complete the Associated Services page,
and Social Worker can add narrative entry to
this page.
RECORD SERVICES BEING PROVIDED ON
BEHALF OF A CHILD/FAMILY:
Open ANY existing contact or complete a NEW
contact, then click on the Associated Services
page.
Use the plus button in the upper left corner to add
each Service provided to child/family.
Be sure to complete all YELLOW fields.
If you are unable to find the Service Provider in
search, go to the next step: Create New Service
Provider.
The ‘Well Child Exam’ button will become
enabled ONLY if the following services are
selected:
HEP – CHDP Equivalent Physical Exam
HEP - CHDP Physical Exam
HEP - Periodic Dental Exam
A Well Child Exam can be recorded for ONLY one
child at a time.
CREATE NEW SERVICE PROVIDER:
,
**Only create a service provider, if you were
unable to locate provider using SEARCH.**
Complete both pages with as much information as
you can.
Be sure to complete all YELLOW fields.

14
RECORD OBSERVATION NOTES FOR
VISITS:
Open ANY existing contact or create a NEW
contact, then click on the Associated Visits page.
Use the plus button in the upper left corner to add
observation details regarding a visit between a
child and parents/siblings/others. Use this page to
record ‘attempted’ visits also.
PRINT A DELIVERED SERVICES LOG:
(a chronological listing of narratives)
File
Print Report
SAVE TO DATABASE AFTER ENTRY
Select the Print Report command from the File
menu.
Under ‘Areas of Interest’, be sure that Services
Reports is selected, and Delivered Services Log is
highlighted.
Select appropriate criteria in each dialog box
that appears.
This report can be spell checked before printed.
SERVICE PROVIDER SEARCH Tips:
Many service providers are already in the database, the trick is finding them.
You can search with provider’s first and last name, or agency name, or any combination. There is no
phonetic search – that means that your spelling has to be just right, or you will not find the provider.
Use the ‘Wild Card’ for additional search power.
Example: Searching for the provider: Financial First
Surrounding the word ‘financial’ with the percent signs – is asking
for any provider with the word financial in it.

15
Recording Family Finding Efforts
Client Notebook
Open ‘Existing Client’ and select the Focus Child.
On the related client’s page, choose the child/relative relationship that
you want to document your efforts for.
At the bottom of the page, use this grid to identify the lifelong
connection status information.
SAVE TO DATABASE
Collateral
Notebook
Open ‘Existing Collateral’ – highlight child’s name, and select the
relative from the list of collateral’s associated with the child.
Or
Create ‘New Collateral’ – highlight child’s name, and click OK to
create the relative as a collateral.
SAVE TO DATABASE

16
Creating Eligibility Forms
Create an FC-2 Create an MC250 Create a SAWS-1
Note: In order for the forms to be accurate, the following information needs to be entered in the
following Notebooks and Pages.
Birthplace ----Client Notebook, Demog Page
Immigration Status ----Client Notebook, Demog Page
US Citizen ----Client Notebook, Demog Page
Unemployed Parent ----Client Notebook, Demog Page
Military Status ----Client Notebook, Demog Page
SS# -Child ----Client Notebook, ID Page
Parents Names ----Client Notebook, Related Clients Page
Maiden Name ----Client Notebook, Names Page
Parents Addresses ----Client Notebook, Address Page
To Print the Forms: Use the Plus button – to Create New Document - Client
Then, select the document you want to create.
FC-2 – Facts Supporting
Eligibility for AFDC-FC
Save - Print
MC250 – Medi-Cal
Application
Save - Print
SAWS 1 – Application for
Cash Aid
Save - Print
SAVE TO DATABASE

17
QUICK GUIDE TO A NON-FOSTER CARE PLACEMENT
The Non-Foster Care section of the Placement Notebook should be used to record information
about a child’s incarceration or placement into a medical facility only.
STEP 1: Review Each Child’s Client Notebook to be sure
they have an Active State ID number .
TIP: All children to be placed must have an active
STATE ID number.
If there is not an Active State ID number, follow your
county’s procedure for obtaining and entering number.
STEP 2: Create New Placement
,
Select the child you want to place in non-
foster care, then the Non-Foster Care
button.
Complete this page ONLY if this is the initial removal of
the child.
*** If this is NOT the initial removal of the
child, SKIP THIS PAGE. ***
Complete this page with information
about the non-foster care placement.
SAVE TO DATABASE
ENDING A NON-FOSTER CARE PLACEMENT
STEP 1: Open the Existing Non-Foster Care Placement
,
Enter the placement change reason and the
date the child is taken out of the facility.
Only use the Placement Episode Termination if
the child’s involvement with Child Welfare
Services is coming to an end.
SAVE TO DATABASE

18
QUICK GUIDE TO A FOSTER CARE PLACEMENT
Note: If you are placing multiple children in the same home, you must open each child’s case.
STEP 1: Review Each Child’s Client Notebook to be sure
they have an Active State ID number .
,
TIP: All children to be placed must have an active
STATE ID number.
If there is not an Active State ID number, follow your
county’s procedure for obtaining and entering number.
STEP 2: SEARCH for Placement Home
Search for ‘Placement Facility’ and select the facility
type you are looking for, i.e., foster family home, group
home, etc.
Double click the row of the home you want to review to
bring up the Abstract. Close Search Results.
STEP 3: Create New Placement
Select child(ren) that you wish to place in the first box,
then select the home you are placing in from the bottom
box and click OK.
Worker can multi select children for placement into
the same home.
Complete this page ONLY if this is initial removal of
the child(ren).
**If this is not the initial removal, SKIP this page.**
SAVE TO DATABASE
Complete all YELLOW fields. Complete
PERIWINKLE fields as applicable.
Record any Foster Care payments on the Ongoing
Requests page.
Complete Incidental Payments page ONLY if
authorized.
If you are placing multiple children in the same home,
you must complete these pages for each child. The
system automatically opens each child’s placement
notebook; you will find them under WINDOW in the
title bar.
STEP 4: Create Placement Documents
Create the Placement Agreement document for the type
of home child placed in.
SOC158A – Foster Child’s Data Record can also be
created here.
APPROVAL
Request Approval per your county policy for the
Placement and any Payments authorized. Use the
Approval command under the ACTION menu.
SAVE TO DATABASE

19
QUICK GUIDE TO ENDING A PLACEMENT or A PLACEMENT EPISODE End a Placement STEP 1: Open the Placement you want to End.
Select the placement that you want to end from the list
and open it.
Be sure an ‘Agreement Effective Date’ has been entered
on this page. Should be the same date as the placement
start date. Be sure that ‘Legal Authorization for
Placement’ info has been entered.
Be sure that any Incidental Payments listed on this page
have an End Date.
Record a Payment Stop Date for any payment listed on
this page.
Record the placement change reason, end date of
placement and description. An automatic message
will appear to remind you that the placement
notebook will become read only.
SAVE TO DATABASE
End a Placement Episode – when the child goes to his/her final and permanent placement, home or
otherwise. STEP 1: Open the Placement you want to End.
Select the placement that you want to end from the list
and open it.
Be sure an ‘Agreement Effective Date’ has been entered
on this page. Should be the same date as the placement
start date.
Be sure that any Incidental Payments listed on this page
have an End Date.
Record a Payment Stop Date for any payment listed on
this page.
Record the placement episode termination reason,
description, and end date of episode. This will
automatically fill in the top part of the screen, and
remind you that the placement notebook will become
read only.
SAVE TO DATABASE

20
Using the Collateral Notebook to Record Relative/NREFM Assessment
Create the Individual as a Collateral:
Complete these pages with as much
information as you have regarding the
individual.
Be sure that all children that may be placed
are listed on the Related Clients page.
LiveScan Rec’d DOJ CACI Rec’d FBI Requested DOJ RAP-Backs Requested These checks at minimum must be entered.
The collateral’s name will appear on this page.
Use the + to add information regarding
criminal clearances requested, rec’d, etc.
Record status updates on this page as received.
Use the + to select the children that the
assessment is being done on behalf of.
Complete this page with the appropriate
relative assessment information.
Note: The Approval Worker and Supervisor
will not be enabled unless all the required
background checks have been entered.
Once all required entries are made, the screen
becomes Read Only.
Generating the SOC 815, 817, 818 ‘s
Select the document you want to create from
the list.
Select the relative you want the assessment
document created for. The forms will be
populated with information from the
Relative/NREFM Assessment page.
The Declaration and Agreement page of the
SOC 818 can be created in English or
Spanish.
SAVE TO DATABASE
If this relative is approved for placement, this assessment can be ATTACHED to the placement.

21
QUICK GUIDE TO RELATIVE PLACEMENT Note: If you are placing multiple children in the same home, you must open each child’s case. STEP 1: Review Each Child’s Client Notebook to be sure
they have an Active State ID number .
,
TIP: All children to be placed must have an active
STATE ID number.
If there is not an Active State ID number, follow your
county’s procedure for obtaining and entering number.
STEP 2: SEARCH for Relative Placement Home
Search for ‘Placement Facility’ and Type as Relative/NREFM
Home to see if this relative home has already been entered into
CWS/CMS.
If the Relative Home is already in the system, go to Step 5, then
Open the Placement Home and go to Step 4:
STEP 3: Create New Placement Home
Complete this page with as much information as you have.
Be sure to enter the number of beds needed in the Adj. Cap. box
on the ID page of the placement home.
http://zip4.usps.com/zip4/welcome.jsp Use this link for Zip +
4 for the Placement Home address.
STEP 4:
If the Relative Assessment has been approved
in the Collateral Notebook – SKIP this step.
If you found the SCP in your search, use the ‘Attach Existing Sub
Care Provider’ command in the menu bar to attach them to the
home.
If your search did not find SCP, use the plus + sign in left corner
to activate the page, and record as much information as you have.
Be sure to check ‘Resident’ and ‘Primary Provider’.
Complete these pages with as much information as you have.
Complete all YELLOW and GREEN fields.
If the Relative Assessment has been approved in
the Collateral Notebook – SKIP this step.
Complete this page with all background check information for
individuals 18 and over that live in the home.
STEP 5: Create New Placement
Select child(ren) that you wish to place in the first box,
then select the home you are placing in from the bottom
box and click OK.
Worker can multi select children for placement into the
same home.
Complete this page ONLY if this is initial removal of the
child(ren).If not the initial removal, SKIP this page.**
Complete these pages for each child placed – the placements
have been opened automatically – select under WINDOW.
Complete all YELLOW and applicable PERIWINKLE
fields.
Record any Foster Care payments on the Ongoing
Requests page.
Complete Incidental Payments page ONLY if authorized.
IF Guardian Home – be sure to check box GUARDIAN
CHILD IS A DEPENDENT on the ID PAGE!!
ATTACH EXISTING RELATIVE ASSESSMENT ONLY use this command if Relative Assessment had been
completed in the Collateral Notebook. Verify
Reassessment Due Date.
Complete this page if not completed in Collateral
Notebook and attached in prior step.
STEP 6: Create Placement Documents
Create the Placement Agreement document for the type of
home child placed in.
SOC158A – Foster Child’s Data Record can be created
here. SOC 815, 817 & 818 can be created here.
SAVE TO DATABASE

22
1. Calendar Hearing
3. Prepare Court
Reports & Documents
2. Notice the Parties 4. Hearing Held
Record Results &
Attendees
CWS/CMS Court Process
1. If no hearing exists: Use the + sign to Create a New Hearing. If a hearing does exist: Use the
Create Next Hearing command under the Action Menu.
2. After completing the Notices page in the hearing you are preparing for: Create notices by File, Print Report option, and selecting the type of notice you are preparing.
3. On the ID page of the hearing you are preparing for, use the + button on the bottom to Create New Court Report.
4. Use the results & attendees page of a hearing to record findings & orders.
FILE – Print Report

23
Creating and Updating Petitions
Open the ‘Existing Hearing’ that you are
preparing the petition for. If the hearing
has not been entered into the system, use the
plus button under the Hearing Notebook to
create the hearing. Complete the ID and the
Minors page.
At the bottom of the ID page of the hearing –
use the Plus button – Create New Petition to
begin setting the parameters for the petition.
You Will Now Be in the Petition
Notebook:
SAVE TO DATABASE
Record status of Petition on the ID page.
On the Minors page, select all 300 WIC
subdivisions that apply for each child.
On the ID page, you will find the plus button
at the bottom of the screen to “Create New
Petition Document”. Select JV110 if filing a
joint dependency petition for children with
same mother and father. Select JV100 if
filing a separate petition for each child.
This will create the Petition document shell
in Word.
All Court documents that have been created in
CWS/CMS will be filed here. They can be
retrieved, viewed, modified, and printed at any
time.
Updating Petition - Filed Date and Status Open the Existing Petition:
SAVE TO DATABASE
Once the Petition is filed, the filed date and
time can be entered on the ID page.
The Petition status can be updated as
appropriate to: Dismissed, Sustained, etc.
Amending a Petition Open the Existing Petition:
If a Petition has been filed, and is in Pending
status: Use the Create Amended Petition
under the Action menu to amend the Petition.
This creates a new Petition notebook and the
amended Petition document can be generated
using the + sign on the bottom of the ID page.
The original petition’s status is automatically
entered as ‘superseded’

24
Creating Court Reports and Worker’s Court Calendar
Open the ‘Existing Hearing’ that you are
preparing a court report for.
At the bottom of the ID page of the hearing
– use the Plus button – Create New Court
Report to select the type of report you want
to create.
You Will Now Be in the Court Report
Notebook:
SAVE TO DATABASE
Select the type of court report you want to
create.
Be sure to select all children the court
report is for.
At the bottom of the ID page of the Court
Report Notebook, use the Plus button –
“Create New Court Report Document” to
create the actual Court Report Document
shell.
All Court Report documents that have been
created in CWS/CMS will be filed here.
They can be retrieved, viewed, modified,
and printed at any time.
CREATE A COURT CALENDAR
FROM THE CONTROL PANEL
– CLICK ON CASELOAD
File
Print Report
Under the ‘Area of Interest’, be sure that
Caseload Reports is selected. Then select
‘Caseload Court Calendar Report’, and
Print.
Select the Caseload you want to print the
calendar for.
Specify the date range and how the report
should be sorted.

25
Creating a Court Report when No Hearing is Scheduled
(ex. ExParte for Judge’s Signature only )
Create ‘New Hearing’
Create ‘New Hearing’.
On the ID page – choose “Date Not Set”.
12/31/2099 will automatically populate.
At the bottom of the ID page of the hearing
– use the Plus button – Create New Court
Report to select the type of report you want
to create.
You Will Now Be in the Court Report
Notebook:
SAVE TO DATABASE
Select the type of court report you want to
create, ex. Exparte Application and Order.
Select the child the report is for.
At the bottom of the ID page of the Court
Report Notebook, use the Plus button –
“Create New Court Report Document” to
create the actual Court Report Document
shell.
All Court Report documents that have been
created in CWS/CMS will be filed here.
They can be retrieved, viewed, modified,
and printed at any time.
“Open the Existing Hearing”:
Open the Existing Hearing and select the
12/31/2099 hearing.
Change the date – to the date the Judge
signed the order.
Notes section – narrate the circumstances
here.
IMPORTANT: A case cannot be closed
with 12/31/2099 hearings.

26
Things to Check before Beginning the Case Plan
CASE INFO
Each Focus Child’s
case must be opened
and these pages
must be checked.
Case Name Correct.
Projected End Date of Child Welfare Services entered.
Intervention Reasons entered.
Case Status – Court or Voluntary with correct effective date.
Correct Service Component and Date entered.
CLIENT INFO
Check these pages
for each client that
will be a Case Plan
Participant.
Gender, DOB, Age, SSN entered.
ICWA eligibility checked if applicable.
Primary and Secondary languages identified.
Primary and Secondary Ethnicity entered.
Fill in PERIWINKLE fields if known.
Complete Education Information and Health Information Boxes
Fill in PERIWINKLE fields if known.
Make sure relationships are correct.
Juvenile Court number should be entered for all case focus
children if case status is ‘Court’.
SAVE TO DATABASE – before beginning the Case Plan.
27
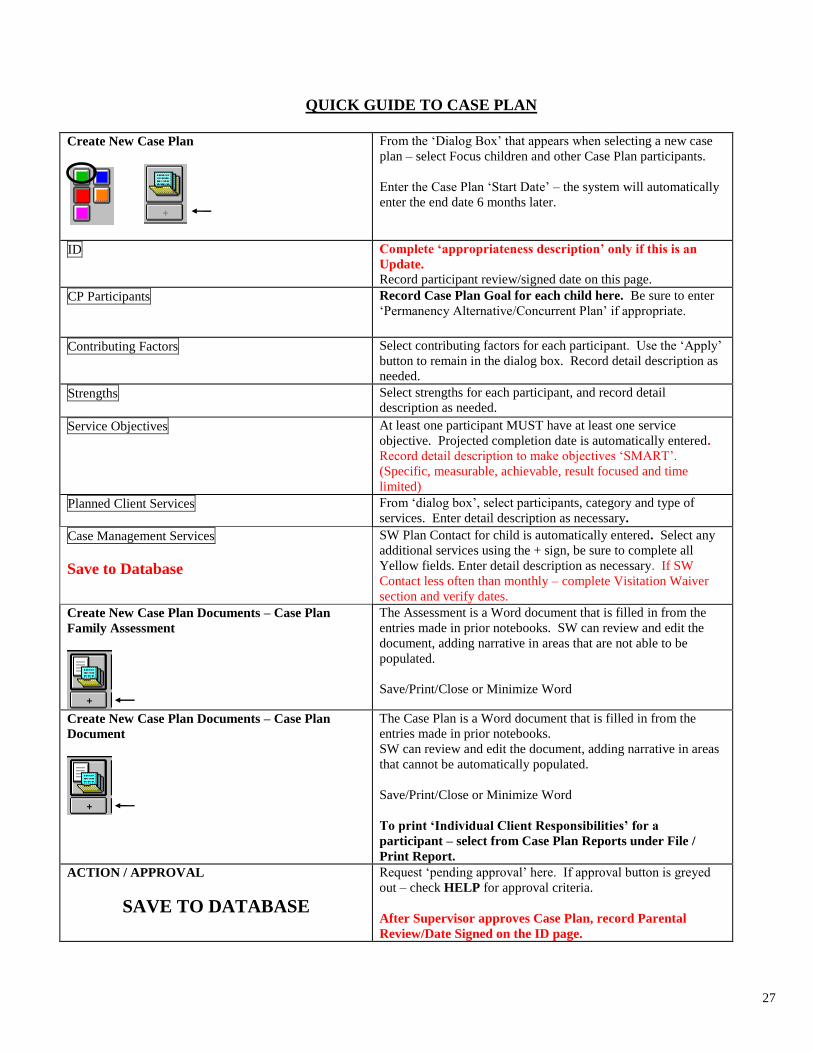
QUICK GUIDE TO CASE PLAN
Create New Case Plan
From the ‘Dialog Box’ that appears when selecting a new case
plan – select Focus children and other Case Plan participants.
Enter the Case Plan ‘Start Date’ – the system will automatically
enter the end date 6 months later.
ID
Complete ‘appropriateness description’ only if this is an
Update.
Record participant review/signed date on this page.
CP Participants Record Case Plan Goal for each child here. Be sure to enter
‘Permanency Alternative/Concurrent Plan’ if appropriate.
Contributing Factors Select contributing factors for each participant. Use the ‘Apply’
button to remain in the dialog box. Record detail description as
needed.
Strengths
Select strengths for each participant, and record detail
description as needed.
Service Objectives At least one participant MUST have at least one service
objective. Projected completion date is automatically entered.
Record detail description to make objectives ‘SMART’.
(Specific, measurable, achievable, result focused and time
limited)
Planned Client Services From ‘dialog box’, select participants, category and type of
services. Enter detail description as necessary.
Case Management Services
Save to Database
SW Plan Contact for child is automatically entered. Select any
additional services using the + sign, be sure to complete all
Yellow fields. Enter detail description as necessary. If SW
Contact less often than monthly – complete Visitation Waiver
section and verify dates.
Create New Case Plan Documents – Case Plan
Family Assessment
The Assessment is a Word document that is filled in from the
entries made in prior notebooks. SW can review and edit the
document, adding narrative in areas that are not able to be
populated.
Save/Print/Close or Minimize Word
Create New Case Plan Documents – Case Plan
Document
The Case Plan is a Word document that is filled in from the
entries made in prior notebooks.
SW can review and edit the document, adding narrative in areas
that cannot be automatically populated.
Save/Print/Close or Minimize Word
To print ‘Individual Client Responsibilities’ for a
participant – select from Case Plan Reports under File /
Print Report.
ACTION / APPROVAL
SAVE TO DATABASE
Request ‘pending approval’ here. If approval button is greyed
out – check HELP for approval criteria.
After Supervisor approves Case Plan, record Parental
Review/Date Signed on the ID page.

28
QUICK GUIDE TO UPDATING A CASE PLAN
Create New Case Plan
NOTE: You can only do a Case Plan update when
your existing case plan is ‘in effect’!
Immediately after using the + plus button to create updated Case
Plan: You will need to check YES or NO regarding recording
progress toward Service Objectives of the In-Effect Case Plan.
Once progress is recorded: Use the “GO TO CASE PLAN
UPDATE” box to begin.
From the ‘Dialog Box’ that appears when selecting a new case
plan – select Focus children and other Case Plan participants.
Enter the Case Plan ‘Start Date’ – the system will automatically
enter the end date 6 months later.
Use the COPY feature to copy appropriate items into the
update.
ID
Record ‘Appropriateness Description’ of this case plan
update.
CP Participants Record Case Plan Goal for each child here. Be sure to enter
‘Permanency Alternative/Concurrent Plan’ if appropriate.
Contributing Factors Selections from previous Case Plan will be copied here. Select
any additional contributing factors for each participant. Use the
‘Apply’ button to remain in the dialog box. Record detail
description as needed.
Strengths
Selections from previous Case Plan will be copied here. Select
any additional strengths for each participant, and record detail
description as needed.
Service Objectives Selections from previous Case Plan will be copied here. Add,
delete or modify objectives as appropriate. At least one
participant MUST have at least one service objective. Projected
completion date is automatically entered. Record detail
description to make objectives ‘SMART’. (Specific,
measurable, achievable, result focused and time limited)
Planned Client Services Selections from previous Case Plan will be copied here. Add,
delete or modify services as appropriate. From ‘dialog box’,
select participants, category and type of services. Enter detail
description as necessary.
Case Management Services
Save to Database
Selections from previous Case Plan will be copied here. Add,
delete or modify services as appropriate. Select any additional
services using the + sign, be sure to complete all Yellow fields.
Enter detail description as necessary.
Create New Case Plan Documents – Updated Case
Plan Document
The Case Plan Update is a Word document that is filled in from
the entries made in prior notebooks.
SW can review and edit the document, adding narrative in areas
that cannot be automatically populated. Save/Print/Close
To print ‘Individual Client Responsibilities’ for a
participant – select from Case Plan Reports under File /
Print Report.
ACTION / APPROVAL
SAVE TO DATABASE
Request ‘pending approval’ here. If approval button is greyed
out – check HELP for approval criteria.
After Supervisor approves Case Plan, record Parental
Review/Date Signed on the ID page.

29
Accessing County Templates from a Case or a Referral
In a Case- Use ‘Create New Document’
In a Referral – Use ‘Create New Document’
Use the + sign to access the ‘New’
documents within Case or Referral.
Select your county from the County menu. All county templates will appear in the
list, select the template you wish to access, and use the OK button.
The template will open in WORD. The document can be updated and spell
checked.
SAVE, Print and Close. The document will be saved as a permanent part of the case
record and can be accessed from the Existing Document icon.
SAVE TO DATABASE

30
IMPORTING DOCUMENTS TO A CASE or REFERRAL:
CASE
OR
REFERRAL
Click on the ‘Create New Documents’ icon and then
IMPORT. Select the file from the drive and directory it is
in, and name it. Any Word document outside of CWS/CMS
can be attached to a case or referral here.
Find the Document that you want to import – you can access A, C, G drives from here.
Highlight the Document.
Name the Document in the Yellow – File Title field.
Then Click OK.
The Document will open – review the document to make sure it is the one you wanted to import.
Close the document – you can access it again – under ‘OPEN EXISTING DOCUMENT’
SAVE TO DATABASE

31
QUICK GUIDE TO ENDING A CASE In order to end a case, you must be Primary or Secondary worker on the case, or have approval
in the worker’s unit. If this is an Adoptions Case, you must have primary assignment to end the case. STEP 1: Open the Case that you want to Close.
ACTION – END CASE
Select the case that you want to end from the
list and open it.
From the Action Menu – select END CASE.
All reminders will be deleted when case is
closed. Click OK here.
Select the most appropriate Closure Reason from the drop down – and record a closure statement in
narrative section. You must ask for APPROVAL for a case closing.
SAVE TO DATABASE
If the End Case command is gray, use the
Navigational Tool to see what items must
be completed before the case can be closed.
A case cannot be closed if an item in this
list is outstanding.
Only items without a red check need to be
addressed. The tool will walk you through
the steps to take care of any open item.