Embed Size (px)
Citation preview

CPMS®/SYSD®
Release 7.2
Reference Manual

Trade Secrets The materials contained in this manual are the TRADE SECRETS of H&W Computer Systems, Inc., Boise, Idaho.No part of this publication may be reproduced or transmitted in any form or by any means electronic or mechanical, including photocopying, recording, or any information storage and retrieval system, without written permission from H&W Computer Systems, Inc.
Copyright ©2013. H&W Computer Systems, Inc. All rights reserved.
Published December 2013.
Trademarks CPMS and SYSD/ATP are trademarks of H&W Computer Systems, Inc.
Adobe, the Adobe logo, Acrobat, and Acrobat Reader are either registered trademarks or trademarks of Adobe Systems Incorporated in the United States and/or other countries.
IBM, CICS, OS/390, RACF, VTAM, z/OS, and zSeries are trademarks of International Business Machines Corporation in the United States, other countries, or both.
Microsoft, Internet Explorer, and Visual Basic are either registered trademarks or trademarks of Microsoft Corporation in the United States and/or other countries.
Other brands or products may be service marks, trademarks, or registered trademarks of their respective holders and should be treated as such.
Order No. CRU-D072
This edition, CRU-D072, applies to release 7.2 of the H&W CPMS/SYSD product and to all subsequent releases and modifications until otherwise indicated in new editions or technical manual updates.
Contact H&W Website:
http://www.hwcs.com/support
E-mail:
Phone, technical support:
1-208-377-8436
Phone, main:
1-208-377-0336
Fax:
1-208-377-0069
Address, P.O. box:
P.O. Box 46019Boise, ID 83711
Address, physical:
6154 N. Meeker Pl., Ste. 100Boise, ID 83713
CPMS/SYSD Reference Manual ~ 7.2

Contents
Conventions and optional resources. . . . . . . . . . . . . . . . . . . . . . . . . . 13Conventions . . . . . . . . . . . . . . . . . . . . . . . . . . . . . . . . . . . . . . . . . . . . . . . . . . . . . . . . . . 13Optional resources . . . . . . . . . . . . . . . . . . . . . . . . . . . . . . . . . . . . . . . . . . . . . . . . . . . . . 14
Chapter 1 Introduction . . . . . . . . . . . . . . . . . . . . . . . . . . . . . . . . . . . . . . . . . . . . . . 15CPMS/SYSD overview . . . . . . . . . . . . . . . . . . . . . . . . . . . . . . . . . . . . . . . . . . . . . . . . . 16
Using CICS Print Management System . . . . . . . . . . . . . . . . . . . . . . . . . . . . . . . . . . . 17Managing DASD data sets . . . . . . . . . . . . . . . . . . . . . . . . . . . . . . . . . . . . . . . . . . . . . 19Editing and browsing data sets and members . . . . . . . . . . . . . . . . . . . . . . . . . . . . . . 19
Signing on to CPMS/SYSD . . . . . . . . . . . . . . . . . . . . . . . . . . . . . . . . . . . . . . . . . . . . . . 20Using the CPMS/SYSD Signon screen to sign on . . . . . . . . . . . . . . . . . . . . . . . . . . . 20Bypassing the CPMS/SYSD Signon screen to sign on . . . . . . . . . . . . . . . . . . . . . . . 21Signing on and going to a specific screen. . . . . . . . . . . . . . . . . . . . . . . . . . . . . . . . . . 21
Using CPMS/SYSD as a menu-driven or function-driven system . . . . . . . . . . . . . . . . . . 22Moving around in the menu-driven system . . . . . . . . . . . . . . . . . . . . . . . . . . . . . . . . . . 23
Going directly to a specific screen . . . . . . . . . . . . . . . . . . . . . . . . . . . . . . . . . . . . . . . 23Understanding the general screen format . . . . . . . . . . . . . . . . . . . . . . . . . . . . . . . . . . 26Using universal commands . . . . . . . . . . . . . . . . . . . . . . . . . . . . . . . . . . . . . . . . . . . . . . 27
CLEAR . . . . . . . . . . . . . . . . . . . . . . . . . . . . . . . . . . . . . . . . . . . . . . . . . . . . . . . . . . . . 27DOWN [nn] . . . . . . . . . . . . . . . . . . . . . . . . . . . . . . . . . . . . . . . . . . . . . . . . . . . . . . . . 27END . . . . . . . . . . . . . . . . . . . . . . . . . . . . . . . . . . . . . . . . . . . . . . . . . . . . . . . . . . . . . . 27ENTER . . . . . . . . . . . . . . . . . . . . . . . . . . . . . . . . . . . . . . . . . . . . . . . . . . . . . . . . . . . . 27HELP . . . . . . . . . . . . . . . . . . . . . . . . . . . . . . . . . . . . . . . . . . . . . . . . . . . . . . . . . . . . . 27RECALL . . . . . . . . . . . . . . . . . . . . . . . . . . . . . . . . . . . . . . . . . . . . . . . . . . . . . . . . . . 27REPEAT . . . . . . . . . . . . . . . . . . . . . . . . . . . . . . . . . . . . . . . . . . . . . . . . . . . . . . . . . . 28RETURN . . . . . . . . . . . . . . . . . . . . . . . . . . . . . . . . . . . . . . . . . . . . . . . . . . . . . . . . . . 28SET . . . . . . . . . . . . . . . . . . . . . . . . . . . . . . . . . . . . . . . . . . . . . . . . . . . . . . . . . . . . . 28SPLIT . . . . . . . . . . . . . . . . . . . . . . . . . . . . . . . . . . . . . . . . . . . . . . . . . . . . . . . . . . . . 28SWAP [p] . . . . . . . . . . . . . . . . . . . . . . . . . . . . . . . . . . . . . . . . . . . . . . . . . . . . . . . . . . 29UP [nn] . . . . . . . . . . . . . . . . . . . . . . . . . . . . . . . . . . . . . . . . . . . . . . . . . . . . . . . . . . . 29
Using the Primary Option menu . . . . . . . . . . . . . . . . . . . . . . . . . . . . . . . . . . . . . . . . . . . 30
Chapter 2 Option 0: Setting CPMS/SYSD parameters . . . . . . . . . . . . . . . . . . . . . 33Parameter Options screen. . . . . . . . . . . . . . . . . . . . . . . . . . . . . . . . . . . . . . . . . . . . . . . . 34General Parameter Definitions screen . . . . . . . . . . . . . . . . . . . . . . . . . . . . . . . . . . . . . . 36JES/List Parameter Definitions screen . . . . . . . . . . . . . . . . . . . . . . . . . . . . . . . . . . . . . . 38Program Function Key Definition screen . . . . . . . . . . . . . . . . . . . . . . . . . . . . . . . . . . . . 42
Changing PF key assignments . . . . . . . . . . . . . . . . . . . . . . . . . . . . . . . . . . . . . . . . . . 44Disabling a PF key . . . . . . . . . . . . . . . . . . . . . . . . . . . . . . . . . . . . . . . . . . . . . . . . . . . 45Returning a PF key to its default . . . . . . . . . . . . . . . . . . . . . . . . . . . . . . . . . . . . . . . . . 45
3

Job/File Tailoring Parameters screen . . . . . . . . . . . . . . . . . . . . . . . . . . . . . . . . . . . . . . 46GET/PUT TS Queue Identifiers screen . . . . . . . . . . . . . . . . . . . . . . . . . . . . . . . . . . . . 48Utility Parameters screen . . . . . . . . . . . . . . . . . . . . . . . . . . . . . . . . . . . . . . . . . . . . . . . 50Edit Parameters screen . . . . . . . . . . . . . . . . . . . . . . . . . . . . . . . . . . . . . . . . . . . . . . . . 52
Chapter 3 Option 1: Browsing source data . . . . . . . . . . . . . . . . . . . . . . . . . . . . . 55Browse – Dataset menu . . . . . . . . . . . . . . . . . . . . . . . . . . . . . . . . . . . . . . . . . . . . . . . . . 56Browse – Dataset menu for CA Panvalet screen . . . . . . . . . . . . . . . . . . . . . . . . . . . . . 62Browse – Member Selection screen . . . . . . . . . . . . . . . . . . . . . . . . . . . . . . . . . . . . . . . . 65
Browsing a load library . . . . . . . . . . . . . . . . . . . . . . . . . . . . . . . . . . . . . . . . . . . . . . . . 68Browse – Dataset Display screen . . . . . . . . . . . . . . . . . . . . . . . . . . . . . . . . . . . . . . . . . . 72Browse – Hot List Selection screen . . . . . . . . . . . . . . . . . . . . . . . . . . . . . . . . . . . . . . . . 82
Chapter 4 Option 2: Editing source data . . . . . . . . . . . . . . . . . . . . . . . . . . . . . . 85Understanding the SYSD editor . . . . . . . . . . . . . . . . . . . . . . . . . . . . . . . . . . . . . . . . . . 87Managing edit sessions . . . . . . . . . . . . . . . . . . . . . . . . . . . . . . . . . . . . . . . . . . . . . . . . . 88Edit – Dataset menu . . . . . . . . . . . . . . . . . . . . . . . . . . . . . . . . . . . . . . . . . . . . . . . . . . . . 89
Using temporary edit sessions . . . . . . . . . . . . . . . . . . . . . . . . . . . . . . . . . . . . . . . . . 95Edit – Dataset menu for CA Panvalet . . . . . . . . . . . . . . . . . . . . . . . . . . . . . . . . . . . . . . 96Edit – Session Display screen . . . . . . . . . . . . . . . . . . . . . . . . . . . . . . . . . . . . . . . . . . . 99Edit – Member Selection screen . . . . . . . . . . . . . . . . . . . . . . . . . . . . . . . . . . . . . . . . 101.Edit – Dataset Display screen . . . . . . . . . . . . . . . . . . . . . . . . . . . . . . . . . . . . . . . . . . . 106Edit – Hot List Selection screen . . . . . . . . . . . . . . . . . . . . . . . . . . . . . . . . . . . . . . . . . . 108
Editing the hot list . . . . . . . . . . . . . . . . . . . . . . . . . . . . . . . . . . . . . . . . . . . . . . . . . . . 109Issuing primary commands in the edit session . . . . . . . . . . . . . . . . . . . . . . . . . . . . . . . 112Understanding primary commands . . . . . . . . . . . . . . . . . . . . . . . . . . . . . . . . . . . . . . . . 113
+ or ? . . . . . . . . . . . . . . . . . . . . . . . . . . . . . . . . . . . . . . . . . . . . . . . . . . . . . . . . . . . . 117- . . . . . . . . . . . . . . . . . . . . . . . . . . . . . . . . . . . . . . . . . . . . . . . . . . . . . . . . . . . . . . . . 117: or .label . . . . . . . . . . . . . . . . . . . . . . . . . . . . . . . . . . . . . . . . . . . . . . . . . . . . . . . . . 117ABORT . . . . . . . . . . . . . . . . . . . . . . . . . . . . . . . . . . . . . . . . . . . . . . . . . . . . . . . . . . 117AUTONUM . . . . . . . . . . . . . . . . . . . . . . . . . . . . . . . . . . . . . . . . . . . . . . . . . . . . . . . 118BACKWARD . . . . . . . . . . . . . . . . . . . . . . . . . . . . . . . . . . . . . . . . . . . . . . . . . . . . . . . 118BOTTOM . . . . . . . . . . . . . . . . . . . . . . . . . . . . . . . . . . . . . . . . . . . . . . . . . . . . . . . . 119BOUNDS or BNDS . . . . . . . . . . . . . . . . . . . . . . . . . . . . . . . . . . . . . . . . . . . . . . . . . 119CANCEL . . . . . . . . . . . . . . . . . . . . . . . . . . . . . . . . . . . . . . . . . . . . . . . . . . . . . . . . . 119CAPS . . . . . . . . . . . . . . . . . . . . . . . . . . . . . . . . . . . . . . . . . . . . . . . . . . . . . . . . . . . 120CCHAR . . . . . . . . . . . . . . . . . . . . . . . . . . . . . . . . . . . . . . . . . . . . . . . . . . . . . . . . . . . 120CHANGE . . . . . . . . . . . . . . . . . . . . . . . . . . . . . . . . . . . . . . . . . . . . . . . . . . . . . . . . . 121CLEAR . . . . . . . . . . . . . . . . . . . . . . . . . . . . . . . . . . . . . . . . . . . . . . . . . . . . . . . . . . 124COLS . . . . . . . . . . . . . . . . . . . . . . . . . . . . . . . . . . . . . . . . . . . . . . . . . . . . . . . . . . . . 124COPY . . . . . . . . . . . . . . . . . . . . . . . . . . . . . . . . . . . . . . . . . . . . . . . . . . . . . . . . . . . 125CREATE . . . . . . . . . . . . . . . . . . . . . . . . . . . . . . . . . . . . . . . . . . . . . . . . . . . . . . . . . 126DELETE . . . . . . . . . . . . . . . . . . . . . . . . . . . . . . . . . . . . . . . . . . . . . . . . . . . . . . . . . 127DELLINE . . . . . . . . . . . . . . . . . . . . . . . . . . . . . . . . . . . . . . . . . . . . . . . . . . . . . . . . . 128DELQ . . . . . . . . . . . . . . . . . . . . . . . . . . . . . . . . . . . . . . . . . . . . . . . . . . . . . . . . . . . . 128DELWORD . . . . . . . . . . . . . . . . . . . . . . . . . . . . . . . . . . . . . . . . . . . . . . . . . . . . . . . 129DOWN . . . . . . . . . . . . . . . . . . . . . . . . . . . . . . . . . . . . . . . . . . . . . . . . . . . . . . . . . . . 129DQ . . . . . . . . . . . . . . . . . . . . . . . . . . . . . . . . . . . . . . . . . . . . . . . . . . . . . . . . . . . . . . 130
4 CPMS/SYSD Reference Manual ~ 7.2

END . . . . . . . . . . . . . . . . . . . . . . . . . . . . . . . . . . . . . . . . . . . . . . . . . . . . . . . . . . . . . 130ENTER . . . . . . . . . . . . . . . . . . . . . . . . . . . . . . . . . . . . . . . . . . . . . . . . . . . . . . . . . . 131EXCLUDE . . . . . . . . . . . . . . . . . . . . . . . . . . . . . . . . . . . . . . . . . . . . . . . . . . . . . . . 131FILE . . . . . . . . . . . . . . . . . . . . . . . . . . . . . . . . . . . . . . . . . . . . . . . . . . . . . . . . . . . . . 131FIND . . . . . . . . . . . . . . . . . . . . . . . . . . . . . . . . . . . . . . . . . . . . . . . . . . . . . . . . . . . . 132FINDN . . . . . . . . . . . . . . . . . . . . . . . . . . . . . . . . . . . . . . . . . . . . . . . . . . . . . . . . . 137FINDP . . . . . . . . . . . . . . . . . . . . . . . . . . . . . . . . . . . . . . . . . . . . . . . . . . . . . . . . . . . 137FINDR . . . . . . . . . . . . . . . . . . . . . . . . . . . . . . . . . . . . . . . . . . . . . . . . . . . . . . . . . . 137FIRST . . . . . . . . . . . . . . . . . . . . . . . . . . . . . . . . . . . . . . . . . . . . . . . . . . . . . . . . . . . 137FLBL . . . . . . . . . . . . . . . . . . . . . . . . . . . . . . . . . . . . . . . . . . . . . . . . . . . . . . . . . . . . . 138FLINE . . . . . . . . . . . . . . . . . . . . . . . . . . . . . . . . . . . . . . . . . . . . . . . . . . . . . . . . . . . . 138FLIP . . . . . . . . . . . . . . . . . . . . . . . . . . . . . . . . . . . . . . . . . . . . . . . . . . . . . . . . . . . . . 139FORWARD . . . . . . . . . . . . . . . . . . . . . . . . . . . . . . . . . . . . . . . . . . . . . . . . . . . . . . . . 139FSTR . . . . . . . . . . . . . . . . . . . . . . . . . . . . . . . . . . . . . . . . . . . . . . . . . . . . . . . . . . . . 140FWORD . . . . . . . . . . . . . . . . . . . . . . . . . . . . . . . . . . . . . . . . . . . . . . . . . . . . . . . . . . 141GET . . . . . . . . . . . . . . . . . . . . . . . . . . . . . . . . . . . . . . . . . . . . . . . . . . . . . . . . . . . . 142HEX . . . . . . . . . . . . . . . . . . . . . . . . . . . . . . . . . . . . . . . . . . . . . . . . . . . . . . . . . . . . 143INSERT . . . . . . . . . . . . . . . . . . . . . . . . . . . . . . . . . . . . . . . . . . . . . . . . . . . . . . . . . . 144KEEP . . . . . . . . . . . . . . . . . . . . . . . . . . . . . . . . . . . . . . . . . . . . . . . . . . . . . . . . . . . . 145KEYS . . . . . . . . . . . . . . . . . . . . . . . . . . . . . . . . . . . . . . . . . . . . . . . . . . . . . . . . . . . . 145LAST . . . . . . . . . . . . . . . . . . . . . . . . . . . . . . . . . . . . . . . . . . . . . . . . . . . . . . . . . . . . 145LEFT . . . . . . . . . . . . . . . . . . . . . . . . . . . . . . . . . . . . . . . . . . . . . . . . . . . . . . . . . . . . 146LINE . . . . . . . . . . . . . . . . . . . . . . . . . . . . . . . . . . . . . . . . . . . . . . . . . . . . . . . . . . . . 146LINEND . . . . . . . . . . . . . . . . . . . . . . . . . . . . . . . . . . . . . . . . . . . . . . . . . . . . . . . . . . 147LOCATE . . . . . . . . . . . . . . . . . . . . . . . . . . . . . . . . . . . . . . . . . . . . . . . . . . . . . . . . . 148MASK . . . . . . . . . . . . . . . . . . . . . . . . . . . . . . . . . . . . . . . . . . . . . . . . . . . . . . . . . . . 148MODID . . . . . . . . . . . . . . . . . . . . . . . . . . . . . . . . . . . . . . . . . . . . . . . . . . . . . . . . . . 149MOD5 . . . . . . . . . . . . . . . . . . . . . . . . . . . . . . . . . . . . . . . . . . . . . . . . . . . . . . . . . . . 150NEXT . . . . . . . . . . . . . . . . . . . . . . . . . . . . . . . . . . . . . . . . . . . . . . . . . . . . . . . . . . . . 151NULLS . . . . . . . . . . . . . . . . . . . . . . . . . . . . . . . . . . . . . . . . . . . . . . . . . . . . . . . . . . 151NUMBER . . . . . . . . . . . . . . . . . . . . . . . . . . . . . . . . . . . . . . . . . . . . . . . . . . . . . . . . 152PCDEL . . . . . . . . . . . . . . . . . . . . . . . . . . . . . . . . . . . . . . . . . . . . . . . . . . . . . . . . . . . 153PCRCV . . . . . . . . . . . . . . . . . . . . . . . . . . . . . . . . . . . . . . . . . . . . . . . . . . . . . . . . . . 153PCSND . . . . . . . . . . . . . . . . . . . . . . . . . . . . . . . . . . . . . . . . . . . . . . . . . . . . . . . . . . 154PRINT . . . . . . . . . . . . . . . . . . . . . . . . . . . . . . . . . . . . . . . . . . . . . . . . . . . . . . . . . . . 154PROFILE . . . . . . . . . . . . . . . . . . . . . . . . . . . . . . . . . . . . . . . . . . . . . . . . . . . . . . . . . 155PUT . . . . . . . . . . . . . . . . . . . . . . . . . . . . . . . . . . . . . . . . . . . . . . . . . . . . . . . . . . . . . 156QLABEL . . . . . . . . . . . . . . . . . . . . . . . . . . . . . . . . . . . . . . . . . . . . . . . . . . . . . . . . . 156QQUIT . . . . . . . . . . . . . . . . . . . . . . . . . . . . . . . . . . . . . . . . . . . . . . . . . . . . . . . . . . . 157RECALL . . . . . . . . . . . . . . . . . . . . . . . . . . . . . . . . . . . . . . . . . . . . . . . . . . . . . . . . . 157RECOVERY . . . . . . . . . . . . . . . . . . . . . . . . . . . . . . . . . . . . . . . . . . . . . . . . . . . . . . . 158RENUMBER . . . . . . . . . . . . . . . . . . . . . . . . . . . . . . . . . . . . . . . . . . . . . . . . . . . . . . . 159REPEAT . . . . . . . . . . . . . . . . . . . . . . . . . . . . . . . . . . . . . . . . . . . . . . . . . . . . . . . . . 159REPLACE . . . . . . . . . . . . . . . . . . . . . . . . . . . . . . . . . . . . . . . . . . . . . . . . . . . . . . . . 160RESET . . . . . . . . . . . . . . . . . . . . . . . . . . . . . . . . . . . . . . . . . . . . . . . . . . . . . . . . . 161RETURN . . . . . . . . . . . . . . . . . . . . . . . . . . . . . . . . . . . . . . . . . . . . . . . . . . . . . . . . . 161RIGHT . . . . . . . . . . . . . . . . . . . . . . . . . . . . . . . . . . . . . . . . . . . . . . . . . . . . . . . . . . . 162SAVE . . . . . . . . . . . . . . . . . . . . . . . . . . . . . . . . . . . . . . . . . . . . . . . . . . . . . . . . . . . . 162SCALE . . . . . . . . . . . . . . . . . . . . . . . . . . . . . . . . . . . . . . . . . . . . . . . . . . . . . . . . . . . 163SHOW . . . . . . . . . . . . . . . . . . . . . . . . . . . . . . . . . . . . . . . . . . . . . . . . . . . . . . . . . 164SORT . . . . . . . . . . . . . . . . . . . . . . . . . . . . . . . . . . . . . . . . . . . . . . . . . . . . . . . . . . . 165SPLIT . . . . . . . . . . . . . . . . . . . . . . . . . . . . . . . . . . . . . . . . . . . . . . . . . . . . . . . . . . 167
5

SPLTJOIN . . . . . . . . . . . . . . . . . . . . . . . . . . . . . . . . . . . . . . . . . . . . . . . . . . . . . . . . 168STATS . . . . . . . . . . . . . . . . . . . . . . . . . . . . . . . . . . . . . . . . . . . . . . . . . . . . . . . . . . . 168SUBMIT . . . . . . . . . . . . . . . . . . . . . . . . . . . . . . . . . . . . . . . . . . . . . . . . . . . . . . . . . . 169SWAP . . . . . . . . . . . . . . . . . . . . . . . . . . . . . . . . . . . . . . . . . . . . . . . . . . . . . . . . . . . . 169TA . . . . . . . . . . . . . . . . . . . . . . . . . . . . . . . . . . . . . . . . . . . . . . . . . . . . . . . . . . . . . . 170TABS . . . . . . . . . . . . . . . . . . . . . . . . . . . . . . . . . . . . . . . . . . . . . . . . . . . . . . . . . . . . 171TAC . . . . . . . . . . . . . . . . . . . . . . . . . . . . . . . . . . . . . . . . . . . . . . . . . . . . . . . . . . . . . 172TAL . . . . . . . . . . . . . . . . . . . . . . . . . . . . . . . . . . . . . . . . . . . . . . . . . . . . . . . . . . . . . 173TAR . . . . . . . . . . . . . . . . . . . . . . . . . . . . . . . . . . . . . . . . . . . . . . . . . . . . . . . . . . . . . 174TOP . . . . . . . . . . . . . . . . . . . . . . . . . . . . . . . . . . . . . . . . . . . . . . . . . . . . . . . . . . . . . 174TRANCHR . . . . . . . . . . . . . . . . . . . . . . . . . . . . . . . . . . . . . . . . . . . . . . . . . . . . . . . . 175TRUNC . . . . . . . . . . . . . . . . . . . . . . . . . . . . . . . . . . . . . . . . . . . . . . . . . . . . . . . . . . . 176UNDO . . . . . . . . . . . . . . . . . . . . . . . . . . . . . . . . . . . . . . . . . . . . . . . . . . . . . . . . . . . . 177UNNUMBER . . . . . . . . . . . . . . . . . . . . . . . . . . . . . . . . . . . . . . . . . . . . . . . . . . . . . . 178UP . . . . . . . . . . . . . . . . . . . . . . . . . . . . . . . . . . . . . . . . . . . . . . . . . . . . . . . . . . . . . . 178WRAP . . . . . . . . . . . . . . . . . . . . . . . . . . . . . . . . . . . . . . . . . . . . . . . . . . . . . . . . . . . . 178ZONE . . . . . . . . . . . . . . . . . . . . . . . . . . . . . . . . . . . . . . . . . . . . . . . . . . . . . . . . . . . 179
Understanding editor scroll commands . . . . . . . . . . . . . . . . . . . . . . . . . . . . . . . . . . . . . 180CSR . . . . . . . . . . . . . . . . . . . . . . . . . . . . . . . . . . . . . . . . . . . . . . . . . . . . . . . . . . . . . 180HALF . . . . . . . . . . . . . . . . . . . . . . . . . . . . . . . . . . . . . . . . . . . . . . . . . . . . . . . . . . . . 180PAGE . . . . . . . . . . . . . . . . . . . . . . . . . . . . . . . . . . . . . . . . . . . . . . . . . . . . . . . . . . . . 180
Understanding editor line commands . . . . . . . . . . . . . . . . . . . . . . . . . . . . . . . . . . . . . 181A – After . . . . . . . . . . . . . . . . . . . . . . . . . . . . . . . . . . . . . . . . . . . . . . . . . . . . . . . . . 183B – Before . . . . . . . . . . . . . . . . . . . . . . . . . . . . . . . . . . . . . . . . . . . . . . . . . . . . . . . . 184COLS – Column guide control . . . . . . . . . . . . . . . . . . . . . . . . . . . . . . . . . . . . . . . . . 184( – Column shift left . . . . . . . . . . . . . . . . . . . . . . . . . . . . . . . . . . . . . . . . . . . . . . . . . 185(( – Column shift left block . . . . . . . . . . . . . . . . . . . . . . . . . . . . . . . . . . . . . . . . . . . 185) – Column shift right . . . . . . . . . . . . . . . . . . . . . . . . . . . . . . . . . . . . . . . . . . . . . . . . 186)) – Column shift right block . . . . . . . . . . . . . . . . . . . . . . . . . . . . . . . . . . . . . . . . . . . 187CL – Continue line . . . . . . . . . . . . . . . . . . . . . . . . . . . . . . . . . . . . . . . . . . . . . . . . . . 188CC – Copy block . . . . . . . . . . . . . . . . . . . . . . . . . . . . . . . . . . . . . . . . . . . . . . . . . . . 188C – Copy lines . . . . . . . . . . . . . . . . . . . . . . . . . . . . . . . . . . . . . . . . . . . . . . . . . . . . . 189< – Data shift left . . . . . . . . . . . . . . . . . . . . . . . . . . . . . . . . . . . . . . . . . . . . . . . . . . . 189<< – Data shift left block . . . . . . . . . . . . . . . . . . . . . . . . . . . . . . . . . . . . . . . . . . . . . 190> – Data shift right . . . . . . . . . . . . . . . . . . . . . . . . . . . . . . . . . . . . . . . . . . . . . . . . . . 191>> – Data shift right block . . . . . . . . . . . . . . . . . . . . . . . . . . . . . . . . . . . . . . . . . . . . 192D – Delete lines . . . . . . . . . . . . . . . . . . . . . . . . . . . . . . . . . . . . . . . . . . . . . . . . . . . . 193DD – Delete block . . . . . . . . . . . . . . . . . . . . . . . . . . . . . . . . . . . . . . . . . . . . . . . . . . 193E – Exchange . . . . . . . . . . . . . . . . . . . . . . . . . . . . . . . . . . . . . . . . . . . . . . . . . . . . . . 194EE – Exchange block . . . . . . . . . . . . . . . . . . . . . . . . . . . . . . . . . . . . . . . . . . . . . . . . 195F – First (show) lines . . . . . . . . . . . . . . . . . . . . . . . . . . . . . . . . . . . . . . . . . . . . . . . . 195FL – Flip line status . . . . . . . . . . . . . . . . . . . . . . . . . . . . . . . . . . . . . . . . . . . . . . . . . 195FLL – Flip block status . . . . . . . . . . . . . . . . . . . . . . . . . . . . . . . . . . . . . . . . . . . . . . . 196I – Insert lines . . . . . . . . . . . . . . . . . . . . . . . . . . . . . . . . . . . . . . . . . . . . . . . . . . . . . 196IC* – Insert comment (asterisks) . . . . . . . . . . . . . . . . . . . . . . . . . . . . . . . . . . . . . . . 196IC- – Insert comment (dashes) . . . . . . . . . . . . . . . . . . . . . . . . . . . . . . . . . . . . . . . . . 197.label – Set bookmark . . . . . . . . . . . . . . . . . . . . . . . . . . . . . . . . . . . . . . . . . . . . . . . . 197L – Last (show) lines . . . . . . . . . . . . . . . . . . . . . . . . . . . . . . . . . . . . . . . . . . . . . . . . 198LC – Lowercase . . . . . . . . . . . . . . . . . . . . . . . . . . . . . . . . . . . . . . . . . . . . . . . . . . . . 198LCC – Lowercase block . . . . . . . . . . . . . . . . . . . . . . . . . . . . . . . . . . . . . . . . . . . . . . 199LCCT – Lowercase and translate block . . . . . . . . . . . . . . . . . . . . . . . . . . . . . . . . . 199LCT – Lowercase and translate hex . . . . . . . . . . . . . . . . . . . . . . . . . . . . . . . . . . . . . 200
6 CPMS/SYSD Reference Manual ~ 7.2

LL – Lowercase block . . . . . . . . . . . . . . . . . . . . . . . . . . . . . . . . . . . . . . . . . . . . . . . . 200LLT – Lowercase and translate block . . . . . . . . . . . . . . . . . . . . . . . . . . . . . . . . . . . 200M – Move lines . . . . . . . . . . . . . . . . . . . . . . . . . . . . . . . . . . . . . . . . . . . . . . . . . . . . 201MM – Move block . . . . . . . . . . . . . . . . . . . . . . . . . . . . . . . . . . . . . . . . . . . . . . . . . . 201O – Overlay lines . . . . . . . . . . . . . . . . . . . . . . . . . . . . . . . . . . . . . . . . . . . . . . . . . . . 202OO – Overlay block . . . . . . . . . . . . . . . . . . . . . . . . . . . . . . . . . . . . . . . . . . . . . . . . . 202R – Repeat line . . . . . . . . . . . . . . . . . . . . . . . . . . . . . . . . . . . . . . . . . . . . . . . . . . . . 203RR – Repeat block . . . . . . . . . . . . . . . . . . . . . . . . . . . . . . . . . . . . . . . . . . . . . . . . . 203RT – Retab . . . . . . . . . . . . . . . . . . . . . . . . . . . . . . . . . . . . . . . . . . . . . . . . . . . . . . . . 204/ – Set current line . . . . . . . . . . . . . . . . . . . . . . . . . . . . . . . . . . . . . . . . . . . . . . . . . . 204S – Show lines . . . . . . . . . . . . . . . . . . . . . . . . . . . . . . . . . . . . . . . . . . . . . . . . . . . . . 204TA – Justify data . . . . . . . . . . . . . . . . . . . . . . . . . . . . . . . . . . . . . . . . . . . . . . . . . . . . 205TAC – Center data . . . . . . . . . . . . . . . . . . . . . . . . . . . . . . . . . . . . . . . . . . . . . . . . . . 205TAL – Left justify data . . . . . . . . . . . . . . . . . . . . . . . . . . . . . . . . . . . . . . . . . . . . . . . . 206TAR – Right justify data . . . . . . . . . . . . . . . . . . . . . . . . . . . . . . . . . . . . . . . . . . . . . . 206TF – Text flow . . . . . . . . . . . . . . . . . . . . . . . . . . . . . . . . . . . . . . . . . . . . . . . . . . . . . 207TM – Text merge . . . . . . . . . . . . . . . . . . . . . . . . . . . . . . . . . . . . . . . . . . . . . . . . . . 208TR – Translate hex . . . . . . . . . . . . . . . . . . . . . . . . . . . . . . . . . . . . . . . . . . . . . . . . . . 209TRR – Translate block hex . . . . . . . . . . . . . . . . . . . . . . . . . . . . . . . . . . . . . . . . . . . . 209TS – Text split . . . . . . . . . . . . . . . . . . . . . . . . . . . . . . . . . . . . . . . . . . . . . . . . . . . . . 210UC – Uppercase . . . . . . . . . . . . . . . . . . . . . . . . . . . . . . . . . . . . . . . . . . . . . . . . . . . . 210UCC – Uppercase block . . . . . . . . . . . . . . . . . . . . . . . . . . . . . . . . . . . . . . . . . . . . . . 211UCCT – Uppercase and translate block . . . . . . . . . . . . . . . . . . . . . . . . . . . . . . . . . . 211UCT – Uppercase and translate hex . . . . . . . . . . . . . . . . . . . . . . . . . . . . . . . . . . . . 212UU - Uppercase block . . . . . . . . . . . . . . . . . . . . . . . . . . . . . . . . . . . . . . . . . . . . . . . 212UUT - Uppercase and translate block . . . . . . . . . . . . . . . . . . . . . . . . . . . . . . . . . . . 212X – Exclude lines . . . . . . . . . . . . . . . . . . . . . . . . . . . . . . . . . . . . . . . . . . . . . . . . . . . 213XX – Exclude block . . . . . . . . . . . . . . . . . . . . . . . . . . . . . . . . . . . . . . . . . . . . . . . . . 213
Chapter 5 Option 3: Performing utility functions . . . . . . . . . . . . . . . . . . . . . . . . 215Utility Selection menu . . . . . . . . . . . . . . . . . . . . . . . . . . . . . . . . . . . . . . . . . . . . . . . . . . 217Library Utilities menu . . . . . . . . . . . . . . . . . . . . . . . . . . . . . . . . . . . . . . . . . . . . . . . . 219Dataset Utilities menu . . . . . . . . . . . . . . . . . . . . . . . . . . . . . . . . . . . . . . . . . . . . . . . . . 224Dataset Information screen . . . . . . . . . . . . . . . . . . . . . . . . . . . . . . . . . . . . . . . . . . . . . 229Dataset Extents screen . . . . . . . . . . . . . . . . . . . . . . . . . . . . . . . . . . . . . . . . . . . . . . . . 232Allocate Utility screen . . . . . . . . . . . . . . . . . . . . . . . . . . . . . . . . . . . . . . . . . . . . . . . . . . 235Catalog Utility screen . . . . . . . . . . . . . . . . . . . . . . . . . . . . . . . . . . . . . . . . . . . . . . . . . . 239Listcat Utility screen . . . . . . . . . . . . . . . . . . . . . . . . . . . . . . . . . . . . . . . . . . . . . . . . . . . 244VTOC Utility screen . . . . . . . . . . . . . . . . . . . . . . . . . . . . . . . . . . . . . . . . . . . . . . . . . . . 249System Device Unit Display screen . . . . . . . . . . . . . . . . . . . . . . . . . . . . . . . . . . . . . . . 253
Chapter 6 Option 4: Displaying active jobs . . . . . . . . . . . . . . . . . . . . . . . . . . . . 257JES2 Display Active Jobs . . . . . . . . . . . . . . . . . . . . . . . . . . . . . . . . . . . . . . . . . . . . . . 258
7

Chapter 7 Option 5: Following a job through the system . . . . . . . . . . . . . . . . 263JES2 Job Queue Display screen (new format) . . . . . . . . . . . . . . . . . . . . . . . . . . . . . 264JES2 Job Queue Display screen (old format) . . . . . . . . . . . . . . . . . . . . . . . . . . . . . . 269JES2 Job Queue Display (Right) screen (old format) . . . . . . . . . . . . . . . . . . . . . . . . 272JES2 Job Dataset Display screen . . . . . . . . . . . . . . . . . . . . . . . . . . . . . . . . . . . . . . . 277JES2 Job Dataset Display (Right) screen . . . . . . . . . . . . . . . . . . . . . . . . . . . . . . . . . . 281
Chapter 8 Option 6: Viewing output data sets . . . . . . . . . . . . . . . . . . . . . . . . . . 285JES2 Job Output Display screen. . . . . . . . . . . . . . . . . . . . . . . . . . . . . . . . . . . . . . . . . . 286JES2 Job Output Display (Right) screen . . . . . . . . . . . . . . . . . . . . . . . . . . . . . . . . . . . . 289JES2 Spool Display screen . . . . . . . . . . . . . . . . . . . . . . . . . . . . . . . . . . . . . . . . . . . . . 292
Chapter 9 Option 7: Controlling the printer . . . . . . . . . . . . . . . . . . . . . . . . . . . . 303CPMS/SYSD Printer Table Display/Change screen . . . . . . . . . . . . . . . . . . . . . . . . . . 304CPMS/SYSD Spool Writer Start screen . . . . . . . . . . . . . . . . . . . . . . . . . . . . . . . . . . . 308JES2 Printer Display screen . . . . . . . . . . . . . . . . . . . . . . . . . . . . . . . . . . . . . . . . . . . . 311Output Waiting for Printer screen . . . . . . . . . . . . . . . . . . . . . . . . . . . . . . . . . . . . . . . . 315
Chapter 10 Option C: Executing CICS transactions. . . . . . . . . . . . . . . . . . . . . . . 319Viewing the CICS Transaction screen . . . . . . . . . . . . . . . . . . . . . . . . . . . . . . . . . . . . . 320Returning to the menu-driven system . . . . . . . . . . . . . . . . . . . . . . . . . . . . . . . . . . . . . . 321
Chapter 11 Option T: Tutorial and online help . . . . . . . . . . . . . . . . . . . . . . . . . . . 323Accessing the tutorial for the online help . . . . . . . . . . . . . . . . . . . . . . . . . . . . . . . . . . . . 324Navigating the tutorial and online help screens . . . . . . . . . . . . . . . . . . . . . . . . . . . . . . 325
Using page commands . . . . . . . . . . . . . . . . . . . . . . . . . . . . . . . . . . . . . . . . . . . . . . . 325Using PF keys . . . . . . . . . . . . . . . . . . . . . . . . . . . . . . . . . . . . . . . . . . . . . . . . . . . . . . 326Viewing the Table of Contents screen . . . . . . . . . . . . . . . . . . . . . . . . . . . . . . . . . . . 326Showing the help topics for the screen you are viewing . . . . . . . . . . . . . . . . . . . . . 327Exiting the tutorial or online help . . . . . . . . . . . . . . . . . . . . . . . . . . . . . . . . . . . . . . . . 327
Viewing the new features available in CPMS/SYSD . . . . . . . . . . . . . . . . . . . . . . . . . . 328
Chapter 12 Option U: Maintaining the user file. . . . . . . . . . . . . . . . . . . . . . . . . . . 329User File Maintenance. . . . . . . . . . . . . . . . . . . . . . . . . . . . . . . . . . . . . . . . . . . . . . . . . . 330
8 CPMS/SYSD Reference Manual ~ 7.2

Chapter 13 Using CPMS/SYSD functional commands . . . . . . . . . . . . . . . . . . . . 331Managing CICS activities . . . . . . . . . . . . . . . . . . . . . . . . . . . . . . . . . . . . . . . . . . . . . . . 332Debugging CICS using CPMS/SYSD aids . . . . . . . . . . . . . . . . . . . . . . . . . . . . . . . . . . 332Issuing functional commands . . . . . . . . . . . . . . . . . . . . . . . . . . . . . . . . . . . . . . . . . . . . 333
Formatting commands . . . . . . . . . . . . . . . . . . . . . . . . . . . . . . . . . . . . . . . . . . . . . . . 333Using aliases . . . . . . . . . . . . . . . . . . . . . . . . . . . . . . . . . . . . . . . . . . . . . . . . . . . . . . . 334Formatting parameters . . . . . . . . . . . . . . . . . . . . . . . . . . . . . . . . . . . . . . . . . . . . . . . 334Omitting positional parameters . . . . . . . . . . . . . . . . . . . . . . . . . . . . . . . . . . . . . . . . . 334Using parameter lists. . . . . . . . . . . . . . . . . . . . . . . . . . . . . . . . . . . . . . . . . . . . . . . . . 335
Recalling functional commands . . . . . . . . . . . . . . . . . . . . . . . . . . . . . . . . . . . . . . . . . 335Viewing the online help for a command . . . . . . . . . . . . . . . . . . . . . . . . . . . . . . . . . . . . 336Understanding functional commands . . . . . . . . . . . . . . . . . . . . . . . . . . . . . . . . . . . . . . 337
A – Viewing jobs that are being executed . . . . . . . . . . . . . . . . . . . . . . . . . . . . . . . 337AA – Dynamically displaying jobs being executed . . . . . . . . . . . . . . . . . . . . . . . . . 340AE – View jobs being executed (Extended) . . . . . . . . . . . . . . . . . . . . . . . . . . . . . . . 341AAE – Dynamically displaying jobs being executed (Extended) . . . . . . . . . . . . . . . 342AL – Viewing CICS-allocated data sets . . . . . . . . . . . . . . . . . . . . . . . . . . . . . . . . . . 342ALLOC – Viewing CICS-allocated data sets . . . . . . . . . . . . . . . . . . . . . . . . . . . . . 343BIO – Viewing a biorhythm chart. . . . . . . . . . . . . . . . . . . . . . . . . . . . . . . . . . . . . . . . 343CANCEL – Canceling a job . . . . . . . . . . . . . . . . . . . . . . . . . . . . . . . . . . . . . . . . . . . 344CATLG – Cataloging an OS data set . . . . . . . . . . . . . . . . . . . . . . . . . . . . . . . . . . . 344CICSTRAN – Viewing CICS transaction IDs . . . . . . . . . . . . . . . . . . . . . . . . . . . . . . 345COMPRESS – Compressing a cataloged PDS . . . . . . . . . . . . . . . . . . . . . . . . . . . . 345CORE – Viewing and changing virtual memory . . . . . . . . . . . . . . . . . . . . . . . . . . . 346DEST – Viewing and changing the DCT . . . . . . . . . . . . . . . . . . . . . . . . . . . . . . . . . 348DLTA – Deleting a high-level index alias . . . . . . . . . . . . . . . . . . . . . . . . . . . . . . . . . 350DLTX – Disconnecting catalogs . . . . . . . . . . . . . . . . . . . . . . . . . . . . . . . . . . . . . . . 350DRPX – Deleting a primary or generation index . . . . . . . . . . . . . . . . . . . . . . . . . . . 351DSMAINT – Performing maintenance on a single data set within a job . . . . . . . . . 351DSN – Viewing the attributes for a data set . . . . . . . . . . . . . . . . . . . . . . . . . . . . . 352DSPCHR – Viewing a DASD record . . . . . . . . . . . . . . . . . . . . . . . . . . . . . . . . . . . . 355ENDAUTO – Ending a dynamic display . . . . . . . . . . . . . . . . . . . . . . . . . . . . . . . . . . 357ENQ – Viewing the OS global resource serialization queue . . . . . . . . . . . . . . . . . . 358FILE – Viewing and changing the FCT . . . . . . . . . . . . . . . . . . . . . . . . . . . . . . . . . . 360HELP – Viewing help information . . . . . . . . . . . . . . . . . . . . . . . . . . . . . . . . . . . . . . . 361HOLD – Holding a job . . . . . . . . . . . . . . . . . . . . . . . . . . . . . . . . . . . . . . . . . . . . . . . 361IC – Viewing CICS interval control elements . . . . . . . . . . . . . . . . . . . . . . . . . . . . . . 362JOB – Viewing the status of a job . . . . . . . . . . . . . . . . . . . . . . . . . . . . . . . . . . . . . . 362JOECLN – Purging job output elements . . . . . . . . . . . . . . . . . . . . . . . . . . . . . . . . . 366L – Viewing a PDS source member . . . . . . . . . . . . . . . . . . . . . . . . . . . . . . . . . . . . . 366LC – Listing catalog entries . . . . . . . . . . . . . . . . . . . . . . . . . . . . . . . . . . . . . . . . . . . 367LD – Viewing a PDS directory . . . . . . . . . . . . . . . . . . . . . . . . . . . . . . . . . . . . . . . . . 367LICENSE – Updating the product license . . . . . . . . . . . . . . . . . . . . . . . . . . . . . . . . 367LIST – Viewing a PDS source member . . . . . . . . . . . . . . . . . . . . . . . . . . . . . . . . . . 368LISTC – Listing catalog entries . . . . . . . . . . . . . . . . . . . . . . . . . . . . . . . . . . . . . . . . 368LISTCAT – Listing catalog entries . . . . . . . . . . . . . . . . . . . . . . . . . . . . . . . . . . . . . . 368LISTD – Viewing a PDS directory . . . . . . . . . . . . . . . . . . . . . . . . . . . . . . . . . . . . . . 369LISTPDS – Viewing a PDS directory . . . . . . . . . . . . . . . . . . . . . . . . . . . . . . . . . . . . 369LISTVTOC – Viewing a Volume Table of Contents . . . . . . . . . . . . . . . . . . . . . . . . . 374LOCATE – Viewing the z/OS catalog entry for a data set . . . . . . . . . . . . . . . . . . . . 377LPAD – Viewing the z/OS link pack directory . . . . . . . . . . . . . . . . . . . . . . . . . . . . . . 377LV – Viewing a Volume Table of Contents . . . . . . . . . . . . . . . . . . . . . . . . . . . . . . . . 378
9

MENU – Signing on to the CPMS/SYSD menu-driven system . . . . . . . . . . . . . . . 378MLPAD – Viewing modified link pack directory . . . . . . . . . . . . . . . . . . . . . . . . . . . . 379N – Viewing all of the jobs in a queue . . . . . . . . . . . . . . . . . . . . . . . . . . . . . . . . . . . 379NONSWAP – Changing CICS swap status . . . . . . . . . . . . . . . . . . . . . . . . . . . . . . . 382OC – Issuing an operator command . . . . . . . . . . . . . . . . . . . . . . . . . . . . . . . . . . . . 382OKSWAP – Changing CICS swap status . . . . . . . . . . . . . . . . . . . . . . . . . . . . . . . . . 382OP – Printing a cataloged PDS member . . . . . . . . . . . . . . . . . . . . . . . . . . . . . . . . . 383OSCMD – Issuing a command to the OS or JES2 . . . . . . . . . . . . . . . . . . . . . . . . . . 383OSPRINT – Printing a cataloged PDS member . . . . . . . . . . . . . . . . . . . . . . . . . . . . 384PA – Adjusting a spool printer . . . . . . . . . . . . . . . . . . . . . . . . . . . . . . . . . . . . . . . . 384PC – Canceling a spool print data set . . . . . . . . . . . . . . . . . . . . . . . . . . . . . . . . . . 385PD – Viewing a spool printer status . . . . . . . . . . . . . . . . . . . . . . . . . . . . . . . . . . . . . 385PDSALIAS – Creating an alias for a PDS member . . . . . . . . . . . . . . . . . . . . . . . . . 386PDSCHG – Renaming a PDS member . . . . . . . . . . . . . . . . . . . . . . . . . . . . . . . . . . 386PDSDEL – Deleting a PDS member . . . . . . . . . . . . . . . . . . . . . . . . . . . . . . . . . . . . 387PDSDSPLY – Viewing a PDS source member . . . . . . . . . . . . . . . . . . . . . . . . . . . . 387PF – Replying to a forms change request . . . . . . . . . . . . . . . . . . . . . . . . . . . . . . . 388PH – Holding a spool printer . . . . . . . . . . . . . . . . . . . . . . . . . . . . . . . . . . . . . . . . . . 388PJ – Printing a job on a CICS printer . . . . . . . . . . . . . . . . . . . . . . . . . . . . . . . . . . . . 388PP – Purging a spool printer . . . . . . . . . . . . . . . . . . . . . . . . . . . . . . . . . . . . . . . . . . 388PROG – Viewing and changing programs . . . . . . . . . . . . . . . . . . . . . . . . . . . . . . . 389PRTADJ – Adjusting a spool printer . . . . . . . . . . . . . . . . . . . . . . . . . . . . . . . . . . . . 390PRTCNL – Canceling a spool print task . . . . . . . . . . . . . . . . . . . . . . . . . . . . . . . . 391PRTDSP – Viewing the status of a spool printer . . . . . . . . . . . . . . . . . . . . . . . . . . . 391PRTFRM – Replying to a forms change request . . . . . . . . . . . . . . . . . . . . . . . . . . 405PRTHLD – Holding a spool printer . . . . . . . . . . . . . . . . . . . . . . . . . . . . . . . . . . . . . 406PRTJOB – Printing a job on a CICS printer . . . . . . . . . . . . . . . . . . . . . . . . . . . . . . 406PRTJOE – Starting a spool JOE writer . . . . . . . . . . . . . . . . . . . . . . . . . . . . . . . . . . 408PRTPRG – Purging a spool printer . . . . . . . . . . . . . . . . . . . . . . . . . . . . . . . . . . . . . 409R – Viewing outstanding operator requests . . . . . . . . . . . . . . . . . . . . . . . . . . . . . . . 409RECALL – Recalling an archived data set . . . . . . . . . . . . . . . . . . . . . . . . . . . . . . . . 410RECATLG – Recataloging an OS data set . . . . . . . . . . . . . . . . . . . . . . . . . . . . . . . 410RELEASE – Releasing a held job . . . . . . . . . . . . . . . . . . . . . . . . . . . . . . . . . . . . . . 411RENAME – Renaming a data set . . . . . . . . . . . . . . . . . . . . . . . . . . . . . . . . . . . . . . . 411ROUTE – Routing the output for a job . . . . . . . . . . . . . . . . . . . . . . . . . . . . . . . . . . . 412SCRATCH – Scratching a data set . . . . . . . . . . . . . . . . . . . . . . . . . . . . . . . . . . . . . 412SD – Viewing the output for a job . . . . . . . . . . . . . . . . . . . . . . . . . . . . . . . . . . . . . . 412SHUT – Terminating CPMS/SYSD . . . . . . . . . . . . . . . . . . . . . . . . . . . . . . . . . . . . 413SJ – Viewing the output elements for a job . . . . . . . . . . . . . . . . . . . . . . . . . . . . . . . 413SN – Viewing the output dataset summary for a job . . . . . . . . . . . . . . . . . . . . . . . . 414SP – Purging the output for a job . . . . . . . . . . . . . . . . . . . . . . . . . . . . . . . . . . . . . . 414SPLCLN – Cleaning the spool print queue . . . . . . . . . . . . . . . . . . . . . . . . . . . . . . . 414SPLDSN – Viewing the output data set summary for a job . . . . . . . . . . . . . . . . . . . 415SPLDSP – Viewing the output for a job . . . . . . . . . . . . . . . . . . . . . . . . . . . . . . . . . . 418SPLJOE – Viewing the output elements for a job . . . . . . . . . . . . . . . . . . . . . . . . . . 420SPLPRG – Purging the output for a job . . . . . . . . . . . . . . . . . . . . . . . . . . . . . . . . . 422SPLPRT – Printing a job on a CICS printer . . . . . . . . . . . . . . . . . . . . . . . . . . . . . . . 422SPLRTE – Routing the output for a job . . . . . . . . . . . . . . . . . . . . . . . . . . . . . . . . . . 423SR – Routing the output for a job . . . . . . . . . . . . . . . . . . . . . . . . . . . . . . . . . . . . . . . 423STAT – Viewing CICS general statistics . . . . . . . . . . . . . . . . . . . . . . . . . . . . . . . . . 423STATUS – Viewing the status of a job . . . . . . . . . . . . . . . . . . . . . . . . . . . . . . . . . . 424STE – Viewing the status of a job . . . . . . . . . . . . . . . . . . . . . . . . . . . . . . . . . . . . . . 424
10 CPMS/SYSD Reference Manual ~ 7.2

STORAGE – Viewing CICS storage . . . . . . . . . . . . . . . . . . . . . . . . . . . . . . . . . . . . 428STPWTR – Stopping a spool JOE writer . . . . . . . . . . . . . . . . . . . . . . . . . . . . . . . . . 430STRWTR – Starting a spool JOE writer . . . . . . . . . . . . . . . . . . . . . . . . . . . . . . . . . 431SUBD – Submitting a job for execution using the DCT entry . . . . . . . . . . . . . . . . . 432SUBMIT – Submitting a job for execution . . . . . . . . . . . . . . . . . . . . . . . . . . . . . . . 432SUBMITD – Submitting a job for execution using the DCT entry . . . . . . . . . . . . . . 433SUBTD – Submitting a job from a transient data queue . . . . . . . . . . . . . . . . . . . . . 433SUBTS – Submitting a job from a temporary storage queue . . . . . . . . . . . . . . . . . 434SW – Starting a spool JOE writer . . . . . . . . . . . . . . . . . . . . . . . . . . . . . . . . . . . . . . 434SYSDTASK – Viewing the status of auxiliary tasks . . . . . . . . . . . . . . . . . . . . . . . . 435TERM – Viewing and changing terminals . . . . . . . . . . . . . . . . . . . . . . . . . . . . . . . 435TRAN – Viewing and changing transactions . . . . . . . . . . . . . . . . . . . . . . . . . . . . . 436TSQ – Viewing and purging temporary storage queues . . . . . . . . . . . . . . . . . . . . . 437TSQUEINQ – Viewing and purging temporary storage queues . . . . . . . . . . . . . . . 437U – Viewing all of the unit control blocks . . . . . . . . . . . . . . . . . . . . . . . . . . . . . . . . 439UNCATLG – Uncataloging an OS data set . . . . . . . . . . . . . . . . . . . . . . . . . . . . . . . 440VC – Issuing VM commands . . . . . . . . . . . . . . . . . . . . . . . . . . . . . . . . . . . . . . . . . . 440VERSION – Viewing the current CPMS/SYSD version . . . . . . . . . . . . . . . . . . . . . 440VMCMD – Issuing VM commands . . . . . . . . . . . . . . . . . . . . . . . . . . . . . . . . . . . . . 441VMRESET – Ending a dialed session . . . . . . . . . . . . . . . . . . . . . . . . . . . . . . . . . . 441VR – Ending a dialed session . . . . . . . . . . . . . . . . . . . . . . . . . . . . . . . . . . . . . . . . 441
Appendix A Using CPMS/SYSD commands . . . . . . . . . . . . . . . . . . . . . . . . . . . . . . 443CPMS/SYSD spool-display and print commands . . . . . . . . . . . . . . . . . . . . . . . . . . . . . 444SYSD DASD commands . . . . . . . . . . . . . . . . . . . . . . . . . . . . . . . . . . . . . . . . . . . . . . . 447CPMS/SYSD CICS management commands . . . . . . . . . . . . . . . . . . . . . . . . . . . . . . . 449CPMS/SYSD management commands . . . . . . . . . . . . . . . . . . . . . . . . . . . . . . . . . . . . 451
Appendix B Error messages . . . . . . . . . . . . . . . . . . . . . . . . . . . . . . . . . . . . . . . . . . 453Index . . . . . . . . . . . . . . . . . . . . . . . . . . . . . . . . . . . . . . . . . . . . . . . . . . . 493
11

12 CPMS/SYSD Reference Manual ~ 7.2

Conventions and optional resources
Conventions
This document uses the following conventions.
This kind of text Represents
ENTER • Keys or function keys you press. Examples: ENTER, PF3.
• Command names. Examples: FIND, FINDR.
Bold • BOLD UPPERCASE: Text you must type exactly as it appears.
• bold lowercase: Variable text you replace. For example, when you see ddname, type the appropriate DDNAME.
Italic • Field names.
• New terms.
• Emphasized text. Example: “The software finds the first occurrence of the letters a b c.”
[PARAMETER] An optional parameter in a command format.
PARM1|PARM2 An either/or situation in a command format. You can specify one parameter or the other, but not both.
PARM1|PARM2 An either/or situation in a command format, where the underlined parameter is the default.
… A parameter in a command format you can repeat.
13

Conventions and optional resources
Optional resources
See the following publications for additional information.
Publisher Title
H&W Computer Systems, Inc. CPMS/SYSD Installation Manual
CPMS/SYSD Administrator Guide
SYSD/JFT for CPMS/SYSD Reference Manual
IBM Access Method Services Reference
OS/SPL: Job Management Manual
IBM z/OS System Messages Manual
Computer Associates CA Panvalet System Management Manual
14 CPMS/SYSD Reference Manual ~ 7.2

Chapter 1
Introduction
CPMS®/SYSD® is comprised of two parts: a menu-driven system with an optional editor, and a function-driven system.
The menu-driven system incorporates the flexibility and freedom of the function-driven system in an easy-to-learn, easy-to-use structure. In the menu-driven system, the power of the function-driven system is tied to a menu logic that channels the power without reducing the flexibility. The menu-driven system links screens and functions in a stepped hierarchy. One screen provides options that you can use to access related screens. These screens, in turn, offer other sets of options. You can access each screen by descending the stairway one step at a time, and you can access preceding screens by ascending the stairway one step at a time.
This chapter contains information about:
• “CPMS/SYSD overview” on page 16
• “Signing on to CPMS/SYSD” on page 20
• “Using CPMS/SYSD as a menu-driven or function-driven system” on page 22
• “Moving around in the menu-driven system” on page 23
• “Understanding the general screen format” on page 26
• “Using universal commands” on page 27
• “Using the Primary Option menu” on page 30
15

Chapter 1 Introduction
CPMS/SYSD overview
The CPMS/SYSD menu-driven system, used in conjunction with the optional editor, is a complete package for submitting batch jobs, developing programs, and displaying and maintaining z/OS® and CICS®/TS.
The complete CPMS/SYSD product (menu-driven system, optional editor, and function-driven system) includes the following components:
• CICS Print Management System facilities
• Direct access storage device (DASD) and data-set management facilities
• Editor and browse facility similar to the IBM® Interactive System Productivity Facility (ISPF)
The following is the CPMS/SYSD Primary Option Menu, which displays all the primary options you can access.
16 CPMS/SYSD Reference Manual ~ 7.2

Chapter 1 Introduction
The second menu contains only the options for the CPMS menu-driven system.
Using CICS Print Management System
SYSD includes CICS spool display and CICS Print Management System (CPMS) that allow you to follow your work through the system from start to finish.
Use CPMS to do the following:
• View the status of active jobs to determine where your job stands.
• Get a special condition code summary to see if your job ran successfully.
• View a selection menu that lists print output that you can view.
• View a specific report.
• Search for character strings to see specific information.
• View the console log.
After viewing job output, use CPMS to do the following:
• Print all or part of the output on any CICS printer.
• Control CICS printers to handle form changes, restarts, repeats, and so on.
• Route the output to a standard JES2 printer, either local or remote.
• Purge the output.
Using CICS Print Management System 17

Chapter 1 Introduction
Understanding a typical CPMS session
Whether you use the menu-driven system or the function-driven system, a typical CPMS session follows the same flow:
• Submit a job using any batch or online facility. You can use CPMS to submit a job if the JCL for your job is in a partitioned or sequential data set.
• After you submit a job, you can use the CPMS menus or commands to track the job through the processing stages.
• You can use CPMS commands to hold, release, or cancel the job while it is being processed.
• After your job is executed, the output goes to the JES2 output spool where it stays until it is printed or deleted. You can view the output before printing it. View a summary of the data sets in a job or start the display with a specific data set.
• After viewing the job, you can purge the output from the system, print it on a CICS printer with the CPMS spool print facility, or route it to a local or remote operating system (OS) printer.
Printing job output on the CICS printer
CPMS includes a command that lets you route job output to a CICS printer. If the CICS printer is busy, CPMS queues the output and prints it when the printer becomes available. After a job starts printing, you can hold the print job, restart it, terminate printing completely, or skip the current data set and start printing the next data set.
The spool print command leaves printed jobs on the JES2 spool. You can print jobs as many times as you want or issue a command to delete them from the JES2 spool.
Printing job output on the JOE writer
The job output element (JOE) writer automatically prints job output on a CICS printer. After the JOE writer starts, it periodically scans the JES2 output queue for jobs that meet your criteria and then prints those jobs. You can issue commands to control printing while the print job is active. When the job is finished printing, the JOE writer purges the job from the JES2 spool. The JOE writer keeps scanning the queue until you issue the command to stop it or shut down either CPMS or CICS.
18 CPMS/SYSD Reference Manual ~ 7.2

Chapter 1 Introduction
Managing DASD data sets
SYSD makes it easy to manage z/OS DASD data sets. SYSD includes commands to list volume table of contents (VTOCs) and partitioned data sets (PDSs); find, scratch, and rename data sets; and more.
Editing and browsing data sets and members
The SYSD optional editor is an ISPF-like editor that lets you create and update source partitioned data set (PDS and PDSE) members and sequential data sets in real time under CICS. In addition, SYSD works with H&W’s optional SYSD/ATP® (Access to Panvalet®) interface, which lets you edit and browse CA Panvalet members.
The optional editor uses a unique work file concept that provides security and recovery. Use the optional editor to perform the following activities:
• Work on a member or data set without updating the original until you are ready.
• Create temporary work sessions where you can change and submit JCL without changing the base member.
• Edit existing partitioned or sequential data sets.
• Create new partitioned or sequential data sets.
• Cut and paste data from multiple data-set sources.
Managing DASD data sets 19

Chapter 1 Introduction
Signing on to CPMS/SYSD
You can enter the CPMS/SYSD menu-driven system in three ways. Each method shows a different screen in the system.
Using the CPMS/SYSD Signon screen to sign on
Enter your user ID and password on the Signon screen. For security reasons, the password is not shown when you type it on this screen.
To use the CPMS/SYSD Signon screen to sign on
1. On a clear CICS screen or at the bottom of any function-driven screen, type SYSD,MENU and then press ENTER.
2. In the User Identifier field, type your user ID.
3. Press TAB to go to the Password field, and then type your password.
4. Press ENTER. The Primary Option menu appears.
Note The paragraph indicating the product includes SYSD ATP only appears if you are licensed for SYSD/ATP.
20 CPMS/SYSD Reference Manual ~ 7.2

Chapter 1 Introduction
Bypassing the CPMS/SYSD Signon screen to sign on
CAUTION Your password appears on the screen when you type it as a parameter in the MENU command. To maintain a secure password, use the process described in “Using the CPMS/SYSD Signon screen to sign on” on page 20.
You can bypass the Signon screen and go directly to the Primary Option menu by including your user ID and password as positional parameters in the MENU command. The format of the MENU command is:
Signing on and going to a specific screen
CAUTION Your password appears on the screen when you type it as a parameter in the MENU command. To maintain a secure password, use the process described in “Using the CPMS/SYSD Signon screen to sign on” on page 20.
You can sign on and go directly to a specific screen. To do so, include the address for the screen as the last positional parameter in the MENU command. The format of the MENU command is:
SYSD,MENU,user_id,password
SYSD,MENU,user_id,password,address
Bypassing the CPMS/SYSD Signon screen to sign on 21

Chapter 1 Introduction
Using CPMS/SYSD as a menu-driven or function-driven system
You can use CPMS/SYSD as a menu-driven system or as a function-driven system. In the menu-driven system, you type commands in the Input field or type options in an O (Option) column. See the following for more information about using the menu-driven system:
• “Introduction” on page 15
• “Option 0: Setting CPMS/SYSD parameters” on page 33
• “Option 1: Browsing source data” on page 55
• “Option 2: Editing source data” on page 85
• “Option 3: Performing utility functions” on page 215
• “Option 4: Displaying active jobs” on page 257
• “Option 5: Following a job through the system” on page 263
• “Option 6: Viewing output data sets” on page 285
• “Option 7: Controlling the printer” on page 303
• “Option C: Executing CICS transactions” on page 319
• “Option T: Tutorial and online help” on page 323
• “Option U: Maintaining the user file” on page 329
In the CPMS/SYSD function-driven system, you can type functional commands at the top of a blank CICS screen or at the bottom of a formatted screen. See “Using CPMS/SYSD functional commands” on page 331 for a description of the functional commands available with CPMS/SYSD. See “Using CPMS/SYSD commands” on page 443 for a list of the commands, grouped according to function.
22 CPMS/SYSD Reference Manual ~ 7.2

Chapter 1 Introduction
Moving around in the menu-driven system
Visualize each screen in CPMS/SYSD as a landing in a series of stairways. One passage leads you up to the previous screen. Any number of passages, in the form of options, lead you down to other screens in the system.
The Primary Option menu is the main landing in the stairway. From the Primary Option menu, you can descend the appropriate stairway to access any screen in CPMS/SYSD. Selecting an option from the Primary Option menu takes you one step down that particular stairway. For example, to go one step down the stairway called Parameters, type 0 in the Input field, and then press ENTER. The Parameter Options screen appears. To go another step down the stairway, type 0 in the Input field, and then press ENTER. The General Parameter Definitions screen appears. Repeat this process to descend a stairway until you reach the screen you want to view. To return to the Primary Option menu one step at a time, repeatedly press END until you reach the Primary Option menu.
Going directly to a specific screen
After you are familiar with the system, you may find it more convenient to move directly from one screen to another screen. CPMS/SYSD provides several ways of moving quickly between screens:
• To return to the Primary Option menu from anywhere in the system, press RETURN.
• To view a specific screen, type the address for the screen in any input field following an equal sign on any screen (for example, =3.4), and then press ENTER.
There are no spaces in the screen address and the equal sign (=) must be in position 1 of the input field.
The address for a screen is made up of the options, commands, or both in descending order and separated by periods, that you would issue to access the screen from the Primary Option menu.
The address may be typed into any input field on the screen using the =a.b.c format. If you use this format in the Input field, then enter it as a normal command.
Moving around in the menu-driven system 23

Chapter 1 Introduction
Special rules when using =a.b.c in any other input field
• The command stops processing when a blank is encountered. This functionality enables you to enter the command followed by a blank in a field that already contains data. The field will not be saved and the original contents of the field will be restored the next time you enter the menu.
• If the command accepts parameters, such as =C cmd you may use the underscore (_) to represent blanks. You must still place a blank at the end of the command. Example: =C_cmd
• While in the editor, the =a.b.c address is only accepted in the Input field.
The following example, starting at the Primary Option menu, shows how the components of the direct screen-flow address for the Program Function Key Definition screen are derived.
24 CPMS/SYSD Reference Manual ~ 7.2

Chapter 1 Introduction
To view the Parameter Options screen from the Primary Option menu, type 0 in the Input field, and then press ENTER. The CPMS/SYSD Parameter Options screen appears.
To display the Program Function Key Definition screen from the Parameter Options screen, type 2 in the Input field, and then press ENTER.
To view the Program Function Key Definition screen using direct screen flow, type 0.2 in the Input field on any screen, and then press RETURN.
To view the Program Function Key Definition screen using the commands instead of the options, type PARMS.PF in the Input field, and then press RETURN. If your terminal does not have PF keys, you can type an equal sign (=) in front of the address, and then press ENTER. For this example, type =0.2 or =PARMS.PF in the Input field on any screen, and then press ENTER.
Going directly to a specific screen 25

Chapter 1 Introduction
Understanding the general screen format
CPMS/SYSD includes the following types of screens:
• Menu screens provide options that lead to other logical levels in the system. You cannot perform any data manipulation operations on menu screens.
• Read-only screens provide source or summary data for browsing. You cannot update data on read-only screens. On some read-only screens, you can issue scrolling commands such as TOP, BOTTOM, UP, and DOWN and primary commands such as FIND.
• Read-update screens display source and summary data and let you manipulate the data. These screens accept all of the commands available on read-only screens plus a full set of data-manipulation commands.
Each screen in the menu-driven system includes the following items:
• The title of the screen, centered on the first line.
• A field on the right side of the first line that tells you which menu partition you are in and how many active partitions you have. For example, (3/5) means you are in the third of five partitions. You can create up to eight active partitions. If (5/3) is showing, you are in partition five of three active partitions. This shows that two of the partitions have been deleted.
• The Input field, located on the left side of the second line, where you type commands.
• The Scroll field, located on the right side of the second line, where you specify the type of scrolling performed.
• System and error messages on the third line.
Type To scroll
CSR Based on the cursor position. When you press DOWN, the line the cursor is positioned on moves to the first line on the screen. When you press UP, the line the cursor is positioned on moves to the last line on the screen.
FULL|PAGE A full screen at a time.
HALF A half a screen at a time.
26 CPMS/SYSD Reference Manual ~ 7.2

Chapter 1 Introduction
Using universal commands
CPMS/SYSD provides several commands that perform the same function on every screen.
CLEAR
The CLEAR command terminates the menu-driven system and returns to CICS. The CLEAR command cannot be typed in the Input field; it must be assigned to a PF key.
DOWN [nn]
The DOWN command scrolls down by the number (nn) of lines that you type in the Input field or by the value specified in the Scroll field. If you type a number of lines in the Input field, that number takes priority over the value specified in the Scroll field.
The DOWN command works only on read-only and read-update screens with more than one page of data.
END
The END command takes you to the next-highest logical level in the menu-driven system.
ENTER
Press ENTER to submit the command or option to the mainframe.
HELP
Use the HELP command to view the online help for the screen.
RECALL
CPMS/SYSD saves the commands you issue in a special command buffer. Use the RECALL command to view the commands in this buffer, starting with the most recent command that you issued. This lets you keep track of what you have been doing in the system and go back and issue a command again.
Using universal commands 27

Chapter 1 Introduction
REPEAT
The REPEAT command repeats the most recent command that you issued.
RETURN
The RETURN command takes you to the Primary Option menu.
SET
The SET command temporarily sets a variable to a new value. The variables you can change correspond to the fields on the JES/List Parameter Definitions screen (Option 0.1) and the Program Function Key Definition screen (Option 0.2).
The format of the SET command is:
For example, type SET PREFIX SY to change the job selection criteria to show only jobs that start with the characters SY.
Variable settings are in effect only during the current menu flow. To reset the variables to their original state, press RETURN or issue the SET command without specifying any parameters.
If values for the CLASS, DESTID, or PREFIX fields are set, then CPMS/SYSD sets the corresponding selection parameter to Y. For example, type SET PREFIX ABC to set the PREFIX field to ABC and the value for the PREFSEL field to Y.
SPLIT
The SPLIT command creates and then CPMS/SYSD displays a new CPMS/SYSD partition. You can create up to eight active partitions. To delete a partition and view the previous partition (if any are active), on the Primary Option menu type X in the Input field of the partition that you want to delete.
SET [CLASS A-Z,0-9|*] [CLASSEL Y|N] [CLEAR command] [DESTID remote|unit_queue] [DESTSEL Y|N] [DSPSTCS Y|N|*] [JOBCRD1,2,3,4 job_info] [PREFSEL Y|N] [PREFIX job_name] [PA1,2,3 command] [PF1-24 or PF01-24 command] [PRINTER printer] [SYSINOK Y|N]
28 CPMS/SYSD Reference Manual ~ 7.2

Chapter 1 Introduction
SWAP [p]
The SWAP command takes you from the current partition to the previous partition. For example, if you are in partition 3 and issue the SWAP command, CPMS/SYSD takes you to partition 2.
You may SWAP to a specific partition by typing the partition number (the first number displayed in the top-right corner) in the Input field and pressing PF9 or typing the partition number after the SWAP command. If you type the partition number after the SWAP command, it must be separated by a single blank space. The first character entered is the only character used to determine the partition number.
You may type SWAP ? to display a menu of partitions. From this menu, you can swap to any partition you want by typing the partition number in the Input field and pressing PF9.
UP [nn]
The UP command scrolls up by the number (nn) of lines that you type in the Input field or by the value specified in the Scroll field. If you type a number of lines in the Input field, that number takes priority over the value specified in the Scroll field.
The UP command works only on read-only and read-update screens with more than one page of data.
SWAP [p] 29

Chapter 1 Introduction
Using the Primary Option menu
The Primary Option menu is the main CPMS/SYSD menu. This screen acts as the primary landing in the stepped hierarchy. You can access all other screens and functions from the Primary Option menu.
Option definitions
To navigate through the menu-driven system, type the single-character option that you want in the Input field, and then press ENTER.
0 – PARMS
The 0 – PARMS option displays the Parameter Options menu. Use the Parameter Options menu to access the parameter screens and functions.
1 – BROWSE
The 1 – BROWSE option allows you to browse the source data that you are authorized to access.
2 – EDIT
The 2 – EDIT option opens the optional editor that you can use to create or update source data.
30 CPMS/SYSD Reference Manual ~ 7.2

Chapter 1 Introduction
3 – UTIL
The 3 – UTIL option displays the Utility Selection screen from which you can perform operations related to the library, data sets, catalogs, VTOC, and unit devices.
4 – ACTIVE
The 4 – ACTIVE option displays the address spaces in z/OS.
5 – N
The 5 – N option displays the jobs that are in the input and output queues.
6 – O
The 6 – O option displays the jobs that are in the output queues.
7 – PRINTER
Use the 7 – PRINTER option to review and change CICS printer assignments or display and control JES2 printers.
8 – JFT
The 8 – JFT option executes previously defined Job and File Tailoring (JFT) panels. You can use these user-developed panels to submit jobs and update files.
C – CICS
The C – CICS option closes the CPMS/SYSD menu-driven system and a clear CICS screen appears, but does not terminate your CPMS/SYSD session. You can execute native CICS transactions and return to your CPMS/SYSD session where you left it.
To return to the Primary Option menu in the partition that you were in when you exited, type SYSD on the CICS screen, and then press ENTER.
If you have an available partition, you can also create a new partition and view the CICS screen. To do so, type C in the Input field on any screen, and then press SPLIT. To return to the original screen, go back to the menu-driven system, and then press END.
T – TUTORIAL
The T – TUTORIAL option displays a tutorial on how to use the CPMS/SYSD online help. You can access other topics in the help system from the tutorial.
Using the Primary Option menu 31

Chapter 1 Introduction
U – USER
Authorized users can utilize the U – USER option to add, update, delete, and review the CPMS/SYSD user file.
X – END
The X – END option terminates the CPMS/SYSD menu-driven system and returns to a clear CICS screen.
32 CPMS/SYSD Reference Manual ~ 7.2

Chapter 2
Option 0: Setting CPMS/SYSD parameters
The CPMS/SYSD menu-driven system uses profile variables, or parameters, that let you tailor the way the system works for you without affecting other users. After you have set a profile variable, that setting is tied to your user profile. Whenever you sign on to the menu-driven system, CPMS/SYSD pulls the preset variables from your user profile and applies them throughout the system.
This chapter contains information about:
Screen Address
• Parameter Options screen on page 34 0
• General Parameter Definitions screen on page 36 0.0
• JES/List Parameter Definitions screen on page 38 0.1
• Program Function Key Definition screen on page 42
0.2
• Job/File Tailoring Parameters screen on page 46 0.3
• GET/PUT TS Queue Identifiers screen on page 48 0.4
• Utility Parameters screen on page 50 0.5
• Edit Parameters screen on page 52 0.6
33

Chapter 2 Option 0: Setting CPMS/SYSD parameters
Parameter Options screen
The Parameter Options screen (Option 0) displays a list of options you can use to access the screens from which you set various profile variables.
To access the Parameter Options screen
Access the Parameter Options screen in one of these ways.
• On the Primary Option menu, type 0 in the Input field, and then press ENTER.
• On any screen, type 0 in the Input field, and then press RETURN.
Primary command definitions
To issue a primary command, type a primary command in the Input field, and then press ENTER.
SETID
You must have master control authority in order to use this command.
Use the SETID primary command to alter another person’s user profile. The format of the SETID command is:
SETID user_id
34 CPMS/SYSD Reference Manual ~ 7.2

Chapter 2 Option 0: Setting CPMS/SYSD parameters
The User field contains the user ID that you specified using the SETID command.
To reset the user ID to the logged on user, leave the Parameter Options screen or issue the SETID command again using the following format:
Option definitions
To use an option, type the single-character option in the Input field, and then press ENTER.
0 – GENERAL
Use the 0 – GENERAL option to manage your user profile. Your user profile includes your password, name, title, department, and mailing address.
1 – LIST
Use the 1 – LIST option to set and change JES2 parameters. JES2 parameters include your default CICS printer ID, job display criteria, and default JOB card information.
2 – PF
Use the 2 – PF option to manage or specify your PF key assignments.
3 – JFTPANEL
Use the 3 – JFTPANEL option to specify the default JFT panel that appears when you access the JFT option. You can also use this option to define dynamically JFT-panel, skeleton, and message data sets.
4 – QUEUEIDs
Use the 4 – QUEUEIDs option to specify the default temporary storage queue name and CICS system ID name that are used when you issue a PUT, GET, or DELQ command.
5 – UTILPRMs
Use the 5 – UTILPRMs option to specify the JOB card and default parameters for the batch print jobs you submit from the Library Utilities menu (Option 3.1 on the Primary Option menu).
6 – EDIT
Use the 6 – EDIT option to set the Edit Profile parameters.
SETID *
Parameter Options screen 35

Chapter 2 Option 0: Setting CPMS/SYSD parameters
General Parameter Definitions screen
The General Parameter Definitions screen (Option 0.0) appears with your user profile information. This information includes your password, name, title, department, and mailing address. Use this screen to manage your profile information. CPMS/SYSD uses the information in this file throughout the system.
To access the General Parameter Definitions screen
Access the General Parameter Definitions screen in one of these ways.
• On the Parameter Options menu, type 0 in the Input field, and then press ENTER.
• On any screen, type 0.0 in the Input field, and then press RETURN.
Field definitions
Field definitions are listed here in the order that they appear on the screen.
Password
The Password field specifies your password. You can change this field. You should change your password regularly to maintain security.
Note Depending on how your CPMS/SYSD administrator set up CPMS/SYSD, you might not need a password.
36 CPMS/SYSD Reference Manual ~ 7.2

Chapter 2 Option 0: Setting CPMS/SYSD parameters
Name
The Name field contains the name you type.
Verify Pswd
Type the same password in the Verify Pswd field that you entered in the Password field, if you are changing your password.
Title
The Title field contains the job title you type.
Department
The Department field contains the department name you type.
Show Tips
The Show Tips field determines whether tips appear on the main menu. The options are Y or N. You will always receive messages from the CPMS/SYSD administrator, even if you set this to N.
Tips will not appear if your CPMS/SYSD administrator disabled the Show Tips feature. In addition, your CPMS/SYSD administrator determines which tips appear on the screen when the Show Tips field is set to Y.
Address
The Address field consists of up to four lines and contains the mailing address you type.
General Parameter Definitions screen 37

Chapter 2 Option 0: Setting CPMS/SYSD parameters
JES/List Parameter Definitions screen
Use the JES/List Parameter Definitions screen (Option 0.1) to set the following job-related profile variables:
• The default CICS printer on which you print from the JES2 Job Queue Display screen (Option 5) and the JES2 Job Output Display screen (Option 6).
• The job-selection criteria that affect what appears on the JES2 Job Queue Display screen (Option 5) and the JES2 Job Output Display screen (Option 6).
• The default JOB card that CPMS/SYSD automatically puts in each batch job you run. If you specify a different JOB card in the batch job itself, that JOB card overrides the default JOB card defined on the JES/List Parameter Definitions screen (Option 0.1).
To access the JES/List Parameter Definitions screen
Access the General Parameter Definitions screen in one of these ways.
• On the Parameter Options menu, type 1 in the Input field, and then press ENTER.
• On any screen, type 0.1 in the Input field, and then press RETURN.
Field definitions
Field definitions are listed here in the order that they appear on the screen.
Printer Identifier
The Printer Identifier field specifies the CPMS/SYSD printer that receives P=Print job output. This printer is used when you print from the JES2 Job Queue Display (Option 5), the JES2 Job Dataset Display (Option 5), or the JES2 Job Output Display (Option 6).
38 CPMS/SYSD Reference Manual ~ 7.2

Chapter 2 Option 0: Setting CPMS/SYSD parameters
Printer Display Screen
The Printer Display Screen field specifies which type of printers CPMS/SYSD shows on the Printer Table Display/Change screen (Option 7).
Job Prefix
The Job Prefix field allows you to limit the jobs shown on the JES2 Display Active Jobs (Option 4), JES2 Job Queue Display (Option 5), and the JES2 Job Output Display (Option 6) to only those jobs that start with the specified prefix. For example, type ABC in the Job Prefix field to view only the jobs that start with the characters ABC. Normally, this prefix would be your user ID.
To exclude a column from the job prefix, type a plus sign (+) in that column. For example, type A+C to view all of the jobs that have an A as the first character, any character in the second position, and C as the third character.
The Use field next to the Job Prefix field turns on or off the Job Prefix parameter for the job queue screens (=5 and =6). Set the Use field to Y to see only jobs that have the prefix entered in the Job Prefix field. Set the Use field to N to see all jobs.
The Act field next to the Job Prefix field turns on or off the job prefix parameter for the active display screen (=4).
Note If the Use or Act field is set to N, you can still use the PREFIX command on the Job Active screen (Option 4), JES2 Job Queue Display screen (Option 5), and the JES2 Job Output Display screen (Option 6) to limit the display.
Class
The Class field allows you to limit the jobs that CPMS/SYSD shows on the JES2 Job Output Display (Option 6) to a specific SYSOUT class. The default value for this field is A.
The Use field turns on or off the selection by class criteria. If you set the Use field to Y, CPMS/SYSD displays only jobs with the SYSOUT class specified in the Class field. If you set the Use field to N, CPMS/SYSD displays all classes.
Destination
Use the Destination field to filter the jobs that CPMS/SYSD shows on the JES2 Job Queue Display (Option 5) and the JES2 Job Output Display (Option 6) for a specific destination. You can specify a JES2 queue, terminal, or other routing code.
Type To view
C CPMS/SYSD printers
J JES2 printers
JES/List Parameter Definitions screen 39

Chapter 2 Option 0: Setting CPMS/SYSD parameters
The Use field turns on or off the selection by destination criteria. If you set this field to Y, CPMS/SYSD displays only jobs with the destination specified in the Destination field. If you set this field to N, CPMS/SYSD displays all destinations.
SYSIN
Use the SYSIN field to specify whether SYSIN data sets appear when data sets within a job appear. The options are Y or N.
Note Data set number one (original JCL) is treated like a SYSIN data set.
Deleted
Use the Deleted field to specify whether deleted data sets appear in the data set display. The options are Y or N.
Note IBM uses the same flag to indicate if a data set is non-printable and deleted. Data set number one (original JCL) has this flag always set. CPMS will never show this data set as a deleted data set.
TSO/STC
The TSO/STC field specifies what CPMS/SYSD shows on the JES2 Display Active Jobs screen (Option 4) and JES2 Job Queue Display (Option 5).
Sequence
The Sequence field specifies the order in which jobs appear on the JES2 Job Queue Display (Option 5).
Job Statement Information
Use the Job Statement Information field to specify up to four job statements to insert when you submit a job if the first statement is not a JOB statement.
Type To view
* All active jobs and tasks, including master tasks and initiators.
N Only batch jobs. This is the default.
Y All active time sharing option (TSO) sessions, started tasks, and batch jobs.
Type To view
A The jobs in ascending order.
D The jobs in descending order.
40 CPMS/SYSD Reference Manual ~ 7.2

Chapter 2 Option 0: Setting CPMS/SYSD parameters
Behavior
The Behavior field indicates how SYSD scrolls backward through data sets when in the data set spool display. When SYSD scrolls backward to a data set that has not been viewed during this jobs preview, it must read the entire file to find the end result of the data set. This process may take some time.
If a data set has been previously viewed, a message is never displayed. The display of the data set will most likely be fast since SYSD has enough information to go directly to the end of the file.
Set this value to one of the following values:.
Note In all cases your keyboard will be locked until SYSD displays the data set.
View
The view field will only show if your SYSD administrator allows you to view the job list using the old or new screen format.
This field indicates which view you will use when you view a job list (=5) screen.
Set this value to one of the following values:.
Value To view
0 The previous data set at the top of file (TOF). This process is fast and never displays any type of wait message.
1 The previous data set at the end of file (EOF). Depending on the size of the data set, this process may take several seconds. No message is displayed indicating what SYSD is doing.
n The previous data at the end of file (EOF). If the data set has n or more records, then the following message is displayed:SYSD is advancing to the bottom of the file, please wait
Value To view
O Use the old format for the job list.
N Use the new format for the job list.
JES/List Parameter Definitions screen 41

Chapter 2 Option 0: Setting CPMS/SYSD parameters
Program Function Key Definition screen
Use the Program Function Key Definition screen (Option 0.2) to review and change the commands assigned to your program function (PF) keys. H&W ships CPMS/SYSD with preassigned values for PF1 through PF24.
To access the Program Function Key Definition screen
Access the Program Function Key Definition screen in one of these ways.
• On the Parameter Options menu, type 2 in the Input field, and then press ENTER.
• On any screen, type 0.2 in the Input field, and then press RETURN.
Default PF key assignments
Default PF key assignments are listed here in alphanumeric order.
CLEAR (CLEAR)
The CLEAR PF key ends the CPMS/SYSD session and returns you to a clear CICS screen.
PA1 (NOP)
The PA1 key is nonoperational.
42 CPMS/SYSD Reference Manual ~ 7.2

Chapter 2 Option 0: Setting CPMS/SYSD parameters
PA2 (NOP)
The PA2 key is nonoperational.
PA3 (NOP)
The PA3 key is nonoperational.
PF1 (HELP)
The PF1 key displays the online help for the screen that you are viewing.
PF2 (SPLIT)
The PF2 key creates a new partition and then CPMS/SYSD displays the Primary Option menu in the new partition. You can create up to eight full-screen partitions. This is similar to the split screen concept in ISPF, except that each partition fills the entire screen.
You can visualize menu partitions as a set of window panes. The field on the right side of the first line of the screen tells you which partition you are viewing and how many partitions are active. For example, (1/5) means that you are viewing partition one of five active partitions.
PF3 (END)
The PF3 key returns you to the previous screen or the next-highest logical level in the menu-driven system.
PF4 (FINDP)
The PF4 key finds the previous FIND search string.
PF5 (FIND)
The PF5 key issues a search command.
PF6 (CHANGE)
The PF6 key issues a search-and-replace command.
PF7 (UP)
The PF7 key scrolls up through a list of data.
PF8 (DOWN)
The PF8 key scrolls down through a list of data.
Program Function Key Definition screen 43

Chapter 2 Option 0: Setting CPMS/SYSD parameters
PF9 (SWAP)
The PF9 key swaps from one partition to another. See “PF2 (SPLIT)” on page 43 for information about creating new partitions.
PF10 (LEFT)
The PF10 key moves to the left across the data.
PF11 (RIGHT)
The PF11 key moves to the right across the data.
PF12 (RETURN)
The PF12 key returns you to the Primary Option menu.
PF13 through PF24
The PF 13 through PF24 keys are assigned the same commands as PF1 through PF12.
Changing PF key assignments
You can change which command is assigned to a PF key.
To change a PF key assignment
1. Press TAB repeatedly until you reach the field to the right of the PF key that you want to change.
2. Type the new command and then delete any remaining characters.
3. Press ENTER.
44 CPMS/SYSD Reference Manual ~ 7.2

Chapter 2 Option 0: Setting CPMS/SYSD parameters
Disabling a PF key
You can disable a PF key so that it becomes nonoperational.
To disable a PF key
1. Press TAB repeatedly until you reach the field to the right of the PF key that you want to disable.
2. Type NOP and then delete any remaining characters.
3. Press ENTER.
Returning a PF key to its default
You can return a PF key assignment you have changed to its default assignment.
To return a PF key to its default
1. Press TAB repeatedly until you reach the field to the right of the PF key that you want to change.
2. Press ERASE EOF to delete the characters in the field.
3. Press ENTER.
Disabling a PF key 45

Chapter 2 Option 0: Setting CPMS/SYSD parameters
Job/File Tailoring Parameters screen
Use the Job/File Tailoring Parameters screen (Option 0.3) to specify the panels that CPMS/SYSD executes by default when you invoke JFT.
To access the Job/File Tailoring Parameters screen
Access the Job/File Tailoring Parameters screen in one of these ways.
• On the Parameter Options menu, type 3 in the Input field, and then press ENTER.
• On any screen, type 0.3 in the Input field, and then press RETURN.
Field definitions
Field definitions are listed here in the order that they appear on the screen.
Default Panel Name
The Default Panel Name field specifies the name of the panel that appears when you invoke JFT. The default panel name is SYSDO8.
Default JES Panel Name
The Default JES Panel Name field specifies the name of the JFT panel that appears when you invoke JFT on the JES2 Job Queue Display screen (Option 5) or the JES2 Job Output Display screen (Option 6).
46 CPMS/SYSD Reference Manual ~ 7.2

Chapter 2 Option 0: Setting CPMS/SYSD parameters
Execute Any Panel
The Execute Any Panel field specifies whether you can issue the EXEC panel_name primary command to access other panels. If this field is set to N or is left blank, a security violation occurs when you try to access another panel.
Panel Libraries
The Panel Libraries field specifies up to five data set names that JFT uses to process panels. JFT searches these data sets based on the data set concatenation that was defined when JFT was installed. Most likely, the data set concatenation is set up so that JFT searches the first data set listed, then the second, and so on. The Panel Libraries field is optional and does not have to be specified in order to use JFT.
Skeleton Libraries
The Skeleton Libraries field specifies up to five data set names that JFT uses to process skeletons. JFT searches these data sets based on the data set concatenation that was defined when JFT was installed. Most likely, the data set concatenation is set up so that JFT searches the first data set listed, then the second, and so on. The Skeleton Libraries field is optional and does not have to be specified in order to use JFT.
Message Libraries
The Message Libraries field specifies up to five data set names that JFT uses to process messages. JFT searches these data sets based on the data set concatenation that was defined when JFT was installed. Most likely, the data set concatenation is set up so that JFT searches the first data set listed, then the second, and so on. The Message Libraries field is optional and does not have to be specified in order to use JFT.
Job/File Tailoring Parameters screen 47

Chapter 2 Option 0: Setting CPMS/SYSD parameters
GET/PUT TS Queue Identifiers screen
Use the GET/PUT TS Queue Identifiers screen (Option 0.4) to define the default temporary storage queue name and the CICS system ID. CPMS/SYSD uses these values when you issue a GET, PUT, or DELQ primary command.
To access the GET/PUT TS Queue Identifiers screen
Access the GET/PUT TS Queue Identifiers screen in one of these ways.
• On the Parameter Options menu, type 4 in the Input field, and then press ENTER.
• On any screen, type 0.4 in the Input field, and then press RETURN.
Field definitions
Field definitions are listed here in the order that they appear on the screen.
GET/PUT TS Queue Name
The GET/PUT TS Queue Name field specifies the temporary storage queue that CPMS/SYSD uses when you issue a GET, PUT, or DELQ command. If this field is set to a single asterisk (*), CPMS/SYSD uses the default temporary storage queue called CFTRterminal _id, where terminal_id is the ID of the terminal you are signed on to; such as CFTRG031. If the GET/PUT TS Queue Name field is set to characters followed by four asterisks in a row (****), CPMS/SYSD uses the terminal ID in place of the asterisks. For example, ABC**** means that CPMS/SYSD uses a temporary storage queue called ABCG031.
48 CPMS/SYSD Reference Manual ~ 7.2

Chapter 2 Option 0: Setting CPMS/SYSD parameters
CICS Region SYSID
The CICS Region SYSID field specifies the system ID of the CICS region where CPMS/SYSD reads from or writes to the temporary storage queue. If this field is set to an asterisk (*), CPMS/SYSD reads from and writes to the temporary storage queue located in the current CICS region.
Queue and SYSID Command Override Retention
The Queue and SYSID Command Override Retention field specifies how long a temporary storage queue name or CICS system ID that you specify in a GET, PUT, or DELQ command overrides the temporary storage queue name or CICS system ID that you specify in this screen.
Type To
0 Override the temporary storage queue name or CICS system ID specified on this screen only for the current command. If you do not specify an override in the next command, CPMS/SYSD uses the values specified on this screen for the temporary storage queue name and CICS system ID.
1 Override the temporary storage queue name or CICS system ID specified on this screen until you exit CPMS/SYSD or end the current spool display, browse, or edit session.
2 Permanently override the temporary queue name or CICS system ID specified on this screen and keep it as the default until you change it.
GET/PUT TS Queue Identifiers screen 49

Chapter 2 Option 0: Setting CPMS/SYSD parameters
Utility Parameters screen
Use the Utility Parameters screen (Option 0.5) to do the following activities:
• Define the default lines per page.
• Define the SYSOUT class.
• Define the job card information that CPMS/SYSD uses when you submit a batch job to print a data set from the Library Utilities menu (Option 3.1).
The fields on this screen also define the default high-level qualifier that CPMS/SYSD uses for the Listcat Utility (Option 3.4).
To access the Utility Parameters screen
Access the Utility Parameters screen in one of these ways.
• On the Parameter Options menu, type 5 in the Input field, and then press ENTER.
• On any screen, type 0.5 in the Input field, and then press RETURN.
Field definitions
Field definitions are listed here in the order that they appear on the screen.
50 CPMS/SYSD Reference Manual ~ 7.2

Chapter 2 Option 0: Setting CPMS/SYSD parameters
Lines Per Page
The Lines Per Page field specifies the number of output lines per page that CPMS/SYSD uses for the batch print jobs you submit from the Library Utilities menu (Option 3.1).
Sysout Class
The Sysout Class field specifies the output class to which CPMS/SYSD writes the batch reports that you submit from the Library Utilities menu (Option 3.1).
Jobcard Information
The Jobcard Information field specifies the job-card information that CPMS/SYSD attaches to the front of the batch print job that you submit from the Library Utilities menu (Option 3.1).
Index
The Index field specifies the high-level qualifier that CPMS/SYSD uses on the Listcat Utility screen (Option 3.4). If you leave this field blank, CPMS/SYSD uses your CPMS/SYSD user ID by default.
To restore the last index you used, type ? in the Index field.
Sel
The Sel field defines how the S=Select option behaves on the Listcat Utility screen (Option 3.4).
Type To
I View the VTOC information for a data set you select on the Listcat Utility screen (Option 3.4). This is the default value.
E Go directly to the Edit - Dataset menu when you select a data set on the Listcat Utility screen (Option 3.4).
B Go directly to the Browse - Dataset menu when you select a data set on the Listcat Utility screen (Option 3.4).
Utility Parameters screen 51

Chapter 2 Option 0: Setting CPMS/SYSD parameters
Edit Parameters screen
Use the Edit Parameters screen (Option 0.6) to define the profiles that are available for use on the edit display. Specify a profile for the Profile Name field on the Edit - Dataset menu or as a parameter for the PROFILE command used during an edit session.
If you use CPMS/SYSD on more than one terminal, you must sign off of CPMS/SYSD and then sign on again on each of the other terminals to activate the changes made on the Edit Parameters screen (Option 0.6).
To access the Edit Parameters screen
Access the Edit Parameters screen in one of these ways.
• On the Parameter Options menu, type 6 in the Input field, and then press ENTER.
• On any screen, type 0.6 in the Input field, and then press RETURN.
52 CPMS/SYSD Reference Manual ~ 7.2

Chapter 2 Option 0: Setting CPMS/SYSD parameters
Field definitions
Field definitions are listed here in the order that they appear on the screen.
MOD5
Indicates if the editor supports a MOD5 terminal. Valid entries are ON or OFF. This parameter may also be changed using the MOD5 editor command. See “MOD5” on page 150 for complete details on the use of this option.
Edit Profile Settings
Use the Edit Profile Settings field to configure the profiles used during edit sessions.
• Separate the profile settings specified in this field with semicolons.
• If a semicolon is required for a command parameter, enclose the setting in single quotation marks.
• There are 80 bytes available in each of the two lines under the profile name (160 bytes total) to enter profile settings.
This setting Controls
CAPS ON|OFF Whether or not alpha characters will be changed to uppercase.
COLS ON|ON n|OFF Whether or not the column guides appear. The n represents the data line where the column guide appears.
FLINE n Setting the find search line to n, where n=1 to 15.
LINEND ON character|OFF
Setting the command stack character.
NULLS ON|OFF Whether or not to replace trailing blanks with nulls.
NUM ON|OFF COB|STD
Whether sequence numbering is on or off; and whether COB format fields, STD format fields, or both are wanted. COB uses columns 1 to 6; STD uses columns 73 to 80 for fixed records or columns 1 to 8 for variable records.
RECOVERY ON|OFF Whether recovery is turned on or off.
STATS ON|OFF Whether statistics are turned on or off for the member.
TABS ON character columns|OFF
Whether logical tabbing is turned on or off and lets you specify the tab character. You can assign from 1 to 15 tab columns.
TRANCHR h1 h2 Whether or not the hex character h1 is translated to h2 during the edit session.
Edit Parameters screen 53

Chapter 2 Option 0: Setting CPMS/SYSD parameters
You can also enter the Edit Profile settings as commands on the Edit screen. See “Issuing primary commands in the edit session” on page 112 for information about using the Edit Profile settings as primary commands.
To restore the Edit Profile Settings field to the default settings, press ERASE EOF, and then press ENTER.
Default
The Default field specifies the default profile that CPMS/SYSD uses if a profile is not specified on the Edit -Dataset menu, or if a member is selected on the Edit - Member Selection screen. The default profiles available are COBOL, NONUM, STD, USER1, and USER2.
CPMS/SYSD overrides the default profile and uses the COBOL profile when you edit an ANSCB or COBOL SYSD/ATP member.
TRUNC ON|OFF|column_number
Whether or not to truncate the data to be edited. Specify the column number where the you want the truncation to occur.
WRAP ON|OFF Whether or not the FIND and CHANGE commands continue searching (and replacing) text strings without stopping at the end of a file or the top of a file.
ZONE ON|OFF|AUTO|column start;column end
Whether or not to set the zone for the data to be edited.
• Specify AUTO to set the zone to columns 7 through 72 if the member is COBOL source code. If not COBOL source code, CPMS/SYSD turns zone off when you specify AUTO.
• Specify the column start and column end boundaries for the zone.
Profile type Use with
COBOL COBOL programs.
NONUM Text without numbers.
STD Data, JCL, or Assembler programs.
USER1 Data sets with unique requirements.
USER2 Data sets with unique requirements.
This setting Controls
54 CPMS/SYSD Reference Manual ~ 7.2

Chapter 3
Option 1: Browsing source data
CPMS/SYSD, when used with the optional editor, gives you the ability to browse source PDS members and sequential data sets. Browse lets you view data sets without changing the data. If your company has installed the SYSD/ATP option, you can also browse CA Panvalet data sets.
This chapter contains information about:
Screen Address
• Browse – Dataset menu on page 56 1
• Browse – Dataset menu for CA Panvalet screen on page 62
1, if you have the SYSD/ATP option
• Browse – Member Selection screen on page 65
Not applicable
• Browse – Dataset Display screen onpage 72
Not applicable
• Browse – Hot List Selection screen on page 82
1.L
55

Chapter 3 Option 1: Browsing source data
Browse – Dataset menu
The Browse – Dataset menu (Option 1) is the main browse screen. Use this screen to select and browse members of a browse library. A browse library is a PDS that contains members with the same type of information. Each browse library has a three-part name that usually follows a naming convention similar to PROJECT.LIBRARY.TYPE.
You can browse a partitioned or sequential data set that does not conform to the three-part naming convention. To do so, type the dataset name in the Dataset Name field. If the dataset name is not enclosed with single quotation marks, CPMS/SYSD automatically puts your user ID in front of the dataset name.
To access the Browse – Dataset menu
Access the Browse - Dataset menu in one of these ways.
• On the Primary Option menu, type 1 in the Input field, and then press ENTER.
• On any screen, type 1 in the Input field, and then press RETURN.
56 CPMS/SYSD Reference Manual ~ 7.2

Chapter 3 Option 1: Browsing source data
Field definitions
Field definitions are listed here in the order that they appear on the screen.
Project
The Project field specifies the name of the project that you want to edit. This is the first level of the three-part library naming convention and is the identifier for libraries that belong to the same project. The Project field is not required.
Use the following conventions to specify the project name:
• Specify the project name without quotation marks.
• Specify only the project name; do not include the member name.
• Stay within the 44-character limit of the Project field.
• You can include your user ID in the Project field. CPMS/SYSD does not automatically include it.
You can type the entire dataset name in either the Project or the Type field.
If you enter a project in the Project field, any values you type in either the Library or the Type field are concatenated with the value you type in the Project field to form multiple dataset names. See “Examples of concatenated dataset names” on page 58 for more information.
Library
The Library field specifies the name of the library that you want to browse. This is the second level of the three-part library naming convention. The Library field is not required.
Use the following conventions to specify the library name:
• Complete each index.
• Specify the library name without quotation marks.
• Specify only the library name; do not include the member name.
• Stay within the eight-character limit of the Library field.
• You can include your user ID in the Library field. CPMS/SYSD does not automatically include it.
In the Library field, you can enter a single dataset name, or you can enter multiple names to provide a concatenated set of names. You can concatenate up to four libraries. CPMS/SYSD searches the libraries in order, starting with the first one listed.
You can type the entire dataset name in either the Project or the Type field. The maximum length for the Project field and the Type field is 44 characters.
Browse – Dataset menu 57

Chapter 3 Option 1: Browsing source data
If you enter a library in the Library field, any values you type in either the Project or the Type field are concatenated with the value you type in the Library field to form multiple dataset names. See “Examples of concatenated dataset names” on page 58 for more information.
Type
The Type field specifies the type of data in the library. This is the third level of the three-part library naming convention. For two-level names, leave the Type field blank. The Type field is not required.
Use the following conventions to specify the type of data in the library:
• Specify the type of data without quotation marks.
• Specify only the type of data; do not include the member name.
• Stay within the 44-character limit of the Type field.
• You can include your user ID in the Type field. CPMS/SYSD does not automatically include it.
You can type the entire dataset name in either the Project or the Type field. The maximum length for the Project field and the Type field is 44 characters.
If you enter a data type in the Type field, any values you type in either the Project or the Library field are concatenated with the value you type in the Type field to form multiple dataset names. See “Examples of concatenated dataset names” on page 58 for more information.
Examples of concatenated dataset names
1. The table below shows a typical one-level project to generate the SYSD.TEST.SOURCE, SYSD.MODS.SOURCE, and SYSD.PROD.SOURCE dataset names.
2. The table below shows a two-level project to generate the PRODUCTS.SYSD.TEST.SOURCE, PRODUCTS.SYSD.MODS.SOURCE, and PRODUCTS.SYSD.PROD.SOURCE dataset names.
Project: SYSD
Library: TEST MODS PROD
Type: SOURCE
Project: PRODUCTS.SYSD
Library: TEST MODS PROD
Type: SOURCE
58 CPMS/SYSD Reference Manual ~ 7.2

Chapter 3 Option 1: Browsing source data
3. If you do not specify any libraries, CPMS/SYSD generates the SYSD.TEST.SOURCE dataset name.
4. If you specify the entire name in the Project field, CPMS/SYSD generates the SYSD.TEST.SOURCE dataset name.
5. If you specify the entire name in the Type field, CPMS/SYSD generates the SYSD.TEST.SOURCE dataset name.
Members
The Member field specifies the name of the member you want to browse. CPMS/SYSD displays the contents of the member on the Browse – Dataset Display screen. See “Browse – Dataset Display screen” on page 72 for more information.
You can use wildcards and placeholders in the Member field to view a filtered list of members. An asterisk (*) is the designated wildcard character. Use an asterisk (*) to represent from 0 to n characters in the search string. A plus sign (+) is the designated placeholder character. Use a plus sign (+) to represent exactly one character in the search string. If you use wildcards, the Member field is limited to eight characters.
You can use wildcards in the middle of the search string pattern, as in the following examples.
• AB+++CD
• AB*CD
• AB*CD*
• AB+CD*
Project: SYSD.TEST
Library:
Type: SOURCE
Project: SYSD.TEST.SOURCE
Library:
Type:
Project:
Library:
Type: SYSD.TEST.SOURCE
Browse – Dataset menu 59

Chapter 3 Option 1: Browsing source data
If you do not specify a member name, CPMS/SYSD displays a list of all of the members in the first library on the Browse – Member Selection screen. See “Browse – Member Selection screen” on page 65 for more information.
Dataset Name
The Dataset Name field specifies the 1-character to 44-character name of the PDS or sequential data set that you want to browse. Use this field if the dataset name does not conform to the three-part naming convention for the browse library. The Dataset Name field overrides any dataset name specified in the Project field, Library field, or Type field.
To view a PDS member, type the PDS name followed by the member name enclosed with parentheses. For example:
CPMS/SYSD adds your user ID to the front of the dataset name if you do not enclose the PDS name in single quotation marks. For example, if you type:
the user_id.SYSD.PROD.USRLIB(PTFLIST) data set appears.
Volume Serial
If the data set is not cataloged, use the Volume Serial field to specify the volume serial number for the data set. If the data set is cataloged, leave this field blank.
Dataset Password
The Dataset Password field specifies the password for the data set. This field is required only if the data set is password protected. The password is not visible on the screen when you type it.
'SYSD.PROD.USRLIB(PTFLIST)’
SYSD.PROD.USRLIB(PTFLIST)
60 CPMS/SYSD Reference Manual ~ 7.2

Chapter 3 Option 1: Browsing source data
Example of three-part library naming convention
In this example, the fields specify the following values:
• The project name is SYSD.
• The PTFA, PTFB, and PTFC libraries have been concatenated. CPMS/SYSD searches these libraries in order, starting with PTFA.
• The type of data in the library is Assembler (ASM).
• The full library names are:
• SYSD.PTFA.ASM
• SYSD.PTFB.ASM
• SYSD.PTFC.ASM
CPMS/SYSD searches the libraries only if you specify a member name in the Member field. If you do not specify a member name, CPMS/SYSD displays a list of all the members in the first library. In this example, the first library is SYSD.PTFA.ASM.
Browse – Dataset menu 61

Chapter 3 Option 1: Browsing source data
Browse – Dataset menu for CA Panvalet screen
If your company installed the SYSD/ATP option, you can use the Browse - Dataset menu for CA Panvalet screen to browse CA Panvalet library members. The Library Codes, Member Code, and Installation Code fields on this screen control your access to CA Panvalet members.
You must provide security codes to access CA Panvalet members that have a security level greater than zero (0). You can provide the codes separately for the libraries, member, and installation, or you can provide the sum of the codes in the member code.
If you do not specify a member name, you may have to provide the library code to view a list of members in a library.
To access the Browse - Dataset menu for CA Panvalet screen
You can access the Browse - Dataset menu for CA Panvalet screen only if your company installed the SYSD/ATP option.
Access the Browse - Dataset menu for CA Panvalet screen in one of these ways.
• On the Primary Option menu, type 1 in the Input field, and then press ENTER.
• On any screen, type 1 in the Input field, and then press RETURN.
62 CPMS/SYSD Reference Manual ~ 7.2

Chapter 3 Option 1: Browsing source data
Field definitions
Field definitions are listed here in the order that they appear on the screen.
See “Browse – Dataset menu” on page 56 for more information about the Project, Library, Type, Member, Dataset Name, and Volume Serial fields.
Library Codes
The Library Codes field specifies the library security code for the CA Panvalet libraries. You can concatenate up to four libraries. To see a list of members in a secured library, you must specify that library’s security code.
Member Code
The Member Code field specifies the member security code for a CA Panvalet member that has a security level greater than zero. You can also specify the sum of the codes for the libraries, member, and installation in this field.
Installation Code
The Installation Code field specifies the installation security code for a CA Panvalet member that has a security level greater than two.
Browse – Dataset menu for CA Panvalet screen 63

Chapter 3 Option 1: Browsing source data
Example
In this example, the fields specify the following values:
• The project name is PAN.
• The TEST, ACPT, and PROD libraries have been concatenated. CPMS/SYSD searches these libraries in order, starting with TEST.
• The type of data in the library is SOURCE.
• The full library names are:
• PAN.TEST.SOURCE
• PAN.ACPT.SOURCE
• PAN.PROD.SOURCE
CPMS/SYSD searches the libraries only if you specify a member name in the Member field. If you do not specify a member name, CPMS/SYSD displays a list of all the members in the first library. In this example, the first library is PAN.TEST.SOURCE.
64 CPMS/SYSD Reference Manual ~ 7.2

Chapter 3 Option 1: Browsing source data
Browse – Member Selection screen
The Browse – Member Selection screen displays a list of members in a library and the statistics for each member. Use this screen to scan a list of members for a specific member and then view it.
To access the Browse – Member Selection screen
Access the Browse - Member Selection screen in one of these ways.
• On the Browse – Dataset menu in the Browse Library section, type a browse library name. Leave the Member field blank. Press ENTER. If several libraries are concatenated, CPMS/SYSD displays the members in the first library.
• On the Browse – Dataset menu in the Other Partitioned or Sequential Dataset section, type a partitioned or sequential dataset name that does not conform to the three-part naming convention. Do not specify a member name. Press ENTER.
Browse – Member Selection screen 65
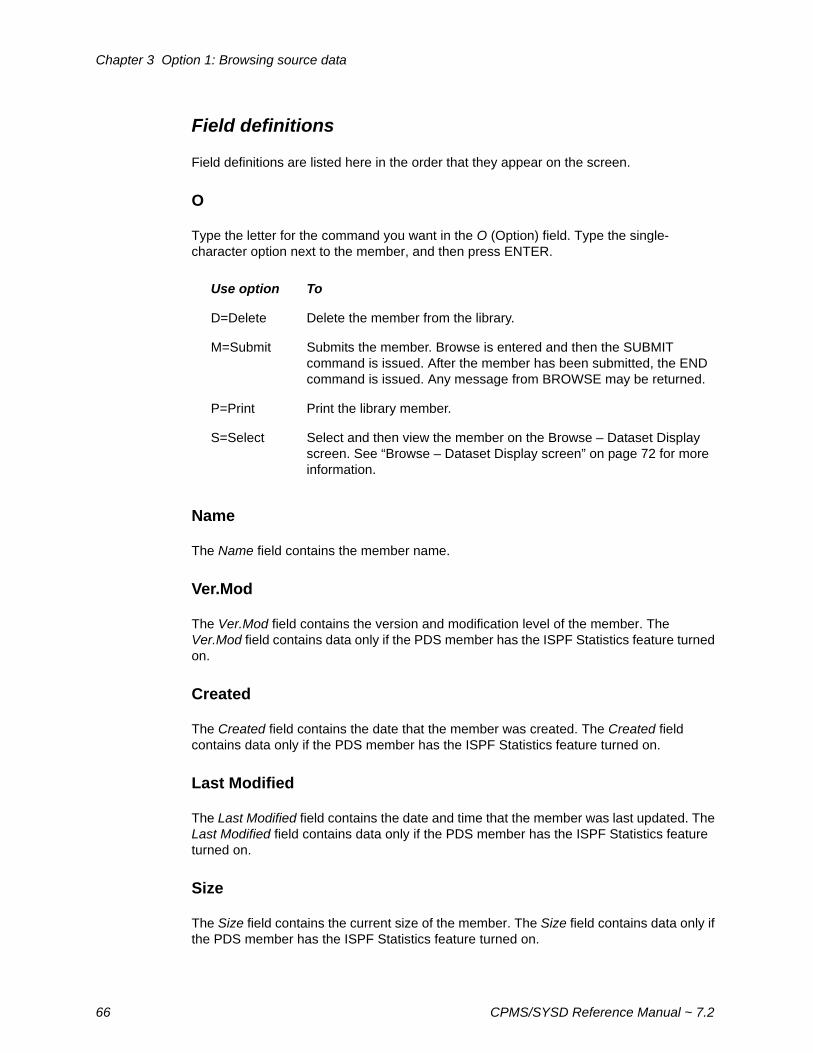
Chapter 3 Option 1: Browsing source data
Field definitions
Field definitions are listed here in the order that they appear on the screen.
O
Type the letter for the command you want in the O (Option) field. Type the single-character option next to the member, and then press ENTER.
Name
The Name field contains the member name.
Ver.Mod
The Ver.Mod field contains the version and modification level of the member. The Ver.Mod field contains data only if the PDS member has the ISPF Statistics feature turned on.
Created
The Created field contains the date that the member was created. The Created field contains data only if the PDS member has the ISPF Statistics feature turned on.
Last Modified
The Last Modified field contains the date and time that the member was last updated. The Last Modified field contains data only if the PDS member has the ISPF Statistics feature turned on.
Size
The Size field contains the current size of the member. The Size field contains data only if the PDS member has the ISPF Statistics feature turned on.
Use option To
D=Delete Delete the member from the library.
M=Submit Submits the member. Browse is entered and then the SUBMIT command is issued. After the member has been submitted, the END command is issued. Any message from BROWSE may be returned.
P=Print Print the library member.
S=Select Select and then view the member on the Browse – Dataset Display screen. See “Browse – Dataset Display screen” on page 72 for more information.
66 CPMS/SYSD Reference Manual ~ 7.2

Chapter 3 Option 1: Browsing source data
Init
The Init field contains the initial size of the member. The Init field contains data only if the PDS member has the ISPF Statistics feature turned on.
Mod
The Mod field contains the number of times that the member has been updated. The Mod field contains data only if the PDS member has the ISPF Statistics feature turned on.
ID
The ID field contains the user ID of the most recent person to update the member. The ID field contains data only if the PDS member has the ISPF Statistics feature turned on.
Browse – Member Selection screen 67

Chapter 3 Option 1: Browsing source data
Browsing a load library
You can use the Browse – Member Selection screen to view the list of members in a load library and the statistics for each member.
To browse a load library
1. Go to the Browse – Member Selection menu. See “To access the Browse – Member Selection screen” on page 65 for more information.
2. In the Project field, type the name of the project.
3. In the Library field, type the name of the library.
4. In the Type field, type LOADLIB.
5. Press ENTER. The Browse – Member Selection appears and contains the information related to your load library.
Load library field definitions
The load-library field definitions are listed in the order that they appear on the screen.
Name
The Name field contains the name of the member in the library.
68 CPMS/SYSD Reference Manual ~ 7.2

Chapter 3 Option 1: Browsing source data
Alias-of
The Alias-of field contains the name of the member for which this member is an alias.
Size
The Size field contains the member size, in hexadecimal.
TTR
The TTR field contains the relative block address.
AC
The AC field contains the authorization code, in hexadecimal.
AM
The AM field contains the addressing mode (AMODE).
RM
The RM field contains the residency mode (RMODE).
Attributes
The Attributes field contains the attributes of the member.
SSI
The SSI field contains the System Status Index (SSI).
Attribute Explanation
RF Refreshable
RN Re-entrant
RU Reusable
OV In overlay structure
OL Only loadable
NX Not executable
Browsing a load library 69

Chapter 3 Option 1: Browsing source data
Command definitions
To issue a command, type a command in the Input field, and then press ENTER. Command definitions are listed here in alphabetical order.
BOTTOM
The BOTTOM command scrolls to the bottom of the member list. The format of the BOTTOM command is:
DOWN
The DOWN command scrolls down through the member list. The format of the DOWN command is:
FIND
The FIND command searches for a specific member. The formats of all the aliases of the FIND command are:
LOCATE
The LOCATE command is an alias of the FIND command. This command searches for a specific member. The formats of all the aliases of the LOCATE command are:
BOTTOM
DOWN [nnn|Max]
This parameter Specifies
nnn Scroll down by the specified number of members.
Max Scroll to the bottom of the member list.
FIND member_nameLOCATE
LOCATE member_nameFIND
70 CPMS/SYSD Reference Manual ~ 7.2

Chapter 3 Option 1: Browsing source data
SELECT
Use the SELECT command to view a member on the Browse – Dataset Display screen. The format of the SELECT command is:
See “Browse – Dataset Display screen” on page 72 for more information.
TOP
The TOP command scrolls to the top of the member list. The format of the TOP command is:
UP
The UP command scrolls up through the member list. The format of the UP command is:
SELECT member_name
TOP
UP [nnn|Max]
This parameter Specifies
nnn Scroll up by the specified number of members.
Max Scroll to the top of the member list.
Browsing a load library 71

Chapter 3 Option 1: Browsing source data
Browse – Dataset Display screen
The Browse – Dataset Display screen displays the contents of a source member. Use the primary commands to browse through the member and then search for data. Use a hexadecimal command to view the member in vertical or horizontal hexadecimal notation.
To access the Browse – Dataset Display screen
Access the Browse – Dataset Display screen in one of these ways.
• On the Browse – Dataset menu in the Browse Library section, type a browse library and member name, and then press ENTER.
• On the Browse – Dataset menu in the Other Partitioned or Sequential Dataset section, type a partitioned or sequential dataset name that does not conform to the three-part naming convention, and then press ENTER.
• On the Browse – Member Selection screen, type S (Select) in the O (Option) field next to the member that you want to view, and then press ENTER.
72 CPMS/SYSD Reference Manual ~ 7.2

Chapter 3 Option 1: Browsing source data
Field definitions
Field definitions are listed here in the order that they appear on the screen.
(CICSxx)
The CICSxx field contains the current CICS APPLID.
Browse
The Browse field contains the data set, member, and volser information if the dataset name is not cataloged. If the DSN is cataloged, the volser information does not appear.
Cols
The Cols field contains the numbers of the first and last columns that are on the screen, the current partition, and the number of partitions (1/1).
Line
The Line field contains the line number for the first line that is on the screen.
RecFm
The RecFm field contains the record format of the data set.
LRecL
The LRecL field contains the logical record length of the data set.
Blocksize
The Blocksize field contains the physical block size of the data set.
This code Means the record format is
F Fixed
FB Fixed block
U Undefined
V Variable
VB Variable block
Browse – Dataset Display screen 73

Chapter 3 Option 1: Browsing source data
Command definitions
To issue a command, type a command in the Input field, and then press ENTER. Command definitions are listed here in alphabetical order.
.label
Use the .label command after a SET .label command to display the line assigned to the label as the top line. The format of the .label command is:
BACKWARD
The BACKWARD command ignores the Scroll field and scrolls backward by the number of pages that you specify. The format of the BACKWARD command is:
BOTTOM
The BOTTOM command scrolls to the bottom of the member. The format of the BOTTOM command is:
CAPS
The CAPS command turns on or off uppercase translation. When the translator is turned off, you can search for both uppercase and lowercase characters. The format of the CAPS command is:
.label
BACKWARD [nn|M]
This parameter Specifies
nn Scroll backward by the specified number of pages. The page length is calculated from the number of rows on the screen.
M Scroll to the top of the form (TOF).
BOTTOM
CAPS [ON|OFF]
74 CPMS/SYSD Reference Manual ~ 7.2

Chapter 3 Option 1: Browsing source data
DEL .label
Use the DEL .label command to remove an assigned label. The format of the DEL .label command is:
After you have deleted a label, you cannot enter .label to return to the set line number.
DELQ
The DELQ command deletes a temporary storage queue that you created with the PUT or PCSND command. The formats of all the aliases of the DELQ command are:
The default temporary storage queue name and CICS system ID are defined on the GET/PUT TS Queue Identifiers screen (Option 0.4). See “GET/PUT TS Queue Identifiers screen” on page 48 for more information.
DOWN
The DOWN command scrolls down through the member. The format of the DOWN command is:
If you do not specify one of the parameters, the screen scrolls by the value specified in the Scroll field.
DEL .label
DELQ [Q=queue_name] [S=sysid] DQ
This parameter Specifies
queue_name The 8-character name of the temporary storage queue that you want to delete.
sysid The 4-character system ID of the CICS region in which the temporary storage resides. This parameter lets you delete a temporary storage queue in a different CICS region.
DOWN [nn|M]
This parameter Specifies
nn Scroll by the specified number of lines.
M Scroll to the bottom of the member.
Browse – Dataset Display screen 75

Chapter 3 Option 1: Browsing source data
EDIT
The EDIT command turns the browse session into an edit session. The format of the EDIT command is:
FIND
The FIND command searches for a specific string of text. Use scan parameters to control the search operation. The format of the FIND command is:
EDIT
FIND [string|x’string|p’string’|* [left_column] [right_column]] [NEXT|ALL|FIRST|LAST|PREV|XALL]
This parameter Specifies
string • The string that you want to find. You can type an alphanumeric string as is.
• If the string contains special characters or blanks, enclose the string with single quotation marks.
• To include an apostrophe in the search string, type it twice. Examples of valid strings are ABC, 'ABC', 'DON''T', and 'AND HIS'.
x'string' The hexadecimal data that you want to find. The string must be an even number of characters and can contain only the letters a through f, A through F, and the numbers 0 through 9. The second apostrophe is optional.
p'string' • The picture string that you want to find. Enclose the picture string with single quotation marks. If CAPS is turned on, the picture string is uppercase. If CAPS is turned off, the picture string is used as is when a lowercase p is used to define the picture string, such as p'string'. When an upper case P is used to define the picture string, such as P'string', the search is not case sensitive.
• A plus sign (+) or question mark (?) is the designated placeholder for the picture string. Use a plus sign (+) or question mark (?) to represent exactly one character in the picture string. An asterisk (*) is used to represent 0 through n characters.
• A back slash (\) is the designated escape character for the picture string. To search for a plus sign (+), question mark(?), or back slash (\) within a picture string, type \+, \?, or \\.
* The last string that you entered. To find a single asterisk (*), enclose it in quotation marks.
76 CPMS/SYSD Reference Manual ~ 7.2

Chapter 3 Option 1: Browsing source data
There are two ways to search for a string that contains both uppercase and lowercase data:
• To find the string exactly as it is entered, issue the CAPS OFF command. Then issue the FIND command, typing the string exactly as it appears in the member and enclosing it with quotation marks. For example, type FIND “John” or FIND “john”.
• To find all occurrences of the string regardless of the case, do not enclose the string with quotation marks. For example, type FIND JOHN.
FINDN
The FINDN command performs a FIND NEXT. The FINDN command is designed to be assigned to a PF key. See “Program Function Key Definition screen” on page 42 for more information.
FINDP
The FINDP command performs a find previous (FIND PREV). The FINDP command is designed to be assigned to a PF key. See “Program Function Key Definition screen” on page 42 for more information.
left_column The left column where you want the search to start. CPMS/SYSD excludes from the search data to the left of this column. The default is 1.
right_column The right column where you want the search to end. CPMS/SYSD searches only the text between and including the left and right columns. The default is the end of the record.
Note If you want to search a single column, do not enter a right column.
NEXT Display the next occurrence of the string. This is the default parameter. You can type N for this parameter.
ALL Display all occurrences of the string and their relative line locations. You can type A for this parameter.
FIRST Display the first occurrence of the string. You can type F for this parameter.
LAST Display the last occurrence of the string. You can type L for this parameter.
PREV Display the previous occurrence of the string. You can type P for this parameter.
XALL Search all records and exclude the lines that do not contain the string from the display. You can type X for this parameter.
This parameter Specifies
Browse – Dataset Display screen 77

Chapter 3 Option 1: Browsing source data
FINDR
The FINDR command is a reverse find. This command toggles the PREV option and then issues a FIND command in the new direction. Use the FIND command to continue to search in the new direction. Issue the FINDR command a second time to reverse the direction of the FIND command again.
The FINDR command is designed to be assigned to a PF key. See “Program Function Key Definition screen” on page 42 for more information.
FORWARD
The FORWARD command ignores the Scroll field and scrolls forward the number of pages that you specify. The format of the FORWARD command is:
HEX
Use the HEX command to view the member in hexadecimal notation. The format of the HEX command is:
FORWARD [nn|M]
This parameter Specifies
nn Scroll by the specified number of pages. The page length is calculated from the number of rows on the screen.
M Scroll to the end-of-file (EOF).
HEX [ON|OFF] [VERT|DATA]
This parameter Specifies
ON Turn on hexadecimal notation. This is the default.
OFF Turn off hexadecimal notation.
VERT Display the two-digit hexadecimal number in the column below each character. This is the default.
DATA Display the two-digit hexadecimal number in linear format below the alphanumeric data.
78 CPMS/SYSD Reference Manual ~ 7.2

Chapter 3 Option 1: Browsing source data
LEFT
The LEFT command scrolls to the left across the data. The format of the LEFT command is:
LINE
The LINE command positions a line you specify as the first line on the screen. The format of the LINE command is:
The PRINT command prints the data set to the JES2 local destination queue. The JES2 local destination queue is normally the system printer. The format of the PRINT command is:
LEFT [nn|M]
This parameter Specifies
nn Scroll left by the specified number of columns.
M Scroll left to the first column.
LINE nn
This parameter Specifies
nn The line number that you want to appear as the first line
Browse – Dataset Display screen 79

Chapter 3 Option 1: Browsing source data
PUT
The PUT command writes all or some of the records in a browse session to a temporary storage queue. You can then use the GET command from an edit session to copy the data from the temporary storage queue into the edit session.
CPMS/SYSD truncates records to 255 bytes, if necessary. You can issue multiple PUTs to concatenate data from several sources. The format of the PUT command is:
The default temporary storage queue name and CICS system ID are defined on the GET/PUT TS Queue Identifiers screen (Option 0.4). See “GET/PUT TS Queue Identifiers screen” on page 48 for more information.
RIGHT
The RIGHT command scrolls to the right across the data. The format of the RIGHT command is:
PUT [begin_line] [end_line] [Q=queue_name] [S=sysid]
This parameter Specifies
begin_line The number of the first line that you want to write to the temporary storage queue. The default is 1.
end_line The number of the last line that you want to write to the temporary storage queue.
If the end_line number is not specified, the limit is the end of the file or the &PUTLIMIT value in SYSDSETS, whichever is less. Your CPMS/SYSD administrator sets the parameters in SYSDSETS.
queue_name The 8-character name of the temporary storage queue to which you want to write the records.
sysid The 4-character system ID of the CICS region in which the temporary storage resides. This parameter lets you write to a temporary storage queue in a CICS region other than the CICS region you are in currently.
RIGHT [nn|M]
This parameter Specifies
nn Scroll right by the specified number of columns.
M Scroll right to the last column.
80 CPMS/SYSD Reference Manual ~ 7.2

Chapter 3 Option 1: Browsing source data
SET .label
The SET .label command sets a label to the line displayed at the top of the screen. You can return to this line by entering .label as a command. Label names can be from 1 to 6 characters, not including the dot. You can have up to 20 labels. If the label has already been assigned, the label is reset to the new line number. You can delete a label using the DEL .label command. The format of the SET .label command is:
TOP
The TOP command scrolls to the top of the member. The format of the TOP command is:
UP
The UP command scrolls up through the member. The format of the UP command is:
SET .label
This parameter Specifies
.label A 1-character to 6-character label name to assign to the top line of the screen.
TOP
UP [nn|M]
This parameter Specifies
nn Scroll up by the specified number of lines.
M Scroll to the top of the member.
Browse – Dataset Display screen 81

Chapter 3 Option 1: Browsing source data
Browse – Hot List Selection screen
The Browse - Hot List Selection screen (Option 1.L) displays a list of data sets that you use frequently and allows you to access them quickly. CPMS/SYSD automatically creates the HOTLIST work file the first time you start CPMS/SYSD. You can use the editor to update the HOTLIST work file. See “Edit – Hot List Selection screen” on page 108 for more information about editing the hot list.
To access the Browse - Hot List Selection screen
On the Primary Option menu, type 1.L in the Input field, and then press ENTER to access the Hot List Selection screen.
82 CPMS/SYSD Reference Manual ~ 7.2

Chapter 3 Option 1: Browsing source data
Command definitions
To issue a command, type a command in the Input field, and then press ENTER. Command definitions are listed here in alphabetical order.
DOWN
The DOWN command scrolls down through the hot list.
EDIT
The EDIT command edits the selected &&HOTLIST.userid list.
TOP
The TOP command scrolls to the top of the hot list.
UP
The UP command scrolls up through the hot list.
O
Type the letter for the command you want in the O (Option) field. Type the single-character option next to the member, and then press ENTER.
Use option To
S=Browse Browse the data set.
B=Browse Browse the data set.
E=Edit Edit the data set.
Browse – Hot List Selection screen 83

Chapter 3 Option 1: Browsing source data
Example of a Hot List
In this example, the fields specify the following values:
• TEST.CLIST Generates userid.test.clist
• 'SYSD.PROD.SOURCE',VOL=AAAAAA Uses the data set on volume AAAAAA.
84 CPMS/SYSD Reference Manual ~ 7.2

Chapter 4
Option 2: Editing source data
The optional editor available with CPMS/SYSD provides an ISPF-like editor that lets you create and update source PDS members or sequential data sets in real time within CICS. The SYSD editing option includes the following advantages:
• A single interaction to do full-screen, context editing for multiple-line updates.
• Three types of editing commands: primary, scroll, and line.
• Full support of the SPLIT and SWAP commands. These commands let you create and then toggle between up to eight active, full-screen sessions.
• Full use of PF keys for performing SYSD operations.
• Temporary work data sets that are not tied to an existing data set.
This chapter contains information about the following topics:
• “Understanding the SYSD editor” on page 87
• “Managing edit sessions” on page 88
• “Issuing primary commands in the edit session” on page 112
• “Understanding primary commands” on page 113
• “Understanding editor scroll commands” on page 180
• “Understanding editor line commands” on page 181
85

Chapter 4 Option 2: Editing source data
This chapter contains information about the following screens:
Screen Address
• Edit – Dataset menu on page 89 2
• Edit – Dataset menu for CA Panvalet on page 96
2
• Edit – Session Display screen onpage 99
2.S
• Edit – Member Selection screen on page 101
Not applicable
• .Edit – Dataset Display screen onpage 106
Not applicable
• Edit – Hot List Selection screen on page 108
2.L
86 CPMS/SYSD Reference Manual ~ 7.2

Chapter 4 Option 2: Editing source data
Understanding the SYSD editor
The SYSD editor is based on an edit session concept that provides security, recovery, and flexibility. The editor copies a member or data set to a work session for editing. The editor does not update the original data until you issue the END or SAVE command. This means you can work on a member without changing it until you are ready. If CICS stops functioning, SYSD recovers all of the changes you made up to the most recent time you pressed ENTER or a PF key.
To start an edit session, specify a new or existing PDS member or sequential data set on the Edit – Dataset menu, and then press ENTER. In the edit session, you can issue the following types of commands:
• Primary commands that change the flow of the session, such as END or CANCEL.
• Scroll commands that act with certain primary commands to control pagination.
• Line commands that perform various functions on a specific line of data.
You can update or enter data directly on each line as you scroll through the edit session. The screen acts as a window that travels up, down, left, or right over the data.
The SYSD editor processes each screen in the same sequence. This process sequence lets you enter data, line commands, and a primary command on the same input screen before you press ENTER or a PF key. The SYSD editor processes items in this order:
1. Process the data portion. SYSD stores all updated data (including lines you have inserted or added) in the edit session.
2. Check and perform any line commands.
3. Check and perform any primary commands.
Understanding the SYSD editor 87

Chapter 4 Option 2: Editing source data
Managing edit sessions
SYSD provides several commands to handle updated files in the edit session:
Issue this command To
ABORT Exit the editor and return to the screen from which you entered the edit session without updating the source member. You can return later and continue the edit session where you left off.
CANCEL End the edit session without updating the original data set. SYSD does not save any new source data sets.
END End the session and merge the edited work data set back into the original. If you are creating a new source data set, SYSD saves the data set.
RETURN View the Primary Option menu without canceling the edit session or updating the source member if EDTSAVE is set to N in SYSDSETS. You can return later and continue the edit session where you left off. The CPMS/SYSD administrator sets the EDTSAVE parameter in SYSDSETS.
If EDTSAVE is set to Y in SYSDSETS, use the RETURN command to return to the Primary Option menu, end the session, and merge the edited work data set back into the original. If you are creating a new source data set, SYSD saves the data set.
SAVE Merge the current updates into the original source data set and stay in the edit session.
SPLIT Exit the current edit session and view the Primary Option menu in a new partition without merging the updates into the source data set. To return to the edit session where you left off, issue the SWAP command. You can create up to eight active partitions.
Press this key To
CLEAR Exit the editor and menu-driven system without canceling the edit session or updating the source member. You can return later and continue the edit session where you left off.
88 CPMS/SYSD Reference Manual ~ 7.2

Chapter 4 Option 2: Editing source data
Edit – Dataset menu
Use the Edit – Dataset menu (Option 2) to specify the name of the source data set that you want to edit. You can access all other edit screens directly or indirectly from this menu. The Edit – Dataset menu lets you:
• Edit existing data sets.
• Create new members.
• Start a new edit session.
• Re-enter a current edit session.
• Concatenate libraries that belong to the same project.
• Create temporary edit sessions.
To access the Edit – Dataset menu
Access the Edit - Dataset menu in one of these ways.
• On the Primary Option menu, type 2 in the Input field, and then press ENTER.
• On any screen, type 2 in the Input field, and then press RETURN.
Edit – Dataset menu 89

Chapter 4 Option 2: Editing source data
Field definitions
Field definitions are listed here in the order that they appear on the screen.
Force Required for Exit
The Force Required for Exit field specifies whether the Force parameter must be used with the CANCEL, END, or RETURN command to exit an editing session after updating the source data. The Force Required for Exit field does not affect the SAVE command.
Project
The Project field specifies the name of the project that you want to edit. This is the first level of the three-part library naming convention and is the identifier for libraries that belong to the same project. The Project field is not required.
Use the following conventions to specify the project name:
• Specify the project name without quotation marks.
• Specify only the project name; do not include the member name.
• Stay within the 44-character limit of the Project field.
• You can include your user ID in the Project field. SYSD does not automatically include it.
You can type the entire dataset name in either the Project or the Type field.
If you enter a project in the Project field, any values you type in either the Library or the Type field are concatenated with the value you type in the Project field to form multiple dataset names. See “Examples of concatenated dataset names” on page 92 for more information.
To create a temporary edit session, type &&name in the Project field, where name is the name of your temporary project. See “Using temporary edit sessions” on page 95 for more information.
Type To specify
N Force parameter is not required.
C Force parameter is required for the CANCEL command.
E Force parameter is required for the END command.
If EDTSAVE=Y in SYSDINIT, the Force parameter is also required for the RETURN command.
B Force parameter is required for the CANCEL and END commands.
If EDTSAVE=Y in SYSDINIT, the Force parameter is also required for the RETURN command.
90 CPMS/SYSD Reference Manual ~ 7.2

Chapter 4 Option 2: Editing source data
Library
The Library field specifies the name of the library that you want to edit. This is the second level of the three-part library naming convention. Use the Library field to enter a single dataset name or provide a concatenated set of names. The Library field is not required.
Use the following conventions to specify the library name:
• Complete each index.
• Specify the library name without quotation marks.
• Specify only the library name; do not include the member name.
• Stay within the eight-character limit of the Library field.
• You can include your user ID in the Library field. SYSD does not automatically include it.
You can concatenate up to four libraries. To enter a concatenated set of names, enter multiple names in the Library field.The editor searches the libraries in order starting with the first one listed. If the member you want to edit is not in the first library listed, the editor copies the member to the edit session. After you make the changes in the edit session, you can use the SAVE or END command to put the edit session in the first library. The original member in the other library is unaffected.
You can type the entire dataset name in either the Project or the Type field. The maximum length for the Project field and the Type field is 44 characters.
If you enter a library in the Library field, any values you type in either the Project or the Type field are concatenated with the value you type in the Library field to form multiple dataset names. See “Examples of concatenated dataset names” on page 92 for more information.
Type
The Type field specifies the type of data in the library. This is the third level of the three-part library naming convention. For two-level names, leave the Type field blank. The Type field is not required.
Use the following conventions to specify the type of data in the library:
• Specify the type of data without quotation marks.
• Specify only the type of data; do not include the member name.
• Stay within the 44-character limit of the Type field.
• You can include your user ID in the Type field. SYSD does not automatically include it.
You can type the entire dataset name in either the Project or the Type field. The maximum length for the Project field and the Type field is 44 characters.
Edit – Dataset menu 91

Chapter 4 Option 2: Editing source data
If you enter a data type in the Type field, any values you type in either the Project or the Library field are concatenated with the value you type in the Type field to form multiple dataset names. See “Examples of concatenated dataset names” on page 92 for more information.
Examples of concatenated dataset names
1. The table below shows a typical one-level project to generate the SYSD.TEST.SOURCE, SYSD.MODS.SOURCE, and SYSD.PROD.SOURCE dataset names.
2. The table below shows a two-level project to generate the PRODUCTS.SYSD.TEST.SOURCE, PRODUCTS.SYSD.MODS.SOURCE, and PRODUCTS.SYSD.PROD.SOURCE dataset names.
3. If you do not specify any libraries, the editor generates the SYSD.TEST.SOURCE dataset name.
4. If you specify the entire name in the Project field, the editor generates the SYSD.TEST.SOURCE dataset name.
Project: SYSD
Library: TEST MODS PROD
Type: SOURCE
Project: PRODUCTS.SYSD
Library: TEST MODS PROD
Type: SOURCE
Project: SYSD.TEST
Library:
Type: SOURCE
Project: SYSD.TEST.SOURCE
Library:
Type:
92 CPMS/SYSD Reference Manual ~ 7.2

Chapter 4 Option 2: Editing source data
5. If you specify the entire name in the Type field, the editor generates the SYSD.TEST.SOURCE dataset name.
Member
The Member field specifies the name of the member that you want to edit. The editor displays the contents of the specified member on the Edit – Dataset Display screen. See “.Edit – Dataset Display screen” on page 106 for more information. If the specified member does not exist, the editor starts a new edit session.
You can use wildcards and placeholders in the Member field to view a filtered list of members. An asterisk (*) is the designated wildcard character. Use an asterisk (*) to represent from 0 to n characters in the search string. A plus sign (+) is the designated placeholder character. Use a plus sign (+) to represent exactly one character in the search string. If you use wildcards, the Member field is limited to eight characters.
You can use wildcards in the middle of the search string pattern, as in the following examples.
• AB+++CD
• AB*CD
• AB*CD*
• AB+CD*
If you do not specify a member name in the Member field, the editor displays a list of all the members contained in the first library on the Edit – Member Selection screen. See “Edit – Member Selection screen” on page 101 for more information.
To create a temporary member, type &&member in the Member field, where member is the name of a new or existing member. See “Using temporary edit sessions” on page 95 for more information.
Project:
Library:
Type: SYSD.TEST.SOURCE
Edit – Dataset menu 93

Chapter 4 Option 2: Editing source data
Dataset Name
The Dataset Name field specifies the 1-character to 44-character name of the PDS or sequential data set that you want to edit. Use this field when the dataset name does not conform to the three-part naming convention for the edit library. Any data-set name in this field overrides a dataset name specified in the Edit Library section of the Edit - Dataset menu.
To view a PDS member, in the Dataset Name field type the PDS name followed by the member name enclosed with parentheses. For example:
The editor adds your user ID to the front of the dataset name if you do not enclose the PDS name in single quotation marks. For example:
For this example, the user_id.SYSD.PROD.USRLIB(PTFLIST) data set would appear.
To create a temporary data set, type &&name in the Dataset Name field, where name is the dataset name. See “Using temporary edit sessions” on page 95 for more information.
Volume Serial
The Volume Serial field specifies the volume serial number for the data set, if the data set is not cataloged. If the data set is cataloged, leave this field blank.
Dataset Password
The password for the data set. This field is required only if the data set is password protected. The password is not visible on the screen when you type it.
Profile Name
The Profile Name field specifies the type of profile that you want to apply to the member.
'SYSD.PROD.USRLIB(PTFLIST)'
SYSD.PROD.USRLIB(PTFLIST)
Profile type Use with
COBOL COBOL programs.
NONUM Text without numbers.
STD Data, JCL, or Assembler programs.
USER1 Data sets that have unique requirements.
USER2 Data sets that have unique requirements.
94 CPMS/SYSD Reference Manual ~ 7.2

Chapter 4 Option 2: Editing source data
Using temporary edit sessions
Temporary edit sessions are ideal for editing the JCL for an existing job, submitting JCL, and deleting the edit session without updating the original member or data set.
To create a temporary edit session, prefix a project, member, or dataset name with two ampersands (&&). If the project, member, or data set already exists, the editor uses the data to create a temporary member. If the project, member, or data set is new, the editor creates a new, temporary edit session.
The editor does not save temporary edit sessions when you issue the END command. To delete a temporary edit session, issue the CANCEL command or the D=Delete option on the Edit – Session Display screen. See “Edit – Session Display screen” on page 99 for more information about the CANCEL command and the D=Delete option.
Using temporary edit sessions 95

Chapter 4 Option 2: Editing source data
Edit – Dataset menu for CA Panvalet
If your company has installed the SYSD/ATP option, you can use the two additional sections that appear on the Edit – Dataset menu to edit CA Panvalet library members. The Panvalet (R) Access Security section controls your access to CA Panvalet members. The Panvalet (R) New Member Options section lets you create new CA Panvalet members.
You must provide security codes to access CA Panvalet members that have a security level greater than zero (0).
If you do not provide a member name, you may have to provide the library code to view a member selection list.
To access the Edit – Dataset menu for CA Panvalet
Access the Edit - Dataset menu in one of these ways.
• On the Primary Option menu, type 2 in the Input field, and then press ENTER.
• On any screen, type 2 in the Input field, and then press RETURN.
96 CPMS/SYSD Reference Manual ~ 7.2

Chapter 4 Option 2: Editing source data
Field definitions
Field definitions are listed here in the order that they appear on the screen.
See “Edit – Dataset menu” on page 89 for definitions of the fields in the Edit Library and Other Partitioned or Sequential Dataset sections and the Dataset Password and Profile Name fields.
Library Codes
The Library Codes field specifies the security code for the CA Panvalet library. You can concatenate up to four libraries. To view a list of members in a secured library, you must specify the library code.
Member Code
The Member Code field specifies the security code for a CA Panvalet member that has a security level greater than zero (0). You can also specify the sum of the codes for the libraries, member, and installation in this field.
Installation Code
The Installation Code field specifies the installation security code for a CA Panvalet member that has a security level greater than 2.
Language Type
The Language Type field specifies the standard CA Panvalet language type. See the CA-Panvalet System Management Manual for more information about language types.
Format
The Format field specifies whether CA Panvalet uses the NOFORMAT parameter when storing the new member in the CA Panvalet library.
User Code
The User Code field specifies the user code security for the new member.
Edit – Dataset menu for CA Panvalet 97

Chapter 4 Option 2: Editing source data
Security Level
The Security Level field specifies the security level for the new member.
++Copy Member
The ++Copy Member field lets you perform the ++COPY function before you edit the member. The ++COPY member must exist in the same library as the member you are creating or editing.
Type To specify
0 There is no security. This is the default.
1 The member access code must be supplied.
2 The member and library access codes must be supplied.
3 The library, member, and installation access codes must be supplied. See the CA Panvalet System Management Manual for more information about CA Panvalet security access codes.
98 CPMS/SYSD Reference Manual ~ 7.2

Chapter 4 Option 2: Editing source data
Edit – Session Display screen
Use the Edit – Session Display screen to view a list of your current edit sessions and related statistics. From this screen, you can delete an edit session or select an edit session and continue working on it.
To access the Edit – Session Display screen
1. On the Primary Option menu, type 2 in the Input field, and then press ENTER.
2. In the Input field, type S (Session), and then press ENTER.
Edit – Session Display screen 99

Chapter 4 Option 2: Editing source data
Field definitions
Field definitions are listed here in order from the top of the screen, reading left to right.
O
Type the letter for the command you want in the O (Option) field. Type the single-character option next to the edit session, and then press ENTER.
Member
The Member field contains the name of the member that you are editing.
Dataset Name
The Dataset Name field contains the 1-character to 44-character name of the partitioned or sequential data set that you are editing.
Volser
The Volser field contains the volume serial number where an uncataloged data set resides. If the data set you are editing is cataloged, the Volser field is blank.
Age
The Age field contains the age, in days, since the member or session was last updated. The age is set to N/A if the Create or Modify date is not available.
Rcds
The Rcds field contains the number of records in the PDS member or sequential data set.
UPD
The UPD field contains the number of records that you updated during the current edit session. If you update a line more than once, the editor counts all of the updates made to that line as one update.
Use option To
D=Delete Delete the edit session without updating the source data. The editor displays a message asking you to verify that you want to delete the member.
Deleting an edit session does not delete the actual PDS member. The editor only deletes the work session.
S=Select Reopen the edit session and view it on the Edit – Dataset Display screen. See “.Edit – Dataset Display screen” on page 106 for more information.
100 CPMS/SYSD Reference Manual ~ 7.2

Chapter 4 Option 2: Editing source data
Edit – Member Selection screen
Use the Edit – Member Selection screen to view a list of members in a PDS. You can select a member to create and then start an edit session, or you can delete a member from the PDS.
To access the Edit – Member Selection screen
Access the Edit – Member Selection screen in one of these ways.
• On the Edit – Dataset Menu, fill in all of the fields in the Edit Library section except the Member field, and then press ENTER.
• On the Edit – Dataset Menu, type a PDS name without a member name in the Other Partitioned or Sequential Dataset section, and then press ENTER.
Edit – Member Selection screen 101

Chapter 4 Option 2: Editing source data
Field definitions
Field definitions are listed here in order from the top of the screen, reading left to right.
O
Type the letter for the command you want in the O (Option) field. Type the single-character option next to the member, and then press ENTER.
Name
The Name field contains the name of the member.
Ver.Mod
The Ver.Mod field contains the version and modification level of the member.
Created
The Created field contains the date that the member was created.
The Created field contains data only if the PDS member has the ISPF Statistics feature turned on.
Last Modified
The Last Modified field contains the date and time that the member was last updated.
The Last Modified field contains data only if the PDS member has the ISPF Statistics feature turned on.
Use option To
S=Select Select a member and then start an edit session for the member. The member shows on the Edit – Dataset Display screen. See “.Edit – Dataset Display screen” on page 106 for more information.
D=Delete Delete the selected member from the PDS. The editor displays a message asking you to verify that you want to delete the member.
M=Submit The member is edited, then the SUBMIT command is issued. If the member was not resumed, then the CANCEL command is issued. Any message from EDIT may be returned.
102 CPMS/SYSD Reference Manual ~ 7.2

Chapter 4 Option 2: Editing source data
Size
The Size field contains the current size of the member.
The Size field contains data only if the PDS member has the ISPF Statistics feature turned on.
Init
The Init field contains the initial size of the member.
The Init field contains data only if the PDS member has the ISPF Statistics feature turned on.
Mod
The Mod field contains the number of times that the member has been updated.
The Mod field contains data only if the PDS member has the ISPF Statistics feature turned on.
ID
The ID field contains the user ID of the most recent person who updated the member.
The ID field contains data only if the PDS member has the ISPF Statistics feature turned on.
Profile
The Profile field contains the profile type that was specified in the Profile Name field on the Edit – Dataset menu (Option 2).
If you have selected a member to edit, you can specify a new profile type in the Profile field from the Edit – Member Selection screen. See “Profile Name” on page 94 for more information.
Edit – Member Selection screen 103

Chapter 4 Option 2: Editing source data
Command definitions
To issue a command, type a command in the Input field, and then press ENTER. Command definitions are listed here in alphabetical order.
BOTTOM
The BOTTOM command scrolls to the bottom of the member list. The format of the BOTTOM command is:
COMPRESS
The COMPRESS command issues a compress for the current library. The formats of all the aliases of the COMPRESS command are:
DOWN
The DOWN command scrolls down through the member list. The format of the DOWN command is:
FIND
The FIND command searches for a specific member. The format of the FIND command is:
SELECT
The SELECT command creates and starts an edit session for a member and then SYSD displays the member on the Edit – Dataset Display screen. The format of the SELECT command is:
See “.Edit – Dataset Display screen” on page 106 for more information.
BOTTOMBOT
COMPressO
DOWND
FIND member_nameFL
SELECT member_nameS
104 CPMS/SYSD Reference Manual ~ 7.2

Chapter 4 Option 2: Editing source data
TOP
The TOP command scrolls to the top of the member list. The format of the TOP command is:
UP
The UP command scrolls up through the member list. The format of the UP command is:
TOPT
UPU
Edit – Member Selection screen 105

Chapter 4 Option 2: Editing source data
.Edit – Dataset Display screen
Use the Edit – Dataset Display screen to perform all dataset editing operations. A full range of editing functions lets you perform virtually any type of data manipulation.
Format lines at the top and bottom of the screen let you quickly find and edit data. Sequence numbers on the left help you quickly find lines of information. Single quotation marks ('''''') in place of sequence numbers on the left identify insert lines where you can enter new data.
See “Issuing primary commands in the edit session” on page 112, “Understanding editor scroll commands” on page 180, and “Understanding editor line commands” on page 181 for more information about the commands you can use on this screen.
To access the Edit – Dataset Display screen
Access the Edit – Dataset Display screen in one of these ways.
• On the Edit – Dataset menu (Option 2), fill in the necessary fields, and then press ENTER.
• On the Edit – Session screen or Edit – Member Selection screen, type S (Select) in the O (Option) field next to the member that you want to edit, and then press ENTER.
106 CPMS/SYSD Reference Manual ~ 7.2

Chapter 4 Option 2: Editing source data
Field definitions
Field definitions are listed here in the order that they appear on the screen.
(CICSxx)
The CICSxx field contains the current CICS APPLID.
Edit
The Edit field contains the name of the data set, member, volser (if not cataloged), and version and modification level.
Cols
The Cols field contains the numbers of the first and last columns on the screen.
Rcds
The Rcds field contains the number of records in the member.
UpD
The UpD field contains the number of records that you updated during the current edit session. If you update a line more than once, the editor counts all of the updates made to that line as one update.
.Edit – Dataset Display screen 107

Chapter 4 Option 2: Editing source data
Edit – Hot List Selection screen
Use the Edit – Hot List Selection screen to edit the list of data sets that appears on the Edit - Hot List Selection screen. You can add any dataset name that you can type in the Other Partitioned or Sequential Dataset section on the Edit – Dataset menu to the hot list. Fully qualified dataset names must be enclosed in quotation marks. If you do not use quotation marks, the editor concatenates the user ID at the beginning of the dataset name.
Note The hot list information is stored in the SYSD work file using the &&HOTLIST.userid. If the SYSD work file is initialized, the hot list information is cleared.
To access the Edit – Hot List Selection screen
On the Primary Option menu, type 2.L in the Input field, and then press ENTER.
108 CPMS/SYSD Reference Manual ~ 7.2

Chapter 4 Option 2: Editing source data
Editing the hot list
Use the &&HOTLIST.userid edit session to change the dataset names in the hot list.
To edit the hot list
1. On the Edit – Hot List Selection screen, type EDIT in the Input field, and then press ENTER.
2. Edit the hot list.
3. Press END to save the updated hot list.
Use the following format guidelines to add dataset names to the hot list.
• Data set names must start in column 1.
• Names must be enclosed in quotation marks. If you do not enclose the name in quotation marks, your user ID will precede the dataset name.
• To add a member name, type it in parentheses after the dataset name.
• Specify the volume for duplicate or uncataloged data sets.
• To specify the volume serial, add a comma and VOL=volser after the name.
• To add a comment, place an asterisk (*) in column 1 or put a blank in any line. SYSD treats the text after the blank as a comment.
• Arrange entries in any convenient sequence.
Editing the hot list 109

Chapter 4 Option 2: Editing source data
Command definitions
To issue a command, type a command in the Input field, and then press ENTER. Command definitions are listed here in alphabetical order.
BOTTOM
The BOTTOM command scrolls to the bottom of the member list. The format of the BOTTOM command is:
DOWN
The DOWN command scrolls down through hot list.
EDIT
The EDIT command edits the selected &&HOTLIST.userid list.
O
Type the letter for the command you want in the O (Option) field. Type the single-character option next to the data set, and then press ENTER.
BOTTOMBOT
DOWNDO
Use option To
S=Edit Edit the data set.
B=Browse Browse the data set.
E=Edit Edit the data set.
110 CPMS/SYSD Reference Manual ~ 7.2

Chapter 4 Option 2: Editing source data
TOP
The TOP command scrolls to the top of the hot list.
UP
The UP command scrolls up through the hot list.
TOPTO
Editing the hot list 111

Chapter 4 Option 2: Editing source data
Issuing primary commands in the edit session
Primary commands control the edit session. They manage the movement of the window across the data and let you terminate the editing session. See “Understanding primary commands” on page 113 for a complete description of the primary commands that are available in the editor.
The shortest form of the primary command that SYSD allows is represented in capital letters. The letters shown in the command name in lowercase are optional. For example, the format of the NUMBER command is:
To issue the NUMBER command, you can type NUM, NUMb, NUMbe, or NUMber.
Many primary commands have aliases or are assigned to PF keys. See “Program Function Key Definition screen” on page 42 for more information.
To issue primary commands
Type the command in the Input field, and then press ENTER.
To issue primary commands assigned to a PF key
Take one of the following actions:
• Press the PF key assigned to the command.
• In the Input field, type PFn, where n is the PF key number of the command you want, and then press ENTER.
For example, the END command is assigned to the PF3 key. Type PF3 in the Input field, and then press ENTER to issue the END command.
NUMber ON|OFF [STD] [COB]
112 CPMS/SYSD Reference Manual ~ 7.2

Chapter 4 Option 2: Editing source data
Understanding primary commands
The following table is an alphabetical list of the primary commands, their parameters, and any aliases or key assignments. A detailed description of each command follows this table.
Primary command Alias or key
+ or ? RECALL
- REPEAT
: nnnnnn or .label Line
ABORT
AUTOnum [ON|OFF]
BAckward [nnn|M]
BOttom LAst
BOUnds or BNDs [ON|OFF|AUTO] begin_column end_column Zone
CANcel [FORCE] QQuit
CAPs [ON|OFF]
CCHAR
Change 'string1' 'string2'|c'string1'|x'string1 x'string2|p'string1' [.l1 [.l2]] [left_column] [right_column]] [NEXT|ALL|FIRST|LAST|PREV||XALL] [ONCE] [WORD|PREFIX|SUFFIX] [X|NX]
CHG, PF6
CLEAR
COLs [OFF|ON|ON TOp|ON BOttom|ON n] SCAle
COPY
CREate 'dsn'|'dsn(member)'|member
DELete .l1 .l2 [ALL|X|NX]
DELLINE
DELQ [Q=queue_name] [S=sysid] PCDel, DQ
DELWORD
DOwn [nnn|M] Next, PF8
DQ [Q=queue_name] [S=sysid] PCDel, DELQ
Understanding primary commands 113

Chapter 4 Option 2: Editing source data
END [FORCE] FILe, PF3
ENTER ENTER key
EXCLude
FILe [FORCE] END, PF3
Find string|c'string'|x'string|p'string|* [.l1 [.l2]] [[left_column] [right_column]] [NEXT|ALL|FIRST|LAST|PREV|XALL][ONCE] [WORD|PREFIX|SUFFIX] [X|NX]
LOcate, PF5
FINDN
FINDP
FINDR
FIRst TOp
FLBL
FLine [nn]
FLIP .l1 .l2 [F|NX|X]
FOrward [nn|M]
FSTR
FWORD
GET [KEEP] [Q=queue_name] [S=sysid] PCRcv
HEX [ON|OFF] [VERT|DATA]
INSERT .l1 .l2 string {{col} NOTRunc|TRunc}
KEEP 'dsn'|'dsn(member)'|member SAVe
Keys [S]
LAst BOttom
LEft [nnn|M] PF10
Line nnnnnn :, .label
LINEND [ON <character>|OFF]
LOcate string|c'string'|x'string|p'string|* [.l1 [.l2]] [[left_column] [right_column]] [NEXT|ALL|FIRST|LAST|ONCE|PREV|XALL|X|NX]
Find, PF5
MASK [ON|OFF]
Primary command Alias or key
114 CPMS/SYSD Reference Manual ~ 7.2

Chapter 4 Option 2: Editing source data
MODid [ON|OFF] [PIC()] [[mod_id] [begin_column]]
MOD5 [ON|OFF]
Next [nnn|M] DOwn, PF8
NULLs [ON|OFF]
NUMber [ON|OFF] [STD] [COB]
PCDel [Q=queue_name] [S=sysid] DELQ, DQ
PCRcv [KEEP] [Q=queue_name] [S=sysid] GET
PCSnd [Q=queue_name] [S=sysid] PUT
PROfile [profile name]
PUT [Q=queue_name] [S=sysid] PCSnd
QLabel
QQuit [FORCE] CANcel
RECALL +, ?
RECovery (ON|OFF [FORCE]|SIze)
RENumber [FORCE]
REPEAT -
REPlace 'dsn'|'dsn(member)'|member
RESet [all|.label|.]
RETURN [FORCE] PF12
RIght [nnn|M] PF11
SAVe ['dsn'|'dsn(member)'|member] KEEP
SCAle [OFF|ON|ON TOp|ON BOttom|ON n] COLs
Primary command Alias or key
Understanding primary commands 115

Chapter 4 Option 2: Editing source data
SHOw [ALL][OFF]
[DELETES [OFF]]
[COMMENTS [OFF]]
[CHANGES [OFF]]
[MODS [OFF]]
[INSERTS [OFF]]
[UPDATES [OFF]]
[ERRORS [OFF]]
[EXCLUDE [OFF]]
SORT .l1 .l2 [ex] [KFD|KLD] [f1-f7] [[type][dir] s e|[type][dir] s-e|[type][dir] s.l]
SPLIT [address] PF2
SPLTJOIN
STATS [ON|OFF]
SUBmit
SWAP [p] PF9
TA .l1 .l2
TABs [ON|OFF] [character] [columns]
TAC .l1 .l2
TAL .l1 .l2
TAR .l1 .l2
TOp FIRst
TRANchr h1 h2
TRunc [ON|OFF] column
UNDo [?|n]
UNNumber
UP [nnn|M] PF7
WRap [ON|OFF]
Zone [ON|OFF|AUTO] begin_column end_column BOUNDS, BNDs
Primary command Alias or key
116 CPMS/SYSD Reference Manual ~ 7.2

Chapter 4 Option 2: Editing source data
+ or ?
The + and ? commands are aliases of the RECALL command. These commands allow you to view the commands in the Input field that you have already issued, one command at a time. (See “RECALL” on page 157 for more information.) The formats of all the aliases of the + and ? command are:
-
The - command is an alias of the REPEAT command. This command allows you to repeat the most recent command you issued. (See “REPEAT” on page 159 for more information.) The formats of all the aliases of the - command are:
: or .label
The : and .label commands are aliases of the LINE command. These commands allow you to move a line that you specify to appear as the first line on the screen. (See “LINE” on page 146 for more information.) The formats of all the aliases of the : and .label command are:
ABORT
The ABORT command ends the edit session, leaving it intact, and returns to the screen from which you entered the edit session. The format of the ABORT command is:
+ ?RECALL
- REPEAT
: nnnnnn Line.label
ABORT
+ or ? 117

Chapter 4 Option 2: Editing source data
AUTONUM
The AUTONUM command turns on or off automatic numbering.
CAUTION If you issue the SAVE command while automatic numbering is turned on, you will lose all of your recovery data.
The format of the AUTONUM command is:
BACKWARD
The BACKWARD command ignores the Scroll field and scrolls backward toward the TOF by the number of pages that you specify. If the scroll would advance past the TOF, then the TOF appears. The format of the BACKWARD command is:
AUTOnum [ON|OFF]
This parameter Specifies
ON Turn on automatic numbering. The editor numbers the lines in increments of 100, unless the number of records in the data set exceeds 8,000. If there are more than 8,000 lines in the data set, the editor renumbers the lines in increments of 10.
Every time you save or end the edit session, the editor automatically renumbers the source member and updates all of the line numbers to account for new and deleted lines. This is the default.
OFF Turn off automatic numbering. To renumber the lines, issue the RENUMBER command. See “RENUMBER” on page 159 for more information.
BAckward [nn|M]
This parameter Specifies
nn Scroll backward by the specified number of pages. The page length is calculated from the number of rows on the screen.
M Scroll to the TOF.
118 CPMS/SYSD Reference Manual ~ 7.2

Chapter 4 Option 2: Editing source data
BOTTOM
The BOTTOM command scrolls to the bottom of the edit session. The editor displays the last line of the member on the last line of the screen. The formats of all the aliases of the BOTTOM command are:
BOUNDS or BNDS
The BOUNDS and BNDS commands are aliases of the ZONE command. These commands allow you to set the zone or boundaries of data to edit. (See “ZONE” on page 179.) The formats of all the aliases of the BOUNDS or BNDS command are:
CANCEL
The CANCEL command ends and then deletes the edit session without updating the source data set. The formats of all the aliases of the CANCEL command are:
BOttom LAst
BOUnds [ON|OFF|AUTO] begin_column end_columnBNDsZone
CANcel [FORCE]QQuit
This parameter Specifies
[FORCE] The Force parameter needed to exit the editing session.
The Force parameter is required if you specified Force=C or Force=B on the Edit – Dataset menu. See “Force Required for Exit” on page 90 for more information.
BOTTOM 119

Chapter 4 Option 2: Editing source data
CAPS
The CAPS command turns on or off automatic uppercase translation. The format of the CAPS command is:
CCHAR
The CCHAR command counts the number of characters between two delimiters. Place your cursor on any valid data in the editor, and then press the PF key assigned to the CCHAR command. The editor counts the number of characters between the delimiters or to the end of the record.
For example:
In this example, the results of the CCHAR command would be as follows, based on the position of the cursor:
CAPs [ON|OFF]
This parameter Specifies
ON Turn on automatic uppercase translation. The editor translates alphabetic input to uppercase when you press ENTER. This is the default.
OFF Turn off automatic uppercase translation. The editor leaves alphabetic input as entered.
John said, 'How do you do?'....+....1....+....2....+....3....+....4....+....5....+....6....+....7....+....8
Cursor position Number of characters
12 14 characters between the apostrophe delimiters (positions 12 through 27)
14 3 characters between the letter “o” in “How” and the letter “o” in “do” (positions 14 through 18)
22 58 characters between the letter “u” in “you” and the end of the record (positions 22 through 81)
120 CPMS/SYSD Reference Manual ~ 7.2

Chapter 4 Option 2: Editing source data
CHANGE
The CHANGE command searches the member for a string of characters and then replaces the string with another string. The editor moves the line where the first change occurred to the first line on the screen and automatically reprompts the change parameters. To issue the CHANGE command again, press PF6.
The editor only changes data within the ZONE columns. See “ZONE” on page 179 for more information.
The formats of all the aliases of the CHANGE command are:
Note The first character of the command inside the brackets [.l1 [.l2]] is a lowercase letter “L.”
Change 'string1' 'string2' [.l1 [.l2]] [left_column] [right_column]] [NEXT|ALL|FIRST|LAST|PREV|XALL][ONCE][WORD|PREFIX|SUFFIX][X|NX] CHG c'string1' x'string1 x'string2 p'string1' P'string1'<PF6>PF6
This parameter Specifies
'string1' The string for which you want to search. You can type an alphanumeric string as is.
If the string contains special characters or blanks, enclose the string with single quotation marks.
To include an apostrophe in the search string, type it twice. Examples of valid strings are ABC, 'ABC', 'DON''T', and 'AND HIS'.
'string2' The string with which you want to replace the search string. Follow the rules described in the definition for 'string1'.
c'string1' The case-sensitive string that you want to replace. Enclose the string with single quotation marks. For example, if you are in an edit session and have CAPS turned on but you want to search for text that contains the string AbC, type c'AbC'.
x'string1' The hexadecimal data that you want to replace. The string must be an even number of characters and can contain only the letters a through f, A through F, and the numbers 0 through 9. The second apostrophe is optional.
x'string2' The hexadecimal string with which you want to replace the search string. Follow the rules described in the definition for x'string1'.
CHANGE 121

Chapter 4 Option 2: Editing source data
p'string1' The picture string that you want to replace. Enclose the picture string with single quotation marks. If CAPS is turned on, the picture string is uppercase. If CAPS is turned off, the picture string is used as is when a lowercase p is used to define the picture string, such as p'string'. When an uppercase P is used to define the picture string, such as P'string', the search is not case sensitive.
Either a plus sign (+) or a question mark (?) is a designated placeholder for the picture string. Use a plus sign (+) or a question mark (?) to represent exactly one character in the picture string.
An asterisk (*) placeholder in the picture string represents 0 through n characters.
Note When using the WORD, PREFIX, or SUFFIX parameters, the picture string wild cards will not cross over non-alphanumeric characters.
A back slash (\) is the designated escape character for the picture string. To search for a plus sign (+), question mark (?), or back slash (\) within a picture string, type \+, \?, or \\.
.l1 and .l2 Search and then change the string between only the lines bookmarked by .l1 and .l2. The first character in each bookmark is a lowercase “L”.
If .l2 is not present, then EOF is set for .l2.
.ZF/.TOF and .ZL/.EOF are system labels used to indicate TOF and EOF, respectively.
.TOD is a system label used to indicate the top line of the display.
See “.label – Set bookmark” on page 197 for more information.
left_column The left column where you want the search and replace to start. The editor does not search or change data to the left of this column. The default is the left zone.
right_column The right column where you want the search and replace to end. The editor does not search or change data to the right of this column. The default is the right zone.
Note If you want to search a single column, do not enter a right column.
Next Search down from the current line and change the next occurrence of the search string. This is the default.
All Change all occurrences of the search string.
First Change only the first occurrence of the search string.
Last Change only the last occurrence of the search string.
This parameter Specifies
122 CPMS/SYSD Reference Manual ~ 7.2

Chapter 4 Option 2: Editing source data
You can use the CHANGE command with the TRUNC and ZONE primary commands. You can use the X (Exclude) line command to limit the extent of the change operation.
You can use the PF keys to which the FIND and CHANGE commands are assigned together.
To use the CHANGE command
1. Type CHANGE 'string1' 'string2' in the Input field, and then press FIND. The editor positions the cursor at the first occurrence of the search string but does not change the search text.
2. Take one of the following actions:
• To change the string, press CHANGE.
• To leave the string as is and search for the next occurrence, press FIND.
3. Repeat Step 2 until you reach the end of the member.
Prev Search up from the current line and change the previous occurrence of the search string.
Xall Change all of the records that match the change criteria and then remove any lines that do not include the string from the screen.
Once Change only the first occurrence on each line. If the Find key is pressed, the string is found only once per line.
Note The WORD, PREFIX, and SUFFIX parameters only work with words. A word is defined as the characters a through z, A through Z, and 0 through 9.
Word Change string1 if it is a word.
For example, type C ABC XYZ WORD. SYSD changes ABC and 'ABC', but not ABC123, ABCDEF, or XYZABC.
PREFix Change string1 only if it is a prefix.
For example, type C ABC XYZ PREFIX. SYSD changes ABCDEF and (ABCXYZ), but not ABC, XYZABC, or AABCZ.
Suffix Change string1 only if it is a suffix.
For example, type C ABC XYZ SUFFIX. SYSD changes XYZABC and 'XYZABC.', but not ABC, ABC123, or AABCZ.
X Change only those lines that have been excluded with the EXCLUDE primary or X (Exclude) line command.
NX Change only lines that have not been excluded with the EXCLUDE primary or X (Exclude) line command.
This parameter Specifies
CHANGE 123

Chapter 4 Option 2: Editing source data
CLEAR
The CLEAR command clears the screen and returns to CICS, leaving the current edit session intact. You must assign the CLEAR command to your clear key, a PF key, or a PA key.
COLS
The COLS command controls the column guides in the edit session. The COLS command turns off all column guides except those guides turned on using this command. The formats of all the aliases of the COLS command are:
Note You can also use the COLS line command to control the column guides in the edit session. See “COLS – Column guide control” on page 184 for more information.
The column guide embedded in the body of the edit does not contain a prefix area. Use the prefix area in the line above or below the guide as if the guide was not present.
COLs [OFF|ON|ON TOp|ON BOttom|ON n]SCAle
This parameter Specifies
OFF Turn off all of the column guides.
ON Turn on the top and bottom column guides.
ON TOp Turn on the top column guide.
ON BOttom Turn on the bottom column guide.
ON n Place the column guide on the line under the nth data line shown in the edit session.
The value for n must be less than the number of physical lines on the screen minus four (4). For example, n must be 1 to 20 for a 24-line terminal.
For example, type SCALE ON 6. In this example, SYSD places the column guide after the sixth data line shown in the edit session.
124 CPMS/SYSD Reference Manual ~ 7.2

Chapter 4 Option 2: Editing source data
COPY
The COPY command inserts data from an external member into the current edit session. You must also use the A (After) or B (Before) line command to tell the editor where you want to insert the data. The format of the COPY command is:
The editor prompts you for the dataset name and the beginning and ending line numbers. After the editor verifies that the data is valid, it copies the data into the current edit session at the position indicated by the A (After) or B (Before) line command and then renumbers all of the lines according to the current edit session. If you do not specify the beginning and ending line numbers, the editor copies the entire data set.
To copy data
1. In the Input field, type COPY.
2. In the number sequence field next to the appropriate line, type A (After) or B (Before).
3. Press ENTER. The Copy menu appears.
4. Press ENTER.
COPY
COPY 125

Chapter 4 Option 2: Editing source data
CREATE
The CREATE command copies all or part of the current edit session in the menu-driven system into a new member in either the same data set or another data set. If you want to copy all or part of the current edit session in the menu-driven system into an existing member, use the REPLACE command.
The format of the CREATE command is:
To copy only specific lines from the current edit session into the new member, use the C (Copy) or CC (Copy block) line command.
To move only specific lines from the current edit session into the new member, use the M (Move) or MM (Move block) line command.
To copy the entire current edit session, issue the CREATE command without any line commands.
CREate 'dsn'|'dsn(member)'|member
This parameter Specifies
'dsn' The name of the data set in which you want to create the new member. The editor copies or moves the data from the current edit session into a new member in a different data set. The new member name is the same as the current edit session.
'dsn(member)' The name of the data set and member that you want to create. The editor copies or moves the data from the current edit session into a new member in a different data set.
member The name of the new member you want to create. The editor copies or moves the data from the current edit session into a new member in the same data set as the current edit session.
126 CPMS/SYSD Reference Manual ~ 7.2

Chapter 4 Option 2: Editing source data
DELETE
The DELETE command deletes the records between and including two labels. You can delete all records, excluded records, or nonexcluded records. The format of the DELETE command is:
The editor deletes the labels on deleted records.
Examples of the DELETE command
In the following example, the FIND command defines records that contain the string ABCDEF as nonexcluded. The editor displays only those lines that contain the string ABCDEF. The DELETE command then deletes only those records that are defined as nonexcluded.
In this example, the editor only deletes those records that contain the ABCDEF string because they are defined as nonexcluded.
DELete .l1 .l2 [ALL|X|NX]
This parameter Specifies
.l1 and .l2 Delete the records between the lines bookmarked by .l1 and .l2. The first character in each bookmark is a lowercase “L”.
.ZF/.TOF and .ZL/.EOF are system labels used to indicate TOF and EOF, respectively.
.TOD is a system label used to indicate the top line of the display.
See “.label – Set bookmark” on page 197 for more information.
ALL Delete all of the records in the range. This is the default.
X Delete only excluded records in the delete range.
NX Delete only nonexcluded records in the delete range.
Find ABCDEF XALLDELete .TOF .EOF NX
DELETE 127

Chapter 4 Option 2: Editing source data
In the following example, the FIND command defines records that contain the string ABCDEF as nonexcluded. The editor displays only those lines that contain the string ABCDEF. The DELETE command then deletes only those records that are defined as excluded.
In this example, the editor deletes all of the records that do not contain the ABCDEF string. The records that contain the ABCDEF string are nonexcluded, so they are not deleted.
DELLINE
The DELLINE command deletes the record located at the cursor position. The DELLINE command is designed to be assigned to a PF key. See “Program Function Key Definition screen” on page 42 for more information.
DELQ
The DELQ command is an alias of the PCDEL command. This command allows you to delete a temporary storage queue that you created using a previous PUT or PCSND command. (See “PCDEL” on page 153 for more information.) The formats of all the aliases of the DELQ command are:
Find ABCDEF XALLDELete .TOF .EOF X
DELQ [Q=queue_name] [S=sysid] PCDel DQ
This parameter Specifies
queue_name The name of the temporary storage queue that you want to delete.
sysid The 4-character system ID of the CICS region in which the temporary storage queue resides. This parameter lets you delete a temporary storage queue in a different CICS region.
128 CPMS/SYSD Reference Manual ~ 7.2

Chapter 4 Option 2: Editing source data
DELWORD
The DELWORD command deletes a single word, including the first blank following the word or the right zone, whichever comes first. The cursor must be within the current zone settings. The DELWORD command is designed to be assigned to a PF key. See “Program Function Key Definition screen” on page 42 for more information.
For example:
In this example, the results of the DELWORD command are as follows, based on the position of the cursor:
DOWN
The DOWN command scrolls down through the edit session. The formats of all the aliases of the DOWN command are:
This is a test sentence.....+....1....+....2....+....3....+....4....+....5....+....6....+....7....+....8
Cursor position Zone setting Result of DELWORD command
5 Thisis a test sentence.
11 This is a sentence.
20 This is a test sent
9 ZONE 5 20 This is test sente nce.
16 ZONE 5 20 This is a test nce.
DOwn [nnn|M] Next PF8
This parameter Specifies
nnn Scroll down by the specified number of lines. This number overrides the value specified in the Scroll field.
M Scroll to the bottom of the edit session.
DELWORD 129

Chapter 4 Option 2: Editing source data
DQ
The DQ command is an alias of the PCDEL command. This command allows you to delete a temporary storage queue that you created using a previous PUT or PCSND command. (See “PCDEL” on page 153 for more information.) The formats of all the aliases of the DQ command are:
END
The END command saves the current edit session in the data set and then deletes the edit session. The editor returns to the screen from which you started the edit session. If you issue the END command on the Edit – Copy menu, the editor returns to the current edit session. You should only issue the END command when you have completed all editing and you want to save the data.
The formats of all the aliases of the END command are:
DQ [Q=queue_name] [S=sysid] PCDel DELQ
This parameter Specifies
queue_name The name of the temporary storage queue that you want to delete.
sysid The 4-character system ID of the CICS region in which the temporary storage queue resides. This parameter lets you delete a temporary storage queue in a different CICS region.
END [FORCE]<PF3>PF3FILe
This parameter Specifies
[FORCE] The Force parameter needed to exit the editing session.
The Force parameter is required if you specified Force=E or Force=B on the Edit – Dataset menu and you made updates to the session. See “Force Required for Exit” on page 90 for more information.
130 CPMS/SYSD Reference Manual ~ 7.2

Chapter 4 Option 2: Editing source data
ENTER
The ENTER command is assigned to the ENTER key and submits all text changes, line commands, and primary commands to the CPU. The editor executes the submissions in order starting with the text changes and ending with the primary commands. If the primary command line is empty and there are no pending line commands or text changes, the editor does not change the screen. The editor updates the work session each time you press ENTER.
EXCLUDE
The EXCLUDE command hides all of the records from the display. The format of the EXCLUDE command is:
To view the records, issue the SHOW command. See “SHOW” on page 164 for more information.
FILE
The FILE command is an alias of the END command. This command allows you to save the current edit session in the data set and then deletes the edit session. (See “END” on page 130 for more information.) The formats of all the aliases of the FILE command are:
EXCLude
FILe [FORCE]END<PF3>PF3
This parameter Specifies
[FORCE] The Force parameter needed to exit the editing session.
The Force parameter is required if you specified Force=E or Force=B on the Edit – Dataset menu and you made updates to the session. See “Force Required for Exit” on page 90 for more information.
ENTER 131

Chapter 4 Option 2: Editing source data
FIND
The FIND command searches the edit session for a specific string of text and displays the string, if found, on the line defined by the FLINE command. The editor searches data only within the ZONE columns. See “ZONE” on page 179 for more information.
If SYSD reaches the end of the file without finding the search string when wrap is turned on, SYSD wraps to the TOF or EOF(PREV) and continues searching.
If SYSD reaches the EOF without finding the search string when wrap is turned off, SYSD displays a message and then sets the internal starting point for the search to the TOF. The next FIND command issued after a TOF or EOF appears wraps and then begins at the top or bottom of the file, respectively.
The .l1 and .l2 parameters redefine the TOF and EOF for the FIND command. If you specify these parameters in the FIND command, the next FIND command wraps and then begins at the top or bottom of the range defined by the .l1 and .l2 parameters, respectively.
To view the next occurrence of the string, press FIND.
You can use the FIND command with the TRUNC and ZONE primary commands. You can use the X (Exclude) line command to limit the search.
You can use the FIND command with the CHANGE command. When the CHANGE and FIND commands are used together, SYSD executes only the FIND command. Once the string is found, you can use PF6 to accept the changes. This combination of FIND and CHANGE can be used to replace certain strings only.
The formats of all the aliases of the FIND command are:
Find string|c'string'|x'string|p'string'|* [.l1 [.l2]] [[left_column] [right_column]][NEXT|ALL|FIRST|LAST|PREV|XALL][ONCE][WORD|PREFIX|SUFFIX][X|NX]PF5 LOcateFINDR
132 CPMS/SYSD Reference Manual ~ 7.2

Chapter 4 Option 2: Editing source data
The order of the parameters is important. The string must be the first parameter, .l1 and .l2, if present, must follow the string, left_column must be before right_column and FIRST, PREV, and so forth must follow. See “Examples showing the correct parameter order for FIND command” on page 136 for examples of the order in which you should enter the parameters.
This parameter Specifies
string • The string that you want to find. You can type an alphanumeric string as is.
• If the string contains special characters or blanks, enclose the string with single quotation marks.
• To include an apostrophe in the search string, type it twice. Examples of valid strings are ABC, 'ABC', 'DON''T', and 'AND HIS'.
c'string' The case-sensitive string that you want to find. Enclose the string with single quotation marks. For example, if you are in an edit session and have CAPS turned on but you want to search for text that contains the string AbC, type c'AbC'.
x'string' The hexadecimal data that you want to find. The string must be an even number of characters and can contain only the letters a through f, A through F, and the numbers 0 through 9. The second apostrophe is optional.
p'string' • The picture string that you want to find. Enclose the picture string with single quotation marks. If CAPS is turned on, the picture string is uppercase. If CAPS is turned off, the picture string is used as is when a lowercase p is used to define the picture string, such as p'string'. When an uppercase P is used to define the picture string, such as P'string', the search is not case sensitive.
• Either a plus sign (+) or a question mark (?) is a designated placeholder for the picture string. Use a plus sign (+) or a question mark (?) to represent exactly one character in the picture string.
• An asterisk (*) placeholder in the picture string represents 0 through n characters.
Note When using the WORD, PREFIX or SUFFIX parameters, the picture string wild cards will not cross over non-alphanumeric characters.
• A back slash (\) is the designated escape character for the picture string. To search for a plus sign (+), question mark (?), or back slash (\) within a picture string, type \+, \?, or \\.
* The last string that you entered. To find a single asterisk (*), enclose it in quotation marks.
FIND 133

Chapter 4 Option 2: Editing source data
.l1 and .l2 • Find the string only between and including the lines bookmarked by .l1 and .l2. The first character is a lowercase “L”. These parameters are referred to as labels.
• If .l2 is not specified, then the EOF is used in its place.
• .ZF/.TOF and .ZL/.EOF are system labels used to indicate TOF and EOF, respectively.
• .TOD is a system label used to indicate the top line of the display.
• See “.label – Set bookmark” on page 197 for more information.
left_column The left column where you want the search to start. SYSD does not search the columns to the left of this column. The default is the left zone.
right_column The right column where you want the search to end. SYSD searches only the data that falls between and including the left and right columns. The default is the right zone.
Note If you want to search a single column, do not enter a right column.
Next Start the search on the current line and then move down to find the next occurrence of the string. This is the default.
You can type N for this parameter.
All Start the search at the top of the data set and then move forward to find all occurrences of the string.
You can type A for this parameter.
First Start the search at the top of the data set and then move down to find the first occurrence of the string.
You can type F for this parameter.
Last Start the search at the bottom of the data set and then move up to find the last occurrence of the string.
You can type L for this parameter.
Prev Start the search on the current line and then move up to find the previous occurrence of the string.
You can type P for this parameter.
Xall Search all lines and then remove any lines that do not contain the string from the display.
Once Find the search string only once per line.
You can type O for this parameter.
This parameter Specifies
134 CPMS/SYSD Reference Manual ~ 7.2

Chapter 4 Option 2: Editing source data
Note The WORD, PREFIX, and SUFFIX parameters only work with words. A word is defined as the characters a through z, A through Z, and 0 through 9.
Word Finds string1 if it is a word.
For example, type F ABC WORD. SYSD finds ABC and 'ABC', but not ABC123, ABCDEF, or XYZABC.
PREFix Finds string1 only if it is a prefix.
For example, type F ABC PREFIX. SYSD finds ABCDEF and (ABCXYZ), but not ABC, XYZABC, or AABCZ.
Suffix Finds string1 only if it is a suffix.
For example, type F ABC SUFFIX. SYSD finds XYZABC and 'XYZABC.', but not ABC, ABC123, or AABCZ.
X Search only lines that have been excluded.
NX Only search lines that have not been excluded. If you do not specify either the X or NX parameter, SYSD searches all of the lines.
This parameter Specifies
FIND 135

Chapter 4 Option 2: Editing source data
Examples showing the correct parameter order for FIND command
The following examples illustrate the order in which you should enter parameters for the FIND command.
Note When you stack FIND commands using the LINEND character, the final target line is positioned on the top line. Stacking FIND commands ignores the FLINE setting only during the stacked search.
Example Result of FIND command
F abc Finds the next occurrence of abc starting at the cursor position on the current line. Also finds ABC or Abc.
f c'Abc' Finds only the characters Abc starting at the cursor position on the current line. Does not find ABC or abc.
f ABC 10 Finds the characters abc in position 10.
f ABC 10 25 Finds the characters abc in positions 10 through 25. The string must fit completely within the columns. Finds ABC if the string starts in positions 10 to 23 but not if it starts in positions 24 or 25.
F 'a b c' Finds the first occurrence of the characters a b c in the file. Single quotation marks are required because of the blanks.
F abc last Finds the last occurrence of the characters abc.
F abc x Finds all occurrences and exclude any lines without the characters abc.
F * p Finds the previous occurrence of the last string.
F "*" p Finds the previous occurrence of the asterisk (*) character.
136 CPMS/SYSD Reference Manual ~ 7.2

Chapter 4 Option 2: Editing source data
FINDN
The FINDN command continues a search toward the EOF using the previous FIND search string. If you issue the FIND command after you issue the FINDN command, the FIND command searches toward the EOF.
The FINDN command is designed to be assigned to a PF key. See “Changing PF key assignments” on page 44 for more information.
FINDP
The FINDP command continues a search toward the TOF using the previous FIND search string. If you issue the FIND command after you issue the FINDP command, the FIND command searches toward the TOF.
The FINDP command is assigned to the PF5 key by default. See “Default PF key assignments” on page 42 for more information.
FINDR
The FINDR command is a reverse find. This command reverses the direction of the FIND command. Use the FIND command to continue to search in the new direction. Issue the FINDR command again to reverse the direction of the FIND command again.
The FINDR command is designed to be assigned to a PF key. See “Changing PF key assignments” on page 44 for more information.
FIRST
The FIRST command is an alias of the TOP command. This command allows you to scroll to the top of the edit session. (See “TOP” on page 174 for more information.) The formats of all the aliases of the FIRST command are:
FIRst TOp
FINDN 137

Chapter 4 Option 2: Editing source data
FLBL
The Find Label (FLBL) command sets the data under the cursor to the Find string. It then performs a search for the data toward the end of file. After this command, you may use the standard FIND, FINDN, and FINDP commands to continue to locate the string.
This command is designed for computer source code, where the special characters are valid for label names.
The FLBL command is designed to be assigned to a PF key. See “Changing PF key assignments” on page 44 for more information.
• The string begins on the first alphanumeric character, including the characters @#$_ starting at the cursor position and searches the record. The string ends when a non-alphanumeric character or non special listed character is found.
• The search always advances toward the end of file.
• The search string is always placed in quotes for the FIND routine.
See “FIND” on page 132, “FINDN” on page 137, and “FINDP” on page 137 for more information.
FLINE
The FLINE command sets the target line for the FIND command. You can set this from 1 to 15. When you issue a FIND command and the string is found, the line appears on the target line specified by the FLINE command. Line 1 is the first line below the top column line. If the line number of the found line is less than the number you specified in the FLINE command, then the first line in the file appears on line 1.
If you use the ALL or XALL parameters in the FIND or CHANGE command, then the editor does not adjust the final line.
The format of the FLINE command is:
FLine [nn]
This parameter Specifies
nn • The target line for the FIND command.
• If you do not specify a target line, the FLINE command shows the current FLINE target number.
138 CPMS/SYSD Reference Manual ~ 7.2

Chapter 4 Option 2: Editing source data
FLIP
The FLIP command changes the status of the excluded lines between and including two lines that contain labels. The format of the FLIP command is:
FORWARD
The FORWARD command ignores the Scroll field and scrolls down toward the EOF by the number of pages that you specify. If the number of pages specified would cause the display to advance past the EOF, then the EOF appears. The format for the FORWARD command is:
FLIP .l1 .l2 [ALL|NX|X]
This parameter Specifies
.l1 and .l2 • Flip the records between the lines bookmarked by .l1 and .l2. The first character in each bookmark is a lowercase “L”.
• .ZF/.TOF and .ZL/.EOF are system labels used to indicate TOF and EOF, respectively.
• .TOD is a system label used to indicate the top line of the display.
See “.label – Set bookmark” on page 197 for more information.
ALL Flip the status of all records. This is the default.
NX Change the status of all records to “nonexcluded.”
X Change the status of all records to “excluded.”
FOrward [nn|M]
This parameter Specifies
nn • Scroll forward by the specified number of pages. The page length is calculated from the number of rows on the screen.
• This number overrides the value specified in the Scroll field.
M Scroll to the EOF.
FLIP 139

Chapter 4 Option 2: Editing source data
FSTR
The Find String command sets the data under the cursor to the Find String. It then performs a search for the data toward the end of the file. After this command, you may use the standard FIND, FINDN, and FINDP commands to continue to locate the string.
The FSTR command is designed to be assigned to a PF key. See “Changing PF key assignments” on page 44 for more information.
• The string begins on the first non-blank character starting at the cursor position and searches the record. The string ends at the next blank.
• The search always advances toward the end of the file.
• The search string is always placed in quotes for the FIND routine.
For example:
See “FIND” on page 132, “FINDN” on page 137, and “FINDP” on page 137 for more information.
....+....1....+....2....+....3....+....4....+....5.. ...I say 'Math, such as (13+1) is really easy.'
Cursor position Search string
6 ‘‘‘Math,’
15 ‘uch’
21 ‘(13+1)’
38 ‘easy.’’’
43 Error - no string found
140 CPMS/SYSD Reference Manual ~ 7.2

Chapter 4 Option 2: Editing source data
FWORD
The Find Word command sets the data under the cursor to the Find string. It then performs a search for the data toward the end of the file. After this command, you may use the standard FIND, FINDN, and FINDP commands to continue to locate the string.
The FWORD command is designed to be assigned to a PF key. See “Changing PF key assignments” on page 44 for more information.
• The string begins on the first character (a through z, A through Z) or number (0 through 9) starting at the cursor position and searches the record. The string ends when a character or number is not found.
• The search always advances toward the end of the file.
• The search string is always placed in quotes for the FIND routine.
For example:
See “FIND” on page 132, “FINDN” on page 137, and “FINDP” on page 137 for more information.
....+....1....+....2....+....3....+....4....+....5.. ...I say 'Math, such as (13+1) is really easy.'
Cursor position Search string
6 ‘Math’
15 ‘uch’
21 ‘13’
38 ‘easy’
43 Error - no string found
FWORD 141

Chapter 4 Option 2: Editing source data
GET
The GET command retrieves data that a previous PUT or PCSND command put in a temporary storage queue. The editor inserts the data in the current edit session at the place marked by the A (After) or B (Before) line command. The formats of all the aliases of the GET command are:
Note The default temporary storage queue name and CICS system ID are defined on the GET/PUT TS Queue Identifiers screen (Option 0.4). See “GET/PUT TS Queue Identifiers screen” on page 48 for more information.
GET [KEEP] [Q=queue_name] [S=sysid] PCRcv
This parameter Specifies
KEEP That SYSD should not delete the data from the temporary storage queue after inserting the data in the current edit session.
queue_name The name of the temporary storage queue that contains the data that you want to retrieve. You can use the queue_name parameter to override the default temporary storage queue name.
sysid The 4-character system ID of the CICS region in which the temporary storage queue resides. You can use the sysid parameter to override the default CICS system ID to retrieve data from a temporary storage queue in a different CICS region.
142 CPMS/SYSD Reference Manual ~ 7.2

Chapter 4 Option 2: Editing source data
HEX
Use the HEX command to view the source data in hexadecimal notation either in columnar or linear format. You can edit or update the data in hexadecimal mode as well as alphanumeric mode. The format of the HEX command is:
HEX [ON|OFF] [VERT|DATA]
This parameter Specifies
ON Turn on hexadecimal notation. This is the default.
OFF Turn off hexadecimal notation and translate the data back to alphanumeric.
VERT Display the hexadecimal data in columnar format, which is two lines per byte. This is the default.
DATA Display the hexadecimal data in linear format, which is two character positions per byte.
HEX 143

Chapter 4 Option 2: Editing source data
INSERT
Use the INSERT command to insert a string into every record between two labels.The format of the INSERT command is:
The string is inserted into each record after the “col” column. If the column setting is zero, the string is inserted at the front of each record. All data after the inserted string is shifted to the right the length of the inserted string. If data is pushed to the right (which would cause the data to be truncated), the record is not updated unless the TRunc option has been entered. Excluded and deleted records are not processed.
INSERT .11 .12 str {{col} NOTRunc|TRunc}
This parameter Specifies
.l1
.l2Label pair defining the records to be processed. All records between and including the labels are processed. Labels are required parameters.
• Use .ZF/.TOF or .ZL/.EOF to set the range to TOF or EOF.
• .TOD is a system label used to indicate the top line of the display.
• See “.label – Set bookmark” on page 197 for more information.
str The string to be inserted. If the string requires blanks or special characters, place the string inside quotation marks.
col Column number to insert the string after. The number must be less than the record size of the file. The default is 0 (insert the string in front of the record).
NOTRunc Do not truncate the data. This is the default.
TRunc Truncate the data.
144 CPMS/SYSD Reference Manual ~ 7.2

Chapter 4 Option 2: Editing source data
KEEP
The KEEP command is an alias of the SAVE command. This command allows you to save an edit session into a new member. (See “SAVE” on page 162 for more information.) The formats of all the aliases of the KEEP command are:
KEYS
Use the KEYS command to view the commands that are assigned to the primary or secondary PF keys. The primary PF keys are PF1 through PF12. The secondary PF keys are PF13 through PF24. The format of the KEYS command is:
LAST
The LAST command is an alias of the BOTTOM command. This command allows you to scroll to the bottom of the edit session. (See “BOTTOM” on page 119 for more information.) The formats of all the aliases of the LAST command are:
KEEP ['dsn'|'dsn(member)'|member] SAVe
Keys [S]
This parameter Specifies
[S] Display the secondary PF keys. If you do not specify this parameter, the editor displays the primary PF keys.
LAstBOttom
KEEP 145

Chapter 4 Option 2: Editing source data
LEFT
The LEFT command scrolls to the left. The formats of all the aliases of the LEFT command are:
LINE
The LINE command moves a line that you specify to appear as the first line on the screen. The formats of all the aliases of the LINE command are:
LEft [nnn|M] PF10
This parameter Specifies
nnn Scroll left by the specified number of columns. This number overrides the value specified in the Scroll field.
M Scroll to the column farthest on the left.
Line nnnnnn :.label
This parameter Specifies
nnnnnn The line number where you want the display to start. To see the first line of the data set, type 1 or 0. To see the end of the data set, type a large number, such as 999999. You can specify a bookmark with a leading dot for the line number.
.label Position the line with a .label bookmark to appear as the first line on the screen.
146 CPMS/SYSD Reference Manual ~ 7.2

Chapter 4 Option 2: Editing source data
LINEND
The LINEND command turns on or off command stacking. It also allows you to change the character used as the command-stack character. If you do not enter any parameters, then the current LINEND setting appears. The format of the LINEND command is:
The LINEND character does not stack commands if the LINEND parameters are enclosed in quotation marks.
For example:
In this example, the editor finds #ABC and then finds XYZ.
Note When stacking FIND commands using the LINEND character, the editor positions the final target line on the top line. Stacking FIND commands ignores the FLINE parameter only during the stacked search.
LINEND [ON] <CHARACTER>LINEND OFF
This parameter Specifies
ON Turns on command stacking and sets character as the stacking character. If LINEND is currently turned off, character defaults to #.
If LINEND is currently on and you do not enter the character, then the LINEND character appears.
OFF Turns off command stacking.
CHARACTER The command-stack character. Valid characters in no specific order.
Char Hex Char Hex Char Hex Char Hex
‘ 79 ~ A1 ! 5A @ 7C
# 7B $ 5B % 6C ^ B0
5F & 50 * 5C ( 4D
) 5D - 60 _ 6D + 4E
[ AD { C0 ] BD } D0
\ E0 | 4F ; 5E : 7A
< 4C . 4B > 6E / 61
? 6F
F '#ABC'#F XYZ
LINEND 147

Chapter 4 Option 2: Editing source data
LOCATE
The LOCATE command is an alias of the FIND command. This command allows you to search the edit session for a specific string of text. (See “FIND” on page 132 for more information.) The formats of all the aliases of the LOCATE command are:
MASK
Use the MASK command with the INSERT line command to prefill inserted lines with the contents of a mask. You can have only one mask. The format of the MASK command is:
The first time you issue the MASK command, the editor displays a blank line that starts with =MASK>. To define the contents of the mask, type the characters in their respective positions on the =MASK> line. If you have already issued the MASK command, the contents of the previous mask appear. You can type new characters over the existing ones.
To put the contents of the mask in any inserted lines, issue the INSERT line command. You must change the inserted line so that the editor recognizes the line as a permanent entry. Pressing the SPACE BAR while on the line is a sufficient change.
When you press ENTER, the editor deletes any inserted mask lines that you did not change.
LOcate string|c'string'|x'string|p'string'|* [.l1 [.l2]] [[left_column] [right_column]][NEXT|ALL|FIRST|LAST|PREV|XALL][ONCE][WORD|PREFIX|SUFFIX][X|NX]FindPF5
MASK [ON|OFF]
This parameter Specifies
ON Enable the MASK command. This is the default.
OFF Disable the MASK command.
148 CPMS/SYSD Reference Manual ~ 7.2

Chapter 4 Option 2: Editing source data
MODID
The MODID command identifies changes made during an edit session. The editor highlights the line number of each updated line and inserts your modification ID. The format of the MODID command is:
If the NUMBER command is turned off, you can place the MODID command in the COB or STD number field. See “NUMBER” on page 152 for more information.
If any errors are detected, the MODID setting is not changed.
PIC( ) remarks:
• The mod_id string is inserted into the changed record unconditionally until a PIC( ) picture pattern is entered. The pattern remains the same until changed by another PIC( ) picture pattern.
• There may be times when you want to insert the mod_id only under conditions, such as when there are all blanks or an old mod_id. You can use the PIC( ) parameter to set a picture pattern of when the mod_id will be inserted.
• If you enter PIC, the pattern will be set to "++++++++", which indicates to insert the mod_id unconditionally.
MODid [ON] [[PIC()] mod_id [begin_column]]MODid OFF
This parameter Specifies
ON • Turn on the MODID command. This is the default if a mod_id is entered.
• Use the ON parameter without a mod_id parameter to turn on a previously entered mod_id.
OFF Turn off the MODID command.
PIC( ) Sets a picture pattern to specify when the MODID is inserted into the changed record. See the remarks below for complete details.
mod_id The 1-character to 8-character modification ID that you want to insert. To include a blank in the modification ID, enclose the mod_id with single quotation marks.
begin_column The column in which you want SYSD to display the first character of the modification ID. If you do not specify a beginning column, the modification ID appears as follows:
For The modification ID is
STD or no numbers Right justified and ends in column 71.
COBOL numbering Right justified and ends in column 80.
MODID 149

Chapter 4 Option 2: Editing source data
• If you enter PIC( ), the pattern will be set to all blanks (B), which indicates to insert the mod_id only if the columns are all blank.
• If you enter PIC(x) where x is 1 to 8 characters, the pattern is set based on x as listed below. If the pattern is less than 8 characters, the pattern is padded on the right with blanks (b).
+ = Any character A = Alphabetic character (A-Z, a-z) and blankN = Numeric character (0-9) and blankB = Blank
• Before the mod_id is inserted, the columns where the insertion is to take place must match the pattern exactly, except for a blank (which matches any picture pattern character).
• If the pattern is not all plus signs, it will be displayed on the bottom column guide. “A” is displayed as @ and “N” as #.
Examples:
• PIC(AANNNNNN)
The mod_id is inserted into the changed record only if the columns in the changed record have two alphanumeric characters and six numeric characters.
• PIC( ) or PIC(BBBBBBBB)
The mod_id is inserted into the changed record only if the columns in the changed record contain all blanks.
MOD5
This command changes the editor display to use a MOD5 (27 x 132) format when you are logged onto a MOD5 terminal. The format of the MOD5 command is:
If you are on a MOD5 terminal and the MOD5 option is turned off, the display is in a MOD2 format. If you have the MOD5 option on and you are not on a MOD5 terminal, the display will be the type of terminal you are logged on as (MOD2, MOD3, or MOD4).
You only have to issue this command once. It remains in effect until changed by another MOD5 command. This setting may also be changed on the Edit Parameter screen (=0.6).
MOD5 [ON|OFF]
This parameter Specifies
ON Turn on the MOD5 support.
OFF Turn off the MOD5 support.
150 CPMS/SYSD Reference Manual ~ 7.2

Chapter 4 Option 2: Editing source data
NEXT
The NEXT command is an alias of the DOWN command. This command allows you to scroll down through the edit session. (See “DOWN” on page 129 for more information.) The formats of all the aliases of the NEXT command are:
NULLS
The NULLS command replaces trailing blanks with nulls so that you can press the INSERT key to insert data in the middle of a line. If the NULLS command is set to OFF, you must press ERASE EOF or manually delete the trailing blanks to provide the spaces needed to insert data. The format of the NULLS command is:
Next [nnn|M] DOwn PF8
This parameter Specifies
nnn Scroll down by the specified number of lines. This number overrides the value specified in the Scroll field.
M Scroll to the bottom of the edit session.
NULLs [ON|OFF]
This parameter Specifies
ON Turn on nulls. This is the default.
OFF Turn off nulls.
NEXT 151

Chapter 4 Option 2: Editing source data
NUMBER
The NUMBER command turns on or off the number mode and sets the line numbering fields that the editor uses.
The formats of all the aliases of the NUMBER command are:
You can override the NUMBER command by specifying search columns in the FIND command.
For example:
• If you specify NUMBER ON, the default is STD unless you enable COB or NUMBER OFF COB was previously in effect. If you specify NUMBER OFF and do not enable STD or COB, the editor turns off both, regardless of the prior setting.
• If you specify both the STD and COB parameters, numbering occurs in both fields. The editor copies the COBOL numbering from the STD numbers. If the COB and STD fields are not synchronized, this can result in out-of-sequence COBOL numbers. Use the RENUMBER command to force synchronization. See “RENUMBER” on page 159 for more information.
Both the STD and COB parameters can be on or off simultaneously, but one parameter cannot be off and the other on. To do this, use the ZONE command to exclude one of the fields. See “ZONE” on page 179 for more information.
NUMber ON|OFF [STD] [COB]
This parameter* Specifies
ON Turn on numbering. The editor ensures that all of the lines have valid sequence numbers and are in ascending order.
OFF Turn off numbering.
STD • Use the standard sequence number field, which is the first 8 bytes of variable-length records or the last 8 bytes of fixed-length records. This is the default if ON and COB were not previously set.
• The FIND and shift commands ignore the sequence columns, even when STD is turned on or off.
COB • Use the COBOL sequence number field, which is the first 6 bytes of fixed-length records.
• The FIND command and shift commands ignore the sequence columns, even when COBOL is turned on or off.
*You can enter the parameters for the NUMBER command in any order.
Find 200 73 80
152 CPMS/SYSD Reference Manual ~ 7.2

Chapter 4 Option 2: Editing source data
PCDEL
The PCDEL command deletes a temporary storage queue that you created using a previous PUT or PCSND command. The formats of all the aliases of the PCDEL command are:
The default temporary storage queue name and CICS system ID are defined on the GET/PUT TS Queue Identifiers screen (Option 0.4). See “GET/PUT TS Queue Identifiers screen” on page 48 for more information.
PCRCV
The PCRCV command is an alias of the GET command. This command allows you to retrieve data that a previous PUT or PCSND command put in a temporary storage queue. (See “GET” on page 142 for more information.) The formats of all the aliases of the PCRCV command are:
PCDel [Q=queue_name] [S=sysid] DELQ DQ
This parameter Specifies
queue_name The name of the temporary storage queue that you want to delete. You can use the queue_name parameter to override the default temporary storage queue name.
sysid The 4-character system ID of the CICS region in which the temporary storage queue resides. You can use the sysid parameter to override the default CICS system ID to delete a temporary storage queue in a different CICS region.
PCRcv [KEEP] [Q=queue_name] [S=sysid] GET
This parameter Specifies
KEEP That SYSD should not delete the data from the temporary storage queue after inserting the data in the current edit session.
queue_name The name of the temporary storage queue that contains the data that you want to retrieve. You can use the queue_name parameter to override the default temporary storage queue name.
sysid The 4-character system ID of the CICS region in which the temporary storage queue resides. You can use the sysid parameter to override the default CICS system ID to retrieve data from a temporary storage queue in a different CICS region.
PCDEL 153

Chapter 4 Option 2: Editing source data
PCSND
The PCSND command is an alias of the PUT command. This command allows you to write all or part of an edit session to a temporary storage queue. (See “PUT” on page 156 for more information.) The formats of all the aliases of the PCSND command are:
The PRINT command prints the edit session to the JES2 local destination queue, which is normally the system printer. The editor prints the name of the data set that you are editing and your user ID on the banner page. The format of the PRINT command is:
PCSnd [Q=queue_name] [S=sysid] PUT
This parameter Specifies
queue_name The name of the temporary storage queue to which you want to write the data. You can use the queue_name parameter to override the default temporary storage queue name.
sysid The 4-character system ID of the CICS region in which the temporary storage queue resides. You can use the sysid parameter to override the default CICS system ID to write data to a temporary storage queue in a different CICS region.
154 CPMS/SYSD Reference Manual ~ 7.2

Chapter 4 Option 2: Editing source data
PROFILE
The PROFILE command controls the current profile and edit session options. Options can include ISPF STATS, NULLS, and CAPS. The formats of all the aliases of the PROFILE command are:
To view the current profile settings, issue the PROFILE command without specifying the profile_name. Define profiles on the Edit Parameters screen (Option =0.6). The profile name must be one of the following names:
PROfile [profile_name]
This parameter Specifies
profile_name The name of the profile that you want to view or set.
Profile name Sets profile commands for
COBOL COBOL programs for updating.
NONUM Text without numbers in the edit session.
STD Data or Assembler programs for updating.
USER1 A unique profile for the edit session.
USER2 A unique profile for the edit session.
PROFILE 155

Chapter 4 Option 2: Editing source data
PUT
The PUT command writes all or part of an edit session to a temporary storage queue. The formats of all the aliases of the PUT command are:
You can issue a PCRCV or GET command to retrieve the data from the temporary storage queue.
The default temporary storage queue name and CICS system ID are defined on the GET/PUT TS Queue Identifiers screen (Option 0.4). See “GET/PUT TS Queue Identifiers screen” on page 48 for more information.
You can use the C (Copy), CC (Copy block), M (Move), and MM (Move block) line commands to write parts of an edit session to the temporary storage queue.
If you issue multiple PUT commands, the editor concatenates the data in the temporary storage queue. This lets you build a data set from several sources.
The data stays in the temporary storage queue until you issue a PCRCV, PCDEL, or GET command or CICS clears the temporary storage queue. Because the data stays in a temporary storage queue, you can retrieve data more than once.
QLABEL
Use the QLabel command to view all of the .label names that have been set. The format of the QLabel command is:
PUT [Q=queue_name] [S=sysid] PCSnd
This parameter Specifies
queue_name The name of the temporary storage queue to which you want to write the data. You can use the queue_name parameter to override the default temporary storage queue name.
sysid The 4-character system ID of the CICS region in which the temporary storage queue resides. You can use the sysid parameter to override the default CICS system ID to write data to a temporary storage queue in a different CICS region.
QLabel
156 CPMS/SYSD Reference Manual ~ 7.2

Chapter 4 Option 2: Editing source data
QQUIT
The QQUIT command is an alias of the CANCEL command. This command allows you to end and then delete the edit session without updating the source data set. (See “CANCEL” on page 119 for more information.) The formats of all the aliases of the QQUIT command are:
RECALL
Use the RECALL command to view the commands in the Input field that you have already issued, one command at a time. When the last command appears, the RECALL command sequence wraps and begins again at the first recalled command. The RECALL command is available anywhere in the menu-driven system, not just in the editor.
To issue a command that you recalled using the RECALL command, press ENTER when the command you want is in the Input field.
The formats of all the aliases of the RECALL command are:
If you use the plus sign (+) or question mark (?) in place of the RECALL command, you do not have to clear the Input field first. You can recall the most recent eight commands using multiple plus signs (+) or question marks (?). For example, type ++ or ?? to recall the second most recent command.
QQuit [FORCE]CANcel
This parameter Specifies
[FORCE] • The Force parameter needed to exit the editing session.
• The Force parameter is required if you specified Force=C or Force=B on the Edit – Dataset menu. See “Force Required for Exit” on page 90 for more information.
RECALL + ?
QQUIT 157

Chapter 4 Option 2: Editing source data
RECOVERY
The RECOVERY command turns on or off the recovery option. The response time might be slower with recovery turned on. When the recovery option is turned on, all changes you make in the editor are logged so that you can issue the UNDO command to undo the changes. See “UNDO” on page 177 for more information.
CAUTION If you turn off recovery or issue the RENUM edit command, the recovery data is deleted. You cannot undo any changes made before you turned off recovery or issued the RENUM command.
The format of the RECOVERY command is:
When the recovery option is turned on, all changes you make in the editor are placed in groups. Each group consists of the changes made to the file after you press a PF key or the ENTER key. After the maximum number of recovery groups have been created, the data wraps and the editor removes the oldest changes from the recovery file. The CPMS/SYSD administrator sets the number of groups that you can undo.
Examples of the recovery option
The following examples illustrate how to use the recovery option.
• If you delete five lines in a file, those five lines constitute one group. If you issue the UNDO command, the editor recovers all five lines.
• If you make a global change, all of the affected lines become one group. If you issue the UNDO command, all of the global changes are undone at the same time.
• If you insert one line in a file and then press ENTER, the inserted line is the only item in the group. If you issue the UNDO command, the editor deletes the line that you inserted.
RECovery (ON|OFF FORCE|SIze)
This parameter Specifies
ON Turns on the recovery option.
OFF FORCE Turns off the recovery option.
SIze Display the maximum number of recovery groups.
158 CPMS/SYSD Reference Manual ~ 7.2

Chapter 4 Option 2: Editing source data
RENUMBER
The RENUMBER command renumbers the lines in the work data set in increments of 100, unless the number of records in the data set exceeds 8,000. If there are more than 8,000 lines in the data set, the editor renumbers the lines in increments of 10.
CAUTION The RENUMBER command deletes all recovery data. See “RECOVERY” on page 158 for more information.
The formats of all the aliases of the RENUMBER command are:
REPEAT
The REPEAT command repeats the most recent command you issued. The formats of all the aliases of the REPEAT command are:
RENumber [FORCE]
This parameter Specifies
[FORCE] The Force parameter is needed if the recovery option is turned on.
REPEAT -
RENUMBER 159

Chapter 4 Option 2: Editing source data
REPLACE
The REPLACE command copies or moves all or part of the current edit session into a new or existing member. Use the C (Copy), CC (Copy block), M (Move), or MM (Move block) line commands to copy or move only part of the edit session. If the member you want to copy or move data to already exists, the editor replaces the existing data with the selected part of the edit session. If you do not specify any line commands, the editor replaces the entire member.
The format of the REPLACE command is:
REPlace 'dsn'|'dsn(member)'|member
This parameter Specifies
'dsn' The name of a data set to which you want to copy or move the data. If you use this option, the editor copies or moves the data from the current edit session into a new member in the specified data set. The new member name will be the same as the current edit session.
'dsn(member)' The name of a data set and member you want to create. If you use this option, the editor copies or moves the data from the current edit session into the new, specified member in the specified data set.
member The name of the member you want to create or replace. If you use this option, the editor copies or moves the data from the current edit session into the new, specified member in the same data set as the current edit session.
160 CPMS/SYSD Reference Manual ~ 7.2

Chapter 4 Option 2: Editing source data
RESET
The RESET command resets all pending line editor commands, change indicators, and error messages. In addition, the editor removes all incomplete or incorrect line commands. Because the editor processes line commands before primary commands, the RESET command does not reset complete and correct line commands.
The formats of all the aliases of the RESET command are:
RETURN
Use the RETURN command to view the Primary Option menu, leaving the edit session intact. You can restart the edit session at any time. The formats of all the aliases of the RETURN command are:
If you have more than one active partition and you issue the RETURN command on the Primary Option menu of a partition, SYSD cancels that partition and moves to the previous partition. To return to a specific screen in the previous partition, type the address for the screen in the Input field, and then press RETURN. See “SPLIT” on page 167 for more information about partitions.
RESet [ALL|.label|.]
This parameter Specifies
ALL Reset pending line commands and bookmarks.
.label Reset (delete) a bookmark.
. Reset (delete) all bookmarks.
RETURN [FORCE]PF12
This parameter Specifies
[FORCE] • The Force parameter needed to exit the editing session.
• The Force parameter is required if you specified Force=E or Force=B on the Edit – Dataset menu, you made changes while you were in the edit session, and EDTSAVE=Y is in SYSDSETS. See “Force Required for Exit” on page 90 for more information.
RESET 161

Chapter 4 Option 2: Editing source data
RIGHT
The RIGHT command scrolls to the right across the data. The formats of all the aliases of the RIGHT command are:
SAVE
The SAVE command saves an edit session into a new member. Use this command to protect against data loss when you are working in long edit sessions. The formats of all the aliases of the SAVE command are:
If you do not specify any parameters with the SAVE command, the editor saves the data from the current edit session in the original data set and member.
This command works the same way as the CREATE command. To save the member over an existing member, use the REPLACE command. See “CREATE” on page 126 and “REPLACE” on page 160 for more information.
RIght [nnn|M] PF11
This parameter Specifies
nnn Scroll right by the specified number of columns. This number overrides the value specified in the Scroll field.
M Scroll to the column farthest on the right.
SAVe ['dsn'|'dsn(member)'|member] KEEP
This parameter Specifies
'dsn' The name of the data set into which you want to save data. If you use this option, the editor saves the data from the current edit session in the data set that you specify.
'dsn(member)' The name of the data set and member into which you want to save the data. If you use this option, the editor saves the data from the current edit session in a new member in the data set that you specify.
member The name of the new member into which you want to save the data. If you use this option, the editor saves the data from the current edit session in the new member you specify in the current data set.
162 CPMS/SYSD Reference Manual ~ 7.2

Chapter 4 Option 2: Editing source data
Note CA Panevalet members cannot be saved into PDS or PDSE data sets using the SAVE command. Conversely, PDS or PDSE members cannot be saved into CA Panvalet using the SAVE command. To save CA Panvalet members into PDS or PDSE data sets, use the PUT and GET commands.
SCALE
The SCALE command is an alias of the COLS command. This command allows you to control the column guides in the edit session. (See “COLS” on page 124 for more information.) The formats of all the aliases of the SCALE command are:
SCAle [OFF|ON|ON TOp|ON BOttom|ON n]COLs
This parameter Specifies
OFF Turn off all of the column guides.
ON Turn on the top and bottom column guides.
ON TOp Turn on the top column guide.
ON BOttom Turn on the bottom column guide.
ON n Place the column guide on the line under the nth data line shown in the edit session.
The value for n must be less than the number of physical lines on the screen minus four (4). For example, n must be 1 to 20 for a 24-line terminal.
For example, type SCALE ON 6. In this example, SYSD places the column guide after the sixth data line shown in the edit session.
SCALE 163

Chapter 4 Option 2: Editing source data
SHOW
The SHOW command marks the indicated records to appear or not appear. The format of the SHOW command is:
SHOw [ALL] [OFF] [DELETES [OFF]] [COMMENTS [OFF]] [CHANGES [OFF]] [MODS [OFF]] [INSERTS [OFF]] [UPDATES [OFF]] [ERRORS [OFF]] [EXCLUDE [OFF]]
This parameter Specifies
ALL Show all previously excluded records. This is the default.
To exclude all records from the view, type ALL OFF or OFF.
DELETES Show all previously deleted records.
To exclude the deleted records from the display again, type DELETES OFF.
COMMENTS Show the comment records.
To exclude the comment records from the display again, type COMMENTS OFF.
CHANGES Show all changed records. You can substitute CHG for the CHANGES command.
To exclude the changed records from the display again, type CHANGES OFF.
MODS Show all modified records.
To exclude the modified records from the display again, type MODS OFF.
INSERTS Show all newly inserted lines.
To exclude the newly inserted lines from the display again, type INSERTS OFF.
UPDATES Show all updated lines.
To exclude the updated lines from the display again, type UPDATES OFF.
164 CPMS/SYSD Reference Manual ~ 7.2

Chapter 4 Option 2: Editing source data
SORT
The SORT command allows you to sort data using up to seven fields, and you can specify one of three sort formats for each of the seven fields. The format specified for each field can be different.
The format of the SORT command is:
ERRORS Show all error lines. This command is useful after you issue a SHOW ALL OFF command.
To exclude the error lines from the display again, type ERRORS OFF.
EXCLUDE Show the “n line(s) not displayed” line. This line shows how many lines contain excluded records that are not shown on the screen.
To hide the “n line(s) not displayed” line, type EXCLUDE OFF.
SORT .l1 .l2 [ex][KFD|KLD] [f1-f7][[type][dir] s e|[type][dir] s-e|[type][dir] s.l]
This parameter Specifies
.l1 and .l2 • Label pair that defines the records to be sorted. The first character is a lowercase “L”. The editor sorts all of the records between and including the labels. Labels are required parameters.
• .ZF/.TOF and .ZL/.EOF are system labels used to indicate TOF and EOF, respectively.
• .TOD is a system label used to indicate the top line of the display.
• See “.label – Set bookmark” on page 197 for more information.
ex Limit the sort. The default is to sort all records.
Note Deleted records are never sorted.
• Type X to limit the sort to excluded records.
• Type NX to limit the sort to nonexcluded records.
This parameter Specifies
SORT 165

Chapter 4 Option 2: Editing source data
When sorting, keep the following points in mind:
• The sort is always case sensitive.
• Variable-length records are padded on the right with blanks.
• Label (bookmarks) between .l1 and .l2 will be adjusted to their new line numbers. If one of these lines is sorted to the top or bottom, then two labels will be pointing to the same line. If you perform a sort a second time, neither label assigned to .l1 or .l2 will be adjusted.
• Deleted records are never sorted.
• If a field is sorted as hex, but does not contain hex data (0-9, A-F) it will still be sorted, but the results will be unpredictable.
KFD|KLD (optional) After the records have been sorted, you may choose to delete duplicate records. The ZONE columns are compared to determine whether the records are duplicates.
• KFD (keep first duplicate) Keeps the first duplicate record.
• KLD (keep last duplicate) Keeps the last duplicate record.
If this option is not used, then no records are deleted. Records with equal sort keys stay in their original order.
f1 Sort field 1. If not present, the default field is the current zone setting.
f2-f7 Sort fields 2 through 7. If you do not specify e or l, then end of the record is used as the ending column for the field.
type Type of data in the field.
– Type H to convert this data to hexadecimal before sorting.
– Type C for character data. This is the default.
dir Direction of sort for the sort field.
– Type A to sort the field in ascending order. This is the default.
– Type D to sort the field in descending order.
s Start column for the sort field.
e End column for the sort field.
l Length of field to sort.
This parameter Specifies
166 CPMS/SYSD Reference Manual ~ 7.2

Chapter 4 Option 2: Editing source data
For example:
In this example, the editor sorts all of the records from TOF to .MYLBL with columns 1 to 10 in ascending order, columns 15 to 18 in descending order, and columns 30 to 31 in ascending order.
Example of hex sorting:
SPLIT
The SPLIT command creates a SYSD partition. The editor saves all of the updates in the edit session and then SYSD displays the Primary Option menu in the new partition. You can create up to eight concurrent partitions. The formats of all the aliases of the SPLIT command are:
A field in the upper-right corner of the screen tells you which partition you are in and the number of active partitions. For example, (2/4) tells you that you are in the second of four partitions. The SWAP command moves between partitions. See “SWAP” on page 169 for more information.
To delete a partition and then swap to another partition, if one is available, issue the RETURN command on the Primary Option menu in that partition. If there are no available partitions, SYSD returns to CICS.
SORT .TOF .MYLBL 1 10 D 15-18 30.2
CMD: SORT .TOF .EOFSorted as character
SORT .TOF .EOF HSorted as hex
AB01 0001
FA33 0100
FA35 9C6F
FA36 AB01
0001 FA33
0100 FA35
9C6F FA36
SPLIT [address] PF2
This parameter Specifies
address The address of the screen you want to view in the new partition.
SPLIT 167

Chapter 4 Option 2: Editing source data
SPLTJOIN
The SPLTJOIN command performs a text split (TS) or text merge (TM) for a single line. If data follows the cursor, the editor issues a text-split. If the rest of the data line is blank, the editor issues a text-merge. The cursor remains at its current position. See “TS – Text split” on page 210 and “TM – Text merge” on page 208 for more information.
The cursor must be between the zone columns to issue the SPLTJOIN command. If MODID is turned on and the starting column specified for the MODID command is after the cursor position, the MODID starting column becomes the right zone position. See “MODID” on page 149 and “ZONE” on page 179 for more information.
It is useful to assign this command to a PF key. The format of the SPLTJOIN command is:
STATS
The STATS command turns on or off the ISPF Statistics feature. The format of the STATS command is:
The editor maintains the STATS setting as a user-profile variable. The editor remembers the last STATS setting and uses it in each edit session until you change it. You can use the PROFILE command in an edit session to view the current STATS setting. See “PROFILE” on page 155 for more information.
SPLTJOIN
STATS [ON|OFF]
This parameter Specifies
ON Turn on the ISPF Statistics feature. The editor saves and updates all ISPF information for this PDS member. The editor displays this information on the Edit – Member Selection and Browse – Member Selection screens. This is the default.
OFF Turn off the ISPF Statistics feature. The editor does not update the ISPF statistics for this PDS member.
168 CPMS/SYSD Reference Manual ~ 7.2

Chapter 4 Option 2: Editing source data
SUBMIT
The SUBMIT command submits the edit session to the OS. The format of the SUBMIT command is:
The SUBMIT command processes ++INCLUDE cards for CA Panvalet and non-CA Panvalet members. The ++INCLUDE card must begin in column 8, and the member that you want to include must reside in the same data set as the member you are submitting. You can have up to five levels of nested ++INCLUDEs.
SWAP
The SWAP command allows you to swap between existing partitions. The formats of all the aliases of the SWAP command are:
A field in the upper-right corner of the screen tells you which partition you are in and the number of active partitions. For example, (2/8) tells you that you are in the second of eight partitions.
SUBmit
SWAP [p]PF9
This parameter Specifies
p Partition number (1 to 8) of the partition you want to swap to.
If not present, swaps to the previous partition. This cycles backward through the partitions.
Type N to swap to the next partition. This cycles forward through the partitions.
Type ? to display all 8 partitions and what screen is displayed on each partition.
The partition number may be entered on the INPUT line and the SWAP PF key pressed.
SUBMIT 169

Chapter 4 Option 2: Editing source data
TA
The TA command aligns the data between the ZONE columns such that all lines are left justified and right justified. If ZONE is turned off, the editor justifies the data between the first column and the end of the record. See “ZONE” on page 179 for more information. The editor removes the leading blanks and converts multiple blanks to a single blank before justifying the data.
The format of the TA command is:
See “TA – Justify data” on page 205 for more information about justifying data using the TA line command.
TA .l1 .l2
This parameter Specifies
.l1 and.l2 • Left justify and right justify the text between the lines bookmarked by .l1 and .l2. The first character is a lowercase letter “L”.
• .ZF/.TOF and .ZL/.EOF are system labels used to indicate TOF and EOF, respectively.
• .TOD is a system label used to indicate the top line of the display.
• See “.label – Set bookmark” on page 197 for more information.
170 CPMS/SYSD Reference Manual ~ 7.2

Chapter 4 Option 2: Editing source data
TABS
The TABS command turns on or off logical tabbing and lets you specify the tab character. You can assign from 1 to 15 tab columns. The format of the TABS command is:
Note To stack commands, turn LINEND OFF and set the # sign for the tab character. You can then turn LINEND ON with the default character of # and tabbing will work correctly.
For example, if you issue the following command in the edit session:
and you type the following in a line of data:
the editor repositions the data in the appropriate tab columns in the following manner:
TABs [ON|OFF] [character] [columns]
This parameter Specifies
ON Turn on logical tabbing. This is the default.
OFF Turn off logical tabbing.
character The character that the editor interprets as a logical tab when it finds it in the input. The tab character can be any nonalphanumeric character. The editor displays the tab character in the format lines on the edit screen.
columns The columns where you want tabbing to occur. Separate each column number by a space.
TABS ON ! 5 10 15
!aaa!bb!cccc
----!----!----!----2----+----3----+----4----+----5----+----6----+----7-- aaa bb cccc
TABS 171

Chapter 4 Option 2: Editing source data
TAC
The TAC command aligns the data in the center of the ZONE columns. If ZONE is turned off, the boundaries for the data alignment are the first column and the end of the record. (See “ZONE” on page 179 for more information.) The editor removes the leading blanks and converts multiple blanks to a single blank before aligning the data.
The format of the TAC command is:
See “TAC – Center data” on page 205 for more information about centering data using the TAC line command.
TAC .l1 .l2
This parameter Specifies
.l1 and .l2 • Align the text between the lines bookmarked by .l1 and .l2. The first character in each bookmark is a lowercase “L”.
• .ZF/.TOF and .ZL/.EOF are system labels used to indicate TOF and EOF, respectively.
• .TOD is a system label used to indicate the top line of the display.
• See “.label – Set bookmark” on page 197 for more information.
172 CPMS/SYSD Reference Manual ~ 7.2

Chapter 4 Option 2: Editing source data
TAL
The TAL command aligns the data between the ZONE columns so that the first character of the first word is left justified. If ZONE is turned off, the boundaries for the data alignment are the first column and the end of the record. (See “ZONE” on page 179 for more information.) The editor removes the leading blanks and converts multiple blanks to a single blank before aligning the data.
The format of the TAL command is:
See “TAL – Left justify data” on page 206 for more information about left justifying data using the TAL line command.
TAL .l1 .l2
This parameter Specifies
.l1 and .l2 • Align the text between the lines bookmarked by .l1 and .l2. The first character in each bookmark is a lowercase “L”.
• .ZF/.TOF and .ZL/.EOF are system labels used to indicate TOF and EOF, respectively.
• .TOD is a system label used to indicate the top line of the display.
• See “.label – Set bookmark” on page 197 for more information.
TAL 173

Chapter 4 Option 2: Editing source data
TAR
The TAR command aligns the data between the ZONE columns so that the last character of the last word is right justified. If ZONE is turned off, the boundaries for the data alignment are the first column and the end of the record. (See “ZONE” on page 179 for more information.) The editor removes the leading blanks and converts multiple blanks to a single blank before aligning the data.
The format of the TAR command is:
See “TAR – Right justify data” on page 206 for more information about right justifying data using the TAR line command.
TOP
The TOP command scrolls to the top of the edit session. The editor displays the first line of the edit session on the first line of the screen. The formats of all the aliases of the TOP command are:
TAR .l1 .l2
This parameter Specifies
.l1 and.l2 • Align the text between the lines bookmarked by .l1 and .l2. The first character in each bookmark is a lowercase “L”.
• .ZF/.TOF and .ZL/.EOF are system labels used to indicate TOF and EOF, respectively.
• .TOD is a system label used to indicate the top line of the display.
• See “.label – Set bookmark” on page 197 for more information.
TOp FIRst
174 CPMS/SYSD Reference Manual ~ 7.2

Chapter 4 Option 2: Editing source data
TRANCHR
The TRANCHR command allows the character c1 to be translated to c2 during an edit session. You can translate any character to any other character. This is useful if you do not have a specific character on your keyboard, such as a “not” sign (x’5F’). You could use this command to translate an unused character to the “not” sign. The format of the TRAN command is:
You can have only three translate characters.
Type TRANCHR with no parameters to display your translate characters.
The command line is translated using this table before any other translation takes place, such as uppercasing commands.
Translation is performed from position 1 up to and including the truncation column or end of record, whichever occurs first.
Translation stops after the first match. For example, if you translate a to b, and b to c, then a will translate to b not c.
TRANchr {c1 c2 | c1 OFF | OFF}
This parameter Specifies
c1 = c 1-byte character you want to translate.
= hh 2-byte hex representation of the character you want to translate.
= OFF Turns off all translation of characters.
c2 = c 1-byte character you want c1 to translate to.
= hh 2-bye hex representation of the character you want c1 to translate to.
= OFF Turns off translation for c1.
TRANCHR 175

Chapter 4 Option 2: Editing source data
TRUNC
The TRUNC command truncates the data that is viewable on each edit line.
When the TRUNC command is used with the ZONE command and the left column on the screen is aligned with the left ZONE column, the editor does not display data to the right of the TRUNC column. Working together, these commands prevent data outside the zone from shifting in to or out of the data that you are editing. Usually TRUNC should be set equal to the right zone column.
The format of the TRUNC command is:
TRunc [ON|OFF] column
This parameter Specifies
ON Turn on truncation. This is the default. You do not have to specify this parameter if the column is specified.
OFF Turn off truncation.
column The column number where you want the truncation to occur. The editor marks this column with a V in the format line.
176 CPMS/SYSD Reference Manual ~ 7.2

Chapter 4 Option 2: Editing source data
UNDO
The UNDO command allows you to remove changes that you made to a file. You can remove a single change to the file, or multiple groups of changes. You can issue the UNDO command multiple times until there is no more recovery data or you have reached the MAXRECOVERY number that your CPMS/SYSD administrator set in SYSDSETS.
The recovery option must be turned on in order to use the UNDO command. See “RECOVERY” on page 158 for more information about the recovery option and how the changes made to a file are grouped.
CAUTION If you turn off recovery or issue the RENUM edit command, the recovery data is deleted. You cannot undo any changes made before you turned off recovery or issued the RENUM command.
The editor deletes the recovery data when you issue the CANCEL or END command to exit the edit session. If you issue the SAVE command to save the edit session, you can still use the UNDO command to remove changes made to the file before the save, provided that AUTONUM is not turned on.
The format of the UNDO command is:
Examples of the UNDO command
The following examples illustrate how to use the UNDO command.
• If you repeat three lines and press ENTER and then make changes to each of the three lines and press ENTER, you have made six changes in two groups. To remove all of these changes, type UNDO 2.
• If you make a global change, all of the affected lines are put into one group. If you issue the UNDO command, all of the global changes are undone at the same time.
UNDo [?|n]
This parameter Specifies
? Show the number of groups remaining in the recovery data. This indicates the number of times that you can issue the UNDO command before you run out of recoverable data. This number corresponds to the number of changes you have made to the file or the MAXRECOVERY number, whichever is smaller.
n Number of groups to undo. The default is 1.
UNDO 177

Chapter 4 Option 2: Editing source data
UNNUMBER
The UNNUMBER command sets all sequence fields to blanks and turns off numbering. This applies to both STD and COBOL sequence numbers. If STD and COB are on, you can use UNNUMBER to clear STD and COB sequence fields to blanks. Numbering is off but the fields are reserved.
The format of the UNNUMBER command is:
UP
The UP command scrolls up through the edit session. The formats of all the aliases of the UP command are:
WRAP
The WRAP command turns on or off the wrap option. When WRAP is turned on, the FIND and CHANGE commands wrap the file and continue searching at the TOF, top-of-range, EOF, or end-of-range until the editor reaches the start line.
If you do not enter parameters with the WRAP command, the wrap setting appears when you issue the WRAP command.
UNNumber
UP [nnn|M] PF7
This parameter Specifies
nnn Scroll up by the specified number of lines. This number overrides the value specified in the Scroll field.
M Scroll to the top of the edit session.
WRap [ON|OFF]
This parameter Specifies
ON Turns on wrapping.
OFF Turns off wrapping.
178 CPMS/SYSD Reference Manual ~ 7.2

Chapter 4 Option 2: Editing source data
ZONE
The ZONE command sets the zone or boundaries of data to edit. Use the ZONE command with the TRUNC command to truncate the data that appears in order to assist you with editing.
The formats of all the aliases of the ZONE command are:
Zone [ON|OFF|AUTO] begin_column end_columnBNDsBOUnds
This parameter Specifies
ON Turn on zone. This is the default. You do not have to specify this parameter if columns are specified.
OFF Turn off zone. The zone becomes column 1 to the end of the record.
AUTO Set the zone to ZONE 7 72 automatically if the file you are editing contains COBOL source code.
If the source code is not COBOL, the editor automatically turns off zone.
begin_column The beginning column of the zone.
end_column The ending column of the zone.
ZONE 179

Chapter 4 Option 2: Editing source data
Understanding editor scroll commands
Scroll commands are specified in the Scroll field located in the upper-right corner of the screen. Scroll commands work with certain primary commands such as LEFT, RIGHT, UP, and DOWN to define how much the data on the screen moves. After you specify a scroll command, it remains constant until you change it.
The FORWARD and BACKWARD primary commands ignore the Scroll field and always scroll by full pages.
CSR
The CSR command scrolls up, down, left, or right (depending on the primary command) to the position of the cursor in the data portion of the screen. The format of the CSR command is:
HALF
The HALF command scrolls up, down, left, or right (depending on the primary command) by one-half a screen. The format of the HALF command is:
PAGE
The PAGE command scrolls up, down, left, or right (depending on the primary command) by one full screen. The formats of all the aliases of the PAGE command are:
CSR
HALF
PAGE FULL
180 CPMS/SYSD Reference Manual ~ 7.2

Chapter 4 Option 2: Editing source data
Understanding editor line commands
You can enter line commands in the line number fields to edit the data set at the line level. The following is a list of the available line commands. A detailed description of each command follows the list.
Command Format Alias
A – After A[nn] or [nn]A
B – Before B[nn] or [nn]B
COLS – Column guide control COLS SCALE
( – Column shift left ([nn] or [nn](
(( – Column shift left block (([nn] or [nn]((
((([nn] or [nn](((
) – Column shift right )[nn] or [nn])
)) – Column shift right block ))[nn] or [nn]))
)))[nn] or [nn])))
CL – Continue line CL[nn] or [nn]CL
C – Copy lines C[nn] or [nn]C
CC – Copy block CC
< – Data shift left <[nn] or [nn]<
<< – Data shift left block <<[nn] or [nn]<<
<<<[nn] or [nn]<<<
> – Data shift right >[nn] or [nn]>
>> – Data shift right block >>[nn] or [nn]>>
>>>[nn] or [nn]>>>
D – Delete lines D[nn] or [nn]D
DD – Delete block DD
E – Exchange E[nn] or [nn]E
EE - Exchange block EE
F – First (show) lines F[nn] or [nn]F
FL – Flip line status FL[nn] or [nn]FL
FLL – Flip block status FLL
Understanding editor line commands 181

Chapter 4 Option 2: Editing source data
I – Insert lines I[nn] or [nn]I
IC* – Insert comment (asterisks) IC*
IC- – Insert comment (dashes) IC-
.Label – Set bookmark .Label
L – Last (show) lines L[nn] or [nn]L
LC – Lowercase LC[nn], [nn] LC, LCT [nn], or [nn]LCT
LCC (Lowercase block) LCC, LCCT, LL, or LLT
M – Move lines M[nn] or [nn]M
MM – Move block MM
O – Overlay lines O[nn] or [nn]O
OO – Overlay block OO
R – Repeat line R[nn] or [nn]R "
RR – Repeat block RR[nn] or [nn]RR ""
RT – Retab RT[nn] or [nn]RT
/ – Set current line /
S – Show lines S[nn] or [nn]S
TA – Justify data TA[nn]
TAC – Center data TAC[nn]
TAL – Left justify data TAL[nn]
TAR – Right justify data TAR[nn]
TF – Text flow TF
TM – Text merge TM[nn]
TR – Translate hex TR[nn]
TRR – Translate block hex TRR
TS – Text split TS
UC – Uppercase UC[nn], [nn] UC,UCT [nn] or [nn] UCT
Command Format Alias
182 CPMS/SYSD Reference Manual ~ 7.2

Chapter 4 Option 2: Editing source data
A – After
The A command tells the editor to perform the specified operation after this line. Use the A command with the C (Copy), CC (Copy block), M (Move), and MM (Move block), line commands and the COPY and GET primary commands. The formats of the A command are:
For example:
In this example, the editor copies line 000100 three times and inserts all three lines after line 000400. If the operation applies to a block of lines, the editor copies the entire block three times and inserts each block one after the other.
UCC – Uppercase block UCC, UCCT, UU, or UUT
X – Exclude lines X[nn] or [nn]X
XX – Exclude block XX
A[nn] [nn]A
This parameter Specifies
nn The number of times that you want to repeat the operation. The default is 1.
C 0100000200000300A3 400
Command Format Alias
A – After 183

Chapter 4 Option 2: Editing source data
B – Before
The B command tells the editor to perform the specified operation before this line. Use the B command with the C (Copy), CC (Copy block), M (Move), and MM (Move block) line commands and the COPY and GET primary commands. The formats of the B command are:
For example:
In this example, the editor copies line 000100 three times and inserts all three lines before line 000400. If the operation applies to a block of lines, the editor copies the entire block three times and inserts each block one after the other.
COLS – Column guide control
Use the COLS command to put the column guide on the line following the line where you issue the command. If the final column line is greater than the number of lines on the screen, the editor adjusts the column guide to the maximum value. The editor does not reset a pending line command when you type the COLS command over a pending line command.
The COLS command is not valid on the top or bottom column guide. Because the top and bottom column guides do not change, you can use the COLS command to include a third column guide on the screen.
The formats of all the aliases of the COLS command are:
The column guide embedded in the body of the edit does not contain a prefix area. Use the prefix area in the line above or below the guide as if the guide was not present.
You can also use the COLS primary command to control the column guides in the edit session. See “COLS” on page 124 for more information.
B[nn] [nn]B
This parameter Specifies
nn The number of times you want to repeat the operation. The default is 1.
C 0100000200000300B3 400
COLSSCALE
184 CPMS/SYSD Reference Manual ~ 7.2

Chapter 4 Option 2: Editing source data
( – Column shift left
The ( command shifts the contents of a line to the left. Use the ( command with the ZONE command to control the shift area. If you use the ZONE command, the editor shifts only the data in the zone. See “ZONE” on page 179 for more information.
The formats of the ( command are:
CAUTION There are no restrictions to prohibit shifting characters out of the record or zone area. Characters shifted out of the record or zone area are lost.
(( – Column shift left block
The (( command shifts the contents of a block of lines to the left. Type the (( command in the line number fields for the first and last lines that you want to shift. You can use the (( command with the ZONE command to control the shift area. If you use the ZONE command, the editor shifts only the data in the zone. See “ZONE” on page 179 for more information.
The formats of the (( command are:
CAUTION There are no restrictions to prohibit shifting characters out of the record or zone area. Characters shifted out of the record or zone area are lost.
([nn] [nn](
This parameter Specifies
nn The number of columns that you want to shift the line to the left. The default is 1.
(([nn] or [nn]((((([nn] or [nn](((
This parameter Specifies
nn The number of columns you want to shift the block to the left. The default is 1. If you specify two different numbers, the editor shifts the block by the higher of the two numbers.
( – Column shift left 185

Chapter 4 Option 2: Editing source data
The ((( format is a special format you can use with Assembler code. In Assembler, continued lines must start in column 16. Any line in the block specified with the ((( command that meets one of the following criteria is not shifted to the left with the rest of the block.
• The current line is a comment and contains an asterisk (*) in the first column.
• The current line or the line immediately preceding the current line is a continuation line. A continuation line is a line where the previous line contains a nonblank character in column 72.
The ((( format is designed for use with source code. The editor, however, cannot determine whether a file is source code or not. If you use the ((( format on files that do not contain source code, the editor does not shift the lines that meet the criteria described above.
If the editor detects an ID DIVISION record indicating that the file is COBOL source, the editor does not shift comment records. Comment records in COBOL source contain a nonblank character in column 7.
) – Column shift right
The ) command shifts the contents of a line to the right. Use the ) command with the ZONE command to control the shift area. If you use the ZONE command, the editor shifts only the data in the zone. See “ZONE” on page 179 for more information.
The formats of the ) command are:
CAUTION There are no restrictions to prohibit shifting characters out of the record or zone area. Characters shifted out of the record or zone area are lost.
)[nn] [nn])
This parameter Specifies
nn The number of columns you want to shift the line to the right. The default is 1.
186 CPMS/SYSD Reference Manual ~ 7.2

Chapter 4 Option 2: Editing source data
)) – Column shift right block
The )) command shifts the contents of a block of lines to the right. Type the )) command in the line number fields for the first and last lines you want to shift. You can use the )) command with the ZONE command to control the shift area. If you use the ZONE command, the editor shifts only the data in the zone. See “ZONE” on page 179 for more information.
The formats of the )) command are:
CAUTION There are no restrictions to prohibit shifting characters out of the record or zone area. Characters shifted out of the record or zone area are lost.
The ))) format is a special format you can use with Assembler code. In Assembler, continued lines must start in column 16. Any line in the block specified with the ))) command that meets one of the following criteria is not shifted to the right with the rest of the block.
• The current line is a comment and contains an asterisk (*) in the first column.
• The current line or the line immediately preceding the current line is a continuation line. A continuation line is a line where the previous line contains a nonblank character in column 72.
The ))) format is designed for use with source code. The editor, however, cannot determine whether a file is source code or not. If you use the ))) format on files that do not contain source code, the editor does not shift the lines that meet the criteria described above.
If the editor detects an ID DIVISION record indicating that the file is COBOL source, the editor does not shift comment records. Comment records in COBOL source contain a nonblank character in column 7.
))[nn] or [nn])))))[nn] or [nn])))
This parameter Specifies
nn The number of columns that you want to shift the block to the right. The default is 1. If you specify two different numbers, the editor shifts the block by the higher of the two numbers.
)) – Column shift right block 187

Chapter 4 Option 2: Editing source data
CL – Continue line
The CL command adds an asterisk (*) to column 72, indicating a continued line in Assembler source code. The formats of the CL command are:
CC – Copy block
The CC command copies a block of lines to the point in the edit session marked by an A (After), B (Before), or O (Overlay) line command. The editor leaves the original lines unchanged. You cannot specify a repetition count for the CC command. The format of the CC command is:
For example:
In this example, the editor copies all of the lines between and including line 000100 and line 000300 and inserts all of the copied lines after line 500.
CL[nn][nn]CL
This parameter Specifies
nn The number of additional lines to process. The default is 1.
CC
CC 100000200CC 300000400A 0500
188 CPMS/SYSD Reference Manual ~ 7.2

Chapter 4 Option 2: Editing source data
C – Copy lines
The C command copies lines to the point in the edit session marked by an A (After), B (Before), or O (Overlay) line command. The editor leaves the original lines unchanged. The formats of the C command are:
For example:
In this example, the editor copies line 000100 and the following two lines and inserts all three lines after line 000400.
< – Data shift left
The < command shifts the body of a line to the left. Use the < command with the ZONE command to control the shift area. If you use the ZONE command, the editor shifts only the data in the zone. See “ZONE” on page 179 for more information.
The formats of the < command are:
C[nn] [nn]C
This parameter Specifies
nn The number of lines that you want to copy, including the line on which you specify the C command. The default is 1.
C3 100000200000300A 0400
<[nn] [nn]<
This parameter Specifies
nn The number of columns that you want to shift the body to the left. The default is 1.
C – Copy lines 189

Chapter 4 Option 2: Editing source data
The body of a line is defined by the following rules:
• The editor starts scanning in the left column.
• The editor finds the first blank character.
• When the editor finds the next nonblank character following the first blank, it considers that character to be the start of the body. This character is where the editor starts shifting the data.
• When the editor finds the first two consecutive blanks, it considers that place to be the end of the body. This is where the editor stops shifting the data.
<< – Data shift left block
The << command shifts the body of a block of lines to the left. Type the << command in the line number fields for the first and last lines you want to shift. Use the << command with the ZONE command to control the shift area. If you use the ZONE command, the editor shifts only the data in the zone. See “ZONE” on page 179 for more information.
The formats of the << command are:
The <<< format is a special format you can use with Assembler code. In Assembler, continued lines must start in column 16. Any line in the block specified with the <<< command that meets one of the following criteria is not shifted to the left with the rest of the block.
• The current line is a continuation line. A continuation line is a line where the previous line contains a nonblank character in column 72.
• The line immediately preceding the current line is a continuation line.
The editor always shifts the first line in the block.
The <<< format is designed for use with source code. The editor, however, cannot determine whether a file is source code or not. If you use the <<< format on files that do not contain source code, the editor does not shift the lines that meet the criteria described above.
<<[nn] or [nn]<<<<<[nn] or [nn]<<<
This parameter Specifies
nn The number of columns that you want to shift the body to the left. The default is 1. If you specify two different numbers, the editor shifts the body by the higher of the two numbers.
190 CPMS/SYSD Reference Manual ~ 7.2

Chapter 4 Option 2: Editing source data
The body of a line is defined by the following rules:
• The editor starts scanning in the left column.
• The editor finds the first blank character.
• When the editor finds the next nonblank character following the first blank, it considers that character to be the start of the body. This character is where the editor starts shifting the data.
• When the editor finds the first two consecutive blanks, it considers that place to be the end of the body. This is where the editor stops shifting the data.
> – Data shift right
The > command shifts the body of a line to the right. Use the > command with the ZONE command to control the shift area. If you use the ZONE command, the editor shifts only the data in the zone. See “ZONE” on page 179 for more information.
The formats of the > command are:
The body of a line is defined by the following rules:
• The editor starts scanning in the left column.
• The editor finds the first blank character.
• When the editor finds the next nonblank character following the first blank, it considers that character to be the start of the body. This character is where the editor starts shifting the data.
• When the editor finds the first two consecutive blanks, it considers that place to be the end of the body. This is where the editor stops shifting the data.
>[nn] [nn]>
This parameter Specifies
nn The number of columns that you want to shift the body to the right. The default is 1.
> – Data shift right 191

Chapter 4 Option 2: Editing source data
>> – Data shift right block
The >> command shifts the body of a block of lines to the right. Type the >> command in the line number fields for the first and last lines you want to shift. Use the >> command with the ZONE command to control the shift area. If you use the ZONE command, the editor shifts only the data in the zone. See “ZONE” on page 179 for more information.
The formats of the >> command are:
The >>> format is a special format you can use with Assembler code. In Assembler, continued lines must start in column 16. Any line in the block specified with the >>> command that meets one of the following criteria is not shifted to the right with the rest of the block.
• The current line is a continuation line. A continuation line is a line where the previous line contains a nonblank character in column 72.
• The line immediately preceding the current line is a continuation line.
The editor always shifts the first line in the block.
The >>> format is designed for use with source code. The editor, however, cannot determine whether a file is source code or not. If you use the >>> format on files that do not contain source code, the editor does not shift the lines that meet the criteria described above.
The body of a line is defined by the following rules:
• The editor starts scanning in the left column.
• The editor finds the first blank character.
• When the editor finds the next nonblank character following the first blank, it considers that character to be the start of the body. This character is where the editor starts shifting the data.
• When the editor finds the first two consecutive blanks, it considers that place to be the end of the body. This is where the editor stops shifting the data.
>>[nn] or [nn]>>>>>[nn] or [nn]>>>
This parameter Specifies
nn The number of columns that you want to shift the body to the right. The default is 1. If you specify two different numbers, the editor shifts the body by the higher of the two numbers.
192 CPMS/SYSD Reference Manual ~ 7.2

Chapter 4 Option 2: Editing source data
D – Delete lines
The D command deletes lines from the edit session. The formats of the D command are:
For example:
In this example, the editor deletes line 000100 and the following two lines.
To see an original line again if you accidentally delete it, type SHOW DELETES in the Input field, and then press ENTER. To recover the deleted line, change the line by typing over any character and then pressing ENTER.
DD – Delete block
The DD command deletes a block of lines from the edit session. Type the DD command in the line number fields of the first and last lines of the block that you want to delete. You cannot specify a repetition count for the DD command. The formats of the DD command are:
For example:
In this example, the editor deletes all of the lines between and including line 000100 and line 000300.
D[nn] [nn]D [nn] [nn]
This parameter Specifies
nn The number of lines that you want to delete. If the number exceeds the number of lines remaining in the data set, the editor deletes the rest of the edit session. The default is 1.
D3 100000200000300000400
DD
DD 100000200DD 300000400
D – Delete lines 193

Chapter 4 Option 2: Editing source data
E – Exchange
The E command swaps a set of lines with another set of lines. The command must be used in conjunction with a second E command. The two sets of lines cannot overlap. The sets of lines you want to exchange do not have to be identical sizes. For example, you can exchange a set of three lines with a set of five lines.
The E command exchanges deleted lines if SHOW DEL is turned on. See “S – Show lines” on page 204 for more information.
The formats of the E command are:
For example:
In this example, the results of the E command are as follows:
E[nn][nn]E
This parameter Specifies
nn The number of lines that you want to exchange, including the line on which you issue the command. The default is 1.
000100 LINE 1000200 LINE 2E2 300 LINE 3000400 LINE 4000500 LINE 5000600 LINE 6E3 700 LINE 7000800 LINE 8000900 LINE 9001000 LINE 10001100 LINE 11001200 LINE 12001300 LINE 13001400 LINE 14
000100 LINE 1000200 LINE 2000210 LINE 7000220 LINE 8000230 LINE 9000500 LINE 5000600 LINE 6000610 LINE 3000620 LINE 4001000 LINE 10001100 LINE 11001200 LINE 12001300 LINE 13001400 LINE 14
194 CPMS/SYSD Reference Manual ~ 7.2

Chapter 4 Option 2: Editing source data
EE – Exchange block
The EE command is not a true block command. Once there are matching EE commands, the EE command is turned into an E (exchange) command. This is just a simple way to enter the E command without having to count lines. It can be used to set either set of E lines. See “E – Exchange” on page 194 for more information.
F – First (show) lines
Use the F command to view the first lines in a block that you previously excluded with the X (Exclude) line command. The formats of the F command are:
FL – Flip line status
The FL command changes the exclude status for the specified number of records. You can perform the FL command on an excluded block. Records previously set as excluded are set to nonexcluded. Records previously set as nonexcluded are set to excluded. The formats of the FL command are:
F[nn] [nn]F
This parameter Specifies
nn The number of excluded lines that you want to see. The default is the first line of the excluded block.
FL[nn] [nn]FL
This parameter Specifies
nn The number of excluded lines for which you want to change the status, including the line on which you enter the command. The default is 1.
EE – Exchange block 195

Chapter 4 Option 2: Editing source data
FLL – Flip block status
The FLL command changes the exclude status for a block of records. Records contained within the block that were previously set as excluded are set to nonexcluded. Records within the block that were previously set as nonexcluded are set to excluded. Enter the command twice to mark the block of records. The format of the FLL command is:
I – Insert lines
The I command inserts null lines below the current line. An insert line has six single quotation marks in the line number field. The formats of the I command are:
If you update a null line, leave the cursor on that line, and press ENTER, the editor inserts another line after the line you edited. If you do not enter data on a null line, the editor deletes the line when you press ENTER.
IC* – Insert comment (asterisks)
The IC* command inserts a comment block and uses asterisks as the block character. If the editor detects that the source code is COBOL, it adds the comments in columns 7 through 71; otherwise, it adds comments in columns 1 through 60. The format of the IC* command is:
FLL
I[nn] [nn]I
This parameter Specifies
nn The number of lines that you want to insert. If this number exceeds the number of lines remaining on the screen, the editor inserts only as many lines as can fit on the current screen. The default is 1.
IC*
196 CPMS/SYSD Reference Manual ~ 7.2

Chapter 4 Option 2: Editing source data
IC- – Insert comment (dashes)
The IC- command inserts a comment block and uses dashes as the block character. If the editor detects that the source code is COBOL, it adds the comments in columns 7 through 71; otherwise, it adds comments in columns 1 through 60.The format of the IC- command is:
.label – Set bookmark
The .label command allows you to set a bookmark to a specific line in the editor. You are limited to 20 labels, or bookmarks. The label can be between one and five alpha characters (A to Z) in length. The editor removes the leading blanks. The bookmark stays with the line until the line is deleted, changed to another line, or reset using the RESET command.
To return to a set bookmark, enter .label on the primary command line. The line with the bookmark becomes the current top line. Bookmark lines show their bookmark in the prefix area. To enter a line command, type over the bookmark. The format of the .label command is:
The .ZF and .TOF labels are system-reserved labels that indicate the first line in the file.
The .ZL and .EOF labels are system-reserved labels that indicate the last line in the file.
.TOD is a system label used to indicate the top line of the display.
Note Edit commands that require label pairs, such as CHANGE and FIND, may have a numeric value for the second label. The value indicates how many lines to process, starting at the first label.
IC-
.label .ZF or .TOF .ZL or .EOF .TOD
IC- – Insert comment (dashes) 197

Chapter 4 Option 2: Editing source data
L – Last (show) lines
Use the L command to view the last lines in a block that you previously excluded with the X (Exclude) line command. The formats of the L command are:
LC – Lowercase
The LC command changes the number of lines that you specify to lowercase. The editor changes only those columns between the starting and ending zones to lowercase.
The formats of the LC command are:
L[nn] [nn]L
This parameter Specifies
nn The number of lines from the excluded block that you want to see. The default is the last line of the excluded block.
LC(nn)(nn)LC
This parameter Specifies
nn The number of lines that you want to change to lowercase, including the line on which you enter the command. The default is 1.
198 CPMS/SYSD Reference Manual ~ 7.2

Chapter 4 Option 2: Editing source data
LCC – Lowercase block
The LCC command changes a block of lines to lowercase. The editor changes only those columns between the start and end zone to lowercase. Enter the command twice to mark the block.
Use the LCCT command to translate all nondisplayable hex data to blanks at the same time.
The formats of all the aliases of the LCC command are:
Any combination of the above commands changes a block of lines to lowercase. If you use the LCC command with the LCCT command, SYSD changes the block of lines as if both line commands were LCCT.
LCCT – Lowercase and translate block
The LCCT command changes a block of lines to lowercase and translates all nondisplayable hex data to blanks. The editor changes only those columns between the start and end zone to lowercase. Enter the command twice to mark the block.
The formats of all the aliases of the LCCT command are:
You can use the LCC command with the LCCT command to mark the block of lines that you want to change. If you use the LCC command with the LCCT command, SYSD changes the block of lines as if both line commands were LCCT.
LCCLCCTLLLLT
LCCTLLT
LCC – Lowercase block 199

Chapter 4 Option 2: Editing source data
LCT – Lowercase and translate hex
The LCT command changes the number of lines that you specify to lowercase and translates all nondisplayable hex data to blanks at the same time. The editor changes only those columns between the starting and ending zones to lowercase.
The formats of the LCT command are:
LL – Lowercase block
The LL command is an alias of the LCC command. This command allows you to change a block of lines to lowercase. (See “LCC – Lowercase block” on page 199 for more information.) The formats of all the aliases of the LL command are:
LLT – Lowercase and translate block
The LLT command is an alias of the LCCT command. This command allows you to change a block of lines to lowercase and translate all nondisplayable hex data to blanks. (See “LCCT – Lowercase and translate block” on page 199 for more information.) The formats of all the aliases of the LLT command are:
LCT(nn)(nn)LCT
This parameter Specifies
nn The number of lines that you want to change to lowercase and translate, including the line on which you enter the command. The default is 1.
LLLLTLCCLCCT
LLTLCCT
200 CPMS/SYSD Reference Manual ~ 7.2

Chapter 4 Option 2: Editing source data
M – Move lines
The M command moves lines to the point in the edit session indicated by an A (After), B (Before), or O (Overlay) line command. The editor deletes the original lines after the move. The formats of the M command are:
For example:
In this example, the editor moves line 000100 and the following two lines after line 000500.
MM – Move block
The MM command moves a block of lines to the point in the edit session indicated by an A (After), B (Before), or O (Overlay) line command. The format of the MM command is:
For example:
In this example, the editor moves lines 000100 through 000300 after line 000500.
M[nn] [nn]M
This parameter Specifies
nn The number of lines that you want to move, including the line on which you enter the M command. The default is 1.
M3 100000200000300000400A 0500
MM
MM 100000200MM 300000400A 0500
M – Move lines 201

Chapter 4 Option 2: Editing source data
O – Overlay lines
The O command fills in the blank spaces on receiving lines with characters from the sending lines. The O command puts only characters in the blank spaces on a line. Mark the receiving lines with the O command. The formats of the O command are:
You can use the COPY or MOVE primary command to put data on the receiving lines without impacting existing characters on the receiving line. Mark the sending lines with the M (Move) or C (Copy) command.
If there are more receiving lines (O) than there are sending lines (M or C), the editor repeats the sending lines in sequential order until all of the receiving lines are filled. If there are more sending lines (M or C) than receiving lines (O), the editor ignores the extra sending lines.
Use the O command with the ZONE command to copy or move an overlay into the blanks within specified zones. See “ZONE” on page 179 for more information.
OO – Overlay block
The OO block command fills in the blanks on selected lines with characters from another line. Type the OO command in the line number fields for the first and last lines of the block that you want to overlay. The format of the OO command is:
To put data on selected lines without impacting existing characters, use the C (Copy), CC (Copy block), M (Move), or MM (Move block) commands.
O[nn] [nn]O
This parameter Specifies
nn The number of lines that you want to overlay. The default is 1.
OO
202 CPMS/SYSD Reference Manual ~ 7.2

Chapter 4 Option 2: Editing source data
R – Repeat line
The R command repeats a line. You cannot repeat more than one line. The formats of the R command are:
RR – Repeat block
The RR command repeats a block of lines. Type the RR command in the line number fields for the first and last lines of the block that you want to repeat. The formats of the RR command are:
For example:
In this example, the editor repeats lines 000100 through 000300 one time and inserts the repeated lines after line 000300.
R[nn][nn]R"[nn][nn]"
This parameter Specifies
nn The number of times that you want to repeat the line. The default is 1.
RR[nn] [nn]RR ""[nn] [nn]""
This parameter Specifies
nn The number of times that you want to repeat the block. If you specify two different numbers, the editor repeats the block the higher of the two numbers. The default is 1.
RR 100000200RR 300000400000500
R – Repeat line 203

Chapter 4 Option 2: Editing source data
RT – Retab
The RT command compresses lines and puts a tab character between each blank, delimited word. The editor then expands the line based on the tab columns and replaces the existing line with the expanded line. If lines would be truncated due to the expansion, the line is not expanded and is marked as ==ERR>.
If the tab setting is turned off, the editor replaces the existing line with a new line that contains the tab character between each word.
The formats of the RT command are:
/ – Set current line
The / command moves a line to the top of the screen. The format of the / command is:
S – Show lines
Use the S command to view lines that you previously excluded with the X (Exclude) line command. The formats of the S command are:
RT[nn][nn]RT
This parameter Specifies
nn The number of lines in which you want to change the tab locations. The default is 1.
/
S[nn][nn]S
This parameter Specifies
nn The number of lines in the excluded block that you want to see. The default is the entire block.
204 CPMS/SYSD Reference Manual ~ 7.2

Chapter 4 Option 2: Editing source data
TA – Justify data
The TA command aligns the data between the ZONE columns such that all lines are left and right justified. If ZONE is turned off, the data between the first column and the end of the record are justified. (See “ZONE” on page 179 for more information.) The editor removes the leading blanks and converts multiple blanks to a single blank before justifying the data.
The format of the TA command is:
See “TA” on page 170 for more information about justifying data using the TA primary command.
TAC – Center data
The TAC command aligns the data in the center of the ZONE columns. If ZONE is turned off, the boundaries for the data alignment are the first column and the end of the record. (See “ZONE” on page 179 for more information.) The editor removes the leading blanks and converts multiple blanks to a single blank before aligning the data. The format of the TAC command is:
See “TAC” on page 172 for more information about centering data using the TAC primary command.
TA[nn][nn]TA
This parameter Specifies
nn The number of lines that you want to left justify and right justify. The default is 1.
TAC[nn][nn]TAC
This parameter Specifies
nn The number of lines that you want to center. The default is 1.
TA – Justify data 205

Chapter 4 Option 2: Editing source data
TAL – Left justify data
The TAL command aligns the data between the ZONE columns such that the first character of the first word is left justified. If ZONE is turned off, the boundaries for the data alignment are the first column and the end of the record. (See “ZONE” on page 179 for more information.) The editor removes the leading blanks and converts multiple blanks to a single blank before aligning the data. The format of the TAL command is:
See “TAL” on page 173 for more information about left justifying data using the TAL primary command.
TAR – Right justify data
The TAR command aligns the data between the ZONE columns such that the last character of the last word is right justified. If ZONE is turned off, the boundaries for the data alignment are the first column and the end of the record. (See “ZONE” on page 179 for more information.) The editor removes the leading blanks and converts multiple blanks to a single blank before aligning the data. The format of the TAR command is:
See “TAR” on page 174 for more information about right justifying data using the TAR primary command.
TAL[nn][nn]TAL
This parameter Specifies
nn The number of lines that you want to left justify. The default is 1.
TAR[nn][nn]TAR
This parameter Specifies
nn The number of lines that you want to right justify. The default is 1.
206 CPMS/SYSD Reference Manual ~ 7.2

Chapter 4 Option 2: Editing source data
TF – Text flow
The TF command groups a series of text lines into a paragraph. The flow continues until the editor finds a blank line or a line in which the indentation changes. Indentation for the line does not change. The flow stops after the editor processes 39 lines of data without detecting a change in indentation.The formats of the TF command are:
Use the ZONE command to limit input data. Any data outside the ZONE columns remains as is. The editor formats the right margin according to the right zone or the end of the record, excluding any sequence number field. See “ZONE” on page 179 for more information.
For example:
In this example, the editor temporarily sets the right ZONE boundary at column 60.
The editor does not use the TRUNC setting in the text flow process. However, you can use the TRUNC command to limit the view. To limit the view, set the TRUNC command equal to the right zone. See “TRUNC” on page 176 for more information.
At the end of each line, the editor reduces multiple blanks to one blank, except at the end of a sentence. The editor inserts two blanks at the end of a sentence. Indicate the end of a sentence with a period (.), question mark (?), or exclamation point (!) followed by a blank.
TF[nn][nn]TF
This parameter Specifies
nn • The end-column ZONE setting. The nn parameter temporarily overrides the end_column ZONE setting. The new ZONE setting must be greater than the begin_column ZONE setting. The editor resets the end_column ZONE setting after you issue the TF command.
• See “ZONE” on page 179 for more information about the end_column and begin_column settings.
TF60
TF – Text flow 207

Chapter 4 Option 2: Editing source data
TM – Text merge
The TM command merges two or more lines without breaking up words. Position the cursor on the first record to indicate where the text merge will begin. The TM command and the cursor must be on the same line. The TM command deletes any data after the cursor. The format of the TM command is:
The TM command retains the indentation for the first record. Indentation for the remaining records follows the indentation from the second record, unless the second record is completely blank. In that case, the TM command uses the indentation from the first record.
Use the ZONE command to limit the input data to be merged. Any data outside the zone columns remains as is. The editor formats the right margin according to the right zone or the end of the record, excluding any sequence number field. See “ZONE” on page 179 for more information.
The TM command does not use the TRUNC setting in the merge process. However, you can use the TRUNC command to limit the view by setting the TRUNC command equal to the right zone. See “TRUNC” on page 176 for more information.
The editor keeps the blank spaces within each merged line. At the end of each line, the editor reduces multiple blanks to one blank, except at the end of a sentence. The editor inserts two blanks at the end of a sentence. Indicate the end of a sentence with a period (.), question mark (?), or exclamation point (!) followed by a blank. The editor deletes lines that do not have any data. The editor inserts data that does not fit in the original record into new records.
Use the TM command to merge lines that do not follow the indentation requirements specified for the TF command. See “TF – Text flow” on page 207 for more information.
To merge two lines
1. In the line number field for the line where you want the merge to occur, type TM.
2. If you want to delete data on the first line, place the cursor directly to the left of the text that you want to delete.
3. Press ENTER.
The TM command deletes data on the line to the right of the cursor up to and including the right zone column, merges as much of the subsequent line as possible, left justifies any remaining data on the line below the TM command, and pads to the right with nulls or blanks.
TM[nn]
This parameter Specifies
nn The number of lines that you want to merge. The default is 1.
208 CPMS/SYSD Reference Manual ~ 7.2

Chapter 4 Option 2: Editing source data
To merge a specific number of lines
1. In the line number field for the first line that you want to reformat, type TMnn, where nn is the number of lines that you want to reformat.
2. Press ENTER.
If the cursor is not positioned in the data area on the line, the last word is the default merge point.
TR – Translate hex
The TR command translates any nondisplayable hex characters to blanks. The editor translates only those columns between the start and end zone. The format of the TR command is:
TRR – Translate block hex
The TRR command translates the nondisplayable hex data in a block of lines to blanks. The editor translates only those columns between the start and end zone. Enter the command twice to mark the block. The format of the TRR command is:
TR[nn]
This parameter Specifies
nn The number of additional lines that you want to translate. The default is 1.
TRR
TR – Translate hex 209

Chapter 4 Option 2: Editing source data
TS – Text split
The TS command splits a line into two lines based on the location of the cursor. This is helpful in changing and aligning text in conjunction with the TF and TM commands. The editor aligns the split line with the next line. If the next line is blank, the editor aligns the split line with the first character on the initial line. The format of the TS command is:
Use the ZONE command to limit the data to be split. The editor copies data outside the zone to the split record. See “ZONE” on page 179 for more information.
To reverse the split, use the TM command with the cursor on the same column as the original split.
The TS command does not use the TRUNC setting.
To split a line of text
1. In the line number field for the line you want to split, type TS.
2. Move the cursor to the position in the line where you want the split to occur.
3. Press ENTER.
UC – Uppercase
The UC command changes the number of lines that you specify to uppercase. The editor changes only those columns between the starting and ending zones to uppercase.
The formats of the UC command are:
TS
UC[nn][nn] UC
This parameter Specifies
nn The number of lines that you want to change to uppercase, including the line on which you enter the command. The default is 1.
210 CPMS/SYSD Reference Manual ~ 7.2

Chapter 4 Option 2: Editing source data
UCC – Uppercase block
The UCC command changes a block of lines to uppercase. The editor changes only those columns between the starting and ending zones to uppercase. Enter the command twice to mark the block.
Use the UCCT command to translate all nondisplayable hex data to blanks at the same time.
The formats of all the aliases of the UCC command are:
Any combination of the above commands changes a block of lines to uppercase. If you use the UCC command with the UCCT command, SYSD changes the block of lines as if both line commands were UCCT.
UCCT – Uppercase and translate block
The UCCT command changes a block of lines to uppercase and translates all nondisplayable hex data to blanks. The editor changes only those columns between the starting and ending zones to uppercase. Enter the command twice to mark the block.
The formats of all the aliases of the UCCT command are:
You can use the UCC command with the UCCT command to mark the block of lines that you want to change. If you use the UCC command with the UCCT command, SYSD changes the block of lines as if both line commands were UCCT.
UCCUCCTUUUUT
UCCTUUT
UCC – Uppercase block 211

Chapter 4 Option 2: Editing source data
UCT – Uppercase and translate hex
The UCT command changes the number of lines that you specify to uppercase and translates all nondisplayable hex data to blanks. The editor changes only those columns between the starting and ending zones to uppercase.
The formats of the UCT command are:
UU - Uppercase block
The UU command is an alias of the UCC command. This command allows you to change a block of lines to uppercase. (See “UCC – Uppercase block” on page 211 for more information.) The formats of all the aliases of the UU command are:
UUT - Uppercase and translate block
The UUT command is an alias of the UCCT command. This command allows you to change a block of lines to uppercase and translate all nondisplayable hex data to blanks. (See “UCCT – Uppercase and translate block” on page 211 for more information.) The formats of all the aliases of the UUT command are:
UCT [nn][nn] UCT
This parameter Specifies
nn The number of lines that you want to change to uppercase and translate, including the line on which you enter the command. The default is 1.
UUUUTUCCUCCT
UUTUCCT
212 CPMS/SYSD Reference Manual ~ 7.2

Chapter 4 Option 2: Editing source data
X – Exclude lines
The X command excludes, or hides, lines from the display. The formats of the X command are:
For example:
In this example, the editor hides line 000200 and the following two lines.
To view the excluded lines, issue the SHOW primary or line command. See “SHOW” on page 164 and “S – Show lines” on page 204 for more information.
XX – Exclude block
The XX command excludes, or hides, a block of lines from the display. Type the XX command in the line number fields for the first and last lines of the block that you want to exclude. The format of the XX command is:
X[nn] [nn]X
This parameter Specifies
nn The number of lines that you want to exclude, including the line on which you enter the X command. The default is 1.
000100X3 200000300000400000500
XX
X – Exclude lines 213

Chapter 4 Option 2: Editing source data
214 CPMS/SYSD Reference Manual ~ 7.2

Chapter 5
Option 3: Performing utility functions
Use the Perform Utility Functions screen (Option 3) in the CPMS/SYSD menu-driven system to create and maintain disk data sets. You can access the following functions from this screen:
• Rename, delete, and print partitioned and sequential data sets.
• View information about a specific data set.
• Allocate, rename, and delete data sets.
• Compress libraries.
• Catalog and uncatalog data sets.
• View the catalog entries for a high-level qualifier.
• View the volume table of contents for a disk volume.
• View the unit control blocks (UCBs) for all devices.
This chapter contains information about:
Screen Address
• Utility Selection menu on page 217 3
• Library Utilities menu on page 219 3.1
• Dataset Utilities menu on page 224 3.2
• Dataset Information screen on page 229 n/a
• Dataset Extents screen on page 232 n/a
• Allocate Utility screen on page 235 3.2.A
• Catalog Utility screen on page 239 3.2.C
• Listcat Utility screen on page 244 3.4
215

Chapter 5 Option 3: Performing utility functions
• VTOC Utility screen on page 249 3.7
• System Device Unit Display screen onpage 253
3.U
Screen Address
216 CPMS/SYSD Reference Manual ~ 1.2

Chapter 5 Option 3: Performing utility functions
Utility Selection menu
The Utility Selection menu (Option 3) is the first screen that appears when you select the 3 – UTIL option on the Primary Option menu. This screen provides access to the utility display screens.
To access the Utility Selection menu
Access the Utility Selection menu in one of these ways.
• On the Primary Option menu, type 3 in the Input field, and then press ENTER.
• On any screen, type 3 in the Input field, and then press RETURN.
Utility Selection menu 217

Chapter 5 Option 3: Performing utility functions
Option definitions
To use an option, type the single-character option in the Input field, and then press ENTER.
1– LIBRARY
The 1 – LIBRARY option displays the Library Utilities menu. Use the Library Utilities menu to do the following tasks:
• Compress data sets
• Print index listings or entire data sets
• Browse, print, rename, or delete members
• View dataset information
2 – DATASET
The 2 – DATASET option displays the Dataset Utilities menu. Use the Dataset Utilities menu to do the following tasks:
• Allocate new data sets
• Rename or delete entire data sets
• View dataset information
• Catalog, uncatalog, or compress a data set
4 – CATALOG
The 4 – CATALOG option displays the Catalog Utility screen. Use the Catalog Utility screen to catalog data sets.
7 – VTOC
The 7 – VTOC option displays the VTOC entries for a DASD volume.
U – UNIT LIST
The U – UNIT LIST option displays the status information for UCBs defined in your OS.
218 CPMS/SYSD Reference Manual ~ 1.2

Chapter 5 Option 3: Performing utility functions
Library Utilities menu
Use the Library Utilities menu (Option 3.1) to manage partitioned and sequential data sets. The Library Utilities menu allows you to do the following functions:
• Compress a data set
• Print an index listing
• Print an entire data set
• View dataset information
• Browse a member
• Print a member
• Rename a member
• Delete a member
To access the Library Utilities menu
Access the Library Utilities menu in one of these ways.
• On the Utility Selection menu, type 1 in the Input field, and then press ENTER.
• On any screen, type 3.1 in the Input field, and then press RETURN.
Library Utilities menu 219

Chapter 5 Option 3: Performing utility functions
Field definitions
Field definitions are listed here in the order that they appear on the screen.
Project
The Project field specifies the name of the project containing the PDS member that you want to manipulate. This is the first level of the three-part library naming convention and is the identifier for libraries that belong to the same project. The Project field is not required.
Use the following conventions to specify the project name:
• Specify the project name without quotation marks.
• Specify only the project name; do not include the member name.
• Stay within the 44-character limit of the Project field.
• You can include your user ID in the Project field. CPMS/SYSD does not automatically include it.
You can type the entire dataset name in either the Project or the Type field.
If you enter a project in the Project field, any values you type in either the Library or the Type field are concatenated with the value you type in the Project field to form the dataset name. See “Examples of concatenated dataset names” on page 221 for more information.
Library
The Library field specifies the name of the library containing the PDS member that you want to manipulate. This is the second level of the three-part library naming convention. The Library field is not required.
Use the following conventions to specify the library name:
• Specify the library name without quotation marks.
• Specify only the library name; do not include the member name.
• Stay within the eight-character limit of the Library field.
• You can include your user ID in the Library field. CPMS/SYSD does not automatically include it.
You can type the entire dataset name in either the Project or the Type field. The maximum length for the Project field and the Type field is 44 characters.
If you enter a library in the Library field, any values you type in either the Project or the Type field are concatenated with the value you type in the Library field to form the dataset name. See “Examples of concatenated dataset names” on page 221 for more information.
220 CPMS/SYSD Reference Manual ~ 1.2

Chapter 5 Option 3: Performing utility functions
Type
The Type field specifies the type of data in the library. This is the third level of the three-part library naming convention. ASM, COBOL, HELP, OBJ, and SOURCE are common data types. For two-level names, leave the Type field blank. The Type field is not required.
Use the following conventions to specify the type of data in the library:
• Specify the type of data without quotation marks.
• Specify only the type of data; do not include the member name.
• Stay within the 44-character limit of the Type field.
• You can include your user ID in the Type field. CPMS/SYSD does not automatically include it.
You can type the entire dataset name in either the Project or the Type field. The maximum length for the Project field and the Type field is 44 characters.
If you enter a data type in the Type field, any values you type in either the Project or the Library field are concatenated with the value you type in the Type field to form the dataset name. See “Examples of concatenated dataset names” on page 221 for more information.
Examples of concatenated dataset names
1. The table below shows a typical one-level project to generate the SYSD.TEST.SOURCE dataset name.
2. The table below shows a two-level project to generate the PRODUCTS.SYSD.TEST.SOURCE dataset name.
3. If you do not specify any libraries, the library utility generates the SYSD.TEST.SOURCE dataset name.
Project: SYSD
Library: TEST
Type: SOURCE
Project: PRODUCTS.SYSD
Library: TEST
Type: SOURCE
Project: SYSD.TEST
Library:
Type: SOURCE
Library Utilities menu 221

Chapter 5 Option 3: Performing utility functions
4. If you specify the entire name in the Project field, the library utility generates the SYSD.TEST.SOURCE dataset name.
5. If you specify the entire name in the Type field, the library utility generates the SYSD.TEST.SOURCE dataset name.
Member
The Member field specifies the name of the PDS member.
Newname
The Newname field specifies the new name for the PDS member. This field is required only if you are renaming a PDS member.
Dataset Name
The Dataset Name field specifies the 1-character to 44-character name of the partitioned or sequential data set. Use this field if the dataset name does not conform to the three-part naming convention. CPMS/SYSD puts your user ID in front of the dataset name unless you enclose the dataset name in quotation marks.
The Dataset Name field overrides any dataset name specified in the Project field, Library field, or Type field.
Volume Serial
If the data set is not cataloged, use the Volume Serial field to specify the volume serial number for the data set. If the data set is cataloged, leave this field blank.
Dataset Password
The Dataset Password field specifies the password for the data set. This field is required only if the data set is password protected. The password is not visible on the screen when you type it.
Project: SYSD.TEST.SOURCE
Library:
Type:
Project:
Library:
Type: SYSD.TEST.SOURCE
222 CPMS/SYSD Reference Manual ~ 1.2

Chapter 5 Option 3: Performing utility functions
Command definitions
To issue a command, type a command in the Input field, and then press ENTER. Command definitions are listed here in alphabetical order.
B – Browse member
Use the B command to view the specified PDS member or sequential data set.
C – Compress data set
The C command compresses the data set and then CPMS/SYSD displays a message saying that it started the batch compress process.
D – Delete member
The D command deletes the PDS member. You must specify in the Member field the name of the member that you want to delete.
G – Print index listing
For a PDS, the G command prints general information about the PDS and a list of the members in the PDS. For a sequential data set, the G command prints only general information about the data set.
L – Print entire data set
For a PDS, the L command prints general information about the PDS, a list of the members in the PDS, and the contents of each member. For a sequential data set, the L command prints general information about the data set and the contents of the data set.
P – Print member
The P command submits a batch job to print the PDS member. The default JOB cards for the batch print job are defined on the Utility Parameters screen (Option 0.5).
R – Rename member
The R command renames the PDS member. You must specify the name of the member that you want to rename in the Member field and the new member name in the Newname field.
S – Data set information
Use the S command to view information about the partitioned or sequential data set on the Dataset Information screen. See “Dataset Information screen” on page 229 for more information.
Library Utilities menu 223

Chapter 5 Option 3: Performing utility functions
Dataset Utilities menu
Use the Dataset Utilities menu (Option 3.2) to access the dataset utility screens. The Dataset Utilities menu allows you to do the following functions:
• Allocate new data sets
• Rename entire data sets
• Delete entire data sets
• View dataset information
• Catalog data sets
• Uncatalog data sets
• Compress data sets
To access the Dataset Utilities menu
Access the Dataset Utilities menu in one of these ways.
• On the Utility Selection menu, type 2 in the Input field, and then press ENTER.
• On any screen, type 3.2 in the Input field, and then press RETURN.
224 CPMS/SYSD Reference Manual ~ 1.2

Chapter 5 Option 3: Performing utility functions
Field definitions
Field definitions are listed here in the order that they appear on the screen.
Project
The Project field specifies the name of the project containing the PDS member that you want to manipulate. This is the first level of the three-part library naming convention and is the identifier for libraries that belong to the same project. The Project field is not required.
Use the following conventions to specify the project name:
• Specify the project name without quotation marks.
• Specify only the project name; do not include the member name.
• Stay within the 44-character limit of the Project field.
• You can include your user ID in the Project field. CPMS/SYSD does not automatically include it.
You can type the entire dataset name in either the Project or the Type field.
If you enter a project in the Project field, any values you type in either the Library or the Type field are concatenated with the value you type in the Project field to form the dataset name. See “Examples of concatenated dataset names” on page 226 for more information.
Library
The Library field specifies the name of the library containing the PDS member that you want to manipulate. This is the second level of the three-part library naming convention. The Library field is not required.
Use the following conventions to specify the library name:
• Specify the library name without quotation marks.
• Specify only the library name; do not include the member name.
• Stay within the eight-character limit of the Library field.
• You can include your user ID in the Library field. CPMS/SYSD does not automatically include it.
You can type the entire dataset name in either the Project or the Type field. The maximum length for the Project field and the Type field is 44 characters.
If you enter a library in the Library field, any values you type in either the Project or the Type field are concatenated with the value you type in the Library field to form the dataset name. See “Examples of concatenated dataset names” on page 226 for more information.
Dataset Utilities menu 225

Chapter 5 Option 3: Performing utility functions
Type
The Type field specifies the type of data in the library. This is the third level of the three-part library naming convention. ASM, COBOL, HELP, OBJ, and SOURCE are common data types. For two-level names, leave the Type field blank. The Type field is not required.
Use the following conventions to specify the type of data in the library:
• Specify the type of data without quotation marks.
• Specify only the type of data; do not include the member name.
• Stay within the 44-character limit of the Type field.
• You can include your user ID in the Type field. CPMS/SYSD does not automatically include it.
You can type the entire dataset name in either the Project or the Type field. The maximum length for the Project field and the Type field is 44 characters.
If you enter a data type in the Type field, any values you type in either the Project or the Library field are concatenated with the value you type in the Type field to form the dataset name. See “Examples of concatenated dataset names” on page 226 for more information.
Examples of concatenated dataset names
1. The table below shows a typical one-level project to generate the SYSD.TEST.SOURCE dataset name.
2. The table below shows a two-level project to generate the PRODUCTS.SYSD.TEST.SOURCE dataset name.
3. If you do not specify any libraries, the dataset utility generates the SYSD.TEST.SOURCE dataset name.
Project: SYSD
Library: TEST
Type: SOURCE
Project: PRODUCTS.SYSD
Library: TEST
Type: SOURCE
Project: SYSD.TEST
Library:
Type: SOURCE
226 CPMS/SYSD Reference Manual ~ 1.2

Chapter 5 Option 3: Performing utility functions
4. If you specify the entire name in the Project field, the dataset utility generates the SYSD.TEST.SOURCE dataset name.
5. If you specify the entire name in the Type field, the dataset utility generates the SYSD.TEST.SOURCE dataset name.
Dataset Name
The Dataset Name field specifies the 1-character to 44-character name of the partitioned or sequential data set. Use this field if the dataset name does not conform to the three-part naming convention. CPMS/SYSD puts your user ID in front of the dataset name unless you enclose the dataset name in quotation marks.
The Dataset Name field overrides any dataset name specified in the Project field, Library field, or Type field.
Volume Serial
If the data set is not cataloged, use the Volume Serial field to specify the volume serial number for the data set. If the data set is cataloged, leave this field blank.
Dataset Password
The Dataset Password field specifies the password for the data set. This field is required only if the data set is password protected. The password is not visible on the screen when you type it.
New Dataset Name
The New Dataset Name field specifies the 1-character to 44-character name that you want to assign to the data set. CPMS/SYSD puts your user ID in front of the dataset name unless you enclose the dataset name in quotation marks. This field is required only if you are renaming the entire data set.
Project: SYSD.TEST.SOURCE
Library:
Type:
Project:
Library:
Type: SYSD.TEST.SOURCE
Dataset Utilities menu 227

Chapter 5 Option 3: Performing utility functions
Command definitions
To issue a command, type a command in the Input field, and then press ENTER. Command definitions are listed here in alphabetical order.
Blank – Display data set information
If you leave the Input field blank and then press ENTER, CPMS/SYSD displays information about the data set on the Dataset Information screen. See “Dataset Information screen” on page 229 for more information.
A – Allocate new data set
The A command dynamically allocates the new data set. If the allocate fails, CPMS/SYSD displays the IBM reason code, reason code error, and reason code information at the bottom of the screen. See the IBM OS/SPL: Job Management Manual for an explanation of the codes.
C – Catalog data set
Use the C command to view the Catalog Utility screen where you can catalog multiple data sets. See “Catalog Utility screen” on page 239 for more information.
D – Delete entire data set
The D command deletes and uncatalogs the entire data set. CPMS/SYSD displays a message asking you to verify that you want to delete the data set. To confirm the delete, press ENTER. To cancel the delete, remove the D from the Input field, and then press ENTER.
O – Compress data set
The O command compresses the data set and then CPMS/SYSD displays a message saying that it started the batch compress process.
R – Rename entire data set
The R command renames the entire data set. CPMS/SYSD displays the Dataset Utilities menu on which you specify the new dataset name. See “Dataset Utilities menu” on page 224 for more information.
U – Uncatalog data set
The U command uncatalogs the data set from the specified volume.
228 CPMS/SYSD Reference Manual ~ 1.2

Chapter 5 Option 3: Performing utility functions
Dataset Information screen
The Dataset Information screen displays allocation and usage information for a specific data set. The Dataset Information screen allows you to do the following functions:
• Allocate data sets
• Browse data sets
• Catalog data sets
• Uncatalog data sets
• Edit data sets
• Delete data sets
• Compress data sets
• Rename data sets
• View more information about the extents for data sets
To access the Dataset Information screen
On the Dataset Utilities menu, leave the Input field blank, fill in the necessary fields, and then press ENTER.
The data on the screen is divided into four sections.
Dataset Information screen 229

Chapter 5 Option 3: Performing utility functions
Section definitions
Section definitions are listed here in alphabetical order.
Current Allocation
The Current Allocation section contains information about the current space allocations for the data set.
Current Utilization
The Current Utilization section contains information about the percentage of allocated space that the data set is using. For PDSEs, CPMS/SYSD displays “N/A” in the Used Tracks and Used Extents fields.
Extent Data
The Extent Data section contains detailed information about the current space allocations for the data set.
General Data
The General Data section contains information about the data set such as the location, device type, and record size. The information in the parentheses after PO in the Organization field indicates whether the data set is in PDS or PDSE format.
Command definitions
To issue a command, type a command in the Input field, and then press ENTER. Command definitions are listed here in alphabetical order.
A=Allocate
The A command dynamically allocates a new data set.
B=Browse
If the file is a PDS, the B command takes you to the Browse – Member Selection screen. If the file is sequential, the B command takes you directly to the Browse – Dataset Display screen. See “Browse – Member Selection screen” on page 65 and “Browse – Dataset menu” on page 56 for more information.
C=Catalog
The C command catalogs a data set.
230 CPMS/SYSD Reference Manual ~ 1.2

Chapter 5 Option 3: Performing utility functions
D=Delete
The D command deletes the data set. CPMS/SYSD displays a message asking you to verify that you want to delete the data set.
E=Extents
Use the E command to view up to 16 extents on the Dataset Extents screen. See “Dataset Extents screen” on page 232 for more information.
ED=Edit
• If the file is a PDS, the ED command takes you to the Edit – Member Selection screen. See “Edit – Member Selection screen” on page 101 for more information.
• If the file is sequential, the ED command takes you directly to the Edit – Dataset Display screen. See “Edit – Dataset menu” on page 89 for more information.
O=Compress
The O command compresses the data set.
R=Rename
The R command takes you to the Dataset Utilities menu, where you can rename the data set. See “Dataset Utilities menu” on page 224 for more information.
U=Uncatalog
The U command uncatalogs the data set from the volume.
Dataset Information screen 231

Chapter 5 Option 3: Performing utility functions
Dataset Extents screen
The Dataset Extents screen displays the volume on which the data set resides and information about the extents for the data set.
The functions available from the Dataset Extents screen include the following:
• Allocate data sets
• Browse data sets
• Catalog data sets
• Delete data sets
• Edit data sets
• Compress data sets
• Rename data sets
• Select data sets
• Uncatalog data sets
To access the Dataset Extents screen
On the Dataset Information screen, type E in the Input field, and then press ENTER.
232 CPMS/SYSD Reference Manual ~ 1.2

Chapter 5 Option 3: Performing utility functions
Field definitions
Field definitions are listed here in the order that they appear on the screen.
Dataset Name
The Dataset Name field contains the name of the data set.
Volume Serial
The Volume Serial field contains the volume on which the data set resides.
Seq
The Seq field contains the sequence number of the dataset extent.
CC
The CC field contains the cylinder on the disk where the dataset extent starts and ends.
HH
The HH field contains the head on the disk where the dataset extent starts and ends.
Trks
The Trks field contains the number of tracks in each extent.
Command definitions
To issue a command, type a command in the Input field, and then press ENTER. Command definitions are listed here in alphabetical order.
A=Allocate
The A command dynamically allocates a new data set.
B=Browse
• If the file is a PDS, the B command takes you to the Browse – Member Selection screen. See “Browse – Member Selection screen” on page 65 for more information.
• If the file is sequential, the B command takes you directly to the Browse – Dataset Display screen. See “Browse – Dataset menu” on page 56 for more information.
Dataset Extents screen 233

Chapter 5 Option 3: Performing utility functions
C=Catalog
The C command catalogs a data set.
D=Delete
The D command deletes the data set. CPMS/SYSD displays a message asking you to verify that you want to delete the data set.
ED=Edit
• If the file is a PDS, the ED command takes you to the Edit – Member Selection screen. See “Edit – Member Selection screen” on page 101 for more information.
• If the file is sequential, the ED command takes you directly to the Edit – Dataset Display screen. See “Edit – Dataset menu” on page 89 for more information.
O=Compress
The O command compresses the data set.
R=Rename
The R command takes you to the Dataset Utilities menu, where you can rename the data set. See “Dataset Utilities menu” on page 224 for more information.
S=Select
The S command takes you to the Dataset Information screen, where you can view the allocation and utilization information for the data set. See “Dataset Information screen” on page 229 for more information.
U=Uncatalog
The U command uncatalogs the data set from the volume.
234 CPMS/SYSD Reference Manual ~ 1.2

Chapter 5 Option 3: Performing utility functions
Allocate Utility screen
Use the Allocate Utility screen (Option 3.2.A) to allocate dynamically a new data set. If the allocation fails, CPMS/SYSD displays the reason code, reason code error, and reason code information at the bottom of the screen. See the IBM OS/SPL: Job Management Manual for an explanation of the codes.
To access the Allocate Utility screen
Access the Allocate Utility screen in one of these ways.
• On the Dataset Utilities menu, type A (Allocate) in the Input field, and then press ENTER.
• On any screen, type 3.2.A in the Input field, and then press RETURN.
Field definitions
Field definitions are listed here in the order that they appear on the screen.
Dataset Name
The Dataset Name field specifies the name of the data set that you want to allocate. CPMS/SYSD puts your user ID in front of the dataset name unless you enclose the dataset name in quotation marks.
Allocate Utility screen 235

Chapter 5 Option 3: Performing utility functions
Volume Serial
The Volume Serial field specifies the volume serial number where you want to allocate the data set. Leave this field blank if you want the system to select a volume serial number.
Unit
The Unit field specifies the unit type for the data set. You can request the unit type on the UNIT= parameter of a DD JCL statement. If you leave the Unit field blank, the field contains SYSDA by default.
Space Units
The Space Units field specifies the allocation type for the data set. Valid allocation types are BLKS, TRKS, or CYLS.
Primary Quan
The Primary Quan field specifies the primary number of space units that you want to allocate for the data set.
Secondary Quan
The Secondary Quan field specifies the secondary number of space units that you want to allocate for the data set. The Secondary Quan field determines the size of the extents.
Directory Blocks
The Directory Blocks field specifies the number of directory blocks that you want to allocate for the data set. For sequential data sets, specify zero (0).
Record Format
The Record Format field specifies the record format for the data set. For example, FB indicates that the records are fixed block.
Record Length
The Record Length field specifies the length of the records for the data set.
236 CPMS/SYSD Reference Manual ~ 1.2

Chapter 5 Option 3: Performing utility functions
Blocksize
The Blocksize field specifies the length of the blocks for the data set. For fixed and fixed-block records, the block size must be a multiple of the record length. For unblocked records, the block size should be the same as the record length.
For systems that support block sizes that the system determines, you can leave this field blank or set it to zero (0).
Create as PDSE
The Create as PDSE field specifies whether you want the data set to be a PDSE.
Catalog the DSN
The Catalog the DSN field specifies whether you want to catalog the data set.
Command definitions
To issue a command, type a command in the Input field, and then press ENTER. Command definitions are listed here in alphabetical order.
C=Catalog
The C command catalogs the data set.
D=Delete
The D command deletes the data set. CPMS/SYSD displays a message asking you to verify that you want to delete the data set.
Enter=Allocate
Press ENTER to allocate dynamically the data set. If you specified Yes in the Catalog the DSN field, CPMS/SYSD also catalogs the data set.
R=Rename
The R command takes you to the Dataset Utilities menu, where you can rename the data set. See “Dataset Utilities menu” on page 224 for more information.
The R command is useful if the data set that you want to allocate already exists or if the allocated dataset name is incorrect.
Allocate Utility screen 237

Chapter 5 Option 3: Performing utility functions
S=Select
The S command takes you to the Dataset Information screen, where you can view the allocation and utilization information for the data set. See “Dataset Information screen” on page 229 for more information.
U=Uncatalog
The U command uncatalogs the data set.
238 CPMS/SYSD Reference Manual ~ 1.2

Chapter 5 Option 3: Performing utility functions
Catalog Utility screen
Use the Catalog Utility screen (Option 3.2.C) to catalog data sets on up to five volumes.
To access the Catalog Utility screen
Access the Catalog Utility screen in one of these ways.
• On the Dataset Utilities menu, type C (Catalog data set) in the Input field, and then press ENTER.
• On any screen, type 3.2.C in the Input field, and then press RETURN.
Field definitions
Field definitions are listed here in the order that they appear on the screen.
Project
The Project field specifies the name of the project containing the PDS member that you want to manipulate. This is the first level of the three-part library naming convention and is the identifier for libraries that belong to the same project. The Project field is not required.
Use the following conventions to specify the project name:
• Specify the project name without quotation marks.
• Specify only the project name; do not include the member name.
• Stay within the 44-character limit of the Project field.
Catalog Utility screen 239

Chapter 5 Option 3: Performing utility functions
• You can include your user ID in the Project field. CPMS/SYSD does not automatically include it.
You can type the entire dataset name in either the Project or the Type field.
If you enter a project in the Project field, any values you type in either the Library or the Type field are concatenated with the value you type in the Project field to form the dataset name. See “Examples of concatenated dataset names” on page 241 for more information.
Library
The Library field specifies the name of the library containing the PDS member that you want to manipulate. This is the second level of the three-part library naming convention. The Library field is not required.
Use the following conventions to specify the library name:
• Specify the library name without quotation marks.
• Specify only the library name; do not include the member name.
• Stay within the eight-character limit of the Library field.
• You can include your user ID in the Library field. CPMS/SYSD does not automatically include it.
You can type the entire dataset name in either the Project or the Type field. The maximum length for the Project field and the Type field is 44 characters.
If you enter a library in the Library field, any values you type in either the Project or the Type field are concatenated with the value you type in the Library field to form the dataset name. See “Examples of concatenated dataset names” on page 241 for more information.
Type
The Type field specifies the type of data in the library. This is the third level of the three-part library naming convention. ASM, COBOL, HELP, OBJ, and SOURCE are common data types. For two-level names, leave the Type field blank. The Type field is not required.
Use the following conventions to specify the type of data in the library:
• Specify the type of data without quotation marks.
• Specify only the type of data; do not include the member name.
• Stay within the 44-character limit of the Type field.
• You can include your user ID in the Type field. CPMS/SYSD does not automatically include it.
You can type the entire dataset name in either the Project or the Type field. The maximum length for the Project field and the Type field is 44 characters.
240 CPMS/SYSD Reference Manual ~ 1.2

Chapter 5 Option 3: Performing utility functions
If you enter a data type in the Type field, any values you type in either the Project or the Library field are concatenated with the value you type in the Type field to form the dataset name. See “Examples of concatenated dataset names” on page 241 for more information.
Examples of concatenated dataset names
1. The table below shows a typical one-level project to generate the SYSD.TEST.SOURCE dataset name.
2. The table below shows a two-level project to generate the PRODUCTS.SYSD.TEST.SOURCE dataset name.
3. If you do not specify any libraries, the catalog utility generates the SYSD.TEST.SOURCE dataset name.
4. If you specify the entire name in the Project field, the catalog utility generates the SYSD.TEST.SOURCE dataset name.
5. If you specify the entire name in the Type field, the catalog utility generates the SYSD.TEST.SOURCE dataset name.
Project: SYSD
Library: TEST
Type: SOURCE
Project: PRODUCTS.SYSD
Library: TEST
Type: SOURCE
Project: SYSD.TEST
Library:
Type: SOURCE
Project: SYSD.TEST.SOURCE
Library:
Type:
Project:
Library:
Type: SYSD.TEST.SOURCE
Catalog Utility screen 241

Chapter 5 Option 3: Performing utility functions
Dataset Name
The Dataset Name field specifies the 1-character to 44-character name of the partitioned or sequential data set. Use this field if the dataset name does not conform to the three-part naming convention. CPMS/SYSD puts your user ID in front of the dataset name unless you enclose the dataset name in quotation marks.
The Dataset Name field overrides any dataset name specified in the Project field, Library field, or Type field.
Volume Serial
The Volume Serial field specifies the volume serial number where an uncataloged data set resides.
Device Type
The Device Type field specifies the storage device on which you want to catalog the data set. DASD and TAPE are common device types.
Dataset Password
The Dataset Password field specifies the password for the data set. This field is required only if the data set is password protected. The password is not visible on the screen when you type it.
Command definitions
To issue a command, type a command in the Input field, and then press ENTER. Command definitions are listed here in alphabetical order.
A=Allocate
The A command dynamically allocates the data set.
C=Catalog
The C command catalogs the data set.
D=Delete
The D command deletes the data set. CPMS/SYSD displays a message asking you to verify that you want to delete the data set.
242 CPMS/SYSD Reference Manual ~ 1.2

Chapter 5 Option 3: Performing utility functions
O=Compress
The O command compresses the data set.
R=Rename
The R command takes you to the Dataset Utilities menu, where you can rename the data set. See “Dataset Utilities menu” on page 224 for more information.
The R command is useful if the data set that you want to allocate already exists or if the allocated dataset name is incorrect.
S=Select
The S command takes you to the Dataset Information screen, where you can view the allocation and utilization information for the data set. See “Dataset Information screen” on page 229 for more information.
U=Uncatalog
The U command uncatalogs the data set.
Catalog Utility screen 243

Chapter 5 Option 3: Performing utility functions
Listcat Utility screen
Use the Listcat Utility screen (Option 3.4) to list the catalog entries for a specific high-level qualifier.
The functions available from the Listcat Utility screen include the following:
• Browse data sets
• Delete data sets
• Edit data sets
• Compress data sets
• Rename data sets
• Uncatalog data sets
• View the VTOC information for data sets
To access the Listcat Utility screen
Access the Listcat Utility screen in one of these ways.
• On the Utility Selection menu, type 4 in the Input field, and then press ENTER.
• On any screen, type 3.4 in the Input field, and then press RETURN.
244 CPMS/SYSD Reference Manual ~ 1.2

Chapter 5 Option 3: Performing utility functions
If an error occurs when retrieving the dataset information from the catalog, CPMS/SYSD does one of the following:
• Displays question marks (?) in the Volser field and RC=nnnn in the Device field. See IDC3009I in the IBM z/OS System Messages Manual for more information.
• Displays question marks (?) in the Volser, Device, or Seq field and does not display a return code. In this case, the data set has more than 29 volume serial numbers cataloged, and CPMS/SYSD could not retrieve all of the information. CPMS/SYSD displays as much data as possible.
Field definitions
Field definitions are listed here in the order that they appear on the screen.
Index
The Index field is a required field that specifies the complete high-level qualifier needed to display data sets. CPMS/SYSD treats all entries in the Index field as generic. If the high-level qualifier is an alias of a CVOL catalog, you must specify complete qualifiers. Otherwise, you can specify partial qualifiers after the high-level qualifier. You cannot use wildcards in the high-level qualifier.
You can define a default high-level qualifier on the Utility Parameters screen (Option 0.5).
You can use wildcards in the Index field to search for data sets. Use the asterisk (*), question mark (?), and plus sign (+) wildcard characters in the following ways:
• Asterisk (*): Use to specify any number of characters, from 0 to n, in which you want to search for a character match or the next period, whichever comes first.
• Two asterisks (**): Use two asterisks (**) to specify any number of qualifiers, from 0 to n, that CPMS/SYSD should skip until finding the next qualifier.
• Question mark (?) or plus sign (+): Use to find any character, except a period, in the position indicated by the question mark (?) or plus sign (+).
Row
The Row field contains the row number of the first displayed data set line (X) and the number of rows available to view (Y). The format of the Row field is:
Row: X of Y
Listcat Utility screen 245

Chapter 5 Option 3: Performing utility functions
Record Selection
The Record Selection field specifies the type of record to show. If you leave this field blank, CPMS/SYSD displays all record types. The following record types are valid and consist of IBM-abbreviated keywords. The uppercase characters are the minimum abbreviation allowed. Separate each keyword by blanks or commas.
See the IBM Access Method Services Reference manual for more information about these record types.
Type To view
ALias Aliases
AIx Alternate indexes
CL Clusters
DAta Data components for a VSAM data set
GDg GDGs; If the data set is cataloged in a CVOL catalog, these record types are not shown
IX Index components for a VSAM data set
NVsam Non-VSAM data sets
PAth Paths
PGspc Page spaces
UCat User catalogs
246 CPMS/SYSD Reference Manual ~ 1.2

Chapter 5 Option 3: Performing utility functions
O
Type the letter for the command you want in the O (Option) field. Type the single-character option next to the catalog entry, and then press ENTER.
If you specify multiple options, CPMS/SYSD performs the C=Compress, R=Rename, and U=Uncatalog options first; then the D=Delete option with a verification prompt; and then the first occurrence of either the B=Browse, E=Edit, S=Select, or /=Reposition option.
Use option To
/=Reposition Move the data set to the first line on the screen.
B=Browse • If the data set is a PDS, go to the Browse – Member Selection screen. See “Browse – Member Selection screen” on page 65 for more information.
• If the data set is sequential, go directly to the Browse – Dataset Display screen. See “Browse – Dataset menu” on page 56 for more information.
D=Delete Delete the data set. CPMS/SYSD displays a message asking you to verify that you want to delete the data set.
E=Edit • If the data set is a PDS, go to the Edit – Member Selection screen. See “Edit – Member Selection screen” on page 101 for more information.
• If the data set is sequential, go directly to the Edit – Dataset Display screen. See “Edit – Dataset menu” on page 89 for more information.
I=Information View the VTOC information for the data set.
O=Compress Compress the data set.
R=Rename Rename the data set.
S=Select • View the VTOC information for the data set.
• Go directly to the Edit – Dataset menu for the selected data set.
• Go directly to the Browse – Dataset menu for the selected data set.
The action performed by the S=Select option depends on how the Sel field was configured on the Utility Parameters screen (Option 0.5). See “Sel” on page 51 for more information.
U=Uncatalog Uncatalog the data set.
Listcat Utility screen 247

Chapter 5 Option 3: Performing utility functions
DSN(S)
The DSN(S) field contains the 1-character to 44-character dataset name.
Volser
The Volser field contains the volume serial number. A plus sign (+) in the Volser field indicates that the data set has multiple volumes.
Device
The Device field contains the type of device on which the data set resides.
Seq
The Seq field contains the file sequence number. This field is valid only for tape and cartridge data sets.
Flags
The Flags field contains the record type of the data set.
248 CPMS/SYSD Reference Manual ~ 1.2

Chapter 5 Option 3: Performing utility functions
VTOC Utility screen
Use the VTOC Utility screen (Option 3.7) to view a DASD VTOC online and perform data set management functions. You can view an entire volume or limit the entries to only those data sets whose names agree with a specified prefix.
To access the VTOC Utility screen
Access the VTOC Utility screen in one of these ways.
• On the Utility Selection menu, type 7 in the Input field, and then press ENTER.
• On any screen, type 3.7 in the Input field, and then press RETURN.
Field definitions
Field definitions are listed here in the order that they appear on the screen.
Vol
The Vol field specifies the volume serial number that you want to view.
VTOC Utility screen 249

Chapter 5 Option 3: Performing utility functions
DSN Prefix
The DSN Prefix field specifies the full or partial prefix for the data set. CPMS/SYSD displays only the entries for the data sets on the volume whose names match the prefix that you specify. You can use the not sign () or exclamation point (!) in front of the prefix to limit the visible entries to all of the data sets except the ones whose names match the specified prefix.
Volume Data
The Volume Data section contains the Total field, Used field, and Datasets field. The Total field contains the total number of tracks available on the volume. The Used field contains the number of tracks on the volume that are currently in use. The Datasets field contains the total number of data sets on the volume.
VTOC Data
The VTOC Data section contains the Total field, Used field, and Free field. The Total field contains the total number of data set control blocks (DSCBs) that are available on the volume. The Used field contains the number of DSCBs that the volume is using. The Free field contains the number of unused DSCBs available for the volume.
Free Space
The Free Space section contains the Total field, Largest field, and Extents field. The Total field contains the total number of free cylinders and tracks on the volume. The Largest field contains the largest, single, free cylinder or largest, single, free track area on the volume. The Extents field contains the number of extents in which the free tracks reside.
O
Type the letter for the command you want in the O (Option) field. Type the single-character option next to the VTOC entry, and then press ENTER.
Use option To
B=Browse • If the data set is a PDS, go to the Browse – Member Selection screen. See “Browse – Member Selection screen” on page 65 for more information.
• If the data set is sequential, go directly to the Browse – Dataset Display screen.See “Browse – Dataset menu” on page 56 for more information.
C=Catalog Catalog the data set
D=Delete Delete the data set
250 CPMS/SYSD Reference Manual ~ 1.2

Chapter 5 Option 3: Performing utility functions
Dataset Name
The Dataset Name field contains the 1-character to 44-character dataset name.
CreDt
The CreDt field contains the date on which the data set was created.
ExpDt
The ExpDt field contains the date on which the data set expires.
Org
The Org field contains the organization type of the data set.
RecFm
The RecFm field contains the record format of the data set.
LRecL
The LRecL field contains the logical record length of the data set.
BlkSz
The BlkSz field contains the block size of the data set.
E=Edit • If the data set is a PDS, go to the Edit – Member Selection screen. See “Edit – Member Selection screen” on page 101 for more information.
• If the data set is sequential, go directly to the Edit – Dataset Display screen. See “Edit – Dataset menu” on page 89 for more information.
O=Compress Compress the data set
R=Rename Rename the data set
S=Select View the VTOC information for the data set
U=Uncatalog Uncatalog the data set
Use option To
VTOC Utility screen 251

Chapter 5 Option 3: Performing utility functions
Ex
The Ex field contains the number of extents that the data set has used.
Trks
The Trks field contains the number of tracks allocated for the data set.
Use%
The Use% field contains the percentage of allocated tracks that the data set has used.
252 CPMS/SYSD Reference Manual ~ 1.2

Chapter 5 Option 3: Performing utility functions
System Device Unit Display screen
Use the System Device Unit Display screen (Option 3.U) to list the UCBs defined in your OS. You can limit the units displayed by typing over the information in the Class field and Status field.
To access the System Device Unit Display screen
Access the System Device Unit Display screen in one of these ways.
• On the Utilities Selection menu, type U (Unit List) in the Input field, and then press ENTER.
• On any screen, type 3.U in the Input field, and then press RETURN.
System Device Unit Display screen 253

Chapter 5 Option 3: Performing utility functions
Field definitions
Field definitions are listed here in the order that they appear on the screen.
Class
The Class field specifies the class of the UCBs to be listed. Valid classes are DASD, TAPE, COMM, CTC, DISP, UREC, and CHAR. Substitute classes are DISK or SYSDA for DASD; GRAPHICS, TERM, or TRM for DISP; and UR for UREC. To view all UCBs, type ALL or use blanks.
Status
The Status field allows you to limit the display to the devices that match the status entered. Valid device statuses are ALL, OFFLINE, ONLINE, or blanks. The default is ONLINE.
O
Type the letter for the command you want in the O (Option) field. Type the single-character option next to the UCB, and then press ENTER.
Volser
The Volser field contains the volume serial number of the unit.
Addr
The Addr field contains the three-digit to four-digit UCB ID.
Use option To
P=Print VTOC Submit a job to print the VTOC. This option is available only for DASD VTOCs. The print job uses the JOB statements defined on the Utility Parameters screen (Option 0.5). (See “Utility Parameters screen” on page 50 for more information.) You can view the output from the spool.
S=Select View the VTOC Utility screen for the volume serial number. See “VTOC Utility screen” on page 249 for more information.
V=View VTOC View the VTOC Utility screen for the volume serial number. See “VTOC Utility screen” on page 249 for more information.
254 CPMS/SYSD Reference Manual ~ 1.2

Chapter 5 Option 3: Performing utility functions
Class
The Class field contains the device class of the UCB.
Device
The Device field contains the type of device.
Status
The Status field contains the status of the device. Valid statuses are ONLINE or OFFLINE.
DASD Attributes
The DASD Attributes field contains the mount attributes of DASD.
This class Means
DASD Direct access device
TAPE Tape
COMM Communications device
CTC Channel-to-channel device
DISP Display device
UREC Unit record device
CHAR Character device
This attribute Means
PRIV Private
STRG Storage
RSRV Reserved
PAGE Active page data set
PUBL Public
RES Resident
SYSRES System resident device
System Device Unit Display screen 255

Chapter 5 Option 3: Performing utility functions
Use
The Use field contains the number of data control blocks (DCBs) open for this volume.
Command definition
Type the command in the Input field, and then press ENTER.
FIND
The FIND command searches the listed UCBs for a specific volser or unit address. When CPMS/SYSD finds a match, it displays the unit to which the volser or unit address belongs. The FIND command always starts searching at the top of the display and shows only a single screen of data. If your search results extend beyond a single screen, change the search string to be more specific.
The format of the FIND command is:
To exit the FIND screen and return to the System Device Unit Display screen, press ENTER.
FIND string
This parameter Specifies
string • The string that you want to find.
• You can use wildcards and placeholders in the string parameter. An asterisk (*) is the designated wildcard character. Use an asterisk (*) to represent from 0 to n characters in the search string. A plus sign (+) is the designated placeholder character. Use a plus sign (+) to represent exactly one character in the search string.
256 CPMS/SYSD Reference Manual ~ 1.2

Chapter 6
Option 4: Displaying active jobs
Use the JES2 Display Active Jobs screen (Option 4) to view the statistics for the jobs that are being executed in the OS.
This chapter contains information about:
Screen Address
• JES2 Display Active Jobs on page 258 4
257

Chapter 6 Option 4: Displaying active jobs
JES2 Display Active Jobs
Use the JES2 Display Active Jobs screen (Option 4) to estimate the completion time for a job after the OS has started to execute the job. You can also use this screen to determine the current state of the OS with respect to jobs being executed. Every time you press ENTER on this screen, CPMS/SYSD updates the statistics.
To access the JES2 Display Active Jobs screen
Access the JES2 Display Active Jobs screen in one of these ways.
• On the Primary Option menu, type 4 in the Input field, and then press ENTER.
• On any screen, type 4 in the Input field, and then press RETURN..
Field definitions
Field definitions are listed here in the order that they appear on the screen.
ASID
The ASID field contains the address space ID for the job.
Jobname
The Jobname field contains the name of the job or started task procedure that the OS is executing.
258 CPMS/SYSD Reference Manual ~ 7.2

Chapter 6 Option 4: Displaying active jobs
Jobid
The Jobid field contains the job number ID assigned by JES2. This field is only displayed if Jobid is on.
Stepname
The Stepname field contains the job step that the OS is executing.
Procstep
The Procstep field contains the step name of the procedure in the job that the OS is executing. This field does not display if Jobid is on.
CPUR
The CPUR field contains the real CPU time that the current step has used, in seconds.
Status
The Status field contains the dispatching status for the job.
Real
The Real field contains the amount of real memory that the job is using.
JES2 Display Active Jobs 259

Chapter 6 Option 4: Displaying active jobs
Aux
The Aux field contains the amount of virtual memory that the job is using, including virtual input/output (VIO) data sets.
Prty
The Prty field contains the dispatching priority for the job.
#I/O
The #I/O field contains the number of input and output operations that the job has performed.
Command definition
Type the command in the Input field, and then press ENTER.
ALL
Use the ALL command to view all active jobs, including TSO and started tasks. The ALL command overrides the setting on the JES/List Parameter Definitions screen (Option 0.1). See “JES/List Parameter Definitions screen” on page 38 for more information.
Jobid
The Jobid setting remains in affect until changed by another Jobid command. The format for the Jobid command is:
Jobid [ON|OFF]
This parameter Specifies
ON Displays the Jobid instead of the Procstep.
OFF Displays the Procstep instead of the Jobid.
260 CPMS/SYSD Reference Manual ~ 7.2

Chapter 6 Option 4: Displaying active jobs
PREFIX
The PREFIX command limits the jobs that are displayed. The format of the PREFIX command is:
If jobname contains any wildcards or is 8 bytes long, the parameter is left as-is. Otherwise, an * is appended to the end of the parameter, indicating that all jobs that begin with the jobname characters will be displayed.
To return to a complete active job list, type PREFIX *, PREFIX, or just P.
For example:
• P CICS - Displays only those jobs that begin with the letters “CICS”.
PREFIX jobname
This parameter Specifies
jobname Indicates which jobs in the active list will be displayed. Only the first 8 bytes of jobname are used. All other characters are ignored. This parameter may contain the following wildcard characters:
+ = Any character
* = 0-n characters
JES2 Display Active Jobs 261

Chapter 6 Option 4: Displaying active jobs
262 CPMS/SYSD Reference Manual ~ 7.2

Chapter 7
Option 5: Following a job through the system
Use the JES2 Job Queue Display (Option 5) and JES2 Job Dataset Display to follow a job through the input and output queues.
This chapter contains information about:
Screen Address
• JES2 Job Queue Display screen (new format) on page 264
5.
• JES2 Job Queue Display screen (old format) on page 269
5.
• JES2 Job Queue Display (Right) screen (old format) on page 272
5.
• JES2 Job Dataset Display screen on page 277 Not applicable.
• JES2 Job Dataset Display (Right) screen on page 281
Not applicable.
263

Chapter 7 Option 5: Following a job through the system
JES2 Job Queue Display screen (new format)
Use the JES2 Job Queue Display (Option 5) to view a list of jobs in the JES2 queues. This screen tells you if your job is waiting to be executed, is executing, or is waiting in the output queue. Use this screen to release a held job; cancel, delete, hold, print, route, or view a job; and view a summary of the output elements for the job or output data sets.
Note Use the View parameter on the JES/List Parameter Definitions screen (Option 0.1) to switch between the old and new format for this screen. See “View” on page 41 for more information.
Field definitions
Field definitions are listed here in the order that they appear on the screen.
O
Type the letter for the command you want in the O (Option) field. Type the single-character option next to the job, and then press ENTER.
Use option To
A=Release Release a job held by the H=Hold option.
C=Cancel Cancel a job that is being executed.
D=Delete Cancel and then purge the job.
H=Hold Hold the job.
264 CPMS/SYSD Reference Manual ~ 7.2

Chapter 7 Option 5: Following a job through the system
Job#
The Job# field contains the JES2-assigned job number for the job. The letter in parentheses after the field name indicates whether the jobs are listed in ascending (A) or descending (D) order. See “JES/List Parameter Definitions screen” on page 38 for more information.
Jobname
The Jobname field contains the job name for each job assigned by JES2. A dash (-) at the end of this field indicates the MAXRC is hex.
MAXRC
The MAXRC field contains the value of the maximum return code:
J=JFT View and execute the default JES2 JFT panel defined on the Job/File Tailoring Parameters screen (Option 0.3). See “Job/File Tailoring Parameters screen” on page 46 for more information.
O=Output View the output elements for the job on the JES2 Job Output Display screen (Option 6). See “JES2 Job Output Display screen” on page 286 for more information.
P=Print Print the job on the default CICS printer defined on the JES/List Parameter Definitions screen (Option 0.1). See “JES/List Parameter Definitions screen” on page 38 for more information.
S=Select View a summary of the output data sets for the job on the JES2 Job Dataset Display screen. Use this information to determine the characteristics for viewing or printing the output data sets. See “JES2 Job Dataset Display screen” on page 277 for more information.
T=Route • Change the print or punch destination ID for the job.
• To change the destination, type T in the O (Option) field next to the job, change the Print or Punch field, and then press ENTER.
V=View View the job output from the JES2 spool on the JES2 Spool Display screen. See “JES2 Spool Display screen” on page 292 for more information.
This value Means
CANCEL The job was cancelled.
CNVERT The converter abended while processing the job.
JCLERR The job had a JCL error.
Use option To
JES2 Job Queue Display screen (new format) 265

Chapter 7 Option 5: Following a job through the system
EC
The EC field displays the execution class. If the job has not executed, this field can be modified.
MC
The MC field displays the message class from the job card.
Stat
The Stat field contains one of the following values:
Pri
The Pri field contains the priority of the job.
SECUR The job failed security checks.
EOMERR The job failed in the end of memory.
Shhhh The system abend code of hhhh.
Unnnnn The user abend code of nnnnn.
nnnnnn The max return code in decimal or hex. If there is a dash (-) at the end of the Jobname field, then the value in the MaxRC field is the maximum return code in hex.
For non-zero return codes, view the job output for more information. See “JES2 Job Output Display screen” on page 286.
N/A None of the maximum return code values listed above are applicable.
Value Identifies
ACT The job is currently active.
WAIT The job is currently waiting.
HOLD The job is currently held.
COMP The job is currently complete.
TSU The job is a time sharing user.
This value Means
266 CPMS/SYSD Reference Manual ~ 7.2

Chapter 7 Option 5: Following a job through the system
The Print field contains the print destination ID for the job. To change this field, use the T=Route option.
Date
The Date field contains the date and time when the job completed or entered the system.
#Lines
The #Lines field displays the total number of lines contained in the job.
Programmer
Displays the programmer field from the job card.
Note The Date/Time #Lines fields will be toggled with the Programmer field when the LEFT or RIGHT command is entered.
Primary command definitions
To issue a primary command, type a primary command in the Input field, and then press ENTER.
Left
Toggles the display between #Lines Pri Sysname and Programmer fields.
Right
Toggles the display between #Lines Pri Sysname and Programmer fields.
RC
Use the RC primary command to view only those jobs that match a specific maximum return code. The maximum return code appears in the MaxRC field on the JES2 Job Queue Display (Right) screen. The format of the RC command is:
RC cond value
This parameter Specifies
cond The condition you want CPMS/SYSD to use when determining which jobs to show.
JES2 Job Queue Display screen (new format) 267

Chapter 7 Option 5: Following a job through the system
If you change the job prefix while you are on the JES2 Job Queue Display screen, CPMS/SYSD resets the RC command to RC ALL.
View
Sets the current view as your default when you enter the I/O Job Display panel (=5).
Type To
ALL View all jobs.
AB | ABEND Display jobs with abend codes.
EQ or = View jobs for which the return code is the same as the maximum return code.
NE or <> View jobs for which the return code is not the same as the maximum return code.
GT or > View jobs for which the maximum return code is greater than the return code for the job.
GE or >= View jobs for which the maximum return code is greater than or equal to the return code for the job.
LT or < View jobs for which the maximum return code is less than the return code for the job.
LE or <= View jobs for which the maximum return code is less than or equal to the return code for the job.
Choosing condition values other than ALL could cause the software to run slowly when you are working with large displays.
value The decimal value against which to compare the value in the MaxRC field.
Note If you set a filter of RC <> 0, then all jobs with abend codes will also be displayed.
This parameter Specifies
268 CPMS/SYSD Reference Manual ~ 7.2

Chapter 7 Option 5: Following a job through the system
JES2 Job Queue Display screen (old format)
Use the JES2 Job Queue Display (Option 5) to view a list of jobs in the JES2 queues. This screen tells you if your job is waiting to be executed, is executing, or is waiting in the output queue. Use this screen to release a held job; cancel, delete, hold, print, route, or view a job; and view a summary of the output elements for the job or output data sets.
Note Use the View parameter on the JES/List Parameter Definitions screen (Option 0.1) to switch between the old and new format for this screen. See “View” on page 41 for more information.
To access the JES2 Job Queue Display screen
Access the JES2 Job Queue Display screen in one of these ways.
• On the Primary Option menu, type 5 in the Input field and then press ENTER.
• On any screen, type 5 in the Input field and then press RETURN.
See “Primary command definitions” on page 267 for more information about the additional fields on the extended screen.
JES2 Job Queue Display screen (old format) 269

Chapter 7 Option 5: Following a job through the system
Field definitions
Field definitions are listed here in the order that they appear on the screen.
O
Type the letter for the command you want in the O (Option) field. Type the single-character option next to the job and then press ENTER.
Job#
The Job# field contains the JES2-assigned job number for the job. The letter in parentheses after the field name indicates whether the jobs are listed in ascending (A) or descending (D) order. See “JES/List Parameter Definitions screen” on page 38 for more information.
Use option To
A=Release Release a job held by the H=Hold option.
C=Cancel Cancel a job that is being executed.
D=Delete Cancel and then purge the job.
H=Hold Hold the job.
J=JFT View and execute the default JES2 JFT panel defined on the Job/File Tailoring Parameters screen (Option 0.3). See “Job/File Tailoring Parameters screen” on page 46 for more information.
O=Output View the output elements for the job on the JES2 Job Output Display screen (Option 6). See “JES2 Job Output Display screen” on page 286 for more information.
P=Print Print the job on the default CICS printer defined on the JES/List Parameter Definitions screen (Option 0.1). See “JES/List Parameter Definitions screen” on page 38 for more information.
S=Select View a summary of the output data sets for the job on the JES2 Job Dataset Display screen. Use this information to determine the characteristics for viewing or printing the output data sets. See “JES2 Job Dataset Display screen” on page 277 for more information.
T=Route • Change the print or punch destination ID for the job.
• To change the destination, type T in the O (Option) field next to the job, change the Print or Punch field, and then press ENTER.
V=View View the job output from the JES2 spool on the JES2 Spool Display screen. See “JES2 Spool Display screen” on page 292 for more information.
270 CPMS/SYSD Reference Manual ~ 7.2

Chapter 7 Option 5: Following a job through the system
Jobname
The Jobname field contains the procedure name for the started task or the job name on the JOB card.
STA
The STA field contains the queue type for the job.
XHA
The XHA field contains (in three columns) information about the job.
Pri
The Pri field contains the priority of the job in its queue.
Held
Always blank.
The Print field contains the print destination ID for the job. To change this field, use the T=Route option.
Punch
The Punch field contains the punch destination ID for the job. To change this field, use the T=Route option.
This type Identifies
PPU The print and punch queue for jobs waiting to print.
STC The started task queue for jobs waiting or being executed.
t** The execution queue for jobs waiting to be executed or are executing, where t is the execution class.
This column Contains
X A W if the job is waiting to be executed or the number of the CPU on which the job is being executed. Otherwise, this column is blank.
H An H if the job is held.
A Always blank.
JES2 Job Queue Display screen (old format) 271
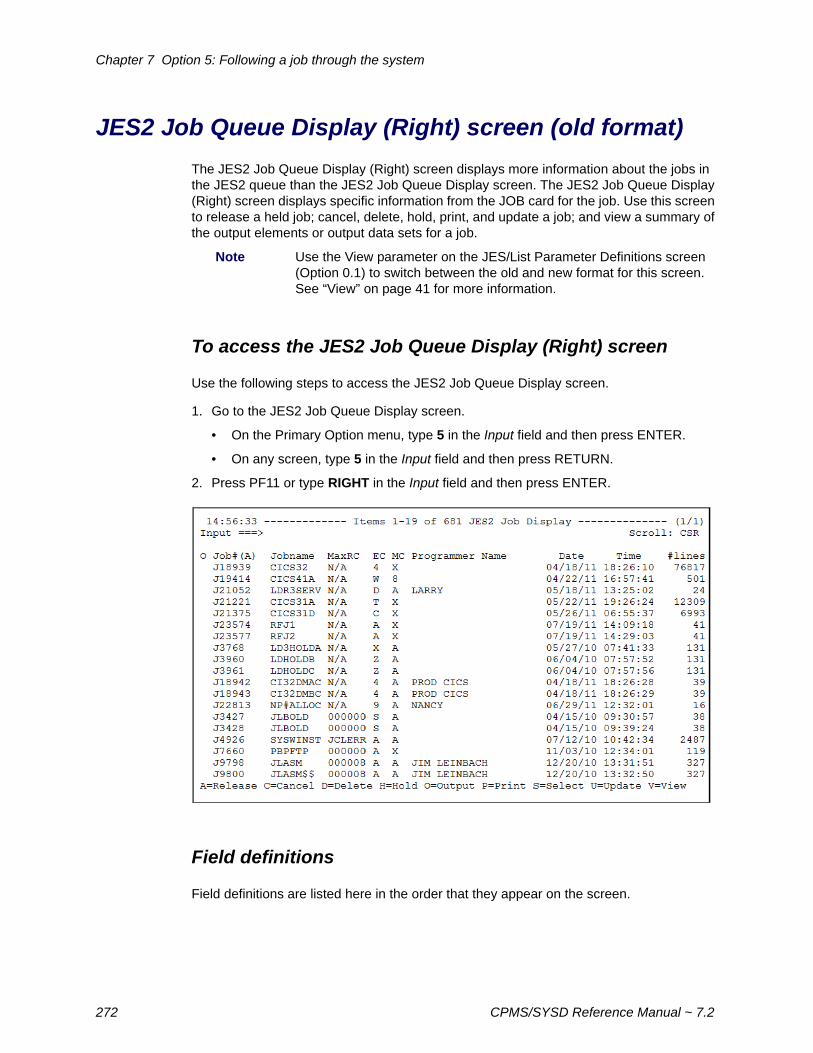
Chapter 7 Option 5: Following a job through the system
JES2 Job Queue Display (Right) screen (old format)
The JES2 Job Queue Display (Right) screen displays more information about the jobs in the JES2 queue than the JES2 Job Queue Display screen. The JES2 Job Queue Display (Right) screen displays specific information from the JOB card for the job. Use this screen to release a held job; cancel, delete, hold, print, and update a job; and view a summary of the output elements or output data sets for a job.
Note Use the View parameter on the JES/List Parameter Definitions screen (Option 0.1) to switch between the old and new format for this screen. See “View” on page 41 for more information.
To access the JES2 Job Queue Display (Right) screen
Use the following steps to access the JES2 Job Queue Display screen.
1. Go to the JES2 Job Queue Display screen.
• On the Primary Option menu, type 5 in the Input field and then press ENTER.
• On any screen, type 5 in the Input field and then press RETURN.
2. Press PF11 or type RIGHT in the Input field and then press ENTER.
Field definitions
Field definitions are listed here in the order that they appear on the screen.
272 CPMS/SYSD Reference Manual ~ 7.2

Chapter 7 Option 5: Following a job through the system
O
Type the letter for the command you want in the O (Option) field. Type the single-character option next to the job and then press ENTER.
Job#
The Job# field contains the JES2-assigned job number. The letter in parentheses after the field name indicates whether the jobs are listed in ascending (A) or descending (D) order. See “JES/List Parameter Definitions screen” on page 38 for more information.
Jobname
The Jobname field contains the procedure name for the started task or the job name on the JOB card.
Use option To
A=Release Release a job held by the H=Hold option.
C=Cancel Cancel a job being executed.
D=Delete Cancel and then purge the job.
H=Hold Hold the job.
J=JFT View and execute the default JES2 JFT panel defined on the Job/File Tailoring Parameters screen (Option 0.3). See “Job/File Tailoring Parameters screen” on page 46 for more information.
O=Output View the output elements for the job on the JES2 Job Output Display screen (Option 6). See “JES2 Job Output Display screen” on page 286 for more information.
P=Print Print the job on the default CICS printer defined on the JES/List Parameter Definitions screen (Option 0.1). See “JES/List Parameter Definitions screen” on page 38 for more information.
S=Select View a summary of the output data sets for the job on the JES2 Job Dataset Display screen. Use this information to determine the characteristics for viewing or printing the output data sets. See “JES2 Job Dataset Display screen” on page 277 for more information.
U=Update Change the execution class of a job waiting to be executed. After you type the command in the O (Option) field, change the EC field and press ENTER.
V=View View the job output from the JES2 spool on the JES2 Spool Display screen. See “JES2 Spool Display screen” on page 292 for more information.
JES2 Job Queue Display (Right) screen (old format) 273

Chapter 7 Option 5: Following a job through the system
MaxRC
The MaxRC field contains the value of the maximum return code.
EC
The EC field contains the execution class for the job. If this field is highlighted, the job has not yet been executed, and you can use the U=Update option to change the execution class for the job.
MC
The MC field contains the message class for the job.
Programmer Name
The Programmer Name field contains the name of the programmer specified on the JOB card.
Date
The Date field contains the date on which the job entered the system.
This value Means
CANCEL The job was cancelled.
CNVERT The converter abended while processing the job.
JCLERR The job had a JCL error.
SECUR The job failed security checks.
EOMERR The job failed in the end of memory.
Shhhh The system abend code of hhhh.
Unnnnn The user abend code of nnnnn.
nnnnnn The max return code in decimal or hex. If there is a dash (-) at the end of the Jobname field, then the value in the MaxRC field is the maximum return code in hex.
For non-zero return codes, view the job output for more information. See “JES2 Job Output Display screen” on page 286.
N/A None of the maximum return code values listed above are applicable.
274 CPMS/SYSD Reference Manual ~ 7.2

Chapter 7 Option 5: Following a job through the system
Time
The Time field contains the time at which the job entered the system.
#Lines
The #Lines field contains the number of printable lines in the job.
Primary command definitions
To issue a primary command, type a primary command in the Input field and then press ENTER.
RC
Use the RC primary command to view only those jobs that match a specific maximum return code. The maximum return code appears in the MaxRC field on the JES2 Job Queue Display (Right) screen. The format of the RC command is:
RC cond value
This parameter Specifies
cond The condition you want CPMS/SYSD to use when determining which jobs to show.
Type To
ALL View all jobs.
AB | ABEND Display jobs with abend codes.
EQ or = View jobs for which the return code is the same as the maximum return code.
NE or <> View jobs for which the return code is not the same as the maximum return code.
GT or > View jobs for which the maximum return code is greater than the return code for the job.
GE or >= View jobs for which the maximum return code is greater than or equal to the return code for the job.
LT or < View jobs for which the maximum return code is less than the return code for the job.
LE or <= View jobs for which the maximum return code is less than or equal to the return code for the job.
JES2 Job Queue Display (Right) screen (old format) 275

Chapter 7 Option 5: Following a job through the system
If you change the job prefix while you are on the JES2 Job Queue Display screen, CPMS/SYSD resets the RC command to RC ALL.
View
Sets the current view as your default when you enter the I/O Job Display panel (=5).
Choosing condition values other than ALL could cause the software to run slowly when you are working with large displays.
value The decimal value against which to compare the value in the MaxRC field.
Note If you set a filter of RC <> 0, then all jobs with abend codes will also be displayed.
This parameter Specifies
276 CPMS/SYSD Reference Manual ~ 7.2

Chapter 7 Option 5: Following a job through the system
JES2 Job Dataset Display screen
The JES2 Job Dataset Display screen shows a complete list of data sets belonging to a job in the JES2 spool, along with various data set statistics. These statistics help you determine the printer display characteristics for each data set. From here you can print the data set and view information about it. You can also delete the individual data set. If your company has installed the JFT option, you can use the J=JFT option to access JFT panels.
Note Due to the way JES2 APIs obtains data, if you are displaying SYSIN and/or DELETED data sets the values returned will not always reflect attribute changes after the data set was created.
To access the JES2 Job Dataset Display screen
On the JES2 Job Queue Display screen, type S (Select) in the O (Option) field next to the job and then press ENTER to access the JES2 Job Dataset Display screen.
See “JES2 Job Dataset Display (Right) screen” on page 281 for more information about the additional fields on the extended screen.
JES2 Job Dataset Display screen 277

Chapter 7 Option 5: Following a job through the system
Primary command definitions
DELETE
The DELETE command deletes the current job and all spool files associated with the job.
The format of the DELETE command is:
This command is not valid for an active job.
CAUTION CPMS/SYSD deletes the job as soon as you enter this command.
Field definitions
Field definitions are listed here in the order that they appear on the screen.
O
Type the letter for the command you want in the O (Option) field. Type the single-character option next to the data set and then press ENTER.
DSN
The DSN field contains the JES2-assigned name or number for the data set.
DDName
The DDName field contains the DDNAME for the data set.
DELETE
Use option To
D=Delete Delete the data set from the job.
J=JFT View and execute the default JES2 JFT panel defined on the Job/File Tailoring Parameters screen (Option 0.3). See “Job/File Tailoring Parameters screen” on page 46 for more information.
P=Print Print the data set on the default CICS printer defined on the JES/List Parameter Definitions screen (Option 0.1). See “JES/List Parameter Definitions screen” on page 38 for more information.
V=View View the dataset information on the JES2 Spool Display screen. See “JES2 Spool Display screen” on page 292 for more information.
278 CPMS/SYSD Reference Manual ~ 7.2

Chapter 7 Option 5: Following a job through the system
Stepname
The Stepname field contains the name of the step that created the data set.
Procstep
The Procstep field contains the step name of the PROC that created the data set.
HSNCD
The HSNCD field contains (in five columns) a summary of the dataset status.
NumLin
The NumLin field contains the estimated number of lines in the data set.
This column Specifies
H The data set is held.
S The data set is a spin data set.
N The data set cannot be printed.
C The class in which the data set resides. The class can be A through Z or 0 through 9.
D Indicates whether the data set has been deleted.
JES2 Job Dataset Display screen 279

Chapter 7 Option 5: Following a job through the system
RecFm
The RecFm field contains the format of the records in the data set.
LRecL
The LRecL field contains the logical record length for the data set.
This value Means the records are
F Fixed
FA Fixed ANSI (carriage control information)
FB Fixed blocked
FBA Fixed blocked with ANSI control characters
FBM Fixed blocked with machine control characters
FM Fixed machine (carriage control information)
U Undefined
V Variable
VB Variable blocked
280 CPMS/SYSD Reference Manual ~ 7.2

Chapter 7 Option 5: Following a job through the system
JES2 Job Dataset Display (Right) screen
The JES2 Job Dataset Display (Right) screen displays more information about a data set.
To access the JES2 Job Dataset Display (Right) screen
Access the JES2 Job Dataset Display (Right) screen in one of these ways.
• On the JES2 Job Dataset Display screen, type RIGHT in the Input field, and then press ENTER.
• On the JES2 Job Dataset Display screen, press PF11.
JES2 Job Dataset Display (Right) screen 281

Chapter 7 Option 5: Following a job through the system
Field definitions
Field definitions are listed here in the order that they appear on the screen.
O
Type the letter for the command you want in the O (Option) field. Type the single-character option next to the data set and then press ENTER.
DSN
The DSN field contains the JES2-assigned name or number for the data set.
DDName
The DDName field contains the DDNAME for the data set.
Stepname
The Stepname field contains the name of the step that created the data set.
Procstep
The Procstep field contains the step name of the procedure that created the data set.
Dest
The Dest field contains the printer or queue destination for the data set.
Form
The Form field contains the type of form on which the data set will print.
Use option To
D=Delete Delete the data set from the job.
J=JFT View and execute the default JES2 JFT panel defined on the Job/File Tailoring Parameters screen (Option 0.3). See “Job/File Tailoring Parameters screen” on page 46 for more information.
P=Print Print the data set on the default CICS printer defined on the JES/List Parameter Definitions screen (Option 0.1). See “JES/List Parameter Definitions screen” on page 38 for more information.
V=View View the dataset information on the JES2 Spool Display screen. See “JES2 Spool Display screen” on page 292 for more information.
282 CPMS/SYSD Reference Manual ~ 7.2

Chapter 7 Option 5: Following a job through the system
Copies
The Copies field contains the number of printed copies requested.
FCB
The FCB field contains the forms control buffer (FCB) that the data set will use to print. Four asterisks in a row (****) means that the data set will use the default FCB defined in SYSDSETS. Your CPMS/SYSD administrator sets the parameters in SYSDSETS.
UCS
The UCS field contains the universal character set that the data set will use to print. Four asterisks in a row (****) means that the data set will use the default UCS defined in JES2.
JES2 Job Dataset Display (Right) screen 283

Chapter 7 Option 5: Following a job through the system
284 CPMS/SYSD Reference Manual ~ 7.2

Chapter 8
Option 6: Viewing output data sets
Use the Display Jobs in the Output Queue screen (Option 6) to view and change certain job characteristics in the output queue.
This chapter contains information about:
Screen Address
• JES2 Job Output Display screen on page 286 6
• JES2 Job Output Display (Right) screen on page 289
Not applicable
• JES2 Spool Display screen on page 292 Not applicable
285

Chapter 8 Option 6: Viewing output data sets
JES2 Job Output Display screen
Use the JES2 Job Output Display screen (Option 6) to view the output data sets for a job. This screen lists the output data sets eligible for printing or punching.
On the Output Display screen, jobs are sorted in descending order by job number within disposition.
To access the JES2 Job Output Display screen
Access the JES2 Job Output Display screen in one of these ways.
• On the Primary Option menu, type 6 in the Input field, and then press ENTER.
• On any screen, type 6 in the Input field, and then press RETURN.
286 CPMS/SYSD Reference Manual ~ 7.2

Chapter 8 Option 6: Viewing output data sets
Field definitions
Field definitions are listed here in the order that they appear on the screen.
O
Type the letter for the command you want in the O (Option) field. Type the single-character option next to the data set, and then press ENTER.
Job#
The Job# field contains the JES2-assigned job number to which the output element belongs.
Jobname
The Jobname field contains the name of the job to which the output element belongs.
Disp
The Disp field contains the disposition for the job. Valid dispositions are HOLD, KEEP, LEAV, PURG, and WRIT. To change this field, use the U=Update option.
Use option To
A=Release Release for printing a data set that is held by the H=Hold option.
D=Delete Purge the output for the job from the system.
H=Hold Hold the data set. You must release the data set before it will print.
J=JFT View and execute the default JES2 JFT panel defined on the Job/File Tailoring Parameters screen (Option 0.3). See “Job/File Tailoring Parameters screen” on page 46 for more information.
P=Print Print the data set on the default CICS printer defined on the JES/List Parameter Definitions screen (Option 0.1). See “JES/List Parameter Definitions screen” on page 38 for more information.
S=Select View the data sets for the job on the JES2 Job Dataset Display screen. See “JES2 Job Dataset Display screen” on page 277 for more information.
U=Update Dynamically change the fields on the screen. After you type the command in the O (Option) field, change the field that you want, and then press ENTER.
V=View View the job on the JES2 Spool Display screen. See “JES2 Spool Display screen” on page 292 for more information.
JES2 Job Output Display screen 287

Chapter 8 Option 6: Viewing output data sets
C
The C field contains the job class to which the output element is assigned. To change this field, use the U=Update option.
Dest
The Dest field contains the ID of the local or remote device to which the output is sent. To change this field, use the U=Update option.
Writer
The Writer field contains the writer ID. To change this field, use the U=Update option.
Form
The Form field contains the form that the output element will use to print. To change this field, use the U=Update option.
FCB
The FCB field contains the FCB that the output element will use to print. To change this field, use the U=Update option.
UCS
The UCS field contains the universal character set that the output element will use to print. To change this field, use the U=Update option.
HTP
This is the hold type. You may use the A=Release line command to release a specific hold type. Enter OPR, SYS or ALL to control the type of release you wish to issue. If you do not enter any option in this field, then a REL=OPER is issued.
If you use the H=Hold line command, this field is ignored and a HOLD=OPER is issued.
PP
The PP field contains the print priority for the output element. If the output element is currently printing or punching, this field contains PRT/PUN.
#Line
The #Line field contains the real number of lines in the output element for the job.
288 CPMS/SYSD Reference Manual ~ 7.2

Chapter 8 Option 6: Viewing output data sets
JES2 Job Output Display (Right) screen
The JES2 Job Output Display (Right) screen displays more information about the output elements for the job than the JES2 Job Output Display screen.
To access the JES2 Job Output Display (Right) screen
Access the JES2 Job Output Display (Right) in one of these ways.
• On the JES2 Job Output Display screen, type RIGHT in the Input field, and then press ENTER.
• On the JES2 Job Output Display screen, press PF11.
JES2 Job Output Display (Right) screen 289

Chapter 8 Option 6: Viewing output data sets
Field definitions
Field definitions are listed here in the order that they appear on the screen.
O
Type the letter for the command you want in the O (Option) field. Type the single-character option next to the data set, and then press ENTER.
Job#
The Job# field contains the JES2-assigned job number to which the output element belongs.
Jobname
The Jobname field contains the name of the job to which the output element belongs.
S
The S field contains the attributes for the output element. An S in this field means that the output element is a spin data set and is eligible to print as soon as it has been closed, no matter how many other data sets the job is creating.
Use option To
A=Release Release for printing a data set that is held by the H=Hold option.
D=Delete Purge the output for the job from the system.
H=Hold Hold the data set. You must release the data set before it will print.
J=JFT View and execute the default JES2 JFT panel defined on the Job/File Tailoring Parameters screen (Option 0.3). See “Job/File Tailoring Parameters screen” on page 46 for more information.
P=Print Print the data set on the default CICS printer defined on the JES/List Parameter Definitions screen (Option 0.1). See “JES/List Parameter Definitions screen” on page 38 for more information.
S=Select View the data sets for the job on the JES2 Job Dataset Display screen. See “JES2 Job Dataset Display screen” on page 277 for more information.
U=Update Dynamically change the fields on the screen. After you type the command in the O (Option) field, change the field that you want, and then press ENTER.
V=View View the job on the JES2 Spool Display screen. See “JES2 Spool Display screen” on page 292 for more information.
290 CPMS/SYSD Reference Manual ~ 7.2

Chapter 8 Option 6: Viewing output data sets
Ovly
The Ovly field contains the overlay name (FLASH) that the output element will use to print.
B
The B field specifies whether the output element is to be burst.
Prcsmode
The Prcsmode field contains the process mode for the output element.
DY
Use the DY field to change the date on which the output element was created by nn days.
HR
Use the HR field to change the time at which the output element was created by nn hours.
Date
The Date field contains the date on which the output element was last updated. If the job output element (JOE) has not been changed, the date shown is the date on which the JOE was created.
Time
The Time field contains the time at which the output element was last updated. If the job output element (JOE) has not been changed, the time represents when the JOE was created.
GroupID
The GroupID field contains the group ID to which the output element belongs. Together, the JES2-assigned group ID and JOE ID form the OUTGROUP.
JES2 Job Output Display (Right) screen 291

Chapter 8 Option 6: Viewing output data sets
JES2 Spool Display screen
The JES2 Spool Display screen displays the printable and punchable job output that is located in the JES2 spool.
Active spool files display the JES2 buffers not yet written to the spool file.
When a BOTTOM or DOWN MAX command is entered in an active spool file, CPMS/SYSD searches up to 1,500 records beyond the known end of file (EOF) in an attempt to find the real EOF. If the EOF cannot be found within the 1,500 records, the file is displayed as if the 1,500th record beyond the known EOF were the real EOF. This process keeps CPMS/SYSD from “chasing” an active spool to EOF.
When an UP command is entered and the display is at the top of file (TOF), CPMS/SYSD advances to the previous data set based on the following rules:
• Non-active jobs and SYSLOG always advance.
• Active jobs never advance.
When a DOWN command is entered and the display is at the EOF, CPMS/SYSD advances to the next data set based on the following rules:
• Non-active jobs always advance.
• Active jobs never advance.
• SYSLOG view advances, unless you are viewing the active SYSLOG data set.
The ENTER key refreshes the screen, but does not reposition the view on the screen. To continue to update an active spool view, including the active SYSLOG, and stay at the bottom, use the DOWN (PF8) command.
292 CPMS/SYSD Reference Manual ~ 7.2

Chapter 8 Option 6: Viewing output data sets
To access the JES2 Spool Display screen
Access the JES2 Spool Display screen in one of these ways.
• On the JES2 Job Queue Display screen, type V in the O (Option) field next to the job, and then press ENTER.
• On the JES2 Job Dataset Display screen, type V in the O (Option) field next to the data set, and then press ENTER.
• On the JES2 Job Output Display screen, type V in the O (Option) field next to the data set, and then press ENTER.
JES2 Spool Display screen 293

Chapter 8 Option 6: Viewing output data sets
Field definitions
Field definitions are listed here in the order that they appear on the screen.
DSN
The DSN field contains the SYSOUT dataset type.
To view the SYSOUT data set, type the dataset type in the DSN field, and then press ENTER.
Line
The Line field contains the real line number shown on the first line of the screen. To scroll up or down without pressing UP or DOWN, type the relative line number, and then press ENTER.
Size
The Size field contains the number of lines in the data set.
Cols
The Cols field contains the beginning and ending columns that appear on the screen. The normal settings for this field are 001 for the left margin and 080 for the right margin. To scroll across the data, change these margin numbers.
You can see the full line, even if it exceeds 80 columns. CPMS/SYSD wraps the line and puts the rest of the text on a second line. To view a line of 133 columns, type 133 in place of 080, and then press ENTER.
LRecL
The LRecL field contains the logical record length for the SYSOUT data set. If the record length is greater than 080, CPMS/SYSD does not automatically display the rest of the line. To see the rest of the line, press RIGHT or LEFT or change the margins in the Cols field.
This value Means
CC Condition codes.
LOG System log messages.
JCL Execution JCL messages.
MSG System job messages.
nnnn User SYSOUT data sets. These are referred to by the data set number on the JES2 Job Dataset Display screen.
294 CPMS/SYSD Reference Manual ~ 7.2

Chapter 8 Option 6: Viewing output data sets
Caps
The Caps field shows whether uppercase translation is turned on or off.
Command definitions
To issue a command, type a command in the Input field, and then press ENTER. Command definitions are listed here in alphabetical order.
BOTTOM
The BOTTOM command scrolls to the bottom of the data set. The format of the BOTTOM command is:
CAPS
The CAPS command turns on or off uppercase translation. The format of the CAPS command is:
When uppercase translation is turned off, you can search for both uppercase and lowercase characters. The search string must be enclosed in single quotation marks for case sensitive scans.
DELETE
The DELETE command deletes spool output while you are viewing it. CPMS/SYSD deletes only the group ID that you are currently viewing. This command is not valid with an active job.
CAUTION CPMS/SYSD deletes the spool output as soon as you enter this command.
The format of the DELETE command is:
BOTTOM
CAPS [ON|OFF]
DELETE
JES2 Spool Display screen 295

Chapter 8 Option 6: Viewing output data sets
DELQ
The DELQ command deletes the temporary storage queue created with the PUT command. The formats of all the aliases of the DELQ command are:
The default temporary storage queue name and CICS system ID are defined on the GET/PUT TS Queue Identifiers screen (Option 0.4). See “GET/PUT TS Queue Identifiers screen” on page 48 for more information.
DOWN
The DOWN command scrolls down through the data set. The format of the DOWN command is:
DELQ [Q=queue_name] [S=sysid] DQ
This parameter Specifies
queue_name The 8-character name of the temporary storage queue that you want to delete.
sysid The 4-character system ID of the CICS region in which the temporary storage queue resides. This parameter lets you delete a temporary storage queue in a different CICS region.
DOWN [nn|M]
This parameter Specifies
nn Scroll down by the specified number of lines.
M Scroll to the bottom of the data set.
296 CPMS/SYSD Reference Manual ~ 7.2

Chapter 8 Option 6: Viewing output data sets
FIND
The FIND command searches for a string. The search is confined to the area between the left and right margins specified in the Cols field. The search is limited to the &SCANLIM value set in SYSDSETS. (Your CPMS/SYSD administrator sets the parameters in SYSDSETS.) The format of the FIND command is:
FIND ['string'|p'string'|*][NEXT|FIRST|PREV|LAST|XALL]
This parameter Specifies
'string' The string that you want to find. You can type an alphanumeric string as is.
If the string contains special characters or blanks, enclose the string with single quotation marks.
If the CAPS command is off and you want to find a case sensitive string, enclose the string with single quotation marks.
To include an apostrophe in the search string, type it twice. Examples of valid strings are ABC, 'ABC', 'DON''T', and 'AND HIS'.
* An asterisk (*) refers to the last string entered. To find a single asterisk (*), enclose it in quotation marks.
p'string' The picture string that you want to find. Enclose the picture string with single quotation marks. If CAPS is turned on, the picture string is uppercase. If CAPS is turned off, the picture string is used as is when a lowercase p is used to define the picture string, such as p'string'. When an upper case P is used to define the picture string, such as P'string', the search is not case sensitive.
A plus sign (+) or question mark (?) is the designated placeholder for the picture string. Use a plus sign (+) or question mark (?) to represent exactly one character in the picture string.
An asterisk (*) represents 0 through n characters.
A back slash (\) is the designated escape character for the picture string. To search for a plus sign (+), question mark (?) or back slash (\) within a picture string, type \+, \?, or \\.
NEXT Find the next occurrence of the string.
You can type N for this parameter.
FIRST Find the first occurrence of the string in the data set.
You can type F for this parameter.
PREV Find the previous occurrence of the string.
You can type P for this parameter.
JES2 Spool Display screen 297

Chapter 8 Option 6: Viewing output data sets
You can also type the string that you want to find in the Input field, and then press FIND.
If the cursor is positioned in the middle of the data set when you issue the FIND command, CPMS/SYSD does not automatically wrap around and continue the search at the top of the data set when it reaches the end of the data set. To start the search on the first line of the data set, take one of the following actions before issuing the FIND command:
• Use the FIRST parameter with the FIND command.
• Issue the TOP line command. See “TOP” on page 301 for more information.
• Set the Line field to 1. See “Line” on page 294 for more information.
FINDN
The FINDN command continues a search toward the EOF using the previous FIND search string. The FINDN command is designed to be assigned to a PF key.
If you issue the FIND command after you issue the FINDN command, the FIND command searches toward the EOF.
FINDP
The FINDP command continues a search toward the TOF using the previous FIND search string. The FINDP command is designed to be assigned to a PF key.
If you issue the FIND command after you issue the FINDP command, the FIND command searches toward the TOF.
FINDR
The FINDR command is a reverse find. This command toggles the PREV option and then issues a FIND command in the new direction. Use the FIND command to continue to search in the new direction. Issue the FINDR command again to reverse the current direction of the FIND command.
The FINDR command is designed to be assigned to a PF key.
LAST Find the last occurrence of the string in the data set.
You can type L for this parameter.
XALL Find all occurrences of the string.
You can type X for this parameter.
This parameter Specifies
298 CPMS/SYSD Reference Manual ~ 7.2

Chapter 8 Option 6: Viewing output data sets
JFT
The JFT command shows and executes the default JES2 JFT panel defined on the Job/File Tailoring Parameters screen (Option 0.3). (See “Job/File Tailoring Parameters screen” on page 46 for more information.) The format of the JFT command is:
LEFT
The LEFT command scrolls to the left. The format of the LEFT command is:
The PRINT command prints the output on a CICS printer. The format of the PRINT command is:
JFT
LEFT [nn|M]
This parameter Specifies
nn Scroll left by the specified number of columns.
M Scroll all the way to the left.
PRINT [nnn nnn] [tttt]|p=tttt
This parameter Specifies
nnn nnn The beginning and ending output line numbers that you want to print. CPMS/SYSD prints all of the data on and between the specified output line numbers. The default is the entire data set.
tttt or p=tttt The CPMS/SYSD printer where you want to send the output. The default is the printer defined on the JES/List Parameter Definitions screen (Option 0.1). See “JES/List Parameter Definitions screen” on page 38 for more information.
JES2 Spool Display screen 299

Chapter 8 Option 6: Viewing output data sets
PUT
The PUT command writes all or part of a SYSOUT data set to a temporary storage queue. If your company has the optional editor installed, you can issue the GET command to retrieve the data from the temporary storage queue and put it in an edit session. The format of the PUT command is:
Note To define what data is passed to the temporary storage queue, change the column in the Cols field.
The default temporary storage queue name and CICS system ID are defined on the GET/PUT TS Queue Identifiers screen (Option 0.4). See “GET/PUT TS Queue Identifiers screen” on page 48 for more information.
RIGHT
The RIGHT command scrolls to the right. The format of the RIGHT command is:
PUT [begin_line] [end_line] [Q=queue_name] [S=sysid]
This parameter Specifies
begin_line The first line that you want to write to the temporary storage queue. The default is line 1.
end_line The last line that you want to write to the temporary storage queue. The default is the last line in the SYSOUT data set.
If the end_line number is not specified, the limit is the &PUTLIMIT value set in SYSDSETS. Your CPMS/SYSD administrator sets this parameter in SYSDSETS.
queue_name The 8-character name of the temporary storage queue to which you want to write the SYSOUT data set.
sysid The 4-character system ID of the CICS region on which the temporary storage queue resides. This parameter lets you write to a temporary storage queue in a different CICS region.
RIGHT [nn|M]
This parameter Specifies
nn Scroll right by the specified number of columns.
M Scroll all the way to the right.
300 CPMS/SYSD Reference Manual ~ 7.2

Chapter 8 Option 6: Viewing output data sets
SELECT
The SELECT command takes you to the Job Dataset Display screen.The format of the SELECT command is:
TOP
The TOP command scrolls to the top of the SYSOUT data set. The format of the TOP command is:
UP
The UP command scrolls up through the SYSOUT data set. The format of the UP command is:
SELECT
TOP
UP [nn|M]
This parameter Specifies
nn Scroll up by the specified number of lines.
M Scroll to the top of the SYSOUT data set.
JES2 Spool Display screen 301

Chapter 8 Option 6: Viewing output data sets
Primary command definitions
The following primary commands are valid in an active SYSLOG view only.
/cmd
Issues “cmd” to the z/OS console. After the command is issued, the display is repositioned to the bottom of the SYSLOG.
OR [ON|OFF]
Display operator replies at the bottom of the display. This setting is for the current view only. If you exit, the SYSLOG view and return, the OR setting is ON.
This parameter Specifies
ON Turns the display on.
OFF Turns the display off.
302 CPMS/SYSD Reference Manual ~ 7.2

Chapter 9s
Option 7: Controlling the printer
Use Option 7 to control the printers. Option 7 displays either the CPMS/SYSD Printer Table Display/Change screen or the JES2 Printer Display screen.
Define the default printer type (CPMS/SYSD or JES2) shown for Option 7 on the JES/List Parameter Definitions screen (Option 0.1). See “JES/List Parameter Definitions screen” on page 38 for more information.
This chapter contains information about:
Screen Address
• CPMS/SYSD Printer Table Display/Change screen on page 304
7[C]
• CPMS/SYSD Spool Writer Start screen on page 308
Not applicable
• JES2 Printer Display screen on page 311 7[J]
• Output Waiting for Printer screen on page 315
Not applicable
303

Chapter 9 Option 7: Controlling the printer
CPMS/SYSD Printer Table Display/Change screen
The CPMS/SYSD Printer Table Display/Change screen displays the status of all spool printers. From here you can change various characteristics for the print tasks. This screen provides a great deal of flexibility in controlling your own print tasks. For example, you can use the SELECT primary command to limit the display to certain printers. Specify a unique printer ID as the mask, or use the plus sign (+) and asterisk (*) in those positions of the printer ID that you want to match to all characters.
To access the CPMS/SYSD Printer Table Display/Change screen
Access the CPMS/SYSD Printer Table Display/Change screen in one of these ways.
• On the Primary Option menu, type 7 in the Input field, and then press ENTER.
• On any screen, type 7 in the Input field, and then press RETURN.
304 CPMS/SYSD Reference Manual ~ 7.2

Chapter 9 Option 7: Controlling the printer
Field definitions
Field definitions are listed here in the order that they appear on the screen.
O
Type the letter for the command you want in the O (Option) field. Type the single-character option next to the printer, and then press ENTER.
Use option To
C=Cancel Cancel a job element that is printing, but do not purge the job from the JES2 queue.
E=Restart Restart a held JOE writer (STRWTR) task.
F=Forms Reply to a forms change request. This option notifies the print task that the forms have been changed and printing can resume.
H=Hold Put on hold a job that is printing.
P=Purge Purge the spool print task. For a print job (PRTJOB) task, CPMS/SYSD stops printing the current job and then terminates it. You can issue this command after the print task starts, even if the print task has been held.
R=Release Release a printer held by the H=Hold option. Releasing a printer frees the printer to continue printing where it left off.
S=Start View the CPMS/SYSD Spool Writer Start screen. See “CPMS/SYSD Spool Writer Start screen” on page 308 for more information.
T=Stop Stop the JOE writer (STRWTR) spool print task. The spool writer completes any job it is printing and then stops. This is not an immediate stop, but an orderly shutdown of the function. For an immediate stop, use the P=Purge option.
W=Waiting View a list of all the jobs waiting to print on the Output Waiting for Printer screen. See “Output Waiting for Printer screen” on page 315 for more information.
CPMS/SYSD Printer Table Display/Change screen 305

Chapter 9 Option 7: Controlling the printer
Term
The Term field contains the CICS terminal ID.
TPA
The TPA field contains (in three columns) information about the status of the job.
Job#
The Job# field contains the JES2-assigned number for the job.
Jobname
The Jobname field contains the name of the job being printed.
Dataset
The Dataset field contains the name of the data set being printed.
Form
The Form field contains the form on which the printer is printing.
Copy
The Copy field contains the number of copies being printed.
This column Contains
T The terminal destination type.
• A D means the terminal destination is a data set.
• A T means the terminal destination is a terminal.
P The print queue indicator. A W means the JOE writer is started. See “S=Start” on page 305 or “STRWTR – Starting a spool JOE writer” on page 431 for more information.
A The active task.
• A J means the PRTJOB task is active.
The PRTJOB task emulates the function of a normal OS writer, except that it does not purge any part of the job.
• A W means the STRWTR task is active.
The STRWTR task starts the JOE writer that scans the JES2 queues, prints the selected jobs, purges them, and repeats the JES2 queue scan.
306 CPMS/SYSD Reference Manual ~ 7.2

Chapter 9 Option 7: Controlling the printer
Line#
The Line# field contains the number of lines in the output data set.
Page
The Page field contains the number of the page that is printing.
Status
The Status field contains the status of the print task.
This status Means
PRINTING The data set is printing.
WAITING FORMS The printer is waiting for a forms change request before continuing. The Form field contains the form for which the printer is looking.
HELD The job is on hold. You must release the job for it to print.
RECOVERY WAIT An abend occurred. If the job was started with the STRWTR command, CPMS/SYSD automatically restarts the job when the scan delay expires.
DRAINING The print buffer is draining. Stopping a print task does not stop the printing immediately. Because of the difference in speed between the CPU and the printer, the print task often ends before the buffer for the printer is drained. This message means that the print task has terminated and the contents of the buffer for the printer are still printing. When the buffer for the printer is drained, printing stops.
SCANNING The STRWTR task is scanning the JES2 queues for jobs to print.
NONE STARTED No print tasks have been initiated on this terminal.
WAITING WORK A STRWTR task was issued and the task is waiting for jobs that meet the criteria listed on the printer display line. The printer display line contains the destination queue, classes, and form that are eligible for printing.
CPMS/SYSD Printer Table Display/Change screen 307

Chapter 9 Option 7: Controlling the printer
CPMS/SYSD Spool Writer Start screen
The Spool Writer Start screen shows the default selection criteria for a printer and disposition parameters. If authorized, you can change the selection criteria and disposition parameters before starting the spool writer. This screen is the menu-driven system’s equivalent to the STRWTR command. The STRWTR command is the print functional command for CPMS/SYSD.
To access the CPMS/SYSD Spool Writer Start screen
On the CPMS/SYSD Printer Table Display/Change screen, type S (Start) in the O (Option) field next to the printer that you want to start, and then press ENTER.
Field definitions
Field definitions are listed here in the order that they appear on the screen.
Start for Printer Terminal ID
The Start for Printer Terminal ID field specifies the CICS name of the terminal or destination to which CPMS/SYSD sends the spool writer output.
Writer Type
The Writer Type field specifies the type of writer to start for this printer. Type SW in this field to start the JOE writer.
308 CPMS/SYSD Reference Manual ~ 7.2

Chapter 9 Option 7: Controlling the printer
WriterID
The WriterID field specifies the writer ID for which the spool writer looks when selecting jobs to print. This field applies only if the value in the Writer Type field is SW.
Dest
The Dest field specifies the name of the JES2 destination for which the spool writer looks when selecting jobs to print.
Class(es)
The Class(es) field specifies the JES2 classes for which the spool writer looks when selecting jobs to print.
Form
The Form field specifies the form ID for which the spool writer looks when selecting jobs to print.
Purge (Y/N)
The Purge (Y/N) field specifies whether CPMS/SYSD performs a normal JOE purge after the output is printed. If you set this field to N (No), CPMS/SYSD performs special disposition processing after the output is printed. The special disposition is defined by the New Dest, New Class, and Hold (Y/N) fields.
New Dest
The New Dest field specifies the new JES2 destination to which CPMS/SYSD assigns the output after it is printed.
New Class
The New Class field specifies the new JES2 class to which CPMS/SYSD assigns the output after it is printed.
Hold (Y/N)
The Hold (Y/N) field specifies whether CPMS/SYSD holds output after it is printed. If you set this field to N (No), CPMS/SYSD does not issue a hold command and lets you delete the output after it is printed.
CPMS/SYSD Spool Writer Start screen 309

Chapter 9 Option 7: Controlling the printer
Command definition
To issue a command, type a command in the Input field, and then press ENTER. Command definitions are listed here in alphabetical order.
START
The START command validates the screen data and starts the spool writer. If the spool writer starts successfully, CPMS/SYSD returns to the CPMS/SYSD Printer Table Display/Change screen and displays the updated status of the selected printer. The format of the START command is:
START
310 CPMS/SYSD Reference Manual ~ 7.2

Chapter 9 Option 7: Controlling the printer
JES2 Printer Display screen
The JES2 Printer Display screen shows the status and attributes of local and remote JES2 printers. If authorized, you can control a printer using line options or you can type over the information in the fields on the screen to change the printer attributes.
To access the JES2 Printer Display screen
On the CPMS/SYSD Printer Table Display/Change screen, type JES2 in the Input field, and then press ENTER.
JES2 Printer Display screen 311

Chapter 9 Option 7: Controlling the printer
For 80-column terminals, press RIGHT to view the following additional fields.
Field definitions
Field definitions are listed here in the order that they appear on the screen.
O
Type the letter for the command you want in the O (Option) field. Type the single-character option next to the printer, and then press ENTER.
Use option To
C=Cancel Cancel the printer output.
E=Restart Restart the printer activity.
I=Interrupt Interrupt the printer activity and then queue the printer again.
N=Repeat Print the job output again.
P=Stop Stop the printer.
S=Start Start the printer.
W=Waiting View the JES2 data sets that are waiting for the JES2 writer.
Z=Halt Temporarily stop the printer activity.
312 CPMS/SYSD Reference Manual ~ 7.2

Chapter 9 Option 7: Controlling the printer
Prt Name
The Prt Name field contains the name of the printer.
Status
The Status field contains the status of the printer. Valid statuses are ACTIVE, DRAINED, DRAINING, HALTED, and INACTIVE.
Jobname
The Jobname field contains the JES2 name of the job being printed.
Job#
The Job# field contains the JES2-assigned job number.
Prty
The Prty field contains the priority of the output data set.
C
The C field contains the JES2 output class.
Form
The Form field contains the output form name.
FCB
The FCB field contains the FCB ID for the output forms.
RMT
The RMT field specifies whether the print routing is local or remote.
This value Means
Jnnnnn A normal batch job.
Snnnnn A started task job.
Tnnnnn A TSO job.
JES2 Printer Display screen 313

Chapter 9 Option 7: Controlling the printer
Tot Rec
The Tot Rec field contains the number of records to be printed.
Prt Rec
The Prt Rec field contains the number of records printed.
UCS
The UCS field contains the output UCS ID (print train).
WrtID
The WrtID field contains the writer or data set ID. You can change the writer or data set ID.
Flash
The Flash field contains the output flash ID. You can change the output flash ID.
B
The B field specifies whether the output is to be burst.
SClass
The SClass field contains the classes that the printer is set up to print. You can change the classes.
SForms
The SForms field contains the form that the printer is set up to print. You can change the form.
SFCB
The SFCB field contains the FCB that the printer is set up to use. You can change the FCBs.
SUCS
The SUCS field contains the universal character set that the printer is set up to use. You can change the UCS.
314 CPMS/SYSD Reference Manual ~ 7.2

Chapter 9 Option 7: Controlling the printer
Output Waiting for Printer screen
The Output Waiting for Printer screen displays the JES2 data sets waiting for a specific CPMS/SYSD or JES2 writer. From here you can reroute or purge these data sets.
To access the Output Waiting for Printer screen
On the CPMS/SYSD Printer Table Display/Change screen, type W (Waiting) in the O (Option) field next to the printer, and then press ENTER.
Output Waiting for Printer screen 315

Chapter 9 Option 7: Controlling the printer
Field definitions
Field definitions are listed here in the order that they appear on the screen.
O
Type the letter for the command you want in the O (Option) field. Type the single-character option next to the data set, and then press ENTER.
Job#
The Job# field contains the JES2-assigned job number to which the output element belongs.
Jobname
The Jobname field contains the name of the job to which the output element belongs.
Disp
The Disp field contains the disposition for the output element. You can change this field to set a different disposition. Valid dispositions are HOLD, KEEP, LEAV, PURG, and WRIT.
Use option To
A=Release Release for printing a data set held by the H=Hold option.
D=Delete Purge the output for the job from the system.
H=Hold Hold the data set. You must release the data set before it will print.
P=Print Print the data set on the default CICS printer defined on the JES/List Parameter Definitions screen (Option 0.1). See “JES/List Parameter Definitions screen” on page 38 for more information.
S=Select View the data sets for the job on the JES2 Job Dataset Display screen. See “JES2 Job Dataset Display screen” on page 277 for more information.
U=Update Dynamically change the fields on the screen. After you type the command in the O (Option) field, change the field on the screen, and then press ENTER.
V=View View the job on the JES2 Spool Display screen. See “JES2 Spool Display screen” on page 292 for more information.
316 CPMS/SYSD Reference Manual ~ 7.2

Chapter 9 Option 7: Controlling the printer
C
The C field contains the job class to which the output element is assigned. You can change the job class.
Dest
The Dest field contains the ID of the local or remote device to which the output is sent. You can change the device.
Writer
The Writer field contains the writer ID. You can change the writer ID.
Form
The Form field contains the type of form to be used. You can change the type of form.
FCB
The FCB field contains the FCB to be used. You can change the FCB.
UCS
The UCS field contains the character set that the output will use to print. You can change the UCS.
HTP
The HTP field contains the hold type. Valid hold types are ALL, OPR, and SYS.
You can use the A=Release and H=Hold options to control the HTP field. When you issue the A=Release option, CPMS/SYSD ignores the contents of this field and issues a REL=OPER command. When you issue the H=Hold option, type a valid hold type over the information in this field.
PP
The PP field contains the print priority assigned to the output. If the output is printing or punching, this field contains PRT/PUN.
#Line
The #Line field contains the actual number of lines in the output element.
Output Waiting for Printer screen 317

Chapter 9 Option 7: Controlling the printer
318 CPMS/SYSD Reference Manual ~ 7.2

Chapter 10
Option C: Executing CICS transactions
Use the CICS Transaction screen (Option C) to exit the CPMS/SYSD menu-driven system and execute native CICS transactions without terminating the CPMS/SYSD session.
This chapter contains information about:
• “Viewing the CICS Transaction screen” on page 320
• “Returning to the menu-driven system” on page 321
319

Chapter 10 Option C: Executing CICS transactions
Viewing the CICS Transaction screen
Use the CICS Transaction screen (Option C) to execute native CICS transactions without terminating the CPMS/SYSD session. You can also use the CICS Transaction screen with the SPLIT command if you have an available partition.
To access the CICS Transaction screen
Access the CICS Transaction screen in one of these ways.
• On the Primary Option menu, type C in the Input field, and then press ENTER.
• On any screen, type C in the Input field, and then press RETURN.
See “Using CPMS/SYSD functional commands” on page 331 for more information about the functional commands that you can issue from the CICS Transaction screen.
320 CPMS/SYSD Reference Manual ~ 7.2

Chapter 10 Option C: Executing CICS transactions
Returning to the menu-driven system
You can return to the CPMS/SYSD menu-driven system when you are finished using the CICS Transaction screen.
To return to the menu-driven system
1. On the CICS Transaction screen, type either SYSD or D.
2. Press ENTER. The Primary Option menu appears, returning to the partition where you were in the menu-driven system.
Returning to the menu-driven system 321

Chapter 10 Option C: Executing CICS transactions
322 CPMS/SYSD Reference Manual ~ 7.2

Chapter 11
Option T: Tutorial and online help
CPMS/SYSD includes an online tutorial and help system. The tutorial and online help provide information about the help system itself, navigating through the help screens, and the parts of the system.
This chapter contains information about:
• “Accessing the tutorial for the online help” on page 324
• “Navigating the tutorial and online help screens” on page 325
• “Viewing the new features available in CPMS/SYSD” on page 328
323

Chapter 11 Option T: Tutorial and online help
Accessing the tutorial for the online help
Use the information that follows to access the help screens and then navigate through them.
To access the tutorial for the online help
Access the tutorial for the online help in one of these ways.
• On the Primary Option menu, type T in the Input field, and then press ENTER.
• On any screen, type T in the Input field, and then press RETURN.
Help topics with information continuing on the next screen will have the word “more” on the last line of the screen. To view the next screen, press ENTER.
324 CPMS/SYSD Reference Manual ~ 7.2

Chapter 11 Option T: Tutorial and online help
Navigating the tutorial and online help screens
In addition to the navigation options and prompts, you can use page commands and PF keys to view online help screens.
Using page commands
You can use page commands to navigate through the tutorial and online help screens in CPMS/SYSD.
To use page commands
To issue a command, type a command in the Input field, and then press ENTER. The following page commands are available:
Note The uppercase characters in the command name represent the minimum abbreviation that you can type for the command.
Type To go
Back Back to the previous page.
Up To a higher-level menu screen.
Top To the first page of the tutorial section.
Index To the Table of Contents screen for the help file. From there you can select any help topic in the system.
Navigating the tutorial and online help screens 325

Chapter 11 Option T: Tutorial and online help
Using PF keys
You can use the PF keys to navigate through the tutorial and online help screens in CPMS/SYSD.
To use the PF keys
Press the appropriate PF key for the direction that you want to go within the tutorial or online help. The following PF keys are available:
Viewing the Table of Contents screen
Use the Table of Contents screen for the tutorial and online help to view the online help topic for any part of the menu-driven system.
To view the Table of Contents screen
View the Table of Contents screen for the tutorial and online help in one of these ways.
• On any screen, type HELP INDEX in the Input field, and then press ENTER.
• When you are in the tutorial or online help system, type INDEX In the Input field, and then press ENTER.
Press this PF key To go
Up To a higher-level menu screen.
Left To the previous page.
Right To the next page.
Down To the next page.
326 CPMS/SYSD Reference Manual ~ 7.2

Chapter 11 Option T: Tutorial and online help
Showing the help topics for the screen you are viewing
Show the help topics associated with the CPMS/SYSD screen that you are currently viewing. CPMS/SYSD bypasses the tutorial and the Table of Contents screen and displays the online help for the appropriate screen.
To show the help topics for the screen you are viewing
Display the help topics for the screen you are viewing in one of these ways.
• In the Input field, type HELP, and then press ENTER.
• Press the PF key assigned to the HELP command. The HELP command is assigned to the PF1 key by default.
Exiting the tutorial or online help
You can exit the tutorial or online help and then go to the screen from which you entered the help system, go to the Primary Option menu, or go directly to a specific screen in CPMS/SYSD.
To exit the tutorial or online help
Exit the tutorial or online help in one of these ways.
• To return to the screen from which you entered the online help, press END.
• To view the Primary Option menu, press RETURN.
• To go directly to a specific screen, type the address for the screen that you want to view in the Input field, and then press RETURN.
Showing the help topics for the screen you are viewing 327

Chapter 11 Option T: Tutorial and online help
Viewing the new features available in CPMS/SYSD
You can view a list of the new features available in the current release of CPMS/SYSD.
To view the new features available in CPMS/SYSD
View the new features available in CPMS/SYSD in one of these ways.
• On any screen, type HELP NEW in the Input field, and then press ENTER.
• When you are in the tutorial or online help system, type NEW in the Input field, and then press ENTER.
328 CPMS/SYSD Reference Manual ~ 7.2

Chapter 12
Option U: Maintaining the user file
Use the User File Maintenance screen (Option U) to add, change, or delete user profiles.
This chapter contains information about:
Screen Address
• User File Maintenance on page 330 U
329

Chapter 12 Option U: Maintaining the user file
User File Maintenance
You must have authorization to add, change, and delete user profiles using the User File Maintenance screen (Option U). For ease in making changes, CPMS/SYSD displays the first user profile in the file when you access the Option U screen. After you make the changes, you must log off and log back on to CPMS/SYSD for the profile changes to take effect.
See the CPMS/SYSD Installation Manual for more information about maintaining the user file using the User File Maintenance screen.
330 CPMS/SYSD Reference Manual ~ 7.2

Chapter 13
Using CPMS/SYSD functional commands
The CPMS/SYSD function-driven system consists of commands that you enter as a single line of input either at the top of a clear CICS screen or at the bottom of a CPMS/SYSD functional display. The functional commands let:
• System programmers use the CICS management facilities to view the status of CICS and dynamically change the CICS tables. They can also use the CORE display function to dynamically display and change memory.
• Computer operators use CPMS/SYSD to reply to outstanding operator requests and monitor the status of CICS.
• CPMS/SYSD users perform limited job submission.
This chapter contains information about:
• “Managing CICS activities” on page 332
• “Debugging CICS using CPMS/SYSD aids” on page 332
• “Issuing functional commands” on page 333
• “Recalling functional commands” on page 335
• “Viewing the online help for a command” on page 336
• “Understanding functional commands” on page 337
331

Chapter 13 Using CPMS/SYSD functional commands
Managing CICS activities
CPMS/SYSD provides two important facilities for managing CICS. You can monitor CICS activity and change CICS while it is executing. These facilities offer greater control and less downtime for your CICS system.
With CPMS/SYSD, you can view overall CICS statistics or concentrate on particular areas within CICS. For example, the STAT command gives you a snapshot of the status of CICS including the number of transactions processed, associated limits, the number of times the limits have been reached, dynamic storage area (DSA) usage, temporary storage usage, and current task usage.
Other CPMS/SYSD commands display and dynamically change the status of CICS tables. You can view a summary of all the entries in a table or the settings for a specific entry in a table.
Debugging CICS using CPMS/SYSD aids
CPMS/SYSD provides several debugging aids to help application developers. Developers can view and change (zap) memory and view internal CICS information. This information helps them get CICS applications up and running as quickly as possible.
332 CPMS/SYSD Reference Manual ~ 7.2

Chapter 13 Using CPMS/SYSD functional commands
Issuing functional commands
The CPMS/SYSD function-driven system consists of commands that you enter as a single line of input either at the top of a clear CICS screen or at the bottom of a CPMS/SYSD functional display.
Formatting commands
The format of a functional command includes a CICS transaction code, the CPMS/SYSD functional command, and any associated positional parameters. Each item is separated by a comma or a blank. In the command definitions starting on page 337, commands appear in boxes in the following format:
For example, to rename the data set called JANE.DOE to JOHN.DOE on the disk volume labeled HWDISK, type one of the following commands:
SYSD,COMMAND,parm1,PARM2,[parm3],parm4|parm5,parm6|parm7,parm8...,parmn CMD
This kind of text Identifies
COMMAND The command.
CMD An alias for the command.
parm1 A value you must supply. For example, if the vol_ser parameter appears in a command format, type the volume serial number.
PARM2 A parameter you must type exactly as it appears.
[parm3] An optional parameter.
parm4|parm5 An either/or situation. You can specify one parameter or the other, but not both.
parm6|parm7 The default if you issue the command without specifying either parameter.
parm8,...,parmn A parameter that you can repeat.
SYSD,RENAME,HWDISK,JANE.DOE,JOHN.DOE SYSD RENAME HWDISK JANE.DOE JOHN.DOE
Issuing functional commands 333

Chapter 13 Using CPMS/SYSD functional commands
Using aliases
For your convenience, many commands allow shortened aliases. In the functional command formats starting on page 337, the alias appears below the full command. For example:
So to cancel a job with the job number j123, type either of the following commands:
Formatting parameters
You can type single-word, alphanumeric parameters as is. Enclose multiple-word parameters or parameters that contain special characters with single quotation marks. To include an apostrophe, type it twice. For example:
Omitting positional parameters
If you omit a positional parameter, you must still type its separator character. For example, if the JANE.DOE data set is cataloged, you do not have to specify a volume serial number when you issue the RENAME command. To rename a data set, type either of the following commands:
SYSD,CANCEL,job CAN
SYSD,CANCEL,J123SYSD,CAN,J123
SYSD,command,oneword SYSD,command,'two words' SYSD,command,'Bob''s box'
SYSD,RENAME,,JANE.DOE,JOHN.DOE SYSD RENAME JANE.DOE JOHN.DOE
334 CPMS/SYSD Reference Manual ~ 7.2

Chapter 13 Using CPMS/SYSD functional commands
Using parameter lists
Some CPMS/SYSD commands let you specify a parameter list instead of a single parameter. Parameter lists can be null or can contain one or more parameters. To indicate a null parameter list, type two separator characters in a row just as you would for a normal parameter. If the list contains one parameter, type it as a regular parameter or enclose it with parentheses. If the list contains two or more parameters, separate each by a separator character and enclose the list with parentheses.
For example, to catalog the JANE.DOE data set on the disk volume labeled HWDISK, type one of the following commands:
To catalog the same data set on the disk volumes labeled HWDISK and HWDSK2, type the following command:
Recalling functional commands
You can recall functional commands and then either reissue the command or modify the command before it is executed. The recall buffer specifies the number of functional commands that CPMS/SYSD stores in a temporary storage queue and can be recalled using the recall command. Your CPMS/SYSD administrator uses the RECALLBUFFS parameter in SYSDSETS to set the recall buffer between 0 and 255. If the CPMS/SYSD administrator sets the recall buffer to zero, you cannot recall any functional commands.
Use the following format to recall functional commands:
You can place up to eight question marks (?) in the command to recall up to the most recent eight commands that you issued. Continue entering the command to cycle through the recall buffer. You do not have to clear any data following the question mark (?) in the recall command. The recall buffer is held while you are in the menu-driven system. If you exit the menu-driven system, you can still recall the most recent functional commands that you issued.
SYSD,CATLG,SYSDA,HWDISK,JANE.DOE SYSD,CATLG,SYSDA,(HWDISK),JANE.DOE
SYSD,CATLG,SYSDA,(HWDISK,HWDSK2),JANE.DOE
SYSD ?
Using parameter lists 335

Chapter 13 Using CPMS/SYSD functional commands
Viewing the online help for a command
CPMS/SYSD includes an extensive online help facility. There are several types of online help commands:
• To view a summary of the commands that you are authorized to use, type the following command on a clear CICS screen, and then press ENTER.
• To view the online help for a particular command, type the following command on a clear CICS screen, and then press ENTER:
For example, to view the online help for the RENAME command, type SYSD,HELP,RENAME and then press ENTER.
• To view a list of all of the commands in CPMS/SYSD, type the following command on a clear CICS screen, and then press ENTER:
• To view only those commands that start with a specified character string, type the following command on a clear CICS screen, and then press ENTER:
SYSD,HELP
SYSD,HELP,command
SYSD,HELP,HELP
SYSD,HELP,HELP,xx
336 CPMS/SYSD Reference Manual ~ 7.2

Chapter 13 Using CPMS/SYSD functional commands
Understanding functional commands
This section describes each CPMS/SYSD functional command. The functional commands are listed here in alphabetical order. Some of the commands are only available with the optional editor.
A – Viewing jobs that are being executed
Use the A command to view statistics for the jobs that are being executed. This helps you estimate the completion time for a job and determine the state of the OS with respect to overall execution. The format of the A command is:
SYSD,A,[ALL][,jobname] [*]
This parameter Specifies
ALL Show started tasks and TSO users in addition to batch jobs. The default is to show only regular batch jobs.
* Show all tasks that are being executed, including initiators and master tasks.
jobname Displays only these jobnames. This field may contain wildcards + and *.
Specify To
+ Indicate any single character.
* Indicate characters 0 through n.
Understanding functional commands 337

Chapter 13 Using CPMS/SYSD functional commands
The following screen shows what appears when you issue the SYSD,A,ALL command:
Field definitions
Field definitions are listed here in the order that they appear on the screen.
ASID
The ASID field contains the address space ID for the job, in hexadecimal.
Jobname
The Jobname field contains the started task procedure name or the job name from the JOB card.
Jobid
The Jobid field contains the job number ID assigned by JES. This field displays with the AE and AAE commands only.
Stepname
The Stepname field contains the step that is being executed.
338 CPMS/SYSD Reference Manual ~ 7.2

Chapter 13 Using CPMS/SYSD functional commands
Procstep
The Procstep field contains the procedure that is being executed. This field does not display with the AE and AAE commands.
CPUR
The CPUR field contains the real CPU time, in seconds, that the job has used.
Status
The Status field contains the dispatching status for the job.
Real
The Real field contains the amount of real memory the job is using.
Aux
The Aux field contains the amount of virtual memory, including VIO data sets, that the job is using.
Prty
The Prty field contains the dispatching priority for the job.
#I/O
The #I/O field contains the number of input/output operations that the job has executed.
A – Viewing jobs that are being executed 339

Chapter 13 Using CPMS/SYSD functional commands
AA – Dynamically displaying jobs being executed
The AA command dynamically displays statistics for the jobs that are being executed. CPMS/SYSD displays the statistics on the JES2 Display Active Jobs screen.
The AA command is the same as the A command except that it automatically issues itself at an interval your CPMS/SYSD administrator defined when CPMS/SYSD was installed. This auto-display feature lets you constantly monitor jobs that are being executed. The format of the AA command is:
See “A – Viewing jobs that are being executed” on page 337 for the screen that appears when you issue the SYSD,AA command and the associated field definitions.
SYSD,AA,[ALL][,jobname] [*]
This parameter Specifies
ALL Show started tasks and TSO users in addition to batch jobs. The default is to show only regular batch jobs.
* Show all tasks that are being executed, including initiators and master tasks.
jobname Displays only these jobnames. This field may contain wildcards + and *.
Specify To
+ Indicate any single character.
* Indicate characters 0 through n.
340 CPMS/SYSD Reference Manual ~ 7.2

Chapter 13 Using CPMS/SYSD functional commands
AE – View jobs being executed (Extended)
The AE command is an extended A command. The AE command displays the Jobid field instead of the Procstep field.
See the associated fields and their definitions under “A – Viewing jobs that are being executed” on page 337.
The format of the AE command is:
SYSD,AE,[ALL|*][,jobname]
This parameter Specifies
ALL Show started tasks and TSO users in addition to batch jobs. The default is to show only regular batch jobs.
* Show all tasks that are being executed, including initiators and master tasks.
jobname Displays only these jobnames. This field may contain wildcards + and *.
Specify To
+ Indicate any single character.
* Indicate characters 0 through n.
AE – View jobs being executed (Extended) 341

Chapter 13 Using CPMS/SYSD functional commands
AAE – Dynamically displaying jobs being executed (Extended)
The AAE command is an extended AA command. The AAE command displays the Jobid field instead of the Procstep field.
See the associated fields and their definitions under “A – Viewing jobs that are being executed” on page 337.
The format of the AAE command is:
AL – Viewing CICS-allocated data sets
SYSD only
The AL command is an alias of the ALLOC command. This command allows you to view a summary of currently allocated CICS data sets. (See “ALLOC – Viewing CICS-allocated data sets” on page 343 for more information.) The formats of all the aliases of the AL command are:
SYSD,AAE,[ALL|*][,jobname]
This parameter Specifies
ALL Show started tasks and TSO users in addition to batch jobs. The default is to show only regular batch jobs.
* Show all tasks that are being executed, including initiators and master tasks.
jobname Displays only these jobnames. This field may contain wildcards + and *.
Specify To
+ Indicate any single character.
* Indicate characters 0 through n.
SYSD,AL,[dsn],[type] ALLOC
342 CPMS/SYSD Reference Manual ~ 7.2

Chapter 13 Using CPMS/SYSD functional commands
ALLOC – Viewing CICS-allocated data sets
SYSD only
Use the ALLOC command to view a summary of currently allocated CICS data sets. The formats of all the aliases of the ALLOC command are:
If you do not specify the dataset name and type, CPMS/SYSD displays a summary of all allocated data sets.
BIO – Viewing a biorhythm chart
SYSD only
Use the BIO command to view a biorhythm chart based on three bodily cycles. The first is the 23-day masculine rhythm cycle, which supposedly affects the physical aspects of the body encompassing energy levels, resistance, and endurance. The second is the 28-day feminine rhythm cycle, which supposedly governs the nervous system, or sensitivity, and affects attitude and creativity. The third is the 33-day intellectual rhythm cycle, which supposedly affects logic and computational abilities.
The format of the BIO command is:
SYSD,ALLOC,[dsn],[type] AL
This parameter Specifies
dsn The name of the allocated data set that you want to view.
type The dataset name that you want to view is a data definition name (DDN), dataset name (DSN), or relative record number (RRN).
SYSD,BIO,birthday,start_day
This parameter Specifies
birthday The date of your birth in mmddyyyy format. For example, type 03181949 if you were born on March 18, 1949.
start_day The date on which you want to start the biorhythm chart, in mmddyyyy format. The chart starts with this date and displays the next 18 days.
ALLOC – Viewing CICS-allocated data sets 343

Chapter 13 Using CPMS/SYSD functional commands
CANCEL – Canceling a job
The CANCEL command purges a batch job from the JES2 queue. If the job is being executed, it abends with an S222 abend. CPMS/SYSD purges the job without printing, no matter which JES2 queue the job is in. The format of the CANCEL command is:
CATLG – Cataloging an OS data set
SYSD only
The CATLG command adds the dataset name and the associated volume serial numbers to the catalog. The format of the CATLG command is:
SYSD,CANCEL,jobnumber
This parameter Specifies
jobnumber The job number you want to purge.
SYSD,CATLG,unit_type,vol_list,dsn
This parameter Specifies
unit_type The 1-character to 8-character device type. You must specify this parameter the same way that you specify the UNIT parameter on a DD statement in the JCL.
vol_list A list of one to five volume serial numbers. Each number is one to six characters long. These volumes must be mounted on the OS when you issue the CATLG command. If you specify multiple volume serial numbers, separate each by a comma or blank and enclose the list with parentheses.
dsn The 1-character to 44-character name of the data set that you want to catalog.
344 CPMS/SYSD Reference Manual ~ 7.2

Chapter 13 Using CPMS/SYSD functional commands
CICSTRAN – Viewing CICS transaction IDs
SYSD only
Use the CICSTRAN command to view all CICS transaction IDs that you are authorized to issue. The format of the CICSTRAN command is:
COMPRESS – Compressing a cataloged PDS
SYSD only
The COMPRESS command compresses a cataloged PDS. The format of the COMPRESS command is:
The first parameter in the COMPRESS command is omitted.
CPMS/SYSD issues a z/OS start command to execute the SYSDCMPR procedure. This means that SYSDCMPR operates asynchronously with CICS.
SYSD,CICSTRAN
SYSD,COMPRESS,,dsn
This parameter Specifies
dsn The 1-character to 44-character name of the data set that you want to compress.
CICSTRAN – Viewing CICS transaction IDs 345

Chapter 13 Using CPMS/SYSD functional commands
CORE – Viewing and changing virtual memory
The CORE command lets you view all the virtual memory in a z/OS environment and change memory in the CICS address space.
When you view the requested storage area, CPMS/SYSD converts the specified address to the hexadecimal address of the next section of memory. This lets you press ENTER to page through memory. However, you may want to chase chains or monitor a specific location in memory. To keep CPMS/SYSD from converting the address, type an ampersand (&) as the first character of the address.
The formats of the CORE command are:
Note The verify_data and change_data parameters must be the same length and must consist of an even number of hexadecimal digits.
SYSD,CORE,address|ASID=,[verify_data,change_data] SYSD,CORE,,,[scan_data]
This parameter Specifies
address The hexadecimal virtual memory address that you want to view or change. See “Using the address parameter for the CORE command” on page 347 for more information.
verify_data The hexadecimal data that you want to verify. CPMS/SYSD checks the data to make sure it is at the specified address. If not, CPMS/SYSD does not change the data.
change_data The hexadecimal data with which you want to replace the data located at the specified address. This occurs only if the verify_data parameter is equal to the data at the specified address.
scan_data The character string for which you want to scan. The scan limit is 320K. When scanning, you cannot use an ampersand (&) as part of the address. To enter the data for the scan_data parameter in hexadecimal, enclose the digits in X' '. For example, type SYSD CORE PGM=SYSD0000,,,X'E2E8E2C4'.
You can use the ASID= parameter to scan other address spaces.
346 CPMS/SYSD Reference Manual ~ 7.2

Chapter 13 Using CPMS/SYSD functional commands
Using page functions with the CORE command
Use the following page functions with the CORE command.
Using the address parameter for the CORE command
Use the following guidelines to specify the address parameter:
• An operand that CPMS/SYSD appends to address calculations. These address calculations consist of the following operands:
This key Function
ENTER Page down one screen unless the address is preceded by an ampersand (&), in which case the screen will show the current address.
PF7 Page up by hex 100 characters.
PF8 Page down by hex 100 characters.
PF10 Page up by one screen.
PF11 Page down by one screen.
The PF7, PF8, PF10, and PF11 keys adjust the last <or> operator value to page. If no <or> exists, CPMS/SYSD adds one.
This operand Means
+ or > Add a displacement to the current address value. For example, 2A+11 generates the address 3B.
- or < Subtract a displacement from the current address value. For example, 2A-16 generates the address 14.
@ Add a displacement to the current address value. CPMS/SYSD uses this address to load a new address from that location. This operation is particularly useful for chasing storage chains. For example, 0@10 loads the address of the z/OS communications vector table (CVT).
# Add a displacement to the current address value. CPMS/SYSD uses this address to load a new 24-bit address from that location. Similar to the @ operand.
CORE – Viewing and changing virtual memory 347

Chapter 13 Using CPMS/SYSD functional commands
• A constant representing a predefined internal storage address. Valid constants are:
For example, CVT@0@4 displays the CICS current task control block (TCB).
You can also use address character constants to view items in memory:
• View the memory in a specific address space. You can code ASID= as a job name or an ASID number.
• View a specific program in memory if it has been loaded.
• View the memory at a specific entry in the subsystem control table.
For example, SSCT=JES2 points to the SSCT JES2 entry.
• View the memory containing the CPMS/SYSD printer table. PTBL is built from the entries in the SYSDPTBL program and is different from displaying SYSDPTBL using the PGM= parameter with the CORE command.
DEST – Viewing and changing the DCT
SYSD only
Use the DEST command to view either a summary of all the entries in the destination control table (DCT) or a summary of the variable settings for a specific destination entry.
Each destination entry is an intrapartition or extrapartition (or intersystem communication) CICS sequential data set. You can use this command to change the variable settings for a destination entry. The format of the DEST command is:
This constant Means
CVT z/OS CVT
JESCT JES2 Communications Table
SYSD,CORE,ASID=xxxxxxxx[+/-/@]
SYSD,CORE,PGM=xxxxxxxx[+/-/@]
SYSD,CORE,SSCT=xxxx[+/-/@]
SYSD,CORE,PTBL[+/-/@]
SYSD,DEST,[destination],[subfunction],[new_value]
348 CPMS/SYSD Reference Manual ~ 7.2

Chapter 13 Using CPMS/SYSD functional commands
This parameter Specifies
destination The ID of the destination entry that you want to view or change. The default is a summary of all of the entries in the DCT. This parameter is required if you are changing the variable settings for a destination entry.
subfunction The subfunction that you want to view or change for a specific destination entry. The default is a summary of the variable settings for the entry that the destination parameter specifies.
Specify To
CLO Close the destination to processing.
DIS Disable the destination entry.
DSTNTRM Change the destination facility to nonterminal.
DSTTRM Change the destination facility to a terminal.
ENA Enable the destination entry.
OPE Open the destination for processing.
TRAN Change the trigger transaction ID to the value specified in the new_value parameter.
TRIGGER Change the trigger level to the trigger level specified in the new_value parameter.
new_value The new value that you want to assign to the variable for the destination entry. This parameter is required only if you specify a value in the subfunction parameter that requires a new value, such as the TRIGGER subfunction.
Specify To
tran Assign a one to four character transition ID.
trigger Assign a number from 0 to 32767.
DEST – Viewing and changing the DCT 349

Chapter 13 Using CPMS/SYSD functional commands
DLTA – Deleting a high-level index alias
SYSD only
The DLTA command deletes a high-level index alias from the z/OS catalog. The format of the DLTA command is:
DLTX – Disconnecting catalogs
SYSD only
The DLTX command deletes the primary index that connects one z/OS catalog to another. The format of the DLTX command is:
SYSD,DLTA,[control_vol],index
This parameter Specifies
control_vol The 1-character to 6-character control-volume serial number where the catalog resides. CPMS/SYSD starts the catalog search with the catalog in the control_vol parameter. The default is the master catalog.
index The 1-character to 8-character high-level index alias that you want to delete.
SYSD,DLTX,[control_vol],index
This parameter Specifies
control_vol The 1-character to 6-character control-volume serial number where the catalog resides. CPMS/SYSD starts the catalog search with the catalog in the control_vol parameter. The default is the master catalog.
index The 1-character to 44-character primary index that you want to delete.
350 CPMS/SYSD Reference Manual ~ 7.2

Chapter 13 Using CPMS/SYSD functional commands
DRPX – Deleting a primary or generation index
SYSD only
The DRPX command deletes a primary or generation index and all of the subindexes for the index from the z/OS catalog. The format of the DRPX command is:
DSMAINT – Performing maintenance on a single data set within a job
SYSD only
The DSMAINT command performs maintenance on a single data set within a job. The format of the DSMAINT command is:
SYSD,DRPX,[control_vol],index
This parameter Specifies
control_vol The 1-character to 6-character control-volume serial number where the catalog resides. CPMS/SYSD starts the catalog search with the catalog in the control_vol parameter. The default is the master catalog.
index The 1-character to 44-character primary or generation index that you want to delete.
SYSD,DSMAINT,jobid,dataset#,action,keyword=value,keyword=value,...
This parameter Specifies
jobid The JES2 jobid of the job that you wish to maintain.
dataset# The data set number in the job that you want to maintain. May be LOG, JCL, or MSG.
action The action that you wish to perform:
P = Purge (delete the data set)
H = Hold the data set
R = Release the data set
U = Update the data set (use the keywords described below)
DRPX – Deleting a primary or generation index 351

Chapter 13 Using CPMS/SYSD functional commands
Keywords are used with the Update action only. You may use any or all keywords with a single update. Keywords must have an equal sign following them. Keywords may be in any order.
DSN – Viewing the attributes for a data set
SYSD only
The DSN command reads the VTOC entry for a data set and then displays the attributes and space usage for the data set. Information includes general data about DCBs, extent statistics, and, when applicable, ISAM definitions. The format of the DSN command is:
This keyword Sets a new...
DEST= Destination for the data set (1 to 18 characters)
CLASS= Class for the data set (1 character)
FORM= Form for the data set (1 to 8 characters)
PRI= Priority for the data set (0 to 255)
COPIES= Number of copies for the data set
SYSD,DSN,[vol_ser],dsn
This parameter Specifies
vol_ser The 1-character to 6-character volume serial number where the data set resides. The default is the first volume serial number from the catalog.
dsn The 1-character to 44-character name of the data set you want to view.
352 CPMS/SYSD Reference Manual ~ 7.2

Chapter 13 Using CPMS/SYSD functional commands
The following screen shows what appears when you issue the SYSD,DSN,,SYSD.MMC.HELP command:
Field definitions
Field definitions are listed here in the order that they appear on the screen.
Volume
The Volume field contains the volume serial number.
CreDt
The CreDt field contains the date on which the data set was created.
ExpDt
The ExpDt field contains the date on which the data set expires.
DsOrg
The DsOrg field contains the organization for the data set.
OptCd
The OptCd field contains the option code for the data set.
DSN – Viewing the attributes for a data set 353

Chapter 13 Using CPMS/SYSD functional commands
RecFm
The RecFm field contains the record format for the data set.
LRecL
The LRecL field contains the logical record length for the data set.
BlkSize
The BlkSize field contains the block size for the data set.
KeyL
The KeyL field contains the length of the access key.
RKP
The RKP field contains the relative key position for the data set.
VolSq
The VolSq field contains the volume sequence.
Initial Alloc
The Initial Alloc field contains the initial allocation type.
2nd Alloc
The 2nd Alloc field contains the amount of secondary space allocated for the data set.
Last Blk - TTRLL
The Last Blk - TTRLL field contains the last block in the track-track-record-length-length format.
DSCB PTR - CCHHR
The DSCB PTR - CCHHR field contains the control block pointer, in cylinder-cylinder-head-head-record format, for the data set.
TTR
The TTR field contains the track-track-record.
354 CPMS/SYSD Reference Manual ~ 7.2

Chapter 13 Using CPMS/SYSD functional commands
Type
The Type field contains the type of extent.
Seq
The Seq field contains the extent sequence number for the data set.
CC
The CC field contains the beginning and ending cylinders.
HH
The HH field contains the beginning and ending heads.
Trks
The Trks field contains the number of tracks.
Total Tracks
The Total Tracks field contains the total number of tracks.
DSPCHR – Viewing a DASD record
SYSD only
Use the DSPCHR command to view a physical record on a DASD COUNT, KEY, and DATA (CKD) volume. The COUNT describes the rest of the record and consists of the cylinder-cylinder-head-head-record format (CCHHR) for the record, the key length, and the record length. If the record length is zero, CPMS/SYSD assumes that the record is the EOF.
Note The volume must be mounted and ready before you issue this command.
DSPCHR – Viewing a DASD record 355

Chapter 13 Using CPMS/SYSD functional commands
The format of the DSPCHR command is:
The following screen shows what appears when you issue the SYSD,DSPCHR,HWS917,1 command:
SYSD,DSPCHR,vol_ser,cchhr,<dsname>
This parameter Specifies
vol_ser The 1-character to 6-character volume serial number where the record resides.
cchhr The cylinder, head, and record for the DASD record. This consists of 1 to 5 bytes of hexadecimal characters. You can omit leading zeros.
dsname The dsname rather than the initial cchhr and volume serial number of the first record of the dsname. If the volume serial number is specified, then CPMS/SYSD searches only that volume for the dsname. If the volume serial number is not specified, then CPMS/SYSD uses the catalog to locate the dsname.
CPMS/SYSD shows the command line with the initial cchhr and volume serial number for the dsname, as well as the dsname that you specified.
If the cylinder, head, and record for the DASD record are specified along with the dsname parameter, CPMS/SYSD ignores the dsname. CPMS/SYSD shows the dsname on the command line for reference purposes.
356 CPMS/SYSD Reference Manual ~ 7.2

Chapter 13 Using CPMS/SYSD functional commands
Field definitions
Field definitions are listed here in the order that they appear on the screen.
CC
The CC field contains the cylinder for the DASD record.
HH
The HH field contains the head for the DASD record.
RR
The RR field contains the record number for the DASD record.
KL
The KL field contains the key length for the DASD record.
DL
The DL field contains the data length for the DASD record.
ENDAUTO – Ending a dynamic display
Some functional commands automatically reissue themselves. For example, compare the A and AA commands described in “A – Viewing jobs that are being executed” on page 337 and “AA – Dynamically displaying jobs being executed” on page 340. Commands that automatically reissue themselves let you monitor a display without your reissuing the command. The ENDAUTO command ends an automatic display. Because CPMS/SYSD automatically reprompts the command, you must press ENTER when you want to end the autodisplay.
The format of the ENDAUTO command is:
SYSD,ENDAUTO
ENDAUTO – Ending a dynamic display 357

Chapter 13 Using CPMS/SYSD functional commands
ENQ – Viewing the OS global resource serialization queue
SYSD only
Use the ENQ command to view the global resource serialization (GRS) queue. The format of the ENQ command is:
Note Viewing all of the GRS queue names in a multiple-CPU complex may significantly degrade the performance of the CICS region.
SYSD,ENQ,[queue_name],[dsn],[member],[DEQ|REENQ]SYSD,ENQ,[WAIT]
This parameter Specifies
queue_name The GRS queue name that you want to view. For example, specify SYSDSN or SYSVSAM. The default is for CPMS/SYSD to show all of the GRS queue names. This parameter is required if you specify the dsn parameter.
dsn The dataset name. If you specify a high-level qualifier, CPMS/SYSD displays all of the enqueues starting with that high-level qualifier.
member • The member that you want to DEQ or ENQ. If the DSN is a sequential data set, the member parameter is null.
• If you do not specify DEQ or REENQ, CPMS/SYSD adds the value specified in the member parameter to the end of the dsn parameter to make a complete ENQ request.
DEQ A DEQ request for the data set member specified in the dsn parameter. This request is valid only when you are in the same CICS region that contains the ENQ.
REENQ An ENQ request for the data set member specified in the dsn parameter.
WAIT View only the resources with waiting tasks.
358 CPMS/SYSD Reference Manual ~ 7.2

Chapter 13 Using CPMS/SYSD functional commands
The following is an example of the information that appears when you issue the SYSD,ENQ command:
Field definitions
Field definitions are listed here in the order that they appear on the screen.
Scope
The Scope field contains the scope of the resource requested. Valid scopes are GLOBAL, SYSTEMS, SYSTEM, and STEP. If the scope is GLOBAL, CPMS/SYSD puts an asterisk (*) in front of the scope.
Qname
The Qname field contains the major name for the resource.
Rname
The Rname field contains the minor name for the resource. CPMS/SYSD displays non displayable bytes as spaces.
Type
The Type field contains the request type. Valid request types are SHR (shared) or EXC (exclusive). If the request type is EXC, CPMS/SYSD highlights the line. If the resource request is a RESERVE, a plus sign (+) follows the request type. If GRS converted the RESERVE to an ENQ, a minus sign (-) appears after the request type.
ENQ – Viewing the OS global resource serialization queue 359

Chapter 13 Using CPMS/SYSD functional commands
Sysname
The Sysname field contains the system name of the requester. If the system name is not defined in the PARMLIB IEASYSxx entry, this field contains NONAME.
Jobname
The Jobname field contains the job name for the requester. The requester could also be a TSO user ID or a started task name.
FILE – Viewing and changing the FCT
SYSD only
Use the FILE command to view either a summary of all the entries in the File Control Table (FCT) or a summary of the variable settings for a specific FCT entry. You can use this command to change the variable settings for an FCT entry.
Each FCT entry represents a file to CICS. Valid access methods are BDAM, ISAM, or VSAM.
The format of the FILE command is:
SYSD,FILE,[file_id],[subfunction],[new_value]
This parameter Specifies
file_id This parameter specifies the ID of the FCT entry that you want to view or change. The default is a summary of all the entries in the FCT. This parameter is required if you are changing the variable settings for an FCT entry.
subfunction The subfunction that you want to change for an FCT entry. The default is to show a summary of the variable settings for the FCT entry specified for the file_id parameter.
Specify To
CLO Close the file.
DIS Disable the FCT entry.
DSN Change the name of the dataset to the name specified in the new_value parameter.
ENA Enable the FCT entry.
OPE Open the file.
360 CPMS/SYSD Reference Manual ~ 7.2

Chapter 13 Using CPMS/SYSD functional commands
HELP – Viewing help information
Use the HELP command to view either general information for operating CPMS/SYSD or specific information for using a particular command. The online help summarizes the information in this manual and includes a description of each command. The format of the HELP command is:
HOLD – Holding a job
The HOLD command puts a job in a JES2 queue on hold. The job stops in its cycle through the OS. If the job is in the JES2 input queue, it is not executed until you release it. If the job is in the JES2 output queue, it is not printed until you release it. The format of the HOLD command is:
new_value The new value that you want to assign to the FCT entry. This parameter is required only if you specify a value in the subfunction parameter that requires a new value. For example, you can specify DSN, data set_name, where data set_name can be a maximum of 44 characters.
SYSD,HELP,[function|NEW|MSGxnnnn]
This parameter Specifies
function Show the online help for the specified function.
NEW Show the latest release information.
MSGxnnnn Display help for the message xnnnn, where x is a letter for the message type and nnnn is the message number.
SYSD,HOLD,jobnumber
This parameter Specifies
jobnumber The JES2 job number that you want to put on hold.
This parameter Specifies
HELP – Viewing help information 361

Chapter 13 Using CPMS/SYSD functional commands
IC – Viewing CICS interval control elements
Use the IC command to view CICS interval control elements (ICEs). You can view all or part of the ICEs. Use this command for debugging purposes. The format of the IC command is:
JOB – Viewing the status of a job
The JOB command finds all occurrences of a job name in the JES2 spool and lets you track the job through the queues. If you have submitted a job several times, the status of each job appears. You may then use the job number to view or print each occurrence.
The formats of all the aliases of the JOB command are:
SYSD,IC,[tran_id]
This parameter Specifies
tran_id The transaction ID of the ICE that you want to view. The default is a summary of all of the ICEs.
You can also specify a mask. A plus sign (+) in place of a character means CPMS/SYSD selects characters in that position. An asterisk (*) following a character means CPMS/SYSD ignores characters in that position and beyond.
SYSD,JOB,[jobname],[jobnumber],[opts] STATUS ST STE,[jobname],[jobnumber],[opts],[owner]
This parameter Specifies
jobname The name of the batch job that you want to view. All jobs with this name appear. The default is for CPMS/SYSD to show all of the jobs in the JES2 spool.
You can enter the name of the batch job as a mask. Enter the beginning letters of the job name followed by an asterisk (*) to select a group of jobs. For example, type ABC* for CPMS/SYSD to show all of the batch jobs that start with the characters ABC.
jobnumber The job number of the specific batch job that you want to view.
Use J, S, or T to indicate a job, started task, or TSO respectively, followed by the job number. Leading zeros can be omitted. For example, type J123 to view job number J123.
opts Which batch jobs, TSO sessions, or started tasks that you want CPMS/SYSD to show.
362 CPMS/SYSD Reference Manual ~ 7.2

Chapter 13 Using CPMS/SYSD functional commands
Specify To
B View only batch jobs that are being executed.
T View only TSO sessions that are being executed.
S View only started tasks that are being executed.
A View batch jobs, TSO sessions, and started tasks that are being executed.
* View all jobs.
xxx View any combination of batch jobs, TSO sessions, and started tasks that are being executed. Specify B, T, S, or any combination thereof.
Leave blank View all jobs.
owner The job owner, or submitter. CPMS/SYSD shows only those jobs with owners that match the value specified in this parameter. This parameter is valid only when you use the STE command.
You can enter the name of the owner as a mask. Enter the beginning letters of the job owner followed by an asterisk (*) to select a group of jobs. For example, type ABC* for CPMS/SYSD to show all of the jobs that have an owner that starts with the characters ABC.
If you leave this parameter blank, CPMS/SYSD does not filter the results based on the job owner.
This parameter Specifies
JOB – Viewing the status of a job 363

Chapter 13 Using CPMS/SYSD functional commands
The following screen shows what appears when you issue the SYSD,JOB command:
Note When you issue the STE command, an extended screen appears. See “STE – Viewing the status of a job” on page 424 for more information.
Field definitions
Field definitions are listed here in the order that they appear on the screen.
Job#
The Job# field contains the JES2-assigned job number.
Jobname
The Jobname field contains the started task procedure or job name found on the JOB card.
364 CPMS/SYSD Reference Manual ~ 7.2

Chapter 13 Using CPMS/SYSD functional commands
STA
The STA field contains the phase of the job.
XHA
The XHA field contains (in three columns) information about the job.
Pri
The Pri field contains the priority for the job in the queue.
Held
The Held field contains the number of held data sets in the job.
The Print field contains the print destination ID for the job.
Punch
The Punch field contains the punch destination ID for the job.
This type Identifies
TSU The time sharing user.
STC A started task.
C** The class for executing or waiting jobs.
COMP Completed jobs.
This column Contains
X A W if the job is waiting to be executed.
H An H if the job is held.
A An A if the job was held using a HOLD ALL command.
JOB – Viewing the status of a job 365

Chapter 13 Using CPMS/SYSD functional commands
JOECLN – Purging job output elements
The JOECLN command selectively purges the job output elements in a JES2 queue. By default, CPMS/SYSD scans the queue for jobs that are older than 36 hours or have more than 25,000 lines of output and then purges them. In order to protect Friday-night jobs, this command does not run on Saturday, Sunday, or Monday. You can use the JES208 user exit to control purges of job output elements.
The JOECLN command is controlled using the JOECLNCLASS, JOECLNJOBNAME, JOECLNLINES, and JOECLNHOURS parameters in SYSDSETS. Your CPMS/SYSD administrator sets the parameters in SYSDSETS.
Note JOECLN purges at the job element level.
The format of the JOECLN command is:
L – Viewing a PDS source member
SYSD only
The L command is an alias of the PDSDSPLY command. This command allows you to list a member of a source PDS. (See “PDSDSPLY – Viewing a PDS source member” on page 387 for more information.) The formats of all the aliases of the L command are:
SYSD,JOECLN,[DEST],[TEST]
This parameter Specifies
DEST The name of the JES2 destination that you want to scan. The default is the JES2 destination that the CPMS/SYSD administrator has defined.
TEST List jobs and job elements on the system console that are set to be purged, but do not actually purge them.
SYSD,L,[vol_ser],dsn,member PDSDSPLY LIST
366 CPMS/SYSD Reference Manual ~ 7.2

Chapter 13 Using CPMS/SYSD functional commands
LC – Listing catalog entries
SYSD only
The LC command is an alias of the LISTCAT command. This command allows you to view the entries in a catalog. (See “LISTCAT – Listing catalog entries” on page 368 for more information.) The formats of all the aliases of the LC command are:
LD – Viewing a PDS directory
SYSD only
The LD command is an alias of the LISTPDS command. This command allows you to list the members in a PDS. (See “LISTPDS – Viewing a PDS directory” on page 369 for more information.) The formats of all the aliases of the LD command are:
LICENSE – Updating the product license
Use the LICENSE command to query or update a license record in CPMS/SYSD while CPMS/SYSD is running. The format of the LICENSE command is:
SYSD,LC,node LISTCAT LISTC
SYSD,LD,[vol_ser],dsn,[member],[format] LISTPDS LISTD
SYSD,LICENSE,QSYSD,LICENSE,U|A,license
This parameter Specifies
Q Query the expiration date of the current product license.
U Update the license record and build with just this current license.
A Append this license record to the current license record. Use this parameter if CPMS/SYSD runs on multiple CECs and you need more than one license.
license Enter the license, including brackets, that H&W Computer Systems, Inc. sent you.
LC – Listing catalog entries 367

Chapter 13 Using CPMS/SYSD functional commands
LIST – Viewing a PDS source member
SYSD only
The LIST command is an alias of the PDSDSPLY command. This command allows you to list a member of a source PDS. (See “PDSDSPLY – Viewing a PDS source member” on page 387 for more information.) The formats of all the aliases of the LIST command are:
LISTC – Listing catalog entries
SYSD only
The LISTC command is an alias of the LISTCAT command. This command allows you to view the entries in a catalog. (See “LISTCAT – Listing catalog entries” on page 368 for more information.) The formats of all the aliases of the LISTC command are:
LISTCAT – Listing catalog entries
SYSD only
Use the LISTCAT command to view the entries in a catalog. The formats of all the aliases of the LISTCAT command are:
SYSD,LIST,[vol_ser],dsn,member PDSDSPLY L
SYSD,LISTC,node LISTCAT LC
SYSD,LISTCAT,node LISTC LC
This parameter Specifies
node The 1-character to 44-character node that you want to view. The node does not have to be a complete index node. You can use a partial node. A partial node cannot contain wildcard selection characters such as an asterisk (*) or a plus sign (+).
368 CPMS/SYSD Reference Manual ~ 7.2

Chapter 13 Using CPMS/SYSD functional commands
LISTD – Viewing a PDS directory
SYSD only
The LISTD command is an alias of the LISTPDS command. This command allows you to list the members in a PDS. (See “LISTPDS – Viewing a PDS directory” on page 369 for more information.) The formats of all the aliases of the LISTD command are:
LISTPDS – Viewing a PDS directory
SYSD only
The LISTPDS command lists the members in a PDS. The formats of all the aliases of the LISTPDS command are:
SYSD,LISTD,[vol_ser],dsn,[member],[format] LISTPDS LD
SYSD,LISTPDS,[vol_ser],dsn,[member],[format] LISTD LD
This parameter Specifies
vol_ser The volume serial number where the data set resides. The default is to use the first volume serial number in the z/OS catalog.
dsn The 1-character to 44-character name of the PDS that you want to view.
member The 1-character to 8-character name of the member that you want to view.
format The type of information that you want to view. The default is a list of each member and its TTR pointer. The uppercase character represents the minimum abbreviation allowed.
Type To view
Dump Each member in dump format.
Format Each member in a formatted display that explains the variables in the entry. Only specify this parameter for a source or object PDS.
LISTD – Viewing a PDS directory 369

Chapter 13 Using CPMS/SYSD functional commands
Example 1
The following screen shows what appears when you issue the SYSD,LISTPDS,,SYSD.MMC.SOURCE,,DUMP command:
Field definitions
Field definitions are listed here in the order that they appear on the screen.
Name
The Name field contains the member name.
TTRC
The TTRC field contains the track, record, and count for the member.
Alias
The Alias field contains the alias assigned to the member.
Spf The Structured Programming Facility (SPF) statistics in SPF format.
This parameter Specifies
370 CPMS/SYSD Reference Manual ~ 7.2

Chapter 13 Using CPMS/SYSD functional commands
User Data
The User Data field contains a hexadecimal dump of the directory entry for the member.
Example 2
The following screen shows what appears when you issue the SYSD,LISTPDS,,SYSD.MMC.SOURCE,,FORMAT command:
Field definitions
Field definitions are listed here in the order that they appear on the screen.
Name
The Name field contains the member name.
TTRC
The TTRC field contains the track, record, and count for the member.
Alias
The Alias field contains the alias assigned to the member.
LISTPDS – Viewing a PDS directory 371

Chapter 13 Using CPMS/SYSD functional commands
Size
The Size field contains the size of the member.
Entry
The Entry field contains the displacement in the load module where execution should start.
SSI
The SSI field contains the system status information.
Rent
The Rent field specifies whether the program is re-entrant.
Reus
The Reus field specifies whether the program is reusable.
Example 3
The following screen shows what appears when you issue the SYSD,LISTPDS,,SYSD.MMC.SOURCE,,SPF command:
372 CPMS/SYSD Reference Manual ~ 7.2

Chapter 13 Using CPMS/SYSD functional commands
Field definitions
Field definitions are listed here in the order that they appear on the screen.
Name
The Name field contains the member name.
TTRC
The TTRC field contains the track, record, and count for the member.
Ver.Mod
The Ver.Mod field contains the version and modification level.
Created
The Created field contains the date on which the member was created.
Last Modified
The Last Modified field contains the date on which the member was last changed.
Size
The Size field contains the size of the member.
Init
The Init field contains the number of lines in the member when it was created.
Mod
The Mod field contains the number of changes made to the member.
ID
The ID field contains the ID of the user who most recently changed the member.
LISTPDS – Viewing a PDS directory 373

Chapter 13 Using CPMS/SYSD functional commands
LISTVTOC – Viewing a Volume Table of Contents
SYSD only
The LISTVTOC command reads all of the VTOC entries on a DASD volume and then displays information about each entry. The information includes all of the data sets on the volume, the available free space, general information, and current indicators.
The formats of all the aliases of the LISTVTOC command are:
Example
The following screen shows what appears when you issue the SYSD,LISTVTOC,339004 command. Field definitions follow the second screen.
LISTVTOC – Page 001
SYSD,LISTVTOC,vol_ser LV
This parameter Specifies
vol_ser The 1-character to 6-character volume serial number that you want to view.
374 CPMS/SYSD Reference Manual ~ 7.2

Chapter 13 Using CPMS/SYSD functional commands
LISTVTOC – Page 002
Field definitions
Field definitions are listed here in the order that they appear on the screen.
Dataset Name
The Dataset Name field contains the name of the data set.
DsOrg
The DsOrg field contains the data set organization.
CreDt
The CreDt field contains the date on which the data set was created.
ExpDt
The ExpDt field contains the date on which the data set expires.
Extents
The Extents field contains the number of extents for the data set.
LISTVTOC – Viewing a Volume Table of Contents 375

Chapter 13 Using CPMS/SYSD functional commands
Space
The Space field contains the number of tracks that the data set has used.
Largest Free Area in Tracks
The Largest free area in tracks field contains the largest free area of tracks available for the DASD device.
Total Free Tracks
The Total free tracks field contains the number of free tracks available for the DASD device.
Free Extents
The Free extents field contains the free extents for the DASD device.
Total DSCBS Available
The Total DSCBS available field contains the total data set control blocks (DSCBS) available for the DASD device.
Number of Free DSCBS
The Number of free DSCBS field contains the number of free DSCBS available for the DASD device.
Number of DSCBS in Use
The Number of DSCBS in Use field contains the number of DSCBS currently in use.
PDS Directory BLKS Per Track
The PDS Directory BLKS Per Track field contains the number of PDS directory blocks per track.
376 CPMS/SYSD Reference Manual ~ 7.2

Chapter 13 Using CPMS/SYSD functional commands
LOCATE – Viewing the z/OS catalog entry for a data set
SYSD only
The LOCATE command lists all of the volume serial numbers associated with an OS data set. First, CPMS/SYSD lists the catalog entry for the data set and the volume serial numbers in the catalog. Second, CPMS/SYSD searches every online DASD volume and lists any volumes on which it finds the data set.
The format of the LOCATE command is:
LPAD – Viewing the z/OS link pack directory
SYSD only
Use the LPAD command to view all or part of the link pack directory with an entry point for each module. The format of the LPAD command is:
SYSD,LOCATE,[control_vol],dsn,[BYPASS]
This parameter Specifies
control_vol The 1-character to 6-character control-volume serial number on which the catalog resides. The default is the master catalog. CPMS/SYSD starts searching for the data set in the catalog specified in the control_vol parameter.
dsn The 1-character to 44-character name of the data set that you want to view. For GDGs, enclose the dataset name in single quotation marks. For example, type 'SYSD.USRLIB (-1)' to show the SYSD.USRLIB(-1) generation data group.
BYPASS Do not perform the DASD search.
SYSD,LPAD,[program_id]
This parameter Specifies
program_id • The ID of the program that you want to view. The default is the entire directory.
• To view several programs, specify the first letters of the program name followed by an asterisk (*). For example, type ABC* to view all programs starting with the characters ABC.
LOCATE – Viewing the z/OS catalog entry for a data set 377

Chapter 13 Using CPMS/SYSD functional commands
LV – Viewing a Volume Table of Contents
SYSD only
The LV command is an alias of the LISTVTOC command. This command allows you to read all of the VTOC entries on a DASD volume and then display information about each entry. (See “LISTVTOC – Viewing a Volume Table of Contents” on page 374 for more information.) The formats of all the aliases of the LV command are:
MENU – Signing on to the CPMS/SYSD menu-driven system
The MENU command lets you sign on to the CPMS/SYSD menu-driven system. This provides all spool display and print commands, as well as the optional editor. The format of the MENU command is:
If you do not specify a user ID or password, the Signon screen appears.
SYSD,LV,vol_ser LISTVTOC
SYSD,MENU,[user_id],[password],[address]
This parameter Specifies
user_id Your CPMS/SYSD user ID.
password Your password. Your password appears on the screen when you enter it as a parameter. To keep it from appearing when you type it, issue the MENU command without the user_id and password parameters and then sign on using the Signon screen.
address The direct screen flow address of the CPMS/SYSD screen that you want to view. The address consists of a series of numbers or names separated by periods. Each number represents an option and each name represents a command on a screen in the chain leading to the screen that you want to view. For example, to view the General Parameter Definitions screen (Option 0.0), issue one of the following commands:
• SYSD,MENU,user_id,password,0.0
• SYSD,MENU,user_id,password,PARMS.GENERAL
See “Moving around in the menu-driven system” on page 23 for a complete explanation of direct screen flow.
378 CPMS/SYSD Reference Manual ~ 7.2

Chapter 13 Using CPMS/SYSD functional commands
MLPAD – Viewing modified link pack directory
SYSD only
Use the MLPAD command to view all or part of the z/OS modified link pack directory with an entry point for each module. The format of the MLPAD command is:
N – Viewing all of the jobs in a queue
Use the N command to view the statistics for the jobs in the JES2 queue. The N command shows you whether the jobs are waiting to be executed, are being executed, or are waiting in the output queue. The format of the N command is:
SYSD,MLPAD,[program_id]
This parameter Specifies
program_id The ID of the program that you want to view. The default is the entire directory. To view several programs, type the first letters of the program name followed by an asterisk (*). For example, type ABC* to show all programs starting with the characters ABC.
SYSD,N,[phase],[dest],[jobname],[jobtype],[sort]
This parameter Specifies
phase Displays jobs in a specific phase.
c** = Actively executing or waiting in class c.
Any combination of the following:
This type Identifies
A|E Actively executing
W Waiting to execute
C Completed
dest Jobs remote destination.
* = All destinations.
jobname Specific job names. May contain wildcards of "*" or "?".
MLPAD – Viewing modified link pack directory 379

Chapter 13 Using CPMS/SYSD functional commands
Example
The following screen shows what appears when you issue the SYSD,N command:
jobtype Specific job type. Any combination of the following:
This type Identifies
S Started task
T TSO users
B Batch jobs
* All jobs (Default)
sort Sort the display. Sorting is always done within phase.
Format: name | (name,dir)
If using the name only format, dir defaults to "D".
This type Identifies
name "Name" = Sort by jobid within jobname
"Id" = Sort by jobid (Default)
"NOne" = Does not sort
dir "A" = Sort ascending
"D" = Sort descending (Default)
This parameter Specifies
380 CPMS/SYSD Reference Manual ~ 7.2

Chapter 13 Using CPMS/SYSD functional commands
Field definitions
Field definitions are listed here in the order that they appear on the screen.
Job#
The Job# field contains the JES2-assigned job number.
Jobname
The Jobname field contains the started task procedure name or job name on the JOB card.
STA
The STA field displays the phase of the job.
XHA
The XHA field contains (in three columns) information about the job.
Pri
The PRI field contains the priority for the job in the queue.
Held
The Held field contains the number of held data sets in the job.
This type Specifies
TSU A time sharing user.
STC A started task.
C** The class for executing and waiting jobs.
This column Contains
X A W if the job is waiting to be executed.
H An H if the job was held.
A An A if the job was held using a HOLD ALL command.
N – Viewing all of the jobs in a queue 381

Chapter 13 Using CPMS/SYSD functional commands
The Print field contains the print destination ID for the job.
Punch
The Punch field contains the punch destination ID for the job.
NONSWAP – Changing CICS swap status
The NONSWAP command changes the swap status of the current CICS region to nonswappable. The format of the NONSWAP command is:
OC – Issuing an operator command
The OC command is an alias of the OSCMD command. This command allows you to issue a command to either the OS or JES2. (See “OSCMD – Issuing a command to the OS or JES2” on page 383 for more information.) The formats of all the aliases of the OC command are:
OKSWAP – Changing CICS swap status
The OKSWAP command changes the current CICS region swap status to Swappable. The format of the OKSWAP command is:
SYSD,NONSWAP
SYSD,OC,command OSCMD
SYSD,OKSWAP
382 CPMS/SYSD Reference Manual ~ 7.2

Chapter 13 Using CPMS/SYSD functional commands
OP – Printing a cataloged PDS member
SYSD only
The OP command is an alias of the OSPRINT command. This command allows you to print a cataloged PDS member on the z/OS printer. (See “OSPRINT – Printing a cataloged PDS member” on page 384 for more information.) The formats of all the aliases of the OP command are:
OSCMD – Issuing a command to the OS or JES2
The OSCMD command issues a command to either the OS or JES2. You can issue any command that the CPU console operator can issue. The formats of all the aliases of the OSCMD command are:
SYSD,OP,,dsn,[member],[class] OSPRINT
SYSD,OSCMD,command OC
This parameter Specifies
command The 1-character to 79-character OS or JES2 command that you want to issue. CPMS/SYSD takes the command literally after the separator character following OSCMD to the end of the line.
OP – Printing a cataloged PDS member 383

Chapter 13 Using CPMS/SYSD functional commands
OSPRINT – Printing a cataloged PDS member
SYSD only
The OSPRINT command prints a cataloged PDS member on the z/OS printer. CPMS/SYSD prints the output with a job name of SYSDPRNT. CPMS/SYSD issues a z/OS START command to execute the SYSDPRNT procedure. SYSDPRNT operates asynchronously with CICS.
The formats of all the aliases of the OSPRINT command are:
Note The double commas mean the first parameter is omitted from the OSPRINT command.
PA – Adjusting a spool printer
The PA command is an alias of the PRTADJ command. This command allows you to stop a PRTJOB or PRTJOE spool print task and then restart it on a different page. (See “PRTADJ – Adjusting a spool printer” on page 390 for more information.) The formats of all the aliases of the PA command are:
SYSD,OSPRINT,,dsn,[member],[class] OP
This parameter Specifies
dsn The 1-character to 44-character dataset name of the PDS in which the member resides.
member The 1-character to 8-character name of the PDS member that you want to print.
class Optional SYSOUT class for the print.
SYSD,PA,printer_id,page_number PRTADJ
384 CPMS/SYSD Reference Manual ~ 7.2

Chapter 13 Using CPMS/SYSD functional commands
PC – Canceling a spool print data set
The PC command is an alias of the PRTCNL command. This command allows you to cancel a PRTJOB or PRTJOE spool print task and stop the spool print task from printing the current SYSOUT data set. (See “PRTCNL – Canceling a spool print task” on page 391 for more information.) You can issue the PC command only from the originating, forms change, or master terminal. The formats of all the aliases of the PC command are:
PD – Viewing a spool printer status
The PD command is an alias of the PRTDSP command. This command allows you to view the status of one or all of the spool printers. (See “PRTDSP – Viewing the status of a spool printer” on page 391 for more information.) The formats of all the aliases of the PD command are:
SYSD,PC,printer_id PRTCNL
SYSD,PD,[printer_id],[subfunction],[new_value] PRTDSP
PC – Canceling a spool print data set 385

Chapter 13 Using CPMS/SYSD functional commands
PDSALIAS – Creating an alias for a PDS member
SYSD only
The PDSALIAS command creates an alias for a PDS member. The PDSALIAS command does not support load modules. Use the link editor to assign an alias for load modules.
The format of the PDSALIAS command is:
PDSCHG – Renaming a PDS member
SYSD only
The PDSCHG command renames a PDS member. The format of the PDSCHG command is:
SYSD,PDSALIAS,[vol_ser],dataset,member,alias
This parameter Specifies
vol_ser The volume serial number where the data set resides. The default is the first volume serial number in the z/OS catalog entry.
dataset The data-set name of the PDS for which you want to create an alias.
member The 1-character to 8-character name of the member for which you want to create an alias.
alias The 1-character to 8-character alias that you want to assign for the member.
SYSD,PDSCHG,[vol_ser],dsn,member,new_name
This parameter Specifies
vol_ser The volume serial number where the PDS resides. The default is the first volume serial number in the z/OS catalog entry.
dsn The 1-character to 44-character name of the PDS in which the member resides.
member The 1-character to 8-character name of the member that you want to rename.
new_name The new 1-character to 8-character name of the member.
386 CPMS/SYSD Reference Manual ~ 7.2

Chapter 13 Using CPMS/SYSD functional commands
PDSDEL – Deleting a PDS member
SYSD only
The PDSDEL command deletes a PDS member. The format of the PDSDEL command is:
PDSDSPLY – Viewing a PDS source member
SYSD only
The PDSDSPLY command lists a member of a source PDS. You can use this command to browse a PDS member. The formats of all the aliases of the PDSDSPLY command are:
SYSD,PDSDEL,[vol_ser],dsn,member
This parameter Specifies
vol_ser The volume serial number where the PDS resides. The default is the first volume serial number in the z/OS catalog entry.
dsn The 1-character to 44-character name of the PDS in which the member resides.
member The 1-character to 8-character name of the member that you want to delete.
SYSD,PDSDSPLY,[vol_ser],dsn,member LIST L
This parameter Specifies
vol_ser The volume serial number where the PDS resides. The default is the first volume serial number in the z/OS catalog entry.
dsn The 1-character to 44-character name of the PDS in which the member resides.
member The 1-character to 8-character name of the member that you want to view.
PDSDEL – Deleting a PDS member 387

Chapter 13 Using CPMS/SYSD functional commands
PF – Replying to a forms change request
The PF command is an alias of the PRTFRM command. This command allows you to reply to a forms change request from a PRTJOB or PRTJOE spool print task. (See “PRTFRM – Replying to a forms change request” on page 405 for more information.) The formats of all the aliases of the PF command are:
PH – Holding a spool printer
The PH command is an alias of the PRTHLD command. This command allows you to hold a PRTJOB or PRTJOE spool print task after CPMS/SYSD prints the current buffer. (See “PRTHLD – Holding a spool printer” on page 406 for more information.) The formats of all the aliases of the PH command are:
PJ – Printing a job on a CICS printer
The PJ command is an alias of the PRTJOB command. This command allows you to print all or part of the output for a job on a CICS printer. (See “PRTJOB – Printing a job on a CICS printer” on page 406 for more information.) The formats of all the aliases of the PJ command are:
PP – Purging a spool printer
The PP command is an alias of the PRTPRG command. This command allows you to purge a spool print task. (See “PRTPRG – Purging a spool printer” on page 409 for more information.) The formats of all the aliases of the PP command are:
SYSD,PF,printer_id PRTFRM
SYSD,PH,printer_id PRTHLD
SYSD,PJ,job,printer_id,[sysout_id],[line],[begin_col],[scan_parms] PRTJOB SPLPRT
SYSD,PP,printer_id PRTPRG
388 CPMS/SYSD Reference Manual ~ 7.2
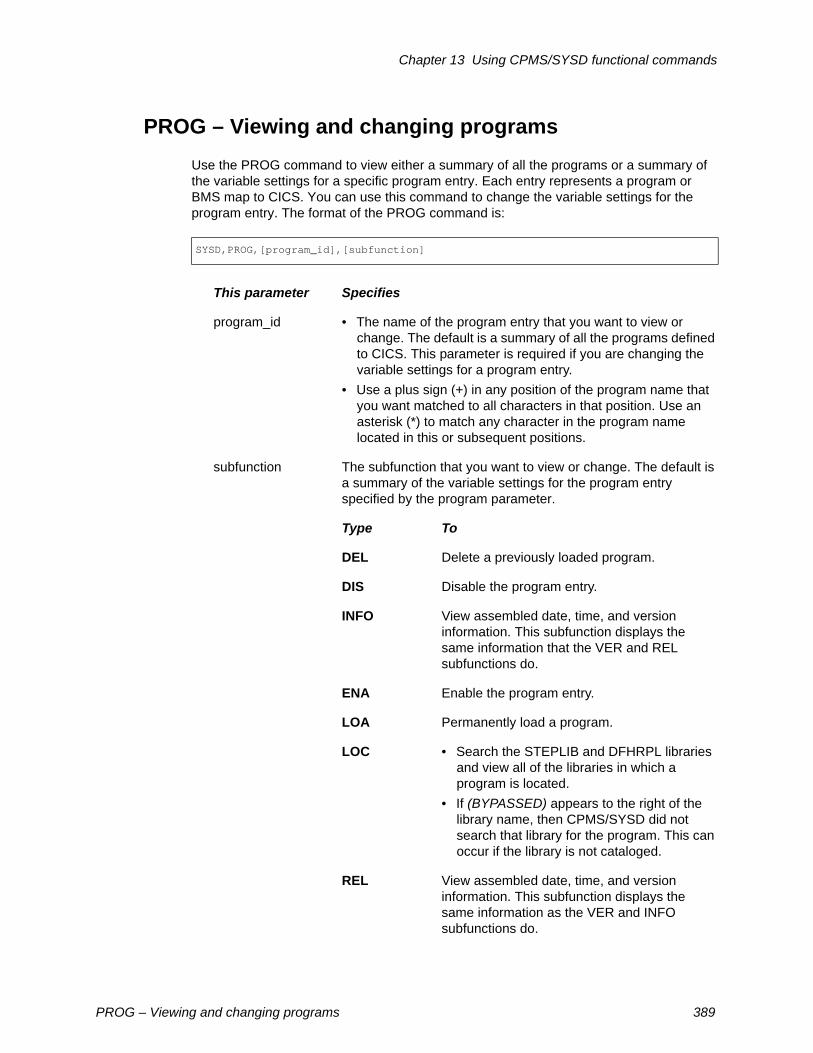
Chapter 13 Using CPMS/SYSD functional commands
PROG – Viewing and changing programs
Use the PROG command to view either a summary of all the programs or a summary of the variable settings for a specific program entry. Each entry represents a program or BMS map to CICS. You can use this command to change the variable settings for the program entry. The format of the PROG command is:
SYSD,PROG,[program_id],[subfunction]
This parameter Specifies
program_id • The name of the program entry that you want to view or change. The default is a summary of all the programs defined to CICS. This parameter is required if you are changing the variable settings for a program entry.
• Use a plus sign (+) in any position of the program name that you want matched to all characters in that position. Use an asterisk (*) to match any character in the program name located in this or subsequent positions.
subfunction The subfunction that you want to view or change. The default is a summary of the variable settings for the program entry specified by the program parameter.
Type To
DEL Delete a previously loaded program.
DIS Disable the program entry.
INFO View assembled date, time, and version information. This subfunction displays the same information that the VER and REL subfunctions do.
ENA Enable the program entry.
LOA Permanently load a program.
LOC • Search the STEPLIB and DFHRPL libraries and view all of the libraries in which a program is located.
• If (BYPASSED) appears to the right of the library name, then CPMS/SYSD did not search that library for the program. This can occur if the library is not cataloged.
REL View assembled date, time, and version information. This subfunction displays the same information as the VER and INFO subfunctions do.
PROG – Viewing and changing programs 389

Chapter 13 Using CPMS/SYSD functional commands
PRTADJ – Adjusting a spool printer
The PRTADJ command stops a PRTJOB or PRTJOE spool print task and then restarts it on a different page. You can issue this command any time after the print task starts, even if the job is on hold. You can issue the PRTADJ command only from the originating, forms change, or master terminal. The formats of all the aliases of the PRTADJ command are:
NEW • Reset the TTR to indicate a new version of the program.
• When using this parameter, you can set the program_id parameter to SYSD*. This setting refreshes all SYSD programs, including those loaded as permanent, except for SYSD0002.
TRON Turn on tracing for a program. Use only at H&W Support’s request.
TROFF Turn off tracing for a program. Use only at H&W Support’s request.
VER View assembled date, time, and version information for H&W Assembler programs. This subfunction displays the same information as the INFO and REL subfunctions do.
SYSD,PRTADJ,printer_id,page_number PA
This parameter Specifies
printer_id The ID of the CICS printer on which the task is active.
page_number • The actual or relative page number on which you want to restart the printing. An actual page number restarts the printing on that page.
• Typing a plus (+) or minus (-) sign before a number restarts the printing that many pages before or after the current page. For example, if the current page is 33, type -22 to restart printing on page 11 or +22 to restart printing on page 55. If a relative number forces the page number to be less than one, CPMS/SYSD starts printing on page one. If the relative number forces the page number beyond the end of the data set, CPMS/SYSD stops printing immediately.
This parameter Specifies
390 CPMS/SYSD Reference Manual ~ 7.2

Chapter 13 Using CPMS/SYSD functional commands
PRTCNL – Canceling a spool print task
The PRTCNL command cancels a PRTJOB or PRTJOE spool print task and stops the spool print task from printing the current SYSOUT data set. If the SYSOUT data set contains multiple copies, the rest of the copies are not printed. The next data set in the job starts printing. You can issue this command any time after the print task starts, even if the task is on hold.
You can issue the PRTCNL command only from the originating, forms change, or master terminal. The formats of all the aliases of the PRTCNL command are:
PRTDSP – Viewing the status of a spool printer
Use the PRTDSP command to view the status of one or all of the spool printers. The formats of all the aliases of the PRTDSP command are:
SYSD,PRTCNL,printer_id PC
This parameter Specifies
printer_id The ID of the CICS printer on which the task is active.
SYSD,PRTDSP,[printer_id],[subfunction],[new_value] PD
This parameter Specifies
printer_id The ID of the CICS printer that you want to view. The default is all printers.
subfunction The subfunctions used to change printer parameters dynamically. See the field definitions in “Example 2” on page 395 for more information about the subfunctions.
new_value The new value that you want to assign to the subfunction parameter. See the field definitions “Example 2” on page 395 for more information about the new value for each subfunction.
PRTCNL – Canceling a spool print task 391

Chapter 13 Using CPMS/SYSD functional commands
Example 1
The following screen shows what appears when you issue the SYSD,PRTDSP command:
Field definitions
Field definitions are listed here in the order that they appear on the screen.
Term
The Term field contains the CICS terminal ID.
TPA
The TPA field contains (in three columns) information about the status of the job.
This column Contains
T The terminal destination type.
• A D means the terminal destination is a data set.
• A T means the terminal destination is a terminal.
P The print queue indicator. A W means the JOE Writer facility is started.
A The active task.
• A J means the PRTJOB task is active.
• A W means the PRTJOE (JOE writer) task is active.
392 CPMS/SYSD Reference Manual ~ 7.2

Chapter 13 Using CPMS/SYSD functional commands
Jobname
The Jobname field contains the name of the job being printed.
Job#
The Job# field contains the JES2-assigned number for the job.
Dataset
The Dataset field contains the ID of the data set being printed.
Form
The Form field contains the type of form on which the data set is being printed.
Copy
The Copy field contains the number of copies being printed.
Line#
The Line# field contains the number of lines in the output data set.
Page
The Page field contains the number of the page being printed.
PRTDSP – Viewing the status of a spool printer 393

Chapter 13 Using CPMS/SYSD functional commands
Status
The Status field contains the status of the print task.
This status code Means
DRAINING Printing will stop when the buffer for the printer is drained. This message might appear after you issue a PRTSTP command on a PRTJOE task.
HELD The printer is on hold. To continue printing, you must release the printer.
NONE STARTED There are no active print tasks.
PRINTING The job is printing.
RECOVERY RESTART An abend occurred. If the job was started with the PRTJOE command, CPMS/SYSD automatically restarts the printer when the scan delay expires.
SCAN CRITERIA The selection criteria for the PRTJOE task. CPMS/SYSD displays the destination queue and classes eligible for printing.
SCANNING A PRTJOE command was issued. CPMS/SYSD is searching the JES2 QUE for a job that meets the scan criteria.
WAITING FORMS The job is waiting for a forms change request.
WAITING WORK A PRTJOE command was issued and the task is waiting for jobs that meet the scan criteria.
394 CPMS/SYSD Reference Manual ~ 7.2

Chapter 13 Using CPMS/SYSD functional commands
Example 2
The following screen shows what appears when you issue the SYSD,PRTDSP,S003 command. See “Section definitions” on page 396 for an explanation of the fields.
PRTDSP – Page 001
PRTDSP – Page 002
PRTDSP – Viewing the status of a spool printer 395

Chapter 13 Using CPMS/SYSD functional commands
PRTDSP – Page 003
Section definitions
Section definitions are listed here in alphabetical order.
General Information
The General Information section contains a list of the general terminal specifications. Most of these specifications are set in PTBLMAIN. You can dynamically change some of these specifications. The format for dynamically changing a setting is provided in the field definitions. However, because of the impact of change, only people who are familiar with the system should be allowed to change them.
JOE Writer AutoStart Default Options
The JOE Writer AutoStart Default Options section displays the auto-start options for the JOE writer. If the JOE Writer is active, CPMS/SYSD displays fields similar to the fields in “PRTDSP – Page 003” on page 396. These fields show the selection criteria and Sysout disposition options for the JOE writer.
JOE Writer Information
The JOE Writer Information section contains the status of the JOE writer. If the JOE writer is active, CPMS/SYSD displays fields similar to the fields in “PRTDSP – Page 002” on page 395. You can view the selection criteria and SYSOUT disposition options for the JOE writer.
396 CPMS/SYSD Reference Manual ~ 7.2

Chapter 13 Using CPMS/SYSD functional commands
Printer Status Information
The Printer Status Information section contains statistics about the job being printed. If a print task is active, CPMS/SYSD displays fields similar to those shown in “PRTDSP – Page 003” on page 396.
Field definitions
Field definitions are listed here in alphabetical order.
Beginning Separator Pages
The Beginning separator pages field contains the number of separator pages printed at the beginning of the output. To change the number of beginning separator pages, issue the following command:
Carriage Size
The Carriage size field contains the number of columns that the printer is set to print. To change the carriage size, issue the following command:
Class(es) To Be Printed
The Class(es) to be printed field contains a list of the JES2 output classes for which the JOE writer scans when looking for jobs to print.
Copies
The Copies field contains the number of copies being printed.
SYSD,PD,printer_id,SEPBGN,number
This parameter Specifies
printer_id The ID of the printer that you want to change.
number The number of separator pages that you want to print.
SYSD,PD,printer_id,CARSIZ,number
This parameter Specifies
printer_id The ID of the printer that you want to change.
number The number of columns that you want the printer to print.
PRTDSP – Viewing the status of a spool printer 397

Chapter 13 Using CPMS/SYSD functional commands
Current Buffer PTR
The Current buffer PTR field contains the current hexadecimal address for the buffer pointer.
Current Form Type Loaded
The Current form type loaded field contains the form on which the printer is set to print. To change the form type, issue the following command:
Current Outstanding Print Tasks
The Current outstanding print tasks field contains the print tasks queued up for the JOE writer. This command is for recovery purposes only. You should issue it only when a printer task is hung up and needs to be restarted. To reset the current outstanding print task counter to zero (0) for recovery purposes, issue the following command:
Current Line Number
The Current line number field contains the current SYSOUT line number being printed.
Current TWA PTR
The Current TWA PTR field contains the current hexadecimal address for the transaction work-area pointer.
Dataset
The Dataset field contains the number of the JES2 data set being printed.
SYSD,PD,printer_id,FORM,form
This parameter Specifies
printer_id The ID of the printer that you want to change.
form The new form that you want the printer to handle.
SYSD,PD,printer_id,RSETTASK
This parameter Specifies
printer_id The ID of the printer that you want to reset.
398 CPMS/SYSD Reference Manual ~ 7.2

Chapter 13 Using CPMS/SYSD functional commands
Default FCB For This Printer
The Default FCB for this printer field contains the default FCB that the printer is using. To change the default FCB, issue the following command:
Default UCS For This Printer
The Default UCS for this printer field contains the default universal character set (UCS) that the printer is using. To change the UCS, issue the following command:
Definite Response Frequency
The Definite response frequency field contains the number of buffers printed before CICS requests a definite response from the printer. To change the number of buffers, issue the following command:
SYSD,PD,printer_id,DFTFCB,new_fcb
This parameter Specifies
printer_id The ID of the printer that you want to change.
new_fcb The 8-byte name of the FCB that you want to assign to the printer.
SYSD,PD,printer_id,DFTUCS,new_ucs
This parameter Specifies
printer_id The ID of the printer that you want to change.
new_ucs The name of the new UCS that you want to assign to the printer.
SYSD,PD,printer_id,CHKRESP,number
This parameter Specifies
printer_id The ID of the printer that you want to change.
number The number of buffers that you want to print before CICS requests a definite response.
PRTDSP – Viewing the status of a spool printer 399

Chapter 13 Using CPMS/SYSD functional commands
Delay Between Buffers (SECS)
The Delay between buffers (SECS) field contains the delay, in seconds, between printing the buffers. To set or change the delay, issue the following command:
Destination Type
The Destination type field contains the destination type assigned to the device. The type can be either a terminal or a DCT destination. For a terminal, CPMS/SYSD prints the output. For a DCT destination, CPMS/SYSD stores the output on a disk.
Emulation
The Emulation field contains the terminal type that the printer emulates. To change the type of emulation, issue the following command:
SYSD,PD,printer_id,DELAY,setting
This parameter Specifies
printer_id The ID of the printer that you want to change.
setting The number of seconds to delay between printing the buffers. You can omit leading zeros.
SYSD,PD,printer_id,emulation
This parameter Specifies
printer_id The ID of the printer that you want to change.
emulation The type of emulation that you want to assign to the printer. Valid emulation types are 3286, 3287, 3289, and ASIS.
The ASIS option is used mainly for debugging. If you specify ASIS, CPMS/SYSD does not perform character translation.
400 CPMS/SYSD Reference Manual ~ 7.2

Chapter 13 Using CPMS/SYSD functional commands
Ending Separator Pages
The Ending separator pages field contains the number of separator pages printed at the end of a print out. To change the number of ending separator pages, issue the following command:
Form
The Form field contains the type of forms that the printer is using.
Forms Control Buffer (FCB)
The Forms control buffer (FCB) field contains the FCB that the printer is using.
Forms Change Terminal
The Forms change terminal field contains the forms change terminal assigned to the printer. To change the forms change terminal, issue the following command:
Job Name
The Job name field contains the name of the job being printed.
Job Number
The Job number field contains the JES2-assigned job number.
SYSD,PD,printer_id,SEPEND,number
This parameter Specifies
printer_id The ID of the printer that you want to change.
number The number of ending separator pages that you want to print. You can omit leading zeros.
SYSD,PD,printer_id,CHGTERM,term
This parameter Specifies
printer_id The ID of the printer that you want to change.
term The forms change terminal that you want to assign to the printer.
PRTDSP – Viewing the status of a spool printer 401

Chapter 13 Using CPMS/SYSD functional commands
Line Number
The Line number field contains the line number in the data set being printed.
Line Number Within Page
The Line number within page field contains the number of the line printing on the given page. See “Page Number” on page 403 for more information.
Lines Per Page
The Lines per page field contains the number of lines that the printer prints on each page.
Master Terminal
The Master terminal field contains the master terminal assigned to the printer. You can set the master terminal for all devices in SYSDPTBL or you can change each terminal dynamically. To change the master terminal dynamically, issue the following command:
Maximum Number of Lines Per Dataset
The Maximum number of lines per dataset field contains the maximum number of lines in the data set that can be printed. Set this number in PTBLMAIN.
Number of Print Buffers
The Number of print buffers field contains the number of print buffers assigned to this terminal.
Originating Terminal
The Originating terminal field contains the ID of the terminal that issued the print command.
SYSD,PD,printer_id,MASTERM,master_id
This parameter Specifies
printer_id The ID of the printer that you want to change.
master_id The ID of the master terminal that you want to assign to the printer.
402 CPMS/SYSD Reference Manual ~ 7.2

Chapter 13 Using CPMS/SYSD functional commands
Outstanding Print Task Limit
The Outstanding print task limit field contains the AIDLIMT setting for a printer. The AIDLIMT parameter defines the number of outstanding CICS START commands that the global JOE-writer scanning task queues for the printer. To change the limit, issue the following command:
Page Number
The Page number field contains the number of the page being printed.
Print Buffer Size
The Print buffer size field contains the number of bytes in each buffer.
Printer Terminal Identifier
The Printer terminal identifier field contains the printer ID.
PrtJob Is Doing The Printing
The PrtJob is doing the printing field contains the task doing the printing. Valid tasks are PRTJOB or PRTJOE.
Queue To Be Printed
The Queue to be printed field contains the JES2 queue names that this printer prints.
SYSD,PD,printer_id MAXTASK,number
This parameter Specifies
printer_id The ID of the printer that you want to change.
number The number of outstanding CICS print tasks for a JOE writer that you want the global JOE-writer scanning task to queue. You must type a number from 0 to 10.
PRTDSP – Viewing the status of a spool printer 403

Chapter 13 Using CPMS/SYSD functional commands
Special Printer Options In Effect
The Special Printer Options in Effect field contains the options that are in effect for the printer. To change the options, issue the following command:
Status
The Status field contains the status of the task. Valid statuses are HELD, PRINTING, or WAITING FOR xxx.
SYSD,PD,printer_id,OPTON|OPTOFF,options
This parameter Specifies
printer_id The ID of the printer that you want to change.
option The options that you want to assign to the printer.
Type To have the printer
DISCON Disconnect from CICS when printing is done (VTAM® only).
FMCGBP Bypass all forms change requests.
FRMFED Use form feed characters on printers that support X'0C' as TOP OF FORM. This speeds up the printing process and provides better top-of-form recovery.
FRMPRT Process printer-attended forms changes. CPMS/SYSD supports printer PA keys.
FRMSEL Print the same forms together.
RTACMP Use repeat-to-address control characters to compress printer output data streams. The RTACMP and SCSCMP options are mutually exclusive.
SCSCMP Use SCS horizontal tabs to compress printer output data streams. The SCSCMP and RTACMP options are mutually exclusive.
SETVRT Use vertical tabs from the FCB for the forms length.
UCSCTL Issue leading and trailing control characters based on the UCS= parameter of SYSOUT.
404 CPMS/SYSD Reference Manual ~ 7.2

Chapter 13 Using CPMS/SYSD functional commands
Sysout Disposition Options
The Sysout Disposition Options field specifies what the writer does with the SYSOUT after the writer finishes printing. These options are specified when CPMS/SYSD starts the JOE writer. The writer can purge the output or route it to a new class, destination, or both. This field also describes the dispositions of the output during printing. For example, the Sysout Disposition Options field indicates whether the output is enqueued during printing.
PRTFRM – Replying to a forms change request
The PRTFRM command replies to a forms change request from a PRTJOB or PRTJOE spool print task. When the print task requires a different form, CPMS/SYSD issues a request on the originating terminal indicating the current form and the new form and waits for your response. After you change the form in the printer, issue the PRTFRM command to restart the printing. If a print task is hanging, it is usually waiting for new forms.
The PRTFRM command answers a forms change request (FCR).
The formats of all the aliases of the PRTFRM command are:
You can issue the PRTFRM command only from the originating, forms change, or master terminal. If the originating terminal is a console, CPMS/SYSD displays the forms change message on the console. The forms change message scrolls off the console when the operator responds to the FCR with the OS modify command.
CPMS/SYSD automatically prompts the PRTFRM command at the bottom of the FCR display. Press ENTER to issue the command.
SYSD,PRTFRM,printer_id PF
This parameter Specifies
printer_id The ID of the CICS printer on which the print task is active.
PRTFRM – Replying to a forms change request 405

Chapter 13 Using CPMS/SYSD functional commands
PRTHLD – Holding a spool printer
The PRTHLD command holds a PRTJOB or PRTJOE spool print task after CPMS/SYSD prints the current buffer. You can issue this command any time after the print task starts. You can issue the PRTHLD command only from the originating, forms change, or master terminal. The formats of all the aliases of the PRTHLD command are:
The print task accepts all other commands after it has been held. The commands automatically restart the printing unless otherwise indicated.
To restart the spool print task, issue the PRTHLD command again.
PRTJOB – Printing a job on a CICS printer
The PRTJOB command prints all or part of the output for a job on a CICS printer. This command emulates a normal JES2 writer, except that it does not purge any of the job. The formats of all the aliases of the PRTJOB command are:
SYSD,PRTHLD,printer_id PH
This parameter Specifies
printer_id The ID of the CICS printer on which the print task is active.
SYSD,PRTJOB,job,printer_id,[sysout_id],[line],[begin_col],[scan_parms] PJ SPLPRT
This parameter Specifies
job The name or number of the batch job that you want to print. For multiple jobs with the same name, CPMS/SYSD uses the first job it finds. If you specify the job number, type it exactly as it appears when you issue the N or JOB command, omitting leading zeros.
printer_id The ID of the printer on which you want the job to print.
406 CPMS/SYSD Reference Manual ~ 7.2

Chapter 13 Using CPMS/SYSD functional commands
sysout_id The type of JES2 SYSOUT data set that you want to print. The uppercase character represents the minimum abbreviation allowed.
Type To print
Jcl Execution JCL messages.
Log System log messages. This is the default.
Msg System job messages.
nnn User SYSOUT data sets referred to by the job number shown when you issue the SPLDSN command.
line The line number in the SYSOUT data set where you want to start the printing, stop the printing, or both. This parameter is a sublist of the beginning and ending line numbers. The default beginning line number is 1. The default ending line number is the last line in the data set. To see the number of lines in the data set, use the SPLDSN command.
For example:
Type To start printing on
,111 Line 111 and print to the end of the data set.
,(111) Line 111 and print to the end of the data set.
,(,10) Line 1 and end on line 10.
,(10,20) Line 10 and end on line 20.
begin_col The column number in which you want the output to start. The default is 1. The carriage control character does not print.
This parameter Specifies
PRTJOB – Printing a job on a CICS printer 407

Chapter 13 Using CPMS/SYSD functional commands
PRTJOE – Starting a spool JOE writer
The PRTJOE command is an alias of the STRWTR command. This command allows you to start the CPMS/SYSD JOE writer. (See “STRWTR – Starting a spool JOE writer” on page 431 for more information.) The formats of all the aliases of the PTRJOE command are:
scan_parms The sublist on which you want CPMS/SYSD to perform a scan. This parameter is optional. Printing starts with the scan constant.
This parameter consists of the following subparameters:
• The search constant. If this parameter contains nonalphanumeric characters, enclose it with single quotation marks.
• The left search column.
• The right search column.
CPMS/SYSD searches between these two columns. If the left search column is not specified, the default is column 1. If the right search column is not specified, the default is the actual line length.
The following examples search for the word error:
Type To scan
,ERROR Each entire line.
,'ERROR' Each entire line.
,('ERROR',10) Each line starting in column 10.
,(ERROR,10,20) From column 10 through column 20.
,(ERROR,20) From column 1 through column 20.
You must always specify a constant in order for the scan to occur.
SYSD,PRTJOE,printer_id,[writer_id],[queue_id],[sysout_classes],[form_id], [DISP,NONSEL] [DISP,PURGE] [DISP,NEWDEST,new_dest] [DISP,NEWCLASS,new_class] STRWTR SW
This parameter Specifies
408 CPMS/SYSD Reference Manual ~ 7.2

Chapter 13 Using CPMS/SYSD functional commands
PRTPRG – Purging a spool printer
The PRTPRG command purges a spool print task. For a PRTJOB task, CPMS/SYSD stops printing the current job and then the print task stops. For a PRTJOE task, the PRTPRG command purges the current job and then continues selecting work. You can issue this command any time after the print task starts, even if the print task is on hold.
You can issue the PRTPRG command only from the originating, forms change, or master terminal. The formats of all the aliases of the PRTPRG command are:
R – Viewing outstanding operator requests
Use the R command to view the outstanding messages shown on the main operator console. Each message has a number that the operator uses to answer the request. The format of the R command is:
The following screen shows what appears when you issue the SYSD,R command:
SYSD,PRTPRG,printer_id PP
This parameter Specifies
printer_id The ID of the CICS printer on which the task is active.
SYSD,R
PRTPRG – Purging a spool printer 409

Chapter 13 Using CPMS/SYSD functional commands
RECALL – Recalling an archived data set
SYSD only
The RECALL command recalls the specified data set. The format of the RECALL command is:
RECATLG – Recataloging an OS data set
SYSD only
The RECATLG command deletes a data set entry from the catalog and then adds it and any associated volume serial numbers to the catalog. The format of the RECATLG command is:
SYSD,RECALL,dsname
This parameter Specifies
dsname The 1-character to 44-character name of the data set that you want to recall.
SYSD,RECATLG,unit_type,vol_list,dsn
This parameter Specifies
unit_type The 1-character to 8-character device type defined at system generation. You must specify the unit type the way you specify the UNIT parameter on a DD statement in the JCL.
vol_list A list of one to five volume serial numbers. Each number is one to six characters long. The volumes must be mounted on the OS when you issue this command. If you enter multiple volume serial numbers, separate each by a comma or blank and enclose the whole list with parentheses.
dsn The 1-character to 44-character name of the data set that you want to recatalog.
410 CPMS/SYSD Reference Manual ~ 7.2

Chapter 13 Using CPMS/SYSD functional commands
RELEASE – Releasing a held job
The RELEASE command releases a job held in a JES2 queue. The job continues its cycle through the OS. If the job is in the JES2 input queue, it becomes eligible for execution. If the job is in the JES2 output queue, it becomes eligible for printing. The format of the RELEASE command is:
RENAME – Renaming a data set
SYSD only
The RENAME command renames a data set but does not change the catalog entry for the data set. The format of the RENAME command is:
SYSD,RELEASE,job
This parameter Specifies
job The job number that you want to release.
SYSD,RENAME,vol_list,old_dsn,new_dsn
This parameter Specifies
vol_list A list of one to five volume serial numbers. Each number is one to six characters long. The volumes must be mounted on the OS when you issue this command. If you enter multiple volume serial numbers, separate each by a comma or blank and enclose the list with parentheses.
old_dsn The 1-character to 44-character dataset name that you want to rename.
new_dsn The new 1-character to 44-character dataset name.
RELEASE – Releasing a held job 411

Chapter 13 Using CPMS/SYSD functional commands
ROUTE – Routing the output for a job
The ROUTE command is an alias of the SPLRTE command. This command routes a batch job from the JES2 output queue to an OS writer and then modifies the batch job for printing. (See “SPLRTE – Routing the output for a job” on page 423 for more information.) The formats of all the aliases of the ROUTE command are:
SCRATCH – Scratching a data set
SYSD only
The SCRATCH command scratches a data set, but does not uncatalog it. This command completely removes the data set from the VTOC and returns the space it occupied to free space. The format of the SCRATCH command is:
SD – Viewing the output for a job
The SD command is an alias of the SPLDSP command. This command allows you to view the output for a job from the JES2 spool. (See “SPLDSP – Viewing the output for a job” on page 418 for more information.) The formats of all the aliases of the SD command are:
SYSD,ROUTE,jobnumber,destination SPLRTE SR
SYSD,SCRATCH,vol_list,dsn
This parameter Specifies
vol_list A list of one to five volume serial numbers where the data set resides. Each number is one to six characters long. The volumes must be mounted on the OS when you issue this command. If you enter multiple volume serial numbers, separate each by a comma or blank and enclose the list of volume serial numbers with parentheses.
dsn The 1-character to 44-character name of the data set that you want to scratch.
SYSD,SD,job,[sysout_id],[line_number],[begin_col],[scan_parms] SPLDSP
412 CPMS/SYSD Reference Manual ~ 7.2

Chapter 13 Using CPMS/SYSD functional commands
SHUT – Terminating CPMS/SYSD
Depending on the Type parameter, the SHUT command temporarily terminates the auxiliary tasks for CPMS/SYSD, disables CPMS/SYSD transactions, or disables CPMS/SYSD and terminates CICS. Normally, you issue this command only when you no longer need the CPMS/SYSD functions.
CAUTION You must shut down CPMS/SYSD with this command or through a PLT entry. Otherwise, CICS abends with an SA03 when CICS terminates.
The format of the SHUT command is:
SJ – Viewing the output elements for a job
The SJ command is an alias of the SPLJOE command. This command allows you to view the job output elements that JES2 maintains. (See “SPLJOE – Viewing the output elements for a job” on page 420 for more information.) The formats of all the aliases of the SJ command are:
SYSD,SHUT,<type>
This parameter Specifies
type The parameter that CPMS/SYSD passes to the CEMT PERFORM SHUT command.
Type To
D Terminate CPMS/SYSD and disable transactions.
T Temporarily shut down the CPMS/SYSD auxiliary tasks without disabling the transactions. The next CPMS/SYSD operation requiring the tasks must reinitialize them. This parameter is normally used to get a new copy of the auxiliary task programs.
YES Terminate CPMS/SYSD. Issue the EXEC CICS PERFORM SHUTDOWN command to shut down CICS.
SYSD,SJ,[job],[destination] SPLJOE
SHUT – Terminating CPMS/SYSD 413

Chapter 13 Using CPMS/SYSD functional commands
SN – Viewing the output dataset summary for a job
The SN command is an alias of the SPLDSN command. This command allows you to view statistics about the data sets for a job in the JES2 spool. (See “SPLDSN – Viewing the output data set summary for a job” on page 415 for more information.) The formats of all the aliases of the SN command are:
SP – Purging the output for a job
The SP command is an alias of the SPLPRG command. This command allows you to purge the output for a batch job from the JES2 output queue and then remove the output from the system. (See “SPLPRG – Purging the output for a job” on page 422 for more information.) The formats of all the aliases of the SP command are:
SPLCLN – Cleaning the spool print queue
The SPLCLN command selectively purges jobs from the JES2 queue. By default, CPMS/SYSD scans for jobs that are more than 36 hours old or have more than 25,000 lines of output and then purges them. You can use the JES208 user exit to control job purges. To protect Friday-night jobs, this command does not operate on Saturday, Sunday, or Monday.
The SPLCLN command is controlled by the SPLCLNCLASS, SPLCLNJOBNAME, SPLCLNLINES, and SPLCLNHOURS parameters in SYSDSETS. Your CPMS/SYSD administrator sets the parameters in SYSDSETS.
The format of the SPLCLN command is:
SYSD,SN,job,[ALL] SPLDSN
SYSD,SP,job SPLPRG
SYSD,SPLCLN,[DEST],[TEST]
This parameter Specifies
DEST The JES2 queue that you want to scan. The default is established by the CPMS/SYSD administrator.
TEST List on the system console jobs that will be purged without actually purging them.
414 CPMS/SYSD Reference Manual ~ 7.2

Chapter 13 Using CPMS/SYSD functional commands
SPLDSN – Viewing the output data set summary for a job
Use the SPLDSN command to view statistics about the data sets for a job in the JES2 spool. These statistics can help you determine the characteristics that CPMS/SYSD will use for displaying or printing the data set. The formats of all the aliases of the SPLDSN command are:
Example
The following screen shows what appears when you issue the SYSD,SPLDSN,J000029 command:
SYSD,SPLDSN,job,[ALL] SN
This parameter Specifies
job The name or number of the batch job that you want to view. If you have multiple jobs with the same name, CPMS/SYSD displays the first one. If you use the job parameter, type the name or number of the batch job exactly as shown when you issue the N or JOB command, omitting leading zeros.
ALL Display datasets with zero records.
SPLDSN – Viewing the output data set summary for a job 415

Chapter 13 Using CPMS/SYSD functional commands
Field definitions
Field definitions are listed here in the order that they appear on the screen.
DSN
The DSN field contains the dataset name or number.
HSNC
The HSNC field contains (in four columns) a summary of the dataset status.
NumLin
The NumLin field contains the approximate number of lines in the data set.
Dest
The Dest field contains the ID of the printer on which the data set is to be printed.
Form
The Form field contains the form on which the data set is to be printed.
Copies
The Copies field contains the number of printed copies requested.
FCB
The FCB field contains the FCB being used. Four asterisks in a row (****) represents the default FCB that your CPMS/SYSD administrator defined in SYSDSETS.
UCS
The UCS field contains the universal character set used to display or print the data set.
This column Specifies
H The data set is held.
S The data set is a spin data set.
N A nonprintable output data set.
C The class in which the data set resides. The class can be A through Z or 0 through 9.
416 CPMS/SYSD Reference Manual ~ 7.2

Chapter 13 Using CPMS/SYSD functional commands
RecFm
The RecFm field contains the format of the records in the data set.
LRecL
The LRecL field contains the logical record length for the data set.
DDName
The DDName field contains the 1-character to 8-character DDNAME that is the last qualifier of the JES2 dataset name.
GroupID
The GroupID field contains the ID of the group to which the output element belongs. JES2 assigns the group ID and the JOE ID. Together they form the OUTGROUP.
SPLDSN – Viewing the output data set summary for a job 417

Chapter 13 Using CPMS/SYSD functional commands
SPLDSP – Viewing the output for a job
Use the SPLDSP command to view the output for a job from the JES2 spool. The display acts as a window passing over the output. Various parameters shift the display up, down, left, or right. The formats of all the aliases of the SPLDSP command are:
SYSD,SPLDSP,job,[sysout_id],[line_number],[begin_col],[scan_parms] SD
This parameter Specifies
job The name or number of the batch job that you want to view. For multiple jobs with the same name, CPMS/SYSD uses the first name or number you listed. If you use the job parameter, type the name or number of the batch job exactly as shown when you issue the N or JOB command, omitting leading zeros.
This parameter consists of the following subparameters:
• Job name or number
• Job class
sysout_id The SYSOUT dataset type that you want to view. Specify input and output data sets using the same parameter. The uppercase characters represent the minimum abbreviation allowed.
Type To view
CC Condition codes.
Log System log messages. This is the default.
Jcl Execution JCL messages.
Msg System job messages.
nnn User SYSOUT data sets by number as shown when you issue the SPLDSN command.
line_number The first line number in the SYSOUT data set that you want to view. The default is 1. To view the last line, type E as the first character of this parameter.
begin_col The first column that you want to view. The default is column 1. Most SYSOUT data is formatted in 132 columns.
418 CPMS/SYSD Reference Manual ~ 7.2

Chapter 13 Using CPMS/SYSD functional commands
scan_parms The constant for which you want to scan the data set. If this parameter is not specified, no scan occurs.
This parameter consists of the following subparameters:
• The search constant. If this parameter contains nonalphanumeric characters or blanks, enclose it with single quotation marks.
• The left search column.
• The right search column.
CPMS/SYSD searches between these two columns. If the left search column is not specified, the default is column 1. If the right search column is not specified, the default is the ending column, which is usually 132.
The following examples search for the word error
Type To scan
,ERROR Each entire line.
,'ERROR' Each entire line.
,('ERROR',10) Each line starting in column 10.
,(ERROR,10,20) From column 10 through column 20.
,(ERROR,,20) From column 1 through column 20.
You need to enter the search constant in the scan_parms parameter only once. CPMS/SYSD performs the search each time you press ENTER. To browse the data without performing the search, use the following PF keys. CPMS/SYSD ignores the search constant, but reprompts it.
Use this PF key To page
PF7 Up by one-half a screen.
PF8 Down by one-half a screen.
Note If the job is active, the up and down commands will not advance to the previous or next data set.
PF10 Left by one-half a screen.
PF11 Right by one-half a screen.
This parameter Specifies
SPLDSP – Viewing the output for a job 419

Chapter 13 Using CPMS/SYSD functional commands
SPLJOE – Viewing the output elements for a job
Use the SPLJOE command to view the job output elements that JES2 maintains. CPMS/SYSD displays information about each output group. This information helps you determine the characteristics for printing the job. The formats of all the aliases of the SPLJOE command are:
Example
The following screen shows what appears when you issue the SYSD,SPLJOE command:
SYSD,SPLJOE,[job],[destination] SJ
This parameter Specifies
job The name of the batch job that you want to view. The default is all jobs.
destination The destination ID of a remote or unit queue. The default is all output queues.
420 CPMS/SYSD Reference Manual ~ 7.2

Chapter 13 Using CPMS/SYSD functional commands
Field definitions
Field definitions are listed here in the order that they appear on the screen.
Job#
The Job# field contains the JES2-assigned job number.
Jobname
The Jobname field contains the name of the job on the JOB card.
CNOHSRU
The CNOHSRU field contains (in seven columns) a summary of the attributes for the output element.
PP
The PP field contains the priority level for the job.
Dest
The Dest field contains the destination ID of the local or remote device to which the output is sent.
Form
The Form field contains the form on which the output element is to be printed.
This column Specifies
C The job class for the output element.
N A nonprintable output element.
O Whether the output element will be offloaded to a tape or disk.
H A held output element.
S Whether the output element is a spin data set. This means that the output is eligible for printing as soon as the data set has been created, no matter how many of the data sets for the job are left to be printed.
R Whether the output element is being printed.
U Whether the output element is being punched.
SPLJOE – Viewing the output elements for a job 421

Chapter 13 Using CPMS/SYSD functional commands
FCB
The FCB field contains the FCB used to print the output element.
UCS
The UCS field contains the universal character set used to print or display the job.
#Lines
The #Lines field contains the approximate number of lines in the output element.
GrpID
The GrpID field contains the ID of the group to which the element belongs. JES2 assigns the group ID and the JOE ID. Together they form the OUTGROUP.
SPLPRG – Purging the output for a job
The SPLPRG command purges the output for a batch job from the JES2 output queue and then removes the output from the system. The formats of all the aliases of the SPLPRG command are:
SPLPRT – Printing a job on a CICS printer
The SPLPRT command is an alias of the PRTJOB command. This command allows you to print all or part of the output for a job on a CICS printer. (See “PRTJOB – Printing a job on a CICS printer” on page 406 for more information.) The formats of all the aliases of the SPLPRT command are:
SYSD,SPLPRG,job SP
This parameter Specifies
job The JES2 name or number of the job that you want to purge.
SYSD,SPLPRT,job,printer_id,[sysout_id],[line],[begin_col],[scan_parms] PRTJOB PJ
422 CPMS/SYSD Reference Manual ~ 7.2

Chapter 13 Using CPMS/SYSD functional commands
SPLRTE – Routing the output for a job
The SPLRTE command routes a batch job from the JES2 output queue to an OS writer and then modifies the batch job for printing. CPMS/SYSD routes the job to the destination and then releases it. If the job is on hold or already resides in the specified destination, CPMS/SYSD releases it. The formats of all the aliases of the SPLRTE command are:
SR – Routing the output for a job
The SR command is an alias of the SPLRTE command. This command allows you to route a batch job from the JES2 output queue to an OS writer and then modify the batch job for printing. (See “SPLRTE – Routing the output for a job” on page 423 for more information.) The formats of all the aliases of the SR command are:
STAT – Viewing CICS general statistics
SYSD only
Use the STAT command to view general statistics about CICS including execution, current task, main storage, and temporary storage information. The format of the STAT command is:
SYSD,SPLRTE,jobnumber,destination ROUTE SR
This parameter Specifies
jobnumber The number of the job that you want to route.
destination The destination to which you want to route the job. The default destination is LOCAL.
For JES2, the destination parameter specifies a destination queue.
SYSD,SR,jobnumber,destination SPLRTE ROUTE
SYSD,STAT,[TASK]
This parameter Specifies
TASK Show all active and suspended CICS tasks.
SPLRTE – Routing the output for a job 423

Chapter 13 Using CPMS/SYSD functional commands
STATUS – Viewing the status of a job
The STATUS command is an alias of the JOB command. This command allows you to find all occurrences of a job name in the JES2 spool and then lets you track the job through the queues. (See “JOB – Viewing the status of a job” on page 362 for more information.) The formats of all the aliases of the STATUS command are:
STE – Viewing the status of a job
Use the STE command to view in an extended format more information about the status of a job than the JOB command shows. (See “JOB – Viewing the status of a job” on page 362 for more information.) The STE command might run slower than the JOB command.
The format of the STE command is:
SYSD,JOB,[jobname],[jobnumber],[opts] STATUS ST STE,[jobname],[jobnumber],[opts],[owner]
SYSD,STE,[jobname],[jobnumber],[opts],[owner]
This parameter Specifies
jobname • The name of the batch job that you want to view. All jobs with this name will appear. The default is to show all of the jobs in the JES2 spool.
• You can enter the name of the batch job as a mask. Enter the beginning letters of the job name followed by an asterisk (*) to select a group of jobs. For example, type ABC* to have CPMS/SYSD show all of the batch jobs that start with the characters ABC.
jobnumber The job number of the specific batch job that you want to view.
Use J, S, or T to indicate a job, started task, or TSO respectively, followed by the job number. Leading zeros can be omitted. For example, type J123 to view job number J123.
424 CPMS/SYSD Reference Manual ~ 7.2

Chapter 13 Using CPMS/SYSD functional commands
opts The batch jobs, TSO sessions, or started tasks that you want CPMS/SYSD to display.
Type To
B View only batch jobs that are being executed.
T View only TSO sessions that are being executed.
S View only started tasks that are being executed.
A View batch jobs, TSO sessions, and started tasks that are being executed.
* View all jobs.
xxx View any combination of batch jobs, TSO sessions, and started tasks that are being executed. Specify B, T, S, or any combination thereof.
Leave blank View all jobs.
owner The job owner or submitter. CPMS/SYSD displays only those jobs with owners that match the value specified in this parameter. This parameter is valid only when you use the STE command.
You can enter the name of the owner as a mask. Enter the beginning letters of the job owner followed by an asterisk (*) to select a group of jobs. For example, type ABC* for CPMS/SYSD to view all of the jobs that have an owner that starts with the characters ABC.
If you leave this parameter blank, CPMS/SYSD does not filter the results based on the job owner.
This parameter Specifies
STE – Viewing the status of a job 425

Chapter 13 Using CPMS/SYSD functional commands
The following screen shows what appears when you issue the SYSD,STE,JL* command:
Field definitions
Field definitions are listed here in the order that they appear on the screen.
Job#
The Job# field contains the JES2-assigned job number.
Jobname
The Jobname field contains the started task procedure or job name found on the JOB card.
STA
The STA field will display the phase of the job.
This type Identifies
ACT Active job.
WAIT Waiting job.
COMP Completed job.
426 CPMS/SYSD Reference Manual ~ 7.2

Chapter 13 Using CPMS/SYSD functional commands
H
The H field indicates if the job is held.
Pri
The Pri field contains the priority, in the queue, for the job.
The Print field contains the print destination ID for the job.
Punch
The Punch field contains the punch destination ID for the job.
Date
The Date field contains the date on which the job entered the system.
Time
The Time field contains the time at which the job entered the system.
Lines
The Lines field contains the number of printable lines in the job.
Owner
The Owner field contains the name of the job owner.
This column Contains
H An H if the job is held.
A An A if the job was held using a HOLD ALL command.
STE – Viewing the status of a job 427

Chapter 13 Using CPMS/SYSD functional commands
STORAGE – Viewing CICS storage
SYSD only
The STORAGE command dynamically displays the CICS storage statistics showing the current state of all of the DSA and extended DSA (EDSA) pools. If you want the command to reissue itself automatically, enter a number of seconds in the optional field after the command.
The ENDAUTO command is reprompted on each display automatically. To end the autodisplay, press ENTER. CPMS/SYSD issues the ENDAUTO command.
Disable the auto-display feature using the AUTO01 user exit. The return seconds from AUTO01 are not used.
The format of the STORAGE command is:
The following screen shows what appears when you issue the SYSD,STORAGE command:
SYSD,STORAGE<,secs>
This parameter Specifies
,secs The number of seconds after which you want CPMS/SYSD to reissue the command automatically.
428 CPMS/SYSD Reference Manual ~ 7.2

Chapter 13 Using CPMS/SYSD functional commands
Field definitions
Field definitions are listed here in the order that they appear on the screen.
Total Storage
The Total Storage field contains the name of the storage pool.
Limit (K)
The Limit (K) field contains the limit that the region size and SIT parameters (EDSALIM=) set. The value for the Limit (K) field is in kilobytes.
In-Use (K)
The In-Use (K) field contains the current storage amount in use. This limit expands as necessary, up to the amount entered in the Limit (K) field. The value for the In-Use (K) field is in kilobytes.
HWM (K)
The HWM (K) field contains the high-water mark for the amount of storage in use in the storage pool. The value for the HWM (K) field is in kilobytes.
DSAName
The DSAName field lists the DSA pools.
Size (K)
The Size (K) field contains the current size of the DSA pool. The value for the Size (K) field is in kilobytes.
Free (K)
The Free (K) field contains the current amount of free space in the DSA pool. The value for the Free (K) field is in kilobytes.
SOS
The SOS field contains the number of times that the DSA pool has been short on storage since the last CICS cycle.
SV
The SV field contains the number of times that the DSA pool has had a storage violation.
STORAGE – Viewing CICS storage 429

Chapter 13 Using CPMS/SYSD functional commands
Free Summary
The Free Summary field summarizes the free space in the two storage pools of the current storage amount in use.
Current (K)
The Current (K) field contains the current amount of free space in the storage pool. The value for the Current (K) field is in kilobytes.
HWM (K)
The HWM (K) field contains the high-water mark for the free space. The value for the HWM (K) field is in kilobytes.
LWM (K)
The LWM (K) field contains the low-water mark for the free space. The value for the LWM (K) field is in kilobytes.
STPWTR – Stopping a spool JOE writer
The STPWTR command stops a STRWTR spool print task. The spool writer finishes printing the current job and then stops.
Note Using the STPWTR command causes an orderly shutdown of the function, not an immediate stop. For an immediate stop, issue the PRTPRG command after you issue the STPWTR command.
You can issue the STPWTR command only from the originating, forms change, or master terminal. The format of the STPWTR command is:
SYSD,STPWTR,printer_id
This parameter Specifies
printer_id The CICS printer on which the task is active.
430 CPMS/SYSD Reference Manual ~ 7.2

Chapter 13 Using CPMS/SYSD functional commands
STRWTR – Starting a spool JOE writer
The STRWTR command starts the CPMS/SYSD JOE writer. This command assigns the CPMS/SYSD writer and selection criteria to a printer. The writer scans the specified JES2 queues for SYSOUT data sets that meet the selection criteria. If the writer finds any, it prints the data sets; purges, holds, or routes them; and then repeats the JES2-queue scan. If it does not find any data sets that meet the selection criteria, the writer sleeps for the specified scan interval and then repeats the scan. During the sleep interval, other printing can occur.
The formats of all the aliases of the STRWTR command are:
SYSD,STRWTR,printer_id,[writer_id],[queue_id],[sysout_classes],[form_id], [DISP,NONSEL] [DISP,PURGE] [DISP,NEWDEST,new_dest] [DISP,NEWCLASS,new_class] SW PRTJOE
This parameter Specifies
printer_id The CICS printer on which you want to start the writer.
writer_id The JES2 SYSOUT writer name from which the writer selects data sets.
queue_id The JES2 destination queue from which the writer selects jobs. Valid destinations are LOCAL, remote_number, or unit_queue.
sysout_classes The JES2 SYSOUT classes from which the writer selects jobs. The job class is specified in the SYSOUT parameter on the DD statement for the print file. The default is A through Z and 0 through 9.
form_id The forms type from which the writer selects jobs.
DISP,NONSEL Put the SYSOUT data set on hold status after it is printed.
DISP,PURGE Purge the SYSOUT data set after it is printed.
DISP,NEWDEST,new_dest Route the SYSOUT data set to a new destination after it is printed.
DISP,NEWCLASS,new_class Route the SYSOUT data set to a new class after it is printed.
STRWTR – Starting a spool JOE writer 431

Chapter 13 Using CPMS/SYSD functional commands
SUBD – Submitting a job for execution using the DCT entry
The SUBD command is an alias of the SUBMITD command. This command allows you to submit a job stream from a sequential data set or PDS member to JES2. (See “SUBMITD – Submitting a job for execution using the DCT entry” on page 433 for more information.) The formats of all the aliases of the SUBD command are:
SUBMIT – Submitting a job for execution
The SUBMIT command submits a job stream from a sequential data set or PDS member to JES2. The data set must contain a proper JCL job stream. CPMS/SYSD checks only to make sure that the data set exists; it does not check the data set for JCL errors. The format of the SUBMIT command is:
CPMS/SYSD starts a separate task to submit the job. A job has not necessarily been submitted when you receive the completion message.
SYSD,SUBD,[vol_ser],dsn,[member] SUBMITD
SYSD,SUBMIT,[vol_ser],dsn,[member]
This parameter Specifies
vol_ser The volume serial number where an uncataloged data set resides. This parameter is optional if the data set is cataloged.
dsn The name of a partitioned or sequential data set that you want to submit.
member The name of the PDS member that you want to submit. For sequential data sets, omit this parameter.
432 CPMS/SYSD Reference Manual ~ 7.2

Chapter 13 Using CPMS/SYSD functional commands
SUBMITD – Submitting a job for execution using the DCT entry
The SUBMITD command submits a job stream from a sequential data set or PDS member to JES2. This command uses the SYSD DCT entry, which points to the internal reader, to perform the submit. The data set must contain a proper JCL job stream. The only checking CPMS/SYSD does it to make sure that the data set exists. The formats of all the aliases of the SUBMITD command are:
SUBTD – Submitting a job from a transient data queue
The SUBTD command submits a job stream from a CICS transient data queue to JES2. The transient data queue must contain the proper JCL job stream. The format of the SUBTD command is:
CAUTION If the transient data queue does not support purge, the P parameter (purge indicator) may cause an ATDT abend.
SYSD,SUBMITD,[vol_ser],dsn,[member] SUBD
This parameter Specifies
vol_ser The volume serial number where an uncataloged data set resides. This parameter is optional if the data set is cataloged.
dsn The name of the partitioned or sequential data set that you want to submit.
member The name of the PDS member that you want to submit. For a sequential data set, omit this parameter.
SYSD,SUBTD,td_queue,[P],[N]
This parameter Specifies
td_queue The 1-character to 4-character name of the CICS transient data queue where the JCL resides. This parameter is required.
P Purge the CICS transient data queue. If this parameter is not specified, CPMS/SYSD does not purge the CICS transient data queue.
N Do not send a message to the user’s terminal. The N parameter is used to support EXEC CICS LINKs from user application programs to the CPMS/SYSD application program interface (API). The default is to send all messages to the user’s terminal.
SUBMITD – Submitting a job for execution using the DCT entry 433

Chapter 13 Using CPMS/SYSD functional commands
SUBTS – Submitting a job from a temporary storage queue
The SUBTS command submits a job stream from a CICS temporary storage queue to JES2. The temporary storage queue must contain the proper JCL job stream. If the first 8 bytes of the first record is the queue ID, CPMS/SYSD ignores the first record and starts the job submission at the second record.
The format of the SUBTS command is:
SW – Starting a spool JOE writer
The SW command is an alias of the STRWTR command. This command allows you to start the CPMS/SYSD JOE writer. (See “STRWTR – Starting a spool JOE writer” on page 431 for more information.) The formats of all the aliases of the SW command are:
SYSD,SUBTS,[ts_queue],[K],[N]
This parameter Specifies
ts_queue The CICS temporary storage queue where the JCL resides. The default is CFTRterminal_id.
K Keep the CICS temporary storage queue. If this parameter is not specified, CPMS/SYSD purges the CICS temporary storage queue.
N Do not send a message to the user’s terminal. This parameter is used to support EXEC CICS LINKs from user application programs to the CPMS/SYSD API. The default is to send all messages to the user’s terminal.
SYSD,SW,printer_ID,[writer_id],[queue_id],[sysout_classes],[form_id], [DISP,NONSEL] [DISP,PURGE] [DISP,NEWDEST,new_dest] [DISP,NEWCLASS,new_class] STRWTR PRTJOE
434 CPMS/SYSD Reference Manual ~ 7.2

Chapter 13 Using CPMS/SYSD functional commands
SYSDTASK – Viewing the status of auxiliary tasks
Use the SYSDTASK command to view the status of the auxiliary tasks that CPMS/SYSD uses. This command is used for debugging purposes. The format of the SYSDTASK command is:
TERM – Viewing and changing terminals
Use the TERM command to view either a summary of all of the logged-in terminals or a summary of the variable settings for a specific terminal entry. Each entry represents a terminal to CICS. You can use this command to change the variable settings for a terminal entry. The format of the TERM command is:
SYSD,SYSDTASK,[task_id]
This parameter Specifies
task_id The ID of the task that you want to view. The default is the general status of all the auxiliary tasks.
SYSD,TERM,[terminal_id],[subfunction],[new_value]
This parameter Specifies
terminal_id The ID of the terminal entry that you want to view or change. The default is a summary of the table. To summarize the entry for your terminal, type a question mark (?) as this parameter.
If you do not know your terminal ID, type a question mark (?) and then press ENTER.
Use a plus sign (+) in any position of the terminal ID to match all characters in that position. Use an asterisk (*) to match any character in the terminal ID in that position and beyond.
subfunction The subfunction to which you want to assign a new value. The default is a summary of the variable settings for the terminal entry specified by the terminal parameter.
Type To
IN Change the status of the terminal to in service.
OUT Change the status of the terminal to out of service.
PRTY Change the priority of the terminal to the priority specified in the new_value parameter.
SYSDTASK – Viewing the status of auxiliary tasks 435

Chapter 13 Using CPMS/SYSD functional commands
TRAN – Viewing and changing transactions
SYSD only
Use the TRAN command to view either a summary of all the transaction entries or a summary of the variable settings for a specific transaction. Each entry represents a transaction ID to CICS. You can use this command to change the variable settings for a transaction. The format of the TRAN command is:
UCTRAN Switch the uppercase translation indicator off and on.
new_value The new priority that you want to assign to the subfunction parameter. For example, you can change the PRTY subfunction to a number from 0 through 255.
SYSD,TRAN,[tran_id],[subfunction],[new_value]
This parameter Specifies
tran_id The ID of the transaction that you want to view or change. The default is a summary of all of the transactions defined to CICS. This parameter is required if you are changing the transaction.
subfunction The subfunction that you want to change for the transaction. The default is a summary of the variable settings for the transaction specified by the tran_id parameter.
Type To
DIS Disable the entry.
ENA Enable the entry.
PRTY Change the transaction priority to the priority specified in the new_value parameter.
new_value The new value that you want to assign to the subfunction parameter. For example, you can change the PRTY subfunction to a number from 0 through 255.
This parameter Specifies
436 CPMS/SYSD Reference Manual ~ 7.2

Chapter 13 Using CPMS/SYSD functional commands
TSQ – Viewing and purging temporary storage queues
The TSQ command is an alias of the TSQUEINQ command. This command allows you to view either a summary of the temporary storage queues or a specific temporary storage queue. (See “TSQUEINQ – Viewing and purging temporary storage queues” on page 437 for more information.) The formats of all the aliases of the TSQ command are:
TSQUEINQ – Viewing and purging temporary storage queues
The TSQUEINQ command lets you view either a summary of the temporary storage queues or a specific temporary storage queue. It also lets you purge a temporary storage queue. The formats of all the aliases of the TSQUEINQ command are:
SYSD,TSQ,[queue_name],[PURGE] [id_mask] [LIST],[itemnum],[ASCII] [ALL] TSQUEINQ
SYSD,TSQUEINQ,[queue_name],[PURGE [id_mask] [LIST],[itemnum],[ASCII] [ALL] TSQ
This parameter Specifies
id_mask A generic queue ID used to limit the summary display to only those queue names that match the id_mask.
Use a plus sign (+) in positions where any character is acceptable and place an asterisk (*) as the last character. See “Examples” on page 438.
CPMS/SYSD assumes that a queue_id containing an asterisk (*) is an id_mask. If queue_name and id_mask are omitted, all queues appear.
ALL List all items. ALL is the default if item_num or ALL is omitted.
queue_name The name of the temporary storage queue that you want to view or purge. The default is a summary of all of the allocated temporary storage queues.
To view a summary of a selected group of temporary storage queues, specify an asterisk (*) as part of the temporary storage queue name. For example, type CFTR* to view a list of all the temporary storage queues that begin with the characters CFTR.
Enclose hexadecimal digits with single quotation marks to indicate a hexadecimal value for the queue_name. For example, type X' '.
TSQ – Viewing and purging temporary storage queues 437

Chapter 13 Using CPMS/SYSD functional commands
Examples
The following examples illustrate how to use the TSQUEINQ command.
item_num List one specific item from the queue.
LIST List the contents of a specific queue_id. The list is in a dump-like format showing the data in both hexadecimal and character format.
PURGE • Purge the temporary storage queue. The queue_name parameter is required to purge a temporary storage queue.
• Purge a specific queue_id. If this parameter is omitted, CPMS/SYSD generates a display of the temporary storage queue.
ASCII Convert the character portion of each line as if the data is in ASCII. The ASCII parameter must be placed after LIST but may be before item_num or ALL.
Example Result of TSQUEINQ command
SYSD TSQ Shows a summary of all temporary storage queues.
SYSD TSQ CFTR* Shows all queues that start with CFTR.
SYSD TSQ CF+R*' Shows all queues that start with CFxR where x is any character.
SYSD TSQ SYSDCP03 Shows the attributes for SYSDCP03.
SYSD TSQ SYSDCP03 PURGE Deletes the SYSDCP03 temporary storage queue.
SYSD TSQ SYSDCP03 LIST Shows the attributes for SYSDCP03 and lists the contents of all of its items.
SYSD TSQ SYSDCP03 LIST 3 Shows the attributes for SYSDCP03 and lists the contents of its item 3.
SYSD TSQ X'E2E8E2E6C3D7F0F3' LIST 4 Shows the attributes for SYSDCP03 and lists the contents of its item 4.
SYSD TSQ SYSDCP03 LIST 3 ASCII Shows the attributes for SYSDCP03 and lists the contents of its item 3, showing the character portion as if it were in ASCII.
This parameter Specifies
438 CPMS/SYSD Reference Manual ~ 7.2

Chapter 13 Using CPMS/SYSD functional commands
U – Viewing all of the unit control blocks
SYSD only
Use the U command to view the UCBs. There is one UCB for each peripheral device attached to the mainframe. Each UCB identifies the device and its status. The format of the U command is:
SYSD,U,[unit_type],[ADDR]
This parameter Specifies
unit_type The classification of the devices that you want to view. The default is all devices.
Type To view
DASD Direct-access devices or disks.
DISP Display devices.
TAPE Magnetic tape devices.
UREC Unit record devices, such as card readers.
COMM Communications devices.
CTC Channel-to-channel devices.
ADDR View the address of the UCB for the unit.
U – Viewing all of the unit control blocks 439

Chapter 13 Using CPMS/SYSD functional commands
UNCATLG – Uncataloging an OS data set
SYSD only
The UNCATLG command removes a dataset name from the catalog. The format of the UNCATLG command is:
VC – Issuing VM commands
The VC command is an alias of the VMCMD command. This command allows you to issue VM console commands from your own terminal. (See “VMCMD – Issuing VM commands” on page 441 for more information.) The formats of all the aliases of the VC command are:
VERSION – Viewing the current CPMS/SYSD version
Use the VERSION command to view the version currently available for CPMS/SYSD. You do not need a license key for the current version in order to view this information. The format of the VERSION command is:
To upgrade to the latest version of CPMS/SYSD, contact H&W.
SYSD,UNCATLG,[control_vol],dsn
This parameter Specifies
control_vol The 1-character to 6-character control-volume serial number where the catalog resides. CPMS/SYSD starts the catalog search with the catalog in the control_vol parameter. The default is the master catalog.
dsn The 1-character to 44-character dataset name that you want to uncatalog.
SYSD,VC,command VMCMD
SYSD,VERSION
440 CPMS/SYSD Reference Manual ~ 7.2

Chapter 13 Using CPMS/SYSD functional commands
VMCMD – Issuing VM commands
The VMCMD command lets you issue VM console commands from your own terminal. The formats of all the aliases of the VMCMD command are:
VMRESET – Ending a dialed session
The VMRESET command returns the terminal to the control of VM if the terminal was initially dialed into an OS under the control of VM. The formats of all the aliases of the VMRESET command are:
VR – Ending a dialed session
The VR command is an alias of the VMRESET command. This command allows you to return the terminal to the control of VM if the terminal was initially dialed into an OS under the control of VM. (See “VMRESET – Ending a dialed session” on page 441 for more information.) The formats of all the aliases of the VR command are:
SYSD,VMCMD,command VC
This parameter Specifies
command The VM command or sublist of VM commands that you want to issue. If you specify a sublist of VM commands, separate each command with the number sign (#).
SYSD,VMRESET VR
SYSD,VR VMRESET
VMCMD – Issuing VM commands 441

Chapter 13 Using CPMS/SYSD functional commands
442 CPMS/SYSD Reference Manual ~ 7.2

Appendix A
Using CPMS/SYSD commands
The commands available in the CPMS/SYSD product are listed in this appendix for your convenience. The commands are organized by function.
This chapter contains information about:
• “CPMS/SYSD spool-display and print commands” on page 444
• “SYSD DASD commands” on page 447
• “CPMS/SYSD CICS management commands” on page 449
• “CPMS/SYSD management commands” on page 451
443

Appendix A Using CPMS/SYSD commands
CPMS/SYSD spool-display and print commands
The following is an alphabetical list of the commands you can use to view and print jobs in the spool.
Command Function
SYSD,A,[ALL] ,[*]
Shows jobs that are being executed.
SYSD,AA,[ALL] ,[*]
Dynamically shows jobs that are being executed.
SYSD,CANCEL,jobnumber Cancels a job.
SYSD,DSMAINT,jobid,dataset#,action,keyword=value,keyword=value
Performs data set maintenance.
SYSD,ENDAUTO Ends a dynamic display.
SYSD,HOLD,job number Holds a job.
SYSD,JOB,[jobname],[jobnumber],[opts] STATUS ST STE,[jobname],[jobnumber],[opts],[owner]
Shows the status of a job. Use the STE command to view in an extended format more information about the status of a job than the JOB command does.
SYSD,JOECLN,[queue_name],[TEST] Purges the job output elements in a JES2 queue.
SYSD,MENU,[user_id],[password],[address] Allows you to sign on to the CPMS/SYSD 3270 menu-driven system.
SYSD,N,phase[,dest][,jobname][,jobtype][,sort] Shows all of the jobs in a queue.
SYSD,OSCMD,command OC
Issues an operator command.
SYSD,PRTADJ,printer_id,page_number PA
Adjusts a spool printer.
SYSD,PRTCNL,printer_id PC
Cancels a spool-print task.
444 CPMS/SYSD Reference Manual ~ 7.2

Appendix A Using CPMS/SYSD commands
SYSD,PRTDSP,[printer_id],[subfunction],[new_value] PD
Shows the status of a spool printer.
SYSD,PRTFRM,printer_id PF
Replies to a forms change request.
SYSD,PRTHLD,printer_id PH
Holds a spool printer.
SYSD,PRTJOB,job,printer_id,[sysout_id],[line],[begin_col] ,[scan_parms] PJ SPLPRT
Prints a job on a CICS printer.
SYSD,PRTPRG,printer_id PP
Purges a spool printer.
SYSD,R Shows outstanding operator requests.
SYSD,RELEASE,job Releases a held job.
SYSD,SPLCLN,[queue_name],[TEST] Cleans up the spool print queue.
SYSD,SPLDSN,job,[ALL] SN
Shows a summary of the output data sets for a job.
SYSD,SPLDSP,job,[sysout_id],[line_number],[begin_col] ,[scan_parms] SD
Shows the output for a job.
SYSD,SPLJOE,[job],[destination] SJ
Shows the output elements for a job.
SYSD,SPLPRG,job SP
Purges the output for a job.
SYSD,SPLRTE,jobnumber,destination ROUTE SR
Routes the output for a job.
SYSD,STPWTR,printer_id Stops a STRWTR spool print task.
Command Function
CPMS/SYSD spool-display and print commands 445

Appendix A Using CPMS/SYSD commands
SYSD,STRWTR,printer_id,[writer_id],[queue_id], [sysout_classes],[form_id],[DISP,NONSEL] [DISP,PURGE] [DISP,NEWDEST,new_dest] [DISP,NEWCLASS,new_class] SW PRTJOE
Starts a spool JOE writer.
SYSD,SUBMIT,[vol_ser],dsn,[member] Submits a job for execution.
SYSD,SUBMITD,[vol_ser],dsn,[member] SUBD
Uses the DCT entry to submit a job.
SYSD,SUBTD,td_queue,[P],[N] Submits a job from a transient data queue.
SYSD,SUBTS,[ts_queue],[K],[N] Submits a job from a temporary storage queue.
Command Function
446 CPMS/SYSD Reference Manual ~ 7.2

Appendix A Using CPMS/SYSD commands
SYSD DASD commands
The following is an alphabetical list of the commands you can use to manage your DASD.
Command Function
SYSD,CATLG,unit_type,vol_list,dsn Catalogs an OS data set.
SYSD,COMPRESS,,dsn Compresses a PDS data set.
SYSD,DLTA,[control_vol],index Deletes a high-level index alias.
SYSD,DLTX,[control_vol],index Disconnects a catalog.
SYSD,DRPX,[control_vol],index Deletes a primary or generation index.
SYSD,DSN,[vol_ser],dsn Shows the attributes for a data set.
SYSD,DSPCHR,vol_ser,cchhr,[dsname] Shows a DASD record.
SYSD,ENQ,[queue_name],[dsn],[member],[DEQ|REENQ]SYSD,ENQ,[WAIT]
Shows the global resource serialization queue for the OS.
SYSD,LISTCAT,node LISTC LC
Lists catalog entries.
SYSD,LISTPDS,[vol_ser],dsn,[member],[format] LISTD LD
Shows a PDS directory.
SYSD,LISTVTOC,vol_ser LV
Shows a VTOC.
SYSD,LOCATE,[control_vol],dsn,[BYPASS] Locates a data set. Shows a catalog entry, if there is one, and all volumes containing the data set.
SYSD,OSPRINT,,dsn,[member],[class] OP
Prints a PDS member.
SYSD,PDSALIAS,[vol_ser],dataset,member,alias Creates an alias for a PDS member.
SYSD,PDSCHG,[vol_ser],dsn,member,new_name Renames a PDS member.
SYSD DASD commands 447

Appendix A Using CPMS/SYSD commands
SYSD,PDSDEL,[vol_ser],dsn,member Deletes a PDS member.
SYSD,PDSDSPLY,[vol_ser],dsn,member LIST L
Shows a PDS source member.
SYSD,RECALL,dsname Recalls a migrated data set.
SYSD,RECATLG,unit_type,vol_list,dsn Recatalogs an OS data set.
SYSD,RENAME,vol_list,old_dsn,new_dsn Renames a data set.
SYSD,SCRATCH,vol_list,dsn Scratches a data set.
SYSD,U,[unit_type],[ADDR] Shows all UCBs.
SYSD,UNCATLG,[control_vol],dsn Uncatalogs an OS data set.
Command Function
448 CPMS/SYSD Reference Manual ~ 7.2

Appendix A Using CPMS/SYSD commands
CPMS/SYSD CICS management commands
The following is an alphabetical list of the commands you can use to manage CICS.
Command Function
SYSD,ALLOC,[dsn],[type] AL
Shows currently allocated CICS data sets.
SYSD,CICSTRAN Shows CICS transaction IDs.
SYSD,CORE,address|ASID=,[verify_data,change_data]SYSD,CORE,,,[scan_data]
Shows or changes virtual memory.
SYSD,DEST,[destination],[subfunction],[new_value] Shows or changes the DCT.
SYSD,FILE,[file_id],[subfunction],[new_value] Shows or changes the FCT.
SYSD,IC,[tran_id] Shows CICS interval control elements.
SYSD,LPAD,[program_id] Shows the z/OS link pack directory.
SYSD,MLPAD,[program_id] Shows the z/OS modified link-pack directory.
SYSD,NONSWAP Changes CICS swap status to nonswappable.
SYSD,OKSWAP Changes CICS swap status to swappable.
SYSD,PROG,[program_id],[subfunction] Shows or changes programs.
SYSD,STAT,[TASK] Shows general CICS statistics.
SYSD STORAGE,[SECS] Shows CICS storage.
SYSD,TERM,[terminal_id],[subfunction],[new_value] Shows or changes terminals.
SYSD,TRAN,[tran_id],[subfunction],[new_value] Shows or changes transactions.
CPMS/SYSD CICS management commands 449

Appendix A Using CPMS/SYSD commands
SYSD,TSQUEINQ,[queue_name],[PURGE] [id_mask] [LIST],[item_num],[ASCII] [ALL] TSQ
Shows or purges temporary storage queues.
Command Function
450 CPMS/SYSD Reference Manual ~ 7.2

Appendix A Using CPMS/SYSD commands
CPMS/SYSD management commands
The following is an alphabetical list of the commands you can use to manage CPMS/SYSD.
Command Function
SYSD,HELP,[function|NEW|MSGxnnnn] Shows online help.
SYSD,LICENSE,QSYSD,LICENSE,U|A,license
Queries, updates, or creates a license record in CPMS/SYSD.
SYSD,SHUT,[type] Shuts down CPMS/SYSD.
SYSD,SYSDTASK,[task_id] Shows the status of the auxiliary task.
SYSD,VERSION Shows the currently available version of CPMS/SYSD.
SYSD,VMCMD,command VC
Issues a VM command.
SYSD,VMRESET VR
Ends a dialed session.
CPMS/SYSD management commands 451

Appendix A Using CPMS/SYSD commands
452 CPMS/SYSD Reference Manual ~ 7.2

Appendix B
Error messages
This appendix lists the error messages that CPMS/SYSD generates. The character prefix on the error message ID identifies the type of message.
The messages in this chapter are listed in numerical order, without regard for the message-type prefix.
This character Means
E Error message.
I Informational message.
T Temporary error; retry the function.
W Warning message.
453

Appendix B Error messages
Message ID Messages text Description
E0000 UNKNOWN MSG msgnumber. UPDATE ERRMSG.
Update the SYSD ERRMSG table for msgnumber.
E0001 INVALID PRIMARY COMMAND (ENTER ASSUMED).
The primary command is invalid or unknown to this function. Correct the command and issue it again.
E0002 ONE OR MORE INVALID LINE OPTIONS WERE FOUND.
The line option command is invalid or unknown to this function. Correct the command and issue it again.
W0003 PUT/PRINT NOT SUPPORTED WITH CONDITION CODE DISPLAY.
The request was ignored.
E0004 INVALID LINE NUMBER GIVEN.
The line number specified is nonnumeric or too large.
I0005 AUTONUM IS ALREADY ACTIVE.
Automatic numbering is active. The request was ignored.
E0006 WTR IS ALREADY ACTIVE. A start was issued for an active printer. The request was ignored.
I0007 MOVE/COPY IS IN PROGRESS.
An M (Move) or C (Copy) line command is pending. Complete or cancel the command.
I0008 BLOCK COMMAND IS INCOMPLETE.
An unpaired block line command was entered. Complete or cancel the command.
E0009 BLOCK COMMAND IS INVALID.
An unmatched block command pair was entered. Correct or cancel the command.
I0010 NULLS IS ALREADY ACTIVE.
The NULLS ON command has already been issued. The request was ignored.
I0011 NULLS IS NOT ACTIVE. The NULLS OFF command has already been issued. The request was ignored.
E0012 INVALID OR MISSING SCAN STRING.
The parameters for this command are invalid or missing. Correct the command and issue it again.
454 CPMS/SYSD Reference Manual ~ 7.2

Appendix B Error messages
I0013 END OF FILE REACHED. The FIND command reached the end of the file without finding the character string.
E0014 UNAUTHORIZED DESTINATION.
You are not authorized to specify this destination.
I0015 JOB HAS BEEN SUBMITTED.
The job has been submitted to the OS using the SUBMIT command.
E0016 CHARACTER STRING NOT FOUND.
CPMS/SYSD could not find the character string.
I0017 CHARACTER STRING FOUND.
CPMS/SYSD found the character string.
T0018 I/O ERROR(hhhhhhhh) IN rtn, DATA NOT UPDATED
An error(hhhhhhhh) was detected in routine rtn while CPMS/SYSD was trying to save the data. If the problem persists, contact H&W Support.
W0019 FILE IS EMPTY, SAVE NOT PERFORMED.
The work file did not have any records. The OS file was not updated.
E0020 SUBMIT FAILED. System error. Contact your CPMS/SYSD administrator.
I0021 STRING {CHANGED | FOUND} t TIMES IN r RECORDS.
Indicates how many times the string was changed or found in how many records. Appears when XALL or ALL is used with the CHANGE or FIND command.
I0022 TOP OF FILE REACHED. The FIND PREVIOUS command reached the top of the file without finding the character string.
E0023 INVALID TRUNC VALUE SPECIFIED.
The column number specified on the TRUNC command is invalid.
E0024 INVALID ZONE(S) SPECIFIED.
The column numbers specified on the FIND command are invalid.
E0025 MODID COLUMN IS INVALID.
The column number specified on the MODID command is invalid.
E0026 USER IDENTIFIER IS INVALID.
The specified user ID is unknown or is a duplicate.
Message ID Messages text Description
455

Appendix B Error messages
E0027 INVALID DESTINATION SPECIFIED.
The specified JES2 destination is invalid.
E0028 PASSWORD IS MISSING OR INVALID.
The password was not specified at all, or the specified password is invalid.
E0029 FILE, SYSDUSER, IS NOT USABLE.
An I/O error occurred on the user file. Contact your CPMS/SYSD administrator.
E0030 COMMAND/FUNCTION NOT AVAILABLE.
The requested function is not supported at the current system level.
E0031 INVALID DESTINATION IDENTIFIER.
The route request specified an invalid JES2 destination.
E0032 INVALID CLASS (USE A-Z, 0-9 OR *).
The specified class was non-numeric or non-alphabetic.
E0033 THIS FIELD MUST BE "Y" OR "N".
The character typed in this field was not a Y or N.
E0034 CLASS MUST BE SPECIFIED FOR LOCAL DESTINATION.
A class must be specified for the local print queue.
E0035 INVALID TERMINAL IDENTIFIER.
The target terminal for the print request is unknown or out of service.
E0036 DATA SET NOT FOUND. The data set was not cataloged or was not on the specified volume.
W0037 NO LINES TO DISPLAY. The job has no output to view.
W0038 NO OUTPUT TO PROCESS. The job has no output to print or punch.
E0039 *** SECURITY VIOLATION - ACCESS DENIED.
You are not authorized to do the requested function.
E0040 NO RECORD TO PROCESS.
A PUT request was specified for an empty edit session.
Message ID Messages text Description
456 CPMS/SYSD Reference Manual ~ 7.2

Appendix B Error messages
E0041 RECORD KEY HAS CHANGED, NOT UPDATED.
The record does not correspond to the entered key. The update request was ignored.
E0042 RECORD WAS NOT FOUND.
A delete request was specified for a record that does not exist.
W0043 RECORD ALREADY EXISTS.
The request to add a record specified a duplicate key.
E0044 &&$HLPNAME HELP DATA SET NOT FOUND.
The SYSD help file is unavailable. Contact your CPMS/SYSD administrator.
E0045 INVALID OR DUP DESTINATION SPECIFIED.
A JES2 destination ID is invalid, or the new destination is a duplicate of the selection-criteria destination.
E0046 INVALID OR DUP CLASS SPECIFIED.
A JES2 class is invalid or the new class is a duplicate of the selection-criteria class.
W0047 JOB NOT FOUND. The job is not available in the JES2 queue.
E0048 LINE OPTION FAILED. The requested action for the job was not successful.
I0049 MEMBER UPDATED. The edit work subfile was successfully written to the OS data set.
I0050 EDIT SESSION HAS BEEN CANCELED.
The edit work subfile was deleted from CPMS/SYSD.
I0051 NO EDIT SESSIONS IN PROGRESS.
The request to view an edit session shows there are no active sessions.
I0052 EDIT SESSION RESUMED. The request to start an edit session resulted in an existing edit session being resumed.
E0053 CONFLICTING DISPOSITION PARAMETERS SPECIFIED.
The disposition parameters conflict or are incomplete.
E0054 MEMBER NOT FOUND. The specified member is not in the specified PDS.
Message ID Messages text Description
457

Appendix B Error messages
E0055 MEMBER NAME GIVEN FOR SEQUENTIAL FILE.
The requested file is not a PDS.
E0056 SESSION NOT FOUND. The request to delete an edit session failed.
W0057 SESSION EMPTY. SUBMIT NOT PERFORMED.
The work session does not have any records. The submit request was ignored.
E0058 INVALID DATASET ORGANIZATION.
The DsOrg for the requested data set was not PS or PO.
E0059 INVALID RECORD FORMAT.
The record format for the data set was not fixed, undefined, or variable.
E0060 LRECL IS BELOW THE MINIMUM VALUE.
The logical record length for the file is less than 10.
E0061 LRECL EXCEEDS THE MAXIMUM VALUE.
The logical record length for the file is greater than 255.
E0062 OPEN ERROR OCCURRED ON THE DATASET.
The data set could not be processed. Contact your CPMS/SYSD administrator.
E0063 SPOOL WRITER NOT STARTED.
System error. Contact your CPMS/SYSD administrator.
E0064 PRINTER ID NOT FOUND IN SYSDPTBL.
The CPMS/SYSD print subsystem does not recognize the selected printer.
W0065 PRINTER IS NOT ACTIVE. The request for a status change was issued for a printer that is not active.
I0066 SPOOL WRITER HAS BEEN STARTED.
The start process has finished.
E0067 INVALID DATASET NAME ENTERED.
There was a syntax error in the DSN name entry, member name entry, or both.
E0068 REQUESTED SESSION NOT FOUND.
A current edit session with the specified name does not exist.
Message ID Messages text Description
458 CPMS/SYSD Reference Manual ~ 7.2

Appendix B Error messages
W0069 DATASET(MEMBER) BEING EDITED BY ANOTHER USER.
The request to start an edit session will result in duplicate sessions.
E0070 DATASET(MEMBER) BEING EDITED BY ANOTHER USER (user_id) IN ANOTHER REGION.
The request to start an edit session failed. Another user ID appears, if possible.
E0071 I/O ERROR READING SPOOL.
A read error for the JES2 spool occurred. The processing for this job was terminated.
W0072 INVALID JCT -JOB NO LONGER AVAILABLE.
The processing for this job was terminated.
W0073 INVALID IOT -JOB NO LONGER AVAILABLE.
The processing for this job was terminated.
W0074 DATASET UNAVAILABLE FOR PRINT/DISPLAY.
The processing for this job was terminated.
E0075 SVC99 (ALLOCATE) FAILED. RC=X'returncode,' RS=X'reasoncode.'
The dynamic allocation failed with the specified return code and reason code. Contact your CPMS/SYSD administrator.
E0076 SVC99 (DE-ALLOCATE) FAILED.
The dynamic deallocation failed. Contact your CPMS/SYSD administrator.
I0077 MEMBER UPDATED, (INPLACE).
The work session was successfully saved in the PDS (INPLACE).
E0078 TEMP STORAGE GETQ ERROR.
System error. Contact your CPMS/SYSD administrator.
E0079 LINE EXCEEDS SPOOL DISPLAY MAXIMUM.
The processing for this job was terminated.
E0080 MEMBER ALREADY EXISTS, USE REPLACE.
The CREATE request specified an existing member.
E0081 SECURITY VIOLATION ON THIS PRINTER.
You are not authorized to control this printer.
Message ID Messages text Description
459

Appendix B Error messages
W0082 PRIOR COMMAND STILL ACTIVE, TRY LATER.
A command issued earlier is still active. The request was ignored.
E0083 INVALID OR MISSING PAGE NUMBER.
You entered an invalid page number or you did not enter any page number. The request was ignored.
E0084 UNEXPECTED ERROR HAS OCCURRED.
An unexpected error occurred. The processing for this job was terminated.
E0085 SPOOL WRITER NOT ACTIVE.
The spool writer is not active. The STOP request was ignored.
I0086 RECORD HAS BEEN ADDED.
The user record was successfully added.
I0087 RECORD HAS BEEN DELETED.
The user record was successfully deleted.
I0088 RECORD HAS BEEN INITIALIZED.
The user record has been prepared to be added.
I0089 RECORD HAS BEEN UPDATED.
The user record was successfully updated.
E0090 I/O ERROR ON OUTPUT, SAVE FAILED.
The work session save failed. Contact your CPMS/SYSD administrator.
E0091 DIRECTORY FULL OR I/O ERROR, SAVE FAILED.
The PDS directory was full. The save failed.
I0092 NOTHING UPDATED, SAVE NOT PERFORMED.
The work session was not updated. The data was not rewritten.
E0093 MEMBER NAME MISSING OR INVALID.
The valid commands are HELP INDEX or HELP NEW.
I0094 CONTINUING TO NEXT PRINT DATA SET.
The print job will continue with the next data set or job.
I0095 PRINTER PLACED IN HOLD STATUS.
The printer is waiting for the release command.
Message ID Messages text Description
460 CPMS/SYSD Reference Manual ~ 7.2

Appendix B Error messages
I0096 CPMS/SYSD PRINT ADJUST ISSUED.
This is an audit message for the PRTADJ command.
I0097 CPMS/SYSD PRINT CANCEL ISSUED.
This is an audit message for the PRINT CANCEL command.
I0098 CPMS/SYSD PRINT PURGE ISSUED.
This is an audit message for the PRTPRG command.
W0099 NO LINES TO PRINT. There is no output available for printing.
W0100 NO OUTPUT TO PRINT. There is no output available for printing.
E0101 UNEXPECTED ERROR OCCURRED (INITTSA).
System error. Contact your CPMS/SYSD administrator.
I0103 MEMBER(S) DELETED. The request to delete a member was successful.
E0104 MEMBER(S) COULD NOT BE DELETED.
The request to delete a member failed.
I0105 COMMAND AVAILABLE ONLY WITH JES2 SP.
The current version of JES2 does not support the function requested.
I0106 PDS DIRECTORY CONTAINS NO MEMBERS.
The request for a directory display was ignored.
W0107 FIRST CARD NOT JOB CARD, SUBMIT CONTINUING.
The user profile JOB statements were not available. CPMS/SYSD submitted the work file as is.
I0108 JOB SUBMITTED WITH USER PROFILE JOB STATEMENT(S).
The user profile JOB statements have been prefixed to the work session and submitted.
I0109 VERIFY DELETE(S), PRESS ENTER TO PROCESS.
CPMS/SYSD is waiting for confirmation or cancellation of the delete request.
I0110 SELECTED FUNCTION NOT ALLOWED FOR THIS USERID.
You are not authorized for this function.
Message ID Messages text Description
461

Appendix B Error messages
I0111 SELECTED FUNCTION HAS BEEN DISABLED BY SYSTEM ADMINISTRATOR.
This function is not available to any users.
I0112 CHARACTER STRING NOT FOUND AFTER 5,000 RECORDS SEARCHED.
The record scan limit was reached before CPMS/SYSD found the string.
W0113 DATA SET BEING COMPRESSED OR IN USE BY ANOTHER JOB - RETRY LATER.
The data set was unavailable. The request was ignored.
I0114 END OF ADDRESSABLE AREA REACHED.
The request referenced an invalid virtual storage address.
E0115 CPMS/SYSD ATP INTERFACE NOT INSTALLED, SEQUENTIAL ASSUMED.
Installation error. Contact your CPMS/SYSD administrator.
I0116 SPLIT LIMIT HAS BEEN REACHED.
The request to create a new partition was ignored.
I0117 NO ACTIVE SPLITS, SWAP NOT PERFORMED.
The request to swap to another partition was ignored.
I0118 MULTIPLE SESSIONS FOUND, CHOOSE ONE.
The same member name was found in two different data sets.
E0119 EDIT SESSION COULD NOT BE OPENED.
An error occurred while starting the edit session. Contact your CPMS/SYSD administrator.
I0120 ++INCLUDE COULD NOT BE EXPANDED.
The member to be included could not be found. Processing continues.
E0121 EDITOR WORK DATA SET IS FULL.
The processing was terminated. Contact your CPMS/SYSD administrator.
E0122 EDITOR BLOCK NUMBER INVALID.
System error. Contact your CPMS/SYSD administrator.
Message ID Messages text Description
462 CPMS/SYSD Reference Manual ~ 7.2

Appendix B Error messages
E0123 FUNCTION NOT SUPPORTED FOR PANVALET(R) DATA SETS.
The delete request for a CA Panvalet data set was ignored.
E0124 CPMS/SYSD ATP INTERFACE NOT INSTALLED, SAVE NOT PERFORMED.
Installation error. Contact your CPMS/SYSD administrator.
T0125 SLAM BLOCK CHAIN DESTROYED, EDIT SESSION IS NO LONGER VALID.
System error. Contact your CPMS/SYSD administrator.
I0126 PRINT REQUEST PROCESSED.
The print request was successful.
I0127 PRINT REQUEST NOT PROCESSED.
The print request failed. Contact your CPMS/SYSD administrator.
E0128 LANGUAGE FORMAT MUST BE SPECIFIED FOR NEW PAN MEMBER.
You did not enter a language format for the new PAN member. Enter the language type.
E0129 INVALID PANVALET SECURITY LEVEL.
The CA Panvalet security level is invalid. Enter the correct security level.
E0130 SYSDPTBL ENTRY NOT FOUND IN TCT.
CICS did not recognize the specified printer.
E0131 SYSDPTBL ENTRY NOT FOUND IN DCT.
CICS did not recognize the specified printer.
W0132 PRINTER NOT WAITING FOR FORMS CHANGE.
The forms change request was ignored.
W0133 PRINTER ALREADY HELD. The request to hold the printer was ignored.
W0134 PRINTER NOT HELD. The request to release the printer was ignored.
I0135 TS QUEUE RECORDS TRANSFERRED.
The PUT request was successful.
Message ID Messages text Description
463

Appendix B Error messages
E0136 TS QUEUE NOT FOUND. The GET request was successful, but there were no data records.
E0137 ERROR IN WORK SESSION.
An error occurred during the GET or PUT processing. Contact your CPMS/SYSD administrator.
I0138 TS QUEUE DELETED. The PCDEL command was successful.
E0139 VOLUME SERIAL NUMBER IS BLANK OR INVALID.
The volume was not found. Enter a valid volume serial number.
E0140 DATASET NOT FOUND. The data set was not found. Enter a valid data set.
E0141 INVALID LINE COMMAND FOUND.
The line command was issued incorrectly.
E0142 REQUEST EXCEEDS PRINTER LINE COUNT LIMIT.
The request was ignored.
I0143 CATALOG WAS SUCCESSFUL.
The catalog process is complete.
E0144 REQUIRED CONTROL VOL NOT AVAILABLE.
The required control volume is not available. Contact your CPMS/SYSD administrator.
E0145 INCONSISTENT CATALOG STRUCTURE.
The catalog structure is inconsistent. Contact your CPMS/SYSD administrator.
E0146 CATALOG STRUCTURE DOES NOT EXIST.
The catalog structure does not exist. Contact your CPMS/SYSD administrator.
E0147 CATALOG IS OUT OF SPACE.
The catalog is out of space. Contact your CPMS/SYSD administrator.
E0148 GDG DS IS FULL OR IMPROPERLY NAMED.
The GDG data set is full or is not named properly. Contact your CPMS/SYSD administrator.
E0149 A PERMANENT I/O ERROR HAS OCCURRED.
A permanent I/O error occurred. Contact your CPMS/SYSD administrator.
Message ID Messages text Description
464 CPMS/SYSD Reference Manual ~ 7.2

Appendix B Error messages
E0150 INVALID PARAMETER LIST PASSED.
The requested function failed. Contact your CPMS/SYSD administrator.
E0151 AN UNKNOWN ERROR HAS OCCURRED.
An unknown error occurred. Contact your CPMS/SYSD administrator.
E0152 DEVICE TYPE INVALID OR MISSING.
You entered an invalid device type, or you did not enter any device type. Enter a valid device type.
E0153 VOLUME LIST INVALID OR MISSING.
You entered an invalid volume list, or you did not enter any volume list. Enter a valid volume list.
E0154 DATASET NAME INVALID OR MISSING.
You entered an invalid dataset name, or you did not enter any dataset name. Enter a valid dataset name.
E0155 AT LEAST ONE LIB MUST BE SPECIFIED.
You did not enter a library field. Enter a value in the Library field.
E0156 DATASET NOT CATALOGED.
The incorrect DSN was entered, or the volume serial number is missing.
I0157 JOB OUTPUT ELEMENTS NOT AVAILABLE DUE TO MEMORY CONSTRAINTS.
The function is not available. Contact your CPMS/SYSD administrator.
I0158 DATASET DELETED, CATALOG NOT MODIFIED.
The scratch was successful, but the data set was not uncataloged.
E0159 VOLUME(S) NOT MOUNTED.
The requested function failed.
E0160 INVALID HEXADECIMAL TS QUEUE NAME.
The temporary storage queue name does not contain valid hexadecimal characters.
E0161 THE VOLUME LIST WAS INVALID.
The volume serial number is invalid.
E0162 INVALID OPTION OR OPTION FAILED.
The option entered in the option column was either invalid or failed. If the option failed, there is an error message on the line.
E0163 DATASET NOT FOUND. The requested function failed.
Message ID Messages text Description
465

Appendix B Error messages
E0164 SYNTAX ERROR IN COMMAND.
Check the manual for correct syntax of the command you entered.
E0165 DATASET ALREADY EXISTS.
The data set could not be created because one already exists on the volume.
E0166 UNKNOWN PROFILE NAME ENTERED.
Profile name is unknown or misspelled.
E0167 VOLUME NOT MOUNTED. The requested function failed.
I0168 NEWNAME PROVIDED BUT NOT RENAME.
A new name was entered but R for rename was not specified.
E0169 UNABLE TO OPEN OR CREATE WORK SESSION.
This error may indicate there is a problem with one of the editor work data sets. The data set may be too small, not open, or unavailable to CICS (File SYSDWRKx).
E0170 UNABLE TO READ WORK SESSION.
This may indicate there is a problem with one of the editor work data sets. The data set may be too small, not open, or unavailable to CICS (File SYSDWRKx).
E0171 UNABLE TO CLOSE WORK SESSION.
This may indicate there is a problem with one of the editor work data sets. The data set may be too small, not open, or unavailable to CICS (File SYSDWRKx).
I0172 DATASET HAS BEEN UNCATALOGED.
The requested function was successful.
E0173 THE CVOL NAME IS INVALID.
The requested function failed. Contact your CPMS/SYSD administrator.
E0174 THE INDEX HAS AN ALIAS, INDEX OR DSN.
The requested function failed. Contact your CPMS/SYSD administrator.
E0175 INVALID INPUT PARAMETERS SUPPLIED.
Invalid information was entered in this field.
E0176 NEW DATASET NAME MISSING OR INVALID.
Invalid information was entered in this field.
Message ID Messages text Description
466 CPMS/SYSD Reference Manual ~ 7.2

Appendix B Error messages
I0177 RENAME WAS SUCCESSFUL.
The requested function was successful.
I0178 DATASET RENAMED AND RECATALOGED.
The requested function was successful.
E0179 NECESSARY INPUT PARAMETER MISSING.
A parameter is missing.
E0180 DYNAMIC ALLOCATION UNSUCCESSFUL.
The requested function failed. Contact your CPMS/SYSD administrator.
E0181 DATASET NOT PARTITIONED ORGANIZATION.
A member name is valid only on a PDS or PDSE data set.
I0182 COMPRESS ISSUED FOR “pdsname”.
A COMPRESS command has been issued for the specified PDS data set.
E0183 DATASET CATALOGED TO OTHER VOLUME.
The catalog contains an entry to the data set but not the volume specified.
E0184 VTOC I/O ERROR OR INVALID F4 DSCB.
An error reading the VTOC occurred.
E0185 VTOC I/O ERROR OR INVALID F5 DSCB.
An error reading the VTOC occurred.
E0186 VTOC I/O ERROR OR INVALID F3 DSCB.
An error reading the VTOC occurred.
E0187 VSAM MANAGEMENT IS NOT SUPPORTED AT THIS TIME.
A request was issued for a unsupported VSAM file.
E0188 CATALOG LOCATE FAILED. The catalog locate failed.
E0189 SYSDATPM TASK FAILED ACCESSING PANVALET(R) LIBRARY. SEE OS CONSOLE.
See the system console for more information.
Message ID Messages text Description
467

Appendix B Error messages
E0190 SYSDATP1 TASK FAILED ACCESSING PANVALET(R) LIBRARY. SEE OS CONSOLE.
See the system console for more information.
E0191 INCONSISTENT HELP STRUCTURE.
The help file might be corrupted.
E0192 DATASET NAME IS AN INDEX.
An index might not be referenced as a data set.
I0193 INDEX HAS BEEN DELETED.
The requested function was successful.
E0194 GDG COUNT IS REQUIRED.
The GDG count must be specified.
E0195 INVALID OPTIONS SPECIFIED.
An unsupported or invalid option was specified.
I0196 INDEX BUILT SUCCESSFULLY.
The requested function was successful.
E0197 INVALID NUMBER SPECIFIED.
Check the number specified.
E0198 GDG COUNT IS OUT OF RANGE.
Correct the GDG count and retry.
E0199 OPTION NOT VALID WITH THIS FUNCTION.
An unsupported or invalid option was specified.
E0200 INVALID DEVICE TYPE SPECIFIED.
Specify a correct device type.
E0201 INVALID DEVICE STATUS SPECIFIED.
Specify a correct status.
E0202 DATASET ALREADY EXISTS ON VOLUME.
The requested function failed.
E0203 INSUFFICIENT SPACE ON VOLUME.
The request could not be processed. Try again later.
Message ID Messages text Description
468 CPMS/SYSD Reference Manual ~ 7.2

Appendix B Error messages
I0204 SUCCESSFULLY ALLOCATED.
The requested function was successful.
W0205 ATP SUBTASK BUSY - RETRY LATER.
The requested function failed. Try again later.
E0206 INVALID PASSWORD OR VSAM SPACE.
The requested function failed.
E0207 DATASET ALREADY EXISTS.
The requested function failed.
E0208 VTOC I/O ERROR OR INVALID F1 DSCB.
The requested function failed.
E0209 VOLUME NOT MOUNTED. The requested function failed.
E0210 UNABLE TO MOUNT VOLUME.
The requested function failed.
E0211 DATASET IS IN-USE. The requested function failed.
E0212 RACF DATA SET AND NO AUTHORIZATION.
The requested function failed.
E0213 RACF COULD NOT DELETE.
The requested function failed.
E0214 MAXIMUM SESSION SIZE EXCEEDED.
The number of records for this session exceeds the limit. See the CPMS/SYSD Installation Manual for more information about determining session sizes.
W0215 DATASET IS EMPTY. The requested function failed.
E0216 DATASET HAS ZERO EXTENTS.
The requested function failed.
E0217 SUBMIT FAILED ++ INCLUDE PROCESSING ERROR.
The data set is invalid for ++INCLUDE processing.
Message ID Messages text Description
469

Appendix B Error messages
E0218 SUBMIT FAILED MAX. NUMBER ++INCLUDES EXCEEDED.
The number of nested ++INCLUDE statements exceeded the limit.
E0219 INVALID COMMAND FOR SEQUENTIAL / GDGS.
The requested function failed.
E0220 INVALID GENERATION DATASET SPECIFIED.
The requested function failed.
E0221 TS QUEUE RECORD LENGTH GREATER THAN 255.
The requested function failed.
E0222 CICS TRACE TABLE HAS BEEN CAPTURED IN TEMP STORAGE.
The initial TRT request was successful.
E0223 EDIT SESSION ALREADY IN PROGRESS FOR SPECIFIED MEMBER.
Specify a new member for the TRT command.
E0224 MEMBER SPECIFIED MUST NOT CONTAIN PRIOR DATA.
Specify a new member for the TRT command.
E0225 TEMP STORAGE ERROR HAS OCCURRED IN TRT CAPTURE PROCESSING.
The requested function failed.
E0226 TRACE TABLE TOO LARGE FOR CAPTURE (MAXIMUM ENTRIES-- 4095).
The requested function failed.
E0227 TRACE TABLE TOO LARGE FOR CAPTURE (MAXIMUM ENTRIES-- 1023).
The requested function failed.
E0228 TEMP STORAGE PUTQ ERROR HAS OCCURRED IN TRT CAPTURE PROCESSING.
The requested function failed.
Message ID Messages text Description
470 CPMS/SYSD Reference Manual ~ 7.2

Appendix B Error messages
E0229 CICS TRACE TABLE HAS BEEN CAPTURED IN SPECIFIED SESSION NAME.
The requested function was successful.
E0230 GENERIC LIST FOR THIS INDEX COULD NOT BE GENERATED.
The requested function failed.
E0231 TOO MANY ENTRIES TO PROCESS FOR THIS INDEX LEVEL, BE MORE SPECIFIC.
The work area of 32K was exceeded. Qualify the index further.
E0232 CATALOG COULD NOT BE FOUND FOR THIS INDEX.
The requested function failed.
E0233 CONVERSATIONAL MGR ERROR OCCURRED.
The requested function failed.
E0234 NO ENTRIES FOUND FOR THIS INDEX.
There were no data sets cataloged for the specified index.
E0235 CATALOG READ ERROR. The requested function failed.
E0236 UNABLE TO OPEN CATALOG.
The requested function failed.
W0237 SAVE SUCCESSFUL, RELOAD FAILED - RESELECT MEMBER.
Restart the edit session with the S=select option.
E0238 INVALID LANGUAGE OR DATA TYPE SPECIFIED.
You entered an invalid language or data type. Enter a valid language type or data type.
W0239 STORAGE CHAIN NO LONGER VALID.
An internal error occurred.
I0240 DATASET ALLOCATED AND CATALOGED.
The requested function was successful.
I0241 DATASET DELETED AND UNCATALOGED.
The requested function was successful.
Message ID Messages text Description
471

Appendix B Error messages
E0242 DATASET IS ALREADY CATALOGED.
The requested function was ignored.
E0243 SECURITY VIOLATION ON ++INCLUDE MEMBER.
The requested function failed.
E0244 ONE OR MORE RECORD SELECTION TYPES IS NOT VALID.
The record selection was not valid. Correct the invalid entry and try again.
E0245 LINE OPTION SELECTED IS NOT VALID FOR THIS RECORD TYPE.
Correct the invalid line option and try again.
E0246 $JES2PRT HAS FAILED. The requested function failed.
E0247 UNABLE TO GETMAIN STORAGE.
There is not enough storage to proceed with the request. Retry later.
I0248 SELECTION CRITERIA NOT MATCHED.
There were no printers available for display.
W0249 NOT IN NUMBER MODE. The UNNUMBER request was ignored.
I0250 COMMAND TO DELETE JOB HAS BEEN ISSUED.
The delete request was scheduled.
E0251 GENERIC DESTIDS ARE NOT ALLOWED.
Specific destinations or blanks must be entered.
I0252 ENTER DATASET PASSWORD TO VERIFY DELETE(S).
A password is required for the delete function.
E0253 THIS FIELD MUST BE 'Y', 'N', OR '*'.
Invalid data was supplied. Enter a Y, N, or asterisk (*).
E0254 UNAUTHORIZED CLASS. Security violation. You are not authorized for the specified class.
I0255 COMMAND HAS BEEN ISSUED.
An operator command was issued.
Message ID Messages text Description
472 CPMS/SYSD Reference Manual ~ 7.2

Appendix B Error messages
E0256 INVALID NUMBER TYPE SPECIFIED.
The numbering type must be standard, relative, or COBOL.
E0257 INVALID FIRST LINE NUMBER SPECIFIED.
The first line number must be numeric.
E0258 INVALID LAST LINE NUMBER SPECIFIED.
The last line number must be numeric.
E0259 FIRST LINE GREATER THAN LAST.
The first, or beginning, copy line number is larger than the last, or ending, copy line number. The first line number must be smaller than the last line number.
E0260 FIRST LINE SPECIFIED NOT FOUND IN DATASET.
When using relative line numbering, the first line number specified was not found in the copied data set.
W0261 MEMBER UPDATED. (PDS NEARLY FULL).
The PDS is more than 90 percent full.
I0262 RECORDS TRANSFERRED (EXCLUDES SKIPPED).
Records, except for lines that were excluded, were written to a temporary storage queue.
E0263 INVALID TS QUEUE SYSID SPECIFIED.
The system ID specified on the GET/PUT TS Queue Identifiers screen (Option 0.4) is invalid.
E0264 CICS TS QUEUE I/O ERROR.
An error occurred while CPMS/SYSD was writing the data to temporary storage.
E0265 USER NOT AUTHORIZED FOR CICS TS QUEUE.
You are not authorized to use the specified temporary storage queue ID.
E0266 CICS TS QUEUE ISC LINK FAILURE.
The connection to the remote region was not available.
E0267 INVALID REPETITION COUNT.
The repetition count specified was less than zero.
E0268 CICS TS QUEUE IS CURRENTLY IN USE.
The specified temporary storage queue is already in use.
Message ID Messages text Description
473

Appendix B Error messages
E0269 NEW NAME ALREADY EXISTS.
The new member name already exists.
E0270 NO DIRECTORY SPACE AVAILABLE.
There is no directory space available in the PDS.
E0271 DATA SET IS READ ONLY OR INVALID DCB.
The data set is in read-only mode or it has an invalid DCB parameter.
I0272 PRINT JOB SUCCESSFULLY SUBMITTED.
The job to print the requested information was submitted.
E0273 INVALID JOB CARD, PRINT JOB NOT SUBMITTED.
The JOB card specified on the Utility Parameters screen (Option 0.5) is invalid.
E0274 SECURITY VIOLATION, COMMAND NOT ISSUED.
You are not authorized to issue the command from the SYSLOG display.
E0275 QUEUE IDENTIFIER SPECIFIED IS RESERVED.
The specified temporary storage queue ID is reserved. See the MENU06 user exit for a list of reserved queue IDs.
E0276 NEW MEMBER NAME MISSING OR INVALID.
The new member name for the rename option is missing or invalid.
E0277 SYS1.IMAGELIB IS NOT CATALOGED.
SYS1.IMAGELIB is not cataloged. CPMS/SYSD needs this data set to find the FCBs.
E0278 SYS1.IMAGELIB IS NOT FOUND IN VTOC.
SYS1.IMAGELIB was not found on the volume it is cataloged on.
E0279 FCB FCB2xxxx COULD NOT BE FOUND IN SYS1.IMAGELIB.
The FCB was not found in SYS1.IMAGELIB.
E0280 INVALID TTR POINTER FOR FCB.
The TTR pointer for the FCB is invalid.
E0281 FCB LENGTH MUST BE GREATER THAN 0.
The length of the FCB is zero.
Message ID Messages text Description
474 CPMS/SYSD Reference Manual ~ 7.2

Appendix B Error messages
E0282 WRITER TYPE MUST BE SW.
When starting a writer, you must specify SW for a JOE writer.
E0283 THE SYSDUSER FILE IS FULL.
The SYSDUSER file is full. Increase the file size.
E0284 ERROR UPDATING THE SYSDUSER FILE.
CPMS/SYSD found an error while trying to update the SYSDUSER file.
E0285 DATASET HAS INVALID BLOCKSIZE.
The data set had an invalid block size.
W0286 ARCHIVED DATASET. END TO CANCEL,<ENTER> TO RESTORE.
The data set accessed has been archived. To restore the data set, press ENTER. To cancel the restore, press the END or RETURN PF key or type the END or RETURN command.
I0287 DATASET RESTORE HAS BEEN CANCELLED.
The archived data set will not be restored.
I0288 ARCHIVED DATASET HAS BEEN DELETED.
The archived data set has been deleted.
I0289 DATASET RESTORE HAS BEEN SCHEDULED.
The archived data set has been scheduled for restore.
E0290 CICS FAILED AUTHORIZATION FOR CATALOG ACCESS.
You are not authorized to catalog the data set.
E0291 INVALID CLASS (USE 'A-Z', '0-9' or' '.
The user specified an invalid character for the class.
E0292 SMS DATASET-UNCATLG NOT ALLOWED.
The storage management product does not allow the data set to be uncataloged.
E0293 SUPERSET MEMBERS CANNOT BE EDITED.
Individual members of a SYSD/ATP superset cannot be edited.
E0294 BLOCK SIZE IS NOT A MULTIPLE OF LRECL.
When allocating fixed-blocked data sets, the block size must be a multiple of the record size.
Message ID Messages text Description
475

Appendix B Error messages
E0295 TEMPORARY STORAGE FULL - QUEUE DELETED.
The temporary storage queue specified with the PUT command found a full condition. The temporary storage queue was deleted and the function failed.
E0296 RECORD LENGTH MUST BE GREATER THAN ZERO.
For fixed or variable data sets, the record length must be greater that zero.
I0297 FILE SUBMITTED. The request was successful.
E0298 FILE SUBMIT ERROR - INVALID RECORD LENGTH.
The record length is invalid. It must be 80 bytes when you are submitting it from browse.
E0299 FILE SUBMIT ERROR - INVALID RECORD FORMAT.
The record format is invalid. The file must be fixed or fixed block to allow you to submit it from browse.
W0300 CHARACTER STRING 'xxxx' NOT FOUND.
The character string you were looking for could not be found.
I0301 CHARACTER STRING 'xxxx' FOUND. {(WRAP)}.
The character string xxxx was found. If the option wrap is on and the find wrapped the file, then (WRAP) appears.
I0302 pgmname applid userid JES2FREE ISSUED.
A JES2FREE command was issued by the specified user (userid) in the specified CICS region (applid). The Pgmname program identifies the internal program.
W0303 pgmname applid UNABLE TO FIND ascbname ASCB.
The ASCB for ascbname could not be found in the specified CICS region (applid). The Pgmname program identifies the internal program.
I0304 pgmname applid AUTOFREE ISSUED.
AUTOFREE was internally issued in program pgmname in the specified CICS region (applid).
I0305 pgmname applid ABEND abendcode abendtext.
An abend was issued in program pgmname in the specified CICS region (applid). The abend is identified by abendcode and abendtext.
Message ID Messages text Description
476 CPMS/SYSD Reference Manual ~ 7.2

Appendix B Error messages
W0306 pgmname applid SYSDSRB1 RETURNED srbresponse.
Program pgmname in the specified CICS region (applid) scheduled an SRB that failed. The srbresponse is the return code from the SRB. An x'50' srbresponse might indicate that the CPMS/SYSD JES2 programs may need to be assembled using INSTPROG in SYSD.USRLIB.
I0310 SLAM RC=0. SUCCESSFUL COMPLETION.
The request was successful.
I0311 SLAM RC=4. RECORD NOT FOUND OR EOF.
The record was not found in the editor work file.
E0312 SLAM RC=8. INVALID SLAM REQUEST.
The request was invalid for the editor work file.
E0313 SLAM RC=12. SLAM DATASET FULL.
The editor work file is full.
E0314 SLAM RC=16. I/O ERROR ON SLAM DATASET.
An I/O error occurred in the editor work file.
W0315 SLAM RC=20. DIRECTORY ENTRY WAS NOT FOUND OR PASSWORD IS INVALID.
The editor work file directory was not found.
E0316 SLAM RC=24. SLAM DIRECTORY IS FULL.
The editor work file directory is full.
E0317 SLAM RC=28. DIRECTORY I/O ERROR.
There was an I/O error reading the editor work file directory.
I0318 SLAM RC=32. OS FILE EOF DETECTED.
The EOF was detected for the OS data set being edited.
E0319 SLAM RC=36. OS FILE I/O ERROR DETECTED.
There was an I/O error detected when the editor was accessing the OS file being edited.
E0320 SLAM RC=40. OS FILE OPEN FAILED.
The OS file you want to edit failed to open.
Message ID Messages text Description
477

Appendix B Error messages
E0321 SLAM RC=44. OS FILE CLOSE FAILED.
The OS file you want to edit failed to close.
W0322 SLAM RC=48. OS FILE INVALID VOLSER.
The OS file you are editing points to an invalid VOLSER.
W0323 SLAM RC=52. OS FILE INVALID DATASET NAME.
The dataset name for the OS file is invalid.
W0324 SLAM RC=56. OS FILE INVALID MEMBER NAME.
The member name specified for the OS file is invalid.
W0325 SLAM RC=60. OS FILE INVALID DSORG.
The dataset organization is invalid for edit.
W0326 SLAM RC=64. OS FILE INVALID RECFM.
The dataset record format is invalid for edit.
W0327 SLAM RC=68. OS FILE INVALID LRECL.
The dataset logical record length is invalid for edit.
E0328 SLAM RC-72 LARGE DATASET NOT SUPPORTED.
Data sets larger than 64 K tracks are not supported in the edit function.
E0335 SLAM RC=100+ UNKNOWN RETURN CODE.
The process for the editor work file received an unknown return code. Call H&W Customer Support.
W0336 DATASET RESTORE NOT SCHEDULED. INSUFFICIENT OSTASKS. RETRY LATER.
The restore of an archived data set could not be accomplished due to a temporary shortage of CPMS/SYSD OS tasks. Retry later. If the problem persists, consider increasing the number of OS tasks.
E0337 DATASET RESTORE NOT SCHEDULED. START PROBLEMS.
Internal problem attempting to start the task to do the dataset restore. Contact H&W Customer Support.
I0338 DATASET RESTORE IN PROGRESS.
A dataset restore for an archived data set is currently in progress.
Message ID Messages text Description
478 CPMS/SYSD Reference Manual ~ 7.2

Appendix B Error messages
I0339 DATASET MIGRATED. PRESS <ENTER> TO RESTORE.
An archived data set has been requested. To schedule a restore, press ENTER. To avoid scheduling the restore, press the END or RETURN PF key or type the END or RETURN command.
I0340 RESTORE COMPLETED. The restore of an archived data set has been completed, and the data set is now ready for use.
E0341 RESTORE FAILED. The restore of an archived data set has failed. See the OS console for possible problems with the restore.
I0342 DATASET MIGRATED. RESTORE PROHIBITED.
The restore of an archived data set has been prohibited. See the OS console for possible reasons.
E0343 OS SUBTASK ABENDED. CONTACT H&W SUPPORT.
The SYSD OS task has abended. See the OS console for more information. If the cause is unknown or the problem persists, call H&W Customer Support.
I0344 Applid,userid,sysdfunction,subfunction,volser, dsname,membername, RC=returncode STACK=(stack).
Log message from the call to the DSN001 exit. Triggered by setting LDSN001 to Y or F using function SYSDINIT. Return code not equal to zero indicates the exit rejected the access. Applid, userid, sysdfunction, subfunction, volser, dsname, and membername are the input parameters to the exit. The stack indicates the program and procedures that called the exit.
I0345 Applid,userid volser,dsname,membername,subfunction,format, RC=returncode STACK=(stack).
Log message from the call to the DSN002 exit. Triggered by setting LDSN002 to Y or F using function SYSDINIT. Return code not equal to zero indicates the exit rejected the access. Applid, userid, volser, dsname, membername, subfunction, and format are the input parameters to the exit. The stack indicates the program and procedures that called the exit.
Message ID Messages text Description
479

Appendix B Error messages
I0346 Applid,userid,sysdfunction,"inputdsname","outputdsname", RC=returncode STACK=(stack).
Log message from the call to the DSN003 exit. Triggered by setting LDSN003 to Y or F using function SYSDINIT. Return code is informational only. This exit does not reject access. Applid, userid, sysdfunction, and inputdsname are the input parameters to the exit. Outputdsname is the converted dsname. The stack indicates the program and procedures that called the exit.
I0347 Applid,userid,sysdfunction,type,printerid,function,subfunction, RC=returncode STACK=(stack).
Log message from the call to the PRT001exit. Triggered by setting LPRT001 to Y or F using function SYSDINIT. Return code not equal to zero indicates the exit rejected the print request. Applid, userid, sysdfunction, type, printerid, function, and subfunction are the input parameters to the exit. The stack indicates the program and procedures that called the exit.
I0348 Applid,userid,opid,sysdfunction,printerid,requestortermid, RC=returncode STACK=(stack).
Log message from the call to the PRT002 exit. Triggered by setting LPRT002 to Y or F using function SYSDINIT. Return code not equal to zero indicates the exit rejected the print request. Applid, userid, opid, sysdfunction, printerid, and requestortermid are the input parameters to the exit. The stack indicates the program and procedures that called the exit.
I0349 Applid,userid,opid,sysdfunction,subfunction, RC=returncode STACK=(stack).
Log message from the call to the FUNC01 exit. Triggered by setting LFUNC01 to Y or F using function SYSDINIT. Return code not equal to zero indicates the exit rejected the access to the function. Applid, userid, opid, sysdfunction, and subfunction are the input parameters to the exit. The stack indicates the program and procedures that called the exit.
I0350 Applid,userid,sysduserid,sysdpassword, RC=returncode STACK=(stack).
Log message from the call to the MENU00 exit. Triggered by setting LMENU00 to Y or F using function SYSDINIT. Return code of 4 indicates to use the default if the updated sysduserid is not found. Applid and userid are the input parameters to the exit. sysduserid and sysdpassword are output fields set by the exit to contain the sysd userid and password. The stack indicates the program and procedures that called the exit.
Message ID Messages text Description
480 CPMS/SYSD Reference Manual ~ 7.2

Appendix B Error messages
I0352 Applid,userid,sysdfunction,refparm1,refparm2,refparm3, refparm4,sysduserid,RC=returncode STACK=(stack).
Log message from the call to the MENU02 exit. Triggered by setting LMENU02 to Y or F using function SYSDINIT. Return code not equal to zero indicates the exit rejected the access. Applid, userid, sysdfunction, refparm1, refparm2, refparm3, refparm4, and sysduserid are the input parameters to the exit. The stack indicates the program and procedures that called the exit.
I0353 Applid,userid,sysdfunction,refparm1,refparm2,refparm3, refparm4,control,admin,receive, RC=returncode STACK=(stack).
Log message from the call to the MENU03 exit. Triggered by setting LMENU03 to Y or F using function SYSDINIT. Return code not equal to zero indicates the exit rejected the access. Applid, userid, sysdfunction, refparm1, refparm2, refparm3, refparm4, control, admin, and receive are the input parameters to the exit. The stack indicates the program and procedures that called the exit.
I0354 Applid,userid,sysduserid,RC=returncode STACK=(stack).
Log message from the call to the MENU04 exit. Triggered by setting LMENU04 to Y or F using function SYSDINIT. See the MENU04 exit for meaning of the return code. Applid, userid, and sysduserid are the input parameters to the exit. The stack indicates the program and procedures that called the exit.
I0355 Applid,userid,sysdfunction,queueid,sysid,command,flag, RC=returncodeSTACK=(stack).
Log message from the call to the MENU05 exit. Triggered by setting LMENU05 to Y or F using function SYSDINIT. See the MENU05 exit for meaning of the return code. Applid, userid, sysdfunction, queueid, sysid, command, and flag are the input parameters to the exit. The stack indicates the program and procedures that called the exit.
I0356 Applid,userid,sysdfunction,queueid,RC=returncodeSTACK=(stack).
Log message from the call to the MENU06 exit. Triggered by setting LMENU06 to Y or F using function SYSDINIT. Return code not equal to zero indicates the queueid is reserved. Applid, userid, sysdfunction, and queueid are the input parameters to the exit. The stack indicates the program and procedures that called the exit.
Message ID Messages text Description
481

Appendix B Error messages
I0357 Applid,userid,RC=returncode STACK=(stack).
Log message from the call to the MENU07 exit. Triggered by setting LMENU07 to Y or F using function SYSDINIT. Return code is informational only. Applid and userid are the input parameters to the exit. The stack indicates the program and procedures that called the exit.
I0360 Applid,userid,opid,"command",admin,control,receive, RC=returncode STACK=(stack).
Log message from the call to the SYSL01 exit. Triggered by setting LSYSL01 to Y or F using function SYSDINIT. Return code not equal to zero indicates the command was rejected. Applid, userid, opid, "command", admin, control, and receive are the input parameters to the exit. The stack indicates the program and procedures that called the exit.
I0361 Applid,userid,opid,sysdfunction,jobname,jobid, RC=returncode STACK=(stack).
Log message from the call to the JES201 exit. Triggered by setting LJES201 to Y or F using function SYSDINIT. Return code not equal to zero indicates access to the job was rejected. Applid, userid, opid, sysdfunction, jobname, and jobid are the input parameters to the exit. The stack indicates the program and procedures that called the exit.
I0362 Applid,userid,opid,sysdfunction,subfunction, stepname,ddname,class,R0=R0code, RC=returncode STACK=(stack).
Log message from the call to the JES202 exit. Triggered by setting LJES202 to Y or F using function SYSDINIT. Return code not equal to zero indicates access to the sysout data set was rejected. R0code indicates whether to apply the return code to subsequent data sets with the same class. Applid, userid, opid, sysdfunction, stepname, ddname, and class are the input parameters to the exit. The stack indicates the program and procedures that called the exit.
I0363 Applid,userid,opid,sysdfunction,subfunction,jobname,jobid, RC=returncode STACK=(stack).
Log message from the call to the JES203 exit. Triggered by setting LJES203 to Y or F using function SYSDINIT. Return code not equal to zero indicates access to the job was rejected. Applid, userid, opid, sysdfunction, subfunction, jobname, and jobid are the input parameters to the exit. The stack indicates the program and procedures that called the exit.
Message ID Messages text Description
482 CPMS/SYSD Reference Manual ~ 7.2

Appendix B Error messages
I0364 Applid,userid,sysdfunction,subfunction, stepname,ddname,class,RC=returncode STACK=(stack).
Log message from the call to the JES204 exit. Triggered by setting LJES204 to Y or F using function SYSDINIT. Applid, userid, sysdfunction, stepname, ddname, and class are the input parameters to the exit. The stack indicates the program and procedures that called the exit.
I0365 Applid,sysdfunction,RC/TBLPTR=tblptr STACK=(stack).
Log message from the call to the JES205 exit. Triggered by setting LJES205 to Y or F using function SYSDINIT. Return code of zero indicates no setup string was returned; otherwise, this will be the address of a setup string prefixed with a halfword length. Applid and sysdfunction are the input parameters to the exit. The stack indicates the program and procedures that called the exit.
I0366 Applid,userid,opid,sysdfunction,jobname,jobid,class,RC=returncode STACK=(stack).
Log message from the call to the JES206 exit. Triggered by setting LJES206 to Y or F using function SYSDINIT. Return code not equal to zero indicates access to the job output element was rejected. Applid, userid, opid, sysdfunction, jobname, jobid, and class are the input parameters to the exit. The stack indicates the program and procedures that called the exit.
I0367 Applid,userid,opid,sysdfunction,jobname,jobid,jobdest,RC=returncode STACK=(stack).
Log message from the call to the JES207 exit. Triggered by setting LJES207 to Y or F using function SYSDINIT. Return code not equal to zero indicates access to the job output element was rejected. Applid, userid, opid, sysdfunction, jobname, jobid, and jobdest are the input parameters to the exit. The stack indicates the program and procedures that called the exit.
E0368 INVALID SETTING "parm" FOUND IN PROFILE "profileid”.
An invalid parameter was found in the profile indicated by “profileid”.
E0369 INVALID SETTING FOR DEFAULT PROFILE.
An invalid parameter was found in the default profile.
E0370 INVALID SETTING "parm" FOUND IN OPTION "optionid”.
An invalid parameter was found in the specified option.
Message ID Messages text Description
483

Appendix B Error messages
I0371 USER PROFILE RECORD UPDATED.
The user profile record has been updated.
W0372 STATS NOT APPLICABLE TO PANVALET(R) DATA SETS.
The STATS do not apply to CA Panvalet data sets.
E0373 FIELD MUST BE "A" OR "D". The sequence field must be A or D.
E0374 EDIT OF MULTI-VOLUME DATASET NOT ALLOWED.
The dataset expands across multiple volumes and can not be edited.
E0375 LABEL .xxxx NOT SET. NO MORE SLOTS AVAILABLE.
LABEL xxxx NOT SET. INVALID LABEL.
The label .xxxx is not set. You can only have 20 labels defined in a single edit session.
Labels can consist only of the letters A through Z.
E0376 LABEL xxxx NOT FOUND. You are trying to use a label xxxx (bookmark) which has not been previously set.
E0377 NEW DATASET NAME IS MIGRATED.
During a rename of a current dataset, the new dataset name already exists as a migrated data set.
I0378 TOP OF RANGE REACHED. The FIND command has reached the top of the range that was defined.
I0379 END OF RANGE REACHED.
The FIND command has reached the end of the range that was defined.
E0380 TARGET LINE MUST BE 1-15.
The FIND target line must be a line from 1 through 15 in the FLINE edit command.
E0381 INVALID SORT COLUMNS. The SORT columns for a specific sort field are invalid. One cause is the starting column might be larger than the ending column.
E0382 STORAGE NOT AVAILABLE FOR SORT.
The editor SORT reads in the entire range of records into core to perform the sort. The storage could not be obtained. The sort was not performed.
E0383 SORT START AND END LABELS MUST BE ENTERED.
The SORT command works with a range of records defined by labels. Enter the start and end labels.
Message ID Messages text Description
484 CPMS/SYSD Reference Manual ~ 7.2

Appendix B Error messages
E0384 EXCLUDE/NON-EXCLUDE MUST BE "X" OR "NX".
The EXCLUDE/NON-EXCLUDE option on the SORT command is invalid. The option must be X or NX.
I0385 nnnn RECORDS SORTED. The sort has completed successfully. The number of records specified by nnnn have been sorted.
E0386 COMMAND INVALID - LINE COMMAND PENDING.
You have issued a command that would result in deleting a pending line command. Reset or complete line commands before issuing the DELETE command.
E0387 CURSOR IS NOT ON A VALID DATA FIELD.
The cursor must be between the ZONE settings when you enter a SPLTJOIN command.
E0388 LABEL xxxx IS RESERVED AND HAS NOT BEEN SET.
The label name xxxx is a system-reserved label. The label is not set.
W0389 TS QUEUE RECORDS TRANSFERRED. RECORDS TRUNCATED TO 255.
While viewing a JES2 spool file, you are "PUTting" records that are longer than 255 bytes. The "PUT" records have been truncated to 255 bytes.
I0390 MEMBER DSN (MEMBER) {CREATED | REPLACED}
You have saved the current edit member as a new member of the DSN or you replaced a member.
W0391 MEMBER NOT UPDATED DUE TO REPLY "M" ON CONSOLE.
The member belongs to a PDS that has an expiration date of 99/365 causing the user to respond U or M on the master console. U continues with the update, M cancels the update. When replying M, it is normal to receive an error message similar to the following:
+SYSD - OSTK0002 - ESTAE EXIT INVOKED-ABEND 713000 PSW=FF54000D00000000
E0392 WILDCARD NOT ALLOWED IN 1ST QUALIFIER.
You cannot use a wildcard in the first qualifier of a index dataset name.
E0393 PASSWORD AND VERIFY PASSWORD MISMATCH.
The Password field and the Verify Password field do not match. The password was not updated.
I0394 PASSWORD UPDATED. Your password has been accepted and changed.
Message ID Messages text Description
485

Appendix B Error messages
E0395 {SYSD | CPMS} TERMINATED: LICENSE INVALID, RC=nnnnn.
An error has been detected trying to validate your SYSD or CPMS license key.
If RC=1 through 4, rerun the license-key load procedure. If the problem persists, contact H&W Support.
If RC > 4, contact H&W Support and provide the error code and RC= information.
E0396 {SYSD | CPMS} TERMINATED: LICENSE EXPIRED ON mm/dd/yyyy.
Your SYSD or CPMS license key expired on the date shown. Contact H&W Support to obtain a new license key.
W0397 {SYSD | CPMS} GRACE MODE EXPIRES IN nn DAYS ON mm/dd/yyyy.
You are running SYSD or CPMS on an unlicensed system. If this is a disaster recovery system used for testing, you can continue to run for nn more days without any problems. If your CEC id has changed or your license has expired, contact H&W Support to obtain a new license key.
W0398 {SYSD | CPMS} LICENSE EXPIRES IN nnn DAY(S) ON mm/dd/yyyy.
Your SYSD or CPMS license will expire in nn days on this system. Contact H&W Support to obtain a new license key.
I0399 Applid,userid,opid,sysdfunction,command, RC=returncode STACK=(stack).
Log message from the call to the JES208 exit. Triggered by setting LJES208 to Y or F using function SYSDINIT. Return code not equal to zero indicates the exit rejected the access to the function. Applid, userid, opid, sysdfunction, and subfunction are the input parameters to the exit. The stack indicates the program and procedures that called the exit.
E0400 INVALID LINEND CHARACTER.
The LINEND character must be one included in the LINEND character table.
E0401 {FROM | TO} HEX STRING IS INVALID.
The FROM or TO string does not contain valid hexadecimal characters. The FROM and TO strings must be an even number of characters and can contain only the letters a through f, A through F, and the numbers 0 through 9.
E0402 COLUMN GUIDE MUST BE ON LINE 1-n.
The column guide must be between or include the specified lines. Enter the command again using a row number from 1 through n.
Message ID Messages text Description
486 CPMS/SYSD Reference Manual ~ 7.2

Appendix B Error messages
E0403 {RECOVERY|UNDO} HAS BEEN DISABLED BY ADMINISTRATOR.
The MAXRECOVERY parameter in SYSDSETS is set to zero.
E0404 UNDO NOT ALLOWED WITH LINE COMMANDS.
You cannot issue the UNDO primary command if you entered any commands that are still pending.
I0405 NOTHING TO UNDO. There is nothing in the UNDO recovery file.
I0406 n GROUP(S) UNDONE. The UNDO command has finished successfully and has undone n groups.
W0407 RECOVERY DATA HAS BEEN DELETED.
You issued a command that deletes the current recovery data. Due to the method used to undo changes, the recovery data is no longer valid and must be deleted to prevent accidentally corrupting the file when the UNDO command is issued. CPMS/SYSD will continue collecting recovery data after the RENUM command or RECOVERY ON command is issued.
I0408 MAX RECOVERY GROUPS=nn.
You issued the RECOVERY SIZE command to see the value of the MAXRECOVERY parameter in SYSDSETS. The number of groups shown is the maximum number of actions that you can undo using the UNDO command.
Message ID Messages text Description
487

Appendix B Error messages
E0409 ERROR(nn,eee) aaaaaaaa xxxxxxxx FILE. RECOVERY SET OFF.
CPMS/SYSD encountered an error when trying to read, write, or delete records in the xxxxxxxx recovery VSAM file. CPMS/SYSD turned off recovery for this user. View the master console and CICS logs for possible CICS or VSAM error messages. If the problem continues, contact H&W Support.
The variables in the error message represent the following:
• nn: An internal return code used by H&W Customer Support. Look in SYSD.MACLIB(ERRMSG) under error message 409 for more information about this return code.
• eee: EIBRESP2 (decimal) from the EXEC CICS command.
• aaaaaaaa: CPMS/SYSD shows READING, WRITING, or DELETING in place of this variable.
• xxxxxxxx: The DDNAME of the VSAM file.
E0410 EDIT RECOVERY FILE ID MUST BE A-Z, 0-9 OR "*".
The edit recovery file DD name is SYSDRECx, where x is A through Z or 0 through 9.
An asterisk (*) indicates that CPMS/SYSD will use the default value from SYSDSETS for the user ID.
W0411 USE "FORCE", RECOVERY DATA WILL BE LOST.
You are running with recovery turned on and the command you entered will delete the current recovery data. Use the FORCE option to continue with the command.
E0412 "FORCE" REQUIRED TO EXIT.
You have entered a C, E or B in the Force required to exit field before entering an edit session. You must use CANCEL FORCE, END FORCE, or RETURN FORCE to exit the edit session.
E0413 FIELD MUST BE "N", "C", "E" OR "B".
The Force required to exit field must be one of the listed values.
E0414 ZONE OVERRIDE MUST BE GREATER THAN nnn.
You have issued a TF line command with a right zone override. The column value must be greater than the current left zone value.
Message ID Messages text Description
488 CPMS/SYSD Reference Manual ~ 7.2

Appendix B Error messages
E0415 INVALID RC CONDITION. The RC condition value must be one of the following:
• = or EQ
• <> or NE
• < or LT
• <= or LE
• > or GT
• >= or GE
I0416 EXCHANGE COMMAND PENDING
You have entered an exchange (E) command. This command must be paired with another exchange line command.
E0417 EXCHANGE BLOCKS OVERLAP
The exchange blocks cannot overlap. Enter the second exchange command again.
W0418 TRUNCATION WOULD OCCUR, SOME DATA NOT ADJUSTED.
During the RETAB (RT) line command, some of the lines would have been truncated. The lines which would have been truncated are not expanded.
E0419 OPEN ERROR ON WORK FILE nnnn.
While trying to edit a file, the exit has swapped the edit work file to nnnn, but nnnn cannot be found in the SYSDWORK tables.
E0420 YOU ARE NOT AUTHORIZED FOR "SETID".
You do not have master control authority and cannot change the profile for other users.
E0421 USERID MISSING OR INVALID.
You have issued a SETID command, and the user ID is missing or does not exist in the SYSDUSER file.
I0422 NN CHARACTERS BETWEEN "X" (SS-EE).
You issued the CCHAR edit command, and the character count is displayed. The variables in the message indicate the following:
• NN: Number of characters between the delimiters.
• X: The delimiter.
• SS: The column of the first delimiter.
• EE: The column of the second delimiter.
W0423 NO RECORDS PUT. No records were put to the TSQ for retrieval.
Message ID Messages text Description
489

Appendix B Error messages
W0424 TRANCHR NOT ALLOWED WITH THIS DIRECTORY VERSION.
You have edited an old file from an edit session that does not support the TRANchr command.
E0425 {FROM|TO} CHARACTER MISSING OR INVALID.
The data entered in the FROM or TO position does not contain valid hex data.
W0426 ONLY 3 TRANSLATE CHARACTERS ALLOWED.
TRANchr supports only three different characters.
W0427 CHARACTER X"hh" NOT FOUND.
The character X"hh" does not exist in the translate table.
W0428 SWAP TO SELF OR PARTITION IS NOT ACTIVE.
The partition ID you entered is not an active partition or you are already viewing the partition.
I0429 LABEL xxxxxx SET TO LINE nnnnnn.
You assigned the label xxxxxx to line nnnnnn while browsing.
I04230 LABEL xxxxxx DELETED. You deleted label xxxxxx while browsing.
E0431 PIC() MAY ONLY CONTAIN "A", "N", "B" OR "+".
The PIC( ) parameter for the MODID command can contain only the characters listed.
E0432 KEYWORD INVALID OR CONFLICTING PARAMETERS.
You have an invalid keyword or a keyword is used incorrectly. Keywords such as ALL LAST PREF FIRST cannot be used together.
W0433 ENTER A NAME AND/OR DEPARTMENT TO SEARCH FOR.
When performing a search in the user's maintenance menu, you must enter a user's name and/or department
E0434 VALUE MUST BE "ON" OR "OFF".
The value entered must be "ON" or "OFF".
I0435 DEFAULT VIEW HAS BEEN SET.
Your default view has been set and will be used each time you enter the panel.
W0436 UNABLE TO RETRIEVE DATASETS FOR JOB.
CPMS was unable to retrieve the datasets using the JES2 API's for the specific job.
Message ID Messages text Description
490 CPMS/SYSD Reference Manual ~ 7.2

Appendix B Error messages
W0437 SAVE COMMAND NOT VALID FOR &&DATASETS OR &&MEMBERS.
The SAVE command may not be used with temporary datasets or members. These datasets or members stay in the editor’s work file.
E0438 VALUE MUST BE NUMERIC The field may only contain the characters 0 through 9.
Message ID Messages text Description
491

Appendix B Error messages
492 CPMS/SYSD Reference Manual ~ 7.2

Index
Symbols: (colon) primary command 117? (question mark)
error indicator 244primary command 117wildcard for searching 245
.label commandBrowse - Dataset Display screen 74editor line (set bookmark) 197primary command 117
( (column shift left) editor line command 185(( (column shift left block) editor line command 185) (column shift right) editor line command 186)) (column shift right block) editor line
command 187* (asterisk)
comment character in edit sessions 196continuation line indicator in edit sessions 188wildcard for browsing data sets 245
/ (set current line) editor line command 204/=Reposition option (Listcat Utility screen) 247/cmd command, JES2 Spool Display screen 302&& prefix
for temporary data sets 94for temporary edit sessions 90, 95for temporary library member names 93
&&HOTLIST.userid 108#I/O field
Active Task Display screen 339JES2 Display Active Jobs screen 260
#Line fieldJES2 Job Output Display screen 288Output Waiting For Printer screen 317
#Lines fieldJES2 Job Queue Display screen (new
format) 267Job Output Element Display screen 422JES2 Job Queue Display (Right) screen (old
format) 275JES2 Job Queue Display screen (new
format) 267Job Output Element Display screen 422
+ (plus sign), primary command 117++Copy Member field (Edit - Dataset Menu for CA
Panvalet screen) 98
< (data shift left) editor line command 189<< (data shift left block) editor line command 190> (data shift right) editor line command 191>> (data shift right block) editor line command 192
Numerics0 - PARMS option (JES2 Primary Option Menu
screen) 301 - BROWSE option (JES2 Primary Option Menu
screen) 302 - EDIT option (JES2 Primary Option Menu
screen) 302nd Alloc field 3543 - UTIL option (JES2 Primary Option Menu
screen) 314 - ACTIVE option (JES2 Primary Option Menu
screen) 315 - N option (JES2 Primary Option Menu
screen) 316 - O option (JES2 Primary Option Menu
screen) 317 - PRINTER option (JES2 Primary Option Menu
screen) 318 - JFT option (JES2 Primary Option Menu
screen) 31
AA - Allocate New Dataset data set command 228A (after) editor line command 183A functional command 337A job status 365A status type for jobs 306A=Allocate data set command
Catalog Utility screen 242Dataset Extents screen 233Dataset Information screen 230
A=Release optionJES2 Job Output Display (Right) screen 290JES2 Job Output Display screen 287JES2 Job Queue Display (Right) screen (old
format) 273JES2 Job Queue Display screen (new
format) 264
493

Index
JES2 Job Queue Display screen (old format) 270
Output Waiting For Printer screen 316AA functional command 340AAE functional command 342abend return code for jobs in queues (JES2 Job
Queue Display (Right) screen, old format) 274
ABORTcommand for editing 88primary command 117
AC field (Browse - Member Selection screen) 69Access to Panvalet (SYSD/ATP) 19ACTIVE JES2 printer status 313active jobs. See jobsACTIVE option (JES2 Primary Option Menu
screen) 31active page data set DASD attribute 255Active Task Display screen
field descriptions 338illustration and description 337
active tasks. See tasksadding
aliases for members of partitioned data sets 386
data set names and volume serial numbers to catalog 344
new member from current edit session 126partitions (PF2 key) 43partitions (SPLIT primary command) 167partitions (SPLIT universal command) 28product license record 367user profiles 32, 329
Addr field (System Device Unit Display screen) 254
Address field (General Parameter Definitions screen) 37
address spacesCICS 346z/OS 31
addressesdirect screen flow 378UCBs 439
addressing mode (AMODE) for load library members 69
ADJUSTING PAGE print task status 307, 394AE functional command 341Age field (Edit - Session Display screen) 100AIDLIMT, viewing and changing 403AIx data set record type 246AL functional command 342ALias data set record type 246
Alias field, Directory for PDS Member screen 370, 371
aliasesCVOL catalog 245data set record type 246deleting high-level from z/OS catalog 350editor line commands 181functional commands 334partitioned data set members 386primary commands 113
Alias-of field (Browse - Member Selection screen) 69
aligning data in edit sessionsbetween columns 170, 173, 174between columns to left justify 206between columns to right justify 206in the center of columns 172to left and right justify 205
ALL commandfor viewing all active jobs 260JES2 Display Active Jobs screen 260
ALL hold typefor data sets 317for jobs 288
ALLOC functional command 343Allocate data set command
Allocate Utility screen 237Catalog Utility screen 242Dataset Extents screen 233Dataset Information screen 230
Allocate New Dataset data set command 228Allocate Utility screen
command definitions 237field definitions 235illustration and description 235
allocated CICS data sets, viewing summaryAL functional command 342ALLOC functional command 343
allocatingnew data sets 218, 224new data sets dynamically 235
allocation, viewing for data sets 229alphanumeric notation, turning on and off for
source data in edit sessions 143alternate index data set record type 246AM field (Browse - Member Selection screen) 69AMODE (addressing mode for load library
members) 69archived data sets, recalling 410ASID field
Active Task Display screen 338JES2 Display Active Jobs screen 258
494 CPMS/SYSD Reference Manual ~ 7.2

Index
asterisk (*)comment character in edit sessions 196continuation line indicator in edit sessions 188wildcard for browsing data sets 245
ATP (Access to Panvalet) 19attributes
DASD 255data sets 352JES2 printers 311load library members 69output elements 421spin data sets 290
Attributes field (Browse - Member Selection) screen 69
authorization code for load library members 69automatic numbering, turning on and off for lines in
edit sessions 118automatic translation, turning on and off for edit
sessions 120AUTONUM primary command 118auto-start options for JOE writer, viewing 396Aux field
Active Task Display screen 339JES2 Display Active Jobs screen 260
auxiliary tasks. See tasks, auxiliary
BB - Browse Member data set command 223B (before) editor line command 184B field
JES2 Job Output Display (Right) screen) 291JES2 Printer Display screen 314
B=Browse data set commandDataset Extents screen 233Dataset Information screen 230
B=Browse optionListcat Utility screen 247VTOC Utility screen 250
BACKWARD commandBrowse - Dataset Display screen 74primary command 118
batch jobs. See jobs, batchbatch print jobs. See jobs, batchBeginning Separator Pages field (Printer Status
screen) 397beginning separator pages, viewing and changing
for spool printers 397Behavior field (JES/List Parameter Definitions
screen) 41BIO functional command 343biorhythm chart, viewing 343
Blank - Display Data Set Information data set command 228
blanks in edit sessionsin lines, overlaying with characters from
another line 202in lines, overlaying with characters from
sending lines 202translating to from hexadecimal 209
blanks, trailing, replacing with nulls 151BlkSize field (VTOC for Data Set screen) 354BlkSz field (VTOC Utility screen) 251Blocksize field
Allocate Utility screen 237Browse - Dataset Display screen 73
BMS maps to CICS, viewing 389BNDS primary command 119bookmarks
labeling 166resetting and deleting 161setting to a specific line in edit sessions 197
BOTTOM commandBrowse - Dataset Display screen 74Browse - Member Selection screen 70Edit - Hot List Selection screen 110Edit - Member Selection screen 104primary command 119
boundaries, setting for editing data in edit sessions 119, 179
BOUNDS primary command 119Browse - Dataset Display screen
command definitions 74field definitions 73illustration and description 72
Browse - Dataset Menu for CA Panvalet screenfield definitions 63illustration and description 62
Browse - Dataset Menu screenfield definitions 57illustration and description 56
Browse - Hot List Selection screencommand definitions 83illustration and description 82
Browse - Member Selection screencommand definitions 70field descriptions 66illustration and description 65load library field definitions 68
Browse data set commandDataset Extents screen 233Dataset Information screen 230
Browse field (Browse - Dataset Display screen) 73browse libraries. See libraries
495

Index
Browse Member data set command 223Browse option
Listcat Utility screen 247VTOC Utility screen 250
BROWSE option (JES2 Primary Option Menu screen) 30
browsingdata set members 219data sets 19load library 68partitioned data set source members (L
functional command) 366partitioned data set source members (LIST
functional command) 368partitioned data set source members
(PDSDSPLY functional command) 387source data 30, 55
buffer pointer for spool printer 398buffers for spool printers, viewing and changing
delay between printing 400burst output elements 291bypassing forms change requests 404
CC - Catalog Dataset data set command 228C - CICS option (JES2 Primary Option Menu
screen) 31C - Compress Data Set data set command 223C (copy lines) editor line command 189C field
JES2 Job Output Display screen 288JES2 Printer Display screen 313Output Waiting For Printer screen 317
C job output element attribute 421C status for data sets for jobs in queues 279C** phase 365C=Cancel option
CPMS/SYSD Printer Table Display/Change screen 305
JES2 Job Queue Display (Right) screen (old format) 273
JES2 Job Queue Display screen (new format) 264
JES2 Job Queue Display screen (old format) 270
JES2 Printer Display screen 312C=Catalog data set command
Allocate Utility screen 237Catalog Utility screen 242Dataset Extents screen 234Dataset Information screen 230
C=Catalog option (VTOC Utility screen) 250
C=Compress data set command (Dataset Extents screen) 234
CA Panvaletbrowsing data sets 55editing library members 96installation code for members 63requirement to use PUT and GET instead of
SAVE to save members into data sets 163security code for libraries 63security for data set library members 96selecting and browsing library members 62
CANCEL commandfunctional command 344primary command 119when editing 88
Cancel optionCPMS/SYSD Printer Table Display/Change
screen 305JES2 Job Queue Display (Right) screen (old
format) 273JES2 Job Queue Display screen (new
format) 264JES2 Job Queue Display screen (old
format) 270JES2 Printer Display screen 312
cancelingbatch jobs from queues without printing 344edit sessions without updating source
(CANCEL primary command) 88, 119edit sessions without updating source (QQUIT
primary command) 157JES2 printer output 312job output elements while printing without
purging jobs from JES2 queue 305jobs (JES2 Job Queue Display (Right) screen,
old format) 272jobs (JES2 Job Queue Display screen, old
format) 269jobs on JES2 Job Queue Display screen (new
format) 264output on JES2 printers 312spool print tasks and printing of current
SYSOUT data set (PC functional command) 385
spool print tasks and printing of current SYSOUT data set (PRTCNL functional command) 391
See also stoppingcapitalization. See lowercase; uppercaseCAPS command
Browse - Dataset Display screen 74primary command 120
496 CPMS/SYSD Reference Manual ~ 7.2

Index
Caps field (JES2 Spool Display screen) 295Carriage Size field (Printer Status screen) 397carriage size for spool printers, viewing and
changing 397case. See lowercase; uppercaseCatalog data set command
Allocate Utility screen 237Catalog Utility screen 242Dataset Extents screen 234Dataset Information screen 230
Catalog Dataset data set command 228CATALOG option (Utility Selection Menu
screen) 218Catalog option (VTOC Utility screen) 250Catalog the DSN field (Allocate Utility screen) 237Catalog Utility screen
command definitions 242field definitions 239illustration and description 239
cataloging data sets 218, 239, 344catalogs
adding data set names and associated volume serial numbers 344
compressing for partitioned data sets 345data set record type for user 246listing entries for specific high-level
qualifiers 244printing partitioned data set members (OP
functional command) 383printing partitioned data set members
(OSPRINT functional command) 384recataloging data sets 410viewing entries (LC functional command) 367viewing entries (LISTC functional
command) 368viewing entries (LISTCAT functional
command) 368z/OS, deleting high-level index aliases 350z/OS, deleting primary indexes 350z/OS, deleting primary or generation indexes
(DRPX functional command) 351z/OS, uncataloging data sets 440z/OS, viewing entries 377
CATLG functional command 344CC (copy block) editor line command 188CC field
DASD Record screen 357Dataset Extents screen 233VTOC for Data Set screen 355
CC SYSOUT data set type 294CCHAR primary command 120center data editor line command 205
centering data in columns 205CHANGE (PF6) key 43change indicators, resetting in edit sessions 161CHANGE primary command
description 121using PF6 to repeat 121using with TRUNC and ZONE primary
commands 123change requests for forms. See forms change
requestschanges
identifying those made in edit sessions 149logging for editor 158recovering from in edit sessions 177submitting to mainframe from edit
sessions 131changing
attributes for JES2 printers 311beginning separator pages for spool
printers 397blocks of lines specified to lowercase in edit
sessions 200blocks of lines to lowercase and translating
hex data to blanks 199blocks of lines to lowercase and translating
hex data to blanks in edit sessions 200blocks of lines to lowercase in edit
sessions 199carriage size for spool printers 397character strings in edit sessions 121CICS definite response frequency 399CICS dynamically 332CICS swap status to nonswappable 382CICS swap status to swappable 382criteria for data sets waiting to print 316DCT variables 348defaults. See defaultsdelay between printing buffers for spool
printer 400destinations for jobs 288dispositions for jobs 287dispositions for output elements 316ending separator pages for spool printers 401exclude status for a block of records 196exclude status for a specified number of
records 195FCB for jobs 288FCT variables 360forms change terminal for spool printer 401forms for jobs 288forms on which spool printer is set to print 398job class for output elements 288
497

Index
lines specified to lowercase and translating hex data to blanks in edit sessions 200
master terminal assigned to spool printer 402number of columns set to print for spool
printers 397number of lines specified to lowercase in edit
sessions 198parameters 35passwords 36PF key assignments 44program variables 389spool printer options 404spool printer outstanding print task
counter 398terminal priority 435terminal specifications 396terminal status to in or out of service 435terminal variables 435transaction variables 436UCS for jobs 288uppercase translation for terminals 435user profiles 34, 329virtual memory in CICS address spaces 346writer ID for jobs 288
channel-to-channel UCB device class 255CHAR UCB
class 254device class 255
character UCB device class 255characters
counting number of between characters 120translating 175
CICSchanging swap status to nonswappable 382changing swap status to swappable 382debugging with CPMS/SYSD aids 332disabling CPMS/SYSD and terminating 413disconnecting from when printing is done 404executing transactions without terminating
CPMS/SYSD sessions 319management commands, summary list 449monitoring and managing activities 332returning to clear screen 27returning to from menu-driven system 31, 32transaction codes in functional
commands 333viewing and changing definite response
frequency for spool printers 399viewing and changing outstanding print task
limit for spool printer 403viewing and changing virtual memory in
address spaces 346
viewing and dynamically changing CICS tables 332
viewing BMS maps 389viewing ICEs (interval control elements) 362viewing statistics (general) 423viewing statistics (overall) 332viewing storage statistics 428viewing transaction IDs 345
CICS APPLIDin CICSxx field 73viewing current 107
CICS option (Primary Option Menu screen) 31CICS printer. See printers, CICSCICS Region SYSID field (GET/PUTS Queue
Identifiers screen) 49CICS system ID, setting default for GET, PUT, and
DELQ commands 48CICS Transactions screen
illustration and description 320using with SPLIT command 320
CICSTRAN functional command 345CICSxx field
Browse - Dataset Display screen 73Edit - Dataset Display screen 107
CL (continue line) editor line command 188CL data set record type 246Class field
JES/List Parameter Definitions screen 39System Device Unit Display screen 254, 255
Class(es) field (CPMS/SYSD Spool Writer Start screen) 309
Class(es) To Be Printed field (Printer Status screen) 397
classesdisplaying execution 266displaying message (JES2 Job Queue Display
screen, new format) 266job execution (JES2 Job Queue Display
(Right) screen, old format) 274job message (JES2 Job Queue Display (Right)
screen, old format) 274job output elements 288SYSOUT 50UCB 254UCB device 255
cleaning the spool print queue 414CLEAR
key 88PF key 42primary command 124universal command 27
498 CPMS/SYSD Reference Manual ~ 7.2

Index
clearingscreens 27screens and returning to CICS with edit
session intact 124closing. See stoppingclusters data set record type 246/cmd command, JES2 Spool Display screen 302CNOHSRU field (Job Output Element Display
screen) 421COB numbering mode for edit sessions 152COBOL
data set profile type 94edit profile 54edit profile type 52, 54, 155
codesauthorization for load library members 69CICS transaction in functional commands 333for CA Panvalet library members 96for print tasks 394installation for CA Panvalet data set
members 63installation security for CA Panvalet library
members 97library security for CA Panvalet members 97member security for CA Panvalet
members 97return for jobs in queues (JES2 Job Queue
Display (Right) screen, old format) 274security for CA Panvalet data set members 63security for CA Panvalet libraries 63security for installation of CA Panvalet data set
members 63user security for CA Panvalet library
members 97: (colon) primary command 117COLS command
column guide control, editor line command 184
primary command 124Cols field
Browse - Dataset Display screen 73Edit - Dataset Display screen 107JES2 Spool Display screen 294
column guides in edit sessionscontrolling (COLS editor line command) 184controlling (COLS primary command) 124controlling (SCALE primary command) 163
( column shift left editor line command 185(( column shift left block editor line command 185) column shift right line editor line command 186)) column shift right block editor line command 187
columnsdisplaying and excluding for jobs 39scrolling across in data sets 294viewing and changing number set for printing
by spool printers 397See also columns in edit sessions
columns in edit sessionsaligning 170aligning data between 173, 174aligning data in the center 172aligning data to left justify 206aligning data to right justify 206centering data in 205defining where tabbing occurs 171justifying data to left and right 205shifting contents of a block of lines to the
left 185shifting contents of a block of lines to the
right 187shifting contents of a line to the left in edit
sessions 185shifting contents of a line to the right in edit
sessions 186COMM
device class 255device classification 439specifying UCB class 254
commandsALL for viewing all active jobs 260changing command-stack character 147CPU console operator to OS or JES2 (OC
functional command) 382CPU console operator to OS or JES2 (OSCMD
functional command) 383data set. See commands, data setediting. See commands, editingeditor line. See commands, editor lineeditor scroll. See commands, editor scrollfor searching and replacing 43functional. See commands, functionalglobal. See commands, universalissuing primary 112Jobid 260online help. See commands, helppaging for online help 325paging in tutorial and online help 325primary. See commands, primaryrecalling from command buffer 27repeating most recent issued (- primary
command) 117repeating most recent issued (REPEAT
primary command) 28, 159
499

Index
START for spool writers 310submitting to mainframe from CPMS/SYSD
sessions 27submitting to mainframe from edit
sessions 131summary lists. See commands, summary liststurning stacking on and off 147universal. See commands, universalviewing already issued (+ or ? primary
command) 117viewing already issued (RECALL primary
command) 157viewing PF key assignments 145VM, issuing from terminals (VC functional
command) 440VM, issuing from terminals (VMCMD functional
command) 441See also alphabetical listing by command
namecommands, data set
A - Allocate New Dataset 228A=Allocate (Catalog Utility screen) 242A=Allocate (Dataset Extents screen) 233A=Allocate (Dataset Information screen) 230B - Browse Member 223B=Browse (Dataset Extents screen) 233B=Browse (Dataset Information screen) 230Blank - Dislay Data Set Information 228C - Catalog Dataset 228C - Compress Data Set 223C=Catalog (Allocate Utility screen) 237C=Catalog (Catalog Utility screen) 242C=Catalog (Dataset Extents screen) 234C=Catalog (Dataset Information screen) 230D - Delete Entire Dataset 228D - Delete Member 223D=Delete (Allocate Utility screen) 237D=Delete (Catalog Utility screen) 242D=Delete (Dataset Extents screen) 234D=Delete (Dataset Information screen) 231E=Extents (Dataset Information screen) 231ED=Edit (Dataset Extents screen) 234ED=Edit (Dataset Information screen) 231Enter=Allocate (Allocate Utility screen) 237FIND 256G - Print Index Listing 223L - Print Entire Data Set 223O - Compress Dataset 228O=Compress (Catalog Utility screen) 243O=Compress (Dataset Extents screen) 234O=Compress (Dataset Information
screen) 231
P - Print Member 223R - Rename Entire Dataset 228R - Rename Member 223R=Rename (Allocate Utility screen) 237R=Rename (Catalog Utility screen) 243R=Rename (Dataset Extents screen) 234R=Rename (Dataset Information screen) 231S - Data Set Information 223S=Select (Allocate Utility screen) 238S=Select (Catalog Utility screen) 243S=Select (Dataset Extents screen) 234U - Uncatalog Dataset 228U=Uncatalog 234U=Uncatalog (Allocate Utility screen) 238U=Uncatalog (Dataset Information
screen) 231U=Uncatalog(Catalog Utility screen) 243
commands, editingABORT 88CANCEL 88END 88RETURN 88SAVE 88SPLIT 88
commands, editor line.label (set bookmark) 197( (column shift left) 185(( (column shift left block) 185) (column shift right) 186)) (column shift right block) 187/ (set current line) 204< (data shift left) 189<< (data shift left block) 190> (data shift right) 191>> (data shift right block) 192A (after) 183aliases 181B (before) 184C (copy lines) 189CC (copy block) 188CL (continue line) 188COLS (column guide control) 184D (delete lines) 193DD (delete block) 193E (exchange) 194EE (exchange block) 195F (first show lines) 195FLIP (flip line status) 195FLL (flip block status) 196I (insert lines) 196IC- (insert comment - dash) 197IC* (insert comment - asterisk) 196
500 CPMS/SYSD Reference Manual ~ 7.2

Index
L (last show lines) 198LC (lowercase) 198LCC (lowercase block) 199LCCT (lowercase and translate block) 199LCT (lowercase and translate hex) 200LL (lowercase block) 200LLT (lowercase and translate block) 200M (move lines) 201MM (move block) 201O (overlay lines) 202OO (overlay block) 202R (repeat line) 203resetting pending 161RR (repeat block) 203RT (retab) 204S (show lines) 204summary list 181TA (justify data) 205TAC (center data) 205TAL (left justify data) 206TAR (right justify data) 206TF (text flow) 207TM (text merge) 208TR (translate hex) 209TS (text split) 210UC (uppercase) 210UCC (uppercase block) 211UCCT (uppercase and translate block) 211UCT (uppercase and translate) 212UU (uppercase block) 212UUT (uppercase and translate block) 212X (exclude lines) 213XX (exclude block) 213
commands, editor scrollCSR 180description 180HALF 180PAGE 180
commands, functionalA 337AA 340AAE 342AE 341AL 342ALLOC 343BIO 343CANCEL 344CATLG 344CICSTRAN 345COMPRESS 345CORE 346definition 331
DEST 348DLTA 350DLTX 350DRPX 351DSMAINT 351DSN 352DSPCHR 355ENDAUTO 357ending dynamic displays 357ENQ 358FILE 360formatting 333formatting parameters 334HELP 361HOLD 361IC 362issuing 333JOB 362JOECLN 366L 366LC 367LD 367LICENSE 367LIST 368LISTC 368LISTCAT 368LISTD 369LISTPDS 369LISTVOC 374LOCATE 377LPAD 377LV 378MENU 378MLPAD 379N 379NONSWAP 382OC 382OKSWAP 382omitting positional parameters 334OP 383OSCMD 383OSPRINT 384PA 384PC 385PD 385PDSALIAS 386PDSCHG 386PDSDEL 387PDSDSPLY 387PF 388PH 388PJ 388
501

Index
PP 388PROG 389PRTADJ 390PRTCNL 391PRTDSP 391PRTFRM 405PRTHLD 406PRTJOB 406PRTJOE 408PRTPRG 409R 409RECALL 410recalling and then reissuing or changing before
executing 335recalling most recent issued 335RECATLG 410RELEASE 411RENAME 411ROUTE 412SCRATCH 412SD 412SHUT 413SJ 413SN 414SP 414SPLCLN 414SPLDSN 415SPLDSP 418SPLJOE 420SPLPRG 422SPLPRT 422SPLRTE 423SR 423STAT 423STATUS 424STE 424STORAGE 428STPWTR 430STRWTR 431SUBD 432SUBMIT 432SUBMITD 433SUBTD 433SUBTS 434SW 434SYSDTASK 435TERM 435TRAN 436TSQ 437TSQUEINQ 437U 439UNCATLG 440
using 331using aliases 334using parameter lists 335VC 440VERSION 440viewing list or summary 336viewing online help for 336VMCMD 441VMRESET 441VR 441
commands, helpHELP 327HELP INDEX 326HELP NEW 328INDEX 326paging 325
commands, primary- (hyphen) 117: (colon) 117? (question mark) 117.label 117+ (plus sign) 117ABORT 117alphabetical list with parameters, aliases, and
key assignments 113AUTONUM 118BACKWARD 118BNDS 119BOTTOM 119BOUNDS 119CANCEL 119CAPS 120CCHAR 120CHANGE 121CLEAR 124COLS 124COPY 125CREATE 126definition 87DELETE 127DELLINE 128DELQ 128DELWORD 129description 112DOWN 129DQ 130END 130ENTER 131EXCLUDE 131FILE 131FIND 132FINDN 137
502 CPMS/SYSD Reference Manual ~ 7.2

Index
FINDP 137FINDR 137FIRST 137FLBL 138FLINE 138FLIP 139FORWARD 139FSTR 140FWORD 141GET 142HEX 143INSERT 144KEEP 145KEYS 145LAST 145LEFT 146Left (JES2 Job Queue Display screen, new
format) 267LINE 146LINEND 147LOCATE 148MASK 148MOD5 150MODID 149NEXT 151NULLS 151NUMBER 152PCDEL 153PCRCV 153PCSND 154PRINT 154PROFILE 155PUT 156QLABEL 156QQUIT 157RC (JES2 Job Queue Display (Right) screen,
old format) 275RC (JES2 Job Queue Display screen, new
format) 267RECALL 157RECOVERY 158RENUMBER 159REPEAT 159REPLACE 160RESET 161RETURN 161RIGHT 162Right (JES2 Job Queue Display screen, new
format) 267SAVE 162SCALE 163SETID 34
SHOW 164SORT 165SPLIT 167SPLTJOIN 168STATS 168SUBMIT 169SWAP 169TA 170TABS 171TAC 172TAL 173TAR 174TOP 174TRANCHR 175TRUNC 176UNDO 177UNNUMBER 178UP 178View (JES2 Job Queue Display (Right) screen,
old format) 276View (JES2 Job Queue Display screen, new
format) 268WRAP 178ZONE 179
commands, summary listsCICS management 449CPMS/SYSD management 451CPMS/SYSD product 443CPMS/SYSD spool-display and print 444DASD 447editing 88editor line 181primary 113
commands, universalCLEAR 27descriptions 27DOWN 27END 27HELP 27RECALL 27REPEAT 28RETURN 28SET 28SPLIT 28SWAP 29UP 29
comment blocks, inserting in edit sessions 197communications UCB device class 255COMP phase 365components of CPMS/SYSD 16
503

Index
COMPRESS commandfunctional command 345on Edit - Member Selection screen 104
Compress data set commandCatalog Utility screen 243Dataset Extents screen 234Dataset Information screen 231
Compress Data Set data set command 223Compress Dataset data set command 228Compress option
Listcat Utility screen 247VTOC Utility screen 251
compressingcataloged partitioned data sets 345data sets 218, 219, 224lines and placing tab character between each
blank, delimited word 204partitioned data set members 101printer output data streams using repeat-to-
address control characters 404printer output data streams using SCS
horizontal tabs 404Computer Associates resource documents 14condition codes, SYSOUT data set type for 294console operator commands
issuing to OS or JES2 (OC functional command) 382
issuing to OS or JES2 (OSCMD functional command) 383
contact information for customer support 2continue line editor line command 188continued line, adding * to indicate in editing
sessions 188control characters, using leading and trailing based
on UCS- parameter of SYSOUT 404conventions for documentation 13Copies field
JES2 Job Dataset Display (Right) screen 283Job Dataset Display for Job screen 416Printer Status screen 397
copy block editor line command 188Copy field
CPMS/SYSD Printer Table Display/Change screen 306
Printer Status screen 393copy lines editor line command 189++Copy Member field (Edit - Dataset Menu for CA
Panvalet screen) 98COPY primary command 125
copyingall or part of edit session into new member
(CREATE primary command) 126all or part of edit session into new or existing
member (REPLACE primary command) 160
blocks of lines in edit sessions 188data from external member into edit
session 125lines in edit sessions 189masks to edit sessions 148members 98
COREfunctional command 346using address parameter for command 347using page functions with command 347
counting number of characters between delimiters 120
CPMS Primary Option Menu screen. See Primary Option Menu screen
CPMS/SYSDcomponents 16menu-driven system versus function-driven
system 22overview 15signing on to menu-driven system 378summary list of commands in product 443understanding a typical CPMS session 18viewing and updating current version 440
CPMS/SYSD Primary Option Menu screen. See Primary Option Menu screen
CPMS/SYSD Printer Table Display/Change screen, field definitions 305
CPMS/SYSD printer. See printers, CPMS/SYSDCPMS/SYSD Spool Writer Start screen
command definitions 310field definitions 308illustration and description 308
CPMS/SYSD writer. See writers, CPMS/SYSDCPUR field
Active Task Display screen 339JES2 Display Active Jobs screen 259
Create as PDSE field (Allocate Utility screen) 237CREATE primary command 126Created field
Browse - Member Selection screen 66Directory for PDS Member screen 373Edit - Member Selection screen 102
creating. See adding
504 CPMS/SYSD Reference Manual ~ 7.2

Index
CreDt fieldVTOC for Data Set screen 353VTOC listing for entry screen 375VTOC Utility screen 251
CSRcommand on screens 26editor scroll command 180
CTCdevice classification 439UCB class 254UCB device class 255
Current (K) field (Storage Statistics for CICS screen) 430
Current Allocation section (Dataset Information screen) 230
Current Buffer PTR field (Printer Status screen) 398
Current Form Type Loaded field (Printer Status screen) 398
Current Line Number field (Printer Status screen) 398
Current Outstanding Print Tasks field (Printer Status screen) 398
Current TWA PTR field (Printer Status screen) 398
Current Utilization section (Dataset Information screen) 230
customer support contact information 2customizing CPMS/SYSD 33CVOL catalog alias 245
DD - Delete Entire Dataset data set command 228D - Delete Member data set command 223D (delete lines) editor line command 193D=Delete data set command
Allocate Utility screen 237Catalog Utility screen 242Dataset Extents screen 234Dataset Information screen 231
D=Delete optionJES2 Job Output Display (Right) screen 290JES2 Job Output Display screen 287JES2 Job Queue Display (Right) screen (old
format) 273JES2 Job Queue Display screen (new
format) 264JES2 Job Queue Display screen (old
format) 270Output Waiting For Printer screen 316VTOC Utility screen 250
DASDattributes 255commands, summary list 447description 19device classification 439physical records 355support 16UCB classes 254UCB device classes 255UCBs 439VTOC entries (LISTVTOC functional
command) 374VTOC entries (LV functional command) 378VTOC entries (VTOC Utility screen) 218, 249
DASD Attributes field (System Device Unit Display screen) 255
DASD Record screenfield definitions 357illustration and description 356
DASD VTOC. See VTOC (volume table of contents)
databrowsing 30scrolling down through 43scrolling down through on screens 27scrolling left across 44scrolling right across 44scrolling up through 29, 43type of in libraries 91See also data in edit sessions
data control blocks (DCBs). See DCBs (data control blocks)
data definition name (DDN) data set type 343data in edit sessions
aligning between columns 170, 173, 174aligning between columns to left and right
justify 205aligning between columns to left justify 206aligning between columns to right justify 206aligning in the center of columns 172centering in columns 205continuing search toward top of file using
previous FIND string 137continuing searches toward top or end of file
using previous FIND string 137copying from external member into
session 125displaying source in hexadecimal
notation 143editing source 85inserting in the middle of lines 151retrieving from TSQ for edit sessions (GET
505

Index
primary command) 142retrieving from TSQ for edit sessions (PCRCV
primary command) 153scrolling backward 118scrolling down (DOWN primary
command) 129scrolling down (NEXT primary command) 151scrolling left 162scrolling to bottom (BOTTOM primary
command) 119scrolling to bottom (LAST primary
command) 145searching (FIND primary command) 132searching (LOCATE primary command) 148searching in reverse 137setting zones for editing 179sorting 165
DAta record type 246Data Set Information data set command 223data set name (DSN) data set type 343data sets
allocating new 218, 224allocating new dynamically 235assigning profile types 94browsing members 219browsing, printing, renaming, and deleting
members 218CA Panvalet. See data sets, CA Panvaletcataloging 218, 239, 344compressing 218, 219, 224creating and maintaining 215creating temporary 94deleting 218, 224deleting members 219dynamically defining JFT-panel, skeleton, and
message 35JES2. See data sets, JES2listing qualifiers 244managing 19output. See data sets, outputpartitioned. See data sets, partitionedperforming maintenance within a job 351prefixes 250printing 218, 219printing index listing 218printing members 219recalling archived 410recataloging 410record types 246renaming 218, 224, 411renaming members 219rerouting or purging data sets waiting to
print 315scratching without uncataloging 412scrolling behavior 41searching for with wildcards 245sequential. See data sets, sequentialsetting when SYSIN are displayed 40specifying for JFT 47specifying password 94, 222specifying prefixes 250specifying volume serial number 94specifying whether deleted data sets
appear 40SYSOUT. See data sets, SYSOUTtypes 343uncataloging 224, 440viewing allocation and usage information 229viewing catalog entries 377viewing complete list belonging to jobs in JES2
spool 277, 281viewing held waiting to print on JES2
printer 316viewing hot list of frequently used 82viewing information about 218, 219, 224viewing JES2 waiting to print 315viewing location, device type, and record
size 230viewing number of lines 279viewing record formats 280viewing status for jobs in queues 279viewing summary of output elements (JES2
Job Queue Display (Right) screen, old format) 272
viewing summary of output elements (JES2 Job Queue Display screen, new format) 264
viewing summary of output elements (JES2 Job Queue Display screen, old format) 269
viewing summary of recently allocated CICS (AL functional command) 342
viewing summary of recently allocated CICS (ALLOC functional command) 343
viewing volume on which reside and information about extents 232
viewing VTOC entry, attributes, and space usage 352
viewing VTOC information 247, 249viewing which FCB and UCS will be used for
printing 283data sets, CA Panvalet
editing 85editing library members 96
506 CPMS/SYSD Reference Manual ~ 7.2

Index
data sets, JES2printing 316releasing held 316
data sets, outputdeleting from JES2 output queue and then
removing from system (SP functional command) 414
deleting from JES2 output queue and then removing from system (SPLPRG functional command) 422
displaying 292logical record length 294number of lines 294viewing 285viewing attributes for spin 290viewing job output (SD functional
command) 412viewing job output (SPLDSP functional
command) 418viewing job output elements (JES2 Job Queue
Display screen (old format) 269viewing job output elements (JES2 Job Queue
Display screen, new format) 264viewing summary statistics for jobs (SN
functional command) 414viewing summary statistics for jobs (SPLDSN
functional command) 415viewing whether uppercase translation is on or
off 295data sets, partitioned
browsing 55compressing cataloged 345creating aliases for members 386deleting members 387editing 85naming 94printing cataloged members (OP functional
command) 383printing cataloged members (OSPRINT
functional command) 384renaming members 386selecting, deleting, and compressing
members 101submitting job streams from 432submitting job streams from using DCT entry
(SUBD functional command) 432submitting job streams from using DCT entry
(SUBMITD functional command) 433viewing list of members 101viewing members (LD functional
command) 367viewing members (LISTD functional
command) 369viewing members (LISTPDS functional
command) 369viewing source members (L functional
command) 366viewing source members (LIST functional
command) 368viewing source members (PDSDSPLY
functional command) 387data sets, sequential
browsing 55editing 85naming 94submitting job streams from 432submitting job streams from using DCT entry
(SUBD functional command) 432submitting job streams from using DCT entry
(SUBMITD functional command) 433data sets, SYSOUT
canceling printing of current (PC functional command) 385
canceling printing of current (PRTCNL functional command) 391
routing 431specifying what is done with output after
printing 405types 294, 406
< data shift left editor line command 189<< data shift left block editor line command 190> data shift right editor line command 191>> data shift right block editor line command 192Dataset Extents screen
command definitions 233field definitions 233illustration and description 232
Dataset fieldCPMS/SYSD Printer Table Display/Change
screen 306Printer Status screen 393Printer Status screen (example) 398
Dataset Information screencommand definitions 230illustration and description 229section definitions 230
Dataset Name fieldAllocate Utility screen 235Browse - Dataset Menu screen 60Catalog Utility screen 242Dataset Extents screen 233Dataset Utilities Menu screen 227Edit - Dataset Menu screen 94Edit - Session Display screen 100
507

Index
Library Utilities Menu screen 222VTOC listing for entry screen 375VTOC Utility screen 251
DATASET option (Utility Selection Menu screen) 218
Dataset Password fieldBrowse - Dataset Menu screen 60Catalog Utility screen 242Dataset Utilities Menu screen 227Edit - Dataset Menu screen 94Library Utilities Menu screen 222
Dataset Utilities Menu screencommand definitions 228illustration and description 224
Date fieldJES2 Job Output Display (Right) screen 291JES2 Job Queue Display (Right) screen (old
format) 274JES2 Job Queue Display screen (new
format) 267Job Status Display screen 427
DCBs (data control blocks)number open for volumes 256viewing general data for data sets 352
DCT (destination control table)changing variables 348using to submit job streams (SUBD functional
command) 432using to submit job streams (SUBMITD
functional command) 433viewing entries and variables 348
DD (delete block) editor line command 193DDN (data definition name) data set type 343DDName field
JES2 Job Dataset Display (Right) screen 282JES2 Job Dataset Display screen 278Job Dataset Display for Job screen 417
debugging. See troubleshootingDefault FCB for This Printer field (Printer Status
screen) 399Default field (Edit Parameters screen) 54Default JES Panel Name field (Job/File Tailoring
Parameters screen) 46Default Panel Name field (Job/File Tailoring
Parameters screen) 46Default UCS for This Printer field (Printer Status
screen) 399defaults
CICS printer ID and job display criteria 35CPMS/SYSD printer 38edit session profile 52FCB 283, 399
JFT panels 35JOB card information 35jobs and columns displayed for Option 5 and
Option 6 39jobs displayed for Option 6 39lines per page for batch print jobs 50panels displayed when JFT is invoked 46PF key assignments 42, 44PF keys, restoring 45qualifier for Listcat Utility 50spool printer 399spool writer 308TSQ name and CICS system ID for GET, PUT,
and DELQ commands 35, 48type of printers displayed on Printer Table
Display/Change screen 39UCS 283, 399
Definite Response Frequency field (Printer Status screen) 399
definite response frequency, viewing and changing 399
DEL .label command (Browse - Dataset Display screen) 75
Delay Between Buffers (SECS) field (Printer Status screen) 400
delay between printing buffers for spool printer, viewing and changing 400
delete block editor line command 193DELETE command
JES2 Job Dataset Display screen 278JES2 Spool Display screen 295primary command 127
Delete data set commandAllocate Utility screen 237Catalog Utility screen 242Dataset Extents screen 234Dataset Information screen 231
Delete Entire Dataset data set command 228delete lines editor line command 193Delete Member data set command 223Delete option
JES2 Job Output Display (Right) screen 290JES2 Job Output Display screen 287JES2 Job Queue Display (Right) screen (old
format) 273JES2 Job Queue Display screen (new
format) 264JES2 Job Queue Display screen (old
format) 270Output Waiting For Printer screen 316VTOC Utility screen 250
508 CPMS/SYSD Reference Manual ~ 7.2

Index
deleted data sets, specifying whether displayed 40
Deleted field (JES/List Parameter Definitions screen) 40
deletingblocks of lines in edit sessions 193bookmarks 161data set members 218, 219data sets 218, 224data sets from VTOC 412data sets waiting to print 315edit sessions 99edit sessions (Edit - Session Display
screen) 100edit sessions after saving (END primary
command) 130edit sessions after saving (FILE primary
command) 131high-level index aliases from z/OS
catalog 350job output elements in queues 366job output waiting to print 316jobs 414jobs (JES2 Job Queue Display (Right) screen,
old format) 272jobs (JES2 Job Queue Display screen (old
format) 269jobs (JES2 Job Queue Display screen, new
format) 264library members 66lines from edit sessions 193output for batch jobs from JES2 output and
then removing from system (SP functional command) 414
output for batch jobs from JES2 output and then removing from system (SPLPRG functional command) 422
partitioned data set members 101, 387partitions and then swapping to another 167previously loaded program 389primary indexes (DLTX functional
command) 350primary or generation indexes from z/OS
catalog (DRPX functional command) 351records in edit sessions 127records located at cursor position in edit
sessions 128recovery data (caution) 158single word in edit sessions 129spool output while viewing 295spool print tasks (CPMS/SYSD Printer Table
Display/Change screen) 305
spool print tasks (PP functional command) 388
spool print tasks (PRTPRG functional command) 409
temporary edit sessions 95temporary storage queue created with
previous PUT or PCSND primary command (DELQ primary command) 128
temporary storage queue created with previous PUT or PCSND primary command (DQ primary command) 130
temporary storage queue created with previous PUT or PCSND primary command (PCDEL primary command) 153
TSQ (TSQ functional command) 437TSQ (TSQUEINQ functional command) 437user profiles 32, 329
delimiters, counting number of characters between 120
DELLINE primary command 128DELQ command
Browse - Dataset Display screen 75JES2 Spool Display screen 296primary command 128setting default TSQ name and CICS system ID
for 48DELWORD primary command 129Department field (General Parameter Definitions
screen) 37Dest field
CPMS/SYSD Spool Writer Start screen 309JES2 Job Dataset Display (Right) screen 282JES2 Job Output Display screen 288Job Dataset Display for Job screen 416Job Output Element Display screen 421Output Waiting For Printer screen 317
DEST functional command 348destination control table (DCT). See DCT
(destination control table)Destination field (JES/List Parameter Definitions
screen) 39Destination Type field (Printer Status screen) 400destinations
changing for jobs (JES2 Job Queue Display screen, new format) 265
changing for jobs (JES2 Job Queue Display screen, old format) 270
filtering jobs displayed 39for printing 267viewing and changing for jobs 288viewing type assigned to spool printers 400
509

Index
Device fieldListcat Utility screen 248System Device Unit Display screen 255
Device Type field (Catalog Utility screen) 242device type for data sets 230devices
classification types 439UCB device classes 255viewing those defined in OS 253viewing UCBs and status 439
dialed sessionsreturning control to VM (VMRESET functional
command) 441returning control to VM (VR functional
command) 441direct access UCB device class 255directories for partitioned data sets
viewing (LD functional command) 367viewing (LISTD functional command) 369viewing (LISTPDS functional command) 369
Directory Blocks field (Allocate Utility screen) 236Directory for PDS Member screen
field definitions 370, 371, 373illustration and description 370
disablingCPMS/SYSD and terminating CICS 413CPMS/SYSD transactions 413PF (program function) keys 45program entries 389transactions 436
DISCON option for spool printer 404disconnecting
from CICS when printing is done 404z/OS catalogs 350
DISK UCB class 254DISP device classification 439Disp field
JES2 Job Output Display screen 287Output Waiting For Printer screen 316
DISP UCBclass 254device class 255
Display Data Set Information data set command 228
Display Sequence field. See Sequence field 14Display SYSIN field. See SYSIN fieldDisplay TSO/STC field. See TSO/STC fielddisplay UCB device class 255displaying jobs, dynamically executed
(extended) 342displaying. See viewing
dispositionsviewing and changing for jobs 287viewing and changing for output elements 316viewing and changing for spool writer 308viewing for output during printing 405
DL field (DASD Record screen) 357DLTA functional command 350DLTX functional command 350documentation
conventions 13order number for CPMS/SYSD Reference
Manual 2related publications 14
DOWN (PF8) key 43DOWN command
Browse - Dataset Display screen 75Browse - Hot List Selection screen 83Browse - Member Selection screen 70Edit - Hot List Selection screen 110Edit - Member Selection screen 104JES2 Spool Display screen 296primary command 129universal command 27
DQ primary command 130DRAINED JES2 printer status 313DRAINING JES2 printer status 313DRAINING print task status 307, 394DRPX functional command 351DSAName field (Storage Statistics for CICS
screen) 429DSCB PTR - CCHHR field (VTOC for Data Set
screen) 354DSMAINT functional command 351DSN (data set name) data set type 343DSN field
JES2 Job Dataset Display (Right) screen 282JES2 Job Dataset Display screen 278JES2 Spool Display screen 294Job Dataset Display for Job screen 416
DSN functional command 352DSN Prefix field (VTOC Utility screen) 250DSN(S) field (Listcat Utility screen) 248DsOrg field
VTOC for Data Set screen 353VTOC listing for entry screen 375
DSPCHR functional command 355DY field (JES2 Job Output Display (Right)
screen) 291dynamic displays for functional commands,
ending 357
510 CPMS/SYSD Reference Manual ~ 7.2

Index
dynamicallyallocating new data sets 235defining JFT-panel, skeleton, and message
data sets 35displaying statistics for executing tasks and
jobs 340
EE (exchange) editor line command 194E=Edit option
Listcat Utility screen 247VTOC Utility screen 251
E=Extents data set commandDataset Information screen 231
E=Restart optionCPMS/SYSD Printer Table Display/Change
screen 305JES2 Printer Display screen 312
EC fieldJES2 Job Queue Display (Right) screen (old
format) 274JES2 Job Queue Display screen (new
format) 266ED=Edit data set command
Dataset Extents screen 234Dataset Information screen 231
Edit - Copy Menu screen 125Edit - Dataset Display screen
field definitions 107illustration and description 106
Edit - Dataset Menu for CA Panvalet screenfield definitions 97illustration and description 96
Edit - Dataset Menu screenfield definitions 90illustration and description 89
Edit - Hot List Selection screencommand definitions 110illustration and description 108
Edit - Member Selection screencommand definitions 104field definitions 102illustration and description 101
Edit - Session Display screenfield definitions 100illustration and description 99
EDIT commandBrowse - Dataset Display screen 76Browse - Hot List Selection screen 83Edit - Hot List Selection screen 110
Edit data set commandDataset Extents screen 234Dataset Information screen 231
Edit field (Edit - Dataset Display screen) 107EDIT option
CPMS/SYSD Parameter Options screen 35JES2 Primary Option Menu screen 30
Edit optionListcat Utility screen 247VTOC Utility screen 251
Edit Parameters screenfield definitions 53illustration and description 52
Edit Profile Settings field (Edit Parameters screen) 53
edit profiles. See profiles, editedit sessions
aligning data between columns 173aligning data in the center of columns 172cancelling without updating source (CANCEL
primary command) 119cancelling without updating source (QQUIT
primary command) 157copying data from external members into 125copying into new member 126creating, saving, and deleting temporary 95defining profiles 52defining tabs 171deleting 100deleting (Edit - Session Display screen) 99excluding from display 164excluding records from display 131identifying changes made 149inserting comment blocks 197inserting data in the middle of lines 151managing 88merging updates into source while remaining
in edit session 88moving blocks of lines 201number of records updated during current 107opening 99opening for partitioned data set members 101performing all data set editing operations 106performing specified function after a line 183performing specified function before a
line 184printing 154reformatting lines and paragraphs 208resetting pending line editor commands,
change indicates, and error messages 161returning to CICS leaving edit session intact
(CLEAR primary command) 124
511

Index
returning to Primary Option Menu screen leaving session intact (RETURN primary command) 161
saving and then deleting (END primary command) 130
saving and then deleting (FILE primary command) 131
saving into new member (KEEP primary command) 145
saving into new member (SAVE primary command) 162
setting sequence fields to blanks and turning line numbering off 178
splitting partitions 167starting for partitioned data set members 101stopping leaving intact 117submitting changes and commands to
mainframe (ENTER primary command) 131
submitting to OS (SUBMIT primary command) 169
swapping to previous partition (SWAP primary command) 169
turning error lines on and off 164turning ISPF statistics on and off 168turning line truncation on and off 176turning wrapping on and off 178using temporary 95viewing and setting profiles 155viewing Primary Option Menu with or without
cancelling edit session or updating source member 88
viewing statistics 99See also commands, editing; commands,
editor line; commands, editor scroll; editoreditor
description 19, 87line commands 181logging changes 158scroll commands 180starting 30, 87support 16types of commands 87See also commands, editing; commands,
editor line; commands, editor scroll; edit sessions
editor display, changing for MOD5 terminal 150editor line commands. See commands, editor lineEE (exchange block) editor line command 195e-mail address for customer support 2Emulation field (Printer Status screen) 400
emulation type the spool printer emulates, viewing and changing 400
enablingprogram entries 389transactions 436
END (PF3) key 43END command
for editing 88primary command 130universal command 27
end of file (EOF), setting 41end of file, continuing searching toward using
previous FIND search string 137END option (JES2 Primary Option Menu
screen) 32ENDAUTO functional command 357Ending Separator Pages field (Printer Status
screen) 401ending separator pages, viewing and changing for
spool printers 401ending. See stoppingENQ functional command 358ENTER key
command assignment 131description 27
ENTER primary command 131Enter=Allocate data set command (Allocate Utility
screen) 237Entry field (Directory for PDS Member screen) 372EOF (end of file), setting 41error lines, turning on and off in edit sessions 164error messages 453Ex field (VTOC Utility screen) 252examples,TSQUEINQ command 438exchange block editor line command 195exchange editor line command 194exclude block editor line command 213exclude lines editor line command 213EXCLUDE primary command 131exclude status
changing for a block of records 196changing for specified number of records 195
excluded lines in edit sessionsflipping status 139viewing first of in a block previously
excluded 195viewing last of in a block previously
excluded 198viewing previously excluded 204
512 CPMS/SYSD Reference Manual ~ 7.2

Index
excludingblocks of lines from display 213lines from display 213records from display in edit sessions 131, 164
Execute Any Panel field (Job/File Tailoring Parameters screen) 47
execution class, displaying 266execution classes for jobs in queues (JES2 Job
Queue Display (Right) screen, old format) 274
exiting. See stoppingExpDt field
VTOC for Data Set screen 353VTOC listing for entry screen 375VTOC Utility screen 251
Extent Data section for Dataset Information screen 230
extentsviewing information for data sets 232viewing statistics 352
Extents data set command (Dataset Information screen) 231
Extents field (VTOC listing for entry screen) 375
FF (first show lines) editor line command 195F record format for data sets 280F=Forms option (CPMS/SYSD Printer Table
Display/Change screen) 305FA record format for data sets 280fax contact information for customer support 2FB record format for data sets 280FBA record format for data sets 280FBM record format for data sets 280FCB (forms control buffer)
using vertical tabs for forms length 404viewing and changing default for spool
printer 399viewing and changing for jobs 288viewing FCB the spool printer is using 401viewing which a data set will use to print 283
FCB fieldJES2 Job Dataset Display (Right) screen 283JES2 Job Output Display screen 288JES2 Printer Display screen 313Job Dataset Display for Job screen 416Job Output Element Display screen 422Output Waiting For Printer screen 317
FCT (File Control Table)changing variables 360viewing entries and variables 360
features of product, viewing new 328
field definitions. See alphabetical listing by field name or by screen name
fieldsJob Status Display screen 426
FILE commandfunctional command 360primary command 131
File Control Table (FCT). See FCT (File Control Table)
FIND (PF5) key 43FIND command
Browse - Dataset Display screen 76Browse - Member Selection screen 70data set command 256Edit - Member Selection screen 104JES2 Spool Display screen 297
find next command, Browse - Dataset Display screen 77
find previous command, Browse - Dataset Display screen 77
FIND primary commandcontinuing searches to end or top of file using
previous search string 137description 132examples showing correct parameter
order 136reversing search direction 137setting target line 138using with CHANGE primary command 132using with TRUNC and ZONE primary
commands 132finding
labels 138strings 140words 141See also searching
FINDN commandBrowse - Dataset Display screen 77JES2 Spool Display screen 298primary command 137
FINDP (PF4) key 43FINDP command
Browse - Dataset Display screen 77JES2 Spool Display screen 298primary command 137
FINDR commandBrowse - Dataset Display screen 78JES2 Spool Display screen 298primary command 137
first (show) lines editor line command 195FIRST primary command 137fixed record format for data sets 280
513

Index
Flags field (Listcat Utility screen) 248Flash field (JES2 Printer Display screen) 314FLBL primary command 138FLINE primary command 138FLIP (flip line status) editor line command 195flip block status editor line command 196flip line status editor line command 195FLIP primary command 139FLL (flip block status) editor line command 196flow of text, grouping in edit sessions 207FM record format for data sets 280FMCGBP option for spool printer 404Force parameter requirement 90Force Required for Exit field (Edit - Dataset Menu
screen) 90form feed character option for spool printer 404Form field
CPMS/SYSD Printer Table Display/Change screen 306
CPMS/SYSD Spool Writer Start screen 309JES2 Job Dataset Display (Right) screen 282JES2 Job Output Display screen 288JES2 Printer Display screen 313Job Dataset Display for Job screen 416Job Output Element Display screen 421Output Waiting For Printer screen 317Printer Status screen 393
Form field (Printer Status screen) 401Format field (Edit - Dataset Menu for CA Panvalet
screen) 97formatting
functional commands 333parameters for functional commands 334
formsprinting same together 404viewing and changing for jobs 288viewing and changing those on which spool
printer is set to print 398forms change requests
bypassing 404replying to (CPMS/SYSD Printer Table
Display/Change screen) 305replying to (PF functional command) 388replying to (PRTFRM functional
command) 405Forms Change Terminal field (Printer Status
screen) 401forms change terminal for spool printers, viewing
and changing 401Forms Control Buffer (FCB) field (Printer Status
screen) 401
forms control buffer (FCB). See FCB (forms control buffer)
Forms option (CPMS/SYSD Printer Table Display/Change screen) 305
FORWARD commandBrowse - Dataset Display screen 78primary command 139
Free (K) field (Storage Statistics for CICS screen) 429
Free Extents field (VTOC listing for entry screen) 376
Free Space field (VTOC Utility screen) 250Free Summary field (Storage Statistics for CICS
screen) 430FRMFED option for spool printer 404FRMPRT option for spool printer 404FRMSEL option for spool printer 404FSTR primary command 140FULL|PAGE command on screens 26functional commands. See commands, functionalfunction-driven system versus menu-driven
system 22FWORD primary command 141
GG - Print Index Listing) data set command 223GDg record type 246GDGs (generation data groups)
record type 246General Data section (Dataset Information
screen) 230General Information section (Printer Status
screen) 396GENERAL option (SYD/CPMS Parameter Options
screen) 35General Parameter Definitions screen
field definitions 36illustration and description 36
generation data groups (GDGs). See GDGs (generation data groups)
generation indexes, deleting from z/OS catalog 351
GET primary commanddescription 142setting default TSQ name and CICS system ID
for 48GET/PUT TS Queue Identifiers screen
field definitions 48illustration and description 48
GET/PUT TS Queue Name field (GET/PUT TS Queue Identifiers screen) 48
514 CPMS/SYSD Reference Manual ~ 7.2

Index
getting data from TSQ for edit sessionsGET primary command 142PCRCV primary command 153
global commands. See commands, universalglobal resource serialization (GRS) queue,
viewing 358GRAPHICS UCB class 254GroupID field
JES2 Job Output Display (Right) screen 291Job Dataset Display for Job screen 417
GrpID field (Job Output Element Display screen) 422
GRS (global resource serialization) queue, viewing 358
GRS Queue screenfield definitions 359illustration and description 359
HH field (Job Status Display screen) 427H job
output element attribute 421status 365
H status for data sets for jobs in queues 279H=Hold option
CPMS/SYSD Printer Table Display/Change screen 305
JES2 Job Output Display (Right) screen 290JES2 Job Output Display screen 287JES2 Job Queue Display (Right) screen (old
format) 273JES2 Job Queue Display screen (new
format) 264JES2 Job Queue Display screen (old
format) 270Output Waiting For Printer screen 316
HALFcommand on screens 26editor scroll command 180
Halt option (JES2 Printer Display screen) 312HALTED JES2 printer status 313halting. See stoppingheld
JES2 data sets, releasing 316jobs, releasing 411jobs, releasing (JES2 Job Queue Display
(Right) screen, old format) 272jobs, releasing (JES2 Job Queue Display
screen, new format) 264jobs, releasing (JES2 Job Queue Display
screen, old format) 269
printers, releasing 305tasks, restarting for JOE writer 305
Held fieldJES2 Job Queue Display screen (old
format) 271Job Queue Display screen 381Job Status Display screen 365
HELD print task status 307, 394HELP (PF1) key 43HELP command
functional command 361help command 327universal command 27
HELP INDEX help command 326HELP NEW help command 328help, online
commands for paging 325HELP command for viewing 361navigating using page commands 325navigating using PF keys 326starting 324starting tutorial 31, 324stopping 327using 323using tutorial 323viewing 27viewing for functional commands 336viewing for screen being viewed 327viewing table of contents 326
HEX commandBrowse - Dataset Display screen 78primary command 143
hexadecimaltranslating to blanks and changing blocks of
lines to uppercase in edit sessions 211, 212
translating to blanks and changing lines to uppercase in edit sessions 212
translating to blanks for blocks of lines in edit sessions 199, 200
translating to blanks for specified lines in edit sessions 200
translating to blanks sessions 209turning notation on and off for source data in
edit sessions 143HH field
DASD Record screen 357Dataset Extents screen 233VTOC for Data Set screen 355
515

Index
hiding in edit sessionsblocks of lines from display 213lines from display 213records from display 131
HOLDdisposition for jobs 287functional command 361output element disposition 316
Hold (Y/N) field (CPMS/SYSD Spool Writer Start screen) 309
Hold optionCPMS/SYSD Printer Table Display/Change
screen 305JES2 Job Output Display (Right) screen 290JES2 Job Output Display screen 287JES2 Job Queue Display (Right) screen (old
format) 273JES2 Job Queue Display screen (new
format) 264JES2 Job Queue Display screen (old
format) 270Output Waiting For Printer screen 316
hold typesfor data sets 317for jobs 288
holdingjobs (JES2 Job Queue Display (Right) screen,
old format) 272jobs (JES2 Job Queue Display screen (old
format) 269jobs (JES2 Job Queue Display screen, new
format) 264jobs in queues 361jobs that are printing 305print tasks on spool printers (PH functional
command) 388print tasks on spool printers (PRTHLD
functional command) 406hot list of frequently used data sets
description 82example 84viewing and editing 108
HOTLIST work file 82HR field (JES2 Job Output Display (Right)
screen) 291HSNC field (Job Dataset Display for Job
screen) 416HSNCD field (JES2 Job Dataset Display
screen) 279HTP field
JES2 Job Output Display screen 288Output Waiting For Printer screen 317
HWM (K) field (Storage Statistics for CICS screen) 429, 430
II (insert lines) editor line command 196#I/O field
Active Task Display screen 339JES2 Display Active Jobs screen 260
I=Information option (Listcat Utility screen) 247I=Interrupt option (JES2 Printer Display
screen) 312IBM Interactive System Productivity Facility
(ISPF). See ISPF (IBM Interactive System Productivity Facility)
IBM operating system support 16IBM resource documents 14IC- (insert comment - dash) editor line
command 197IC functional command 362IC* (insert comment - asterisk) editor line
command 196ICEs (interval control elements), viewing 362ID field
Browse - Member Selection screen 67Directory for PDS Member screen 373Edit - Member Selection screen 103
INACTIVE JES2 printer status 313index components for VSAM data set, data set
record type 246Index field
Listcat Utility screen 245Utility Parameters screen 51
INDEX help command 326index listing for data sets, printing 218, 219indexes
deleting generation from z/OS catalog 351deleting high-level aliases from z/OS
catalog 350deleting primary from z/OS catalog 350, 351
Information option (Listcat Utility screen) 247Init field
Browse - Member Selection screen 67Directory for PDS Member screen 373Edit - Member Selection screen 103
Initial Alloc field (VTOC for Data Set screen) 354initiators, setting display 40input queues. See queuesinsert comment editor line command 196, 197insert lines editor line command 196INSERT primary command 144
516 CPMS/SYSD Reference Manual ~ 7.2

Index
insertingcomment blocks in edit sessions 197data from TSQ for edit sessions (GET primary
command) 142data from TSQ for edit sessions (PCRCV
primary command) 153data in the middle of lines in edit sessions 151null lines below current line in edit
sessions 196Installation Code field
Browse - Dataset Menu for CA Panvalet screen 63
Edit - Dataset Menu for CA Panvalet screen 97
installation security code for installation for CA Panvalet members 63
Interactive System Productivity Facility (ISPF). See ISPF (IBM Interactive System Productivity Facility)
Interrupt option (JES2 Printer Display screen) 312interrupting printing on JES2 printers and then
queuing printer again 312interval control elements (ICEs), viewing 362In-Use (K) field (Storage Statistics for CICS
screen) 429ISAM definitions, viewing for data sets 352ISPF (Interactive System Productivity Facility)
support 16turning statistics on and off in edit
sessions 168issuing
CPU console operator commands to OS or JES2 (OC functional command) 382
CPU console operator commands to OS or JES2 (OSCMD functional command) 383
functional commands 333functional commands and recalling most
recent issued 335functional commands and recalling to reissue
or change before executing 335VM console commands from terminals (VC
functional command) 440VM console commands from terminals
(VMCMD functional command) 441IX data set record type 246
JJ=JFT option
JES2 Job Dataset Display (Right) screen 282JES2 Job Dataset Display screen 278JES2 Job Output Display (Right) screen 290JES2 Job Output Display screen 287
JES2 Job Queue Display (Right) screen (old format) 273
JES2 Job Queue Display screen (new format) 265
JES2 Job Queue Display screen (old format) 270
JCL messages, SYSOUT data set type for 294JCL SYSOUT data set type 294Jcl SYSOUT data set type 406JCLERR return code for jobs in queues (JES2 Job
Queue Display (Right) screen, old format) 274
JES printer. See printers, JESJES/List Parameter Definitions screen
field definitions 38illustration and description 38temporarily changing variables on 28
JES2 Display Active Jobs screencommand definitions 260field definitions 258illustration and description 258setting display of users, tasks, and active and
batch jobs 40JES2 Job Dataset Display (Right) screen
field definitions 282illustration and description 281
JES2 Job Dataset Display screencommand definitions 278field definitions 278illustration and description 277
JES2 Job Output Display (Right) screenfield definitions 290illustration and description 289
JES2 Job Output Display screenfield definitions 287illustration and description 286
JES2 Job Queue Display (Right) screen (old format)
command definitions 275field definitions 272illustration and description 272
JES2 Job Queue Display screen (new format)command definitions 267field definitions 264illustration and description 264
JES2 Job Queue Display screen (old format)field definitions 270illustration and description 269
JES2 Printer Display screenfield definitions 312illustration and description 311
JES2 printer. See printers, JES2
517

Index
JES2 Spool Display screencommand definitions 295field definition 294illustration and description 292primary command defintions 302
JES2 spool. See spools, JES2JES2 writer. See writers, JES2JFT (8) option (JES2 Primary Option Menu
screen) 31JFT (Job and File Tailoring)
accessing panels 277, 281accessing parameters for 46invoking from JES2 Job Dataset Display
screen 278specifying data sets for processing messages,
panels, and skeletons 47specifying default panels 35specifying default panels and libraries 46using previously defined panels 31
JFT commandJES2 Spool Display screen 299
JFT optionJES2 Job Dataset Display (Right) screen 282JES2 Job Dataset Display screen 278JES2 Job Output Display (Right) screen 290JES2 Job Output Display screen 287JES2 Job Queue Display (Right) screen (old
format) 273JES2 Job Queue Display screen (new
format) 265JES2 Job Queue Display screen (old
format) 270JES2 Primary Option Menu screen 31
JFTPANEL option (CPMS/SYSD Parameter Options screen) 35
Job and File Tailoring (JFT). See JFT (Job and File Tailoring)
job card, displaying programmer field 267JOB cards
defining information used for batch jobs to print a data set 50
setting and changing default information 35viewing information from for jobs (JES2 Job
Queue Display (Right) screen, old format) 272
Job Dataset Display for Job screenfield definitions 416illustration and description 415
job destinations. See destinationsjob elements. See job output elementsJOB functional command 362Job Name field (Printer Status screen) 401
Job Number field (Printer Status screen) 401job output
canceling on JES2 printer 312printing on CICS printer (PJ functional
command) 388printing on CICS printer (PRTJOB functional
command) 406printing on CICS printer (SPLPRT functional
command) 422printing on CICS printer, description 18printing on JOE writer 18routing (ROUTE functional command) 412routing (SPLRTE functional command) 423routing (SR functional command) 423specifying what is done with after printing from
spool printer 405waiting to print, deleting 316
job output data sets. See data sets, outputJob Output Element Display screen
field definitions 421illustration and description 420
job output elementsattributes 421canceling while printing without purging job
from JES2 queue 305deleting in queues 366viewing (JES2 Job Queue Display screen, new
format) 264viewing (JES2 Job Queue Display screen, old
format) 269viewing (SJ functional command) 413viewing (SPLJOE functional command) 420viewing for jobs or output data sets (JES2 Job
Queue Display (Right) screen, old format) 272
Job Prefix field (JES/List Parameter Definitions screen) 39
job priority (Job Status Display screen) 427Job Queue Display screen
field definitions 381illustration and description 380
Job Statement Information field (JES/List Parameter Definitions screen) 40
Job Status Display screenfield definitions 364fields 426illustration and description 364job priority 427job status 426
job status field (Job Status Display screen) 426
518 CPMS/SYSD Reference Manual ~ 7.2

Index
job streamssubmitting from data sets (SUBMIT functional
command) 432submitting from data sets using DCT entry
(SUBD functional command) 432submitting from data sets using DCT entry
(SUBMITD functional command) 433submitting from temporary storage
queues 434submitting from transient data queues 433
job tasks. See tasksJob/File Tailoring Parameters screen
field definitions 46illustration and description 46
Job# fieldCPMS/SYSD Printer Table Display/Change
screen 306JES2 Job Output Display (Right) screen 290JES2 Job Output Display screen 287JES2 Job Queue Display (Right) screen (old
format) 273JES2 Job Queue Display screen (new
format) 265JES2 Job Queue Display screen (old
format) 270JES2 Printer Display screen 313Job Output Element Display screen 421Job Queue Display screen 381Job Status Display screen 364, 426Output Waiting For Printer screen 316Printer Status screen 393
Jobcard Information field (Utility Parameters screen) 51
Jobid command (JES2 Display Active Jobs screen) 260
Jobid fieldActive Task Display screen 338JES2 Display Active Jobs screen 259
Jobname fieldActive Task Display screen 338CPMS/SYSD Printer Table Display/Change
screen 306GRS Queue screen 360JES2 Display Active Jobs screen 258JES2 Job Output Display (Right) screen 290JES2 Job Output Display screen 287JES2 Job Queue Display (Right) screen (old
format) 273JES2 Job Queue Display screen (new
format) 265JES2 Job Queue Display screen (old
format) 271
JES2 Printer Display screen 313Job Output Element Display screen 421Job Queue Display screen 381Job Status Display screen 364, 426Output Waiting For Printer screen 316Printer Status screen 393
jobscanceling (JES2 Job Queue Display (Right)
screen, old format) 272canceling (JES2 Job Queue Display screen,
new format) 264canceling (JES2 Job Queue Display screen,
old format) 269deleting 414deleting (JES2 Job Queue Display (Right)
screen, old format) 272deleting (JES2 Job Queue Display screen (old
format) 269deleting (JES2 Job Queue Display screen,
new format) 264filtering destinations 39following through the system 263hold types 288holding (JES2 Job Queue Display (Right)
screen, old format) 272holding (JES2 Job Queue Display screen (old
format) 269holding (JES2 Job Queue Display screen, new
format) 264holding while printing 305limiting displayed for Option 4 40limiting displayed for Option 5 and Option 6 39number of lines in 267prefixes 39printing (JES2 Job Queue Display (Right)
screen, old format) 272printing (JES2 Job Queue Display screen (old
format) 269printing (JES2 Job Queue Display screen, new
format) 264queue types 271releasing held 411releasing held (JES2 Job Queue Display
(Right) screen, old format) 272releasing held (JES2 Job Queue Display
screen, new format) 264releasing held (JES2 Job Queue Display
screen, old format) 269return codes (JES2 Job Queue Display (Right)
screen, old format) 274routing (JES2 Job Queue Display screen (old
format) 269
519
Index
routing (JES2 Job Queue Display screen, new format) 264
setting order in which displayed 40specifying statements for insertion 40updating statistics dynamically for active
jobs 258view those being executed 341viewing and changing dispositions 287viewing data set statistics for JES2 spool 277viewing data set statistics for jobs in JES2
spool 281viewing execution class (JES2 Job Queue
Display (Right) screen, old format) 274viewing in queues (JES2 Job Queue Display
(Right) screen, old format) 272viewing in queues (JES2 Job Queue Display
screen, new format) 264viewing in queues (JES2 Job Queue Display
screen, old format) 269viewing in queues (Primary Option Menu
screen) 31viewing information from JOB cards (JES2 Job
Queue Display (Right) screen, old format) 272
viewing list of all waiting to print 305viewing memory being used 258, 337viewing message class (JES2 Job Queue
Display (Right) screen, old format) 274viewing only those that match a specific
maximum return code (JES2 Job Queue Display (Right) screen, old format) 275
viewing only those that match a specific maximum return code (JES2 Job Queue Display screen, new format) 267
viewing priority in queues (JES2 Job Queue Display screen, new format) 266
viewing priority in queues (JES2 Job Queue Display screen, old format) 271
viewing statistics for active 257viewing statistics for executing 337viewing statistics for executing (dynamic) 340viewing statistics while being printed 397viewing status for jobs in print spool 306viewing status of data sets for jobs in
queues 279jobs, batch
canceling from queues without printing 344deleting output from JES2 output queue and
then removing from system (SP functional command) 414
deleting output from JES2 output queue and then removing from system (SPLPRG
functional command) 422routing output (ROUTE functional
command) 412routing output (SPLRTE functional
command) 423routing output (SR functional command) 423setting default lines per page 50setting defaults for parameters 35setting display 40setting SYSOUT class 50tracking status in JES2 spool (JOB functional
command) 362tracking status in JES2 spool (STATUS
functional command) 424tracking status in JES2 spool, extended (STE
functional command) 424viewing JES2 job output elements (SJ
functional command) 413viewing JES2 job output elements (SPLJOE
functional command) 420viewing output (SD functional command) 412viewing output (SPLDSP functional
command) 418viewing summary of output data sets (SN
functional command) 414viewing summary of output data sets
(SPLDSN functional command) 415JOE Writer AutoStart Default Options section
(Printer Status screen) 396JOE Writer Information section (Printer Status
screen) 396JOE writer. See writers, JOEJOECLN functional command 366justify data editor line command 205justifying data in edit sessions. See aligning data in
edit sessions
KKEEP
disposition for jobs 287output element disposition 316primary command 145
KeyL field (VTOC for Data Set screen) 354keys
CLEAR 88ENTER 27See also PF (program function) keys
KEYS primary command 145KL field (DASD Record screen) 357
520 CPMS/SYSD Reference Manual ~ 7.2

Index
LL - Print Entire Data Set data set command 223L (last show lines) editor line command 198L functional command 366.label (set bookmark) editor line command 197.label command
Browse - Dataset Display screen 74primary command 117
label names, viewing 156labeling bookmarks 166labels, finding 138Language Type field, Edit - Dataset Menu for CA
Panvalet screen 97Largest Free Area in Tracks field (VTOC listing for
entry screen) 376Last Blk - TTRLL field (VTOC for Data Set
screen) 354Last Modified field
Browse - Member Selection screen 66Directory for PDS Member screen 373Edit - Member Selection screen 102
LAST primary command 145last show lines editor line command 198LC (lowercase) editor line command 198LC functional command 367LCC (lowercase block) editor line command 199LCCT (lowercase and translate block) editor line
command 199LCT (lowercase and translate hex) editor line
command 200LD functional command 367leading and trailing control characters based on
UCS- parameter of SYSOUT 404LEAV
disposition for jobs 287output element disposition 316
LEFT (PF10) key 44LEFT command
Browse - Dataset Display screen 79JES2 Spool Display screen 299primary command 146
left justify data editor line command 206Left primary command (JES2 Job Queue Display
screen, new format) 267libraries
data types 91description 56description (CA Panvalet) 62displaying contents of source members 72naming conventions 56, 91selecting and browsing members 56
selecting and browsing members (CA Panvalet) 62
specifying data sets for JFT 47viewing members and their statistics 65viewing programs in 389viewing, deleting, and printing members 66viewing, deleting, submitting, and printing
members 66See also libraries, load
libraries, loadauthorization code for members 69browsing members and statistics 68See also libraries
Library Codes fieldBrowse - Dataset Menu for CA Panvalet
screen 63Edit - Dataset Menu for CA Panvalet
screen 97Library field
Browse - Dataset Menu screen 57Catalog Utility screen 240Dataset Utilities Menu screen 225Edit - Dataset Menu screen 91Library Utilities Menu screen 220
LIBRARY option (Utility Selection Menu screen) 218
Library Utilities Menu screencommand definitions 223field definitions 220, 225illustration and description 219
LICENSE functional command 367license record, querying, updating, or creating 367Limit (K) field (Storage Statistics for CICS
screen) 429limiting
jobs and columns displayed for Option 5 and Option 6 39
jobs displayed for Option 4 40LINE command
Browse - Dataset Display screen 79primary command 146
line commands for editor. See commands, editor line
#Line fieldJES2 Job Output Display screen 288Output Waiting For Printer screen 317
Line fieldBrowse - Dataset Display screen 73JES2 Spool Display screen 294
Line Number field (Printer Status screen) 402Line Number Within Page field (Printer Status
screen) 402
521

Index
Line# fieldCPMS/SYSD Printer Table Display/Change
screen 307Printer Status screen 393
LINEND primary command 147lines
moving to first on screen 146number in job 267number of in data sets 294setting default lines per page for batch print
jobs 50viewing maximum number in data sets that can
be printed by spool printer 402viewing number of in data sets 279viewing number printed on each page by spool
printer 402See also lines in edit sessions
Lines fieldJob Status Display screen 427
lines in edit sessionsaligning data in edit sessions 170changing blocks to lowercase 199, 200changing blocks to lowercase and translating
hex data to blanks 199, 200changing blocks to uppercase 211, 212changing blocks to uppercase and translating
hex data to blanks 211, 212changing number specified to lowercase 198changing to lowercase and translating hex
data to blanks 200changing to uppercase 210changing to uppercase and translating hex
data to blanks 212compressing and placing tab character
between each blank, delimited word 204copying 189copying blocks 188deleting 193deleting blocks 193exchanging set of with another set without
counting lines 195excluding blocks from display 213excluding from display 213flipping status 139grouping into a paragraph 207inserting data in the middle 151inserting masks 148inserting null below current line 196merging without breaking up words 208moving blocks to point indicated 201moving body of blocks of to the left 190moving body of blocks of to the right 192
moving single to top of screen 204moving to first on screen 117moving to point indicated 201moving to the left 189moving to the right 191overlaying blanks with characters from another
line 202overlaying blanks with characters from
sending lines 202performing specified editing function after 183performing specified editing function
before 184renumbering 159repeating 203repeating blocks 203setting bookmarks to 197setting numbering (AUTONUM primary
command) 118setting numbering (NUMBER primary
command) 152setting sequence fields to blanks and turning
numbering off 178setting target for FIND command 138shifting contents of blocks to the left 185shifting contents of blocks to the right 187shifting contents to the left 185shifting contents to the right 186showing newly inserted and updated 164splitting 210splitting or merging 168swapping set of with another set 194translating hexadecimal characters to
blanks 209turning truncation on and off 176using * to indicate continued 188viewing first in a block previously
excluded 195viewing last in a block previously
excluded 198viewing previously excluded 204
Lines Per Page fieldPrinter Status screen 402Utility Parameters screen 51
link pack directoriesmodified, viewing for z/OS directories 379viewing for z/OS directories 377
LIST functional command 368LIST option (CPMS/SYSD Parameter Options
screen) 35LISTC functional command 368LISTCAT functional command 368
522 CPMS/SYSD Reference Manual ~ 7.2

Index
Listcat Utilitydefining default high-level qualifier 50defining how SELECT command behaves 51using 244
Listcat Utility screenfield definitions 245illustration and description 244
LISTD functional command 369LISTPDS functional command 369LISTVTOC functional command 374LL (lowercase block) editor line command 200LLT (lowercase and translate block) editor line
command 200load libraries. See libraries, loadloading programs permanently 389LOCATE command
Browse - Member Selection screen 70functional command 377primary command 148using with TRUNC and ZONE primary
commands 148LOCATE primary command
using with CHANGE primary command 148log messages, SYSOUT data set type for 294LOG SYSOUT data set type 294Log SYSOUT data set type 406logging changes made in editor 158logging in to CPMS/SYSD. See signing onlogical record length
viewing for job data sets 280viewing for SYSOUT data sets 294
logical tabbing, defining for edit sessions 171lowercase
changing blocks of lines to and translating hex data to blanks in edit sessions 199, 200
changing blocks of lines to in edit sessions 199, 200
changing lines to and translating hex data to blanks in edit sessions 200
changing number of lines to in edit sessions 198
turning on and off for edit sessions 120viewing whether translation is on or off 295
lowercase and translate block editor line command 199, 200
lowercase and translate hex editor line command command 200
lowercase block editor line command 199, 200lowercase editor line command 198LPAD functional command 377
LRecL fieldBrowse - Dataset Display screen 73JES2 Job Dataset Display screen 280JES2 Spool Display screen 294Job Dataset Display for Job screen 417VTOC for Data Set screen 354VTOC Utility screen 251
LV functional command 378LWM (K) field (Storage Statistics for CICS
screen) 430
MM (move lines) editor line command 201maintenance, performing on a single data set 351management commands for CPMS/SYSD,
summary list 451managing
CICS activities 332DASD data sets 19
manualsconventions 13related publications 14
MASK primary command 148masks
copying to edit sessions 148defining contents 148
master terminal assigned to spool printer, viewing and changing 402
Master Terminal field (Printer Status screen) 402Maximum Number of Lines Per Dataset field
(Printer Status screen) 402MaxRC field (JES2 Job Queue Display (Right)
screen, old format) 274MAXRC field (JES2 Job Queue Display screen,
new format) 265MC field
JES2 Job Queue Display (Right) screen (old format) 274
JES2 Job Queue Display screen (new format) 266
Member Code fieldBrowse - Dataset Menu for CA Panvalet
screen 63Edit - Dataset Menu for CA Panvalet
screen 97Member field
Browse - Dataset Menu screen 59Edit - Dataset Menu screen 93Edit - Session Display screen 100Library Utilities Menu screen 222
members, copying into edit sessions 125
523

Index
memorybeing used by jobs 258, 337viewing and changing virtual in CICS address
space 346MENU functional command 378menu screens, definition 26menu-driven system
navigating 23, 30password 378returning to from CICS transactions 321signing on to 378stopping 27, 32STRWTR command equivalent 308versus function-driven system 22viewing table of contents for help topics 326
merginglines in edit sessions 168lines without breaking up words in edit
sessions 208message classes
displaying (JES2 Job Queue Display screen, new format) 266
for jobs in queues (JES2 Job Queue Display (Right) screen, old format) 274
Message Libraries field (Job/File Tailoring Parameters screen) 47
messageserror 453location on screens 26resetting pending error in edit sessions 161SYSOUT data set types for 294viewing outstanding operator on main
console 409MLPAD functional command 379MM (move block) editor line command 201Mod field
Browse - Member Selection screen 67Directory for PDS Member screen 373Edit - Member Selection screen 103
MOD5field (Edit Parameters screen) 53primary command 150
MODID primary command 149modification ID, inserting and displaying in edit
sessions 149monitoring CICS activity 332move block editor line command 201move lines editor line command 201moving in edit sessions
all or part of edit session into new or existing member 160
backward 118
blocks of lines to point indicated 201body of a block of lines to the left 190body of a block of lines to the right 192body of a line to the left 189body of a line to the right 191left 146, 162line to top of screen 204lines to first line on screen 117, 146lines to point indicated 201to bottom (BOTTOM primary command) 119to bottom (LAST primary command) 145up, down, left, or right 180up, down, left, or right one full screen 180up, down, left, or right to cursor position 180
Msg SYSOUT data set type 406MSG SYSOUT dataset type 294
NN functional command 379N job output element attribute 421N option (JES2 Primary Option Menu screen) 31N status for data sets for jobs in queues 279N=Repeat option 312Name field
Browse - Member Selection screen 66, 68Directory for PDS Member screen 370, 371,
373Edit - Member Selection screen 102General Parameter Definitions screen 37
naming conventionsdata sets 94libraries 91library data types 91projects 90
navigatingmenu-driven system 23, 30tutorial and online help screens 325
New Class field (CPMS/SYSD Spool Writer Start screen) 309
New Dataset Name field (Dataset Utilities Menu screen) 227
New Dest field (CPMS/SYSD Spool Writer Start screen) 309
new screen format 41Newname field (Library Utilities Menu screen) 222NEXT primary command 151NONE STARTED print task status 307, 394NONSWAP functional command 382NONUM
data set profile type 94edit profile (Edit Parameters screen) 54edit profile (PROFILE primary command) 155
524 CPMS/SYSD Reference Manual ~ 7.2

Index
NOPPA1 key 42PA2 key 43PA3 key 43
null lines, inserting below current line in edit sessions 196
nullsreplacing with trailing blanks 151turning on and off 151
NULLS primary command 151Number of DSCBS in Use field (VTOC listing for
entry screen) 376Number of free DSCBS field (VTOC listing for entry
screen) 376Number of Print Buffers field (Printer Status
screen) 402NUMBER primary command 152numbering
setting all sequence fields to blanks and turning off for lines in edit sessions 178
setting for lines in edit sessions (AUTONUM primary command) 118
setting for lines in edit sessions (NUMBER primary command) 152
NumLin fieldJES2 Job Dataset Display screen 279Job Dataset Display for Job screen 416
NVsam data set record type 246
OO - Compress Dataset data set command 228O (Option) field
Browse - Hot List Selection screen 83Browse - Member Selection screen 66CPMS/SYSD Printer Table Display/Change
screen 305Edit - Hot List Selection screen 110Edit - Member Selection screen 102Edit - Session Display screen 100JES2 Job Dataset Display (Right) screen 282JES2 Job Dataset Display screen 278JES2 Job Output Display (Right) screen 290JES2 Job Output Display screen 287JES2 Job Queue Display (Right) screen (old
format) 273JES2 Job Queue Display screen (new
format) 264JES2 Job Queue Display screen (old
format) 270JES2 Printer Display screen 312Listcat Utility screen 247Output Waiting For Printer screen 316
System Device Unit Display screen 254VTOC Utility screen 250
O (Option) option (JES2 Primary Option Menu screen) 31
O (overlay lines) editor line command 202O job output element attribute 421O=Compress data set command
Catalog Utility screen 243Dataset Information screen 231
O=Compress optionListcat Utility screen 247VTOC Utility screen 251
O=Output optionJES2 Job Queue Display (Right) screen (old
format) 273JES2 Job Queue Display screen (new
format) 265JES2 Job Queue Display screen (old
format) 270OC functional command 382OKSWAP functional command 382old screen format 41online help. See help, onlineOO (overlay block) editor line command 202OP functional command 383opening. See startingoperating system support 16operator messages, viewing outstanding on main
console 409OPR hold type
for data sets 317for jobs 288
OptCd field (VTOC for Data Set screen) 353Option 0 (setting CPMS/SYSD parameters) 33Option 1 (browsing source data) 55Option 2 (editing source data) 85Option 3 (performing utility functions) 215Option 4 (displaying active jobs) 257Option 5 (following jobs through the system) 263Option 6 (viewing output data sets) 285Option 7 (controlling the printer) 303Option C (executing CICS transactions) 319Option T (tutorial and online help) 323Option U (maintaining the user file) 329options
accessing for parameters 34ACTIVE (Primary Option Menu screen) 31BROWSE (Primary Option Menu screen) 30CICS (Primary Option Menu screen) 31EDIT (Primary Option Menu screen) 30END (Primary Option Menu screen) 32JFT (Primary Option Menu screen) 31
525

Index
N (Primary Option Menu screen) 31O (Primary Option Menu screen) 31PARMS (Primary Option Menu screen) 30PRINTER (Primary Option Menu screen) 31submitting to mainframe 27TUTORIAL (Primary Option Menu screen) 31USER (Primary Option Menu screen) 32using to navigate menu-driven system 30UTIL (Primary Option Menu screen) 31viewing and changing for spool printer 404viewing for JOE writer 396
OR command (JES2 Spool Display screen) 302Org field (VTOC Utility screen) 251Originating Terminal field (Printer Status
screen) 402OS data sets. See data setsOSCMD functional command 383OSPRINT functional command 384output classes, viewing those JOE writer scans for
jobs to print 397output data sets. See data sets, outputoutput elements. See job output elementsoutput for jobs. See job outputOutput option
JES2 Job Queue Display (Right) screen (old format) 273
JES2 Job Queue Display screen (new format) 265
JES2 Job Queue Display screen (old format) 270
output queues. See queuesOutput Waiting For Printer screen
field definitions 316illustration and description 315
Outstanding Print Task Limit field (Printer Status screen) 403
outstanding print tasks, resetting counter for 398overlay block editor line command 202overlay lines editor line command 202overlay name for output element for printing 291overlaying in edit sessions
blanks in lines with characters from another line 202
blanks in lines with characters from sending line 202
overview of CPMS/SYSD 15Ovly field (JES2 Job Output Display (Right)
screen) 291Owner field, Job Status Display screen 427
PP - Print Member data set command 223
P status type for jobs 306P=Print option
JES2 Job Dataset Display (Right) screen 282JES2 Job Dataset Display screen 278JES2 Job Output Display (Right) screen 290JES2 Job Output Display screen 287JES2 Job Queue Display (Right) screen (old
format) 273JES2 Job Queue Display screen (new
format) 265JES2 Job Queue Display screen (old
format) 270Output Waiting For Printer screen 316System Device Unit Display screen 254
P=Purge option (CPMS/SYSD Printer Table Display/Change screen) 305
P=Stop option (JES2 Printer Display screen) 312PA functional command 384PA1 (NOP) key 42PA2 (NOP) key 43PA3 (NOP) key 43PAGE DASD attribute 255PAGE editor scroll command 180Page field
CPMS/SYSD Printer Table Display/Change screen 307
Printer Status screen 393Page Number field (Printer Status screen) 403page space data set record type 246paging commands for tutorial and online help 325Panel Libraries field ((Job/File Tailoring
Parameters screen) 47panels
accessing for JFT 277, 281setting default for display when JFT is
invoked 46setting whether primary command to access
other panels can be issued 47using previously defined to submit jobs and
update files 31paragraphs, grouping text lines into in edit
sessions 207parameter lists, using for functional
commands 335Parameter Options screen
illustration and description 34option definitions 35primary command definitions 34reaching 25See also CPMS/SYSD Parameter Options
screen
526 CPMS/SYSD Reference Manual ~ 7.2

Index
parametersaccessing for JFT 46accessing options for 34accessing screens and functions for 30for primary commands 113Force requirement 90formatting for functional commands 334omitting positional in functional
commands 334setting and changing 35setting for CPMS/SYSD 33setting for edit profiles 35using lists for functional commands 335
PARMS option (JES2 Primary Option Menu screen) 30
partitionsadding (PF2 key) 43adding (SPLIT universal command) 28deleting and then swapping to another 167description 43splitting (PF2 key) 43splitting (SPLIT primary command) 167splitting (SPLIT universal command) 28swapping between (PF9 key) 44swapping to previous (SWAP primary
command) 169swapping to previous (SWAP universal
command) 29viewing which partition you are located in and
number of active 167Password field (General Parameter Definitions
screen) 36passwords
changing 36entering 20maintaining secure when signing on 21managing in user profiles 35specifying for data sets 94, 222to CPMS/SYSD menu-driven system 378
PAth data set record types 246PC functional command 385PCDEL primary command 153PCRCV primary command 153PCSND primary command 154PD functional command 385PDS (partitioned data set). See data sets,
partitionedPDS directory BLKS per track field (VTOC listing
for entry screen) 376PDSALIAS functional command 386PDSCHG functional command 386PDSDEL functional command 387
PDSDSPLY functional command 387performing maintenance on a single data set 351peripheral devices, viewing UCBs 439PF (program function) keys
alternative to using 25changing assignments 44CLEAR key assignment 42disabling 45for navigating tutorial and online help 326how derived 24managing assignments 35PA1 (NOP) 42PA2 (NOP) 43PA3 (NOP) 43PF1 (HELP) 43PF10 (LEFT) 44PF11 (RIGHT) 44PF12 (RETURN) 44PF13 through PF24 44PF2 (SPLIT) 43PF3 (END) key 43PF4 (FINDP) 43PF5 (FIND) 43PF6 (CHANGE) 43PF7 (UP) 43PF8 (DOWN) 43PF9 (SWAP) 44primary command assignments 113restoring defaults 45temporarily changing variables 28using with CHANGE primary command to
repeat 121viewing and changing defaults 42viewing commands assigned to primary or
secondary 145PF functional command 388PF option (CPMS/SYSD Parameter Options
screen) 35PF1 (HELP) key 43PF10 (LEFT) key 44PF11 (RIGHT) key 44PF12 (RETURN) key 44PF13 through PF24 keys 44PF2 (SPLIT) key 43PF3 (END) key 43PF4 (FINDP) key 43PF5 (FIND) key 43PF6 (CHANGE) key 43PF7 (UP) key 43PF8 (DOWN) key 43PF9 (SWAP) key 44PGspc data set record type 246
527

Index
PH functional command 388phases for jobs 365PJ functional command 388placeholders
for browsing 59for searching library member names 93
+ (plus sign)primary command 117
++Copy Member field (Edit - Dataset Menu for CA Panvalet screen) 98
positional parameters, omitting in functional commands 334
PP fieldJES2 Job Output Display screen 288Job Output Element Display screen 421Output Waiting For Printer screen 317
PP functional command 388PPU queue type 271Prcsmode field (JES2 Job Output Display (Right)
screen) 291PREFIX command
JES2 Display Active Jobs screen 261prefixes
for data sets 250for jobs 39for temporary edit sessions 90, 95
Pri fieldJES2 Job Queue Display screen (new
format) 266JES2 Job Queue Display screen (old
format) 271Job Queue Display screen 381Job Status Display screen 365, 427
primary commands. See commands, primaryprimary indexes
deleting from z/OS catalog (DLTX functional command) 350
deleting from z/OS catalog (DRPX functional command) 351
Primary Option Menu screenillustration and description 30returning to (PF12 key) 44returning to (RETURN universal
command) 28using to navigate menu-driven system 23
Primary Quan field (Allocate Utility screen) 236Print Buffer Size field (Printer Status screen) 403print buffers, viewing number assigned to spool
printer 402PRINT command
Browse - Dataset Display screen 79JES2 Spool Display screen 299
print commands for CPMS/SYSD, summary list 444
print destination ID 267print destinations. See destinationsPrint Entire Data Set data set command 223Print field
JES2 Job Queue Display screen (new format) 267
JES2 Job Queue Display screen (old format) 271
Job Queue Display screen 382Job Status Display screen 365, 427
Print Index Listing data set command 223Print Member data set command 223Print option
JES2 Job Dataset Display (Right) screen 282JES2 Job Dataset Display screen 278JES2 Job Output Display (Right) screen 290JES2 Job Output Display screen 287JES2 Job Queue Display (Right) screen (old
format) 273JES2 Job Queue Display screen (new
format) 265JES2 Job Queue Display screen (old
format) 270Output Waiting For Printer screen 316
PRINT primary command 154print priority for output elements 288print tasks. See tasksPrint VTOC option (System Device Unit Display
screen) 254Printer Display Screen field (JES/List Parameter
Definitions screen) 39Printer Identifier field (JES/List Parameter
Definitions screen) 38PRINTER option (JES2 Primary Option Menu
screen) 31Printer Status Information section (Printer Status
screen) 397Printer Status Summary screen
field definitions 392illustration and description 392section definitions 396
Printer Table Display/Change screenillustration and description 304
Printer Terminal Identifier field (Printer Status screen) 403
printer-attended forms changes for spool printer 404
printersCICS. See printers, CICScontrolling 303
528 CPMS/SYSD Reference Manual ~ 7.2

Index
CPMS/SYSD. See printers, CPMS/SYSDJES2. See printers, JES2spool. See printers, spoolSee also printing
printers, CICSprinting output on (PJ functional
command) 388printing output on (PRTJOB functional
command) 406printing output on (SPLPRT functional
command) 422reviewing and changing printer
assignments 31setting and changing default printer ID 35specifying as default for type displayed 39
printers, CPMS/SYSDdeleting output waiting to print 316printing data sets waiting to print 316setting default 38specifying as default for types displayed 39
printers, JES2canceling output 312changing criteria for data sets waiting to
print 316displaying and controlling 31holding data sets waiting to print 316interrupting printing and then queuing printer
again 312printing job output again 312releasing held data sets 316restarting printing 312starting 312stopping 312stopping temporarily 312viewing JES2 data sets waiting for JES2
writer 312viewing status 313viewing status and attributes of locate and
remote printers 311writer ID 314
printers, spoolcanceling tasks and stopping from printing
current SYSOUT data set (PC functional command) 385
canceling tasks and stopping from printing current SYSOUT data set (PRTCNL functional command) 391
changing characteristics for print tasks 304deleting spool print tasks (CPMS/SYSD Printer
Table Display/Change screen) 305deleting spool print tasks (PP functional
command) 388
deleting spool print tasks (PRTPRG functional command) 409
holding jobs that are printing 305releasing held 305replying to forms change requests 305replying to forms change requests (PF
functional command) 388replying to forms change requests (PRTFRM
functional command) 405restarting held JOE writer tasks 305restarting tasks on new page (PA functional
command) 384restarting tasks on new page (PRTADJ
functional command) 390starting for JOE writer (PRTJOE functional
command) 408starting for JOE writer (STRWTR functional
command) 431starting for JOE writer (SW functional
command) 434stopping for JOE writer 430viewing and changing beginning separator
pages 397viewing and changing carriage size 397viewing and changing characteristics 304viewing and changing default FCB 399viewing and changing default UCS 399viewing and changing definite response
frequency 399viewing and changing delay between printing
buffers 400viewing and changing emulation type 400viewing and changing ending separator
pages 401viewing and changing forms change
terminal 401viewing and changing forms on which set to
print 398viewing and changing number of columns set
to print 397viewing and changing outstanding print task
limit 403viewing and changing special options 404viewing and resetting JOE writer outstanding
print task counter 398viewing assigned destination type 400viewing current SYSOUT line number being
printed 398viewing FCB being used 401viewing JES2 queue name printed 403viewing list of all jobs waiting to print 305viewing maximum number of data set lines that
529

Index
can be printed 402viewing number of lines printed on each
page 402viewing number of print buffers assigned 402viewing printer ID 403viewing status (CPMS/SYSD Printer Table
Display/Change screen) 304viewing status (PD functional command) 385viewing status (PRTDSP functional
command) 391writer type 308
printingbrowse library members 66canceling for spool print tasks and restarting
on a new page (PA functional command) 384
canceling for spool print tasks and restarting on a new page (PRTADJ functional command) 390
canceling spool print tasks and stopping printing of current SYSOUT data set (PC functional command) 385
canceling spool print tasks and stopping printing of current SYSOUT data set (PRTCNL functional command) 391
cataloged partitioned data set members (OP functional command) 383
cataloged partitioned data set members (OSPRINT functional command) 384
data set members 219data sets 218, 219data sets waiting to print on JES2 printer 316disconnecting from CICS when done 404edit sessions 154holding jobs that are printing 305index listing for data sets 218, 219interrupting on JES2 printers and then queuing
the printer again 312job output (JES2 Job Queue Display (Right)
screen, old format) 272job output (JES2 Job Queue Display screen,
new format) 264job output (JES2 Job Queue Display screen,
old format) 269job output on CICS printer 18job output on CICS printer (PJ functional
command) 388job output on CICS printer (PRTJOB functional
command) 406job output on CICS printer (SPLPRT functional
command) 422job output on JOE writer 18
repeating job output 312restarting on JES2 printers 312same forms together 404starting on JES2 printers 312stopping on JES2 printer 312stopping temporarily on JES2 printer 312
PRINTING print task status 307, 394priorities
for JES2 data sets waiting for writer 317for JES2 local and remote printers 313for JES2 printer output data sets 313for job dispatching 260, 339for job output elements 288, 421for jobs in queues 365, 381for jobs in queues (JES2 Job Queue Display
screen, new format) 266for jobs in queues (JES2 Job Queue Display
screen, old format) 271for terminals 435for transactions 436
priorty field, Job Status Display screen 427PRIV DASD attribute 255private DASD attribute 255problems
troubleshooting CICS using CPMS/SYSD debugging aids 332
troubleshooting using CPMS/SYSD aids 453troubleshooting using program tracing 390troubleshooting using status of auxiliary
tasks 435process mode for output elements 291Procstep field
Active Task Display screen 339JES2 Display Active Jobs screen 259JES2 Job Dataset Display (Right) screen 282JES2 Job Dataset Display screen 279
productcomponents 16license record, querying, updating, or
creating 367overview 15support contact information 2viewing new features 328
Profile field (Edit - Member Selection screen) 103Profile Name field (Edit - Dataset Menu screen) 94PROFILE primary command 155profiles, edit
setting parameters 35specifying default profile 54viewing and setting 52, 155
530 CPMS/SYSD Reference Manual ~ 7.2

Index
profiles, useradding, changing, and deleting 32, 329assigning to data sets 94managing profile information 35setting job-related variables 38using SETID primary command to change 34viewing 36
PROG functional command 389program function (PF) keys. See PF (program
function) keysProgram Function Key Definition screen
default PF key assignments 42illustration and description 42temporarily changing variables on 28viewing 25
Programmer fieldJES2 Job Queue Display screen (new
format) 267Programmer Name field (JES2 Job Queue Display
(Right) screen, old format) 274programs
deleting previously loaded 389enabling and disabling entries 389permanently loading 389setting edit profile 52, 54turning tracing on and off 390viewing assembly date, time, and version 389viewing libraries located in 389viewing summary or specific variables 389viewing z/OS link pack directories 377viewing z/OS modified link pack
directories 379Project field
Browse - Dataset Menu screen 57Catalog Utility screen 239Dataset Utilities Menu screen 225Edit - Dataset Menu screen 90Library Utilities Menu screen 220
projects, naming conventions 90Prt Name field (JES2 Printer Display screen) 313PRT print priority 288Prt Rec field (JES2 Printer Display screen) 314PRTADJ functional command 390PRTCNL functional command 391PRTDSP functional command 391PRTFRM functional command 405PRTHLD functional command 406PRTJOB functional command 406PrtJob Is Doing the Printing field (Printer Status
screen) 403
PRTJOB spool print taskscanceling and stopping from printing current
SYSOUT data set (PC functional command) 385
canceling and stopping from printing current SYSOUT data set (PRTCNL functional command) 391
deleting (PP functional command) 388deleting (PRTPRG functional command) 409holding (PH functional command) 388holding (PRTHLD functional command) 406replying to forms change requests (PF
functional command) 388replying to forms change requests (PRTFRM
functional command) 405restarting on new page (PA functional
command) 384restarting on new page (PRTADJ functional
command) 390PRTJOE functional command 408PRTJOE spool print tasks
canceling and stopping from printing current SYSOUT data set (PC functional command) 385
canceling and stopping from printing current SYSOUT data set (PRTCNL functional command) 391
deleting (PP functional command) 388deleting (PRTPRG functional command) 409holding (PH functional command) 388holding (PRTHLD functional command) 406replying to forms change requests (PF
functional command) 388replying to forms change requests (PRTFRM
functional command) 405restarting on new page (PA functional
command) 384restarting on new page (PRTADJ functional
command) 390PRTPRG functional command 409Prty field
Active Task Display screen 339JES2 Display Active Jobs screen 260JES2 Printer Display screen 313
PUBL DASD attribute 255public DASD attribute 255publications, related 14PUN print priority 288punch destinations, changing for jobs
JES2 Job Queue Display screen (new format) 265
531

Index
JES2 Job Queue Display screen (old format) 270
Punch fieldJES2 Job Queue Display screen (old
format) 271Job Queue Display screen 382Job Status Display screen 365, 427
PURG disposition for jobs 287PURG output element disposition 316Purge (Y/N) field (CPMS/SYSD Spool Writer Start
screen) 309Purge option (CPMS/SYSD Printer Table Display/
Change screen) 305purging. See deletingPUT command
Browse - Dataset Display screen 80JES2 Spool Display screen 300primary command 156setting default TSQ queue name and CICS
system ID for 48
QQLABEL primary command 156Qname field (GRS Queue screen) 359QQUIT primary command 157qualifier used for Listcat Utility, defining 50qualifiers
alias of CVOL catalog 245index 245listing entries for high level 244
question mark (?)error indicator 244primary command 117wildcard for searching 245
Queue and SYSID Command Override Retention field (GET/PUT TS Queue Identifiers screen) 49
Queue To Be Printed field (Printer Status screen) 403
queue types for jobs 271QUEUEIDs option (CPMS/SYSD Parameter
Options screen) 35queues
canceling jobs without printing 344deleting jobs 414deleting output elements 366filtering destinations 39following jobs through 263holding jobs 361releasing held jobs 411routing batch jobs (ROUTE functional
command) 412
routing batch jobs (SPLRTE functional command) 423
routing batch jobs (SR functional command) 423
tracking status of batch jobs (JOB functional command) 362
tracking status of batch jobs (STATUS functional command) 424
tracking status of batch jobs, extended (STE functional command) 424
viewing GRS 358viewing job execution class (JES2 Job Queue
Display (Right) screen, old format) 274viewing job output elements (SJ functional
command) 413viewing job output elements (SPLJOE
functional command) 420viewing jobs (JES2 Job Queue Display (Right)
screen, old format) 272viewing jobs (JES2 Job Queue Display screen,
new format) 264viewing jobs (JES2 Job Queue Display screen,
old format) 269viewing jobs (Primary Option Menu
screen) 31viewing names spool printer prints 403viewing statistics for jobs 379viewing status of data sets for jobs 279See also TSQ (temporary storage queues)
RR - Rename Entire Dataset data set
command 228R - Rename Member data set command 223R (repeat line) editor line command 203R functional command 409R job output element attribute 421R=Release option, CPMS/SYSD Printer Table
Display/Change screen 305R=Rename data set command
Allocate Utility screen 237Catalog Utility screen 243Dataset Extents screen 234Dataset Information screen 231
R=Rename optionListcat Utility screen 247VTOC Utility screen 251
RC primary commandJES2 Job Queue Display (Right) screen (old
format) 275JES2 Job Queue Display screen (new
format) 267
532 CPMS/SYSD Reference Manual ~ 7.2

Index
Rcds fieldEdit - Dataset Display screen 107Edit - Session Display screen 100
read-only screens, definition 26read-update screens, definition 26Real field
Active Task Display screen 339JES2 Display Active Jobs screen 259
recall buffer, setting with RECALLBBUFFS parameter 335
RECALL commandfunctional command 410primary command 157universal command 27
RECALLBUFFS parameter for setting recall buffer 335
recallingarchived data sets 410commands from command buffer 27functional commands and then reissuing or
changing before executing 335most recent functional command issued 335
recataloging data sets 410RECATLG functional command 410RecFm field
Browse - Dataset Display screen 73JES2 Job Dataset Display screen 280Job Dataset Display for Job screen 417VTOC for Data Set screen 354VTOC Utility screen 251
Record Format field (Allocate Utility screen) 236record format types for data sets 280record length
viewing for data sets 280viewing for SYSOUT data sets 294
Record Length field (Allocate Utility screen) 236Record Selection field (Listcat Utility screen) 246records
changing exclude status for a block 196changing exclude status for specified
number 195data set types 246deleting in edit sessions 127deleting located at cursor position in edit
sessions 128excluding from display in edit sessions 131,
164flipping status in edit sessions 139hiding from display in edit sessions 131number of in member 107number updated during current edit
session 107
viewing during edit sessions 164viewing format for data sets 280viewing physical DASD 355
recoverydescription of option 158turning on and off 158using UNDO command for changes in edit
sessions 177RECOVERY primary command 158RECOVERY RESTART print task status 394RECOVERY WAIT print task status 307registered trademark information 2relative record number (RRN) data set type 343RELEASE functional command 411release of product, viewing new features 328Release option
CPMS/SYSD Printer Table Display/Change screen 305
JES2 Job Output Display (Right) screen 290JES2 Job Output Display screen 287JES2 Job Queue Display (Right) screen (old
format) 273JES2 Job Queue Display screen (new
format) 264JES2 Job Queue Display screen (old
format) 270Output Waiting For Printer screen 316
releasingheld JES2 data sets 316held jobs 411held jobs (JES2 Job Queue Display (Right)
screen, old format) 272held jobs (JES2 Job Queue Display screen,
new format) 264held jobs (JES2 Job Queue Display screen,
old format) 269held printers 305
removing. See deletingRename data set command
Allocate Utility screen 237Catalog Utility screen 243Dataset Extents screen 234Dataset Information screen 231
Rename Entire Dataset data set command 228RENAME functional command 411Rename Member data set command 223Rename option
Listcat Utility screen 247VTOC Utility screen 251
533

Index
renamingdata set members 218, 219data sets 218, 224, 411partitioned data set members 386
Rent field (Directory for PDS Member screen) 372RENUMBER primary command 159renumbering lines in edit sessions 159repeat block editor line command 203REPEAT command
primary command 159universal command 28
repeat line editor line command 203Repeat option (JES2 Printer Display screen) 312repeating
blocks of lines in edit sessions 203lines in edit sessions 203most recent command issued (- primary
command) 117most recent command issued (REPEAT
primary command) 28, 159repeat-to-address control characters for spool
printer 404REPLACE primary command 160replacing
character strings in edit sessions 121members in edit sessions 160
replying to forms change requestsusing CPMS/SYSD Printer Table Display/
Change screen 305using PF functional command 388using PRTFRM functional command 405
Reposition option (Listcat Utility screen) 247rerouting data sets waiting to print 315RES DASD attribute 255reserved DASD attribute 255RESET primary command 161resetting
bookmarks 161outstanding print task counter for JOE
writer 398pending editor line commands, change
indicators, and error messages in edit sessions 161
PF (program function) key defaults 45TTR 390user ID to logged-in user 34variables 28
residency mode (RMODE) for load library members 69
resident DASD attribute 255
Restart optionCPMS/SYSD Printer Table Display/Change
screen 305JES2 Printer Display screen 312
restartingheld JOE writer tasks 305printing on JES2 printers 312spool print tasks on new page (PA functional
command) 384spool print tasks on new page (PRTADJ
functional command) 390retab editor line command 204retrieving data
from TSQ for edit sessions (GET primary command) 142
from TSQ for edit sessions (PCRCV primary command) 153
RETURN (PF12) key 44return codes
viewing for jobs in queues (JES2 Job Queue Display (Right) screen, old format) 274
viewing jobs with specific maximum (JES2 Job Queue Display (Right) screen, old format) 275
viewing jobs with specific maximum (JES2 Job Queue Display screen, new format) 267
RETURN commandediting command 88primary command 161universal command 28
returningterminals to VM control for dialed sessions
(VMRESET functional command) 441terminals to VM control for dialed sessions (VR
functional command) 441to CICS from menu-driven system 27, 31, 32to CICS leaving edit session intact 124to CPMS/SYSD session from CICS 31to previous screen or next-highest logical
level 43to previous screens 27to Primary Option Menu screen (PF12 key) 44to Primary Option Menu screen (RETURN
universal command) 28to Primary Option Menu screen from edit
session leaving session intact 161Reus field (Directory for PDS Member screen) 372reverse find command, Browse - Dataset Display
screen 78RIGHT (PF11) key 44
534 CPMS/SYSD Reference Manual ~ 7.2

Index
RIGHT commandBrowse - Dataset Display screen 80JES2 Spool Display screen 300primary command 162
right justify data editor line command 206Right primary command, JES2 Job Queue Display
screen (new format) 267RKP field (VTOC for Data Set screen) 354RM field (Browse - Member Selection screen) 69RMODE (residency mode for load library
members) 69RMT field (JES2 Printer Display screen) 313Rname field (GRS Queue screen) 359ROUTE functional command 412Route option
JES2 Job Queue Display screen (new format) 265
JES2 Job Queue Display screen (old format) 270
routingbatch job output (ROUTE functional
command) 412batch job output (SPLRTE functional
command) 423batch job output (SR functional command 423jobs (JES2 Job Queue Display screen (old
format) 269jobs (JES2 Job Queue Display screen, new
format) 264SYSOUT data sets 431
Row field (Listcat Utility screen) 245RR (repeat block) editor line command 203RR field (DASD Record screen) 357RRN (relative record number) data set type 343RSRV DASD attribute 255RT (retab) editor line command 204RTACMP option for spool printer 404
SS - Data Set Information data set command 223S (show lines) editor line command 204S field (JES2 Job Output Display (Right)
screen) 290S job output element attribute 421S status for data sets for jobs in queues 279S=Select data set command
Allocate Utility screen 238Catalog Utility screen 243Dataset Extents screen 234
S=Select optionJES2 Job Output Display (Right) screen 290JES2 Job Output Display screen 287
JES2 Job Queue Display (Right) screen (old format) 273
JES2 Job Queue Display screen (new format) 265
JES2 Job Queue Display screen (old format) 270
Listcat Utility screen 247Output Waiting For Printer screen 316System Device Unit Display screen 254VTOC Utility screen 251
S=Start optionCPMS/SYSD Printer Table Display/Change
screen 305JES2 Printer Display screen 312
SAVE commandediting command 88primary command 162
savingall or part of edit sessions to TSQ (PCSND
primary command) 154all or part of edit sessions to TSQ (PUT primary
command) 156CA Panvalet members into data sets,
requirement for 163edit sessions and then deleting (END primary
command) 130edit sessions and then deleting (FILE primary
command) 131edit sessions into new member (KEEP primary
command) 145edit sessions into new member (SAVE primary
command) 162SCALE primary command 163SCAN CRITERIA print task status 394SCANNING print task status 307, 394SClass field (JES2 Printer Display screen) 314Scope field (GRS Queue screen) 359SCRATCH functional command 412scratching data sets without uncatalog 412screens
viewing old or new format 41screens, about
addresses, composition 23addresses, direct flow 378clearing 27clearing and returning to CICS with edit
session intact 124location of messages 26moving directly to specific 23moving directly to when signing on 21returning to previous 23, 27scrolling down 27
535

Index
scrolling up 29types and their components 26viewing help topics for 327viewing online help for 27See also screens, description
screens, descriptionActive Task Display 337Allocate Utility 235Browse - Dataset Display 72Browse - Dataset Menu 56Browse - Dataset Menu for CA Panvalet 62Browse - Hot List Selection 82Browse - Member Selection 65Catalog Utility 239CICS Transactions 320CPMS/SYSD Parameter Options 30CPMS/SYSD Printer Table Display/
Change 304CPMS/SYSD Spool Writer Start screen 308DASD Record 356Dataset Extents 232Dataset Information 229Dataset Utilities Menu 224Directory for PDS member 370Edit - Copy Menu 125Edit - Dataset Display 106Edit - Dataset Menu 89Edit - Dataset Menu for CA Panvalet 96Edit - Hot list Selection 108Edit - Member Selection 101Edit - Session Display 99Edit Parameters 52General Parameter Definitions 36GET/PUT TS Queue Identifiers 48GRS Queue 359JES/List Parameter Definitions 38JES2 Display Active Jobs 258JES2 Job Dataset Display 277JES2 Job Dataset Display (Right) 281JES2 Job Output Display 286JES2 Job Output Display (Right) 289JES2 Job Queue Display (new format) 264JES2 Job Queue Display (old format) 269JES2 Job Queue Display (Right) (old
format) 272JES2 Printer Display 311JES2 Spool Display 292Job Dataset Display for Job 415Job Output Element Display 420Job Queue Display screen 380Job Status Display 364Job/File Tailoring Parameters 46
Library Utilities Menu 219Listcat Utility 244Output Waiting For Printer 315Parameter Options 25, 34Primary Option Menu 30Printer Status Summary 392Program Function Key Definition 42Signon 20, 378Storage Statistics for CICS 428System Device Unit Display 253User File Maintenance 330Utility Parameters 50Utility Selection Menu 217VTOC for Data Set 352VTOC listing for entry 374VTOC Utility 249See also screens, about
scroll commands for editor. See commands, editor scroll
scrolling backward 41scrolling behavior for data sets 41scrolling in edit sessions
backward 118down (DOWN primary command) 129down (NEXT primary command) 151down toward end of file by number of
pages 139left 146, 162to bottom (BOTTOM primary command) 119to bottom (LAST primary command) 145to top (FIRST primary command) 137to top (TOP primary command) 174up 178up, down, left, or right 180up, down, left, or right one full screen 180up, down, left, or right to cursor position 180See also scrolling on screens
scrolling on screensacross columns in data sets 294down 27, 43left across data 44right across data 44up 29, 43See also scrolling in edit sessions
SCS horizontal tabs for compressing printer output data streams 404
SCSCMP option for spool printer 404SD functional command 412search-and-replace command, issuing 43
536 CPMS/SYSD Reference Manual ~ 7.2

Index
searchingcharacter strings in edit sessions and
replacing 121continuing toward end or top of file using
previous FIND search string in edit sessions 137
continuing toward top of tile using previous FIND search string in edit sessions 137
for data sets using wildcards 245for previous FIND search string 43issuing command for 43reversing direction of FIND primary command
in edit sessions 137text in edit sessions (FIND primary
command) 132text in edit sessions (LOCATE primary
command) 1482nd Alloc field 354Secondary Quan field (Allocate Utility screen) 236security
code for CA Panvalet data set members 63code for CA Panvalet libraries 62, 63code for CA Panvalet library members 96code for installation for CA Panvalet
members 63level for CA Panvalet library members 98specifying data set passwords 222when signing on with password 21
Security Level field (Edit - Dataset Menu for CA Panvalet screen) 98
SELECT commandBrowse - Member Selection screen 71Edit - Member Selection screen 104JES2 Spool Display screen 301
Select data set commandAllocate Utility screen 238Catalog Utility screen 243Dataset Extents screen 234
Select optionJES2 Job Output Display (Right) screen 290JES2 Job Output Display screen 287JES2 Job Queue Display (Right) screen (old
format) 273JES2 Job Queue Display screen (new
format) 265JES2 Job Queue Display screen (old
format) 270Listcat Utility screen 247Output Waiting For Printer screen 316System Device Unit Display screen 254VTOC Utility screen 251
separator pages for spool printerviewing and printing beginning 397viewing and printing ending 401
Seq fieldDataset Extents screen 233Listcat Utility screen 248VTOC for Data Set screen 355
Sequence field (JES/List Parameter Definitions screen) 40
sequence fields, setting to blanks in edit sessions 178
sequence of jobs displayed, setting 40sequential data sets. See data sets, sequentialsessions, CPMS/SYSD
starting 20stopping 27understanding typical for CPMS 18
sessions, dialedreturning to VM control (VMRESET functional
command) 441returning to VM control (VR functional
command) 441sessions, edit. See edit sessionsSET .label command, Browse - Dataset Display
screen 81set bookmark editor line 197set current line editor line command 204Set field (Utility Parameters screen) 51SET universal command 28SETID primary command 34setting
bookmarks 161parameters 35
SETVRT option for spool printer 404SFCB field (JES2 Printer Display screen) 314SForms field (JES2 Printer Display screen) 314show lines editor line command 204SHOW primary command 164Show Tips field (General Parameter Definitions
screen) 37showing. See viewingSHUT functional command 413signing on
and moving to a specific screen 21to CPMS/SYSD bypassing the CPMS/SYSD
Signon screen 21to CPMS/SYSD using CPMS/SYSD Signon
screen 20to menu-driven system 378
Signon screenillustration and description 20MENU functional command for opening 378
537

Index
Size (K) field (Storage Statistics for CICS screen) 429
Size fieldBrowse - Member Selection screen 66, 69Directory for PDS Member screen 372, 373Edit - Member Selection screen 103JES2 Spool Display screen 294
SJ functional command 413SN functional command 414SORT primary command 165sorting data in edit sessions 165SOS field (Storage Statistics for CICS screen) 429source members, browsing 55SP functional command 414space allocations. See allocationSpace field (VTOC listing for entry screen) 376Space Units field (Allocate Utility screen) 236space usage for data sets, viewing 352spaces in lines
overlaying with characters from another line in edit sessions 202
overlaying with characters from sending lines in edit sessions 202
Special Printer Options in Effect field (Printer Status screen) 404
spin data setsattributes 290status 279
SPLCLN functional command 414SPLDSN functional command 415SPLDSP functional command 418SPLIT (PF2) key 43SPLIT command
editing command 88primary command 167universal command 28
splittinglines in edit sessions 168, 210partitions (PF2 key) 43partitions (SPLIT universal command) 28partitions in edit sessions (SPLIT primary
command) 167SPLJOE functional command 420SPLPRG functional command 422SPLPRT functional command 422SPLRTE functional command 423SPLTJOIN primary command 168spool output, deleting while viewing 295spool print tasks. See tasksspool printer. See printers, spoolspool writer. See writers, spool
spool-display commands for CPMS/SYSD, summary list 444
spools, JES2tracking status of batch jobs (JOB functional
command) 362tracking status of batch jobs (STATUS
functional command) 424tracking status of batch jobs, extended (STE
functional command) 424viewing job output (SD functional
command) 412viewing job output (SPLDSP functional
command) 418viewing printable and punchable job
output 292viewing summary of output data sets for jobs
(SN functional command) 414viewing summary of output data sets for jobs
(SPLDSN functional command) 415SR functional command 423SSI (System Status Index) for load library 69SSI field
Browse - Member Selection screen 69Directory for PDS Member screen 372
STA fieldJES2 Job Queue Display screen (old
format) 271Job Queue Display screen 381Job Status Display screen 365, 426
stacking of commands, turning on and off 147START command for spool writers 310Start for Printer Terminal ID field (CPMS/SYSD
Spool Writer Start screen) 308Start option
CPMS/SYSD Printer Table Display/Change screen 305
JES2 Printer Display screen 312started tasks. See tasksstarting
CPMS/SYSD sessions 20edit sessions 100edit sessions for partitioned data set
members 101editor 87JES2 printer 312job streams from data sets (SUBMIT functional
command) 432job streams from data sets using DCT entry
(SUBD functional command) 432job streams from data sets using DCT entry
(SUBMITD functional command) 433
538 CPMS/SYSD Reference Manual ~ 7.2

Index
job streams from temporary storage queues 434
job streams from transient data queues 433JOE writer (PRTJOE functional
command) 408JOE writer (STRWTR functional
command) 431JOE writer (SW functional command) 434online help 324spool print tasks again on new page (PA
functional command) 384spool print tasks again on new page (PRTADJ
functional command) 390spool writer 310tutorial for online help 31, 324
Stat field, JES2 Job Queue Display screen (new format) 266
STAT functional command 423statements for jobs, specifying for insertion 40statistics
active jobs 257CICS (general) 423CICS (overall) 332data sets belonging to jobs in JES2 spool 277,
281edit sessions 99executing jobs and tasks 337executing jobs and tasks (dynamic) 340extents 352ISPF 168job being printed 397jobs in queues 379library members 65load library members 68output data sets (SN functional
command) 414output data sets (SPLDSN functional
command) 415partitioned data set members 101TSO users 337TSO users (dynamic) 340updating dynamically for active jobs 258
STATS primary command 168status
active jobs 257auxiliary tasks 435batch jobs in JES2 spool (JOB functional
command) 362batch jobs in JES2 spool (STATUS functional
command) 424batch jobs in JES2 spool, extended (STE
functional command) 424
changing to in service or out of service for terminals 435
CICS swap, changing to nonswappable 382CICS swap, changing to swappable 382devices 439JES2 printer 313jobs in print spool 306jobs in queues (JES2 Job Queue Display
(Right) screen, old format) 272jobs in queues (JES2 Job Queue Display
screen, new format) 264jobs in queues (JES2 Job Queue Display
screen, old format) 269JOE writer 396local and remote JES2 printers 311spool printer 304, 385, 391tasks 306, 307types for jobs 306UCBs 218
Status fieldActive Task Display screen 339CPMS/SYSD Printer Table Display/Change
screen 307JES2 Display Active Jobs screen 259JES2 Printer Display screen 313Printer Status screen 394, 404System Device Unit Display screen 254, 255
STATUS functional command 424STC
edit profile 155phase 365queue type 271
STDdata set profile type 94edit profile 54numbering mode for edit sessions 152
STE functional command 424Stepname field
Active Task Display screen 338JES2 Display Active Jobs screen 259JES2 Job Dataset Display (Right) screen 282JES2 Job Dataset Display screen 279
Stop optionCPMS/SYSD Printer Table Display/Change
screen 305JES2 Printer Display screen 312
stoppingauxiliary tasks temporarily 413dynamic displays for functional
commands 357edit sessions and merging work into data
set 88
539

Index
edit sessions leaving intact 117editor and menu-driven system without
canceling edit session or updating source 88
JES2 printer 312JES2 printer temporarily 312JOE writer 430JOE writer spool print tasks 305menu-driven system 27, 32menu-driven system without ending CPMS/
SYSD session 31spool print tasks 430tips from appearing on main menu 37tutorial or online help 327See also canceling
storage DASD attribute 255STORAGE functional command 428Storage Statistics for CICS screen
field definitions 429illustration and description 428
storage statistics for CICS, viewing 428STPWTR functional command 430STRG DASD attribute 255strings, finding 140STRWTR
command, menu-driven equivalent to 308functional command 431
SUBD functional command 432SUBMIT
functional command 432primary command 169
SUBMITD functional command 433submitting
commands and options to mainframe 27edit sessions to OS 169job streams from data sets (SUBMIT functional
command) 432job streams from data sets using DCT entry
(SUBD functional command) 432job streams from data sets using DCT entry
(SUBMITD functional command) 433job streams from temporary storage
queues 434job streams from transient data queues 433library members 66
SUBTD functional command 433SUBTS functional command 434SUCS field (JES2 Printer Display screen) 314support contact information 2SV field (Storage Statistics for CICS screen) 429SW functional command 434SWAP (PF9) key 44
SWAP commandprimary command 169universal command 29
swap status for CICSchanging to nonswappable 382changing to swappable 382
swappingbetween partitions (PF9 key) 44set of lines with another set in edit
sessions 194set of lines with another set without counting
lines in edit sessions 195to previous partition (SWAP universal
command) 29to previous partition in edit sessions (SWAP
primary command) 169SYS hold type
for data sets 317for jobs 288
SYSD/ATP (Access to Panvalet) 19SYSDA UCB class 254SYSDTASK functional command 435SYSIN data sets, setting when displayed 40SYSIN field (JES/List Parameter Definitions
screen) 40SYSLOG view, primary command defintions 302Sysname field (GRS Queue screen) 360Sysout Class field (Utility Parameters screen) 51SYSOUT classes
limiting jobs displayed for 39specifying 50
SYSOUT data sets. See data sets, SYSOUTSysout Disposition Options field (Printer Status
screen) 405SYSRES DASD attribute 255system abend return code for jobs in queues (JES2
Job Queue Display (Right) screen, old format) 274
System Device Unit Display screencommand definitions 256field definitions 254illustration and description 253
system devices. See devicessystem ID. See CICS system IDsystem log messages, SYSOUT data set type
for 294system messages. See messagessystem resident device DASD attribute 255System Status Index (SSI) for load library 69
540 CPMS/SYSD Reference Manual ~ 7.2

Index
TT - TUTORIAL option (JES2 Primary Option Menu
screen) 31t** queue type 271T=Route option
JES2 Job Queue Display screen (new format) 265
JES2 Job Queue Display screen (old format) 270
T=Stop optionCPMS/SYSD Printer Table Display/Change
screen 305TA command
justify data command for editor line 205primary command 170
tabbing, defining for edit sessions 171table of contents screen for tutorial and online
help 326TABS primary command 171TAC command
center data command for editor line 205primary command 172
TAL commandleft justify data command for editor line 206primary command 173
TAPE device classification 439TAPE UCB
class 254device class 255
TAR commandprimary command 174right justify data command for editor line 206
tasksauxiliary. See tasks, auxiliaryJOE writer, restarting held 305print. See tasks, printsetting display 40spool print. See tasks, spool printviewing active and started 40viewing started 258viewing statistics for executing 337viewing statistics for executing (dynamic) 340viewing status 307
tasks, auxiliarytemporarily stopping without disabling
transactions 413viewing status 435
tasks, printdeleting from JES2 spool 305resetting outstanding counter for JOE
writer 398
restarting on new page (PA functional command) 384
status codes 394stopping for JOE writers 430
tasks, spool printcanceling and printing current SYSOUT data
set (PRTCNL functional command) 391canceling and stopping from printing current
SYSOUT data set (PC functional command) 385
canceling and stopping from printing current SYSOUT data set (PRTCNL functional command) 391
deleting (CPMS/SYSD Printer Table Display/Change screen) 305
deleting (PP functional command) 388deleting (PRTPRG functional command) 409description 18holding (PH functional command) 388holding (PRTHLD functional command) 406replying to forms change requests (PF
functional command) 388replying to forms change requests (PRTFRM
functional command) 405restarting on new page (PA functional
command) 384restarting on new page (PRTADJ functional
command) 390stopping 305, 430viewing outstanding limit for spool printer 403viewing status 304
telephone contact information for customer support 2
temporarily stopping JES2 printer 312temporary data sets 94temporary edit sessions
&& prefix 90%% prefix 95creating, saving, and deleting 95
temporary library names, creating using && 93temporary storage queues (TSQ). See TSQ
(temporary storage queues)Term field (CPMS/SYSD Printer Table Display/
Change screen) 306Term field Printer (Printer Status screen) 392TERM functional command 435TERM UCB class 254terminal type the spool printer emulates, viewing
and changing 400terminals
changing priority 435changing status to in or out of service 435
541

Index
master assigned to spool printer, viewing and changing 402
switching uppercase translation indicator on and off 435
viewing and changing specifications 396viewing ID for source of print commands 402viewing information about 435
text flow editor line command 207text merge editor line command 208text split editor line command 210TF (text flow) editor line command 207Time field
JES2 Job Output Display (Right) screen 291JES2 Job Queue Display (Right) screen (old
format) 275Job Status Display screen 427
tips on main menu, turning on and off 37Title field (General Parameter Definitions
screen) 37TM (text merge) editor line command 208TOF (top of file), setting 41TOP command
Browse - Dataset Display screen 81Browse - Hot List Selection screen 83Browse - Member Selection screen 71Edit - Hot List Selection screen 111Edit - Member Selection screen 105JES2 Spool Display screen 301
top of file (TOF), setting 41top of file, continuing searching toward using
previous FIND search string in edit sessions 137
TOP primary command 174Tot Rec field (JES2 Printer Display screen) 314Total DSCBS Available field (VTOC listing for entry
screen) 376Total Free Tracks field (VTOC listing for entry
screen) 376Total Storage field (Storage Statistics for CICS
screen) 429Total Tracks field (VTOC for Data Set screen) 355TPA field
CPMS/SYSD Printer Table Display/Change screen 306
Printer Status screen 392TR (translate hex) editor line command 209tracing, turning on and off for programs 390tracking status of batch jobs in JES2 spools
extended, using STE functional command 424
using JOB functional command 362using STATUS functional command 424
trademark information 2trailing and leading control characters based on
UCS= parameter of SYSOUT 404trailing blanks, replacing with nulls 151TRAN functional command 436TRANCHR primary command 175transaction work-area pointer for spool printer 398transactions
changing priority 436enabling and disabling 436temporarily disabling CPMS/SYSD 413viewing CICS IDs 345viewing information about 436
transient data queues, submitting job streams from 433
translate hex editor line command 209translating
case in edit sessions 120characters 175
Trks fieldDataset Extents screen 233VTOC for Data Set screen 355VTOC Utility screen 252
TRM UCB class 254troubleshooting
CICS with CPMS/SYSD debugging aids 332support contact information 2using error lines in edit sessions 164using error messages 453using program tracing 390using status of auxiliary tasks 435
TRUNC primary commanddescription 176using with CHANGE primary command 123using with FIND primary command 132using with LOCATE primary command 148
truncation of lines, turning on and off in edit sessions 176
TS (text split) editor line command 210TSO (time sharing option)
setting display of sessions, tasks, and active and batch jobs 40
viewing statistics for users 337viewing statistics for users (dynamic) 340
TSO/STC field (JES/List Parameter Definitions screen) 40
TSQ (temporary storage queues)deleting previously created with PUT or
PCSND primary command (DELQ command) 128
542 CPMS/SYSD Reference Manual ~ 7.2

Index
deleting previously created with PUT or PCSND primary command (DQ command) 130
deleting previously created with PUT or PCSND primary command (PCDEL command) 153
retrieving data from for edit sessions (GET primary command) 142
retrieving data from for edit sessions (PCRCV primary command) 153
setting default name for GET, PUT, and DELQ commands 48
submitting job streams from 434viewing and deleting (TSQ functional
command) 437viewing and deleting (TSQUEINQ functional
command) 437writing all or part of edit sessions to (PUT
primary command) 156writing all or part of edit sessions to (using
PCSND primary command) 154TSQ functional command 437TSQUEINQ command
examples 438functional command 437
Tstatus type for jobs 306TSU phase 365TTR field
Browse - Member Selection screen 69VTOC for Data Set screen 354
TTR, resetting 390TTRC field
Directory for PDS Member screen 370Directory for PDS Member screen
example 371, 373tutorial for online help
commands for paging 325navigating using page commands 325navigating using PF keys 326starting 31, 324stopping 327using 323viewing table of contents 326
TUTORIAL option (JES2 Primary Option Menu screen) 31
Type fieldBrowse - Dataset Menu screen 58Catalog Utility screen 240Dataset Utilities Menu screen 226GRS Queue screen 359Library Utilities Menu screen 221VTOC for Data Set screen 355
UU - Uncatalog Dataset data set command 228U - USER option (JES2 Primary Option Menu
screen) 32U functional command 439U job output element attribute 421U record format for data sets 280U=Uncatalog data set command 234
Allocate Utility screen 238Catalog Utility screen 243Dataset Information screen 231
U=Uncatalog optionListcat Utility screen 247VTOC Utility screen 251
U=Update optionJES2 Job Output Display (Right) screen 290JES2 Job Output Display screen 287JES2 Job Queue Display (Right) screen (old
format) 273Output Waiting For Printer screen 316
UC (uppercase) editor line command 210UCat data set record type 246UCBs (unit control blocks)
addresses 439classes 254defined in OS 253device classes 255status 218viewing 439
UCC (uppercase block) editor line command 211UCCT (uppercase and translate block) editor line
command 211UCS (universal character set)
viewing and changing default for spool printer 399
viewing and changing for jobs 288viewing which a data set will use to print 283
UCS fieldJES2 Job Dataset Display (Right) screen 283JES2 Job Output Display screen 288JES2 Printer Display screen 314Job Dataset Display for Job screen 416Job Output Element Display screen 422Output Waiting For Printer screen 317
UCSCTL option for spool printer 404UCT (uppercase and translate) editor line
command 212Uncatalog data set command 234
Allocate Utility screen 238Catalog Utility screen 243Dataset Information screen 231
Uncatalog Dataset data set command 228
543

Index
Uncatalog optionListcat Utility screen 247VTOC Utility screen 251
uncataloging data sets 218, 224UNCATLG functional command 440undefined record format for data sets 280UNDO primary command 177unit control blocks (UCBs). See UCBs (unit control
blocks)Unit field (Allocate Utility screen) 236UNIT LIST option (Utility Selection Menu
screen) 218unit record UCB device class 255universal character set (UCS). See UCS (universal
character set)universal commands. See commands, universalUNNUMBER primary command 178UP (PF7) key 43UP command
Browse - Dataset Display screen 81Browse - Hot List Selection screen 83Browse - Member Selection screen 71Edit - Hot List Selection screen 111Edit - Member Selection screen 105JES2 Spool Display screen 301primary command 178universal command 29
UpD field (Edit - Dataset Display screen) 107UPD field (Edit - Session Display screen) 100Update option
JES2 Job Output Display (Right) screen 290JES2 Job Output Display screen 287JES2 Job Queue Display (Right) screen (old
format) 273Output Waiting For Printer screen 316
updatingproduct license record 367statistics dynamically for active jobs 258user profiles 32, 34version of CPMS/SYSD 440
uppercasechanging blocks of lines to and translating hex
data to blanks in edit sessions 211, 212changing blocks of lines to in edit
sessions 211, 212changing lines to and translating hex data to
blanks in edit sessions 212changing lines to in edit sessions 210turning on and off for edit sessions 120viewing whether translation is on or off 295
uppercase and translate block editor line command 211, 212
uppercase and translate hex editor line command 212
uppercase block editor line command 211, 212uppercase editor line command 210UR UCB class 254UREC
device classification 439UCB class 254UCB device class 255
usage information, viewing for data sets 229Use field (System Device Unit Display screen) 256Use% field (VTOC Utility screen) 252User Code field (Edit - Dataset Menu for CA
Panvalet screen) 97User Data field (Directory for PDS Member
screen) 371User File Maintenance screen 330user IDs
entering 20resetting to logged-in user 34
USER option (JES2 Primary Option Menu screen) 32
user profiles. See profiles, userUSER1 and USER2 data set profile types 94USER1 and USER2 edit profiles 54, 155UTIL (3) option (JES2 Primary Option Menu
screen) 31UTIL option (JES2 Primary Option Menu
screen) 31Utility Parameters screen
field definitions 50illustration and description 50
Utility Selection Menu screenillustration and description 217option definitions 218
UTILPRMs option (CPMS/SYSD Parameter Options screen) 35
UU (uppercase block) editor line command 212UUT (uppercase and translate block) editor line
command 212
VV record format for data sets 280V=View option
JES2 Job Dataset Display (Right) screen 282JES2 Job Dataset Display screen 278JES2 Job Output Display (Right) screen 290JES2 Job Output Display screen 287JES2 Job Queue Display (Right) screen (old
format) 273JES2 Job Queue Display screen (new
format) 265
544 CPMS/SYSD Reference Manual ~ 7.2

Index
JES2 Job Queue Display screen (old format) 270
Output Waiting For Printer screen 316System Device Unit Display screen 254
variable and variable blocked record formats for data sets 280
variablesresetting 28setting for job-related profiles 38temporarily setting to new values 28viewing and changing for programs 389viewing and changing for terminals 435viewing and changing for transactions 436
VB record format for data sets 280VC functional command 440Ver.Mod field
Browse - Member Selection screen 66Directory for PDS Member screen 373Edit - Member Selection screen 102
Verify Pswd field (General Parameter Definitions screen) 37
versionviewing and updating current for CPMS/
SYSD 440viewing for programs 389
VERSION functional command 440vertical tabs from FCB for forms length 404View field (JES/List Parameter Definitions
screen) 41View option
JES2 Job Dataset Display (Right) screen 282JES2 Job Dataset Display screen 278JES2 Job Output Display (Right) screen 290JES2 Job Output Display screen 287JES2 Job Queue Display (Right) screen (old
format) 273JES2 Job Queue Display screen (new
format) 265JES2 Job Queue Display screen (old
format) 270Output Waiting For Printer screen 316
View primary commandJES2 Job Queue Display (Right) screen (old
format) 276JES2 Job Queue Display screen (new
format) 268View VTOC option (System Device Unit Display
screen) 254viewing
biorhythm chart 343BMS maps to CICS 389browse library members 66
catalog entries (LC functional command) 367catalog entries (LISTC functional
command) 368catalog entries (LISTCAT functional
command) 368CICS address space virtual memory 346CICS APPLID 107CICS data sets currently allocated (AL
functional command) 342CICS data sets currently allocated (ALLOC
functional command) 343CICS definite response frequency 399CICS name of terminal or destination to which
CPMS/SYSD sends spool writer output 308
commands already issued (+ or ? primary command) 117
commands already issued (RECALL primary command) 157
commands assigned to PF keys 145commands in command buffer 27DASD physical records 355data set allocation and usage information 229data set information 218, 219, 224data set qualifiers 244data set record format 280data sets belonging to jobs in JES2 spool 277,
281DCT entries and variables 348defaults. See defaultsdelay between printing buffers for spool
printer 400edit profiles 155FCT entries and variables 360first lines in a block previously excluded in edit
sessions 195forms change terminal for spool printer 401forms on which spool printer is set to print 398functional command online help 336functional command summary 336help topics for screen being viewed 327hot list of frequently used data sets 82, 108JES2 data sets waiting to print 315JES2 printer attributes 311JES2 printer status 313JES2 spool output 412job output elements (SJ functional
command) 413job output elements (SPLJOE functional
command) 420job output in JES2 spool that is printable and
punchable 292
545

Index
jobs being executed 341jobs in queues (JES2 Job Queue Display
(Right) screen, old format) 272jobs in queues (JES2 Job Queue Display
Screen, new format) 264jobs in queues (JES2 Job Queue Display
Screen, old format) 269jobs in queues (Primary Option Menu
screen) 31jobs waiting to print 305label names 156last lines in a block previously excluded in edit
sessions 198lines previously excluded 204link pack directories for z.OS 377logical record lengths for data sets 280maximum number of lines in data sets that can
be printed by spool printer 402memory being used by jobs 258, 337modified link pack directories for z.OS 379new features of product 328number of columns set to print for spool
printers 397number of lines printed on each page by spool
printer 402online help table of contents screen for tutorial
and online help 326output classes scanned by JOE writer for jobs
to print 397output data sets 285outstanding print task limit for spool
printer 403outstanding spool printer print task
counter 398partition located in and number of active 167partitioned data set members (Edit - Member
Selection screen) 101partitioned data set members (LD functional
command) 367partitioned data set members (LISTD
functional command) 369partitioned data set members (LISTPDS
functional command) 369partitioned data set source members (L
functional command) 366partitioned data set source members (LIST
functional command) 368partitioned data set source members
(PDSDSPLY functional command) 387priorities. See prioritiesproduct license record 367
program assembly date, time, and version 389
records during edit sessions 164spool printer beginning separator pages 397spool printer carriage size 397spool printer ending separator pages 401spool printer ID 403spool printer options 404spool printer queue names 403started tasks 258statistics. See statisticsstatus. See statusSYSOUT line number being printed by spool
printer 398tasks, active and started 40terminal ID for source of print commands 402terminal information 435terminal master assigned to spool printer 402transaction information 436TSQ (TSQ functional command) 437TSQ (TSQUEINQ functional command) 437tutorial table of contents 326UCBs 439UCBs (device units) defined in OS 253user profiles 32, 36version currently available for CPMS/
SYSD 440VTOC information. See VTOC (volume table of
contents)z/OS address spaces 31
virtual memory, viewing and changing in CICS address space 346
VMissuing console commands from terminals (VC
functional command) 440issuing console commands from terminals
(VMCMD functional command) 441returning control to from terminals for dialed
sessions (VMRESET functional command) 441
returning control to from terminals for dialed sessions (VR functional command) 441
VMCMD functional command 441VMRESET functional command 441Vol field (VTOC Utility screen) 249Volser field
Edit - Session Display screen 100Listcat Utility screen 248System Device Unit Display screen 254
VolSq field (VTOC for Data Set screen) 354Volume Data field (VTOC Utility screen) 250Volume field (VTOC for Data Set screen) 353
546 CPMS/SYSD Reference Manual ~ 7.2

Index
Volume Serial fieldAllocate Utility screen 236Browse - Dataset Menu screen 60Catalog Utility screen 242Dataset Extents screen 233Dataset Utilities Menu screen 227Edit - Dataset Menu screen 94Library Utilities Menu screen 222
volume serial numbersadding to catalogs 344viewing for z/OS catalog entries 377
volume table of contents (VTOC). See VTOC (volume table of contents)
volumes, viewing for data sets 232VR functional command 441VSAM and non-VSAM data set record types 246VTOC (volume table of contents)
scratching data sets 412viewing and performing data set management
functions 249viewing entries for DASD volumes 218viewing entries for data sets 352viewing information about entries (LISTVTOC
functional command) 374viewing information about entries (LV
functional command) 378viewing information for data sets 247
VTOC Data field (VTOC Utility screen) 250VTOC for Data Set screen
field definitions 353illustration and description 352
VTOC listing for entry screenfield definitions 375illustration and description 374
VTOC option (Utility Selection Menu screen) 218VTOC Utility screen
field definitions 249illustration and description 249
WW=Waiting option
CPMS/SYSD Printer Table Display/Change screen 305
JES2 Printer Display screen 312WAITING FORM print task status 394WAITING FORMS print task status 307Waiting option
CPMS/SYSD Printer Table Display/Change screen 305
JES2 Printer Display screen 312WAITING WORK print task status 307, 394website for customer support 2
wildcardsfor browsing 59for searching data sets 245for searching library member names 93
words, deleting in edit sessions 129workflow for a typical CPMS session 18WRAP primary command 178wrapping, turning on and off in edit sessions 178WRIT
disposition for jobs 287output element disposition 316
Writer fieldJES2 Job Output Display screen 288Output Waiting For Printer screen 317
Writer Type field (CPMS/SYSD Spool Writer Start screen) 308
WriterID field (CPMS/SYSD Spool Writer Start screen) 309
writers, CPMS/SYSDviewing data sets waiting to print 315writer ID 317
writers, JES2viewing data sets waiting to print 312writer ID 288
writers, JOEprinting job output on 18resetting outstanding print task counter 398restarting held tasks 305specifying what is done with SYSOUT after
printing 405starting (PRTJOE functional command) 408starting (STRWTR functional command) 431starting (SW functional command) 434stopping 430stopping spool print tasks 305viewing and changing outstanding print task
limit for spool printer 403viewing auto-start and SYSOUT disposition
options and selection criteria 396viewing output classes scanned when
searching for jobs to print 397viewing status, SYSOUT disposition options,
and selection criteria 396writer type 308
writers, spoolCICS name of destination printer 308special disposition processing 309specifying type of writer to start for
printers 308starting 310viewing and changing default criteria 308writer ID 309
547

Index
writing, all or part of edit sessions to TSQPCSND primary command 154PUT primary command 156
WrtID field (JES2 Printer Display screen) 314
XX - END option (JES2 Primary Option Menu
screen) 32X (exclude lines) editor line command 213X job status 365XHA field
JES2 Job Queue Display screen (old format) 271
Job Queue Display screen 381Job Status Display screen 365
XX (exclude block) editor line command 213
Zz/OS
managing data sets 19operating system support 16viewing address spaces 31viewing link pack directories 377viewing modified link pack directories 379
z/OS catalogdeleting high-level index aliases 350deleting primary or generation indexes 351uncataloging data sets 440viewing entries for data sets 377
Z=Halt option (JES2 Printer Display screen) 312ZONE columns. See columnsZONE primary command
description 179using with CHANGE primary command 123using with FIND primary command 132using with LOCATE primary command 148
zones, setting for editing data in edit sessionsBOUNDS and BNDS commands 119ZONE command 179
548 CPMS/SYSD Reference Manual ~ 7.2