Embed Size (px)
Citation preview

The Making of
What Might Be the
Thickest Set of Spun Cups for
The Cups and Balls Trick
Copyright 2010 by James P. Riser

A client asked me to make him a custom set of my Riser Stage and Street Cups from .080” thick copper. He wanted them large and strong for visibility and durability in his street performances. Since
the copper gets slightly thinned during the spinning process, I decided to spin the set of cups from .094” thick copper!
This thickness of copper is very resistant to being spun when compared to the .064” thick copper normally utilized for street cups. This is just shy of being 1/8” thick. This was not to be a simple and
easy spinning job.
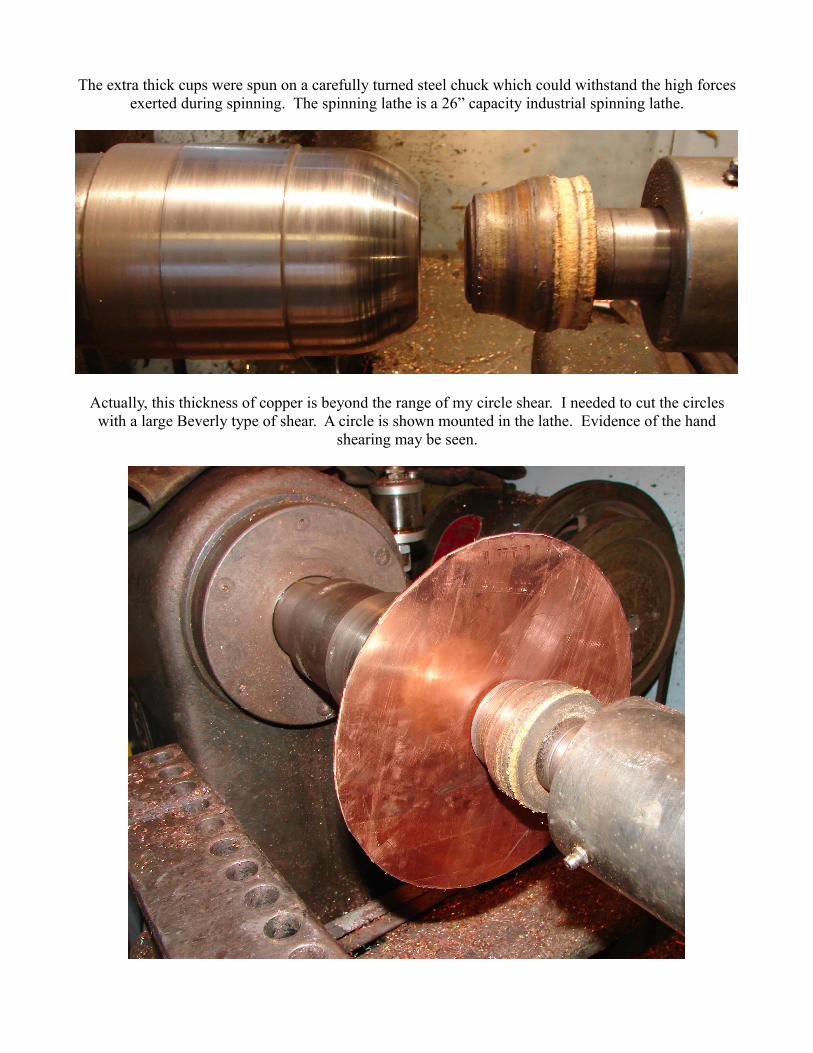
The extra thick cups were spun on a carefully turned steel chuck which could withstand the high forces exerted during spinning. The spinning lathe is a 26” capacity industrial spinning lathe.
Actually, this thickness of copper is beyond the range of my circle shear. I needed to cut the circles with a large Beverly type of shear. A circle is shown mounted in the lathe. Evidence of the hand
shearing may be seen.

Because of the thickness of the metal, I needed to use scissors or compound action roller tools to obtain the required leverage to begin the spinning. This initial “locking on” of the circle to the chuck is
critical and needs to be done with great force and care. Carelessness could have the rapidly spinning disc of copper flying from the lathe like a spinning table saw blade. Spinning metal can be very
dangerous.

Here is another view of the initial spinning process.
Once the metal is “locked on” to the chuck by being spun tightly to the steel, I switch over to using drag tools for the spinning. Shown below is the tip of a 5' long combination tool smoothing over the
roller marks and getting a better fit to the chuck's contour. Drag tools can give a nicer finish and provide a good feel for what the metal is doing. Feel is very important in metal spinning.

Virtually all of the rest of the spinning was done using two different sizes of combination drag tools. The stuff you will see on the copper being spun is special spinners lube. This allows the hardened steel
spinning tool to glide over the metal as it forms it.
As copper is spun, it work hardens. If spinning of work hardened copper is attempted, the brittle metal will split and the piece will be ruined. Only experience and a developed sense of feel for the metal
being worked let the spinner know that it is time to anneal or soften the metal.
I decided that at this point in the spinning process, I would do my first anneal.
I anneal using a large propane weed torch. The copper is evenly heated to a dull red then quenched in acid. The acid removes the black oxides formed during the heating process. The torch flame is about 3
feet long, the acid is fairly strong, and gloves/face mask are worn. Metal spinning is a dangerous activity. But with the danger comes the thrill of playing with fire and acid!

This is what the copper looks like after the annealing and acid bath. It is very clean and has a satin like finish. It is also once again soft enough to resume the spinning.
The cup set looks like this.

The metal is now spun down to the steel chuck until it again shows signs of work hardening.

Time to anneal again. Here is what the cups looked like after the process.
The annealed copper was put back onto the spinning chuck.

Now things begin to resemble the finished shape. The copper is spun down more to the steel chuck and the beginning of the mouth bead is shaped.
The complete body of the cup was gone over to harden the copper again for durability.
Before anything else could be done, the size needed to be checked. If the cups are too large or too small, they will not nest or stack properly. This is a critical step in the process.
I have a spun aluminum cup that I use as a gauge for measuring the size of the copper cups.

It can be seen here how the aluminum cup slips comfortably on to the copper being spun.
Here is another view.

After confirming that the size is good, the mouth bead is continued.
Then the bead is closed to form a good tight bead.

With completion of the mouth bead, the actual spinning was completed.The cup set now looked like this.
It was time to make certain that all cups were the same height.

The next step was to roll on the side bead.

And after the side beads were formed, it was time to see if the cups all stacked correctly. Large cups require some slop in their stack so that a partial vacuum is not created when separating the cups during
a performance.
The stack was perfect.
Next came the grinding and buffing process. This is what I term a “bad news” filthy job. But if the cups have a nice polish, they will develop a nice patina over time.

Here is a completed cup.
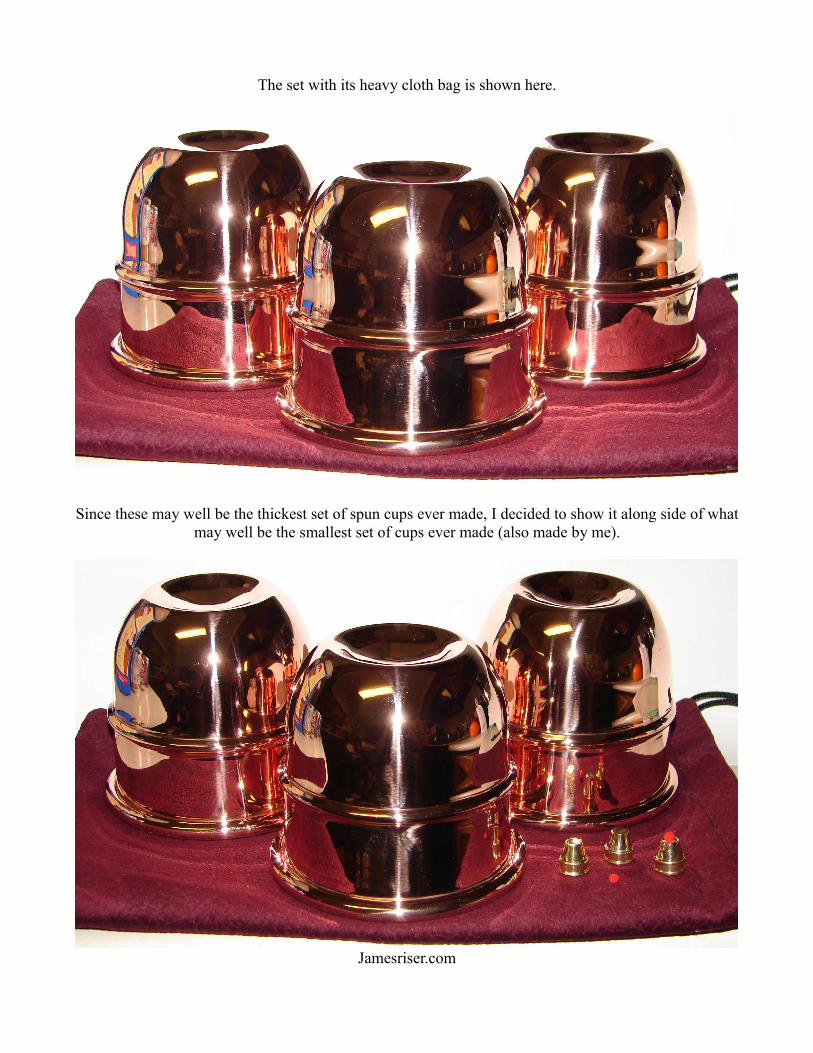
The set with its heavy cloth bag is shown here.
Since these may well be the thickest set of spun cups ever made, I decided to show it along side of what may well be the smallest set of cups ever made (also made by me).
Jamesriser.com