Embed Size (px)
Citation preview
555Copia para evaluación. Prohibido uso y reproducción. © Kuaderno

2
Animation: Your favourite character1
Fractals and spirals: Geometry in nature2
Robot people
Animation: Model sheet4
Character design: Fun with shapes!5
Patterns in nature6
Watch the floor! Roman art7
From textile to Pixel art8
Its alive! Creating a GIF9
GROUP PROJECT: shadow theater10
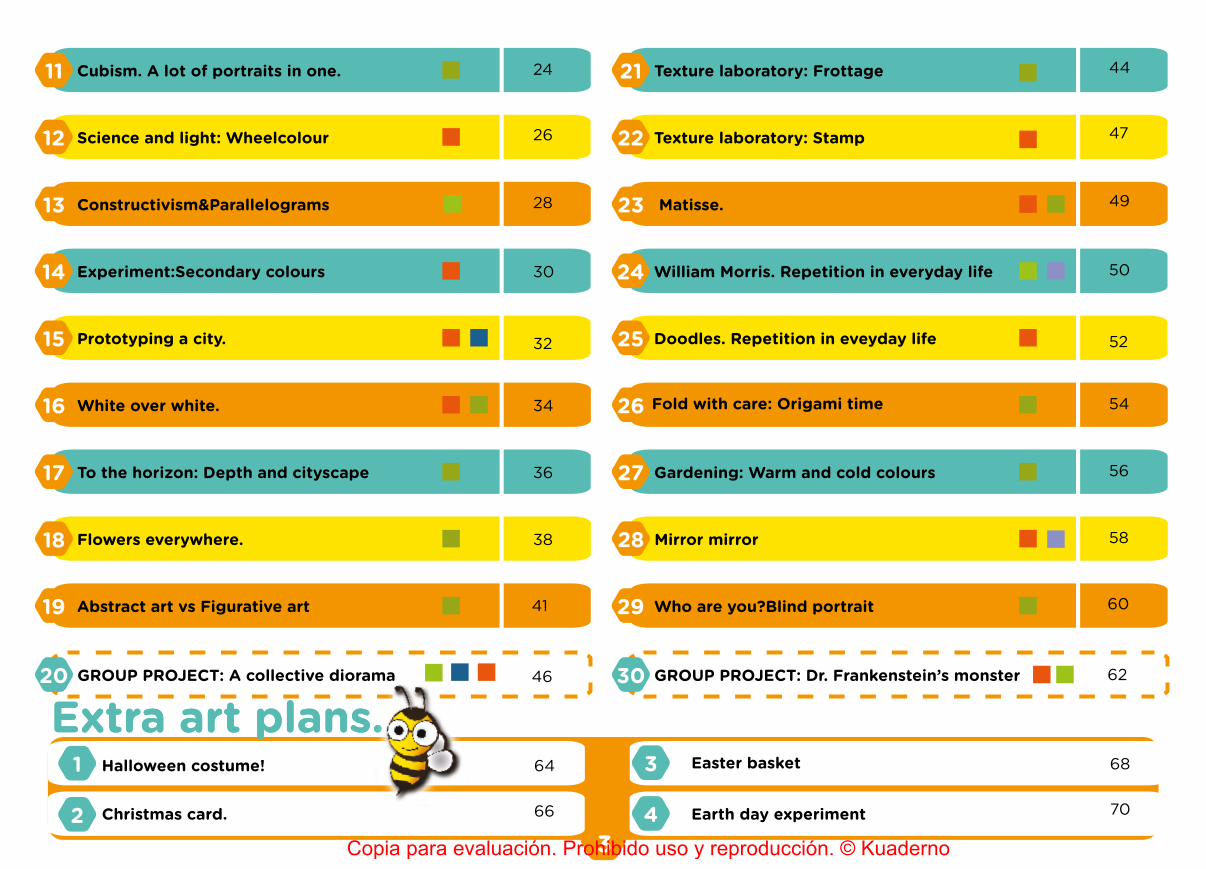
CONTENTS
3
Two-dimensional activity
Three-dimensional activity
Geometry activity
ICTs activity
The activities in this book have been desigend in order to cover up all contents and objectives for 5th grade of Primary. Fully practical and entertainging, these activities will develop creativity and skills alltogether.
Skills have been grouped into four main areas:
Arts & Crafts. Introduction.
Extra activities are designed at the end of this book for you to celebrate special festivities; Halloween, Christmas, Easter and Earth day are waiting for you to get creative!Look in page 63 onwards.
Skills
Extra art plans
You will find information on materials recomended for each activity. Check out our symbols list on page 3 and get your materials ready for work!
Materials
Skills Page4
6
8
10
12
14
16
18
20
22
Copia para evaluación. Prohibido uso y reproducción. © Kuaderno
3
Experiment:Secondary colours14
Prototyping a city.15
White over white. 16
To the horizon: Depth and cityscape17
Flowers everywhere. 18
Abstract art vs Figurative art19
GROUP PROJECT: A collective diorama20
Cubism. A lot of portraits in one.11
Science and light: Wheelcolour12
Constructivism&Parallelograms13
William Morris. Repetition in everyday life 24
Doodles. Repetition in eveyday life25
Fold with care: Origami time26
Gardening: Warm and cold colours27
Mirror mirror28
Who are you?Blind portrait29
GROUP PROJECT: Dr. Frankenstein’s monster30
Texture laboratory: Frottage21
Texture laboratory: Stamp22
Matisse.23
24
26
28
30
32
34
36
38
46
41
44
47
49
50
52
54
56
58
62
60
Extra art plans.
Christmas card.
1
2
3
467
65
71
69
3
Extra art plans.Halloween costume!
Christmas card.
Easter basket
Earth day experiment
1
2
3
466
64
70
68
3Copia para evaluación. Prohibido uso y reproducción. © Kuaderno
4
Multi craft
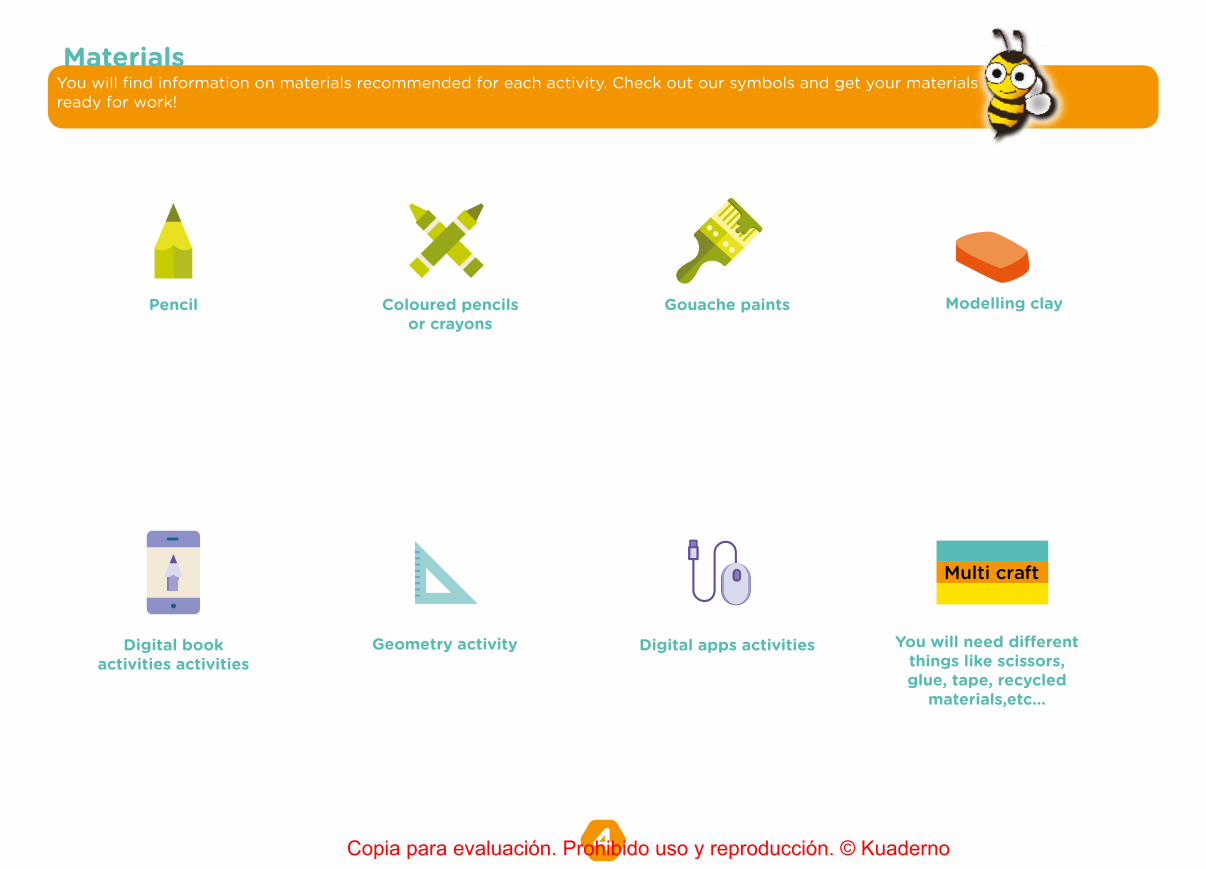
You will find information on materials recommended for each activity. Check out our symbols and get your materials ready for work!
Materials
Pencil Coloured pencils or crayons
Gouache paints Modelling clay
Digital book activities activities
Geometry activity Digital apps activities You will need different things like scissors, glue, tape, recycled
materials,etc...
Copia para evaluación. Prohibido uso y reproducción. © Kuaderno

5
Animation: Your favourite character
Animation is the process of giving the illusion of movement to drawings, models, or objects.
• Do you prefer 2D animation or 3D?
• Did you know that you used to have to draw at least 25 drawings for just one second?
• What is your favourite show? Why?
Draw a portrait of your favourite character on this note,it can be a group of them. Now tell your class why you love it.
1.
For further information visit our digital version
Copia para evaluación. Prohibido uso y reproducción. © Kuaderno
6Copia para evaluación. Prohibido uso y reproducción. © Kuaderno
7
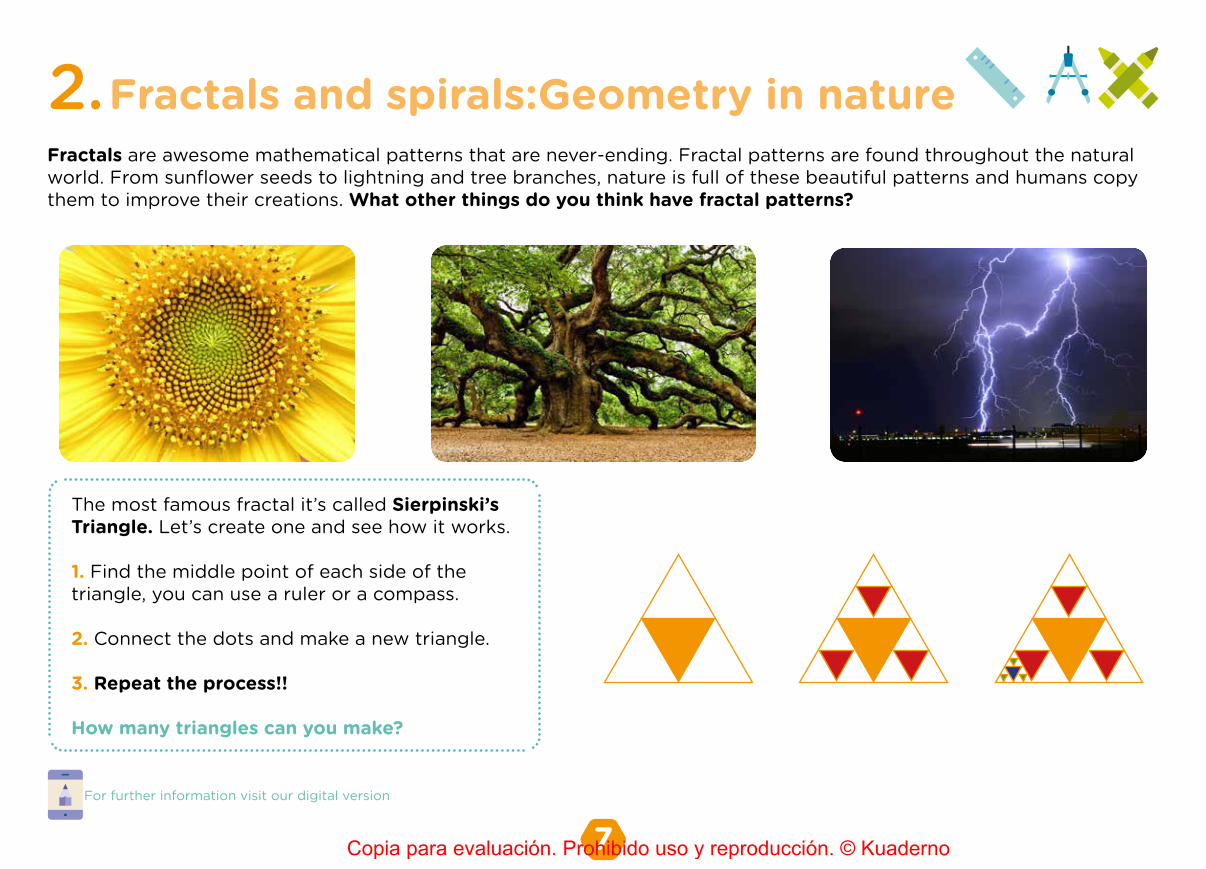
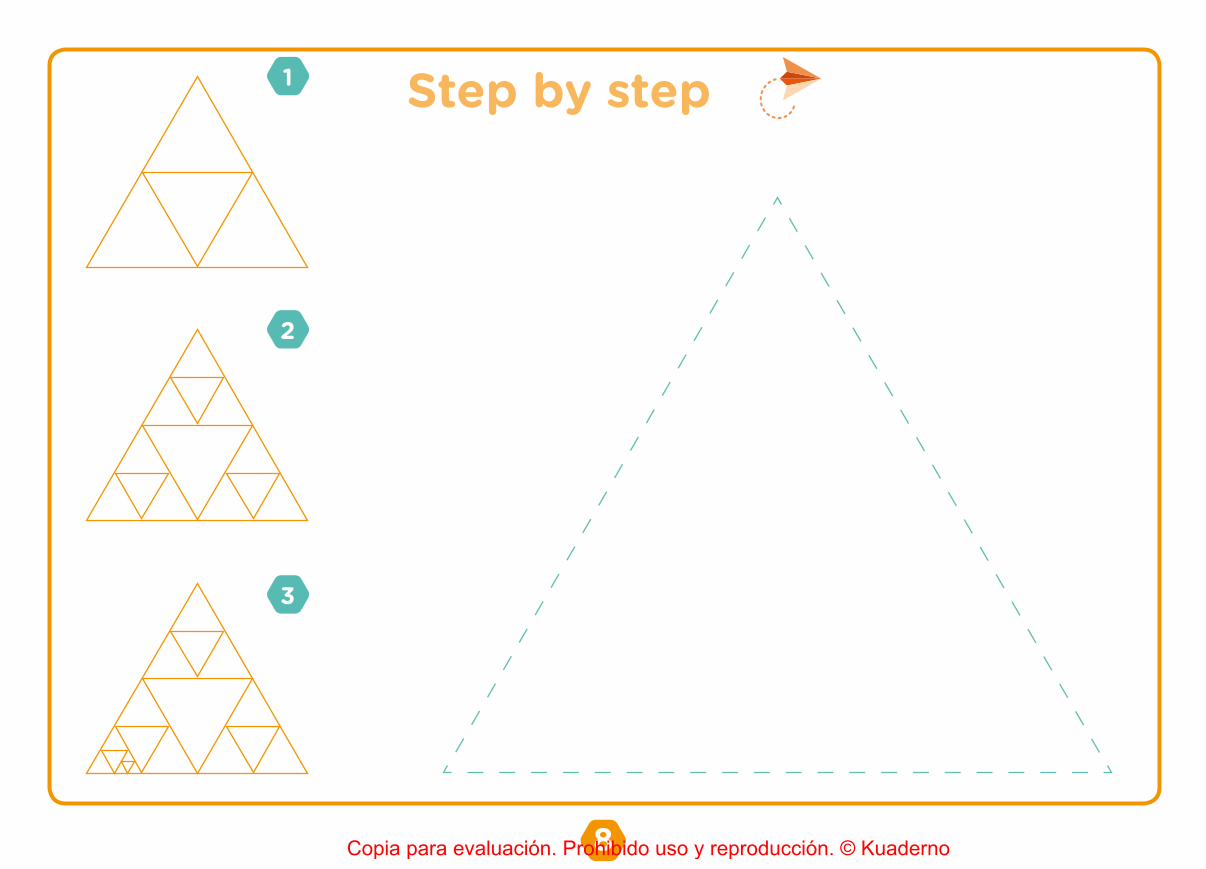
Fractals and spirals:Geometry in natureFractals are awesome mathematical patterns that are never-ending. Fractal patterns are found throughout the natural world. From sunflower seeds to lightning and tree branches, nature is full of these beautiful patterns and humans copy them to improve their creations. What other things do you think have fractal patterns?
2.
For further information visit our digital version
The most famous fractal it’s called Sierpinski’s Triangle. Let’s create one and see how it works.
1. Find the middle point of each side of the triangle, you can use a ruler or a compass.
2. Connect the dots and make a new triangle.
3. Repeat the process!!
How many triangles can you make?
Copia para evaluación. Prohibido uso y reproducción. © Kuaderno
8
Step by step1
2
3
Copia para evaluación. Prohibido uso y reproducción. © Kuaderno
9
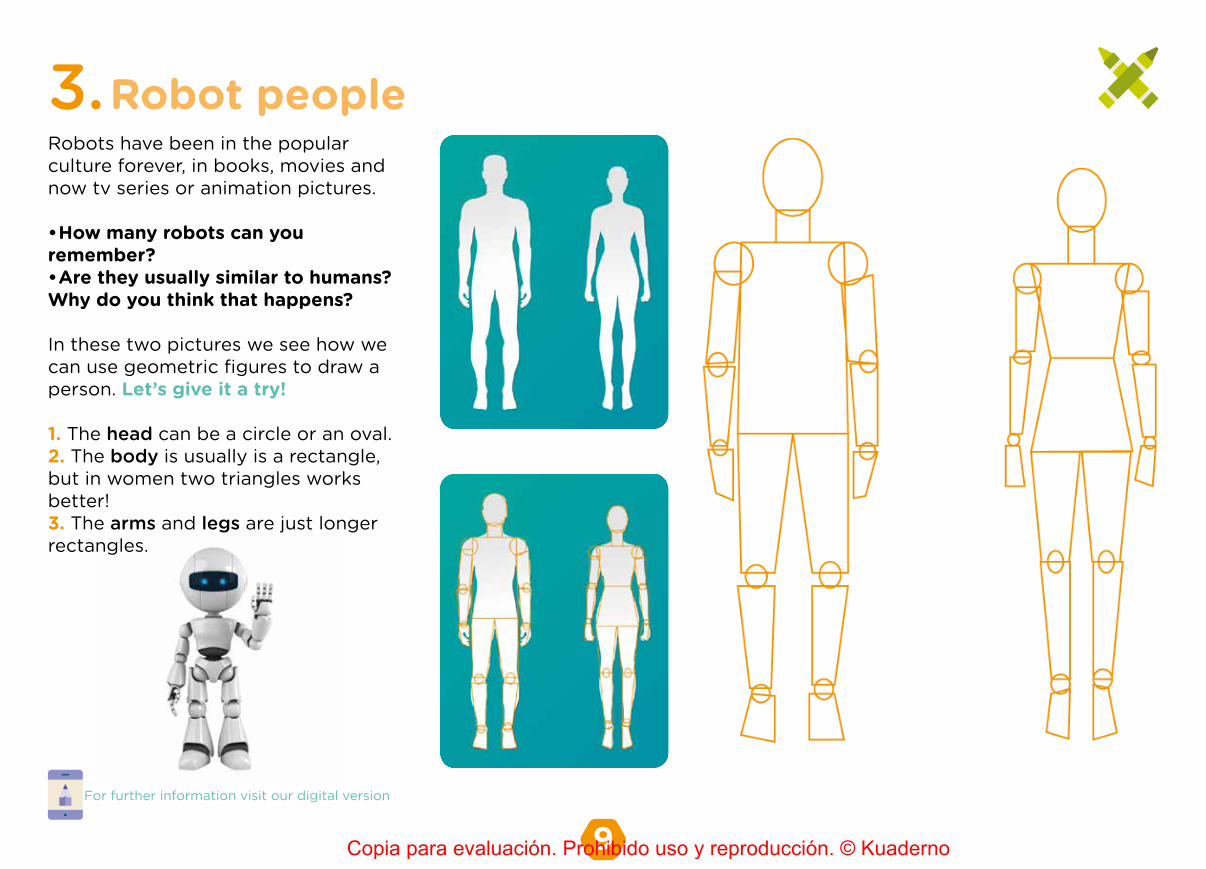
Robot peopleRobots have been in the popular culture forever, in books, movies and now tv series or animation pictures.
• How many robots can you remember?• Are they usually similar to humans? Why do you think that happens?
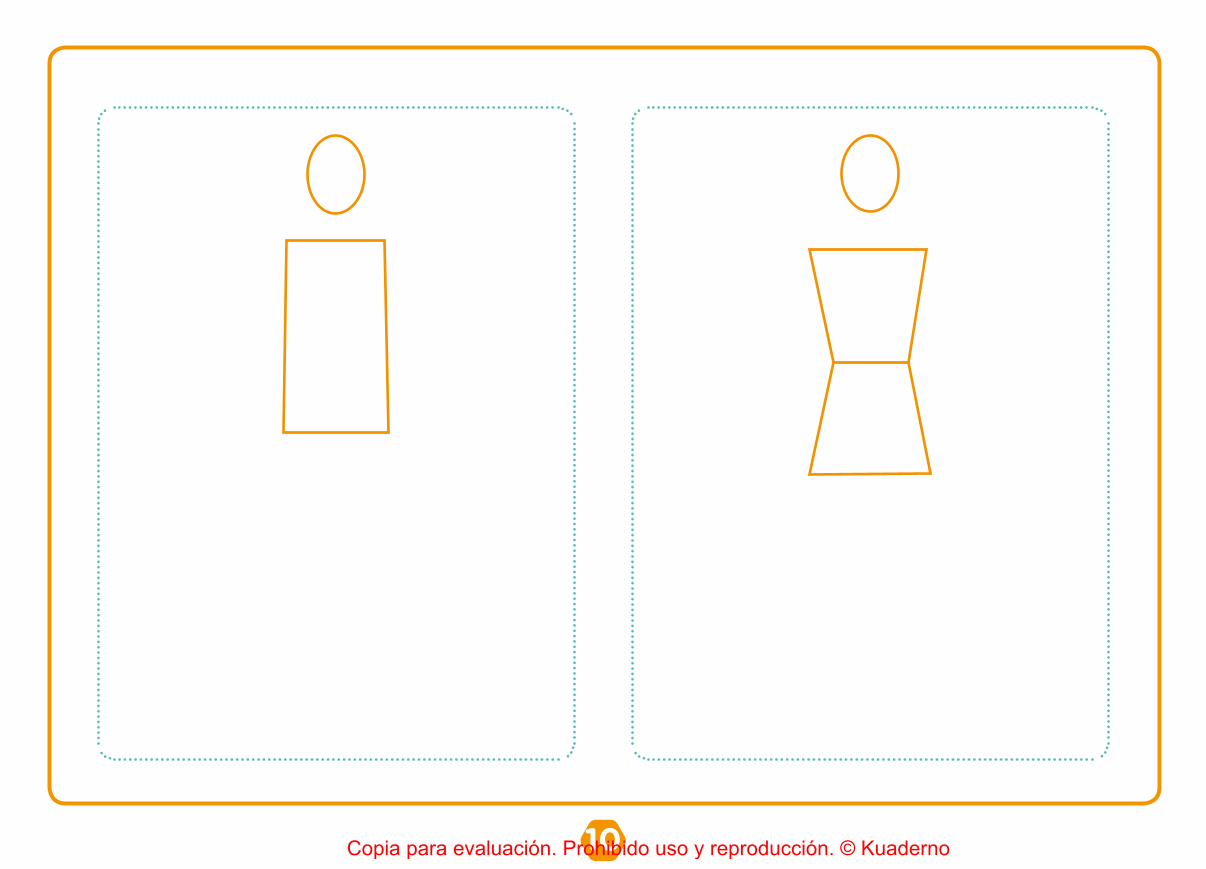
In these two pictures we see how we can use geometric figures to draw a person. Let’s give it a try!
1. The head can be a circle or an oval.2. The body is usually is a rectangle, but in women two triangles works better!3. The arms and legs are just longer rectangles.
3.
For further information visit our digital version
Copia para evaluación. Prohibido uso y reproducción. © Kuaderno
10Copia para evaluación. Prohibido uso y reproducción. © Kuaderno
11
Animation: Model sheet4.
For further information visit our digital version
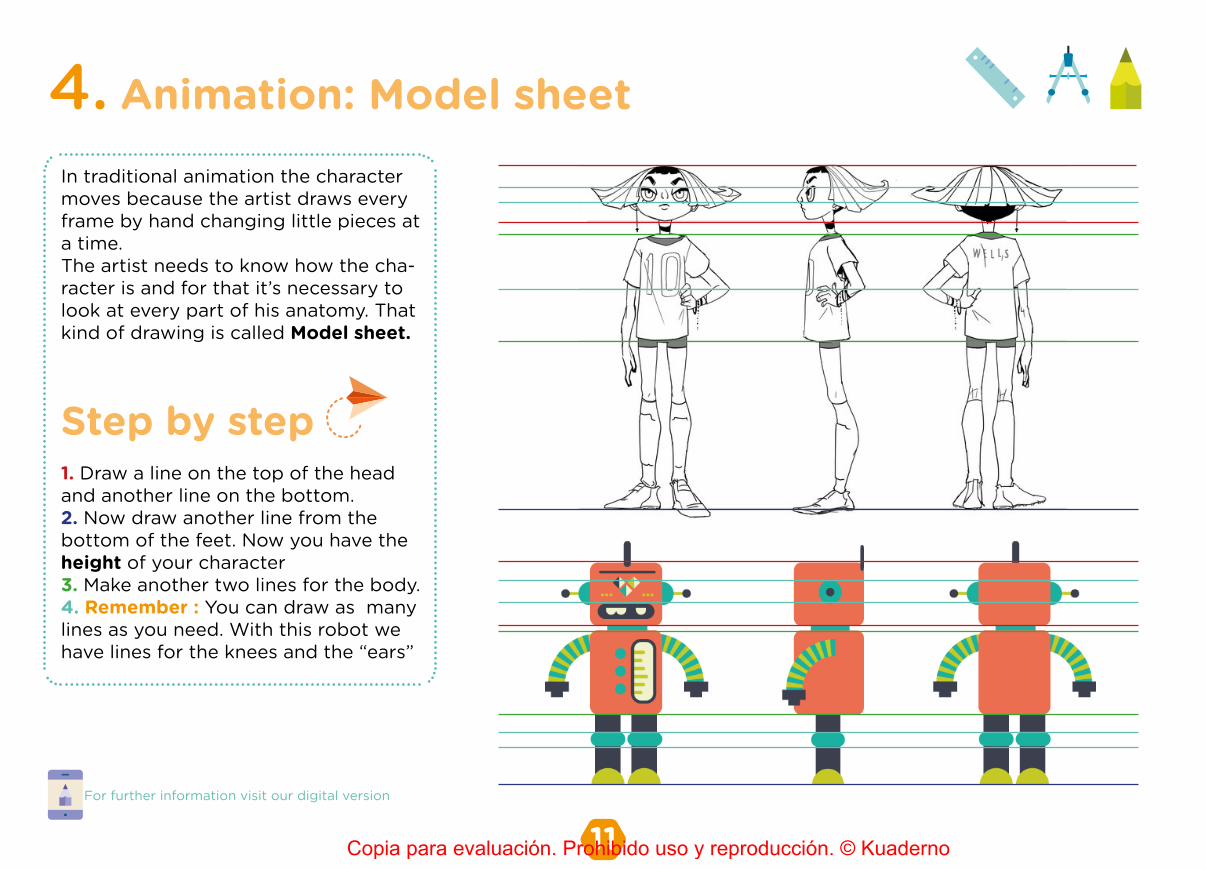
In traditional animation the character moves because the artist draws every frame by hand changing little pieces at a time. The artist needs to know how the cha-racter is and for that it’s necessary to look at every part of his anatomy. That kind of drawing is called Model sheet.
Step by step1. Draw a line on the top of the head and another line on the bottom.2. Now draw another line from the bottom of the feet. Now you have the height of your character 3. Make another two lines for the body.4. Remember : You can draw as many lines as you need. With this robot we have lines for the knees and the “ears”
Copia para evaluación. Prohibido uso y reproducción. © Kuaderno
12
FRONT SIDE BACK
Copia para evaluación. Prohibido uso y reproducción. © Kuaderno
13 For further information visit our digital version
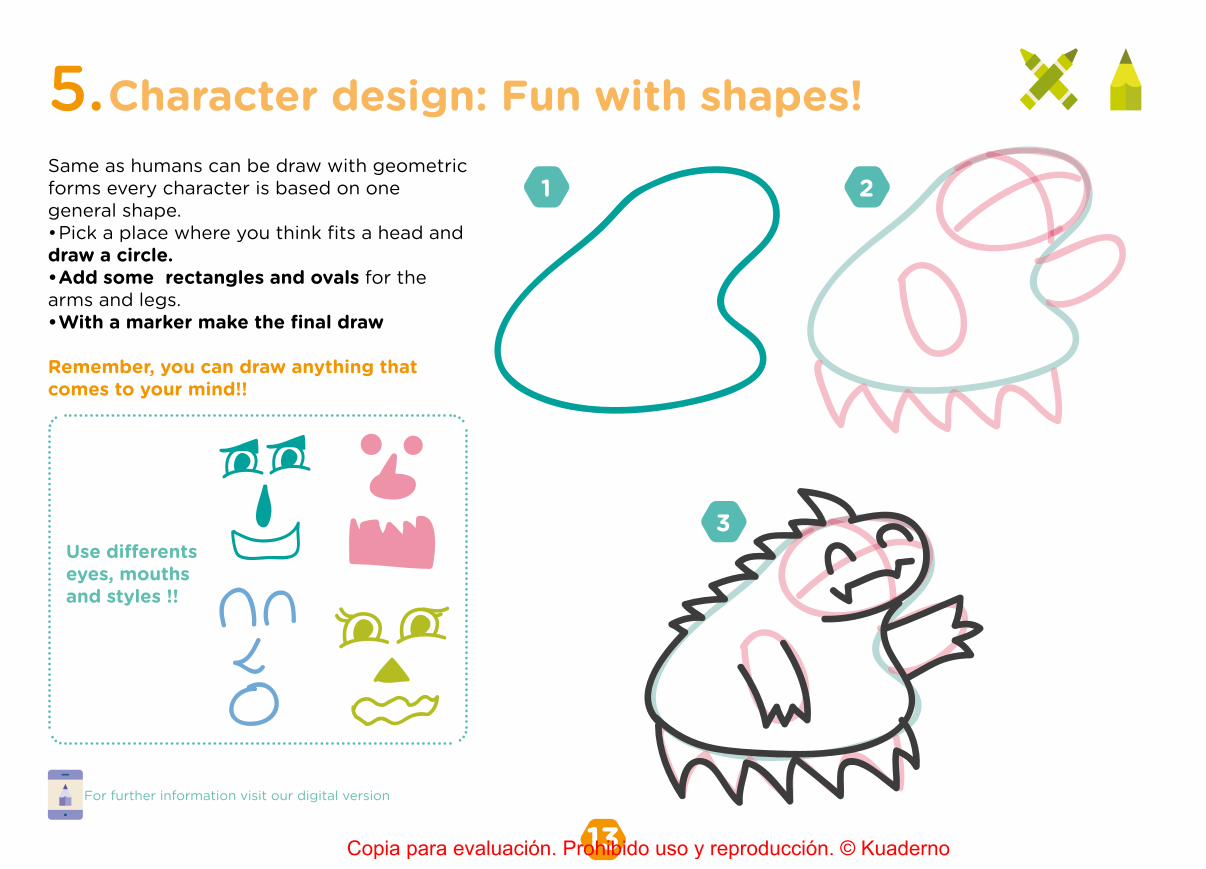
Character design: Fun with shapes! 5.Same as humans can be draw with geometric forms every character is based on one general shape.• Pick a place where you think fits a head and draw a circle.• Add some rectangles and ovals for the arms and legs.• With a marker make the final draw
Remember, you can draw anything thatcomes to your mind!!
1 2
3Use differents eyes, mouths and styles !!
Copia para evaluación. Prohibido uso y reproducción. © Kuaderno
14Copia para evaluación. Prohibido uso y reproducción. © Kuaderno
15 For further information visit our digital version
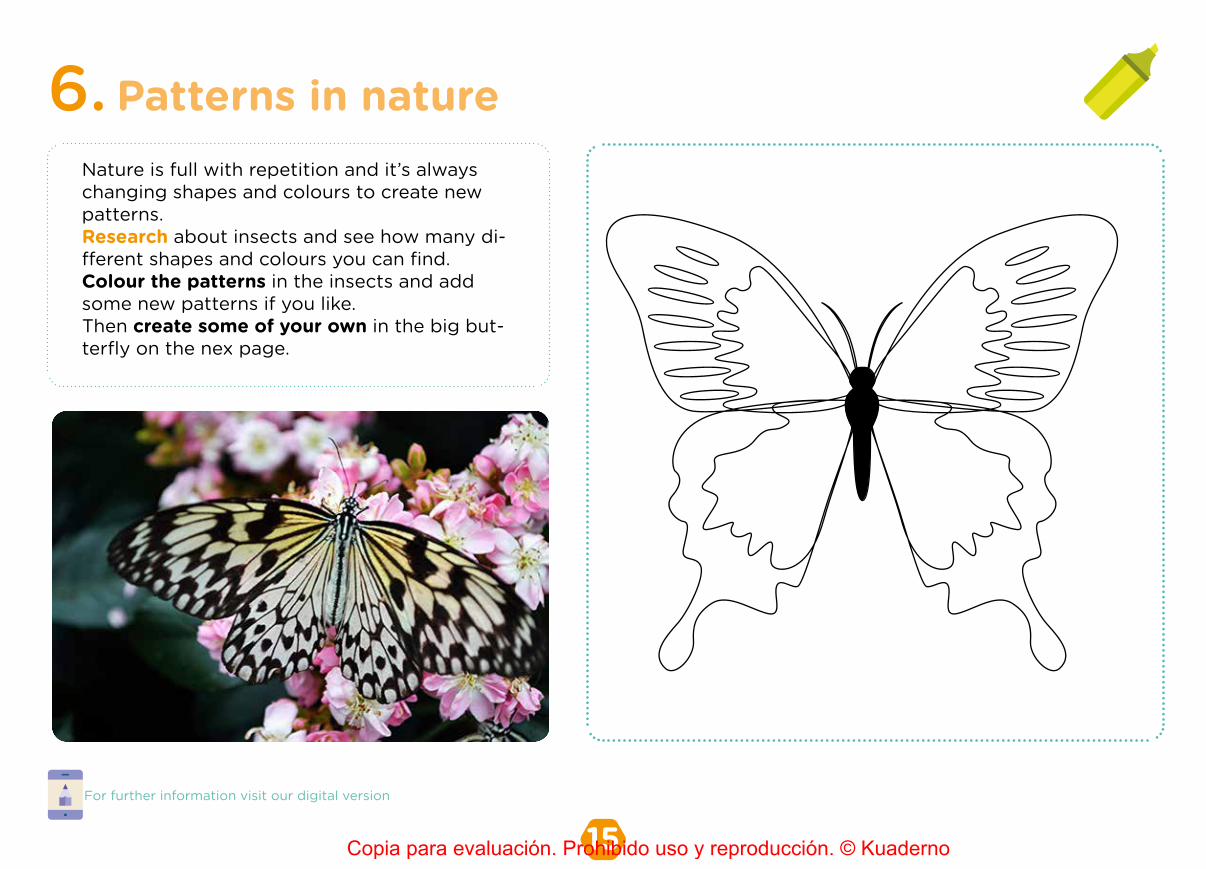
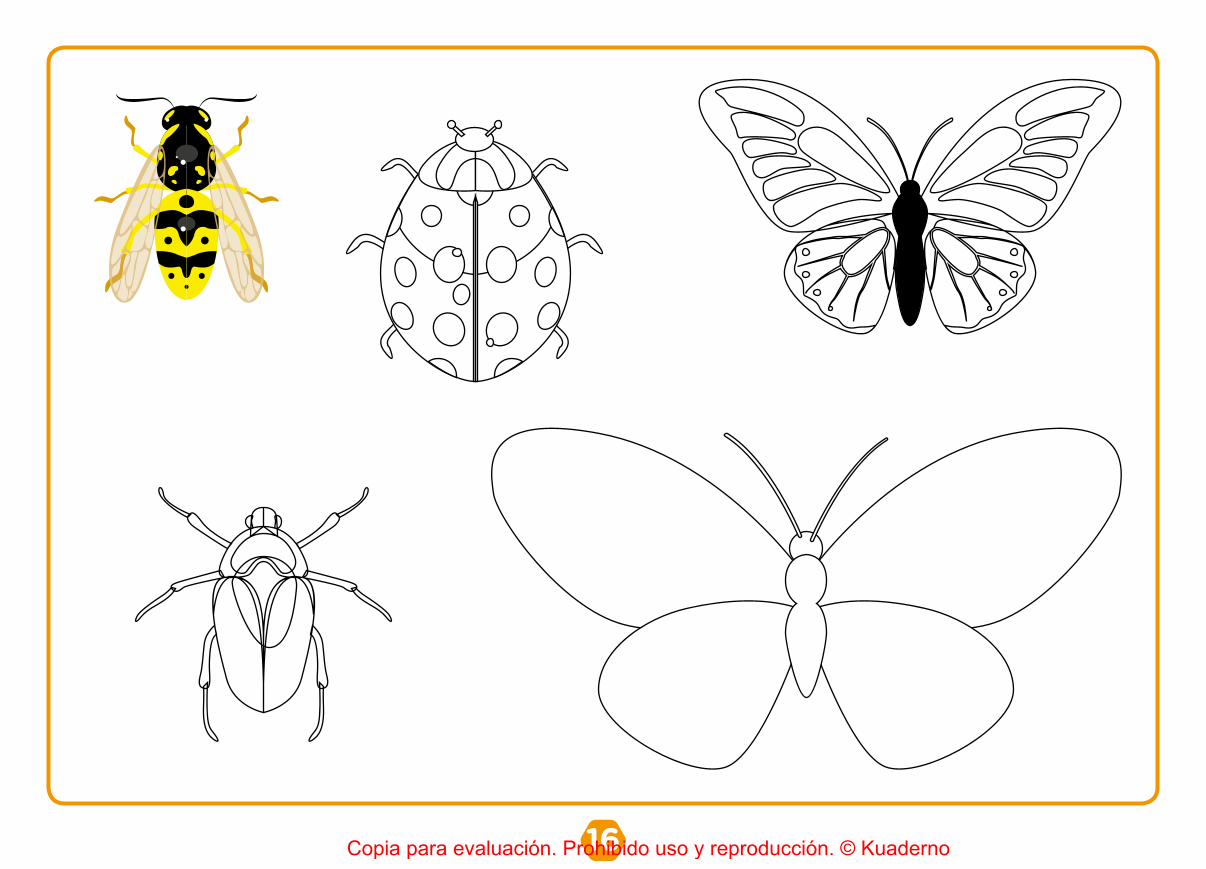
Patterns in nature6.Nature is full with repetition and it’s always changing shapes and colours to create new patterns. Research about insects and see how many di-fferent shapes and colours you can find.Colour the patterns in the insects and add some new patterns if you like.Then create some of your own in the big but-terfly on the nex page.
Copia para evaluación. Prohibido uso y reproducción. © Kuaderno
16Copia para evaluación. Prohibido uso y reproducción. © Kuaderno
17 For further information visit our digital version
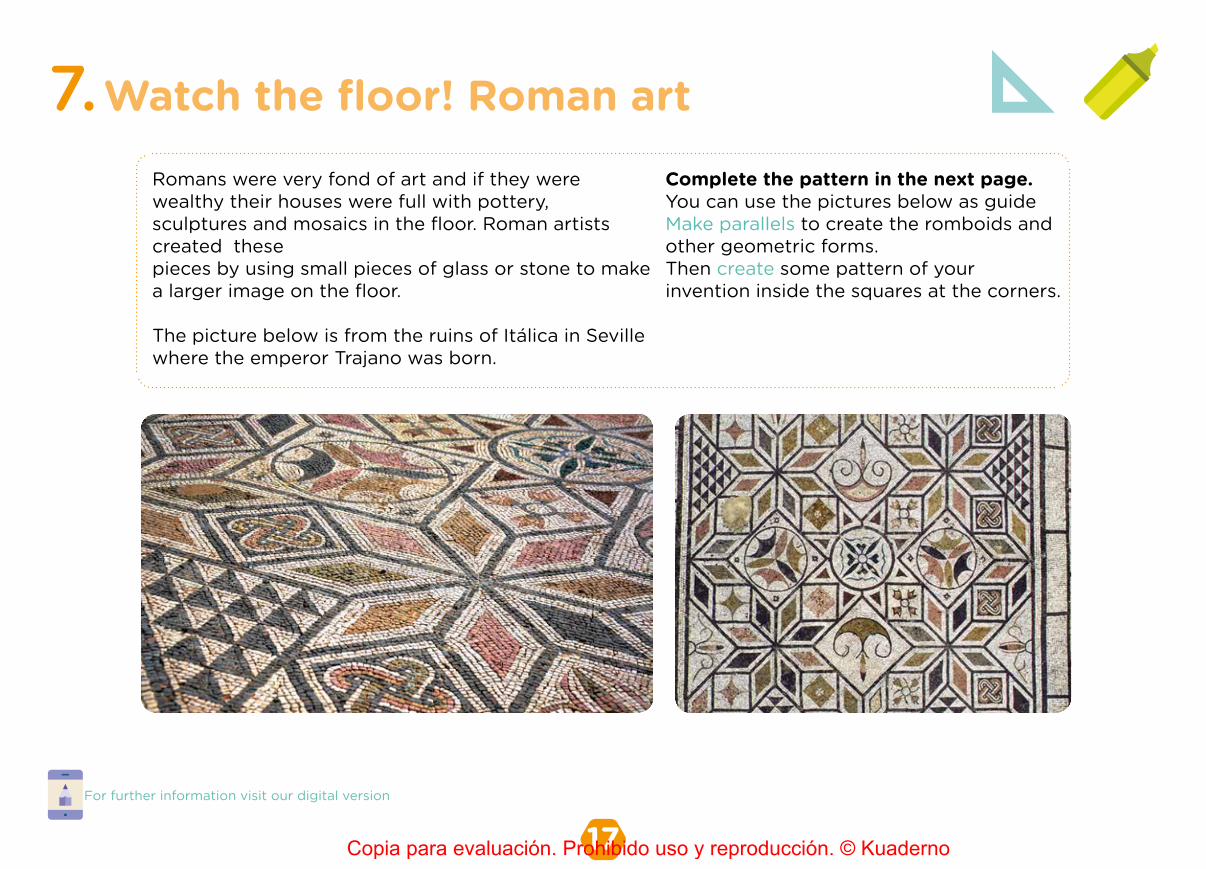
Watch the floor! Roman art7.Romans were very fond of art and if they werewealthy their houses were full with pottery,sculptures and mosaics in the floor. Roman artists created these pieces by using small pieces of glass or stone to make a larger image on the floor.
The picture below is from the ruins of Itálica in Seville where the emperor Trajano was born.
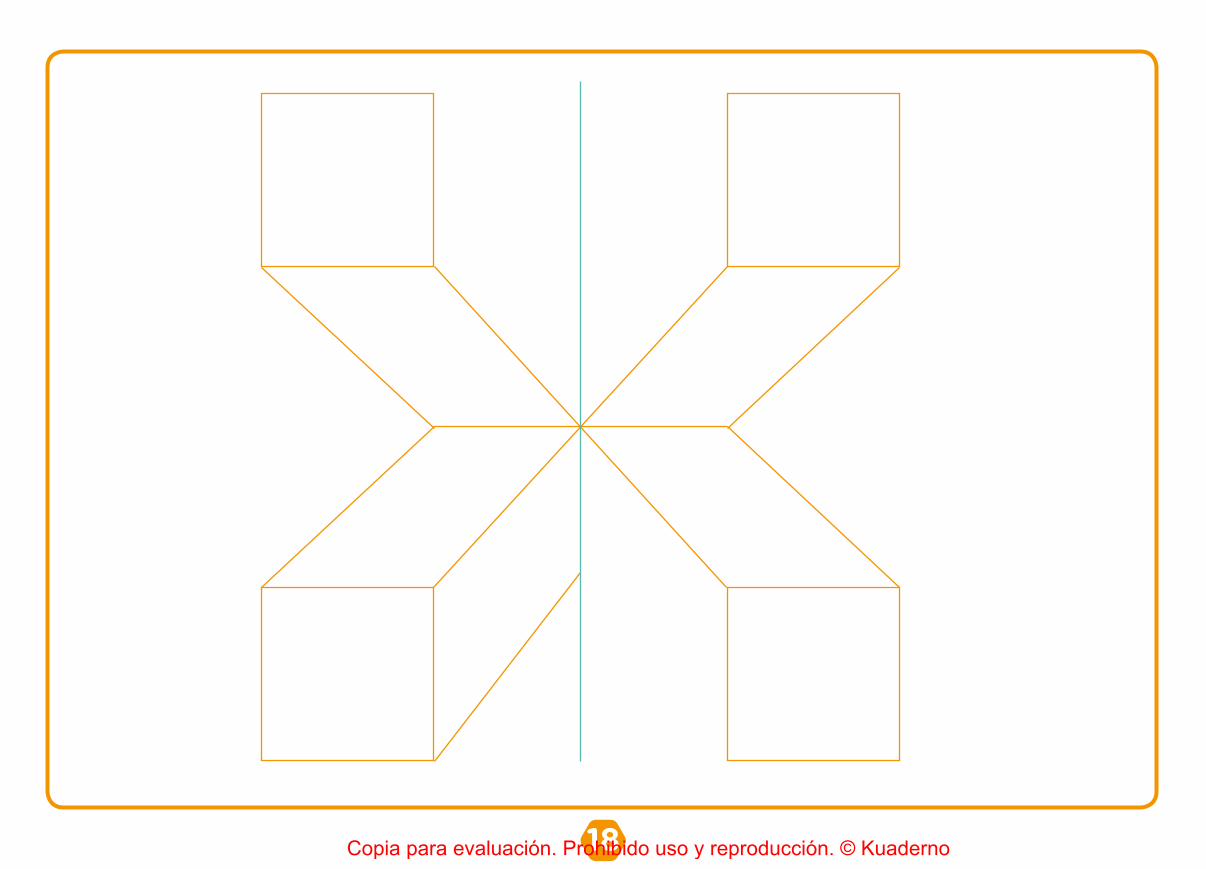
Complete the pattern in the next page.You can use the pictures below as guide Make parallels to create the romboids and other geometric forms.Then create some pattern of your invention inside the squares at the corners.
Copia para evaluación. Prohibido uso y reproducción. © Kuaderno
18Copia para evaluación. Prohibido uso y reproducción. © Kuaderno
19 For further information visit our digital version
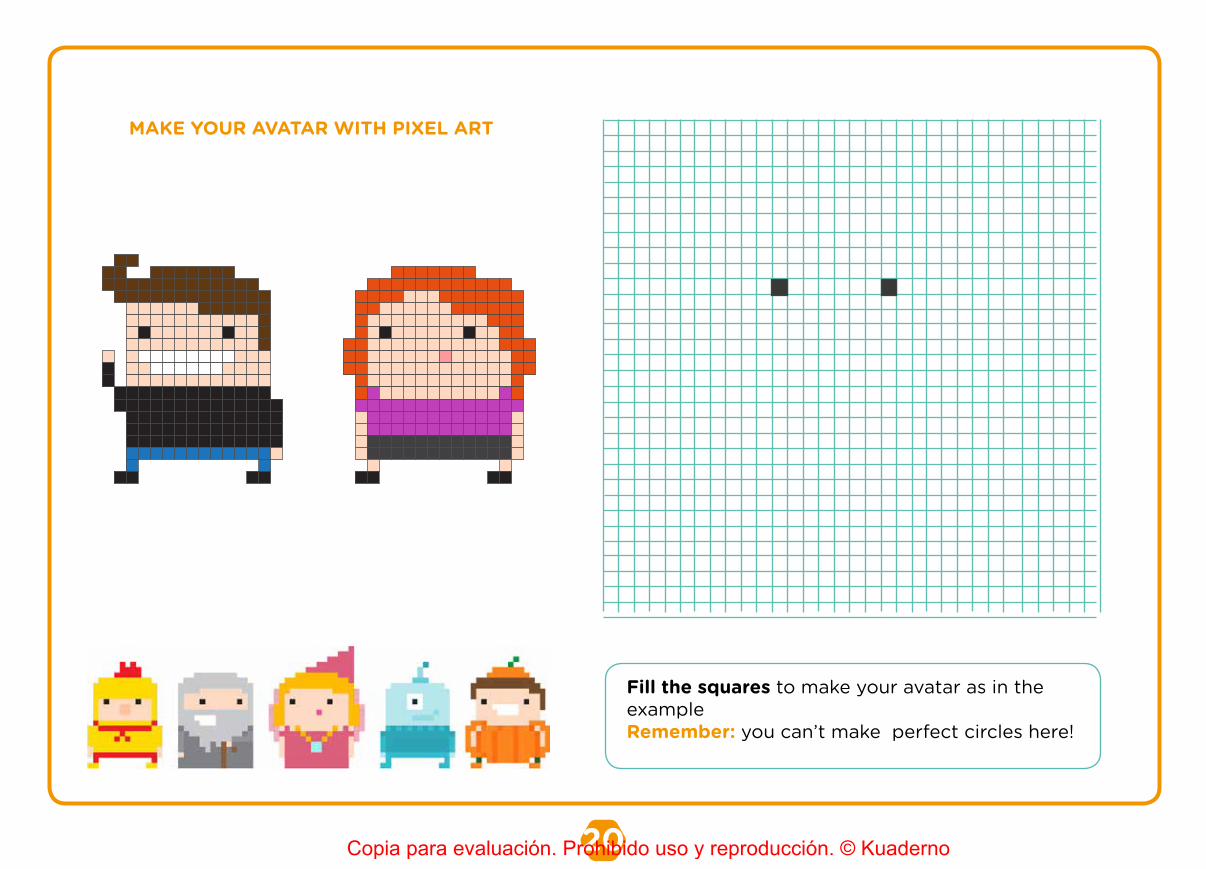
From textile to pixel art8.
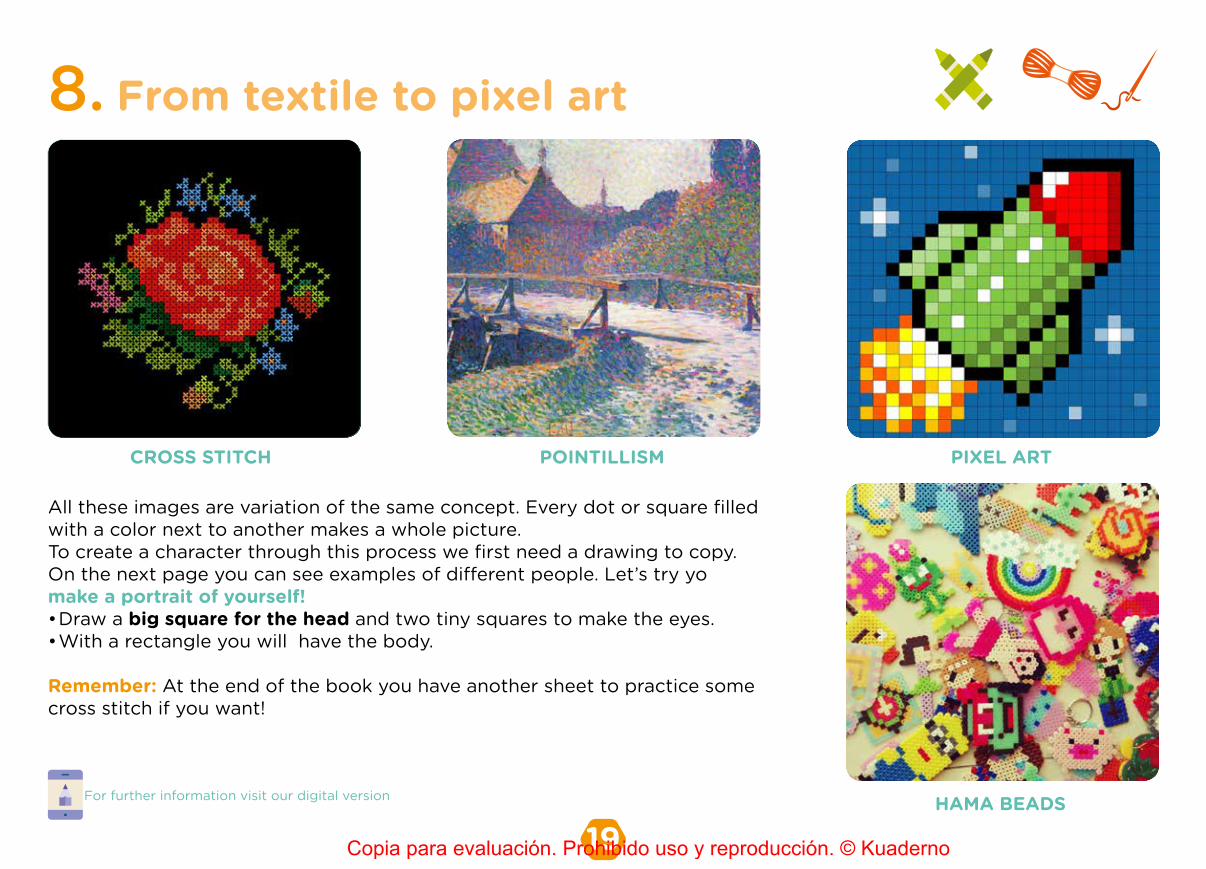
CROSS STITCH POINTILLISM PIXEL ART
HAMA BEADS
All these images are variation of the same concept. Every dot or square filled with a color next to another makes a whole picture. To create a character through this process we first need a drawing to copy. On the next page you can see examples of different people. Let’s try yo make a portrait of yourself!• Draw a big square for the head and two tiny squares to make the eyes.• With a rectangle you will have the body.
Remember: At the end of the book you have another sheet to practice some cross stitch if you want!
Copia para evaluación. Prohibido uso y reproducción. © Kuaderno
20
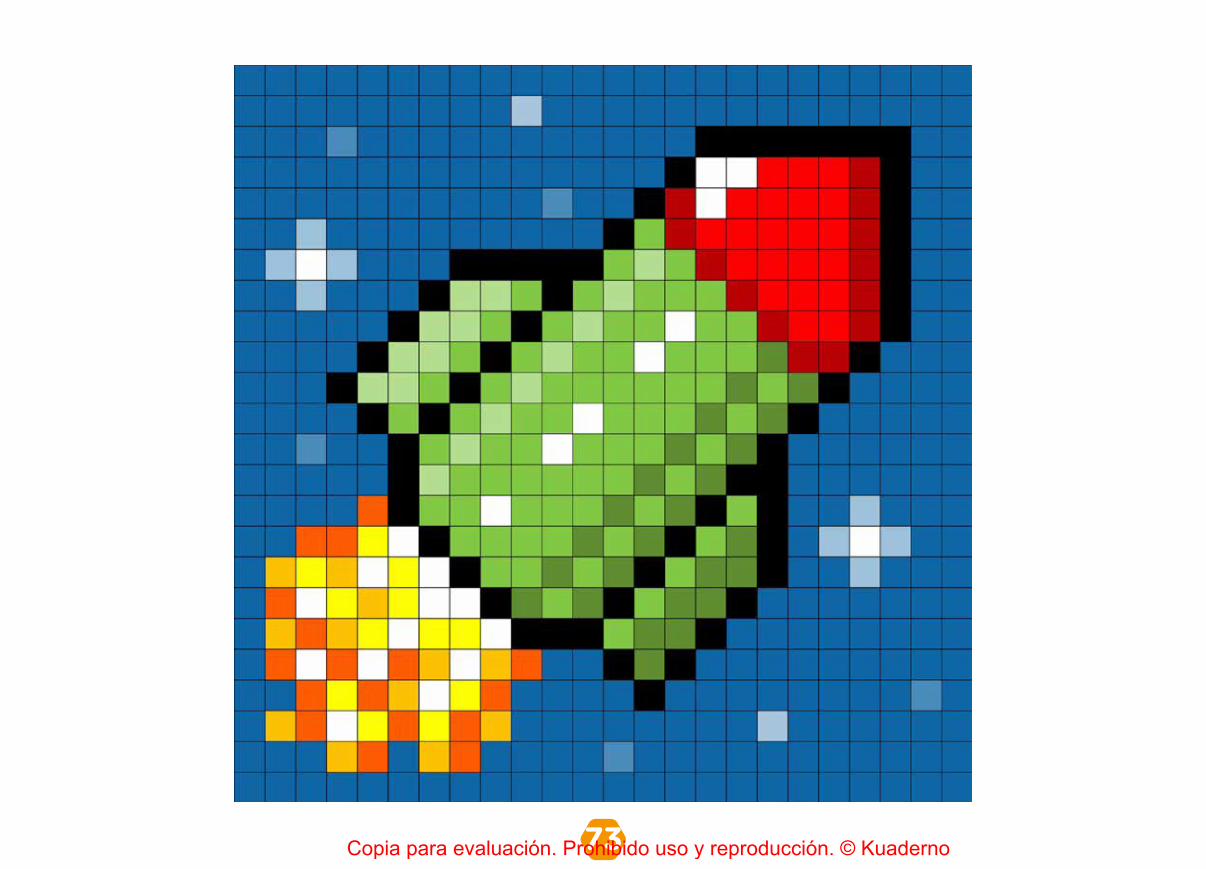
MAKE YOUR AVATAR WITH PIXEL ART
Fill the squares to make your avatar as in the exampleRemember: you can’t make perfect circles here!
Copia para evaluación. Prohibido uso y reproducción. © Kuaderno
21 For further information visit our digital version
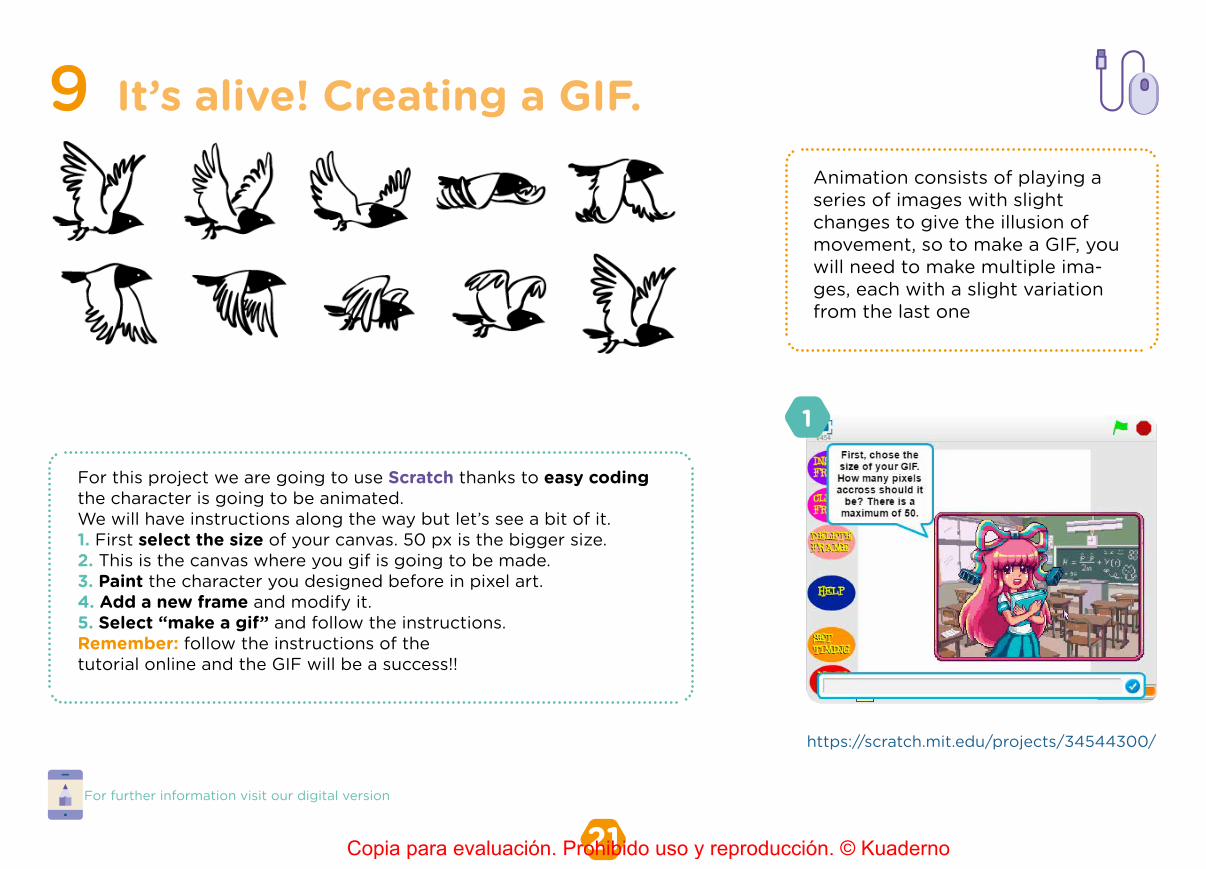
It’s alive! Creating a GIF.9Animation consists of playing a series of images with slight changes to give the illusion of movement, so to make a GIF, you will need to make multiple ima-ges, each with a slight variation from the last one
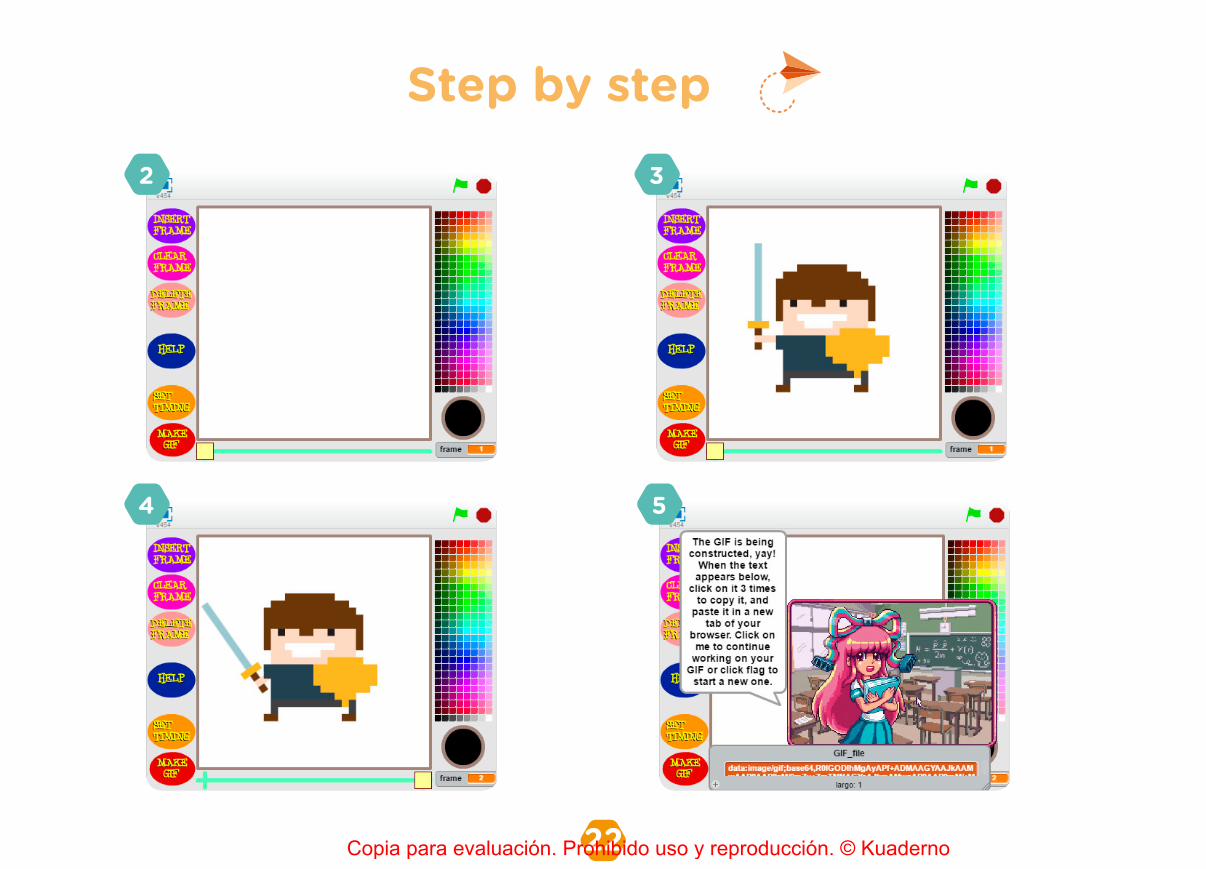
For this project we are going to use Scratch thanks to easy coding the character is going to be animated.We will have instructions along the way but let’s see a bit of it.1. First select the size of your canvas. 50 px is the bigger size.2. This is the canvas where you gif is going to be made.3. Paint the character you designed before in pixel art.4. Add a new frame and modify it.5. Select “make a gif” and follow the instructions.Remember: follow the instructions of the tutorial online and the GIF will be a success!!
1
https://scratch.mit.edu/projects/34544300/
Copia para evaluación. Prohibido uso y reproducción. © Kuaderno
22
Step by step2 3
54
Copia para evaluación. Prohibido uso y reproducción. © Kuaderno
23 For further information visit our digital version
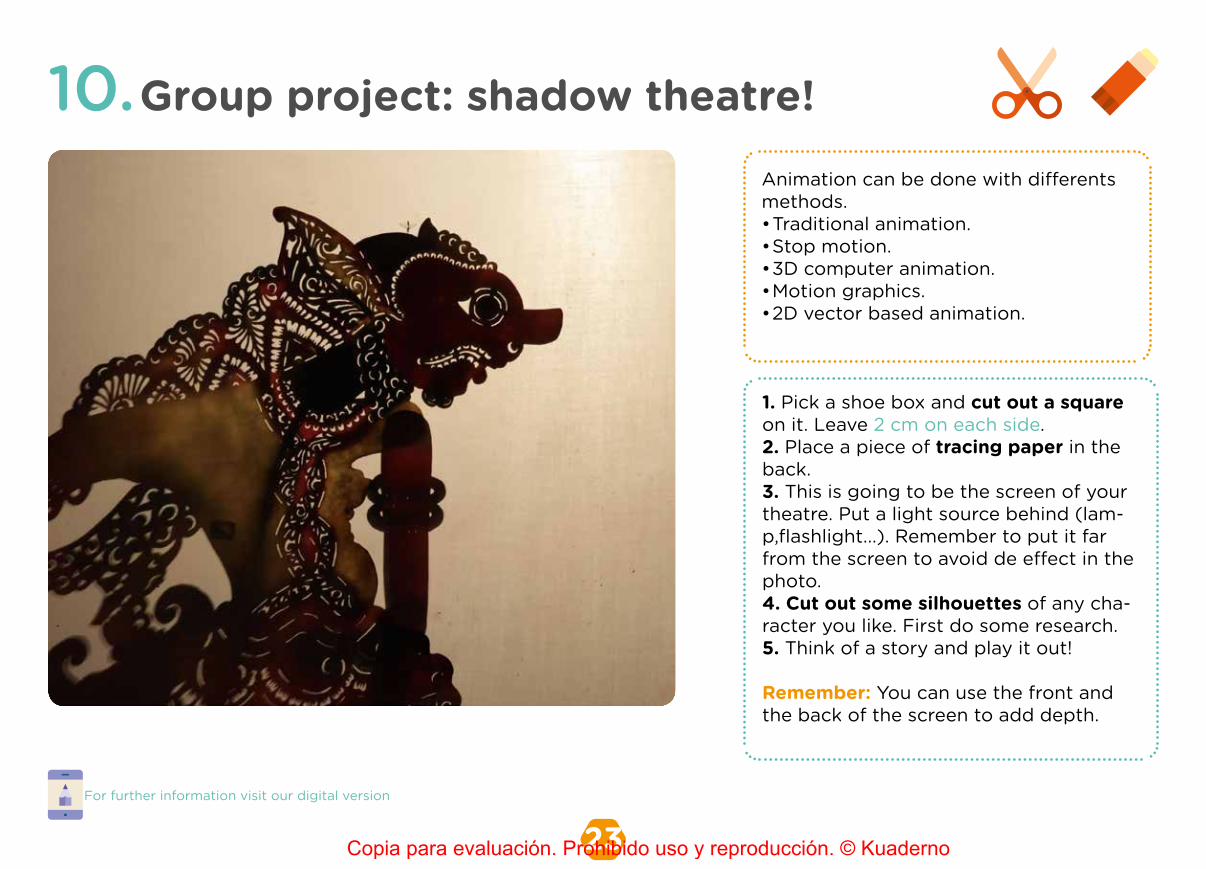
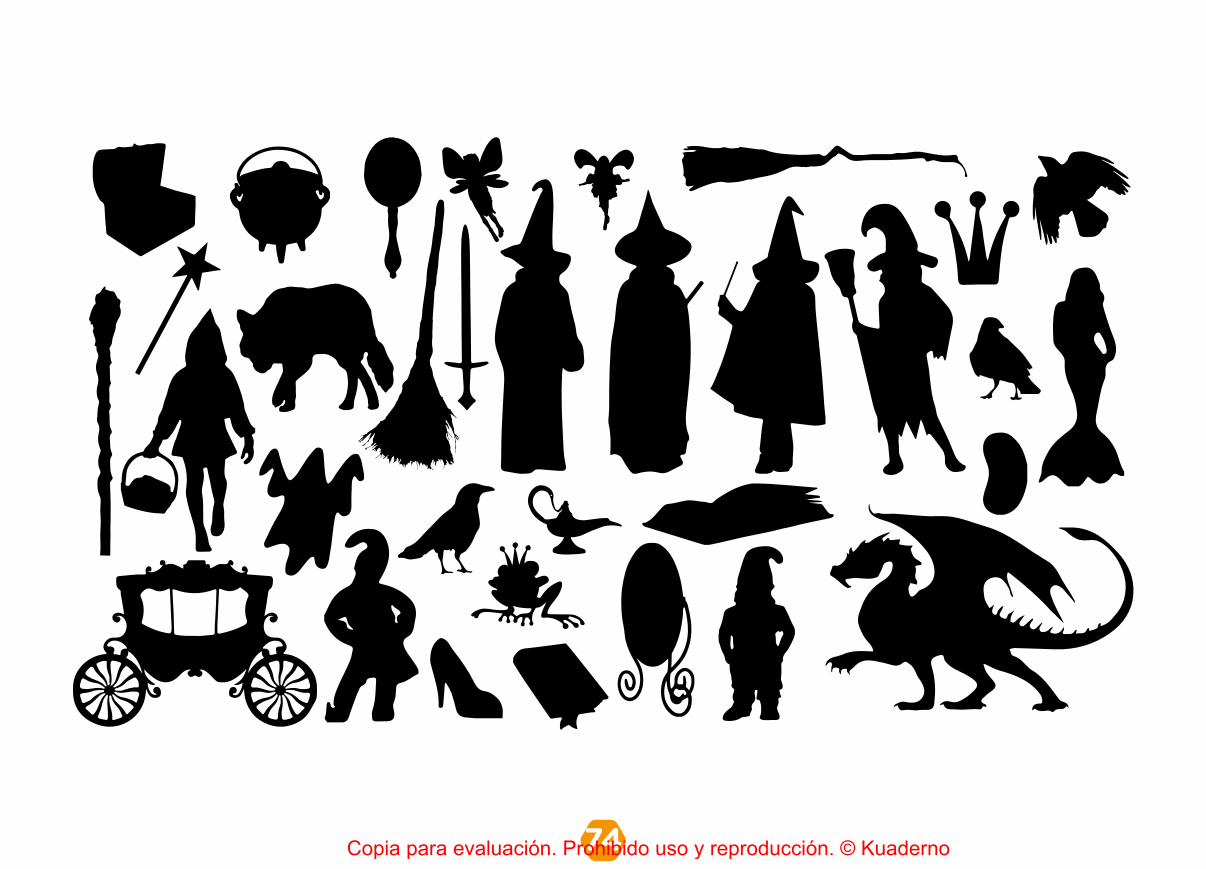
Group project: shadow theatre!10.Animation can be done with differents methods.• Traditional animation.• Stop motion.• 3D computer animation.• Motion graphics.• 2D vector based animation.
1. Pick a shoe box and cut out a square on it. Leave 2 cm on each side.2. Place a piece of tracing paper in the back. 3. This is going to be the screen of your theatre. Put a light source behind (lam-p,flashlight...). Remember to put it far from the screen to avoid de effect in the photo.4. Cut out some silhouettes of any cha-racter you like. First do some research.5. Think of a story and play it out!
Remember: You can use the front and the back of the screen to add depth.
Copia para evaluación. Prohibido uso y reproducción. © Kuaderno
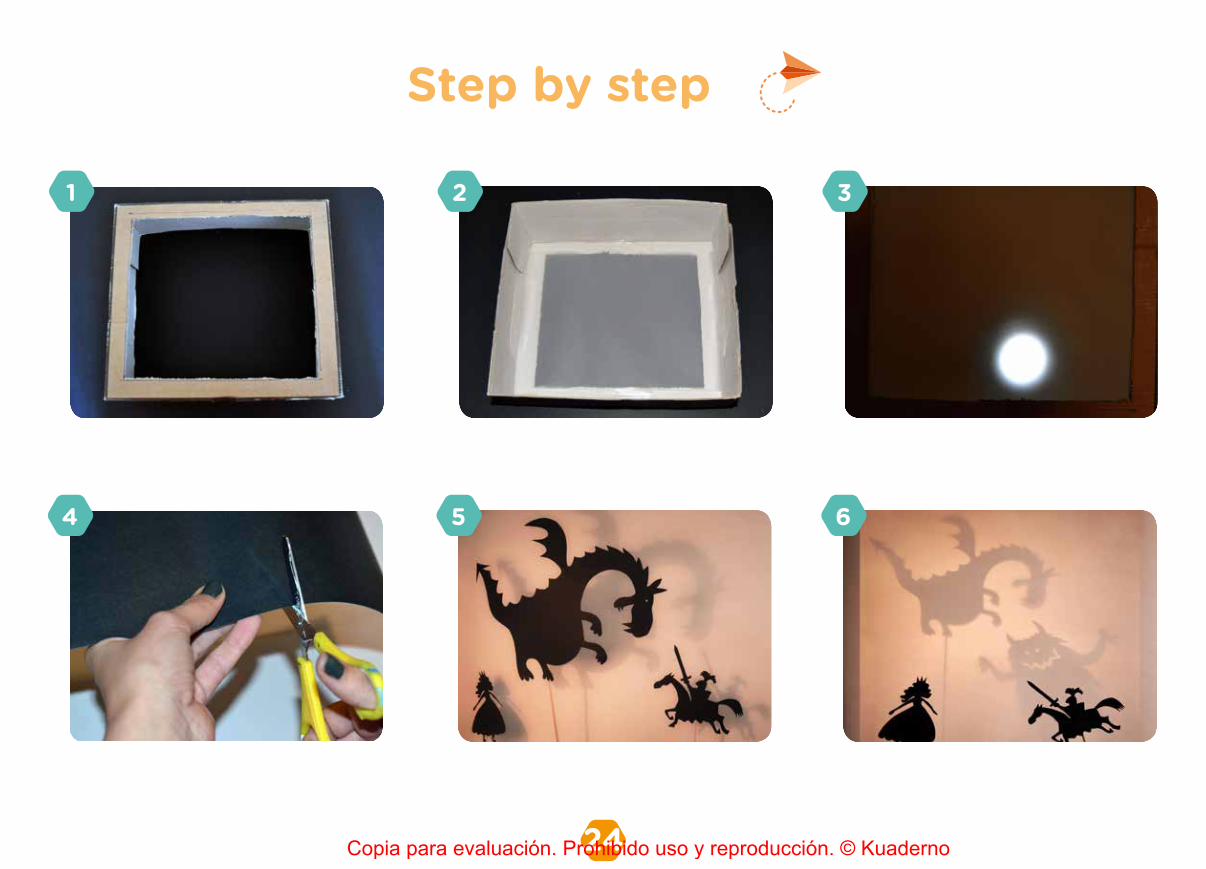
24
Step by step
1 2 3
4 5 6
Copia para evaluación. Prohibido uso y reproducción. © Kuaderno
25 For further information visit our digital version
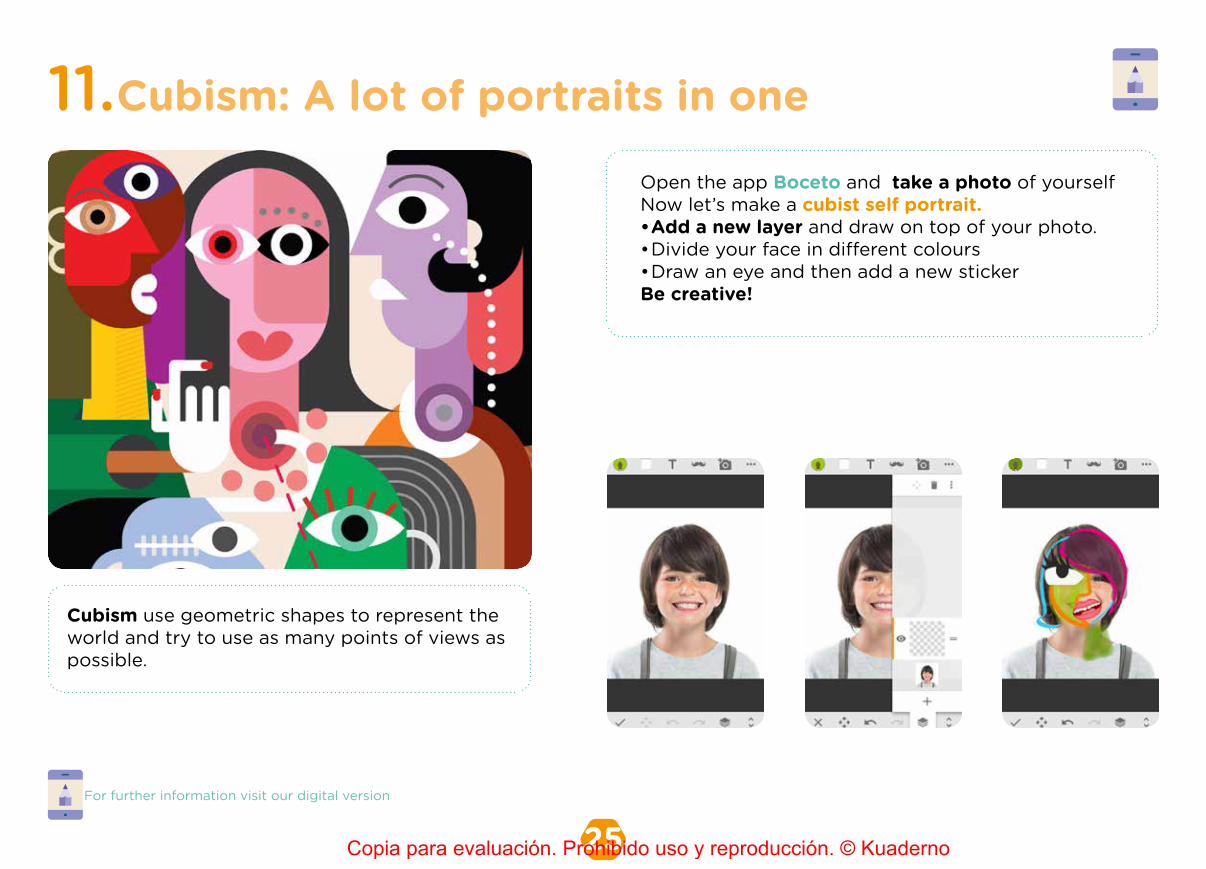
Cubism: A lot of portraits in one11.
Cubism use geometric shapes to represent the world and try to use as many points of views as possible.
Open the app Boceto and take a photo of yourselfNow let’s make a cubist self portrait.• Add a new layer and draw on top of your photo.• Divide your face in different colours• Draw an eye and then add a new stickerBe creative!
Copia para evaluación. Prohibido uso y reproducción. © Kuaderno

26Copia para evaluación. Prohibido uso y reproducción. © Kuaderno

27 For further information visit our digital version
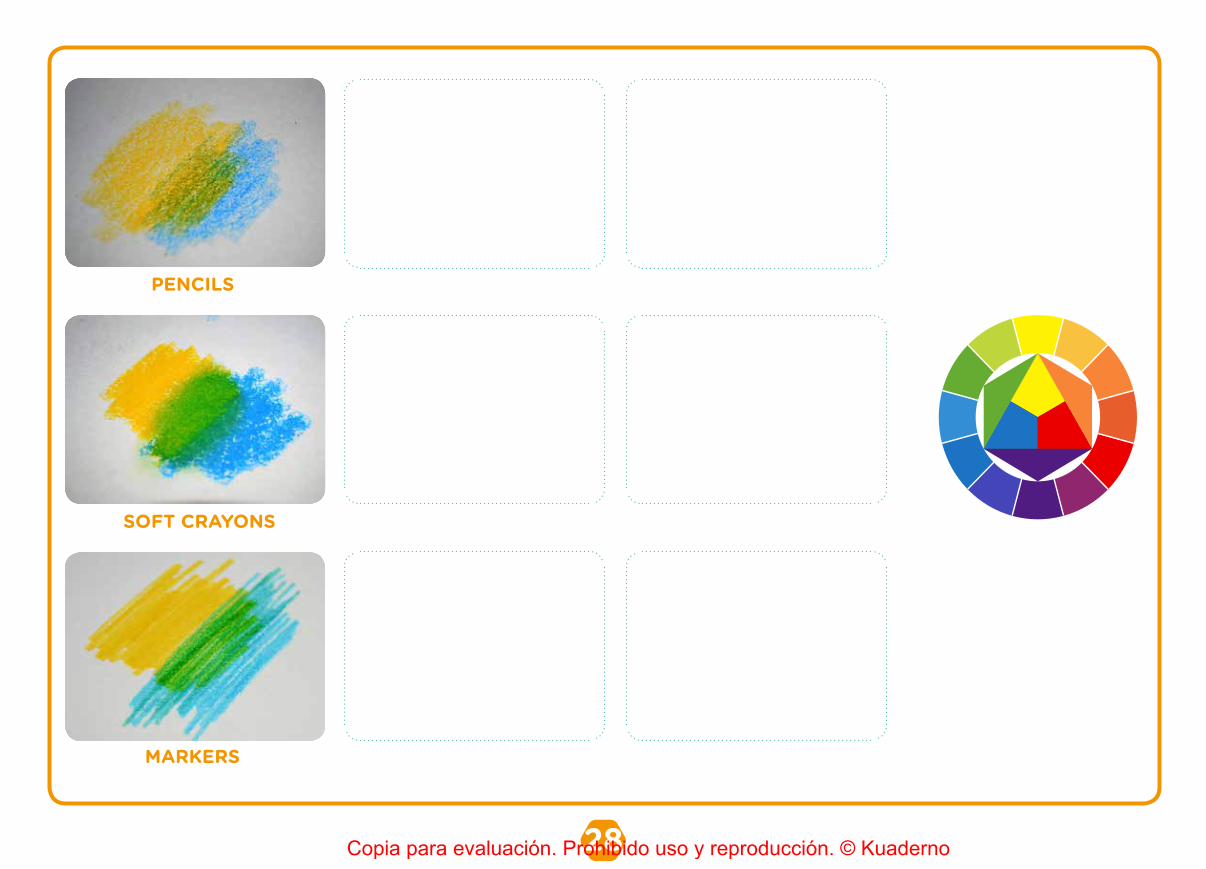
Science and light: The wheelcolour12.
When you mix Yellow, Cyan (blue) and Magenta (red) with pencil colours the colour you get is Black.That happens with every colour made with pigments.
When you mix Green, Cyan (blue) and Red with light the color you get is White .That happens with every colour made with light. For example in a computer or the colours in the rainbow.
With the primary colours you can get every colour that you think of. Lighter colours are use to give light, and darker colours to add shadows.
Try different tools to make secondary colours
Copia para evaluación. Prohibido uso y reproducción. © Kuaderno
28
PENCILS
SOFT CRAYONS
MARKERS
Copia para evaluación. Prohibido uso y reproducción. © Kuaderno

29 For further information visit our digital version
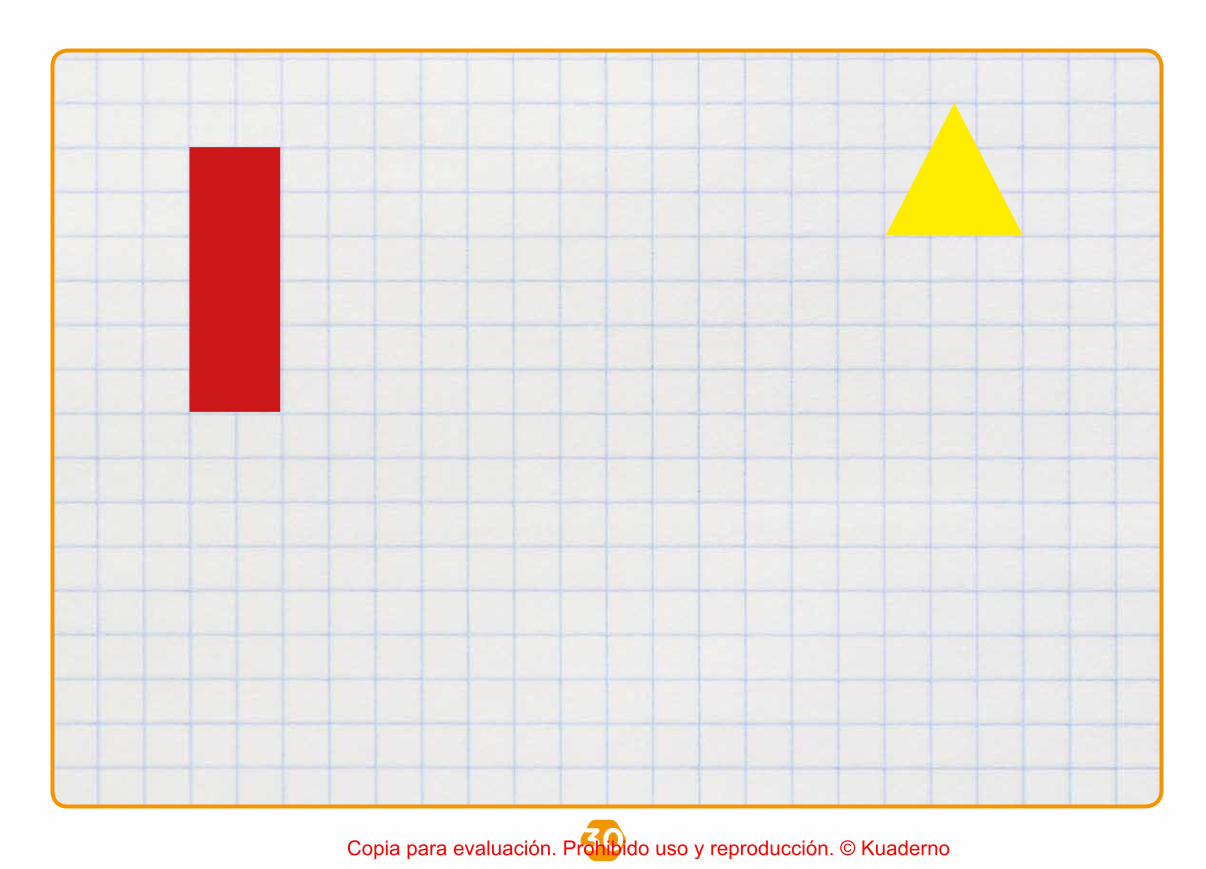
Constructivism & paralallelograms13.
Constructivism was an artistic and architectural movement that originated in Russia in 1914. This movement tried to avoid representation of things so it was always abstract art. The art centered in representation it’s called figurative art.
In the nex page make your own abstract piece.With your ruler make some rectangles, squares andtriangles.Vary the size and angle to create a more dinamic picture.
Remember: your creation can be very simple or more complex. It’s up to you!
Do you prefer figurative art orabstract art? Why?
Abstract art can make you feel something? or tell a story?
Copia para evaluación. Prohibido uso y reproducción. © Kuaderno
30Copia para evaluación. Prohibido uso y reproducción. © Kuaderno
31 For further information visit our digital version
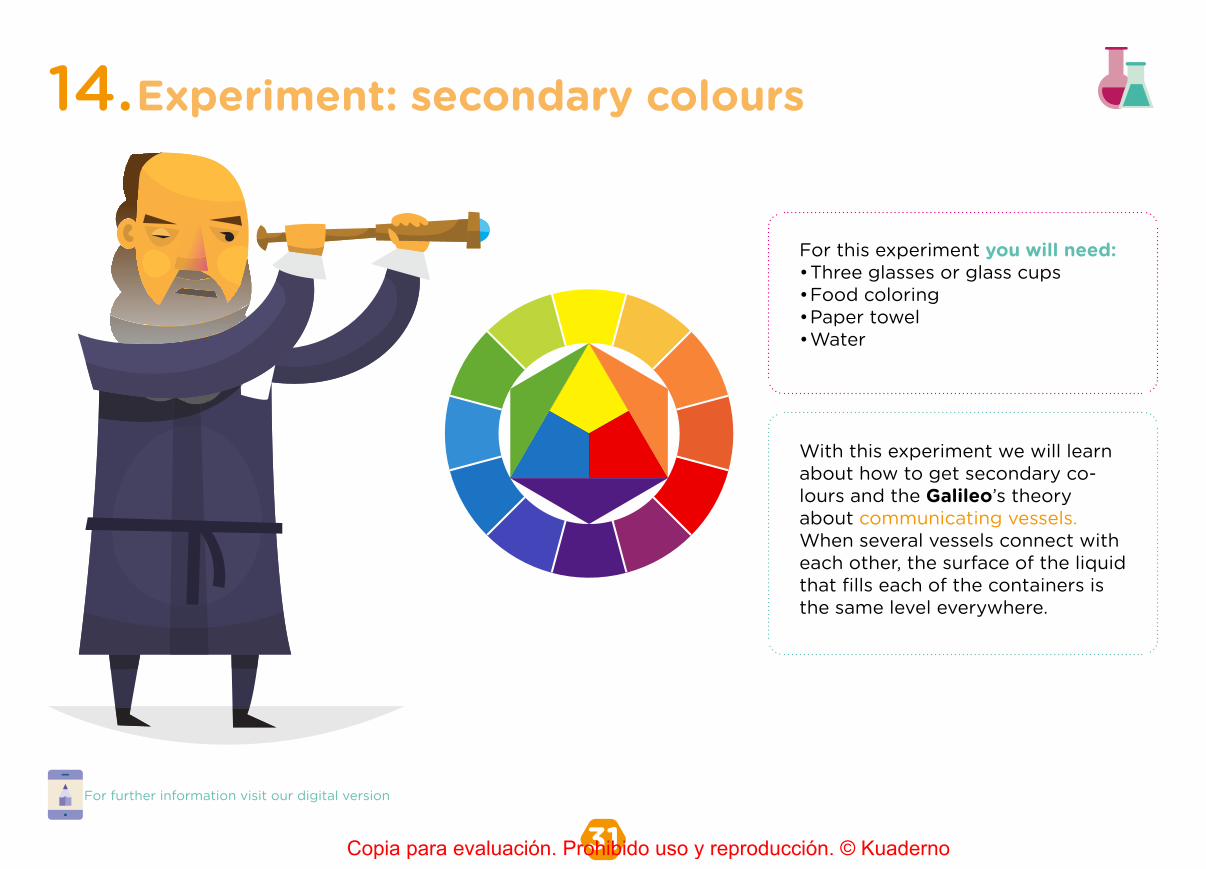
Experiment: secondary colours14.
For this experiment you will need:• Three glasses or glass cups• Food coloring• Paper towel• Water
With this experiment we will learn about how to get secondary co-lours and the Galileo’s theory about communicating vessels.When several vessels connect with each other, the surface of the liquid that fills each of the containers is the same level everywhere.
Copia para evaluación. Prohibido uso y reproducción. © Kuaderno
32
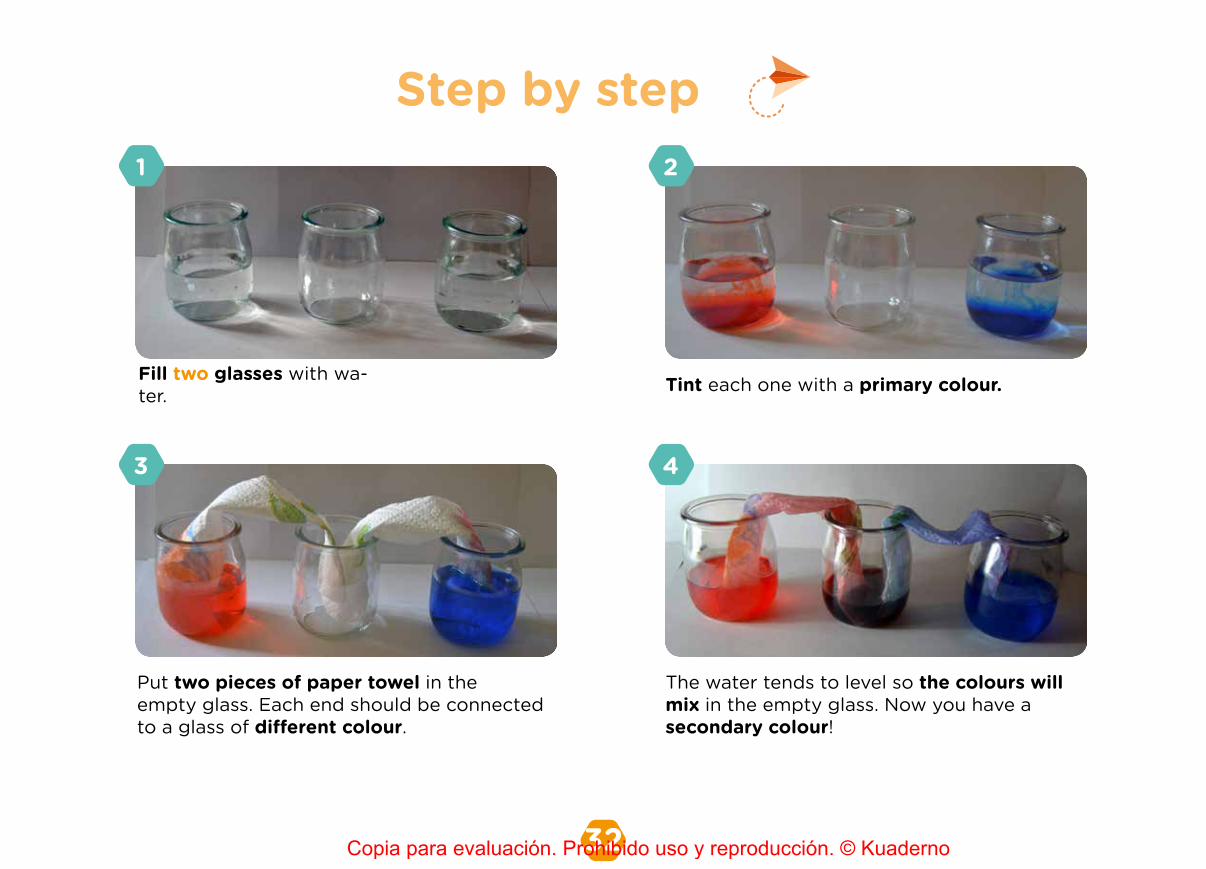
Step by step1
Fill two glasses with wa-ter.
3
Put two pieces of paper towel in the empty glass. Each end should be connected to a glass of different colour.
2
Tint each one with a primary colour.
4
The water tends to level so the colours will mix in the empty glass. Now you have a secondary colour!
Copia para evaluación. Prohibido uso y reproducción. © Kuaderno
33
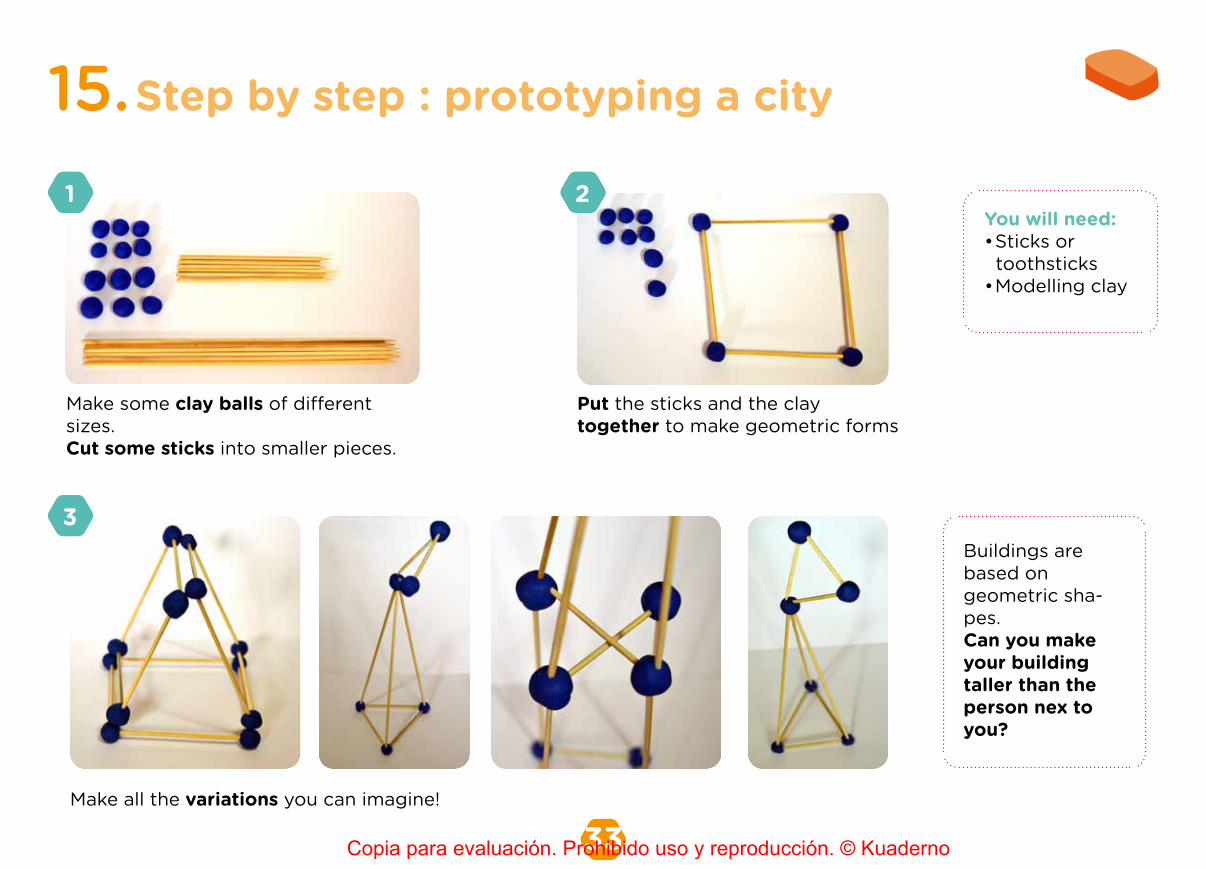
Step by step : prototyping a city15.1
Make some clay balls of different sizes.Cut some sticks into smaller pieces.
3
Make all the variations you can imagine!
2
Put the sticks and the clay together to make geometric forms
You will need:• Sticks or toothsticks• Modelling clay
Buildings are based on geometric sha-pes.Can you makeyour buildingtaller than the person nex to you?
Copia para evaluación. Prohibido uso y reproducción. © Kuaderno

34Copia para evaluación. Prohibido uso y reproducción. © Kuaderno
35
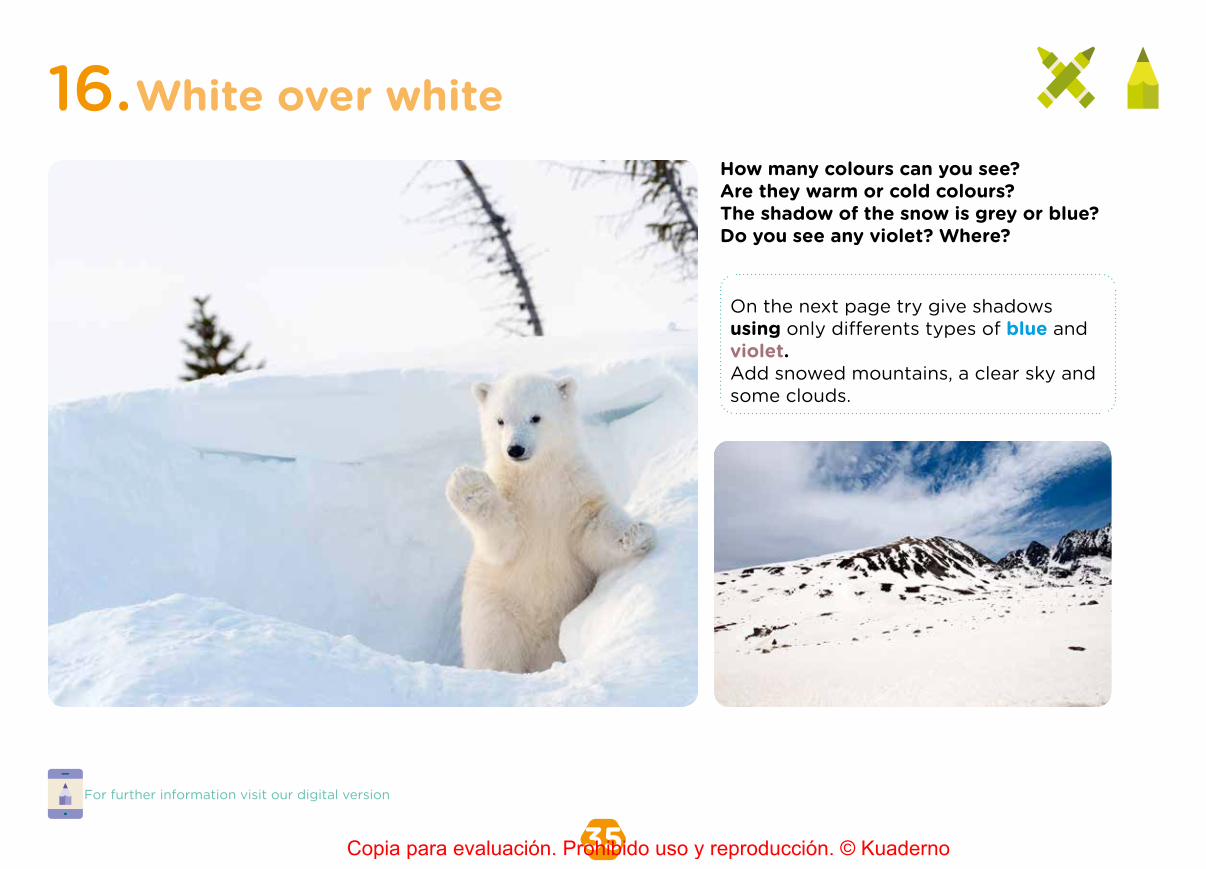
White over white16.
For further information visit our digital version
How many colours can you see?Are they warm or cold colours?The shadow of the snow is grey or blue?Do you see any violet? Where?
On the next page try give shadows using only differents types of blue and violet.Add snowed mountains, a clear sky and some clouds.
Copia para evaluación. Prohibido uso y reproducción. © Kuaderno
36Copia para evaluación. Prohibido uso y reproducción. © Kuaderno

37
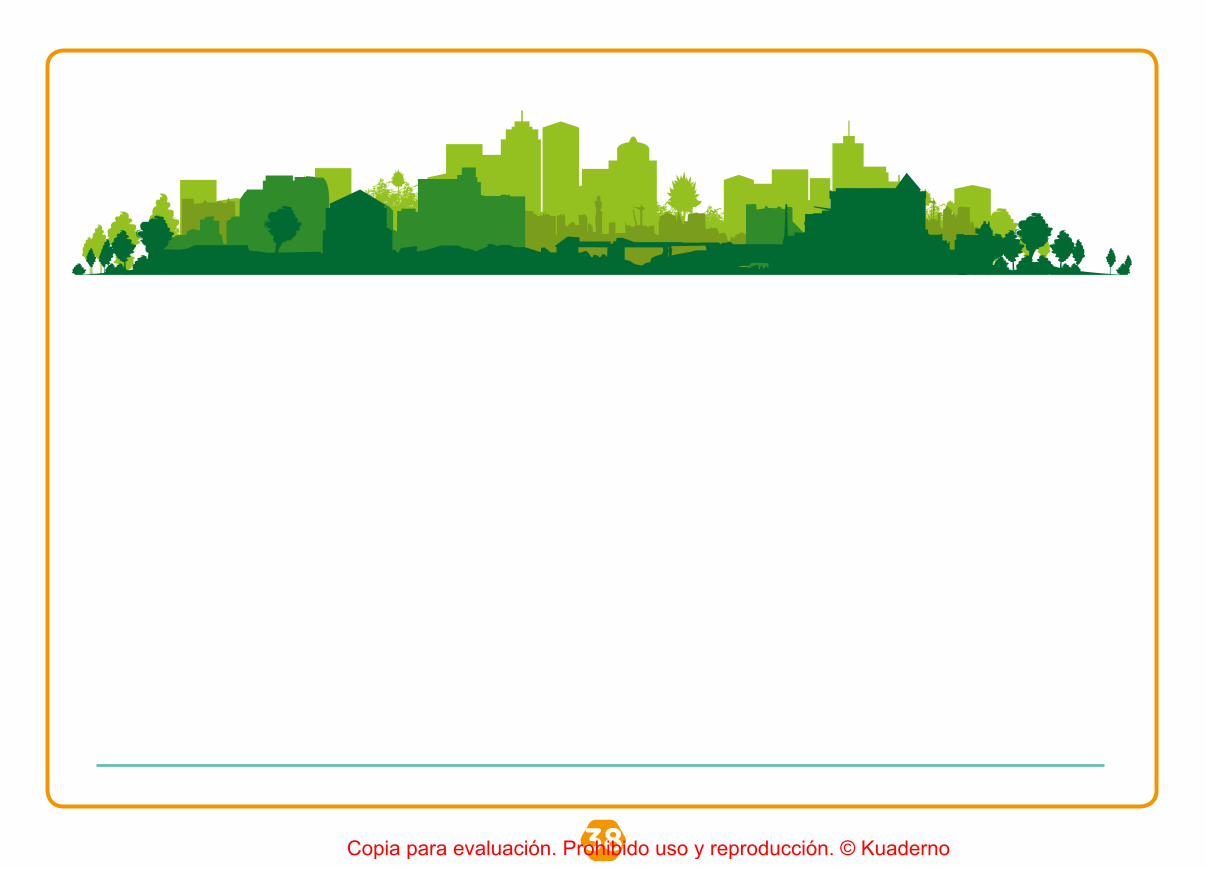
To the horizon: Depth and cityscape17.
For further information visit our digital version
When things are far away the details disappear and the colours tend to blend and become lighter.The warmer and darker colours go in the foreground. Add some details so sticks out!In the middleground you can’t see a lot of detail and it has the same colour.The background gets lighter and lighter as the horizon disappear.In the next page draw your own city using geometric shapes and practice depth with a single colour range.
Copia para evaluación. Prohibido uso y reproducción. © Kuaderno
38Copia para evaluación. Prohibido uso y reproducción. © Kuaderno
39
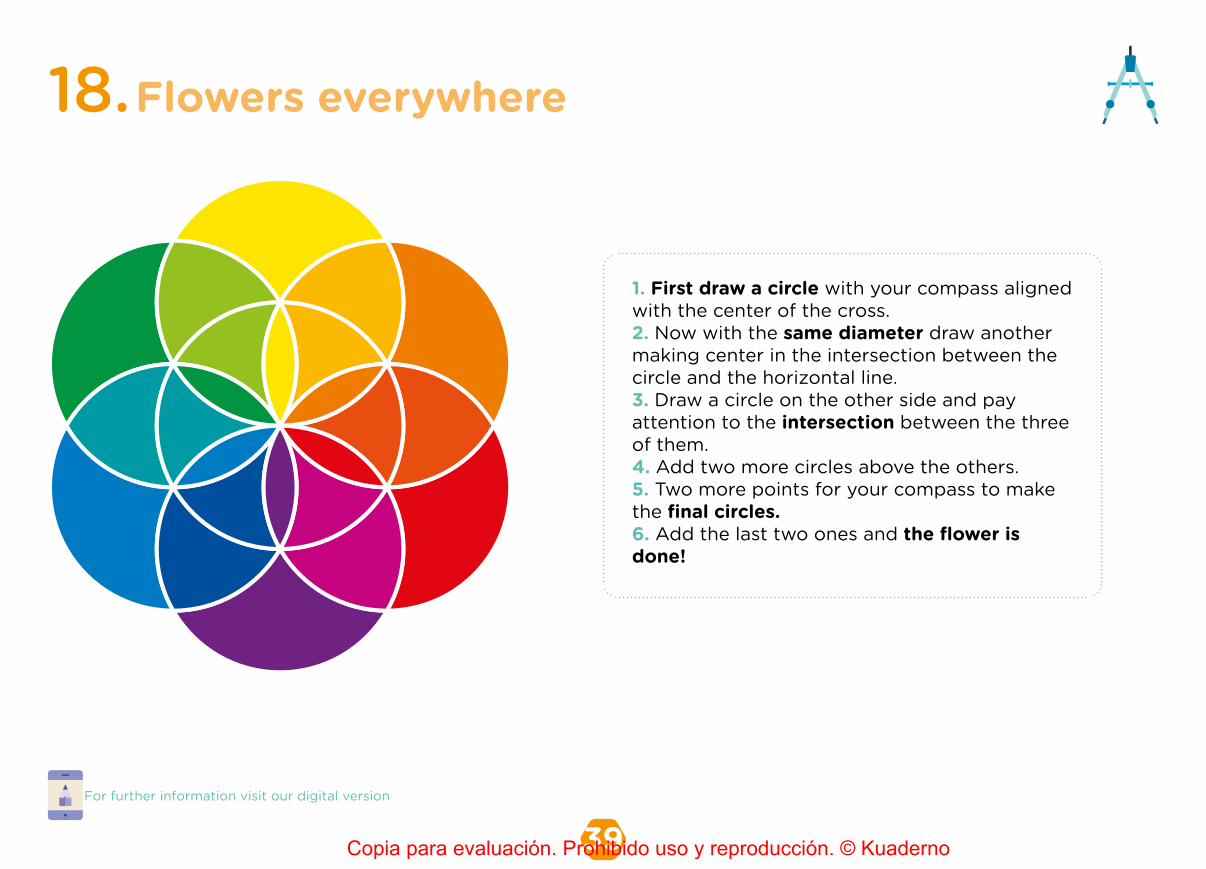
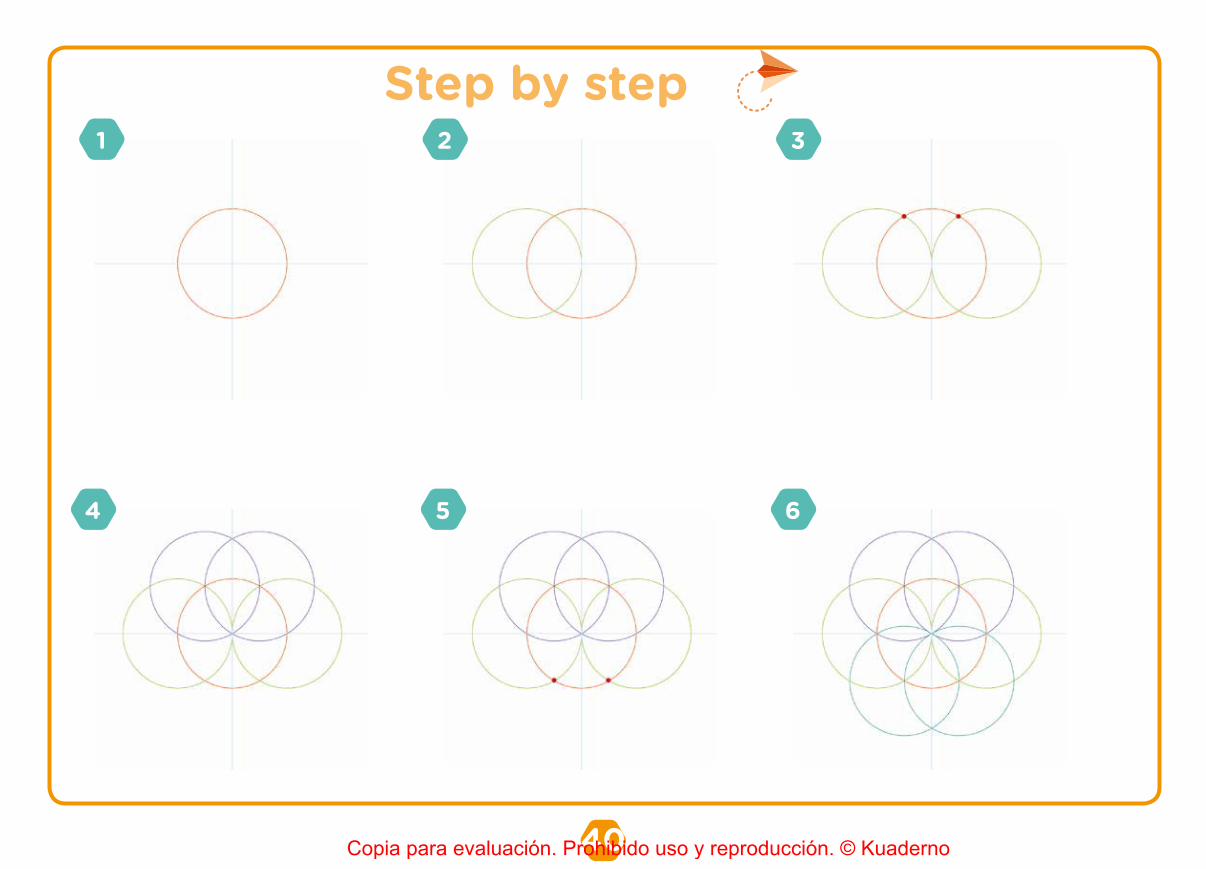
Flowers everywhere18.
For further information visit our digital version
1. First draw a circle with your compass aligned with the center of the cross.2. Now with the same diameter draw another making center in the intersection between the circle and the horizontal line.3. Draw a circle on the other side and pay attention to the intersection between the three of them.4. Add two more circles above the others.5. Two more points for your compass to make the final circles.6. Add the last two ones and the flower is done!
Copia para evaluación. Prohibido uso y reproducción. © Kuaderno
40
Step by step1
4
2
5
3
6
Copia para evaluación. Prohibido uso y reproducción. © Kuaderno
41Copia para evaluación. Prohibido uso y reproducción. © Kuaderno
42
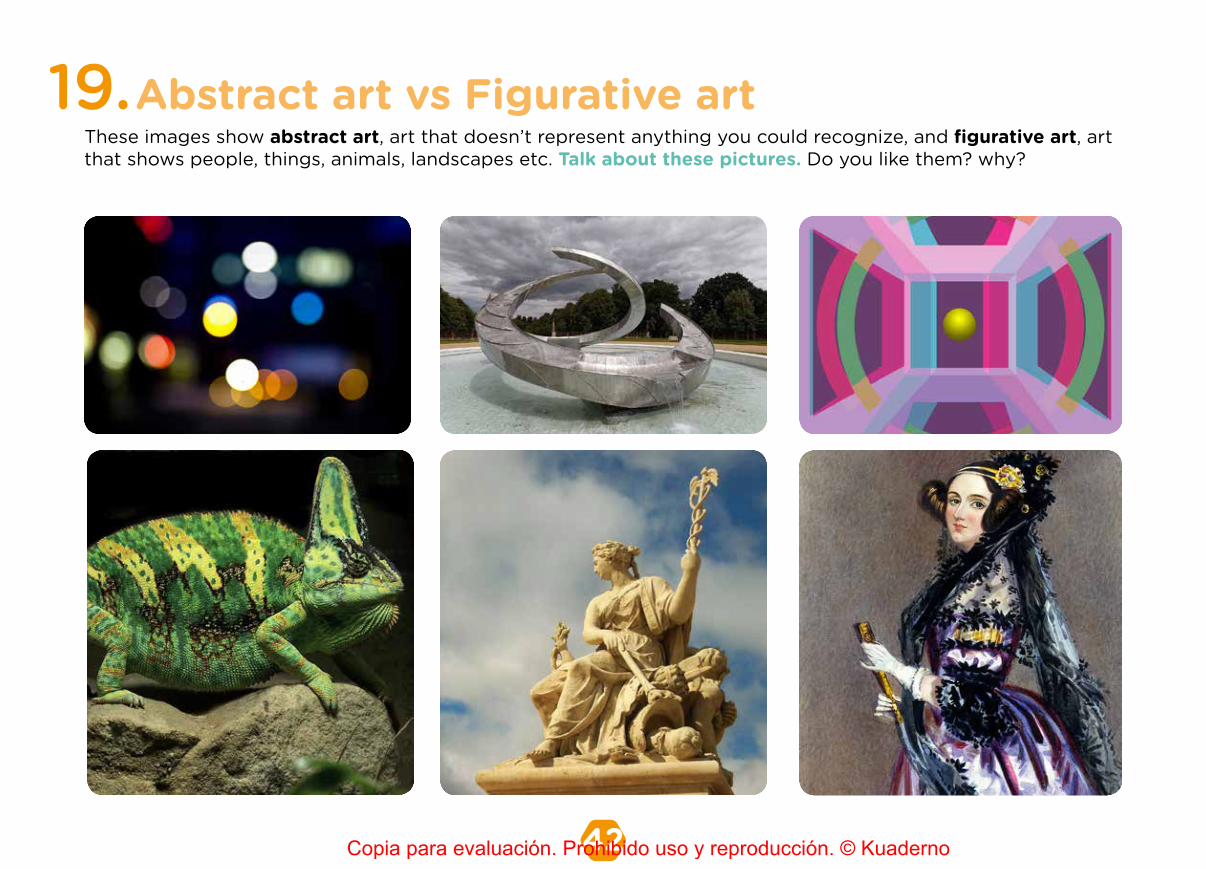
Abstract art vs Figurative art19.These images show abstract art, art that doesn’t represent anything you could recognize, and figurative art, art that shows people, things, animals, landscapes etc. Talk about these pictures. Do you like them? why?
Copia para evaluación. Prohibido uso y reproducción. © Kuaderno
43
Draw something figurative and something abstract!
Copia para evaluación. Prohibido uso y reproducción. © Kuaderno
44
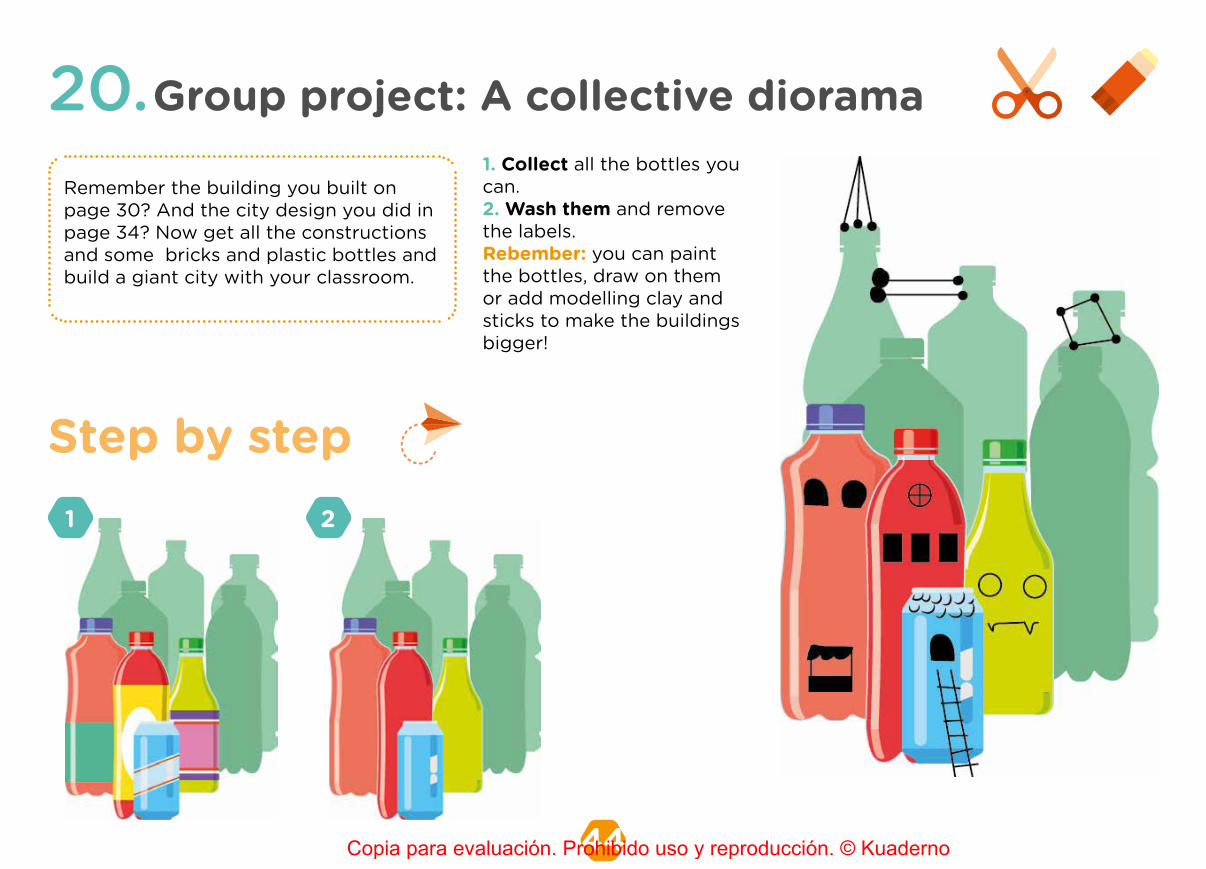
Group project: A collective diorama20.
1 2
Remember the building you built on page 30? And the city design you did in page 34? Now get all the constructions and some bricks and plastic bottles and build a giant city with your classroom.
1. Collect all the bottles you can.2. Wash them and remove the labels.Rebember: you can paint the bottles, draw on them or add modelling clay and sticks to make the buildings bigger!
Step by step
Copia para evaluación. Prohibido uso y reproducción. © Kuaderno
45
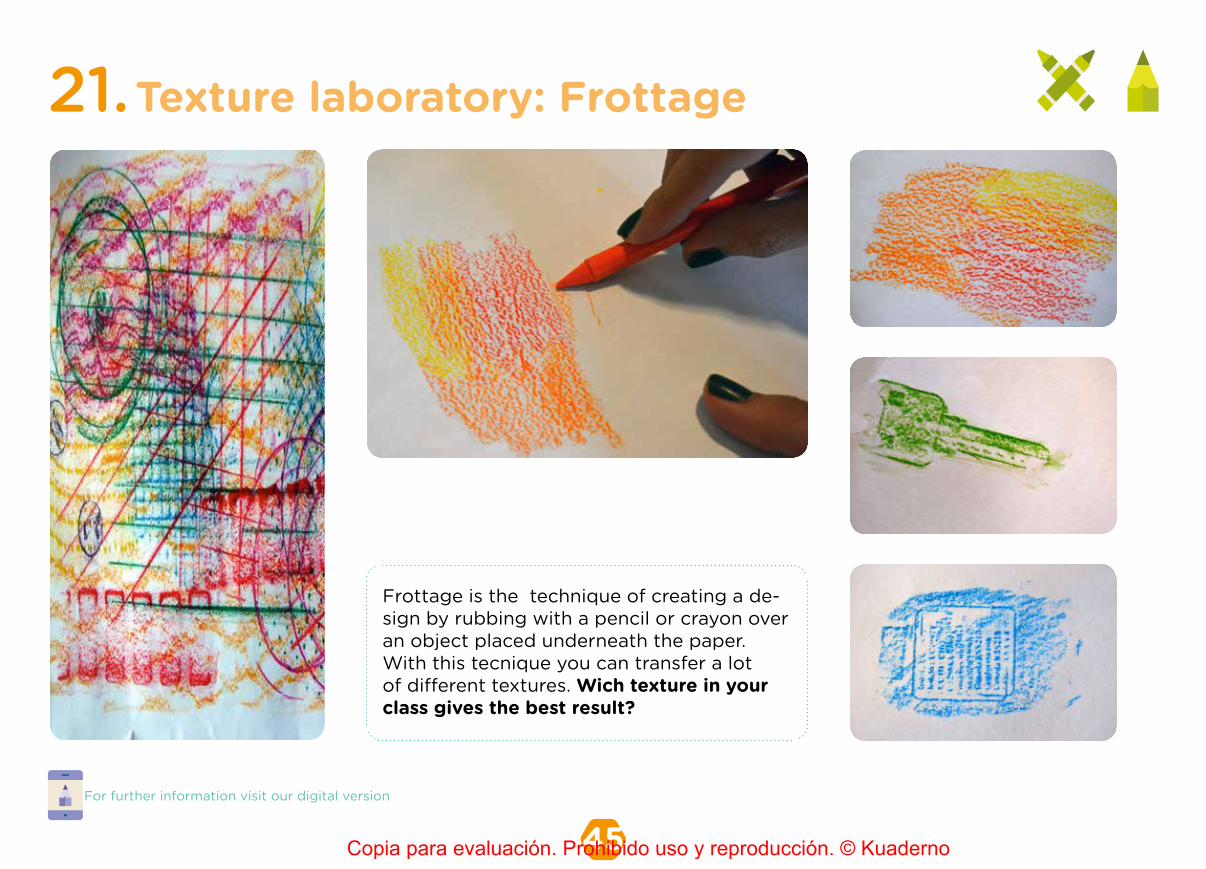
Texture laboratory: Frottage21.
For further information visit our digital version
Frottage is the technique of creating a de-sign by rubbing with a pencil or crayon over an object placed underneath the paper.With this tecnique you can transfer a lot of different textures. Wich texture in your class gives the best result?
Copia para evaluación. Prohibido uso y reproducción. © Kuaderno
46Copia para evaluación. Prohibido uso y reproducción. © Kuaderno
47
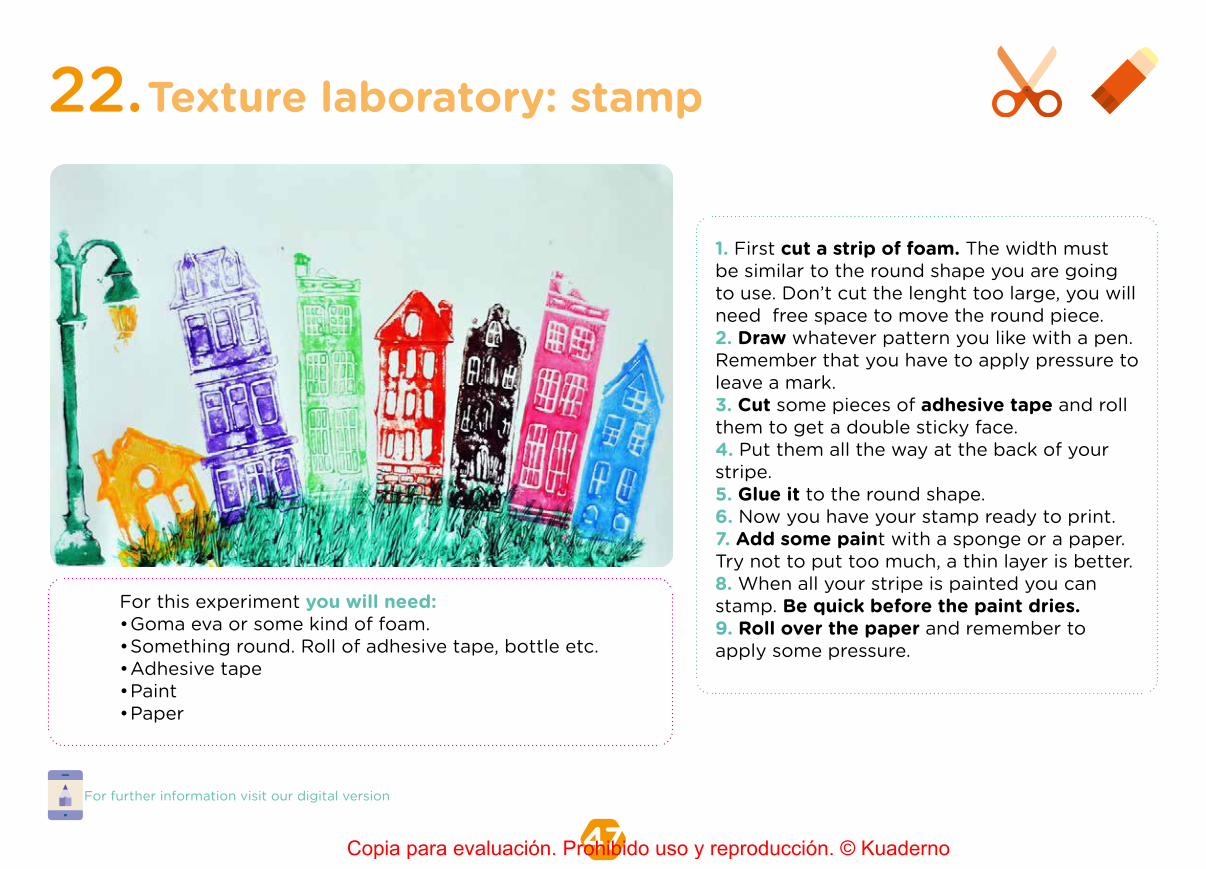
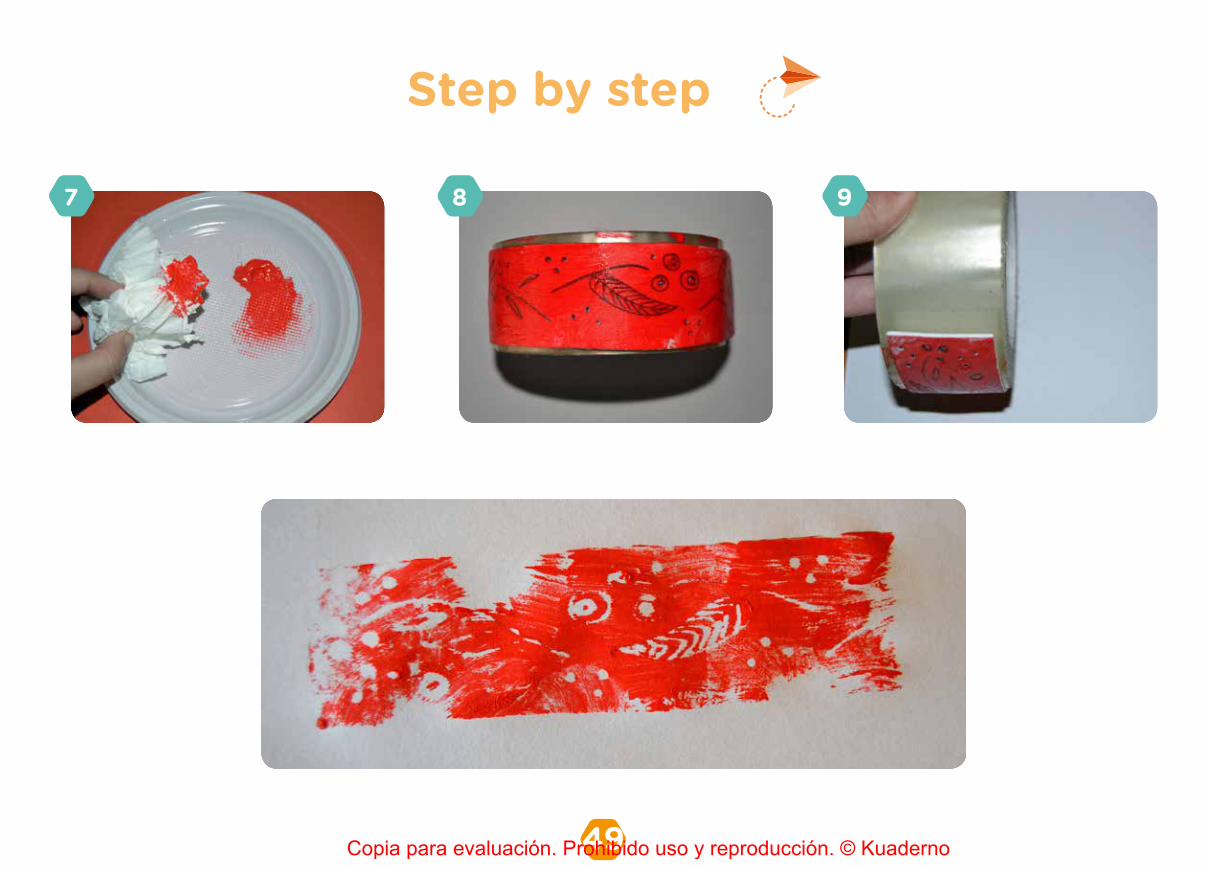
Texture laboratory: stamp 22.
For further information visit our digital version
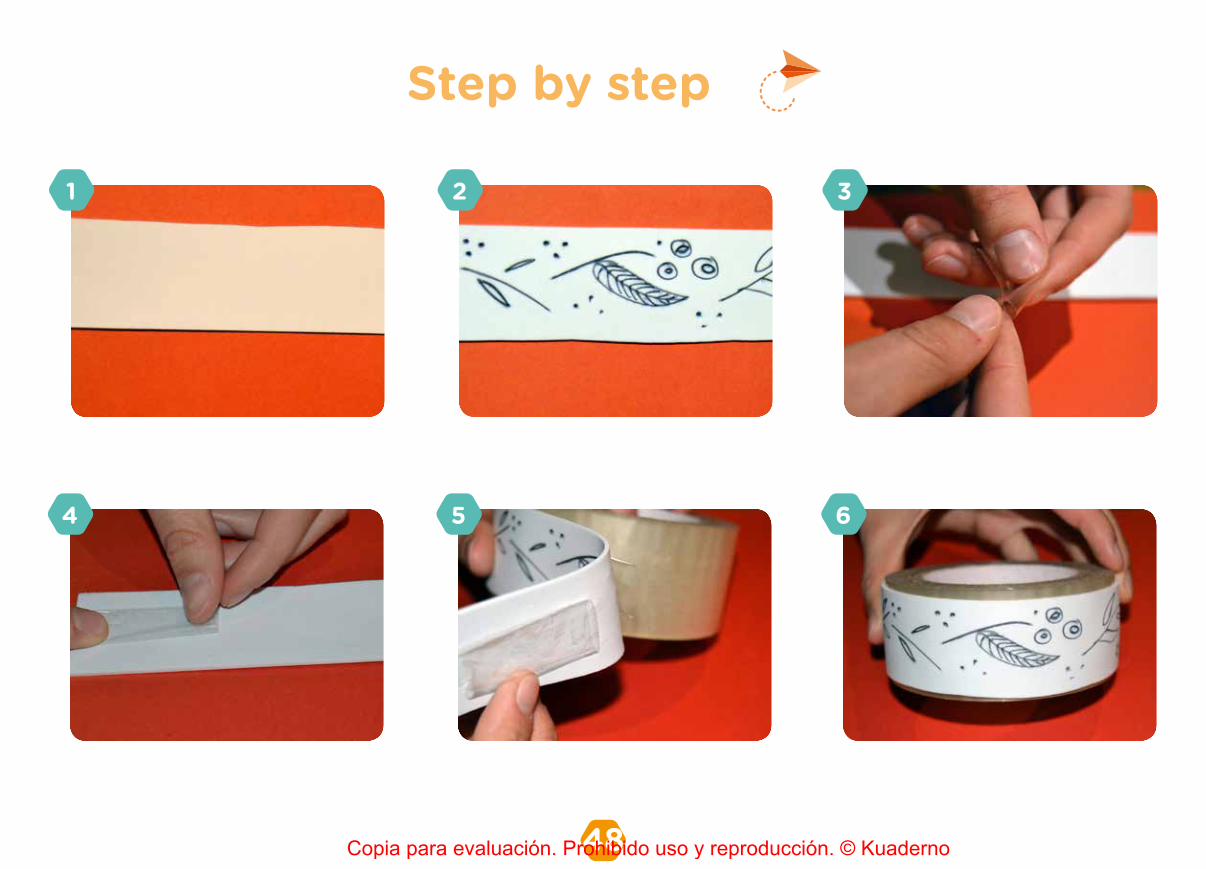
1. First cut a strip of foam. The width must be similar to the round shape you are going to use. Don’t cut the lenght too large, you will need free space to move the round piece. 2. Draw whatever pattern you like with a pen. Remember that you have to apply pressure to leave a mark.3. Cut some pieces of adhesive tape and roll them to get a double sticky face.4. Put them all the way at the back of your stripe.5. Glue it to the round shape.6. Now you have your stamp ready to print.7. Add some paint with a sponge or a paper. Try not to put too much, a thin layer is better.8. When all your stripe is painted you can stamp. Be quick before the paint dries.9. Roll over the paper and remember to apply some pressure.
For this experiment you will need:• Goma eva or some kind of foam.• Something round. Roll of adhesive tape, bottle etc.• Adhesive tape• Paint• Paper
Copia para evaluación. Prohibido uso y reproducción. © Kuaderno
48
Step by step
1 2 3
4 5 6
Copia para evaluación. Prohibido uso y reproducción. © Kuaderno
49
Step by step
7 8 9
Copia para evaluación. Prohibido uso y reproducción. © Kuaderno
50 For further information visit our digital version
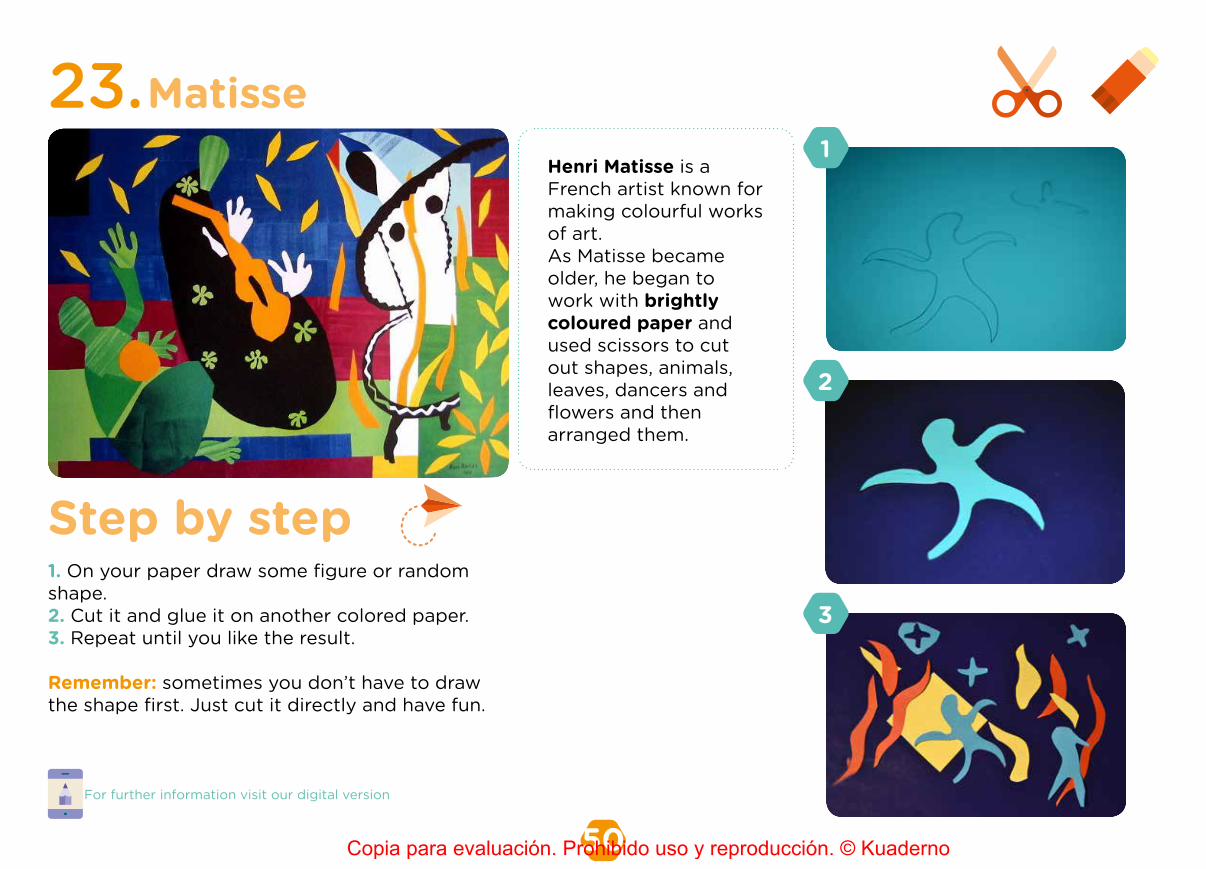
Matisse23.
Step by step
Henri Matisse is a French artist known for making colourful works of art.As Matisse became older, he began to work with brightly coloured paper and used scissors to cut out shapes, animals, leaves, dancers and flowers and then arranged them.
1
2
3
1. On your paper draw some figure or random shape.2. Cut it and glue it on another colored paper.3. Repeat until you like the result.
Remember: sometimes you don’t have to draw the shape first. Just cut it directly and have fun.
Copia para evaluación. Prohibido uso y reproducción. © Kuaderno
51 For further information visit our digital version
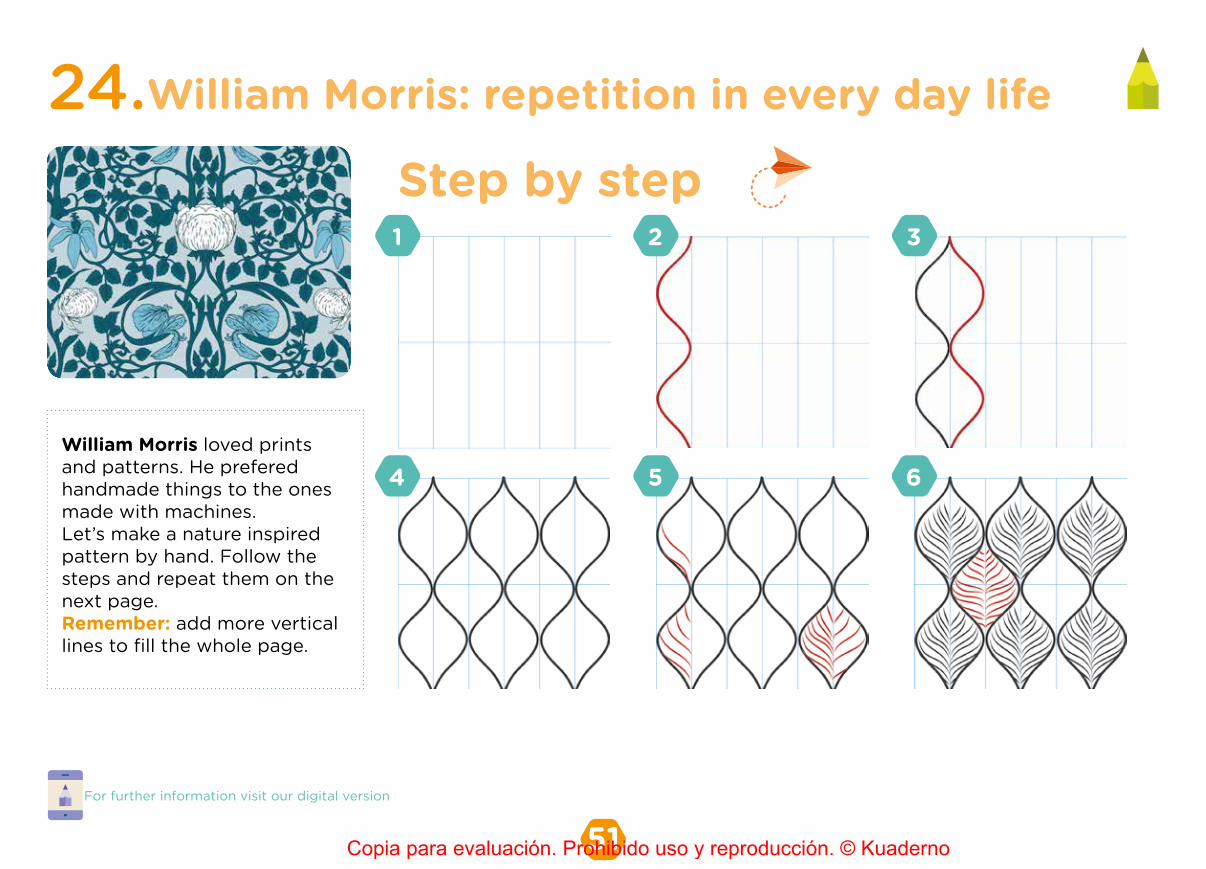
William Morris: repetition in every day life24.Step by step1 2 3
4 5 6William Morris loved prints and patterns. He prefered handmade things to the ones made with machines.Let’s make a nature inspired pattern by hand. Follow the steps and repeat them on the next page. Remember: add more vertical lines to fill the whole page.
Copia para evaluación. Prohibido uso y reproducción. © Kuaderno
52Copia para evaluación. Prohibido uso y reproducción. © Kuaderno
53
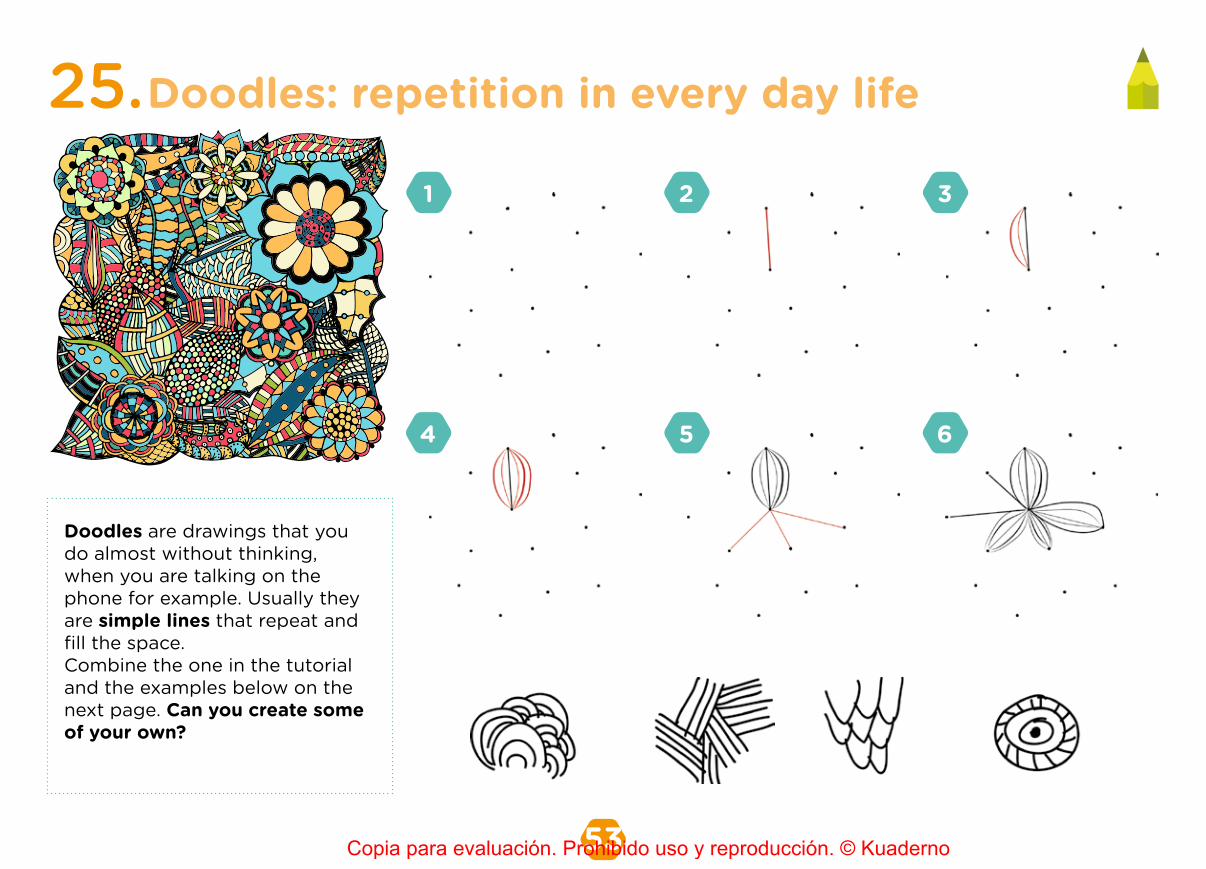
Doodles: repetition in every day life25.1 2 3
4 5 6
Doodles are drawings that you do almost without thinking, when you are talking on the phone for example. Usually they are simple lines that repeat and fill the space.Combine the one in the tutorial and the examples below on the next page. Can you create some of your own?
Copia para evaluación. Prohibido uso y reproducción. © Kuaderno
54
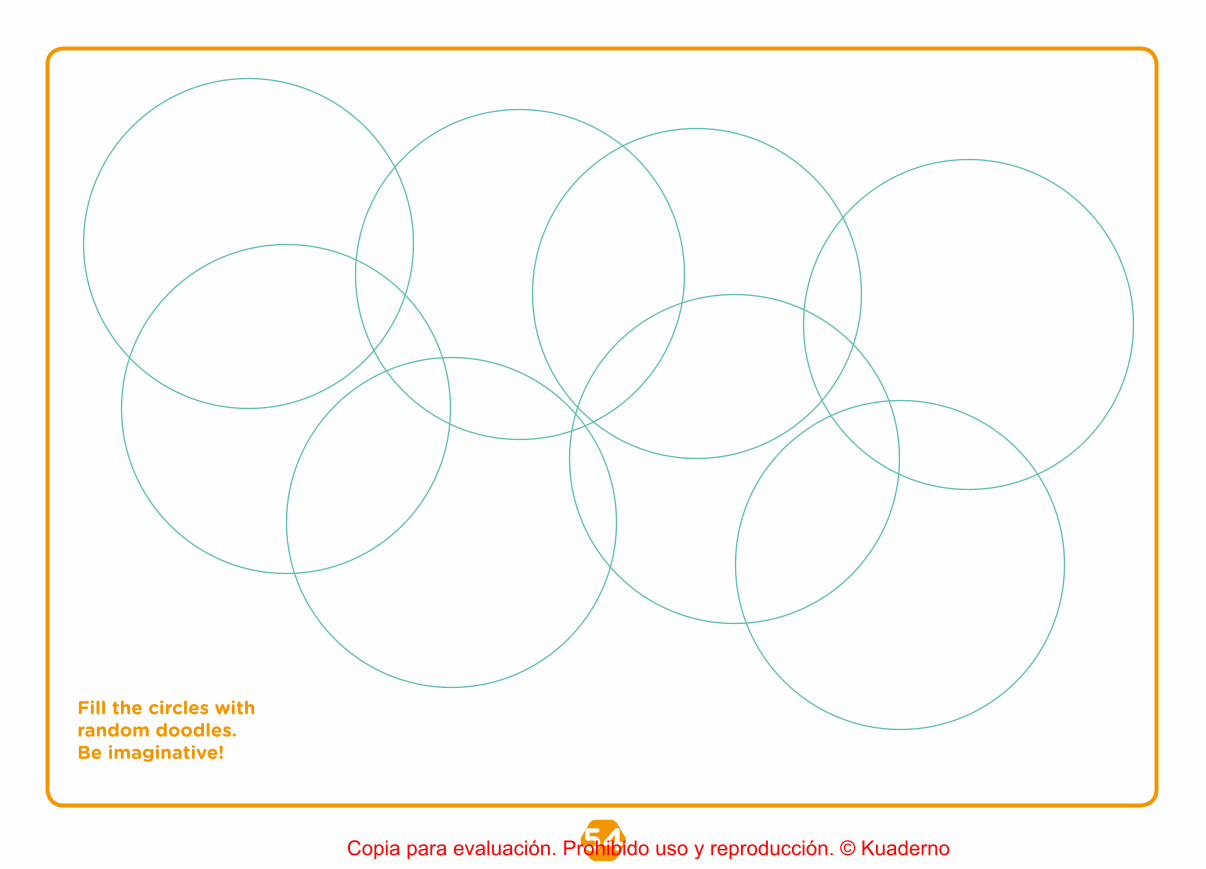
Fill the circles withrandom doodles.Be imaginative!
Copia para evaluación. Prohibido uso y reproducción. © Kuaderno
55 http://www.hellokids.com/c_31580/kids-crafts-and-activities/origami-how-to-videos/the-origami-frog
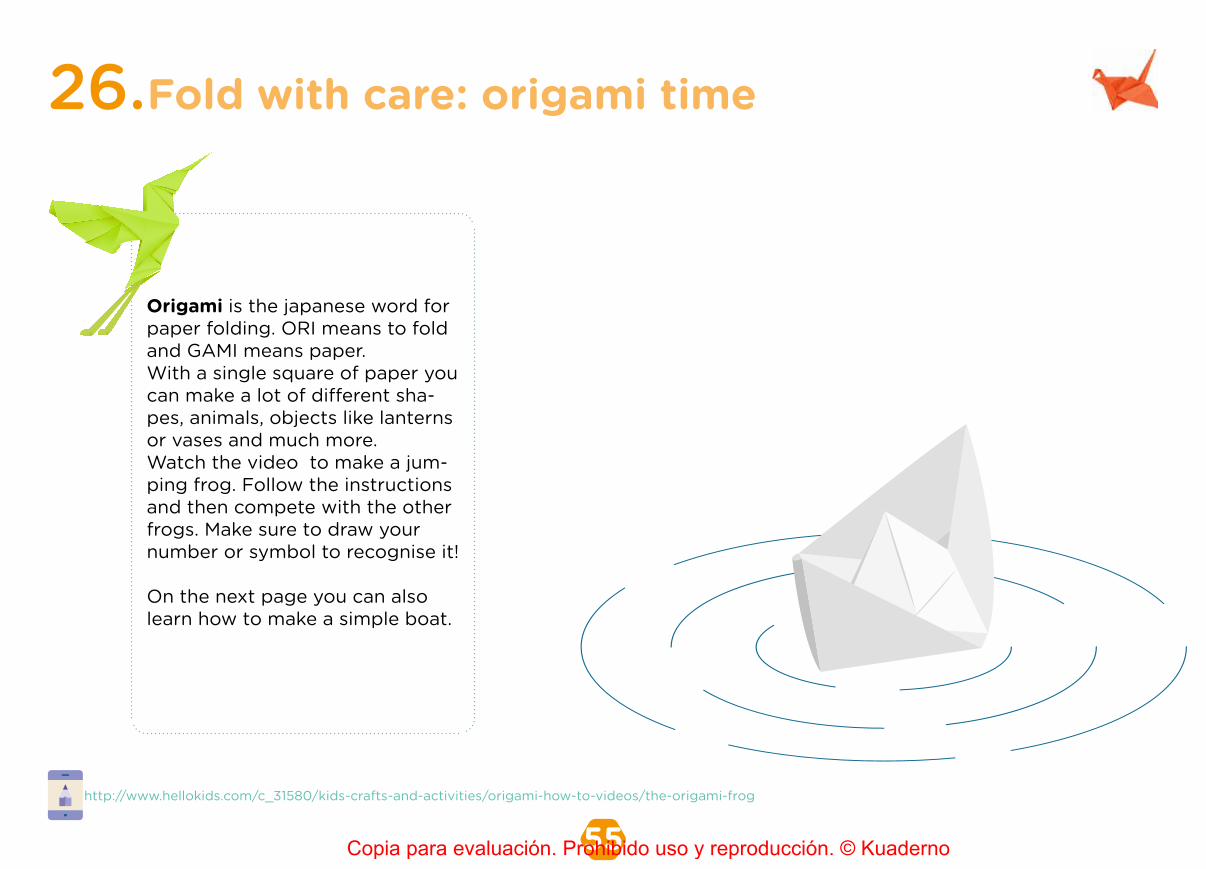
Fold with care: origami time26.
Origami is the japanese word for paper folding. ORI means to fold and GAMI means paper. With a single square of paper you can make a lot of different sha-pes, animals, objects like lanterns or vases and much more.Watch the video to make a jum-ping frog. Follow the instructions and then compete with the other frogs. Make sure to draw your number or symbol to recognise it!
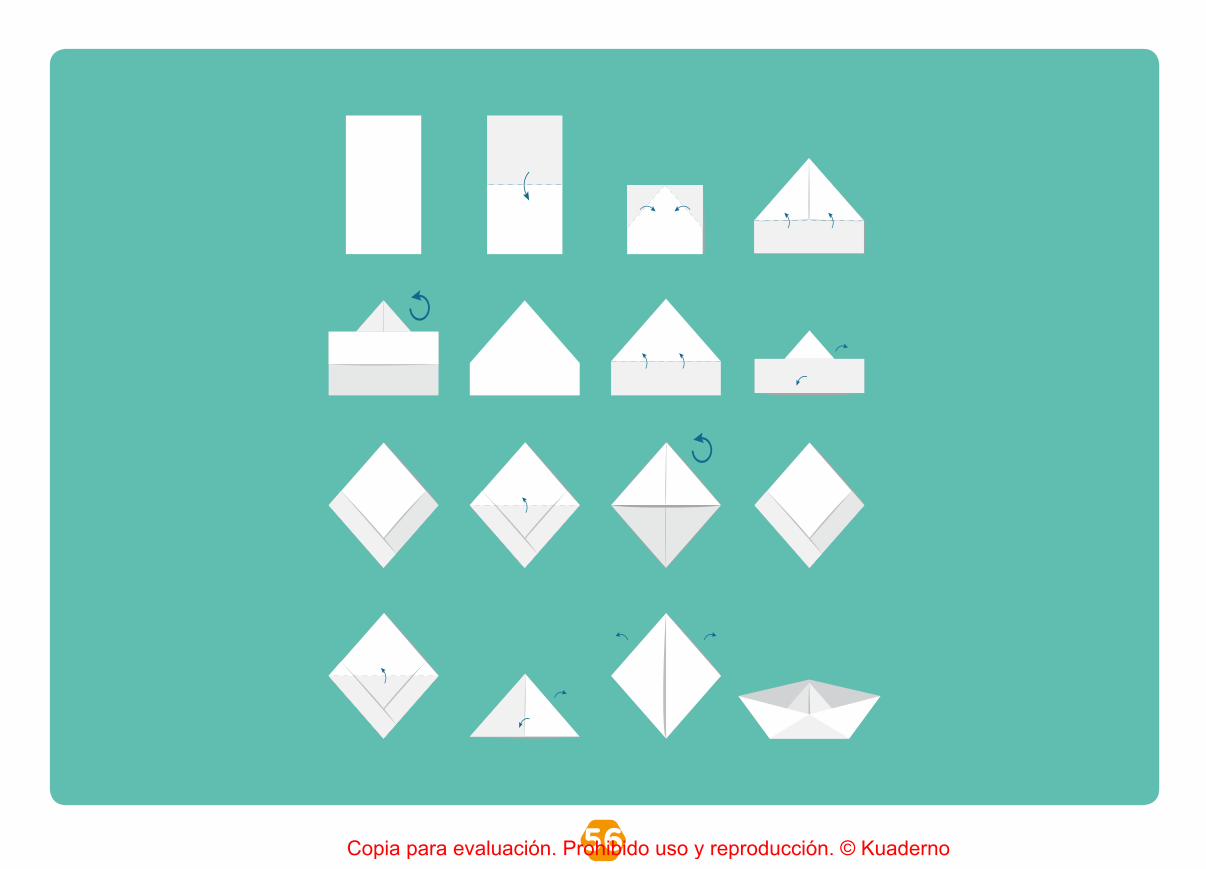
On the next page you can also learn how to make a simple boat.
Copia para evaluación. Prohibido uso y reproducción. © Kuaderno
56Copia para evaluación. Prohibido uso y reproducción. © Kuaderno
57 For further information visit our digital version
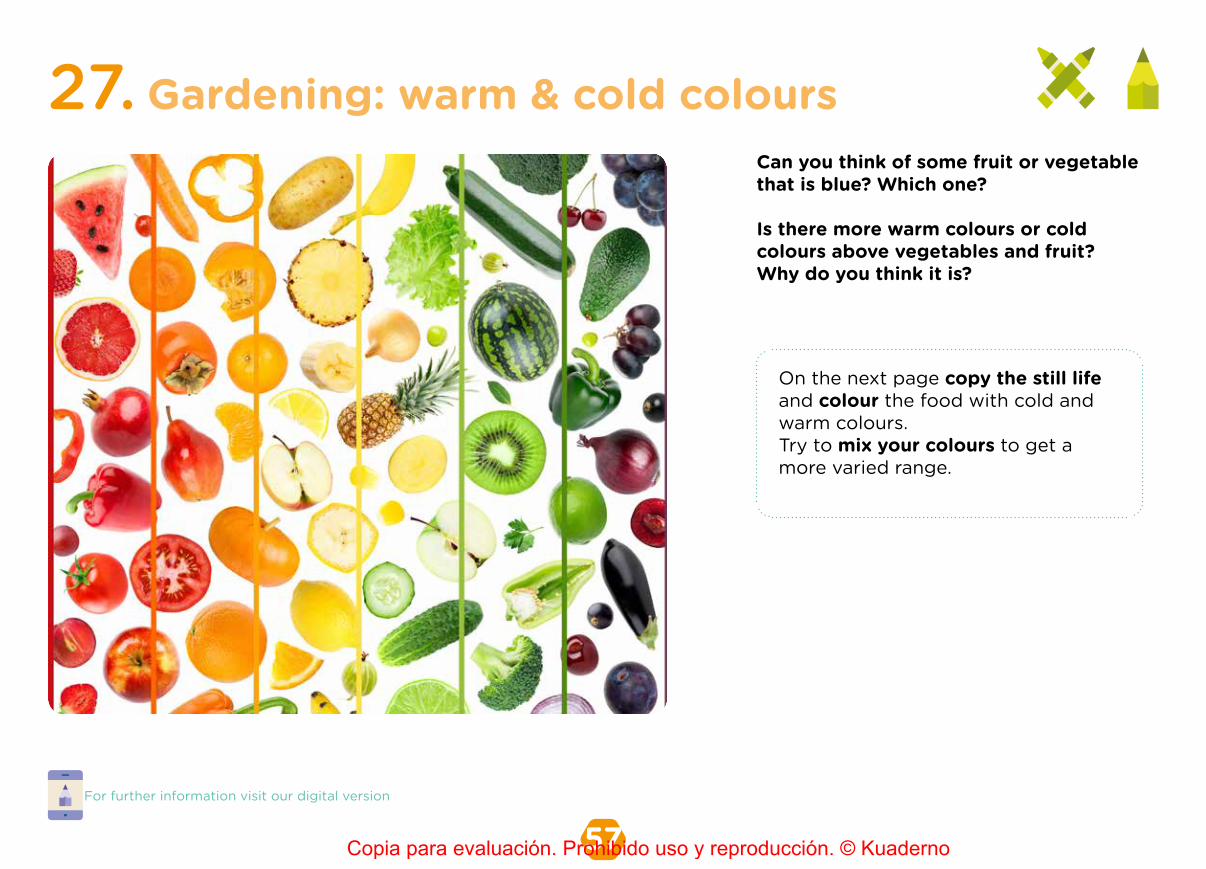
Gardening: warm & cold colours27.Can you think of some fruit or vegetable that is blue? Which one?
Is there more warm colours or cold colours above vegetables and fruit? Why do you think it is?
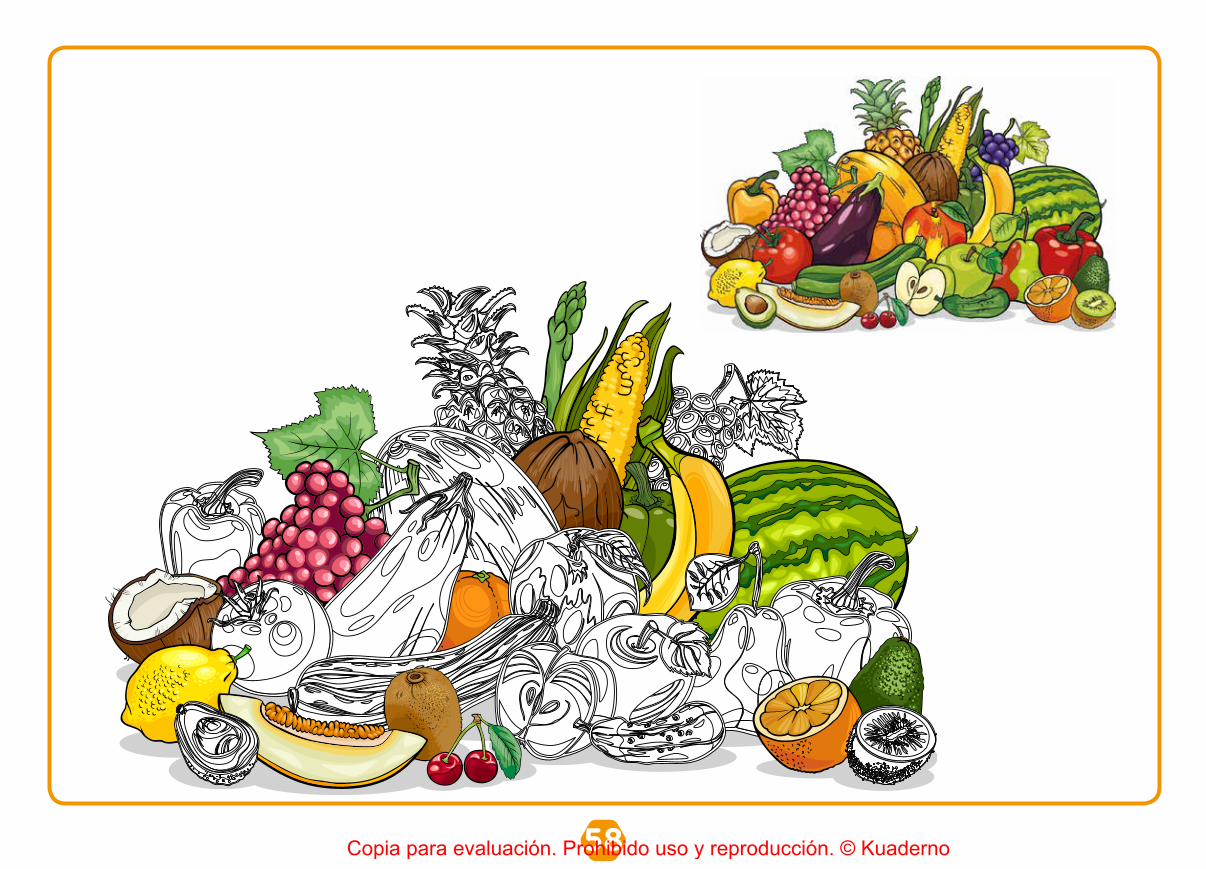
On the next page copy the still life and colour the food with cold and warm colours.Try to mix your colours to get a more varied range.
Copia para evaluación. Prohibido uso y reproducción. © Kuaderno
58Copia para evaluación. Prohibido uso y reproducción. © Kuaderno
59
Mirror mirror28.
For further information visit our digital version
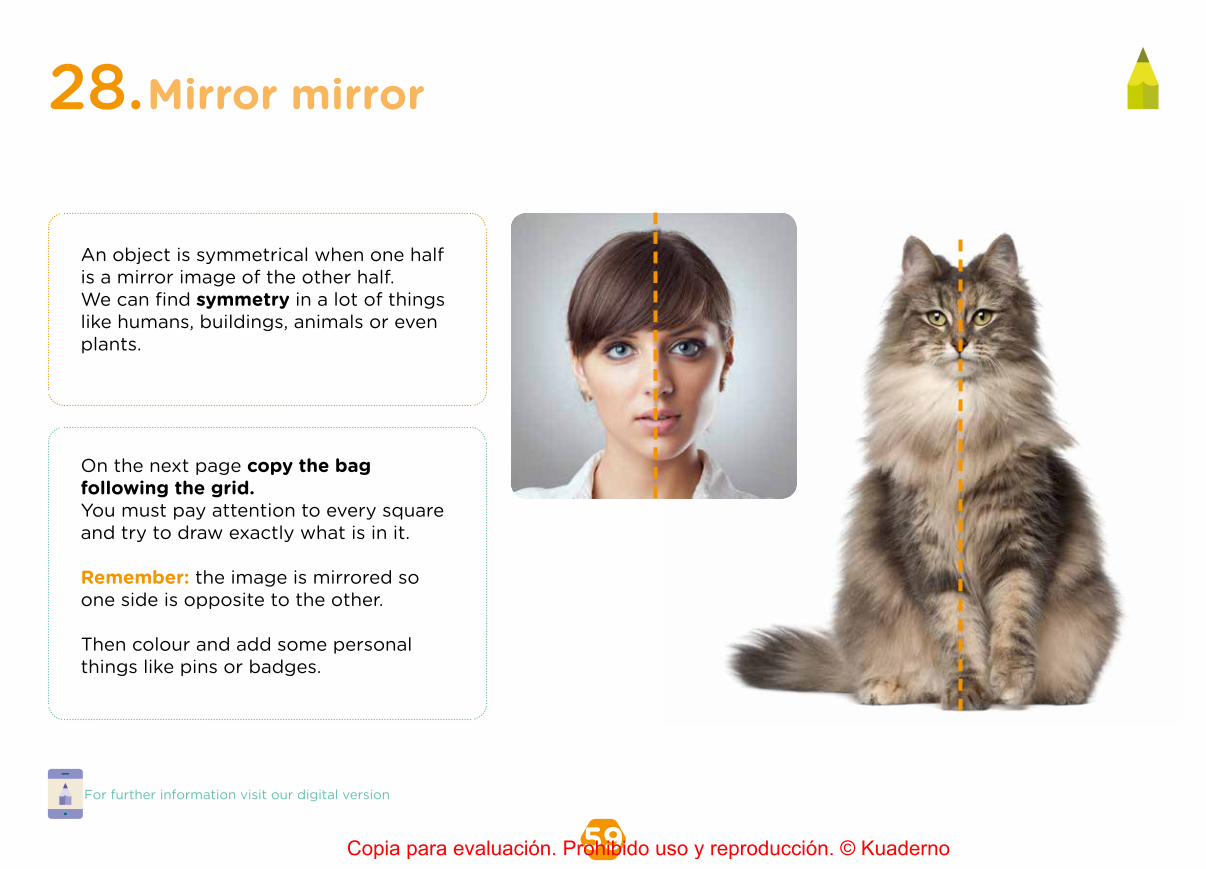
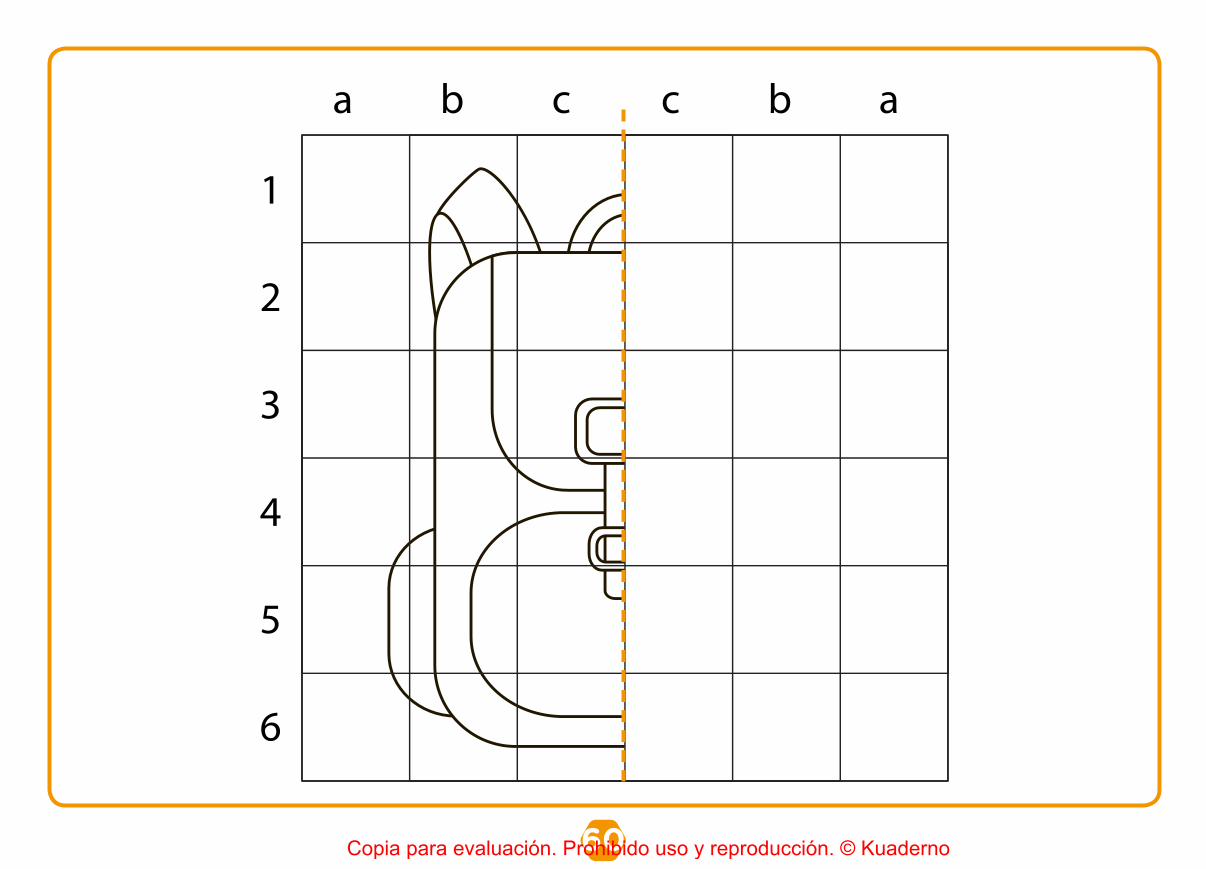
On the next page copy the bag following the grid.You must pay attention to every square and try to draw exactly what is in it.
Remember: the image is mirrored so one side is opposite to the other.
Then colour and add some personal things like pins or badges.
An object is symmetrical when one halfis a mirror image of the other half.We can find symmetry in a lot of things like humans, buildings, animals or even plants.
Copia para evaluación. Prohibido uso y reproducción. © Kuaderno
60Copia para evaluación. Prohibido uso y reproducción. © Kuaderno
61
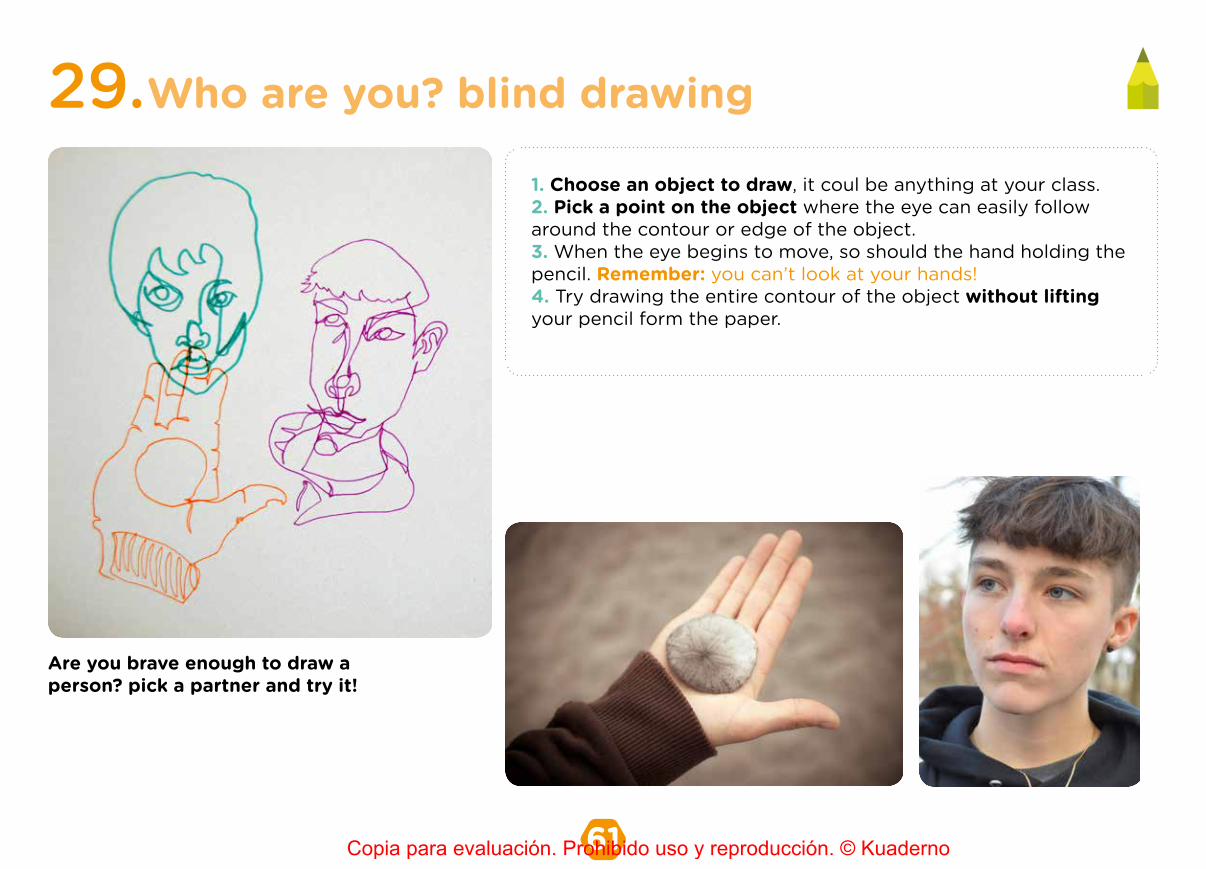
Who are you? blind drawing29.1. Choose an object to draw, it coul be anything at your class.2. Pick a point on the object where the eye can easily follow around the contour or edge of the object. 3. When the eye begins to move, so should the hand holding the pencil. Remember: you can’t look at your hands!4. Try drawing the entire contour of the object without lifting your pencil form the paper.
Are you brave enough to draw a person? pick a partner and try it!
Copia para evaluación. Prohibido uso y reproducción. © Kuaderno

62Copia para evaluación. Prohibido uso y reproducción. © Kuaderno
63 For further information visit our digital version
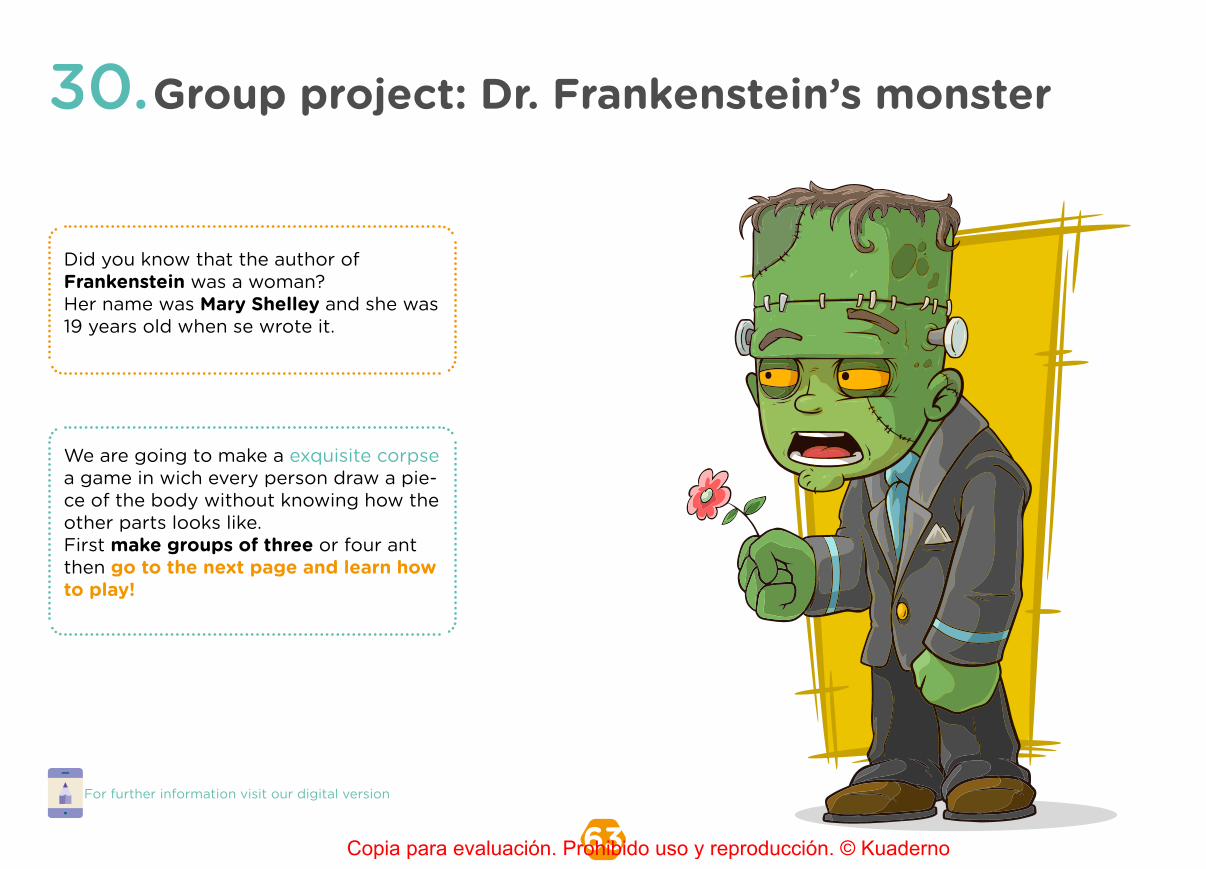
Group project: Dr. Frankenstein’s monster30.
Did you know that the author of Frankenstein was a woman?Her name was Mary Shelley and she was 19 years old when se wrote it.
We are going to make a exquisite corpsea game in wich every person draw a pie-ce of the body without knowing how the other parts looks like.First make groups of three or four ant then go to the next page and learn how to play!
Copia para evaluación. Prohibido uso y reproducción. © Kuaderno
64
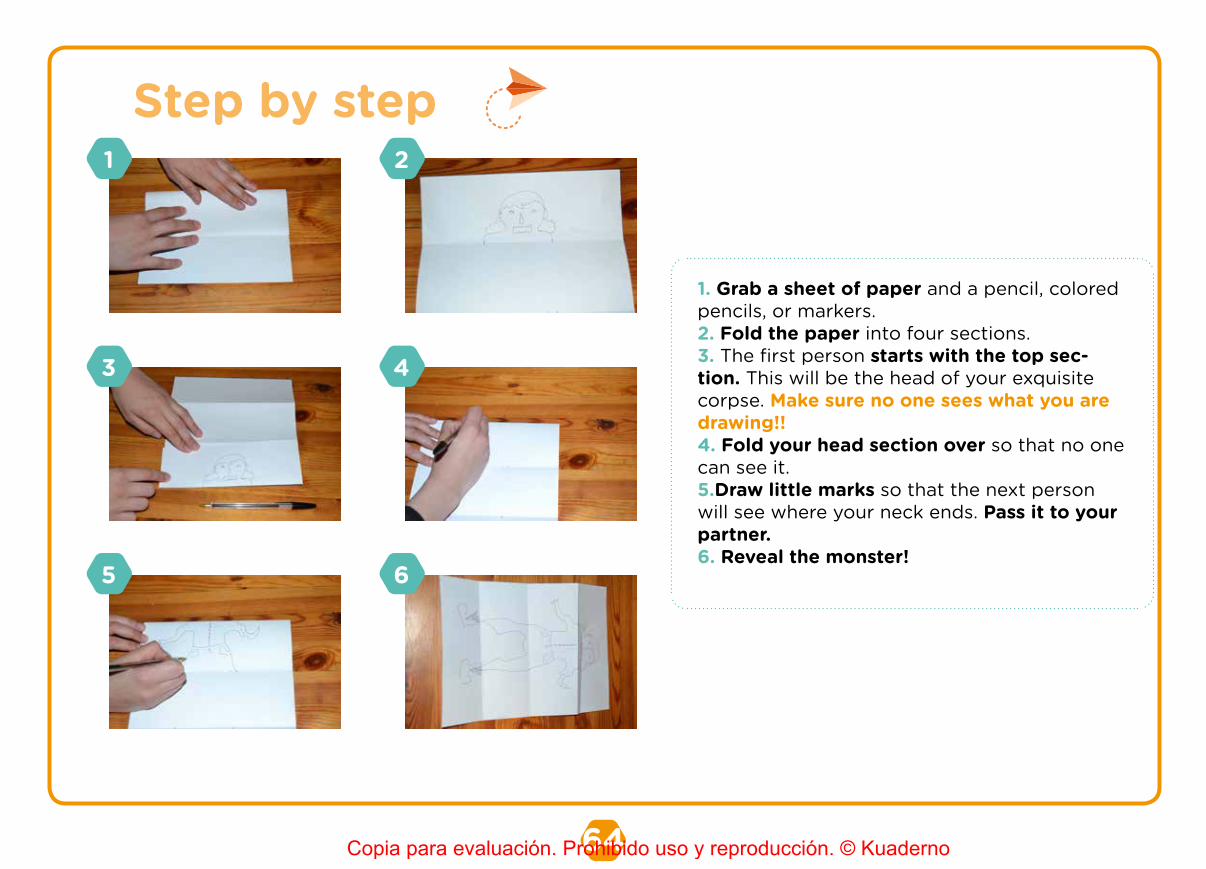
1. Grab a sheet of paper and a pencil, colored pencils, or markers.2. Fold the paper into four sections.3. The first person starts with the top sec-tion. This will be the head of your exquisite corpse. Make sure no one sees what you are drawing!!4. Fold your head section over so that no one can see it.5.Draw little marks so that the next person will see where your neck ends. Pass it to your partner.6. Reveal the monster!
Step by step1
3
5
2
4
6
Copia para evaluación. Prohibido uso y reproducción. © Kuaderno
65
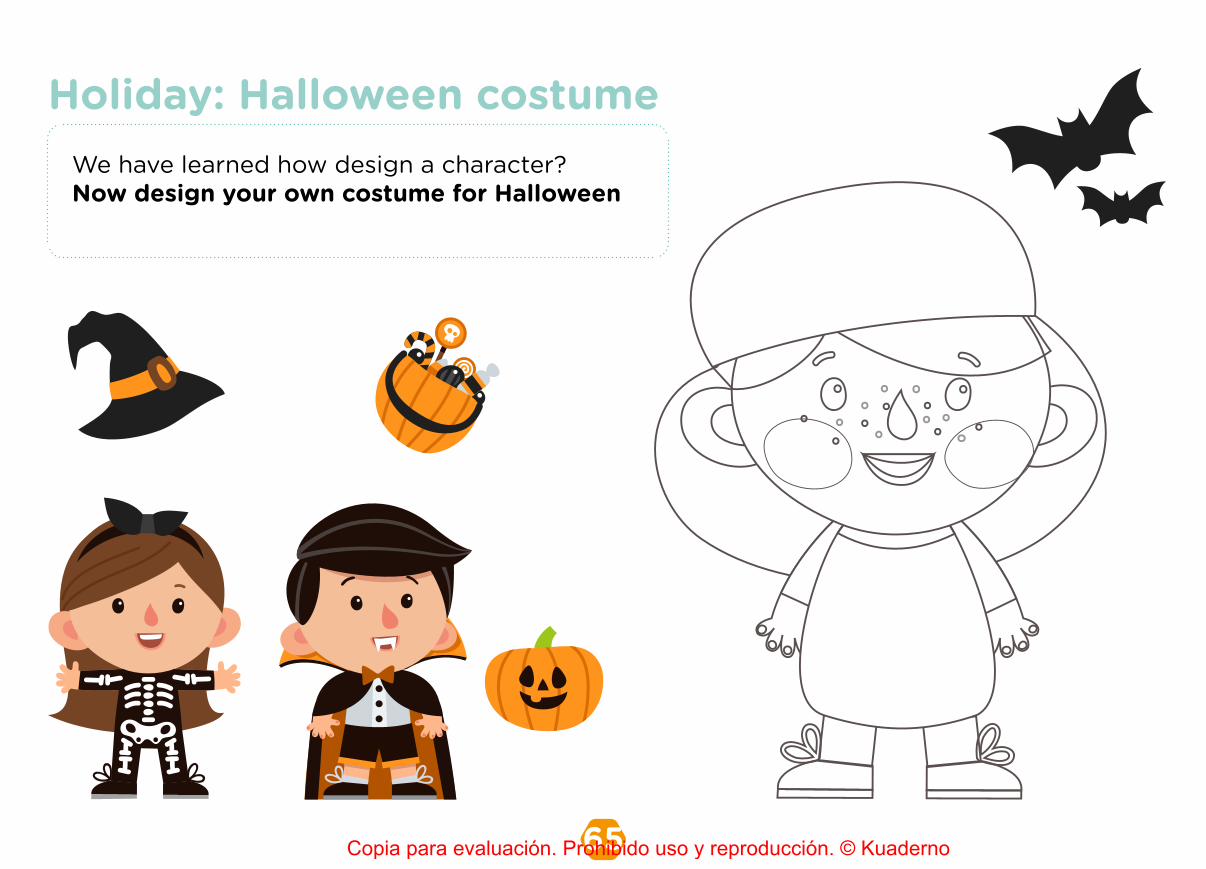
Holiday: Halloween costumeWe have learned how design a character?Now design your own costume for Halloween
Copia para evaluación. Prohibido uso y reproducción. © Kuaderno

66Copia para evaluación. Prohibido uso y reproducción. © Kuaderno
67
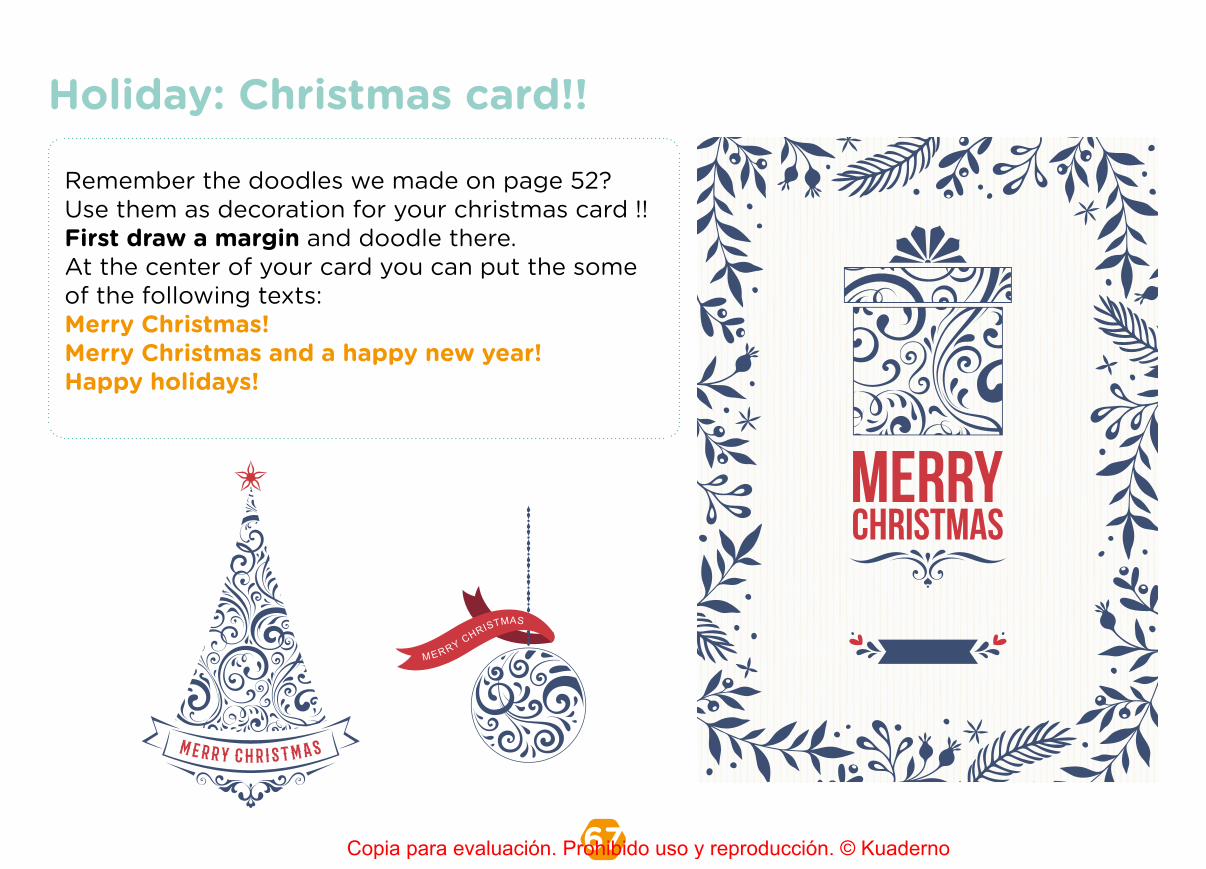
Holiday: Christmas card!!
Remember the doodles we made on page 52?Use them as decoration for your christmas card !!First draw a margin and doodle there.At the center of your card you can put the some of the following texts:Merry Christmas!Merry Christmas and a happy new year!Happy holidays!
Copia para evaluación. Prohibido uso y reproducción. © Kuaderno

68Copia para evaluación. Prohibido uso y reproducción. © Kuaderno
69
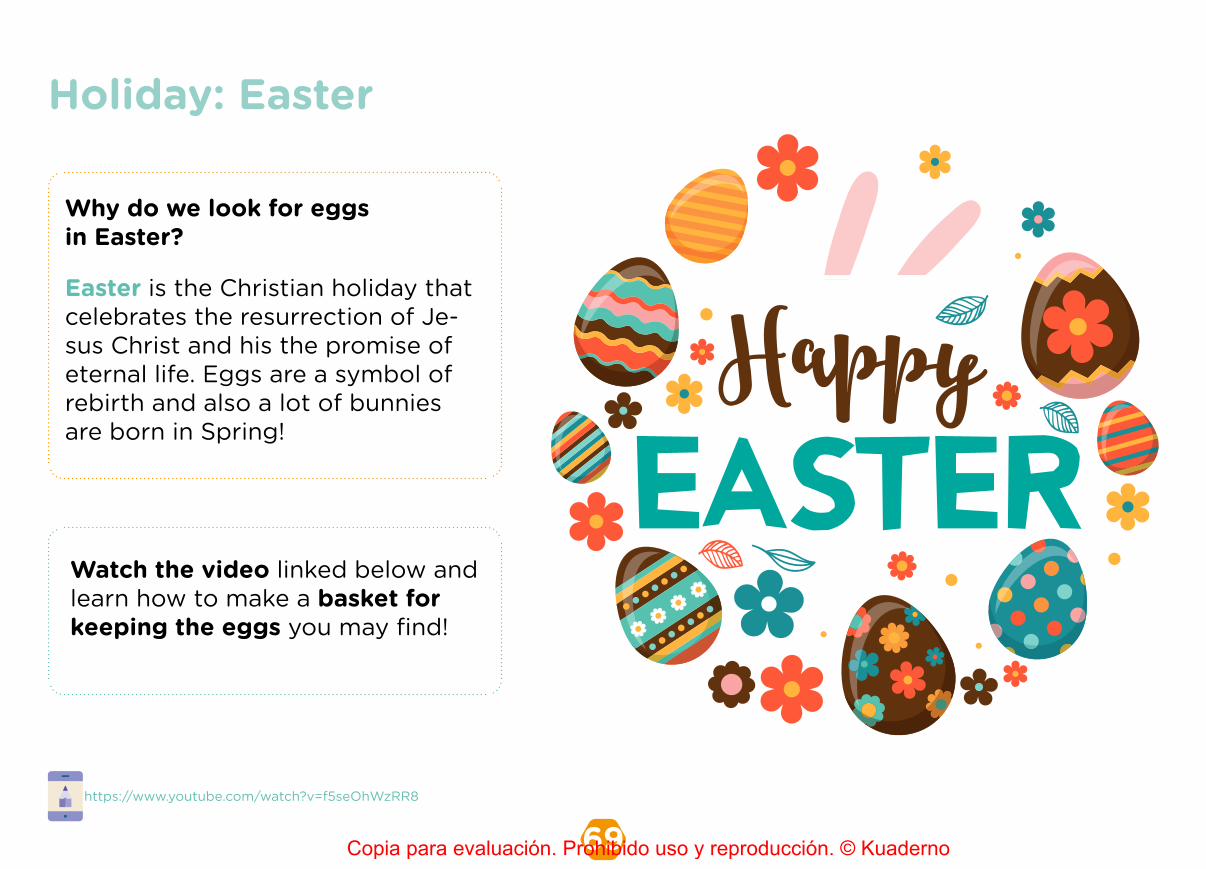
Holiday: Easter
Watch the video linked below and learn how to make a basket for keeping the eggs you may find!
Why do we look for eggs in Easter?
Easter is the Christian holiday that celebrates the resurrection of Je-sus Christ and his the promise of eternal life. Eggs are a symbol of rebirth and also a lot of bunnies are born in Spring!
https://www.youtube.com/watch?v=f5seOhWzRR8
Copia para evaluación. Prohibido uso y reproducción. © Kuaderno

70Copia para evaluación. Prohibido uso y reproducción. © Kuaderno

71
Holiday: Earth Day
Earth is our home and we have to take care of it.With this experiment we can see how the water that plants use affects them. What will happen if the water is dirty?1. Get two glasses and fill them with water. 2. Tint each of them with a colour. You can use alimetary tint, watercolour or ink.3. Wait a see what happens to the flower.Remember: if you use a white flower the colour would be brighter.
Copia para evaluación. Prohibido uso y reproducción. © Kuaderno
72Copia para evaluación. Prohibido uso y reproducción. © Kuaderno
73Copia para evaluación. Prohibido uso y reproducción. © Kuaderno
74Copia para evaluación. Prohibido uso y reproducción. © Kuaderno
7575Copia para evaluación. Prohibido uso y reproducción. © Kuaderno
767676
Arts and Crafts 4 Primaria
Edited by Kuaderno Solutions, S.L. © [email protected]
Original Title: Arts and Crafts 4 Primaria by Kuaderno
Editing team and resources: © Kuaderno Solutionstext: Althea Espejo.design: Althea Espejoedition: Althea Espejo.images and illustrations: 123rf.com,Althea Espejo, Wikimedia Commons, Chiara Maria Ferrari, (ISBN: 978-84-945963-6-0Legal Deposit: BI-1164-2017Printed in Spain / European Union
Printed on ecological paper.
Total or partial reproduction of this book or its incorporation into a computer system, or transmission in any form or by any means - electronic, mechanical, photocopying, recording or otherwise - is not permitted without the prior permission in writing of the copyright holder. The infringement of these rights may constitute intellectual property crime.
This book includes a curation of external content and online resources that are considered to be interesting for academic purposes for the student and the teacher. Neverthe-less, these external resources are not property of Kuaderno, so Kuaderno cannot guarantee their validity and continued existence, and it is not responsible for any damage due to their use.
The editors of this book have checked with rights’ owners to use their content in the book. If any content owner has not been contacted, please contact [email protected].
Copia para evaluación. Prohibido uso y reproducción. © Kuaderno