Embed Size (px)
Citation preview

Cooking Basics for KidsFirst Nations Edition
A Leaders Manual for First NationsCommunity Food Educators
Adapted with permission from “Cooking Basics For Kids. A Presentation Module forCommunity Food Advisors”, Nutrition Resource Centre, Ontario Public HealthAssociation, 2006.
First Nations & Inuit HealthOntario Region
Elizabeth Smith, RD2009

Cooking Basics for Kids, First Nations Edition, 2009
First Nations Community Food Educator Program
Table of contents
Purpose and Learning Objectives . . . . . . . . . . . . . . . . . . . . . . . . . . . . . . . . . . . . . 1
Suggested Outline . . . . . . . . . . . . . . . . . . . . . . . . . . . . . . . . . . . . . . . . . . . . . . . . . 4
Getting Ready to Cook with Kids . . . . . . . . . . . . . . . . . . . . . . . . . . . . . . . . . . . . . . 5
Background Information: What kids need to know . . . . . . . . . . . . . . . . . . . . . . . . 11
Cooking Safely with Kids . . . . . . . . . . . . . . . . . . . . . . . . . . . . . . . . . . . . . . . . . . . 13
Ready to cook! . . . . . . . . . . . . . . . . . . . . . . . . . . . . . . . . . . . . . . . . . . . . . . . . . . . 19
SESSION 1: KITCHEN SAFETY, HANDWASHING AND NO COOK RECIPES . . . . . . . . . . . 20
SESSION 2: HEALTHY EATING WITH THE FOOD GUIDE, MEASURING AND USING A BLENDER. . . . . . . . . . . . . . . . . . . . . . . . . . . . . . . . . . . . . . . . . 24
SESSION 3: START WITH BREAKFAST / USING THE MICROWAVE . . . . . . . . . . . . . . . . 29
SESSION 4: QUICK MEALS AND USING THE STOVE / ELECTRIC SKILLET . . . . . . . . . . . 32
SESSION 5: HEALTHY SNACKS / USING THE OVEN . . . . . . . . . . . . . . . . . . . . . . . . . . 35
SESSION 6: TRADITIONAL FOODS / THE BASICS OF FOOD PRESERVATION . . . . . . . . . 37
Additional Resources . . . . . . . . . . . . . . . . . . . . . . . . . . . . . . . . . . . . . . . . . . . . . . 40
Handouts
Recipes
Cooking Basics for Kids, First Nations Edition, 2009
First Nations Community Food Educator Program 1
Purpose and learning objectives:
This manual is a tool for Community Food Educators to use when they are teachingbasic cooking skills, kitchen safety and food safety to school aged children. It isdesigned to be used with small groups of children aged 5-12, and may be modifiedfor use with teens or adults as a basic learn-to-cook lesson.
A small group (less than 12 participants) is ideal so that more hands-on experienceand supervision can be provided. Inviting responsible teens or adults such as olderstudents, teachers, parents and/or elders to assist and supervise the children canbe very helpful when cooking with kids.
There are six sessions. Each session will take approximately 70-95 minutesincluding cleanup time allowing for the children to acquire some hands-on kitchenexperience.
Each session may be used as a stand-alone class or part of a series of lessons. Session 1 begins with simple no-cook recipes and safety information. Sessions 2-6involve more complex tasks and the use of different types of appliances requiringmore caution and supervision.
Each session has some activities and demonstrations which are most suitable forolder kids. Suggestions for how to modify the activities for younger cooks areincluded. The recipes are all meant for beginners and have extra explanatory stepsso the children will be able to follow at home as well.
Suggested learning objectivesT To learn how to prepare simple, low-cost snacks and small meals
using everyday foods and basic cooking utensils.
T To learn the benefits of preparing food and cooking at homeinstead of eating out or choosing vending machine snacks.
T To learn the basics of Eating Well with Canada’s Food Guide suchas food groups and serving sizes.
T To learn to use basic kitchen tools and small appliances safely.
T To learn simple cooking terminology.
T To learn to prepare and store food safely.
T To learn about traditional foods and cooking methods.
T To encourage recycling. (Recycling practice is included with therecipes to make this habit a part of everyday cooking routines).

Cooking Basics for Kids, First Nations Edition, 2009
First Nations Community Food Educator Program 2
Adapting the lesson plans for different ages and/or skill levelsThe lessons may be used with children of various ages and skill levels. All therecipes involve some tasks that a child of any age could assist with (e.g. mixingingredients with a spoon, or placing items into a bowl).
Each lesson also involves cutting and the use of knives. Leaders need to usejudgement when deciding if the children should participate in the activity or justobserve.
Please refer to page 8 for a list of age appropriate tasks and other generalprinciples needed for teaching cooking to children.
Cooking classes for community kitchensThis manual may be used to add a cooking class for kids into the work CFEs dowith community or collective kitchens as well as the Maternal Child Health Programand Early Childhood programs. Community or collective kitchens usually involve agroup of participants who meet regularly (once every 1-3 weeks) to cook batchmeals together to share among the participants. A small fee may be charged topurchase the ingredients and in return the participants receive a week or more ofmeals for their family.
More ideas to involve kids in cooking activities‘ Invite existing collective kitchen participants to bring their children.‘ Use the Cooking Basics for Kids sessions to lead separate sessions
for the children while the parents cook in their collective kitchen.‘ Use the Cooking Basics for Kids sessions with all participants (parents
and kids) and then make the recipes together.‘ Modify the collective kitchen meal plans to include some of the
Cooking Basics for Kids recipes.‘ Teach the parents and kids to use the skills in the Cooking Basics for
Kids to prepare the collective kitchen meals at home (i.e. reheat, finishcooking, etc).
‘ Use the Cooking Basics for Kids program as a starting point for acollective or community kitchen. Get the children cooking and thenask the parents to join and expand the program as a community orcollective kitchen.
‘ Partner with community garden and food box initiatives to teachCooking Basics for Kids and prepare food from the garden or foodbox.

Cooking Basics for Kids, First Nations Edition, 2009
First Nations Community Food Educator Program 3
More resources on starting up a collective or community kitchen
What’s Cooking in Dawson Creek, 2006
www.peaceriver.com
Winnipeg Cooks Together, 1993
www.winnipeghealtregion.com

Cooking Basics for Kids, First Nations Edition, 2009
First Nations Community Food Educator Program 4
Suggested Outline
Session 1: Kitchen Safety and Hand Washingi kitchen and knife safetyi food safety and hand washingi sanitizing counter tops and cooking surfacesi HANDS ON COOKING: “no cook” recipesi tasting and cleanup
Session 2: Healthy Eating with Canada’s Food Guidei review of kitchen safety and hand washingi what is healthy eating?i introduction to Eating Well with Canada’s Food Guide /First Nations, Inuit
and Métisi importance of cookingi HANDS ON COOKING: measuring dry and wet ingredients; using a
blender or food processori tasting and cleanup
Session 3: Start with Breakfasti review of kitchen safety and hand washingi microwave basicsi HANDS ON COOKING: using the microwavei tasting and cleanup
Session 4: Quick Mealsi review of kitchen safety and hand washingi quick mealsi HANDS ON COOKING: using the stove topi tasting and cleanup
Session 5: Healthy Snacksi review of kitchen safety and hand washingi healthy snacksi HANDS ON COOKING: using the oven or toaster oveni tasting and cleanup
Session 6: Traditional Foodsi review of kitchen safety and hand washingi traditional foods i basics of food preservationi HANDS ON COOKING: introduction to food preservationi tasting and cleanup
Allow 1 ½ hours for each session

Cooking Basics for Kids, First Nations Edition, 2009
First Nations Community Food Educator Program 5
Getting Ready to Cook with Kids
Before you start offering a “cooking basics for kids” course or session, take sometime to review this manual and plan.
1. Team up with other community groups who work with children.
2. Find a location for your program. If possible, the facility should‘ be convenient and familiar to your target group;
‘ have a kitchen big enough for your group, including counter top space;
‘ have kitchen equipment that works including a fridge, stove/range,and basic kitchen tools;
‘ have working sinks (at least two – one for hands and one for dishes);
‘ have room for the other educational activities; and
‘ have cleaning supplies, dish soap, and towels.
If you need to do cooking sessions in a place that does not have basic kitchensupplies, you will need to bring your own. Read over the recipes you will be usingand make sure you have all the needed equipment and utensils.
Basic kitchen tools and equipment for cooking sessions
• mixing bowls• knives and cutting
boards• mixing spoons, slotted
spoons• spatula• vegetable peeler• can opener• wire whisk• fork• cheese grater• colander / strainer• trivet / racks for cooling• hand mixer• blender and food
processor• microwave• frying pan
• saucepan• baking sheets• oven mitts• dishes (plates, bowls,
etc.)• cutlery• serving plates• containers for left
overs• paper napkins• dish soap• dish cloth and tea
towels• paper towels• soap-free hand
washing solution (e.g. Purell™)• garbage bags
• sanitizing spray /bleach solution

Cooking Basics for Kids, First Nations Edition, 2009
First Nations Community Food Educator Program 6
3. Know your ingredients and choose recipes that suit your group /community. Iron, folate, calcium and fibre are nutrients low in the diets of some children. Whilethe kids are cooking, be prepared to talk about the nutrients provided by the foodsthey are using. When cooking with traditional foods talk about the history of thefood to your community and emphasize what nutrients it contributes to the diet.
Try to chose foods that are available in your home communities, seasonallygrown, locally available or available from the Food Mail Program.
Remember, a cooking lesson means that food supplies must be purchased. Makesure this is arranged before the lesson including who is paying for the supplies andwhat is to be done with the leftovers.
4. Food allergiesFood allergies can be serious and life threatening. Make sure to find out from theparents, caregivers or teachers, if there are any food allergies among theparticipants. It is a good idea to ask in advance and again at the beginning of thelesson. If you are the organizer, check with each participant and their parent orguardian during registration. Avoid using any ingredients that a participant isallergic to (e.g. peanuts, nuts, eggs, etc.).
5. Age appropriate tasks for childrenSupervision is the key to cooking successfully with kids. Children develop cookingskills at different rates, so it’s important to have an adult introduce children to theskills that match their ability level.

Cooking Basics for Kids, First Nations Edition, 2009
First Nations Community Food Educator Program 7
Age Range Appropriate Tasks
most 5 - 6 year olds i scrub and wash vegetable and fruiti tear lettuce to make saladi add ingredients to bowl and mixi add dry ingredients to moist ingredientsi help measure and stir ingredientsi help pour batter into baking dishi arrange food on a serving plate
most 7 - 8 year olds i all of the above, plusi fill and level measuring spoons and cups i use a microwave oven with supervisioni follow the steps in a recipe with adult guidance
except placing items in and taking them out ofhot ovens
most 9 - 10 year olds i all of the above, plusi read a recipe aloud (some younger kids may be
able to do this but do not assume)i use a can opener i use a grater to shred cheese or carrots i use a vegetable peeler (a flat handle style)i use a knife with supervisioni prepare a simple recipe with few ingredients
independently
most 11 - 12 year olds i all of the above, plusi follow a recipe without helpi use a blenderi use an oven or stove
Remember:
T Most kids learn best by doing; whenever possible, let them try a task on theirown.
T Supervise them while using knives and other sharp tools (graters, peelers,blenders, etc.) and when using the stove or oven.
T It is a good idea to review safety tips at each session.

Cooking Basics for Kids, First Nations Edition, 2009
First Nations Community Food Educator Program 8
6. The language of cooking
The words that describe all the ways to prepare and cook foods in recipes may notbe familiar to all of your participants. The recipes have more detail included to helpthe kids learn what the various cooking terms mean. Some kitchen utensils andtools may not be familiar to the kids or be called something else in their home. Make sure the kids know what tools you are referring to and what they arecommonly called. One idea is to go through your equipment bin and find out whatthe kids think the utensils are called, providing them with the more common namewhen necessary.
Is this a colander, strainer, drainer or space helmet?

Cooking Basics for Kids, First Nations Edition, 2009
First Nations Community Food Educator Program 9
Glossary of basic cooking terms
Bake to cook something in the oven using heat from thebottom.
Batter a mixture made from ingredients like sugar, eggs,flour and water that is used to make cakes, cookiesand pancakes.
Beat to mix hard with a spoon, fork, whisk or electricmixer.
Blend to mix foods together until smooth.Boil to cook in a liquid until bubbles appear or until a
liquid reaches its boiling point (water boils at 100degrees Celsius / 212 degrees Fahrenheit). Watercannot get hotter than boiling; it can only make steamfaster.
Broil to cook food under the broiler of an oven where theheat source is above the food.
Brown to cook at low or medium heat until food turns brown.Chill to refrigerate food until it is cold.Chop to cut food into small pieces with a knife, blender or
food processor.Cool to let food sit at room temperature until it is no longer
hot.Cream to mix ingredients like sugar, butter and eggs
together until they are smooth and creamy.Dice to chop food into small squares (like dice), even
sized pieces.Drain to pour off a liquid in which the food has been cooked
or stored.Drizzle to sprinkle drops of liquid, like chocolate syrup or an
icing lightly over the top of something like cookies ora cake.
Fold to gently combine ingredients together from top tobottom until they are just mixed together.
Grate to shred food into tiny pieces with a shredder, blender orfood processor.
Grease to rub a pan or a dish with butter, margarine or oil sofood cooked on or in the pan won’t stick.
Cooking Basics for Kids, First Nations Edition, 2009
First Nations Community Food Educator Program 10
Knead to fold, press and turn dough to make it the right consistency.Mince to cut food into very small pieces.Mix to stir two or more ingredients together until they are
evenly combined.Preheat to turn the oven on to the desired temperature and let
it heat up before using for cooking.Puree to mix in a blender or food processor until the food is
smooth and has the consistency of apple sauce or amilkshake.
Saute to cook food on the stove top in a skillet with a littleliquid or oil.
Simmer to cook food over low heat until the food almost boilsor if the food has been heated to boiling, continue tocook over low heat so that it barely boils.
Slice to cut food into evenly sized pieces.Stir to continuously mix food with a spoon.Stir-fry to cook food on the stove top in a very hot pan while
stirring constantly.Steam to put food over a pan of boiling water so the steam
cooks it.Whip to beat rapidly with a whisk, electric mixer or
eggbeater.
7. Involve parents, guardians and eldersParents and other adults who live with the children can be involved in the learningprocess if they encourage and allow the children to use their new skills whencooking at home. Talk to the parents and the other adults and/or send a letterhome. A sample letter is enclosed in the Handout Section.
Invite the parents other adults and elders who live with the children to be involvedwith the cooking class. Help with supervision can make the classes run moresmoothly and may also encourage the families to use their newly learned cookingskills at home, together!
8. Allow enough time!Cooking lessons especially cooking lessons for kids take a lot of time andpreparation. Allow at least 2 hours per session plus additional time for shoppingand set-up.

Cooking Basics for Kids, First Nations Edition, 2009
First Nations Community Food Educator Program 11
Background Information: What kids need to know
Healthy eating: “everyday” vs “sometime” foodsHealthy eating is not just what you eat at one meal or in one day. Healthy eating ismaking healthy food choices MOST of the time with the occasional treats orsplurges. “Sometimes” foods are foods that do not fit into the food groups of EatingWell with Canada’s Food Guide and do not provide the body with many nutrients. Candy, pop, potato chips, donut, and chocolate are “sometimes” foods becausethey don’t supply nutrients that our bodies need to grow and develop at our best.
“Everyday” foods are foods that have a lot of nutrients and fit into one, some or allof the food groups of Eating Well with Canada’s Food Guide. Our bodies needabout 40 nutrients every day. A nutrient may be a carbohydrate, protein, fat,vitamin, mineral or water. The food groups of Eating Well with Canada’s FoodGuide are set up to make sure that we know what foods to eat to get thesenutrients. Eating these foods at most meals and snacks is what is called healthyeating. Eating healthy food promotes achievement. Kids who eat well do better atplay and at school.
Should kids cook?Kids should cook so that they can make good choices about how to fuel their bodiesas they grow and as adults. Teaching kids to cook fosters self-reliance and goodhealth.
Kids who don’t know how to cook often rely on convenience foods and fast foodsthat are available to them every where they go: at school, at the local arena,convenience stores and at the movie theatre. Foods from vending machines or fastfood outlets usually do not have a lot of nutrients other than fat, sugar and caloriesbut they are chosen because they are easy to get and easy to eat.
Teaching kids to make their own meals and snacks helps them develop life longskills. Learning about healthy eating and how to cook healthy meals and snackscan help them make better choices from the local stores while giving themalternatives to the vending machines and snack bars around them.
Learning to cook is a lot of fun and it equips kids and their families with the toolsthey need to prepare and eat healthy foods without spending a lot of money. It helpsthem feel good about themselves and their decisions. When we involve elders andtraditional foods in the sessions, learning to cook also becomes a way of sharingand preserving traditions and strengthening community bonds.

Cooking Basics for Kids, First Nations Edition, 2009
First Nations Community Food Educator Program 12
Key Nutrient What it does Where you find it (by Food Group)Vegetablesand Fruits
GrainProducts
Milk andAlternatives
Meat andAlternatives
Protein -builds and repairs body tissue, including muscles,bones and blood-makes antibodies andthe blood componentswhich fight infection
T T
Fat -concentrated energysource (9 calories pergram)-helps you feel full-provides essential fattyacids and carries fat-soluble vitamins
T T
Carbohydrates -major source of energy(4 calories per gram) T T T
Fibre - promotes bowel function - helps you feel full T T
Thiamin -helps body tissues useenergy - promotes a normalappetite-keeps the nervoussystem healthy
T T
Riboflavin -helps body tissues useenergy-promotes healthy skin,eyes and vision
T T T
Niacin -helps body tissues useenergy-promotes normal nervefunction
T T
Vitamin B6 -assists in protein,carbohydrate and fatmetabolism-promotes normal nervefunction
T T
Folate -aids in red blood cellformation and proteinmetabolism
T T
Vitamin C -enhances iron absorptionand utilization-strengthens connectivetissue-promotes normal nervefunction
T

Cooking Basics for Kids, First Nations Edition, 2009
First Nations Community Food Educator Program 13
Key Nutrient What it does Where you find it (by Food Group)Vegetablesand Fruits
GrainProducts
Milk andAlternatives
Meat andAlternatives
Vitamin A -promotes healthy eyesand skin T T
Vitamin D -regulates calciumabsorption- promotes healthy cellfunctions
T
Calcium -builds and maintainsstrong bones and teeth-promotes normal bloodclotting-promotes normal nervefunction
T
Iron - keeps red blood cellshealthy- helps fight off infection
T T

Cooking Basics for Kids, First Nations Edition, 2009
First Nations Community Food Educator Program 14
Cooking safely with kidsLearning to cook safely includes:
• avoiding accidental cuts • avoiding burns • avoiding food-borne illness
Basic food handling and kitchen safety skills should be reviewed in every class.
• general kitchen rules • proper use of knives • hand washing • keeping hair restrained • sanitizing surfaces • safe food handling (cook / chill / separate) • tasting and sampling food safety
1. General kitchen safety rules:Remind the kids to always check with an adult before starting to cook and ask forhelp to use any kitchen appliances, especially the stove or oven.
Other rules to review with kids are:
• Wash hands before handling food, during cooking and after.• Wear an apron, cooking can be messy.• Keep your mouth away from food during preparation.• Use sharp knives, vegetable peelers and graters with care. Don’t
rush.• Never put your hand inside a blender. The blades are very sharp.• Use dry hands to plug in or unplug electrical appliances.• Hold the plug, not the cord when unplugging.• Don’t leave a pot on the stove unattended, it could boil over, boil dry
and start a fire.• Avoid hot steam coming from boiling water, it could scald you.• Point the handle of a frying pan or pot inwards or toward the back of
the stove top. This way you won’t catch it on your clothes or knock itover.
• Always turn off the stove or oven after using.• Always use dry oven mitts to lift food in and out of the oven.

Cooking Basics for Kids, First Nations Edition, 2009
First Nations Community Food Educator Program 15
2. Knife safetyAn adult should always supervise children using knives. Use the correct size knifefor the job and make sure the child can hold the knife properly. A smaller paringknife is good for cutting fruit and vegetables and a larger serrated knife for bread.
An adult should cut up all meat and poultry. Serrated knifes are more stable whencutting; straight-edged knives cut through quickly and tend to cause more accidents. Even adults can cut themselves so review knife safety with all participants.
Knife safety• Always use a cutting board. Never peel or cut vegetables in the palm
of your hand.• Cut DOWN and AWAY from you in case the knife slips.• Keep fingers curled in tight, away from the knife blade when holding
the food you are cutting.• Put dirty knives beside the sink not in the sink with the other dirty
dishes. • Wash knives one at a time and put them away.
3. HandwashingThe importance of handwashing while cooking or working with food cannot beoverstated. Everyone must wash their hands before starting food preparation andcontinue to wash hands throughout the cooking process (and after using thewashroom, coughing or sneezing) to prevent the spread of germs.
Start every session with hand washing as the first thing the kids do when enteringthe room and again before they start cooking. Talk about using hand sanitizerswhen at events or places where clean running water is not available. Talk abouthow to make water safe for washing if it is a concern for your community. Refer tothe CFE Resource Manual section on water safety for more information.
Session 1 has more details on hand washing and how to demonstrate.

Cooking Basics for Kids, First Nations Edition, 2009
First Nations Community Food Educator Program 16
Notes on hand sanitizers
Alcohol based hand sanitizers, containing 60-90% alcohol (rubbing alcohol). They areexcellent disinfectants. They can be used after washing hands or when soap and water arenot available. Hand sanitizers without alcohol are not recommended.
Hand sanitizers work best on clean skin. If your hands are visibly soiled, you should washfirst with soap and water before applying a hand sanitizer.
Follow these steps to clean your hands with alcohol-based hand sanitizers:
• Apply enough sanitizer to open palms (about the size of a dime orapproximately ½ teaspoon).
• Rub hands together, palm-to-palm.
• Rub in between and around fingers.
• Rub back of each hand with the palm of the other hand.
• Rub fingertips of each hand in the opposite palm.
• Rub each thumb clasped in the opposite palm.
• Rub each wrist in opposite palm.
• Keep rubbing hands until dry (approximately 15 seconds). Paper towels arenot needed.
Are alcohol-based hand sanitizers safe to use?
• They are very safe. The alcohol content in the hand sanitizer completelyevaporates after rubbing hands for 15 seconds.
• Hand sanitizers may be used on the hands of children (over one year).
• Make sure children do not eat or drink the sanitizer, or touch their eyes, noseor mouth while the sanitizer is still wet. A child can safely touch their eyes,nose or mouth when his/her hands are dry.
• Frequent use of hand sanitizers can cause drying of the skin. Apply handlotion after cleaning your hands to help prevent drying.

Cooking Basics for Kids, First Nations Edition, 2009
First Nations Community Food Educator Program 17
4. Keep hair restrainedNo one wants to find a hair in their food. Long hair is also a safety concern to getcaught in mixers or singed by hot ovens / elements / open flames. When cooking ina group, tie back long hair and cover heads with a clean ball cap or hairnet! Athome, remind the kids to keep hair tied away from their faces.
5. Sanitizing surfaces and equipmentSanitizing gets rid of the germs you can’t see. Make sure that all equipment,cooking surfaces and counters are cleaned and sanitized before and after cooking. A good sanitizing solution is bleach and water. Here are a few things to rememberfor making an effective sanitizer.
• Sanitizer in spray bottles should be changed daily (bleach breaks downin light).
• Bleach is ineffective when mixed with soapy water.• Too little bleach will not kill germs.• Too much bleach is toxic and a skin irritant.• Mix 5 ml bleach to 750 ml water (1 tsp bleach to 3 cups water).• If you want a solution a little stronger, use 5 ml bleach to 500 ml water
(1 tsp bleach to 2 cups water). This strength is also adequate forimmersing clean dishes if you need to also sanitize them (for examplewhen camping).
• Spray the surface, let the solution sit for at least 60 seconds then wipedry with a single use towel (clean dish towel / paper towel).
(* reference Wellington Dufferin Guelph Health Unit cleaning and sanitizing fact sheets,FightBac!® website.)
6. Basic food safetyClean separate cook chill Keep hot foods hot and cold foods cold. Discuss with the kids the basics of foodsafety. Stress that you cannot tell if a food is bad by smelling, looking or eventasting it and tell them the best rule to remember is “when in doubt, throw it out”.
Wash all vegetables and fruit with cool running water before eating or peeling toremove surface dirt and bacteria.
Trim off any parts that look discoloured. Discard any mouldy fruits and vegetables.
Use a separate cutting board for raw meats, fish, poultry. Keep these foods awayfrom other ingredients.

Cooking Basics for Kids, First Nations Edition, 2009
First Nations Community Food Educator Program 18
Cover and place leftovers in the fridge as soon as possible after a meal.
Leftover food in a can should be transferred to a clean container.
Return cold foods like milk and eggs to the fridge as soon as possible after youhave used them.
7. Sampling and testing foodTasting is an important part of the cooking experience but can potentially spreadgerms. Teach the kids to wait until the recipe is complete before tasting. Remindthem of the rule to keep their mouths away from the food while cooking!
Have a supply of spoons, wooden sticks or tongue depressors for tasting and stressthat they should be used only once. No “double-dipping”!

Cooking Basics for Kids, First Nations Edition, 2009
First Nations Community Food Educator Program 19
Ready to cook!
Before each session, make sure you have reviewed the session notes and have theingredients and materials needed for the recipes.
Complete all the food preparation needed and set out the equipment and utensilsfor your cooking demonstration and the hands-on cooking by the children.
Decide how you will welcome the children into the session. How will you learn theirnames, will they already know each other or will you need to coordinateintroductions.
One suggestion is to welcome each child with an apron, hat or tie for their hair andthen direct them to wash their hands while the others arrive!
Prepare to go over the basic kitchen rules and hand washing at each class.

Cooking Basics for Kids, First Nations Edition, 2009
First Nations Community Food Educator Program 20
SESSION 1: KITCHEN SAFETY, HANDWASHING AND NO COOK RECIPES
Equipment: • knives• cutting boards • vegetable peeler • measuring spoons
Recipes: • Raw Vegetables and Dill Dip • Fruit Parfait• Apples and Cheese with Citrus Dip• Fuel Up Trail Mix (might appeal to older kids more)
These recipes are simple and can be used with younger children. Adult supervisionis needed when knives are used. Plan ahead to make sure all ingredients, suppliesand utensils are available.
Before the class starts, clean and sanitize all surfaces.
As the kids arrive, give them their aprons and make sure their hair is tied backand/or covered.
Invite them to wash their hands and then join you at the table, circle or whereveryou are going to start the teaching component.
Introduce yourself and the session.
1. Kitchen safety (10 minutes)
Start with a review of kitchen rules and safety. Stress that you expect the rules tobe followed at all times. Depending on the age of the kids, use a handout and /oroverhead to teach the rule. For younger kids or if literacy is an issue, talk about therules with the kids, use a flip chart to draw simple pictures to emphasize importantrules (like hand washing, no sampling while cooking, keep pot handles pointingback, etc.). Invite the kids to share rules that they have in their home or otherthings that they think might be important.
2. Knife safety (10 minutes)
The cooking component of this first session involves using knives and peelers toprepare fruit and vegetables as healthy snack choices. Talk about how to use aknife or a peeler safely. Proper cutting technique is cutting down and away on a

Cooking Basics for Kids, First Nations Edition, 2009
First Nations Community Food Educator Program 21
cutting board (and NOT cutting in the palm of your hand). Demonstrate anddepending on the ages of the children, get them to help you demonstrate (take turnswith “guest” demonstrators, copying your lead).
The following rhyme can be used to help the kids remember this technique:
When it’s time to use a knife,there’s something you should do.When you’re going to chop or slice,be sure to face the blade away from you!
3. Hand washing (15 minutes)
Make sure the kitchen has a separate sink for handwashing and is equipped withsoap and towels. Talk with the kids about why hand washing is important. Take thekids over to the sink and demonstrate the six - step method of hand washing. Thenallow each child to do it as well.
1. Wet hands under warm, running water. Apply soap.
2. Wash all surfaces thoroughly including the wrists, palms, backs of hands, fingers and under finger nails.
3. Scrub with soap and count for 10 - 20 seconds.
4. Rinse under running water for a count of 5 seconds.
5. When drying use a clean towel or a single use paper towel.
6. Turn off the taps with the towel to avoid re-contamination.
It is suggested that the kids sing a short song while hand washing. Three timesthrough “Happy Birthday” works as does 2 or 3 verses of “Row, Row, Row YourBoat”. Maybe there is a traditional song or rhyme that also runs 10-20 seconds (1-2 times through).
Depending on the age of the children and the time you have, you can also start totalk about food safety.
For the youngest kids, focus on hand washing and keeping hair away from food aswell as keeping hot foods hot and cold foods cold!
Older children are ready to learn about other food safety topics like cross-contamination and sanitizing. Emphasize the importance of clean hands andsurfaces while preparing food and that foods need to be stored properly to avoid the
Cooking Basics for Kids, First Nations Edition, 2009
First Nations Community Food Educator Program 22
spread of germs or food borne illness. Demonstrate how to sanitize counter tops ifthere is time.
The Food Safety Word Find Puzzle may be given out for kids to do at home.
You can also teach the kids this rhyme:
Wash your hands with soap and water and make them cleanfor you,Rinse your fruit and vegetables too!Keep the kitchen counters clean andChase those germs away!
Demonstration: Sanitizing counter-tops and cooking surfaces (5 minutes)
Create a sanitizing solution by mixing 5 ml (1 tsp) bleach with 750 ml (3 cups) warmwater in a spray bottle. Label the spray bottle. Use this solution to spray on countertops and other cooking surfaces, such as cutting boards, to sanitize and killbacteria. The spray must sit on the surface for at least 1 minute before being dried /rinsed.
(Reference: MHLTC, Consumer Food Safety Brochure, March 2007).
4. Recipe preparation (30 minutes)
Choose one or more of the following recipes from Session 1:
• Raw Vegetables and Dill Dip
• Fruit Parfait
• Apples and cheese with Citrus Dip
• Fuel Up Trail Mix (might appeal to older kids more)
If the group is very young or it is a large group, you may want to cut up thevegetables and fruit yourself as the children watch. Select one or two helpers toassist with the measuring and stirring of the dip ingredients or with layering the fruitparfaits.

Cooking Basics for Kids, First Nations Edition, 2009
First Nations Community Food Educator Program 23
Session 2 has an activity on teaching measuring techniques.
If the children are older and/or you have enough supervision help, space theequipment, set up different work stations so that the kids each get hands-on cuttingexperience with the vegetables and fruits.
The fruit parfait recipe is for one serving. You may want to have several groupsmake this recipe so there is enough for sharing or let each child make a mini parfaitafter seeing the full sized version!
5. Tasting
Make sure the kids all wash their hands again before tasting. Allow everyone tohave a sample of all the recipes that were prepared. After everyone has had ataste, ask for some feedback on what they have tried. Do they like it? Have theyever had anything similar? Can they think of other fruits or vegetable or flavoursthey would like to try in a similar recipe at home?
Optional Activities
1. While the class is working on the recipes or tasting, start a discussion about different fruits and vegetables. Ask each participant, “what is your favouritevegetable or fruit?”.
2. Ask if anyone knows how many servings of vegetables and fruit arerecommended each day in Eating Well with Canada’s Food Guide.
3. Place a mystery fruit or vegetable in a paper bag. Take turns asking the kidsto guess what is in the bag without peaking (they can reach in and touch theitem). Change the item between kids!
4. Look for more fun vegetable and fruit activities in the on-line resource listings.
6. Cleanup and Goodbye
Involve the kids in washing dishes, cleaning the work surfaces and making sure thefood is stored in its proper location (i.e. fridge or cupboard). Remind the childrenthat cleaning up is an important part of cooking at home! Send each child homewith a copy of the recipes, and a copy of Eating Well with Canada’s Food Guideand/or Eating Well with Canada’s Food Guide First Nations, Inuit and Métis. Youmight also want to include a note to parents/guardians to encourage cookingpractice at home!

Cooking Basics for Kids, First Nations Edition, 2009
First Nations Community Food Educator Program 24
SESSION 2: HEALTHY EATING WITH THE FOOD GUIDE, MEASURING AND USING A BLENDER.
Equipment: • can opener • measuring spoons and cups • blender or hand mixer• knives and cutting boards
Recipes: • Fruit and Yogurt Smoothie• Tofu Taco Dip• Chick Pea Mash (humus) • Fuel Up Trail Mix (was also seen in session 1, good for practising
measuring).
Plan ahead to make sure all ingredients, supplies and utensils are available. Therecipes in this session involve using small electrical appliances (blender or handmixer) and require close supervision.
Before the class starts, clean and sanitize all surfaces.
As the kids arrive, give them their aprons and make sure their hair is tied backand/or covered.
Invite them to wash their hands and then join you at the table, circle or whereveryou are going to start the teaching component.
Introduce yourself and the session. If you have already done session 1, do a quickreview of kitchen rules, knife safety and handwashing (15 minutes).
If this is your first session, go over session 1 notes on kitchen safety, knife safetyand handwashing with the kids.
1. What is healthy eating?
Lead a discussion about what is healthy eating. Ask the kids what it means tothem. Encourage the children to provide comments and reinforce that healthyeating is about:
T eating the foods you enjoy
T eating foods that your body needs to be its best
T aiming for variety and moderation in all the foods you eat

Cooking Basics for Kids, First Nations Edition, 2009
First Nations Community Food Educator Program 25
T recognizing that some foods need to be eaten less often and in smalleramounts
Talk about why healthy eating is important, especially for kids, and link to moresuccess at school and play as well as reduced risk for health problems like diabetesand heart disease when they are adults. For older kids, you might want to discussthe nutrients that are often lacking in their diets and why they need them, as well aswhat traditional foods can provide.
2. Introduce Eating Well with Canada’s Food Guide (and /or First Nations,Inuit and Métis version)
For younger kids, use a poster to talk about the food groups and the different foodsas well as serving sizes. Older kids might like their own copy as well as informationabout how to make their own poster on the Food Guide Website.
Explain that the food guide is a tool to help people understand how to make healthyfood choices.
Talk about the rainbow, the different colours and the different sizes of the colourbands to demonstrate that we need more of some foods compared to others. Talkabout the food groups, key nutrients (specifics will depend on age of the group: forexample, 6 year olds can understand that grains give them energy and that vitaminshelp their bodies use the energy, 10 year olds can know about carbohydrates andfibre as well as B vitamins and whole grains).
Talk about the Aboriginal Food guide and how it reflects the goodness of thetraditional diet as well as the reality of the foods that are available in more isolatedcommunities.
Talk about “everyday” and “sometime” foods.
Talk about foods that are not on either food guide (snack foods like chips, donuts,pop, candy, etc.) and why they are not recommended for health.
3. Measuring techniques (10 minutes including demonstration)
Show the group a selection of measuring cups and spoons for dry and liquidingredients. Pass different size spoons or cups around and let the children readthe various amounts in metric and imperial units. You may need to explain recipeabbreviations as well!

Cooking Basics for Kids, First Nations Edition, 2009
First Nations Community Food Educator Program 26
Metric conversions
‘ 250 ml = 1 cup
‘ 175 ml = 3/4 cup
‘ 150 ml = 2/3 cup
‘ 125 ml = ½ cup
‘ 75 ml = 1/3 cup
‘ 60 ml = 1/4 cup
‘ 15 ml = 1 tablespoon
‘ 7.5 ml = ½ tablespoon
‘ 5 ml = 1 teaspoon
‘ 2 ml = ½ teaspoon
‘ 1 ml = 1/4 teaspoon
4. Demonstration: measuring wet and dry ingredients
Show the group how to level measurements of dry ingredients like flour or sugar sothat the correct amount is added to the dish.
Fill the measuring cup either by scooping directly out of the container or by using asmaller scoop to fill the measuring cup or spoon to the top. Use the flat side of aknife to level off the measuring cup and push off the excess. Remind the kids thatthey might have to use different size measuring cup to match how much they need(eg. For 2 ½ cups, use the 1 cup measure twice and the ½ cup measure once). Similarly when measuring spices, level off the measuring spoon with the flat side ofa knife. Be sure to remind them not to level off into the mixing bowl!
Soft ingredients like butter, brown sugar, peanut butter need to be packed in.
Show the group a glass or plastic graduated measuring cup (500 ml / 2 cups). Show the group how to measure a liquid by placing the glass measuring cup on thelevel counter and reading the correct amount at eye level.

Cooking Basics for Kids, First Nations Edition, 2009
First Nations Community Food Educator Program 27
5. Recipe Preparation (30 minutes)
Choose one of the following recipes from Session 2:
• Fruit and Yogurt Smoothie
• Tofu Taco Dip (if you use this recipe, make some in advance andchill)
• Chick Pea Mash (hummus)
• Fuel Up Trail Mix
It the group is young or large, you may want to do the cutting or mincing yourselfand have the children observe. Involve the kids in age-appropriate tasks likepeeling the banana, mixing with a spoon, adding measured ingredients into thebowl, etc.
If the children are older, and there is enough space, equipment and supervisionavailable, set up different work stations to allow each child to get hands onexperience. This could include, using the can opener, measuring ingredients, oroperating the blender or hand mixer.
Note: The Smoothie recipe is for one or two servings only; enough for a small tasteeach or for larger samples, either double the recipe or have several small groups ofkids make the recipe. Using different combinations of fruit for each group will give avariety of flavours to taste.
Remind the kids to save tasting until the end!
6. Tasting
Make sure the kids all wash their hands again before tasting. Allow everyone tohave a sample of all the recipes that were prepared. After everyone has had ataste, ask for some feedback on what they have tried. Do they like it? Have theyever had anything similar? Can they think of other fruits, vegetables or flavoursthey would like to try in a similar recipe at home?
7. Cleanup and Goodbye
Involve the kids in washing dishes, cleaning the work surfaces and making sure thefood is stored in its proper location (i.e. fridge or cupboard). Remind the childrenthat cleaning up is an important part of cooking at home!

Cooking Basics for Kids, First Nations Edition, 2009
First Nations Community Food Educator Program 28
Send each child home with a copy of the recipes, and a copy of Eating Well withCanada’s Food Guide and/or Eating Well with Canada’s Food Guide First Nations,Inuit and Métis (if this is the first or only session). You might also want to include anote to parents/guardians to encourage cooking practice at home!

Cooking Basics for Kids, First Nations Edition, 2009
First Nations Community Food Educator Program 29
SESSION 3: START WITH BREAKFAST / USING THE MICROWAVE
Equipment: • measuring spoons and cups• knives and cutting boards• wire whisk• cheese grater • microwave
Recipes: • Scrambled Eggs with different flavours (plain, Italian, Mexican) • Baked Almond Peaches • Quick Apple Berry Bake
Plan ahead to ensure all ingredients, supplies and equipment are available. Theserecipes use the microwave and require adult supervision.
1. Review / Introduce kitchen safety (5-10 minutes)
If you have already completed Session 1 with the group, do a review of kitchenrules, knife safety and handwashing.
If this is the first session, use the section from Session 1 on kitchen rules, knifesafety and handwashing to start the session.
2. Start your day with breakfast (10 minutes)
Ask the children how many had breakfast that morning. What are some of thedifferent foods they ate?
Talk about the importance of breakfast for busy kids and that breakfast feeds boththeir bodies and their minds. Talk about some of the reasons it might be hard to eatbreakfast and let the kids discuss ideas to make sure they find a way to eat in themorning.
Talk about eating 3 of the 4 food groups at breakfast and that favourite breakfastscan be leftovers from the night before (properly stored, of course!).
3. Microwave basics (10 minutes)
Ask the children if they have a microwave at home and if they have ever used it. Lead a discussion about what kinds of food are cooked in the microwave oven,such as oatmeal, eggs, and soup; how we can use the microwave for more than

Cooking Basics for Kids, First Nations Edition, 2009
First Nations Community Food Educator Program 30
heating up left overs and snack foods; how useful the microwave is for cookingvegetables and fish quickly and healthily.
Stress that only microwave-safe plastics, glass, or ceramics are used in themicrowave. Never use metal or aluminum foil.
Read over the instructions for the Scrambled Eggs and/or the Baked AlmondPeaches. Both recipes need the microwave opened during cooking to either turn orstir the food.
Talk about why it is necessary to turn or stir food during the cooking process; askthe kids for ideas and then explain that microwaves cook unevenly and that stirringor turning helps the food cook more evenly.
4. Recipe preparation (30 minutes)
Choose one of the following recipes from Session 3:
• Scrambled Eggs with different flavours (plain, Italian, Mexican)
• Baked Almond Peaches
• Quick Apple Berry Bake
If the group is very young or too large, you may want to do the microwaving yourselfand have the children just watch. Involve the kids in other age-appropriate taskssuch as cracking eggs into a bowl, adding other ingredients and mixing ingredients.
If the children are older and there is enough space, equipment and supervisionavailable, set up different workstations to allow each child a hands on experience. Each station could prepare a different version of scrambled eggs; baked almondpeaches only makes one serving so several groups could make this recipe to haveenough for all to taste.
ALLERGY ALERT: Baked Almond Peaches uses NUTS.
Remind the children to save tasting for the end so all can sample together.
5. Tasting
Make sure the kids all wash their hands again before tasting. Allow everyone tohave a sample of all the recipes that were prepared. After everyone has had ataste, ask for some feedback on what they have tried. Do they like it? Have theyever had anything similar? Can they think of other fruits, vegetables or flavoursthey would like to try in a similar recipe at home?

Cooking Basics for Kids, First Nations Edition, 2009
First Nations Community Food Educator Program 31
6. Cleanup and goodbye
Involve the kids in washing dishes, cleaning the work surfaces and making sure thefood is stored in its proper location (i.e. fridge or cupboard). Remind the childrenthat cleaning up is an important part of cooking at home!
Send each child home with a copy of the recipes and a copy of Eating Well withCanada’s Food Guide and/or Eating Well with Canada’s Food Guide First Nations,Inuit and Métis (if this is the first or only session). You might also want to include anote to parents/guardians to encourage cooking practice at home!
Optional Homework: Send kids home with the “MAKE YOUR OWN RECIPES” EXACTLYRIGHT EGGS recipe sheet (from How to Teach Cooking to Kids, leader activity guide;copyright allows reproduction for educational purposes).

Cooking Basics for Kids, First Nations Edition, 2009
First Nations Community Food Educator Program 32
SESSION 4: QUICK MEALS AND USING THE STOVE / ELECTRIC SKILLET
Includes activities to demonstrate boiling and frying.
Equipment: • measuring cups and spoons • knives and cutting boards • vegetable peeler • potato masher • spatula• colander• cheese grater• pots / saucepans with lids • frying pans
Recipes: • Rice and Vegetable Fried Rice• Pasta / Pasta with Tomato Sauce / Pasta Salad• Tortilla Wedges / Quesadillas• Soup Your Way (from Teaching Nutrition to Kids)• Beef Taco Skillet
Plan ahead to ensure all ingredients, supplies and equipment are available at yourfacility.
The recipes in this section involve cooking on the stove. Make sure you have helpfor supervision if needed.
If this is your first class, spend time going over basic kitchen rules, knife safety andhandwashing from Session 1. Otherwise, review the basic kitchen rules, knifesafety and handwashing before proceeding with this session.
1. Quick Meals (10 minutes)
Talk with the kids about the kinds of meals they eat with their families. Do they taketime to have lunch and / or supper together? Do they sit down to eat? Is there afamily plan for meals? Talk about how making meals can be done quickly andhealthily. Ask the kids what they think makes a meal? Lead the discussion back tofood groups and a balanced approach to meals. Also discuss that making a planmakes it easy and helps them figure out what is missing (to have at snacks, etc.).

Cooking Basics for Kids, First Nations Edition, 2009
First Nations Community Food Educator Program 33
If you feel comfortable, you could also talk about the social importance of familymeal times. Taking the time to sit and eat with family and/or friends also gives ustime together to reflect and learn about each day and each other.
2. Recipe Preparation (30- 45 minutes)
Choose one or two of the recipes suggested for this session.
• Rice and Vegetable Fried Rice
• Pasta / Pasta with tomato sauce / Pasta salad
• Tortilla wedges / Quesadillas
• Soup Your Way (from Teaching Nutrition to Kids)
• Beef Taco Skillet
The cooking lesson will take longer if you chose the rice or pasta. The TortillaWedges and Soup are faster. If you choose the rice, you may want to start the ricecooking before you talk about meals!
If the group is very young or large, you may want to make the recipes yourself. Thechildren can watch your actions. You can also select one or two helpers to assistwith age-appropriate tasks like beating an egg, measuring / chopping vegetables, orgrating cheese.
If possible, set up different work stations to allow each group to get some hands onexperience preparing their own tortilla wedges, rice, pasta or soup. It may be anopportunity to compare how each pot of rice or pasta turns out and to explain thedifferent results.
Remind the kids to save tasting until the end when everyone can sample together.
3. Tasting
Make sure the kids all wash their hands again before tasting. Allow everyone tohave a sample of all the recipes that were prepared. After everyone has had ataste, ask for some feedback on what they have tried. Do they like it? Have theyever had anything similar? Can they think of other vegetables, grains or flavoursthey would like to try in a similar recipe at home?
4. Cleanup and Goodbye
Involve the kids in washing dishes, cleaning the work surfaces and making sure thefood is stored in its proper location (i.e. fridge or cupboard). Remind the children
Cooking Basics for Kids, First Nations Edition, 2009
First Nations Community Food Educator Program 34
that cleaning up is an important part of cooking at home! Send each child homewith a copy of the recipes and a copy of Eating Well with Canada’s Food Guideand/or Eating Well with Canada’s Food Guide First Nations, Inuit and Métis (if this isthe first or only session). You might also want to include a note toparents/guardians to encourage cooking practice at home!
Optional Homework; send kids home with the “MAKE YOUR OWN RECIPES” SOUP YOURWAY and invite them to try to invent a new soup combination at home as a quickmeal or snack!

Cooking Basics for Kids, First Nations Edition, 2009
First Nations Community Food Educator Program 35
SESSION 5: HEALTHY SNACKS / USING THE OVEN
Equipment: • toaster or full size oven• measuring cups and spoons• knives and cutting boards• spatula• oven mitts• baking sheets• baking dish / roasting pan• trivet / hot pad
Recipes: • Tuna Melts• Veggie “Fries”• Cereal Snack Mix / Berry Granola• Whole Wheat Bannock (baked)
Plan ahead to ensure all ingredients, supplies and equipment are available at yourfacility.
The recipes in this section involve cooking in an oven. Make sure you have help forsupervision if needed.
If this is your first class, spend time going over basic kitchen rules, knife safety andhandwashing from Session 1. Otherwise, review the basic kitchen rules, knifesafety and handwashing before proceeding with this session.
1. Healthy Snacks (10 - 15 minutes)
Ask the children if they think snacking is healthy. Get their ideas and then discussthat it is healthy to have snacks for most children. Explain that because kids usuallyeat smaller amounts at most meals, planned snacks are an important part of dailyeating. Talk about snacks providing nutrients for kids to grow and develop and thatsnacks can help make sure kids get enough of the nutrients they need. Reinforcethat snacks need to contain food choices from the Food Guide.
Ask the children to name/describe some of their favourite snacks. Use a flip chartor blackboard and coloured markers or chalk if available to help decide what foodgroups their snacks would fit into. Talk about how many food groups a snackshould have (2 or more) compared to a meal (3 or more). Talk about snacks that

Cooking Basics for Kids, First Nations Edition, 2009
First Nations Community Food Educator Program 36
don’t fit the Food Guide and snacking for reasons other than being hungry(especially for older kids).
With older children, talk about planning snacks. Making a “snack plan” work sheetmay be a suitable activity (even for the small groups to work on together while theirfood simmers).
2. Recipe Preparation
Choose from the following recipes suggested for this session:
• Tuna Melts
• Veggie “Fries”
• Cereal snack mix / berry granola
• Whole wheat bannock (baked)
If the group is very young or large, you may want to make the recipes yourself. Thechildren can watch your actions. You can also select one or two helpers to assistwith age-appropriate tasks like mixing ingredients, shaping dough, etc.
If possible, set up different work stations to allow each group to get some hands onexperience. Remind the kids to save tasting until the end when everyone cansample together.
3. Tasting
Make sure the kids all wash their hands again before tasting. Allow everyone tohave a sample of all the recipes that were prepared. After everyone has had ataste, ask for some feedback on what they have tried. Do they like it? Have theyever had anything similar? Can they think of other foods they would like to try in asimilar recipe at home?
4. Cleanup and Goodbye
Involve the kids in washing dishes, cleaning the work surfaces and making sure thefood is stored in its proper location (i.e. fridge or cupboard). Remind the childrenthat cleaning up is an important part of cooking at home!
Send each child home with a copy of the recipes and a copy of Eating Well withCanada’s Food Guide and/or Eating Well with Canada’s Food Guide First Nations,Inuit and Métis (if this is the first or only session). You might also want to include anote to parents/guardians to encourage cooking practice at home!

Cooking Basics for Kids, First Nations Edition, 2009
First Nations Community Food Educator Program 37
SESSION 6: TRADITIONAL FOODS / THE BASICS OF FOOD PRESERVATION
Includes activities to demonstrate traditional cooking and food preservation.
Equipment: • measuring cups and spoons• knives and cutting boards• vegetable peeler• potato masher• spatula• colander • cheese grater • pots / saucepans with lids • frying pans• baking sheets
Recipes: • Easy Fruit Leather• Other recipes that are traditional to your community or choose a
recipe from the CFE Resource Binder
Plan ahead to ensure all ingredients, supplies and equipment are available at yourfacility.
The recipes in this section involve cooking on the stove and using an oven. Makesure you have help for supervision, if needed.
If this is your first class, spend time going over basic kitchen rules, knife safety andhandwashing from Session 1. Otherwise, review the basic kitchen rules, knifesafety and handwashing before proceeding with this session.
1. Role of traditional foods
Ask the children if they eat the same foods as their elders and/or ancestors. Talkabout what is different about the food they eat today compared to theirgrandparents. Ask for their opinions, good and bad, on the differences.
Talk about the benefits of a more traditional diet that is based on the experiences ofthe elders and their relationship to the land. Talk about the aboriginal food guideand how it is a tool to help them chose foods that keep with their heritage.
Cooking Basics for Kids, First Nations Edition, 2009
First Nations Community Food Educator Program 38
It is important to include the message that Traditional Foods continue to be a way oflife for many native groups all over North America as a way to keep body, mind andspirit in balance while celebrating the seasons.
Instead of saving this discussion for this session, it can be easily included in any orall of the previous 5 sessions:
Session 1: No cook meals – what traditional foods are eaten uncooked (emphasison vegetables and fruits).
Session 2: Healthy eating with the food guide – only use the First Nations, Inuitand Métis version pointing out the traditional foods and activities that connect foodand the land to the health of people.
Session 3: Start with breakfast – talk about breakfasts that are eaten in differentseasons and in different settings (home, camp, visiting family in other communities,etc.).
Session 4: Quick meals – talk about the types of quick meals that the children’sgrandparents may have eaten in different seasons and in different settings (home,camp, while hunting, travelling, etc.).
Session 5: Healthy snacks – talk about traditional healthy snacks; what do thechildren think their ancestors used for “fast food”?
2. Basics of food preservation
Talk about how your ancestors would have needed to preserve food in the daysbefore refrigeration (this will also apply to remote locations). Discuss how yourancestors preserved food safely by primarily drying it, smoking it, or salting / brining/ pickling it. Ask the children if any of their family still preserves food by thesemethods. Talk about whether or not they have tried foods preserved these waysand if they like them. Talk with them about how food is preserved today and why itis important that it be done right (food safety and to keep nutrients in the food). Talkto the kids about why canned vegetables and fruit can be as healthy as fresh andoften more available.
Preserving food takes time; you will likely not have enough time to demonstrateproper canning / pickling / smoking techniques but you may be able to bring insamples for the children to taste!
The fruit leather recipe is an easy and fun demonstration of drying food for enjoyingoff season and while travelling.
Cooking Basics for Kids, First Nations Edition, 2009
First Nations Community Food Educator Program 39
3. Recipe preparation: Easy Fruit Leather
If the group is very young or large, you may want to make the recipe yourself. Thechildren can watch your actions. You can also select one or two helpers to assistwith age-appropriate tasks like mixing ingredients, preparing pans, etc.
If possible, set up different work stations to allow each group to get some hands onexperience perhaps using different fruit and vegetable combinations. Remind thekids to save tasting until the end when everyone can sample together.
4. Tasting
Make sure the kids all wash their hands again before tasting. Allow everyone tohave a sample of all the recipes that were prepared. After everyone has had ataste, ask for some feedback on what they have tried. Do they like it? Have theyever had anything similar? Can they think of other foods they would like to try in asimilar recipe at home?
5. Cleanup and Goodbye
Involve the kids in washing dishes, cleaning the work surfaces and making sure thefood is stored in its proper location (i.e. fridge or cupboard). Remind the childrenthat cleaning up is an important part of cooking at home!
Send each child home with a copy of the recipes, and a copy of Eating Well withCanada’s Food Guide and/or Eating Well with Canada’s Food Guide First Nations,Inuit and Métis (if this is the first or only session). You might also want to include anote to parents/guardians to encourage cooking practice at home!

Cooking Basics for Kids, First Nations Edition, 2009
First Nations Community Food Educator Program 40
ADDITIONAL RESOURCES
“Kids in the Kitchen”. A 148 page manual from Health Canada and the WinnipegRegional Health Authority (March 2002) on how to set up a kids cooking club.
http://www.youville.ca/english/links.html
Fight Bac™ learning program presenter’s guides for teaching food safety tochildren K-3, 4-7.
http://www.canfightbac.org/cpcfse/en/learning/
RECOMMENDED COOKBOOKS
THE EVERYTHING KIDS COOKBOOK, Sandra K Nissenberg, Adams Media, 2002. American, with good information and recipes!
NORA’S KITCHEN, Nora Sands, Collins, 2006.Nora was the school chef who worked with Jamie Oliver’s experiences withBritish school lunch offerings. British; fantastic photos of ingredients and kidscooking. The recipes are straightforward.
NATIVE INDIAN WILD GAME, FISH AND WILD FOODS COOKBOOK, Lovesick Lake NativeWomen’s Association, Fox Chapel, 1992, 1997.
Native recipes from North America, good line drawings of wild game, fish andwild plants, interspersed with native history.
KID’S HEALTHY COOKING , Jean Pare, Company’s Coming, 2006.Has nutrition information and written for kids.
SCHOOL DAY LUNCHES Jean Pare, Company’s Coming, 2006.Lots of variety with suggestions on how kids can help.
THE JUMBO COOKBOOK, Judi Gilles, Jennifer Glossop, Kids Can Press, 2000.Canadian, kid friendly and straightforward recipes.

Cooking Basics for Kids, First Nations Edition, 2009
First Nations Community Food Educator Program 41
SUPPERTIME SURVIVAL, Lynn Roblin, Bev Callaghan, 2004.Canadian cookbook designed for busy parents. Includes quick nutritious mealsand tips on how to organize your suppertime life with your kids.
GOOD CHILDREN’S BOOKS
I WILL NEVER NOT EVER EAT A TOMATO, Lauren Child, Candlewick Press, 2000
Humorous picture book about Charlie and his attempts to get his little sister, Lola,to try new foods. They are also a kids show.
BLUE POTATOES, ORANGE TOMATOES, How to Grow a Rainbow Garden, RosalindCreasy, Sierra Club Books, 1994, 1997.
For older children who will still need help to read but gives good informationabout planting a garden and the fun and tasty food that will be harvested!
GOOD ENOUGH TO EAT, A Kids Guide to Food and Nutrition, Lizzy Rockwell,Scholastic, 1999
American so based on the food pyramid but great messages about why healthyeating is important for growing children!
For a more complete listing of books about food and nutrition especially for children,see this listing: www.kidsnutritionbooks.com

COOKING BASICS FOR KIDS RECIPES
SESSION RECIPE 1 Raw Vegetables and Delicious Dill Dip Fruit Parfait Apples and Cheese with Citrus Dip Fuel-up Trail Mix* 2 Fruit and Yogurt Smoothie Chickpea Mash Tofu Taco Dip 3 Scrambled Eggs (Plain, Italian, East Indian or Mexican
style) Eggs – Xactly Right Eggs * Baked Almond Peaches Quick Apple Berry Bake 4 Rice and Vegetable Fried Rice Pasta and Pasta with Tomato Sauce Pasta Salad Tortilla Wedges Soup Your Way * Beef Taco Skillet 5 Tuna Melts Veggie “Fries” Cereal Snack Mix Whole Wheat Bannock 6 Fruit Leather
Look in the CFE Resource Binder for additional recipes. * recipes are copied from How to Teach Nutrition to Kids Workbook, Connie Evers, 24 Carrot Press, 2003 and are used under copyright permission to reproduce for educational purposes. They are suitable “homework” for older children!
Remember that participants will have different levels of experience cooking and being in a kitchen. The recipes in this module are explained simply, and in as much detail as possible. Many kids may not know the names of some utensils, cooking terms, and appliances in the kitchen. It is a good idea to begin each class with a review of kitchen utensils and tools used, and then repeat the names often throughout the class.

Makes: 1 ¼ cups Preparation Time: About 5 minutes Equipment: Knife Cutting board Vegetable peeler Bowl Spoon Canada’s Food Guide 125 mL (½ cup) chopped vegetables is one VEGETABLES & FRUIT serving 175 g (¾ cup) yogurt is one MILK & ALTERNATIVES serving Source: Cooking Healthy Together, 1998. Reprinted with permission from Toronto Public Health
Raw Vegetables & Delicious Dill Dip
This is a great way to sample all kinds of different varieties of vegetables!
250 mL plain yogurt 1 cup 50 mL mayonnaise ¼ cup 2 mL garlic powder ½ tsp 2 mL dried dill ½ tsp 2 mL pepper ½ tsp
Raw vegetables like broccoli, carrots, cauliflower, celery, cucumber, Fennel, radishes, red peppers, green peppers 1. Wash the vegetables under cool tap water. Place them on a clean
dish towel or paper towels to dry. 2. Using a knife and cutting board, remove any stems or parts that
you cannot eat (brown spots, leaves, etc.) and put them in the organic recycling bin. If you are having carrots, use a vegetable peeler to remove the outer skin. Put carrot peels in the organic recycling bin before chopping the carrot.
3. Cut the vegetables into bite-size pieces, and place on a clean plate. 4. Prepare the dip by putting yogurt, mayonnaise, and spices in a
medium-size bowl, and mixing together with a spoon. You can eat the dip right away, but it will taste better the following day. Letting the dip sit in the refrigerator gives the flavours a chance to blend and become stronger tasting. Be sure to cover the dip with plastic wrap before you put it in the refrigerator. It’s great to share your vegetables and delicious dill dip with someone but remember not to “double dip”! “Double dipping” (when you dip your vegetable back into the dip after you’ve taken a bite) can spread germs from one person to another.

Fruit Parfait
You can make this quick snack or breakfast in a bowl or a tall drinking glass. Any fresh, canned or frozen fruit can be used. Try a mixture using any of the following: banana slices, blueberries, mandarin orange sections, mango slices, raspberries, strawberries, or watermelon.
250 mL fruit 1 cup 175 g yogurt, any flavour ¾ cup 30 g Grape Nuts™ ⅓ cup
or Bran Buds™ cereal 1. Wash the fruit under cool tap water if you are using fresh fruit. Do not rinse canned or frozen fruit. 2. Cut the fruit into bite-sized pieces or slices using a knife and cutting board. 3. Place some cut up fruit at the bottom of the bowl or glass. Use a spoon to cover the fruit with half of the yogurt. Then sprinkle with half the cereal. 4. Add another layer of fruit, the rest of the yogurt and top with the remaining cereal. Use a clean spoon to eat your layered parfait. Enjoy!
Makes: About 1 ½ cups Preparation Time: About 5 minutes Equipment: Knife Cutting board Bowl or tall glass Spoon Canada’s Food Guide 125 mL (½ cup) cut-up fruit is one VEGETABLES & FRUIT serving 175 g (¾ cup) yogurt is one MILK & ALTERNATIVES serving 30 g (⅓ cup) cold cereal is one GRAIN PRODUCTS serving Source Sandy Summers, Niagara CFA. Reprinted with permission.

Makes: 1 cup Preparation Time: About 5 minutes Equipment: Knife Cutting board Bowls Spoon Slotted spoon Canada’s Food Guide 125 mL (½ cup) cut-up apples (or one whole apple) is one VEGETABLES & FRUIT serving 50 g cheese is one MILK & ALTERNATIVES serving
Apples & Cheese with Citrus Dip
6 to 8 apples (any variety) 6 to 8 500 mL orange juice 2 cups
Selection of cheeses Dip: 125 mL mayonnaise ½ cup 125 mL plain yogurt ½ cup 30 mL orange juice 2 tbsp 15 mL liquid honey 1 tbsp ½ mL ground cinnamon pinch 1. Wash the apples under cool tap water and pat dry with a clean
cloth or paper towels. 2. Using a knife and cutting board cut the apple into wedges and
remove the core. Trim away any brown or bruised spots. Do not peel the apples.
3. Place the cut apples in a medium-size bowl, and cover them
with orange juice. You do this so the apples won’t turn brown. 4. Using the knife and cutting board, carefully cut the cheese into
bite-size pieces and place on a clean plate. 5. Prepare the dip by putting the mayonnaise, yogurt, 30 mL (2 tbsp)
orange juice, honey and cinnamon in a medium-size bowl. Mix together thoroughly with a spoon.
6. Take the apple wedges out of the bowl with a slotted spoon, and
place on the plate with the cheese chunks. You can drink the orange juice if you like!
Enjoy a chunk of cheese or an apple wedge by dipping them in the citrus dip (just remember not to “double dip” if you’re sharing with others!). You can eat the dip right away, but it will be more flavourful the next day. Letting the citrus dip sit in the fridge gives all the flavours a chance to blend. Be sure to cover the dip with plastic wrap before you put it in the refrigerator.
HINT: Soaking the apples in orange juice keeps them from turning brown! The orange juice contains citric acid (also known as vitamin C), which is an antioxidant.

Preparation Time: About 5 minutes Equipment: Measuring cup Tablespoon Bowl Canada’s Food Guide Each 30 g (⅓ cup) cold cereal is one GRAIN PRODUCTS serving 60 ml (¼ cup) of nuts is one MEAT & ALTERNATIVES serving 60 ml (¼ cup) of dried fruit is one VEGETABLES & FRUIT serving
Make Your Own Recipe - Fuel-up Trail Mix (From: Connie Evers, How to teach nutrition to kids workbook)
Fuel-up trail mix makes a great snack to put in your back pack, gym bag or car. It is delicious and easy to make!
1) Using a ¼ cup (60 ml) measure, mix equal amounts of all or some of the following ingredients. Choose the ones you like!
low fat granola cereal quick cooking oatmeal low-sugar breakfast cereal small pretzel sticks or twists shelled sunflower seeds peanuts almonds raisins dried cranberries dried apple rings dried apricots dried blueberries other dried fruits
2) Mix 1-2 tbsp (15-30 mL) of one of the following:
chocolate chips candy coated peanuts other small candies
You can make endless combinations of your favourite mix!
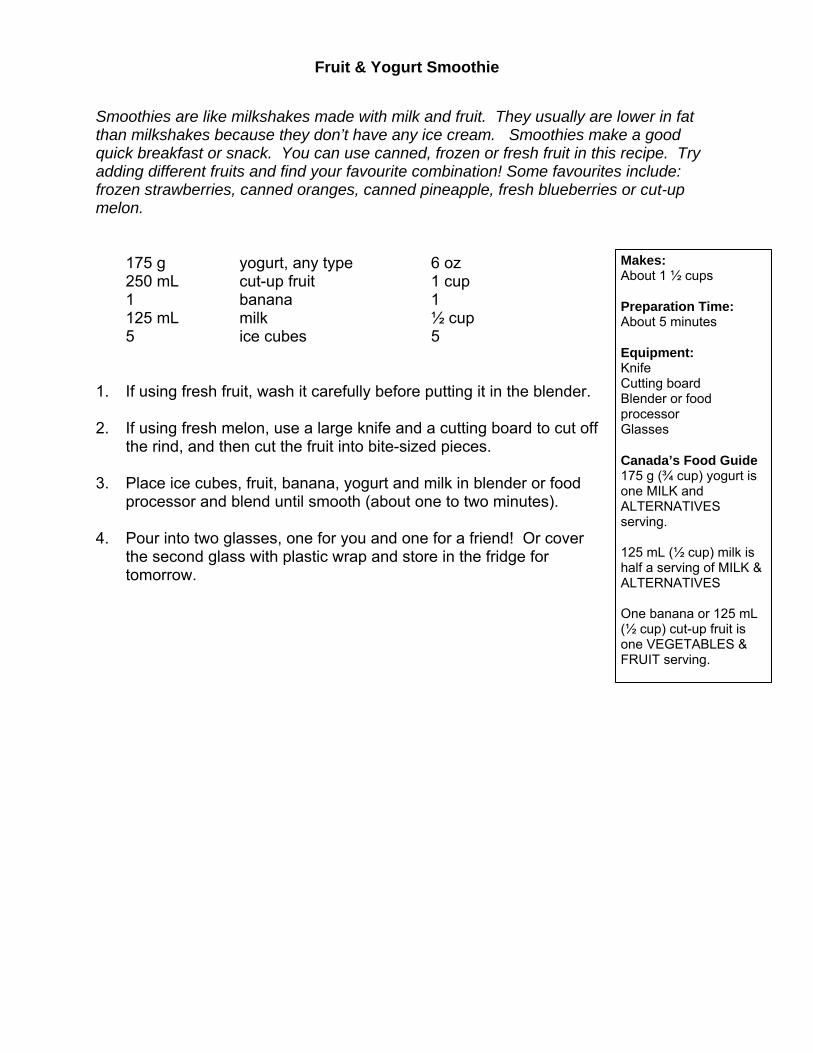
Makes: About 1 ½ cups Preparation Time: About 5 minutes Equipment: Knife Cutting board Blender or food processor Glasses Canada’s Food Guide 175 g (¾ cup) yogurt is one MILK and ALTERNATIVES serving. 125 mL (½ cup) milk is half a serving of MILK & ALTERNATIVES One banana or 125 mL (½ cup) cut-up fruit is one VEGETABLES & FRUIT serving.
Fruit & Yogurt Smoothie Smoothies are like milkshakes made with milk and fruit. They usually are lower in fat than milkshakes because they don’t have any ice cream. Smoothies make a good quick breakfast or snack. You can use canned, frozen or fresh fruit in this recipe. Try adding different fruits and find your favourite combination! Some favourites include: frozen strawberries, canned oranges, canned pineapple, fresh blueberries or cut-up melon. 175 g yogurt, any type 6 oz 250 mL cut-up fruit 1 cup 1 banana 1 125 mL milk ½ cup 5 ice cubes 5 1. If using fresh fruit, wash it carefully before putting it in the blender. 2. If using fresh melon, use a large knife and a cutting board to cut off
the rind, and then cut the fruit into bite-sized pieces. 3. Place ice cubes, fruit, banana, yogurt and milk in blender or food
processor and blend until smooth (about one to two minutes). 4. Pour into two glasses, one for you and one for a friend! Or cover
the second glass with plastic wrap and store in the fridge for tomorrow.

Makes: 2 cups Preparation Time: About 5 minutes Equipment: Knife Cutting board Strainer Blender or food processor Can opener Spoon or spatula Canada’s Food Guide 30 mL (2 tbsp) of chickpea mash is one MEAT & ALTERNATIVES serving. 175 mL (¾ cup) of whole chickpeas is one MEAT & ALTERNATIVES serving. Source: Reprinted from Great Food Fast © 2000 with permission from Dietitians of Canada. Published by Robert Rose Inc.
Chickpea Mash Chickpea Mash is also known as “hummus”. It is a spread or dip made from cooked chickpeas. Chickpeas (also known as Garbanzo beans) are a really good source of protein and can be bought canned (already cooked) so they are easy to use. Chickpea mash tastes great spread on toasted bread, tortillas, pita or naan, or as a dip for raw veggies. 540 mL chickpeas 1 can (19 oz)
2 cloves garlic 2 cloves 45 mL lemon juice 3 tbsp 25 mL tahini paste 2 tbsp 2 mL salt ½ tsp 1 green onion 1 50 mL boiling water ¼ cup
whole wheat pita bread
1. Cut the green onion into very small pieces using a knife and cutting
board. 2. Open the can of chickpeas with a can opener. Pour the chickpeas
into a strainer, drain and rinse well under clean cold water. 3. Place the chickpeas, garlic, lemon juice, tahini paste, salt, water,
and white part of the green onion into a blender or food processor.
4. Blend all the ingredients together into a smooth paste until it looks like peanut butter. Add more water if the paste is too thick. If the mixture sticks to the sides, unplug the blender or food processor before mixing with a spoon or spatula.
5. Stir in the chopped green onion with a spoon. 6. Dip pita bread into hummus or spread hummus on the pita bread.
The chickpea mash can be eaten right away, but may taste better if you cover it with plastic wrap and leave it in the fridge for about a day. Leftover mash can be stored covered in the refrigerator for about five days.
Don’t forget to recycle the empty can!

Makes: 325 ml (1 ⅓ cup) Preparation Time: 15 minutes Equipment: Blender Air tight container Spatula Canada’s Food Guide 150g (¾ cup) of tofu is one MEAT & ALTERNATIVES serving.
Tofu Taco Dip 300g soft or silken tofu or low fat cream cheese 10 oz 30 mL salsa 2 tbsp 15 mL taco seasoning mix 1 tbsp 1. Put all ingredients in blender. Cover with lid. Process until smooth. 2. Using a spatula transfer dip into airtight container. 3. Cover and chill one hour before serving. You can keep this dip in the fridge for up to 3 days. Serve with raw veggies or baked nacho chips. Home made lower sodium taco seasoning
30 mL instant minced onion 2 tbsp 2 mL salt ½ tsp 5 mL chilli powder 1 tsp 2 mL cornstarch ½ tsp 2 mL crushed pepper ½ tsp 2 mL instant minced garlic ½ tsp 2 mL ground cumin ½ tsp 1 mL dried oregano ¼ tsp Combine all the ingredients until evenly mixed. Store in an air tight container in cool, dry place and use within 6 months. Makes about 45 mL ( 3 tbsp).

Makes: 2 eggs Preparation & Cooking Time: About 5 minutes Equipment: Small bowl Wire whisk Microwave safe mug Wax paper Cheese grater Microwave oven Canada’s Food Guide Two eggs is one MEAT & ALTERNATIVES serving Source: www.eggsite.com. Reprinted with permission from the Ontario Egg Producers.
Scrambled Eggs Plain * Italian * East Indian * Mexican
Two eggs Optional ingredients: Salt and Pepper
Spices (oregano, curry powder) Salsa Cheese
Plain: 1. Crack eggs separately into a small bowl 2. Using a wire whisk or a fork beat two eggs in a microwave-safe
mug. 3. Cover the mug with wax paper and microwave for one minute. 4. Uncover and check that egg is solid and cooked through. If not,
cook for another 30 seconds. 5. Add pepper and a dash of salt if you like. Variations: Italian: Follow steps 1 & 2. Sprinkle 5 mL (1 tsp) of oregano or Italian spice blend on the eggs before doing steps 3, 4 and 5. East Indian: Follow steps 1 & 2. Sprinkle 5 mL (1 tsp) of curry powder on the eggs before doing steps 3, 4 and 5. Mexican: Follow steps 1, 2, 3, 4 and 5. Once cooked, put 15 mL (1 tbsp) of tomato salsa on top of the eggs. Using a cheese grater, grate some cheese on top of the eggs. Let eggs sit for a minute to melt the cheese. Use a clean plate and fork to sample some of the scrambled eggs you have prepared.
Don’t forget to put the eggshells in the organics recycling bin!

Makes: 2 servings (2 eggs each serving) Preparation Time: About 5 minutes Equipment: Small bowl Wire whisk Microwave safe dish with lid Microwave oven Pot holders Spoon Canada’s Food Guide Two eggs is one MEAT & ALTERNATIVES serving
Make Your Own Recipe - Egg-Xactly Right Eggs (From: Connie Evers, How to teach nutrition to kids workbook)
This recipe is a fool-proof way for the beginning cook to make fluffy scrambled eggs.
4 medium eggs 4 50 mL nonfat or 1% milk ¼ cup non-stick spray salt & pepper to taste 1. Spray the microwave dish with non-stick spray. 2. Crack the eggs in the mixing bowl. Add milk and stir well with wire whisk or fork. 3. Pour into microwave dish. Cover and microwave on high for 4 minutes. 4. Carefully remove the eggs from the microwave using pot holders. Remove the lid and use a spoon to break the eggs into bite-sized pieces. 5. Add a small amount of salt and pepper or try one of the variations below. Be creative! Variations: Eggs Ole: After you remove the eggs from the microwave, top with 2 tbsp (30 mL) salsa, 5 sliced black olives and 2 tbsp (30 mL) Cheddar cheese. Replace lid and let the eggs sit for 1-2 more minutes. Greek eggs: Add ½ tsp of oregano to the basic recipe prior to cooking. After you remove the eggs from the microwave top with 2 tbsp (30 mL) fresh, chopped tomato and 2-3 tbsp (30-40mL) of feta cheese. Replace lid and let eggs sit for 2-3 more minutes. Pita pocket veggie breakfast: Stuff a pita pocket with scrambled eggs, 2 tbsp (30 mL) grated mozzarella or jack cheese and chopped vegetables of your choice like onion, green pepper, broccoli or sun-dried tomatoes.

Makes: 1 serving Preparation & Cooking Time: About 5 minutes Equipment: Can opener Microwave safe bowl Small mixing bowl Spoons Microwave oven Canada’s Food Guide One whole peach is one VEGETABLES & FRUIT serving
Baked Almond Peaches
1 fresh peach or two canned peach halves 5 mL brown sugar 1 tsp pinch cinnamon pinch 15 mL chopped almonds* 1 tbsp 2 mL butter or margarine ½ tsp 125 mL yogurt or ice cream ½ cup
* Do not use almonds if someone has a nut allergy 1. Wash fresh peach carefully under cool water; cut in half and remove
the pit. (If using canned peaches, open the can with a can opener, remove the peach halves and drain the liquid.)
2. Place peaches into a microwaveable bowl. 3. In a separate small bowl, stir together sugar, cinnamon, and nuts
(if using). 4. Spoon this mixture into the centre of the peaches. 5. Top each with butter or margarine. 6. Put the bowl with the peaches into the microwave oven, and cook
at a high power for one minute. 7. Open the microwave and gently stir the peaches to re-arrange in
the bowl. This will help the peaches cook more evenly. 8. Microwave peaches for another minute and a half. The peaches are ready to eat once cooled a bit. You can top the peaches with yogurt or a bit of ice cream if you like. Sample your baked peaches with a clean spoon.
Don’t forget to recycle the empty can!

Makes : 6-8 servings Preparation and cooking time: 20 minutes Equipment: Microwave safe baking dish Microwave safe mixing bowl Measuring cups and spoons Mixing spoon Microwave oven Canada’s Food Guide: 125 mL (½ cup) cooked fruit is equal to one VEGETABLES & FRUIT serving Cereal topping is equal to one half (½) GRAIN PRODUCTS serving (approximately)
Quick Apple Berry Bake
4 large cooking apples, peeled and sliced 4 (about 1250 ml, 5 cups) 125 -175 mL fresh or frozen berries ½ - ¾ cup (blueberries, cranberries, raspberries) 30 mL dry butterscotch pudding mix 2 tbsp 60 mL margarine or butter ¼ cup 160 mL rolled oats 2/3 cup 125 mL flour ½ cup 125 mL brown sugar ½ cup 125 mL chopped pecans ½ cup 1 mL cinnamon ¼ tsp 1 mL nutmeg ¼ tsp 1. Place apples and berries in 8" round or square microwave safe baking dish. 2. Sprinkle with 30 mL (2 tbsp) dry pudding mix. Set aside. 3. In medium microwave bowl melt margarine or butter (about 30 seconds on high power) 4. Add remaining ingredients (rolled oats, flour, brown sugar, pecans, cinnamon and nutmeg). 5. Spoon over fruit mixture. Dish will be full! 6. Microwave, uncovered, on high power for 11-13 minutes, giving the dish a 1/4 turn every 3 minutes. (Unless microwave has turntable working). 7. Let stand 30 minutes before serving. Can also be baked in an oven for 30-40 minutes (oven safe dish). Serving suggestion: use up rest of butterscotch pudding mix with low fat milk and serve on the top or side!

Rice “No peeking!” The secret to cooking rice is not opening the lid once you have started to cook! To make good rice you have to be patient, but it is worth the wait! Cooked rice can be used to make many dishes – rice salads, fried rice, tortilla filling, and rice pudding, to name a few. This is a recipe for brown rice, but you can also follow the directions on the package of the rice that you are cooking. Rice will increase about three times in size after cooking, in other words, ½ cup of dry rice will make 1-½ cups of cooked rice. 125 mL brown rice ½ cup 300 mL water 1¼ cup 5 mL butter or margarine 1 tsp
1 mL salt ¼ tsp 1. Place rice, water, butter and salt in a large pot, and place on
the stovetop. 2. Turn on the stove/range to HIGH and wait while the water
starts to boil (this will take about five minutes). 3. Take a fork and stir the rice gently. Place the lid tightly on the
pot. 4. Turn down the heat on the stove to medium-low so that the
water will boil very gently (this is called simmering). Don’t open the lid until you have cooked the rice for 35-40 minutes.
5. After 35 to 40 minutes, stir the rice again with a fork. If there
is still some water left in the bottom of the pot, you can put the lid back on and cook it for another five minutes.
6. Once the rice is done, turn off the stove and move the pot off
the element onto a cool element or onto a trivet or cutting board.
Let the rice cool for five minutes before eating it. Let the rice cool for longer if you want to use it in the Vegetable Fried Rice recipe.
Makes: 1 ½ cups Preparation & Cooking Time: About 50 minutes Equipment: Large pot with lid Stove Fork Canada’s Food Guide: 125 mL (½ cup) of cooked rice is one GRAIN PRODUCTS serving Source: Cooking Healthy Together, 1998. Reprinted with permission from Toronto Public Health
Caution: Boiling water and
steam are extremely hot and can burn
you. Be very careful when
working on the stove.
Important: Once the lid is on, don’t remove it or peek! Even if water is boiling over the pot a little, keep the lid on. This allows the rice to absorb all the water and helps it cook. If the lid is removed,
the water will escape as steam and will not be absorbed by the rice.

Makes: 2 ½ cups Preparation & Cooking Time: About 20 minutes Equipment: Knife and cutting board Frying pan Stove Small bowl Fork or wire whisk Spoon for stirring Canada’s Food Guide 125 mL (½ cup) of cooked rice is one GRAIN PRODUCTS serving. 125 mL (½ cup) of peas or chopped vegetables, like peppers, is one VEGETABLES & FRUIT serving. Two eggs is one MEAT & ALTERNATIVES serving.
Vegetable Fried Rice You can use any leftover rice to make a great lunch that you can make ahead. Or surprise someone by making supper for them!
375 mL cooked rice 1-½ cups half red or green pepper half half onion half 15 mL vegetable oil 1 tbsp 2 eggs 2 250 mL frozen peas or mixed vegetables 1 cup 15 mL soya sauce 1 tbsp 1. Wash the red or green pepper in cool water and dry with a paper
towel. 2. Using a knife and cutting board, remove core and seeds of the red
or green pepper. Chop the pepper into small pieces. 3. Using a knife and cutting board, remove the outer skin of the onion
and cut into small pieces. 4. Place a large frying pan on the stove and turn the heat to medium-
high. 5. Place the oil into the frying pan, and let heat for about one minute. 6. Put the chopped pepper and onion in the pan and cook them in the
oil for about one minute, while stirring. 7. Crack the eggs into a small bowl and beat them a few times with a
wire whisk or fork. 8. Add the egg to the pepper and onion in the frying pan. Let the
egg “set” for about one minute and then stir the mixture. 9. Add the soya sauce, frozen peas or vegetables and the cooked
rice to the frying pan. Cook for about four minutes, while stirring. Once the vegetables and rice are warm, the dish is ready to eat. This recipe makes at least 2 servings, so share the extra with someone else!
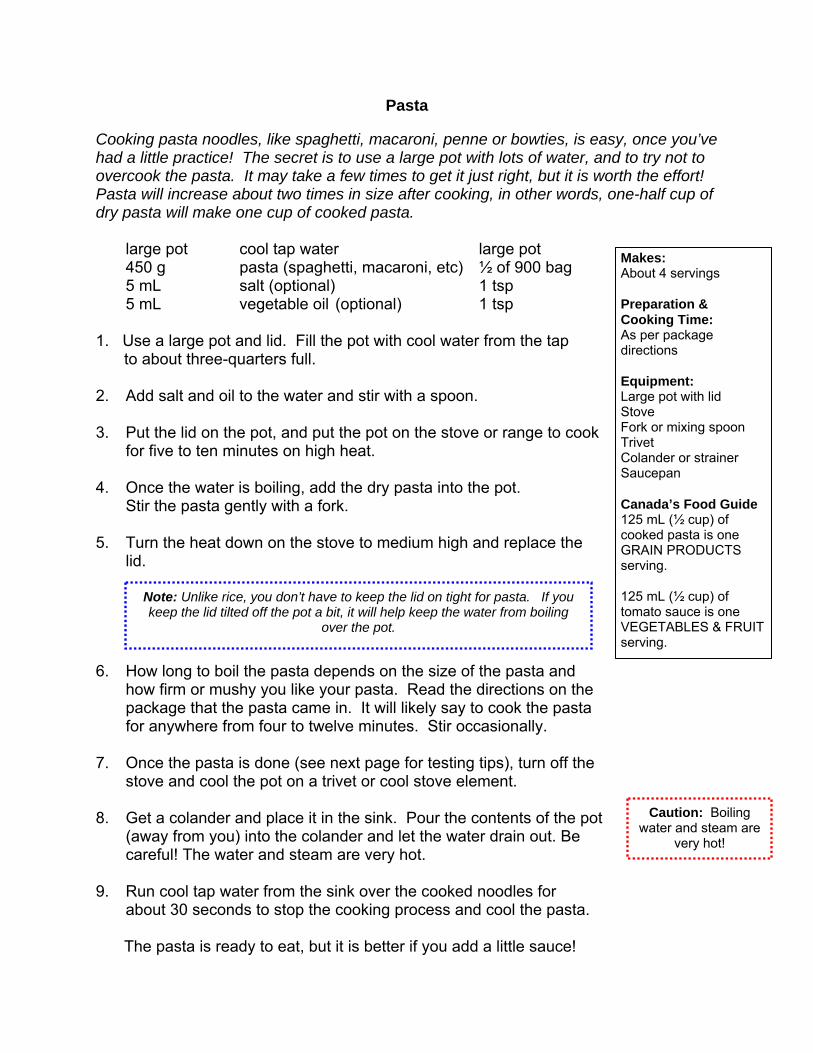
Makes: About 4 servings Preparation & Cooking Time: As per package directions Equipment: Large pot with lid Stove Fork or mixing spoon Trivet Colander or strainer Saucepan Canada’s Food Guide 125 mL (½ cup) of cooked pasta is one GRAIN PRODUCTS serving. 125 mL (½ cup) of tomato sauce is one VEGETABLES & FRUIT serving.
Caution: Boiling water and steam are
very hot!
Pasta Cooking pasta noodles, like spaghetti, macaroni, penne or bowties, is easy, once you’ve had a little practice! The secret is to use a large pot with lots of water, and to try not to overcook the pasta. It may take a few times to get it just right, but it is worth the effort! Pasta will increase about two times in size after cooking, in other words, one-half cup of dry pasta will make one cup of cooked pasta. large pot cool tap water large pot 450 g pasta (spaghetti, macaroni, etc) ½ of 900 bag 5 mL salt (optional) 1 tsp 5 mL vegetable oil (optional) 1 tsp 1. Use a large pot and lid. Fill the pot with cool water from the tap
to about three-quarters full. 2. Add salt and oil to the water and stir with a spoon. 3. Put the lid on the pot, and put the pot on the stove or range to cook
for five to ten minutes on high heat. 4. Once the water is boiling, add the dry pasta into the pot.
Stir the pasta gently with a fork. 5. Turn the heat down on the stove to medium high and replace the
lid. 6. How long to boil the pasta depends on the size of the pasta and
how firm or mushy you like your pasta. Read the directions on the package that the pasta came in. It will likely say to cook the pasta for anywhere from four to twelve minutes. Stir occasionally.
7. Once the pasta is done (see next page for testing tips), turn off the
stove and cool the pot on a trivet or cool stove element. 8. Get a colander and place it in the sink. Pour the contents of the pot
(away from you) into the colander and let the water drain out. Be careful! The water and steam are very hot.
9. Run cool tap water from the sink over the cooked noodles for
about 30 seconds to stop the cooking process and cool the pasta.
The pasta is ready to eat, but it is better if you add a little sauce!
Note: Unlike rice, you don’t have to keep the lid on tight for pasta. If you keep the lid tilted off the pot a bit, it will help keep the water from boiling
over the pot.

Makes: About 4 servings Preparation & Cooking Time: As per package directions Equipment: Large pot with lid Stove Fork or mixing spoon Trivet Colander or strainer Saucepan Canada’s Food Guide 125 mL (½ cup) of cooked pasta is one GRAIN PRODUCTS serving. 125 mL (½ cup) of tomato sauce is one VEGETABLES & FRUIT serving.
Pasta with Tomato Sauce 125 mL tomato sauce (any kind, from a jar or can) ½ cup 250 mL cooked pasta noodles, warm 1 cup Use half a cup of canned or jarred tomato sauce for every one cup of pasta noodles. Heat the pasta sauce in a small saucepan over medium heat on the stove, stirring often. It should take about three to five minutes to heat the sauce. Pour the tomato sauce over warm, cooked noodles. For extra flavour, sprinkle with Parmesan cheese.
Pasta Testing Tips
After the minimum cooking time for pasta has passed, take
the lid off the pot and carefully remove one or two pasta noodles with a fork or spoon.
Again, be careful not to burn yourself on the steam. Let the
noodles cool for about 30 seconds and then bite into them. If they are soft enough to chew easily, they are likely done.
If you want to cook them a little longer to make them softer,
replace the lid and cook for another two to three minutes. Use a different (clean) fork or spoon to test another noodle.
This may take a little practice, after you cook pasta a few
times, you will learn what the noodle looks like when it is done.
Some people like their pasta cooked “al dente” or “to the
tooth”. This means that the pasta is quite firm and not at all mushy when you bite into it. To cook “al dente” pasta, you should cook it for the minimum time.

Makes: About 1 ½ cups Preparation Time: About 15 minutes Equipment: Medium bowl Vegetable peeler Knife Cutting board Mixing spoon Canada’s Food Guide 125 mL (½ cup) of cooked pasta is one GRAIN PRODUCTS serving. 125 mL (½ cup) of cut-up celery, onions, peppers and carrots is one VEGETABLES & FRUIT serving.
Pasta Salad 250 mL cooked pasta noodles, cold 1 cup 1 stalk celery 1 stalk half red onion half half red or green pepper half 1 carrot 1 45 mL oil-based salad dressing 3 tbsp
(i.e. Italian or Greek) to taste Feta cheese, crumbled to taste
1. Put cold, cooked pasta noodles in a medium-sized bowl. 2. Rinse all the vegetables under cool water in the sink. 3. Wash the carrot and remove the outer skin using a vegetable
peeler. Rinse the peeler, and use it to grate the carrot into small slices. Grate the carrots directly into the bowl with the pasta.
4. Use a clean cutting board and knife to chop the celery, red onion
(remove outer skin first), and red or green pepper (core and remove seeds first) into small pieces. Put these into the bowl with the pasta and carrot. Mix together.
5. Pour the salad dressing over the pasta and vegetables. 6. Crumble a little bit of Feta cheese over top. Cover the bowl and put in the refrigerator so that all the flavours can mix together. This process is called “marinating”. You can eat the pasta salad right away, but it tastes best if you leave it in the fridge overnight, and eat it the next day.

Tortilla Wedges
2 small whole-wheat tortillas 2 125 mL canned refried beans ½ cup 50 g Cheddar cheese ¼ cup 50 mL salsa from a jar ¼ cup
1. Spread one tortilla with refried beans. 2. Place tortilla in a non-stick frying pan with the refried beans
facing up. 3. Use a cheese grater to grate a piece of Cheddar cheese.
Sprinkle this over the beans on the tortilla. 4. Cover with second tortilla. 5. Turn stove or range to MEDIUM heat, and place the frying pan
on the heat. 6. Cook the tortillas until the cheese inside is nearly melted and
the bottom of the tortilla is golden-brown in colour (use a spatula to check underneath).
7. Flip the tortilla over using a spatula to heat the other side of
the tortilla. 8. Once both sides are golden-brown, turn off the stove, and put
the tortilla on a plate. 9. Cut the tortilla into six wedges (like cutting a pie). Use the
salsa as dip when you eat the wedges.
Makes: 6 wedges Preparation & Cooking Time: About 15 minutes Equipment: Non-stick frying pan Stove Cheese grater Spatula Knife Can opener Canada’s Food Guide one small tortilla is one GRAIN serving (two small tortillas is two servings) 50 g cheese is one MILK and ALTERNATIVES serving 175 mL (¾ cup) of beans is one MEAT & ALTERNATIVES serving 125 mL (½ cup) of salsa is one VEGETABLE & FRUIT serving, so ¼ cup (50 g) is only half a serving.
Don’t forget to recycle the empty can!

Make Your Own Recipe - Soup Your Way! (From: Connie Evers, How to teach nutrition to kids workbook) The possibilities are endless for creating variations of this delicious Italian soup! Pick one choice in each category for this recipe:
Broth:
500 mL (2 cups) vegetable or chicken or beef Juice:
750 mL (3 cups) vegetable juice or tomato juice use low sodium varieties Vegetables:
1 lb bag of frozen peas, corn, green beans or mixed vegetables 3-4 cups fresh vegetables carrots, zucchini, potato or 3-4 cups of a combination of fresh and frozen vegetables
Protein:
1 can, (16 oz) drained kidney, pinto, white or black beans or 2 cups lean meat (e.g. turkey, cooked ground beef)
Pasta: 1 cup whole wheat pasta (e.g. macaroni, small shells, rotini or bowties) Seasoning: 30 mL garlic powder 2 tbsp 5mL Italian seasoning 1 tsp 2 mL pepper ½ tsp 250 mL water 1 cup 1. In a large saucepan, combine all the ingredients except pasta. Cook on medium heat until the soup boils. 2. Add pasta and cook for 15-20 minutes until pasta is tender. Complete the meal by topping the soup with cheese; eat fruit for dessert.
Makes: 8-10 servings Preparation & Cooking Time: About 30 minutes Equipment: Large saucepan Spoon for stirring Canada’s Food Guide 125 ml (½ cup) of fresh/frozen vegatbles is one VEGETABLES & FRUITS serving 175 mL (¾ cup) of beans is one MEAT & ALTERNATIVES serving 75 g (½ cup) of lean meat is one MEAT & ALTERNATIVES serving 125 ml (½ cup) of pasta is one GRAIN PRODUCTS serving

Beef Taco Skillet A quick stove top lunch or supper that is a source of protein, fibre and vegetables.
450g lean ground meat 1 lb 1 can tomato soup, low sodium 1 can 125 mL salsa ½ cup 125 mL water ½ cup 6 tortillas, cut into 1" pieces 6 125 mL Cheddar cheese, shredded ½ cup 1. Cook beef in skillet until well browned. Break up large chunks. Drain the fat. 2. Stir in soup, salsa, water and tortillas. Heat to a boil. 3. Reduce heat to low and cook for 5 minutes. Stir. 4. Top with cheese. Let cheese melt, then serve. Creamy: Stir in 125 mL (½ cup) low fat sour cream with the soup. Ranchero style: Use corn tortillas instead of flour tortillas and a Mexican cheese instead of cheddar. Additional fibre: Stir in 250 mL (1 cup) frozen or drained canned corn or any type of beans, e.g. kidney beans.
Makes : 4-6 servings Preparation and cooking time: 20 minutes Equipment: Larger skillet Stove Cheese grater Spoon for stirring on the stove top Can opener Canada’s Food Guide: 75g (½ cup) cooked meat is one MEAT & ALTERNATIVES serving ½ tortilla is one GRAIN PRODUCTS serving 125mL (½ cup) salsa is one VEGETABLES & FRUIT serving Source: Submitted by Janice McCue. Adapted from Campbellskitchen.com

Makes: 1-2 servings Preparation & Cooking Time: About 15 minutes Equipment: Can opener Medium bowl Spoon Knife Cutting board Oven or toaster oven Baking sheet Oven mitts Trivet Canada’s Food Guide: ½ bagel or one piece of bread is one GRAIN PRODUCTS serving (a whole bagel or two pieces of bread is equal to two servings). 125 mL (½ cup) tuna is one MEAT & ALTERNATIVE serving. 50 g of cheese is one MILK & ALTERNATIVES serving.
Tuna Melts When you cook in an oven or toaster oven, the heat usually comes from two elements – one at the bottom of the oven and one at the top. When you use the oven or toaster oven on broil, this means that only the top element is used, and very intense heat reaches the food from above. This is a great way to melt the cheese on a pizza or in a sandwich. 170 g 1 can tuna, drained 6 oz 50 mL mayonnaise ¼ cup 1 stalk of celery 1 ¼ small onion ¼ 1 dill pickle (optional) 1 1 whole-wheat bagel or 1
English muffin 50 g Cheddar cheese 2 slices
1. Spoon out the drained tuna into the bowl. 2. Use a cutting board and knife to carefully cut the bagel or English
muffin into two halves. Set aside for a minute. 3. Wash the celery under cool running water. Use a cutting board and
knife to chop the celery into very small pieces. (This is called mincing). Add the minced celery to the tuna.
4. Use a cutting board and knife to mince the dill pickle and the onion
(remove skin first) into very small pieces. Add to the tuna. 5. Finally, add the mayonnaise into the tuna. Mix ingredients
together. This mixture is known as “tuna salad” and can be spread onto bread for a cold “tuna salad sandwich”. This recipe goes a step further.
6. Turn on the oven or toaster oven to broil. Place the bagel halves
on a baking sheet and put inside the oven or toaster oven. Watch very carefully as the bagel toasts under the broiler – this should happen very quickly. Once lightly browned, put on your oven mitts and remove the baking sheet from the oven. Place it on a trivet or cutting board to avoid burning your counter top.
7. Next, place a large scoop (about 50 g or 1½ ounces) of the tuna
mixture onto each half of your bagel.
Don’t forget to recycle the empty can!

8. Put a slice of cheese on top of each, and return them to the baking sheet and into the oven for more broiling. Watch carefully as the cheese melts and bubbles. This will take about one minute.
9. Once the cheese is melted, turn off the broiler and take the baking
sheet out of the oven using oven mitts. Allow the Tuna Melts to cool for about one minute. They are now ready to eat!

Veggie “Fries” 1 potato (red or white) 1 1 sweet potato (yam) 1 10 mL vegetable oil 2 tsp 5 mL seasoning salt (or favourite spices) 1 tsp Ketchup for dip (optional) 1. Turn on the oven to 425° F. When you turn on the oven
before you are ready to put the food in, it is called preheating. 2. Scrub the potato and the yam with a clean vegetable brush or
rough cloth to remove any dirt or brown spots. Rinse them well under cool water.
3. Use a knife to get rid of any spots on the potato and yam that
don’t look fresh. Rinse them again under water. Do not peel. 4. Cut the potato and yam into slices or wedges, using a knife
and cutting board, but try to keep them all about the same size and thickness so that they will cook in the same amount of time.
5. Put the potatoes and yams into a bowl and pour the oil over
top. Mix with a large spoon so that all they are evenly covered with oil.
6. Get a baking sheet or “cookie sheet” and spread the potatoes
and yams in an even layer on the sheet. If you are using a toaster oven, spread the potatoes and yams onto a small baking pan that can fit inside the oven.
7. Put them in the oven to bake. After about ten minutes, use
oven mitts to remove the baking sheet and place it on a trivet (this will keep the hot baking sheet from burning your counter top or table).
8. Use a spatula to flip over all the potato and yam pieces so
that the other side has a chance to get brown and crispy too. Return the baking sheet to the oven for another 10 minutes.
9. Once both sides of the potato and yam slices are brown and
crispy, take them out of the oven and turn the oven off. 10. Sprinkle seasoning salt, or regular salt and pepper, or any
spice that you like on the potatoes and yams.
Makes: 1-2 servings Preparation & Cooking Time: About 30 minutes Equipment: Oven or toaster oven Vegetable brush Knife Cutting board Bowl Large spoon Baking sheet Trivet Oven mitts Spatula Canada’s Food Guide One medium potato or sweet potato is one VEGETABLES & FRUIT serving
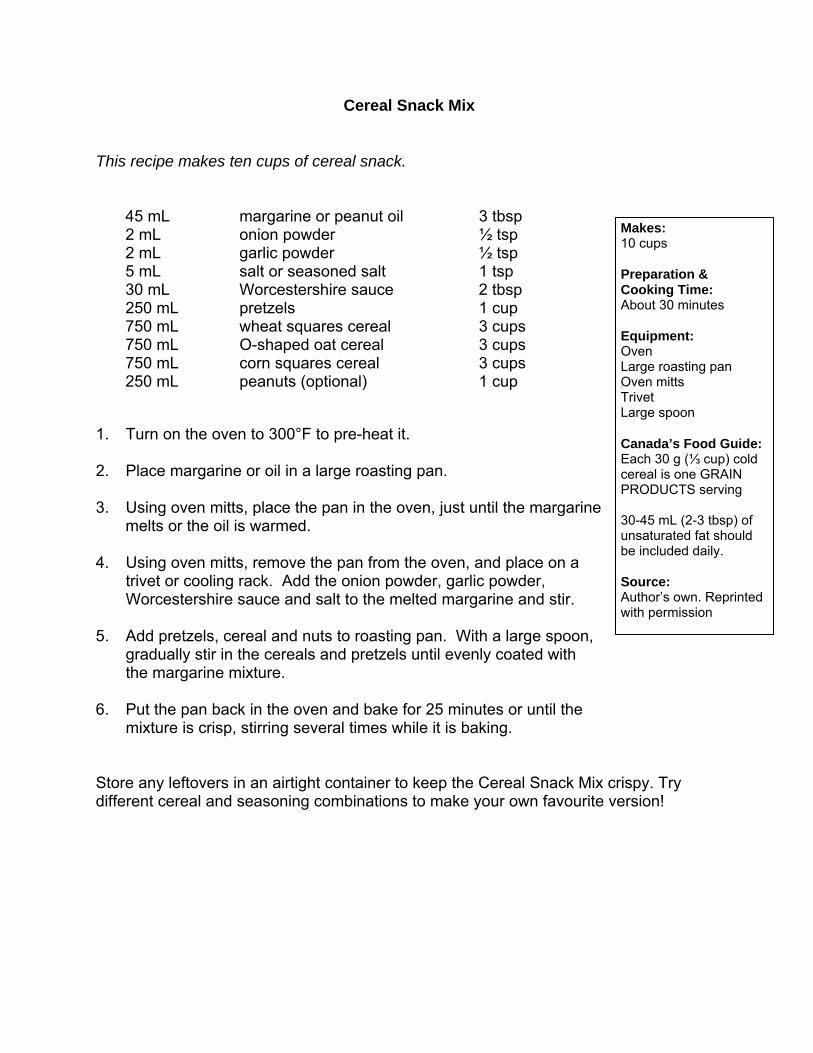
Makes: 10 cups Preparation & Cooking Time: About 30 minutes Equipment: Oven Large roasting pan Oven mitts Trivet Large spoon Canada’s Food Guide: Each 30 g (⅓ cup) cold cereal is one GRAIN PRODUCTS serving 30-45 mL (2-3 tbsp) of unsaturated fat should be included daily. Source: Author’s own. Reprinted with permission
Cereal Snack Mix
This recipe makes ten cups of cereal snack.
45 mL margarine or peanut oil 3 tbsp 2 mL onion powder ½ tsp 2 mL garlic powder ½ tsp 5 mL salt or seasoned salt 1 tsp 30 mL Worcestershire sauce 2 tbsp 250 mL pretzels 1 cup 750 mL wheat squares cereal 3 cups 750 mL O-shaped oat cereal 3 cups 750 mL corn squares cereal 3 cups 250 mL peanuts (optional) 1 cup
1. Turn on the oven to 300°F to pre-heat it.
2. Place margarine or oil in a large roasting pan. 3. Using oven mitts, place the pan in the oven, just until the margarine
melts or the oil is warmed. 4. Using oven mitts, remove the pan from the oven, and place on a
trivet or cooling rack. Add the onion powder, garlic powder, Worcestershire sauce and salt to the melted margarine and stir.
5. Add pretzels, cereal and nuts to roasting pan. With a large spoon,
gradually stir in the cereals and pretzels until evenly coated with the margarine mixture.
6. Put the pan back in the oven and bake for 25 minutes or until the
mixture is crisp, stirring several times while it is baking. Store any leftovers in an airtight container to keep the Cereal Snack Mix crispy. Try different cereal and seasoning combinations to make your own favourite version!
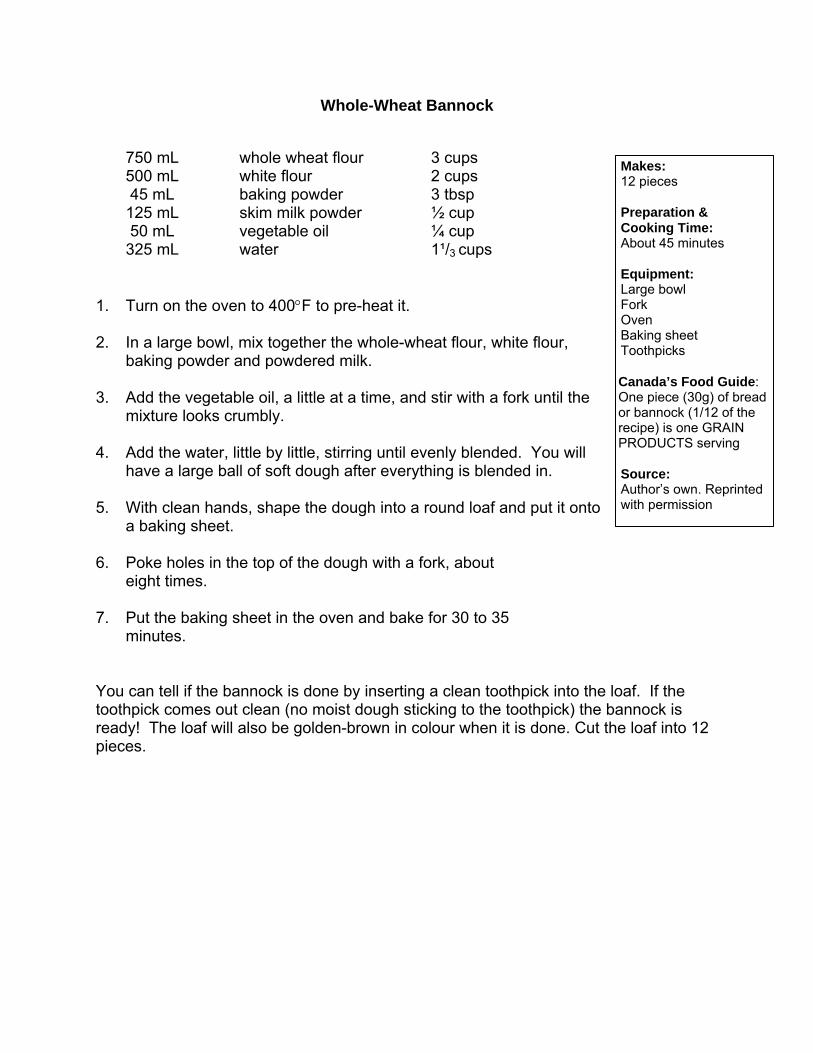
Makes: 12 pieces Preparation & Cooking Time: About 45 minutes Equipment: Large bowl Fork Oven Baking sheet Toothpicks Canada’s Food Guide: One piece (30g) of bread or bannock (1/12 of the recipe) is one GRAIN PRODUCTS serving Source: Author’s own. Reprinted with permission
Whole-Wheat Bannock
750 mL whole wheat flour 3 cups 500 mL white flour 2 cups 45 mL baking powder 3 tbsp 125 mL skim milk powder ½ cup 50 mL vegetable oil ¼ cup 325 mL water 1¹/3 cups
1. Turn on the oven to 400°F to pre-heat it. 2. In a large bowl, mix together the whole-wheat flour, white flour,
baking powder and powdered milk. 3. Add the vegetable oil, a little at a time, and stir with a fork until the
mixture looks crumbly. 4. Add the water, little by little, stirring until evenly blended. You will
have a large ball of soft dough after everything is blended in. 5. With clean hands, shape the dough into a round loaf and put it onto
a baking sheet. 6. Poke holes in the top of the dough with a fork, about
eight times. 7. Put the baking sheet in the oven and bake for 30 to 35
minutes. You can tell if the bannock is done by inserting a clean toothpick into the loaf. If the toothpick comes out clean (no moist dough sticking to the toothpick) the bannock is ready! The loaf will also be golden-brown in colour when it is done. Cut the loaf into 12 pieces.

Fruit Leather Fruit leather is a tasty, chewy, dried fruit product. Fruit leathers are made by pouring pureed fruit onto a flat surface for drying. When dried, the fruit is pulled from the surface and rolled. We call it leather because when pureed fruit is dried, it has a shiny surface and the texture of leather! There are lots of commercial fruit leathers mostly made from sugar and food colouring. Fruit leathers from real fruit are a better alternative and fun to make!
500 mL fruit 2 cups 5 mL lemon juice 2 tsp 60 mL corn syrup or honey ¼ cup 1. Select ripe or slightly overripe fruit or berries. Wash in cool water. 2. Remove peel, stems, seeds. Cut fruit into chunks. 3. 500 mL (2 cups) of fruit will make a 13x15" fruit leather (small baking sheet size). 4. Puree fruit (in blender) until smooth. 5. Add lemon juice for light coloured fruit puree (prevents darkening). 6. To sweeten (optional) add corn syrup or honey. Sucralose (sugar substitute) may be used to reduce tartness without adding calories. Avoid using Aspartame sweeteners as they loose sweetness during drying. 7. For drying in the oven or sun, line cookie sheets with
parchment paper. Pour pureed fruit on the prepared cookie sheet. Spread evenly to a thickness of 3 mm (1/8 inch).
In the oven, dry fruit at 140F until no indentation is left when you touch the centre with your clean finger. This may take about 18 hours.
Drying in the sun will take about 1-2 days. 8. While still warm, peel from plastic wrap, cool and re-wrap in
plastic wrap to store.
Makes: 6-8 servings Preparation and cooking time: 1-2 days Equipment: Knife Cutting board Mixing spoon Mixing bowl Measuring cups Food processor Cookie sheet Parchment paper Plastic wrap Canada’s Food Guide: 125 mL (½ cup) cooked fruit is one VEGETABLES & FRUIT serving

Canned or Frozen Fruits: Thaw frozen fruits, drain and save liquid. Follow instructions as for fresh fruit. If the puree is too thick, add some of the reserved liquid. Applesauce can be dried alone or used with other fruit purees as an extender. It decreases tartness without adding sugar and makes the leather smoother and more pliable.