Embed Size (px)
Citation preview

CONTENTdm for BeginnersSeptember 25, 2012by Kourtney Blackburn

Today’s Goals
•Familiarize or re-familiarize yourself with CONTENTdm
•Become comfortable using CONTENTdm

Today’s Agenda
•Take tour of CDM Project Client software•Learn how to begin a “project”
▫Set up, edit, upload
•Tour Online Administration of CDM•Approve and Index items •Edit existing items
•Tour the USC (User Support Center)
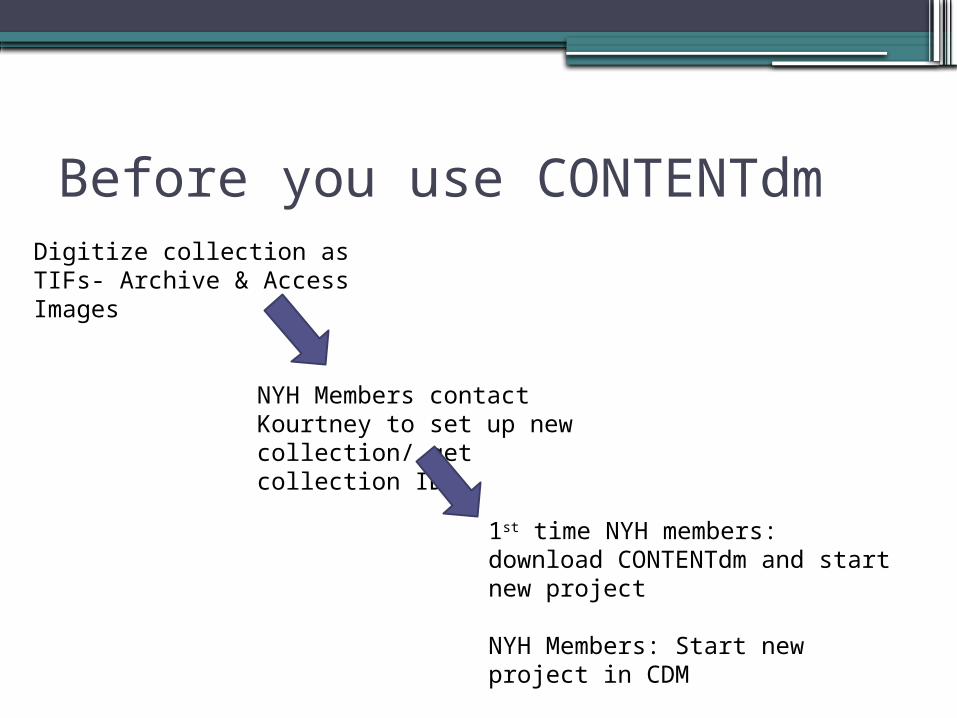
Before you use CONTENTdmDigitize collection as TIFs- Archive & Access Images
NYH Members contact Kourtney to set up new collection/ get collection ID
1st time NYH members: download CONTENTdm and start new project
NYH Members: Start new project in CDM

What is CONTENTdm?
•Program needed to publish items on NY Heritage
•Two components: ▫Desktop Software (Project Client)▫Online Administration (Web Server)

CONTENTdm Jargon• Item: a file and its associated metadata
• Object: an item or group of items that collectively represent a single work
• Compound Object: Multiple files displayed to the end user as a single work
• Metadata Template: template created to assign consistent metadata to a project

Collection vs. Project
•Digital Collection: items grouped by provenance or theme, and often already exists as a physical collection in an archive
•Project: temporary group of items you are editing and only exist inside the Project Client▫New or existing

Tour of Project Client
•New versus Shared Projects
•Remember- projects are temporary!

Editing Your Metadata Template•Metadata fields are established within
Online Administration (Web Server)
•Metadata template- allows you to generate consistent metadata to fields in Project Client▫General or file-specific
•Set this up before loading items in Project Client!

Uploading an Item
•Start small- upload one item first
•Use an access image within a folder on your computer
•“Add item” from Home Tab in Project Client

Editing Items
•Edit in the Spreadsheet View in Project Tab
•Add transcript from .txt file if needed (available by right-clicking on field within Project Tab)
•Double-click to edit one-at-a-time and use controlled vocabularies

Upload, Approve, IndexClick check box in Project Tab. Then,
upload item to Online Administration after editing
Online Admin launches. Check and Approve
Index to make public on NY Heritage

Adding Multiple Items
•Files must be located in the same folder
•Options:1. Upload files of images, then add metadata within Project Client as normal
2. Upload files of images and metadata all at once
(using .txt file created in Excel)

Option 1: Upload files of images, then edit metadata•Upload into Project Client by selecting
“Add Multiple Items” , “Importing from Directory”, and selecting folder with files
•Edit metadata as usual▫Fill down, fill all features available by right-
clicking after 2+ items are in Project Tab

Upload, Approve, and Index
•After uploading multiple items into Project Client, upload to Online Administration, approve, and index as practiced with one item.

Option 2: Uploading files of images and metadata together
Open Excel and enter metadata field names in Row 1
Add column “Object File Name” to end of Row 1 (In rows 2+ adding the file name of files will “map” your
metadata to the corresponding file on your computer. (fall001.tif)
Enter metadata for images in rows 2+, putting the file name (fall001.tif) of the images in the last column

Uploading files of images and metadata all at once
Save* Excel file as a .txt file (Tab-Delimited Text)
*File must be saved in its own folder, outside of folder containing images. Put both folders in a folder labeled
as your digital collection name
Select “Add Multiple Item” from Home Tab and Import using a tab-delimited text file option

Upload, Approve, and Index
•After uploading multiple items into Project Client, upload to Online Administration, approve, and index as practiced with one item.

Upload a double-sided image
From Home Tab, select “ Upload Compound Object”
Upload using Compound Object Wizard

Upload a double-sided image
Select type of compound object to upload
Locate folder (not individual files) and add to Wizard
Finish upload to Project Client, edit object level and page-level metadata

Upload, Approve, and Index
•After uploading into Project Client and editing, upload to Online Administration, approve, and index as practiced.

Editing Published Items
•Options:1. “Pull” items back into Project Client (we will practice)
2. Search for and edit in Online Administration under “Items” tab

“Pull” items back into Project Client
•Edit item while old version is still public until you upload, approve, & index(also true of editing in Online Admin)
•Find in Collection Tab- many ways to search for your item

Upload, Approve, and Index
•After editing your item(s),upload once again to Online Administration, approve, and index as practiced.

Have a question? Try these resources:
• RRLC Librarian Kourtney [email protected]
• OCLC’s CONTENTdm User Support Centerhttp://www.contentdm.org/login/login_USC.asp
•NY Heritage Contributors Page- underneath maphttp://www.nyheritage.org/contributors
Find more links on home screen
of Project Client