Embed Size (px)
Citation preview

Completing the Security Form
Published 3/14/2011 Page 1
Information Technology Services Reference Sheet Completing the Security Form
Concept The Online Security form is used to request and grant access to employees who will be using the PeopleSoft Financials system. Access can be requested for eProcurement, Accounts Payable, General Ledger, Reporting, and Petty Cash. Information that is entered on the form includes contact information for the user and the identification of the user's supervisor and/or approver. The form is available online through PeopleSoft Financials. Those who are requesting access must have a supervisor that can log into PeopleSoft Financials. Procedure This guide explains the steps for completing the form. First, log into PeopleSoft Financials to get started.

Completing the Security Form
Page 2 Published 3/14/2011
Step Action
1. Click the CWRU Online Security Form link.
2. Click the New Security Requests link.
Step Action
3. Enter the CWRU Network ID of the person to receive access in the Case Network ID field.
4. Press [Enter].

Completing the Security Form
Published 3/14/2011 Page 3
Step Action
5. The EMPLID and the Name of the person appears. Verify this is the correct person. If the person had a security request previously, information about those requests will appear below the name along with the buttons to Change or Inactiviate the existing security. Click the Add User Profile button.

Completing the Security Form
Page 4 Published 3/14/2011
Step Action
6. If the person has access and it is being changed or update the screen will look like this, click the Change User Profile button to continue.

Completing the Security Form
Published 3/14/2011 Page 5
Step Action
7. The Security Access Request tab appears. Enter the phone number of the person who needs access in the Phone Number field. Make sure to include 10 digits in the format of xxx/xxx-xxxx.
The following field are pre-populated: Case Network ID: CWRU Network ID of the person for which the form is being completed. Name: Name of the person for which the form is being completed. Requestor ID: The CWRU Net ID of the person who filled out the request for the person listed. Requestor Name: The name of the person who filled out the request for the employee. Employee ID: Employee ID of the person for which the form is being submitted. Request Status: Status of the request. Fill out the following fields to complete the form( * are required fields): *Phone Number: Phone number of the person for which the form is being completed. *Fax Number: Fax number of the person for which the form is being completed. *Building: When you create a requisition the default ship to address will

Completing the Security Form
Page 6 Published 3/14/2011
reference this building. *Room #: When you create a requisition the default ship to address will include this room number. *Department ID: Enter the six-digit code which represents the Department in which your salary is based. The Management Center will populate when the Department ID is entered. Supervisor’s Case Network ID: Your Supervisor’s Case Network ID. The Name of the Supervisor will populate after the ID is entered.
Step Action
8. Enter the Fax Number into the Fax Number field.
9. Enter the Building number. To search, click the Look up button.
Step Action
10. Enter a Building # or a Description to search.
11. Click the Look Up button.

Completing the Security Form
Published 3/14/2011 Page 7
Step Action
12. The items that match your search appear. Choose a building by clicking on the link. For example,

Completing the Security Form
Page 8 Published 3/14/2011
Step Action
13. Enter the Room Number in the Room# field.
14. Enter the 6 digit Department ID in the Department ID field.
15. Enter the CWRU Network ID of the Supervisor of the person needing security in
the Network ID field.
16. Select the items that the person will need access to use. Be sure to enter the
Requisition Approver's CWRU Network ID in the field provided. The Requisition approver must have a higher level of approval authority then this person.
Purchasing / eProcurement Section Submit Requisitions: This person will submit Purchase Requisitions, please check this box. If not, leave it blank. Inquire on Requisitions/Purchase Orders: This person can view Purchase Requisitions that were entered by themselves or by others, please check this box. If not, leave it blank. Requisition Approver's Case Network ID: If applicable, enter the name of the person that will approve this person's requisitions after they have been entered. (Please note that all requisitions exceeding your approval authority will be routed to this person first.) Requisition Approver (Name): This will populate after the Network ID is entered. No Approval on Requisitions - This person can create requisitions but can not approve them. Approve Requisitions - $0 - $5,000: If this person is authorized to approve Requisitions up to $5000, please check this box. If not, leave it blank. Approve Requisitions - $5,000 - $20,000: If this person is authorized to approve Requisitions up to $20,000, please check this box. If not, leave it blank. Approve Requisitions – greater than $20,000: If this person is authorized to approve Requisitions over $20,000, please check this box. If not, leave it blank. Accounts Payable Section Submit Payment Requests: This person can submit Payment Requests,

Completing the Security Form
Published 3/14/2011 Page 9
please check this box. If not, leave it blank. Inquire on Vouchers/Payment: This person can view Payment Request and Vouchers that were entered by them or by other users, please check this box. If not, leave it blank. General Ledger Section: Enter Journals: This person can enter Financial Journals either online or through the Spreadsheet Upload interface, please check this box. If not, leave it blank. Department Deposits: This access is given by default to all PeopleSoft Financials users. It is automatically checked. Petty Cash Section: Petty Cash: This person will enter Petty Cash Vouchers.
Step Action
17. When finished, click the Reporting Access Request button.
Completing the Security Form
Page 10 Published 3/14/2011
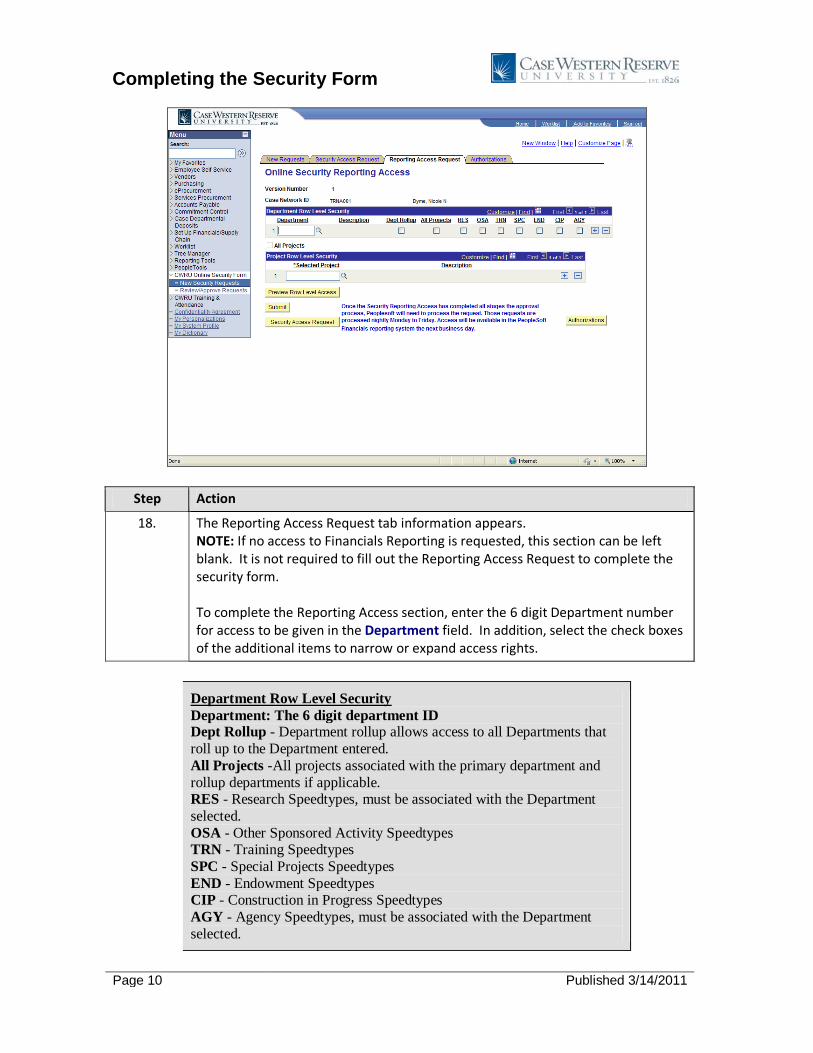
Step Action
18. The Reporting Access Request tab information appears. NOTE: If no access to Financials Reporting is requested, this section can be left blank. It is not required to fill out the Reporting Access Request to complete the security form. To complete the Reporting Access section, enter the 6 digit Department number for access to be given in the Department field. In addition, select the check boxes of the additional items to narrow or expand access rights.
Department Row Level Security Department: The 6 digit department ID Dept Rollup - Department rollup allows access to all Departments that roll up to the Department entered. All Projects -All projects associated with the primary department and rollup departments if applicable. RES - Research Speedtypes, must be associated with the Department selected. OSA - Other Sponsored Activity Speedtypes TRN - Training Speedtypes SPC - Special Projects Speedtypes END - Endowment Speedtypes CIP - Construction in Progress Speedtypes AGY - Agency Speedtypes, must be associated with the Department selected.

Completing the Security Form
Published 3/14/2011 Page 11
Step Action
19. For narrower Row Level Security, enter the Selected Project Speedtypes in the Project Row Level Security section.
Project Row Level Security Specify a list of projects. The list will be limited to the projects which reside in the department(s) you have specified in the Depatment Row Level Security.
Step Action
20. To preview the access that will be granted, click the Preview Row Level Access button.

Completing the Security Form
Page 12 Published 3/14/2011
Step Action
21. Review for accuracy the results and then Click the Back button to return.
Step Action
22. To finish the form, click the Submit button. Click the Save button if the form is not completed. Remember to return to complete the request.
23. To view the Authorizations that will be required for the form to be complete.
Click the Authorizations button. The user for which access is being requested, the supervisor and management center will all receive email notification that a request has been submitted. Email communications will follow as the form follows workflow.

Completing the Security Form
Published 3/14/2011 Page 13
Step Action
24. The Authorized Signatures page appears. This page will list all the approvals that have or have not been processed. Click the Previous Page button to return.
25. This completes the Online Security form.
End of Procedure.