Embed Size (px)
Citation preview
Cluster Server 7.1 Agent forDB2 Installation andConfiguration Guide - AIX
April 2016
Cluster Server Agent for DB2 Installation andConfiguration Guide
Last updated: 2016-04-26
Document version: 7.1 Rev 0
Legal NoticeCopyright © 2016 Veritas Technologies LLC. All rights reserved.
Veritas, the Veritas Logo, and NetBackup are trademarks or registered trademarks of VeritasTechnologies LLC or its affiliates in the U.S. and other countries. Other names may betrademarks of their respective owners.
This product may contain third party software for which Veritas is required to provide attributionto the third party (“Third Party Programs”). Some of the Third Party Programs are availableunder open source or free software licenses. The License Agreement accompanying theSoftware does not alter any rights or obligations you may have under those open source orfree software licenses. Refer to the third party legal notices document accompanying thisVeritas product or available at:
https://www.veritas.com/about/legal/license-agreements
The product described in this document is distributed under licenses restricting its use, copying,distribution, and decompilation/reverse engineering. No part of this document may bereproduced in any form by any means without prior written authorization of Veritas TechnologiesLLC and its licensors, if any.
THE DOCUMENTATION IS PROVIDED "AS IS" AND ALL EXPRESS OR IMPLIEDCONDITIONS, REPRESENTATIONS AND WARRANTIES, INCLUDING ANY IMPLIEDWARRANTY OF MERCHANTABILITY, FITNESS FOR A PARTICULAR PURPOSE ORNON-INFRINGEMENT, ARE DISCLAIMED, EXCEPT TO THE EXTENT THAT SUCHDISCLAIMERS ARE HELD TO BE LEGALLY INVALID. VERITAS TECHNOLOGIES LLCSHALL NOT BE LIABLE FOR INCIDENTAL OR CONSEQUENTIAL DAMAGES INCONNECTION WITH THE FURNISHING, PERFORMANCE, OR USE OF THISDOCUMENTATION. THE INFORMATION CONTAINED IN THIS DOCUMENTATION ISSUBJECT TO CHANGE WITHOUT NOTICE.
The Licensed Software and Documentation are deemed to be commercial computer softwareas defined in FAR 12.212 and subject to restricted rights as defined in FAR Section 52.227-19"Commercial Computer Software - Restricted Rights" and DFARS 227.7202, et seq."Commercial Computer Software and Commercial Computer Software Documentation," asapplicable, and any successor regulations, whether delivered by Veritas as on premises orhosted services. Any use, modification, reproduction release, performance, display or disclosureof the Licensed Software and Documentation by the U.S. Government shall be solely inaccordance with the terms of this Agreement.
Veritas Technologies LLC
500 E Middlefield RoadMountain View, CA 94043
http://www.veritas.com
Technical SupportTechnical Support maintains support centers globally. All support services will be deliveredin accordance with your support agreement and the then-current enterprise technical supportpolicies. For information about our support offerings and how to contact Technical Support,visit our website:
https://www.veritas.com/support
You can manage your Veritas account information at the following URL:
https://my.veritas.com
If you have questions regarding an existing support agreement, please email the supportagreement administration team for your region as follows:
[email protected] (except Japan)
DocumentationMake sure that you have the current version of the documentation. Each document displaysthe date of the last update on page 2. The document version appears on page 2 of eachguide. The latest documentation is available on the Veritas website:
https://sort.veritas.com/documents
Documentation feedbackYour feedback is important to us. Suggest improvements or report errors or omissions to thedocumentation. Include the document title, document version, chapter title, and section titleof the text on which you are reporting. Send feedback to:
You can also see documentation information or ask a question on the Veritas community site:
http://www.veritas.com/community/
Veritas Services and Operations Readiness Tools (SORT)Veritas Services and Operations Readiness Tools (SORT) is a website that provides informationand tools to automate and simplify certain time-consuming administrative tasks. Dependingon the product, SORT helps you prepare for installations and upgrades, identify risks in yourdatacenters, and improve operational efficiency. To see what services and tools SORT providesfor your product, see the data sheet:
https://sort.veritas.com/data/support/SORT_Data_Sheet.pdf
Chapter 1 Introducing the Cluster Server Agent for DB2 ............ 7
About the Cluster Server Agent for DB2 .............................................. 7How Cluster Server Agent for DB2 makes DB2 highly available ............... 8How the DB2 agent supports intelligent resource monitoring ................... 8Supported software for VCS agent for DB2 .......................................... 9About agent functions for VCS Agent for DB2 ...................................... 9
About the online agent function for VCS agent for DB2 .................... 9About the offline agent function for VCS agent for DB2 .................... 9About the monitor agent function for VCS agent for DB2 ................. 10About the clean agent function for VCS agent for DB2 ................... 10About the info agent function for VCS agent for DB2 ...................... 11About the action agent function for VCS agent for DB2 ................... 11About IMF Integration functions for VCS Agent for DB2 .................. 12About running the info agent function to get database information
for VCS agent for DB2 ....................................................... 12Typical DB2 configuration in a Cluster Server .................................... 13Road map for setting up DB2 UDB in a VCS environment ..................... 14
Chapter 2 Installing and configuring DB2 ....................................... 16
VCS requirements for installing DB2 ................................................. 16Preparing to install DB2 UDB non-MPP versions ........................... 16Preparing to install DB2 UDB MPP versions ................................. 17Creating the file systems for non-MPP instances for DB2 ................ 18Creating the shared file systems for MPP instances for DB2 ............ 18Defining user and group accounts for DB2 ................................... 19
Installing DB2 in a VCS environment ................................................ 21Setting up the DB2 configuration ..................................................... 21
Checking /etc/services for DB2 .................................................. 22Enabling password less communication for DB2 users among all
cluster nodes .................................................................. 22Modifying the $DB2InstHome/sqllib/db2nodes.cfg file for
DB2 ............................................................................... 23Confirming the DB2 installation ................................................. 26
Contents
Chapter 3 Installing and removing the Cluster Server Agentfor DB2 ........................................................................... 28
Before you install or upgrade the VCS Agent for DB2 ........................... 28Installing the VCS agent for DB2 software ......................................... 29Upgrading the VCS Agent for DB2 ................................................... 30Disabling the VCS Agent for DB2 ..................................................... 31Removing the VCS Agent for DB2 ................................................... 31
Chapter 4 Configuring VCS service groups for DB2 ................... 33
About configuring service groups for DB2 .......................................... 33About DB2 configurations in VCS .................................................... 34
Non-MPP configuration service groups for DB2 ............................ 35MPP configuration service groups for DB2 ................................... 36
Before configuring the service group for DB2 ..................................... 37Importing the Db2udbTypes.cf file .............................................. 38
Configuring the VCS Agent for DB2 from Cluster Manager (JavaConsole) .............................................................................. 39Adding service group for DB2 MPP using the Cluster Manager
(Java Console) ................................................................ 40Adding a service group for DB2 non-MPP with the Cluster Manager
(Java Console) ................................................................ 41Configuring the VCS Agent for DB2 by editing the main.cf file ................ 43
Configuring the agent to use the DB2 MPP configuration ................ 44Configuring the agent to use the DB2 non-MPP
configurations .................................................................. 45Verifying the configuration for VCS agent for DB2 ......................... 46
Setting up in-depth monitoring of a DB2 instance ................................ 47Enabling in-depth monitoring of a DB2 instance ............................ 48Enabling in-depth monitoring from the command line for
DB2 ............................................................................... 48Enabling and disabling intelligent resource monitoring for Db2udb
resource ......................................................................... 49Handling DB2 error codes during in-depth monitoring .................... 51Disabling in-depth monitoring for DB2 ......................................... 52
Chapter 5 Administering VCS service groups for DB2 ............... 53
About administering service groups for DB2 ....................................... 53Bringing the DB2 service group online .............................................. 53Taking the DB2 service group offline ................................................. 54Switching the DB2 service group ..................................................... 54Disabling the agent for DB2 ............................................................ 54
5Contents
Appendix A Troubleshooting Cluster Server Agent forDB2 .................................................................................. 56
Creating a db2profile for environment variables for DB2 ....................... 56Setting the RestartLimit attribute for VCS agent for DB2 ....................... 57Partition/Node switch-over scenarios for DB2 V9.5, V9.7, V10.1, and
V10.5 in MPP mode ............................................................... 57
Appendix B Resource type information for Cluster ServerAgent for DB2 ............................................................... 58
About the resource type definitions for DB2 ....................................... 58DB2 UDB type definition file: Db2udbTypes.cf on AIX .................... 58
Appendix C Resource type attributes for DB2 ................................. 60
About the Db2udb resource types and attribute definitions .................... 60
Appendix D Sample configurations ..................................................... 67
Sample configuration files for VCS agent for DB2 on AIX ...................... 67Non-MPP main.cf configuration for VCS agent for DB2 on
AIX ................................................................................ 67MPP main.cf configuration for VCS agent for DB2 on AIX ............... 69DB2 instance running in a WPAR for VCS agent for DB2 on
AIX ................................................................................ 75
Index .................................................................................................................... 77
6Contents
Introducing the ClusterServer Agent for DB2
This chapter includes the following topics:
■ About the Cluster Server Agent for DB2
■ How Cluster Server Agent for DB2 makes DB2 highly available
■ How the DB2 agent supports intelligent resource monitoring
■ Supported software for VCS agent for DB2
■ About agent functions for VCS Agent for DB2
■ Typical DB2 configuration in a Cluster Server
■ Road map for setting up DB2 UDB in a VCS environment
About the Cluster Server Agent for DB2The Cluster Server Agent for DB2, version 7.1, for DB2 UDB is a high availabilitysolution for the relational database management system.
This guide describes the agent for DB2 UDB, its modes of operation, and itsattributes. It describes how to install and configure the agent. It also describes howto administer service groups where the resource runs.
This agent is WPAR-aware. The ContainerOpts resource type attribute for this typehas a default value of 1 for RunInContainer and a default value of 0 for PassCInfo.Veritas recommends that you do not change these values. Refer to the ClusterServer Administrator’s Guide for more information.
1Chapter

How Cluster Server Agent for DB2 makes DB2highly available
The agent monitors DB2 UDB database processes at the partition level. If thesystem fails, the agent detects the failure and takes the applicable database partitionoffline. VCS moves the failed instances to another node in the cluster, where theagent brings the database partition or partitions online.
The agent performs different levels of monitoring and different actions, which youcan configure. You can also configure many of the actions that the agent canperform.
The DB2 agent also supports IMF (Intelligent Monitoring Framework) in the processcheck mode of basic monitoring. IMF enables intelligent resource monitoring. TheDB2 agent is IMF aware and uses asynchronous monitoring framework (AMF)kernel driver for resource state change notifications.
See “About agent functions for VCS Agent for DB2” on page 9.
How the DB2 agent supports intelligent resourcemonitoring
With intelligent monitoring framework (IMF), VCS supports intelligent resourcemonitoring in addition to poll-based monitoring. Poll-based monitoring polls theresources periodically whereas intelligent monitoring performs asynchronousmonitoring. You can enable or disable the intelligent resource monitoring functionalityof the VCS agents for DB2.
See “Enabling and disabling intelligent resource monitoring for Db2udb resource”on page 49.
When an IMF-enabled agent starts up, the agent initializes the asynchronousmonitoring framework (AMF) kernel driver. After the resource is in a steady state,the agent registers the details that are required to monitor the resource with theAMF kernel driver. For example, the DB2 agent registers the PIDs of the processeswith the AMF kernel driver using its own imf_register function. The agent'simf_getnotification function waits for any resource state changes. When the AMFkernel driver module notifies the imf_getnotification function about a resource statechange, the agent framework runs the monitor agent function to ascertain the stateof that resource.The agent notifies the state change to VCS which takes appropriateaction.
See the Cluster Server Administrator’s Guide for more information.
8Introducing the Cluster Server Agent for DB2How Cluster Server Agent for DB2 makes DB2 highly available
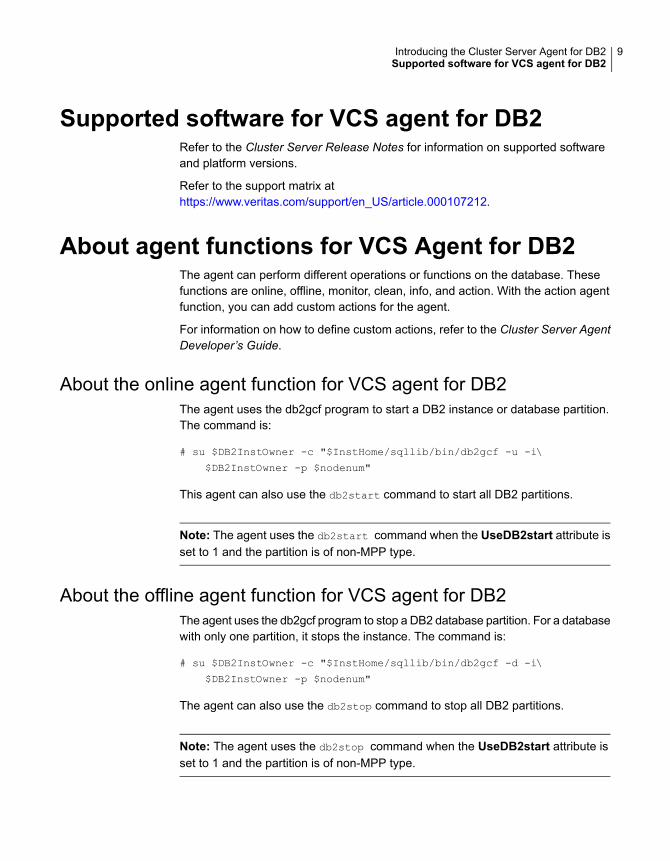
Supported software for VCS agent for DB2Refer to the Cluster Server Release Notes for information on supported softwareand platform versions.
Refer to the support matrix athttps://www.veritas.com/support/en_US/article.000107212.
About agent functions for VCS Agent for DB2The agent can perform different operations or functions on the database. Thesefunctions are online, offline, monitor, clean, info, and action. With the action agentfunction, you can add custom actions for the agent.
For information on how to define custom actions, refer to the Cluster Server AgentDeveloper’s Guide.
About the online agent function for VCS agent for DB2The agent uses the db2gcf program to start a DB2 instance or database partition.The command is:
# su $DB2InstOwner -c "$InstHome/sqllib/bin/db2gcf -u -i\
$DB2InstOwner -p $nodenum"
This agent can also use the db2start command to start all DB2 partitions.
Note: The agent uses the db2start command when the UseDB2start attribute isset to 1 and the partition is of non-MPP type.
About the offline agent function for VCS agent for DB2The agent uses the db2gcf program to stop a DB2 database partition. For a databasewith only one partition, it stops the instance. The command is:
# su $DB2InstOwner -c "$InstHome/sqllib/bin/db2gcf -d -i\
$DB2InstOwner -p $nodenum"
The agent can also use the db2stop command to stop all DB2 partitions.
Note: The agent uses the db2stop command when the UseDB2start attribute isset to 1 and the partition is of non-MPP type.
9Introducing the Cluster Server Agent for DB2Supported software for VCS agent for DB2
About the monitor agent function for VCS agent for DB2The agent executes the su $DB2InstOwner -c "$InstHome/sqllib/bin/db2gcf
-s -i $DB2InstOwner -p $nodenum" command to check the status of the databasepartition or node number. If the exit status of the db2gcf command is 0, the monitorreturns the exit code 110. Otherwise, the monitor returns an exit code of 100 andthe resource is taken offline. The agent then restarts or fails over the resource. Thisaction depends on other type-independent attributes, such as RestartLimit orToleranceLimit.
Note: In case of single partition, the monitor checks the process of the respectivepartition using ps -p command. And in case of multiple partions, db2gcf -s commandis used
Set the IndepthMonitor attribute to 1 for in-depth monitoring. The agent looks forthe monitor_custom_$db2instance_$nodenum file in the/opt/VRTSagents/ha/bin/Db2udb directory. It executes this customized in-depthmonitor file, if the file exists and is executable. You can find samples of custommonitor scripts in the /etc/VRTSagents/ha/conf/Db2udb/sample_db2udb directory.
If the custom monitor has any errors or problems, it checks the value of theWarnOnlyIfDBQueryFailed attribute of the Db2udb agent. If you have a db2error.datfile in the /opt/VRTSagents/ha/bin/Db2udb directory, the agent checks this file, andhandles the error according to the error configuration.
See “Handling DB2 error codes during in-depth monitoring” on page 51.
If you set the WarnOnlyIfDBQueryFailed attribute to 1 (its default), and you haveconfigured the Notifier resource, the agent performs the following actions:
■ Sends a notification
■ Returns the exit code 110
If you set the WarnOnlyIfDBQueryFailed attribute to 0, it performs error handlingin the db2error.dat file. Note that the file needs to exist to perform error handling.If it does not exist, it returns the exit code 100, which is the default.
About the clean agent function for VCS agent for DB2The agent first uses the db2stop command with the force option. If the commandis unable to clean the agent function, the agent then uses the db2_kill script to killthe instance. If the db2_kill script fails, the kill -9 command is invoked. Thecommand ipclean is used to ensure all the DB2 interprocess communications arecleaned for the particular instance.
10Introducing the Cluster Server Agent for DB2About agent functions for VCS Agent for DB2

# su $DB2InstOwner -c "$InstHome/sqllib/adm/db2stop force
nodenum $nodenum"
About the info agent function for VCS agent for DB2The agent supports the info function, which provides static and dynamic informationabout the database partition and its critical processes.
For more information about the Info agent function, see the following guides:
■ Cluster Server Administrator’s Guide
■ Cluster Server Agent Developer’s Guide
See “About running the info agent function to get database information for VCSagent for DB2” on page 12.
About the action agent function for VCS agent for DB2The agent for DB2 supports the action function, which enables you to performpredefined actions or custom actions on a resource. To perform an action on aresource, type the following command:
# hares -action res token [-actionargs arg1 ...]
[-sys system] [-clus cluster]
The agent supports the following predefined actions:
■ The VRTS_GetInstanceName token retrieves the DB2 instance name of theconfigured Db2udb resource.
■ The VRTS_GetRunningServices token retrieves the list of processes that theagent monitors for the Db2udb resource.
For example:
# hares -action db2udb1 VRTS_GetInstanceName -sys systemName
VCS NOTICE V-16-13323 Resource (db2udb1): action
(VRTS_GetInstanceName) completed successfully. Output is:
db2inst1
# hares -action db2udb0 VRTS_GetRunningServices -sys systemName
VCS NOTICE V-16-13323 Resource (db2udb0): action
(VRTS_GetRunningServices) completed successfully. Output is:
PARTITION: 0
11Introducing the Cluster Server Agent for DB2About agent functions for VCS Agent for DB2
PID TTY TIME CMD
9800 ? 0:06 db2sysc
About IMF Integration functions for VCS Agent for DB2The following sections describe the IMF Integration functions for VCS Agent forDB2.
About the imf_init function for VCS agent for DB2Initializes the agent to interface with the AMF kernel driver, which is the IMFnotification module for DB2 agent. This function runs when the agent starts up.
About the imf_register function for VCS agent for DB2Registers or unregisters resource entities with the AMF kernel module. This functionruns for each resource after the resource goes into steady state (online or offline).
About the imf_getnotification function for VCS agent forDB2Gets notification about resource state changes. This function runs after the agentinitializes with the AMF kernel module. This function continuously waits fornotification and takes action on the resource upon notification.
About running the info agent function to get database informationfor VCS agent for DB2
You can run the info agent function to return database information. In this example,the info agent function retrieves the database information.
12Introducing the Cluster Server Agent for DB2About agent functions for VCS Agent for DB2
To retrieve database information
1 Make the configuration writable:
# haconf -makerw
2 Specify the periodic interval in seconds that the info agent function is invoked.The default value of 0 means info agent function is not invoked.
# hatype -modify Db2udb InfoInterval 300
In this command, Db2udb is the name of the DB2 resource type. InfoInterval300 is the duration (in seconds) after which the info agent function executesthe info script. The script gets the information of the processes that the agentmonitors.
3 Show the requested ResourceInfo value. The following example output showsthe processes that the agent monitors for the DB2 resource.
The value needs to be overridden at the resource level using the followingcommand:
# hares -override db2udb3_2 InfoInterval
Note that ResourceInfo refreshes every 300 seconds (five minutes), since youset the InfoInterval to 300 in the previous step.
# hares -value db2udb1 ResourceInfo
State Valid
Msg
PARTITION: 0
PID TTY TIME CMD
413924 - 0:00 db2sysc
TS Fri Jan 14 18:11:52 2011
4 Make the configuration permanent:
# haconf -dump -makero
Typical DB2 configuration in a Cluster ServerDB2 UDB is configured on a two-system cluster. DB2 UDB system binaries areinstalled identically on local file systems on System A and System B. The instancehome directory, instance binaries, and the database reside on shared storage,available to either node.
13Introducing the Cluster Server Agent for DB2Typical DB2 configuration in a Cluster Server
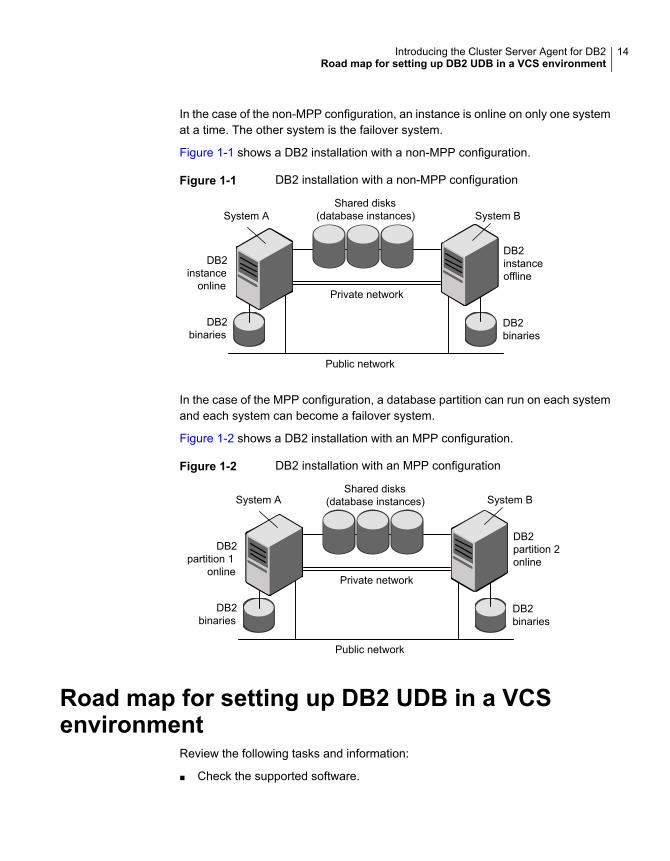
In the case of the non-MPP configuration, an instance is online on only one systemat a time. The other system is the failover system.
Figure 1-1 shows a DB2 installation with a non-MPP configuration.
Figure 1-1 DB2 installation with a non-MPP configuration
DB2instance
online
Public network
DB2binaries
Private network
DB2instanceoffline
Shared disks(database instances)
DB2binaries
System A System B
In the case of the MPP configuration, a database partition can run on each systemand each system can become a failover system.
Figure 1-2 shows a DB2 installation with an MPP configuration.
Figure 1-2 DB2 installation with an MPP configuration
DB2partition 1
online
Public network
DB2binaries
Private network
DB2partition 2online
Shared disks(database instances)
DB2binaries
System A System B
Road map for setting up DB2 UDB in a VCSenvironment
Review the following tasks and information:
■ Check the supported software.
14Introducing the Cluster Server Agent for DB2Road map for setting up DB2 UDB in a VCS environment
■ Review the agent functions.See “About agent functions for VCS Agent for DB2” on page 9.
■ Check the agent requirements.See “VCS requirements for installing DB2” on page 16.
■ Install and set up DB2.See “Installing DB2 in a VCS environment” on page 21.See “Setting up the DB2 configuration” on page 21.
■ Install the VCS agent for DB2.See “Installing the VCS agent for DB2 software” on page 29.
■ Configure the service groups for the VCS agent for DB2.See “Configuring the VCS Agent for DB2 from Cluster Manager (Java Console)”on page 39.
■ Optionally, configure in-depth monitoring and any automated actions.See “Setting up in-depth monitoring of a DB2 instance” on page 47.
■ Bring the service group online.See “Bringing the DB2 service group online” on page 53.
15Introducing the Cluster Server Agent for DB2Road map for setting up DB2 UDB in a VCS environment
Installing and configuringDB2
This chapter includes the following topics:
■ VCS requirements for installing DB2
■ Installing DB2 in a VCS environment
■ Setting up the DB2 configuration
VCS requirements for installing DB2Perform the following tasks before you install:
■ Review preparing to install DB2 UDB non-MPP versions.See “Preparing to install DB2 UDB non-MPP versions” on page 16.
■ Review preparing to install DB2 UDB MPP versions.See “Preparing to install DB2 UDB MPP versions” on page 17.
■ Create the file systems for non-MPP instances.See “Creating the file systems for non-MPP instances for DB2” on page 18.
■ Create the shared file systems for MPP instances.See “Creating the shared file systems for MPP instances for DB2” on page 18.
■ Define user and group accounts.See “Defining user and group accounts for DB2” on page 19.
Preparing to install DB2 UDB non-MPP versionsReview the following list:
2Chapter
■ Verify that all nodes in the cluster have adequate resources to run DB2 andVCS.
■ Make sure that you meet the VCS requirements to install DB2.
■ Define DB2 UDB user and group accounts.See “Defining user and group accounts for DB2” on page 19.For your particular version of DB2 UDB, refer to the appropriate DB2 UDB guide.
■ Install the DB2 UDB system binaries locally.
■ Install the DB2 UDB database instances on shared storage.
■ Install and configure VCS version 7.1 on all nodes in the cluster. For installationinstructions, refer to the Cluster Server Installation Guide.
Preparing to install DB2 UDB MPP versionsReview the following list:
■ Verify that all systems have enough resources to run DB2 UDB. An example ofthis kind of resource is shared memory. Check the memory requirements, whichvary due to the version and the hardware configuration of DB2.
■ Define DB2 UDB user and group accounts.See “Defining user and group accounts for DB2” on page 19.For your particular version of DB2 UDB, refer to the appropriate DB2 UDB guide.
■ Install the DB2 UDB system binaries on the local file systems on each system.
■ Install the DB2 UDB database instances on shared storage.
■ Install and configure VCS version 7.1 on all nodes in the cluster. For installationinstructions, refer to the Cluster Server Installation Guide.
■ The MPP configuration requires the Storage Foundation Cluster File Systemsoftware.
This software includes the following:
■ Cluster Server (VCS)
■ Volume Manager with cluster functionality enabled (CVM)Storage Foundation Cluster File System High Availability Installation Guide.
■ File System with cluster functionality enabled (CFS)Storage Foundation Cluster File System Administration Guide.
17Installing and configuring DB2VCS requirements for installing DB2
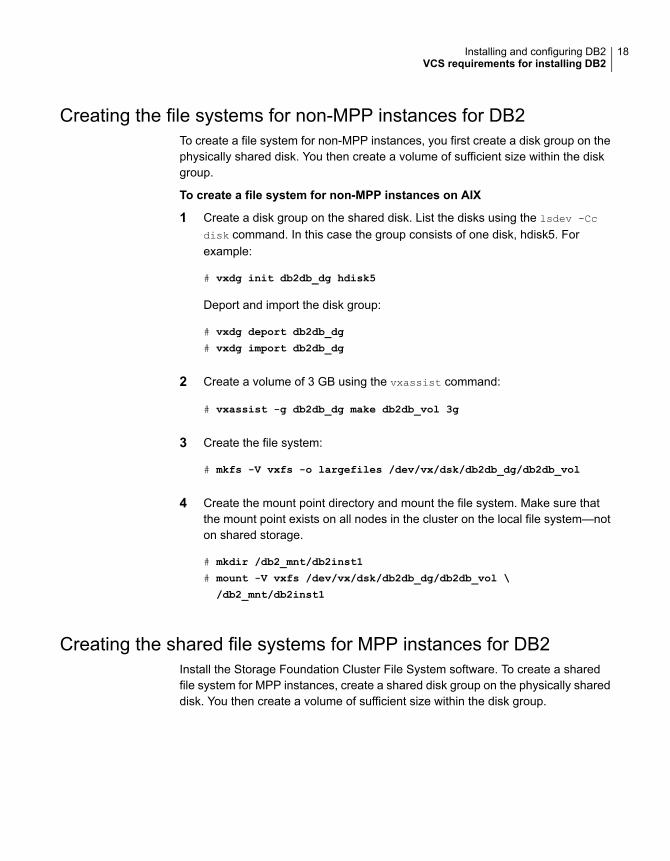
Creating the file systems for non-MPP instances for DB2To create a file system for non-MPP instances, you first create a disk group on thephysically shared disk. You then create a volume of sufficient size within the diskgroup.
To create a file system for non-MPP instances on AIX
1 Create a disk group on the shared disk. List the disks using the lsdev -Cc
disk command. In this case the group consists of one disk, hdisk5. Forexample:
# vxdg init db2db_dg hdisk5
Deport and import the disk group:
# vxdg deport db2db_dg
# vxdg import db2db_dg
2 Create a volume of 3 GB using the vxassist command:
# vxassist -g db2db_dg make db2db_vol 3g
3 Create the file system:
# mkfs -V vxfs -o largefiles /dev/vx/dsk/db2db_dg/db2db_vol
4 Create the mount point directory and mount the file system. Make sure thatthe mount point exists on all nodes in the cluster on the local file system—noton shared storage.
# mkdir /db2_mnt/db2inst1
# mount -V vxfs /dev/vx/dsk/db2db_dg/db2db_vol \
/db2_mnt/db2inst1
Creating the shared file systems for MPP instances for DB2Install the Storage Foundation Cluster File System software. To create a sharedfile system for MPP instances, create a shared disk group on the physically shareddisk. You then create a volume of sufficient size within the disk group.
18Installing and configuring DB2VCS requirements for installing DB2
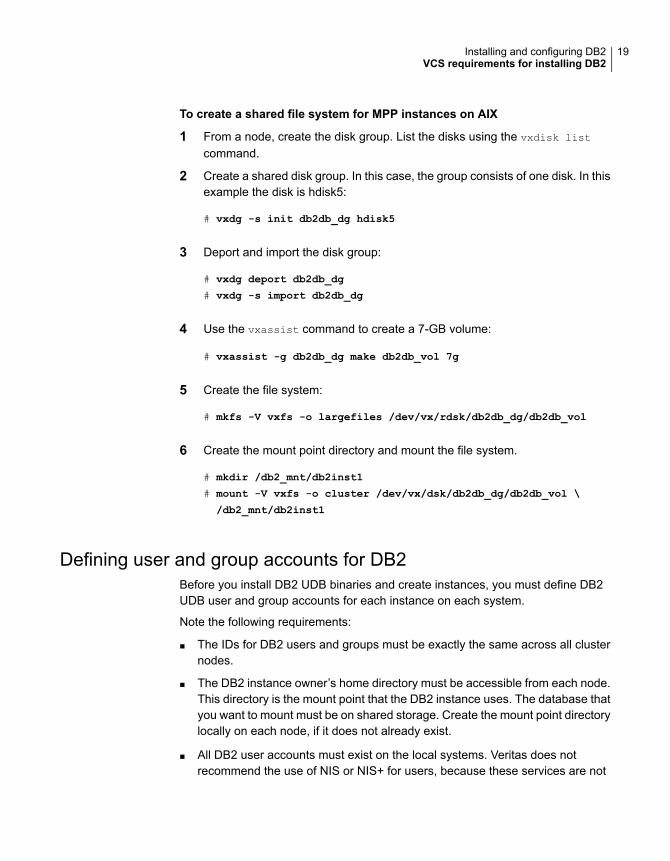
To create a shared file system for MPP instances on AIX
1 From a node, create the disk group. List the disks using the vxdisk list
command.
2 Create a shared disk group. In this case, the group consists of one disk. In thisexample the disk is hdisk5:
# vxdg -s init db2db_dg hdisk5
3 Deport and import the disk group:
# vxdg deport db2db_dg
# vxdg -s import db2db_dg
4 Use the vxassist command to create a 7-GB volume:
# vxassist -g db2db_dg make db2db_vol 7g
5 Create the file system:
# mkfs -V vxfs -o largefiles /dev/vx/rdsk/db2db_dg/db2db_vol
6 Create the mount point directory and mount the file system.
# mkdir /db2_mnt/db2inst1
# mount -V vxfs -o cluster /dev/vx/dsk/db2db_dg/db2db_vol \
/db2_mnt/db2inst1
Defining user and group accounts for DB2Before you install DB2 UDB binaries and create instances, you must define DB2UDB user and group accounts for each instance on each system.
Note the following requirements:
■ The IDs for DB2 users and groups must be exactly the same across all clusternodes.
■ The DB2 instance owner’s home directory must be accessible from each node.This directory is the mount point that the DB2 instance uses. The database thatyou want to mount must be on shared storage. Create the mount point directorylocally on each node, if it does not already exist.
■ All DB2 user accounts must exist on the local systems. Veritas does notrecommend the use of NIS or NIS+ for users, because these services are not
19Installing and configuring DB2VCS requirements for installing DB2
highly available. If their service is interrupted, VCS may not be able to workcorrectly.
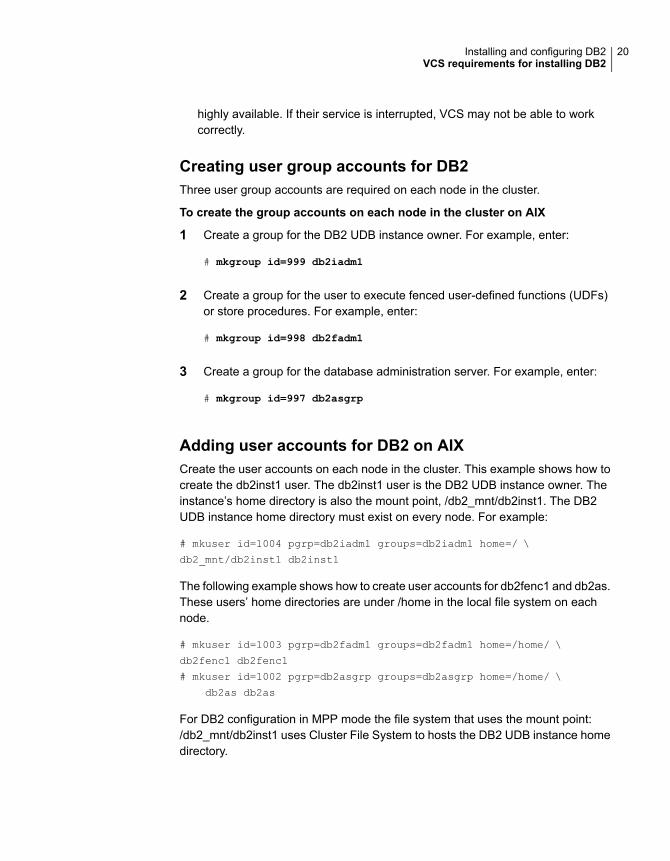
Creating user group accounts for DB2Three user group accounts are required on each node in the cluster.
To create the group accounts on each node in the cluster on AIX
1 Create a group for the DB2 UDB instance owner. For example, enter:
# mkgroup id=999 db2iadm1
2 Create a group for the user to execute fenced user-defined functions (UDFs)or store procedures. For example, enter:
# mkgroup id=998 db2fadm1
3 Create a group for the database administration server. For example, enter:
# mkgroup id=997 db2asgrp
Adding user accounts for DB2 on AIXCreate the user accounts on each node in the cluster. This example shows how tocreate the db2inst1 user. The db2inst1 user is the DB2 UDB instance owner. Theinstance’s home directory is also the mount point, /db2_mnt/db2inst1. The DB2UDB instance home directory must exist on every node. For example:
# mkuser id=1004 pgrp=db2iadm1 groups=db2iadm1 home=/ \
db2_mnt/db2inst1 db2inst1
The following example shows how to create user accounts for db2fenc1 and db2as.These users’ home directories are under /home in the local file system on eachnode.
# mkuser id=1003 pgrp=db2fadm1 groups=db2fadm1 home=/home/ \
db2fenc1 db2fenc1
# mkuser id=1002 pgrp=db2asgrp groups=db2asgrp home=/home/ \
db2as db2as
For DB2 configuration in MPP mode the file system that uses the mount point:/db2_mnt/db2inst1 uses Cluster File System to hosts the DB2 UDB instance homedirectory.
20Installing and configuring DB2VCS requirements for installing DB2
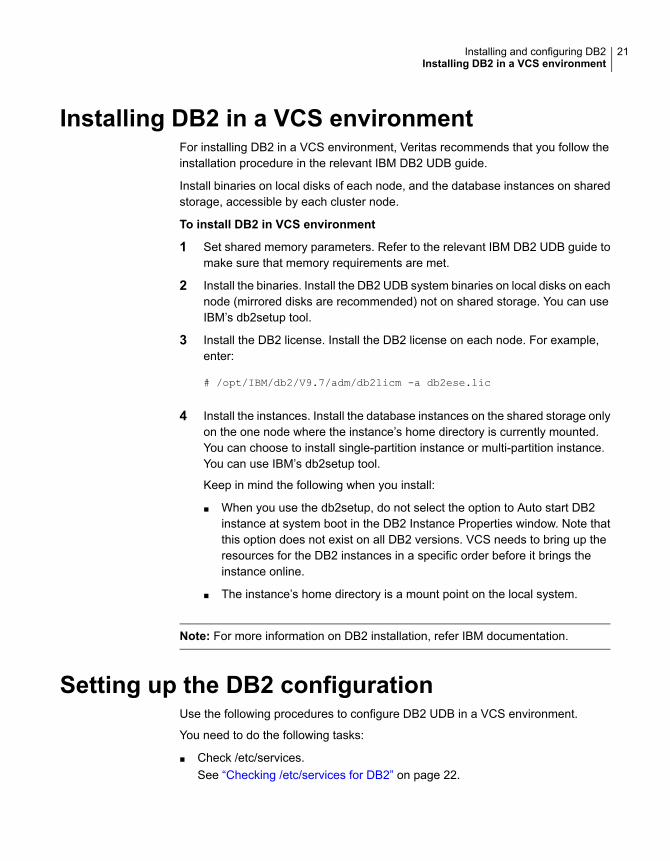
Installing DB2 in a VCS environmentFor installing DB2 in a VCS environment, Veritas recommends that you follow theinstallation procedure in the relevant IBM DB2 UDB guide.
Install binaries on local disks of each node, and the database instances on sharedstorage, accessible by each cluster node.
To install DB2 in VCS environment
1 Set shared memory parameters. Refer to the relevant IBM DB2 UDB guide tomake sure that memory requirements are met.
2 Install the binaries. Install the DB2 UDB system binaries on local disks on eachnode (mirrored disks are recommended) not on shared storage. You can useIBM’s db2setup tool.
3 Install the DB2 license. Install the DB2 license on each node. For example,enter:
# /opt/IBM/db2/V9.7/adm/db2licm -a db2ese.lic
4 Install the instances. Install the database instances on the shared storage onlyon the one node where the instance’s home directory is currently mounted.You can choose to install single-partition instance or multi-partition instance.You can use IBM’s db2setup tool.
Keep in mind the following when you install:
■ When you use the db2setup, do not select the option to Auto start DB2instance at system boot in the DB2 Instance Properties window. Note thatthis option does not exist on all DB2 versions. VCS needs to bring up theresources for the DB2 instances in a specific order before it brings theinstance online.
■ The instance’s home directory is a mount point on the local system.
Note: For more information on DB2 installation, refer IBM documentation.
Setting up the DB2 configurationUse the following procedures to configure DB2 UDB in a VCS environment.
You need to do the following tasks:
■ Check /etc/services.See “Checking /etc/services for DB2” on page 22.
21Installing and configuring DB2Installing DB2 in a VCS environment
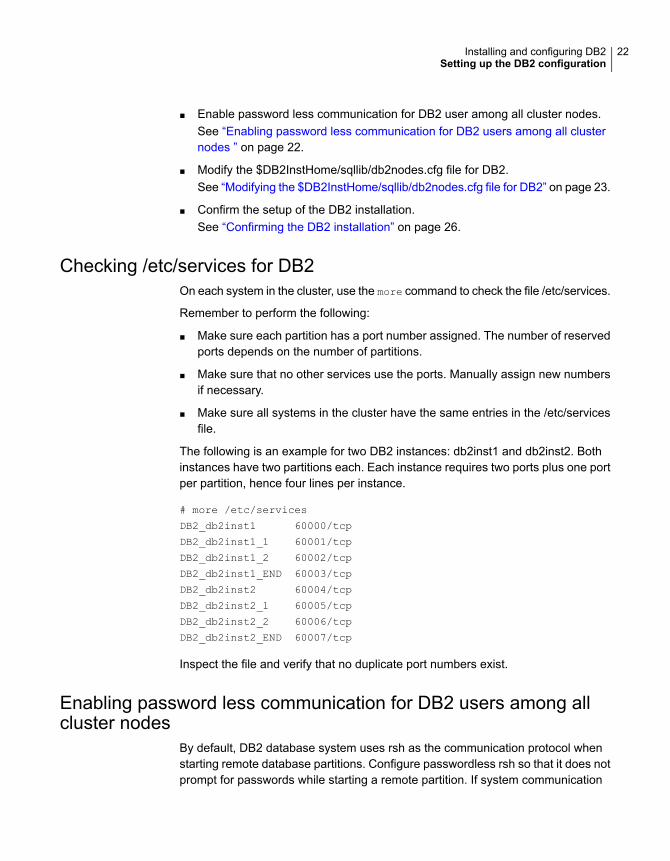
■ Enable password less communication for DB2 user among all cluster nodes.See “Enabling password less communication for DB2 users among all clusternodes ” on page 22.
■ Modify the $DB2InstHome/sqllib/db2nodes.cfg file for DB2.See “Modifying the $DB2InstHome/sqllib/db2nodes.cfg file for DB2” on page 23.
■ Confirm the setup of the DB2 installation.See “Confirming the DB2 installation” on page 26.
Checking /etc/services for DB2On each system in the cluster, use the more command to check the file /etc/services.
Remember to perform the following:
■ Make sure each partition has a port number assigned. The number of reservedports depends on the number of partitions.
■ Make sure that no other services use the ports. Manually assign new numbersif necessary.
■ Make sure all systems in the cluster have the same entries in the /etc/servicesfile.
The following is an example for two DB2 instances: db2inst1 and db2inst2. Bothinstances have two partitions each. Each instance requires two ports plus one portper partition, hence four lines per instance.
# more /etc/services
DB2_db2inst1 60000/tcp
DB2_db2inst1_1 60001/tcp
DB2_db2inst1_2 60002/tcp
DB2_db2inst1_END 60003/tcp
DB2_db2inst2 60004/tcp
DB2_db2inst2_1 60005/tcp
DB2_db2inst2_2 60006/tcp
DB2_db2inst2_END 60007/tcp
Inspect the file and verify that no duplicate port numbers exist.
Enabling password less communication for DB2 users among allcluster nodes
By default, DB2 database system uses rsh as the communication protocol whenstarting remote database partitions. Configure passwordless rsh so that it does notprompt for passwords while starting a remote partition. If system communication
22Installing and configuring DB2Setting up the DB2 configuration
uses ssh, you must configure it so that it operates without requests for passwordsor passphrases.
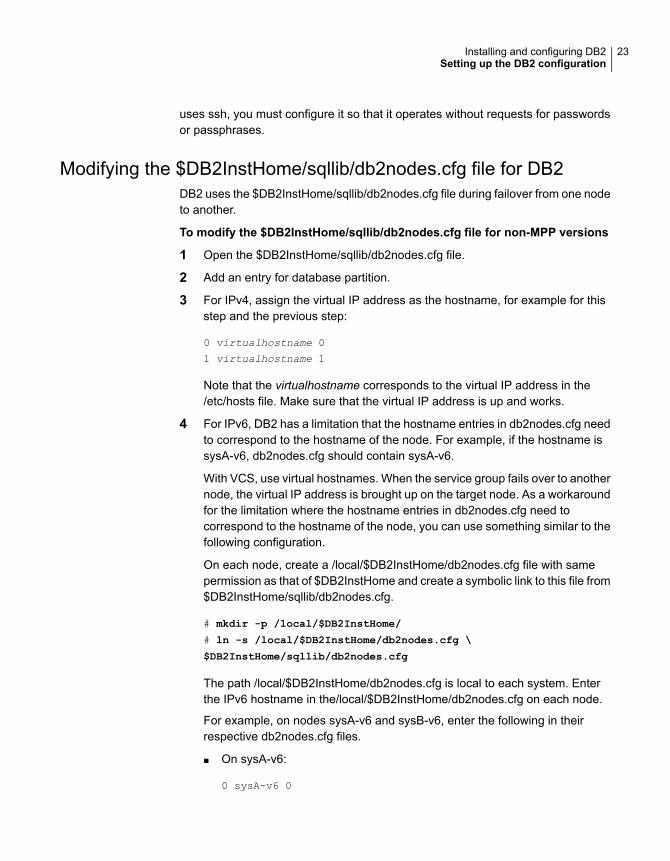
Modifying the $DB2InstHome/sqllib/db2nodes.cfg file for DB2DB2 uses the $DB2InstHome/sqllib/db2nodes.cfg file during failover from one nodeto another.
To modify the $DB2InstHome/sqllib/db2nodes.cfg file for non-MPP versions
1 Open the $DB2InstHome/sqllib/db2nodes.cfg file.
2 Add an entry for database partition.
3 For IPv4, assign the virtual IP address as the hostname, for example for thisstep and the previous step:
0 virtualhostname 0
1 virtualhostname 1
Note that the virtualhostname corresponds to the virtual IP address in the/etc/hosts file. Make sure that the virtual IP address is up and works.
4 For IPv6, DB2 has a limitation that the hostname entries in db2nodes.cfg needto correspond to the hostname of the node. For example, if the hostname issysA-v6, db2nodes.cfg should contain sysA-v6.
With VCS, use virtual hostnames. When the service group fails over to anothernode, the virtual IP address is brought up on the target node. As a workaroundfor the limitation where the hostname entries in db2nodes.cfg need tocorrespond to the hostname of the node, you can use something similar to thefollowing configuration.
On each node, create a /local/$DB2InstHome/db2nodes.cfg file with samepermission as that of $DB2InstHome and create a symbolic link to this file from$DB2InstHome/sqllib/db2nodes.cfg.
# mkdir -p /local/$DB2InstHome/
# ln -s /local/$DB2InstHome/db2nodes.cfg \
$DB2InstHome/sqllib/db2nodes.cfg
The path /local/$DB2InstHome/db2nodes.cfg is local to each system. Enterthe IPv6 hostname in the/local/$DB2InstHome/db2nodes.cfg on each node.
For example, on nodes sysA-v6 and sysB-v6, enter the following in theirrespective db2nodes.cfg files.
■ On sysA-v6:
0 sysA-v6 0
23Installing and configuring DB2Setting up the DB2 configuration

■ On sysB-v6:
0 sysB-v6 0
24Installing and configuring DB2Setting up the DB2 configuration
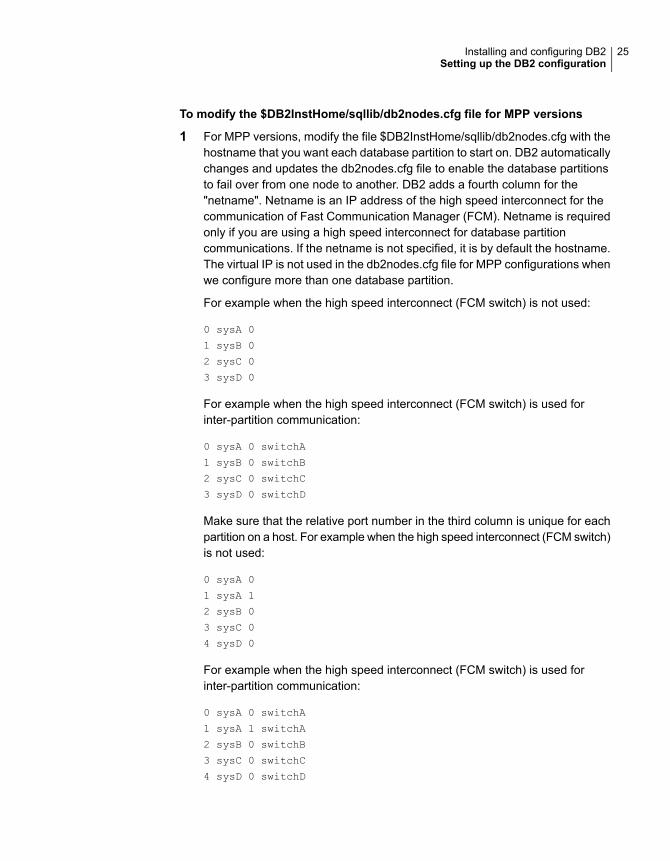
To modify the $DB2InstHome/sqllib/db2nodes.cfg file for MPP versions
1 For MPP versions, modify the file $DB2InstHome/sqllib/db2nodes.cfg with thehostname that you want each database partition to start on. DB2 automaticallychanges and updates the db2nodes.cfg file to enable the database partitionsto fail over from one node to another. DB2 adds a fourth column for the"netname". Netname is an IP address of the high speed interconnect for thecommunication of Fast Communication Manager (FCM). Netname is requiredonly if you are using a high speed interconnect for database partitioncommunications. If the netname is not specified, it is by default the hostname.The virtual IP is not used in the db2nodes.cfg file for MPP configurations whenwe configure more than one database partition.
For example when the high speed interconnect (FCM switch) is not used:
0 sysA 0
1 sysB 0
2 sysC 0
3 sysD 0
For example when the high speed interconnect (FCM switch) is used forinter-partition communication:
0 sysA 0 switchA
1 sysB 0 switchB
2 sysC 0 switchC
3 sysD 0 switchD
Make sure that the relative port number in the third column is unique for eachpartition on a host. For example when the high speed interconnect (FCM switch)is not used:
0 sysA 0
1 sysA 1
2 sysB 0
3 sysC 0
4 sysD 0
For example when the high speed interconnect (FCM switch) is used forinter-partition communication:
0 sysA 0 switchA
1 sysA 1 switchA
2 sysB 0 switchB
3 sysC 0 switchC
4 sysD 0 switchD
25Installing and configuring DB2Setting up the DB2 configuration
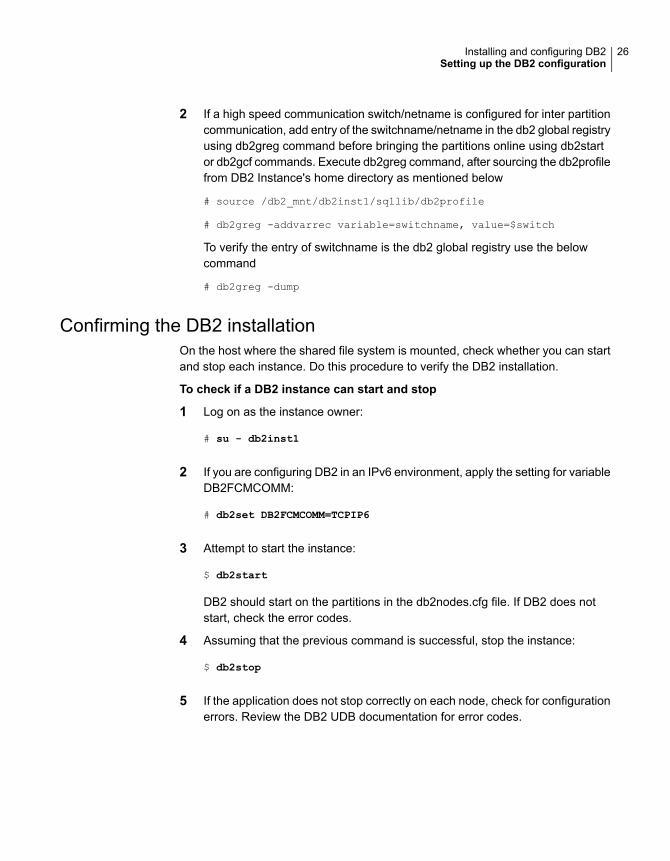
2 If a high speed communication switch/netname is configured for inter partitioncommunication, add entry of the switchname/netname in the db2 global registryusing db2greg command before bringing the partitions online using db2startor db2gcf commands. Execute db2greg command, after sourcing the db2profilefrom DB2 Instance's home directory as mentioned below
# source /db2_mnt/db2inst1/sqllib/db2profile
# db2greg -addvarrec variable=switchname, value=$switch
To verify the entry of switchname is the db2 global registry use the belowcommand
# db2greg -dump
Confirming the DB2 installationOn the host where the shared file system is mounted, check whether you can startand stop each instance. Do this procedure to verify the DB2 installation.
To check if a DB2 instance can start and stop
1 Log on as the instance owner:
# su - db2inst1
2 If you are configuring DB2 in an IPv6 environment, apply the setting for variableDB2FCMCOMM:
# db2set DB2FCMCOMM=TCPIP6
3 Attempt to start the instance:
$ db2start
DB2 should start on the partitions in the db2nodes.cfg file. If DB2 does notstart, check the error codes.
4 Assuming that the previous command is successful, stop the instance:
$ db2stop
5 If the application does not stop correctly on each node, check for configurationerrors. Review the DB2 UDB documentation for error codes.
26Installing and configuring DB2Setting up the DB2 configuration
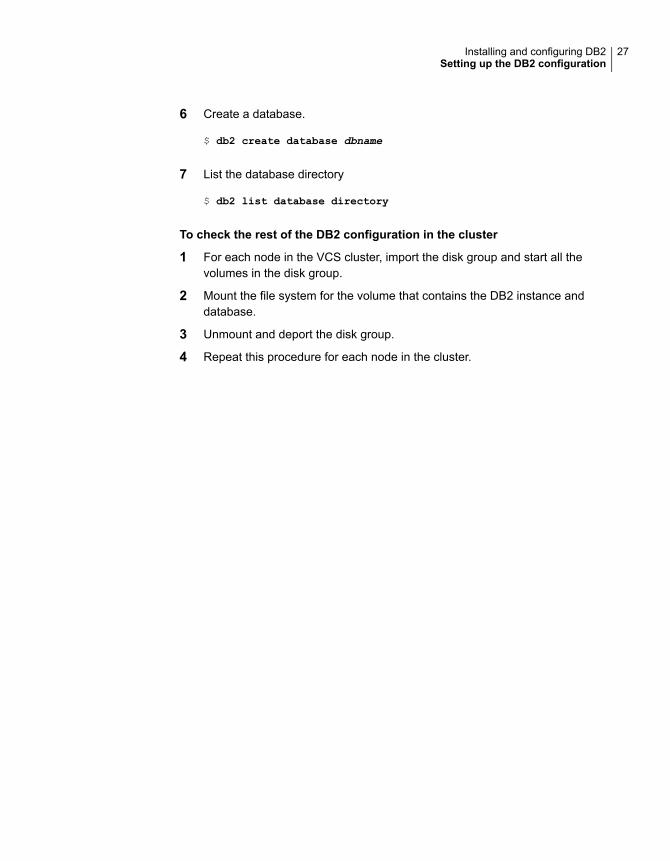
6 Create a database.
$ db2 create database dbname
7 List the database directory
$ db2 list database directory
To check the rest of the DB2 configuration in the cluster
1 For each node in the VCS cluster, import the disk group and start all thevolumes in the disk group.
2 Mount the file system for the volume that contains the DB2 instance anddatabase.
3 Unmount and deport the disk group.
4 Repeat this procedure for each node in the cluster.
27Installing and configuring DB2Setting up the DB2 configuration
Installing and removing theCluster Server Agent forDB2
This chapter includes the following topics:
■ Before you install or upgrade the VCS Agent for DB2
■ Installing the VCS agent for DB2 software
■ Upgrading the VCS Agent for DB2
■ Disabling the VCS Agent for DB2
■ Removing the VCS Agent for DB2
Before you install or upgrade the VCS Agent forDB2
Meet the following prerequisites to install or upgrade the Veritas High AvailabilityAgent for DB2:
■ Meet VCS requirements for installing DB2.See “VCS requirements for installing DB2” on page 16.
■ Install DB2 in a VCS environment.See “Installing DB2 in a VCS environment” on page 21.
■ Make sure that VCS is installed in the cluster.
■ Verify that DB2 is installed and configured.
3Chapter
■ VCS Single Cluster Manager (Java Console) is no longer packaged with VCS.Veritas recommends use of the Veritas InfoScale Operations Manager tomanage, monitor and report on multi-cluster environments. You can downloadVeritas InfoScale Operations Manager at https://sort.veritas.com/vom . If youwish to continue using the VCS Single Cluster Manager, you can get it at nocharge at thehttps://www.veritas.com/product/storage-management/infoscale-operations-managerwebsite.
Installing the VCS agent for DB2 softwareThe agent binaries for Cluster Server Agent for DB2 is part of VRTSvcsea fileset.The VRTSvcsea fileset is already installed if you chose to install all packages orrecommended packages during VCS installation. You must manually install theVRTSvcsea fileset if you installed minimal packages during VCS installation.
You can install the Cluster Server Agent for DB2 from the product disc. You mustinstall the VCS Agent for DB2 enterprise agent on all nodes that will host the DB2service group.
To install the agent on an AIX node
1 Log in as superuser.
2 Make sure that the agent is not already installed. Navigate to/opt/VRTSagents/ha/bin and list the contents of the directory.
If the command returns the VCS agents for DB2, you can skip this procedure.
3 Determine the device access name of the disc drive. For example, enter:
# cd /dev
# lsdev -C -c cdrom
The output might resemble:
cd0 Available 05-08-00 IDE DVD-RAM Drive
In this example, cd0 is the disc’s device access name.
4 Insert the disc with the VCS software into a drive that is connected to the node.
5 Mount the software disc using the device access name that you found in step3:
# mkdir -p /dvdrom
# mount -V cdrfs -o ro /dev/cd0 /dvdrom
# cd /dvdrom
29Installing and removing the Cluster Server Agent for DB2Installing the VCS agent for DB2 software
6 Install the DB2 agent software.
# installp -ac -d /dvdrom/pkgs/VRTSvcsea.bff VRTSvcsea
The fileset also installs the VCS agents for Oracle and Sybase.
7 Repeat step 1 through step 5 on each node that you want to be part of theVCS Agent for DB2 service group.
Upgrading the VCS Agent for DB2To upgrade without saving previous configuration information you must disable theagent, remove it, and reinstall it.
The steps to upgrade and re-use previous configuration information is as follows:
To upgrade from DB2 agent
1 Disable and remove the agent.
For more information see the following:
■ Disabling the agent for DB2See “Disabling the VCS Agent for DB2” on page 31.
■ Removing the agent for DB2 UDBSee “Removing the VCS Agent for DB2” on page 31.
2 From the disc that has the HA agent for DB2, add the new package.
See “Installing DB2 in a VCS environment” on page 21.
3 Make sure that you have copied the Db2udbTypes.cf file from the/etc/VRTSagents/ha/conf/Db2udb/ directory to the /etc/VRTSvcs/conf/configdirectory.
Make sure to update the newly copied Db2udbTypes.cf file with all the type-levelchanges that you had made to the older Db2udbTypes.cf file. For example, ifyou had changed the value of the MonitorInterval attribute from the default 60to 120 seconds, the Db2udbTypes.cf file gets updated. You must apply thesetype-level changes manually to the newly copied Db2udbTypes.cf file.
4 To continue to use in-depth monitoring, use the custom monitoring samplescript or any user-defined scripts.
See “Handling DB2 error codes during in-depth monitoring” on page 51.
30Installing and removing the Cluster Server Agent for DB2Upgrading the VCS Agent for DB2
Disabling the VCS Agent for DB2To disable the Cluster Server Agent for DB2, you must change the VCS Agent forDB2 service group to an OFFLINE state. You can stop the application completelyor switch the agent to another system.
To disable the agent
1 To remove a system from the service group’s SystemList, check if the servicegroup is online:
# hagrp -state service_group -sys system_name
2 If the service group is online, take it offline. Use one of the following commands:
■ To take the service group offline on one node and online it on another node,you can use the -switch option:
# hagrp -switch service_group -to system_name
■ To take the service group offline without bringing it online on any other nodein the cluster, enter:
# hagrp -offline service_group -sys system_name
3 Stop the agent on the node:
# haagent -stop Db2udb -sys system_name
4 When you get the message "Please look for messages in the log file,"check the file /var/VRTSvcs/log/engine_A.log for a message confirming theagent has stopped.
You can also use the ps command to confirm the agent is stopped.
5 You can now remove the service group, the resource type, or both from theVCS configuration after disabling the agent on all nodes.
See the Cluster Server Administrator’s Guide for more information.
Removing the VCS Agent for DB2Before you remove the agent you must disable it on all nodes. Note that the agentpackage VRTSvcsea includes the VCS agents for DB2, Oracle, and Sybase. Thefollowing procedure removes all the VCS agents.
See “Disabling the VCS Agent for DB2” on page 31.
31Installing and removing the Cluster Server Agent for DB2Disabling the VCS Agent for DB2

To remove the agent from a node
◆ On each system that has the agent, remove the fileset. Type:
# installp -u VRTSvcsea
32Installing and removing the Cluster Server Agent for DB2Removing the VCS Agent for DB2
Configuring VCS servicegroups for DB2
This chapter includes the following topics:
■ About configuring service groups for DB2
■ About DB2 configurations in VCS
■ Before configuring the service group for DB2
■ Configuring the VCS Agent for DB2 from Cluster Manager (Java Console)
■ Configuring the VCS Agent for DB2 by editing the main.cf file
■ Setting up in-depth monitoring of a DB2 instance
About configuring service groups for DB2Configuring the DB2 service group involves creating the DB2 service group, itsresources, and defining attribute values for the configured resources. You musthave administrator privileges to create and configure a service group.
You can configure the agent using the following methods:
■ Use the VCS Cluster Manager (the Java Console).You can use the Cluster Manager (Java Console) to edit a service group templatefor the Cluster Server Agent for DB2.See “Configuring the VCS Agent for DB2 from Cluster Manager (Java Console)”on page 39.
■ Use the Veritas InfoScale Operations Manager.Refer to the Veritas InfoScale Operations Manager documentation for details.
■ Use VCS commands.
4Chapter
From the command line, you can configure the agent. For information aboutconfiguring service groups from the command line, see the Cluster ServerAdministrator’s Guide
■ Edit the main.cf file.You can edit the main.cf file. This method requires that you stop and restartVCS before the new configuration takes effect.
For more information on the main.cf file refer to the following:
■ You can use the hacf -verify command to ensure that the modified main.cffile works. For more information on this command, refer to the Cluster ServerAdministrator’s Guide.
■ Configuring the Cluster Server Agent for DB2 by editing the main.cf fileSee “Configuring the VCS Agent for DB2 by editing the main.cf file”on page 43.
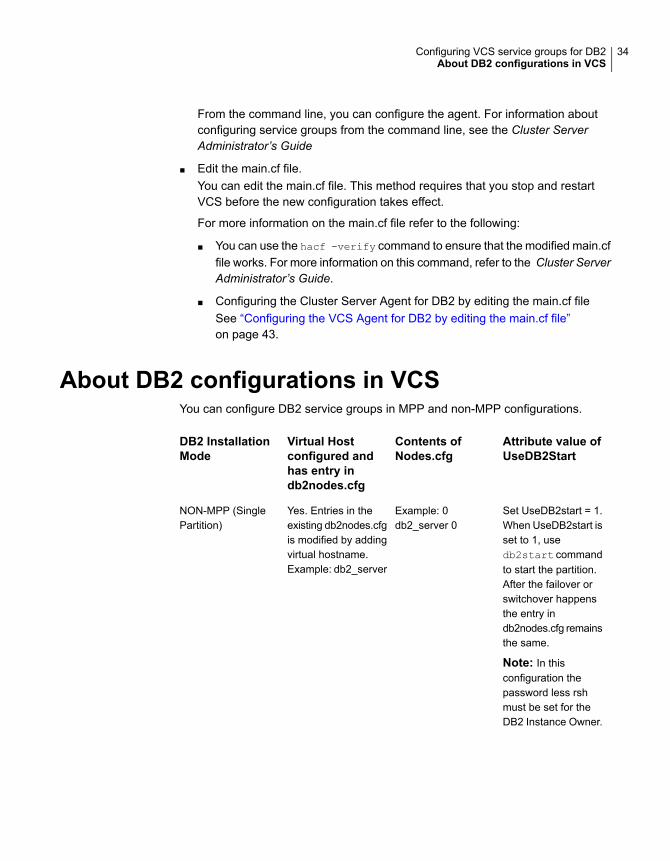
About DB2 configurations in VCSYou can configure DB2 service groups in MPP and non-MPP configurations.
Attribute value ofUseDB2Start
Contents ofNodes.cfg
Virtual Hostconfigured andhas entry indb2nodes.cfg
DB2 InstallationMode
Set UseDB2start = 1.When UseDB2start isset to 1, usedb2start commandto start the partition.After the failover orswitchover happensthe entry indb2nodes.cfg remainsthe same.
Note: In thisconfiguration thepassword less rshmust be set for theDB2 Instance Owner.
Example: 0db2_server 0
Yes. Entries in theexisting db2nodes.cfgis modified by addingvirtual hostname.Example: db2_server
NON-MPP (SinglePartition)
34Configuring VCS service groups for DB2About DB2 configurations in VCS
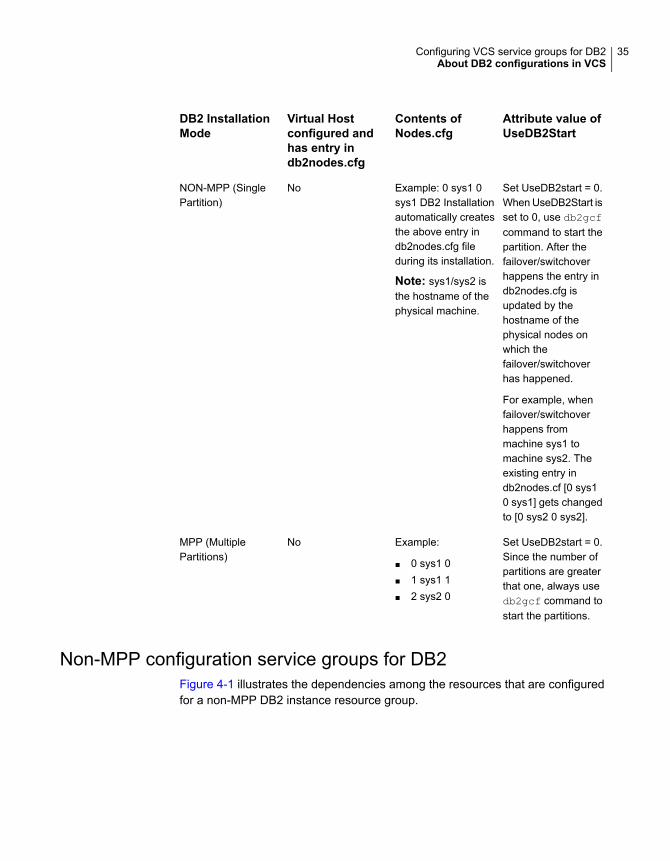
Attribute value ofUseDB2Start
Contents ofNodes.cfg
Virtual Hostconfigured andhas entry indb2nodes.cfg
DB2 InstallationMode
Set UseDB2start = 0.When UseDB2Start isset to 0, use db2gcfcommand to start thepartition. After thefailover/switchoverhappens the entry indb2nodes.cfg isupdated by thehostname of thephysical nodes onwhich thefailover/switchoverhas happened.
For example, whenfailover/switchoverhappens frommachine sys1 tomachine sys2. Theexisting entry indb2nodes.cf [0 sys10 sys1] gets changedto [0 sys2 0 sys2].
Example: 0 sys1 0sys1 DB2 Installationautomatically createsthe above entry indb2nodes.cfg fileduring its installation.
Note: sys1/sys2 isthe hostname of thephysical machine.
NoNON-MPP (SinglePartition)
Set UseDB2start = 0.Since the number ofpartitions are greaterthat one, always usedb2gcf command tostart the partitions.
Example:
■ 0 sys1 0■ 1 sys1 1■ 2 sys2 0
NoMPP (MultiplePartitions)
Non-MPP configuration service groups for DB2Figure 4-1 illustrates the dependencies among the resources that are configuredfor a non-MPP DB2 instance resource group.
35Configuring VCS service groups for DB2About DB2 configurations in VCS
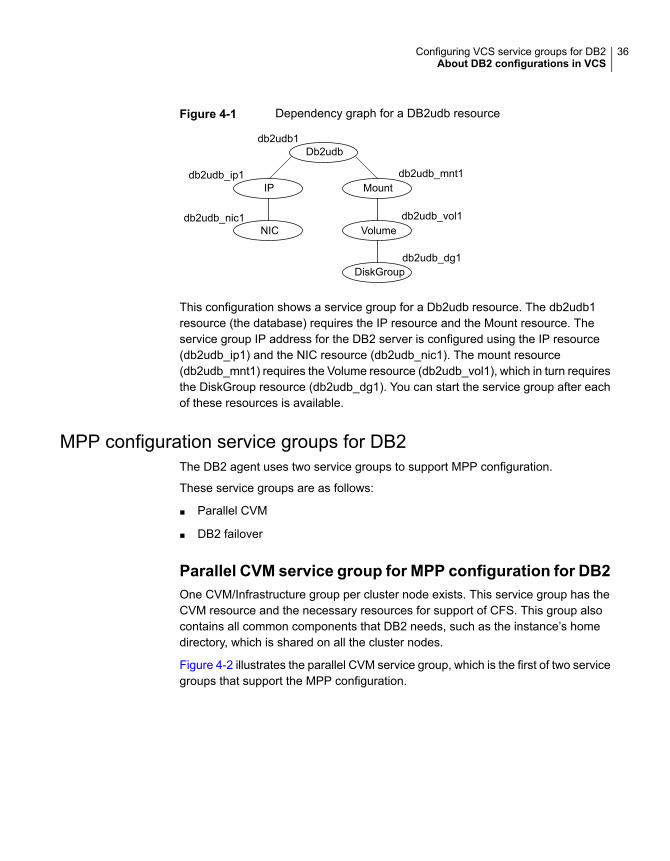
Figure 4-1 Dependency graph for a DB2udb resource
db2udb1
db2udb_ip1
db2udb_nic1
db2udb_mnt1
db2udb_vol1
db2udb_dg1
Mount
Volume
DiskGroup
IP
NIC
Db2udb
This configuration shows a service group for a Db2udb resource. The db2udb1resource (the database) requires the IP resource and the Mount resource. Theservice group IP address for the DB2 server is configured using the IP resource(db2udb_ip1) and the NIC resource (db2udb_nic1). The mount resource(db2udb_mnt1) requires the Volume resource (db2udb_vol1), which in turn requiresthe DiskGroup resource (db2udb_dg1). You can start the service group after eachof these resources is available.
MPP configuration service groups for DB2The DB2 agent uses two service groups to support MPP configuration.
These service groups are as follows:
■ Parallel CVM
■ DB2 failover
Parallel CVM service group for MPP configuration for DB2One CVM/Infrastructure group per cluster node exists. This service group has theCVM resource and the necessary resources for support of CFS. This group alsocontains all common components that DB2 needs, such as the instance’s homedirectory, which is shared on all the cluster nodes.
Figure 4-2 illustrates the parallel CVM service group, which is the first of two servicegroups that support the MPP configuration.
36Configuring VCS service groups for DB2About DB2 configurations in VCS
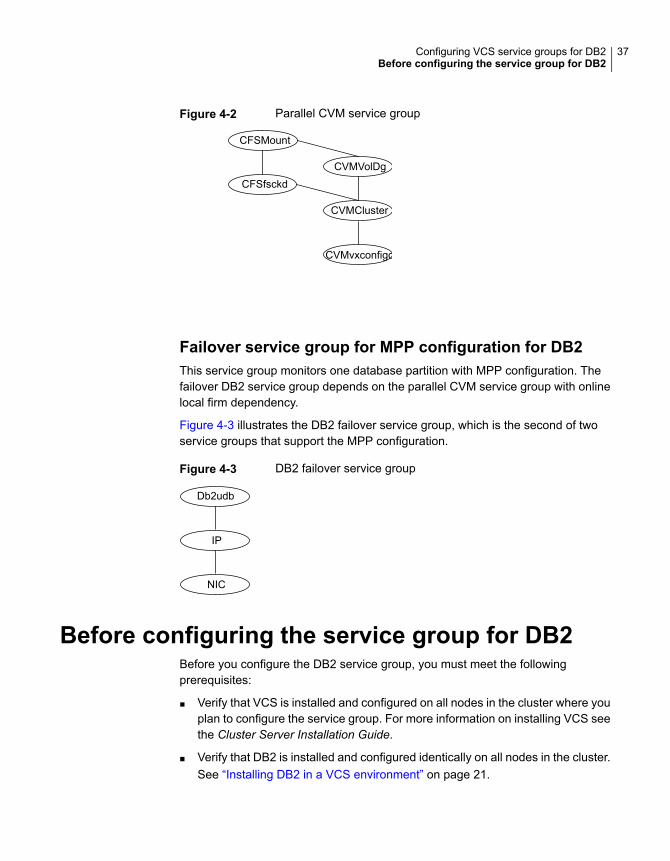
Figure 4-2 Parallel CVM service group
CFSMount
CFSfsckdCVMVolDg
CVMCluster
CVMvxconfigd
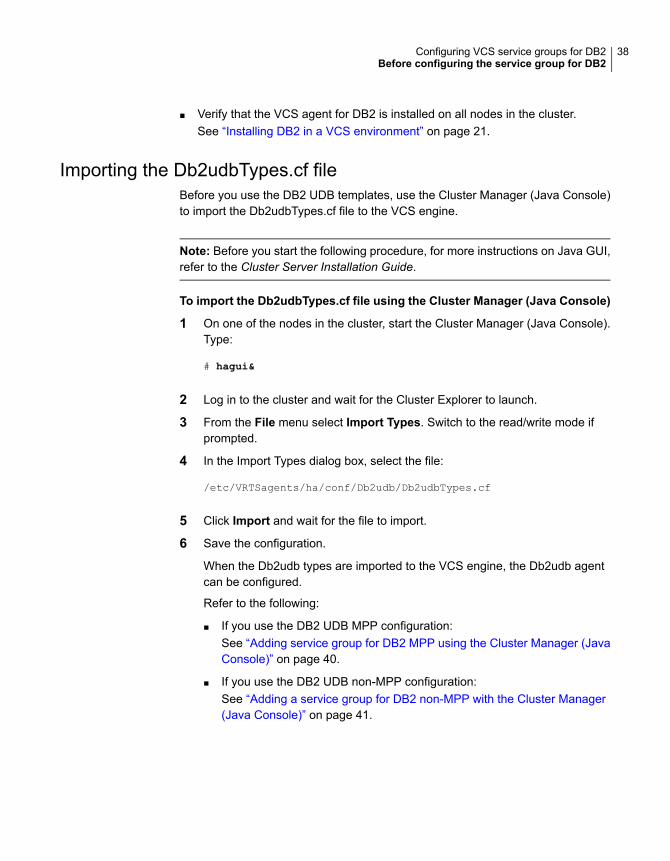
Failover service group for MPP configuration for DB2This service group monitors one database partition with MPP configuration. Thefailover DB2 service group depends on the parallel CVM service group with onlinelocal firm dependency.
Figure 4-3 illustrates the DB2 failover service group, which is the second of twoservice groups that support the MPP configuration.
Figure 4-3 DB2 failover service group
Db2udb
IP
NIC
Before configuring the service group for DB2Before you configure the DB2 service group, you must meet the followingprerequisites:
■ Verify that VCS is installed and configured on all nodes in the cluster where youplan to configure the service group. For more information on installing VCS seethe Cluster Server Installation Guide.
■ Verify that DB2 is installed and configured identically on all nodes in the cluster.See “Installing DB2 in a VCS environment” on page 21.
37Configuring VCS service groups for DB2Before configuring the service group for DB2
■ Verify that the VCS agent for DB2 is installed on all nodes in the cluster.See “Installing DB2 in a VCS environment” on page 21.
Importing the Db2udbTypes.cf fileBefore you use the DB2 UDB templates, use the Cluster Manager (Java Console)to import the Db2udbTypes.cf file to the VCS engine.
Note: Before you start the following procedure, for more instructions on Java GUI,refer to the Cluster Server Installation Guide.
To import the Db2udbTypes.cf file using the Cluster Manager (Java Console)
1 On one of the nodes in the cluster, start the Cluster Manager (Java Console).Type:
# hagui&
2 Log in to the cluster and wait for the Cluster Explorer to launch.
3 From the File menu select Import Types. Switch to the read/write mode ifprompted.
4 In the Import Types dialog box, select the file:
/etc/VRTSagents/ha/conf/Db2udb/Db2udbTypes.cf
5 Click Import and wait for the file to import.
6 Save the configuration.
When the Db2udb types are imported to the VCS engine, the Db2udb agentcan be configured.
Refer to the following:
■ If you use the DB2 UDB MPP configuration:See “Adding service group for DB2 MPP using the Cluster Manager (JavaConsole)” on page 40.
■ If you use the DB2 UDB non-MPP configuration:See “Adding a service group for DB2 non-MPP with the Cluster Manager(Java Console)” on page 41.
38Configuring VCS service groups for DB2Before configuring the service group for DB2
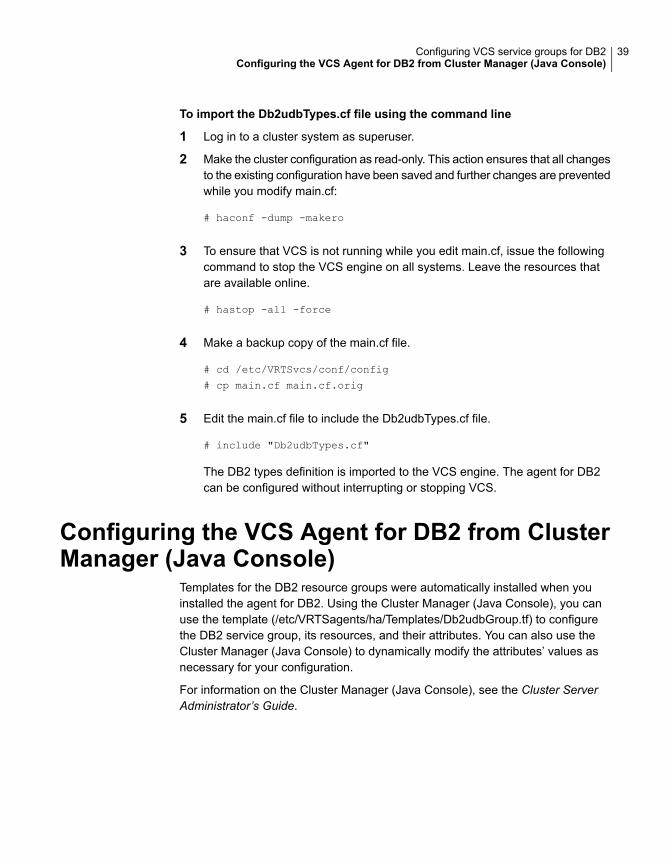
To import the Db2udbTypes.cf file using the command line
1 Log in to a cluster system as superuser.
2 Make the cluster configuration as read-only. This action ensures that all changesto the existing configuration have been saved and further changes are preventedwhile you modify main.cf:
# haconf -dump -makero
3 To ensure that VCS is not running while you edit main.cf, issue the followingcommand to stop the VCS engine on all systems. Leave the resources thatare available online.
# hastop -all -force
4 Make a backup copy of the main.cf file.
# cd /etc/VRTSvcs/conf/config
# cp main.cf main.cf.orig
5 Edit the main.cf file to include the Db2udbTypes.cf file.
# include "Db2udbTypes.cf"
The DB2 types definition is imported to the VCS engine. The agent for DB2can be configured without interrupting or stopping VCS.
Configuring the VCS Agent for DB2 from ClusterManager (Java Console)
Templates for the DB2 resource groups were automatically installed when youinstalled the agent for DB2. Using the Cluster Manager (Java Console), you canuse the template (/etc/VRTSagents/ha/Templates/Db2udbGroup.tf) to configurethe DB2 service group, its resources, and their attributes. You can also use theCluster Manager (Java Console) to dynamically modify the attributes’ values asnecessary for your configuration.
For information on the Cluster Manager (Java Console), see the Cluster ServerAdministrator’s Guide.
39Configuring VCS service groups for DB2Configuring the VCS Agent for DB2 from Cluster Manager (Java Console)
Adding service group for DB2 MPP using the Cluster Manager (JavaConsole)
If you have imported the Db2udbTypes.cf file, you can use the template(/etc/VRTSagents/ha/Templates/Db2udbGroup.tf) to configure a service group.
See “Importing the Db2udbTypes.cf file” on page 38.
After you log into the Cluster Manager, the Status tab indicates that the CVMservice group is online on each system in the cluster. The CVM service group isautomatically configured when you complete the installation of the StorageFoundation Cluster File System (SFCFS) software.
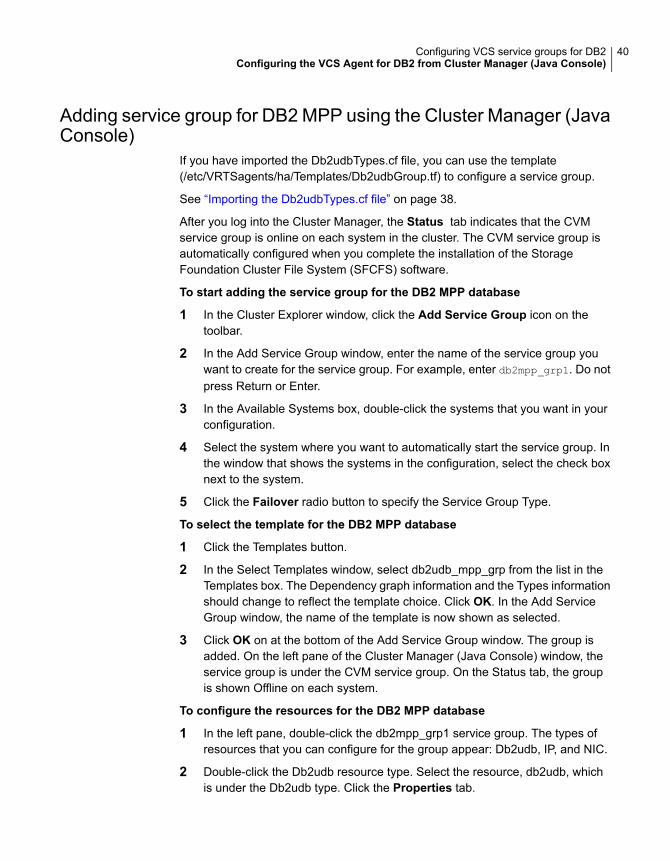
To start adding the service group for the DB2 MPP database
1 In the Cluster Explorer window, click the Add Service Group icon on thetoolbar.
2 In the Add Service Group window, enter the name of the service group youwant to create for the service group. For example, enter db2mpp_grp1. Do notpress Return or Enter.
3 In the Available Systems box, double-click the systems that you want in yourconfiguration.
4 Select the system where you want to automatically start the service group. Inthe window that shows the systems in the configuration, select the check boxnext to the system.
5 Click the Failover radio button to specify the Service Group Type.
To select the template for the DB2 MPP database
1 Click the Templates button.
2 In the Select Templates window, select db2udb_mpp_grp from the list in theTemplates box. The Dependency graph information and the Types informationshould change to reflect the template choice. Click OK. In the Add ServiceGroup window, the name of the template is now shown as selected.
3 Click OK on at the bottom of the Add Service Group window. The group isadded. On the left pane of the Cluster Manager (Java Console) window, theservice group is under the CVM service group. On the Status tab, the groupis shown Offline on each system.
To configure the resources for the DB2 MPP database
1 In the left pane, double-click the db2mpp_grp1 service group. The types ofresources that you can configure for the group appear: Db2udb, IP, and NIC.
2 Double-click the Db2udb resource type. Select the resource, db2udb, whichis under the Db2udb type. Click the Properties tab.
40Configuring VCS service groups for DB2Configuring the VCS Agent for DB2 from Cluster Manager (Java Console)
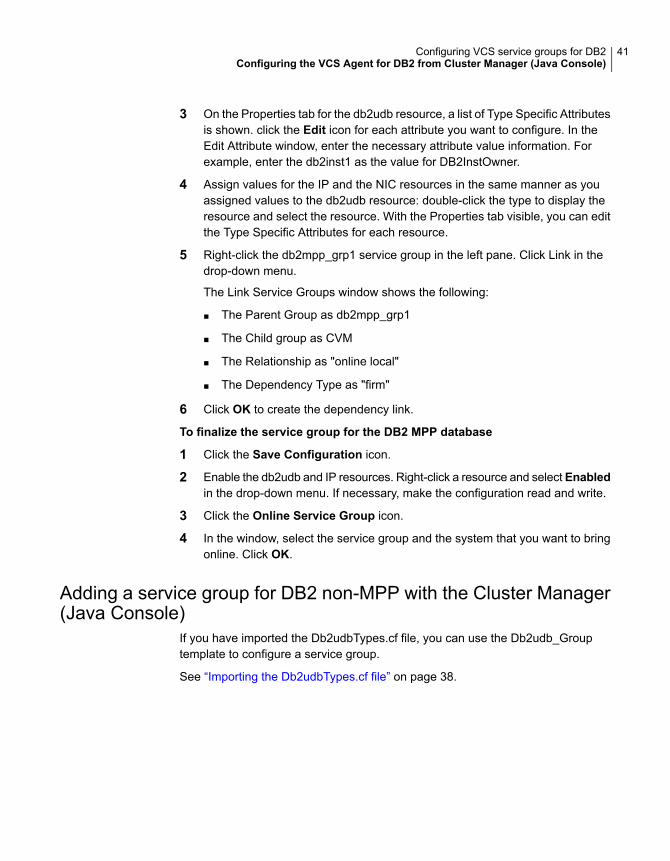
3 On the Properties tab for the db2udb resource, a list of Type Specific Attributesis shown. click the Edit icon for each attribute you want to configure. In theEdit Attribute window, enter the necessary attribute value information. Forexample, enter the db2inst1 as the value for DB2InstOwner.
4 Assign values for the IP and the NIC resources in the same manner as youassigned values to the db2udb resource: double-click the type to display theresource and select the resource. With the Properties tab visible, you can editthe Type Specific Attributes for each resource.
5 Right-click the db2mpp_grp1 service group in the left pane. Click Link in thedrop-down menu.
The Link Service Groups window shows the following:
■ The Parent Group as db2mpp_grp1
■ The Child group as CVM
■ The Relationship as "online local"
■ The Dependency Type as "firm"
6 Click OK to create the dependency link.
To finalize the service group for the DB2 MPP database
1 Click the Save Configuration icon.
2 Enable the db2udb and IP resources. Right-click a resource and select Enabledin the drop-down menu. If necessary, make the configuration read and write.
3 Click the Online Service Group icon.
4 In the window, select the service group and the system that you want to bringonline. Click OK.
Adding a service group for DB2 non-MPP with the Cluster Manager(Java Console)
If you have imported the Db2udbTypes.cf file, you can use the Db2udb_Grouptemplate to configure a service group.
See “Importing the Db2udbTypes.cf file” on page 38.
41Configuring VCS service groups for DB2Configuring the VCS Agent for DB2 from Cluster Manager (Java Console)
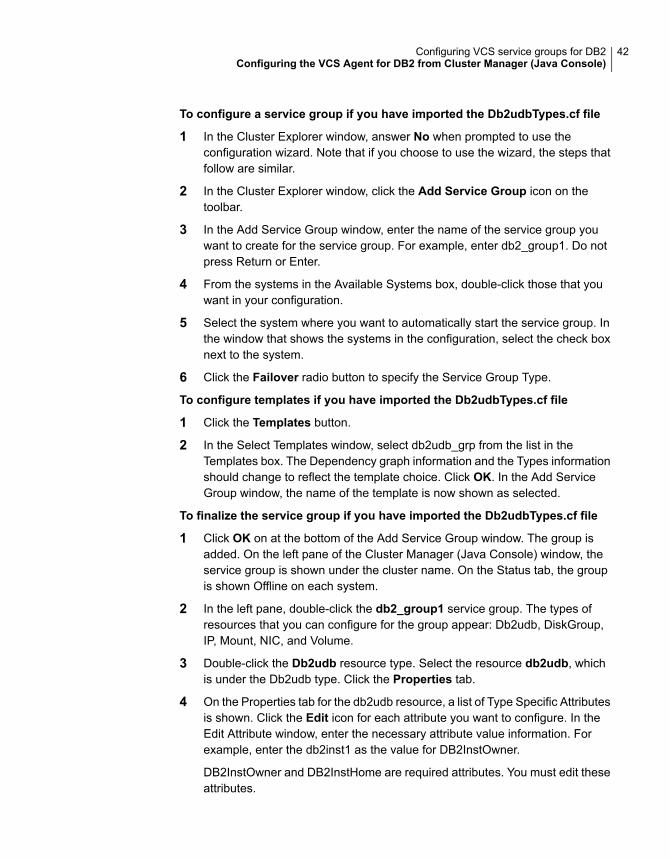
To configure a service group if you have imported the Db2udbTypes.cf file
1 In the Cluster Explorer window, answer No when prompted to use theconfiguration wizard. Note that if you choose to use the wizard, the steps thatfollow are similar.
2 In the Cluster Explorer window, click the Add Service Group icon on thetoolbar.
3 In the Add Service Group window, enter the name of the service group youwant to create for the service group. For example, enter db2_group1. Do notpress Return or Enter.
4 From the systems in the Available Systems box, double-click those that youwant in your configuration.
5 Select the system where you want to automatically start the service group. Inthe window that shows the systems in the configuration, select the check boxnext to the system.
6 Click the Failover radio button to specify the Service Group Type.
To configure templates if you have imported the Db2udbTypes.cf file
1 Click the Templates button.
2 In the Select Templates window, select db2udb_grp from the list in theTemplates box. The Dependency graph information and the Types informationshould change to reflect the template choice. Click OK. In the Add ServiceGroup window, the name of the template is now shown as selected.
To finalize the service group if you have imported the Db2udbTypes.cf file
1 Click OK on at the bottom of the Add Service Group window. The group isadded. On the left pane of the Cluster Manager (Java Console) window, theservice group is shown under the cluster name. On the Status tab, the groupis shown Offline on each system.
2 In the left pane, double-click the db2_group1 service group. The types ofresources that you can configure for the group appear: Db2udb, DiskGroup,IP, Mount, NIC, and Volume.
3 Double-click the Db2udb resource type. Select the resource db2udb, whichis under the Db2udb type. Click the Properties tab.
4 On the Properties tab for the db2udb resource, a list of Type Specific Attributesis shown. Click the Edit icon for each attribute you want to configure. In theEdit Attribute window, enter the necessary attribute value information. Forexample, enter the db2inst1 as the value for DB2InstOwner.
DB2InstOwner and DB2InstHome are required attributes. You must edit theseattributes.
42Configuring VCS service groups for DB2Configuring the VCS Agent for DB2 from Cluster Manager (Java Console)
5 Assign values for the DiskGroup, IP, Mount, NIC, and Volume resources in thesame manner as you assigned values to the db2udb resource: double-clickthe type to display the resource and select the resource. With the Propertiestab visible, you can edit the Type Specific Attributes.
For a list of the required attributes and their descriptions, see the Cluster ServerBundled Agents Reference Guide.
6 Enable the resources in db2_group1. Right-click each resource and selectEnabled in the drop-down menu. If necessary, make the configuration readand write.
7 Click the Save and Close Configuration icon.
8 Click the Online Service Group icon.
9 In the window, select the service group and the system that you want to bringonline. Click the system where you want to bring it online. Click OK. Click Yesat the confirmation question.
Note: VCS Single Cluster Manager (Java Console) is no longer packaged withVCS. Veritas recommends use of the Veritas InfoScale Operations Manager tomanage, monitor and report on multi-cluster environments. You can download VOMat https://sort.veritas.com/vom .
Configuring the VCS Agent for DB2 by editing themain.cf file
The VCS agent for DB2 comes with three sample VCS configuration files, whichare in the /etc/VRTSagents/ha/conf/Db2udb/sample_db2udb directory.
The samples are as follows:
■ A single-partition instance configuration
■ A multi-partition instance SMP configuration
■ A multi-partition instance MPP configuration.
The appropriate file can be used as reference to directly modify your present main.cfconfiguration file. When you use this method, you must stop and restart VCS toimplement the configuration.
After you complete these steps, go to one of the following sections that describeconfiguring the agent.
43Configuring VCS service groups for DB2Configuring the VCS Agent for DB2 by editing the main.cf file
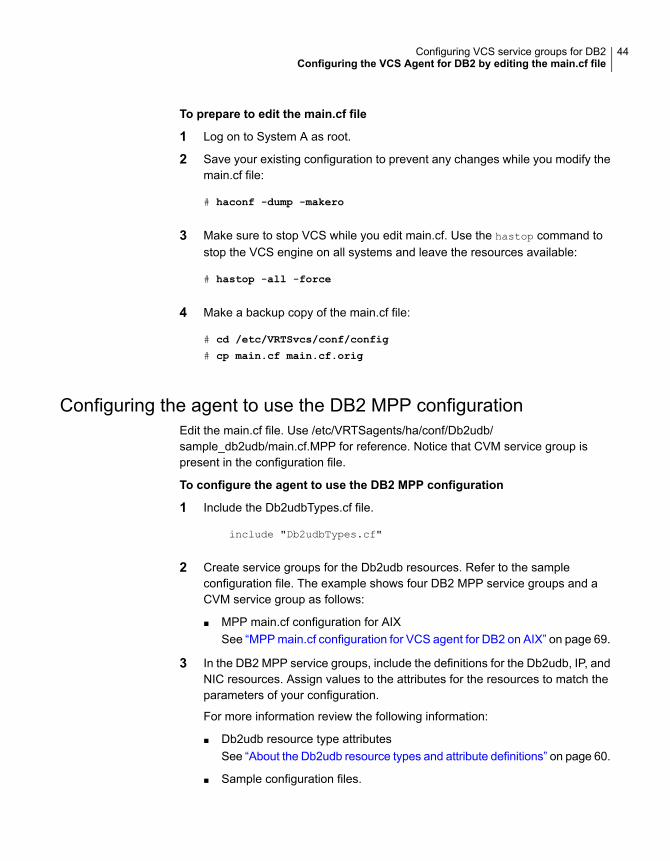
To prepare to edit the main.cf file
1 Log on to System A as root.
2 Save your existing configuration to prevent any changes while you modify themain.cf file:
# haconf -dump -makero
3 Make sure to stop VCS while you edit main.cf. Use the hastop command tostop the VCS engine on all systems and leave the resources available:
# hastop -all -force
4 Make a backup copy of the main.cf file:
# cd /etc/VRTSvcs/conf/config
# cp main.cf main.cf.orig
Configuring the agent to use the DB2 MPP configurationEdit the main.cf file. Use /etc/VRTSagents/ha/conf/Db2udb/sample_db2udb/main.cf.MPP for reference. Notice that CVM service group ispresent in the configuration file.
To configure the agent to use the DB2 MPP configuration
1 Include the Db2udbTypes.cf file.
include "Db2udbTypes.cf"
2 Create service groups for the Db2udb resources. Refer to the sampleconfiguration file. The example shows four DB2 MPP service groups and aCVM service group as follows:
■ MPP main.cf configuration for AIXSee “MPP main.cf configuration for VCS agent for DB2 on AIX” on page 69.
3 In the DB2 MPP service groups, include the definitions for the Db2udb, IP, andNIC resources. Assign values to the attributes for the resources to match theparameters of your configuration.
For more information review the following information:
■ Db2udb resource type attributesSee “About the Db2udb resource types and attribute definitions” on page 60.
■ Sample configuration files.
44Configuring VCS service groups for DB2Configuring the VCS Agent for DB2 by editing the main.cf file
■ For information about IP and NIC resources refer to the Cluster ServerBundled Agents Reference Guide.
4 Assign the online local firm service group dependency of the db2udb servicegroup for the cvm service group. For example:
requires group cvm online local firm
5 Immediately following the service group dependency, assign dependenciesfor the newly created resources. Refer to the appropriate sample configurationfile. For the group db2mpp_grp0, enter:
db2udb0 requires Db2_IP0
Db2_IP0 requires Db2_NIC0
For more information on assigning dependencies refer to the Cluster ServerAdministrator’s Guide.
6 Save and close the file.
Configuring the agent to use the DB2 non-MPP configurationsEdit the main.cf file. Use /etc/VRTSagents/ha/conf/Db2udb/sample_db2udb/main.cf.EE or /etc/VRTSagents/ha/conf/Db2udb/sample_db2/main.cf.EEE for reference.
To configure the agent to use the DB2 non-MPP configurations
1 Include the Db2udbTypes.cf file.
include "Db2udbTypes.cf"
2 Create a service group for the DB2 resources.
This example that shows a group named "db2_grp1" in which two partitionsare defined.
See “Non-MPP main.cf configuration for VCS agent for DB2 on AIX” on page 67.
3 Include all resources in the service groups. These resources include theDb2udb, DiskGroup, IP, Mount, NIC, and Volume resources. Assign values tothe attributes for the resources to match the parameters of your configuration.
For more information:
■ Db2udb resource type attributesSee “About the Db2udb resource types and attribute definitions” on page 60.
■ The sample configuration files
45Configuring VCS service groups for DB2Configuring the VCS Agent for DB2 by editing the main.cf file
For information about the DiskGroup, IP, Mount, NIC, and Volume resources,refer to the Cluster Server Bundled Agents Reference Guide.
4 Assign dependencies for the newly created resources. For the groupdb2udb_grp1, enter:
db2udb1 requires db2udb_ip1
db2udb1 requires db2udb_mnt1
db2udb_ip1 requires db2udb_nic1
db2udb_mnt1 requires db2udb_vol1
db2udb_vol1 requires db2udb_dg1
And for group db2udb_grp3, enter:
db2udb3 requires db2udb_ip3
db2udb3 requires db2udb_mnt3
db2udb_ip3 requires db2udb_nic3
db2udb_mnt3 requires db2udb_vol3
db2udb_vol3 requires db2udb_dg3
For more information, refer to the appropriate sample configuration file.
For more information on assigning dependencies, refer to the Cluster ServerAdministrator’s Guide.
5 Save and close the file.
Verifying the configuration for VCS agent for DB2Check the configuration after you edit the main.cf.
To check the configuration
1 Verify the syntax of the file /etc/VRTSvcs/conf/config/main.cf:
# cd /etc/VRTSvcs/conf/config
# hacf -verify .
2 Start the VCS engine on System A:
# hastart
3 Type the hastatus command:
# hastatus
46Configuring VCS service groups for DB2Configuring the VCS Agent for DB2 by editing the main.cf file
4 When "LOCAL_BUILD" is listed in the message column, start VCS on SystemB:
# hastart
5 Verify that all DB2 service group resources are brought online on System A:
# hagrp -display
6 Take the service groups offline on System A and verify that all resources arestopped:
# hagrp -offline db2udb_grp1 -sys sysa
# hagrp -offline db2udb_grp3 -sys sysa
# hagrp -display
7 Bring the service groups online again on System A and verify that all resourcesare available:
# hagrp -online db2udb_grp1 -sys sysa
# hagrp -online db2udb_grp3 -sys sysa
# hagrp -display
8 Switch the DB2 service group to System B:
# hagrp -switch db2udb_grp1 -to sysb
# hagrp -switch db2udb_grp3 -to sysb
9 Verify that all DB2 service group resources are brought online on System B:
# hagrp -display
10 On all the systems, look at the following log files for any errors or status:
/var/VRTSvcs/log/engine_A.log
/var/VRTSvcs/log/Db2udb_A.log
Setting up in-depth monitoring of a DB2 instanceUse the VCS commands to dynamically reconfigure the Cluster Server Agent forDB2. The following description of configuration changes to include in-depthmonitoring shows the use of VCS commands from the command line. For information
47Configuring VCS service groups for DB2Setting up in-depth monitoring of a DB2 instance
on reconfiguring VCS from the command line refer to the Cluster ServerAdministrator’s Guide.
Enabling in-depth monitoring of a DB2 instanceShallow monitoring of a DB2 instance involves checking the exit status of the db2gcf
command.
In contrast, in-depth monitoring provides a higher level of confidence in theavailability of the instance or partition and its database. It makes additional queriesto the database to verify whether the database is available.
Enabling in-depth monitoring from the command line for DB2You can dynamically configure in-depth monitoring. Veritas recommends that yousuccessfully run DB2 with the agent’s default (shallow) monitoring before you startthe in-depth monitoring. In the MPP configuration, make sure the database can beaccessible locally by the database partition.
For locales other than English, add the following lines to the$INSTHOME/sqllib/userprofile file.
The following example adds Japanese language support:
export LANG=Ja_JP
You need to have custom monitoring scripts. Refer to the following table forinformation on the Indepth Monitor attribute:
See “About the Db2udb resource types and attribute definitions” on page 60.
48Configuring VCS service groups for DB2Setting up in-depth monitoring of a DB2 instance

To start the in-depth monitor for a given instance
1 Make the VCS configuration writable:
# haconf -makerw
2 Freeze the service group so VCS does not perform actions automatically basedon an incomplete reconfiguration:
# hagrp -freeze db2udb_group
3 Enable in-depth monitoring using the command:
# hares -modify resource DatabaseName name
# hares -modify resource IndepthMonitor 1
For example:
# hares -modify db2udb DatabaseName SAMPLE
# hares -modify db2udb IndepthMonitor 1
# haconf -dump -makero
# hagrp -unfreeze db2udb_group
Enabling and disabling intelligent resource monitoring for Db2udbresource
Review the following procedures to enable or disable intelligent resource monitoring.The intelligent resource monitoring feature is now enabled by default. The IMFresource type attribute determines whether an IMF aware agent must performintelligent resource monitoring.
To enable intelligent resource monitoring for Db2udb resource
1 Make the VCS configuration writable by running the command
# haconf -makerw
2 To enable intelligent resource monitoring for all the resources of type Db2udb,run the following command:
# hatype -modify Db2udb IMF -update Mode 2
3 Change the values of the MonitorFreq key and the RegisterRetryLimit key ofthe IMF attribute.
See “About the Db2udb resource types and attribute definitions” on page 60.
49Configuring VCS service groups for DB2Setting up in-depth monitoring of a DB2 instance
4 Save the VCS configuration
# haconf -dump -makero
5 Make sure that the AMF kernel driver is configured on all nodes in the cluster.
# /opt/VRTS/bin/amfconfig
Configure the AMF driver if the command output returns that the AMF driveris not loaded or not configured.
6 Restart the Db2udb agent. Run the following commands on each node.
# haagent -stop Db2udb -force -sys sys_name
# haagent -start Db2udb -sys sys_name
To disable intelligent resource monitoring for Db2udb resource
1 Make the VCS configuration writable.
# haconf -makerw
2 To disable intelligent resource monitoring for all the resources of type Db2udb,run the following command:
# hatype -modify Db2udb IMF -update Mode 0
3 To disable intelligent resource monitoring for a specific Db2udb resource, runthe following command:
# hares -override resource_name IMF
# hares -modify resource_name IMF -update Mode 0
4 Save the VCS configuration.
# haconf -dump -makero
Note: haimfconfig utility can also be used to enable or disable IMF. Please referVCS Admin Guide for more information on haimfconfig.
Administering the AMF kernel driverReview the following procedures to start or stop the AMF kernel driver.
To start the AMF kernel driver
1 Set the value of the AMF_START variable to 1 in the following file:
/etc/default/amf
2 Start the AMF kernel driver. Run the following command:
/etc/init.d/amf.rc start
50Configuring VCS service groups for DB2Setting up in-depth monitoring of a DB2 instance
To stop the AMF kernel driver
1 Stop the AMF kernel driver. Run the following command:
/etc/init.d/amf.rc stop
2 Set the value of the AMF_START variable to 0 in the following file:
/etc/default/amf
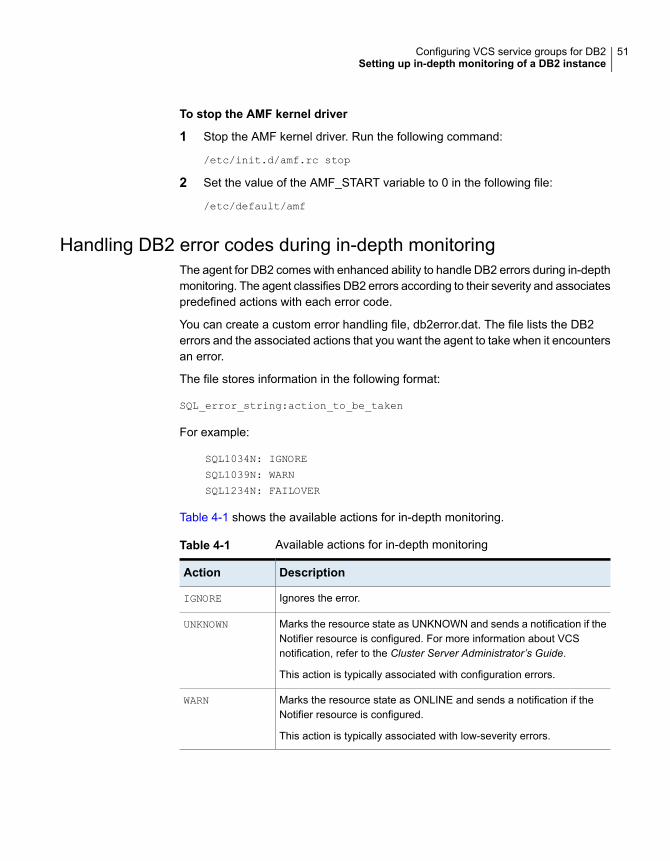
Handling DB2 error codes during in-depth monitoringThe agent for DB2 comes with enhanced ability to handle DB2 errors during in-depthmonitoring. The agent classifies DB2 errors according to their severity and associatespredefined actions with each error code.
You can create a custom error handling file, db2error.dat. The file lists the DB2errors and the associated actions that you want the agent to take when it encountersan error.
The file stores information in the following format:
SQL_error_string:action_to_be_taken
For example:
SQL1034N: IGNORE
SQL1039N: WARN
SQL1234N: FAILOVER
Table 4-1 shows the available actions for in-depth monitoring.
Table 4-1 Available actions for in-depth monitoring
DescriptionAction
Ignores the error.IGNORE
Marks the resource state as UNKNOWN and sends a notification if theNotifier resource is configured. For more information about VCSnotification, refer to the Cluster Server Administrator’s Guide.
This action is typically associated with configuration errors.
UNKNOWN
Marks the resource state as ONLINE and sends a notification if theNotifier resource is configured.
This action is typically associated with low-severity errors.
WARN
51Configuring VCS service groups for DB2Setting up in-depth monitoring of a DB2 instance
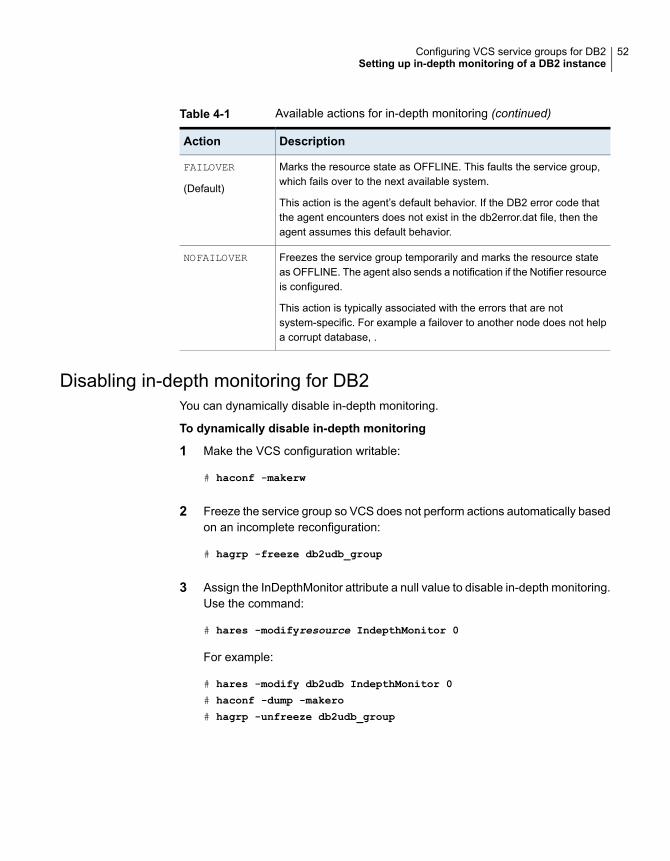
Table 4-1 Available actions for in-depth monitoring (continued)
DescriptionAction
Marks the resource state as OFFLINE. This faults the service group,which fails over to the next available system.
This action is the agent’s default behavior. If the DB2 error code thatthe agent encounters does not exist in the db2error.dat file, then theagent assumes this default behavior.
FAILOVER
(Default)
Freezes the service group temporarily and marks the resource stateas OFFLINE. The agent also sends a notification if the Notifier resourceis configured.
This action is typically associated with the errors that are notsystem-specific. For example a failover to another node does not helpa corrupt database, .
NOFAILOVER
Disabling in-depth monitoring for DB2You can dynamically disable in-depth monitoring.
To dynamically disable in-depth monitoring
1 Make the VCS configuration writable:
# haconf -makerw
2 Freeze the service group so VCS does not perform actions automatically basedon an incomplete reconfiguration:
# hagrp -freeze db2udb_group
3 Assign the InDepthMonitor attribute a null value to disable in-depth monitoring.Use the command:
# hares -modifyresource IndepthMonitor 0
For example:
# hares -modify db2udb IndepthMonitor 0
# haconf -dump -makero
# hagrp -unfreeze db2udb_group
52Configuring VCS service groups for DB2Setting up in-depth monitoring of a DB2 instance
Administering VCS servicegroups for DB2
This chapter includes the following topics:
■ About administering service groups for DB2
■ Bringing the DB2 service group online
■ Taking the DB2 service group offline
■ Switching the DB2 service group
■ Disabling the agent for DB2
About administering service groups for DB2You can administer service groups with the Cluster Manager (Java Console), theVeritas InfoScale Operations Manager, or from the command line. The followingprocedures use the Cluster Manager (Java Console).
Bringing the DB2 service group onlinePerform the following steps to bring a service group online. Note that in the initialfew cycles of bringing a service group online, the memory usage by the agent canspike.
To bring a service group online
1 From Cluster Explorer, click the Service Groups tab in the configuration tree.
2 Right-click the service group and click Enable Resources to enable all theresources in this group.
5Chapter
3 Right-click the service group, hover over Enable, and select either the nodeor all the nodes where you want to enable the service group.
4 Save and close the configuration. Click File > Save Configuration, thenCloseConfiguration.
5 Right-click the service group, pause over Online, and select the system whereyou want to bring the service group online.
Taking the DB2 service group offlinePerform the following procedure from Cluster Manager (Java Console) to take theservice group offline.
To take a service group offline
1 In the Cluster Explorer configuration tree with the Service Groups tab selected,right-click the service group that you want to take offline.
2 Choose Offline, and select the appropriate system from the pop-up menu.
Switching the DB2 service groupThe process of switching a service group involves taking it offline on its currentsystem and bringing it online on another system. Perform the following procedurefrom Cluster Manager (Java Console) to switch the service group.
To switch a service group
1 In the Cluster Explorer configuration tree with the Service Groups tab selected,right-click the service group.
2 Choose Switch To, and select the appropriate system from the pop-up menu.
Disabling the agent for DB2To disable the agent on a system, you must first change the DB2 service group toan OFFLINE state. You can stop the application completely, or switch the servicegroup to another system.
54Administering VCS service groups for DB2Taking the DB2 service group offline
To disable the agent
1 Determine if the service group is online. At the prompt, type:
# hagrp -state service_group -sys system_name
2 If the service group is online, switch the service group to another system ortake it offline. At the prompt, type:
# hagrp -switch service_group -to system_name
Or
# hagrp -offline service_group -sys system_name
3 Stop the agent on the system. At the prompt, type:
# haagent -stop Db2udb -sys system_name
4 When you get the message "Please look for messages in the log file,"
check the file /var/VRTSvcs/log/engine_A.log for a message confirming theagent has stopped.
You can also use the ps command to verify that the agent has stopped.
5 When the agent has stopped, you can remove the system, the service group,or the resource type from the VCS configuration.
For more information, refer to the chapter on reconfiguring VCS from thecommand line in Cluster Server Administrator’s Guide.
55Administering VCS service groups for DB2Disabling the agent for DB2
Troubleshooting ClusterServer Agent for DB2
This appendix includes the following topics:
■ Creating a db2profile for environment variables for DB2
■ Setting the RestartLimit attribute for VCS agent for DB2
■ Partition/Node switch-over scenarios for DB2 V9.5, V9.7, V10.1, and V10.5 inMPP mode
Creating a db2profile for environment variablesfor DB2
You can create a profile file for each instance of DB2 and place environmentvariables in the profile file. You can use this profile to create unique variables foreach database user. Each DB2 instance has a home directory that is associatedwith the instance's log on ID, for example:
$InstHome/sqllib/db2profile
Where $InstHome is the name of the logon ID.
Place the variables that you are interested in using (for example the TimeZonevariable) in the profile file. When you then issue a su - db2instX command (whereX is the instance's name), the environment variables are sourced.
AAppendix
Setting the RestartLimit attribute for VCS agentfor DB2
VCS starts multiple partitions simultaneously, which can lead to a race condition.The agent's RestartLimit attribute is set to a value of three to help avoid thiscondition. You can alleviate the potential for this condition by building resourcedependencies for each partition. For example, within a service group you can havethe Db2udb resource 4 (where nodenum=1) depend on Db2udb resource 3 (wherenodenum=2) etc. With the partitions built in a dependency tree, you can set thevalue of the RestartLimit to zero.
Partition/Node switch-over scenarios for DB2V9.5,V9.7, V10.1, and V10.5 in MPP mode
To switch-over when the partitions are online on a system
1 Serially move any partition from the source machine that is not associated withport 0 on the target.
2 Move the remaining partitions one by one with partition associated with port 0on source being last.
For more information, refer IBM's case no: IC66748.
57Troubleshooting Cluster Server Agent for DB2Setting the RestartLimit attribute for VCS agent for DB2
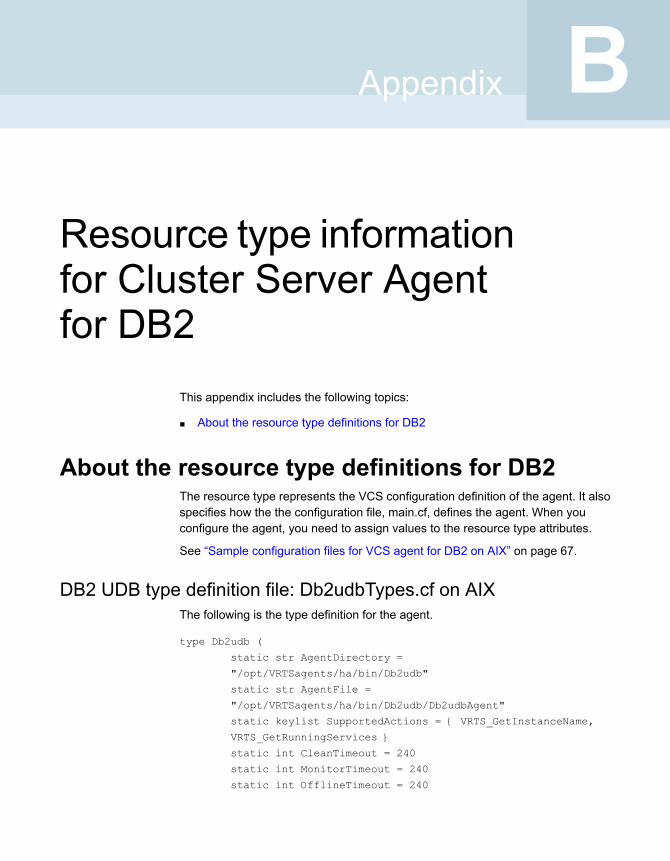
Resource type informationfor Cluster Server Agentfor DB2
This appendix includes the following topics:
■ About the resource type definitions for DB2
About the resource type definitions for DB2The resource type represents the VCS configuration definition of the agent. It alsospecifies how the the configuration file, main.cf, defines the agent. When youconfigure the agent, you need to assign values to the resource type attributes.
See “Sample configuration files for VCS agent for DB2 on AIX” on page 67.
DB2 UDB type definition file: Db2udbTypes.cf on AIXThe following is the type definition for the agent.
type Db2udb (
static str AgentDirectory =
"/opt/VRTSagents/ha/bin/Db2udb"
static str AgentFile =
"/opt/VRTSagents/ha/bin/Db2udb/Db2udbAgent"
static keylist SupportedActions = { VRTS_GetInstanceName,
VRTS_GetRunningServices }
static int CleanTimeout = 240
static int MonitorTimeout = 240
static int OfflineTimeout = 240
BAppendix
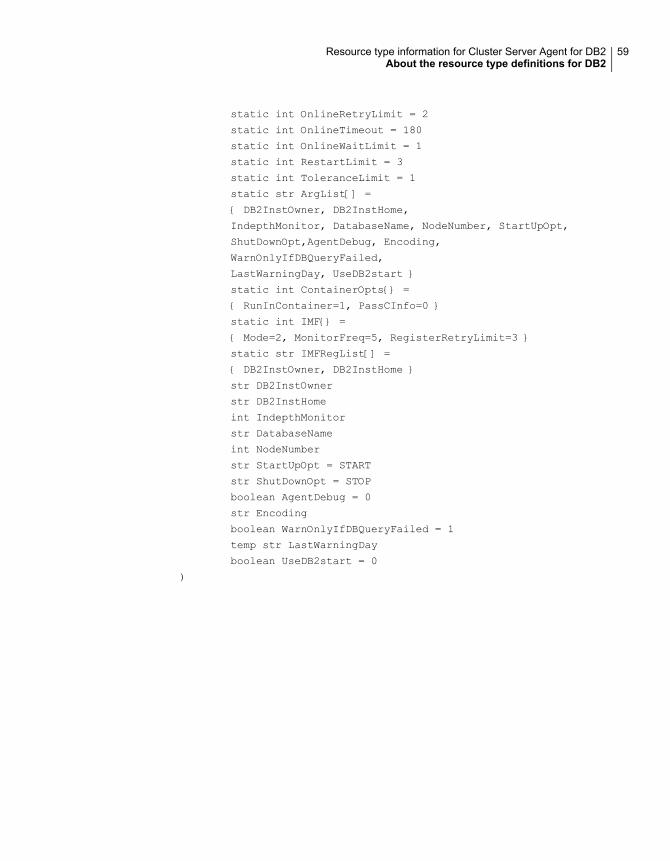
static int OnlineRetryLimit = 2
static int OnlineTimeout = 180
static int OnlineWaitLimit = 1
static int RestartLimit = 3
static int ToleranceLimit = 1
static str ArgList[] =
{ DB2InstOwner, DB2InstHome,
IndepthMonitor, DatabaseName, NodeNumber, StartUpOpt,
ShutDownOpt,AgentDebug, Encoding,
WarnOnlyIfDBQueryFailed,
LastWarningDay, UseDB2start }
static int ContainerOpts{} =
{ RunInContainer=1, PassCInfo=0 }
static int IMF{} =
{ Mode=2, MonitorFreq=5, RegisterRetryLimit=3 }
static str IMFRegList[] =
{ DB2InstOwner, DB2InstHome }
str DB2InstOwner
str DB2InstHome
int IndepthMonitor
str DatabaseName
int NodeNumber
str StartUpOpt = START
str ShutDownOpt = STOP
boolean AgentDebug = 0
str Encoding
boolean WarnOnlyIfDBQueryFailed = 1
temp str LastWarningDay
boolean UseDB2start = 0
)
59Resource type information for Cluster Server Agent for DB2About the resource type definitions for DB2
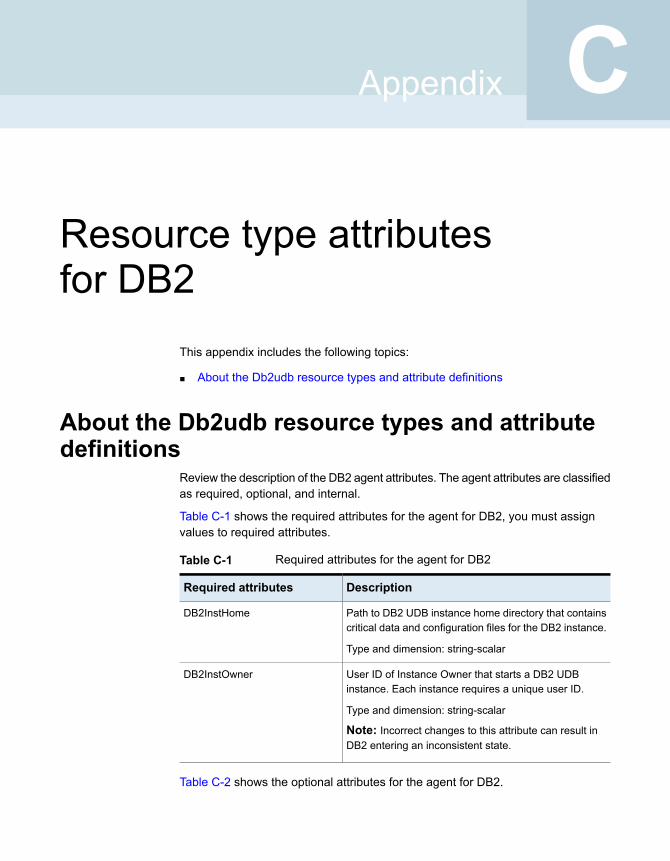
Resource type attributesfor DB2
This appendix includes the following topics:
■ About the Db2udb resource types and attribute definitions
About the Db2udb resource types and attributedefinitions
Review the description of the DB2 agent attributes. The agent attributes are classifiedas required, optional, and internal.
Table C-1 shows the required attributes for the agent for DB2, you must assignvalues to required attributes.
Table C-1 Required attributes for the agent for DB2
DescriptionRequired attributes
Path to DB2 UDB instance home directory that containscritical data and configuration files for the DB2 instance.
Type and dimension: string-scalar
DB2InstHome
User ID of Instance Owner that starts a DB2 UDBinstance. Each instance requires a unique user ID.
Type and dimension: string-scalar
Note: Incorrect changes to this attribute can result inDB2 entering an inconsistent state.
DB2InstOwner
Table C-2 shows the optional attributes for the agent for DB2.
CAppendix
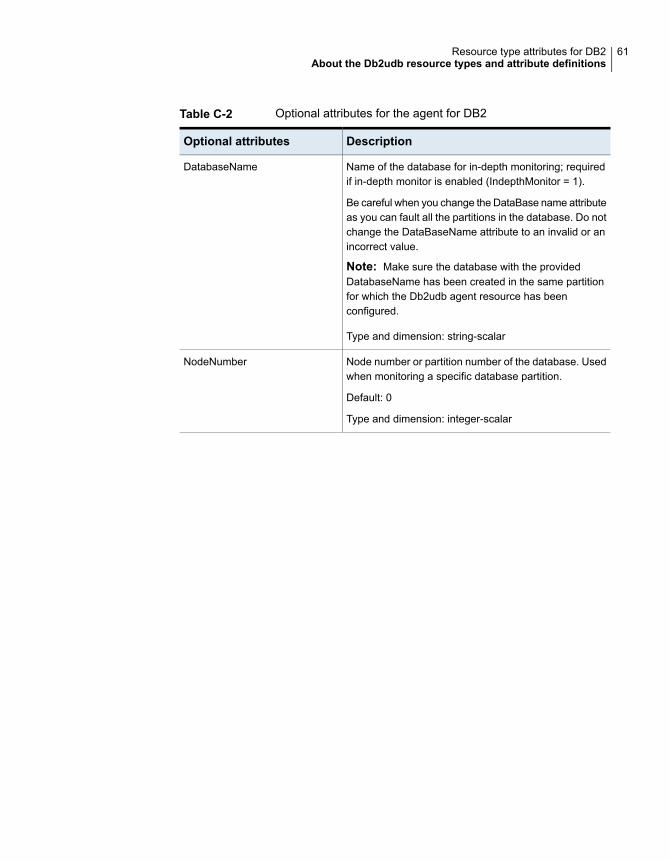
Table C-2 Optional attributes for the agent for DB2
DescriptionOptional attributes
Name of the database for in-depth monitoring; requiredif in-depth monitor is enabled (IndepthMonitor = 1).
Be careful when you change the DataBase name attributeas you can fault all the partitions in the database. Do notchange the DataBaseName attribute to an invalid or anincorrect value.
Note: Make sure the database with the providedDatabaseName has been created in the same partitionfor which the Db2udb agent resource has beenconfigured.
Type and dimension: string-scalar
DatabaseName
Node number or partition number of the database. Usedwhen monitoring a specific database partition.
Default: 0
Type and dimension: integer-scalar
NodeNumber
61Resource type attributes for DB2About the Db2udb resource types and attribute definitions

Table C-2 Optional attributes for the agent for DB2 (continued)
DescriptionOptional attributes
Provides start up options. The allowed values are:START, ACTIVATEDB, or CUSTOM.
Review the following options:
■ START (default)Starts the DB2 instance or partition.
■ ACTIVATEDBPerforms activate database command after db2processes start.
■ CUSTOMThe agent leaves all the online function completelyto the user when the StartUpOpt attribute is set toCUSTOM. It looks for a file namedstart_custom_$db2instance_$nodenum in the/opt/VRTSagents/ha/bin/Db2udb directory. If this fileexists and is executable, it executes this customizedonline file instead.Example:To customize the online function for partition/nodenum1 for the db2 instance named db2inst1, the agent forDB2 runs this customized filestart_custom_db2inst1_1. It runs this file under the/opt/VRTSagents/ha/bin/Db2udb directory.
Type and dimension: string-scalar
StartUpOpt
62Resource type attributes for DB2About the Db2udb resource types and attribute definitions
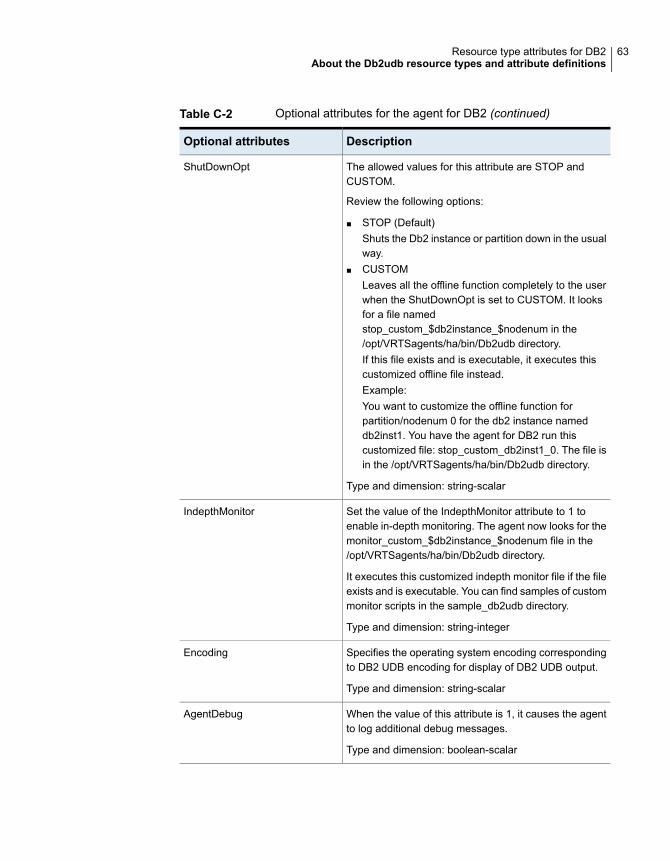
Table C-2 Optional attributes for the agent for DB2 (continued)
DescriptionOptional attributes
The allowed values for this attribute are STOP andCUSTOM.
Review the following options:
■ STOP (Default)Shuts the Db2 instance or partition down in the usualway.
■ CUSTOMLeaves all the offline function completely to the userwhen the ShutDownOpt is set to CUSTOM. It looksfor a file namedstop_custom_$db2instance_$nodenum in the/opt/VRTSagents/ha/bin/Db2udb directory.If this file exists and is executable, it executes thiscustomized offline file instead.Example:You want to customize the offline function forpartition/nodenum 0 for the db2 instance nameddb2inst1. You have the agent for DB2 run thiscustomized file: stop_custom_db2inst1_0. The file isin the /opt/VRTSagents/ha/bin/Db2udb directory.
Type and dimension: string-scalar
ShutDownOpt
Set the value of the IndepthMonitor attribute to 1 toenable in-depth monitoring. The agent now looks for themonitor_custom_$db2instance_$nodenum file in the/opt/VRTSagents/ha/bin/Db2udb directory.
It executes this customized indepth monitor file if the fileexists and is executable. You can find samples of custommonitor scripts in the sample_db2udb directory.
Type and dimension: string-integer
IndepthMonitor
Specifies the operating system encoding correspondingto DB2 UDB encoding for display of DB2 UDB output.
Type and dimension: string-scalar
Encoding
When the value of this attribute is 1, it causes the agentto log additional debug messages.
Type and dimension: boolean-scalar
AgentDebug
63Resource type attributes for DB2About the Db2udb resource types and attribute definitions
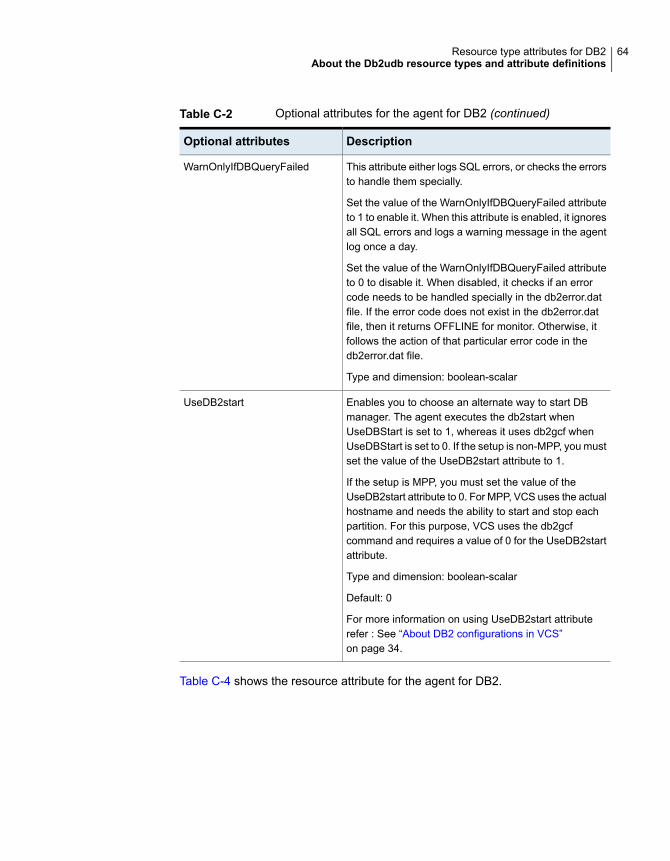
Table C-2 Optional attributes for the agent for DB2 (continued)
DescriptionOptional attributes
This attribute either logs SQL errors, or checks the errorsto handle them specially.
Set the value of the WarnOnlyIfDBQueryFailed attributeto 1 to enable it. When this attribute is enabled, it ignoresall SQL errors and logs a warning message in the agentlog once a day.
Set the value of the WarnOnlyIfDBQueryFailed attributeto 0 to disable it. When disabled, it checks if an errorcode needs to be handled specially in the db2error.datfile. If the error code does not exist in the db2error.datfile, then it returns OFFLINE for monitor. Otherwise, itfollows the action of that particular error code in thedb2error.dat file.
Type and dimension: boolean-scalar
WarnOnlyIfDBQueryFailed
Enables you to choose an alternate way to start DBmanager. The agent executes the db2start whenUseDBStart is set to 1, whereas it uses db2gcf whenUseDBStart is set to 0. If the setup is non-MPP, you mustset the value of the UseDB2start attribute to 1.
If the setup is MPP, you must set the value of theUseDB2start attribute to 0. For MPP, VCS uses the actualhostname and needs the ability to start and stop eachpartition. For this purpose, VCS uses the db2gcfcommand and requires a value of 0 for the UseDB2startattribute.
Type and dimension: boolean-scalar
Default: 0
For more information on using UseDB2start attributerefer : See “About DB2 configurations in VCS”on page 34.
UseDB2start
Table C-4 shows the resource attribute for the agent for DB2.
64Resource type attributes for DB2About the Db2udb resource types and attribute definitions

Table C-3 Resource attribute for the agent for DB2
DescriptionInternal attributes
This agent is zone-aware. The ContainerOpts resourcetype attribute for this type has a default value of 1 forRunInContainer and a default value of 0 for PassCInfo.Veritas recommends that you do not change thesevalues. Refer to the Cluster Server Administrator's Guidefor more information.
ContainerOpts
Table C-4 shows the internal attributes for the agent for DB2.
Table C-4 Internal attribute for the agent for DB2
DescriptionInternal attributes
Specifies the location of other files and scripts that are related to the agent.
Do not use. For internal use only.
AgentDirectory
65Resource type attributes for DB2About the Db2udb resource types and attribute definitions
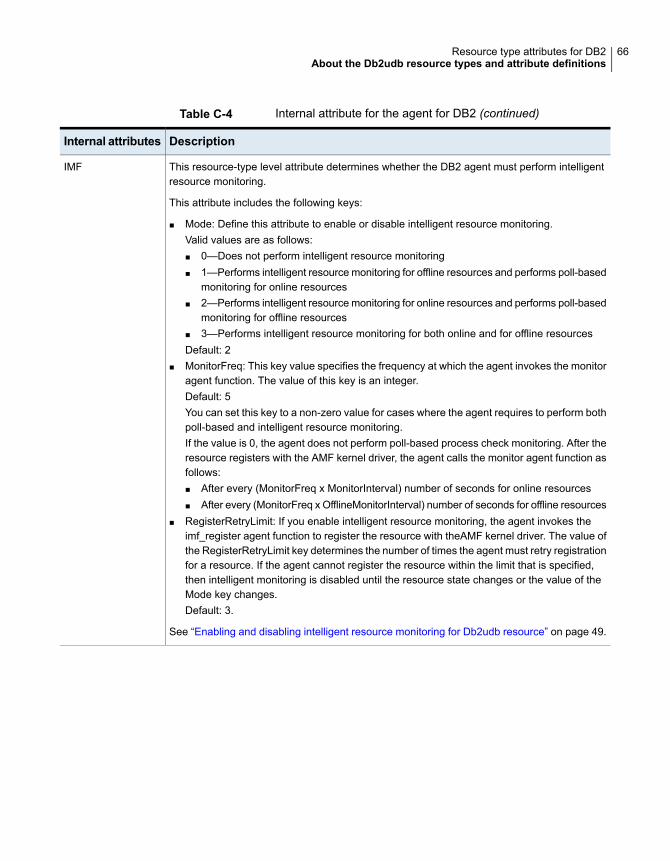
Table C-4 Internal attribute for the agent for DB2 (continued)
DescriptionInternal attributes
This resource-type level attribute determines whether the DB2 agent must perform intelligentresource monitoring.
This attribute includes the following keys:
■ Mode: Define this attribute to enable or disable intelligent resource monitoring.Valid values are as follows:■ 0—Does not perform intelligent resource monitoring■ 1—Performs intelligent resource monitoring for offline resources and performs poll-based
monitoring for online resources■ 2—Performs intelligent resource monitoring for online resources and performs poll-based
monitoring for offline resources■ 3—Performs intelligent resource monitoring for both online and for offline resourcesDefault: 2
■ MonitorFreq: This key value specifies the frequency at which the agent invokes the monitoragent function. The value of this key is an integer.Default: 5You can set this key to a non-zero value for cases where the agent requires to perform bothpoll-based and intelligent resource monitoring.If the value is 0, the agent does not perform poll-based process check monitoring. After theresource registers with the AMF kernel driver, the agent calls the monitor agent function asfollows:■ After every (MonitorFreq x MonitorInterval) number of seconds for online resources■ After every (MonitorFreq x OfflineMonitorInterval) number of seconds for offline resources
■ RegisterRetryLimit: If you enable intelligent resource monitoring, the agent invokes theimf_register agent function to register the resource with theAMF kernel driver. The value ofthe RegisterRetryLimit key determines the number of times the agent must retry registrationfor a resource. If the agent cannot register the resource within the limit that is specified,then intelligent monitoring is disabled until the resource state changes or the value of theMode key changes.Default: 3.
See “Enabling and disabling intelligent resource monitoring for Db2udb resource” on page 49.
IMF
66Resource type attributes for DB2About the Db2udb resource types and attribute definitions
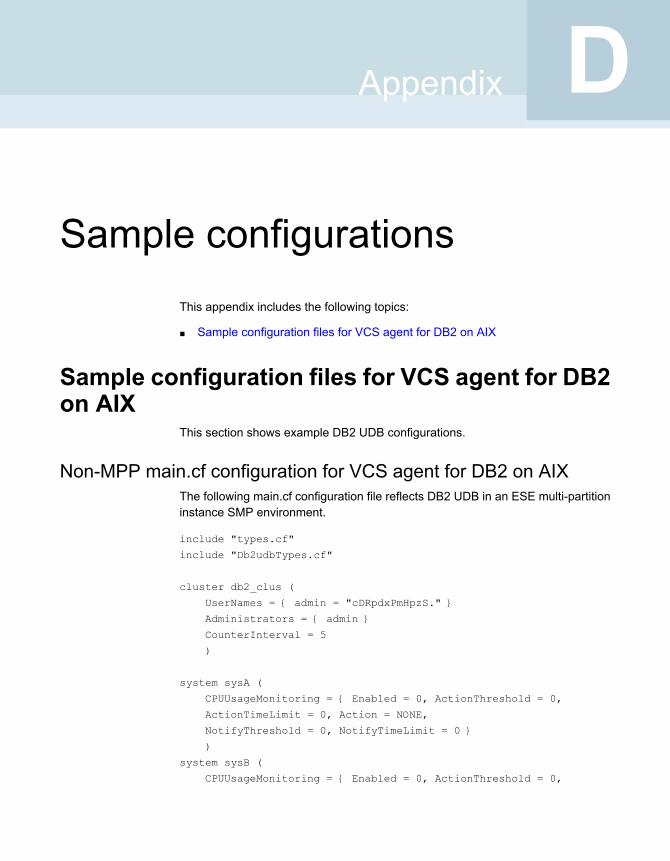
Sample configurationsThis appendix includes the following topics:
■ Sample configuration files for VCS agent for DB2 on AIX
Sample configuration files for VCS agent for DB2on AIX
This section shows example DB2 UDB configurations.
Non-MPP main.cf configuration for VCS agent for DB2 on AIXThe following main.cf configuration file reflects DB2 UDB in an ESE multi-partitioninstance SMP environment.
include "types.cf"
include "Db2udbTypes.cf"
cluster db2_clus (
UserNames = { admin = "cDRpdxPmHpzS." }
Administrators = { admin }
CounterInterval = 5
)
system sysA (
CPUUsageMonitoring = { Enabled = 0, ActionThreshold = 0,
ActionTimeLimit = 0, Action = NONE,
NotifyThreshold = 0, NotifyTimeLimit = 0 }
)
system sysB (
CPUUsageMonitoring = { Enabled = 0, ActionThreshold = 0,
DAppendix
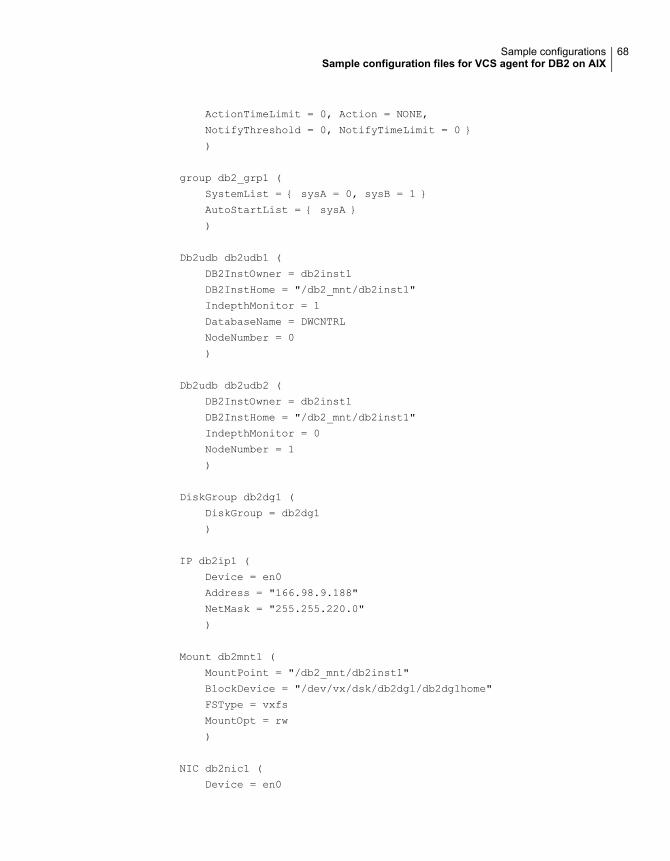
ActionTimeLimit = 0, Action = NONE,
NotifyThreshold = 0, NotifyTimeLimit = 0 }
)
group db2_grp1 (
SystemList = { sysA = 0, sysB = 1 }
AutoStartList = { sysA }
)
Db2udb db2udb1 (
DB2InstOwner = db2inst1
DB2InstHome = "/db2_mnt/db2inst1"
IndepthMonitor = 1
DatabaseName = DWCNTRL
NodeNumber = 0
)
Db2udb db2udb2 (
DB2InstOwner = db2inst1
DB2InstHome = "/db2_mnt/db2inst1"
IndepthMonitor = 0
NodeNumber = 1
)
DiskGroup db2dg1 (
DiskGroup = db2dg1
)
IP db2ip1 (
Device = en0
Address = "166.98.9.188"
NetMask = "255.255.220.0"
)
Mount db2mnt1 (
MountPoint = "/db2_mnt/db2inst1"
BlockDevice = "/dev/vx/dsk/db2dg1/db2dg1home"
FSType = vxfs
MountOpt = rw
)
NIC db2nic1 (
Device = en0
68Sample configurationsSample configuration files for VCS agent for DB2 on AIX
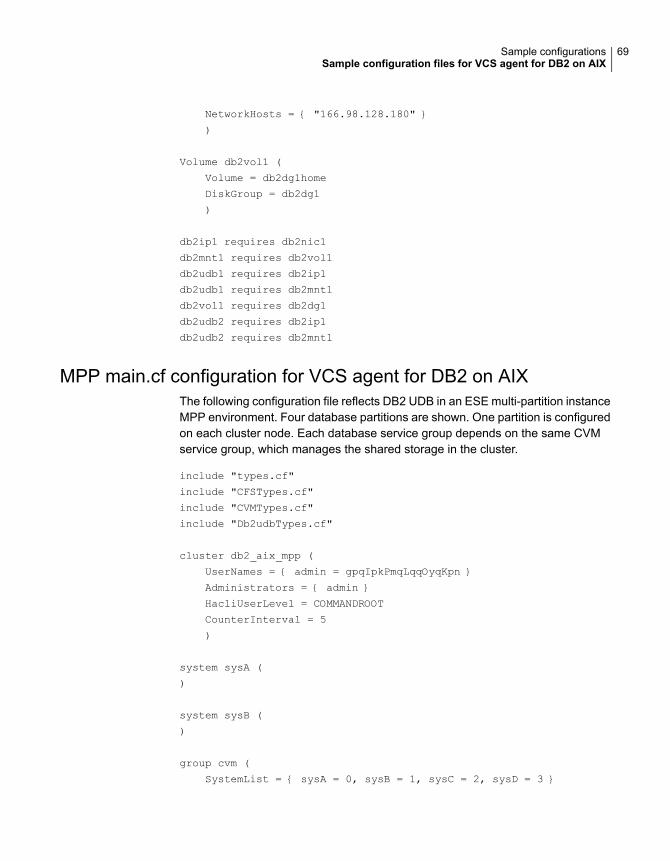
NetworkHosts = { "166.98.128.180" }
)
Volume db2vol1 (
Volume = db2dg1home
DiskGroup = db2dg1
)
db2ip1 requires db2nic1
db2mnt1 requires db2vol1
db2udb1 requires db2ip1
db2udb1 requires db2mnt1
db2vol1 requires db2dg1
db2udb2 requires db2ip1
db2udb2 requires db2mnt1
MPP main.cf configuration for VCS agent for DB2 on AIXThe following configuration file reflects DB2 UDB in an ESE multi-partition instanceMPP environment. Four database partitions are shown. One partition is configuredon each cluster node. Each database service group depends on the same CVMservice group, which manages the shared storage in the cluster.
include "types.cf"
include "CFSTypes.cf"
include "CVMTypes.cf"
include "Db2udbTypes.cf"
cluster db2_aix_mpp (
UserNames = { admin = gpqIpkPmqLqqOyqKpn }
Administrators = { admin }
HacliUserLevel = COMMANDROOT
CounterInterval = 5
)
system sysA (
)
system sysB (
)
group cvm (
SystemList = { sysA = 0, sysB = 1, sysC = 2, sysD = 3 }
69Sample configurationsSample configuration files for VCS agent for DB2 on AIX
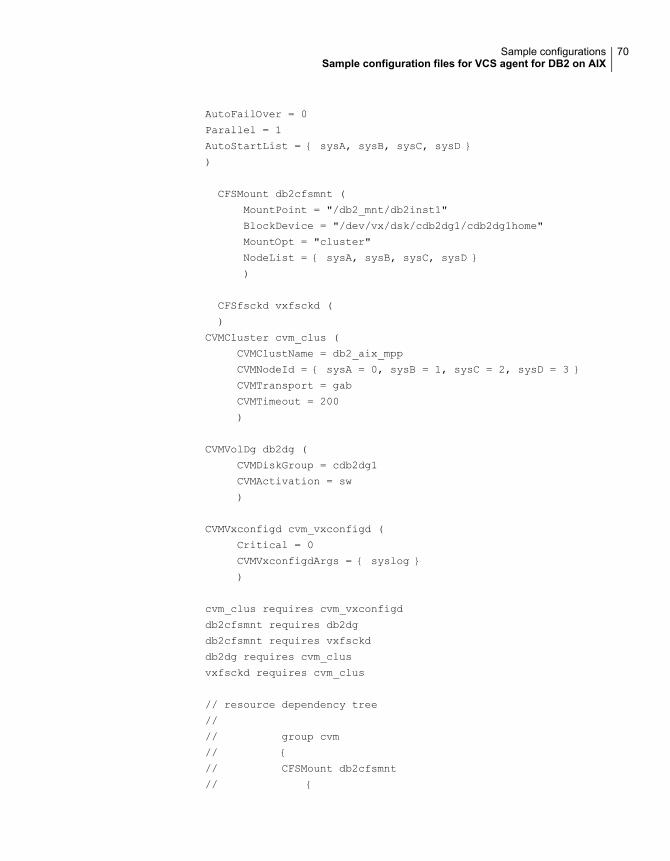
AutoFailOver = 0
Parallel = 1
AutoStartList = { sysA, sysB, sysC, sysD }
)
CFSMount db2cfsmnt (
MountPoint = "/db2_mnt/db2inst1"
BlockDevice = "/dev/vx/dsk/cdb2dg1/cdb2dg1home"
MountOpt = "cluster"
NodeList = { sysA, sysB, sysC, sysD }
)
CFSfsckd vxfsckd (
)
CVMCluster cvm_clus (
CVMClustName = db2_aix_mpp
CVMNodeId = { sysA = 0, sysB = 1, sysC = 2, sysD = 3 }
CVMTransport = gab
CVMTimeout = 200
)
CVMVolDg db2dg (
CVMDiskGroup = cdb2dg1
CVMActivation = sw
)
CVMVxconfigd cvm_vxconfigd (
Critical = 0
CVMVxconfigdArgs = { syslog }
)
cvm_clus requires cvm_vxconfigd
db2cfsmnt requires db2dg
db2cfsmnt requires vxfsckd
db2dg requires cvm_clus
vxfsckd requires cvm_clus
// resource dependency tree
//
// group cvm
// {
// CFSMount db2cfsmnt
// {
70Sample configurationsSample configuration files for VCS agent for DB2 on AIX
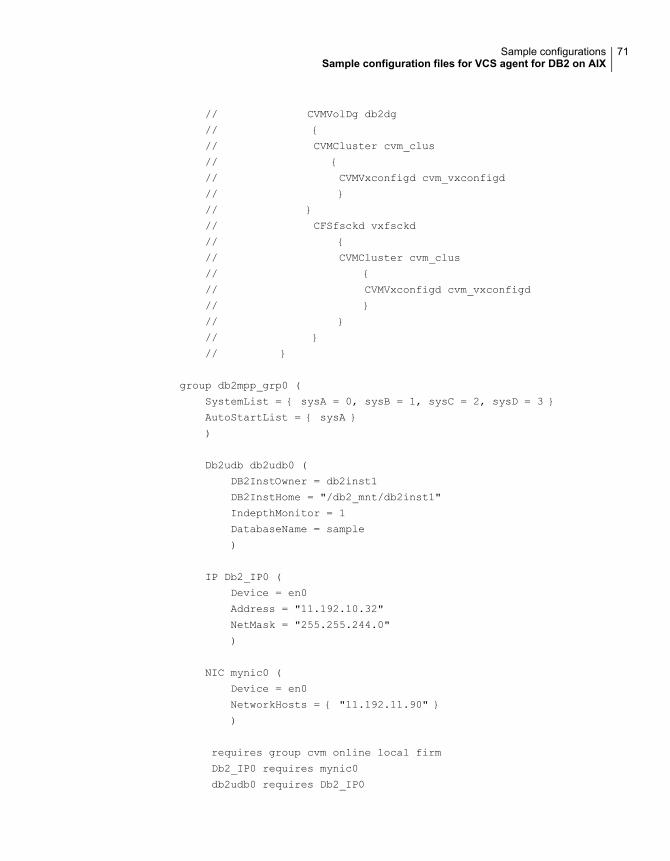
// CVMVolDg db2dg
// {
// CVMCluster cvm_clus
// {
// CVMVxconfigd cvm_vxconfigd
// }
// }
// CFSfsckd vxfsckd
// {
// CVMCluster cvm_clus
// {
// CVMVxconfigd cvm_vxconfigd
// }
// }
// }
// }
group db2mpp_grp0 (
SystemList = { sysA = 0, sysB = 1, sysC = 2, sysD = 3 }
AutoStartList = { sysA }
)
Db2udb db2udb0 (
DB2InstOwner = db2inst1
DB2InstHome = "/db2_mnt/db2inst1"
IndepthMonitor = 1
DatabaseName = sample
)
IP Db2_IP0 (
Device = en0
Address = "11.192.10.32"
NetMask = "255.255.244.0"
)
NIC mynic0 (
Device = en0
NetworkHosts = { "11.192.11.90" }
)
requires group cvm online local firm
Db2_IP0 requires mynic0
db2udb0 requires Db2_IP0
71Sample configurationsSample configuration files for VCS agent for DB2 on AIX
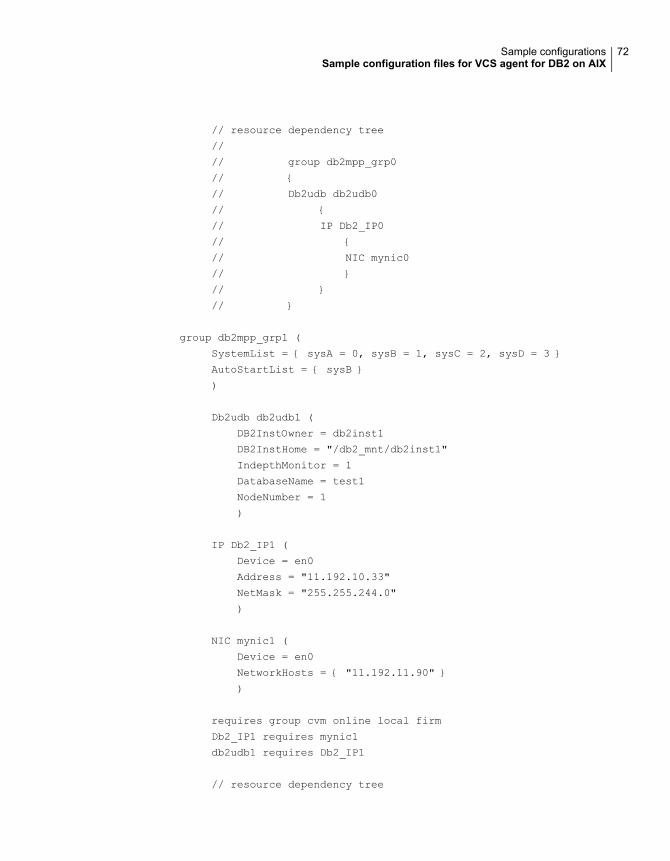
// resource dependency tree
//
// group db2mpp_grp0
// {
// Db2udb db2udb0
// {
// IP Db2_IP0
// {
// NIC mynic0
// }
// }
// }
group db2mpp_grp1 (
SystemList = { sysA = 0, sysB = 1, sysC = 2, sysD = 3 }
AutoStartList = { sysB }
)
Db2udb db2udb1 (
DB2InstOwner = db2inst1
DB2InstHome = "/db2_mnt/db2inst1"
IndepthMonitor = 1
DatabaseName = test1
NodeNumber = 1
)
IP Db2_IP1 (
Device = en0
Address = "11.192.10.33"
NetMask = "255.255.244.0"
)
NIC mynic1 (
Device = en0
NetworkHosts = { "11.192.11.90" }
)
requires group cvm online local firm
Db2_IP1 requires mynic1
db2udb1 requires Db2_IP1
// resource dependency tree
72Sample configurationsSample configuration files for VCS agent for DB2 on AIX
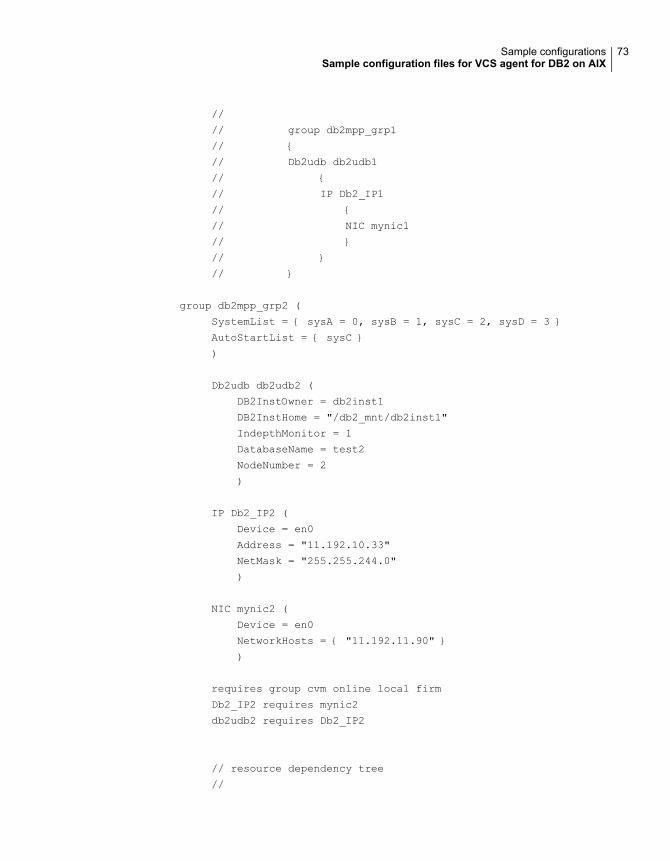
//
// group db2mpp_grp1
// {
// Db2udb db2udb1
// {
// IP Db2_IP1
// {
// NIC mynic1
// }
// }
// }
group db2mpp_grp2 (
SystemList = { sysA = 0, sysB = 1, sysC = 2, sysD = 3 }
AutoStartList = { sysC }
)
Db2udb db2udb2 (
DB2InstOwner = db2inst1
DB2InstHome = "/db2_mnt/db2inst1"
IndepthMonitor = 1
DatabaseName = test2
NodeNumber = 2
)
IP Db2_IP2 (
Device = en0
Address = "11.192.10.33"
NetMask = "255.255.244.0"
)
NIC mynic2 (
Device = en0
NetworkHosts = { "11.192.11.90" }
)
requires group cvm online local firm
Db2_IP2 requires mynic2
db2udb2 requires Db2_IP2
// resource dependency tree
//
73Sample configurationsSample configuration files for VCS agent for DB2 on AIX
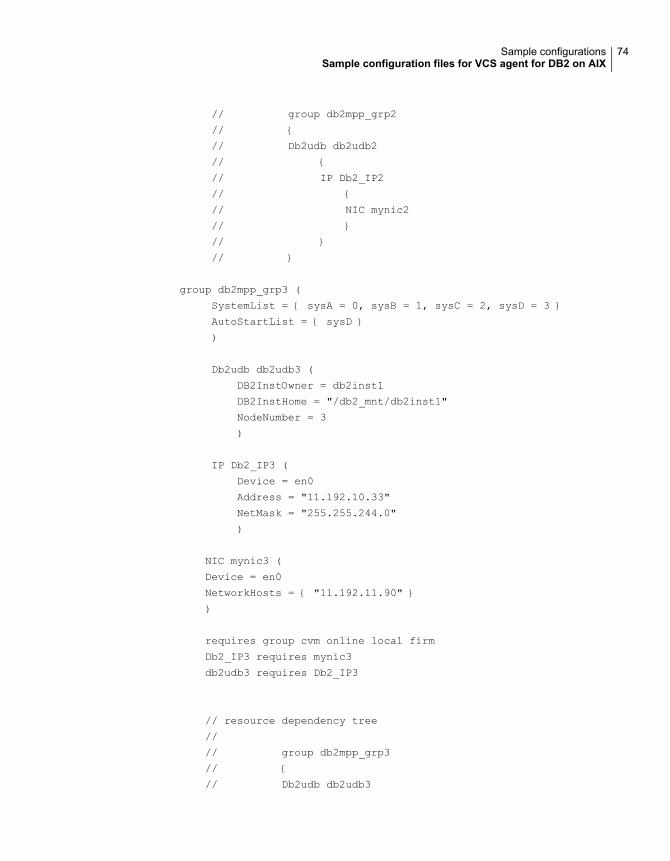
// group db2mpp_grp2
// {
// Db2udb db2udb2
// {
// IP Db2_IP2
// {
// NIC mynic2
// }
// }
// }
group db2mpp_grp3 (
SystemList = { sysA = 0, sysB = 1, sysC = 2, sysD = 3 }
AutoStartList = { sysD }
)
Db2udb db2udb3 (
DB2InstOwner = db2inst1
DB2InstHome = "/db2_mnt/db2inst1"
NodeNumber = 3
)
IP Db2_IP3 (
Device = en0
Address = "11.192.10.33"
NetMask = "255.255.244.0"
)
NIC mynic3 (
Device = en0
NetworkHosts = { "11.192.11.90" }
)
requires group cvm online local firm
Db2_IP3 requires mynic3
db2udb3 requires Db2_IP3
// resource dependency tree
//
// group db2mpp_grp3
// {
// Db2udb db2udb3
74Sample configurationsSample configuration files for VCS agent for DB2 on AIX
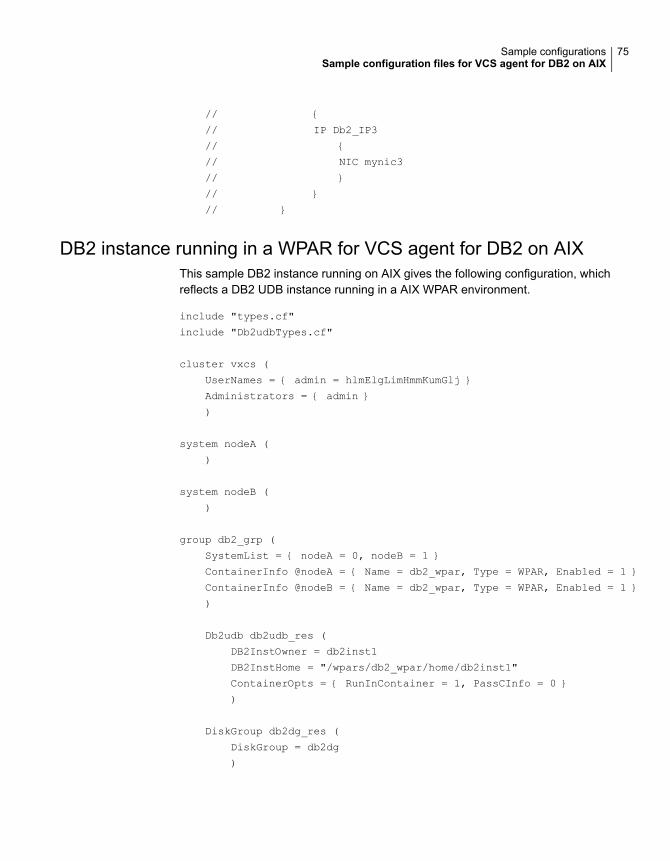
// {
// IP Db2_IP3
// {
// NIC mynic3
// }
// }
// }
DB2 instance running in a WPAR for VCS agent for DB2 on AIXThis sample DB2 instance running on AIX gives the following configuration, whichreflects a DB2 UDB instance running in a AIX WPAR environment.
include "types.cf"
include "Db2udbTypes.cf"
cluster vxcs (
UserNames = { admin = hlmElgLimHmmKumGlj }
Administrators = { admin }
)
system nodeA (
)
system nodeB (
)
group db2_grp (
SystemList = { nodeA = 0, nodeB = 1 }
ContainerInfo @nodeA = { Name = db2_wpar, Type = WPAR, Enabled = 1 }
ContainerInfo @nodeB = { Name = db2_wpar, Type = WPAR, Enabled = 1 }
)
Db2udb db2udb_res (
DB2InstOwner = db2inst1
DB2InstHome = "/wpars/db2_wpar/home/db2inst1"
ContainerOpts = { RunInContainer = 1, PassCInfo = 0 }
)
DiskGroup db2dg_res (
DiskGroup = db2dg
)
75Sample configurationsSample configuration files for VCS agent for DB2 on AIX

Mount db2mnt_res (
MountPoint = "/wpars/db2_wpar/home/db2inst1"
BlockDevice = "/dev/vx/dsk/db2dg/db2vol"
FSType = vxfs
FsckOpt = "-y"
)
Volume db2vol_res (
Volume = db2vol
DiskGroup = db2dg
)
WPAR db2wpar_res (
)
db2mnt_res requires db2vol_res
db2mnt_res requires db2wpar_res
db2udb_res requires db2mnt_res
db2vol_res requires db2dg_res
// resource dependency tree
//
// group db2_grp
// {
// Db2udb db2udb_res
// {
// Mount db2mnt_res
// {
// Volume db2vol_res
// {
// DiskGroup db2dg_res
// }
// WPAR db2wpar_res
// }
// }
// }
76Sample configurationsSample configuration files for VCS agent for DB2 on AIX
Symbols/etc/services
checking assigned ports 22
Aaccounts
required for DB2 UDB users 20agent
configuringoverview 33
attributes of Db2udb resource type 60
Bbinaries
DB2 UDBinstalling locally 21
CCluster Manager (Java Console)
configuring DB2 service group 39using to import Db2udbTypes.cf 39
commandshagrp 54hagui 38
configuration filesdb2nodes.cfg
host for partitions 23Db2udbTypes.cf 58main.cf
example 67, 69configuring DB2 agent
by editing configuration files 43using Cluster Manager (Java Console) 39
CVM (infrastructure) service group 37
DDatabaseName attribute 61DB2
error handling 51
DB2 UDB ESE (Enterprise Server Edition)sample configuration file 67, 69
DB2 UDB instancesinstalling on shared storage 21
DB2 UDB type definition file 58db2gcf -d command 9db2gcf -u command 9DB2InstHome attribute 60DB2InstOwner attribute 60db2nodes.cfg
virtual host for partitions 23db2setup tool
for binariesinstances 21
Db2udb resourcedepends on IP
Mount resources 36example in main.cf file 67
Db2udbTypes.cfincluding in main.cf file 44–45type definition file 58
Db2udbTypes.cf fileimporting 38
dependencybetween DB2 and CVM service groups 41defining in main.cf 46
DiskGroup resourceexample in main.cf 67required by Volume resource 36
EEncoding attribute 63enterprise agent
disabling 31installing 29
Ffile system
creating for MPP configuration 18creating for non-MPP instances 18
Index
filesdb2nodes.cfg 23Db2udbTypes.cf 58main.cf (VCS configuration) 43
Ggroups (user)
adding 20
Hhagrp command 54hagui command 38
IIMF Integration functions 12importing Db2udbTypes.cf file 38in-depth monitoring
disabling 52enabling 48
installing DB2 UDBconfirming setup 26instances on shared storage 21requirements 21system binaries 21
instancesinstalling on shared disk 21starting and stopping 26
IP addressvirtual 23
IP resourceexample in main.cf file 67requires a NIC resource 36
JJava Console
configuring service group 40–41
Mmain.cf file
editing 44example for DB2 UDB EEE 67example for DB2 UDB ESE multi-partition 69examples 44verifying configuration 46
monitoringconfiguring in-depth monitoring 48shallow and indepth 48
Mount resourceexample in main.cf file 67requires the Volume resource 36
NNIC resource
example in main.cf file 67required by IP resource 36
NodeNumber attribute 61
Pparallel mode for CVM service group 37partition number (NodeNumber) 61
Rremoving 31ResourceInfo resource attribute 13
Sservice group
adding using Cluster Manager (Java Console) 40adding using wizard 41creating in main.cf file 44–45CVM 37dependency link DB2 and CVM 41MPP configuration
dependencies 36non-MPP configuration
dependencies 35shallow monitoring
described 48stopping DB2 instance 9supported software 9Supporting intelligent resource monitoring
IMF 8
Ttemplate
for DB2 MPP service group 41using for non-MPP service group 43
testingservice groups are configured 47
Uuninstalling 31user accounts
adding 20
78Index

VVCS supported version 9virtual IP address 23Volume resource
requires the DiskGroup resource 36
WWarnOnlyIfDBQueryFailed attribute 10
79Index


![[NASM.1999.0038] Peenemunde Interviews Project: Arthur ...€¦ · 55 55-57 TAPE 3, 57-59 59-60 61-62 62-63 63 63-65 65-67 67 67-68 68 68-69 69-70 70-71 71-73 Construction of the](https://img.dokumen.tips/doc/110x75/5eac36d47042555b071eaaf9/nasm19990038-peenemunde-interviews-project-arthur-55-55-57-tape-3-57-59.jpg)