Embed Size (px)
Citation preview

Send document comments to nexus7k -doc feedback@c isco .com
Cisco Nexus 7000 Series NX-OS Interfaces Command Reference, Release 5.xOctober 2010
Americas HeadquartersCisco Systems, Inc.170 West Tasman DriveSan Jose, CA 95134-1706 USAhttp://www.cisco.comTel: 408 526-4000
800 553-NETS (6387)Fax: 408 527-0883
Text Part Number: OL-23495-01

Send document comments to nexus7k -doc feedback@c isco .com
THE SPECIFICATIONS AND INFORMATION REGARDING THE PRODUCTS IN THIS MANUAL ARE SUBJECT TO CHANGE WITHOUT NOTICE. ALL STATEMENTS, INFORMATION, AND RECOMMENDATIONS IN THIS MANUAL ARE BELIEVED TO BE ACCURATE BUT ARE PRESENTED WITHOUT WARRANTY OF ANY KIND, EXPRESS OR IMPLIED. USERS MUST TAKE FULL RESPONSIBILITY FOR THEIR APPLICATION OF ANY PRODUCTS.
THE SOFTWARE LICENSE AND LIMITED WARRANTY FOR THE ACCOMPANYING PRODUCT ARE SET FORTH IN THE INFORMATION PACKET THAT SHIPPED WITH THE PRODUCT AND ARE INCORPORATED HEREIN BY THIS REFERENCE. IF YOU ARE UNABLE TO LOCATE THE SOFTWARE LICENSE OR LIMITED WARRANTY, CONTACT YOUR CISCO REPRESENTATIVE FOR A COPY.
The Cisco implementation of TCP header compression is an adaptation of a program developed by the University of California, Berkeley (UCB) as part of UCB’s public domain version of the UNIX operating system. All rights reserved. Copyright © 1981, Regents of the University of California.
NOTWITHSTANDING ANY OTHER WARRANTY HEREIN, ALL DOCUMENT FILES AND SOFTWARE OF THESE SUPPLIERS ARE PROVIDED “AS IS” WITH ALL FAULTS. CISCO AND THE ABOVE-NAMED SUPPLIERS DISCLAIM ALL WARRANTIES, EXPRESSED OR IMPLIED, INCLUDING, WITHOUT LIMITATION, THOSE OF MERCHANTABILITY, FITNESS FOR A PARTICULAR PURPOSE AND NONINFRINGEMENT OR ARISING FROM A COURSE OF DEALING, USAGE, OR TRADE PRACTICE.
IN NO EVENT SHALL CISCO OR ITS SUPPLIERS BE LIABLE FOR ANY INDIRECT, SPECIAL, CONSEQUENTIAL, OR INCIDENTAL DAMAGES, INCLUDING, WITHOUT LIMITATION, LOST PROFITS OR LOSS OR DAMAGE TO DATA ARISING OUT OF THE USE OR INABILITY TO USE THIS MANUAL, EVEN IF CISCO OR ITS SUPPLIERS HAVE BEEN ADVISED OF THE POSSIBILITY OF SUCH DAMAGES.
Cisco and the Cisco Logo are trademarks of Cisco Systems, Inc. and/or its affiliates in the U.S. and other countries. A listing of Cisco's trademarks can be found at www.cisco.com/go/trademarks. Third party trademarks mentioned are the property of their respective owners. The use of the word partner does not imply a partnership relationship between Cisco and any other company. (1005R)
Any Internet Protocol (IP) addresses used in this document are not intended to be actual addresses. Any examples, command display output, and figures included in the document are shown for illustrative purposes only. Any use of actual IP addresses in illustrative content is unintentional and coincidental.
Cisco Nexus 7000 Series NX-OS Interfaces Command Reference, Release 5.x © 2009-2010 Cisco Systems, Inc. All rights reserved.

Send document comments to nexus7k -doc feedback@c isco .com
COL-23495-01
C O N T E N T S
New and Changed Information IF-ix
Preface xiii
Audience xiii
Organization xiii
Document Conventions xiii
Related Documentation xiv
Obtaining Documentation and Submitting a Service Request xv
Cisco NX-OS Interfaces Commands IF-1
attach fex IF-2
bandwidth (interface) IF-3
beacon IF-5
bfd IF-6
bfd echo IF-8
bfd interval IF-10
bfd optimize subinterfaces IF-12
bfd per-link IF-13
bfd slow-timer IF-14
carrier-delay IF-16
channel-group IF-18
clear counters interface IF-22
clear l2protocol tunnel counters IF-24
clear lacp counters IF-25
clear vpc statistics IF-26
default interface IF-27
delay IF-29
delay restore IF-31
description IF-32
description (fex) IF-33
dual-active exclude interface-vlan IF-34
duplex IF-36
iiiisco Nexus 7000 Series NX-OS Interfaces Command Reference, Release 5.x

Send document comments to nexus7k -doc feedback@c isco .com
Contents
encapsulation dot1Q IF-38
errdisable detect cause IF-39
errdisable recovery cause IF-41
errdisable recovery interval IF-43
feature bfd IF-44
feature interface-vlan IF-45
feature lacp IF-46
feature-set fex IF-47
feature tunnel IF-48
feature udld IF-49
feature vpc IF-50
fex IF-51
fex associate IF-52
flowcontrol IF-53
hsrp bfd IF-55
inherit port-profile IF-56
install feature-set fex IF-58
interface cmp-mgmt module IF-59
interface ethernet IF-60
interface loopback IF-61
interface mgmt IF-62
interface port-channel IF-63
interface tunnel IF-65
interface vlan IF-66
ip eigrp bfd IF-67
ip ospf bfd IF-68
ip pim bfd IF-69
ip pim bfd-instance IF-70
ip route static bfd IF-71
ipv6 eigrp bfd IF-72
isis bfd IF-73
fabricpath switch-id IF-74
l2protocol tunnel IF-76
l2protocol tunnel cos IF-77
l2protocol tunnel drop-threshold IF-78
ivCisco Nexus 7000 Series NX-OS Interfaces Command Reference, Release 5.x
OL-23495-01

Send document comments to nexus7k -doc feedback@c isco .com
Contents
l2protocol tunnel shutdown-threshold IF-79
lacp max-bundle IF-80
lacp min-links IF-81
lacp port-priority IF-82
lacp system-priority IF-83
link debounce IF-84
load-interval IF-86
max-ports IF-88
mdix auto IF-89
medium IF-91
mtu IF-92
peer-gateway IF-94
peer-keepalive destination IF-95
peer-switch IF-99
port-channel load-balance ethernet IF-100
port-profile IF-102
rate-mode dedicated IF-105
rate-mode shared IF-107
reload fex IF-108
reload restore IF-109
role priority IF-110
serial IF-111
show bfd neighbors IF-112
show environment fex IF-117
show fex IF-120
show fex detail IF-122
show fex transceiver IF-124
show fex version IF-126
show inventory fex IF-127
show logging level fex IF-128
show module fex IF-129
show tech fex all IF-131
show version fex IF-133
show interface IF-134
show interface brief IF-137
vCisco Nexus 7000 Series NX-OS Interfaces Command Reference, Release 5.x
OL-23495-01

Send document comments to nexus7k -doc feedback@c isco .com
Contents
show interface capabilities IF-139
show interface counters IF-141
show interface counters errors IF-144
show interface counters storm-control IF-148
show interface counters trunk IF-150
show interface debounce IF-151
show interface description IF-153
show interface ethernet IF-155
show interface flowcontrol IF-157
show interface mgmt IF-159
show interface port-channel IF-161
show interface port-channel counters IF-165
show interface transceiver fex-fabric IF-169
show interface status IF-171
show interface switchport IF-173
show interface transceiver IF-176
show interface trunk IF-178
show interface tunnel IF-180
show ip dhcp snooping statistics IF-181
show lacp counters IF-182
show lacp interface IF-184
show lacp neighbor IF-186
show lacp port-channel IF-188
show lacp system-identifier IF-190
show port-channel capacity IF-191
show port-channel compatibility-parameters IF-192
show port-channel database IF-195
show port-channel load-balance IF-197
show port-channel rbh-distribution IF-198
show port-channel summary IF-199
show port-channel traffic IF-201
show port-channel usage IF-203
show port-profile IF-204
show running-config fex IF-207
show running-config interface IF-209
viCisco Nexus 7000 Series NX-OS Interfaces Command Reference, Release 5.x
OL-23495-01

Send document comments to nexus7k -doc feedback@c isco .com
Contents
show running-config interface mgmt IF-212
show running-config vpc IF-213
show sprom fex IF-215
show startup-config interface IF-218
show startup-config vpc IF-220
show system reset-reason fex IF-221
show tech-support fex IF-222
show udld IF-224
show vdc IF-226
show vpc brief IF-228
show vpc consistency-parameters IF-231
show vpc orphan-ports IF-234
show vpc peer-keepalive IF-236
show vpc role IF-238
show vpc statistics IF-240
shutdown IF-242
speed IF-244
state enabled IF-246
switchport IF-247
switchport access vlan IF-249
switchport dot1q ethertype IF-251
switchport host IF-253
switchport mode IF-255
switchport mode dot1q-tunnel IF-257
switchport mode fex-fabric IF-258
switchport trunk allowed vlan IF-259
switchport trunk native vlan IF-261
system default switchport IF-263
system jumbomtu IF-264
system-mac IF-265
system-priority IF-267
track IF-268
tunnel destination IF-270
tunnel mode IF-271
tunnel path-mtu-discovery IF-272
viiCisco Nexus 7000 Series NX-OS Interfaces Command Reference, Release 5.x
OL-23495-01

Send document comments to nexus7k -doc feedback@c isco .com
Contents
tunnel source IF-274
tunnel use-vrf IF-275
tunnel ttl IF-276
type IF-277
udld IF-278
udld aggressive IF-280
udld message-time IF-282
udld reset IF-283
vlan dot1q tag native IF-284
vpc IF-286
vpc domain IF-288
vpc peer-link IF-290
viiiCisco Nexus 7000 Series NX-OS Interfaces Command Reference, Release 5.x
OL-23495-01
Send document comments to nexus7k -doc feedback@c isco .com
New and Changed Information
This chapter provides release-specific information for each new and changed feature in the Cisco Nexus 7000 Series NX-OS Interfaces Command Reference, Release 5.x. The latest version of this document is available at the following Cisco website: http://www.cisco.com/en/US/docs/switches/datacenter/sw/5_x/nx-os/interfaces/command/reference/if_cmd_ref.html
To check for additional information about Cisco NX-OS Release 5.x, see the Cisco Nexus 7000 Series NX-OS Release Notes, Release 5.x available at the following Cisco website: http://www.cisco.com/en/US/products/ps9402/prod_release_notes_list.html
The following table summarizes the new and changed features for the Cisco Nexus 7000 Series NX-OS Interfaces Command Reference, Release 5.x, and tells you where they are documented.
Table 1 New and Changed Information for Release 5.x
Feature Change DescriptionChanged in Release Where Documented
FEX enhancements Added the show sprom fex command. 5.1(1) “Cisco NX-OS Interfaces Commands”
Added the show inventory fex command. 5.1(1) “Cisco NX-OS Interfaces Commands”
Added the show environment fex command. 5.1(1) “Cisco NX-OS Interfaces Commands”
Added the show module fex command. 5.1(1) “Cisco NX-OS Interfaces Commands”
Added the show fex command. 5.1(1) “Cisco NX-OS Interfaces Commands”
Added the show fex detail command. 5.1(1) “Cisco NX-OS Interfaces Commands”
Added the show fex transceiver command. 5.1(1) “Cisco NX-OS Interfaces Commands”
Added the show logging level fex command. 5.1(1) “Cisco NX-OS Interfaces Commands”
Added the show tech fex all command. 5.1(1) “Cisco NX-OS Interfaces Commands”
ixCisco Nexus 7000 Series NX-OS Interfaces Command Reference, Release 5.x
OL-23495-01

Send document comments to nexus7k -doc feedback@c isco .com
New and Changed Information
Added the show system reset-reason fex command.
5.1(1) “Cisco NX-OS Interfaces Commands”
Added the show version fex command. 5.1(1) “Cisco NX-OS Interfaces Commands”
Added the show fex version command. 5.1(1) “Cisco NX-OS Interfaces Commands”
Added the show interface transceiver fex-fabric command.
5.1(1) “Cisco NX-OS Interfaces Commands”
Added the show tech-support fex command. 5.1(1) “Cisco NX-OS Interfaces Commands”
Added the feature-set fex command. 5.1(1) “Cisco NX-OS Interfaces Commands”
Added the install feature-set fex command. 5.1(1) “Cisco NX-OS Interfaces Commands”
Added the switchport mode fex-fabric command.
5.1(1) “Cisco NX-OS Interfaces Commands”
Added the description (fex) command. 5.1(1) “Cisco NX-OS Interfaces Commands”
Added the serial command. 5.1(1) “Cisco NX-OS Interfaces Commands”
Added the type command. 5.1(1) “Cisco NX-OS Interfaces Commands”
vPC enhancements for DHCP Snooping
Added the command output (added two counters) to the show ip dhcp snooping statistics command.
5.1(1) “Cisco NX-OS Interfaces Commands”
Port Channel mix max link support
Added the LACP max-bundle command. 5.1(1) “Cisco NX-OS Interfaces Commands”
Added the LACP min-links command. 5.1(1) “Cisco NX-OS Interfaces Commands”
Added the show vdc command. 5.1(1) “Cisco NX-OS Interfaces Commands”
Added a new port channel status ‘M’ to the show port-channel summary command output.
5.1(1) “Cisco NX-OS Interfaces Commands”
Changed the command output to show the port is suspended due to min-links for the show interface command.
5.1(1) “Cisco NX-OS Interfaces Commands”
vPC enhancements for Fabricpath
Added the fabricpath switch-id command. 5.1(1) “Cisco NX-OS Interfaces Commands”
Default interface Added the default interface command. 5.1(1) “Cisco NX-OS Interfaces Commands”
Table 1 New and Changed Information for Release 5.x (continued)
Feature Change DescriptionChanged in Release Where Documented
xCisco Nexus 7000 Series NX-OS Interfaces Command Reference, Release 5.x
OL-23495-01

Send document comments to nexus7k -doc feedback@c isco .com
New and Changed Information
New commands New commands were added for Bidirectional Forwarding Detection (BFD) support.
5.0(2) “Cisco NX-OS Interfaces Commands”
New commands were added for Q-in-Q VLAN tunnels.
5.0(2) “Cisco NX-OS Interfaces Commands”
New commands were added for vPC enhancements including peer switch.
5.0(2) “Cisco NX-OS Interfaces Commands”
Table 1 New and Changed Information for Release 5.x (continued)
Feature Change DescriptionChanged in Release Where Documented
xiCisco Nexus 7000 Series NX-OS Interfaces Command Reference, Release 5.x
OL-23495-01

Send document comments to nexus7k -doc feedback@c isco .com
New and Changed Information
xiiCisco Nexus 7000 Series NX-OS Interfaces Command Reference, Release 5.x
OL-23495-01

Send document comments to nexus7k -doc feedback@c isco .com
Preface
This preface describes the audience, organization, and conventions of the Cisco Nexus 7000 Series NX-OS Interfaces Command Reference, Release 5.x. It also provides information on how to obtain related documentation.
This chapter includes the following sections:
• Audience, page xiii
• Organization, page xiii
• Document Conventions, page xiii
• Related Documentation, page xiv
• Obtaining Documentation and Submitting a Service Request, page xv
AudienceThis publication is for experienced users who configure and maintain NX-OS devices.
OrganizationThis reference is organized as follows:
Document ConventionsCommand descriptions use these conventions:
Chapter and Title Description
Cisco NX-OS Interfaces Commands Describes the Cisco NX-OS interfaces commands.
Convention Description
boldface font Commands and keywords are in boldface.
italic font Arguments for which you supply values are in italics.
[ ] Elements in square brackets are optional.
xiiiCisco Nexus 7000 Series NX-OS Interfaces Command Reference, Release 5.x
OL-23495-01

Send document comments to nexus7k -doc feedback@c isco .com
Preface
Screen examples use these conventions:
This document uses the following conventions:
Note Means reader take note. Notes contain helpful suggestions or references to material not covered in the manual.
Caution Means reader be careful. In this situation, you might do something that could result in equipment damage or loss of data.
Tip Means the following information will help you solve a problem.
Related DocumentationCisco NX-OS includes the following documents:
Release Notes
Cisco Nexus 7000 Series NX-OS Release Notes, Release 5.x
NX-OS Configuration Guides
Cisco Nexus 7000 Series NX-OS Getting Started with Virtual Device Contexts, Release 5.x
Cisco Nexus 7000 Series OTV Quick Start Guide
Cisco Nexus 7000 Series NX-OS Fundamentals Configuration Guide, Release 5.x
Cisco Nexus 7000 Series NX-OS Interfaces Configuration Guide, Release 5.x
Cisco Nexus 7000 Series NX-OS Layer 2 Switching Configuration Guide, Release 5.x
[ x | y | z ] Optional alternative keywords are grouped in brackets and separated by vertical bars.
string A nonquoted set of characters. Do not use quotation marks around the string or the string will include the quotation marks.
screen font Terminal sessions and information that the switch displays are in screen font.
boldface screen font
Information you must enter is in boldface screen font.
italic screen font Arguments for which you supply values are in italic screen font.
< > Nonprinting characters, such as passwords, are in angle brackets.
[ ] Default responses to system prompts are in square brackets.
!, # An exclamation point (!) or a pound sign (#) at the beginning of a line of code indicates a comment line.
xivCisco Nexus 7000 Series NX-OS Interfaces Command Reference, Release 5.x
OL-23495-01

Send document comments to nexus7k -doc feedback@c isco .com
Preface
Cisco Nexus 7000 Series NX-OS Quality of Service Configuration Guide, Release 5.x
Cisco Nexus 7000 Series NX-OS Unicast Routing Configuration Guide, Release 5.x
Cisco Nexus 7000 Series NX-OS Multicast Routing Configuration Guide, Release 5.x
Cisco Nexus 7000 Series NX-OS Security Configuration Guide, Release 5.x
Cisco Nexus 7000 Series NX-OS OTV Configuration Guide, Release 5.x
Cisco Nexus 7000 Series NX-OS Virtual Device Context Configuration Guide, Release 5.x
Cisco Nexus 7000 Series NX-OS FabricPath Configuration Guide, Release 5.x
Cisco Nexus 7000 Series NX-OS Software Upgrade and Downgrade Guide, Release 5.x
Cisco Nexus 7000 Series NX-OS Licensing Guide, Release 5.x
Cisco Nexus 7000 Series NX-OS High Availability and Redundancy Guide, Release 5.x
Cisco Nexus 7000 Series NX-OS System Management Configuration Guide, Release 5.x
Cisco NX-OS XML Management Interface User Guide, Release 5.x
Cisco NX-OS System Messages Reference
Cisco Nexus 7000 Series NX-OS MIB Quick Reference
NX-OS Command References
Cisco Nexus 7000 Series NX-OS Command Reference Master Index, Release 5.x
Cisco Nexus 7000 Series NX-OS Fundamentals Command Reference, Release 5.x
Cisco Nexus 7000 Series NX-OS Interfaces Command Reference, Release 5.x
Cisco Nexus 7000 Series NX-OS Layer 2 Switching Command Reference, Release 5.x
Cisco Nexus 7000 Series NX-OS Quality of Service Command Reference, Release 5.x
Cisco Nexus 7000 Series NX-OS Unicast Routing Command Reference, Release 5.x
Cisco Nexus 7000 Series NX-OS Multicast Routing Command Reference, Release 5.x
Cisco Nexus 7000 Series NX-OS Security Command Reference, Release 5.x
Cisco Nexus 7000 Series NX-OS OTV Command Reference, Release 5.x
Cisco Nexus 7000 Series NX-OS Virtual Device Context Command Reference, Release 5.x
Cisco Nexus 7000 Series NX-OS FabricPath Command Reference, Release 5.x
Cisco Nexus 7000 Series NX-OS System Management Command Reference, Release 5.x
Other Software Document
Cisco Nexus 7000 Series NX-OS Troubleshooting Guide, Release 5.x
Obtaining Documentation and Submitting a Service RequestFor information on obtaining documentation, submitting a service request, and gathering additional information, see the monthly What’s New in Cisco Product Documentation, which also lists all new and revised Cisco technical documentation, at:
http://www.cisco.com/en/US/docs/general/whatsnew/whatsnew.html
xvCisco Nexus 7000 Series NX-OS Interfaces Command Reference, Release 5.x
OL-23495-01

Send document comments to nexus7k -doc feedback@c isco .com
Preface
Subscribe to the What’s New in Cisco Product Documentation as a Really Simple Syndication (RSS) feed and set content to be delivered directly to your desktop using a reader application. The RSS feeds are a free service and Cisco currently supports RSS Version 2.0.
xviCisco Nexus 7000 Series NX-OS Interfaces Command Reference, Release 5.x
OL-23495-01

Send document comments to nexus7k -doc feedback@c isco .com
Cisco NX-OS Interfaces Commands
This chapter describes the Cisco NX-OS interfaces commands.
IF-1Cisco Nexus 7000 Series NX-OS Interfaces Command Reference, Release 5.x
OL-23495-01

Send document comments to nexus7k -doc feedback@c isco .com
Cisco NX-OS Interfaces Commandsattach fex
attach fexTo access the command-line interface (CLI) of a connected Fabric Extender to run diagnostic commands, use the attach fex command.
attach fex chassis-id
Syntax Description
Defaults None
Command Modes EXEC mode
Command History
Usage Guidelines Use the attach fex command to access the CLI on a connected Fabric Extender and perform diagnostic commands. We recommend that you use this command only by following the directions from Cisco technical support personnel.
Examples This example shows how to access the command-line interface (CLI) of a connected Fabric Extender to run diagnostic commands:
switch(config)# attach fex 101Attaching to FEX 101 ...To exit type 'exit', to abort type '$.'Bad terminal type: "ansi". Will assume vt100.fex-101#
Related Commands
chassis-id Fabric Extender chassis ID. The chassis ID range is from 100 to 199.
Release Modification
5.1(1) This command was introduced.
Command Description
show fex Displays all configured Fabric Extender chassis connected to the switch.
IF-2Cisco Nexus 7000 Series NX-OS Interfaces Command Reference, Release 5.x
OL-23495-01
Send document comments to nexus7k -doc feedback@c isco .com
Cisco NX-OS Interfaces Commandsbandwidth (interface)
bandwidth (interface)To set the inherited and received bandwidth values for an interface, use the bandwidth command in interface configuration mode. To restore the default values, use the no form of this command.
bandwidth {kbps | inherit [kbps]}
no bandwidth {kbps | inherit [kbps]}
Syntax Description
Defaults 1000000 kbps
Command Modes Interface configuration
Supported User Roles network-adminvdc-admin
Command History
Usage Guidelines The bandwidth command sets an informational parameter to communicate only the current bandwidth to the higher-level protocols; you cannot adjust the actual bandwidth of an interface using this command.
Note This is a routing parameter only. It does not affect the physical interface.
The bandwidth inherit command controls how a subinterface inherits the bandwidth of its main interface.
The no bandwidth inherit command enables all subinterfaces to inherit the default bandwidth of the main interface, regardless of the configured bandwidth. If a bandwidth is not configured on a subinterface, and you use the bandwidth inherit command, all subinterfaces will inherit the current bandwidth of the main interface. If you configure a new bandwidth on the main interface, all subinterfaces will use this new value.
If you do not configure a bandwidth on the subinterface and you configure the bandwidth inherit command on the main interface, the subinterfaces will inherit the specified bandwidth.
In all cases, if an interface has an explicit bandwidth setting configured, then that interface will use that setting, regardless of whether the bandwidth inheritance setting is in effect.
This command does not require a license.
kbps Intended bandwidth, in kilobits per second. Valid values are 1 to 10000000.
inherit (Optional) Specifies the inherited bandwidth such as how a subinterface inherits the bandwidth of its main interface.
Release Modification
4.0 This command was introduced.
IF-3Cisco Nexus 7000 Series NX-OS Interfaces Command Reference, Release 5.x
OL-23495-01

Send document comments to nexus7k -doc feedback@c isco .com
Cisco NX-OS Interfaces Commandsbandwidth (interface)
Examples This example shows how to configure all subinterfaces off this main interface to inherit the configured bandwidth:
switch(config-if)# bandwidth inherit 30000
Related Commands Command Description
show interface Displays the interface configuration information.
IF-4Cisco Nexus 7000 Series NX-OS Interfaces Command Reference, Release 5.x
OL-23495-01

Send document comments to nexus7k -doc feedback@c isco .com
Cisco NX-OS Interfaces Commandsbeacon
beaconTo enable the beacon mode for an interface, use the beacon command. To disable the beacon mode for an interface, use the no form of this command.
beacon
no beacon
Syntax Description This command has no arguments or keywords.
Defaults Disabled
Command Modes Interface configuration
Supported User Roles network-adminvdc-admin
Command History
Usage Guidelines The beacon mode allows you to identify a physical port by flashing its link-state LED with a green light. To identify the physical port for an interface, you activate the beacon parameter for the interface.
This command does not require a license.
Examples This example shows how to enable the beacon mode for the Ethernet port 3/1:
switch(config)# interface ethernet 3/1switch(config-if)# beaconswitch(config-if)#
Related Commands
Release Modification
4.0 This command was introduced.
Command Description
show interface Displays the interface status, which includes the beacon mode state.
IF-5Cisco Nexus 7000 Series NX-OS Interfaces Command Reference, Release 5.x
OL-23495-01

Send document comments to nexus7k -doc feedback@c isco .com
Cisco NX-OS Interfaces Commandsbfd
bfdTo enable Bidirectional Forwarding Detection (BFD) for a protocol, use the bfd command. To disable BFD for a protocol, use the no form of this command.
bfd
no bfd
Syntax Description This command has no arguments or keywords.
Defaults BFD is not enabled on the protocol.
Command Modes Router configurationNeighbor configuration
Command History
Usage Guidelines There are two methods to configure protocols to use BFD for failure detection. To enable BFD for all neighbors or interfaces of a protocol, enter the bfd command in router configuration mode for the Enhanced Interior Gateway Routing Protocol (EIGRP), Open Shortest Path First (OSPFv2), and Intermediate-System-to-Intermediate-System (IS-IS) or in neighbor configuration mode for the Border Gateway Protocol (BGP). If you do not want to enable BFD on all interfaces, see the interface-level BFD enable commands in the Related Commands section.
Examples This example shows how to enable BFD for all EIGRP neighbors:
switch# configure terminalswitch(config)# router eigrp Test1switch(config-router)# bfd
This example shows how to enable BFD for all BGP neighbors:
switch# configure terminalswitch(config)# router bgp 1.1switch(config-router)# neighbor 192.0.2.1 remote-as 1.0switch(config-router-neighbor)# bfd
Related Commands
Release Modification
5.0(2) This command was introduced.
Command Description
hsrp bfd Enables BFD on an HSRP interface.
ip eigrp bfd Enables BFD on an EIGRP interface.
IF-6Cisco Nexus 7000 Series NX-OS Interfaces Command Reference, Release 5.x
OL-23495-01

Send document comments to nexus7k -doc feedback@c isco .com
Cisco NX-OS Interfaces Commandsbfd
ip ospf bfd Enables BFD on an OSPFv2 interface.
isis bfd Enables BFD on an IS-IS interface.
Command Description
IF-7Cisco Nexus 7000 Series NX-OS Interfaces Command Reference, Release 5.x
OL-23495-01

Send document comments to nexus7k -doc feedback@c isco .com
Cisco NX-OS Interfaces Commandsbfd echo
bfd echoTo enable Bidirectional Forwarding Detection (BFD) echo mode, use the bfd echo command. To disable BFD echo mode, use the no form of this command.
bfd echo
no bfd echo
Syntax Description This command has no arguments or keywords.
Defaults BFD echo mode is enabled by default.
Command Modes Interface configuration
Command History
Usage Guidelines When echo mode is enabled, the required minimum receive interval value is taken from the BFD slow-timer setting.
Note Before using BFD echo mode, you must disable the IP packet verification check for identical IP source and destination addresses by entering the no hardware ip verify address identical command in the default VDC.
Note Before using BFD echo mode, you must disable the sending of Internet Control Message Protocol (ICMP) redirect messages by entering the no ip redirects command.
Use the no bfd echo command to stop sending echo packets and signify that the device is unwilling to forward echo packets that are received from BFD neighbors. The RequiredMinEchoRx BFD session parameter is set to zero when echo mode is disabled.
This command does not require a license.
Examples This example shows how to configure echo mode between BFD neighbors.
switch(config)# interface Ethernet 1/1switch(config-if)# bfd echo
This example shows that the BFD session neighbor is up and using BFD echo mode. The relevant command output is shown in bold in the output.
switch# show bfd neighbors details
Release Modification
5.0(2) This command was introduced.
IF-8Cisco Nexus 7000 Series NX-OS Interfaces Command Reference, Release 5.x
OL-23495-01

Send document comments to nexus7k -doc feedback@c isco .com
Cisco NX-OS Interfaces Commandsbfd echo
OurAddr NeighAddr LD/RD RH/RS Holdown(mult)State Int172.16.1.2 172.16.1.1 1/6 Up 0 (3 ) Up Fa0/1Session state is UP and using echo function with 50 ms interval.Local Diag: 0, Demand mode: 0, Poll bit: 0MinTxInt: 1000000, MinRxInt: 1000000, Multiplier: 3Received MinRxInt: 1000000, Received Multiplier: 3Holdown (hits): 3000(0), Hello (hits): 1000(337)Rx Count: 341, Rx Interval (ms) min/max/avg: 1/1008/882 last: 364 ms agoTx Count: 339, Tx Interval (ms) min/max/avg: 1/1016/886 last: 632 ms agoRegistered protocols: EIGRPUptime: 00:05:00Last packet: Version: 1 - Diagnostic: 0
State bit: Up - Demand bit: 0Poll bit: 0 - Final bit: 0Multiplier: 3 - Length: 24My Discr.: 6 - Your Discr.: 1Min tx interval: 1000000 - Min rx interval: 1000000Min Echo interval: 50000
Related Commands Command Description
feature bfd Enables the BFD feature.
bfd interval Configures the BFD session parameters.
bfd slow-timer Configures the BFD RequiredminEchoRx interval.
hardware ip verify address identical
Enables verifying that IP packets do not have the same address for IP source and IP destination fields.
ip redirects Enables the sending of ICMP redirect messages if the Cisco IOS software is forced to resend a packet through the same interface on which it was received.
IF-9Cisco Nexus 7000 Series NX-OS Interfaces Command Reference, Release 5.x
OL-23495-01
Send document comments to nexus7k -doc feedback@c isco .com
Cisco NX-OS Interfaces Commandsbfd interval
bfd interval To configure the Bidirectional Forwarding Detection (BFD) session parameters, use the bfd interval command. To return to the default setting, use the no form of this command.
bfd interval mintx min_rx msec multiplier value
no bfd interval mintx min_rx msec multiplier value
Syntax Description
Defaults BFD interval: 50 millisecondsmin_rx: 50 millisecondsmultiplier: 3
Command Modes Global configurationInterface configuration
Supported User Roles network-adminvdc-admin
Command History
Usage Guidelines BFD session parameters configured at the interface level take precedence over the globally configured BFD session parameters.
This command does not require a license.
Examples This example shows how to set the BFD session parameters for Ethernet interface 3/1:
switch# configure terminalswitch(config)# interface ethernet 3/1switch(config-if)# bfd interval 50 min_rx 20 multiplier 3
mintx Rate at which BFD control packets will be sent to BFD neighbors. The configurable time period for the milliseconds argument is from 50 to 999 milliseconds.
min_rx msec Specifies the rate at which BFD control packets will be expected to be received from BFD neighbors. The configurable time period for the msec argument is from 50 to 999 milliseconds.
multiplier value Specifies the number of consecutive BFD control packets that must be missed from a BFD neighbor before BFD declares that the neighbor is unavailable and the BFD neighbor is informed of the failure. The configurable value range for the value argument is from 1 to 50.
Release Modification
5.0(2) This command was introduced.
IF-10Cisco Nexus 7000 Series NX-OS Interfaces Command Reference, Release 5.x
OL-23495-01

Send document comments to nexus7k -doc feedback@c isco .com
Cisco NX-OS Interfaces Commandsbfd interval
Related Commands Command Description
feature bfd Enables the BFD feature.
show bfd neighbors Displays information about BFD neighbors.
IF-11Cisco Nexus 7000 Series NX-OS Interfaces Command Reference, Release 5.x
OL-23495-01

Send document comments to nexus7k -doc feedback@c isco .com
Cisco NX-OS Interfaces Commandsbfd optimize subinterfaces
bfd optimize subinterfacesTo optimize subinterfaces on a physical interface for Bidirectional Forwarding Detection (BFD), use the bfd optimize subinterfaces command. To return to the default setting, use the no form of this command.
bfd optimize subinterfaces
no bfd optimize subinterfaces
Syntax Description This command has no arguments or keywords.
Defaults Disabled
Command Modes Interface configuration
Command History
Usage Guidelines You can optimize subinterfaces, because BFD creates sessions for all configured subinterfaces. BFD sets the subinterface with the lowest configured VLAN ID as the master subinterface and that subinterface uses the BFD session parameters of the parent interface. The remaining subinterfaces use the slow timer. If the master subinterface session detects an error, BFD marks all subinterfaces on that physical interface as down.
This command does not require a license.
Examples This example shows how to enable subinterface optimization:
switch(config)# interface Ethernet 1/1switch(config-if)# bfd optimize subinterfaces
Related Commands
Release Modification
5.0(2) This command was introduced.
Command Description
feature bfd Enables the BFD feature.
IF-12Cisco Nexus 7000 Series NX-OS Interfaces Command Reference, Release 5.x
OL-23495-01

Send document comments to nexus7k -doc feedback@c isco .com
Cisco NX-OS Interfaces Commandsbfd per-link
bfd per-linkTo enable Bidirectional Forwarding Detection (BFD) for all links in a port channel, use the bfd per-link command. To disable BFD for a port channel, use the no form of this command.
bfd per-link
no bfd per-link
Syntax Description This command has no arguments or keywords.
Defaults BFD is not enabled on the port channel.
Command Modes Port channel configuration
Command History
Usage Guidelines Us the bfd per-link command to enable BFD on each link in a port channel. BFD creates a session for each link in the port channel and provides an aggregate result to client protocols. For example, if the BFD session for one link on a port channel is up, BFD informs client protocols such as OSPF that the port channel is up. The BFD session parameters are negotiated between the BFD peers in a three-way handshake.
Examples This example shows how to enable BFD for port channel 3:
switch# configure terminalswitch(config)# interface port-channel 3switch(config-if)# bfd per-link
This example shows how to configure the BFD session parameters for a port channel:
switch# configure terminalswitch(config)# interface port-channel 3switch(config-if)# bfd interval 50 min_rx 50 multiplier 3
Related Commands
Release Modification
5.0(2) This command was introduced.
Command Description
bfd echo Enables BFD echo mode.
feature bfd Enables the BFD feature.
bfd interval Configures the BFD session parameters
IF-13Cisco Nexus 7000 Series NX-OS Interfaces Command Reference, Release 5.x
OL-23495-01

Send document comments to nexus7k -doc feedback@c isco .com
Cisco NX-OS Interfaces Commandsbfd slow-timer
bfd slow-timerTo configure the Bidirectional Forwarding Detection (BFD) slow timer value, use the bfd slow-timer command. To return to the default setting, use the no form of this command.
bfd slow-timer milliseconds
no bfd slow-timer milliseconds
Syntax Description
Defaults The default BFD slow timer value is 2000 milliseconds.
Command Modes Global configurationInterface configuration
Command History
Usage Guidelines Use the bfd slow-timer command to configure how fast a BFD session comes up. This value also sets the RequiredMinRx (or min_rx) value when echo mode is enabled.
This command does not require a license.
Examples This example shows that the BFD slow timer value is configured to 14,000 milliseconds:
switch(config)# bfd slow-timer 14000
This example shows that the BFD slow timer value of 14,000 milliseconds has been implemented. The values for the MinTxInt and MinRxInt will correspond to the configured value for the BFD slow timer. The relevant command output is shown in bold.
switch# show bfd neighbors details
OurAddr NeighAddr LD/RD RH/RS Holdown(mult) State Int172.16.10.1 172.16.10.2 1/1 Up 0 (3 ) Up Et2/0Session state is UP and using echo function with 50 ms interval.Local Diag: 0, Demand mode: 0, Poll bit: 0MinTxInt: 14000, MinRxInt: 14000, Multiplier: 3Received MinRxInt: 10000, Received Multiplier: 3Holdown (hits): 3600(0), Hello (hits): 1200(418)Rx Count: 422, Rx Interval (ms) min/max/avg: 1/1480/1087 last: 112 ms agoTx Count: 420, Tx Interval (ms) min/max/avg: 1/2088/1090 last: 872 ms agoRegistered protocols: OSPFUptime: 00:07:37Last packet: Version: 1 - Diagnostic: 0
State bit: Up - Demand bit: 0Poll bit: 0 - Final bit: 0
milliseconds BFD slow timer value, in milliseconds. The range is from 1000 to 30000.
Release Modification
5.0(2) This command was introduced.
IF-14Cisco Nexus 7000 Series NX-OS Interfaces Command Reference, Release 5.x
OL-23495-01

Send document comments to nexus7k -doc feedback@c isco .com
Cisco NX-OS Interfaces Commandsbfd slow-timer
Multiplier: 3 - Length: 24My Discr.: 1 - Your Discr.: 1Min tx interval: 14000 - Min rx interval: 14000Min Echo interval: 4000
Related Commands Command Description
bfd echo Enables BFD echo mode.
IF-15Cisco Nexus 7000 Series NX-OS Interfaces Command Reference, Release 5.x
OL-23495-01

Send document comments to nexus7k -doc feedback@c isco .com
Cisco NX-OS Interfaces Commandscarrier-delay
carrier-delayTo set the carrier delay on an interface, use the carrier-delay command. To return to the default carrier delay value, use the no form of this command.
carrier-delay {sec | {msec value}}
no carrier-delay
Syntax Description
Defaults The default is 2 seconds or 100 milliseconds.
Command Modes Interface configuration mode
Supported User Roles network-admin
vdc-admin
Command History
Usage Guidelines
Note You must enable the VLAN interface feature, using the feature interface-vlan command, before you can use this command.
If a link goes down and comes back up before the carrier delay timer expires, the down state is effectively filtered, and the rest of the software on the device is not aware that a link-down event occurred. A large carrier delay timer results in fewer link-up/link-down events being detected. When you set the carrier delay time to 0, the device detects each link-up/link-down event that occurs.
Note The carrier-delay command is supported only on the VLAN interface mode; no other interface modes support this command.
In most environments, a lower carrier delay time is better than a higher one. The exact value that you choose depends on the nature of the link outages and how long you expect these linkages to last in your network. If your data links are subject to short outages (especially if those outages last less time than it takes for your IP routing to converge) you should set a long carrier delay value to prevent these short
sec Seconds of delay. The range of values is from 0 to 60.
msec Specifies milliseconds of delay.
value Milliseconds of delay. The range of values is from 0 to 1000.
Release Modification
4.0(3) This command was introduced.
IF-16Cisco Nexus 7000 Series NX-OS Interfaces Command Reference, Release 5.x
OL-23495-01
Send document comments to nexus7k -doc feedback@c isco .com
Cisco NX-OS Interfaces Commandscarrier-delay
outages from causing unnecessary churn in your routing tables. However, if you outages tend to be longer, then you may want to set a shorter carrier delay time so that the outages are detected sooner, and the IP route convergence begins and ends sooner.
This command does not require a license.
Examples This example shows how to set the carrier delay timer to 20 minutes for VLAN 6:
switch(config)# interface vlan 6switch(config-if)# carrier-delay 20switch(config-if)#
Related Commands Command Description
show interface vlan Displays information about VLAN interfaces.
IF-17Cisco Nexus 7000 Series NX-OS Interfaces Command Reference, Release 5.x
OL-23495-01

Send document comments to nexus7k -doc feedback@c isco .com
Cisco NX-OS Interfaces Commandschannel-group
channel-groupTo assign and configure a physical interface to a port-channel group, use the channel-group command. To remove the channel-group configuration from the interface, use the no form of this command.
channel-group number [force] [mode {active | on | passive}]
no channel-group [number]
Syntax Description
Defaults None
Command Modes Interface configuration mode
Supported User Roles network-admin
vdc-admin
number Number of channel group. Maximum number of port channels that can be configured is 256 across all VDCs, and the range of values is from 1 to 4096.
force (Optional) Forces the interface to join the channel group, although some parameters are not compatible. See Usage Guidelines below for information on the compatibility parameters and which ones can be forced.
mode Specifies the port-channel mode of the interface.
active Specifies that when you enable the Link Aggregation Control Protocol (LACP), this command enables LACP on the specified interface. Interface is in active negotiating state, in which the port initiates negotiations with other ports by sending LACP packets.
on Specifies the default channel mode, and all port channels that are not running LACP remain in this mode. If you attempt to change the channel mode to active or passive before enabling LACP, the device returns an error message.After you enable LACP globally, by using the feature lacp command, you enable LACP on each channel by configuring the channel mode as either active or passive. An interface in this mode does not initiate or respond to LACP packets. When an LACP attempts to negotiate with an interface in the on state, it does not receive any LACP packets and becomes an individual link with that interface; it does not join the channel group.
The default mode is on.
passive Specifies that when you enable LACP, this command enables LACP only if an LACP device is detected.The interface is in a passive negotiation state, in which the port responds to LACP packets that it receives but does not initiate LACP negotiation.
IF-18Cisco Nexus 7000 Series NX-OS Interfaces Command Reference, Release 5.x
OL-23495-01

Send document comments to nexus7k -doc feedback@c isco .com
Cisco NX-OS Interfaces Commandschannel-group
Command History
Usage Guidelines Use this command to create a channel group that includes the interface that you are working on and to add or remove specific interfaces from the channel group. Use this command to move a port from one channel group to another. You enter the channel group that you want the port to move to; the device automatically removes the specified from its present channel group and adds that port to the specified channel group.
After you enable LACP globally, by using the feature lacp command, you enable LACP on each channel by configuring the channel mode as either active or passive. A port channel in the on channel mode is a pure port channel and can aggregate a maximum of eight ports. It does not run LACP.
You cannot change the mode for an existing port channel or any of its interfaces if that port channel is not running LACP; the channel mode remains as on. The system returns an error message if you try.
All ports in one port channel must be in the same virtual device context (VDC). With LACP enabled, this requirement applies to the possible eight active ports and the possible eight standby ports. The port channels can originate in one VDC (with all ports in that channel in the same VDC) and partner with a port channel in another VDC (again, all ports in that channel must be in that VDC).
Use the no form of this command to remove the physical interface from the port channel. When you delete the last physical interface from a port channel, the port channel remains. To delete the port channel completely, use the no form of this interface port-channel command.
The compatibility check includes the following operational attributes:
• Network layer
• (Link) speed capability
• Speed configuration
• Duplex capability
• Duplex configuration
• Port mode
• Access VLAN
• Trunk native VLAN
• Tagged or untagged
• Allowed VLAN list
• MTU size
• SPAN—cannot be SPAN source or destination port
• Layer 3 ports cannot have subinterfaces.
• Storm control
• Flow control capability
• Flow control configuration
Use the show port-channel compatibility-parameters command to see the full list of compatibility checks that the Cisco NX-OS uses.
Release Modification
4.0 This command was introduced.
IF-19Cisco Nexus 7000 Series NX-OS Interfaces Command Reference, Release 5.x
OL-23495-01

Send document comments to nexus7k -doc feedback@c isco .com
Cisco NX-OS Interfaces Commandschannel-group
You can only add interfaces configured with the channel mode set to on to static port channels, that is without a configured aggregation protocol. And you can only add interfaces configured with the channel mode as active or passive to port channels that are running LACP.
You can configure these attributes on an individual member port. If you configure a member port with an incompatible attribute, Cisco NX-OS suspends that port in the port channel.
Alternatively, you can force ports with incompatible parameters to join the port channel as long the following parameters are the same:
• (Link) speed capability
• Speed configuration
• Duplex capability
• Duplex configuration
• Flow control capability
• Flow control configuration
When the interface joins a port channel, some of its individual parameters are removed and replaced with the values on the port channel, as follows:
• Bandwidth
• Delay
• Extended Authentication Protocol over UDP
• VRF
• IP address (v4 and v6)
• MAC address
• Spanning Tree Protocol
• NAC
• Service policy
• Quality of Service (QoS)
• ACLs
Also, many interface parameters remain unaffected with the interface joins or leaves a port channel, as follows:
• Beacon
• Description
• CDP
• LACP port priority
• Debounce
• UDLD
• MDIX
• Rate mode
• Shutdown
• SNMP trap
If subinterfaces are configured for the port-channel interface and a member port is removed from the port channel, the configuration of the port-channel subinterface is not propagated to the member ports.
IF-20Cisco Nexus 7000 Series NX-OS Interfaces Command Reference, Release 5.x
OL-23495-01

Send document comments to nexus7k -doc feedback@c isco .com
Cisco NX-OS Interfaces Commandschannel-group
Any configuration changes that you make in any of the compatibility parameters to the port-channel interface are propagated to all interfaces within the same channel group as the port channel (for example, configuration changes are also propagated to the physical interfaces that are not part of the port channel but are part of the channel group).
You do not have to create a port-channel interface before you assign a physical interface to a channel group. A port-channel interface is created automatically when the channel group gets its first physical interface, if it is not already created.
You can create either a Layer 2 or a Layer 3 port channel by entering the interface port-channel command or when the channel group gets its first physical interface assignment. The port channels are not created at run time or dynamically.
This command does not require a license.
Note he number of ports allowed in a port-channel (for ON mode) is different between M1 and F1 (D1) only VDCs. The number is 8 for M1 or M1-F1 VDCs and 16 for F1 ones.
Examples This example shows how to add an interface to LACP channel group 5 in active mode:
switch(config-if)# channel-group 5 mode activeswitch(config-if)#
Related Commands Command Description
show interface port-channel
Displays information about the traffic on the specified port-channel interface.
show port-channel summary
Displays information on the port channels.
show lacp Displays LACP information.
IF-21Cisco Nexus 7000 Series NX-OS Interfaces Command Reference, Release 5.x
OL-23495-01

Send document comments to nexus7k -doc feedback@c isco .com
Cisco NX-OS Interfaces Commandsclear counters interface
clear counters interfaceTo clear the interface counters, use the clear counters interface command.
clear counters interface {all | ethernet slot/port | loopback number | mgmt number | port-channel channel-number | tunnel tunnel-number | vlan vlan-number}
Syntax Description
Defaults None
Command Modes Any command mode
Supported User Roles network-adminvdc-admin
Command History
Usage Guidelines This command does not require a license.
Examples This example shows how to clear and reset the counters on Ethernet port 5/5:
switch# clear counters interface ethernet 5/5
all Clears all interface counters
ethernet slot/port Clears the Ethernet interface counter for the slot number and port number specified.
loopback number Clears the loopback interface counter for the virtual interface number specified. The loopback range is from 0 to 1023.
mgmt number Clears the management interface counter for the number specified. The number is 0.
port-channel channel-number
Clears the port-channel interface for the number specified. The range is from 1 to 4096.
tunnel tunnel-number Clears the port-channel interface for the number specified. The range is from 0 to 65535.
vlan vlan-number Clears the port-channel interface for the number specified. The range is from 1 to 4096.
Release Modification
4.0 This command was introduced.
IF-22Cisco Nexus 7000 Series NX-OS Interfaces Command Reference, Release 5.x
OL-23495-01

Send document comments to nexus7k -doc feedback@c isco .com
Cisco NX-OS Interfaces Commandsclear counters interface
Related Commands Command Description
show interface counters
Displays in and out counters for all interfaces in the system.
IF-23Cisco Nexus 7000 Series NX-OS Interfaces Command Reference, Release 5.x
OL-23495-01

Send document comments to nexus7k -doc feedback@c isco .com
Cisco NX-OS Interfaces Commandsclear l2protocol tunnel counters
clear l2protocol tunnel countersTo clear the Layer 2 protocol tunnel statistics counters, use the clear l2protocol tunnel counters command.
clear l2protocol tunnel counters [interface if-range]
Syntax Description
Defaults None
Command Modes Any command mode
Supported User Roles network-adminvdc-admin
Command History
Usage Guidelines If no interfaces are specified, the Layer 2 protocol tunnel statistics are cleared for all interfaces.
This command does not require a license.
Examples This example shows how to clear the Layer 2 protocol tunnel statistics counters:
switch# clear l2protocol tunnel counters
Related Commands
interface Specifies the interface statistics to clear.
if-range Clears the statistics counters for the specified Ethernet interface or range of interfaces.
Release Modification
5.0(2) This command was introduced.
Command Description
show l2protocol tunnel Displays Layer 2 protocol tunnel information.
IF-24Cisco Nexus 7000 Series NX-OS Interfaces Command Reference, Release 5.x
OL-23495-01
Send document comments to nexus7k -doc feedback@c isco .com
Cisco NX-OS Interfaces Commandsclear lacp counters
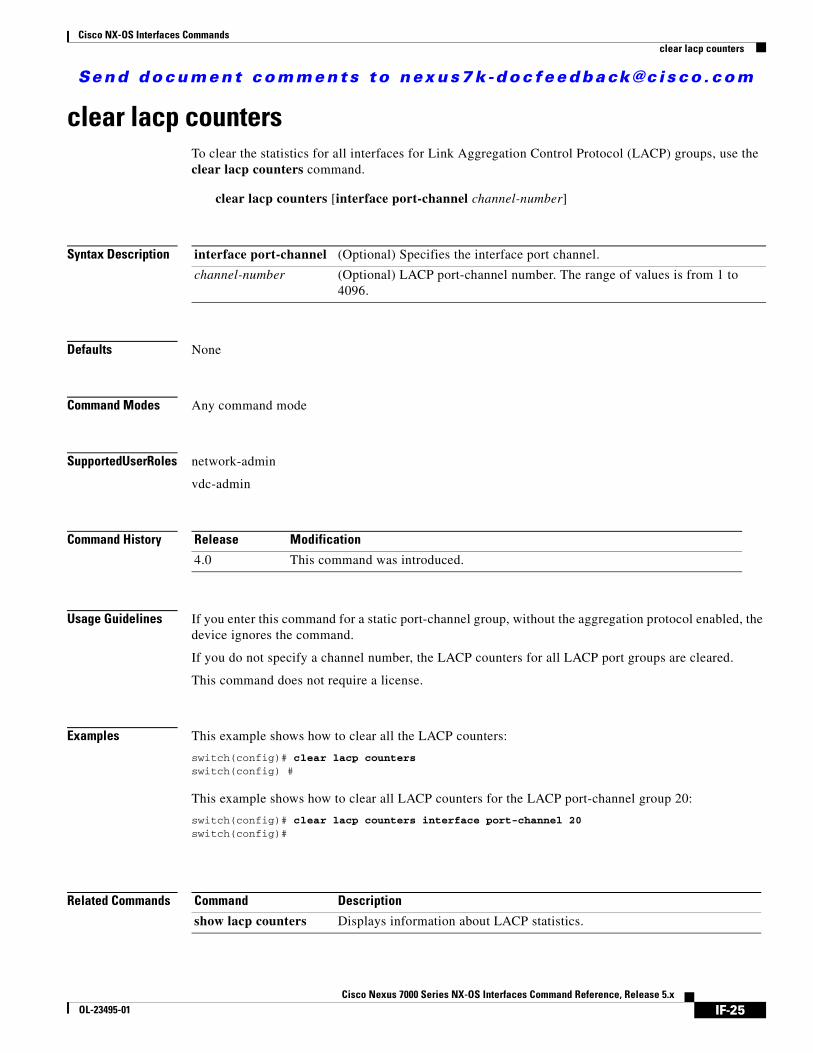
clear lacp countersTo clear the statistics for all interfaces for Link Aggregation Control Protocol (LACP) groups, use the clear lacp counters command.
clear lacp counters [interface port-channel channel-number]
Syntax Description
Defaults None
Command Modes Any command mode
Supported User Roles network-admin
vdc-admin
Command History
Usage Guidelines If you enter this command for a static port-channel group, without the aggregation protocol enabled, the device ignores the command.
If you do not specify a channel number, the LACP counters for all LACP port groups are cleared.
This command does not require a license.
Examples This example shows how to clear all the LACP counters:
switch(config)# clear lacp countersswitch(config) #
This example shows how to clear all LACP counters for the LACP port-channel group 20:
switch(config)# clear lacp counters interface port-channel 20switch(config)#
Related Commands
interface port-channel (Optional) Specifies the interface port channel.
channel-number (Optional) LACP port-channel number. The range of values is from 1 to 4096.
Release Modification
4.0 This command was introduced.
Command Description
show lacp counters Displays information about LACP statistics.
IF-25Cisco Nexus 7000 Series NX-OS Interfaces Command Reference, Release 5.x
OL-23495-01
Send document comments to nexus7k -doc feedback@c isco .com
Cisco NX-OS Interfaces Commandsclear vpc statistics
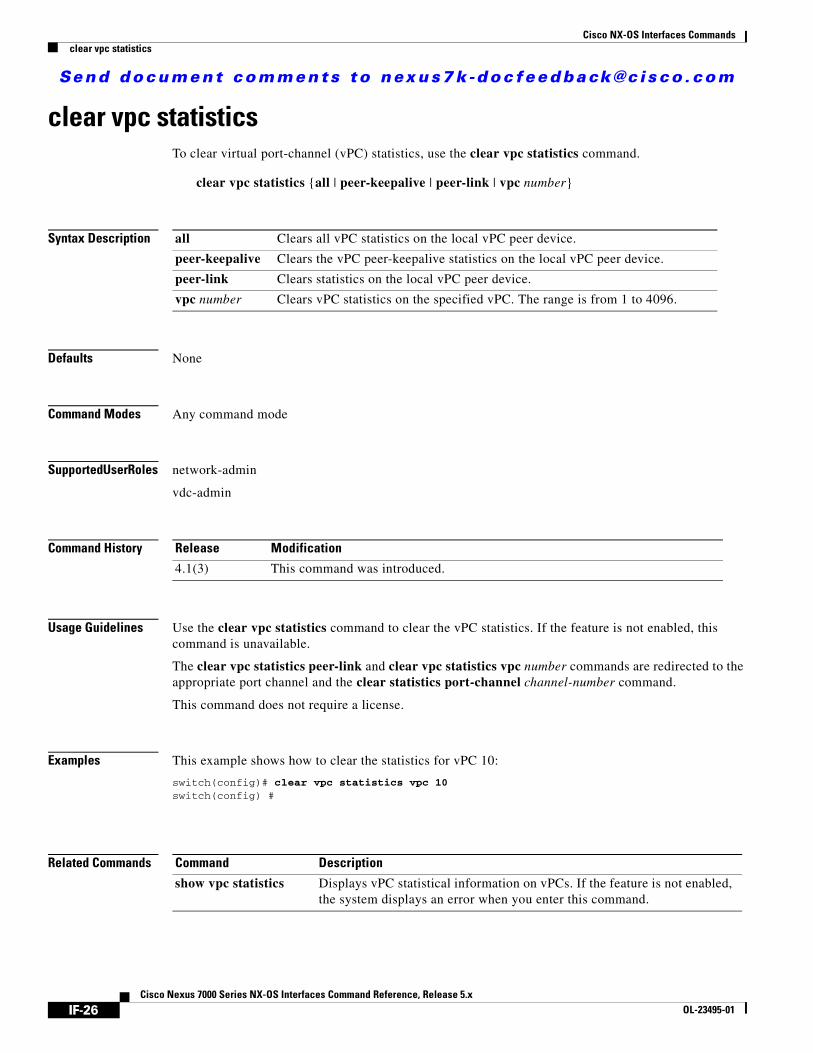
clear vpc statisticsTo clear virtual port-channel (vPC) statistics, use the clear vpc statistics command.
clear vpc statistics {all | peer-keepalive | peer-link | vpc number}
Syntax Description
Defaults None
Command Modes Any command mode
Supported User Roles network-admin
vdc-admin
Command History
Usage Guidelines Use the clear vpc statistics command to clear the vPC statistics. If the feature is not enabled, this command is unavailable.
The clear vpc statistics peer-link and clear vpc statistics vpc number commands are redirected to the appropriate port channel and the clear statistics port-channel channel-number command.
This command does not require a license.
Examples This example shows how to clear the statistics for vPC 10:
switch(config)# clear vpc statistics vpc 10switch(config) #
Related Commands
all Clears all vPC statistics on the local vPC peer device.
peer-keepalive Clears the vPC peer-keepalive statistics on the local vPC peer device.
peer-link Clears statistics on the local vPC peer device.
vpc number Clears vPC statistics on the specified vPC. The range is from 1 to 4096.
Release Modification
4.1(3) This command was introduced.
Command Description
show vpc statistics Displays vPC statistical information on vPCs. If the feature is not enabled, the system displays an error when you enter this command.
IF-26Cisco Nexus 7000 Series NX-OS Interfaces Command Reference, Release 5.x
OL-23495-01
Send document comments to nexus7k -doc feedback@c isco .com
Cisco NX-OS Interfaces Commandsdefault interface
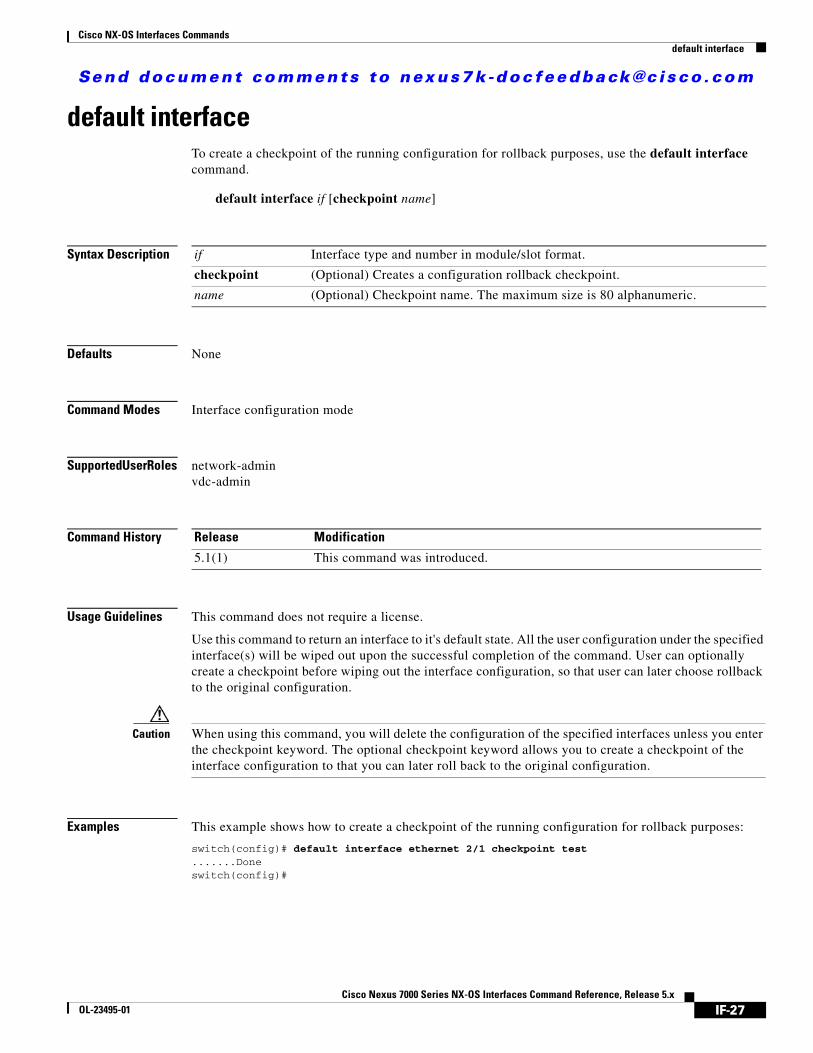
default interfaceTo create a checkpoint of the running configuration for rollback purposes, use the default interface command.
default interface if [checkpoint name]
Syntax Description
Defaults None
Command Modes Interface configuration mode
Supported User Roles network-adminvdc-admin
Command History
Usage Guidelines This command does not require a license.
Use this command to return an interface to it's default state. All the user configuration under the specified interface(s) will be wiped out upon the successful completion of the command. User can optionally create a checkpoint before wiping out the interface configuration, so that user can later choose rollback to the original configuration.
Caution When using this command, you will delete the configuration of the specified interfaces unless you enter the checkpoint keyword. The optional checkpoint keyword allows you to create a checkpoint of the interface configuration to that you can later roll back to the original configuration.
Examples This example shows how to create a checkpoint of the running configuration for rollback purposes:
switch(config)# default interface ethernet 2/1 checkpoint test.......Doneswitch(config)#
if Interface type and number in module/slot format.
checkpoint (Optional) Creates a configuration rollback checkpoint.
name (Optional) Checkpoint name. The maximum size is 80 alphanumeric.
Release Modification
5.1(1) This command was introduced.
IF-27Cisco Nexus 7000 Series NX-OS Interfaces Command Reference, Release 5.x
OL-23495-01

Send document comments to nexus7k -doc feedback@c isco .com
Cisco NX-OS Interfaces Commandsdefault interface
Related Commands Command Description
show interface switchport
Displays the administrative and operational status of a switching (nonrouting) port.
IF-28Cisco Nexus 7000 Series NX-OS Interfaces Command Reference, Release 5.x
OL-23495-01

Send document comments to nexus7k -doc feedback@c isco .com
Cisco NX-OS Interfaces Commandsdelay
delay To configure the interface throughput delay for Ethernet interfaces, use the delay command. To remove the configured throughput delay, use the no form of this command.
delay value
no delay
Syntax Description
Defaults 10 microseconds for all interfaces except loopback ports
5000 microseconds for loopback ports
Command Modes Interface configuration mode
Supported User Roles network-adminvdc-admin
Command History
Usage Guidelines Beginning with Cisco NX-OS Release 4.2(1) for the Cisco Nexus 7000 Series devices, the default delay values are changed. Prior to this release, all the default delay value for all interfaces was 100 microseconds.
Note After upgrading from an older release, when you enter the show running command on a VLAN interface, the display shows an additional configuration of delay 100. If you want to revert the delay value to the new default, enter the no delay command for that VLAN interface.
Specifying a value for the throughput delay provides a value for use by Layer 3 protocols; it does not change the actual throughput delay of an interface.
This command does not require a license.
Examples This example shows how to configure the throughput-delay time to 100,000 microseconds for the slot 3 port 1 Ethernet interface:
switch(config)# interface ethernet 3/1switch(config-if)# delay 10000
value Delay time in tens of microseconds. You can set an informational value range between 1 and 16777215 tens of microseconds.
Release Modification
4.0 This command was introduced.
IF-29Cisco Nexus 7000 Series NX-OS Interfaces Command Reference, Release 5.x
OL-23495-01

Send document comments to nexus7k -doc feedback@c isco .com
Cisco NX-OS Interfaces Commandsdelay
Related Commands Command Description
show interface Displays information about the interface, which includes the delay parameter.
IF-30Cisco Nexus 7000 Series NX-OS Interfaces Command Reference, Release 5.x
OL-23495-01
Send document comments to nexus7k -doc feedback@c isco .com
Cisco NX-OS Interfaces Commandsdelay restore
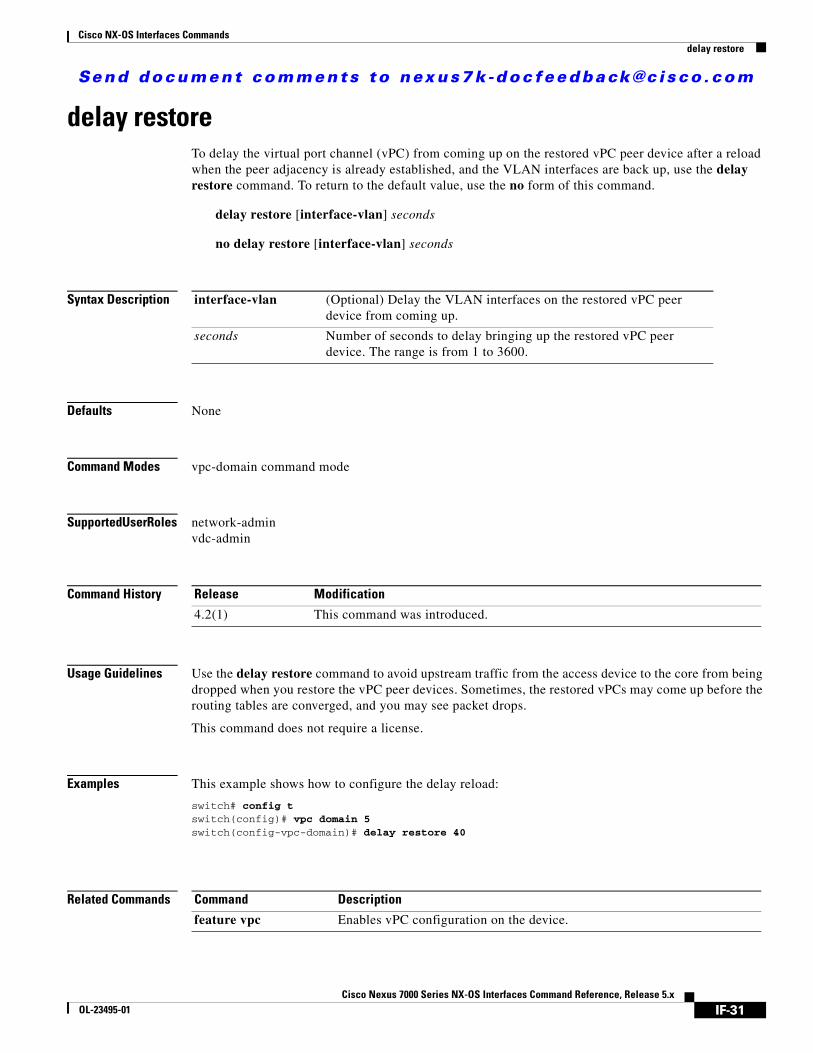
delay restoreTo delay the virtual port channel (vPC) from coming up on the restored vPC peer device after a reload when the peer adjacency is already established, and the VLAN interfaces are back up, use the delay restore command. To return to the default value, use the no form of this command.
delay restore [interface-vlan] seconds
no delay restore [interface-vlan] seconds
Syntax Description
Defaults None
Command Modes vpc-domain command mode
Supported User Roles network-adminvdc-admin
Command History
Usage Guidelines Use the delay restore command to avoid upstream traffic from the access device to the core from being dropped when you restore the vPC peer devices. Sometimes, the restored vPCs may come up before the routing tables are converged, and you may see packet drops.
This command does not require a license.
Examples This example shows how to configure the delay reload:
switch# config t switch(config)# vpc domain 5switch(config-vpc-domain)# delay restore 40
Related Commands
interface-vlan (Optional) Delay the VLAN interfaces on the restored vPC peer device from coming up.
seconds Number of seconds to delay bringing up the restored vPC peer device. The range is from 1 to 3600.
Release Modification
4.2(1) This command was introduced.
Command Description
feature vpc Enables vPC configuration on the device.
IF-31Cisco Nexus 7000 Series NX-OS Interfaces Command Reference, Release 5.x
OL-23495-01
Send document comments to nexus7k -doc feedback@c isco .com
Cisco NX-OS Interfaces Commandsdescription
description To provide textual interface descriptions for the Ethernet and management interfaces, use the description command. To remove the description, use the no form of this command.
description text
Syntax Description
Defaults None
Command Modes Interface configuration mode
Supported User Roles network-adminvdc-admin
Command History
Usage Guidelines You use the description command to provide textual interface descriptions.
This command does not require a license.
Examples This example shows how to add the description server1 to the Ethernet interface on slot 5, port 2:
switch(config)# interface ethernet 5/1switch(config-if)# description server1
Related Commands
text Description for the interface that you are configuring. The maximum range is 80 alphanumeric, case-sensitive characters.
Release Modification
4.0 This command was introduced.
Command Description
show interface Displays information about the interface, which includes the description parameter.
IF-32Cisco Nexus 7000 Series NX-OS Interfaces Command Reference, Release 5.x
OL-23495-01

Send document comments to nexus7k -doc feedback@c isco .com
Cisco NX-OS Interfaces Commandsdescription (fex)
description (fex) To specify a description for a Fabric Extender, use the description command. To revert to the default description, use the no form of this command.
description description
no description
Syntax Description
Defaults None
Command Modes Fabric Extender configuration mode
Command History
Usage Guidelines This command does not require a license.
Examples This example shows how to specify a description for a Fabric Extender:
switch# configure terminal switch(config)# fex 101 switch(config-fex)# description Rack16_FEX101
This example shows how to revert to the default description for a Fabric Extender:
switch# configure terminal switch(config)# fex 101 switch(config-fex)# no description
Related Commands
description Description of a Fabric Extender. The default is the string FEXxxxx where xxxx is the chassis ID. For example, if the chassis ID is 123, the default description is FEX0123. The maximum length is 20 alphanumeric characters.
Release Modification
5.1(1) This command was introduced.
Command Description
show fex Displays all configured Fabric Extender chassis connected to the switch.
IF-33Cisco Nexus 7000 Series NX-OS Interfaces Command Reference, Release 5.x
OL-23495-01
Send document comments to nexus7k -doc feedback@c isco .com
Cisco NX-OS Interfaces Commandsdual-active exclude interface-vlan
dual-active exclude interface-vlanTo ensure that certain VLAN interfaces are not shut down on the virtual port-channel (vPC) secondary peer device when the vPC peer link fails for those VLANs carried on the vPC peer link but not on the vPC configuration itself, use the dual-active exclude interface-vlan command. To return to the default value, use the no form of this command.
dual-active exclude interface-vlan {range}
no dual-active exclude interface-vlan {range}
Syntax Description
Defaults None
Command Modes vpc-domain configuration mode
Supported User Roles network-adminvdc-admin
Command History
Usage Guidelines Use the dual-active exclude interface-vlan command to ensure that those VLAN interfaces on the vPC secondary peer device that are carried on the vPC peer link but not by the vPC configuration itself do not go down if the vPC peer link fails. The VLAN interfaces must have already been configured.
Note We do not recommend configuring an interface-VLAN exclude for a VLAN carried on a vPC because this may cause packed losses on dual-active devices if the interface-VLAN still attracts Layer 3 traffic while the vPC primary device and the vPC peer link are down.
This command does not require a license.
Examples This example shows how to configure the device to keep the VLAN interfaces up on the vPC peer devices if the peer link fails:
switch# config t switch(config)# vpc-domain 5switch(config-vpc-domain)# dual-active exclude interface-vlan 10
range Range of VLAN interfaces that you want to exclude from shutting down. The range is from 1 to 4094.
Release Modification
4.2(1) This command was introduced.
IF-34Cisco Nexus 7000 Series NX-OS Interfaces Command Reference, Release 5.x
OL-23495-01

Send document comments to nexus7k -doc feedback@c isco .com
Cisco NX-OS Interfaces Commandsdual-active exclude interface-vlan
Related Commands Command Description
vpc-domain Configures a vPC domain and enters the vpc-domain configuration mode.
IF-35Cisco Nexus 7000 Series NX-OS Interfaces Command Reference, Release 5.x
OL-23495-01

Send document comments to nexus7k -doc feedback@c isco .com
Cisco NX-OS Interfaces Commandsduplex
duplexTo specify the duplex mode as full, half, or autonegotiate, use the duplex command. To return the system to default mode, use the no form of this command.
duplex {full | half | auto}
no duplex {full | half | auto}
Syntax Description
Defaults None
Command Modes Interface configuration mode
Supported User Roles network-adminvdc-admin
Command History
Usage Guidelines The interface speed that you specify can affect the duplex mode used for an interface, so you should set the speed before setting the duplex mode. If you set the speed for autonegotiation, the duplex mode is automatically set to be autonegotiated. If you specify 10- or 100-Mbps speed, the port is automatically configured to use half-duplex mode, but you can specify full-duplex mode instead. Gigabit Ethernet is full duplex only. You cannot change the duplex mode on Gigabit Ethernet ports or on a 10/100/1000-Mbps port that is set for Gigabit Ethernet.
See the Cisco Nexus 7000 Series NX-OS Interfaces Configuration Guide, Release 5.x, for more information on interface speed and duplex settings.
This command does not require a license.
Examples This example shows how to specify the duplex mode for full duplex:
switch(config-if)# duplex full
full Specifies the duplex mode as full.
half Specifies the duplex mode as half.
auto Specifies the duplex mode as autonegotiate.
Release Modification
4.0 This command was introduced.
IF-36Cisco Nexus 7000 Series NX-OS Interfaces Command Reference, Release 5.x
OL-23495-01

Send document comments to nexus7k -doc feedback@c isco .com
Cisco NX-OS Interfaces Commandsduplex
Related Commands Command Description
show interface Displays information about the interface, which includes the duplex parameter.
IF-37Cisco Nexus 7000 Series NX-OS Interfaces Command Reference, Release 5.x
OL-23495-01

Send document comments to nexus7k -doc feedback@c isco .com
Cisco NX-OS Interfaces Commandsencapsulation dot1Q
encapsulation dot1QTo enable IEEE 802.1Q encapsulation of traffic on a specified subinterface in a virtual LAN (VLAN), use the encapsulation dot1q command. To disable encapsulation, use the no form of this command.
encapsulation dot1Q vlan-id
no encapsulation dot1Q vlan-id
Syntax Description
Defaults No encapsulation
Command Modes Subinterface configuration mode
Supported User Roles network-adminvdc-admin
Command History
Usage Guidelines IEEE 802.1Q encapsulation is configurable on Ethernet interfaces. IEEE 802.1Q is a standard protocol for interconnecting multiple switches and routers and for defining VLAN topologies.
Use the encapsulation dot1q command in subinterface range configuration mode to apply a VLAN ID to the subinterface.
This command does not require a license.
Examples This example shows how to enable dot1Q encapsulation on a subinterface for VLAN 30:
switch(config-subif)# encapsulation dot1q 30
Related Commands
vlan-id VLAN to set when the interface is in access mode; valid values are from 1 to 4094, except for the VLANs reserved for internal switch use.
Release Modification
4.0 This command was introduced.
Command Description
show vlan dot1Q Displays dot1Q encapsulation information for a VLAN.
IF-38Cisco Nexus 7000 Series NX-OS Interfaces Command Reference, Release 5.x
OL-23495-01

Send document comments to nexus7k -doc feedback@c isco .com
Cisco NX-OS Interfaces Commandserrdisable detect cause
errdisable detect causeTo enable error-disabled (errdisable) detection for an application, use the errdisable detect cause command. To return to the default setting, use the no form of this command.
errdisable detect cause {acl-exception | all | link-flap | loopback}
no errdisable detect cause {acl-exception | all | link-flap | loopback}
Syntax Description
Defaults Disabled
Command Modes Global configuration mode
Supported User Roles network-adminvdc-admin
Command History
Usage Guidelines Use the errdisable detect cause command to enable error detection for an application.
A cause is defined as the reason why the error-disabled state occurred. When a cause is detected on an interface, the interface is placed in an error-disabled state. This error-disabled state is an operational state that is similar to the link-down state. You must enter the shutdown command and then the no shutdown command to recover an interface manually from the error-disabled state.
This command does not require a license.
Examples This example shows how to enable error-disabled detection on all cases:
switch(config)# errdisable detect cause all
acl-exception
Enables error-disabled detection for access-list installation failures.
all Enables error-disabled detection on all causes.
link-flap Enables error-disabled disable detection on link-state flapping.
loopback Enables error-disabled detection on loopback.
Release Modification
4.0 This command was introduced.
IF-39Cisco Nexus 7000 Series NX-OS Interfaces Command Reference, Release 5.x
OL-23495-01

Send document comments to nexus7k -doc feedback@c isco .com
Cisco NX-OS Interfaces Commandserrdisable detect cause
Related Commands Command Description
shutdown Brings the port down administratively.
no shutdown Brings the port up administratively.
show interface status err-disabled
Displays the interface error-disabled state.
IF-40Cisco Nexus 7000 Series NX-OS Interfaces Command Reference, Release 5.x
OL-23495-01

Send document comments to nexus7k -doc feedback@c isco .com
Cisco NX-OS Interfaces Commandserrdisable recovery cause
errdisable recovery causeTo enable the automatic recovery from the error-disabled (errdisable) state for an application, use the errdisable recovery cause command. To return to the default setting, use the no form of this command.
errdisable recovery cause {all | bpduguard | link-flap | failed-port-state | psecure-violation | security-violation | storm-control | udld | vpc-peerlink}
no errdisable recovery cause {all | bpduguard | link-flap | psecure-violation | security-violation | storm-control | udld | vpc-peerlink}
Syntax Description
Defaults Disabled
Command Modes Global configuration mode
Supported User Roles network-adminvdc-admin
Command History
Usage Guidelines Use the errdisable recovery cause command to enable automatic recovery on the interface from the error-disabled state for an application. This command tries to bring the interface out of the error-disabled state and retry operation once all the causes have timed out. The interface automatically tries to come up again after 300 seconds. To change this interval, use the errdisable recovery interval command.
all Enables automatic recovery from all causes.
bpduguard Enables automatic recovery from BPDU Guard error-disabled state.
link-flap Enables automatic recovery from link-state flapping.
failed-portstate
Enables timer automatic recovery from the STP set port state failure.
psecure-violation
Enables timer automatic recovery from the psecure violation disable state.
security-violation
Enables automatic recovery from the 802.1X violation disable state.
storm-control
Enables automatic recovery from the storm control error-disabled state.
udld Enables automatic recovery from the UDLD error-disabled state.
vpc-peerlink Enables automatic recovery from an inconsistent vPC peer-link error-disabled state.
Release Modification
4.0 This command was introduced.
4.1(3) Added the vpc-peerlink parameter.
IF-41Cisco Nexus 7000 Series NX-OS Interfaces Command Reference, Release 5.x
OL-23495-01

Send document comments to nexus7k -doc feedback@c isco .com
Cisco NX-OS Interfaces Commandserrdisable recovery cause
This command does not require a license.
Examples This example shows how to automatically recover from the error-disabled state for link flapping after you have enabled the recovery timer:
switch(config)# errdisable recovery cause link-flap
Related Commands Command Description
errdisable recovery interval
Enables the recovery timer.
show interface status err-disabled
Displays interface error-disabled state.
IF-42Cisco Nexus 7000 Series NX-OS Interfaces Command Reference, Release 5.x
OL-23495-01

Send document comments to nexus7k -doc feedback@c isco .com
Cisco NX-OS Interfaces Commandserrdisable recovery interval
errdisable recovery intervalTo enable the recovery timer, use the errdisable recovery interval command.
errdisable recovery interval interval
Syntax Description
Defaults 300 seconds
Command Modes Global configuration mode
Supported User Roles network-adminvdc-admin
Command History
Usage Guidelines Use the errdisable recovery interval command to configure the recovery timer.
This command does not require a license.
Examples This example shows how to configure the recovery timer:
switch(config)# errdisable recovery interval 32
Related Commands
interval Error detection for access-list installation failures. The range is from 30 to 65535.
Release Modification
4.0 This command was introduced.
Command Description
errdisable recovery cause
Enables the error-disabled recovery for an application.
show interface status err-disabled
Displays the interface error-disabled state.
IF-43Cisco Nexus 7000 Series NX-OS Interfaces Command Reference, Release 5.x
OL-23495-01

Send document comments to nexus7k -doc feedback@c isco .com
Cisco NX-OS Interfaces Commandsfeature bfd
feature bfdTo enable Bidirectional Forwarding Detection (BFD), use the feature bfd command. To return to the default setting, use the no form of this command.
feature bfd
no feature bfd
Syntax Description This command has no arguments or keywords.
Defaults Disabled
Command Modes Global configuration mode
Supported User Roles network-adminvdc-admin
Command History
Usage Guidelines You must use the feature bfd command to enable the BFD functionality.
Note The device does not display any BFD commands until you enable the feature.
This command does not require a license.
Examples This example shows how to enable BFD functionality on the device:
switch# config tswitch(config)# feature bfdswitch(config)#
Related Commands
Release Modification
5.0(2) This command was introduced.
Command Description
show feature Displays information about the features enabled on the device.
IF-44Cisco Nexus 7000 Series NX-OS Interfaces Command Reference, Release 5.x
OL-23495-01

Send document comments to nexus7k -doc feedback@c isco .com
Cisco NX-OS Interfaces Commandsfeature interface-vlan
feature interface-vlanTo enable the creation of VLAN interfaces (switched virtual interfaces [SVI]), use the feature interface-vlan command in global configuration mode. To disable the VLAN interface feature, use the no form of this command.
feature interface-vlan
no feature interface-vlan
Syntax Description This command has no arguments or keywords.
Defaults Disabled
Command Modes Global configuration mode
Supported User Roles network-adminvdc-admin
Command History
Usage Guidelines You must use the feature interface-vlan command before you can create VLAN interfaces.
This command does not require a license.
Examples This example shows how to enable the interface VLAN feature:
switch(config)# feature interface-vlan
Related Commands
Release Modification
4.0 This command was introduced.
Command Description
interface vlan Creates a VLAN interface.
IF-45Cisco Nexus 7000 Series NX-OS Interfaces Command Reference, Release 5.x
OL-23495-01

Send document comments to nexus7k -doc feedback@c isco .com
Cisco NX-OS Interfaces Commandsfeature lacp
feature lacp To enable Link Aggregation Control Protocol (LACP) port channeling on the device, use the feature lacp command. To disable LACP on the device, use the no form of this command.
feature lacp
no feature lacp
Syntax Description This command has no arguments or keywords.
Defaults Disabled
Command Modes Global configuration mode
Supported User Roles network-admin
vdc-admin
Command History
Usage Guidelines You must remove all the LACP configuration parameters from all port channels on the device before you can disable LACP. You cannot disable LACP while LACP configurations remain on the device.
Even after you enable LACP globally, you do not have to run LACP on all port channels on the device. You enable LACP on each channel mode using the channel-group mode command.
When you enter the no form of this command, the system removes all the LACP configuration from the device.
This command does not require a license.
Examples This example shows how to enable LACP port channeling on the device:
switch(config)# feature lacp
Related Commands
Release Modification
4.0 This command was introduced.
Command Description
show lacp port-channel
Displays information on port channels with LACP enabled.
IF-46Cisco Nexus 7000 Series NX-OS Interfaces Command Reference, Release 5.x
OL-23495-01

Send document comments to nexus7k -doc feedback@c isco .com
Cisco NX-OS Interfaces Commandsfeature-set fex
feature-set fex To enable the Fabric Extender (FEX) feature set, use the feature-set fex command.
feature-set fex
Syntax Description This command has no arguments or keywords.
Defaults None
Command Modes Global interface configuration mode
Command History
Usage Guidelines None.
Examples This example shows how to enable a FEX feature set:
switch(config)# feature-set fexswitch(config)# show feature-setFeature Set Name ID State-------------------- -------- --------fcoe 1 uninstalledfabricpath 2 uninstalledfex 3 enabledswitch(config)#switch(config)#
Related Commands
Release Modification
5.1(1) This command was introduced.
Command Description
show fex Displays all configured Fabric Extender chassis connected to the switch.
IF-47Cisco Nexus 7000 Series NX-OS Interfaces Command Reference, Release 5.x
OL-23495-01

Send document comments to nexus7k -doc feedback@c isco .com
Cisco NX-OS Interfaces Commandsfeature tunnel
feature tunnelTo enable the creation of tunnel interfaces, use the feature tunnel command in global configuration mode. To disable the tunnel interface feature, use the no form of this command.
feature tunnel
no feature tunnel
Syntax Description This command has no arguments or keywords.
Defaults Disabled
Command Modes Global configuration mode
Supported User Roles network-adminvdc-admin
Command History
Usage Guidelines You must use the feature tunnel command before you can create tunnel interfaces.
This command requires the Enterprise license.
Examples This example shows how to enable the interface tunnel feature:
switch(config)# feature tunnel
Related Commands
Release Modification
4.0 This command was introduced.
Command Description
interface tunnel Creates a tunnel interface.
IF-48Cisco Nexus 7000 Series NX-OS Interfaces Command Reference, Release 5.x
OL-23495-01

Send document comments to nexus7k -doc feedback@c isco .com
Cisco NX-OS Interfaces Commandsfeature udld
feature udldTo enable Unidirectional Link Detection (UDLD) globally on the device, use the feature udld command. To disable UDLD globally on the device, use the no form of this command.
feature udld
no feature udld
Syntax Description This command has no arguments or keywords.
Defaults None
Command Modes Global configuration mode
Supported User Roles network-adminvdc-admin
Command History
Usage Guidelines Use the feature udld command to enable UDLD globally on the device. UDLD must be also enabled on the other linked interface and its device. After enabling the devices, it is possible to enable a UDLD mode for an interface.
Use the no feature udld command to disable UDLD globally for Ethernet interfaces on the device.
This command does not require a license.
Examples This example shows how to enable the UDLD for a device:
switch# config t switch(config)# feature udld
This example shows how to disable UDLD for a device:
switch# config t switch(config)# no feature udld
Related Commands
Release Modification
4.0 This command was introduced.
Command Description
show udld Displays information about the UDLD configuration.
IF-49Cisco Nexus 7000 Series NX-OS Interfaces Command Reference, Release 5.x
OL-23495-01

Send document comments to nexus7k -doc feedback@c isco .com
Cisco NX-OS Interfaces Commandsfeature vpc
feature vpcTo enable virtual port channels (vPCs), use the feature vpc command. To return to the default setting, use the no form of this command.
feature vpc
no feature vpc
Syntax Description This command has no arguments or keywords.
Defaults Disabled
Command Modes Global configuration mode
Supported User Roles network-admin
vdc-admin
Command History
Usage Guidelines You must use the feature vpc command to enable the vPC functionality. You must enable vPCs before you can configure them.
Note When you disable vPC, the device clears all the vPC configurations.
This command does not require a license.
Examples This example shows how to enable vPC functionality on the device:
switch(config)# feature vpc
Related Commands
Release Modification
4.1(3) This command was introduced.
Command Description
show feature Displays information about the features enabled on the device.
show vpc brief Displays vPC information on vPCs. If the feature is not enabled, the system displays an error when you enter this command.
IF-50Cisco Nexus 7000 Series NX-OS Interfaces Command Reference, Release 5.x
OL-23495-01

Send document comments to nexus7k -doc feedback@c isco .com
Cisco NX-OS Interfaces Commandsfex
fex To create a Fabric Extender and enter fabric extender configuration mode, use the fex command. To delete the Fabric Extender configuration, use the no form of this command.
fex chassis-id
no fex chassis-id
Syntax Description
Defaults None
Command Modes Global configuration mode
Command History
Usage Guidelines You must create and configure the Fabric Extender before you can connect and associate it to an interface on the parent switch. Once you associate the Fabric Extender to the switch, the configuration that you created is transferred over to the Fabric Extender and applied.
Examples This example shows how to enter Fabric Extender configuration mode:
switch# configure terminalswitch(config)# fex 101 switch(config-fex)#
This example shows how to delete the Fabric Extender configuration:
switch(config-fex)# no fex 101switch(config)#
Related Commands
chassis-id Fabric Extender chassis ID. The chassis ID range is from 100 to 199.
Release Modification
5.1(1) This command was introduced.
Command Description
show fex Displays all configured Fabric Extender chassis connected to the switch.
IF-51Cisco Nexus 7000 Series NX-OS Interfaces Command Reference, Release 5.x
OL-23495-01

Send document comments to nexus7k -doc feedback@c isco .com
Cisco NX-OS Interfaces Commandsfex associate
fex associateTo associate a Fabric Extender to a fabric interface, use the fex associate command. To disassociate the Fabric Extender, use the no form of this command.
fex associate chassis-id
no fex associate chassis-id
Syntax Description
Defaults None
Command Modes Interface configuration mode
Command History
Usage Guidelines Before you can associate an interface on the parent switch to the Fabric Extender, you must first make the interface into a fabric interface by entering the switchport mode fex-fabric command.
Examples This example shows how to associate the Fabric Extender to an Ethernet interface:
switch# configure terminal switch(config)# interface ethernet 1/40 switch(config-if)# switchport mode fex-fabric switch(config-if)# fex associate 101
This example shows how to associate the Fabric Extender to an EtherChannel interface:
switch# configure terminal switch(config)# interface port-channel 4 switch(config-if)# switchport mode fex-fabric switch(config-if)# fex associate 10
Related Commands
chassis-id Fabric Extender chassis ID. The chassis ID range is from 100 to 199.
Release Modification
5.1(1) This command was introduced.
Command Description
show fex Displays all configured Fabric Extender chassis connected to the switch.
switchport mode fex-fabric
Sets the interface to be an uplink port.
IF-52Cisco Nexus 7000 Series NX-OS Interfaces Command Reference, Release 5.x
OL-23495-01
Send document comments to nexus7k -doc feedback@c isco .com
Cisco NX-OS Interfaces Commandsflowcontrol
flowcontrolTo enable or disable the ability of the Ethernet port to send and receive flow-control pause frames, use the flowcontrol command. To return to the default flow-control settings, use the no form of this command.
flowcontrol {send | receive} {desired | on | off}
no flowcontrol {send | receive}
Syntax Description
Defaults 1-Gb/s interfaces—Off for receive; desired for send
10-Gb/s interfaces—Cannot turn off for receive; off for send
Command Modes Interface configuration mode
Supported User Roles network-adminvdc-admin
Command History
Usage Guidelines Use the flowcontrol command to enable or disable the ability of the Ethernet port to send and receive flow-control pause frames.
Make sure that the remote port has the corresponding setting for the flow control that you need. If you want the local port to send flow-control pause frames, the remote port has a receive parameter set to on or desired. If you want the local port to receive flow-control frames, you must make sure that the remote port has a send parameter set to on or desired. If you do not want to use flow control, you can set the remote port’s send and receive parameters to off.
For Ethernet ports that run at 1 Gbps or faster, you can enable or disable the port’s ability to send and receive flow-control pause frames. For Ethernet ports that run slower than 1 Gbps, you can enable or disable only the port’s ability to receive pause frames.
send Specifies the flow-control send setting for ports that run at 1000 Mbps or faster.
receive Specifies the flow-control receive setting for ports that run at any speed.
desired Specifies the remote port setting to desired for both send and receive, if the configuration of the remote port is unknown.
on Specifies the remote port setting to on, if you want the local port to send flow-control pause frames.
off Specifies the remote port’s send and receive parameter settings to off, if you do not want to use flow control.
Release Modification
4.0 This command was introduced.
IF-53Cisco Nexus 7000 Series NX-OS Interfaces Command Reference, Release 5.x
OL-23495-01

Send document comments to nexus7k -doc feedback@c isco .com
Cisco NX-OS Interfaces Commandsflowcontrol
When enabling flow control for the local port, you either fully enable the local port to send or receive frames regardless of the flow-control setting of the remote port, or you set the local port to use the desired setting used by the remote port. If you enable both the local and remote ports for flow control, or set the desired flow control of the other port, or set a combination of those two states, flow control is enabled for those ports.
Note For ports that run at 10 Gbps, you cannot use the desired state for the send or receive parameter.
To see how the different port flow-control states affect the link flow-control state, see Table 1.
This command does not require a license.
Examples This example shows how to set Ethernet port 3/1 to send flow-control pause frames:
switch# config t switch(config)# interface ethernet 3/1switch(config-if)# flowcontrol send on
Related Commands
Table 1 Port Flow-Control Influences on Link Flow Control
Port Flow Control States
Link Flow Control State
Port Receiving Data(Sends Pause Frames)
Port Transmitting Data (Receives Pause Frames)
Enabled Enabled Enabled
Enabled Desired Enabled
Enabled Disabled Disabled
Desired Enabled Enabled
Desired Desired Enabled
Desired Disabled Disabled
Disabled Enabled Disabled
Disabled Desired Disabled
Disabled Disabled Disabled
Command Description
show interface flowcontrol
Displays information about the interface flow control.
show interface Displays information about the interface, which includes the flow-control parameter.
IF-54Cisco Nexus 7000 Series NX-OS Interfaces Command Reference, Release 5.x
OL-23495-01
Send document comments to nexus7k -doc feedback@c isco .com
Cisco NX-OS Interfaces Commandshsrp bfd
hsrp bfd To enable Bidirectional Forwarding Detection (BFD) on a Hot Standby Router Protocol (HSRP) interface, use the hsrp bfd command. To return to the default setting, use the no form of this command.
hsrp bfd
no hsrp bfd
Syntax Description This command has no keywords or arguments.
Defaults None
Command Modes Interface configuration mode
Command History
Usage Guidelines Use the hsrp bfd command to enable BFD on an HSRP interface.
This command does not require a license.
Examples This example shows how to enable BFD for an HSRP interface:
switch# configure terminalswitch(config)# interface ethernet 2/1switch(config-if)# hsrp bfd
Related Commands
Release Modification
5.0(2) This command was introduced.
Command Description
feature bfd Enables the BFD feature.
IF-55Cisco Nexus 7000 Series NX-OS Interfaces Command Reference, Release 5.x
OL-23495-01

Send document comments to nexus7k -doc feedback@c isco .com
Cisco NX-OS Interfaces Commandsinherit port-profile
inherit port-profileTo assign a port profile to an interface or range of interfaces and to inherit an additional port profile onto an existing port profile, use the inherit port-profile command. To remove an inherited port profile or to remove a port profile from specified interfaces, use the no form of this command.
inherit port-profile name
no inherit port-profile name
Syntax Description
Defaults None
Command Modes Interface configurationPort-profile configuration
Supported User Roles network-admin vdc-admin
Command History
Usage Guidelines Use the inherit port-profile command to do the following:
• Assign the port profile to a specified interface or range of specified interfaces. You do this in the interface configuration mode. The maximum number of interfaces that can inherit a single profile is 512.
• Inherit configuration parameters from another port profile onto an existing port profile. You do this in the port-profile mode, using the name of the port profile that you want to inherit configurations into. Only port profiles of the same type can be inherited by another port profile. The device supports four levels of inheritance except for the switchport private-vlan mapping and the private-vlan mapping commands, which support only one inheritance level. The same port profile can be inherited by any number of port profiles. In a port-profile inheritance hierarchy, all the profiles must have the same switchport configuration.
See the port-profile command and the state-enabled command for information about creating, configuring, and enabling port profiles.
If you attempt to inherit a port profile to the wrong type of interface, the system returns an error.
name Port profile that you want to assign to interfaces or to inherit onto the existing port profile.
Release Modification
4.2(1) This command was introduced.
IF-56Cisco Nexus 7000 Series NX-OS Interfaces Command Reference, Release 5.x
OL-23495-01

Send document comments to nexus7k -doc feedback@c isco .com
Cisco NX-OS Interfaces Commandsinherit port-profile
When you remove a port profile from a range of interfaces, the system undoes the configuration from the interfaces first and then removes the port-profile link itself. Also, when you remove a port profile, the system checks the interface configuration and either skips port-profiles commands that have been overridden by directly entered interface commands or returns the command to the default value.
You can also choose a subset of interfaces from which to remove a port profile from those interfaces to which you originally applied the profile. For example, if you configured a port profile and configured 10 interfaces to inherit that port profile, you can remove the port profile from just some of the specified 10 interfaces. The port profile continues to operate on the remaining interfaces to which it is applied.
You use the port-profile configuration mode to remove an inherited port profile from an original port profile.
This command does not require a license.
Examples This example shows how to assign a specified port profile to a range of interfaces:
switch(config)# interface ethernet 2/1-10switch(config-if)# port-profile test
This example shows how to inherit the configuration parameters from the port profile named switch onto the port profile named test:
switch(config)# testswitch(config-ppm)# inherit port-profile switch
Related Commands Command Description
show port-profile Displays information about port profiles.
IF-57Cisco Nexus 7000 Series NX-OS Interfaces Command Reference, Release 5.x
OL-23495-01

Send document comments to nexus7k -doc feedback@c isco .com
Cisco NX-OS Interfaces Commandsinstall feature-set fex
install feature-set fex To install a Fabric Extender (FEX) feature set, use the install feature-set fex command.
install feature-set fex
Syntax Description This command has no arguments or keywords.
Defaults None
Command Modes Global configuration mode
Command History
Usage Guidelines This command does not require a license.
Examples This example shows how to install a FEX feature set:
switch(config)# install feature-set fexswitch(config)# show feature-setFeature Set Name ID State-------------------- -------- --------fcoe 1 uninstalledfabricpath 2 uninstalledfex 3 installedswitch(config)#
Related Commands
Release Modification
5.1(1) This command was introduced.
Command Description
show fex Displays all configured Fabric Extender chassis connected to the switch.
IF-58Cisco Nexus 7000 Series NX-OS Interfaces Command Reference, Release 5.x
OL-23495-01

Send document comments to nexus7k -doc feedback@c isco .com
Cisco NX-OS Interfaces Commandsinterface cmp-mgmt module
interface cmp-mgmt moduleTo create a Connectivity Management Processor (CMP) management interface and enter interface configuration mode, use the interface cmp-mgmt module command.
interface cmp-mgmt module number
Syntax Description
Defaults None
Command Modes Global configurationInterface configuration
Supported User Roles network-admin vdc-admin
Command History
Usage Guidelines Use the interface cmp-mgmt module command to create a CMP management interface.
This command does not require a license.
Examples This example shows how to create a CMP management interface:
switch(config)# interface cmp-mgmt module 9switch(config-if-cmp)#
number Active or standby supervisor module number. Valid values are 9 or 10.
Release Modification
4.0 This command was introduced.
IF-59Cisco Nexus 7000 Series NX-OS Interfaces Command Reference, Release 5.x
OL-23495-01
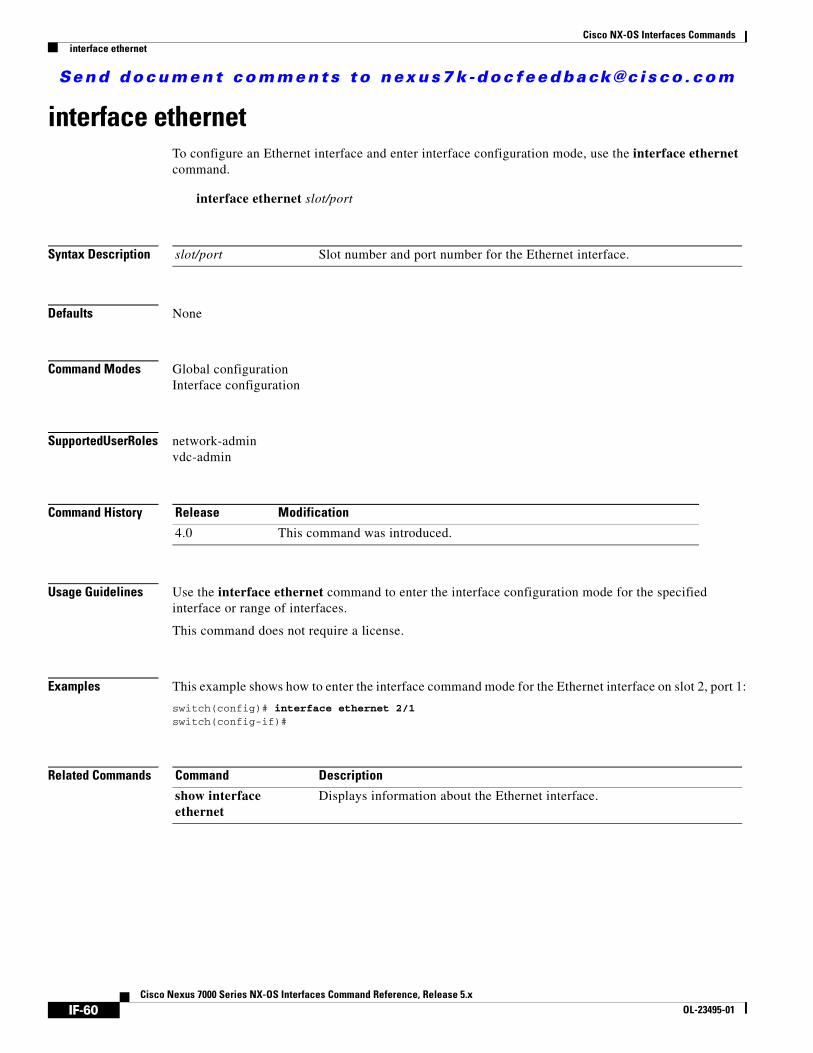
Send document comments to nexus7k -doc feedback@c isco .com
Cisco NX-OS Interfaces Commandsinterface ethernet
interface ethernetTo configure an Ethernet interface and enter interface configuration mode, use the interface ethernet command.
interface ethernet slot/port
Syntax Description
Defaults None
Command Modes Global configurationInterface configuration
Supported User Roles network-admin vdc-admin
Command History
Usage Guidelines Use the interface ethernet command to enter the interface configuration mode for the specified interface or range of interfaces.
This command does not require a license.
Examples This example shows how to enter the interface command mode for the Ethernet interface on slot 2, port 1:
switch(config)# interface ethernet 2/1switch(config-if)#
Related Commands
slot/port Slot number and port number for the Ethernet interface.
Release Modification
4.0 This command was introduced.
Command Description
show interface ethernet
Displays information about the Ethernet interface.
IF-60Cisco Nexus 7000 Series NX-OS Interfaces Command Reference, Release 5.x
OL-23495-01

Send document comments to nexus7k -doc feedback@c isco .com
Cisco NX-OS Interfaces Commandsinterface loopback
interface loopbackTo create a loopback interface and enter interface configuration mode, use the interface loopback command. To remove a loopback interface, use the no form of this command.
interface loopback number
no interface loopback number
Syntax Description
Defaults None
Command Modes Global configurationInterface configuration
Supported User Roles network-admin
vdc-admin
Command History
Usage Guidelines Use the interface loopback command to create or modify loopback interfaces.
This command does not require a license.
Examples This example shows how to create a loopback interface:
switch(config)# interface loopback 50switch(config-if)#
Related Commands
number Interface number; valid values are from 0 to 1023.
Release Modification
4.0 This command was introduced.
Command Description
show interface loopback
Displays information about the traffic on the specified loopback interface.
IF-61Cisco Nexus 7000 Series NX-OS Interfaces Command Reference, Release 5.x
OL-23495-01

Send document comments to nexus7k -doc feedback@c isco .com
Cisco NX-OS Interfaces Commandsinterface mgmt
interface mgmtTo configure the management interface and enter interface configuration mode, use the interface mgmt command.
interface mgmt number
Syntax Description
Defaults None
Command Modes Global configurationInterface configuration
Supported User Roles network-admin
vdc-admin
Command History
Usage Guidelines Use the interface mgmt command to configure the management interface and to enter the interface configuration mode.
This command does not require a license.
Examples This example shows how to enter the interface configuration mode to configure the management interface:
switch(config)# interface mgmtswitch(config-if)#
Related Commands
number Interface number. The range is from 0 to 1023.
Release Modification
4.0 This command was introduced.
Command Description
show interface mgmt0 Displays information about the traffic on the management interface.
IF-62Cisco Nexus 7000 Series NX-OS Interfaces Command Reference, Release 5.x
OL-23495-01

Send document comments to nexus7k -doc feedback@c isco .com
Cisco NX-OS Interfaces Commandsinterface port-channel
interface port-channelTo create a port-channel interface and enter interface configuration mode, use the interface port-channel command. To remove a logical port-channel interface or subinterface, use the no form of this command.
interface port-channel channel-number
no interface port-channel channel-number
Syntax Description
Defaults None
Command Modes Global configurationInterface configuration
Supported User Roles network-admin
vdc-admin
Command History
Usage Guidelines Use the interface port-channel command to create or delete port-channel groups and to enter the interface configuration mode for the port channel.
You can create port channels implicitly using the attach fex command or explicitly using the feature-set fex command.
A port can belong to only one channel group.
You can create subinterfaces on a Layer 3 port-channel interface. However, you cannot add a Layer 3 interface that has existing subinterfaces to a port channel.
Note The Layer 3 port-channel interface is the routed interface.
The Link Aggregation Control Protocol (LACP) system ID is unique for each VDC, and channel-group numbers and names can be re-used in different VDCs.
When you use the interface port-channel command, follow these guidelines:
• If you are using CDP, you must configure it only on the physical interface and not on the port-channel interface.
channel-number Channel number that is assigned to this port-channel logical interface. The range of valid values is from 1 to 4096.
Release Modification
4.0 This command was introduced.
IF-63Cisco Nexus 7000 Series NX-OS Interfaces Command Reference, Release 5.x
OL-23495-01

Send document comments to nexus7k -doc feedback@c isco .com
Cisco NX-OS Interfaces Commandsinterface port-channel
• If you do not assign a static MAC address on the port-channel interface, a MAC address is automatically assigned. If you assign a static MAC address and then later remove it, the MAC address is automatically assigned.
• The MAC address of the port channel is the address of the first operational port added to the channel group. If this first-added port is removed from the channel, the MAC address comes from the next operational port added, if there is one.
This command does not require a license.
Examples This example shows how to create a port-channel group interface with channel-group number 50:
switch(config)# interface port-channel 50switch(config-if)#
Related Commands Command Description
show interface port-channel
Displays information on traffic on the specified port-channel interface.
show port-channel summary
Displays information on the port channels.
show lacp Displays LACP information.
IF-64Cisco Nexus 7000 Series NX-OS Interfaces Command Reference, Release 5.x
OL-23495-01

Send document comments to nexus7k -doc feedback@c isco .com
Cisco NX-OS Interfaces Commandsinterface tunnel
interface tunnelTo create a tunnel interface and enter interface configuration mode, use the interface tunnel command. To remove a tunnel interface, use the no form of this command.
interface tunnel number
no interface tunnel number
Syntax Description
Defaults None
Command Modes Global configurationInterface configuration
Supported User Roles network-admin
vdc-admin
Command History
Usage Guidelines Use the interface tunnel command to create or modify tunnel interfaces.
Cisco NX-OS supports the GRE header defined in IETF RFC 2784. Cisco NX-OS does not support tunnel keys and other options from IETF RFC 1701.
You can configure IP tunnels only in the default virtual device context (VDC).
This command requires the Enterprise license.
Examples This example shows how to create a tunnel interface:
switch(config)# interface tunnel 50switch(config-if)#
Related Commands
number Identifying interface number; valid values are from 0 to 4095.
Release Modification
4.0 This command was introduced.
5.0(1) The maximum valid range of values was changed from 65535 to 4095.
Command Description
tunnel source Sets the source of the IP tunnel.
tunnel destination Sets the destination of the IP tunnel.
show interface tunnel Displays information about the traffic on the specified tunnel interface.
IF-65Cisco Nexus 7000 Series NX-OS Interfaces Command Reference, Release 5.x
OL-23495-01
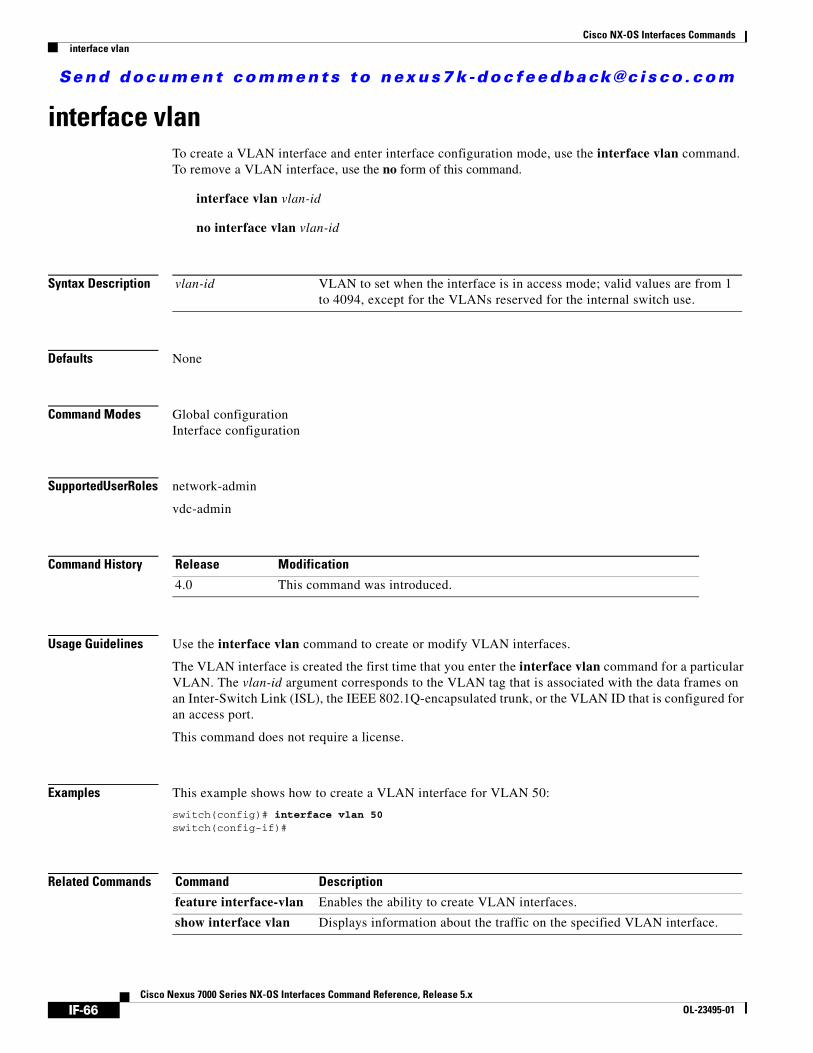
Send document comments to nexus7k -doc feedback@c isco .com
Cisco NX-OS Interfaces Commandsinterface vlan
interface vlanTo create a VLAN interface and enter interface configuration mode, use the interface vlan command. To remove a VLAN interface, use the no form of this command.
interface vlan vlan-id
no interface vlan vlan-id
Syntax Description
Defaults None
Command Modes Global configurationInterface configuration
Supported User Roles network-admin
vdc-admin
Command History
Usage Guidelines Use the interface vlan command to create or modify VLAN interfaces.
The VLAN interface is created the first time that you enter the interface vlan command for a particular VLAN. The vlan-id argument corresponds to the VLAN tag that is associated with the data frames on an Inter-Switch Link (ISL), the IEEE 802.1Q-encapsulated trunk, or the VLAN ID that is configured for an access port.
This command does not require a license.
Examples This example shows how to create a VLAN interface for VLAN 50:
switch(config)# interface vlan 50switch(config-if)#
Related Commands
vlan-id VLAN to set when the interface is in access mode; valid values are from 1 to 4094, except for the VLANs reserved for the internal switch use.
Release Modification
4.0 This command was introduced.
Command Description
feature interface-vlan Enables the ability to create VLAN interfaces.
show interface vlan Displays information about the traffic on the specified VLAN interface.
IF-66Cisco Nexus 7000 Series NX-OS Interfaces Command Reference, Release 5.x
OL-23495-01
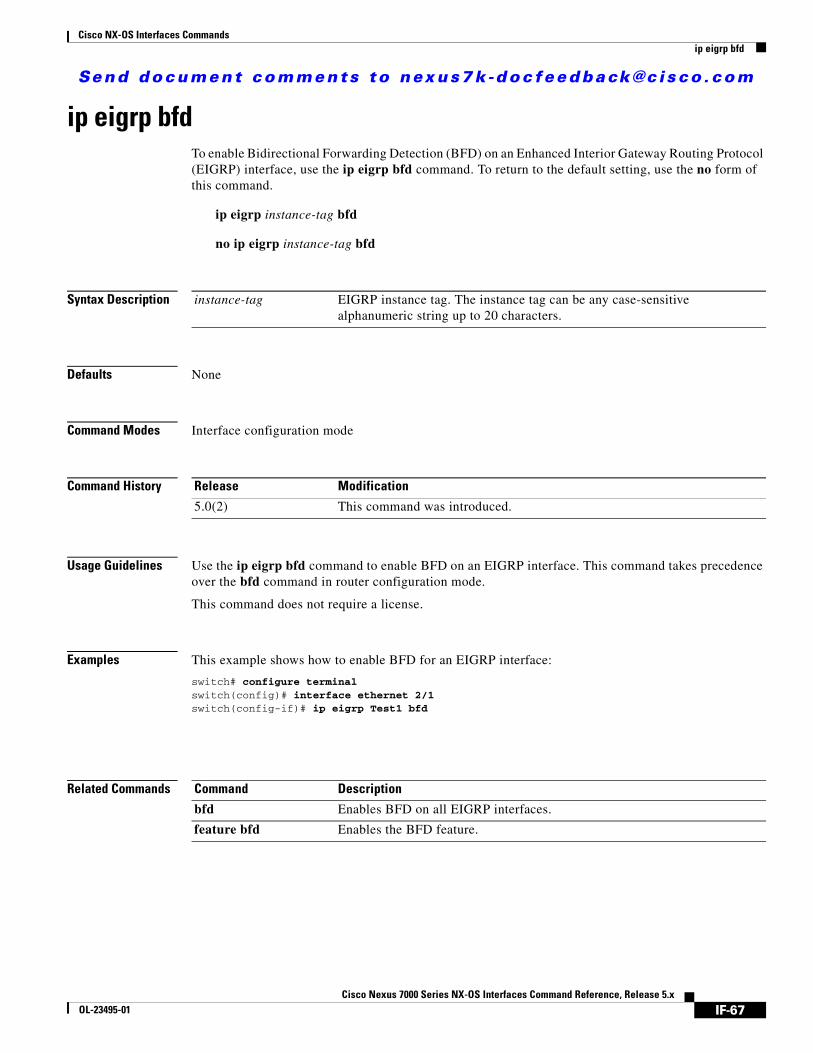
Send document comments to nexus7k -doc feedback@c isco .com
Cisco NX-OS Interfaces Commandsip eigrp bfd
ip eigrp bfd To enable Bidirectional Forwarding Detection (BFD) on an Enhanced Interior Gateway Routing Protocol (EIGRP) interface, use the ip eigrp bfd command. To return to the default setting, use the no form of this command.
ip eigrp instance-tag bfd
no ip eigrp instance-tag bfd
Syntax Description
Defaults None
Command Modes Interface configuration mode
Command History
Usage Guidelines Use the ip eigrp bfd command to enable BFD on an EIGRP interface. This command takes precedence over the bfd command in router configuration mode.
This command does not require a license.
Examples This example shows how to enable BFD for an EIGRP interface:
switch# configure terminalswitch(config)# interface ethernet 2/1switch(config-if)# ip eigrp Test1 bfd
Related Commands
instance-tag EIGRP instance tag. The instance tag can be any case-sensitive alphanumeric string up to 20 characters.
Release Modification
5.0(2) This command was introduced.
Command Description
bfd Enables BFD on all EIGRP interfaces.
feature bfd Enables the BFD feature.
IF-67Cisco Nexus 7000 Series NX-OS Interfaces Command Reference, Release 5.x
OL-23495-01
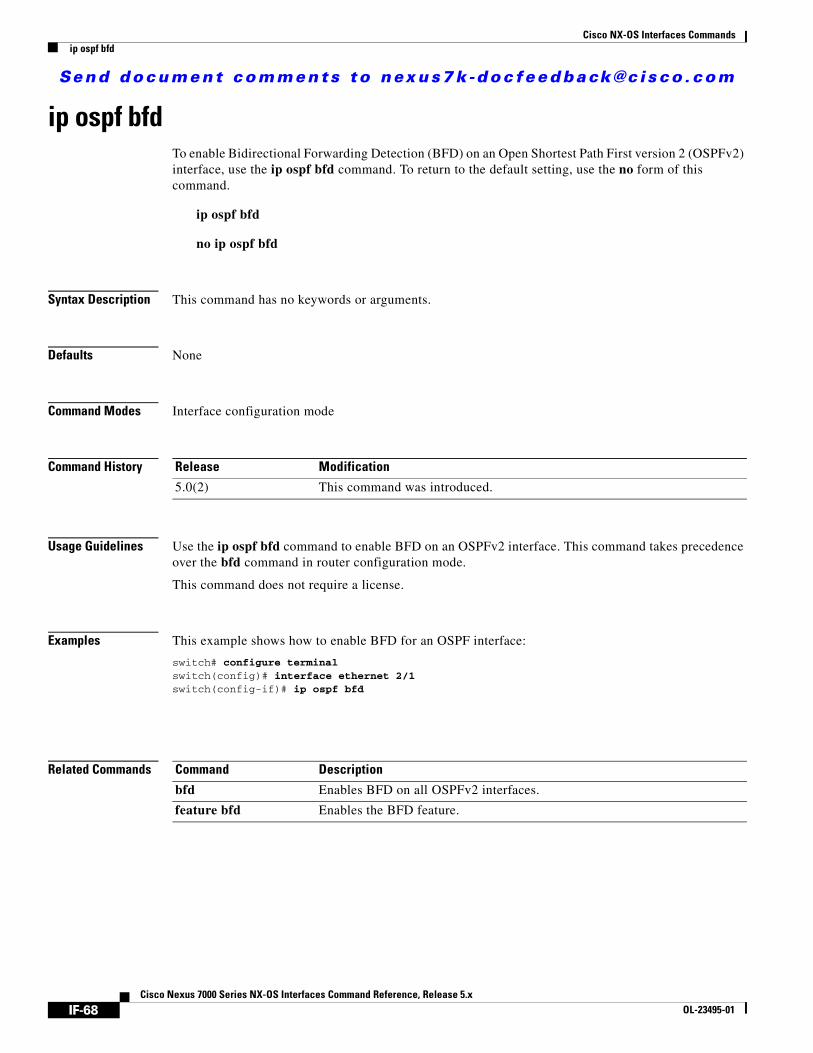
Send document comments to nexus7k -doc feedback@c isco .com
Cisco NX-OS Interfaces Commandsip ospf bfd
ip ospf bfd To enable Bidirectional Forwarding Detection (BFD) on an Open Shortest Path First version 2 (OSPFv2) interface, use the ip ospf bfd command. To return to the default setting, use the no form of this command.
ip ospf bfd
no ip ospf bfd
Syntax Description This command has no keywords or arguments.
Defaults None
Command Modes Interface configuration mode
Command History
Usage Guidelines Use the ip ospf bfd command to enable BFD on an OSPFv2 interface. This command takes precedence over the bfd command in router configuration mode.
This command does not require a license.
Examples This example shows how to enable BFD for an OSPF interface:
switch# configure terminalswitch(config)# interface ethernet 2/1switch(config-if)# ip ospf bfd
Related Commands
Release Modification
5.0(2) This command was introduced.
Command Description
bfd Enables BFD on all OSPFv2 interfaces.
feature bfd Enables the BFD feature.
IF-68Cisco Nexus 7000 Series NX-OS Interfaces Command Reference, Release 5.x
OL-23495-01

Send document comments to nexus7k -doc feedback@c isco .com
Cisco NX-OS Interfaces Commandsip pim bfd
ip pim bfd To enable Bidirectional Forwarding Detection (BFD) for Protocol Independent Multicast (PIM), use the ip pim bfd command. To return to the default setting, use the no form of this command.
ip pim bfd
no ip pim bfd
Syntax Description This command has no keywords or arguments.
Defaults None
Command Modes Global configuration mode
Command History
Usage Guidelines Use the ip pim bfd command to enable BFD for PIM.
This command does not require a license.
Examples This example shows how to enable BFD for PIM:
switch# configure terminalswitch(config)# ip pim bfd
Related Commands
Release Modification
5.0(2) This command was introduced.
Command Description
feature bfd Enables the BFD feature.
IF-69Cisco Nexus 7000 Series NX-OS Interfaces Command Reference, Release 5.x
OL-23495-01

Send document comments to nexus7k -doc feedback@c isco .com
Cisco NX-OS Interfaces Commandsip pim bfd-instance
ip pim bfd-instance To enable Bidirectional Forwarding Detection (BFD) for Protocol Independent Multicast (PIM) on an interface, use the ip pim bfd-instance command. To return to the default setting, use the no form of this command.
ip pim bfd-instance [disable]
no ip pim bfd-instance [disable]
Syntax Description
Defaults None
Command Modes Interface configuration mode
Command History
Usage Guidelines Use the ip pim bfd-instance command to enable BFD for PIM on an interface. This configuration (with or without the disable keyword) overrides the BFD configuration for PIM at the global or VRF configuration level.
This command does not require a license.
Examples This example shows how to disable BFD for PIM on interface ethernet 2/1 when BFD is enabled globally for PIM:
switch# configure terminalswitch(config)# ip pim bfdswitch(config)# interface ethernet 2/1switch(config-if)# ip pim bfd-instance disable
Related Commands
disable Disables BFD for PIM on this interface.
Release Modification
5.0(2) This command was introduced.
Command Description
feature bfd Enables the BFD feature.
IF-70Cisco Nexus 7000 Series NX-OS Interfaces Command Reference, Release 5.x
OL-23495-01
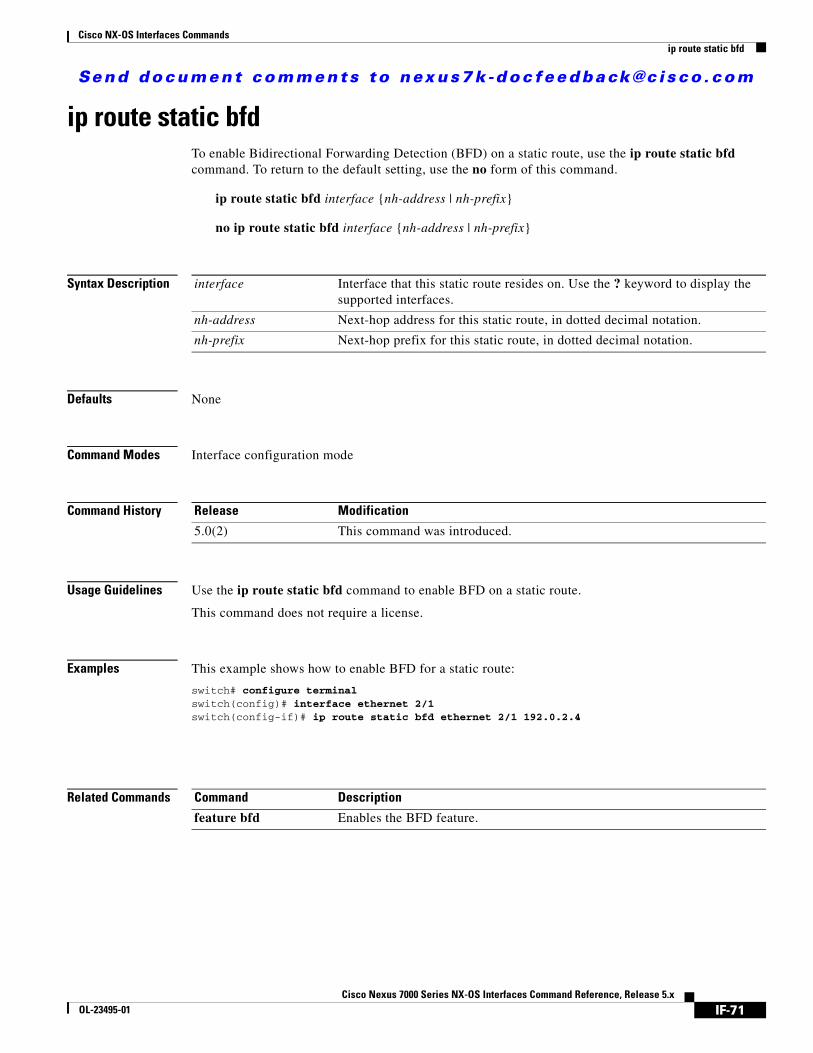
Send document comments to nexus7k -doc feedback@c isco .com
Cisco NX-OS Interfaces Commandsip route static bfd
ip route static bfdTo enable Bidirectional Forwarding Detection (BFD) on a static route, use the ip route static bfd command. To return to the default setting, use the no form of this command.
ip route static bfd interface {nh-address | nh-prefix}
no ip route static bfd interface {nh-address | nh-prefix}
Syntax Description
Defaults None
Command Modes Interface configuration mode
Command History
Usage Guidelines Use the ip route static bfd command to enable BFD on a static route.
This command does not require a license.
Examples This example shows how to enable BFD for a static route:
switch# configure terminalswitch(config)# interface ethernet 2/1switch(config-if)# ip route static bfd ethernet 2/1 192.0.2.4
Related Commands
interface Interface that this static route resides on. Use the ? keyword to display the supported interfaces.
nh-address Next-hop address for this static route, in dotted decimal notation.
nh-prefix Next-hop prefix for this static route, in dotted decimal notation.
Release Modification
5.0(2) This command was introduced.
Command Description
feature bfd Enables the BFD feature.
IF-71Cisco Nexus 7000 Series NX-OS Interfaces Command Reference, Release 5.x
OL-23495-01

Send document comments to nexus7k -doc feedback@c isco .com
Cisco NX-OS Interfaces Commandsipv6 eigrp bfd
ipv6 eigrp bfd To enable Bidirectional Forwarding Detection (BFD) on an Enhanced Interior Gateway Routing Protocol (EIGRP) interface, use the ipv6 eigrp bfd command. To return to the default setting, use the no form of this command.
ipv6 eigrp instance-tag bfd
no ipv6 eigrp instance-tag bfd
Syntax Description
Defaults None
Command Modes Interface configuration mode
Command History
Usage Guidelines Use the ipv6 eigrp bfd command to enable BFD on an EIGRP interface. This command takes precedence over the bfd command in router configuration mode.
This command does not require a license.
Examples This example shows how to enable BFD for an EIGRP interface:
switch# configure terminalswitch(config)# interface ethernet 2/1switch(config-if)# ipv6 eigrp Test1 bfd
Related Commands
instance-tag EIGRP instance tag. The instance tag can be any case-sensitive alphanumeric string up to 20 characters.
Release Modification
5.0(2) This command was introduced.
Command Description
bfd Enables BFD on all EIGRP interfaces.
feature bfd Enables the BFD feature.
IF-72Cisco Nexus 7000 Series NX-OS Interfaces Command Reference, Release 5.x
OL-23495-01

Send document comments to nexus7k -doc feedback@c isco .com
Cisco NX-OS Interfaces Commandsisis bfd
isis bfd To enable Bidirectional Forwarding Detection (BFD) on an Intermediate System-to-Intermediate System (IS-IS) interface, use the isis bfd command. To return to the default setting, use the no form of this command.
isis bfd
no isis bfd
Syntax Description This command has no keywords or arguments.
Defaults None
Command Modes Interface configuration mode
Command History
Usage Guidelines Use the isis bfd command to enable BFD on an IS-IS interface. This command takes precedence over the bfd command in router configuration mode.
This command does not require a license.
Examples This example shows how to enable BFD for an IS-IS interface:
switch# configure terminalswitch(config)# interface ethernet 2/1switch(config-if)# isis bfd
Related Commands
Release Modification
5.0(2) This command was introduced.
Command Description
bfd Enables BFD on all IS-IS interfaces.
feature bfd Enables the BFD feature.
IF-73Cisco Nexus 7000 Series NX-OS Interfaces Command Reference, Release 5.x
OL-23495-01

Send document comments to nexus7k -doc feedback@c isco .com
Cisco NX-OS Interfaces Commandsfabricpath switch-id
fabricpath switch-idTo configure an emulated switch ID, use the fabricpath switch-id command. To return to the default setting, use the no form of this command.
fabricpath switch-id switch-id
no fabricpath switch-id switch-id
Syntax Description
Defaults None
Command Modes Interface configuration mode
Supported User Roles network-adminvdc-admin
Command History
Usage Guidelines This command does not require a license.
Examples This example shows how to configure an emulated switch ID:
switch# config t switch(config)# vpc domain 1switch(config-vpc-domain)# fabricpath switch-id 4Configuring fabricpath switch id will flap vPCs. Continue (yes/no)? [no] yesNote:--------:: Re-init of peer-link and vPCs started ::--------switch(config-vpc-domain)#
This example shows how to set the default ID value:
switch# config t switch(config)# vpc domain 1switch(config-vpc-domain)# no fabricpath switch-id 4Deconfiguring fabricpath switch id will flap vPCs. Continue (yes/no)? [no] yesNote:--------:: Re-init of peer-link and vPCs started ::--------switch(config-vpc-domain)#
switch-id Emulated switch ID. The range is from 1 to4095.
Release Modification
5.1(1) This command was introduced.
IF-74Cisco Nexus 7000 Series NX-OS Interfaces Command Reference, Release 5.x
OL-23495-01

Send document comments to nexus7k -doc feedback@c isco .com
Cisco NX-OS Interfaces Commandsfabricpath switch-id
Related CommandsCommand Description
show interface switchport
Displays the administrative and operational status of a switching (nonrouting) port.
IF-75Cisco Nexus 7000 Series NX-OS Interfaces Command Reference, Release 5.x
OL-23495-01

Send document comments to nexus7k -doc feedback@c isco .com
Cisco NX-OS Interfaces Commandsl2protocol tunnel
l2protocol tunnelTo enable Layer 2 protocol tunneling, use the l2protocol tunnel command. To disable protocol tunneling, use the no form of this command.
l2protocol tunnel [cdp | stp | vtp]
no l2protocol tunnel [cdp | stp | vtp]
Syntax Description
Defaults Layer 2 protocol tunneling is disabled.
Command Modes Interface configuration mode
Command History
Usage Guidelines This command does not require a license.
Examples This example shows how to enable Layer 2 protocol tunneling:
switch(config-if)# l2protocol tunnel cdp
Related Commands
cdp (Optional) Enables Cisco Discovery Protocol (CDP) tunneling.
stp (Optional) Enables Spanning Tree Protocol (STP) tunneling.
vtp (Optional) Enables VLAN Trunking Protocol (VTP) tunneling.
Release Modification
5.0(2) This command was introduced.
Command Description
show l2protocol tunnel Displays Layer 2 protocol tunnel information.
IF-76Cisco Nexus 7000 Series NX-OS Interfaces Command Reference, Release 5.x
OL-23495-01

Send document comments to nexus7k -doc feedback@c isco .com
Cisco NX-OS Interfaces Commandsl2protocol tunnel cos
l2protocol tunnel cosTo specify a global Class of service (CoS) value on all Layer 2 protocol tunneling interfaces, use the l2protocol tunnel cos command. To reset the global CoS value to its default, use the no form of this command.
l2protocol tunnel cos cos-value
no l2protocol tunnel cos
Syntax Description
Defaults CoS value is 5.
Command Modes Global configuration mode
Command History
Usage Guidelines This command does not require a license.
Examples This example shows how to specify a global CoS value on all Layer 2 protocol tunneling interfaces:
switch(config)# l2protocol tunnel cos 7
Related Commands
cos-value CoS value. The range of values is from 0 to 7. The default value is 5.
Release Modification
5.0(2) This command was introduced.
Command Description
show l2protocol tunnel Displays Layer 2 protocol tunnel information.
IF-77Cisco Nexus 7000 Series NX-OS Interfaces Command Reference, Release 5.x
OL-23495-01

Send document comments to nexus7k -doc feedback@c isco .com
Cisco NX-OS Interfaces Commandsl2protocol tunnel drop-threshold
l2protocol tunnel drop-thresholdTo specify the maximum number of packets that can be processed on an Layer 2 protocol tunneling interface before being dropped, use the l2protocol tunnel drop-threshold command. To reset the values to 0 and disable the drop threshold, use the no form of this command.
l2protocol tunnel drop-threshold [cdp | stp | vtp] packets-per-sec
no l2protocol tunnel drop-threshold [cdp | stp | vtp]
Syntax Description
Defaults The drop threshold is disabled.
Command Modes Interface configuration mode
Command History
Usage Guidelines This command does not require a license.
Examples This example shows how to specify the maximum number of CDP packets that can be processed on an Layer 2 protocol tunneling interface before being dropped:
switch(config-if)# l2protocol tunnel drop-threshold cdp 1024
Related Commands
cdp (Optional) Specifies the number of CDP packets that can be processed on an interface.
stp (Optional) Specifies the number of STP packets that can be processed on an interface.
vtp (Optional) Specifies the number of VTP packets that can be processed on an interface.
packets-per-sec Maximum number of packets that can be processed on an interface before being dropped. Valid values for the packets is from 1 to 4096.
Release Modification
5.0(2) This command was introduced.
Command Description
show l2protocol tunnel Displays Layer 2 protocol tunnel information.
IF-78Cisco Nexus 7000 Series NX-OS Interfaces Command Reference, Release 5.x
OL-23495-01

Send document comments to nexus7k -doc feedback@c isco .com
Cisco NX-OS Interfaces Commandsl2protocol tunnel shutdown-threshold
l2protocol tunnel shutdown-thresholdTo specify the maximum number of packets that can be processed on an Layer 2 protocol tunneling interface, use the l2protocol tunnel shutdown-threshold command. To reset the values to 0 and disable the shutdown threshold the no form of this command
l2protocol tunnel shutdown-threshold [cdp | stp | vtp] packets-per-sec
no l2protocol tunnel shutdown-threshold [cdp | stp | vtp]
Syntax Description
Defaults The shutdown threshold is disabled.
Command Modes Interface configuration mode
Command History
Usage Guidelines This command does not require a license.
When the number of packets is exceeded, the port is put in error-disabled state.
Examples This example shows how to specify the maximum number of packets that can be processed on an Layer 2 protocol tunneling interface before the port is put in error-disabled state:
switch(config-if)# l2protocol tunnel shutdown-threshold 2048
Related Commands
cdp (Optional) Specifies the number of Cisco Discovery Protocol (CDP) packets that can be processed on an interface.
stp (Optional) Specifies the number of Spinning Tree Protocol (STP) packets that can be processed on an interface.
vtp (Optional) Specifies the number of VLAN Trunking Protocol (VTP) packets that can be processed on an interface.
packets-per-sec Maximum number of packets that can be processed on an interface. When the number of packets is exceeded, the port is put in error-disabled state. Valid values for the packets is from 1 to 4096.
Release Modification
5.0(2) This command was introduced.
Command Description
show l2protocol tunnel Displays Layer 2 protocol tunnel information.
IF-79Cisco Nexus 7000 Series NX-OS Interfaces Command Reference, Release 5.x
OL-23495-01

Send document comments to nexus7k -doc feedback@c isco .com
Cisco NX-OS Interfaces Commandslacp max-bundle
lacp max-bundleTo configure a port channel maximum bundle, use the lacp max-bundle command. To return to the default setting, use the no form of this command.
lacp max-bundle max-bundle-number
no lacp mac-bundle max-bundle-number
Syntax Description
Command Default The default for the port channel max-bundle is 16.
The allowed range is from 1 to 16.
Command Modes Interface configuration mode
Supported User Roles network-adminvdc-admin
Command History
Usage Guidelines This command does not require a License.
Note Even if the default value is 16, the number of active members in a port channel is the minimum number of the maximum bundle configured and the maximum active members that are allowed in the port-channel.
Examples This example shows how to configure port channel maximum bundles:
switch(config)# interface port-channel 1switch(config-if)# lacp max-bundle 2switch(config-if)#
Related Commands
max-bundle-number
Maximum bundle number. The range is from 1 to 16.
Release Modification
5.1(1) This command was introduced.
Command Description
interface Enters the interface configuration mode, and configures the types and identities of interfaces.
IF-80Cisco Nexus 7000 Series NX-OS Interfaces Command Reference, Release 5.x
OL-23495-01

Send document comments to nexus7k -doc feedback@c isco .com
Cisco NX-OS Interfaces Commandslacp min-links
lacp min-linksTo configure the minimum links for a port channel, use the lacp min-links command. To return to the default setting, use the no form of this command.
lacp min-links number
no lacp min-links number
Syntax Description
Defaults The default for the port channel minimum link is 1.
The allowed range is from 1 to 16.
Command Modes Interface configuration mode
Supported User Roles network-adminvdc-admin
Command History
Usage Guidelines This command does not require a license.
Examples This example shows how to configure the minimum link for a port channel:
switch(config)# interface port-channel 1switch(config-if)# lacp min-links 3switch(config-if)#
Related Commands
number Minimum link number. The range is from 1 to 16.
Release Modification
5.1(1) This command was introduced.
Command Description
interface Enters the interface configuration mode, and configures the types and identities of interfaces.
IF-81Cisco Nexus 7000 Series NX-OS Interfaces Command Reference, Release 5.x
OL-23495-01

Send document comments to nexus7k -doc feedback@c isco .com
Cisco NX-OS Interfaces Commandslacp port-priority
lacp port-priority To set the priority for the physical interfaces for the Link Aggregation Control Protocol (LACP), use the lacp port-priority command. To return the port priority to the default value, use the no form of this command.
lacp port-priority priority
no lacp port-priority
Syntax Description
Defaults 32768
Command Modes Interface configuration mode
Supported User Roles network-admin
vdc-admin
Command History
Usage Guidelines Each port configured to use LACP has an LACP port priority. You can accept the default value of 32768 for the LACP port priority, or you can configure a value between 1 and 65535. LACP uses the port priority in combination with the port number to form the port identifier. The port priority is used with the port number to form the port identifier. The port priority is used to decide which ports should be put into standby mode when there is a hardware limitation that prevents all compatible ports from aggregating or when you have more than eight ports configured for the channel group.
When setting the priority, note that a higher number means a lower priority.
This command does not require a license.
Examples This example shows how to set the LACP port priority for the interface to 2000:
switch(config-if)# lacp port-priority 2000
Related Commands
priority Priority for the physical interfaces. The range of valid numbers is from 1 to 65535.
Release Modification
4.0 This command was introduced.
Command Description
show lacp Displays LACP information.
IF-82Cisco Nexus 7000 Series NX-OS Interfaces Command Reference, Release 5.x
OL-23495-01

Send document comments to nexus7k -doc feedback@c isco .com
Cisco NX-OS Interfaces Commandslacp system-priority
lacp system-priority To set the system priority of the device for the Link Aggregation Control Protocol (LACP), use the lacp system-priority command. To return the system priority to the default value, use the no form of this command.
lacp system-priority priority
no lacp system-priority
Syntax Description
Defaults 32768
Command Modes Global configuration mode
Supported User Roles network-admin
vdc-admin
Command History
Usage Guidelines Each device that runs LACP has an LACP system priority value. You can accept the default value of 32768 for this parameter, or you can configure a value between 1 and 65535. LACP uses the system priority with the MAC address to form the system ID and also during negotiation with other systems. The system ID is unique for each virtual device context (VDC).
When setting the priority, note that a higher number means a lower priority.
This command does not require a license.
Examples This example shows how to set the LACP system priority for the device to 2500:
switch(config)# lacp system-priority 2500switch(config)#
Related Commands
priority Priority for the physical interfaces. The range of valid numbers is from 1 to 65535.
Release Modification
4.0 This command was introduced.
Command Description
show lacp Displays LACP information.
show lacp system identifier
Displays information on the LACP system identifier.
IF-83Cisco Nexus 7000 Series NX-OS Interfaces Command Reference, Release 5.x
OL-23495-01

Send document comments to nexus7k -doc feedback@c isco .com
Cisco NX-OS Interfaces Commandslink debounce
link debounce To enable the debounce timer for Ethernet ports and specify a debounce time, use the link debounce command. To disable the timer, use the no form of this command.
link debounce [time milliseconds]
no link debounce
Syntax Description
Defaults Enabled
300 milliseconds
Command Modes Interface configuration mode
Supported User Roles network-adminvdc-admin
Command History
Usage Guidelines Use the link debounce command to enable the debounce timer for Ethernet ports and set it for a specified amount of time in milliseconds. The default debounce time applies when you enter the link debounce command with no arguments.
The range of time is from 1 to 5000 ms. The debounce timer is disabled if you specify the time to 0 ms.
This command does not require a license.
Examples This example shows how to enable the debounce timer and set the debounce time to 1000 ms for the Ethernet port 3/1:
switch# config t switch(config)# interface ethernet 3/1switch(config-if)# link debounce time 1000
This example shows how to disable the debounce timer for the Ethernet port 3/1:
switch# config t switch(config)# interface ethernet 3/1switch(config-if)# no link debounce
time milliseconds (Optional) Specifies the debounce timer for the time you want to specify. The range of time is from 0 to 5000 ms.
Release Modification
4.0 This command was introduced.
IF-84Cisco Nexus 7000 Series NX-OS Interfaces Command Reference, Release 5.x
OL-23495-01

Send document comments to nexus7k -doc feedback@c isco .com
Cisco NX-OS Interfaces Commandslink debounce
Related Commands Command Description
show interface debounce
Displays the debounce time information about the interface.
IF-85Cisco Nexus 7000 Series NX-OS Interfaces Command Reference, Release 5.x
OL-23495-01

Send document comments to nexus7k -doc feedback@c isco .com
Cisco NX-OS Interfaces Commandsload-interval
load-intervalTo change the sampling interval for statistics collections on interfaces, use the load-interval command. To return to the default sampling interval, use the no form of this command.
load-interval [counter {1 | 2 | 3}] seconds
no load-interval [counter {1 | 2 | 3}] [seconds]
Syntax Description
Defaults 1—30 seconds; 60 seconds for VLAN network interface
2—300 seconds
3—not configured
Command Modes Interface configuration mode
Supported User Roles network-adminvdc-admin
Command History
Usage Guidelines Use the load-interval command to obtain bit-rate and packet-rate statistics for three different durations.
You can set the statistics collection intervals on the following types of interfaces:
• Ethernet interfaces
• Port-channel interfaces
• VLAN network interfaces
You cannot use this command on the management interface or subinterfaces.
This command sets the sampling interval for such statistics as packet rate and bit rate on the specified interface.
This command does not require a license.
1 | 2 | 3 Specifies the number of counters configured on the interface.
seconds Specifies the interval between sampling statistics on the interface. The range is from 60 to 300 seconds for VLAN network interfaces, and the range is from 30 to 300 seconds for Ethernet and port-channel interfaces.
Release Modification
4.2(1) This command was introduced.
IF-86Cisco Nexus 7000 Series NX-OS Interfaces Command Reference, Release 5.x
OL-23495-01

Send document comments to nexus7k -doc feedback@c isco .com
Cisco NX-OS Interfaces Commandsload-interval
Examples This example shows how to set the three sample intervals for the Ethernet port 3/1:
switch# config t switch(config)# interface ethernet 3/1switch(config-if)# load-interval counter 1 60switch(config-if)# load-interval counter 2 135switch(config-if)# load-interval counter 3 225
Related Commands Command Description
show interface Displays information about the interface.
IF-87Cisco Nexus 7000 Series NX-OS Interfaces Command Reference, Release 5.x
OL-23495-01

Send document comments to nexus7k -doc feedback@c isco .com
Cisco NX-OS Interfaces Commandsmax-ports
max-ports To assign a maximum possible number of interfaces that a port profile can inherit, use the max-ports command. To return to the default value, use the no form of this command.
max-ports number
no max-ports number
Syntax Description
Defaults None
Command Modes Port-profile configuration mode
Supported User Roles network-admin
vdc-admin
Command History
Usage Guidelines You must be in the port-profile configuration mode in order to issue this command.
You must enable each specific port profile using the state-enabled command.
This command does not require a license.
Examples This example shows how to enter the port-profile configuration mode and to configure the maximum possible number of interfaces that a port profile can inherit:
switch(config)# port-profile type ethernet type testswitch(config-ppm)# max-ports 500
Related Commands
number Maximum number of interfaces that a port profile can inherit. The range is from 1 to 512 ports, and there is no default value.
Release Modification
4.2(1) This command was introduced.
Command Description
state-enabled Enables a specified port profile.
show port-profile Displays information about port profiles.
IF-88Cisco Nexus 7000 Series NX-OS Interfaces Command Reference, Release 5.x
OL-23495-01
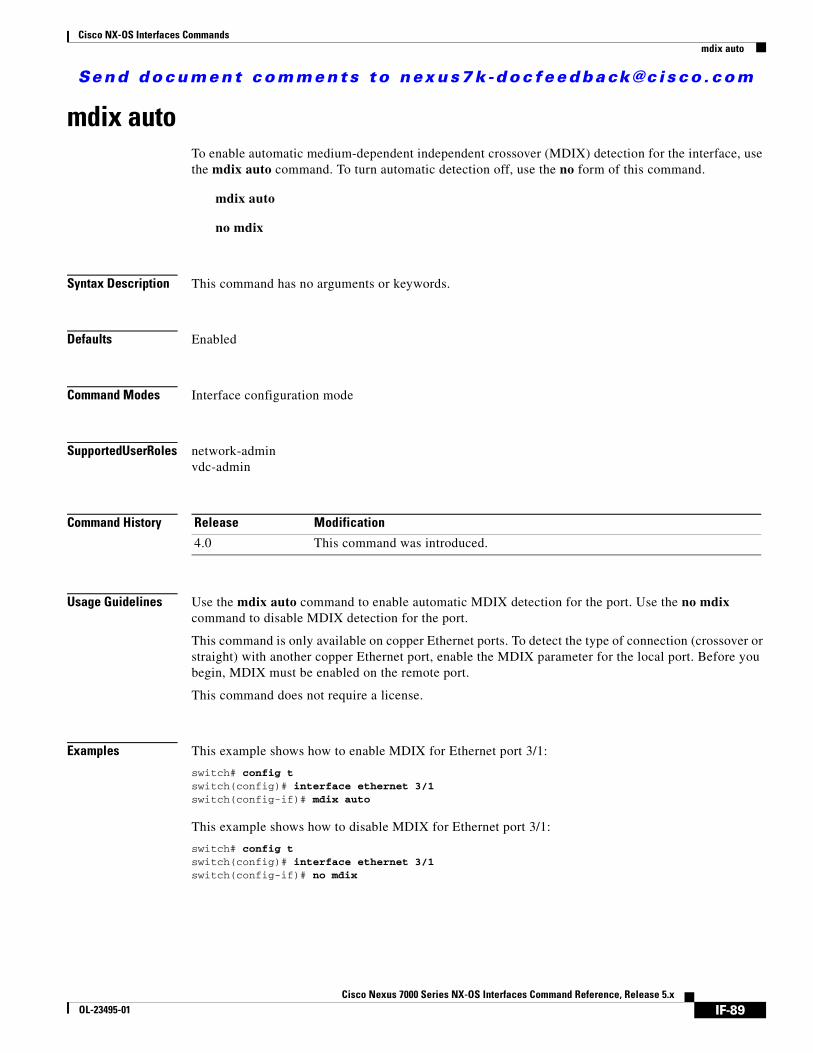
Send document comments to nexus7k -doc feedback@c isco .com
Cisco NX-OS Interfaces Commandsmdix auto
mdix autoTo enable automatic medium-dependent independent crossover (MDIX) detection for the interface, use the mdix auto command. To turn automatic detection off, use the no form of this command.
mdix auto
no mdix
Syntax Description This command has no arguments or keywords.
Defaults Enabled
Command Modes Interface configuration mode
Supported User Roles network-adminvdc-admin
Command History
Usage Guidelines Use the mdix auto command to enable automatic MDIX detection for the port. Use the no mdix command to disable MDIX detection for the port.
This command is only available on copper Ethernet ports. To detect the type of connection (crossover or straight) with another copper Ethernet port, enable the MDIX parameter for the local port. Before you begin, MDIX must be enabled on the remote port.
This command does not require a license.
Examples This example shows how to enable MDIX for Ethernet port 3/1:
switch# config t switch(config)# interface ethernet 3/1switch(config-if)# mdix auto
This example shows how to disable MDIX for Ethernet port 3/1:
switch# config t switch(config)# interface ethernet 3/1switch(config-if)# no mdix
Release Modification
4.0 This command was introduced.
IF-89Cisco Nexus 7000 Series NX-OS Interfaces Command Reference, Release 5.x
OL-23495-01

Send document comments to nexus7k -doc feedback@c isco .com
Cisco NX-OS Interfaces Commandsmdix auto
Related Commands Command Description
show interface Displays information about the interface, which includes the MDIX status.
IF-90Cisco Nexus 7000 Series NX-OS Interfaces Command Reference, Release 5.x
OL-23495-01

Send document comments to nexus7k -doc feedback@c isco .com
Cisco NX-OS Interfaces Commandsmedium
mediumTo set the medium mode for an interface, use the medium command in interface configuration command. To remove the entry, use the no form of this command.
medium {broadcast | p2p}
no medium {broadcast | p2p}
Syntax Description
Defaults None
Command Modes Interface configuration mode
Supported User Roles network-adminvdc-admin
Command History
Usage Guidelines The medium command is used to configure the interface as broadcast or point to point.
This command does not require a license.
Examples This example shows how to configure the interface for point-to-point medium:
switch(config-if)# medium p2p
broadcast Configures the interface as a broadcast medium.
p2p Configures the interface as a point-to-point medium.
Release Modification
4.0 This command was introduced.
IF-91Cisco Nexus 7000 Series NX-OS Interfaces Command Reference, Release 5.x
OL-23495-01

Send document comments to nexus7k -doc feedback@c isco .com
Cisco NX-OS Interfaces Commandsmtu
mtuTo configure the maximum transmission unit (MTU) size for Layer 2 and Layer 3 Ethernet interfaces, use the mtu command. To return to the default value, use the no form of this command.
mtu size
no mtu
Syntax Description
Defaults 1500 bytes
Command Modes Interface configuration mode
Supported User Roles network-adminvdc-admin
Command History
Usage Guidelines Use the mtu size command to configure the MTU size for Layer 2 and Layer 3 Ethernet interfaces.
For Layer 3 interfaces, you can configure the MTU to be between 576 and 9216 bytes (even values are required). For Layer 2 interfaces, you can configure the MTU to be either the system default MTU (1500 bytes) or the system jumbo MTU size (which has the default size of 9216 bytes).
Note You can change the system jumbo MTU size, but if you change that value, you should also update the Layer 2 interfaces that use that value so that they use the new system jumbo MTU value. If you do not update the MTU value for Layer 2 interfaces, those interfaces will use the system default MTU (1500 bytes).
This command does not require a license.
Examples This example shows how to configure the Layer 2 Ethernet port 3/1 with the default MTU size (1500):
switch# config t switch(config)# interface ethernet 3/1switch(config-if)# mtu 1500
size For a Layer 2 interface, specify either the default MTU size (1500) in bytes or the system jumbo MTU size (9216, unless you have changed the default system jumbo size). For a Layer 3 interface, specify any even number between the range of 576 and 9216.
Release Modification
4.0 This command was introduced.
IF-92Cisco Nexus 7000 Series NX-OS Interfaces Command Reference, Release 5.x
OL-23495-01

Send document comments to nexus7k -doc feedback@c isco .com
Cisco NX-OS Interfaces Commandsmtu
Related Commands Command Description
show interface Displays information about the interface, which includes the MTU size.
IF-93Cisco Nexus 7000 Series NX-OS Interfaces Command Reference, Release 5.x
OL-23495-01

Send document comments to nexus7k -doc feedback@c isco .com
Cisco NX-OS Interfaces Commandspeer-gateway
peer-gatewayTo configure the device to send virtual port-channel (vPC) packets to the device’s MAC address, use the peer-gateway command. To return to the default value, use the no form of this command.
peer-gateway
no peer-gateway
Syntax Description This command has no arguments or keywords.
Defaults None
Command Modes vpc-domain configuration mode
Supported User Roles network-adminvdc-admin
Command History
Usage Guidelines Use the peer-gateway command to have a vPC peer device act as the gateway even for packets that are destined to the vPC peer device’s MAC address.
This command does not require a license.
Examples This example shows how to configure the device to use the switch gateway even for the packets that are destined the vPC:
switch# config t switch(config)# vpc-domain 5switch(config-vpc-domain)# peer-gateway
Related Commands
Release Modification
4.2(1) This command was introduced.
Command Description
vpc-domain Configures a vPC domain and enters the vpc-domain configuration mode.
IF-94Cisco Nexus 7000 Series NX-OS Interfaces Command Reference, Release 5.x
OL-23495-01
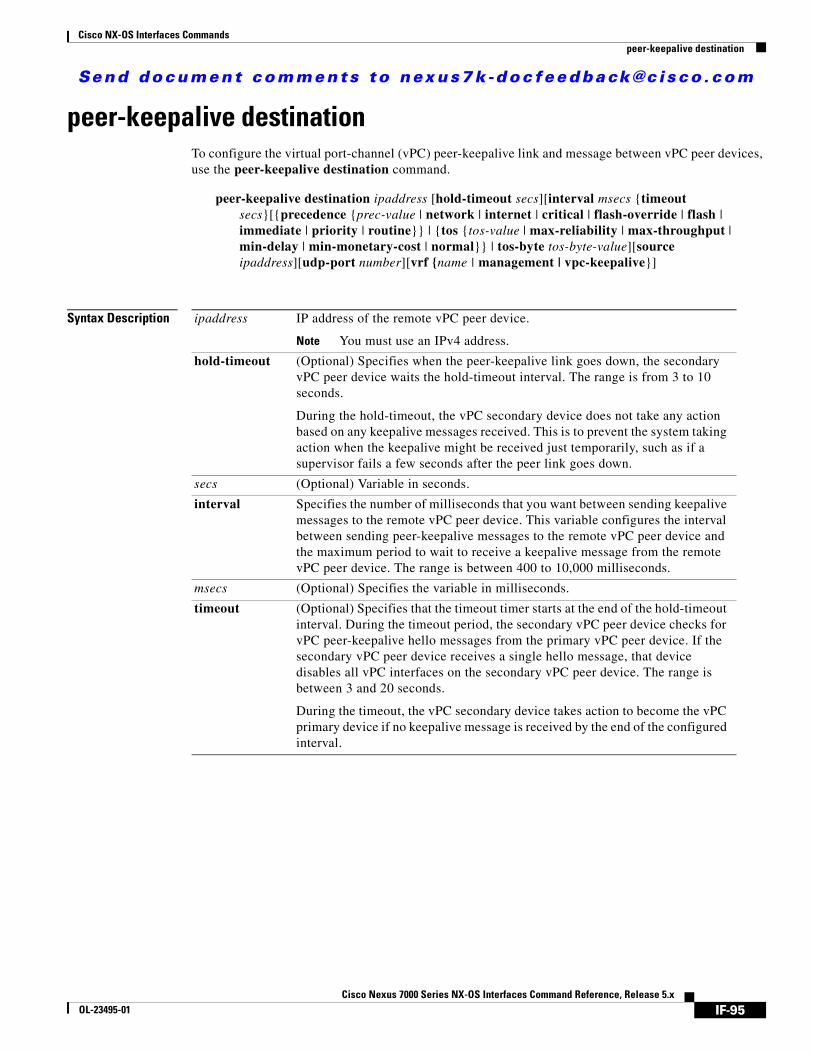
Send document comments to nexus7k -doc feedback@c isco .com
Cisco NX-OS Interfaces Commandspeer-keepalive destination
peer-keepalive destinationTo configure the virtual port-channel (vPC) peer-keepalive link and message between vPC peer devices, use the peer-keepalive destination command.
peer-keepalive destination ipaddress [hold-timeout secs][interval msecs {timeout secs}[{precedence {prec-value | network | internet | critical | flash-override | flash | immediate | priority | routine}} | {tos {tos-value | max-reliability | max-throughput | min-delay | min-monetary-cost | normal}} | tos-byte tos-byte-value][source ipaddress][udp-port number][vrf {name | management | vpc-keepalive}]
Syntax Description ipaddress IP address of the remote vPC peer device.
Note You must use an IPv4 address.
hold-timeout (Optional) Specifies when the peer-keepalive link goes down, the secondary vPC peer device waits the hold-timeout interval. The range is from 3 to 10 seconds.
During the hold-timeout, the vPC secondary device does not take any action based on any keepalive messages received. This is to prevent the system taking action when the keepalive might be received just temporarily, such as if a supervisor fails a few seconds after the peer link goes down.
secs (Optional) Variable in seconds.
interval Specifies the number of milliseconds that you want between sending keepalive messages to the remote vPC peer device. This variable configures the interval between sending peer-keepalive messages to the remote vPC peer device and the maximum period to wait to receive a keepalive message from the remote vPC peer device. The range is between 400 to 10,000 milliseconds.
msecs (Optional) Specifies the variable in milliseconds.
timeout (Optional) Specifies that the timeout timer starts at the end of the hold-timeout interval. During the timeout period, the secondary vPC peer device checks for vPC peer-keepalive hello messages from the primary vPC peer device. If the secondary vPC peer device receives a single hello message, that device disables all vPC interfaces on the secondary vPC peer device. The range is between 3 and 20 seconds.
During the timeout, the vPC secondary device takes action to become the vPC primary device if no keepalive message is received by the end of the configured interval.
IF-95Cisco Nexus 7000 Series NX-OS Interfaces Command Reference, Release 5.x
OL-23495-01

Send document comments to nexus7k -doc feedback@c isco .com
Cisco NX-OS Interfaces Commandspeer-keepalive destination
Defaults Peer-keepalive is disabled.
Hold-timeout is 3 seconds.
Interval is 1000 milliseconds.
Timeout is 5 seconds.
Precedence is default, with a level of 6 (internet).
UDP port is 3200.
VRF is management VRF.
Command Modes vpc-domain configuration mode
precedence (Optional) Specifies the precedence value for the peer-keepalive message. Valid values are as follows:
• 0 to 7
• network (7)
• internet (6)
• critical (5)
• flash-override (4)
• flash (3)
• immediate (2)
• priority (1)
• routine (0)
tos (Optional) Specifies the precedence, or ToS value, for the peer-keepalive message. Valid values are as follows:
• 0, 1, 2, 4, 8
• max-reliability (2)
• max-throughput (4)
• min-delay (8)
• min-monetary-cost (1)
• normal (0)
Note The only valid values are shown here.
tos-byte (Optional) Specifies the precedence, or 8-bit ToS value, for the peer-keepalive message. The higher the numerical value, indicates the higher throughput priority. The range is from 0 to 255.
source (Optional) Specifies the IP address of the local vPC peer device.
Note Must be an IPv4 address.
number (Optional) Number of the UDP port to send and receive the vPC peer-keepalive messages. The range is from 1024 to 6500.
name (Optional) Name of Virtual Routing and Forwarding (VRF) that you want to use for the vPC peer-keepalive link and messages.
IF-96Cisco Nexus 7000 Series NX-OS Interfaces Command Reference, Release 5.x
OL-23495-01

Send document comments to nexus7k -doc feedback@c isco .com
Cisco NX-OS Interfaces Commandspeer-keepalive destination
Supported User Roles network-admin
vdc-admin
Command History
Usage Guidelines You must enable the vPC feature before you can configure the peer-keepalive parameters. The vPC keepalive messages notify the system if one of the vPC peer devices goes down.
Note You must configure the peer-keepalive messages on each of the vPC peer devices to enable the functionality.
Although the keepalive messages can transmit over any Layer 3 topology, we recommend that you create and configure a separate VRF with Layer 3 ports on each vPC peer device as the source and destination for the vPC keepalive messages. The default ports and VRF for the peer-alive link are the management ports and the management VRF. Do not use the peer link itself for the vPC peer-keepalive messages.
Note Ensure that both the source and destination IP addresses used for the peer-keepalive messages are unique in your network.
The vPC keepalive messages are IP/UDP messages.
This command accepts only IPv4 addresses.
Note You must configure the peer-keepalive messages on each of the vPC peer devices to enable the functionality.
The device assumes that its vPC peer device is down when the device does not receive any messages from the peer during the timeout period. We recommend that you configure the timeout value to be three times the interval value.
You can configure either the precedence, tos, or tos-byte value to ensure throughput for the vPC peer-keepalive message.
Note We recommend that you create a separate VRF and assign a Layer 3 port on each vPC peer device for the peer-keepalive link.
This command does not require a license.
Examples This example shows how to configure the IP address of the remote vPC peer device for the fault-tolerant link:
switch(config-vpc-domain)# peer-keepalive destination 172.28.231.85
Release Modification
4.1(3) This command was introduced.
IF-97Cisco Nexus 7000 Series NX-OS Interfaces Command Reference, Release 5.x
OL-23495-01

Send document comments to nexus7k -doc feedback@c isco .com
Cisco NX-OS Interfaces Commandspeer-keepalive destination
Related Commands Command Description
show running-config vpc all
Displays information on vPC peer-keepalive status. If the feature is not enabled, the system displays an error when you enter this command.
show vpc peer-keepalive
Displays information on vPC peer-keepalive status. If the feature is not enabled, the system displays an error when you enter this command.
IF-98Cisco Nexus 7000 Series NX-OS Interfaces Command Reference, Release 5.x
OL-23495-01

Send document comments to nexus7k -doc feedback@c isco .com
Cisco NX-OS Interfaces Commandspeer-switch
peer-switchTo enable the virtual port channel (vPC) switch pair to appear as a single Spanning Tree Protocol (STP) root in the Layer 2 topology, use the peer-switch command. To disable the peer switch vPC topology, use the no form of this command.
peer-switch
no peer-switch
Syntax Description This command has no arguments or keywords.
Defaults Peer switch Layer 2 topology is disabled.
Command Modes vPC domain configuration mode
Supported User Roles network-adminvdc-admin
Command History
Usage Guidelines This command does not require a license.
Examples This example shows how to enable the vPC switch pair to appear as a single STP root in the Layer 2 topology:
switch(config)# vpc domain 5 switch(config-vpc-domain)# peer-switch 2010 Apr 28 14:44:44 switch %STP-2-VPC_PEERSWITCH_CONFIG_ENABLED: vPC peer-switch configuration is enabled. Please make sure to configure spanning tree "bridge" priority as per recommended guidelines to make vPC peer-switch operational.
Related Commands
Release Modification
5.0(2) This command was introduced.
Command Description
vpc domain Creates a virtual port-channel (vPC) domain.
IF-99Cisco Nexus 7000 Series NX-OS Interfaces Command Reference, Release 5.x
OL-23495-01

Send document comments to nexus7k -doc feedback@c isco .com
Cisco NX-OS Interfaces Commandsport-channel load-balance ethernet
port-channel load-balance ethernet To set the load-balancing method among the interfaces in the channel-group bundle, use the port-channel load-balance ethernet command. To return the system priority to the default value, use the no form of this command.
port-channel load-balance ethernet method [module slot]
no port-channel load-balance ethernet [method [module slot]]
Syntax Description
Defaults Layer 2 packets—src-dst-mac
Layer 3 packets—src-dst-ip
Command Modes Global configuration mode
Supported User Roles network-admin
vdc-admin
Command History
Usage Guidelines When you do not specify a module, you are configuring load balancing for the entire device. When you use the module parameter, you are configuring load balancing for the specified modules
Valid method values are as follows:
• dst-ip—Loads distribution on the destination IP address.
• dst-mac—Loads distribution on the destination MAC address.
• dst-port—Loads distribution on the destination port.
• src-dst-ip—Loads distribution on the source XOR-destination IP address.
• src-dst-mac—Loads distribution on the source XOR-destination MAC address.
• src-dst-port—Loads distribution on the source XOR-destination port.
• src-ip—Loads distribution on the source IP address.
• src-mac—Loads distribution on the source MAC address.
• src-port—Loads distribution on the source port.
method Load-balancing method. See the “Usage Guidelines” section for a list of valid values.
module slot (Optional) Specifies the module slot number.
Release Modification
4.0 This command was introduced.
IF-100Cisco Nexus 7000 Series NX-OS Interfaces Command Reference, Release 5.x
OL-23495-01

Send document comments to nexus7k -doc feedback@c isco .com
Cisco NX-OS Interfaces Commandsport-channel load-balance ethernet
Note You cannot configure load balancing using port channels per VDC. You must be in the default VDC to configure this feature; if you attempt to configure this feature from another VDC, the system returns an error.
Use the module argument to configure the module independently for port-channeling and load-balancing mode. When you do this, the remaining module use the current load-balancing method configured for the entire device, or the default method if you have not configured a method for the entire device. When you enter the no argument in conjunction with a module argument, the load-balancing method for the specified module takes the current load-balancing method that is in use for the entire device. If you configured a load-balancing method for the entire device, the specified module uses that configured method, rather than the default src-dst-ip/src-dst-mac. The per module configuration takes precedence over the load-balancing method configured for the entire device.
You can configure one load-balancing mode for the entire device, a different mode for specified modules, and yet another mode for other specified modules. The per module configuration takes precedence over the load balancing configuration for the entire device.
Use the option that provides the balance criteria with the greatest variety in your configuration. For example, if the traffic on a port channel is going only to a single MAC address and you use the destination MAC address as the basis of port channel load balancing, the port channel always chooses the same link in that port channel; using source addresses or IP addresses might result in better load balancing.
This command does not require a license.
Examples This example shows how to set the load-balancing method for the entire device to use the source port:
switch(config)# port-channel load-balance ethernet src-port
Related Commands Command Description
show port-channel load-balance
Displays information on port-channel load balancing.
IF-101Cisco Nexus 7000 Series NX-OS Interfaces Command Reference, Release 5.x
OL-23495-01
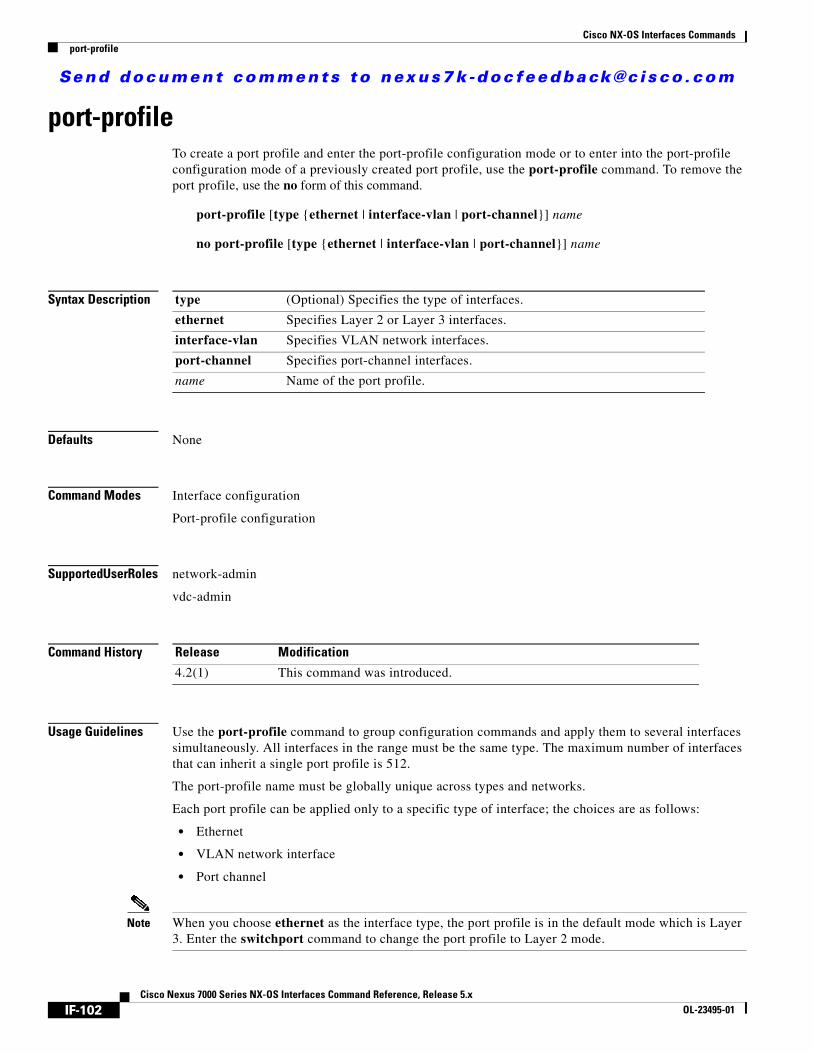
Send document comments to nexus7k -doc feedback@c isco .com
Cisco NX-OS Interfaces Commandsport-profile
port-profileTo create a port profile and enter the port-profile configuration mode or to enter into the port-profile configuration mode of a previously created port profile, use the port-profile command. To remove the port profile, use the no form of this command.
port-profile [type {ethernet | interface-vlan | port-channel}] name
no port-profile [type {ethernet | interface-vlan | port-channel}] name
Syntax Description
Defaults None
Command Modes Interface configuration
Port-profile configuration
Supported User Roles network-admin
vdc-admin
Command History
Usage Guidelines Use the port-profile command to group configuration commands and apply them to several interfaces simultaneously. All interfaces in the range must be the same type. The maximum number of interfaces that can inherit a single port profile is 512.
The port-profile name must be globally unique across types and networks.
Each port profile can be applied only to a specific type of interface; the choices are as follows:
• Ethernet
• VLAN network interface
• Port channel
Note When you choose ethernet as the interface type, the port profile is in the default mode which is Layer 3. Enter the switchport command to change the port profile to Layer 2 mode.
type (Optional) Specifies the type of interfaces.
ethernet Specifies Layer 2 or Layer 3 interfaces.
interface-vlan Specifies VLAN network interfaces.
port-channel Specifies port-channel interfaces.
name Name of the port profile.
Release Modification
4.2(1) This command was introduced.
IF-102Cisco Nexus 7000 Series NX-OS Interfaces Command Reference, Release 5.x
OL-23495-01

Send document comments to nexus7k -doc feedback@c isco .com
Cisco NX-OS Interfaces Commandsport-profile
A subset of commands are available under the port-profile configuration mode, depending on which interface type you specify. Layer 3 and CTS commands are not supported by port profiles.
You can configure the following port-profile operations:
• Create port profiles
• Delete port profiles
• Add commands to and delete commands from port profiles
• Inherit port profiles at interfaces
• Enable and disable port profiles
• Inheritance between port profiles
• Configure maximum number of ports that a profile can inherit
You inherit the port profile when you attach the port profile to an interface or range of interfaces. The maximum number of interfaces that can inherit a single profile is 512. When you attach, or inherit, a port profile to an interface or range of interfaces, the system applies all the commands in that port profile to the interfaces.
Additionally, you can have one port profile inherit another port profile, which allows the initial port profile to assume all of the commands of the second, inherited, port profile that do not conflict with the initial port profile. Four levels of inheritance are supported except for the switchport private-vlan mapping and private-vlan mapping commands, which support only one level of inheritance. See the inherit port-profile command for information about inheriting an additional port profile and assigning port profiles to specified interfaces.
The system applies the commands inherited by the interface or range of interfaces according to the following guidelines:
• Commands that you enter under the interface mode take precedence over the port profile’s commands if there is a conflict. However, the port profile retains that command in the port profile.
• The port profile’s commands take precedence over default commands on the interface, unless it is explicitly overridden by the default command.
• When a range of interfaces inherits a second port profile, the commands of the initial port profile override those commands of the second port profile if there is a conflict.
• After you inherit a port profile onto an interface or range of interfaces, you can override individual configuration values by entering the new value at the interface configuration level. If you then remove the individual configuration values at the interface configuration level, the interface again uses the values in the port profile again.
• There are no default configurations associated with a port profile.
Note You cannot use port profiles with Session Manager. See the Cisco Nexus 7000 Series NX-OS System Management Configuration Guide, Release 5.x, for information on Session Manager.
If you delete a specific configuration for a specified range of interfaces using the interface configuration mode, that configuration is also deleted from the port profile for that range of interfaces only. For example, if you have a channel group inside a port profile and you are in the interface configuration mode and you delete that port channel, the specified port channel is also deleted from the port profile as well.
Just as in the device, you can enter a configuration for an object in port profiles without that object being applied to interfaces yet. For example, you can configure a virtual routing and forward instance (VRF) without it being applied to the system. If you then delete that VRF and its configurations from the port profile, the system is unaffected.
IF-103Cisco Nexus 7000 Series NX-OS Interfaces Command Reference, Release 5.x
OL-23495-01

Send document comments to nexus7k -doc feedback@c isco .com
Cisco NX-OS Interfaces Commandsport-profile
After you inherit a port profile on an interface or range of interfaces and you delete a specific configuration value, that port-profile configuration will not operate on the specified interfaces.
You must enable each specific port profile using the state-enabled command.
This command does not require a license.
Examples This example shows how to configure, name a port profile, and enter the port-profile configuration mode:
switch(config)# port-profile type ethernet testswitch(config-ppm)#
Related Commands Command Description
state-enable Enables a specified port profile.
show port-profile Displays information about port profiles.
IF-104Cisco Nexus 7000 Series NX-OS Interfaces Command Reference, Release 5.x
OL-23495-01

Send document comments to nexus7k -doc feedback@c isco .com
Cisco NX-OS Interfaces Commandsrate-mode dedicated
rate-mode dedicatedTo set the dedicated rate mode for the specified ports, use the rate-mode dedicated command.
rate-mode dedicated
no rate-mode
Syntax Description This command has no arguments or keywords.
Defaults Shared rate mode is the default.
Command Modes Interface configuration mode
Supported User Roles network-adminvdc-admin
Command History
Usage Guidelines Use the rate-mode dedicated command to set the dedicated rate mode for the specified ports.
On a 32-port 10-Gigabit Ethernet module, each set of four ports can handle 10 gigabits per second (Gb/s) of bandwidth. You can use the rate-mode parameter to dedicate that bandwidth to the first port in the set of four ports or share the bandwidth across all four ports.
Note When you dedicate the bandwidth to one port, you must first administratively shut down the ports in the group, change the rate mode to dedicated, and then bring the dedicated port administratively up.
Table 2 identifies the ports that are grouped together to share each 10 Gb/s of bandwidth and which port in the group can be dedicated to utilize the entire bandwidth.
Release Modification
4.0 This command was introduced.
Table 2 Dedicated and Shared Ports
Ports Groups that Can Share Bandwidth
Ports that Can be Dedicated to Each 10-Gigabit Ethernet of Bandwidth
1, 3, 5, 7 1
2, 4, 6, 8 2
9, 11, 13, 15 9
IF-105Cisco Nexus 7000 Series NX-OS Interfaces Command Reference, Release 5.x
OL-23495-01

Send document comments to nexus7k -doc feedback@c isco .com
Cisco NX-OS Interfaces Commandsrate-mode dedicated
Note All ports in each port group must be part of the same virtual device context (VDC). For more information on VDCs, see the Cisco Nexus 7000 Series NX-OS Virtual Device Context Configuration Guide, Release 5.x.
When you enter the rate-mode dedicated command, the full bandwidth of 10 Gb is dedicated to one port. When you dedicate the bandwidth, all subsequent commands for the port are for dedicated mode.
This command does not require a license.
Examples This example shows how to configure the dedicated rate mode for Ethernet ports 4/17, 4/19, 4/21, and 4/23:
switch# config t switch(config)# interface ethernet 4/17, ethernet 4/19, ethernet 4/21, ethernet 4/23switch(config-if)# shutdownswitch(config-if)# interface ethernet 4/17switch(config-if)# rate-mode dedicatedswitch(config-if)# no shutdown
Related Commands
10, 12, 14, 16 10
17, 19, 21, 23 17
18, 20, 22, 24 18
25, 27, 29, 31 25
26, 28, 30, 32 26
Table 2 Dedicated and Shared Ports
Ports Groups that Can Share Bandwidth
Ports that Can be Dedicated to Each 10-Gigabit Ethernet of Bandwidth
Command Description
show interface Displays interface information, which includes the current rate mode dedicated.
IF-106Cisco Nexus 7000 Series NX-OS Interfaces Command Reference, Release 5.x
OL-23495-01

Send document comments to nexus7k -doc feedback@c isco .com
Cisco NX-OS Interfaces Commandsrate-mode shared
rate-mode sharedTo set the shared rate mode for the specified ports, use the rate-mode shared command.
rate-mode shared
Syntax Description This command has no arguments or keywords.
Defaults Shared rate mode is the default.
Command Modes Interface configuration mode
Supported User Roles network-adminvdc-admin
Command History
Usage Guidelines Use the rate-mode shared command to set the shared rate mode for the specified ports. This is the default rate mode for the module.
That is, use the rate-mode shared command to specify that each 10 Gb of bandwidth on a 32-port 10 GE Ethernet module is shared by ports in the same port group.
If the port group is in dedicated rate mode, you must first administratively shut down the ports in the group, change the rate mode to shared, and then bring the ports administratively up.
This command does not require a license.
Examples This example shows how to configure the shared rate mode for Ethernet ports 4/17, 4/19, 4/21, and 4/23:
switch# config t switch(config)# interface ethernet 4/17, ethernet 4/19, ethernet 4/21, ethernet 4/23switch(config-if)# shutdownswitch(config-if)# interface ethernet 4/17switch(config-if)# rate-mode sharedswitch(config-if)# no shutdown
Related Commands
Release Modification
4.0 This command was introduced.
Command Description
show interface Displays interface information, which includes the current rate mode shared.
IF-107Cisco Nexus 7000 Series NX-OS Interfaces Command Reference, Release 5.x
OL-23495-01

Send document comments to nexus7k -doc feedback@c isco .com
Cisco NX-OS Interfaces Commandsreload fex
reload fex To reload a Fabric Extender, use the reload fex command.
reload fex chassis-id all
Syntax Description
Defaults None
Command Modes Global configuration mode
Command History
Usage Guidelines This command does not require a license.
Examples This example shows how to reload all FEX modules:
switch(config)# reload fex allWARNING: This command will reboot all FEX modulesDo you want to continue? (y/n) [n] yqadc3-ind30(config)# 2010 Sep 6 13:13:24 qadc3-ind30 %CALLHOME-2-EVENT: FEX_OFFLINE2010 Sep 6 13:13:25 qadc3-ind30 %FEX-2-NOHMS_ENV_FEX_OFFLINE: FEX-101 Off-line(Serial Number JAF1407AANJ)switch(config)#
This example shows how to reload a specific FEX:
switch(config)# reload fex 101WARNING: This command will reboot FEX module 101Do you want to continue? (y/n) [n] yqadc3-ind30(config)# 2010 Sep 6 13:11:36 qadc3-ind30 %CALLHOME-2-EVENT: FEX_OFFLINE2010 Sep 6 13:11:37 qadc3-ind30 %VNTAG_MGR-2-VNTAG_SEQ_ERROR: Failed to send message to FEX slot(33) Chassis (101) - Error Connection timed out. Ignore if FEXis going offline2010 Sep 6 13:11:38 qadc3-ind30 %FEX-2-NOHMS_ENV_FEX_OFFLINE: FEX-101 Off-line(Serial Number JAF1407AANJ)switch(config)#
Related Commands
chassis-id Fabric Extender chassis ID. The chassis ID range is from 100 to 199.
all Reloads all FEX modules.
Release Modification
5.1(1) This command was introduced.
Command Description
show fex Displays all configured Fabric Extender chassis connected to the switch.
IF-108Cisco Nexus 7000 Series NX-OS Interfaces Command Reference, Release 5.x
OL-23495-01

Send document comments to nexus7k -doc feedback@c isco .com
Cisco NX-OS Interfaces Commandsreload restore
reload restoreTo configure a virtual port channel (vPC) device to assume its peer is not functional and to bring up the vPC, use the reload restore command. To reset the vPC to the standard behavior, use the no form of this command.
reload restore [delay time-out]
no reload restore
Syntax Description
Defaults Delay of 240 seconds
Command Modes vPC domain configuration mode
Supported User Roles network-adminvdc-admin
Command History
Usage Guidelines This command does not require a license.
Examples This example shows how to configure a vPC device to assume its peer is not functional and to bring up the vPC:
switch(config)# vpc domain 5 switch(config-vpc-domain)# reload restore Warning:Enables restoring of vPCs in a peer-detached state after reload, will wait for 240
seconds (by default) to determine if peer is un-reachable
Related Commands
delay time-out (Optional) Sets the time-out that the vPC device will wait. The default delay is 240 seconds. The range is from 240 to 3600 seconds.
Release Modification
5.0(2) This command was introduced.
Command Description
vpc domain Creates a virtual port-channel (vPC) domain.
IF-109Cisco Nexus 7000 Series NX-OS Interfaces Command Reference, Release 5.x
OL-23495-01

Send document comments to nexus7k -doc feedback@c isco .com
Cisco NX-OS Interfaces Commandsrole priority
role priorityTo override the default selection of virtual port-channel (vPC) primary and secondary devices when you create a vPC domain, use the role priority command. To return to the default vPC system priority, use the no form of this command.
role priority priority
no role priority
Syntax Description
Defaults 32667
Command Modes vpc-domain command mode.
Supported User Roles network-admin
vdc-admin
Command History
Usage Guidelines You must enable the vPC feature before you can create a vPC system priority
By default, the system elects a primary and secondary vPC peer device after you configure the vPC domain and both sides of the vPC peer link. However, you may want the system to elect a specific vPC peer device as the primary device for the vPC. Then, you would manually configure the role value for the vPC peer device that you want as primary to be lower than that of the other vPC peer device.
This command does not require a license.
Examples This example shows how to create a vPC role priority:
switch# config t switch(config)# vpc domain 5switch(config-vpc-domain)# role priority 2000
Related Commands
priority Role priority. The range is from 1 to 65636.
Release Modification
4.1(3) This command was introduced.
Command Description
show vpc role Displays the role for this device for the vPC domain as primary or secondary.
IF-110Cisco Nexus 7000 Series NX-OS Interfaces Command Reference, Release 5.x
OL-23495-01
Send document comments to nexus7k -doc feedback@c isco .com
Cisco NX-OS Interfaces Commandsserial
serial To assign a serial number to a Fabric Extender (FEX), use the serial command. To remove the serial number, use the no form of this command.
serial serial-string
no serial
Syntax Description
Defaults None
Command Modes Fabric Extender configuration mode
Command History
Usage Guidelines The serial number string that you define must match the serial number of the Fabric Extender. If you configure a serial number and then you use the fex associate command to associate the corresponding chassis ID to the switch, the association succeeds only if the Fabric Extender reports a matching serial number string.
Examples This example shows how to specify a serial number for a Fabric Extender:
switch# configure terminal switch(config)# fex 101 switch(config-fex)# serial Rack16_FEX101
This example shows how to remove a serial number from a Fabric Extender:
switch# configure terminal switch(config)# fex 101 switch(config-fex)# no serial
Related Commands
serial-string Serial number string for the Fabric Extender. The string is alphanumeric, case sensitive, and has a maximum length of 20 characters.
Release Modification
5.1(1) This command was introduced.
Command Description
fex Creates a Fabric Extender and enters fabric extender configuration mode.
show fex Displays all configured Fabric Extender chassis connected to the switch.
IF-111Cisco Nexus 7000 Series NX-OS Interfaces Command Reference, Release 5.x
OL-23495-01
Send document comments to nexus7k -doc feedback@c isco .com
Cisco NX-OS Interfaces Commandsshow bfd neighbors
show bfd neighbors To display information about Bidirectional Forwarding Detection (BFD) neighbors, use the show bfd neighbors command.
show bfd neighbors [application name | {dest-ip | src-ip} ipaddr interface int-if] [vrf vrf-name] [details]
Syntax Description
Defaults None
Command Modes Any
Command History
Usage Guidelines Use the show bfd neighbors command to display information about BFD sessions. If you use the applications keyword, the application name is one of the following:
• bfd_app
• bgp
• eigrp
• hsrp
• isis
• ospf
• pim
• static
application name (Optional) Displays BFD information for the named protocol that BFD is enabled on.
dest-ip ipaddr (Optional) Displays BFD information for the destination IP address. The IP address is in dotted decimal notation for IPv4 and in A:B::C:D format for IPv6.
src-ip ipaddr (Optional) Displays BFD information for the source IP address. The IP address is in dotted decimal notation for IPv4 and in A:B::C:D format for IPv6.
interface int-if (Optional) Displays BFD information for the interface. Use the ? keyword to display a list of supported interfaces.
vrf vrf-name (Optional) Displays BFD information for the virtual routing and forwarding (VRF) instance.
details (Optional) Displays detailed BFD information.
Release Modification
5.0(2) This command was introduced.
IF-112Cisco Nexus 7000 Series NX-OS Interfaces Command Reference, Release 5.x
OL-23495-01

Send document comments to nexus7k -doc feedback@c isco .com
Cisco NX-OS Interfaces Commandsshow bfd neighbors
This command does not require a license.
Examples This example shows how to display the output from the show bfd neighbors command:
switch# show bfd neighbors
OurAddr NeighAddr LD/RD RH/RS Holdown(mult) State Int10.0.0.2 10.0.0.1 1124073474/1107296257 Up 582(3) Up Po10
This example shows how to display the output from the show bfd neighbors application details command for BFD:
switch# show bfd neighbors application bfd_app details
OurAddr NeighAddr LD/RD RH/RS Holdown(mult) State Int1.1.1.2 1.1.1.1 1090519041/1107296257 Up 137(3) Up Eth4/37
Session state is Up and not using echo functionLocal Diag: 0, Demand mode: 0, Poll bit: 0MinTxInt: 50000 us, MinRxInt: 50000 us, Multiplier: 3Received MinRxInt: 50000 us, Received Multiplier: 3Holdown (hits): 150 ms (2), Hello (hits): 50 ms (1232223)Rx Count: 1267540, Rx Interval (ms) min/max/avg: 0/1789/44 last: 12 ms agoTx Count: 1232223, Tx Interval (ms) min/max/avg: 41/41/41 last: 13 ms agoRegistered protocols: bfd_appUptime: 0day 15hour 5minute 8second 430msLast packet: Version: 1 - Diagnostic: 0
State bit: Up - Demand bit: 0Poll bit: 0 - Final bit: 0Multiplier: 3 - Length: 24My Discr.: 1107296257 - Your Discr.: 1090519041Min tx interval: 50000 - Min rx interval: 50000Min Echo interval: 0
Table 3 describes the significant fields shown in the display.
Table 3 show bfd neighbors Field Descriptions
Field Description
OurAddr IP address of the interface for which the show bfd neighbors command was entered.
NeighAddr IPv4 or IPv6 address of the BFD adjacency or neighbor.
LD/RD Local discriminator and remote discriminator being used for the session.
RH Remote Heard—Indicates that the remote BFD neighbor has been heard.
Holdown(mult) Detect timer multiplier that is used for this session.
State State of the interface—Up or Down.
Int Interface type and slot/port.
Session state is UP and not using echo function
BFD is up and not running in echo mode.
IF-113Cisco Nexus 7000 Series NX-OS Interfaces Command Reference, Release 5.x
OL-23495-01

Send document comments to nexus7k -doc feedback@c isco .com
Cisco NX-OS Interfaces Commandsshow bfd neighbors
RX Count Number of BFD control packets that have been received from the BFD neighbor.
TX Count Number of BFD control packets that have been sent by the BFD neighbor.
TX Interval Interval, in milliseconds, between sent BFD packets.
Registered protocols Routing protocols that have been registered with BFD.
Last packet: Version: BFD version detected and run between the BFD neighbors.
Diagnostic Diagnostic code specifying the local system’s reason for the last transition of the session from Up to some other state.
State values are as follows:
• 0—No Diagnostic
• 1—Control Detection Time Expired
• 2—Echo Function Failed
• 3—Neighbor Signaled Session Down
• 4—Forwarding Plane Reset
• 5—Path Down
• 6—Concentrated Path Down
• 7—Administratively Down
Demand bit Demand Mode bit. If set, the transmitting system wants to operate in demand mode. BFD has two modes—asynchronous and demand. The Cisco implementation of BFD supports only asynchronous mode.
Poll bit Poll bit. If the Poll bit is set, the transmitting system is requesting verification of connectivity or of a parameter change.
Final bit Final bit. If the Final bit is set, the transmitting system is responding to a received BFD control packet that had a Poll (P) bit set.
Multiplier Detect time multiplier. The negotiated transmit interval, multiplied by the detect time multiplier, determines the detection time for the transmitting system in BFD asynchronous mode.
The detect time multiplier is similar to the hello multiplier in Intermediate System-to-Intermediate System (IS-IS), which is used to determine the hold timer: (hello interval) * (hello multiplier) = hold timer. If a hello packet is not received within the hold-timer interval, a failure has occurred.
Similarly, for BFD: (transmit interval) * (detect multiplier) = detect timer. If a BFD control packet is not received from the remote system within the detect-timer interval, a failure has occurred.
Length Length of the BFD control packet, in bytes.
My Discr. My Discriminator. Unique, nonzero discriminator value generated by the transmitting system used to demultiplex multiple BFD sessions between the same pair of systems.
Table 3 show bfd neighbors Field Descriptions (continued)
Field Description
IF-114Cisco Nexus 7000 Series NX-OS Interfaces Command Reference, Release 5.x
OL-23495-01
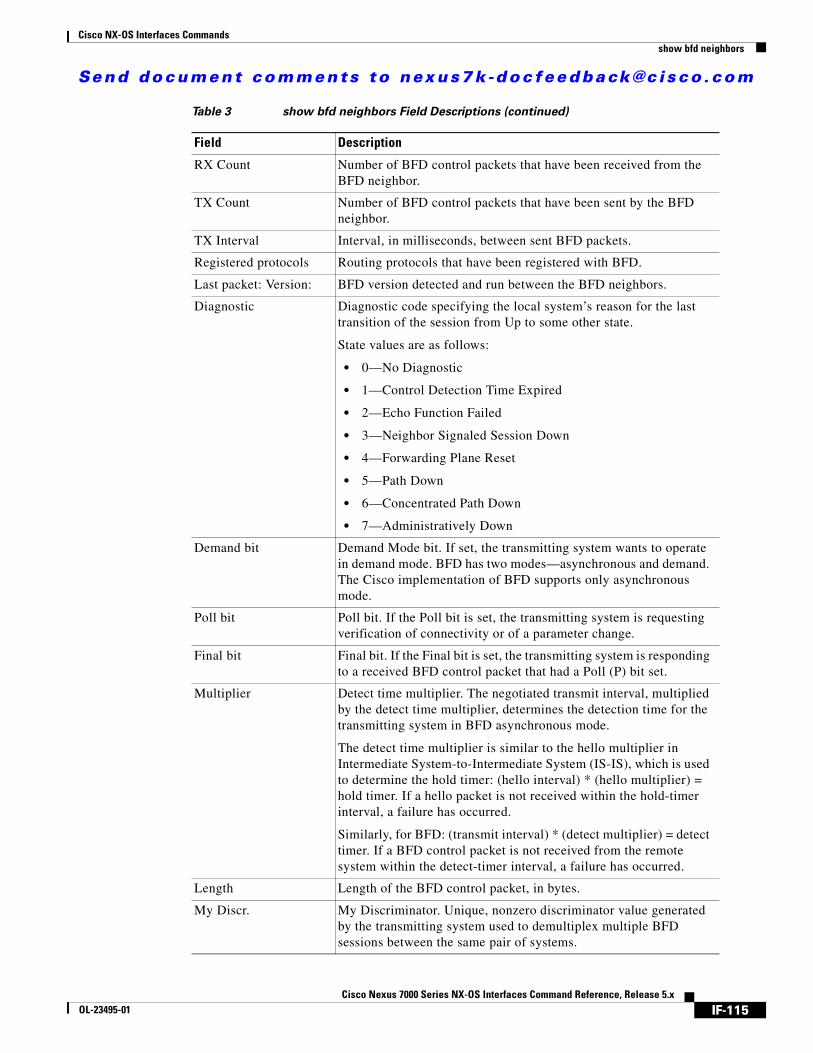
Send document comments to nexus7k -doc feedback@c isco .com
Cisco NX-OS Interfaces Commandsshow bfd neighbors
RX Count Number of BFD control packets that have been received from the BFD neighbor.
TX Count Number of BFD control packets that have been sent by the BFD neighbor.
TX Interval Interval, in milliseconds, between sent BFD packets.
Registered protocols Routing protocols that have been registered with BFD.
Last packet: Version: BFD version detected and run between the BFD neighbors.
Diagnostic Diagnostic code specifying the local system’s reason for the last transition of the session from Up to some other state.
State values are as follows:
• 0—No Diagnostic
• 1—Control Detection Time Expired
• 2—Echo Function Failed
• 3—Neighbor Signaled Session Down
• 4—Forwarding Plane Reset
• 5—Path Down
• 6—Concentrated Path Down
• 7—Administratively Down
Demand bit Demand Mode bit. If set, the transmitting system wants to operate in demand mode. BFD has two modes—asynchronous and demand. The Cisco implementation of BFD supports only asynchronous mode.
Poll bit Poll bit. If the Poll bit is set, the transmitting system is requesting verification of connectivity or of a parameter change.
Final bit Final bit. If the Final bit is set, the transmitting system is responding to a received BFD control packet that had a Poll (P) bit set.
Multiplier Detect time multiplier. The negotiated transmit interval, multiplied by the detect time multiplier, determines the detection time for the transmitting system in BFD asynchronous mode.
The detect time multiplier is similar to the hello multiplier in Intermediate System-to-Intermediate System (IS-IS), which is used to determine the hold timer: (hello interval) * (hello multiplier) = hold timer. If a hello packet is not received within the hold-timer interval, a failure has occurred.
Similarly, for BFD: (transmit interval) * (detect multiplier) = detect timer. If a BFD control packet is not received from the remote system within the detect-timer interval, a failure has occurred.
Length Length of the BFD control packet, in bytes.
My Discr. My Discriminator. Unique, nonzero discriminator value generated by the transmitting system used to demultiplex multiple BFD sessions between the same pair of systems.
Table 3 show bfd neighbors Field Descriptions (continued)
Field Description
IF-115Cisco Nexus 7000 Series NX-OS Interfaces Command Reference, Release 5.x
OL-23495-01

Send document comments to nexus7k -doc feedback@c isco .com
Cisco NX-OS Interfaces Commandsshow bfd neighbors
Related Commands
Your Discr. Your Discriminator. The discriminator received from the corresponding remote system. This field reflects the received value of My Discriminator, or is zero if that value is unknown.
Min tx interval Minimum transmission interval, in microseconds, that the local system wants to use when sending BFD control packets.
Min rx interval Minimum receipt interval, in microseconds, between received BFD control packets that the system can support.
Min Echo interval Minimum interval, in microseconds, between received BFD control packets that the system can support. If the value is zero, the transmitting system does not support the receipt of BFD echo packets.
Table 3 show bfd neighbors Field Descriptions (continued)
Field Description
Command Description
bfd echo Enables BFD echo mode.
IF-116Cisco Nexus 7000 Series NX-OS Interfaces Command Reference, Release 5.x
OL-23495-01

Send document comments to nexus7k -doc feedback@c isco .com
Cisco NX-OS Interfaces Commandsshow environment fex
show environment fex To display Fabric Extender (FEX) environment information, use the show environment fex command.
show environment fex {all chassis-id} [fan | power | temperature]
Syntax Description
Defaults None
Command Modes EXEC mode
Command History
Usage Guidelines This command does not require a license.
Examples This example shows how to display the environmental sensor status for a Fabric Extender:
switch# show environment fex 101
Fan Fex : 101:------------------------------------------------------Fan Model Hw Status------------------------------------------------------Chassis N2K-C2248-FAN -- okPS-1 N2200-PAC-400W -- okPS-2 -- -- absent
Temperature Fex 101:--------------------------------------------------------------------Module Sensor MajorThresh MinorThres CurTemp Status
(Celsius) (Celsius) (Celsius)--------------------------------------------------------------------1 Outlet-1 57 45 33 ok1 Die-1 95 85 45 ok
Power Supply Fex 101:---------------------------------------------------------------------------Voltage: 12 Volts-----------------------------------------------------PS Model Power Power Status
all Displays information for all Fabric Extender chassis.
chassis-id Fabric Extender chassis ID. The chassis ID range is from 100 to 199.
fan (Optional) Displays fan information.
power (Optional) Displays power capacity and power distribution information.
temperature (Optional) Displays temperature sensor information.
Release Modification
5.1(1) This command was introduced.
IF-117Cisco Nexus 7000 Series NX-OS Interfaces Command Reference, Release 5.x
OL-23495-01

Send document comments to nexus7k -doc feedback@c isco .com
Cisco NX-OS Interfaces Commandsshow environment fex
(Watts) (Amp)-----------------------------------------------------1 N2200-PAC-400W 396.00 33.00 ok2 ------------ -- -- --
Mod Model Power Power Power Power StatusRequested Requested Allocated Allocated(Watts) (Amp) (Watts) (Amp)
--- ------------------- ------- ---------- --------- ---------- ----------1 N2K-C2248TP-1GE 63.60 5.30 63.60 5.30 powered-up
Power Usage Summary:--------------------Power Supply redundancy mode: redundant
Total Power Capacity 396.00 W
Power reserved for Supervisor(s) 63.60 WPower currently used by Modules 0.00 W
-------------Total Power Available 332.40 W
-------------switch#
This example shows how to display fan information:
switch# show environment fex 101 fan
Fan Fex : 101:------------------------------------------------------Fan Model Hw Status------------------------------------------------------Chassis N2K-C2248-FAN -- okPS-1 N2200-PAC-400W -- okPS-2 -- -- absentswitch#
This example shows how to display power capacity and power distribution information:
switch# show environment fex 101 powerPower Supply Fex 101:---------------------------------------------------------------------------Voltage: 12 Volts-----------------------------------------------------PS Model Power Power Status
(Watts) (Amp)-----------------------------------------------------1 ------------ -- -- --2 ------------ -- -- --
Mod Model Power Power Power Power StatusRequested Requested Allocated Allocated(Watts) (Amp) (Watts) (Amp)
--- ------------------- ------- ---------- --------- ---------- ----------1 0.00 0.00 0.00 0.00 powered-upPower Usage Summary:--------------------Power Supply redundancy mode: redundant
Total Power Capacity 0.00 W
IF-118Cisco Nexus 7000 Series NX-OS Interfaces Command Reference, Release 5.x
OL-23495-01
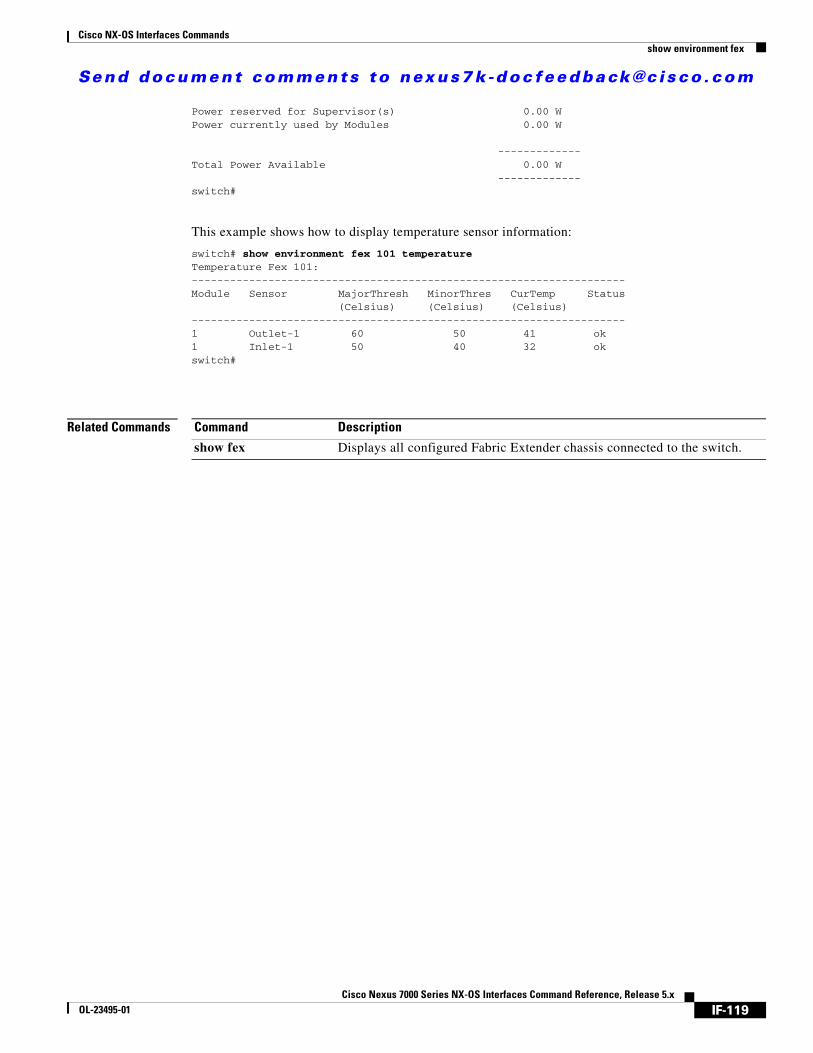
Send document comments to nexus7k -doc feedback@c isco .com
Cisco NX-OS Interfaces Commandsshow environment fex
Power reserved for Supervisor(s) 0.00 WPower currently used by Modules 0.00 W
-------------Total Power Available 0.00 W
-------------switch#
This example shows how to display temperature sensor information:
switch# show environment fex 101 temperatureTemperature Fex 101:--------------------------------------------------------------------Module Sensor MajorThresh MinorThres CurTemp Status
(Celsius) (Celsius) (Celsius)--------------------------------------------------------------------1 Outlet-1 60 50 41 ok1 Inlet-1 50 40 32 okswitch#
Related Commands Command Description
show fex Displays all configured Fabric Extender chassis connected to the switch.
IF-119Cisco Nexus 7000 Series NX-OS Interfaces Command Reference, Release 5.x
OL-23495-01

Send document comments to nexus7k -doc feedback@c isco .com
Cisco NX-OS Interfaces Commandsshow fex
show fexTo display information about a specific or all attached chassis, use the show fex command.
show fex [chassis-id [detail]]
Syntax Description
Defaults None
Command Modes EXEC mode
Command History
Usage Guidelines This command does not require a license.
Examples This example shows how to display information about all attached Fabric Extender chassis:
switch# show fexFEX FEX FEX FEX
Number Description State Model Serial------------------------------------------------------------------------101 FEX0101 Online N2K-C2248TP-1GE JAF1407AANJ102 FEX0102 Online N2K-C2248TP-1GE JAF1407AAQNswitch#
This example shows how to display information about a specific Fabric Extender chassis:
switch# show fex 101 FEX: 101 Description: FEX0101 state: Online
FEX version: 5.1(1) [Switch version: 5.1(1)]FEX Interim version: 5.1(0.159.6)Switch Interim version: 5.1(0.236)
Extender Model: N2K-C2248TP-1GE, Extender Serial: JAF1407AANJPart No: 73-12748-04
pinning-mode: static Max-links: 1Fabric port for control traffic: Po101Fabric interface state:
Po101 - Interface Up. State: ActiveEth9/1 - Interface Up. State: ActiveEth10/1 - Interface Up. State: Active
switch#
chassis-id (Optional) Fabric Extender chassis ID. The chassis ID range is from 100 to 199.
detail (Optional) Displays a detailed listing
Release Modification
5.1(1) This command was introduced.
IF-120Cisco Nexus 7000 Series NX-OS Interfaces Command Reference, Release 5.x
OL-23495-01

Send document comments to nexus7k -doc feedback@c isco .com
Cisco NX-OS Interfaces Commandsshow fex
This example shows how to display the detailed information about all attached Fabric Extender chassis:
switch# show fex detailFEX: 101 Description: FEX0101 state: Online
FEX version: 5.1(1) [Switch version: 5.1(1)]FEX Interim version: 5.1(0.159.6)Switch Interim version: 5.1(0.236)Extender Model: N2K-C2248TP-1GE, Extender Serial: JAF1407AANJPart No: 73-12748-04Card Id: 99, Mac Addr: 00:05:9b:70:dd:42, Num Macs: 64Module Sw Gen: 12594 [Switch Sw Gen: 21]
pinning-mode: static Max-links: 1Fabric port for control traffic: Po101Fabric interface state:
Po101 - Interface Up. State: ActiveEth9/1 - Interface Up. State: ActiveEth10/1 - Interface Up. State: Active
Fex Port State Fabric Port Primary FabricEth101/1/1 Down Po101 Po101Eth101/1/2 Down Po101 Po101Eth101/1/3 Down Po101 Po101Eth101/1/4 Down Po101 Po101Eth101/1/5 Down Po101 Po101Eth101/1/6 Down Po101 Po101Eth101/1/7 Down Po101 Po101Eth101/1/8 Down Po101 Po101Eth101/1/9 Down Po101 Po101
Eth101/1/10 Down Po101 Po101Eth101/1/11 Down Po101 Po101
--More--switch#
Related Commands Command Description
fex Creates a Fabric Extender and enters fabric extender configuration mode.
IF-121Cisco Nexus 7000 Series NX-OS Interfaces Command Reference, Release 5.x
OL-23495-01

Send document comments to nexus7k -doc feedback@c isco .com
Cisco NX-OS Interfaces Commandsshow fex detail
show fex detailTo display detailed information about a specific Fabric Extender (FEX) or all attached chassis, use the show fex detail command.
show fex detail
Syntax Description This command has no arguments or keywords.
Defaults None
Command Modes EXEC mode
Command History
Usage Guidelines This command does not require a license.
Examples This example shows how to display detailed information about a specific Fabric Extender or all attached chassis:
switch# show fex detailFEX: 101 Description: FEX0101 state: Online
FEX version: 5.1(1) [Switch version: 5.1(1)]FEX Interim version: 5.1(0.159.6)Switch Interim version: 5.1(0.236)Extender Model: N2K-C2248TP-1GE, Extender Serial: JAF1407AANJPart No: 73-12748-04Card Id: 99, Mac Addr: 00:05:9b:70:dd:42, Num Macs: 64Module Sw Gen: 12594 [Switch Sw Gen: 21]
pinning-mode: static Max-links: 1Fabric port for control traffic: Po101Fabric interface state:
Po101 - Interface Up. State: ActiveEth9/1 - Interface Up. State: ActiveEth10/1 - Interface Up. State: Active
Fex Port State Fabric Port Primary FabricEth101/1/1 Down Po101 Po101Eth101/1/2 Down Po101 Po101Eth101/1/3 Down Po101 Po101Eth101/1/4 Down Po101 Po101Eth101/1/5 Down Po101 Po101Eth101/1/6 Down Po101 Po101Eth101/1/7 Down Po101 Po101Eth101/1/8 Down Po101 Po101Eth101/1/9 Down Po101 Po101
Eth101/1/10 Down Po101 Po101Eth101/1/11 Down Po101 Po101
Release Modification
5.1(1) This command was introduced.
IF-122Cisco Nexus 7000 Series NX-OS Interfaces Command Reference, Release 5.x
OL-23495-01

Send document comments to nexus7k -doc feedback@c isco .com
Cisco NX-OS Interfaces Commandsshow fex detail
--More--switch#
Related Commands Command Description
show fex Displays all configured Fabric Extender chassis connected to the switch.
fex Creates a Fabric Extender and enters fabric extender configuration mode.
IF-123Cisco Nexus 7000 Series NX-OS Interfaces Command Reference, Release 5.x
OL-23495-01

Send document comments to nexus7k -doc feedback@c isco .com
Cisco NX-OS Interfaces Commandsshow fex transceiver
show fex transceiverTo display information about the transceiver that connects a Fabric Extender (FEX) to the Cisco Nexus 7000 Series switch, use the show fex transceiver command.
show fex chassis-id transceiver [calibration | detail]
Syntax Description
Defaults None
Command Modes EXEC mode
Command History
Usage Guidelines This command does not require a license.
Examples This example shows how to display information about the transceiver that connects a Fabric Extender to the Cisco Nexus 7000 Series switch:
switch# show fex 101 transceiver
Fex Uplink: 1Fabric Port: --
sfp information is not available
Fex Uplink: 2Fabric Port: Ethernet10/1
sfp is presentname is CISCO-FINISARpart number is FTLX8570D3BCL-C1revision is Aserial number is FNS141629V3nominal bitrate is 10300 MBits/secLink length supported for 50/125mm fiber is 0 m(s)Link length supported for 62.5/125mm fiber is 0 m(s)cisco id is --cisco extended id number is 4
Fex Uplink: 3Fabric Port: Ethernet9/1
sfp is present
chassis-id Fabric Extender chassis ID. The chassis ID range is from 100 to 199.
calibration (Optional) Displays detailed calibration information about the transceiver.
detail (Optional) Displays detailed information about the transceiver.
Release Modification
5.1(1) This command was introduced.
IF-124Cisco Nexus 7000 Series NX-OS Interfaces Command Reference, Release 5.x
OL-23495-01

Send document comments to nexus7k -doc feedback@c isco .com
Cisco NX-OS Interfaces Commandsshow fex transceiver
name is CISCO-FINISARpart number is FTLX8570D3BCL-C1revision is Aserial number is FNS141700UEnominal bitrate is 10300 MBits/secLink length supported for 50/125mm fiber is 0 m(s)Link length supported for 62.5/125mm fiber is 0 m(s)cisco id is --cisco extended id number is 4
Fex Uplink: 4Fabric Port: --
sfp information is not available
switch#
Related Commandss Command Description
show fex Displays all configured Fabric Extender chassis connected to the switch.
IF-125Cisco Nexus 7000 Series NX-OS Interfaces Command Reference, Release 5.x
OL-23495-01

Send document comments to nexus7k -doc feedback@c isco .com
Cisco NX-OS Interfaces Commandsshow fex version
show fex version To display the software version information about a Fabric Extender (FEX), use the show fex version command.
show fex chassis-id version
Syntax Description
Defaults None
Command Modes EXEC mode
Command History
Usage Guidelines This command does not require a license.
Examples This example shows how to display the software version of a Fabric Extender:
switch# show fex 101 version Software
Bootloader version: 0.2System boot mode: primarySystem image version: 5.1(1) [build 5.1(0.159.6)]
HardwareModule: Fabric Extender 48x1GE + 4x10G ModuleCPU: Motorola, e300c4Serial number: JAF1407AANJBootflash: locked
Kernel uptime is 1 day(s), 1 hour(s), 47 minutes(s), 4 second(s)
Last reset at Mon Sep 6 07:43:23 2010Reason: Reset Requested by CLI command reloadService: Reload requested by supervisor
switch#
Related Commands
chassis-ID Fabric Extender chassis ID. The chassis ID range is from 100 to 199.
Release Modification
5.1(1) This command was introduced.
Command Description
show fex Displays all configured Fabric Extender chassis connected to the switch.
IF-126Cisco Nexus 7000 Series NX-OS Interfaces Command Reference, Release 5.x
OL-23495-01

Send document comments to nexus7k -doc feedback@c isco .com
Cisco NX-OS Interfaces Commandsshow inventory fex
show inventory fexTo display the system inventory of a Fabric Extender (FEX), such as the name, description, and volume ID, use the show inventory fex command
show inventory fex chassis-id
Syntax Description
Defaults None
Command Modes EXEC mode
Command History
Usage Guidelines This command does not require a license.
Examples This example shows how to display the system inventory of a specific Fabric Extender chassis:
switch# show inventory fex 101PID: N2K-C2248TP-1GE , VID: V00 , SN: JAF1407AANJ
NAME: "FEX 101 Module 1", DESCR: "Fabric Extender Module: 32x10G BaseT, 8x10G BaseT Supervisor"PID: N2K-C2248TP-1GE , VID: V00 , SN: SSI14061500
NAME: "FEX 101 Fan 1", DESCR: "Fabric Extender Fan module"PID: N2K-C2332-FAN , VID: N/A , SN: N/A
NAME: "FEX 101 Power Supply 1", DESCR: "Fabric Extender AC power supply"PID: N2200-PAC-400W , VID: V00 , SN: LIT14030HK9switch#
Related Commands
chassis-id Fabric Extender chassis ID. The chassis ID range is from 100 to 199.
Release Modification
5.1(1) This command was introduced.
Command Description
show fex Displays all configured Fabric Extender chassis connected to the switch.
IF-127Cisco Nexus 7000 Series NX-OS Interfaces Command Reference, Release 5.x
OL-23495-01
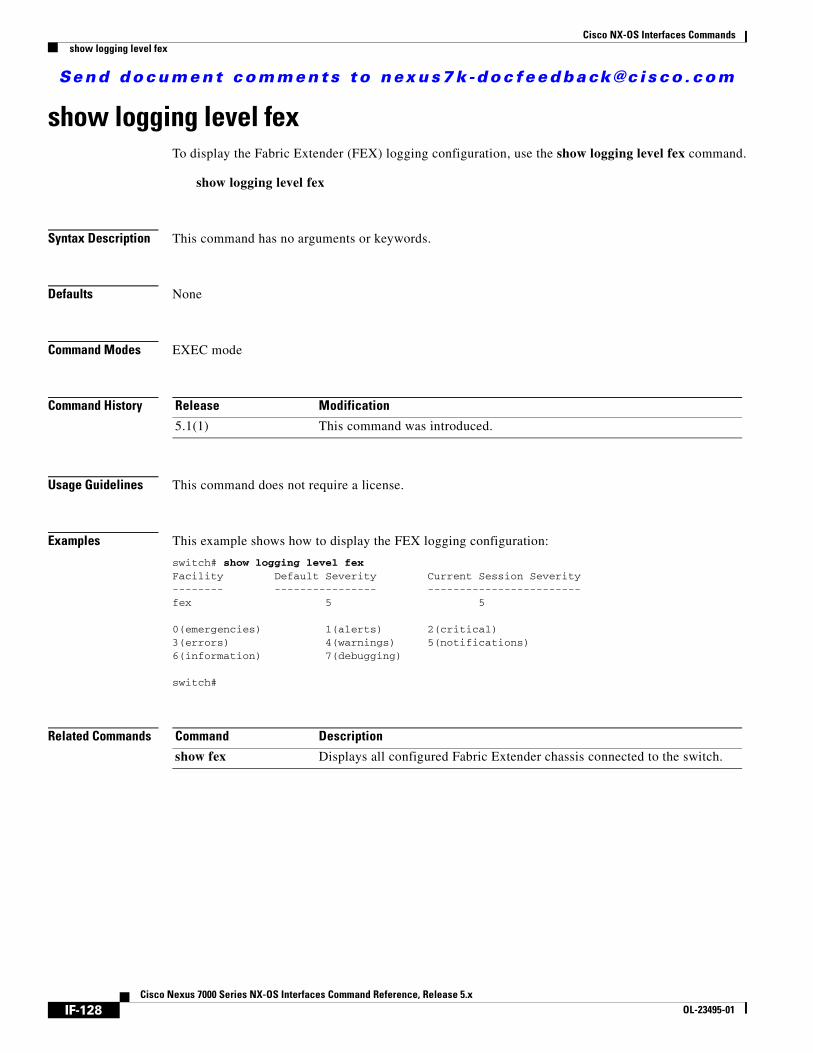
Send document comments to nexus7k -doc feedback@c isco .com
Cisco NX-OS Interfaces Commandsshow logging level fex
show logging level fexTo display the Fabric Extender (FEX) logging configuration, use the show logging level fex command.
show logging level fex
Syntax Description This command has no arguments or keywords.
Defaults None
Command Modes EXEC mode
Command History
Usage Guidelines This command does not require a license.
Examples This example shows how to display the FEX logging configuration:
switch# show logging level fexFacility Default Severity Current Session Severity-------- ---------------- ------------------------fex 5 5
0(emergencies) 1(alerts) 2(critical)3(errors) 4(warnings) 5(notifications)6(information) 7(debugging)
switch#
Related Commands
Release Modification
5.1(1) This command was introduced.
Command Description
show fex Displays all configured Fabric Extender chassis connected to the switch.
IF-128Cisco Nexus 7000 Series NX-OS Interfaces Command Reference, Release 5.x
OL-23495-01
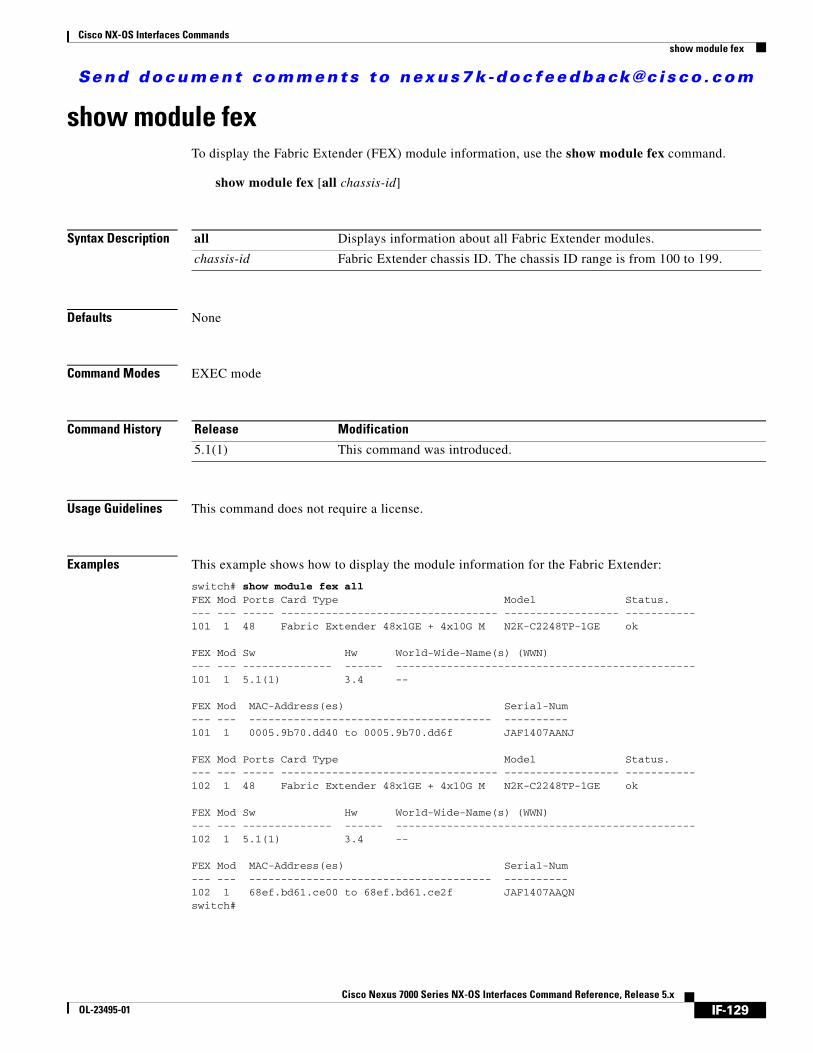
Send document comments to nexus7k -doc feedback@c isco .com
Cisco NX-OS Interfaces Commandsshow module fex
show module fexTo display the Fabric Extender (FEX) module information, use the show module fex command.
show module fex [all chassis-id]
Syntax Description
Defaults None
Command Modes EXEC mode
Command History
Usage Guidelines This command does not require a license.
Examples This example shows how to display the module information for the Fabric Extender:
switch# show module fex allFEX Mod Ports Card Type Model Status.--- --- ----- ---------------------------------- ------------------ -----------101 1 48 Fabric Extender 48x1GE + 4x10G M N2K-C2248TP-1GE ok
FEX Mod Sw Hw World-Wide-Name(s) (WWN)--- --- -------------- ------ -----------------------------------------------101 1 5.1(1) 3.4 --
FEX Mod MAC-Address(es) Serial-Num--- --- -------------------------------------- ----------101 1 0005.9b70.dd40 to 0005.9b70.dd6f JAF1407AANJ
FEX Mod Ports Card Type Model Status.--- --- ----- ---------------------------------- ------------------ -----------102 1 48 Fabric Extender 48x1GE + 4x10G M N2K-C2248TP-1GE ok
FEX Mod Sw Hw World-Wide-Name(s) (WWN)--- --- -------------- ------ -----------------------------------------------102 1 5.1(1) 3.4 --
FEX Mod MAC-Address(es) Serial-Num--- --- -------------------------------------- ----------102 1 68ef.bd61.ce00 to 68ef.bd61.ce2f JAF1407AAQNswitch#
all Displays information about all Fabric Extender modules.
chassis-id Fabric Extender chassis ID. The chassis ID range is from 100 to 199.
Release Modification
5.1(1) This command was introduced.
IF-129Cisco Nexus 7000 Series NX-OS Interfaces Command Reference, Release 5.x
OL-23495-01

Send document comments to nexus7k -doc feedback@c isco .com
Cisco NX-OS Interfaces Commandsshow module fex
This example shows how to display FEX module information:
switch# show module fex
FEX Mod Ports Card Type Model Status.--- --- ----- ---------------------------------- ------------------ -----------101 1 48 Fabric Extender 48x1GE + 4x10G M N2K-C2248TP-1GE ok
FEX Mod Sw Hw World-Wide-Name(s) (WWN)--- --- -------------- ------ -----------------------------------------------101 1 5.1(1) 3.4 --
FEX Mod MAC-Address(es) Serial-Num--- --- -------------------------------------- ----------101 1 0005.9b70.dd40 to 0005.9b70.dd6f JAF1407AANJ
FEX Mod Ports Card Type Model Status.--- --- ----- ---------------------------------- ------------------ -----------102 1 48 Fabric Extender 48x1GE + 4x10G M N2K-C2248TP-1GE ok
FEX Mod Sw Hw World-Wide-Name(s) (WWN)--- --- -------------- ------ -----------------------------------------------102 1 5.1(1) 3.4 --
FEX Mod MAC-Address(es) Serial-Num--- --- -------------------------------------- ----------102 1 68ef.bd61.ce00 to 68ef.bd61.ce2f JAF1407AAQNswitch#
This example shows how to display the module information for a specific Fabric Extender:
switch# show module fex 101
FEX Mod Ports Card Type Model Status.--- --- ----- ---------------------------------- ------------------ -----------101 1 48 Fabric Extender 48x1GE + 4x10G M N2K-C2248TP-1GE ok
FEX Mod Sw Hw World-Wide-Name(s) (WWN)--- --- -------------- ------ -----------------------------------------------101 1 5.1(1) 3.4 --
FEX Mod MAC-Address(es) Serial-Num--- --- -------------------------------------- ----------101 1 0005.9b70.dd40 to 0005.9b70.dd6f JAF1407AANJswitch#
Related Commands Command Description
show fex Displays all configured Fabric Extender chassis connected to the switch.
IF-130Cisco Nexus 7000 Series NX-OS Interfaces Command Reference, Release 5.x
OL-23495-01

Send document comments to nexus7k -doc feedback@c isco .com
Cisco NX-OS Interfaces Commandsshow tech fex all
show tech fex allTo gather detailed information for all Fabric Extender (FEX) troubleshooting information, use the show tech fex all command.
show tech fex all
Syntax Description This command has no arguments or keywords.
Defaults None
Command Modes EXEC mode
Command History
Usage Guidelines This command does not require a license.
Examples This example shows how to display detailed FEX information:
switch# show tech fex all02/25/2008 03:38:18.22739: ***************************************************02/25/2008 03:38:18.23019: Satctrl Built at Thu Aug 5 19:12:00 PDT 2010 on ramineni-lnx in directory /ws/mhau-sjc/deewhy_june_2/build by mhau02/25/2008 03:38:18.23040: Version: 2102/25/2008 03:38:18.23055: ***************************************************02/25/2008 03:38:18.34242: satellite_init: initializing modules02/25/2008 03:38:18.34466: satctrl_get_cardid: Platform card ID 9902/25/2008 03:38:18.34771: Platform info: cardid=99, num_slots=102/25/2008 03:38:18.461803: satctrl_get_cardid: Platform card ID 9902/25/2008 03:38:18.461849: satellite_init: swcardid=9902/25/2008 03:38:18.461995: get fru: chas ser:SSI14061500 chas model:N2K-C2248TP-1GE chas part: 68-3601-0402/25/2008 03:38:18.462022: get fru: mod ser:JAF1407AANJ mod model:N2K-C2248TP-1GE mod part: 73-12748-0402/25/2008 03:38:18.462046: satellite_init: initializing inband02/25/2008 03:38:18.475965: satellite_init: inband initialized02/25/2008 03:38:18.476153: satellite_module_cfg_init: initializing modue (0)02/25/2008 03:38:18.477439: satctrl_module_fsm_init: Fsm initialized for fabricmodule no (0, 0)02/25/2008 03:38:18.477533: satctrl_module_fsm_init: Fsm initialized for fabricmodule no (1, 0)02/25/2008 03:38:18.477855: satellite_init: done initializing satctrl module02/25/2008 03:38:18.477897: satctrl_set_mts_addr: dummy_addr: 0xff0202/25/2008 03:38:18.478139: My addr is changed to 0xff--More--
Release Modification
5.1(1) This command was introduced.
IF-131Cisco Nexus 7000 Series NX-OS Interfaces Command Reference, Release 5.x
OL-23495-01

Send document comments to nexus7k -doc feedback@c isco .com
Cisco NX-OS Interfaces Commandsshow tech fex all
Related Commands Command Description
show fex Displays all configured Fabric Extender chassis connected to the switch.
IF-132Cisco Nexus 7000 Series NX-OS Interfaces Command Reference, Release 5.x
OL-23495-01

Send document comments to nexus7k -doc feedback@c isco .com
Cisco NX-OS Interfaces Commandsshow version fex
show version fexTo display the software version information about a Fabric Extender (FEX), use the show version fex command.
show version fex chassis-ID
Syntax Description
Defaults None
Command Modes EXEC mode
Command History
Usage Guidelines This command does not require a license.
Examples This example shows how to display the software version of a Fabric Extender:
switch# show version fex 100 Software
Bootloader version: 0.2System boot mode: primarySystem image version: 5.1(1) [build 5.1(0.159.6)]
HardwareModule: Fabric Extender 48x1GE + 4x10G ModuleCPU: Motorola, e300c4Serial number: JAF1407AANJBootflash: locked
Kernel uptime is 1 day(s), 1 hour(s), 12 minutes(s), 13 second(s)
Last reset at Mon Sep 6 07:43:23 2010Reason: Reset Requested by CLI command reloadService: Reload requested by supervisor
switch#
Related Commands
chassis-ID Fabric Extender chassis ID. The chassis ID range is from 100 to 199.
Release Modification
5.1(1) This command was introduced.
Command Description
show fex Displays all configured Fabric Extender chassis connected to the switch.
IF-133Cisco Nexus 7000 Series NX-OS Interfaces Command Reference, Release 5.x
OL-23495-01
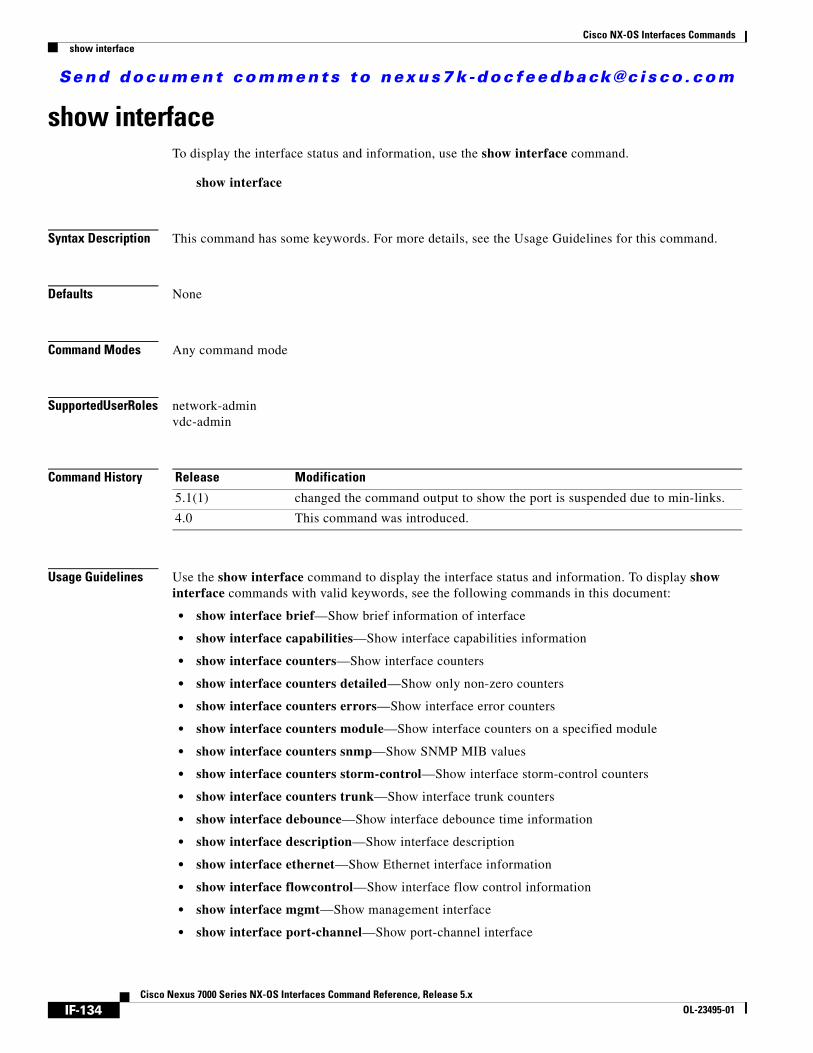
Send document comments to nexus7k -doc feedback@c isco .com
Cisco NX-OS Interfaces Commandsshow interface
show interfaceTo display the interface status and information, use the show interface command.
show interface
Syntax Description This command has some keywords. For more details, see the Usage Guidelines for this command.
Defaults None
Command Modes Any command mode
Supported User Roles network-adminvdc-admin
Command History
Usage Guidelines Use the show interface command to display the interface status and information. To display show interface commands with valid keywords, see the following commands in this document:
• show interface brief—Show brief information of interface
• show interface capabilities—Show interface capabilities information
• show interface counters—Show interface counters
• show interface counters detailed—Show only non-zero counters
• show interface counters errors—Show interface error counters
• show interface counters module—Show interface counters on a specified module
• show interface counters snmp—Show SNMP MIB values
• show interface counters storm-control—Show interface storm-control counters
• show interface counters trunk—Show interface trunk counters
• show interface debounce—Show interface debounce time information
• show interface description—Show interface description
• show interface ethernet—Show Ethernet interface information
• show interface flowcontrol—Show interface flow control information
• show interface mgmt—Show management interface
• show interface port-channel—Show port-channel interface
Release Modification
5.1(1) changed the command output to show the port is suspended due to min-links.
4.0 This command was introduced.
IF-134Cisco Nexus 7000 Series NX-OS Interfaces Command Reference, Release 5.x
OL-23495-01

Send document comments to nexus7k -doc feedback@c isco .com
Cisco NX-OS Interfaces Commandsshow interface
• show interface port-channel counters—Show interface port-channel counters
• show interface status—Show interface line status
• show interface switchport—Show interface switchport information
• show interface transceiver—Show interface transceiver information
• show interface trunk—Show interface trunk information
This command does not require a license.
Examples This example shows how to display the interface status and information:
switch(config-if)# show interface e1/5Ethernet4/27 is down (suspended (min-links))
Hardware: GigabitEthernet, address: 0019.076c.1a78 (bia 0019.076c.1a78)Internet Address is 172.28.231.193/23MTU 1500 bytes, BW 1000000 Kbit, DLY 10 usec,
reliability 255/255, txload 1/255, rxload 1/255Encapsulation ARPAfull-duplex, 1000 Mb/sAuto-Negotiation is turned on1 minute input rate 26608 bits/sec, 10 packets/sec1 minute output rate 2272 bits/sec, 0 packets/secRx
473804 input packets 51412 unicast packets 124811 multicast packets297581 broadcast packets 148270388 bytes
Tx51994 output packets 50387 unicast packets 1460 multicast packets147 broadcast packets 8330595 bytes
Ethernet2/1 is down (Administratively down)Hardware: 10/100/1000 Ethernet, address: 0018.bad8.3ffd (bia 0019.076c.4dac)MTU 1500 bytes, BW 1000000 Kbit, DLY 10 usec,
reliability 255/255, txload 1/255, rxload 1/255Encapsulation ARPAauto-duplex, auto-speedBeacon is turned offAuto-Negotiation is turned onInput flow-control is off, output flow-control is offAuto-mdix is turned onSwitchport monitor is offLast clearing of "show interface" counters never1 minute input rate 0 bits/sec, 0 packets/sec1 minute output rate 0 bits/sec, 0 packets/secL3 in Switched:
ucast: 0 pkts, 0 bytes - mcast: 0 pkts, 0 bytesL3 out Switched:
ucast: 0 pkts, 0 bytes - mcast: 0 pkts, 0 bytesRx
0 input packets 0 unicast packets 0 multicast packets0 broadcast packets 0 jumbo packets 0 storm suppression packets0 bytes
Tx0 output packets 0 multicast packets0 broadcast packets 0 jumbo packets0 bytes0 input error 0 short frame 0 watchdog0 no buffer 0 runt 0 CRC 0 ecc0 overrun 0 underrun 0 ignored 0 bad etype drop0 bad proto drop 0 if down drop 0 input with dribble0 input discard
IF-135Cisco Nexus 7000 Series NX-OS Interfaces Command Reference, Release 5.x
OL-23495-01
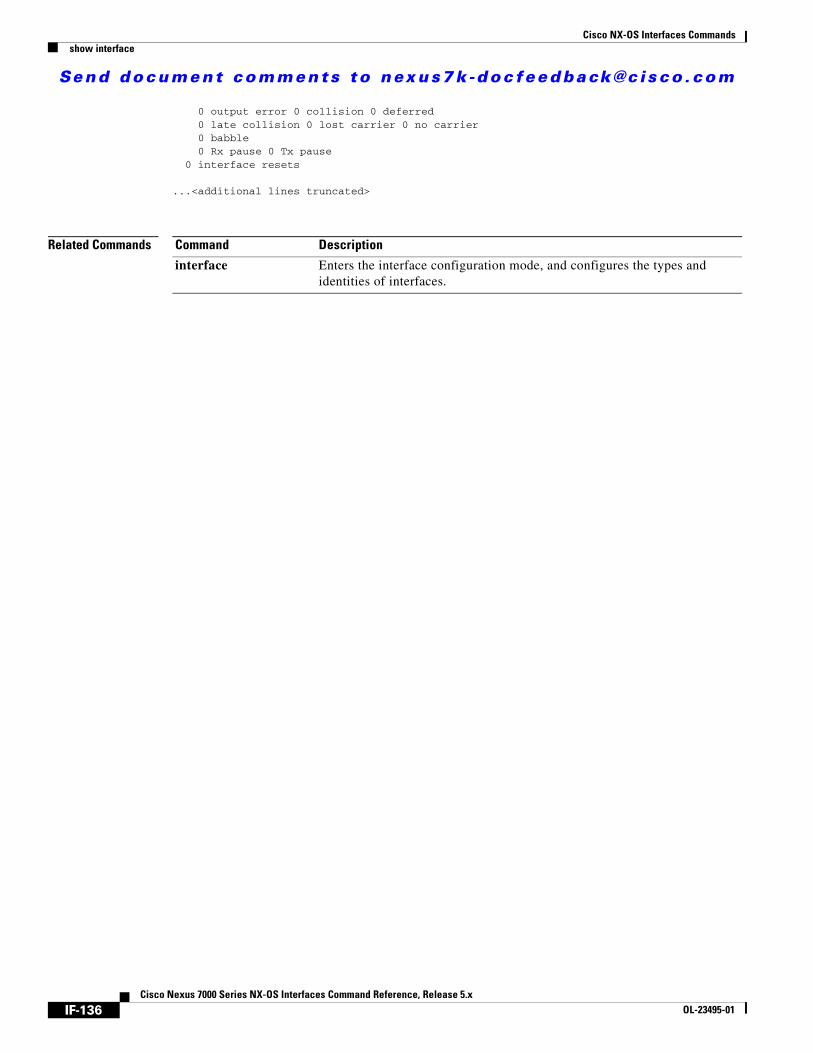
Send document comments to nexus7k -doc feedback@c isco .com
Cisco NX-OS Interfaces Commandsshow interface
0 output error 0 collision 0 deferred0 late collision 0 lost carrier 0 no carrier0 babble0 Rx pause 0 Tx pause
0 interface resets
...<additional lines truncated>
Related Commands Command Description
interface Enters the interface configuration mode, and configures the types and identities of interfaces.
IF-136Cisco Nexus 7000 Series NX-OS Interfaces Command Reference, Release 5.x
OL-23495-01
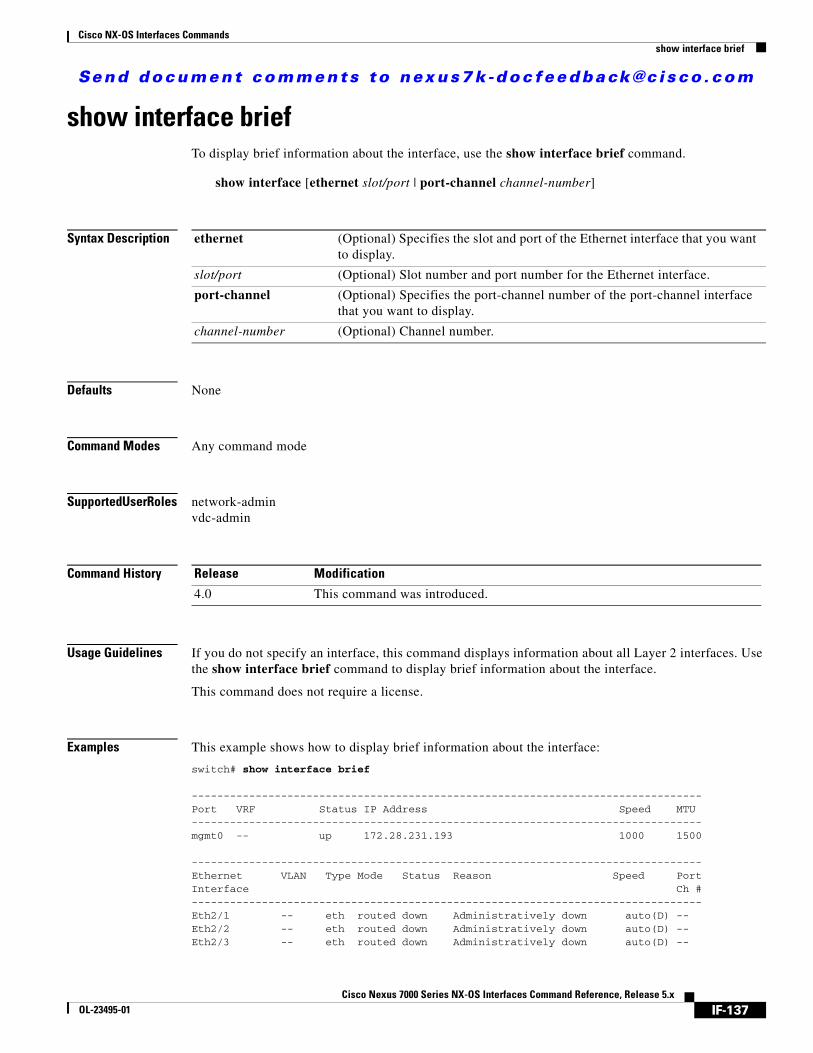
Send document comments to nexus7k -doc feedback@c isco .com
Cisco NX-OS Interfaces Commandsshow interface brief
show interface brief To display brief information about the interface, use the show interface brief command.
show interface [ethernet slot/port | port-channel channel-number]
Syntax Description
Defaults None
Command Modes Any command mode
Supported User Roles network-adminvdc-admin
Command History
Usage Guidelines If you do not specify an interface, this command displays information about all Layer 2 interfaces. Use the show interface brief command to display brief information about the interface.
This command does not require a license.
Examples This example shows how to display brief information about the interface:
switch# show interface brief
--------------------------------------------------------------------------------Port VRF Status IP Address Speed MTU--------------------------------------------------------------------------------mgmt0 -- up 172.28.231.193 1000 1500
--------------------------------------------------------------------------------Ethernet VLAN Type Mode Status Reason Speed PortInterface Ch #--------------------------------------------------------------------------------Eth2/1 -- eth routed down Administratively down auto(D) --Eth2/2 -- eth routed down Administratively down auto(D) --Eth2/3 -- eth routed down Administratively down auto(D) --
ethernet (Optional) Specifies the slot and port of the Ethernet interface that you want to display.
slot/port (Optional) Slot number and port number for the Ethernet interface.
port-channel (Optional) Specifies the port-channel number of the port-channel interface that you want to display.
channel-number (Optional) Channel number.
Release Modification
4.0 This command was introduced.
IF-137Cisco Nexus 7000 Series NX-OS Interfaces Command Reference, Release 5.x
OL-23495-01

Send document comments to nexus7k -doc feedback@c isco .com
Cisco NX-OS Interfaces Commandsshow interface brief
Eth2/4 1 eth pvlan down Administratively down auto(D) --Eth2/5 -- eth routed down Administratively down auto(D) --Eth2/6 1 eth access down Link not connected auto(D) --Eth2/7 1 eth access up none 1000(D) --Eth2/8 -- eth routed down Administratively down auto(D) --Eth2/9 1 eth access up none 1000(D) --Eth2/10 1 eth access down Link not connected auto(D) --Eth2/11 -- eth routed down Administratively down auto(D) --Eth2/12 -- eth routed down Administratively down auto(D) --Eth2/13 -- eth routed down Administratively down auto(D) --Eth2/14 -- eth routed down Administratively down auto(D) --Eth2/15 -- eth routed down Administratively down auto(D) --Eth2/16 -- eth routed down Administratively down auto(D) --Eth2/17 -- eth routed down Administratively down auto(D) --Eth2/18 -- eth routed down Administratively down auto(D) --Eth2/19 -- eth routed down Administratively down auto(D) --Eth2/20 -- eth routed down Administratively down auto(D) --Eth2/21 -- eth routed down Administratively down auto(D) --Eth2/22 -- eth routed down Administratively down auto(D) --Eth2/23 -- eth routed down Administratively down auto(D) --Eth2/24 -- eth routed down Administratively down auto(D) --Eth2/25 -- eth routed down Administratively down auto(D) --Eth2/26 -- eth routed down Administratively down auto(D) --Eth2/27 -- eth routed down Administratively down auto(D) --Eth2/28 -- eth routed down Administratively down auto(D) --Eth2/29 -- eth routed down Administratively down auto(D) --Eth2/30 -- eth routed down Administratively down auto(D) --Eth2/31 -- eth routed down Administratively down auto(D) --Eth2/32 -- eth routed down Administratively down auto(D) --Eth2/33 -- eth routed down Administratively down auto(D) --Eth2/34 -- eth routed down Administratively down auto(D) --Eth2/35 -- eth routed down Administratively down auto(D) --Eth2/36 -- eth routed down Administratively down auto(D) --Eth2/37 -- eth routed down Administratively down auto(D) --Eth2/38 -- eth routed down Administratively down auto(D) --Eth2/39 -- eth routed down Administratively down auto(D) --Eth2/40 -- eth routed down Administratively down auto(D) --Eth2/41 -- eth routed down Administratively down auto(D) --Eth2/42 -- eth routed down Administratively down auto(D) --Eth2/43 -- eth routed down Administratively down auto(D) --Eth2/44 -- eth routed down Administratively down auto(D) --Eth2/45 -- eth routed down Administratively down auto(D) --Eth2/46 -- eth routed down Administratively down auto(D) --Eth2/47 -- eth routed down Administratively down auto(D) --Eth2/48 -- eth routed down Administratively down auto(D) --
-------------------------------------------------------------------------------Interface Secondary VLAN(Type) Status Reason-------------------------------------------------------------------------------Vlan1 -- down none
Related Commands Command Description
interface Enters the interface configuration mode, and configures the types and identities of interfaces.
IF-138Cisco Nexus 7000 Series NX-OS Interfaces Command Reference, Release 5.x
OL-23495-01

Send document comments to nexus7k -doc feedback@c isco .com
Cisco NX-OS Interfaces Commandsshow interface capabilities
show interface capabilitiesTo display information about the interface capabilities, use the show interface capabilities command.
show interface [ethernet slot/port | port-channel channel-number] capabilities
Syntax Description
Defaults None
Command Modes Any command mode
Supported User Roles network-adminvdc-admin
Command History
Usage Guidelines Use the show interface capabilities command to display information about the capabilities of the interface such as the speed, duplex, and rate mode. If you do not specify an interface, this command displays information about all Layer 2 interfaces.
This command does not require a license.
Examples This example shows how to display the capabilities for a specific interface:
switch# show interface ethernet 2/7 capabilitiesEthernet2/7
Model: COPPERType: 1000BaseTSpeed: 10,100,1000,autoDuplex: half/full/autoTrunk encap. type: 802.1QChannel: yesBroadcast suppression: percentage(0-100)Flowcontrol: rx-(off/on/desired),tx-(off/on/desired)Rate mode: dedicatedQOS scheduling: rx-(2q4t),tx-(1p3q4t)CoS rewrite: yes
ethernet (Optional) Specifies the slot and port of the Ethernet interface that you want to display.
slot/port (Optional) Slot number and port number for the Ethernet interface.
port-channel (Optional) Specifies the port-channel number of the port-channel interface that you want to display.
channel-number (Optional) Channel number.
Release Modification
4.0 This command was introduced.
IF-139Cisco Nexus 7000 Series NX-OS Interfaces Command Reference, Release 5.x
OL-23495-01

Send document comments to nexus7k -doc feedback@c isco .com
Cisco NX-OS Interfaces Commandsshow interface capabilities
ToS rewrite: yesSPAN: yesUDLD: yesLink Debounce: yesLink Debounce Time: yesMDIX: yesPort Group Members: none
Related Commands Command Description
interface Enters the interface configuration mode, and configures the types and identities of interfaces.
IF-140Cisco Nexus 7000 Series NX-OS Interfaces Command Reference, Release 5.x
OL-23495-01

Send document comments to nexus7k -doc feedback@c isco .com
Cisco NX-OS Interfaces Commandsshow interface counters
show interface countersTo display in and out counters for all interfaces in the system, use the show interface counters command.
show interface [ethernet slot/port | port-channel channel-number] counters
Syntax Description
Defaults None
Command Modes Any command mode
Supported User Roles network-adminvdc-admin
Command History
Usage Guidelines Use the show interface counters command to display in and out counters for all or a specific interface. If you do not specify an interface, this command displays information about all Layer 2 interfaces.
This command does not require a license.
Examples This example shows how to display the in and out counters for all interfaces:
switch# show interface counters
--------------------------------------------------------------------------------Port InOctets InUcastPkts InMcastPkts InBcastPkts--------------------------------------------------------------------------------mgmt0 137046816 46882 115497 267729Eth2/1 0 0 0 0Eth2/2 0 0 0 0Eth2/3 0 0 0 0Eth2/4 0 0 0 0Eth2/5 0 0 0 0Eth2/6 0 0 0 0Eth2/7 295061 0 1348 0
ethernet (Optional) Specifies the slot and port of the Ethernet interface that you want to display.
slot/port (Optional) Slot number and port number for the Ethernet interface.
port-channel (Optional) Specifies the port-channel number of the port-channel interface that you want to display.
channel-number (Optional) Channel number.
Release Modification
4.0 This command was introduced.
IF-141Cisco Nexus 7000 Series NX-OS Interfaces Command Reference, Release 5.x
OL-23495-01
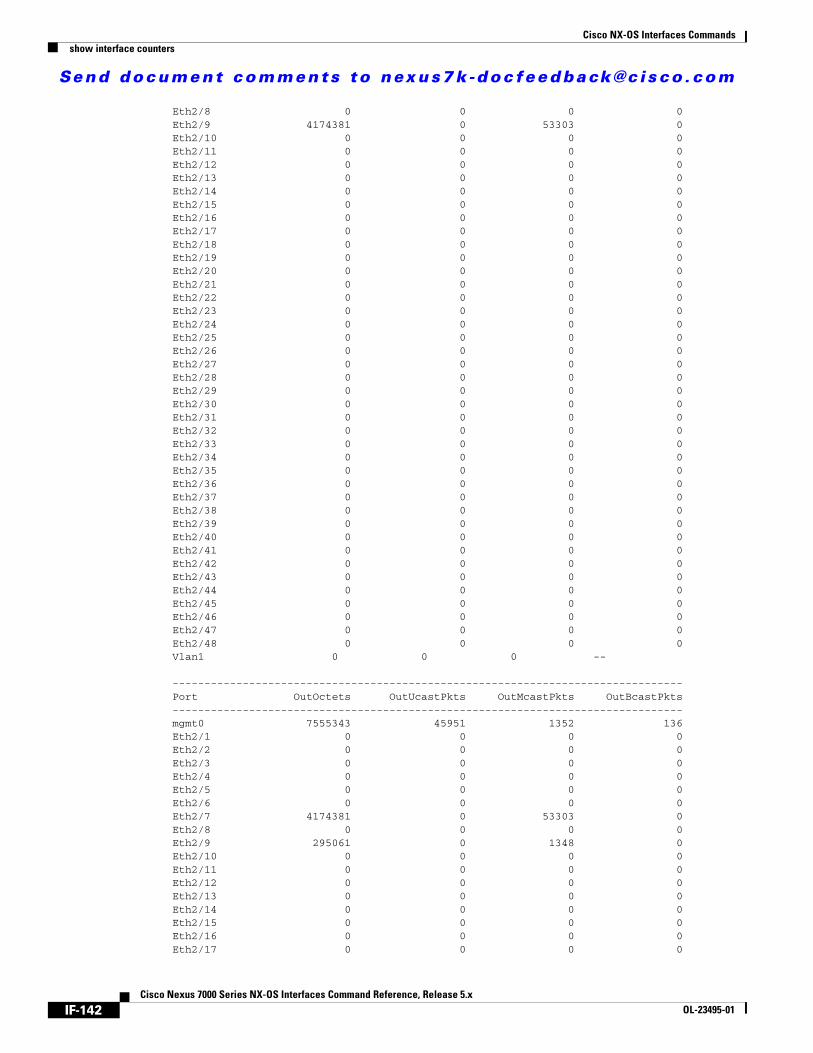
Send document comments to nexus7k -doc feedback@c isco .com
Cisco NX-OS Interfaces Commandsshow interface counters
Eth2/8 0 0 0 0Eth2/9 4174381 0 53303 0Eth2/10 0 0 0 0Eth2/11 0 0 0 0Eth2/12 0 0 0 0Eth2/13 0 0 0 0Eth2/14 0 0 0 0Eth2/15 0 0 0 0Eth2/16 0 0 0 0Eth2/17 0 0 0 0Eth2/18 0 0 0 0Eth2/19 0 0 0 0Eth2/20 0 0 0 0Eth2/21 0 0 0 0Eth2/22 0 0 0 0Eth2/23 0 0 0 0Eth2/24 0 0 0 0Eth2/25 0 0 0 0Eth2/26 0 0 0 0Eth2/27 0 0 0 0Eth2/28 0 0 0 0Eth2/29 0 0 0 0Eth2/30 0 0 0 0Eth2/31 0 0 0 0Eth2/32 0 0 0 0Eth2/33 0 0 0 0Eth2/34 0 0 0 0Eth2/35 0 0 0 0Eth2/36 0 0 0 0Eth2/37 0 0 0 0Eth2/38 0 0 0 0Eth2/39 0 0 0 0Eth2/40 0 0 0 0Eth2/41 0 0 0 0Eth2/42 0 0 0 0Eth2/43 0 0 0 0Eth2/44 0 0 0 0Eth2/45 0 0 0 0Eth2/46 0 0 0 0Eth2/47 0 0 0 0Eth2/48 0 0 0 0Vlan1 0 0 0 --
--------------------------------------------------------------------------------Port OutOctets OutUcastPkts OutMcastPkts OutBcastPkts--------------------------------------------------------------------------------mgmt0 7555343 45951 1352 136Eth2/1 0 0 0 0Eth2/2 0 0 0 0Eth2/3 0 0 0 0Eth2/4 0 0 0 0Eth2/5 0 0 0 0Eth2/6 0 0 0 0Eth2/7 4174381 0 53303 0Eth2/8 0 0 0 0Eth2/9 295061 0 1348 0Eth2/10 0 0 0 0Eth2/11 0 0 0 0Eth2/12 0 0 0 0Eth2/13 0 0 0 0Eth2/14 0 0 0 0Eth2/15 0 0 0 0Eth2/16 0 0 0 0Eth2/17 0 0 0 0
IF-142Cisco Nexus 7000 Series NX-OS Interfaces Command Reference, Release 5.x
OL-23495-01

Send document comments to nexus7k -doc feedback@c isco .com
Cisco NX-OS Interfaces Commandsshow interface counters
Eth2/18 0 0 0 0Eth2/19 0 0 0 0Eth2/20 0 0 0 0Eth2/21 0 0 0 0Eth2/22 0 0 0 0Eth2/23 0 0 0 0Eth2/24 0 0 0 0Eth2/25 0 0 0 0Eth2/26 0 0 0 0Eth2/27 0 0 0 0Eth2/28 0 0 0 0Eth2/29 0 0 0 0Eth2/30 0 0 0 0Eth2/31 0 0 0 0Eth2/32 0 0 0 0Eth2/33 0 0 0 0Eth2/34 0 0 0 0Eth2/35 0 0 0 0Eth2/36 0 0 0 0Eth2/37 0 0 0 0Eth2/38 0 0 0 0Eth2/39 0 0 0 0Eth2/40 0 0 0 0Eth2/41 0 0 0 0Eth2/42 0 0 0 0Eth2/43 0 0 0 0Eth2/44 0 0 0 0Eth2/45 0 0 0 0Eth2/46 0 0 0 0Eth2/47 0 0 0 0Eth2/48 0 0 0 0Vlan1 0 0 0 --
Related Commands Command Description
clear counters interface
Clears the counters for the specified interfaces.
IF-143Cisco Nexus 7000 Series NX-OS Interfaces Command Reference, Release 5.x
OL-23495-01

Send document comments to nexus7k -doc feedback@c isco .com
Cisco NX-OS Interfaces Commandsshow interface counters errors
show interface counters errorsTo display interface error counters, use the show interface counters errors.
show interface [ethernet slot/port | port-channel channel-number] counter errors
Syntax Description
Command Default None
Command Modes Any command mode
Supported User Roles network-adminvdc-admin
Command History
Usage Guidelines Use the show interface counters errors command to display interface error counters. If you do not specify an interface, this command displays information about all Layer 2 interfaces.
This command does not require a license.
Examples This example shows how to display the interface error counters:
switch# show interface counters errors
--------------------------------------------------------------------------------Port Align-Err FCS-Err Xmit-Err Rcv-Err UnderSize OutDiscards--------------------------------------------------------------------------------mgmt0 -- -- -- -- -- --Eth2/1 0 0 0 0 0 0Eth2/2 0 0 0 0 0 0Eth2/3 0 0 0 0 0 0Eth2/4 0 0 0 0 0 0Eth2/5 0 0 0 0 0 0Eth2/6 0 0 0 0 0 0Eth2/7 0 0 0 0 0 0Eth2/8 0 0 0 0 0 0
ethernet (Optional) Specifies the slot and port of the Ethernet interface that you want to display.
slot/port (Optional) Slot number and port number for the Ethernet interface.
port-channel (Optional) Specifies the port-channel number of the port-channel interface that you want to display.
channel-number (Optional) Channel number.
Release Modification
4.0 This command was introduced.
IF-144Cisco Nexus 7000 Series NX-OS Interfaces Command Reference, Release 5.x
OL-23495-01

Send document comments to nexus7k -doc feedback@c isco .com
Cisco NX-OS Interfaces Commandsshow interface counters errors
Eth2/9 0 0 0 0 0 0Eth2/10 0 0 0 0 0 0Eth2/11 0 0 0 0 0 0Eth2/12 0 0 0 0 0 0Eth2/13 0 0 0 0 0 0Eth2/14 0 0 0 0 0 0Eth2/15 0 0 0 0 0 0Eth2/16 0 0 0 0 0 0Eth2/17 0 0 0 0 0 0Eth2/18 0 0 0 0 0 0Eth2/19 0 0 0 0 0 0Eth2/20 0 0 0 0 0 0Eth2/21 0 0 0 0 0 0Eth2/22 0 0 0 0 0 0Eth2/23 0 0 0 0 0 0Eth2/24 0 0 0 0 0 0Eth2/25 0 0 0 0 0 0Eth2/26 0 0 0 0 0 0Eth2/27 0 0 0 0 0 0Eth2/28 0 0 0 0 0 0Eth2/29 0 0 0 0 0 0Eth2/30 0 0 0 0 0 0Eth2/31 0 0 0 0 0 0Eth2/32 0 0 0 0 0 0Eth2/33 0 0 0 0 0 0Eth2/34 0 0 0 0 0 0Eth2/35 0 0 0 0 0 0Eth2/36 0 0 0 0 0 0Eth2/37 0 0 0 0 0 0Eth2/38 0 0 0 0 0 0Eth2/39 0 0 0 0 0 0Eth2/40 0 0 0 0 0 0Eth2/41 0 0 0 0 0 0Eth2/42 0 0 0 0 0 0Eth2/43 0 0 0 0 0 0Eth2/44 0 0 0 0 0 0Eth2/45 0 0 0 0 0 0Eth2/46 0 0 0 0 0 0Eth2/47 0 0 0 0 0 0Eth2/48 0 0 0 0 0 0
--------------------------------------------------------------------------------Port Single-Col Multi-Col Late-Col Exces-Col Carri-Sen Runts--------------------------------------------------------------------------------mgmt0 -- -- -- -- -- --Eth2/1 0 0 0 0 0 0Eth2/2 0 0 0 0 0 0Eth2/3 0 0 0 0 0 0Eth2/4 0 0 0 0 0 0Eth2/5 0 0 0 0 0 0Eth2/6 0 0 0 0 0 0Eth2/7 0 0 0 0 0 0Eth2/8 0 0 0 0 0 0Eth2/9 0 0 0 0 0 0Eth2/10 0 0 0 0 0 0Eth2/11 0 0 0 0 0 0Eth2/12 0 0 0 0 0 0Eth2/13 0 0 0 0 0 0Eth2/14 0 0 0 0 0 0Eth2/15 0 0 0 0 0 0Eth2/16 0 0 0 0 0 0Eth2/17 0 0 0 0 0 0Eth2/18 0 0 0 0 0 0Eth2/19 0 0 0 0 0 0
IF-145Cisco Nexus 7000 Series NX-OS Interfaces Command Reference, Release 5.x
OL-23495-01

Send document comments to nexus7k -doc feedback@c isco .com
Cisco NX-OS Interfaces Commandsshow interface counters errors
Eth2/20 0 0 0 0 0 0Eth2/21 0 0 0 0 0 0Eth2/22 0 0 0 0 0 0Eth2/23 0 0 0 0 0 0Eth2/24 0 0 0 0 0 0Eth2/25 0 0 0 0 0 0Eth2/26 0 0 0 0 0 0Eth2/27 0 0 0 0 0 0Eth2/28 0 0 0 0 0 0Eth2/29 0 0 0 0 0 0Eth2/30 0 0 0 0 0 0Eth2/31 0 0 0 0 0 0Eth2/32 0 0 0 0 0 0Eth2/33 0 0 0 0 0 0Eth2/34 0 0 0 0 0 0Eth2/35 0 0 0 0 0 0Eth2/36 0 0 0 0 0 0Eth2/37 0 0 0 0 0 0Eth2/38 0 0 0 0 0 0Eth2/39 0 0 0 0 0 0Eth2/40 0 0 0 0 0 0Eth2/41 0 0 0 0 0 0Eth2/42 0 0 0 0 0 0Eth2/43 0 0 0 0 0 0Eth2/44 0 0 0 0 0 0Eth2/45 0 0 0 0 0 0Eth2/46 0 0 0 0 0 0Eth2/47 0 0 0 0 0 0Eth2/48 0 0 0 0 0 0
--------------------------------------------------------------------------------Port Giants SQETest-Err Deferred-Tx IntMacTx-Er IntMacRx-Er Symbol-Err--------------------------------------------------------------------------------mgmt0 -- -- -- -- -- --Eth2/1 0 -- 0 0 0 0Eth2/2 0 -- 0 0 0 0Eth2/3 0 -- 0 0 0 0Eth2/4 0 -- 0 0 0 0Eth2/5 0 -- 0 0 0 0Eth2/6 0 -- 0 0 0 0Eth2/7 0 -- 0 0 0 0Eth2/8 0 -- 0 0 0 0Eth2/9 0 -- 0 0 0 0Eth2/10 0 -- 0 0 0 0Eth2/11 0 -- 0 0 0 0Eth2/12 0 -- 0 0 0 0Eth2/13 0 -- 0 0 0 0Eth2/14 0 -- 0 0 0 0Eth2/15 0 -- 0 0 0 0Eth2/16 0 -- 0 0 0 0Eth2/17 0 -- 0 0 0 0Eth2/18 0 -- 0 0 0 0Eth2/19 0 -- 0 0 0 0Eth2/20 0 -- 0 0 0 0Eth2/21 0 -- 0 0 0 0Eth2/22 0 -- 0 0 0 0Eth2/23 0 -- 0 0 0 0Eth2/24 0 -- 0 0 0 0Eth2/25 0 -- 0 0 0 0Eth2/26 0 -- 0 0 0 0Eth2/27 0 -- 0 0 0 0Eth2/28 0 -- 0 0 0 0Eth2/29 0 -- 0 0 0 0Eth2/30 0 -- 0 0 0 0
IF-146Cisco Nexus 7000 Series NX-OS Interfaces Command Reference, Release 5.x
OL-23495-01

Send document comments to nexus7k -doc feedback@c isco .com
Cisco NX-OS Interfaces Commandsshow interface counters errors
Eth2/31 0 -- 0 0 0 0Eth2/32 0 -- 0 0 0 0Eth2/33 0 -- 0 0 0 0Eth2/34 0 -- 0 0 0 0Eth2/35 0 -- 0 0 0 0Eth2/36 0 -- 0 0 0 0Eth2/37 0 -- 0 0 0 0Eth2/38 0 -- 0 0 0 0Eth2/39 0 -- 0 0 0 0Eth2/40 0 -- 0 0 0 0Eth2/41 0 -- 0 0 0 0Eth2/42 0 -- 0 0 0 0Eth2/43 0 -- 0 0 0 0Eth2/44 0 -- 0 0 0 0Eth2/45 0 -- 0 0 0 0Eth2/46 0 -- 0 0 0 0Eth2/47 0 -- 0 0 0 0Eth2/48 0 -- 0 0 0 0
Related Commands Command Description
clear counters interface
Clears the counters for the specified interfaces.
IF-147Cisco Nexus 7000 Series NX-OS Interfaces Command Reference, Release 5.x
OL-23495-01

Send document comments to nexus7k -doc feedback@c isco .com
Cisco NX-OS Interfaces Commandsshow interface counters storm-control
show interface counters storm-controlTo display interface storm control discard counters, use the show interface counters storm-control.
show interface [ethernet slot/port | port-channel channel-number] counters storm-control
Syntax Description
Defaults None
Command Modes Any command mode
Supported User Roles network-adminvdc-admin
Command History
Usage Guidelines Use the show interface counters storm-control command to display interface storm control discard counters. If you do not specify an interface, this command displays information about all Layer 2 interfaces.
This command does not require a license.
Examples This example shows how to display the interface storm control discard counters:
switch# show interface counters storm-control
--------------------------------------------------------------------------------Port UcastSupp % McastSupp % BcastSupp % TotalSuppDiscards--------------------------------------------------------------------------------Eth2/1 100.00 100.00 100.00 0Eth2/2 100.00 100.00 100.00 0Eth2/3 100.00 100.00 100.00 0Eth2/4 100.00 100.00 100.00 0Eth2/5 100.00 100.00 100.00 0Eth2/6 100.00 100.00 100.00 0Eth2/7 100.00 100.00 100.00 0Eth2/8 100.00 100.00 100.00 0
ethernet (Optional) Specifies the slot and port of the Ethernet interface that you want to display.
slot/port (Optional) Slot number and port number for the Ethernet interface.
port-channel (Optional) Specifies the port-channel number of the port-channel interface that you want to display.
channel-number (Optional) Channel number.
Release Modification
4.0 This command was introduced.
IF-148Cisco Nexus 7000 Series NX-OS Interfaces Command Reference, Release 5.x
OL-23495-01

Send document comments to nexus7k -doc feedback@c isco .com
Cisco NX-OS Interfaces Commandsshow interface counters storm-control
Eth2/9 100.00 100.00 100.00 0Eth2/10 100.00 100.00 100.00 0Eth2/11 100.00 100.00 100.00 0Eth2/12 100.00 100.00 100.00 0Eth2/13 100.00 100.00 100.00 0Eth2/14 100.00 100.00 100.00 0Eth2/15 100.00 100.00 100.00 0Eth2/16 100.00 100.00 100.00 0Eth2/17 100.00 100.00 100.00 0Eth2/18 100.00 100.00 100.00 0Eth2/19 100.00 100.00 100.00 0Eth2/20 100.00 100.00 100.00 0Eth2/21 100.00 100.00 100.00 0Eth2/22 100.00 100.00 100.00 0Eth2/23 100.00 100.00 100.00 0Eth2/24 100.00 100.00 100.00 0Eth2/25 100.00 100.00 100.00 0Eth2/26 100.00 100.00 100.00 0Eth2/27 100.00 100.00 100.00 0Eth2/28 100.00 100.00 100.00 0Eth2/29 100.00 100.00 100.00 0Eth2/30 100.00 100.00 100.00 0Eth2/31 100.00 100.00 100.00 0Eth2/32 100.00 100.00 100.00 0Eth2/33 100.00 100.00 100.00 0Eth2/34 100.00 100.00 100.00 0Eth2/35 100.00 100.00 100.00 0Eth2/36 100.00 100.00 100.00 0Eth2/37 100.00 100.00 100.00 0Eth2/38 100.00 100.00 100.00 0Eth2/39 100.00 100.00 100.00 0Eth2/40 100.00 100.00 100.00 0Eth2/41 100.00 100.00 100.00 0Eth2/42 100.00 100.00 100.00 0Eth2/43 100.00 100.00 100.00 0Eth2/44 100.00 100.00 100.00 0Eth2/45 100.00 100.00 100.00 0Eth2/46 100.00 100.00 100.00 0Eth2/47 100.00 100.00 100.00 0Eth2/48 100.00 100.00 100.00 0
Related Commands Command Description
clear counters interface
Clears the counters for the specified interfaces.
IF-149Cisco Nexus 7000 Series NX-OS Interfaces Command Reference, Release 5.x
OL-23495-01
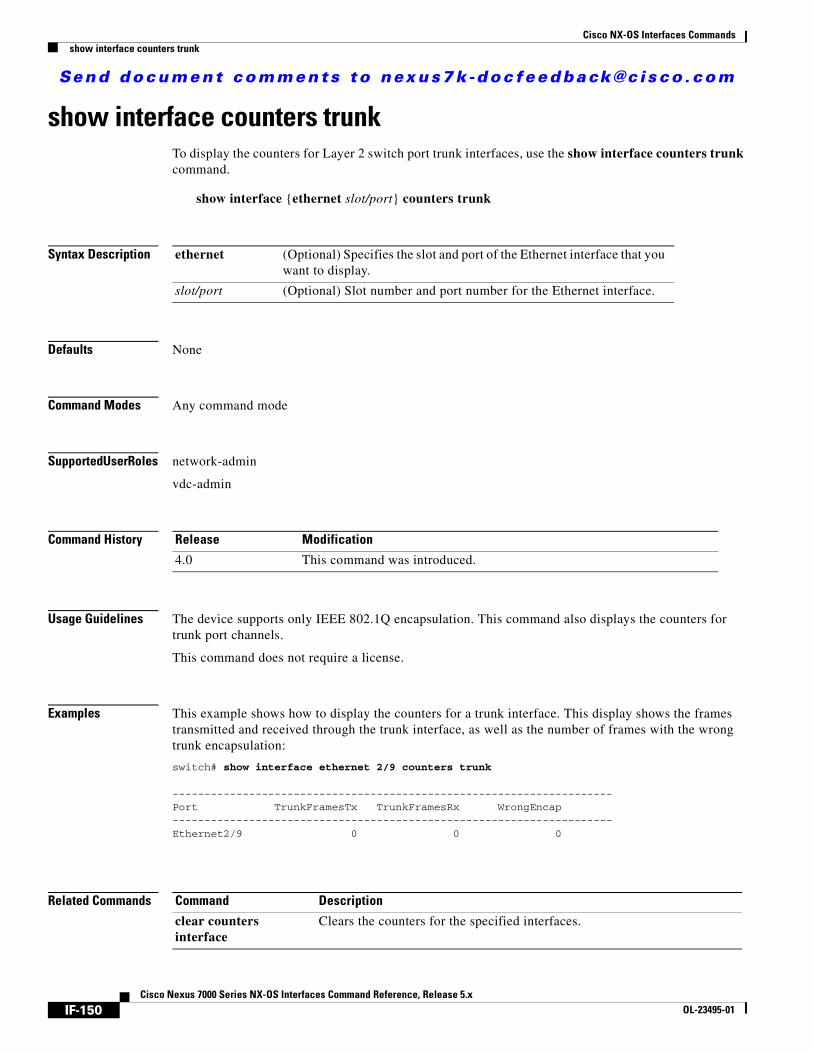
Send document comments to nexus7k -doc feedback@c isco .com
Cisco NX-OS Interfaces Commandsshow interface counters trunk
show interface counters trunkTo display the counters for Layer 2 switch port trunk interfaces, use the show interface counters trunk command.
show interface {ethernet slot/port} counters trunk
Syntax Description
Defaults None
Command Modes Any command mode
Supported User Roles network-admin
vdc-admin
Command History
Usage Guidelines The device supports only IEEE 802.1Q encapsulation. This command also displays the counters for trunk port channels.
This command does not require a license.
Examples This example shows how to display the counters for a trunk interface. This display shows the frames transmitted and received through the trunk interface, as well as the number of frames with the wrong trunk encapsulation:
switch# show interface ethernet 2/9 counters trunk
---------------------------------------------------------------------Port TrunkFramesTx TrunkFramesRx WrongEncap---------------------------------------------------------------------Ethernet2/9 0 0 0
Related Commands
ethernet (Optional) Specifies the slot and port of the Ethernet interface that you want to display.
slot/port (Optional) Slot number and port number for the Ethernet interface.
Release Modification
4.0 This command was introduced.
Command Description
clear counters interface
Clears the counters for the specified interfaces.
IF-150Cisco Nexus 7000 Series NX-OS Interfaces Command Reference, Release 5.x
OL-23495-01

Send document comments to nexus7k -doc feedback@c isco .com
Cisco NX-OS Interfaces Commandsshow interface debounce
show interface debounceTo display the debounce time information about the interface, use the show interface debounce command.
show interface [ethernet slot/port | port-channel channel-number] debounce
Syntax Description
Command Default None
Command Modes Any command mode
Supported User Roles network-adminvdc-admin
Command History
Usage Guidelines Use the show interface debounce command to display debounce time information about the interface. If you do not specify an interface, this command displays information about all Layer 2 interfaces.
This command does not require a license.
Examples This example shows how to display debounce time information about the interface:
switch# show interface debounce
--------------------------------------------------------------------------------Port Debounce time Value(ms)--------------------------------------------------------------------------------Eth2/1 enable 100Eth2/2 enable 100Eth2/3 enable 100Eth2/4 enable 100Eth2/5 enable 100Eth2/6 enable 100Eth2/7 enable 100Eth2/8 enable 100
ethernet (Optional) Specifies the slot and port of the Ethernet interface that you want to display.
slot/port (Optional) Slot number and port number for the Ethernet interface.
port-channel (Optional) Specifies the port-channel number of the port-channel interface that you want to display.
channel-number (Optional) Channel number.
Release Modification
4.0 This command was introduced.
IF-151Cisco Nexus 7000 Series NX-OS Interfaces Command Reference, Release 5.x
OL-23495-01

Send document comments to nexus7k -doc feedback@c isco .com
Cisco NX-OS Interfaces Commandsshow interface debounce
Eth2/9 enable 100Eth2/10 enable 100Eth2/11 enable 100Eth2/12 enable 100Eth2/13 enable 100Eth2/14 enable 100Eth2/15 enable 100Eth2/16 enable 100Eth2/17 enable 100Eth2/18 enable 100Eth2/19 enable 100Eth2/20 enable 100Eth2/21 enable 100Eth2/22 enable 100Eth2/23 enable 100Eth2/24 enable 100Eth2/25 enable 100Eth2/26 enable 100Eth2/27 enable 100Eth2/28 enable 100Eth2/29 enable 100Eth2/30 enable 100Eth2/31 enable 100Eth2/32 enable 100Eth2/33 enable 100Eth2/34 enable 100Eth2/35 enable 100Eth2/36 enable 100Eth2/37 enable 100Eth2/38 enable 100Eth2/39 enable 100Eth2/40 enable 100Eth2/41 enable 100Eth2/42 enable 100Eth2/43 enable 100Eth2/44 enable 100Eth2/45 enable 100Eth2/46 enable 100Eth2/47 enable 100Eth2/48 enable 100
Related Commands Command Description
link debounce time Enables the debounce timer for Ethernet ports.
IF-152Cisco Nexus 7000 Series NX-OS Interfaces Command Reference, Release 5.x
OL-23495-01
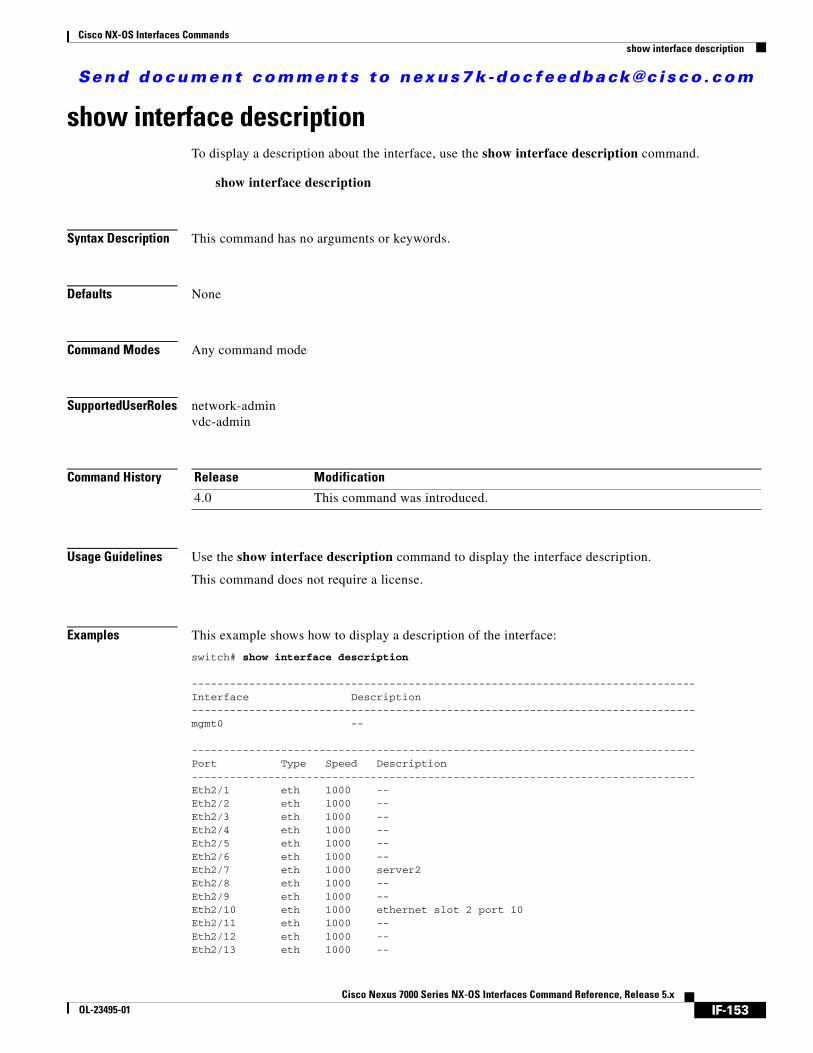
Send document comments to nexus7k -doc feedback@c isco .com
Cisco NX-OS Interfaces Commandsshow interface description
show interface descriptionTo display a description about the interface, use the show interface description command.
show interface description
Syntax Description This command has no arguments or keywords.
Defaults None
Command Modes Any command mode
Supported User Roles network-adminvdc-admin
Command History
Usage Guidelines Use the show interface description command to display the interface description.
This command does not require a license.
Examples This example shows how to display a description of the interface:
switch# show interface description
-------------------------------------------------------------------------------Interface Description-------------------------------------------------------------------------------mgmt0 --
-------------------------------------------------------------------------------Port Type Speed Description-------------------------------------------------------------------------------Eth2/1 eth 1000 --Eth2/2 eth 1000 --Eth2/3 eth 1000 --Eth2/4 eth 1000 --Eth2/5 eth 1000 --Eth2/6 eth 1000 --Eth2/7 eth 1000 server2Eth2/8 eth 1000 --Eth2/9 eth 1000 --Eth2/10 eth 1000 ethernet slot 2 port 10Eth2/11 eth 1000 --Eth2/12 eth 1000 --Eth2/13 eth 1000 --
Release Modification
4.0 This command was introduced.
IF-153Cisco Nexus 7000 Series NX-OS Interfaces Command Reference, Release 5.x
OL-23495-01

Send document comments to nexus7k -doc feedback@c isco .com
Cisco NX-OS Interfaces Commandsshow interface description
Eth2/14 eth 1000 --Eth2/15 eth 1000 --Eth2/16 eth 1000 --Eth2/17 eth 1000 --Eth2/18 eth 1000 --Eth2/19 eth 1000 --Eth2/20 eth 1000 --Eth2/21 eth 1000 --Eth2/22 eth 1000 --Eth2/23 eth 1000 --Eth2/24 eth 1000 --Eth2/25 eth 1000 --Eth2/26 eth 1000 --Eth2/27 eth 1000 --Eth2/28 eth 1000 --Eth2/29 eth 1000 --Eth2/30 eth 1000 --Eth2/31 eth 1000 --Eth2/32 eth 1000 --Eth2/33 eth 1000 --
...<additional lines truncated>
Related Commands Command Description
description Provides textual interface descriptions for interfaces.
IF-154Cisco Nexus 7000 Series NX-OS Interfaces Command Reference, Release 5.x
OL-23495-01

Send document comments to nexus7k -doc feedback@c isco .com
Cisco NX-OS Interfaces Commandsshow interface ethernet
show interface ethernetTo display information about the Ethernet interface, use the show interface ethernet command.
show interface ethernet slot/port
Syntax Description
Defaults None
Command Modes Any command mode
Supported User Roles network-adminvdc-admin
Command History
Usage Guidelines Use the show interface ethernet command to display information about the Ethernet interface.
This command does not require a license.
Examples This example shows how to display information about the Ethernet interface:
switch# show interface ethernet 2/5Ethernet2/5 is down (Administratively down)
Hardware: 10/100/1000 Ethernet, address: 0018.bad8.3ffd (bia 0019.076c.4db0)MTU 1500 bytes, BW 1000000 Kbit, DLY 10 usec,
reliability 255/255, txload 1/255, rxload 1/255Encapsulation ARPAauto-duplex, auto-speedBeacon is turned offAuto-Negotiation is turned onInput flow-control is off, output flow-control is offAuto-mdix is turned onSwitchport monitor is offLast clearing of "show interface" counters never1 minute input rate 0 bits/sec, 0 packets/sec1 minute output rate 0 bits/sec, 0 packets/secL3 in Switched:
ucast: 0 pkts, 0 bytes - mcast: 0 pkts, 0 bytesL3 out Switched:
ucast: 0 pkts, 0 bytes - mcast: 0 pkts, 0 bytesRx
0 input packets 0 unicast packets 0 multicast packets0 broadcast packets 0 jumbo packets 0 storm suppression packets
slot/port Slot number and port number for the Ethernet interface.
Release Modification
4.0 This command was introduced.
IF-155Cisco Nexus 7000 Series NX-OS Interfaces Command Reference, Release 5.x
OL-23495-01

Send document comments to nexus7k -doc feedback@c isco .com
Cisco NX-OS Interfaces Commandsshow interface ethernet
0 bytesTx
0 output packets 0 multicast packets0 broadcast packets 0 jumbo packets0 bytes0 input error 0 short frame 0 watchdog0 no buffer 0 runt 0 CRC 0 ecc0 overrun 0 underrun 0 ignored 0 bad etype drop0 bad proto drop 0 if down drop 0 input with dribble0 input discard0 output error 0 collision 0 deferred0 late collision 0 lost carrier 0 no carrier0 babble0 Rx pause 0 Tx pause
0 interface resets
Related Commands Command Description
interface Enters the interface configuration mode, and configures the types and identities of interfaces.
IF-156Cisco Nexus 7000 Series NX-OS Interfaces Command Reference, Release 5.x
OL-23495-01

Send document comments to nexus7k -doc feedback@c isco .com
Cisco NX-OS Interfaces Commandsshow interface flowcontrol
show interface flowcontrolTo display the flow-control configuration for all or a specified interface, use the show interface flowcontrol command.
show interface [ethernet slot/port | port-channel channel-number] flowcontrol
Syntax Description
Defaults None
Command Modes Any command mode
Supported User Roles network-admin 2vdc-admin
Command History
Usage Guidelines Use the show interface flowcontrol command to display information about the interface flow control. If you do not specify an interface, this command displays information about all Layer 2 interfaces.
This command does not require a license.
Examples This example shows how to display the interface flow-control information:
switch# show interface flowcontrol
--------------------------------------------------------------------------------Port Send FlowControl Receive FlowControl RxPause TxPause
admin oper admin oper--------------------------------------------------------------------------------Eth2/1 off off off off 0 0Eth2/2 off off off off 0 0Eth2/3 off off off off 0 0Eth2/4 off off off off 0 0Eth2/5 off off off off 0 0Eth2/6 off off off off 0 0Eth2/7 off off off off 0 0Eth2/8 off off off off 0 0Eth2/9 off off off off 0 0Eth2/10 off off off off 0 0
ethernet slot/port (Optional) Specifies the slot and port of the Ethernet interface that you want to display.
port-channel channel-number
(Optional) Specifies the port-channel number of the port-channel interface that you want to display.
Release Modification
4.0 This command was introduced.
IF-157Cisco Nexus 7000 Series NX-OS Interfaces Command Reference, Release 5.x
OL-23495-01

Send document comments to nexus7k -doc feedback@c isco .com
Cisco NX-OS Interfaces Commandsshow interface flowcontrol
Eth2/11 off off off off 0 0Eth2/12 off off off off 0 0Eth2/13 off off off off 0 0Eth2/14 off off off off 0 0Eth2/15 off off off off 0 0Eth2/16 off off off off 0 0Eth2/17 off off off off 0 0Eth2/18 off off off off 0 0Eth2/19 off off off off 0 0Eth2/20 off off off off 0 0Eth2/21 off off off off 0 0Eth2/22 off off off off 0 0Eth2/23 off off off off 0 0Eth2/24 off off off off 0 0Eth2/25 off off off off 0 0Eth2/26 off off off off 0 0Eth2/27 off off off off 0 0Eth2/28 off off off off 0 0Eth2/29 off off off off 0 0Eth2/30 off off off off 0 0Eth2/31 off off off off 0 0Eth2/32 off off off off 0 0Eth2/33 off off off off 0 0Eth2/34 off off off off 0 0Eth2/35 off off off off 0 0Eth2/36 off off off off 0 0Eth2/37 off off off off 0 0Eth2/38 off off off off 0 0Eth2/39 off off off off 0 0Eth2/40 off off off off 0 0Eth2/41 off off off off 0 0Eth2/42 off off off off 0 0Eth2/43 off off off off 0 0Eth2/44 off off off off 0 0Eth2/45 off off off off 0 0Eth2/46 off off off off 0 0Eth2/47 off off off off 0 0Eth2/48 off off off off 0 0
Related Commands Command Description
flowcontrol Enables or disables the ability of the Ethernet port to send and receive flow-control pause frames.
IF-158Cisco Nexus 7000 Series NX-OS Interfaces Command Reference, Release 5.x
OL-23495-01

Send document comments to nexus7k -doc feedback@c isco .com
Cisco NX-OS Interfaces Commandsshow interface mgmt
show interface mgmtTo display the management interface information, use the show interface mgmt command.
show interface mgmt number [brief | counters [detailed [all] | errors [snmp]] | description | status]
Syntax Description
Defaults None
Command Modes Any command mode
Supported User Roles network-adminvdc-admin
Command History
Usage Guidelines Use the show interface mgmt number command to display information about the management interface.
This command does not require a license.
Examples This example shows how to display the management interface information:
switch# show interface mgmt0mgmt0 is up
Hardware: GigabitEthernet, address: 0019.076c.1a78 (bia 0019.076c.1a78)Internet Address is 172.28.231.193/23MTU 1500 bytes, BW 1000000 Kbit, DLY 10 usec,
reliability 255/255, txload 1/255, rxload 1/255Encapsulation ARPA
number Information about the management interface number. The valid value is 0.
brief (Optional) Displays brief information about the management interface.
counters (Optional) Displays the counters for the management interface.
detailed (Optional) Displays detailed information about the counters for the management interface.
errors (Optional) Displays the errors for the management interface.
snmp (Optional) Displays the SNMP errors for the management interface.
description (Optional) Displays the description of the management interface.
status (Optional) Displays the status of the management interface.
Release Modification
4.0 This command was introduced.
IF-159Cisco Nexus 7000 Series NX-OS Interfaces Command Reference, Release 5.x
OL-23495-01
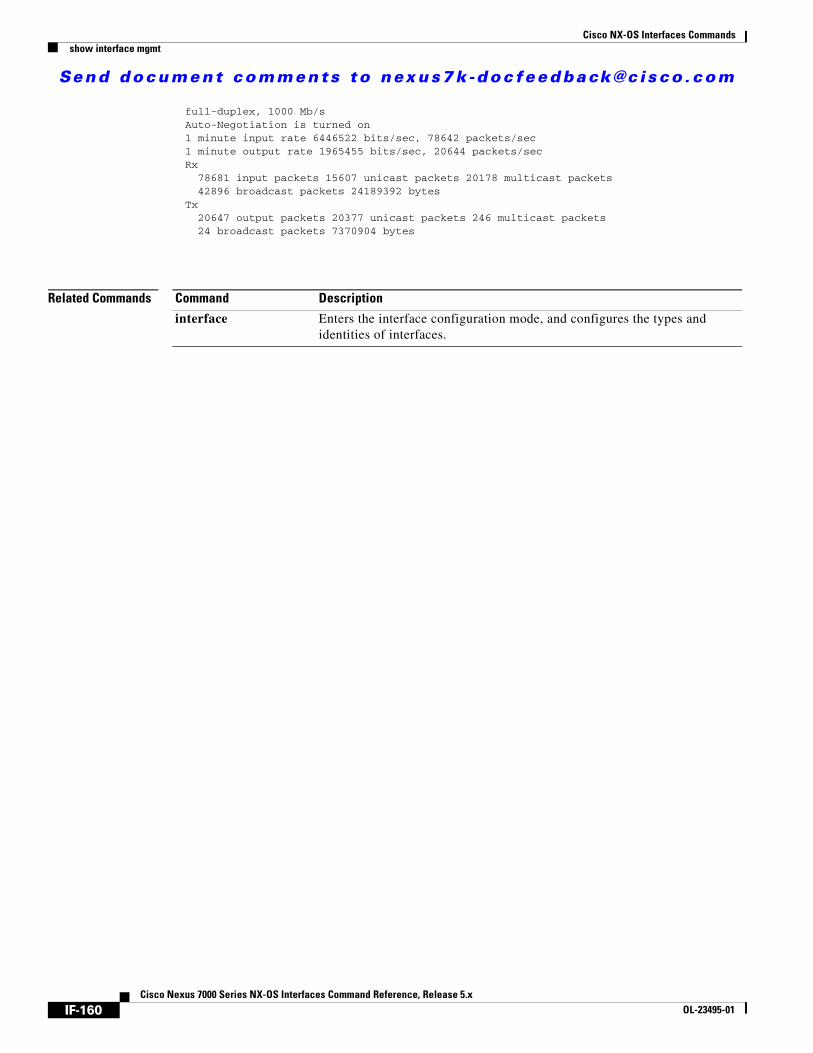
Send document comments to nexus7k -doc feedback@c isco .com
Cisco NX-OS Interfaces Commandsshow interface mgmt
full-duplex, 1000 Mb/sAuto-Negotiation is turned on1 minute input rate 6446522 bits/sec, 78642 packets/sec1 minute output rate 1965455 bits/sec, 20644 packets/secRx
78681 input packets 15607 unicast packets 20178 multicast packets42896 broadcast packets 24189392 bytes
Tx20647 output packets 20377 unicast packets 246 multicast packets24 broadcast packets 7370904 bytes
Related Commands Command Description
interface Enters the interface configuration mode, and configures the types and identities of interfaces.
IF-160Cisco Nexus 7000 Series NX-OS Interfaces Command Reference, Release 5.x
OL-23495-01

Send document comments to nexus7k -doc feedback@c isco .com
Cisco NX-OS Interfaces Commandsshow interface port-channel
show interface port-channelTo display descriptive information about port channels, use the show interface port-channel command.
show interface port-channel channel-number [brief | description | flowcontrol | status | switchport | trunk]
Syntax Description
Defaults None
Command Modes Any command mode
Supported User Roles network-admin
vdc-admin
Command History
Usage Guidelines To display more statistics for the specified port channels, use the show interface port-channel counters command.
This command does not require a license.
Examples This example shows how to display information for a specific port channel. This example displays statistical information gathered on the port channel at 1-minute intervals:
channel-number Number of the port-channel group. Valid values are from 1 to 4096.
brief (Optional) Specifies the summary information for specified port channels.
description (Optional) Specifies the description of specified port channels.
flowcontrol (Optional) Specifies information about the flow-control status control for specified port channels and the statistics on received and transmitted flow-control pause packets.
status (Optional) Specifies information about the status for specified port channels.
switchport (Optional) Specifies information for specified Layer 2 port channels including access and trunk modes.
trunk (Optional) Specifies information for specified Layer 2 port channels on the trunk mode.
Release Modification
4.0 This command was introduced.
4.2(1) Display of configured static MAC address for Layer 3 port channels added.
IF-161Cisco Nexus 7000 Series NX-OS Interfaces Command Reference, Release 5.x
OL-23495-01

Send document comments to nexus7k -doc feedback@c isco .com
Cisco NX-OS Interfaces Commandsshow interface port-channel
switch(config)# show interface port-channel 50port-channel50 is down (No operational members)
Hardware is Port-Channel, address is 0000.0000.0000 (bia 0000.0000.0000)MTU 1500 bytes, BW 100000 Kbit, DLY 10 usec,
reliability 255/255, txload 1/255, rxload 1/255Encapsulation ARPAPort mode is accessauto-duplex, auto-speedBeacon is turned offInput flow-control is off, output flow-control is offSwitchport monitor is offMembers in this channel: Eth2/10Last clearing of "show interface" counters 2d71.2uh1 minute input rate 0 bytes/sec, 0 packets/sec1 minute output rate 0 bytes/sec, 0 packets/secRx
0 input packets 0 unicast packets 0 multicast packets0 broadcast packets 0 jumbo packets 0 storm suppression packets0 bytes
Tx0 output packets 0 multicast packets0 broadcast packets 0 jumbo packets0 bytes0 input error 0 short frame 0 watchdog0 no buffer 0 runt 0 CRC 0 ecc0 overrun 0 underrun 0 ignored 0 bad etype drop0 bad proto drop 0 if down drop 0 input with dribble0 input discard0 output error 0 collision 0 deferred0 late collision 0 lost carrier 0 no carrier0 babble0 Rx pause 0 Tx pause 0 reset
This example shows how to display a brief description for a specific port channel, including the mode for the port channel, the status, speed, and protocol:
switch# show interface port-channel 5 brief
--------------------------------------------------------------------------------Port-channel VLAN Type Mode Status Reason Speed ProtocolInterface--------------------------------------------------------------------------------
eth access down No operational members auto(D) lacp
This example shows how to display the description for a specific port channel:
switch# show interface port-channel 5 description
-------------------------------------------------------------------------------Interface Description-------------------------------------------------------------------------------port-channel5 test
This example shows how to display the flow-control information for a specific port channel:
switch# show interface port-channel 50 flowcontrol
------------------------------------------------------------------------------Port Send FlowControl Receive FlowControl RxPause TxPause
admin oper admin oper------------------------------------------------------------------------------Po50 off off off off 0 0
IF-162Cisco Nexus 7000 Series NX-OS Interfaces Command Reference, Release 5.x
OL-23495-01
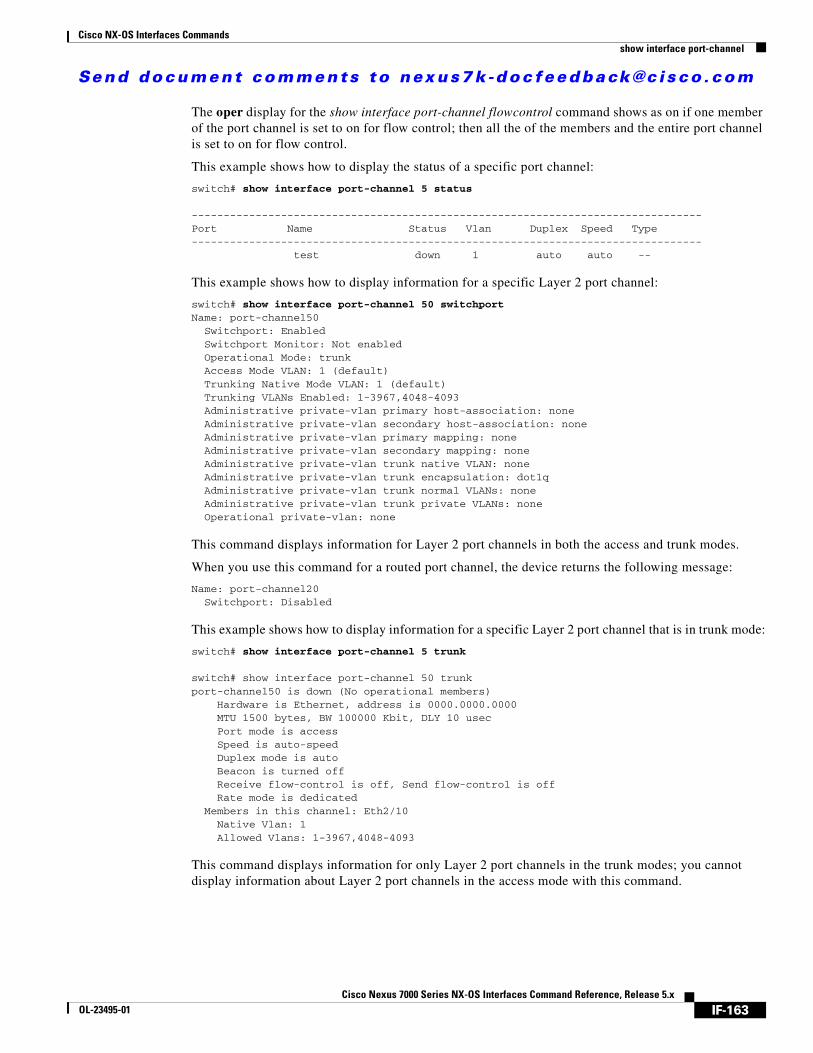
Send document comments to nexus7k -doc feedback@c isco .com
Cisco NX-OS Interfaces Commandsshow interface port-channel
The oper display for the show interface port-channel flowcontrol command shows as on if one member of the port channel is set to on for flow control; then all the of the members and the entire port channel is set to on for flow control.
This example shows how to display the status of a specific port channel:
switch# show interface port-channel 5 status
--------------------------------------------------------------------------------Port Name Status Vlan Duplex Speed Type--------------------------------------------------------------------------------
test down 1 auto auto --
This example shows how to display information for a specific Layer 2 port channel:
switch# show interface port-channel 50 switchportName: port-channel50
Switchport: EnabledSwitchport Monitor: Not enabledOperational Mode: trunkAccess Mode VLAN: 1 (default)Trunking Native Mode VLAN: 1 (default)Trunking VLANs Enabled: 1-3967,4048-4093Administrative private-vlan primary host-association: noneAdministrative private-vlan secondary host-association: noneAdministrative private-vlan primary mapping: noneAdministrative private-vlan secondary mapping: noneAdministrative private-vlan trunk native VLAN: noneAdministrative private-vlan trunk encapsulation: dot1qAdministrative private-vlan trunk normal VLANs: noneAdministrative private-vlan trunk private VLANs: noneOperational private-vlan: none
This command displays information for Layer 2 port channels in both the access and trunk modes.
When you use this command for a routed port channel, the device returns the following message:
Name: port-channel20Switchport: Disabled
This example shows how to display information for a specific Layer 2 port channel that is in trunk mode:
switch# show interface port-channel 5 trunk
switch# show interface port-channel 50 trunkport-channel50 is down (No operational members)
Hardware is Ethernet, address is 0000.0000.0000MTU 1500 bytes, BW 100000 Kbit, DLY 10 usecPort mode is accessSpeed is auto-speedDuplex mode is autoBeacon is turned offReceive flow-control is off, Send flow-control is offRate mode is dedicated
Members in this channel: Eth2/10Native Vlan: 1Allowed Vlans: 1-3967,4048-4093
This command displays information for only Layer 2 port channels in the trunk modes; you cannot display information about Layer 2 port channels in the access mode with this command.
IF-163Cisco Nexus 7000 Series NX-OS Interfaces Command Reference, Release 5.x
OL-23495-01

Send document comments to nexus7k -doc feedback@c isco .com
Cisco NX-OS Interfaces Commandsshow interface port-channel
Related Commands Command Description
show interface port-channel counters
Displays the statistics for channel groups.
show port-channel summary
Displays summary information for all channel groups.
IF-164Cisco Nexus 7000 Series NX-OS Interfaces Command Reference, Release 5.x
OL-23495-01

Send document comments to nexus7k -doc feedback@c isco .com
Cisco NX-OS Interfaces Commandsshow interface port-channel counters
show interface port-channel countersTo display information about port-channel statistics, use the show interface port-channel counters command.
show interface port-channel channel-number counters [brief | detailed [all | snmp] | errors [snmp] | trunk]
Syntax Description
Defaults None
Command Modes Any command mode
Supported User Roles network-admin
vdc-admin
Command History
Usage Guidelines This command displays statistics for all port channels including LACP-enabled port channels and those port channels that are not associated with an aggregation protocol.
This command does not require a license.
Examples This example shows how to display the counters for a specific port channel. This example display shows the transmitted and received unicast and multicast packets:
switch# show interface port-channel 2 counters
Port InOctets InUcastPkts InMcastPkts InBcastPkts
channel-number Number of the port-channel group. Valid values are from 1 to 4096.
brief (Optional) Specifies the rate MB/s and total frames for specified port channels.
detailed (Optional) Specifies the nonzero counters for specified port channels.
all (Optional) Specifies the counters for specified port channels.
snmp (Optional) Specifies the SNMP MIB values for specified port channels.
errors (Optional) Specifies the interface error counters for specified port channels.
trunk (Optional) Specifies the interface trunk counters for specified port channels.
Release Modification
4.0 This command was introduced.
IF-165Cisco Nexus 7000 Series NX-OS Interfaces Command Reference, Release 5.x
OL-23495-01
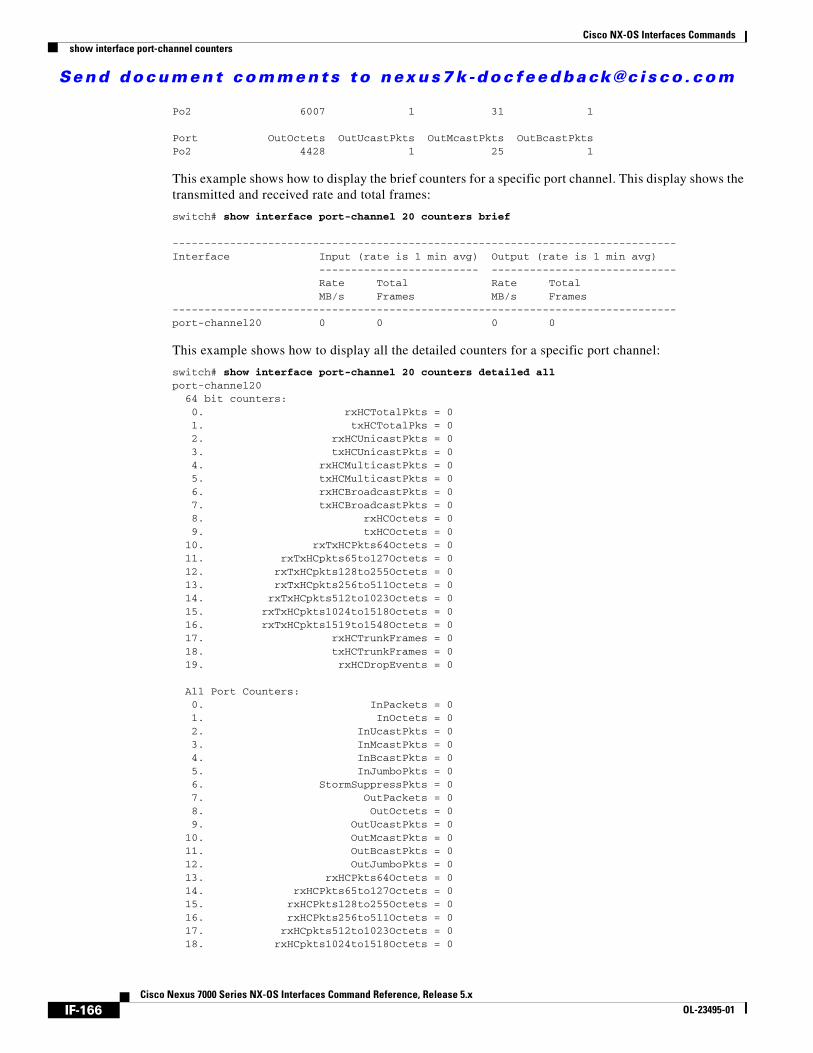
Send document comments to nexus7k -doc feedback@c isco .com
Cisco NX-OS Interfaces Commandsshow interface port-channel counters
Po2 6007 1 31 1
Port OutOctets OutUcastPkts OutMcastPkts OutBcastPktsPo2 4428 1 25 1
This example shows how to display the brief counters for a specific port channel. This display shows the transmitted and received rate and total frames:
switch# show interface port-channel 20 counters brief
-------------------------------------------------------------------------------Interface Input (rate is 1 min avg) Output (rate is 1 min avg)
------------------------- -----------------------------Rate Total Rate TotalMB/s Frames MB/s Frames
-------------------------------------------------------------------------------port-channel20 0 0 0 0
This example shows how to display all the detailed counters for a specific port channel:
switch# show interface port-channel 20 counters detailed allport-channel20
64 bit counters:0. rxHCTotalPkts = 01. txHCTotalPks = 02. rxHCUnicastPkts = 03. txHCUnicastPkts = 04. rxHCMulticastPkts = 05. txHCMulticastPkts = 06. rxHCBroadcastPkts = 07. txHCBroadcastPkts = 08. rxHCOctets = 09. txHCOctets = 0
10. rxTxHCPkts64Octets = 011. rxTxHCpkts65to127Octets = 012. rxTxHCpkts128to255Octets = 013. rxTxHCpkts256to511Octets = 014. rxTxHCpkts512to1023Octets = 015. rxTxHCpkts1024to1518Octets = 016. rxTxHCpkts1519to1548Octets = 017. rxHCTrunkFrames = 018. txHCTrunkFrames = 019. rxHCDropEvents = 0
All Port Counters:0. InPackets = 01. InOctets = 02. InUcastPkts = 03. InMcastPkts = 04. InBcastPkts = 05. InJumboPkts = 06. StormSuppressPkts = 07. OutPackets = 08. OutOctets = 09. OutUcastPkts = 0
10. OutMcastPkts = 011. OutBcastPkts = 012. OutJumboPkts = 013. rxHCPkts64Octets = 014. rxHCPkts65to127Octets = 015. rxHCPkts128to255Octets = 016. rxHCPkts256to511Octets = 017. rxHCpkts512to1023Octets = 018. rxHCpkts1024to1518Octets = 0
IF-166Cisco Nexus 7000 Series NX-OS Interfaces Command Reference, Release 5.x
OL-23495-01

Send document comments to nexus7k -doc feedback@c isco .com
Cisco NX-OS Interfaces Commandsshow interface port-channel counters
19. rxHCpkts1519to1548Octets = 020. txHCPkts64Octets = 021. txHCPkts65to127Octets = 022. txHCPkts128to255Octets = 023. txHCPkts256to511Octets = 024. txHCpkts512to1023Octets = 025. txHCpkts1024to1518Octets = 026. txHCpkts1519to1548Octets = 027. ShortFrames = 028. Collisions = 029. SingleCol = 030. MultiCol = 031. LateCol = 032. ExcessiveCol = 033. LostCarrier = 034. NoCarrier = 035. Runts = 036. Giants = 037. InErrors = 038. OutErrors = 039. InputDiscards = 040. BadEtypeDrops = 041. IfDownDrops = 042. InUnknownProtos = 043. txCRC = 044. rxCRC = 045. Symbol = 046. txDropped = 047. TrunkFramesTx = 048. TrunkFramesRx = 049. WrongEncap = 050. Babbles = 051. Watchdogs = 052. ECC = 053. Overruns = 054. Underruns = 055. Dribbles = 056. Deferred = 057. Jabbers = 058. NoBuffer = 059. Ignored = 060. bpduOutLost = 061. cos0OutLost = 062. cos1OutLost = 063. cos2OutLost = 064. cos3OutLost = 065. cos4OutLost = 066. cos5OutLost = 067. cos6OutLost = 068. cos7OutLost = 069. RxPause = 070. TxPause = 071. Resets = 072. SQETest = 073. InLayer3Routed = 074. InLayer3RoutedOctets = 075. OutLayer3Routed = 076. OutLayer3RoutedOctets = 077. OutLayer3Unicast = 078. OutLayer3UnicastOctets = 079. OutLayer3Multicast = 080. OutLayer3MulticastOctets = 081. InLayer3Unicast = 082. InLayer3UnicastOctets = 0
IF-167Cisco Nexus 7000 Series NX-OS Interfaces Command Reference, Release 5.x
OL-23495-01
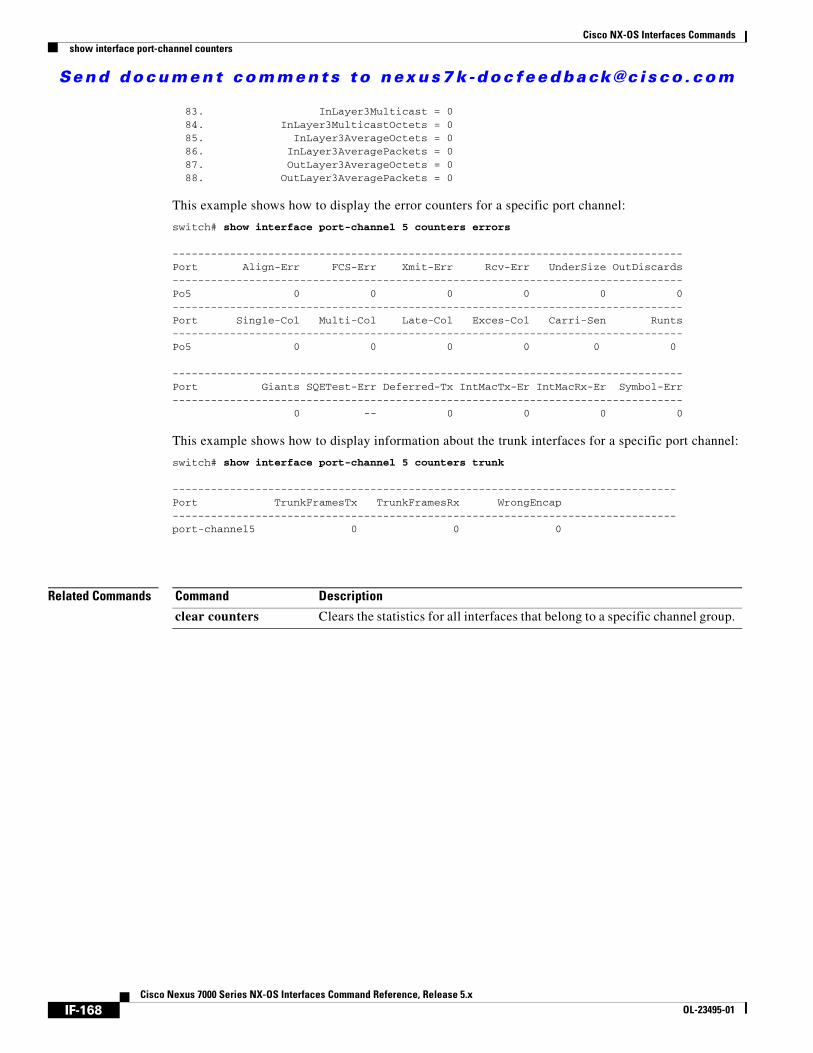
Send document comments to nexus7k -doc feedback@c isco .com
Cisco NX-OS Interfaces Commandsshow interface port-channel counters
83. InLayer3Multicast = 084. InLayer3MulticastOctets = 085. InLayer3AverageOctets = 086. InLayer3AveragePackets = 087. OutLayer3AverageOctets = 088. OutLayer3AveragePackets = 0
This example shows how to display the error counters for a specific port channel:
switch# show interface port-channel 5 counters errors
--------------------------------------------------------------------------------Port Align-Err FCS-Err Xmit-Err Rcv-Err UnderSize OutDiscards--------------------------------------------------------------------------------Po5 0 0 0 0 0 0--------------------------------------------------------------------------------Port Single-Col Multi-Col Late-Col Exces-Col Carri-Sen Runts--------------------------------------------------------------------------------Po5 0 0 0 0 0 0
--------------------------------------------------------------------------------Port Giants SQETest-Err Deferred-Tx IntMacTx-Er IntMacRx-Er Symbol-Err--------------------------------------------------------------------------------
0 -- 0 0 0 0
This example shows how to display information about the trunk interfaces for a specific port channel:
switch# show interface port-channel 5 counters trunk
-------------------------------------------------------------------------------Port TrunkFramesTx TrunkFramesRx WrongEncap-------------------------------------------------------------------------------port-channel5 0 0 0
Related Commands Command Description
clear counters Clears the statistics for all interfaces that belong to a specific channel group.
IF-168Cisco Nexus 7000 Series NX-OS Interfaces Command Reference, Release 5.x
OL-23495-01

Send document comments to nexus7k -doc feedback@c isco .com
Cisco NX-OS Interfaces Commandsshow interface transceiver fex-fabric
show interface transceiver fex-fabricTo display Fabric Extender (FEX) interface transceiver information, use the show interface transceiver fex-fabric command.
show interface transceiver fex-fabric {calibrations | details}
Syntax Description
Defaults None
Command Modes EXEC mode
Command History
Usage Guidelines This command does not require a license.
Examples This example shows how to display interface transceiver calibration information:
switch# show interface transceiver fex-fabric calibrationsEthernet9/1
sfp is presentname is CISCO-FINISARpart number is FTLX8570D3BCL-C1revision is Aserial number is FNS141700UEnominal bitrate is 10300 MBits/secLink length supported for 50/125mm fiber is 0 m(s)Link length supported for 62.5/125mm fiber is 0 m(s)cisco id is --cisco extended id number is 4
Calibration info not availableEthernet9/2
sfp is presentname is CISCO-FINISARpart number is FTLX8570D3BCL-C1revision is Aserial number is FNS141700V2nominal bitrate is 10300 MBits/secLink length supported for 50/125mm fiber is 0 m(s)Link length supported for 62.5/125mm fiber is 0 m(s)
--More--switch#
calibrations Displays interface transceiver calibration information.
details Displays interface transceiver detail information.
Release Modification
5.1(1) This command was introduced.
IF-169Cisco Nexus 7000 Series NX-OS Interfaces Command Reference, Release 5.x
OL-23495-01

Send document comments to nexus7k -doc feedback@c isco .com
Cisco NX-OS Interfaces Commandsshow interface transceiver fex-fabric
This example shows how to display interface transceiver detail information:
switch# show interface transceiver fex-fabric detailsEthernet9/1
sfp is presentname is CISCO-FINISARpart number is FTLX8570D3BCL-C1revision is Aserial number is FNS141700UEnominal bitrate is 10300 MBits/secLink length supported for 50/125mm fiber is 0 m(s)Link length supported for 62.5/125mm fiber is 0 m(s)cisco id is --cisco extended id number is 4
Calibration info not available
Ethernet9/2sfp is presentname is CISCO-FINISARpart number is FTLX8570D3BCL-C1revision is Aserial number is FNS141700V2nominal bitrate is 10300 MBits/secLink length supported for 50/125mm fiber is 0 m(s)Link length supported for 62.5/125mm fiber is 0 m(s)cisco id is --
--More--switch#
Related Commands Command Description
show fex Displays all configured Fabric Extender chassis connected to the switch.
IF-170Cisco Nexus 7000 Series NX-OS Interfaces Command Reference, Release 5.x
OL-23495-01

Send document comments to nexus7k -doc feedback@c isco .com
Cisco NX-OS Interfaces Commandsshow interface status
show interface statusTo display the interface line status, use the show interface status command.
show interface status [down | err-disabled | err-vlans | inactive | module number | up]
Syntax Description
Defaults None
Command Modes Any command mode
Supported User Roles network-adminvdc-admin
Command History
Usage Guidelines Use the show interface status to display the interface line status.
This command does not require a license.
Examples This example shows how to display the interface status for a specific module:
switch# show interface status module 2
--------------------------------------------------------------------------------Port Name Status Vlan Duplex Speed Type--------------------------------------------------------------------------------Eth2/1 -- down routed auto auto 1000BaseTEth2/2 -- down routed auto auto 1000BaseTEth2/3 -- down routed auto auto 1000BaseTEth2/4 -- down 1 auto auto 1000BaseTEth2/5 -- down routed auto auto 1000BaseTEth2/6 -- down 1 auto auto 1000BaseTEth2/7 server2 up 1 full 1000 1000BaseT
down (Optional) Displays the interface down state.
err-disabled (Optional) Displays the interface error-disabled state.
err-vlans (Optional) Displays the VLANs with errors.
inactive (Optional) Displays the interface inactive state.
module number (Optional) Limits display to interfaces on module number that you want to display.
up (Optional) Displays the interface up state.
Release Modification
4.0 This command was introduced.
4.1(2) The err-vlans parameter was added.
IF-171Cisco Nexus 7000 Series NX-OS Interfaces Command Reference, Release 5.x
OL-23495-01

Send document comments to nexus7k -doc feedback@c isco .com
Cisco NX-OS Interfaces Commandsshow interface status
Eth2/8 -- down routed auto auto 1000BaseTEth2/9 -- up 1 full 1000 1000BaseTEth2/10 ethernet slot 2 po down 1 auto auto 1000BaseTEth2/11 -- down routed auto auto 1000BaseTEth2/12 -- down routed auto auto 1000BaseTEth2/13 -- down routed auto auto 1000BaseTEth2/14 -- down routed auto auto 1000BaseTEth2/15 -- down routed auto auto 1000BaseTEth2/16 -- down routed auto auto 1000BaseTEth2/17 -- down routed auto auto 1000BaseTEth2/18 -- down routed auto auto 1000BaseTEth2/19 -- down routed auto auto 1000BaseTEth2/20 -- down routed auto auto 1000BaseTEth2/21 -- down routed auto auto 1000BaseTEth2/22 -- down routed auto auto 1000BaseTEth2/23 -- down routed auto auto 1000BaseTEth2/24 -- down routed auto auto 1000BaseTEth2/25 -- down routed auto auto 1000BaseTEth2/26 -- down routed auto auto 1000BaseTEth2/27 -- down routed auto auto 1000BaseTEth2/28 -- down routed auto auto 1000BaseTEth2/29 -- down routed auto auto 1000BaseTEth2/30 -- down routed auto auto 1000BaseTEth2/31 -- down routed auto auto 1000BaseTEth2/32 -- down routed auto auto 1000BaseTEth2/33 -- down routed auto auto 1000BaseTEth2/34 -- down routed auto auto 1000BaseTEth2/35 -- down routed auto auto 1000BaseTEth2/36 -- down routed auto auto 1000BaseTEth2/37 -- down routed auto auto 1000BaseTEth2/38 -- down routed auto auto 1000BaseTEth2/39 -- down routed auto auto 1000BaseTEth2/40 -- down routed auto auto 1000BaseTEth2/41 -- down routed auto auto 1000BaseTEth2/42 -- down routed auto auto 1000BaseTEth2/43 -- down routed auto auto 1000BaseTEth2/44 -- down routed auto auto 1000BaseTEth2/45 -- down routed auto auto 1000BaseTEth2/46 -- down routed auto auto 1000BaseTEth2/47 -- down routed auto auto 1000BaseTEth2/48 -- down routed auto auto 1000BaseT
Related Commands Command Description
interface Enters the interface configuration mode, and configures the types and identities of interfaces.
IF-172Cisco Nexus 7000 Series NX-OS Interfaces Command Reference, Release 5.x
OL-23495-01

Send document comments to nexus7k -doc feedback@c isco .com
Cisco NX-OS Interfaces Commandsshow interface switchport
show interface switchportTo display information about all the switch port interfaces, use the show interface switchport command.
show interface [ethernet type/slot | port-channel channel-number] switchport
Syntax Description
Defaults None
Command Modes Any command mode
Supported User Roles network-admin
vdc-admin
Command History
Usage Guidelines If you do not specify an interface, this command displays information about all Layer 2 interfaces, including access, trunk, and port-channel interfaces and all private VLAN ports.
Use the show interface counters command to display statistics for the specified Layer 2 interface.
This command does not require a license.
Examples This example shows how to display information for all Layer 2 interfaces:
switch# show interface switchportName: Ethernet2/5
Switchport: EnabledSwitchport Monitor: Not enabledOperational Mode: accessAccess Mode VLAN: 1 (default)Trunking Native Mode VLAN: 1 (default)Trunking VLANs Enabled: 1-3967,4048-4093Administrative private-vlan primary host-association: noneAdministrative private-vlan secondary host-association: noneAdministrative private-vlan primary mapping: noneAdministrative private-vlan secondary mapping: noneAdministrative private-vlan trunk native VLAN: none
ethernet type/slot (Optional) Type and number of the interface that you want to display.
port-channel channel-number
(Optional) Specifies the port-channel number of the port-channel interface that you want to display.
Release Modification
4.0 This command was introduced.
4.2(1) Information about private VLAN promiscuous trunk ports was added.
IF-173Cisco Nexus 7000 Series NX-OS Interfaces Command Reference, Release 5.x
OL-23495-01
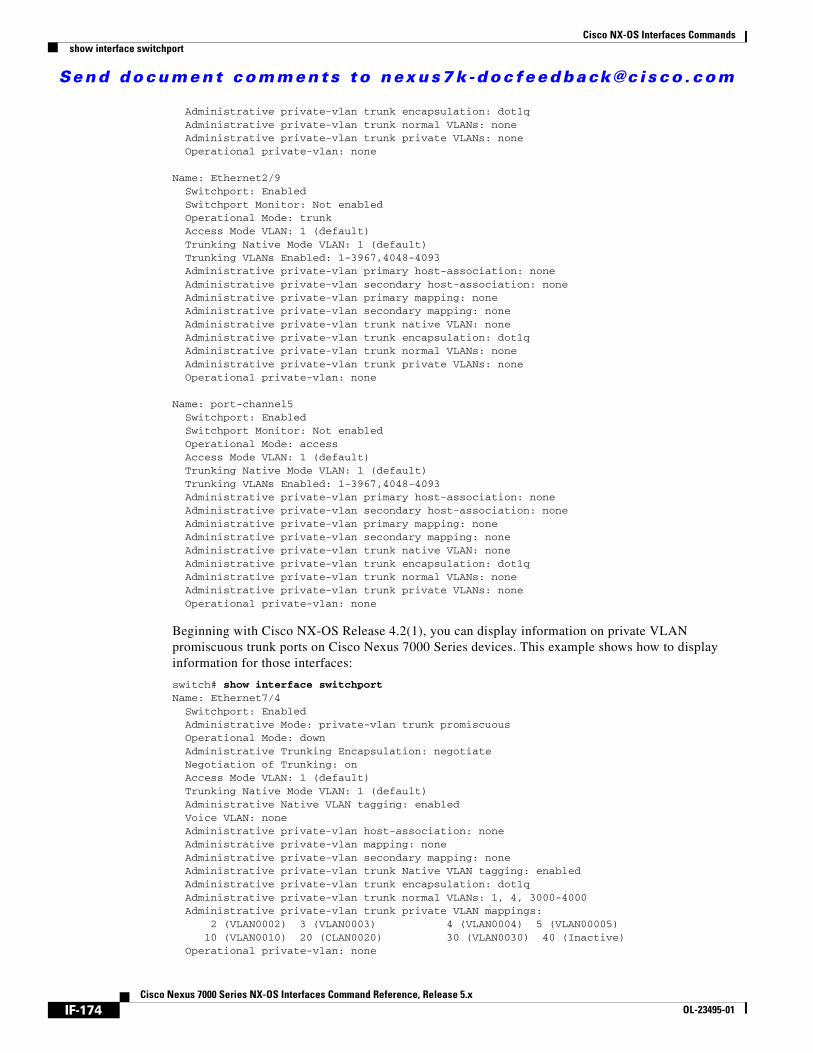
Send document comments to nexus7k -doc feedback@c isco .com
Cisco NX-OS Interfaces Commandsshow interface switchport
Administrative private-vlan trunk encapsulation: dot1qAdministrative private-vlan trunk normal VLANs: noneAdministrative private-vlan trunk private VLANs: noneOperational private-vlan: none
Name: Ethernet2/9Switchport: EnabledSwitchport Monitor: Not enabledOperational Mode: trunkAccess Mode VLAN: 1 (default)Trunking Native Mode VLAN: 1 (default)Trunking VLANs Enabled: 1-3967,4048-4093Administrative private-vlan primary host-association: noneAdministrative private-vlan secondary host-association: noneAdministrative private-vlan primary mapping: noneAdministrative private-vlan secondary mapping: noneAdministrative private-vlan trunk native VLAN: noneAdministrative private-vlan trunk encapsulation: dot1qAdministrative private-vlan trunk normal VLANs: noneAdministrative private-vlan trunk private VLANs: noneOperational private-vlan: none
Name: port-channel5Switchport: EnabledSwitchport Monitor: Not enabledOperational Mode: accessAccess Mode VLAN: 1 (default)Trunking Native Mode VLAN: 1 (default)Trunking VLANs Enabled: 1-3967,4048-4093Administrative private-vlan primary host-association: noneAdministrative private-vlan secondary host-association: noneAdministrative private-vlan primary mapping: noneAdministrative private-vlan secondary mapping: noneAdministrative private-vlan trunk native VLAN: noneAdministrative private-vlan trunk encapsulation: dot1qAdministrative private-vlan trunk normal VLANs: noneAdministrative private-vlan trunk private VLANs: noneOperational private-vlan: none
Beginning with Cisco NX-OS Release 4.2(1), you can display information on private VLAN promiscuous trunk ports on Cisco Nexus 7000 Series devices. This example shows how to display information for those interfaces:
switch# show interface switchportName: Ethernet7/4
Switchport: EnabledAdministrative Mode: private-vlan trunk promiscuousOperational Mode: downAdministrative Trunking Encapsulation: negotiateNegotiation of Trunking: onAccess Mode VLAN: 1 (default)Trunking Native Mode VLAN: 1 (default)Administrative Native VLAN tagging: enabledVoice VLAN: noneAdministrative private-vlan host-association: noneAdministrative private-vlan mapping: noneAdministrative private-vlan secondary mapping: noneAdministrative private-vlan trunk Native VLAN tagging: enabledAdministrative private-vlan trunk encapsulation: dot1qAdministrative private-vlan trunk normal VLANs: 1, 4, 3000-4000Administrative private-vlan trunk private VLAN mappings:
2 (VLAN0002) 3 (VLAN0003) 4 (VLAN0004) 5 (VLAN00005)10 (VLAN0010) 20 (CLAN0020) 30 (VLAN0030) 40 (Inactive)
Operational private-vlan: none
IF-174Cisco Nexus 7000 Series NX-OS Interfaces Command Reference, Release 5.x
OL-23495-01

Send document comments to nexus7k -doc feedback@c isco .com
Cisco NX-OS Interfaces Commandsshow interface switchport
Related Commands Command Description
switchport mode Sets the specified interfaces as either Layer 2 access or trunk interfaces.
IF-175Cisco Nexus 7000 Series NX-OS Interfaces Command Reference, Release 5.x
OL-23495-01

Send document comments to nexus7k -doc feedback@c isco .com
Cisco NX-OS Interfaces Commandsshow interface transceiver
show interface transceiverTo display information about all the transceiver interfaces, use the show interface transceiver command.
show interface transceiver [calibrations | details]
Syntax Description
Defaults None
Command Modes Any command mode
Supported User Roles network-admin
vdc-admin
Command History
Usage Guidelines This command does not require a license.
Examples This example shows how to display calibration information for transceiver interfaces:
switch(config)# show interface transceiver calibrations
Ethernet9/25sfp is presentname is CISCO-EXCELIGHT part number is SPP5101LR-C1revision is Aserial number is ECL121601PBnominal bitrate is 10300 MBits/secLink length supported for 9/125um fiber is 10 km(s)cisco id is --cisco extended id number is 4
SFP External Calibrations Information----------------------------------------------------------------------
Slope Offset Rx4/Rx3/Rx2/Rx1/Rx0----------------------------------------------------------------------Temperature 0 0
calibrations (Optional) Displays calibration information for transceivers.
detail (Optional) Displays detailed information for transceivers.
Release Modification
4.1(2) This command was introduced.
4.1(2) This command was introduced.
IF-176Cisco Nexus 7000 Series NX-OS Interfaces Command Reference, Release 5.x
OL-23495-01

Send document comments to nexus7k -doc feedback@c isco .com
Cisco NX-OS Interfaces Commandsshow interface transceiver
Voltage 0 0Current 0 0Tx Power 0 0Rx Power 0.0000/0.0000/0.0000/0.0000/0.0000
This example shows how to display detailed information for transceiver interfaces:
switch(config)# show interface transceiver detailed
Ethernet10/9sfp is presentname is CISCOpart number is SPP5101SR-C1revision is Aserial number is ECL1120017Jnominal bitrate is 10300 MBits/secLink length supported for 50/125um fiber is 82 m(s)Link length supported for 62.5/125um fiber is 26 m(s)cisco id is --cisco extended id number is 4
SFP Detail Diagnostics Information (external calibration)----------------------------------------------------------------------------
Alarms WarningsHigh Low High Low
----------------------------------------------------------------------------Temperature 25.54 C 75.00 C -5.00 C 70.00 C 0.00 CVoltage 3.22 V 3.63 V 2.97 V 3.46 V 3.13 VCurrent 4.49 mA 10.00 mA 0.00 mA 9.00 mA 0.00 mATx Power -3.50 dBm 2.99 dBm -11.30 dBm -1.00 dBm -7.30 dBmRx Power -2.92 dBm 2.99 dBm -13.97 dBm -1.00 dBm -9.91 dBmTransmit Fault Count = 0----------------------------------------------------------------------------
Related Commands Command Description
show interface Displays information about the specified interfaces.
IF-177Cisco Nexus 7000 Series NX-OS Interfaces Command Reference, Release 5.x
OL-23495-01

Send document comments to nexus7k -doc feedback@c isco .com
Cisco NX-OS Interfaces Commandsshow interface trunk
show interface trunkTo display information about all the trunk interfaces, use the show interface trunk command.
show interface [ethernet slot/port | port-channel channel-number] trunk [module number | vlan vlan-id]
Syntax Description
Defaults None
Command Modes Any command mode
Supported User Roles network-admin
vdc-admin
Command History
Usage Guidelines If you do not specify an interface, a module number, or a VLAN number, the system displays information for all trunk interfaces.
This command displays information about all Layer 2 trunk interfaces and trunk port-channel interfaces.
Use the show interface counters command to display statistics for the specified Layer 2 interface.
This command does not require a license.
Examples This example shows how to display information for all Layer 2 trunk interfaces:
switch(config)# show interface trunk
-----------------------------------------------------------------------------Port Native Status Port
Vlan Channel-----------------------------------------------------------------------------Eth2/9 1 trunking --Eth2/10 1 trnk-bndl Po50Po50 1 not-trunking --
ethernet slot/port (Optional) Type and number of the interface that you want to display.
port-channel channel-number
(Optional) Specifies the port-channel number of the port-channel interface that you want to display.
module number (Optional) Specifies the module number.
vlan vlan-id (Optional) Specifies the VLAN number.
Release Modification
4.0 This command was introduced.
IF-178Cisco Nexus 7000 Series NX-OS Interfaces Command Reference, Release 5.x
OL-23495-01

Send document comments to nexus7k -doc feedback@c isco .com
Cisco NX-OS Interfaces Commandsshow interface trunk
-----------------------------------------------------------------------------Port Vlans Allowed on Trunk-----------------------------------------------------------------------------Eth2/9 1-3967,4048-4093Eth2/10 1-3967,4048-4093Po50 1-3967,4048-4093
-----------------------------------------------------------------------------Port STP Forwarding-----------------------------------------------------------------------------Eth2/9 noneEth2/10 nonePo50 none
Related Commands Command Description
switchport mode trunk
Sets the specified interfaces as Layer 2 trunk interfaces.
IF-179Cisco Nexus 7000 Series NX-OS Interfaces Command Reference, Release 5.x
OL-23495-01

Send document comments to nexus7k -doc feedback@c isco .com
Cisco NX-OS Interfaces Commandsshow interface tunnel
show interface tunnelTo display information about the tunnel interfaces, use the show interface tunnel command.
show interface tunnel number
Syntax Description
Defaults None
Command Modes Any command mode
Supported User Roles network-admin
vdc-admin
Command History
Usage Guidelines This command does not require a license.
Examples This example shows how to display information on tunnel interfaces:
switch(config)# show interface tunnel 5
Tunnel5 is down (Administratively down)MTU 1476 bytes, BW 9 KbitTransport protocol is in VRF "default"Tunnel protocol/transport GRE/IPLast clearing of "show interface" counters neverTx0 packets output, 1 minute output rate 0 packets/secRx0 packets input, 1 minute input rate 0 packets/sec
Related Commands
number Number of the tunnel interface that you want to display information for.
Release Modification
4.1(2) This command was introduced.
4.2(1) Display of configured static MAC address added.
Command Description
show interface Displays information about the specified interfaces.
IF-180Cisco Nexus 7000 Series NX-OS Interfaces Command Reference, Release 5.x
OL-23495-01

Send document comments to nexus7k -doc feedback@c isco .com
Cisco NX-OS Interfaces Commandsshow ip dhcp snooping statistics
show ip dhcp snooping statisticsTo display statistics related to the Dynamic Host Configuration Protocol (DHCP), use the show ip dhcp snooping statistics command.
show ip dhcp snooping statistics
Syntax Description This command has no arguments or keywords.
Defaults None
Command Modes EXEC mode
Command History
Usage Guidelines To enable this feature use the feature dhcp command.
Examples This example shows how to display statistics related to DHCP:
switch# show ip dhcp snooping statisticsPackets processed 0Packets received through cfsoe 0Packets forwarded 0Packets forwarded on cfsoe 0Total packets dropped 0Packets dropped from untrusted ports 0Packets dropped due to MAC address check failure 0Packets dropped due to Option 82 insertion failure 0Packets dropped due to o/p intf unknown 0Packets dropped which were unknown 0Packets dropped due to dhcp relay not enabled 0Packets dropped due to no binding entry 0Packets dropped due to interface error/no interface 0Packets dropped due to max hops exceeded 0switch#
Related Commands
Release Modification
5.1(1) Added the command output (added two counters)
4.0 This command was introduced.
Command Description
show ip dhcp snooping statistics
Display statistics related to the Dynamic Host Configuration Protocol.
IF-181Cisco Nexus 7000 Series NX-OS Interfaces Command Reference, Release 5.x
OL-23495-01

Send document comments to nexus7k -doc feedback@c isco .com
Cisco NX-OS Interfaces Commandsshow lacp counters
show lacp countersTo display information about Link Aggregation Control Protocol (LACP) statistics, use the show lacp counters command.
show lacp counters [interface port-channel channel-number]
Syntax Description
Defaults None
Command Modes Any command mode
Supported User Roles network-admin
vdc-admin
Command History
Usage Guidelines If you do not specify the channel-number, all channel groups are displayed.
This command does not require a license.
Examples This example shows how to display the LACP statistics for a specific channel group:
switch# show lacp counters interface port-channel 1
LACPDUs Marker Marker Response LACPDUsPort Sent Recv Sent Recv Sent Recv Pkts Err-----------------------------------------------------------------------------port-channel1Ethernet1/1 554 536 0 0 0 0 0Ethernet1/2 527 514 0 0 0 0 0Ethernet1/3 535 520 0 0 0 0 0Ethernet1/4 515 502 0 0 0 0 0Ethernet1/5 518 505 0 0 0 0 0Ethernet1/6 540 529 0 0 0 0 0Ethernet1/7 541 530 0 0 0 0 0Ethernet1/8 547 532 0 0 0 0 0Ethernet1/9 544 532 0 0 0 0 0Ethernet1/10 513 501 0 0 0 0 0Ethernet1/11 497 485 0 0 0 0 0Ethernet1/12 493 486 0 0 0 0 0
interface port-channel (Optional) Specifies the interface port channel.
channel-number (Optional) Number of the LACP channel group. Valid values are from 1 to 4096.
Release Modification
4.0 This command was introduced.
IF-182Cisco Nexus 7000 Series NX-OS Interfaces Command Reference, Release 5.x
OL-23495-01

Send document comments to nexus7k -doc feedback@c isco .com
Cisco NX-OS Interfaces Commandsshow lacp counters
Ethernet1/13 492 485 0 0 0 0 0Ethernet1/14 482 481 0 0 0 0 0Ethernet1/15 481 476 0 0 0 0 0Ethernet1/16 482 477 0 0 0 0 0
Related Commands Command Description
clear lacp counters Clears the statistics for all LACP interfaces or those interfaces that belong to a specific LACP channel group.
IF-183Cisco Nexus 7000 Series NX-OS Interfaces Command Reference, Release 5.x
OL-23495-01

Send document comments to nexus7k -doc feedback@c isco .com
Cisco NX-OS Interfaces Commandsshow lacp interface
show lacp interface To display information about specific Link Aggregation Control Protocol (LACP) interfaces, use the show lacp interface command.
show lacp interface ethernet slot/port
Syntax Description
Defaults None
Command Modes Any command mode
Supported User Roles network-admin
vdc-admin
Command History
Usage Guidelines The LACP_Activity field displays whether the link is configured in the active or passive port-channel mode.
The Port Identifier field displays the port priority as part of the information. The part of the information in this field is the port number. The following example shows how to identify the port priority and the port number:
Port Identifier=0x8000,0x101
The port priority value is 0x8000, and the port number value is 0x101 in this example.
This command does not require a license.
Examples This example shows how to display the LACP statistics for a specific channel group:
switch# show lacp interface ethernet 1/1
switch(config-if-range)# show lacp interface eth1/1Interface Ethernet1/1 is up
Channel group is 1 port channel is Po1PDUs sent: 556PDUs rcvd: 538Markers sent: 0Markers rcvd: 0Marker response sent: 0Marker response rcvd: 0Unknown packets rcvd: 0
slot/port Slot number and port number for the interface you want to display.
Release Modification
4.0 This command was introduced.
IF-184Cisco Nexus 7000 Series NX-OS Interfaces Command Reference, Release 5.x
OL-23495-01

Send document comments to nexus7k -doc feedback@c isco .com
Cisco NX-OS Interfaces Commandsshow lacp interface
Illegal packets rcvd: 0Lag Id: [ [(8000, 0-11-11-22-22-74, 0, 8000, 101), (8000, 0-11-11-22-22-75, 0, 8000, 401)] ]Operational as aggregated link since Wed Jun 11 20:37:59 2008
Local Port: Eth1/1 MAC Address= 0-11-11-22-22-74System Identifier=0x8000,0-11-11-22-22-74Port Identifier=0x8000,0x101Operational key=0LACP_Activity=activeLACP_Timeout=Long Timeout (30s)Synchronization=IN_SYNCCollecting=trueDistributing=truePartner information refresh timeout=Long Timeout (90s)
Actor Admin State=Actor Oper State=Neighbor: 4/1
MAC Address= 0-11-11-22-22-75System Identifier=0x8000,0-11-11-22-22-75Port Identifier=0x8000,0x401Operational key=0LACP_Activity=activeLACP_Timeout=Long Timeout (30s)Synchronization=IN_SYNCCollecting=trueDistributing=true
Partner Admin State=Partner Oper State=
Related Commands Command Description
show port-channel summary
Displays information about all port-channel groups.
IF-185Cisco Nexus 7000 Series NX-OS Interfaces Command Reference, Release 5.x
OL-23495-01

Send document comments to nexus7k -doc feedback@c isco .com
Cisco NX-OS Interfaces Commandsshow lacp neighbor
show lacp neighborTo display information about Link Aggregation Control Protocol (LACP) neighbors, use the show lacp neighbor command.
show lacp neighbor [interface port-channel channel-number]
Syntax Description
Defaults None
Command Modes Any command mode
Supported User Roles network-admin
vdc-admin
Command History
Usage Guidelines If you do not specify the channel-number, all channel groups are displayed.
This command does not require a license.
Examples This example shows how to display the information about the LACP neighbors for a specific port channel:
switch# show lacp neighbor interface port-channel 1Flags: S - Device is sending Slow LACPDUs F - Device is sending Fast LACPDUs
A - Device is in Active mode P - Device is in Passive modeport-channel1 neighborsPartner's information
Partner Partner PartnerPort System ID Port Number Age FlagsEth1/1 32768,0-11-11-22-22-750x401 44817 SA
LACP Partner Partner PartnerPort Priority Oper Key Port State32768 0x0 0x3d
Partner's informationPartner Partner Partner
interface port-channel
(Optional) Specifies the interface port channel.
channel-number (Optional) Port-channel number for the LACP neighbor that you want to display. The range of values is from 1 to 4096.
Release Modification
4.0 This command was introduced.
IF-186Cisco Nexus 7000 Series NX-OS Interfaces Command Reference, Release 5.x
OL-23495-01

Send document comments to nexus7k -doc feedback@c isco .com
Cisco NX-OS Interfaces Commandsshow lacp neighbor
Port System ID Port Number Age FlagsEth1/2 32768,0-11-11-22-22-750x402 44817 SA
LACP Partner Partner PartnerPort Priority Oper Key Port State32768 0x0 0x3d
Related Commands Command Description
show port-channel summary
Displays information about all port-channel groups.
IF-187Cisco Nexus 7000 Series NX-OS Interfaces Command Reference, Release 5.x
OL-23495-01

Send document comments to nexus7k -doc feedback@c isco .com
Cisco NX-OS Interfaces Commandsshow lacp port-channel
show lacp port-channelTo display information about Link Aggregation Control Protocol (LACP) port channels, use the show lacp port-channel command.
show lacp port-channel [interface port-channel channel-number]
Syntax Description
Defaults None
Command Modes Any command mode
Supported User Roles network-admin
vdc-admin
Command History
Usage Guidelines If you do not specify the channel-number, all channel groups are displayed.
This command does not require a license.
Examples This example shows how to display the information about LACP port channels:
switch# show lacp port-channel
port-channel1Local System Identifier=0x8000,0-11-11-22-22-74Admin key=0x0Operational key=0x0Partner System Identifier=0x8000,0-11-11-22-22-75Operational key=0x0Max delay=0Aggregate or individual=1
port-channel2Local System Identifier=0x8000,0-11-11-22-22-74Admin key=0x1Operational key=0x1Partner System Identifier=0x8000,0-11-11-22-22-75Operational key=0x1Max delay=0
interface port-channel
(Optional) Specifies the interface port channel.
channel-number (Optional) Port-channel number for the LACP neighbor that you want to display. The range of values is from 1 to 4096.
Release Modification
4.0 This command was introduced.
IF-188Cisco Nexus 7000 Series NX-OS Interfaces Command Reference, Release 5.x
OL-23495-01

Send document comments to nexus7k -doc feedback@c isco .com
Cisco NX-OS Interfaces Commandsshow lacp port-channel
Aggregate or individual=1
Related Commands Command Description
show port-channel summary
Displays information about all port-channel groups.
IF-189Cisco Nexus 7000 Series NX-OS Interfaces Command Reference, Release 5.x
OL-23495-01

Send document comments to nexus7k -doc feedback@c isco .com
Cisco NX-OS Interfaces Commandsshow lacp system-identifier
show lacp system-identifierTo display the Link Aggregation Control Protocol (LACP) system identifier for the device, use the show lacp system-identifier command.
show lacp system-identifier
Syntax Description This command has no arguments or keywords.
Defaults None
Command Modes Any command mode
Supported User Roles network-admin
vdc-admin
Command History
Usage Guidelines The LACP system ID is the combination of the configurable LACP system priority value and the MAC address.
Each system that runs LACP has an LACP system priority value. You can accept the default value of 32768 for this parameter, or you can configure a value between 1 and 65535. LACP uses the system priority with the MAC address to form the system ID and also uses the system priority during negotiation with other devices. A higher system priority value means a lower priority.
The system ID is different for each virtual device context (VDC).
This command does not require a license.
Examples This example shows how to display the information about the LACP port channel for a specific port channel:
switch> show lacp system-identifier8000,AC-12-34-56-78-90
Related Commands
Release Modification
4.0 This command was introduced.
Command Description
lacp system-priority Sets the system priority for LACP.
IF-190Cisco Nexus 7000 Series NX-OS Interfaces Command Reference, Release 5.x
OL-23495-01
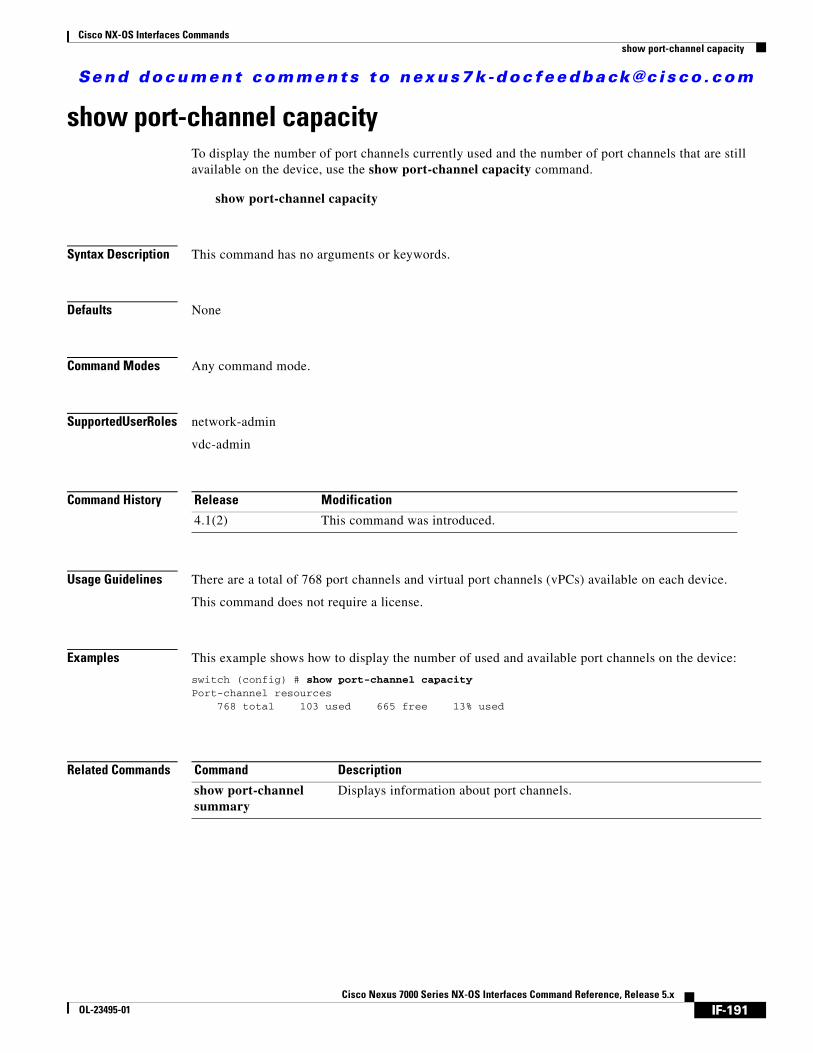
Send document comments to nexus7k -doc feedback@c isco .com
Cisco NX-OS Interfaces Commandsshow port-channel capacity
show port-channel capacityTo display the number of port channels currently used and the number of port channels that are still available on the device, use the show port-channel capacity command.
show port-channel capacity
Syntax Description This command has no arguments or keywords.
Defaults None
Command Modes Any command mode.
Supported User Roles network-admin
vdc-admin
Command History
Usage Guidelines There are a total of 768 port channels and virtual port channels (vPCs) available on each device.
This command does not require a license.
Examples This example shows how to display the number of used and available port channels on the device:
switch (config) # show port-channel capacity Port-channel resources
768 total 103 used 665 free 13% used
Related Commands
Release Modification
4.1(2) This command was introduced.
Command Description
show port-channel summary
Displays information about port channels.
IF-191Cisco Nexus 7000 Series NX-OS Interfaces Command Reference, Release 5.x
OL-23495-01

Send document comments to nexus7k -doc feedback@c isco .com
Cisco NX-OS Interfaces Commandsshow port-channel compatibility-parameters
show port-channel compatibility-parametersTo display the parameters that must be the same among the member ports in order to join a port channel, use the show port-channel compatibility parameters command.
show port-channel compatibility-parameters
Syntax Description This command has no arguments or keywords.
Defaults None
Command Modes Any command mode
Supported User Roles network-admin
vdc-admin
Command History
Usage Guidelines When you add an interface to a channel group, the software checks certain interface attributes to ensure that the interface is compatible with the channel group. For example, you cannot add a Layer 3 interface to a Layer 2 channel group. The software also checks a number of operational attributes for an interface before allowing that interface to participate in the port-channel aggregation.
This command displays the list of compatibility checks that the system uses.
Using the channel-group command, you can force ports with incompatible parameters to join the port channel as long as the following parameters are the same:
• (Link) speed capability
• Speed configuration
• Duplex capability
• Duplex configuration
• Flow-control capability
• Flow-control configuration
Note See the channel-group command for information about forcing ports to join a port channel.
This command does not require a license.
Release Modification
4.0 This command was introduced.
IF-192Cisco Nexus 7000 Series NX-OS Interfaces Command Reference, Release 5.x
OL-23495-01

Send document comments to nexus7k -doc feedback@c isco .com
Cisco NX-OS Interfaces Commandsshow port-channel compatibility-parameters
Examples This example shows how to display the list of compatibility checks that the system makes before an interface to a channel group:
switch# show port-channel compatibility-parameters* port mode
Members must have the same port mode configured, either E or AUTO. If theyare configured in AUTO port mode, they have to negotiate E mode when theycome up. If a member negotiates a different mode, it will be suspended.
* speed
Members must have the same speed configured. If they are configured in AUTOspeed, they have to negotiate the same speed when they come up. If a membernegotiates a different speed, it will be suspended.
* MTU
Members have to have the same MTU configured. This only applies to ethernetport-channel.
* MEDIUM
Members have to have the same medium type configured. This only applies toethernet port-channel.
* Span mode
Members must have the same span mode.
* sub interfaces
Members must not have sub-interfaces.
* Duplex Mode
Members must have same Duplex Mode configured.
* Ethernet Layer
Members must have same Ethernet Layer (switchport/no-switchport) configured.
* Span Port
Members cannot be SPAN ports.
* Storm Control
Members must have same storm-control configured.
* Flow Control
Members must have same flowctrl configured.
* Capabilities
Members must have common capabilities.
* port
Members port VLAN info.
* port
IF-193Cisco Nexus 7000 Series NX-OS Interfaces Command Reference, Release 5.x
OL-23495-01

Send document comments to nexus7k -doc feedback@c isco .com
Cisco NX-OS Interfaces Commandsshow port-channel compatibility-parameters
Members port does not exist.
* switching port
Members must be switching port, Layer 2.
* port access VLAN
Members must have the same port access VLAN.
* port native VLAN
Members must have the same port native VLAN.
* port allowed VLAN list
Members must have the same port allowed VLAN list.
Related Commands Command Description
channel-group Adds or removes interfaces to port-channel groups and assigns the port-channel mode to the interface.
IF-194Cisco Nexus 7000 Series NX-OS Interfaces Command Reference, Release 5.x
OL-23495-01

Send document comments to nexus7k -doc feedback@c isco .com
Cisco NX-OS Interfaces Commandsshow port-channel database
show port-channel databaseTo display information about the current running of the port channels, use the show port-channel database command.
show port-channel database [interface port-channel channel-number]
Syntax Description
Defaults None
Command Modes Any command mode
Supported User Roles network-admin
vdc-admin
Command History
Usage Guidelines If you do not specify the channel-number, all channel groups are displayed. This command displays Link Aggregation Control Protocol (LACP)-enabled ports channels and port channels without an associated aggregation protocol.
This command does not require a license.
Examples This example shows how to display information about the current running of all port channels:
switch# show port-channel databaseport-channel5
Administrative channel mode is activeOperational channel mode is activeLast membership update is successful1 ports in total, 0 ports upAge of the port-channel is 1d:16h:18m:50sTime since last bundle is 1d:16h:18m:56sLast bundled member isPorts: Ethernet2/5 [down]
port-channel20Administrative channel mode is activeOperational channel mode is active
interface port-channel
(Optional) Specifies the interface port channel.
channel-number (Optional) Port-channel number for the LACP neighbor that you want to display. The range of values is from 1 to 4096.
Release Modification
4.0 This command was introduced.
IF-195Cisco Nexus 7000 Series NX-OS Interfaces Command Reference, Release 5.x
OL-23495-01

Send document comments to nexus7k -doc feedback@c isco .com
Cisco NX-OS Interfaces Commandsshow port-channel database
Last membership update is successful1 ports in total, 0 ports upAge of the port-channel is 1d:16h:18m:50sTime since last bundle is 1d:16h:18m:56sLast bundled member isPorts: Ethernet2/20 [down]
This example shows how to display information about the current running of a specific port channel:
switch# show port-channel database interface port-channel 20port-channel20
Administrative channel mode is activeOperational channel mode is activeLast membership update is successful1 ports in total, 0 ports upAge of the port-channel is 1d:16h:23m:14sTime since last bundle is 1d:16h:23m:20sLast bundled member isPorts: Ethernet2/20 [down]
Related Commands Command Description
show port-channel summary
Displays a summary of information about all port channels.
IF-196Cisco Nexus 7000 Series NX-OS Interfaces Command Reference, Release 5.x
OL-23495-01
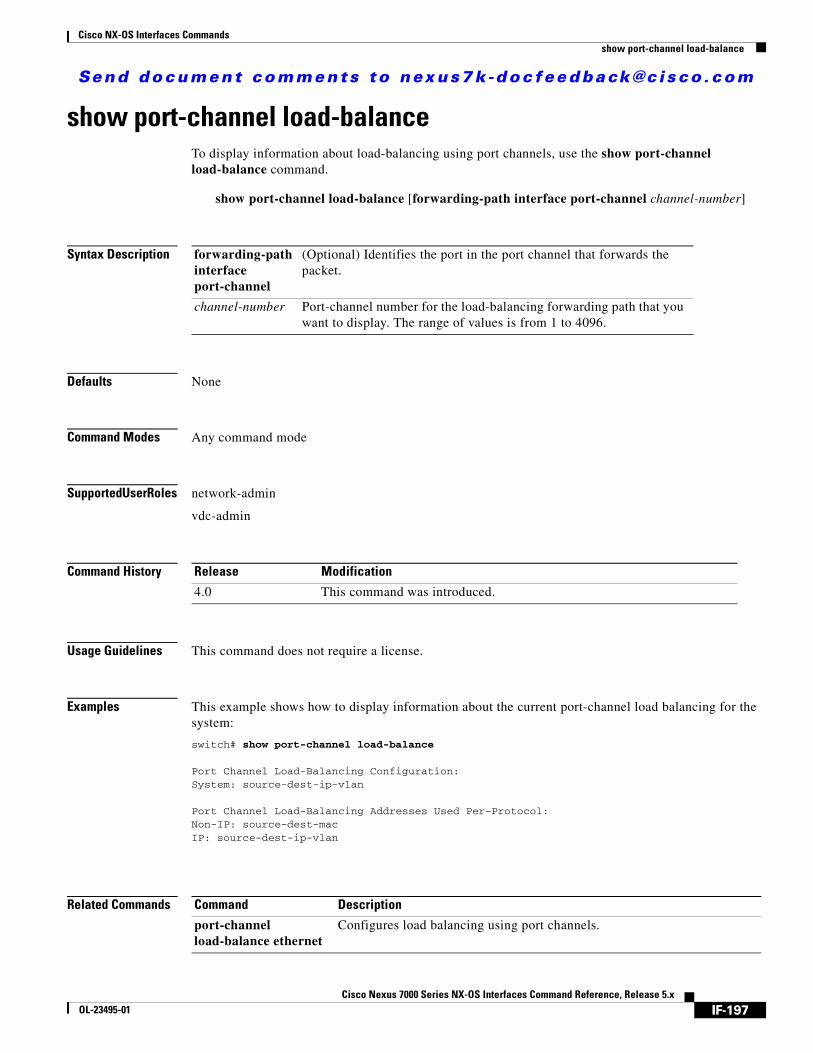
Send document comments to nexus7k -doc feedback@c isco .com
Cisco NX-OS Interfaces Commandsshow port-channel load-balance
show port-channel load-balanceTo display information about load-balancing using port channels, use the show port-channel load-balance command.
show port-channel load-balance [forwarding-path interface port-channel channel-number]
Syntax Description
Defaults None
Command Modes Any command mode
Supported User Roles network-admin
vdc-admin
Command History
Usage Guidelines This command does not require a license.
Examples This example shows how to display information about the current port-channel load balancing for the system:
switch# show port-channel load-balance
Port Channel Load-Balancing Configuration:System: source-dest-ip-vlan
Port Channel Load-Balancing Addresses Used Per-Protocol:Non-IP: source-dest-macIP: source-dest-ip-vlan
Related Commands
forwarding-path interface port-channel
(Optional) Identifies the port in the port channel that forwards the packet.
channel-number Port-channel number for the load-balancing forwarding path that you want to display. The range of values is from 1 to 4096.
Release Modification
4.0 This command was introduced.
Command Description
port-channel load-balance ethernet
Configures load balancing using port channels.
IF-197Cisco Nexus 7000 Series NX-OS Interfaces Command Reference, Release 5.x
OL-23495-01
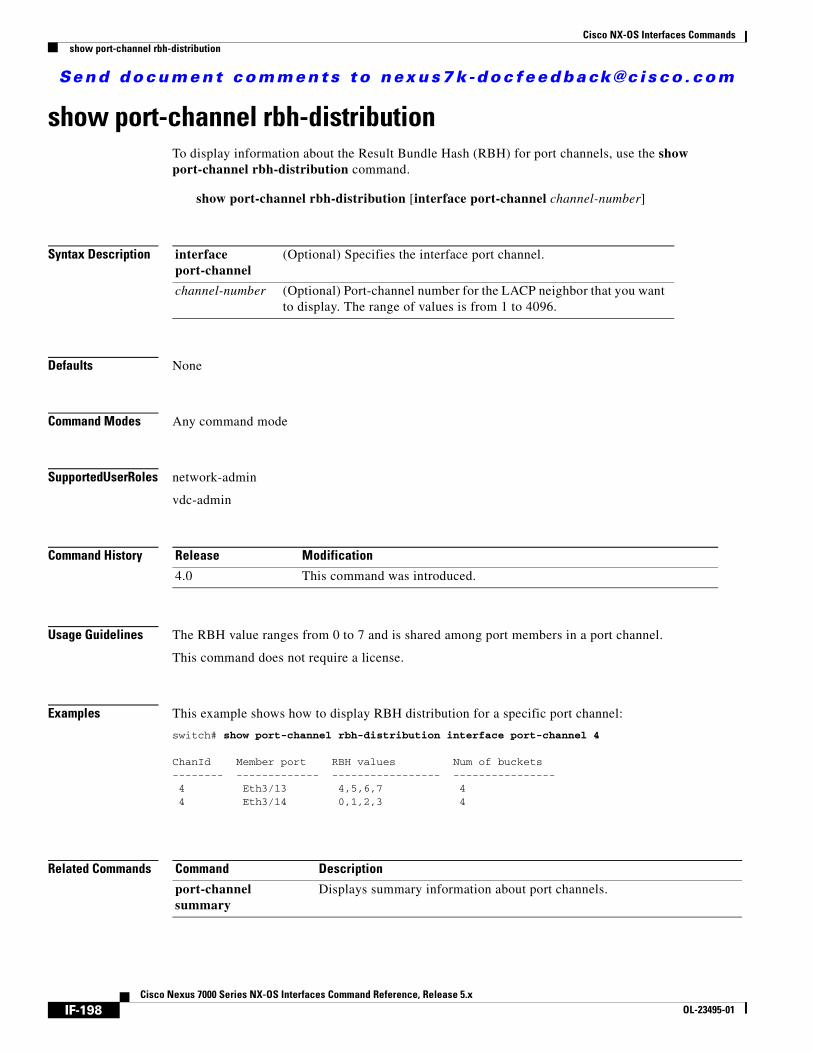
Send document comments to nexus7k -doc feedback@c isco .com
Cisco NX-OS Interfaces Commandsshow port-channel rbh-distribution
show port-channel rbh-distributionTo display information about the Result Bundle Hash (RBH) for port channels, use the show port-channel rbh-distribution command.
show port-channel rbh-distribution [interface port-channel channel-number]
Syntax Description
Defaults None
Command Modes Any command mode
Supported User Roles network-admin
vdc-admin
Command History
Usage Guidelines The RBH value ranges from 0 to 7 and is shared among port members in a port channel.
This command does not require a license.
Examples This example shows how to display RBH distribution for a specific port channel:
switch# show port-channel rbh-distribution interface port-channel 4
ChanId Member port RBH values Num of buckets-------- ------------- ----------------- ----------------4 Eth3/13 4,5,6,7 44 Eth3/14 0,1,2,3 4
Related Commands
interface port-channel
(Optional) Specifies the interface port channel.
channel-number (Optional) Port-channel number for the LACP neighbor that you want to display. The range of values is from 1 to 4096.
Release Modification
4.0 This command was introduced.
Command Description
port-channel summary
Displays summary information about port channels.
IF-198Cisco Nexus 7000 Series NX-OS Interfaces Command Reference, Release 5.x
OL-23495-01
Send document comments to nexus7k -doc feedback@c isco .com
Cisco NX-OS Interfaces Commandsshow port-channel summary
show port-channel summaryTo display summary information about the port channels, use the show port-channel summary command.
show port-channel summary
Syntax Description This command has no arguments or keywords.
Defaults None
Command Modes Any command mode
Supported User Roles network-admin
vdc-admin
Command History
Usage Guidelines If the Link Aggregation Control Protocol (LACP) is not enabled, the output shows NONE in the Protocol column of the display.
A channel-group interface can be in the following operational states:
• Down—The interface is down because it is administratively shut down or some other reason not related to port channels.
• Individual—The interface is part of a port channel but unable to aggregate into a port channel because of protocol exchange problems.
– This interface continues to forward traffic as an individual link.
– STP is aware of this interface.
• Suspended—The operational parameters of the interface are not compatible with the port channel. This interface is not forwarding traffic, although the physical MAC link state is still up.
• Switched—The interface is switched.
• Up (port channel)—The port channel is up.
• Up in port channel (members)—The port member of the port channel is up.
• Hot standby (LACP only)—The interface is eligible to join the port group if one of the interfaces currently participating in the LACP channel goes down.
– This interface does not forward data traffic, only protocol data units (PDUs).
Release Modification
5.1(1) Added a new port channel status ‘M’ to the command output.
4.0 This command was introduced.
IF-199Cisco Nexus 7000 Series NX-OS Interfaces Command Reference, Release 5.x
OL-23495-01

Send document comments to nexus7k -doc feedback@c isco .com
Cisco NX-OS Interfaces Commandsshow port-channel summary
– This interface does not run STP.
• Module-removed—The module has been removed.
• Routed—The interface is routed.
This command does not require a license.
Examples This example shows how to display summary information for the port channels:
switch(config-if)# show port-channel summary Flags: D - Down P - Up in port-channel (members)
I - Individual H - Hot-standby (LACP only)s - Suspended r - Module-removedS - Switched R - RoutedU - Up (port-channel)M - Not in use. Min-links not met
--------------------------------------------------------------------------------Group Port- Type Protocol Member Ports
Channel--------------------------------------------------------------------------------2 Po2(SU) Edge LACP Eth4/9(D) Eth4/10(D) Eth4/11(P)
Eth4/12(P)
3 Po3(SU) Edge LACP Eth4/27(P) Eth4/28(P) Eth4/29(P)
Eth4/30(P)
10 Po10(SU) Edge LACP Eth4/1(P) Eth4/2(P) Eth4/3(P)
Eth4/4(P) Eth4/13(P) Eth4/14(P)
Eth4/15(P) Eth4/16(P) Eth4/17(P)
Eth4/18(P) Eth4/19(P) Eth4/20(P)
Eth4/21(P) Eth4/22(P) Eth4/23(P)
Eth4/24(P)
Related Commands Command Description
show port-channel usage
Displays the port-channel numbers used and available.
show port-channel traffic
Displays transmitted and received unicast, multicast, and broadcast percentages for the port channels.
IF-200Cisco Nexus 7000 Series NX-OS Interfaces Command Reference, Release 5.x
OL-23495-01
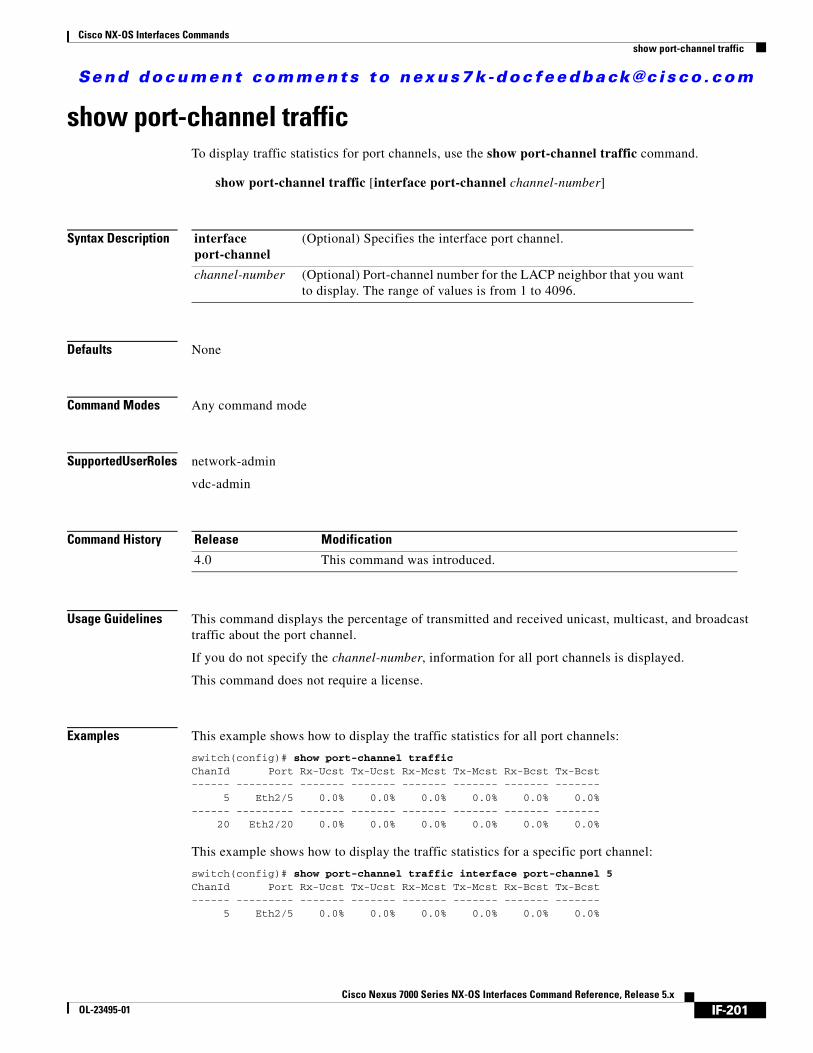
Send document comments to nexus7k -doc feedback@c isco .com
Cisco NX-OS Interfaces Commandsshow port-channel traffic
show port-channel trafficTo display traffic statistics for port channels, use the show port-channel traffic command.
show port-channel traffic [interface port-channel channel-number]
Syntax Description
Defaults None
Command Modes Any command mode
Supported User Roles network-admin
vdc-admin
Command History
Usage Guidelines This command displays the percentage of transmitted and received unicast, multicast, and broadcast traffic about the port channel.
If you do not specify the channel-number, information for all port channels is displayed.
This command does not require a license.
Examples This example shows how to display the traffic statistics for all port channels:
switch(config)# show port-channel trafficChanId Port Rx-Ucst Tx-Ucst Rx-Mcst Tx-Mcst Rx-Bcst Tx-Bcst------ --------- ------- ------- ------- ------- ------- -------
5 Eth2/5 0.0% 0.0% 0.0% 0.0% 0.0% 0.0%------ --------- ------- ------- ------- ------- ------- -------
20 Eth2/20 0.0% 0.0% 0.0% 0.0% 0.0% 0.0%
This example shows how to display the traffic statistics for a specific port channel:
switch(config)# show port-channel traffic interface port-channel 5ChanId Port Rx-Ucst Tx-Ucst Rx-Mcst Tx-Mcst Rx-Bcst Tx-Bcst------ --------- ------- ------- ------- ------- ------- -------
5 Eth2/5 0.0% 0.0% 0.0% 0.0% 0.0% 0.0%
interface port-channel
(Optional) Specifies the interface port channel.
channel-number (Optional) Port-channel number for the LACP neighbor that you want to display. The range of values is from 1 to 4096.
Release Modification
4.0 This command was introduced.
IF-201Cisco Nexus 7000 Series NX-OS Interfaces Command Reference, Release 5.x
OL-23495-01

Send document comments to nexus7k -doc feedback@c isco .com
Cisco NX-OS Interfaces Commandsshow port-channel traffic
Related Commands Command Description
port-channel summary
Displays summary information about port channels.
IF-202Cisco Nexus 7000 Series NX-OS Interfaces Command Reference, Release 5.x
OL-23495-01

Send document comments to nexus7k -doc feedback@c isco .com
Cisco NX-OS Interfaces Commandsshow port-channel usage
show port-channel usageTo display the port-channel numbers used and available, use the show port-channel usage command.
show port-channel usage
Syntax Description This command has no arguments or keywords.
Defaults None
Command Modes Any command mode
Supported User Roles network-admin
vdc-admin
Command History
Usage Guidelines This command displays port-channel numbers used and available in the virtual device context (VDC) that you are monitoring.
The number of port-channel numbers available across all VDCs for the entire system is from 1 to 4096.
This command does not require a license.
Examples This example shows how to display the usage for all port channels:
switch# show port-channel usageTotally 2 port-channel numbers used====================================Used : 5 , 20Unused: 1 - 4 , 6 - 19 , 21 - 4096
Related Commands
Release Modification
4.0 This command was introduced.
Command Description
port-channel summary
Displays summary information about port channels.
IF-203Cisco Nexus 7000 Series NX-OS Interfaces Command Reference, Release 5.x
OL-23495-01

Send document comments to nexus7k -doc feedback@c isco .com
Cisco NX-OS Interfaces Commandsshow port-profile
show port-profileTo display information about port profiles, use the show port-profile command.
show port-profile [brief | expand-interface [name name] | name name | usage]
Syntax Description
Defaults None
Command Modes Any command mode
Supported User Roles network-admin
vdc-admin
Command History
Usage Guidelines Use the show port-profile command to display information about the configured port profiles on the device. It displays all configured port profiles.
Port profiles are not aware of default values, so the default value configuration appears in the port profiles. For example, MTU 1500 is a default value and does not appear in the running-config display of an interface. However, because port profiles are unaware of default values, MTU 1500 appears in the port-profile display.
This command does not require a license.
Examples This example shows how to display information about port profiles:
switch(config)# show port-profiletry1type: Ethernetdescription:status: enabledmax-ports: 512inherit:
brief (Optional) Displays brief information about the port profiles.
expand-interface name
(Optional) Displays the configured attributes at an interface per port profile. An optional name can be specified to show the expanded interface output for that specific port profile.
name name (Optional) Displays information for the specified port profile.
usage (Optional) Displays a list of interfaces to which each profile is attached.
Release Modification
4.2(1) This command was introduced.
IF-204Cisco Nexus 7000 Series NX-OS Interfaces Command Reference, Release 5.x
OL-23495-01

Send document comments to nexus7k -doc feedback@c isco .com
Cisco NX-OS Interfaces Commandsshow port-profile
config attributes:channel-group 5
evaluated config attributes:channel-group 5
assigned interfaces:Ethernet1/1
try2type: Ethernetdescription:status: disabledmax-ports: 512inherit:config attributes:evaluated config attributes:assigned interfaces:
This example shows how to display brief port profile information:
switch(config)# show port-profile brief----------------------------------------------------------Port Profile Conf Eval Assigned ChildProfile State Items Items Intfs Profs----------------------------------------------------------try1 1 1 1 1 0try2 0 0 0 0 0
This example shows how to display expanded port profile interface information:
switch(config)# show port-profile expand-interfacetry1Ethernet1/1channel-group 5
try2
This example shows how to display specific port profile information:
switch(config)# show port-profile name try1try1type: Ethernetdescription:status: enabledmax-ports: 512inherit:config attributes:channel-group 5
evaluated config attributes:channel-group 5
assigned interfaces:Ethernet1/1
switch(config)# show port-profile usagetry1Ethernet1/1
This example shows how to display port profiles and values that you have entered in interface configuration mode using the show running-config command:
switch(config)# show running-config interface ethernet 8/5interface ethernet8/5inherit try1mtu 3000
IF-205Cisco Nexus 7000 Series NX-OS Interfaces Command Reference, Release 5.x
OL-23495-01

Send document comments to nexus7k -doc feedback@c isco .com
Cisco NX-OS Interfaces Commandsshow port-profile
Related Commands Command Description
port-profile Configures, names, and allows you to enter port-profile configuration mode.
inherit port-profile Assigns port profile to specified interfaces and allows one port profile to inherit configuration parameters from another port profile.
IF-206Cisco Nexus 7000 Series NX-OS Interfaces Command Reference, Release 5.x
OL-23495-01

Send document comments to nexus7k -doc feedback@c isco .com
Cisco NX-OS Interfaces Commandsshow running-config fex
show running-config fexTo display the Fabric Extender (FEX) running configuration, use the show running-config fex command.
show running-config fex
Syntax Description This command has no arguments or keywords.
Defaults None
Command Modes Global configuration mode
Command History
Usage Guidelines This command does not require a license.
Examples This example shows how to display detailed FEX information:
switch# show running-config fex
!Command: show running-config fex!Time: Tue Sep 7 09:22:40 2010
version 5.1(1)fex 101
pinning max-links 1description "FEX0101"
fex 102pinning max-links 1description "FEX0102"
interface port-channel101switchport mode fex-fabricfex associate 101
interface port-channel102switchport mode fex-fabricfex associate 102
interface Ethernet9/1switchport mode fex-fabricfex associate 101
interface Ethernet9/2switchport mode fex-fabricfex associate 102
Release Modification
5.1(1) This command was introduced.
IF-207Cisco Nexus 7000 Series NX-OS Interfaces Command Reference, Release 5.x
OL-23495-01

Send document comments to nexus7k -doc feedback@c isco .com
Cisco NX-OS Interfaces Commandsshow running-config fex
interface Ethernet10/1switchport mode fex-fabricfex associate 101
interface Ethernet10/2switchport mode fex-fabricfex associate 102
switch#
Related Commands Command Description
show fex Displays all configured Fabric Extender chassis connected to the switch.
IF-208Cisco Nexus 7000 Series NX-OS Interfaces Command Reference, Release 5.x
OL-23495-01

Send document comments to nexus7k -doc feedback@c isco .com
Cisco NX-OS Interfaces Commandsshow running-config interface
show running-config interfaceTo display the running configuration for a specific interface, use the show running-config interface command.
show running-config interface [all | {ethernet {slot/port} [all]} | expand-port-profile | {loopback {number} [all]} | {mgmt0 [all]} | {port-channel {channel-number} [membership]} | {tunnel {number} [all]} | {vlan {vlan-id} [all]}
Syntax Description
Defaults None
Command Modes Any command mode
Supported User Roles network-admin
vdc-admin
Command History
Usage Guidelines This command does not require a license.
Examples This example shows how to display information about the running configuration for a specific Ethernet interface:
switch(config)# show running-config interface ethernet 2/7version 4.0(3)
all (Optional) Displays the configuration with defaults.
ethernet slot/port Displays the number of the module and port number.
expand-port-profile Displays port profiles.
loopback number Displays the number of the loopback interface. The range of values is from 1 to 4096.
port-channel channel-number
Displays the number of the port-channel group. The range of values is from 0 to 1023.
membership (Optional) Specifies the membership of the specified port channel.
tunnel number Displays the number of the tunnel interface. The range of values is from 0 to 65535.
vlan vlan-id Displays the number of the VLAN. The range of values is from 1 to 4096.
Release Modification
4.0 This command was introduced.
4.2(1) The expand-port-profile parameter was introduced.
IF-209Cisco Nexus 7000 Series NX-OS Interfaces Command Reference, Release 5.x
OL-23495-01
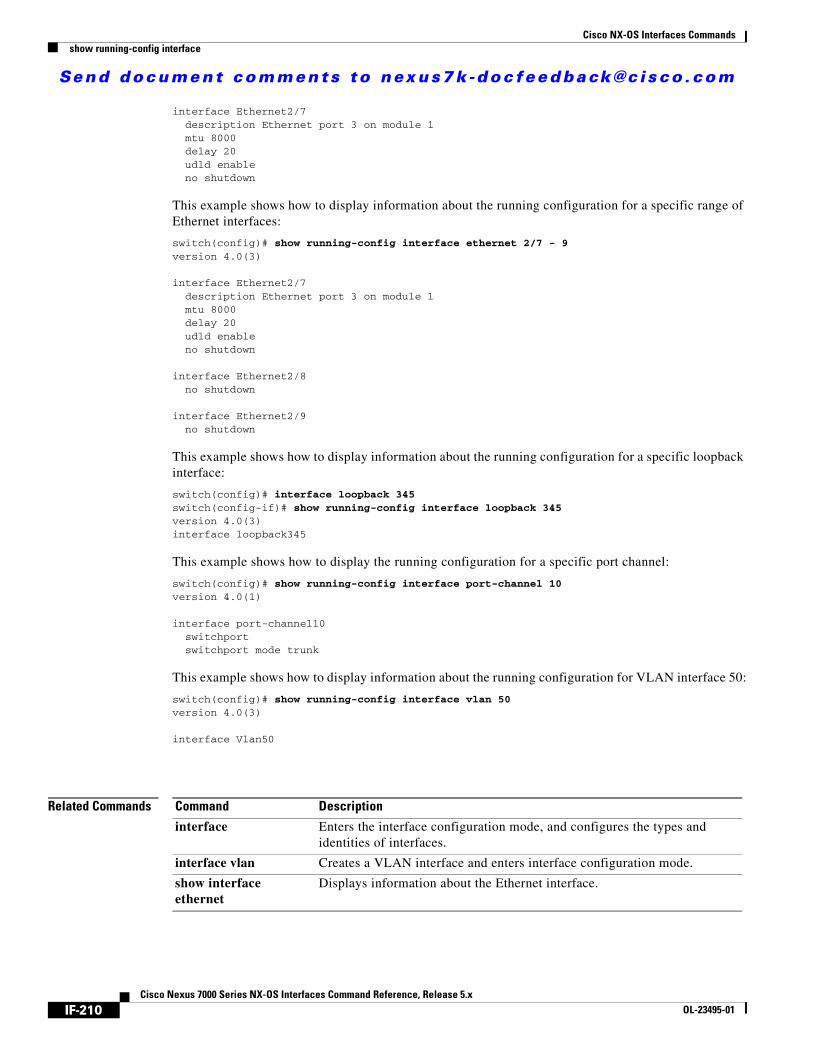
Send document comments to nexus7k -doc feedback@c isco .com
Cisco NX-OS Interfaces Commandsshow running-config interface
interface Ethernet2/7description Ethernet port 3 on module 1mtu 8000delay 20udld enableno shutdown
This example shows how to display information about the running configuration for a specific range of Ethernet interfaces:
switch(config)# show running-config interface ethernet 2/7 - 9version 4.0(3)
interface Ethernet2/7description Ethernet port 3 on module 1mtu 8000delay 20udld enableno shutdown
interface Ethernet2/8no shutdown
interface Ethernet2/9no shutdown
This example shows how to display information about the running configuration for a specific loopback interface:
switch(config)# interface loopback 345switch(config-if)# show running-config interface loopback 345version 4.0(3)interface loopback345
This example shows how to display the running configuration for a specific port channel:
switch(config)# show running-config interface port-channel 10version 4.0(1)
interface port-channel10switchportswitchport mode trunk
This example shows how to display information about the running configuration for VLAN interface 50:
switch(config)# show running-config interface vlan 50version 4.0(3)
interface Vlan50
Related Commands Command Description
interface Enters the interface configuration mode, and configures the types and identities of interfaces.
interface vlan Creates a VLAN interface and enters interface configuration mode.
show interface ethernet
Displays information about the Ethernet interface.
IF-210Cisco Nexus 7000 Series NX-OS Interfaces Command Reference, Release 5.x
OL-23495-01

Send document comments to nexus7k -doc feedback@c isco .com
Cisco NX-OS Interfaces Commandsshow running-config interface
show port-channel summary
Displays a summary of port-channel information.
show running-config Displays the running configuration on the device.
Command Description
IF-211Cisco Nexus 7000 Series NX-OS Interfaces Command Reference, Release 5.x
OL-23495-01

Send document comments to nexus7k -doc feedback@c isco .com
Cisco NX-OS Interfaces Commandsshow running-config interface mgmt
show running-config interface mgmtTo display the running configuration for a specific management interface, use the show running-config interface mgmt command.
show running-config interface mgmt {number}
Syntax Description
Defaults None
Command Modes Any command mode
Supported User Roles network-adminvdc-admin
Command History
Usage Guidelines Use the show running-config interface mgmt command to display the running configuration for a management interface.
This command does not require a license.
Examples This example shows how to display information about the running configuration for management interface 0:
switch# show running-config interface mgmt 0version 4.0(3)
interface mgmt0ip address 172.28.231.193/23
Related Commands
number Management interface number that you want to display. The range is from 0 to 0.
Release Modification
4.0 This command was introduced.
Command Description
show interface mgmt Displays the management interface information.
IF-212Cisco Nexus 7000 Series NX-OS Interfaces Command Reference, Release 5.x
OL-23495-01

Send document comments to nexus7k -doc feedback@c isco .com
Cisco NX-OS Interfaces Commandsshow running-config vpc
show running-config vpcTo display the running configuration information for virtual port channels (vPCs), use the show running-config vpc command.
show running-config vpc [all]
Syntax Description
Defaults None
Command Modes Any command mode.
Supported User Roles network-admin
vdc-admin
Command History
Usage Guidelines This command does not require a license.
Examples This example shows how to display the running configuration for a vPC:
switch (config)# show running-config vpc version 4.1(2)feature vpcvpc domain 2
role priority 1system-priority 32667peer-keepalive destination 10.10.76.52 source 10.10.76.51 udp-port 3200 vrf ma
engagement interval 1000 timeout 5
interface port-channel10vpc 20
interface port-channel101vpc 101
interface port-channel200vpc peer-link
interface port-channel201vpc 201
all (Optional) Displays the running configuration for all vPCs.
Release Modification
4.1(3) This command was introduced.
IF-213Cisco Nexus 7000 Series NX-OS Interfaces Command Reference, Release 5.x
OL-23495-01

Send document comments to nexus7k -doc feedback@c isco .com
Cisco NX-OS Interfaces Commandsshow running-config vpc
Related Commands Command Description
show vpc brief Displays information about vPCs. If the feature is not enabled, this command returns an error.
IF-214Cisco Nexus 7000 Series NX-OS Interfaces Command Reference, Release 5.x
OL-23495-01

Send document comments to nexus7k -doc feedback@c isco .com
Cisco NX-OS Interfaces Commandsshow sprom fex
show sprom fexTo display information about the Fabric Extender Serial (FEX) PROM (SPROM), use the show sprom fex command.
show sprom fex {all | chassis-ID {all | backplane | powersupply module-number}}
Syntax Description
Defaults None
Command Modes EXEC mode
Command History
Usage Guidelines This command does not require a license.
Examples This example shows how to display all SPROM content for a specific Fabric Extender:
switch# show sprom fex 101 allDISPLAY FEX 101 SUP sprom contentsCommon block:Block Signature : 0xababBlock Version : 3Block Length : 160Block Checksum : 0x1853EEPROM Size : 65535Block Count : 3FRU Major Type : 0x6002FRU Minor Type : 0x0OEM String : Cisco Systems, Inc.Product Number : N2K-C2248TP-1GESerial Number : JAF1407AANJPart Number : 73-12748-04Part Revision : 05Mfg Deviation : 0H/W Version : 3.4Mfg Bits : 0Engineer Use : 0snmpOID : 9.12.3.1.9.78.3.0
chassis-ID Fabric Extender chassis ID. The chassis ID range is from 100 to 199.
all Displays all SPROM content for a specific Fabric Extender.
backplane Displays the backplane SPROM content for a specific Fabric Extender.
powersupply Displays the power supply SPROM content for a specific Fabric Extender.
module-number Power supply module number for a specific Fabric Extender. The range is from 1 to 2.
Release Modification
5.1(1) This command was introduced.
IF-215Cisco Nexus 7000 Series NX-OS Interfaces Command Reference, Release 5.x
OL-23495-01
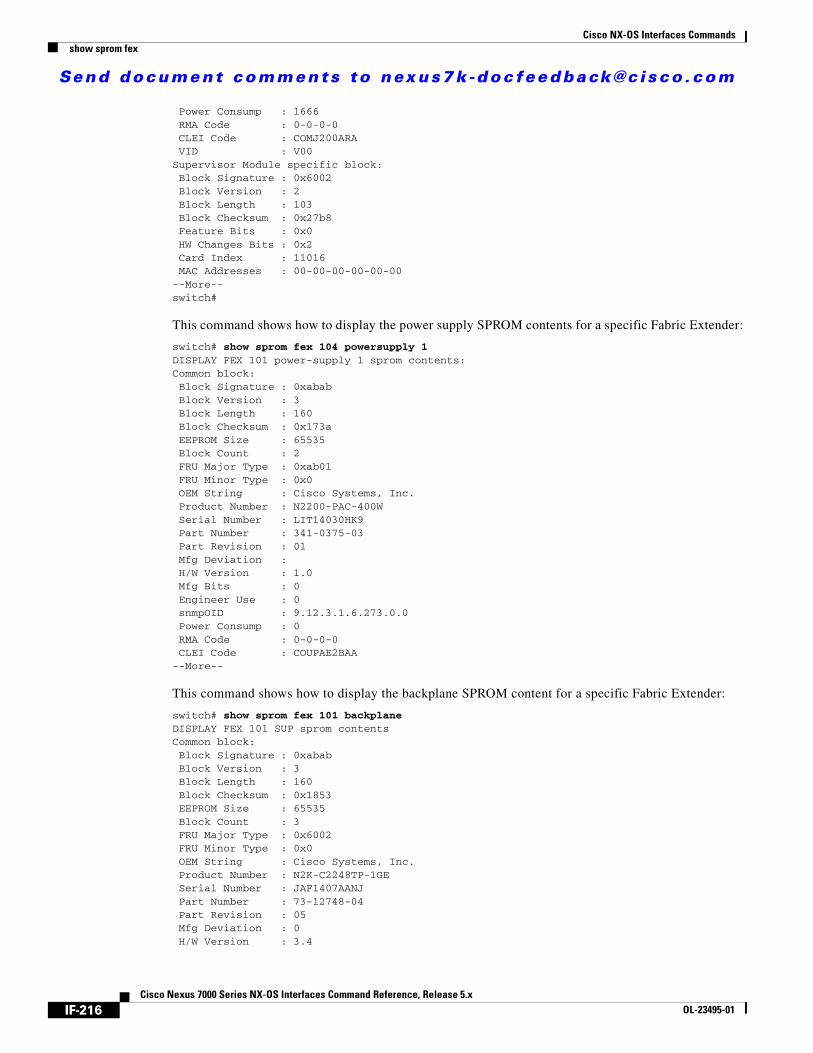
Send document comments to nexus7k -doc feedback@c isco .com
Cisco NX-OS Interfaces Commandsshow sprom fex
Power Consump : 1666RMA Code : 0-0-0-0CLEI Code : COMJ200ARAVID : V00
Supervisor Module specific block:Block Signature : 0x6002Block Version : 2Block Length : 103Block Checksum : 0x27b8Feature Bits : 0x0HW Changes Bits : 0x2Card Index : 11016MAC Addresses : 00-00-00-00-00-00
--More--switch#
This command shows how to display the power supply SPROM contents for a specific Fabric Extender:
switch# show sprom fex 104 powersupply 1DISPLAY FEX 101 power-supply 1 sprom contents:Common block:Block Signature : 0xababBlock Version : 3Block Length : 160Block Checksum : 0x173aEEPROM Size : 65535Block Count : 2FRU Major Type : 0xab01FRU Minor Type : 0x0OEM String : Cisco Systems, Inc.Product Number : N2200-PAC-400WSerial Number : LIT14030HK9Part Number : 341-0375-03Part Revision : 01Mfg Deviation :H/W Version : 1.0Mfg Bits : 0Engineer Use : 0snmpOID : 9.12.3.1.6.273.0.0Power Consump : 0RMA Code : 0-0-0-0CLEI Code : COUPAE2BAA
--More--
This command shows how to display the backplane SPROM content for a specific Fabric Extender:
switch# show sprom fex 101 backplaneDISPLAY FEX 101 SUP sprom contentsCommon block:Block Signature : 0xababBlock Version : 3Block Length : 160Block Checksum : 0x1853EEPROM Size : 65535Block Count : 3FRU Major Type : 0x6002FRU Minor Type : 0x0OEM String : Cisco Systems, Inc.Product Number : N2K-C2248TP-1GESerial Number : JAF1407AANJPart Number : 73-12748-04Part Revision : 05Mfg Deviation : 0H/W Version : 3.4
IF-216Cisco Nexus 7000 Series NX-OS Interfaces Command Reference, Release 5.x
OL-23495-01

Send document comments to nexus7k -doc feedback@c isco .com
Cisco NX-OS Interfaces Commandsshow sprom fex
Mfg Bits : 0Engineer Use : 0snmpOID : 9.12.3.1.9.78.3.0Power Consump : 1666RMA Code : 0-0-0-0CLEI Code : COMJ200ARAVID : V00
Supervisor Module specific block:--More--
Related Commands Command Description
show fex Displays all configured Fabric Extender chassis connected to the switch.
IF-217Cisco Nexus 7000 Series NX-OS Interfaces Command Reference, Release 5.x
OL-23495-01

Send document comments to nexus7k -doc feedback@c isco .com
Cisco NX-OS Interfaces Commandsshow startup-config interface
show startup-config interface To display interface configuration information in the startup configuration, use the show startup-config interface command.
show startup-config interface [ethernet slot/port | expand-port-profile | loopback number | mgmt | port-channel {channel-number} [membership] | tunnel number | {vlan vlan-id}]
Syntax Description
Defaults None
Command Modes Any command mode
Supported User Roles network-admin
vdc-admin
Command History
Usage Guidelines This command does not require a license.
Examples This example shows how to display the information in the startup configuration for the interface Ethernet 7/1:
switch(config)# show startup-config interface ethernet 7/1version 4.1(2)
interface Ethernet7/1ip pim sparse-mode
ethernet slot/port (Optional) Displays the number of the module and port number.
expand-port-profile (Optional) Displays the port profiles.
loopback number (Optional) Displays the number of the loopback interface. The range of values is from 1 to 4096.
port-channel channel-number
(Optional) Displays the number of the port-channel group. The range of values is from 0 to 1023.
membership (Optional) Displays the membership of the specified port channel.
tunnel number (Optional) Displays the number of the tunnel interface. The range of values is from 0 to 65535.
vlan vlan-id (Optional) Displays the number of the VLAN. The range of values is from 1 to 4096.
Release Modification
4.1(2) This command was introduced.
4.2(1) The expand-port-profile parameter was introduced.
IF-218Cisco Nexus 7000 Series NX-OS Interfaces Command Reference, Release 5.x
OL-23495-01

Send document comments to nexus7k -doc feedback@c isco .com
Cisco NX-OS Interfaces Commandsshow startup-config interface
Related Commands Command Description
show interface Displays information about the specified interface.
IF-219Cisco Nexus 7000 Series NX-OS Interfaces Command Reference, Release 5.x
OL-23495-01

Send document comments to nexus7k -doc feedback@c isco .com
Cisco NX-OS Interfaces Commandsshow startup-config vpc
show startup-config vpcTo display virtual port-channel (vPC) configuration information in the startup configuration, use the show startup-config vpc command.
show startup-config vpc [all]
Syntax Description
Defaults None
Command Modes Any command mode
Supported User Roles network-admin
vdc-admin
Command History
Usage Guidelines This command does not require a license.
Examples This example shows how to display the vPC information in the startup configuration:
switch(config)# show startup-config vpcversion 4.1(2)feature vpcvpc domain 1
interface port-channel10vpc peer-link
interface port-channel20vpc 100
Related Commands
all (Optional) Displays the startup-configuration information for all vPCs.
Release Modification
4.1(3) This command was introduced.
Command Description
show vpc brief Displays information about vPCs. If the feature is not enabled, the system displays an error when you enter this command.
IF-220Cisco Nexus 7000 Series NX-OS Interfaces Command Reference, Release 5.x
OL-23495-01

Send document comments to nexus7k -doc feedback@c isco .com
Cisco NX-OS Interfaces Commandsshow system reset-reason fex
show system reset-reason fexTo display the reason for the last reset of the Fabric Extender (FEX), use the show system reset-reason fex command.
show system reset-reason fex chassis-ID
Syntax Description
Defaults None
Command Modes EXEC mode
Command History
Usage Guidelines This command does not require a license.
Examples This example shows how to display the last reset reason for a specific Fabric Extender:
switch# show system reset-reason fex 101 ----- reset reason for FEX 101 ---1) At 550180 usecs after Mon Sep 6 07:43:23 2010
Reset Reason: Reset Requested by CLI command reload (9)Service (Additional Info): Reload requested by supervisorImage Version: 5.1(0.159.6)
2) At 269728 usecs after Mon Sep 6 07:41:36 2010Reset Reason: Reset Requested by CLI command reload (9)Service (Additional Info): Reload requested by supervisorImage Version: 5.1(0.159.6)
3) At 868270 usecs after Sun Feb 24 22:07:28 2008Reset Reason: Reset Requested by CLI command reload (9)Service (Additional Info): Reload requested by supervisorImage Version: 5.1(0.159.6)
4) At 204499 usecs after Sun Feb 24 20:38:20 2008Reset Reason: Reset Requested by CLI command reload (9)Service (Additional Info): Reload requested by supervisorImage Version: 5.1(0.159.6)
switch#
Related Commands
chassis-ID Fabric Extender chassis ID. The chassis ID range is from 100 to 199.
Release Modification
5.1(1) This command was introduced.
Command Description
show fex Displays all configured Fabric Extender chassis connected to the switch.
IF-221Cisco Nexus 7000 Series NX-OS Interfaces Command Reference, Release 5.x
OL-23495-01

Send document comments to nexus7k -doc feedback@c isco .com
Cisco NX-OS Interfaces Commandsshow tech-support fex
show tech-support fexTo display detailed troubleshooting information for a Fabric Extender (FEX), use the show tech-support fex command.
show tech-support fex all chassis-ID
Syntax Description
Defaults None
Command Modes EXEC mode
Command History
Usage Guidelines This command does not require a license.
Examples This example shows how to display detailed troubleshooting information for a FEX:
switch# show tech-support fex 10109/06/2010 07:44:12.26863: Satctrl Built at Thu Aug 5 19:12:00 PDT 2010 on ramineni-lnx in directory /ws/mhau-sjc/deewhy_june_2/build by mhau09/06/2010 07:44:12.26883: Version: 2109/06/2010 07:44:12.26898: ***************************************************09/06/2010 07:44:12.38241: satellite_init: initializing modules09/06/2010 07:44:12.38466: satctrl_get_cardid: Platform card ID 9909/06/2010 07:44:12.38772: Platform info: cardid=99, num_slots=109/06/2010 07:44:12.463410: satctrl_get_cardid: Platform card ID 9909/06/2010 07:44:12.463455: satellite_init: swcardid=9909/06/2010 07:44:12.463598: get fru: chas ser:SSI14061500 chas model:N2K-C2248TP-1GE chas part: 68-3601-0409/06/2010 07:44:12.463625: get fru: mod ser:JAF1407AANJ mod model:N2K-C2248TP-1GE mod part: 73-12748-0409/06/2010 07:44:12.463649: satellite_init: initializing inband09/06/2010 07:44:12.477534: satellite_init: inband initialized09/06/2010 07:44:12.477723: satellite_module_cfg_init: initializing modue (0)09/06/2010 07:44:12.478987: satctrl_module_fsm_init: Fsm initialized for fabricmodule no (0, 0)09/06/2010 07:44:12.479080: satctrl_module_fsm_init: Fsm initialized for fabricmodule no (1, 0)09/06/2010 07:44:12.479423: satellite_init: done initializing satctrl module09/06/2010 07:44:12.479466: satctrl_set_mts_addr: dummy_addr: 0xff0209/06/2010 07:44:12.479709: My addr is changed to 0xff--More--
all Specifies detailed information for all FEX.
chassis-ID Fabric Extender chassis ID. The chassis ID range is from 100 to 199.
Release Modification
5.1(1) This command was introduced.
IF-222Cisco Nexus 7000 Series NX-OS Interfaces Command Reference, Release 5.x
OL-23495-01

Send document comments to nexus7k -doc feedback@c isco .com
Cisco NX-OS Interfaces Commandsshow tech-support fex
This example shows how to display all troubleshooting information for all FEX:
switch# show tech-support fex all09/06/2010 07:44:12.26583: ***************************************************09/06/2010 07:44:12.26863: Satctrl Built at Thu Aug 5 19:12:00 PDT 2010 on ramineni-lnx in directory /ws/mhau-sjc/deewhy_june_2/build by mhau09/06/2010 07:44:12.26883: Version: 2109/06/2010 07:44:12.26898: ***************************************************09/06/2010 07:44:12.38241: satellite_init: initializing modules09/06/2010 07:44:12.38466: satctrl_get_cardid: Platform card ID 9909/06/2010 07:44:12.38772: Platform info: cardid=99, num_slots=109/06/2010 07:44:12.463410: satctrl_get_cardid: Platform card ID 9909/06/2010 07:44:12.463455: satellite_init: swcardid=9909/06/2010 07:44:12.463598: get fru: chas ser:SSI14061500 chas model:N2K-C2248TP-1GE chas part: 68-3601-0409/06/2010 07:44:12.463625: get fru: mod ser:JAF1407AANJ mod model:N2K-C2248TP-1GE mod part: 73-12748-0409/06/2010 07:44:12.463649: satellite_init: initializing inband09/06/2010 07:44:12.477534: satellite_init: inband initialized09/06/2010 07:44:12.477723: satellite_module_cfg_init: initializing modue (0)09/06/2010 07:44:12.478987: satctrl_module_fsm_init: Fsm initialized for fabricmodule no (0, 0)09/06/2010 07:44:12.479080: satctrl_module_fsm_init: Fsm initialized for fabricmodule no (1, 0)09/06/2010 07:44:12.479423: satellite_init: done initializing satctrl module09/06/2010 07:44:12.479466: satctrl_set_mts_addr: dummy_addr: 0xff0209/06/2010 07:44:12.479709: My addr is changed to 0xff--More--
Related Commands Command Description
show fex Displays all configured Fabric Extender chassis connected to the switch.
IF-223Cisco Nexus 7000 Series NX-OS Interfaces Command Reference, Release 5.x
OL-23495-01

Send document comments to nexus7k -doc feedback@c isco .com
Cisco NX-OS Interfaces Commandsshow udld
show udldTo display information about the Unidirectional Link Detection (UDLD) configuration, use the show udld command.
show udld [ethernet slot/port | global | neighbors]
Syntax Description
Defaults None
Command Modes Any command mode
Supported User Roles network-adminvdc-admin
Command History
Usage Guidelines Use the show udld command to display information about the UDLD configuration for an interface. UDLD must be enabled on the device before you can display this command; enter the feature udld command to enable UDLD globally on the device.
This command does not require a license.
Examples This example shows how to display information about the UDLD configuration for Ethernet port 2/7:
switch# show udld ethernet 2/7
Interface Ethernet2/7--------------------------------Port enable administrative configuration setting: disabledPort enable operational state: disabledCurrent bidirectional state: unknownCurrent operational state: udld-init - Multiple neighbor not detectedMessage interval: 7Timeout interval: 5
ethernet slot/port
(Optional) Displays the Ethernet slot and port number you want to display.
global (Optional) Displays the UDLD global status and configuration on all interfaces.
neighbors (Optional) Displays the UDLD neighbor interfaces.
Release Modification
4.0 This command was introduced.
IF-224Cisco Nexus 7000 Series NX-OS Interfaces Command Reference, Release 5.x
OL-23495-01

Send document comments to nexus7k -doc feedback@c isco .com
Cisco NX-OS Interfaces Commandsshow udld
Related Commands Command Description
udld Configures the ports to use a UDLD mode.
feature udld Enables UDLD globally on device.
IF-225Cisco Nexus 7000 Series NX-OS Interfaces Command Reference, Release 5.x
OL-23495-01

Send document comments to nexus7k -doc feedback@c isco .com
Cisco NX-OS Interfaces Commandsshow vdc
show vdcTo display virtual device contexts (VDCs), use the show vdc command.
show vdc
Syntax Description This command has no arguments or keywords.
Defaults None
Command Modes Any command mode
Supported User Roles network-admin
vdc-admin
Command History
Usage Guidelines This command does not require a license.
Examples This example shows how to display VDCs:
switch# show vdc
vdc_id vdc_name state mac
lc
------ -------- ----- ----------
------
1 switch active 00:22:55:79:a4:c1
M1 F1
2 1 active 00:22:55:79:a4:c2
M1 F1
3 2 active 00:22:55:79:a4:c3
M1 F1
4 fred active 00:22:55:79:a4:c4
M1 F1
switch#
Release Modification
5.1(1) This command was introduced.
IF-226Cisco Nexus 7000 Series NX-OS Interfaces Command Reference, Release 5.x
OL-23495-01

Send document comments to nexus7k -doc feedback@c isco .com
Cisco NX-OS Interfaces Commandsshow vdc
Related Commands Command Description
show lacp Displays LACP information.
IF-227Cisco Nexus 7000 Series NX-OS Interfaces Command Reference, Release 5.x
OL-23495-01

Send document comments to nexus7k -doc feedback@c isco .com
Cisco NX-OS Interfaces Commandsshow vpc brief
show vpc briefTo display brief information about the virtual port channels (vPCs), use the show vpc brief command.
show vpc brief [vpc number]
Syntax Description
Defaults None
Command Modes Any command mode
Supported User Roles network-admin
vdc-admin
Command History
Usage Guidelines The show vpc brief command displays the vPC domain ID, the peer-link status, the keepalive message status, whether the configuration consistency is successful, and whether peer-link formed or the failure to form.
This command is not available if you have not enabled the vPC feature. See feature vpc for information on enabling vPCs.
Beginning with Cisco Release 4.2(1), you can display the track object, if you have configured a tracked object for running vPCs on a single module under the vpc-domain configuration mode. See the Cisco Nexus 7000 Series NX-OS Interfaces Configuration Guide, Release 5.x, for information on this feature.
This command does not require a license.
Examples This example shows how to display brief information about the vPCs:
switch(config)# show vpc brief
Legend:(*) - local vpc is down, forwarding via vPC peer-link
vPC domain id : 10Peer status : peer adjacency formed okvPC keep-alive status : peer is aliveConfiguration consistency status: successvPC role : primary
vpc number (Optional) Displays the brief information for the specified vPC. The range is from 1 to 4096.
Release Modification
4.1(3) This command was introduced.
4.2(1) Added the vPCs keyword.
IF-228Cisco Nexus 7000 Series NX-OS Interfaces Command Reference, Release 5.x
OL-23495-01

Send document comments to nexus7k -doc feedback@c isco .com
Cisco NX-OS Interfaces Commandsshow vpc brief
Number of vPC configured : 1
vPC Peer-link status---------------------------------------------------------------------id Port Status Active vlans-- ---- ------ --------------------------------------------------1 Po10 up 1-100
vPC status----------------------------------------------------------------------id Port Status Consistency Reason Active vlans-- ---- ------ ----------- -------------------------- ------------20 Po20 up success success 1-100
This example also shows how to display brief information about the vPCs. In this example, the port channel failed the consistency check, and the device displays the reason for the failure:
switch(config)# show vpc brief
Legend:(*) - local vpc is down, forwarding via vPC peer-link
vPC domain id : 10Peer status : peer adjacency formed okvPC keep-alive status : peer is aliveConfiguration consistency status: failedConfiguration consistency reason: vPC type-1 configuration incompatible - STP interface port type inconsistentvPC role : secondaryNumber of vPC configured : 1
vPC Peer-link status---------------------------------------------------------------------id Port Status Active vlans-- ---- ------ --------------------------------------------------1 Po10 up 1-100
vPC status----------------------------------------------------------------------id Port Status Consistency Reason Active vlans-- ---- ------ ----------- -------------------------- ------------20 Po20 up failed vPC type-1 configuration -
incompatible - STPinterface port typeinconsistent
This example shows how to display information about the tracked objects in the vPCs, which is available beginning in Cisco NX-OS Release 4.2(1):
switch(config)# show vpc brief
Legend:(*) - local vpc is down, forwarding via vPC peer-link
vPC domain id : 1Peer status : peer adjacency formed okvPC keep-alive status : peer is aliveConfiguration consistency status: successvPC role : secondaryNumber of vPC configured : 3Track object : 12
vPC Peer-link status
IF-229Cisco Nexus 7000 Series NX-OS Interfaces Command Reference, Release 5.x
OL-23495-01

Send document comments to nexus7k -doc feedback@c isco .com
Cisco NX-OS Interfaces Commandsshow vpc brief
---------------------------------------------------------------------id Port Status Active vlans-- ---- ------ --------------------------------------------------1 Po10 up 1-100
Related Commands Command Description
feature vpc Enables vPCs on the device.
show port channel summary
Displays information about port channels.
IF-230Cisco Nexus 7000 Series NX-OS Interfaces Command Reference, Release 5.x
OL-23495-01
Send document comments to nexus7k -doc feedback@c isco .com
Cisco NX-OS Interfaces Commandsshow vpc consistency-parameters
show vpc consistency-parametersTo display the consistency of parameters that must be compatible across the virtual port-channel (vPC) interfaces, use the show vpc consistency-parameters command.
show vpc consistency-parameters {global | interface port-channel channel-number | vpc number}}
Syntax Description
Defaults None
Command Modes Any command mode.
Supported User Roles network-admin
vdc-admin
Command History
Usage Guidelines The show vpc consistency-parameters command displays the configuration of all the vPC Type 1 parameters on both sides of the vPC peer link.
Note All the Type 1 configurations must be identical on both sides of the vPC peer link, or the link will not come up.
The vPC Type 1 configuration parameters are as follows:
• Port-channel mode: on, off, or active
• Link speed per channel
global (Optional) Displays the configuration of all Type 1 global parameters on both sides of the vPC peer link.
interface port-channel
(Optional) Displays the configuration of all Type 1 interface parameters on both sides of the vPC peer link.
channel- number (Optional) Channel number.
vpc number (Optional) Displays the configuration of all Type 1 interface parameters on both sides of the vPC peer link for the specified vPC.
Release Modification
4.1(3) This command was introduced.
4.2(1) Added the display of local suspended VLANs.
Note The command does not display the vPC peer device’s suspended VLANs.
4.2(1) Added the vpc argument.
IF-231Cisco Nexus 7000 Series NX-OS Interfaces Command Reference, Release 5.x
OL-23495-01
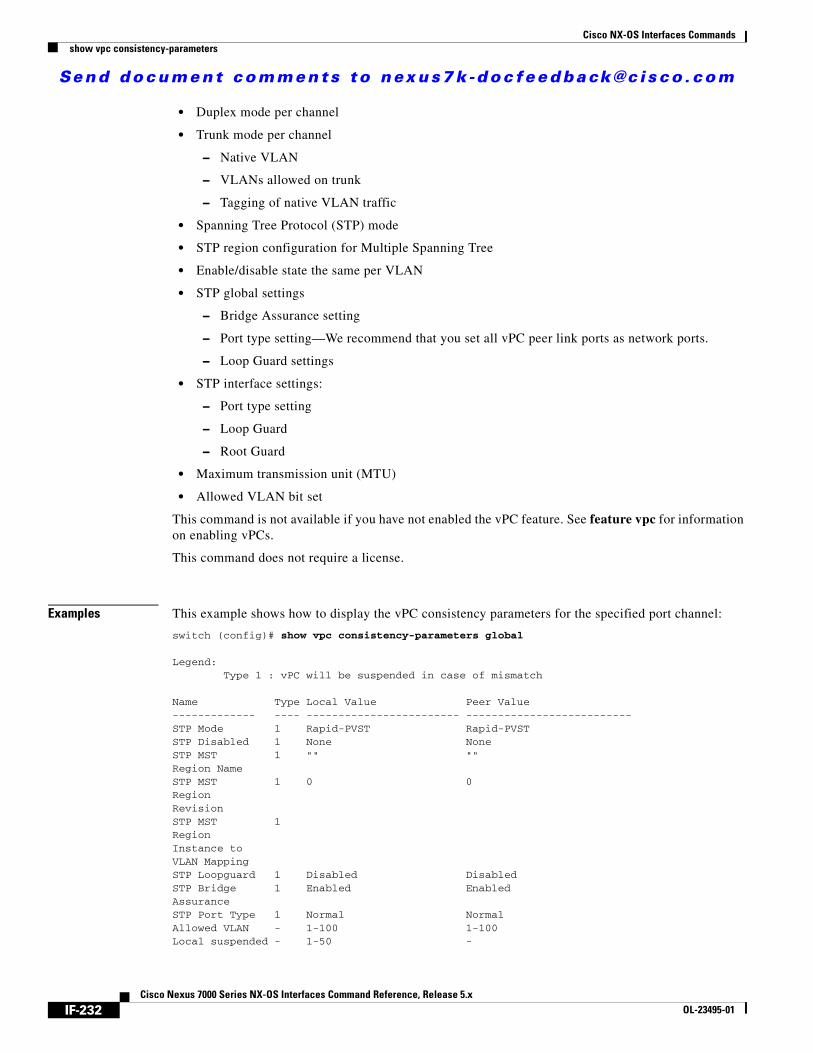
Send document comments to nexus7k -doc feedback@c isco .com
Cisco NX-OS Interfaces Commandsshow vpc consistency-parameters
• Duplex mode per channel
• Trunk mode per channel
– Native VLAN
– VLANs allowed on trunk
– Tagging of native VLAN traffic
• Spanning Tree Protocol (STP) mode
• STP region configuration for Multiple Spanning Tree
• Enable/disable state the same per VLAN
• STP global settings
– Bridge Assurance setting
– Port type setting—We recommend that you set all vPC peer link ports as network ports.
– Loop Guard settings
• STP interface settings:
– Port type setting
– Loop Guard
– Root Guard
• Maximum transmission unit (MTU)
• Allowed VLAN bit set
This command is not available if you have not enabled the vPC feature. See feature vpc for information on enabling vPCs.
This command does not require a license.
Examples This example shows how to display the vPC consistency parameters for the specified port channel:
switch (config)# show vpc consistency-parameters global
Legend:Type 1 : vPC will be suspended in case of mismatch
Name Type Local Value Peer Value------------- ---- ------------------------ --------------------------STP Mode 1 Rapid-PVST Rapid-PVSTSTP Disabled 1 None NoneSTP MST 1 "" ""Region NameSTP MST 1 0 0RegionRevisionSTP MST 1RegionInstance toVLAN MappingSTP Loopguard 1 Disabled DisabledSTP Bridge 1 Enabled EnabledAssuranceSTP Port Type 1 Normal NormalAllowed VLAN - 1-100 1-100Local suspended - 1-50 -
IF-232Cisco Nexus 7000 Series NX-OS Interfaces Command Reference, Release 5.x
OL-23495-01
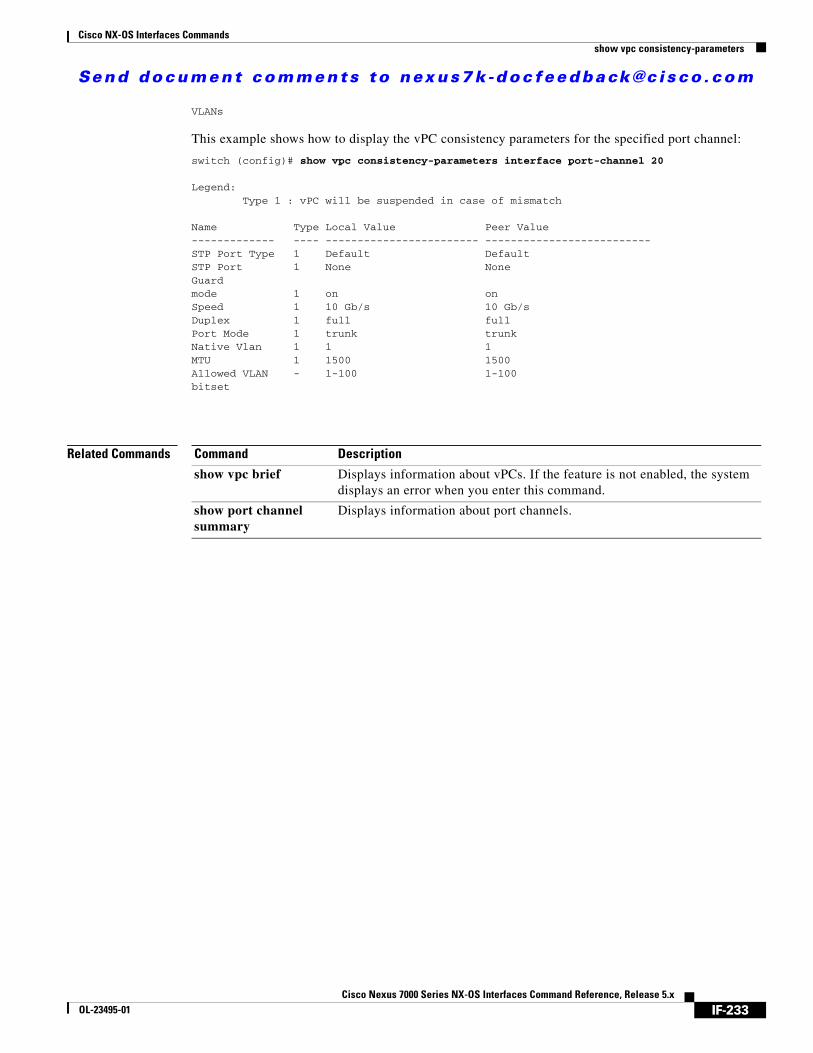
Send document comments to nexus7k -doc feedback@c isco .com
Cisco NX-OS Interfaces Commandsshow vpc consistency-parameters
VLANs
This example shows how to display the vPC consistency parameters for the specified port channel:
switch (config)# show vpc consistency-parameters interface port-channel 20
Legend:Type 1 : vPC will be suspended in case of mismatch
Name Type Local Value Peer Value------------- ---- ------------------------ --------------------------STP Port Type 1 Default DefaultSTP Port 1 None NoneGuardmode 1 on onSpeed 1 10 Gb/s 10 Gb/sDuplex 1 full fullPort Mode 1 trunk trunkNative Vlan 1 1 1MTU 1 1500 1500Allowed VLAN - 1-100 1-100bitset
Related Commands Command Description
show vpc brief Displays information about vPCs. If the feature is not enabled, the system displays an error when you enter this command.
show port channel summary
Displays information about port channels.
IF-233Cisco Nexus 7000 Series NX-OS Interfaces Command Reference, Release 5.x
OL-23495-01

Send document comments to nexus7k -doc feedback@c isco .com
Cisco NX-OS Interfaces Commandsshow vpc orphan-ports
show vpc orphan-portsTo display ports that are not part of the virtual port channel (vPC) but have common VLANs, use the show vpc orphan-ports command.
show vpc orphan-ports
Syntax Description This command has no arguments or keywords.
Defaults None
Command Modes Any command mode.
Supported User Roles network-admin
vdc-admin
Command History
Usage Guidelines The show vpc orphan-ports command displays those ports that are not part of the vPC but that share common VLANs with ports that are part of the vPC.
This command is not available if you have not enabled the vPC feature. See feature vpc for information on enabling vPCs.
This command does not require a license.
Examples This example shows how to display vPC orphan ports:
switch(config)# show vpc orphan ports
Note:--------::Going through port database. Please be patient.::--------
VLAN Orphan Ports------- -------------------------1 Po6002 Po6003 Po6004 Po6005 Po6006 Po6007 Po6008 Po6009 Po60010 Po600
Release Modification
4.2(1) This command was introduced.
IF-234Cisco Nexus 7000 Series NX-OS Interfaces Command Reference, Release 5.x
OL-23495-01

Send document comments to nexus7k -doc feedback@c isco .com
Cisco NX-OS Interfaces Commandsshow vpc orphan-ports
11 Po60012 Po60013 Po60014 Po60015 Po600
Related Commands Command Description
feature vpc Enables vPCs on the device.
show vpc brief Displays brief information about vPCs.
IF-235Cisco Nexus 7000 Series NX-OS Interfaces Command Reference, Release 5.x
OL-23495-01

Send document comments to nexus7k -doc feedback@c isco .com
Cisco NX-OS Interfaces Commandsshow vpc peer-keepalive
show vpc peer-keepaliveTo display the destination IP for the virtual port-channel (vPC) peer keepalive message and the status of the messages, use the show vpc peer-keepalive command.
show vpc peer-keepalive
Syntax Description This command has no arguments or keywords.
Defaults None
Command Modes Any command mode
Supported User Roles network-admin
vdc-admin
Command History
Usage Guidelines The show vpc peer-keepalive command displays the destination IP of the peer keepalive message for the vPC. The command also displays the send and receive status as well as the last update from the peer in seconds and milliseconds
Note We recommend that you create a separate VRF on the peer devices to send and receive the vPC peer keepalive messages. Do not use the peer link itself to send the vPC peer-keepalive messages.
This command is not available if you have not enabled the vPC feature. See feature vpc for information on enabling vPCs.
This command does not require a license.
Examples This example shows how to display information about the peer-keepalive message:
n7k-2(config-vpc-domain)# show vpc peer-keepalive
vPC keep-alive status : peer is alive--Send status : Success--Last send at : 2008.05.17 18:23:53 986 ms--Sent on interface : Eth7/16--Receive status : Success--Last receive at : 2008.05.17 18:23:54 99 ms--Received on interface : Eth7/16--Last update from peer : (0) seconds, (486) msec
Release Modification
4.1(3) This command was introduced.
IF-236Cisco Nexus 7000 Series NX-OS Interfaces Command Reference, Release 5.x
OL-23495-01

Send document comments to nexus7k -doc feedback@c isco .com
Cisco NX-OS Interfaces Commandsshow vpc peer-keepalive
vPC Keep-alive parameters--Destination : 172.23.145.213--Keepalive interval : 1000 msec--Keepalive timeout : 5 seconds--Keepalive hold timeout : 3 seconds--Keepalive vrf : pkal--Keepalive udp port : 3200--Keepalive tos : 192
Related Commands Command Description
show vpc brief Displays information about vPCs. If the feature is not enabled, the system displays an error when you enter this command.
IF-237Cisco Nexus 7000 Series NX-OS Interfaces Command Reference, Release 5.x
OL-23495-01

Send document comments to nexus7k -doc feedback@c isco .com
Cisco NX-OS Interfaces Commandsshow vpc role
show vpc roleTo display information about the virtual port-channel (vPC) role of the peer device, use the show vpc role command.
show vpc role
Syntax Description This command has no arguments or keywords.
Defaults None
Command Modes Any command mode
Supported User Roles network-admin
vdc-admin
Command History
Usage Guidelines The show vpc role command displays the following information about the vPC status:
• Status of peer adjacency
• vPC role of the VDC that you are working on
• vPC MAC address
• vPC system priority
• MAC address of the device that you are working on
• System priority for the device that you are working on
This command is not available if you have not enabled the vPC feature. See feature vpc for information on enabling vPCs.
This command does not require a license.
Examples This example shows how to display the vPC role information of the device that you are working on:
switch (config)# show vpc role
Primary:
vPC Role status----------------------------------------------------vPC role : primaryDual Active Detection Status : 0
Release Modification
4.1(3) This command was introduced.
IF-238Cisco Nexus 7000 Series NX-OS Interfaces Command Reference, Release 5.x
OL-23495-01

Send document comments to nexus7k -doc feedback@c isco .com
Cisco NX-OS Interfaces Commandsshow vpc role
vPC system-mac : 00:23:04:ee:be:01vPC system-priority : 32667vPC local system-mac : 00:22:55:79:ea:c1vPC local role-priority : 32667
Secondary:
vPC Role status----------------------------------------------------vPC role : secondaryDual Active Detection Status : 0vPC system-mac : 00:23:04:ee:be:01vPC system-priority : 32667vPC local system-mac : 00:22:55:79:de:41vPC local role-priority : 32667
When you reload the primary vPC peer device, the secondary vPC peer device assumes the role of primary device. The following example shows how the vPC role displays then on the new primary device:
switch (config)# show vpc role
vPC Role status----------------------------------------------------vPC role : secondary, operational primaryDual Active Detection Status : 0vPC system-mac : 00:23:04:ee:be:64vPC system-priority : 32667vPC local system-mac : 00:22:55:79:de:41vPC local role-priority : 32667
Related Commands Command Description
show vpc brief Displays information about vPCs. If the feature is not enabled, the system displays an error when you enter this command.
show port channel summary
Displays information about port channels.
IF-239Cisco Nexus 7000 Series NX-OS Interfaces Command Reference, Release 5.x
OL-23495-01

Send document comments to nexus7k -doc feedback@c isco .com
Cisco NX-OS Interfaces Commandsshow vpc statistics
show vpc statisticsTo display virtual port-channel (vPC) statistics, use the show vpc statistics command.
show vpc statistics {peer-keepalive | peer-link | vpc number}
Syntax Description[
Defaults None
Command Modes Any command mode
Supported User Roles network-admin
vdc-admin
Command History
Usage Guidelines The peer-link parameter displays the same information as the show interface port-channel channel number command for the vPC peer-link port channel.
The vpc number parameter displays the same information as the show interface port-channel channel number command for the specified vPC port channel.
This command is not available if you have not enabled the vPC feature. See feature vpc for information on enabling vPCs.
This command does not require a license.
Examples This example shows how to display statistics about the peer-keepalive message:
switch# show vpc statistics peer-keepalive
vPC keep-alive status : peer is alive
VPC keep-alive statistics----------------------------------------------------peer-keepalive tx count: 1036peer-keepalive rx count: 1028average interval for peer rx: 995 Count of peer state changes: 1
peer-keepalive Displays statistics about the peer-keepalive message.
peer-link Displays statistics about the peer link.
vpc number Displays statistics about the specified vPC. The range is from 1 to 4096.
Release Modification
4.1(3) This command was introduced.
IF-240Cisco Nexus 7000 Series NX-OS Interfaces Command Reference, Release 5.x
OL-23495-01

Send document comments to nexus7k -doc feedback@c isco .com
Cisco NX-OS Interfaces Commandsshow vpc statistics
Related Commands Command Description
show vpc brief Displays information about vPCs. If the feature is not enabled, the system displays an error when you enter this command.
show port channel summary
Displays information about port channels.
IF-241Cisco Nexus 7000 Series NX-OS Interfaces Command Reference, Release 5.x
OL-23495-01

Send document comments to nexus7k -doc feedback@c isco .com
Cisco NX-OS Interfaces Commandsshutdown
shutdownTo bring the port administratively down, use the shutdown command. To bring the port administratively up, use the no shutdown command.
shutdown [force]
no shutdown [force]
Syntax Description
Defaults None
Command Modes Interface configuration mode
Supported User Roles network-adminvdc-admin
Command History
Usage Guidelines Use the shutdown command to bring the port administratively down. Use the no shutdown command to bring the port administratively up.
This command does not require a license.
Examples This example shows how to bring the port administratively down:
switch(config-if)# shutdown
This example shows how to bring the port administratively up:
switch(config-if)# no shutdown
force (Optional) Forces the interface state to change. When you shut down a management interface, a warning question is displayed regarding active Telnet sessions. You can bypass the question with the force option. The force option is also useful when you run an automated configuration playback.
The force option is only available for Ethernet interfaces or the management port.
Release Modification
4.0 This command was introduced.
IF-242Cisco Nexus 7000 Series NX-OS Interfaces Command Reference, Release 5.x
OL-23495-01

Send document comments to nexus7k -doc feedback@c isco .com
Cisco NX-OS Interfaces Commandsshutdown
Related Commands Command Description
interface ethernet Configures the types and identities of Ethernet interfaces.
IF-243Cisco Nexus 7000 Series NX-OS Interfaces Command Reference, Release 5.x
OL-23495-01

Send document comments to nexus7k -doc feedback@c isco .com
Cisco NX-OS Interfaces Commandsspeed
speedTo set the speed for Ethernet ports or management interfaces or set the port to autonegotiate its speed with other ports on the link, use the speed command.
speed {10 | 100 | 1000 | 10000 | auto [10 [100 [1000]]]}
Syntax Description
Defaults None
Command Modes Interface configuration mode
Supported User Roles network-adminvdc-admin
Command History
Usage Guidelines Before you begin, make sure that the remote port has a speed setting that supports your changes for the local port. If you want to set the local port to use a specific speed, you must set the remote port for the same speed or set the local port to autonegotiate the speed.
The interface speed and duplex mode are interrelated, so you should configure both of their parameters at the same time.
The interface speed that you specify can affect the duplex mode used for an interface, so you should set the speed before setting the duplex mode. If you set the speed for autonegotiation, the duplex mode is automatically set to be autonegotiated. If you specify 10- or 100-Mbps speed, the port is automatically configured to use half-duplex mode, but you can specify full-duplex mode instead. If you specify a speed of 1000 Mbps (1 Gbps) or faster, full duplex is automatically used. For more details about configuring this command, see the Cisco NX-OS Interfaces Configuration Guide.
This command does not require a license.
Examples This example shows how to set the speed of Ethernet port 1 on the 48-port 10/100/1000 module in slot 3 to 1000 Mbps and full-duplex mode:
switch# config t
10 Sets the speed at 10 Mbps.
100 Sets the speed at 100 Mbps.
1000 Sets the speed at 1 Gbps.
10000 Sets the speed at 10 Gbps.
auto Sets the interface to autonegotiation.
Release Modification
4.0 This command was introduced.
IF-244Cisco Nexus 7000 Series NX-OS Interfaces Command Reference, Release 5.x
OL-23495-01

Send document comments to nexus7k -doc feedback@c isco .com
Cisco NX-OS Interfaces Commandsspeed
switch(config)# interface ethernet 3/1switch(config-if)# speed 1000switch(config-if)# duplex full
Related Commands Command Description
duplex Specifies the duplex mode as full, half, or autonegotiate.
show interface Displays the interface status, which includes the speed parameters.
IF-245Cisco Nexus 7000 Series NX-OS Interfaces Command Reference, Release 5.x
OL-23495-01

Send document comments to nexus7k -doc feedback@c isco .com
Cisco NX-OS Interfaces Commandsstate enabled
state enabledTo enable the specified port profile, use the state enabled command. To return to the default value, use the no form of this command.
state enabled
no state enabled
Syntax Description This command has no keywords or arguments.
Defaults Disabled
Command Modes Port-profile configuration mode
Supported User Roles network-admin
vdc-admin
Command History
Usage Guidelines Use the state enabled command to enable the specified port profile. See the port-profile command for information about the port-profile feature.
To apply the port-profile configurations to the interfaces, you must enable the specific port profile. You can configure and inherit a port profile onto a range of interfaces prior to enabling the port profile; you would then enable that port profile for the configurations to take effect on the specified interfaces. The maximum number of interfaces that can inherit a single profile is 512.
If you inherit one or more port profiles onto an original port profile, only the last inherited port profile must be enabled; the system assumes that the underlying port profiles are enabled.
This command does not require a license.
Examples This example shows how to enable the port-profile feature:
switch(config)# port-profile type ethernet testswitch(config-ppm)# state enabled
Related Commands
Release Modification
4.2(1) This command was introduced.
Command Description
show port-profile Displays information about the port profiles.
IF-246Cisco Nexus 7000 Series NX-OS Interfaces Command Reference, Release 5.x
OL-23495-01

Send document comments to nexus7k -doc feedback@c isco .com
Cisco NX-OS Interfaces Commandsswitchport
switchport To set the interface as a Layer 2 switching port, use the switchport command. To return the interface to the default Layer 3 routed interface status and cause all Layer 2 configuration to be erased, use the no form of this command.
switchport
no switchport
Syntax Description This command has no keywords or arguments.
Defaults Interfaces are Layer 3 by default.
Command Modes Interface configuration mode
Supported User Roles network-admin
vdc-admin
Command History
Usage Guidelines You must enter the switchport command without any keywords to configure the LAN interface as a Layer 2 interface before you can enter additional switchport commands with keywords. This action is required only if you have not entered the switchport command for the interface.
The default switchport mode is the access mode. Use the switchport mode command to do the following:
• Set the interface to the Layer 2 access mode
• Return the interface to the Layer 2 trunk mode
• Use the interface with private VLANs.
Enter the no switchport command to shut down the port and then reenable it. This action may generate messages on the device to which the port is connected.
When you use the no switchport command, all the Layer 2 configuration is deleted from that interface, and the interface will have the default VLAN configuration.
The port will go down and reinitialize when you change the interface mode.
This command does not require a license.
Release Modification
4.0 This command was introduced.
IF-247Cisco Nexus 7000 Series NX-OS Interfaces Command Reference, Release 5.x
OL-23495-01

Send document comments to nexus7k -doc feedback@c isco .com
Cisco NX-OS Interfaces Commandsswitchport
Examples This example shows how to cause a port interface to stop operating as a Cisco routed port and convert to a Layer 2 switched interface:
switch(config-if)# switchport
Related Commands Command Description
show interface switchport
Displays the administrative and operational status of a switching (nonrouting) port.
IF-248Cisco Nexus 7000 Series NX-OS Interfaces Command Reference, Release 5.x
OL-23495-01

Send document comments to nexus7k -doc feedback@c isco .com
Cisco NX-OS Interfaces Commandsswitchport access vlan
switchport access vlanTo set the access VLAN when the interface is in access mode, use the switchport access vlan command. To reset the access-mode VLAN to the appropriate default VLAN for the device, use the no form of this command.
switchport access vlan vlan-id
no switchport access vlan
Syntax Description
Defaults VLAN1
Command Modes Interface configuration mode
Supported User Roles network-admin
vdc-admin
Command History
Usage Guidelines You must enter the switchport command without any keywords to configure the LAN interface as a Layer 2 interface before you can enter the switchport access vlan command. This action is required only if you have not entered the switchport command for the interface.
Enter the no switchport access vlan command to shut down the port and then reenable it. This action may generate messages on the device to which the port is connected.
Use the no form of the switchport access vlan command to reset the access-mode VLAN to the appropriate default VLAN for the device.
This command does not require a license.
Examples This example shows how to cause a port interface that has already been configured as a switched interface to operate as an access port in VLAN 2 instead of the platform’s default VLAN in the interface-configuration mode:
switch(config-if)# switchport access vlan 2
vlan-id VLAN to set when the interface is in access mode; valid values are from 1 to 4094, except for the VLANs reserved for internal switch use.
Release Modification
4.0 This command was introduced.
IF-249Cisco Nexus 7000 Series NX-OS Interfaces Command Reference, Release 5.x
OL-23495-01

Send document comments to nexus7k -doc feedback@c isco .com
Cisco NX-OS Interfaces Commandsswitchport access vlan
Related Commands Command Description
show interface switchport
Displays the administrative and operational status of a switching (nonrouting) port.
IF-250Cisco Nexus 7000 Series NX-OS Interfaces Command Reference, Release 5.x
OL-23495-01

Send document comments to nexus7k -doc feedback@c isco .com
Cisco NX-OS Interfaces Commandsswitchport dot1q ethertype
switchport dot1q ethertypeTo set the EtherType used for Q-in-Q encapsulation on an interface, use the switchport dot1q ethertype command. To reset the EtherType to its default value, Use the no form of this command.
switchport dot1q ethertype ethertype
no switchport dot1q ethertype [ethertype]
Syntax Description
Defaults 0x8100 is the default EtherType for 802.1q frames
Command Modes Interface configuration mode
Supported User Roles network-admin
vdc-admin
Command History
Usage Guidelines You must enter the switchport command without any keywords to configure the Ethernet interface as a Layer 2 interface before you can enter the switchport mode command. This action is required only if you have not entered the switchport command for the interface.
You must set the EtherType only on the egress trunk interface that carries double tagged frames (the trunk interface that connects the service providers). If you change the EtherType on one side of the trunk, you must set the same value on the other end of the trunk (symmetrical configuration).
Caution The EtherType value you set will affect all the tagged packets going out on the interface (not just Q-in-Q packets).
This command does not require a license.
Examples This example shows how to create a 802.1Q tunnel on an interface:
switch(config-if)# switchport dot1q ethertype 0x9100
ethertype Value to set for the EtherType. Valid values are from 0x600 to 0xffff.
• 0x8100 is the default EtherType for 802.1q frames
• 0x88A8 is the EtherType for 802.1ad double tagged frames
• 0x9100 is the EtherType for QinQ frames
Release Modification
5.0(2) This command was introduced.
IF-251Cisco Nexus 7000 Series NX-OS Interfaces Command Reference, Release 5.x
OL-23495-01

Send document comments to nexus7k -doc feedback@c isco .com
Cisco NX-OS Interfaces Commandsswitchport dot1q ethertype
Related Commands Command Description
show interface switchport
Displays information about all the switch port interface.
IF-252Cisco Nexus 7000 Series NX-OS Interfaces Command Reference, Release 5.x
OL-23495-01

Send document comments to nexus7k -doc feedback@c isco .com
Cisco NX-OS Interfaces Commandsswitchport host
switchport hostTo configure a port that is not connected to any other devices as a Layer 2 access port with optimized packet forwarding, use the switchport host command. To disable a port that is not connected to any other devices as a Layer 2 access, use the no form of this command.
switchport host
no switchport host
Syntax Description This command has no keywords or arguments.
Defaults Interfaces are Layer 3 by default.
Command Modes Interface configuration mode
Supported User Roles network-admin
vdc-admin
Command History
Usage Guidelines You must enter the switchport command without any keywords to configure the LAN interface as a Layer 2 interface before you can enter the switchport host command. This action is required only if you have not entered the switchport command for the interface.
Entering the switchport host command on an interface:
• Makes the Layer 2 interface an access port.
• Makes the Layer 2 interface an STP edge port, which decreases the time that it takes to start up packet forwarding.
• Disables port channeling on this interface.
You should enter the switchport host command only on ports that are connected to a single host. When you use this command with an interface connected to other than a single host, the device returns an error message.
To optimize the port configuration, entering the switchport host command sets the switch port mode to access and disables channel grouping. Only an end station can accept this configuration.
This command toggles the port if it is in the UP state.
This command does not require a license.
Release Modification
4.0 This command was introduced.
IF-253Cisco Nexus 7000 Series NX-OS Interfaces Command Reference, Release 5.x
OL-23495-01

Send document comments to nexus7k -doc feedback@c isco .com
Cisco NX-OS Interfaces Commandsswitchport host
Examples This example shows how to optimize an access port configuration for a host connection:
switch(config-if)# switchport host
Related Commands Command Description
show interface switchport
Displays the administrative and operational status of a switching (nonrouting) port.
IF-254Cisco Nexus 7000 Series NX-OS Interfaces Command Reference, Release 5.x
OL-23495-01

Send document comments to nexus7k -doc feedback@c isco .com
Cisco NX-OS Interfaces Commandsswitchport mode
switchport mode To set the Layer 2 interface type, use the switchport mode command. To return the interface to the Layer 2 access mode, use the no form of this command.
switchport mode {access | trunk}
no switchport mode
Syntax Description
Defaults access ports
Command Modes Interface configuration mode
Supported User Roles network-admin
vdc-admin
Command History
Usage Guidelines You must enter the switchport command without any keywords to configure the LAN interface as a Layer 2 interface before you can enter the switchport mode command. This action is required only if you have not entered the switchport command for the interface.
If you enter access mode, the interface goes into nontrunking mode; if you enter trunk mode, the interface goes into trunking mode.
To correctly deliver the traffic on a trunk port with several VLANs, the switch uses the IEEE 802.1Q encapsulation, or tagging, method. If an access port receives a packet with an 802.1Q tag in the header, that port drops the packet without learning its MAC source address.
Note A port can function as either an access port, a trunk port, or a private VLAN port; a port cannot function as all three simultaneously.
The port will go down and reinitialize when you change the interface mode.
This command does not require a license.
access Specifies the interface as a nontrunking, nontagged single-VLAN Layer 2 interface. An access port carry traffic in one VLAN only.
trunk Specifies the trunking VLAN interface in Layer 2. A trunk port can carry traffic in one or more VLANs (based on the trunk allowed VLAN list configuration) on the same physical link.
Release Modification
4.0 This command was introduced.
IF-255Cisco Nexus 7000 Series NX-OS Interfaces Command Reference, Release 5.x
OL-23495-01

Send document comments to nexus7k -doc feedback@c isco .com
Cisco NX-OS Interfaces Commandsswitchport mode
Examples This example shows how to set the interface to trunking mode:
switch(config-if)# switchport mode trunk
Related Commands Command Description
show interface switchport
Displays the administrative and operational status of a switching (nonrouting) port.
IF-256Cisco Nexus 7000 Series NX-OS Interfaces Command Reference, Release 5.x
OL-23495-01

Send document comments to nexus7k -doc feedback@c isco .com
Cisco NX-OS Interfaces Commandsswitchport mode dot1q-tunnel
switchport mode dot1q-tunnelTo creates a 802.1Q tunnel on an interface, use the switchport mode dot1q-tunnel command. To disable the 802.1Q tunnel on the interface, use the no form of this command.
switchport mode dot1q-tunnel
no switchport mode dot1q-tunnel
Syntax Description This command has no arguments or keywords.
Defaults No 802.1Q tunnel
Command Modes Interface configuration mode
Supported User Roles network-admin
vdc-admin
Command History
Usage Guidelines You must enter the switchport command without any keywords to configure the Ethernet interface as a Layer 2 interface before you can enter the switchport mode command. This action is required only if you have not entered the switchport command for the interface.
The port will go down and reinitialize (port flap) when the interface mode is changed. BPDU filtering is enabled and CDP is disabled on tunnel interfaces.
This command does not require a license.
Examples This example shows how to create a 802.1Q tunnel on an interface:
switch(config-if)# switchport mode dot1q-tunnel
Related Commands
Release Modification
5.0(2) This command was introduced.
Command Description
IF-257Cisco Nexus 7000 Series NX-OS Interfaces Command Reference, Release 5.x
OL-23495-01

Send document comments to nexus7k -doc feedback@c isco .com
Cisco NX-OS Interfaces Commandsswitchport mode fex-fabric
switchport mode fex-fabricTo set the interface type to be an uplink port for a Fabric Extender, use the switchport mode fex-fabric command. To return to the default setting, use the no form of this command.
switchport mode fex-fabric
no switchport mode fex-fabric
Syntax Description This command has no arguments or keywords.
Defaults None
Command Modes Interface configuration mode
Command History
Usage Guidelines This command does not require a license.
Examples This example shows how to set an Ethernet interface to be an uplink port for a Fabric Extender:
switch# configure terminal switch(config)# interface ethernet 1/40 switch(config-if)# switchport mode fex-fabric
This example shows how to set an EtherChannel interface to be an uplink port for a Fabric Extender:
switch# configure terminal switch(config)# interface port-channel 4 switch(config-if)# switchport mode fex-fabric
Related Commands
Release Modification
5.1(1) This command was introduced.
Command Description
fex associate Associates a Fabric Extender to an Ethernet or EtherChannel interface.
show fex Displays all configured Fabric Extender chassis connected to the switch.
IF-258Cisco Nexus 7000 Series NX-OS Interfaces Command Reference, Release 5.x
OL-23495-01

Send document comments to nexus7k -doc feedback@c isco .com
Cisco NX-OS Interfaces Commandsswitchport trunk allowed vlan
switchport trunk allowed vlanTo set the list of allowed VLANs on the trunking interface, use the switchport trunk allowed vlan command. To allow all VLANs on the trunking interface, use the no form of this command.
switchport trunk allowed vlan {vlan-list | add vlan-list | all | except vlan-list | none | remove vlan-list}
no switchport trunk allowed vlan
Syntax Description
Defaults All VLANs
Command Modes Interface configuration mode
Supported User Roles network-admin
vdc-admin
Command History
Usage Guidelines You must enter the switchport command without any keywords to configure the LAN interface as a Layer 2 interface before you can enter the switchport trunk allowed vlan command. This action is required only if you have not entered the switchport command for the interface.
You can enter the switchport trunk allowed vlan command on interfaces where the Switched Port Analyzer (SPAN) destination port is either a trunk or an access port.
If you remove VLAN 1 from a trunk, the trunk interface continues to send and receive management traffic in VLAN 1.
vlan-list Allowed VLANs that transmit through this interface in tagged format when in trunking mode; the range of valid values is from 1 to 4094.
add Adds the defined list of VLANs to those currently set instead of replacing the list.
all Allows all appropriate VLANs to transmit through this interface in tagged format when in trunking mode.
except Allows all VLANs to transmit through this interface in tagged format when in trunking mode except the specified values.
none Blocks all VLANs transmitting through this interface in tagged format when in trunking mode.
remove Removes the defined list of VLANs from those currently set instead of replacing the list.
Release Modification
4.0 This command was introduced.
IF-259Cisco Nexus 7000 Series NX-OS Interfaces Command Reference, Release 5.x
OL-23495-01

Send document comments to nexus7k -doc feedback@c isco .com
Cisco NX-OS Interfaces Commandsswitchport trunk allowed vlan
This command does not require a license.
Examples This example shows how to add a series of consecutive VLANs to the list of allowed VLANs on a trunking port:
switch(config-if)# switchport trunk allowed vlan add 40-50
Related Commands Command Description
show interface switchport
Displays the administrative and operational status of a switching (nonrouting) port.
IF-260Cisco Nexus 7000 Series NX-OS Interfaces Command Reference, Release 5.x
OL-23495-01
Send document comments to nexus7k -doc feedback@c isco .com
Cisco NX-OS Interfaces Commandsswitchport trunk native vlan
switchport trunk native vlanTo change the native VLAN ID when the interface is in trunking mode, use the switchport trunk native vlan command. To return the native VLAN ID to VLAN 1, use the no form of this command.
switchport trunk native vlan vlan-id
no switchport trunk native vlan
Syntax Description
Defaults VLAN1
Command Modes Interface configuration mode
Supported User Roles network-admin
vdc-admin
Command History
Usage Guidelines You must enter the switchport command without any keywords to configure the LAN interface as a Layer 2 interface before you can enter the switchport trunk native vlan command. This action is required only if you have not entered the switchport command for the interface.
Note See the vlandot1q tag native command for more information about configuring the native VLAN for 802,1Q trunk ports.
Use the no form of the native vlan command to reset the native mode VLAN to the default VLAN1 for the device.
This command does not require a license.
Examples This example shows how to configure the native VLAN for an interface in trunk mode:
switch(config-if)# switchport trunk native vlan 5
vlan-id Native VLAN for the trunk in 802.1Q trunking mode. The range of valid values is from 1 to 4094, except the internally reserved VLANs 3968 to 4047 and 4094.
Release Modification
4.0 This command was introduced.
IF-261Cisco Nexus 7000 Series NX-OS Interfaces Command Reference, Release 5.x
OL-23495-01

Send document comments to nexus7k -doc feedback@c isco .com
Cisco NX-OS Interfaces Commandsswitchport trunk native vlan
Related Commands Command Description
show interface switchport
Displays the administrative and operational status of a switching (nonrouting) port.
IF-262Cisco Nexus 7000 Series NX-OS Interfaces Command Reference, Release 5.x
OL-23495-01
Send document comments to nexus7k -doc feedback@c isco .com
Cisco NX-OS Interfaces Commandssystem default switchport
system default switchportTo change the default interface mode for the system from Layer 3 routing to Layer 2 switching, use the system default switchport command. To return the system to Layer 3 routing default interface mode, use the no form of this command.
system default switchport [shutdown]
no system default switchport [shutdown]
Syntax Description
Defaults None
Command Modes Global configuration mode
Supported User Roles network-admin
vdc-admin
Command History
Usage Guidelines The system default switchport command makes all the interfaces Layer 2 access ports.
This command does not require a license.
Examples This example shows how to configure the system so that all the interfaces are in Layer 2 access mode:
switch(config-if)# system default switchport
Related Commands
shutdown (Optional) Configures the administrative state as down.
Release Modification
4.0 This command was introduced.
Command Description
show interface switchport
Displays the administrative and operational status of a switching (nonrouting) port.
IF-263Cisco Nexus 7000 Series NX-OS Interfaces Command Reference, Release 5.x
OL-23495-01

Send document comments to nexus7k -doc feedback@c isco .com
Cisco NX-OS Interfaces Commandssystem jumbomtu
system jumbomtuTo configure the system jumbo maximum transmission unit (MTU) size for Layer 2 interfaces, use the system jumbomtu command.
system jumbomtu size
Syntax Description
Defaults The system jumbo MTU default size is 9216 bytes and the interface default MTU is 1500 bytes.
Command Modes Global configuration mode
Supported User Roles network-adminvdc-admin
Command History
Usage Guidelines Use the system jumbomtu command to specify the MTU size for Layer 2 interfaces. The range of configurable values are 1500 to 9216 bytes.
The physical level uses an unchangeable bandwidth of 1 GB.
This command does not require a license.
Examples This example shows how to configure the system jumbo MTU as 8000 bytes and how to change the MTU specification for an interface that was configured with the previous jumbo MTU size:
switch# config t switch(config)# system jumbomtu 8000switch(config)# show running-configswitch(config)# interface ethernet 2/2switch(config-if)# switchportswitch(config-if)# mtu 4608
Related Commands
size Even number between the values of 1500 and 9216.
Release Modification
4.0 This command was introduced.
Command Description
show running-config Displays the current operating configuration, which includes the system jumbo MTU size.
IF-264Cisco Nexus 7000 Series NX-OS Interfaces Command Reference, Release 5.x
OL-23495-01

Send document comments to nexus7k -doc feedback@c isco .com
Cisco NX-OS Interfaces Commandssystem-mac
system-macTo overwrite the MAC address that the device creates for the virtual port-channel (vPC) domain when you create a vPC domain, use the system-mac command. To return to the default vPC system MAC address, use the no form of this command.
system-mac mac-address
no system-mac
Syntax Description[
Defaults None
Defaults vpc-domain command mode.
Supported User Roles network-admin
vdc-admin
Command History
Usage Guidelines You must enable the vPC feature before you can create a vPC system MAC address.
Use the system-mac command to overwrite the MAC address created by the system once you create a vPC domain. By default, the system creates a MAC address for the vPC when you create a vPC domain based on the domain ID. Cisco reserved a range of MAC addresses from the IEEE for this purpose and these addresses will be used to complete the last 10 bits of the vPC domain MAC address. The range of default MAC addresses is as follows:
• Number of reserved MAC addresses—1024
• Starting—002304eebe00
• Ending—002304eec1ff
This command does not require a license.
Examples This example shows how to create a vPC system MAC address:
switch# config t switch(config)# vpc domain 5switch(config-vpc-domain)# system-mac 22cd.34ab.ca32
mac-address MAC address that you want for the vPC domain using the format xxxx.xxxx.xxxx.
Release Modification
4.1(3) This command was introduced.
IF-265Cisco Nexus 7000 Series NX-OS Interfaces Command Reference, Release 5.x
OL-23495-01

Send document comments to nexus7k -doc feedback@c isco .com
Cisco NX-OS Interfaces Commandssystem-mac
Related Commands Command Description
show vpc role Displays the system MAC address for the vPC domain.
IF-266Cisco Nexus 7000 Series NX-OS Interfaces Command Reference, Release 5.x
OL-23495-01

Send document comments to nexus7k -doc feedback@c isco .com
Cisco NX-OS Interfaces Commandssystem-priority
system-priorityTo overwrite the system priority that the device creates for the virtual port-channel (vPC) domain when you create a vPC domain, use the system-priority command. To return to the default vPC system priority, use the no form of this command.
system-priority priority
no system-priority priority
Syntax Description[
Defaults 32667
Command Modes vpc-domain command mode.
Supported User Roles network-admin
vdc-admin
Command History
Usage Guidelines You must enable the vPC feature before you can create a vPC system priority.
Note We recommend that you manually configure the vPC system priority when you are running LACP to ensure that the vPC peer devices are the primary devices on LACP.
This command does not require a license.
Examples This example shows how to create a vPC system priority:
switch# config t switch(config)# vpc domain 5switch(config-vpc-domain)# system-priority 4000
Related Commands
priority System priority. The range is from 1 to 65535.
Release Modification
4.1(3) This command was introduced.
Command Description
show vpc role Displays the system priority for the vPC domain.
IF-267Cisco Nexus 7000 Series NX-OS Interfaces Command Reference, Release 5.x
OL-23495-01

Send document comments to nexus7k -doc feedback@c isco .com
Cisco NX-OS Interfaces Commandstrack
trackTo configure the system to monitor the track-list object that contains all the virtual port-channel (vPC) links to the core and to the vPC peer link when you are using only a single module for all links, use the track command. To return to the default, use the no form of this command.
track track-object-id
no track track-object-id
Syntax Description
Defaults No tracking
Command Modes vpc configuration mode
Supported User Roles network-admin
vdc-admin
Command History
Usage Guidelines Beginning with Release 4.2, if you must configure all the vPC peer links and core-facing interfaces on a single N7K-M132XP-12 module, you should configure a track object and a track list that is associated with the Layer 3 link to the core and on all vPC peer links on both vPC peer devices. You can use this configuration to avoid dropping traffic if that particular module goes down because when all the tracked objects on the track list go down, the system does the following:
• Stops the vPC primary peer device sending peer-keepalive messages which forces the vPC secondary peer device to take over.
• Brings down all the downstream vPCs on that vPC peer device, which forces all the traffic to be rerouted in the access switch toward the other vPC peer device.
Once you configure this feature and if the module fails, the system automatically suspends all the vPC links on the primary vPC peer device and stops the peer-keepalive messages. This action forces the vPC secondary device to take over the primary role and all the vPC traffic to go to this new vPC primary device until the system stabilizes.
Create a track list that contains all the links to the core and all the vPC peer links as its object. Enable tracking for the specified vPC domain for this track list. Apply this same configuration to the other PC peer device. See the Cisco Nexus 7000 Series NX-OS Unicast Routing Configuration Guide, Release 5.x, for information about configuring object tracking and track lists.
This command does not require a license.
track-object-id Track-list object that you already configured.
Release Modification
4.2(1) This command was introduced.
IF-268Cisco Nexus 7000 Series NX-OS Interfaces Command Reference, Release 5.x
OL-23495-01

Send document comments to nexus7k -doc feedback@c isco .com
Cisco NX-OS Interfaces Commandstrack
Examples This example shows how to put the previously configured track-list object into the vPC domain on the vPC peer device:
switch# config t switch(config)# vpc domain 5switch(config-vpc-domain)# track object 5
Related Commands Command Description
show vpc brief Displays information on a vPC tracked object.
feature vpc Enables vPCs on the device.
IF-269Cisco Nexus 7000 Series NX-OS Interfaces Command Reference, Release 5.x
OL-23495-01
Send document comments to nexus7k -doc feedback@c isco .com
Cisco NX-OS Interfaces Commandstunnel destination
tunnel destinationTo configure the destination endpoint for a tunnel, use the tunnel destination command in interface configuration mode. To remove the tunnel destination, use the no form of this command.
tunnel destination {ip-address | host-name}
no tunnel destination {ip-address | host-name}
Syntax Description
Defaults None
Command Modes Interface configuration mode
Supported User Roles network-admin
vdc-admin
Command History
Usage Guidelines Use the tunnel destination command to configure the destination address for an IP tunnel.
You should not have two tunnels using the same encapsulation mode with the same source and destination address.
This command requires the Enterprise license.
Examples This example shows how to configure the tunnel destination:
switch(config-if)# tunnel destination 192.0.2.120
Related Commands
ip-address IP address for the tunnel destination.
host-name Hostname for the tunnel destination.
Release Modification
4.0 This command was introduced.
Command Description
tunnel source Sets the source of the IP tunnel.
interface tunnel Creates the IP tunnel.
show interface tunnel Displays information about the traffic about the specified tunnel interface.
IF-270Cisco Nexus 7000 Series NX-OS Interfaces Command Reference, Release 5.x
OL-23495-01

Send document comments to nexus7k -doc feedback@c isco .com
Cisco NX-OS Interfaces Commandstunnel mode
tunnel modeTo configure the tunnel encapsulation mode for a tunnel, use the tunnel mode command in interface configuration mode. To restore the default value, use the no form of this command.
tunnel mode gre {ip | ipv6}
no tunnel mode gre {ip | ipv6}
Syntax Description
Defaults None
Command Modes Interface configuration mode
Supported User Roles network-admin
vdc-admin
Command History
Usage Guidelines Use the tunnel mode command to configure the tunnel encapsulation mode for a tunnel.
This command requires the Enterprise license.
Examples This example shows how to configure the tunnel mode:
switch(config-if)# tunnel mode gre ip
Related Commands
ip Configures this tunnel encapsulation mode as IPv4.
ip v6 Configures this tunnel encapsulation mode as IPv6.
Release Modification
4.0 This command was introduced.
Command Description
tunnel destination Sets the destination of the IP tunnel.
interface tunnel Creates the IP tunnel.
show interface tunnel Displays information about the traffic about the specified tunnel interface.
IF-271Cisco Nexus 7000 Series NX-OS Interfaces Command Reference, Release 5.x
OL-23495-01

Send document comments to nexus7k -doc feedback@c isco .com
Cisco NX-OS Interfaces Commandstunnel path-mtu-discovery
tunnel path-mtu-discoveryTo enable Path MTU Discovery (PMTUD) on a tunnel interface, use the tunnel path-mtu-discovery command in interface configuration mode. To disable PMTUD on a tunnel interface, use the no form of this command.
tunnel path-mtu-discovery [age-timer {aging-mins | infinite} | min-mtu mtu-bytes]
no tunnel path-mtu-discovery [age-timer {aging-mins | infinite} | min-mtu mtu-bytes]
Syntax Description
Defaults Disabled
Command Modes Interface configuration mode
Supported User Roles network-admin
vdc-admin
Command History
Usage Guidelines When PMTUD (RFC 1191) is enabled on a tunnel interface, the router performs PMTUD processing for the tunnel IP packets. The router always performs PMTUD processing on the original data IP packets that enter the tunnel. When PMTUD is enabled, no packet fragmentation occurs on the encapsulated packets that travel through the tunnel. Without packet fragmentation, there is a better throughput of TCP connections. PMTUD maximizes the use of available bandwidth in the network between the endpoints of a tunnel interface.
After PMTUD is enabled, the Don't Fragment (DF) bit of the IP packet header that is forwarded into the tunnel is copied to the IP header of the external IP packets. The external IP packet is the encapsulating IP packet. Adding the DF bit allows the PMTUD mechanism to work on the tunnel path of the tunnel. The tunnel endpoint listens for Internet Control Message Protocol (ICMP) unreachable too-big messages and modifies the IP MTU of the tunnel interface, if required.
age-timer (Optional) Sets a timer to run for a specified interval, in minutes, after which the tunnel interface resets the maximum transmission unit (MTU) of the path to the default tunnel MTU minus 24 bytes for GRE tunnels or minus 20 bytes for IP-in-IP tunnels.
aging-mins Number of minutes. The range is from 10 to 30. The default is 10.
infinite Disables the age timer.
min-mtu mtu-bytes (Optional) Specifies the minimum Path MTU across GRE tunnels. The range is from 92 to 65535 bytes. The default is 92.
Release Modification
4.0 This command was introduced.
IF-272Cisco Nexus 7000 Series NX-OS Interfaces Command Reference, Release 5.x
OL-23495-01

Send document comments to nexus7k -doc feedback@c isco .com
Cisco NX-OS Interfaces Commandstunnel path-mtu-discovery
When the aging timer is configured, the tunnel code resets the tunnel MTU after the aging timer expires. After the tunnel MTU is reset, a set of full-size packets with the DF bit set is required to trigger the tunnel PMTUD and lower the tunnel MTU. At least two packets are dropped each time that the tunnel MTU changes.
When PMTUD is disabled, the DF bit of an external (encapsulated) IP packet is set to zero even if the encapsulated packet has a DF bit set to one.
The min-mtu keyword sets a low limit through the MTU that can be learned through the PMTUD process. Any ICMP signal received that specifies an MTU less than the minimum MTU configured will be ignored. You can use this feature to prevent a denial- of-service attack from any node that can send an ICMP message to the router that specifies a very small MTU.
Note PMTUD on a tunnel interface requires that the tunnel endpoint is able to receive ICMP messages generated by routers in the path of the tunnel. You should check that ICMP messages can be received before you use PMTUD over firewall connections.
This command requires the Enterprise license.
Examples This example shows how to configure PMTUD:
switch(config-if)# tunnel path-mtu-discovery
Related Commands Command Description
tunnel destination Sets the destination of the IP tunnel.
interface tunnel Creates the IP tunnel.
show interface tunnel Displays information about the traffic about the specified tunnel interface.
IF-273Cisco Nexus 7000 Series NX-OS Interfaces Command Reference, Release 5.x
OL-23495-01
Send document comments to nexus7k -doc feedback@c isco .com
Cisco NX-OS Interfaces Commandstunnel source
tunnel sourceTo configure the source endpoint for a tunnel, use the tunnel source command in interface configuration mode. To remove the tunnel source, use the no form of this command.
tunnel source {ip-address | interface-type number}
no tunnel source [ip-address | interface-type number]
Syntax Description
Defaults None
Command Modes Interface configuration command
Supported User Roles network-admin
vdc-admin
Command History
Usage Guidelines Use the tunnel source command to configure the source address for an IP tunnel.
You should not have two tunnels using the same encapsulation mode with the same source and destination address.
This command requires the Enterprise license.
Examples This example shows how to set the tunnel source:
switch(config-if)# tunnel source 192.0.2.120
Related Commands
ip-address IP address for the tunnel source.
interface-type number Interface for the tunnel source.
Release Modification
4.0 This command was introduced.
Command Description
tunnel destination Sets the destination of the IP tunnel.
interface tunnel Creates the IP tunnel.
show interface tunnel Displays information about the traffic about the specified tunnel interface.
IF-274Cisco Nexus 7000 Series NX-OS Interfaces Command Reference, Release 5.x
OL-23495-01
Send document comments to nexus7k -doc feedback@c isco .com
Cisco NX-OS Interfaces Commandstunnel use-vrf
tunnel use-vrfTo specify which VRF to use to look up a tunnel destination IP address, use the tunnel use-vrf command in interface configuration mode. To return to the default, use the no form of this command.
tunnel use-vrf vrf-name
no tunnel use-vrf vrf-name
Syntax Description
Defaults Default VRF
Command Modes Interface configuration command
Supported User Roles network-admin
vdc-admin
Command History
Usage Guidelines You should have the tunnel interface and tunnel destination IP address in the same VRF. In other words, you should have the same value for the vrf-name parameter in both the vrf member and tunnel use-vrf commands.
This command requires the Enterprise license.
Examples This example shows how to specify the VRF in which to look up the tunnel destination IP address:
switch(config-if)# tunnel use-vrf blue
Related Commands
vrf-name Name of the VRF in which to look up the tunnel destination IP address.
Release Modification
4.2(1) This command was introduced.
Command Description
show interface tunnel Displays information about the traffic about the specified tunnel interface.
show vrf interface tunnel
Displays information about the VRF tunnel interface.
IF-275Cisco Nexus 7000 Series NX-OS Interfaces Command Reference, Release 5.x
OL-23495-01
Send document comments to nexus7k -doc feedback@c isco .com
Cisco NX-OS Interfaces Commandstunnel ttl
tunnel ttlTo configure the time-to-live value for a tunnel, use the tunnel ttl command in interface configuration mode. To restore the default value, use the no form of this command.
tunnel ttl value
no tunnel ttl [value]
Syntax Description
Defaults None
Command Modes Interface configuration command
Supported User Roles network-admin
vdc-admin
Command History
Usage Guidelines Use the tunnel ttl command to configure the time-to-live value for an IP tunnel.
This command requires the Enterprise license.
Examples This example shows how to configure the time-to-live value for a tunnel interface:
switch(config-if)# tunnel ttl 30
Related Commands
value Time-to-live value for the tunnel. The range is from 1 to 255.
Release Modification
4.0 This command was introduced.
Command Description
tunnel destination Sets the destination of the IP tunnel.
interface tunnel Creates the IP tunnel.
show interface tunnel Displays information about the traffic about the specified tunnel interface.
IF-276Cisco Nexus 7000 Series NX-OS Interfaces Command Reference, Release 5.x
OL-23495-01

Send document comments to nexus7k -doc feedback@c isco .com
Cisco NX-OS Interfaces Commandstype
type To set the Fabric Extender (FEX) card type to a specific card, use the type command. To revert to the default FEX card, use the no form of this command
type fex-card-type
no type
Syntax Description
Defaults None
Command Modes Fabric Extender configuration mode
Command History
Usage Guidelines This command does not require a license.
Examples This example shows how to configure the Fabric Extender card:
switch(config)# fex 100 switch(config-fex)# type N2148T switch(config-fex)#
Related Commands
fex-card-type Fabric Extender card type. The following Fabric Extender card types are supported:
• N2148T Fabric Extender 48x1G 4x10G Module
• N2248T Fabric Extender 48x1G 4x10G Module
Release Modification
5.1(1) This command was introduced.
Command Description
fex Creates a Fabric Extender and enters fabric extender configuration mode.
show fex Displays all configured Fabric Extender chassis connected to the switch.
IF-277Cisco Nexus 7000 Series NX-OS Interfaces Command Reference, Release 5.x
OL-23495-01

Send document comments to nexus7k -doc feedback@c isco .com
Cisco NX-OS Interfaces Commandsudld
udldTo configure the interfaces to use a Unidirectional Link Detection (UDLD) mode, use the udld command.
udld {enable | disable}
Syntax Description
Defaults By default, UDLD is disabled for the 48-port, 10/100/1000 Ethernet module ports.
By default, UDLD is enabled for the 32-port, 10 gigabit Ethernet module ports.
Command Modes Interface configuration mode
Supported User Roles network-adminvdc-admin
Command History
Usage Guidelines Before you can enable a UDLD mode for specified interfaces, you must make sure that UDLD is already enabled globally on the device. Use the feature udld command to enable UDLD globally.
Use the udld command to enable or disable UDLD separately on specified interfaces. This enables UDLD in normal mode. Enter the udld aggressive command to enable the aggressive mode on UDLD-enabled interfaces.
This command does not require a license.
Examples This example shows how to enable the normal UDLD mode for Ethernet port 3/1:
switch# config t switch(config)# feature udldswitch(config)# interface ethernet 3/1switch(config-if)# udld enable
This example shows how to disable UDLD for Ethernet port 3/1:
switch# config t switch(config)# interface ethernet 3/1switch(config-if-range)# udld disable
disable Disables the UDLD mode for fiber interfaces.
enable Enables the normal UDLD mode for non-fiber interfaces.
Release Modification
4.0 This command was introduced.
IF-278Cisco Nexus 7000 Series NX-OS Interfaces Command Reference, Release 5.x
OL-23495-01

Send document comments to nexus7k -doc feedback@c isco .com
Cisco NX-OS Interfaces Commandsudld
Related Commands Command Description
feature udld Enables UDLD globally on the device.
show udld Displays information about the UDLD configuration.
IF-279Cisco Nexus 7000 Series NX-OS Interfaces Command Reference, Release 5.x
OL-23495-01
Send document comments to nexus7k -doc feedback@c isco .com
Cisco NX-OS Interfaces Commandsudld aggressive
udld aggressiveTo configure the interfaces for aggressive Unidirectional Link Detection (UDLD) mode, use the udld aggressive command.
udld aggressive
Syntax Description This command has no arguments or keywords.
Defaults None
Command Modes Interface configuration
Global configuration
Supported User Roles network-adminvdc-admin
Command History
Usage Guidelines Before you can enable the aggressive UDLD mode for an interface, you must make sure that UDLD is already enabled globally on the device and on the specified interfaces.
Use the udld aggressive command to configure the ports to use a UDLD mode:
• To enable fiber interfaces for the aggressive mode, enter the udld aggressive command in the global command mode and all the fiber interfaces will be in aggressive UDLD mode,
• To enable the copper interfaces for the aggressive, you must enter the udld aggressive command in the interface mode, specifying each interface you want in aggressive UDLD mode.
To use the aggressive UDLD mode, you must configure the interfaces on both ends of the link for the aggressive UDLD mode.
This command does not require a license.
Examples This example shows how to enable fiber interfaces for the aggressive UDLD mode:
switch# config t switch(config)# udld aggressive
This example shows how to enable the aggressive UDLD mode for the copper Ethernet interface 3/1:
switch# config t switch(config)# interface ethernet 3/1switch(config-if)# udld aggressive
Release Modification
4.0 This command was introduced.
IF-280Cisco Nexus 7000 Series NX-OS Interfaces Command Reference, Release 5.x
OL-23495-01

Send document comments to nexus7k -doc feedback@c isco .com
Cisco NX-OS Interfaces Commandsudld aggressive
Related Commands Command Description
feature udld Enables UDLD globally for the device.
show udld Displays information about the UDLD configuration.
IF-281Cisco Nexus 7000 Series NX-OS Interfaces Command Reference, Release 5.x
OL-23495-01

Send document comments to nexus7k -doc feedback@c isco .com
Cisco NX-OS Interfaces Commandsudld message-time
udld message-timeTo set the Unidirectional Link Detection (UDLD) message interval timer, use the udld message-time command.
udld message-time seconds
Syntax Description
Defaults 15 seconds
Command Modes Global configuration mode
Supported User Roles network-adminvdc-admin
Command History
Usage Guidelines Before you can set the UDLD message timer, you must make sure that UDLD is already enabled globally on the device. Use the feature udld command to globally enable UDLD.
This command does not require a license.
Examples This example shows how to configure UDLD interval to 30 seconds:
switch# config t switch(config)# udld message-time 30
Related Commands
seconds Number of seconds that you want between sending UDLD messages. The range is from 7 to 90 seconds.
Release Modification
4.0 This command was introduced.
Command Description
feature udld Enables UDLD globally for the device.
show udld Displays information about the UDLD configuration.
IF-282Cisco Nexus 7000 Series NX-OS Interfaces Command Reference, Release 5.x
OL-23495-01

Send document comments to nexus7k -doc feedback@c isco .com
Cisco NX-OS Interfaces Commandsudld reset
udld resetTo reset the interfaces that Unidirectional Link Detection (UDLD) has shut down and return them to the UP condition, use the udld reset command.
udld reset
Syntax Description This command has no arguments or keywords.
Defaults None
Command Modes Global configuration mode
Supported User Roles network-adminvdc-admin
Command History
Usage Guidelines This command does not require a license.
Examples This example shows how to reset those interfaces that UDLD has shut down:
switch# config t switch(config)# udld reset
Related Commands
Release Modification
4.0 This command was introduced.
Command Description
feature udld Enables UDLD globally for the device.
show udld Displays information about the UDLD configuration.
IF-283Cisco Nexus 7000 Series NX-OS Interfaces Command Reference, Release 5.x
OL-23495-01

Send document comments to nexus7k -doc feedback@c isco .com
Cisco NX-OS Interfaces Commandsvlan dot1q tag native
vlan dot1q tag nativeTo enable dot1q (IEEE 802.1Q) tagging for the native VLAN in a trunk, use the vlan dot1q tag native command. To return to the default where no packets are tagged in the native VLAN in a trunk, use the no form of this command.
vlan dot1q tag native
no vlan dot1q tag native
Syntax Description This command has no arguments or keywords.
Defaults Disabled
Command Modes Global configuration mode
Supported User Roles network-admin
vdc-admin
Command History
Usage Guidelines Typically, you configure 802.1Q trunks with a native VLAN ID, which strips tagging from all packets on that VLAN and allows all untagged traffic and control traffic to transit the switch. Packets that enter the switch with 802.1Q tags that match the native VLAN ID value are similarly stripped of tagging. If you choose to maintain the tagging on the native VLAN and drop untagged traffic, enter the vlan dot1q tag native command.
Use the vlan dot1q tag native command to configure the switch to tag the traffic received on the native VLAN and to admit only 802.1Q-tagged frame, dropping any untagged traffic, including untagged traffic in the native VLAN. Control traffic continues to be accepted untagged on the native VLAN on a trunked port, even when the vlan dot1q tag native command is enabled.
Use this command to enable the tagging behavior on all native VLANs on all trunked ports on the switch.
Note If you enable 802.1Q tagging on one switch and disable it on another switch, all traffic is dropped; you must identically configure 802.1Q tagging on each switch.
This command does not require a license.
Release Modification
4.0 This command was introduced.
IF-284Cisco Nexus 7000 Series NX-OS Interfaces Command Reference, Release 5.x
OL-23495-01

Send document comments to nexus7k -doc feedback@c isco .com
Cisco NX-OS Interfaces Commandsvlan dot1q tag native
Examples This example shows how to enable dot1q tagging for all VLANs on all trunk ports on the switch:
switch(config)# vlan dot1q tag native
Related Commands Command Description
show vlan dot1q tag native
Displays native VLAN-tagging information.
IF-285Cisco Nexus 7000 Series NX-OS Interfaces Command Reference, Release 5.x
OL-23495-01

Send document comments to nexus7k -doc feedback@c isco .com
Cisco NX-OS Interfaces Commandsvpc
vpcTo move other port channels into the virtual port channel (vPC), use the vpc command. To remove a port channel from the vPC, use the no form of this command.
vpc number
no vpc number
Syntax Description
Defaults None
Command Modes Interface command mode
Supported User Roles network-admin
vdc-admin
Command History
Usage Guidelines You must enable the vPC feature before you can create a vPC.
Once you have created the vPC domain ID and the vPC peer link, you create port channels to attach the downstream device to each vPC peer device. That is, you create one port channel from the downstream device to the primary vPC peer device and you create another port channel from the downstream device to the secondary peer device. Finally, working on each vPC peer device, you assign a vPC number to the port channel that connects to the downstream device. You will experience minimal traffic disruption when you are creating vPCs.
Note The vPC number that you assign to the port channel connecting to the downstream device from the vPC peer device must be identical on both vPC peer devices.
This command does not require a license.
Examples This example shows how to move a port channel into the vPC:
switch# config t switch (config)# interface port-channel 10switch (config-if)# vpc 100
number Number for the vPC. The range of numbers is from 1 to 4096.
Release Modification
4.1(3) This command was introduced.
IF-286Cisco Nexus 7000 Series NX-OS Interfaces Command Reference, Release 5.x
OL-23495-01

Send document comments to nexus7k -doc feedback@c isco .com
Cisco NX-OS Interfaces Commandsvpc
Related Commands Command Description
show vpc brief Displays information about vPCs. If the feature is not enabled, the system displays an error when you enter this command.
IF-287Cisco Nexus 7000 Series NX-OS Interfaces Command Reference, Release 5.x
OL-23495-01
Send document comments to nexus7k -doc feedback@c isco .com
Cisco NX-OS Interfaces Commandsvpc domain
vpc domainTo create a virtual port-channel (vPC) domain, use the vpc domain command. To remove a vPC domain, use the no form of this command.
vpc domain domain-id
no vpc domain domain-id
Syntax Description
Defaults None
Command Modes Any command mode
Supported User Roles network-admin
vdc-admin
Command History
Usage Guidelines You must enable the vPC feature before you can create a vPC domain.
You put all vPC interfaces, including the vPC peer link, on both of the vPC peer devices into the identical vPC domain. You must have unique vPC domain numbers within each VDC. In Cisco NX-OS Release 4.1(3), you can have only one vPC per VDC. Once you create a vPC domain, the system automatically creates a vPC system MAC that is unique to that vPC.
You also use this command to enter the vpc-domain command mode in order to configure vPC parameters.
This command does not require a license.
Examples This example shows how to create a vPC domain:
switch# config t switch(config)# vpc domain 5switch(config-vpc-domain)#
This example shows how to enter the vpc-domain command mode to configure an existing vPC domain:
switch# config t switch(config)# vpc domain 5switch(config-vpc-domain)#
domain-id Domain ID for the vPC. The range of numbers is from 1 to 1000. You must use unique vPC IDs for each vPC within a single VDC.
Release Modification
4.1(3) This command was introduced.
IF-288Cisco Nexus 7000 Series NX-OS Interfaces Command Reference, Release 5.x
OL-23495-01

Send document comments to nexus7k -doc feedback@c isco .com
Cisco NX-OS Interfaces Commandsvpc domain
Related Commands Command Description
show vpc brief Displays information about vPCs. If the feature is not enabled, the system displays an error when you enter this command.
IF-289Cisco Nexus 7000 Series NX-OS Interfaces Command Reference, Release 5.x
OL-23495-01

Send document comments to nexus7k -doc feedback@c isco .com
Cisco NX-OS Interfaces Commandsvpc peer-link
vpc peer-linkTo create a virtual port-channel (vPC) peer link, use the vpc peer-link command. To remove a vPC peer link, use the no form of this command.
vpc peer-link
no vpc peer-link
Syntax Description This command has no arguments or keywords
Defaults None
Command Modes Interface command mode
Supported User Roles network-admin
vdc-admin
Command History
Usage Guidelines You must enable the vPC feature before you can create a vPC peer link.
You configure a port channel using 10-Gigabit Ethernet ports on the N7K-M132XP-12 module. We recommend that you use the 10-Gigabit Ethernet ports for the channel in dedicated mode and configure at least two of these ports on two different modules into the port channel for redundancy.
Use the vpc peer-link command to make that port channel a vPC peer link. The system returns an error message if you attempt to configure a 1-Gigabit Ethernet interface as a vPC peer link.
After you configure the vPC peer device and the vPC peer link is established, the system creates a new MAC address for the vPC and decides which vPC device is the primary device and which is the secondary.
This command does not require a license.
Examples This example shows how to create a vPC peer link:
switch# config t switch(config)# interface port-channel 20switch(config-if)# vpc peer-linkswitch(config-vpc-domain)#
Release Modification
4.1(3) This command was introduced.
IF-290Cisco Nexus 7000 Series NX-OS Interfaces Command Reference, Release 5.x
OL-23495-01

Send document comments to nexus7k -doc feedback@c isco .com
Cisco NX-OS Interfaces Commandsvpc peer-link
Related Commands Command Description
show vpc brief Displays information about vPCs. If the feature is not enabled, the system displays an error when you enter this command.
IF-291Cisco Nexus 7000 Series NX-OS Interfaces Command Reference, Release 5.x
OL-23495-01

Send document comments to nexus7k -doc feedback@c isco .com
Cisco NX-OS Interfaces Commandsvpc peer-link
IF-292Cisco Nexus 7000 Series NX-OS Interfaces Command Reference, Release 5.x
OL-23495-01