Embed Size (px)
Citation preview

Cisco Nexus 1000V for KVM Installation Guide, Release 5.2(1)SK3(1.1)First Published: August 04, 2014
Americas HeadquartersCisco Systems, Inc.170 West Tasman DriveSan Jose, CA 95134-1706USAhttp://www.cisco.comTel: 408 526-4000 800 553-NETS (6387)Fax: 408 527-0883

THE SPECIFICATIONS AND INFORMATION REGARDING THE PRODUCTS IN THIS MANUAL ARE SUBJECT TO CHANGE WITHOUT NOTICE. ALL STATEMENTS,INFORMATION, AND RECOMMENDATIONS IN THIS MANUAL ARE BELIEVED TO BE ACCURATE BUT ARE PRESENTED WITHOUT WARRANTY OF ANY KIND,EXPRESS OR IMPLIED. USERS MUST TAKE FULL RESPONSIBILITY FOR THEIR APPLICATION OF ANY PRODUCTS.
THE SOFTWARE LICENSE AND LIMITEDWARRANTY FOR THE ACCOMPANYING PRODUCT ARE SET FORTH IN THE INFORMATION PACKET THAT SHIPPED WITHTHE PRODUCT AND ARE INCORPORATED HEREIN BY THIS REFERENCE. IF YOU ARE UNABLE TO LOCATE THE SOFTWARE LICENSE OR LIMITED WARRANTY,CONTACT YOUR CISCO REPRESENTATIVE FOR A COPY.
The Cisco implementation of TCP header compression is an adaptation of a program developed by the University of California, Berkeley (UCB) as part of UCB's public domain versionof the UNIX operating system. All rights reserved. Copyright © 1981, Regents of the University of California.
NOTWITHSTANDINGANYOTHERWARRANTYHEREIN, ALL DOCUMENT FILES AND SOFTWARE OF THESE SUPPLIERS ARE PROVIDED “AS IS"WITH ALL FAULTS.CISCO AND THE ABOVE-NAMED SUPPLIERS DISCLAIM ALL WARRANTIES, EXPRESSED OR IMPLIED, INCLUDING, WITHOUT LIMITATION, THOSE OFMERCHANTABILITY, FITNESS FORA PARTICULAR PURPOSEANDNONINFRINGEMENTORARISING FROMACOURSEOFDEALING, USAGE, OR TRADE PRACTICE.
IN NO EVENT SHALL CISCO OR ITS SUPPLIERS BE LIABLE FOR ANY INDIRECT, SPECIAL, CONSEQUENTIAL, OR INCIDENTAL DAMAGES, INCLUDING, WITHOUTLIMITATION, LOST PROFITS OR LOSS OR DAMAGE TO DATA ARISING OUT OF THE USE OR INABILITY TO USE THIS MANUAL, EVEN IF CISCO OR ITS SUPPLIERSHAVE BEEN ADVISED OF THE POSSIBILITY OF SUCH DAMAGES.
Any Internet Protocol (IP) addresses and phone numbers used in this document are not intended to be actual addresses and phone numbers. Any examples, command display output, networktopology diagrams, and other figures included in the document are shown for illustrative purposes only. Any use of actual IP addresses or phone numbers in illustrative content is unintentionaland coincidental.
Cisco and the Cisco logo are trademarks or registered trademarks of Cisco and/or its affiliates in the U.S. and other countries. To view a list of Cisco trademarks, go to this URL: http://www.cisco.com/go/trademarks. Third-party trademarks mentioned are the property of their respective owners. The use of the word partner does not imply a partnershiprelationship between Cisco and any other company. (1110R)
© 2014 Cisco Systems, Inc. All rights reserved.

C O N T E N T S
P r e f a c e Preface vii
Audience vii
Document Conventions vii
Related Documentation for Cisco Nexus 1000V for KVM Software ix
Related Documentation for Cisco Nexus Cloud Services Platform ix
Documentation Feedback x
Obtaining Documentation and Submitting a Service Request x
C H A P T E R 1 Overview 1
Information About the Installation 1
Juju Charms 2
Configuration Files 3
Types of Nodes 4
Supported Nodes 6
Network Connectivity Between OpenStack Services 6
Supported Topologies 7
Physical Deployment 7
Virtual Machine Deployment 8
OpenStack High Availability Deployment 8
C H A P T E R 2 System Requirements 11
Server Requirements 11
Networking Requirements 11
Minimum Node Requirements 12
Supported Operating Systems 14
Supported Hypervisors 14
Supported MAAS Deployment 14
Cisco Nexus 1000V for KVM Installation Guide, Release 5.2(1)SK3(1.1) iii

C H A P T E R 3 Preparing for Installation 15
Downloading the Cisco Nexus 1000V Software 15
Preparing the Configuration and Mapping Files 16
OpenStack Charm Parameters 16
Cisco Nexus 1000V for KVM VSM Charm Parameters 18
Cisco Nexus 1000V for KVM VEM Charm Parameters 20
Cisco Nexus 1000V for KVM VXLAN Gateway Charm Parameters 22
C H A P T E R 4 Installing Cisco Nexus 1000V for KVM 25
Steps to Install the Cisco Nexus 1000V for KVM 25
Installing and Configuring MAAS 26
Installing and Configuring Juju 27
Installing and Configuring the OpenStack Services 27
Verifying the Cisco Nexus Plug-in for OpenStack Neutron Version 28
Installing and Configuring the Cisco Nexus 1000V for KVM 29
Installing and Configuring the VXLAN Gateway Using Juju Charms 29
C H A P T E R 5 Installing VSM on the Cisco Nexus Cloud Services Platform 31
Information About Installing a VSM on the Cisco Nexus Cloud Services Platform 31
Installing a VSM on the Cisco Nexus Cloud Services Platform 31
C H A P T E R 6 Installing and Configuring the VXLAN Gateway 35
Information About the VXLAN Gateway Deployment 35
Guidelines and Limitations for Cisco Nexus 1000V VXLAN Gateway 36
Steps to Install and Configure VXLAN Gateway 37
Configuring Port Profiles on the VSM 38
Configuring a Port Profile for the Uplink on the VXLAN Gateway 38
Configuring a Port Profile for the VTEP on the VXLAN Gateway 40
Installing VXLAN Gateway 41
Installing the VXLAN Gateway as a VM Using Juju Charms 41
Configuring the VXLAN Gateway Data and Management Interfaces 42
Configuring the VXLAN Gateway Data and Management Interfaces Using OpenStack
dashboard 42
Guidelines and Limitations for the OpenStack Dashboard 42
Cisco Nexus 1000V for KVM Installation Guide, Release 5.2(1)SK3(1.1)iv
Contents
Steps to Configure the VXLAN Gateway Interfaces Using the OpenStack Dashboard 43
Creating a Trunk Network Profile Using OpenStack Dashboard 43
Creating a VLAN Network Profile Using OpenStack Dashboard 44
Creating a Network Using the OpenStack Dashboard 45
Creating a Subnet for a Network Using the OpenStack Dashboard 45
Booting a VXLAN Gateway VM 46
Configuring the VXLAN Gateway Data and Management Interfaces Using the OpenStack
CLI 47
Steps to Configure the VXLAN Gateway Interfaces Using the OpenStack CLI 47
Creating the VXLAN Gateway Data Interface 47
Creating a VXLAN Gateway Management Interface 48
Booting a VXLAN Gateway VM 48
Example of VXLAN Gateway Interface Configuration 49
Configuring High Availability 49
VXLAN Gateway and High Availability 49
Configuring the VXLAN Gateway HA Mode as Standalone 50
Configuring the VXLAN Gateway as an HA Pair 51
Managing the VXLAN-to-VLAN Mappings on the VXLAN Gateway 51
Verifying the VXLAN Gateway Configuration 53
A P P E N D I X A Sample Global Configuration File 59
Sample Global Configuration File 59
A P P E N D I X B Setup Script 61
Setup Script 61
Cisco Nexus 1000V for KVM Installation Guide, Release 5.2(1)SK3(1.1) v
Contents

Cisco Nexus 1000V for KVM Installation Guide, Release 5.2(1)SK3(1.1)vi
Contents

Preface
The Preface contains the following sections:
• Audience, page vii
• Document Conventions, page vii
• Related Documentation for Cisco Nexus 1000V for KVM Software, page ix
• Related Documentation for Cisco Nexus Cloud Services Platform, page ix
• Documentation Feedback, page x
• Obtaining Documentation and Submitting a Service Request, page x
AudienceThis publication is for network administrators who configure and maintain Cisco Nexus devices.
This guide is for network and server administrators with the following experience and knowledge:
• An understanding of virtualization
• An understanding of the corresponding hypervisor management software for your switch, such asVMware vSwitch, Microsoft System Center Virtual Machine Manager (SCVMM), or OpenStack.
Document ConventionsCommand descriptions use the following conventions:
DescriptionConvention
Bold text indicates the commands and keywords that you enter literallyas shown.
bold
Italic text indicates arguments for which the user supplies the values.Italic
Square brackets enclose an optional element (keyword or argument).[x]
Cisco Nexus 1000V for KVM Installation Guide, Release 5.2(1)SK3(1.1) vii

DescriptionConvention
Square brackets enclosing keywords or arguments separated by a verticalbar indicate an optional choice.
[x | y]
Braces enclosing keywords or arguments separated by a vertical barindicate a required choice.
{x | y}
Nested set of square brackets or braces indicate optional or requiredchoices within optional or required elements. Braces and a vertical barwithin square brackets indicate a required choice within an optionalelement.
[x {y | z}]
Indicates a variable for which you supply values, in context where italicscannot be used.
variable
A nonquoted set of characters. Do not use quotation marks around thestring or the string will include the quotation marks.
string
Examples use the following conventions:
DescriptionConvention
Terminal sessions and information the switch displays are in screen font.screen font
Information you must enter is in boldface screen font.boldface screen font
Arguments for which you supply values are in italic screen font.italic screen font
Nonprinting characters, such as passwords, are in angle brackets.< >
Default responses to system prompts are in square brackets.[ ]
An exclamation point (!) or a pound sign (#) at the beginning of a lineof code indicates a comment line.
!, #
This document uses the following conventions:
Means reader take note. Notes contain helpful suggestions or references to material not covered in themanual.
Note
Means reader be careful. In this situation, you might do something that could result in equipment damageor loss of data.
Caution
Cisco Nexus 1000V for KVM Installation Guide, Release 5.2(1)SK3(1.1)viii
PrefaceDocument Conventions

Related Documentation for Cisco Nexus 1000V for KVM SoftwareThis section lists the documents used with the Cisco Nexus 1000V for KVM software:
General Information
Cisco Nexus 1000V for KVM Release Notes
Install and Upgrade
Cisco Nexus 1000V for KVM Software Installation Guide
Configuration Guides
Cisco Nexus 1000V for KVM High-Availability Configuration Guide
Cisco Nexus 1000V for KVM Interface Configuration Guide
Cisco Nexus 1000V for KVM Layer 2 Configuration Guide
Cisco Nexus 1000V for KVM License Configuration Guide
Cisco Nexus 1000V for KVM Virtual Network Configuration Guide
Cisco Nexus 1000V for KVM Port Profile Configuration Guide
Cisco Nexus 1000V for KVM REST API Configuration Guide
Cisco Nexus 1000V for KVM Security Configuration Guide
Cisco Nexus 1000V for KVM System Management Configuration Guide
Cisco Nexus 1000V for KVM Verified Scalability Guide
Cisco Nexus 1000V for KVM VXLAN Configuration Guide
Reference Guides
Cisco Nexus 1000V for KVM Command Reference
Cisco Nexus 1000V for KVM OpenStack REST API Reference
Troubleshooting and Alerts
Cisco Nexus 1000V for KVM Troubleshooting Guide
Related Documentation for Cisco Nexus Cloud Services PlatformThis section lists the documents used with the Cisco Nexus Cloud Services Platform and available on Cisco.comat the following URL:
http://www.cisco.com/en/US/products/ps12752/tsd_products_support_series_home.html
General Information
Cisco Nexus Cloud Services Platform Release Notes
Cisco Nexus 1000V for KVM Installation Guide, Release 5.2(1)SK3(1.1) ix
PrefaceRelated Documentation for Cisco Nexus 1000V for KVM Software

Install and Upgrade
Cisco Nexus Cloud Services Platform Hardware Installation Guide
Cisco Nexus Cloud Services Platform Software Installation and Upgrade Guide
Regulatory Compliance and Safety Information for the Cisco Nexus Cloud Services Platform
Configuration Guide
Cisco Nexus Cloud Services Platform Software Configuration Guide
Reference Guides
Cisco Nexus Cloud Services Platform Command Reference
Cisco Nexus Cloud Services Platform Compatibility Information
Troubleshooting and Alerts
Cisco Nexus Cloud Services Platform Troubleshooting Guide
Documentation FeedbackTo provide technical feedback on this document, or to report an error or omission, please send your commentsto: [email protected].
We appreciate your feedback.
Obtaining Documentation and Submitting a Service RequestFor information on obtaining documentation, using the Cisco Bug Search Tool (BST), submitting a servicerequest, and gathering additional information, seeWhat's New in Cisco Product Documentation, at: http://www.cisco.com/c/en/us/td/docs/general/whatsnew/whatsnew.html.
Subscribe toWhat's New in Cisco Product Documentation, which lists all new and revised Cisco technicaldocumentation as an RSS feed and delivers content directly to your desktop using a reader application. TheRSS feeds are a free service.
Cisco Nexus 1000V for KVM Installation Guide, Release 5.2(1)SK3(1.1)x
PrefaceDocumentation Feedback

C H A P T E R 1Overview
This chapter contains the following sections:
• Information About the Installation, page 1
• Juju Charms, page 2
• Configuration Files, page 3
• Types of Nodes, page 4
• Supported Nodes, page 6
• Network Connectivity Between OpenStack Services, page 6
• Supported Topologies, page 7
Information About the InstallationCisco Nexus 1000V for KVM uses the Ubuntu Metal as a Service (MAAS) and Juju tools to facilitate theinstallation of OpenStack and Cisco Nexus 1000V for KVM. A description of each is as follows:
• Metal as a Service (MAAS)—Tool that sets up andmanages the physical infrastructure on which servicesare deployed.
• Juju—Tool that deploys services, such as OpenStack and the Cisco Nexus 1000V for KVM services toyour physical or virtual environment. Juju provides the installation logic (Juju charm) and softwarepackages (Debian packages) to deploy the Cisco Nexus 1000V for KVM.
• OpenStack—Scalable cloud operating system that controls large pools of compute, storage, andnetworking resources throughout a datacenter.
• Cisco Nexus 1000V for KVM— Distributed virtual switch (DVS) that works with several differenthypervisors. This DVS version is integrated with the Ubuntu Linux Kernel-based virtual machine (KVM)open source hypervisor.
You need to deployMAAS and Juju before you can deploy OpenStack with the Cisco Nexus 1000V for KVM.
Cisco Nexus 1000V for KVM Installation Guide, Release 5.2(1)SK3(1.1) 1

The following figure shows the installation process:
Figure 1: Installation Process Overview
If you want to deploy OpenStack with the Cisco Nexus 1000V for KVMon a smaller scale for testing purposes,see Setup Script, on page 61.
Juju CharmsThe charm logic to install the Cisco Nexus 1000V-specific OpenStack Networking plugins and the CiscoNexus 1000V for KVM services are packaged together in a charm Debian package calledjujucharm-n1k_5.2.1_sk3.1.1YYYYMMDDhhmm-1_amd64 . This package contains the followingOpenStackand Cisco Nexus 1000V for KVM charms:
• nova-cloud-controller
• quantum-gateway
• openstack-dashboard
• nova-compute
• vsm
• vem
• vxlan-gateway
The Metal-as-a-Service (MAAS) node downloads the OpenStack and Cisco Nexus 1000V for KVM charmsto the cluster nodes to facilitate the installation of their respective services.
You must download each of the following required charms separately from the Charm store:
• ceph
• ceph-radosgw
• cinder
• glance
• keystone
• mysql
• rabbitmq-server
• swift-proxy
Cisco Nexus 1000V for KVM Installation Guide, Release 5.2(1)SK3(1.1)2
OverviewJuju Charms

• swift-storage
Juju deploys each service using its respective charm and two configuration files: its own YAMLAin't MarkupLanguage (YAML) configuration file (called config.yaml that comes with the charm and serves as its parameterdata modeling and default value settings) and a global configuration file (a file that you create for definingany deployment-specific parameters).
Treat the config.yaml file as a read-only file. If you want to add any deployment-specific parameterchanges, use the global configuration file.
Note
For more information about the global configuration file, see Preparing for Installation, on page 15.
The Virtual Supervisor Module (VSM) charm helps to deploy the VSM as a virtual machine on an UbuntuKVM server node in a MAAS environment. This charm does not install the VSM on a Cisco Nexus CloudService Platform. On a Cloud Service Platform, VSM is installed through the standard method without theJuju charm. For more information, see Installing VSM on the Cisco Nexus Cloud Services Platform, on page31.
The Virtual Ethernet Module (VEM) charm is a subordinate charm under two primary charms: nova-computeand quantum-gateway. You deploy the VEM first; however, the real instantiation of the VEM happens whenyou add relationships with the corresponding primary charms.
The VEM can be configured by using the config.yaml file and the global configuration file that you provide.In addition, you can define specific information for a host by using a variable named mapping which takesin the content of a server node mapping file in YAML format and named, for example, mapping.yaml. Thisfile is delineated by the host ID (for example, maas-node-3) where you specify each server node variablevalue that is different from the other server nodes. The most common usage of this mapping file is forconfiguring the VXLANTunnel Endpoints (VTEPs) to implement the Virtual Extensible Local Area Network(VXLAN) feature. VTEPs are host-specific and require that you define host-specific values.
Configuration FilesEach charm's parameters are defined in a configuration file in YAML format.
YAML (rhymes with “camel”) is a human-friendly, cross language, Unicode based data serializationlanguage designed around the common native data structures of agile programming languages. It is broadlyuseful for programming needs ranging from configuration files to Internet messaging to object persistenceto data auditing.
Note
The config.yaml file defines the whole set of configurable parameters for each charm. It defines each parameter'stype, default value, and corresponding description. You do not modify this file. For an example of this file,see Sample Global Configuration File, on page 59.
To define values for parameters that are specific to your deployment, you need to create a global configurationfile. You separate the charms into sections and provide the corresponding parameters and values in eachsection. For more information, see Preparing the Configuration and Mapping Files, on page 16.
For the CiscoNexus 1000V-relatedOpenStack charms listed below, you need tomodify the global configurationfile with this provision: openstack-origin: ppa:cisco-n1kv/icehouse-updates.
• nova-cloud-controller
Cisco Nexus 1000V for KVM Installation Guide, Release 5.2(1)SK3(1.1) 3
OverviewConfiguration Files

• nova-compute
• openstack-dashboard
• quantum-gateway
To deploy the VEMs with their specific parameters, you need to create a host-mapping file, which isdeployed with the other configuration files when you deploy the VEM service. For more information see,Cisco Nexus 1000V for KVM VEM Charm Parameters, on page 20.
Note
Types of NodesA node in MAAS architecture can be a physical server or a virtual machine. MAAS does not differentiatebetween these two.
The Cisco Nexus 1000V for KVM deployment has the following five node types:
• Infrastructure nodes (MAAS server node and Juju bootstrap node)
• OpenStack service nodes
• Network nodes (also known as Quantum-gateway nodes)
• Nova compute nodes
• Virtual Supervisor Module (VSM) nodes
MAAS Server Node
The MAAS server node is the cluster controller where the cluster provisioning and service management areperformed. It provides the following functions:
• DHCP and Preboot Execution Environment (PXE) boot services
• DNS and DNS forwarding service
• Cluster controller service for enlisting and delisting the cluster nodes
• Debian package proxy
• Juju client when the Juju command is issued
Juju Bootstrap Node
The Juju bootstrap node is the server node where the following functions are provided:
• Serves the Juju request from clients (for example, from the MAAS server)
• Service scheduling
• Service staging
• Establishing and maintaining relationships between services
Cisco Nexus 1000V for KVM Installation Guide, Release 5.2(1)SK3(1.1)4
OverviewTypes of Nodes

OpenStack Service Nodes
If you decide to deploy any of the followingOpenStack services, they can be deployed using their correspondingcharms:
CharmsServices
nova-cloud-controller
vxlan-gateway (subordinate charm tonova-cloud-controller)
Cloud controller
Loads Cisco Nexus 1000VVXLANGateway imageto Glance
keystoneIdentity service
cephUnified, distributed storage service
ceph-radosgwAmazon Simple Storage Service (S3),Swift-compatible HTTP gateway for online objectstorage on top of a Ceph cluster (RADOS Gateway)
cinderVolume service
glanceImage service
openstack-dashboardDjango-based web user-interface for administeringthe OpenStack nodes
swift-proxyProxy for object storage service
swift-storageObject storage service
mysqlSQL database service
rabbitmqAdvanced Message Queuing Protocol (AMQP)messaging service
percona-clusterPercona XtraDB Cluster, which provides anactive/active MySQL-compatible alternative that isimplemented using the Galera synchronousreplication extensions
Network Nodes
The network nodes host the OpenStack networking services for your CiscoNexus 1000V for KVMdeployment,including all of the OpenStack service nodes. The network nodes provide the following services through theseservice charms:
CharmsServices
quantum-gateway
vem (subordinate charm to quantum-gateway)
Neutron DHCP and Layer 3 agents
Cisco Nexus 1000V for KVM Installation Guide, Release 5.2(1)SK3(1.1) 5
OverviewTypes of Nodes

Nova Compute Nodes
The Nova compute nodes host your virtual machines (VMs), including any VXLAN Gateway VMs that youhave deployed as VMs. The Nova compute nodes provide the following service through these service charms:
CharmsService
nova-compute
vem (subordinate charm to nova-compute)
Nova compute service
VSM Nodes
The VSM can be hosted on a dedicated server node or on a Cisco Nexus 1110 as a Virtual Service Blade(VSB). The VSM node provides the following service through this service charm:
CharmService
vsmDistributed virtual switch management and controlof multiple Virtual Ethernet Modules (VEMs).
Supported NodesThe Cisco Nexus 1000V for KVM supports the following nodes in a Metal-as-a-Service (MAAS) OpenStackcluster:
• One MAAS server node
• One Juju bootstrap node
• One or more OpenStack service nodes
• One or more Nova-compute nodes
• Zero, one, or more network nodes
• One or two Virtual Supervisor Module (VSM) nodes if you deploy the VSM as a virtual machine (VM).Zero VSM nodes when you deploy the VSM as a Virtual Service Blade (VSB) in a Cisco Cloud ServicesPlatform.
Network Connectivity Between OpenStack ServicesA MAAS deployment requires the following four functional networks:
• Management network—Provides internal communication between the OpenStack components. All IPaddresses on this network need to be reachable only within the data center.
• Data network—Provides communication between VMs in the cloud. The IP addressing requirementsof this network depend on the OpenStack network plugin that your deployment uses.
Cisco Nexus 1000V for KVM Installation Guide, Release 5.2(1)SK3(1.1)6
OverviewSupported Nodes

• Public network—Provides a node with public internet access. If required, IP addresses on this networkneed to be reachable from the internet.
• Intelligent Platform Management Interface (IPMI) network—Manages the power sequence for all ofthe nodes in the cluster.
System administrators retain the option to collapse network boundaries based on the physical setup of theirdatacenter. For example, you can fold the management network into the data network.
Supported TopologiesCisco Nexus 1000V for KVM supports both physical and virtual machine topologies.
Physical DeploymentIn this deployment model, the services are deployed on bare metal servers rather then as virtual machines.See the figure below. The primary benefit of this deployment model is the performance improvement of theOpenStack services as well as the network nodes. When a Layer 3 agent with high performance is required,this deployment model is recommended.
The VSM can be deployed in active/standby high availability (HA) mode using the Juju charms, or it can bemanually brought up on a Cisco Nexus 1010 or 1110 Virtual Service Appliance. In all deployment models,we recommend that you deploy the Virutal Supervisor Module (VSM) in HA mode.
You can also deploy OpenStack in HA mode. For more information, see OpenStack High AvailabilityDeployment, on page 8.
Figure 2: Topology of Physical Deployment
Cisco Nexus 1000V for KVM Installation Guide, Release 5.2(1)SK3(1.1) 7
OverviewSupported Topologies
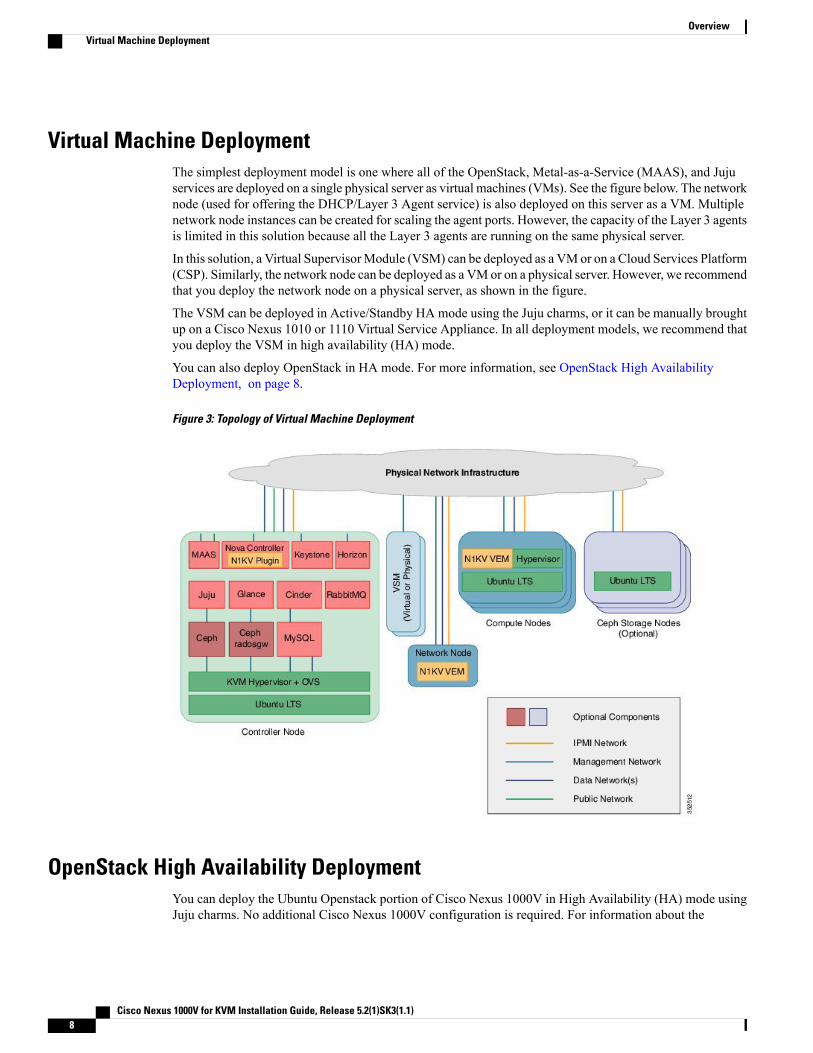
Virtual Machine DeploymentThe simplest deployment model is one where all of the OpenStack, Metal-as-a-Service (MAAS), and Jujuservices are deployed on a single physical server as virtual machines (VMs). See the figure below. The networknode (used for offering the DHCP/Layer 3 Agent service) is also deployed on this server as a VM. Multiplenetwork node instances can be created for scaling the agent ports. However, the capacity of the Layer 3 agentsis limited in this solution because all the Layer 3 agents are running on the same physical server.
In this solution, a Virtual SupervisorModule (VSM) can be deployed as a VMor on a Cloud Services Platform(CSP). Similarly, the network node can be deployed as a VMor on a physical server. However, we recommendthat you deploy the network node on a physical server, as shown in the figure.
The VSM can be deployed in Active/Standby HA mode using the Juju charms, or it can be manually broughtup on a Cisco Nexus 1010 or 1110 Virtual Service Appliance. In all deployment models, we recommend thatyou deploy the VSM in high availability (HA) mode.
You can also deploy OpenStack in HA mode. For more information, see OpenStack High AvailabilityDeployment, on page 8.
Figure 3: Topology of Virtual Machine Deployment
OpenStack High Availability DeploymentYou can deploy the Ubuntu Openstack portion of Cisco Nexus 1000V in High Availability (HA) mode usingJuju charms. No additional Cisco Nexus 1000V configuration is required. For information about the
Cisco Nexus 1000V for KVM Installation Guide, Release 5.2(1)SK3(1.1)8
OverviewVirtual Machine Deployment

requirements for deploying Ubuntu OpenStack in HAmode, see the documentation at the following location:https://wiki.ubuntu.com/ServerTeam/OpenStackHA.
The reason that the Cisco Nexus 1000V requires no additional configuration is that the Cisco Nexus Plug-infor OpenStack Neutron resides in the Nova-cloud-controller (NCC), which provides the API endpoints forthe Nova and Neutron services. As APIs are stateless, the NCC nodes can be scaled horizontally byload-balancing the requests across all of the available nodes. Therefore, only one active NCC node processesthe requests, and, when necessary, the node sends the requests to the Virtual Supervisor Module (VSM).
Cisco Nexus 1000V for KVM Installation Guide, Release 5.2(1)SK3(1.1) 9
OverviewOpenStack High Availability Deployment

Cisco Nexus 1000V for KVM Installation Guide, Release 5.2(1)SK3(1.1)10
OverviewOpenStack High Availability Deployment

C H A P T E R 2System Requirements
This chapter contains the following sections:
• Server Requirements, page 11
• Supported Operating Systems, page 14
• Supported Hypervisors, page 14
• Supported MAAS Deployment, page 14
Server Requirements
Networking RequirementsThe following table describes the networking requirements that the nodes in your Cisco Nexus 1000V forKVM deployment must meet.
Table 1: Networking Requirements for Nodes
Network RequirementsNode
• Intelligent Platform Management Interface (IPMI)
• Management interface
• Public interface
MAAS
• IPMI
• Management interface
Juju
• IPMI
• Management interface
Nova Cloud Controller
Cisco Nexus 1000V for KVM Installation Guide, Release 5.2(1)SK3(1.1) 11

Network RequirementsNode
• IPMI
• Management interface
RabbitMQ+MySQL
• IPMI
• Management interface
VSM
• IPMI
• Management interface
• Data interface
Compute
• IPMI
• Management interface
• Data interface
• Public interface
Network
• IPMI
• Management interface
• HA interface
Ceph (Optional for non-HAdeployment;Required for HA deployment)
Minimum Node RequirementsThe following tables list the minimum node requirements for deploying the Cisco Nexus 1000V for KVM.
Table 2: Minimum Node Requirements for a Physical Server Deployment
Node TypeCPU or vCPUHard Drive (GB)Memory (GB)Node
Server24008Ceph Storage
Server2754MAAS
Server2102Juju
Server2502Rabbit-MQ/MySQL
Cisco Nexus 1000V for KVM Installation Guide, Release 5.2(1)SK3(1.1)12
System RequirementsMinimum Node Requirements

Node TypeCPU or vCPUHard Drive (GB)Memory (GB)Node
Server23002OpenStackController
Server230024Nova Compute
VM234VSM
Server21024Quantum Gateway
VM2102VXLAN Gateway
Server25016VSM Hypervisor
Server230024VXLAN GatewayHypervisor
Table 3: Minimum Node Requirements for a Virtual Server Deployment
Node TypeCPU or vCPUHard Drive (GB)Memory (GB)Node
VM2754MAAS
VM2102Juju
VM2502MySQL
VM2102Rabbit-MQ
VM2102Nova CloudController
VM1751Cinder
VM181Keystone
VM1251Glance
VM2201OpenStackDashboard
VM234VSM
Server230024Nova Compute
Server21024Quantum Gateway
VM2102VXLAN Gateway
Cisco Nexus 1000V for KVM Installation Guide, Release 5.2(1)SK3(1.1) 13
System RequirementsMinimum Node Requirements

Node TypeCPU or vCPUHard Drive (GB)Memory (GB)Node
Server25016VSM Hypervisor
Server230024VXLAN GatewayHypervisor
Supported Operating SystemsThe Cisco Nexus 1000V for KVM with OpenStack Icehouse release supports the operating system levels inthe following table.
Supported VersionsName
14.04Ubuntu
3.13.0-24-genericKernel
Depending on your specific Cisco Nexus 1000V for KVM release, it is your responsibility to monitor andinstall all relevant Linux patches on Linux hosts.
Note
Supported HypervisorsCisco Nexus 1000V for KVM supports the Kernel-based Virtual Machine (KVM) for the supported Ubuntuoperating system as the hypervisor in the OpenStack cluster. KVM is a virtualization package for Linux onan x86 hardware platform. KVM uses x86 hardware virtualization extensions (for example, Intel VT-x) toimplement a hypervisor that hosts VMs as userspace processes.
Supported MAAS DeploymentFor MAAS deployment, the following characteristics are supported:
• One cluster controller per MAAS deployment.
• Amaximum of twoVSMs (active/standby) per Cisco Nexus 1000V for KVMcloud service deployment.
• One or more services on a dedicated server or in a virtual machine on a single server.
• Each VSM must be on different server and must be the only VM on that server.
Cisco Nexus 1000V for KVM Installation Guide, Release 5.2(1)SK3(1.1)14
System RequirementsSupported Operating Systems

C H A P T E R 3Preparing for Installation
This chapter contains the following sections:
• Downloading the Cisco Nexus 1000V Software, page 15
• Preparing the Configuration and Mapping Files, page 16
• OpenStack Charm Parameters, page 16
• Cisco Nexus 1000V for KVM VSM Charm Parameters, page 18
• Cisco Nexus 1000V for KVM VEM Charm Parameters, page 20
• Cisco Nexus 1000V for KVM VXLAN Gateway Charm Parameters, page 22
Downloading the Cisco Nexus 1000V SoftwareThe Cisco Nexus 1000V for KVM software packages are available from two locations and, as such, its imageversions are named based on the location. The following table lists the package name and versions based ontheir location.
Cisco PPACCO Image VersionPackage Name
5.2.1.sk3.1.0.187-15.2.1.SK3.1.1VSM
14.04.5.2.1.sk3.1.0.s0.187-114.04.5.2.1.sk3.1.0.s0.187-1VEM
5.2.1.sk3.1.0.187-15.2.1.SK3.1.1VXLAN-GATEWAY
The location that you choose to download the software from affects the way that you set up and execute theinstallation.
• Downloading from the Cisco PPA—You can set up your installation so that when you deploy the CiscoNexus 1000V for KVM, the charms retrieve the packages from the Cisco PPA. For charms to install theVSM, VEM, and VXLAN gateway packages from the PPA you must provide the correct Cisco PPAlink as the n1kv-source in the global configuration file.
Cisco Nexus 1000V for KVM Installation Guide, Release 5.2(1)SK3(1.1) 15

• Downloading from Cisco.com—You can manually download the software from Cisco.com to an HTTPserver so that when you deploy the Cisco Nexus 1000V for KVM, Juju retrieves the software from theHTTP server. To perform this type of installation, you must define the location of the HTTP server forthe VSM, VEM, and VXLAN Gateway charms in the global configuration file.
For example, you can use the MAAS server as the HTTP server because it already provides the HTTPservice and its IP address is well known within the cluster.
For information, see the following:
• Cisco Nexus 1000V for KVM VSM Charm Parameters, on page 18
• Cisco Nexus 1000V for KVM VEM Charm Parameters, on page 20
• Cisco Nexus 1000V for KVM VXLAN Gateway Charm Parameters, on page 22
Preparing the Configuration and Mapping FilesBefore you can deploy the Cisco Nexus 1000V for KVM, you need to configure several charms with specificconfiguration information. You do this by defining specific charm parameters in a global configuration filethat you create.
You must maintain consistency between the global configuration file parameter names and the charm'sconfig.yaml file parameter names. Do not introduce new parameter names in the global configuration file.
Note
If your deployment requires it, you can deploy VEMs with unique configuration parameters instead of usingthe configuration parameters that are defined for all VEMs in the config.yaml file. To do this, you need tocreate a mapping file.
OpenStack Charm ParametersYou must modify the global configuration file for the following Cisco Nexus 1000V for KVM-relatedOpenStack charms:
• nova-cloud-controller
• nova-compute
• openstack-dashboard
• quantum-gateway
The following sections provide information about the OpenStack charm parameters that you need to definein the global configuration file.
Cisco Nexus 1000V for KVM Installation Guide, Release 5.2(1)SK3(1.1)16
Preparing for InstallationPreparing the Configuration and Mapping Files

nova-cloud-controller Charm Parameters
DescriptionParameter
Location of the Cisco Nexus 1000V for KVMDebian package:
openstack-origin: ppa:cisco-n1kv/icehouse-updates
openstack-origin: debian-pkg-location
Login for accessing the Cisco Nexus 1000V for KVM (VSM).n1kv-vsm-username: vsm-username
Secure password for accessing the CiscoNexus 1000V for KVM(VSM).
n1kv-vsm-password: vsm-password
IP address of the VSM.n1kv-vsm-ip: vsm-ip-address
This example shows the nova-cloud controller portion of the global configuration file:nova-cloud-controller:openstack-origin: ppa:cisco-n1kv/icehouse-updatesn1kv-vsm-username: nexusn1kv-vsm-password: nexus123n1kv-vsm-ip: 192.168.10.1
.
.
.
nova-compute Charm Parameters
DescriptionParameter
Location of the Cisco Nexus 1000V for KVMDebian package:
openstack-origin: ppa:cisco-n1kv/icehouse-updates
openstack-origin: debian-pkg-location
This example shows the nova-compute portion of the global configuration file:nova-comute:openstack-origin: ppa:cisco-n1kv/icehouse-updates
.
.
.
quantum-gateway Charm Parameters
DescriptionParameter
Location of the Cisco Nexus 1000V for KVMDebian package:
openstack-origin: ppa:cisco-n1kv/icehouse-updates
openstack-origin: debian-pkg-location
Parameter for enabling or disabling the Layer 3 agent. Followingare the valid values:
• true—Brings up the Linux router as part of thequantum-gateway.
• false—Does not bring up the Linux router.
enable-l3-agent: {true | false}
Cisco Nexus 1000V for KVM Installation Guide, Release 5.2(1)SK3(1.1) 17
Preparing for InstallationOpenStack Charm Parameters

This example shows the quantum-gateway portion of the global configuration file:quantum-gateway:openstack-origin: ppa:cisco-n1kv/icehouse-updatesplugin: n1kvext-port: eth1
.
.
.
openstack-dashboard Charm Parameters
DescriptionParameter
Location of the Cisco Nexus 1000V for KVMDebian package:
openstack-origin: ppa:cisco-n1kv/icehouse-updates
openstack-origin: debian-pkg-location
Default profile for the dashboard to use, for example, cisco.profile:name
This example shows the openstack-dashboard portion of the global configuration file:openstack-dashboard:openstack-origin: ppa:cisco-n1kv/icehouse-updatesprofile: cisco
.
.
.
Cisco Nexus 1000V for KVM VSM Charm ParametersThis table lists the Cisco Nexus 1000V for KVMVSM charm parameters that you need to define in the globalconfiguration file.
DescriptionParameter
Location of the Cisco Nexus 1000V for KVM VSM software. Thelocation that you define depends on whether you choose to have Jujudownload the VSM software (charm) automatically from the CiscoPersonal Package Archive (PPA) or you choose to manually downloadthe software from Cisco.com to a local HTTP server. For moreinformation, see Downloading the Cisco Nexus 1000V Software, onpage 15.
Define the debian-pkg-location variable in one of the following twoways:
• Cisco PPA—n1kv-source: ppa:cisco-n1kv/n1kv-updates
• Local HTTP server—http://server-address/vsm-image-name.iso
n1kv-source: debian-pkg-location
Domain number that the VSM will control.n1kv-vsm-domain-id: domain-id
Cisco Nexus 1000V for KVM Installation Guide, Release 5.2(1)SK3(1.1)18
Preparing for InstallationCisco Nexus 1000V for KVM VSM Charm Parameters

DescriptionParameter
Secure password for accessing the CiscoNexus 1000V for KVM (VSM).n1kv-vsm-password:vsm-password
Name of the VSM.n1kv-vsm-name: vsm-name
High availability role. Valid values are primary or secondary.n1kv-vsm-role: {primary |secondary}
IP address of the management interface.n1kv-vsm-ip:management-IP-address
IP address subnet mask of the management interface.n1kv-vsm-mgmt-netmask:management-ip-subnet-mask
IP address of the management subnet default gateway.n1kv-vsm-gateway:management-subnet-default-gateway
MAC address of the VSM's control TAP interface. This parameter isoptional for the primary VSM, but required for the secondary VSM.
n1kv-vsm-ctrl-mac:
MAC address of the VSM's management TAP interface. This parameteris optional for the primary VSM, but required for the secondary VSM.
n1kv-vsm-mgmt-mac
MAC address of the VSM's packet TAP interface. This parameter isoptional for the primary VSM.
n1kv-vsm-pkt-mac:
(Optional) Console port of the VSM VM.n1kv-vsm-console-pts:
(Optional) Number of vCPUs in the VSM VM. The default andrecommended value is two vCPUs.
n1kv-vsm-vm-vcpu:
(Optional) Disk size (GB) of the VSM VM.n1kv-vsm-disk-size:
(Optional) Host interface to which the VSM bridge is attached. Thebridge connects the VSMwith the upstream network. The default valueis Ethernet 0 (eth0).
n1kv-phy-intf-bridge:
This example shows the primary and secondary VSMs with the n1kv-source defined as the Cisco PPA:vsm-primary:n1kv-source: deb xxxxx | xxxx (variable)n1kv-vsm-domain-id: 500n1kv-vsm-password: nexus123n1kv-vsm-mgmt-ip: 192.168.10.1n1kv-phy-intf-bridge: eth2n1kv-vsm-mgmt-gateway: 192.168.10.2n1kv-vsm-mgmt-netmask: 255.255.255.0n1kv-vsm-role: primaryn1kv-vsm-name: vsm-pvsm-secondary:n1kv-source: deb xxxxx | xxxx (variable)
Cisco Nexus 1000V for KVM Installation Guide, Release 5.2(1)SK3(1.1) 19
Preparing for InstallationCisco Nexus 1000V for KVM VSM Charm Parameters

n1kv-vsm-domain-id: 500n1kv-vsm-password: nexus123n1kv-phy-intf-bridge: eth2n1kv-vsm-role: secondaryn1kv-vsm-name: vsm-s
This example shows the primary and secondary VSM with the n1kv-source defined as an HTTP server:vsm-primary:n1kv-source: http://192.168.10.3/images/vsm-image-name.ison1kv-vsm-domain-id: 101n1kv-vsm-password: nexus123n1kv-vsm-name: vsm-primaryn1kv-vsm-role: primaryn1kv-vsm-ip: 192.168.10.4n1kv-vsm-mgmt-netmask: 255.255.255.0n1kv-mgmt-gateway: 192.168.10.5...vsm-secondary:n1kv-source: http://192.168.10.6/images/vsm-image-name.ison1kv-vsm-domain-id: 101n1kv-vsm-password: nexus123n1kv-vsm-name: vsm-secondaryn1kv-vsm-role: secondary
.
.
.
Cisco Nexus 1000V for KVM VEM Charm ParametersThis table lists the Cisco Nexus 1000V for KVM VEM charm parameters. You define the parameters thatwill be the same among all of the VEMs in your network. For any parameters that you want to customize,you create a mapping file in YAML syntax in theMAAS node’s file system. In the mapping file, you configurea section for each node by using the host name ID, and you include any of the VEM configuration parameterslisted in this table.
A typical usage for a custom mapping file is to configure certain nodes (for example, nova-compute orquantum-gateway nodes) with specific management or uplink interface settings. Another typical usage is tocreate VTEPs for VXLAN or VXLANGateway configurations on VEMs. If VTEPs are not configured usingDHCP mode, the VTEPs need to be configured with static IP addresses using a custom mapping file.
Cisco Nexus 1000V for KVM Installation Guide, Release 5.2(1)SK3(1.1)20
Preparing for InstallationCisco Nexus 1000V for KVM VEM Charm Parameters

DescriptionParameter
Location of the Cisco Nexus 1000V for KVM VEM software.
The location that you define depends on whether you choose to haveJuju download the VEM software (charm) automatically from the CiscoPersonal Package Archive (PPA) or you choose to manually downloadthe software from Cisco.com to a local HTTP server.
The VEM software is comprised of two Debian packages: a VEMDKMS package and a VEM data-path package. Juju downloads bothautomatically if you specify the Cisco PPA as the source. However, ifyou choose to manually download the software from Cisco.com, youmust download both Debian packages.
For more information, see Downloading the Cisco Nexus 1000VSoftware, on page 15.Define the debian-pkg-location variable in one of the following twoways:
• Cisco PPA—n1kv-source: ppa:cisco-n1kv/n1kv-updates
• Local HTTP server—http://server-address/VEM-DKMS.deb,http://server-address/VEM-DP.deb
n1kv-source: debian-pkg-location
Virtual Tunnel Endpoint (VTEP) port configuration. Only static IP andMAC addresses are supported.
The port-name cannot exceed 11 alphanumeric characters. Ifit does, the VTEP does not come up.
Note
vtep_config: virt port-nameprofile profile-name [mode static| dhcp [address ip-address]]
Type of node that the VEM is intended to be installed on. The defaultvalue is compute.
n1kv-node_type: {compute |network}
Setting that indicates whether multiple VTEPs are located in the samesubnet. The default value is no.
n1kv-vtep_in_same_subnet: {yes| no}
This example shows the VEM with the n1kv-source defined as the Cisco PPA:vem:n1kv-source: ppa:cisco-n1kv/n1kv-updatesvtep_config:node-type: networkvtep_in_same_subnet: yesvtep_config:'virt vtep1-nw2 profile vxlan-vtep mode static address 192.168.10.2 netmask255.255.0.0 mac 0e:1f:56:cf:82:53'...This example shows the VEM with the n1kv-source defined as an HTTP server:vem:n1kv-source: http://192.168.10.1/images/VEM-DKMS.deb, http://server-address/VEM-DP.debvtep_config:node-type: networkvtep_in_same_subnet: yesvtep_config:'virt vtep1-nw2 profile vxlan-vtep mode static address 192.168.10.2 netmask255.255.0.0 mac 0e:1f:56:cf:82:53'.
Cisco Nexus 1000V for KVM Installation Guide, Release 5.2(1)SK3(1.1) 21
Preparing for InstallationCisco Nexus 1000V for KVM VEM Charm Parameters

.
.
This example shows a mapping file with configuration parameters for two nodes. Each section is separatedby the host name ID. Within each section, node-specific parameters are defined because they are differentfrom the ones in the config.yaml file.maas-node-6:host_mgmt_intf: eth1uplink_profile: phys eth2 profile sys-uplink
maas-node-11:host-mgmt-intf: eth0uplink_profile: phys eth3 profile sys-uplinknode_type: networkvtep_config:'virt vtep1-nw2 profile vxlan-vtep mode static address 6.0.8.253 netmask
255.255.0.0 mac 0e:1f:56:cf:82:53'
Cisco Nexus 1000V for KVM VXLAN Gateway Charm ParametersFor VXLAN Gateway, you need to define the source of the vxlan-gateway charm.
The VXLAN Gateway feature has other configuration requirements, including the creation of VTEPs onthe VEMs. You can use a common configuration for all VEMs if you use DHCP to assign IP addressesto all of the VTEPs, or you can use a mapping.yaml file. For more information about creating VTEPsusing a mapping.yaml file, see Cisco Nexus 1000V for KVM VEM Charm Parameters, on page 20.
Note
The following table lists the Cisco Nexus 1000V for KVMVXLAN Gateway charm parameter that you needto define in the global configuration file.
DescriptionParameter
Location of the VXLANGateway software. The location that you definedepends on whether you choose to have Juju download the VXLANGateway software (charm) automatically from the Cisco PersonalPackage Archive (PPA) or you choose to manually download thesoftware from Cisco.com to a local HTTP server. For more information,see Downloading the Cisco Nexus 1000V Software, on page 15.
Define the debian-pkg-location variable in one of the following twoways:
• Cisco PPA—n1kv-source: ppa:cisco-n1kv/n1kv-updates
• Local HTTP server—http://server-address/VXGW-image.qcow
n1kv-source: debian-pkg-location
This example shows the VXLAN Gateway with the n1kv-source defined as the Cisco PPA:vxlan-gateway:n1kv-source: ppa:cisco-n1kv/n1kv-updates
.
.
.
Cisco Nexus 1000V for KVM Installation Guide, Release 5.2(1)SK3(1.1)22
Preparing for InstallationCisco Nexus 1000V for KVM VXLAN Gateway Charm Parameters
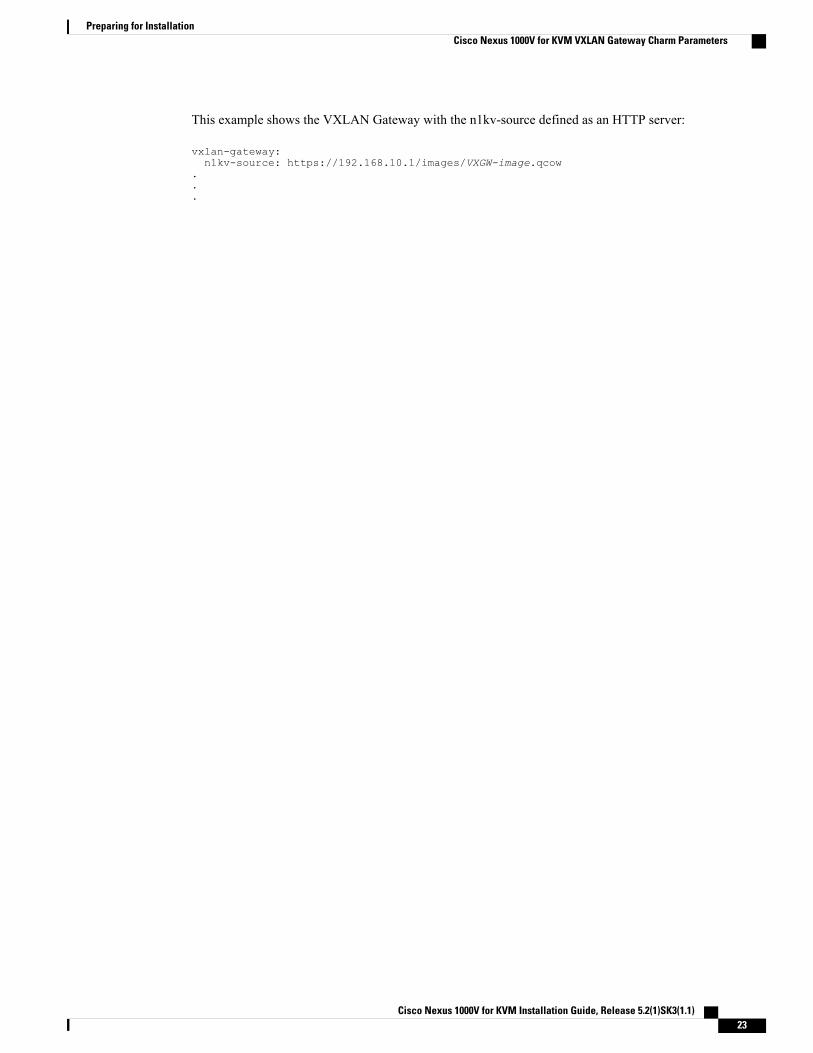
This example shows the VXLAN Gateway with the n1kv-source defined as an HTTP server:
vxlan-gateway:n1kv-source: https://192.168.10.1/images/VXGW-image.qcow
.
.
.
Cisco Nexus 1000V for KVM Installation Guide, Release 5.2(1)SK3(1.1) 23
Preparing for InstallationCisco Nexus 1000V for KVM VXLAN Gateway Charm Parameters
Cisco Nexus 1000V for KVM Installation Guide, Release 5.2(1)SK3(1.1)24
Preparing for InstallationCisco Nexus 1000V for KVM VXLAN Gateway Charm Parameters

C H A P T E R 4Installing Cisco Nexus 1000V for KVM
This chapter contains the following sections:
• Steps to Install the Cisco Nexus 1000V for KVM, page 25
• Installing and Configuring MAAS, page 26
• Installing and Configuring Juju, page 27
• Installing and Configuring the OpenStack Services, page 27
• Verifying the Cisco Nexus Plug-in for OpenStack Neutron Version, page 28
• Installing and Configuring the Cisco Nexus 1000V for KVM, page 29
• Installing and Configuring the VXLAN Gateway Using Juju Charms, page 29
Steps to Install the Cisco Nexus 1000V for KVMYou can use the following high-level procedure to guide you through the installation process.
Before You Begin
• Decide on a deployment model. See Supported Topologies, on page 7.
• Make sure that your network, servers, operating system, hypervisor, and MAAS deployment meet theminimum requirements. See System Requirements, on page 11.
• Gather the required network information for the Juju configuration file (config.yaml file). See Canonicaldocumentation at this URL: http://maas.ubuntu.com/docs/install.html.
• Gather the required network information for the global configuration file. See Preparing the Configurationand Mapping Files, on page 16.
• Gather any unique network information for the VEMs. See Mapping File Parameters.
Cisco Nexus 1000V for KVM Installation Guide, Release 5.2(1)SK3(1.1) 25

Procedure
PurposeCommand or Action
See Installing and Configuring MAAS, on page26.
Install and configure MAAS.Step 1
See Installing and Configuring Juju, on page 27.Install and configure Juju.Step 2
See Installing and Configuring the OpenStackServices, on page 27.
Install and configure the OpenStackservices.
Step 3
See Verifying the Cisco Nexus Plug-in forOpenStack Neutron Version, on page 28
Verify that the correct version of the CiscoNexus Plug-in for OpenStackNeutronwasinstalled.
Step 4
See Installing and Configuring the Cisco Nexus1000V for KVM, on page 29.
Install and configure the Cisco Nexus1000V for KVM.
Step 5
(Optional)See Installing and Configuring the VXLANGateway Using Juju Charms, on page 29.
Install and configure the VXLANGateway.
Step 6
Installing and Configuring MAASYou need to install and configure MAAS. For detailed information about this procedure, see the Canonicaldocumentation at this URL: http://maas.ubuntu.com/docs/install.html.
Procedure
Step 1 Install the following MAAS packages.
• maas
• maas-region-controller
• maas-cluster-controller
• maas-dhcp/maas-dns
Step 2 Set up the initial MAAS configuration:a) Designate the MAAS server API URL.b) Create a MAAS admin account.c) Import the boot images (only necessary during the first time setup).d) Configure DHCP.e) Configure the immediate upstream switch to be in STP PortFast mode for fast convergence on ports in
the forwarding state.
Cisco Nexus 1000V for KVM Installation Guide, Release 5.2(1)SK3(1.1)26
Installing Cisco Nexus 1000V for KVMInstalling and Configuring MAAS
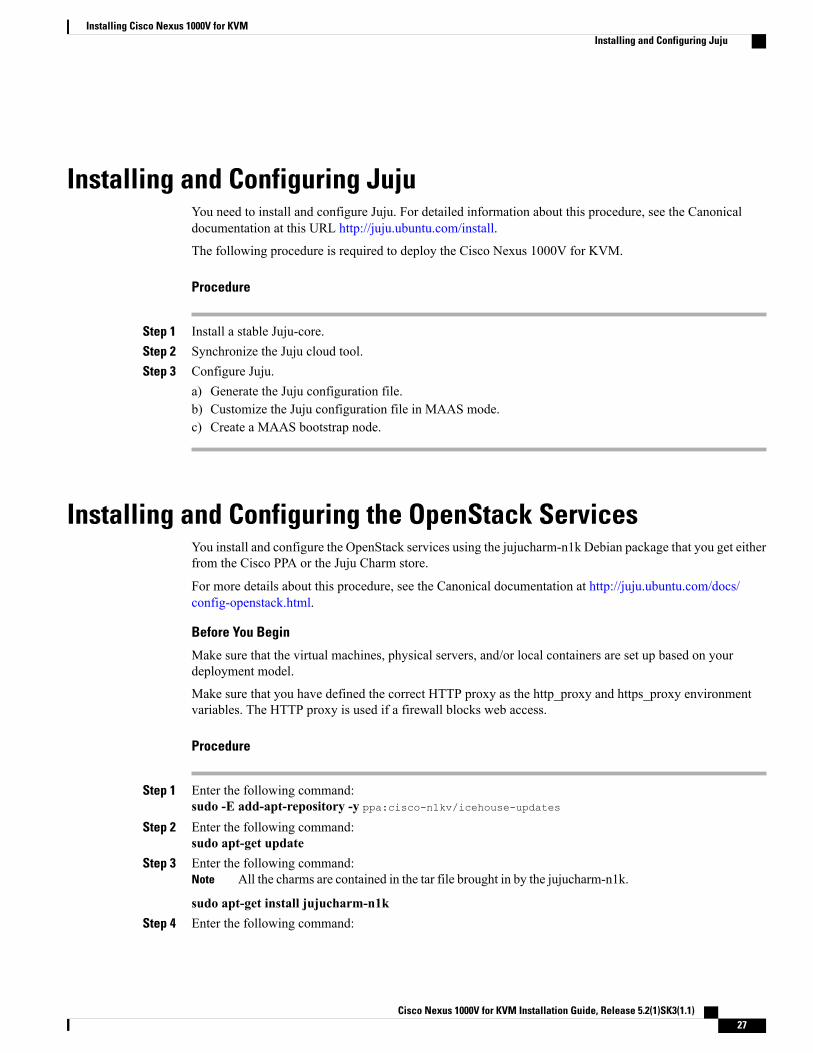
Installing and Configuring JujuYou need to install and configure Juju. For detailed information about this procedure, see the Canonicaldocumentation at this URL http://juju.ubuntu.com/install.
The following procedure is required to deploy the Cisco Nexus 1000V for KVM.
Procedure
Step 1 Install a stable Juju-core.Step 2 Synchronize the Juju cloud tool.Step 3 Configure Juju.
a) Generate the Juju configuration file.b) Customize the Juju configuration file in MAAS mode.c) Create a MAAS bootstrap node.
Installing and Configuring the OpenStack ServicesYou install and configure the OpenStack services using the jujucharm-n1k Debian package that you get eitherfrom the Cisco PPA or the Juju Charm store.
For more details about this procedure, see the Canonical documentation at http://juju.ubuntu.com/docs/config-openstack.html.
Before You Begin
Make sure that the virtual machines, physical servers, and/or local containers are set up based on yourdeployment model.
Make sure that you have defined the correct HTTP proxy as the http_proxy and https_proxy environmentvariables. The HTTP proxy is used if a firewall blocks web access.
Procedure
Step 1 Enter the following command:sudo -E add-apt-repository -y ppa:cisco-n1kv/icehouse-updates
Step 2 Enter the following command:sudo apt-get update
Step 3 Enter the following command:All the charms are contained in the tar file brought in by the jujucharm-n1k.Note
sudo apt-get install jujucharm-n1kStep 4 Enter the following command:
Cisco Nexus 1000V for KVM Installation Guide, Release 5.2(1)SK3(1.1) 27
Installing Cisco Nexus 1000V for KVMInstalling and Configuring Juju

tar zxf /opt/cisco/n1kv/charms/jujucharm-n1k-precise_5.2.1.sk3.1.1.YYYYMMDDhhmm.tar.gzStep 5 Enter the following command:
cd ./jujucharm-n1k/charmsStep 6 Deploy the OpenStack services.
The OpenStack charms in the jujucharm-n1k Debian package contain Cisco Nexus 1000V forKVM-specific changes and need to be installed locally. For information about installing these services,see Installing and Configuring the Cisco Nexus 1000V for KVM, on page 29.
All other required OpenStack charms can be either downloaded locally from their respective bzrbranches and deployed from the local repository or can be deployed directly from the Juju Charmstore using the juju deploy --config config-file charm-name command.
Note
juju deploy --config config-file --repository=. local:trusty/charm-name
Verifying the Cisco Nexus Plug-in for OpenStack NeutronVersion
If you downloaded the Cisco Nexus 1000V for KVM software from the Cisco PPA, an issue exists where youmight download an incompatible version of Cisco Nexus Plug-in for OpenStack Neutron.
Every 12 hours, the Cisco Nexus 1000V for KVM software version is checked, and if it is not the latest version,the latest version is reposted to the Cisco PPA. The reason that the version is checked is that the Debianpackages for the Cisco Nexus 1000V include the version of OpenStack from the Ubuntu PPA, and whenevera new version of OpenStack is posted to the Ubuntu PPA, this version is used in the Cisco Nexus 1000V forKVM software Debian packages. This upstream version of OpenStack may contain an incompatible versionof the Cisco Nexus Plug-in for OpenStack Neutron.
For the latest Cisco Nexus 1000V for KVM features to work properly, you must ensure that the latest versionof the Cisco Nexus Plug-in for OpenStack Neutron is installed.
There are two ways that you can ensure that you have the latest version:
• Log into the nodes and check the Cisco Nexus Plug-in for OpenStack Neutron apt policy. Verify thatthe source of the installed version points to the Cisco PPA. This example shows that the correct versionis installed. The Installed field shows 1:2014.1.1-0ubuntu2+springfieldv1407151351 as the image thatis installed, and the Version table shows the source of that image is the Cisco PPA.~$ sudo apt-cache policy neutron-serverneutron-server:Installed: 1:2014.1.1-0ubuntu2+springfieldv1407151351Candidate: 1:2014.1.1-0ubuntu2+springfieldv1407151351Version table:*** 1:2014.1.1-0ubuntu2+springfieldv1407151351 0
900 https://private-ppa.launchpad.net/springfield-team/icehouse-staging/ubuntu/trusty/main amd64 Packages
100 /var/lib/dpkg/status1:2014.1.1-0ubuntu2 0
500 http://archive.ubuntu.com//ubuntu/ trusty-updates/main amd64 Packages1:2014.1-0ubuntu1.3 0
500 http://archive.ubuntu.com//ubuntu/ trusty-security/main amd64 Packages
• Add the following command to the late_commands in /etc/maas/preseed/generic and use default installerfor MAAS deployment:echo -en 'Package: *\nPin: release o=LP-PPA-cisco-n1kv-icehouse-updates\nPin-Priority:900' > /target/etc/apt/preferences.d/n1kv-pin-900 && \
Cisco Nexus 1000V for KVM Installation Guide, Release 5.2(1)SK3(1.1)28
Installing Cisco Nexus 1000V for KVMVerifying the Cisco Nexus Plug-in for OpenStack Neutron Version
Installing and Configuring the Cisco Nexus 1000V for KVMPerform this procedure to install and configure the Cisco Nexus 1000V for KVM on a physical server or asa VM. To deploy the Cisco Nexus 1000V for KVM on a Cisco Cloud Services Platform, see Installing VSMon the Cisco Nexus Cloud Services Platform, on page 31.
Before You Begin
Make sure that you have defined the necessary parameters in the global configuration file and mapping filefor your deployment.
Procedure
Step 1 Deploy the primary VSM.juju deploy –u --config config-file --repository=. local:trusty/vsm vsm-primary
Step 2 Deploy the secondary VSM.juju deploy –u --config config-file --repository=. local:trusty/vsm vsm-secondary
Step 3 Deploy VEMs.a) juju deploy –u --config config-file --repository=. local:trusty/vemb) juju add-relation nova-compute vemc) juju add-relation vem vsm-primaryd) juju add-relation quantum-gateway veme) (Optional) juju set vem mapping=$(cat mapping.yaml)
Installing and Configuring the VXLAN Gateway Using JujuCharms
The VXLAN Gateway is an optional addition to the Cisco Nexus 1000V for KVM deployment. If you wantto deploy the VXLAN Gateway with the Cisco Nexus 1000V for KVM, you can use the VXLAN Gatewaycharm. For a complete, step-by-step procedure to install and configure the VXLAN Gateway, see Steps toInstall and Configure VXLAN Gateway, on page 37.
Before You Begin
Ensure that the deployment meets the minimum requirements. See Information About the VXLAN GatewayDeployment, on page 35 and Guidelines and Limitations for Cisco Nexus 1000V VXLAN Gateway, onpage 36.
If you are not using DHCP to configure IP addresses on the VTEPS, you must have configured static IPaddresses on the VTEPs. To do this, you must have configured the vtep_config parameter in a custommappingfile for the VEM charm. For information, see Cisco Nexus 1000V for KVM VEM Charm Parameters, onpage 20.
Cisco Nexus 1000V for KVM Installation Guide, Release 5.2(1)SK3(1.1) 29
Installing Cisco Nexus 1000V for KVMInstalling and Configuring the Cisco Nexus 1000V for KVM

You have created two port profiles on the switch (VSM): one for the uplinks on the gateway and one for theVTEP interface. For information, see Configuring a Port Profile for the Uplink on the VXLAN Gateway, onpage 38 and Configuring a Port Profile for the VTEP on the VXLAN Gateway, on page 40.
The source of the VXLAN Gateway image is configured in your VXLAN Gateway charm mapping.file. Forinformation, see Cisco Nexus 1000V for KVM VXLAN Gateway Charm Parameters, on page 22.
Ensure that the Nova cloud controller is started before deploying the VXLAN Gateway charm. To start theNova cloud controller, use the juju status nova-cloud-controller command.
Procedure
Step 1 Deploy the VXLAN Gateway.a) juju deploy –u --config config-file --repository=. local:trusty/vxlan-gatewayb) juju add-relation nova-cloud-controller vxlan-gateway
Step 2 Configure the VXLAN Gateway.You need to configure the data and management interfaces, high availability, and the VXLAN-to-VLANmappings. For information, see Installing and Configuring the VXLAN Gateway, on page 35.
Cisco Nexus 1000V for KVM Installation Guide, Release 5.2(1)SK3(1.1)30
Installing Cisco Nexus 1000V for KVMInstalling and Configuring the VXLAN Gateway Using Juju Charms

C H A P T E R 5Installing VSM on the Cisco Nexus CloudServices Platform
This chapter contains the following sections:
• Information About Installing a VSM on the Cisco Nexus Cloud Services Platform, page 31
• Installing a VSM on the Cisco Nexus Cloud Services Platform, page 31
Information About Installing a VSM on the Cisco Nexus CloudServices Platform
If you choose to install a Virtual Supervisor Module (VSM) on the Cisco Nexus Cloud Services Platform,you must install all primary and secondary VSMs on the Cisco Nexus Cloud Services Platform. You cannotinstall any other VSMs as a VM.
Installing a VSM on the Cisco Nexus Cloud Services PlatformBefore You Begin
Copy the VSM ISO or OVA file to the bootflash:repository/ of the Cisco Nexus Cloud Services Platform.
Procedure
Step 1 Create a virtual service blade.
switch(config)# show virtual-service-blade summary
---------------------------------------------------------------------------------Name HA-Role HA-Status Status Location---------------------------------------------------------------------------------switch(config)# virtual-service-blade vsm-1switch(config-vsb-config)# virtual-service-blade-type new nexus-1000v-dk9.5.2.1.SK3.1.2.iso
Cisco Nexus 1000V for KVM Installation Guide, Release 5.2(1)SK3(1.1) 31

switch(config-vsb-config)# show virtual-service-blade summary
--------------------------------------------------------------------------------------Name HA-Role HA-Status Status Location--------------------------------------------------------------------------------------vsm-1 PRIMARY NONE VSB NOT PRESENT PRIMARYvsm-1 SECONDARY NONE VSB NOT PRESENT SECONDARY
switch(config-vsb-config)#
Step 2 Configure the control, packet, and management interface VLANs for static and flexible topologies.
switch(config-vsb-config)# interface management vlan 100switch(config-vsb-config)# interface control vlan 101switch(config-vsb-config)# interface packet vlan 101
Step 3 Configure two vCPUs and the size of the RAM to 4 GB for the VSM.
switch(config-vsb-config)# ramsize 4096switch(config-vsb-config)# numcpu 2
If desired, you can verify these settings with the following command:
switch(config-vsb-config)# show virtual-service-blade name vsm-1
Step 4 Configure the Cisco Nexus 1000V for KVM on the Cisco Nexus Cloud Services Platform.
switch(config-vsb-config)# enableEnter vsb image: [nexus-1000v.4.2.1.SV2.2.1.iso]Enter domain id[1-1023]: 127Management IP version [V4/V6]: [V4]Enter Management IP address: 192.0.2.79Enter Management subnet mask: 255.255.255.0IPv4 address of the default gateway: 192.0.2.1Enter HostName: n1000vEnter the password for ‘admin’: passwordNote: VSB installation is in progress, please use show virtual-service-blade commands tocheck the installation status.switch(config-vsb-config)#
Step 5 Display the primary and secondary VSM status.
switch(config-vsb-config)# show virtual-service-blade summary
--------------------------------------------------------------------------------------Name HA-Role HA-Status Status Location--------------------------------------------------------------------------------------vsm-1 PRIMARY NONE VSB POWER ON IN PROGRESS PRIMARYvsm-1 SECONDARY ACTIVE VSB POWERED ON SECONDARY
Step 6 Log in to the VSM.
switch(config)# virtual-service-blade vsm-1
Cisco Nexus 1000V for KVM Installation Guide, Release 5.2(1)SK3(1.1)32
Installing VSM on the Cisco Nexus Cloud Services PlatformInstalling a VSM on the Cisco Nexus Cloud Services Platform

switch(config-vsb-config)# login virtual-service-blade vsm-1Telnet escape character is ‘^\’.Trying 192.0.2.18...Connected to 192.0.2.18.Escape character is ‘^\’.
Nexus 1000v Switchn1000v login: adminPassword:Cisco Nexus operating System (NX-OS) SoftwareTAC support: http://www/cisco.com/tacCopyright (c) 2002-2012, Cisco Systems, Inc. All rights reserved.The copyrights to certain works contained in this software areowned by other third parties and used and distributed underlicense. Certain components of this software are licensed underthe GNU General Public License (GPL) version 2.0 or the GNULesser General Public License (LGPL) Version 2.1. A copy of eachsuch license is available athttp://www.opensource.org/licenses/gpl-2.0.php andhttp://www.opensource.org/licenses/lgpl-2.1.phpswitch#
Step 7 Enable the following features in the VSM to ensure that OpenStack can configure the networks appropriately:
• http-server
• network-segmentation-manager
• segmentation
Cisco Nexus 1000V for KVM Installation Guide, Release 5.2(1)SK3(1.1) 33
Installing VSM on the Cisco Nexus Cloud Services PlatformInstalling a VSM on the Cisco Nexus Cloud Services Platform

Cisco Nexus 1000V for KVM Installation Guide, Release 5.2(1)SK3(1.1)34
Installing VSM on the Cisco Nexus Cloud Services PlatformInstalling a VSM on the Cisco Nexus Cloud Services Platform

C H A P T E R 6Installing and Configuring the VXLAN Gateway
This chapter contains the following sections:
• Information About the VXLAN Gateway Deployment, page 35
• Guidelines and Limitations for Cisco Nexus 1000V VXLAN Gateway, page 36
• Steps to Install and Configure VXLAN Gateway, page 37
• Configuring Port Profiles on the VSM, page 38
• Installing VXLAN Gateway, page 41
• Configuring the VXLAN Gateway Data and Management Interfaces, page 42
• Configuring High Availability, page 49
• Managing the VXLAN-to-VLAN Mappings on the VXLAN Gateway, page 51
• Verifying the VXLAN Gateway Configuration, page 53
Information About the VXLAN Gateway DeploymentThe Virtual Extensible Local Area Network (VXLAN) Gateway has the following deployment requirements:
• To configure the VXLAN Gateway, you must install the Advanced Edition license on the Cisco Nexus1000V switch.
• You can only deploy the VXLANGateway as a VM. In this release of the Cisco Nexus 1000V for KVM,the VXLAN Gateway cannot be deployed on a Cisco Nexus Cloud Services Platform (Cisco Nexus1010 or Cisco Nexus 1110 platforms).
• vCPU and memory requirements:
◦Two vCPUs for each Virtual Machine (VM)
◦4-GB RAM
◦10-GB virutal disk space
• Network requirements:
Cisco Nexus 1000V for KVM Installation Guide, Release 5.2(1)SK3(1.1) 35

◦Management interface
◦Gateway uplink interface
◦VTEP interface
This figure shows the VXLAN Gateway deployment.
Figure 4: VXLAN Gateway Deployment on the Cloud Services Platform (CSP)
Guidelines and Limitations for Cisco Nexus 1000V VXLANGateway
VXLAN Gateways have the following configuration guidelines and limitations:
• You must configure the VSM to use the Layer 3 control. We strongly recommend that VSM Layer 3control is through mgmt 0. For more information about Layer 3 control, see the Cisco Nexus 1000VSystem Management Configuration Guide.
Cisco Nexus 1000V for KVM Installation Guide, Release 5.2(1)SK3(1.1)36
Installing and Configuring the VXLAN GatewayGuidelines and Limitations for Cisco Nexus 1000V VXLAN Gateway

• A single VSM can manage a maximum of eight VXLAN Gateway high availability (HA) clusters.
• You must configure the HA mode of the VXLAN Gateway as standalone or primary/secondary so thatwhen you bring up the VXLAN Gateway, the HA state is either active or standby and theVXLAN-to-VLAN mappings are either active or pending. If you do not configure an HA role for theVXLAN Gateway, when you bring up the VXLAN Gateway, the HA state is unknown, andVXLAN-to-VLAN traffic is not processed.
• The VXLAN Gateway virtual machine (VM) uses two vCPUs; one vCPU for management traffic andone vCPU for the data interface.
Steps to Install and Configure VXLAN GatewayThere are several key steps to install and configure a VXLAN Gateway.
Procedure
PurposeCommand or Action
See Configuring a Port Profile for the Uplink onthe VXLAN Gateway, on page 38 and
Create two port profiles on the switch (VSM):one for the uplinks on the gateway and one forthe VTEP interface.
Step 1
Configuring a Port Profile for the VTEP on theVXLAN Gateway, on page 40.
To deploy the VXLAN Gateway as a VM, seeInstalling the VXLAN Gateway as a VM UsingJuju Charms, on page 41.
Deploy the VXLAN Gateway.Step 2
Choose one of the following methods:Create the VXLAN Gateway data andmanagement interfaces.
Step 3
• Configuring the VXLAN Gateway Dataand Management Interfaces UsingOpenStack dashboard, on page 42
• Configuring the VXLAN Gateway Dataand Management Interfaces Using theOpenStack CLI, on page 47
SeeConfiguring theVXLANGatewayHAModeas Standalone, on page 50.
Configure high availability on the VSMs. Youmust configure the HA mode of the VXLANGateway as standalone or primary/secondary so
Step 4
that when you bring up the VXLAN Gateway,the HA state is either active or standby and theVXLAN-to-VLAN mappings are either activeor pending. If you do not configure an HA rolefor the VXLAN Gateway, when you bring upthe VXLANGateway, the HA state is unknown,and VXLAN-to-VLAN traffic is not processed.
SeeManaging the VXLAN-to-VLANMappingson the VXLAN Gateway, on page 51.
Set up the VXLAN-to-VLAN mappings on theVXLAN Gateway.
Step 5
Cisco Nexus 1000V for KVM Installation Guide, Release 5.2(1)SK3(1.1) 37
Installing and Configuring the VXLAN GatewaySteps to Install and Configure VXLAN Gateway

PurposeCommand or Action
(Optional)See Verifying the VXLAN GatewayConfiguration, on page 53.
Verify the VXLAN Gateway installation andconfiguration.
Step 6
Configuring Port Profiles on the VSMYou must create port profiles on the VSM before you can install and configure the VXLAN Gateway.
Configuring a Port Profile for the Uplink on the VXLAN GatewayBefore installing the VXLAN Gateway, you must create two port profiles on the switch (VSM), one for theuplinks on the gateway and one for the VXLAN Tunnel Endpoint (VTEP) interface.
Before You Begin
• Ensure that the VSM is configured in the Advanced mode by entering the svs switch edition advancedconfiguration command to enable Advanced mode.
• Ensure that the VXLAN feature is enabled on the VSM by entering the feature segmentationconfiguration command to enable VXLANs on the VSM.
• Ensure that the VXLAN Gateway is enabled on the VSM by entering the feature vxlan-gatewayconfiguration command.
• Ensure that the interfaces of the upstream switch are configured with a matching port channel and VLANtrunk configuration.
Procedure
PurposeCommand or Action
Enters global configuration mode.vsm# configure terminalStep 1
Creates an encapsulation profile to contain theVLAN-to-VXLAN mappings.
vsm# encapsulation profile segmentname
Step 2
Maps aVLAN to aVXLAN. TheVXLAN is specifiedthrough the bridge-domain name.
vsm(config-vxlan-encap-prof)# dot1qVLAN-ID bridge-domain bd-name
Step 3
The bridge-domain name and VLAN-ID youprovide are not created during the port-profileconfiguration. The bridge-domain name andthe VLAN ID that you provide should be inan active state or the mapping is held in aninactive state until you create thebridge-domain name and VLAN ID.
Note
Cisco Nexus 1000V for KVM Installation Guide, Release 5.2(1)SK3(1.1)38
Installing and Configuring the VXLAN GatewayConfiguring Port Profiles on the VSM
PurposeCommand or Action
Repeat this step to specify additionalmappings.
Note
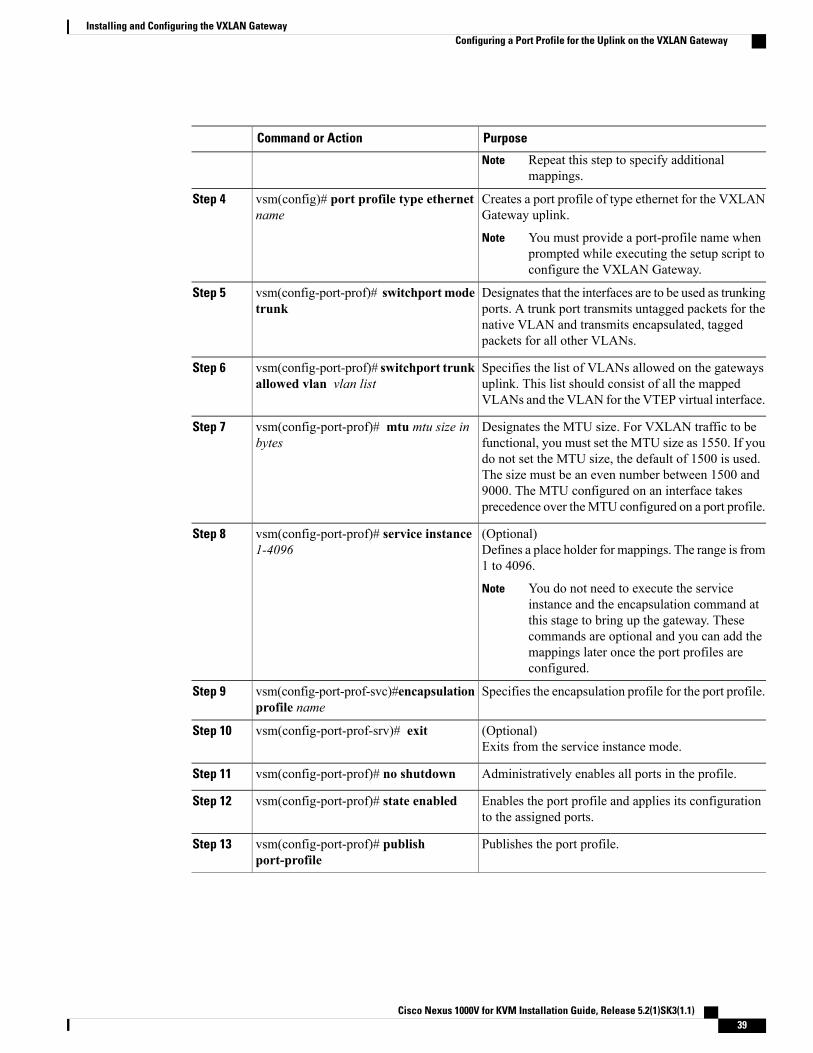
Creates a port profile of type ethernet for the VXLANGateway uplink.
vsm(config)# port profile type ethernetname
Step 4
You must provide a port-profile name whenprompted while executing the setup script toconfigure the VXLAN Gateway.
Note
Designates that the interfaces are to be used as trunkingports. A trunk port transmits untagged packets for the
vsm(config-port-prof)# switchportmodetrunk
Step 5
native VLAN and transmits encapsulated, taggedpackets for all other VLANs.
Specifies the list of VLANs allowed on the gatewaysuplink. This list should consist of all the mappedVLANs and the VLAN for the VTEP virtual interface.
vsm(config-port-prof)# switchport trunkallowed vlan vlan list
Step 6
Designates the MTU size. For VXLAN traffic to befunctional, you must set the MTU size as 1550. If you
vsm(config-port-prof)# mtu mtu size inbytes
Step 7
do not set the MTU size, the default of 1500 is used.The size must be an even number between 1500 and9000. The MTU configured on an interface takesprecedence over theMTU configured on a port profile.
(Optional)Defines a place holder for mappings. The range is from1 to 4096.
vsm(config-port-prof)# service instance1-4096
Step 8
You do not need to execute the serviceinstance and the encapsulation command atthis stage to bring up the gateway. Thesecommands are optional and you can add themappings later once the port profiles areconfigured.
Note
Specifies the encapsulation profile for the port profile.vsm(config-port-prof-svc)#encapsulationprofile name
Step 9
(Optional)Exits from the service instance mode.
vsm(config-port-prof-srv)# exitStep 10
Administratively enables all ports in the profile.vsm(config-port-prof)# no shutdownStep 11
Enables the port profile and applies its configurationto the assigned ports.
vsm(config-port-prof)# state enabledStep 12
Publishes the port profile.vsm(config-port-prof)# publishport-profile
Step 13
Cisco Nexus 1000V for KVM Installation Guide, Release 5.2(1)SK3(1.1) 39
Installing and Configuring the VXLAN GatewayConfiguring a Port Profile for the Uplink on the VXLAN Gateway

This example shows how to configure and display the gateway mappings:
vsm# configuration terminalvsm(config)# port-profile type ethernet gw-uplinkvsm(config)# switchport mode trunkvsm(config)# switchport trunk allowed vlan 1545vsm(config)# mtu 1550vsm(config-port-prof)# service instance 1vsm(config-port-prof)# encapsulation profile gw_mappingsvsm(config-port-prof-srv)# encapsulation profile segment gw-segmentvsm(config-port-prof-srv)# encapsulation dot1q 753 bridge-domain bd-753vsm(config-port-prof-srv)# exitvsm(config-port-prof)# channel-group autovsm(config-port-prof)# no shutdownvsm(config-port-prof)# state enabledvsm(config-port-prof)# publish port-profile
Configuring a Port Profile for the VTEP on the VXLAN GatewayYou can create a port profile that can be applied to the VTEP virtual interface on the VXLAN Gateway.
Procedure
PurposeCommand or Action
Enters global configuration mode.vsm# configure terminalStep 1
Configures a port profile for the VTEP on the VXLANgateway.
vsm(config) # port-profile typevethernet port-profile name
Step 2
You must provide a port profile name whenprompted while executing the setup script toconfigure the VXLAN Gateway.
Note
Designates that the interfaces are to be used as a trunkingports. A trunk port transmits untagged packets for the native
vsm(config-port-prof) # switchportmode access
Step 3
VLAN and transmits encapsulated, tagged packets for allother VLANs.
Assigns an access VLAN ID to this port profile. The VLANID provided must be added to the allowed VLAN set of
vsm(config-port-prof) # switchportaccess vlan vlan-id-access
Step 4
the uplink port profile. This VLAN should not be mappedto any VXLAN.
If you do not specify a VLAN ID, VLAN 1 is usedautomatically.
Note
Configures the capability VXLAN feature on the specifiedvirtual ethernet port and enables encapsulation anddecapsulation of VXLAN packets.
vsm(config-port-prof ) # capabilityvxlan
Step 5
Cisco Nexus 1000V for KVM Installation Guide, Release 5.2(1)SK3(1.1)40
Installing and Configuring the VXLAN GatewayConfiguring a Port Profile for the VTEP on the VXLAN Gateway

PurposeCommand or Action
Configures the IP address, netmask, and gateway for theVTEP.
If you have VTEPs that are in different subnets,you must specify the gateway IP address. If agateway is not provided, the VXLAN Gatewayuses ARP to reach the remote VTEP.
Note
vsm(config-port-prof) # transportip address ip-address netmasknetwork mask [gateway ip-address]
Step 6
Administratively enables all ports in the profile.vsm(config-port-prof)# noshutdown
Step 7
Enables the port profile and applies its configuration to theassigned ports.
vsm(config-port-prof)# stateenabled
Step 8
Publishes the port profile.vsm(config-port-prof)# publishport-profile
Step 9
This example displays how to configure a VTEP on the VXLAN gateway:vsm# configure terminalvsm(config)# port-profile type vethernet gw-vtepvsm(config-port-prof)# switchport mode accessvsm(config-port-prof)# switchport access vlan 760vsm(config-port-prof)# capability vxlanvsm(config-port-prof)# transport ip address 192.0.2.1 255.255.255.0 gateway 192.0.2.254vsm(config-port-prof)# no shutdownvsm(config-port-prof)# state enabledvsm(config-port-prof)# publish port-profile
Installing VXLAN Gateway
Installing the VXLAN Gateway as a VM Using Juju Charms
Before You Begin
• Ensure that the server on which you create the VXLANGateway VMmeets the minimum requirements.See Networking Requirements, on page 11 and Networking Requirements, on page 11.
• The source of the VXLANGateway image is configured in your VXLANGateway charmmapping.file.For information, see Cisco Nexus 1000V for KVM VXLAN Gateway Charm Parameters, on page 22.
• You have created two port profiles on the switch (VSM): one for the uplinks on the gateway and onefor the VTEP interface. For details, see Configuring a Port Profile for the Uplink on the VXLANGateway, on page 38 and Configuring a Port Profile for the VTEP on the VXLAN Gateway, on page40.
• If you are not using DHCP to configure IP addresses on the VTEPS, you must have configured staticIP addresses on the VTEPs. To do this, you must have configured the vtep_config parameter in a custommapping file for the VEM charm. For information, see Cisco Nexus 1000V for KVM VEM CharmParameters, on page 20.
Cisco Nexus 1000V for KVM Installation Guide, Release 5.2(1)SK3(1.1) 41
Installing and Configuring the VXLAN GatewayInstalling VXLAN Gateway

Ensure that the Nova cloud controller is started before deploying the VXLAN Gateway charm. To start theNova cloud controller, use the juju status nova-cloud-controller command.
Procedure
Step 1 Configure the source of the VXLAN Gateway image in your VXLAN Gateway charm mapping file.For more information, see Cisco Nexus 1000V for KVM VXLAN Gateway Charm Parameters, on page 22.
Step 2 Download the VXLAN Gateway software image VXGW-image.qcow.Step 3 Deploy the VXLAN Gateway.
juju deploy [config=config-file] [--to=destination]--repository=/opt/cisco/n1kv/charms/jujucharm-n1k/charms local:precise/vxlan-gateway
Step 4 Make sure the VXLAN Gateway image is present by entering the following OpenStack command:glance image-list
Configuring the VXLAN Gateway Data and ManagementInterfaces
Configuring the VXLAN Gateway Data and Management Interfaces UsingOpenStack dashboard
Guidelines and Limitations for the OpenStack DashboardThe OpenStack dashboard has the following guidelines and limitations when you use it to create virtualnetworks for Cisco Nexus 1000V for KVM:
• Network profile creation by an administrator is not supported in Cisco Nexus 1000V for KVM Release5.2(1)SK3(2.2) software and highter. Network profiles are automatically created for each network type.
• To create a network profile and associate it with a tenant, you must log in to the OpenStack dashboardas a user with admin privileges. Any user can use a network profile that is associated with a tenant.
• You cannot create policy profiles or assign them to a tenant in OpenStack dashboard. You must firstcreate them as part of the port profiles in the VSM. The OpenStack dashboard retrieves them from theVSM and displays them on the Router dashboard.
• When there are multiple VSMs, the port profile must be configured on all the VSMs.
Cisco Nexus 1000V for KVM Installation Guide, Release 5.2(1)SK3(1.1)42
Installing and Configuring the VXLAN GatewayConfiguring the VXLAN Gateway Data and Management Interfaces

Steps to Configure the VXLAN Gateway Interfaces Using the OpenStack Dashboard
Before You Begin
Create one or more port profiles in the VSM. These port profiles are displayed as policy profiles in OpenStackdashboard. For more information, see Configuring a Port Profile for the Uplink on the VXLAN Gateway, onpage 38 and Configuring a Port Profile for the VTEP on the VXLAN Gateway, on page 40.
Procedure
Step 1 Create a network profile of type trunk.See Creating a Trunk Network Profile Using OpenStack Dashboard, on page 43.
Step 2 Create a network profile of type VLAN.See Creating a VLAN Network Profile Using OpenStack Dashboard, on page 44.
Step 3 Create one or more networks for the network profiles.See Creating a Network Using the OpenStack Dashboard, on page 45.
Step 4 Create a subnet for each network.See Creating a Subnet for a Network Using the OpenStack Dashboard, on page 45.
You do not need to create a port for the network. OpenStack dashboard creates a port for the network whenyou launch the instance.
Step 5 Create and launch the VM instance.See Booting a VXLAN Gateway VM, on page 46.
Creating a Trunk Network Profile Using OpenStack Dashboard
Before You Begin
• Create one or more policy profiles as part of the port profiles in the VSM.
• Create one or more tenants in OpenStack dashboard.
Procedure
Step 1 In the Navigation pane, click the Router dashboard.Step 2 In the Cisco Nexus 1000v panel, click Create Network Profile.Step 3 In the Create Network Profile dialog box, do the following:
a) In the Name field, enter a unique name for the network profile.The name can have a maximum length of 255 characters and can contain uppercase or lowercase characters,numerals, and special characters such as an "at" sign (@), ampersand (&), and exclamation point (!).
b) From the Segment Type drop-down list, choose Trunk.c) From the Sub Type drop-down list, choose VLAN.
Cisco Nexus 1000V for KVM Installation Guide, Release 5.2(1)SK3(1.1) 43
Installing and Configuring the VXLAN GatewayConfiguring the VXLAN Gateway Data and Management Interfaces Using OpenStack dashboard

d) From the Projectmulti-select list, choose one or more tenants that you want to associate with this networkprofile.
e) Click Create Network Profile.OpenStack dashboard creates the network profile and then updates the OpenStack Neutron database and theVSM.
What to Do Next
Create one or more networks.
Creating a VLAN Network Profile Using OpenStack Dashboard
Before You Begin
• Create one or more policy profiles as part of the port profiles in the VSM.
• Create one or more tenants in OpenStack dashboard.
Procedure
Step 1 In the Navigation pane, click the Router dashboard.Step 2 In the Cisco Nexus 1000v panel, click Create Network Profile.Step 3 In the Create Network Profile dialog box, do the following:
a) In the Name field, enter a unique name for the network profile.The name can have a maximum length of 255 characters and can contain uppercase or lowercase characters,numerals, and special characters such as an "at" sign (@), ampersand (&), and exclamation point (!).
b) From the Segment Type drop-down list, choose VLAN.Separate the first and last segments in the range with a hyphen (-). For example, enter a range of 80-86.For a segment type of VLAN, the range can be from 1 to 3967 or from 4048 to 4093.
c) In the Segment Range field, enter the segment range for the network profile.For example, enter a range of 80-86. For a segment type of VLAN, the range can be from 1 to 3967 orfrom 4048 to 4093.
d) In the Physical Network field, enter the name of the associated physical network.e) From the Projectmulti-select list, choose one or more tenants that you want to associate with this network
profile.f) Click Create Network Profile.OpenStack dashboard creates the network profile and then updates the OpenStack Neutron database and theVSM.
What to Do Next
Create one or more networks.
Cisco Nexus 1000V for KVM Installation Guide, Release 5.2(1)SK3(1.1)44
Installing and Configuring the VXLAN GatewayConfiguring the VXLAN Gateway Data and Management Interfaces Using OpenStack dashboard
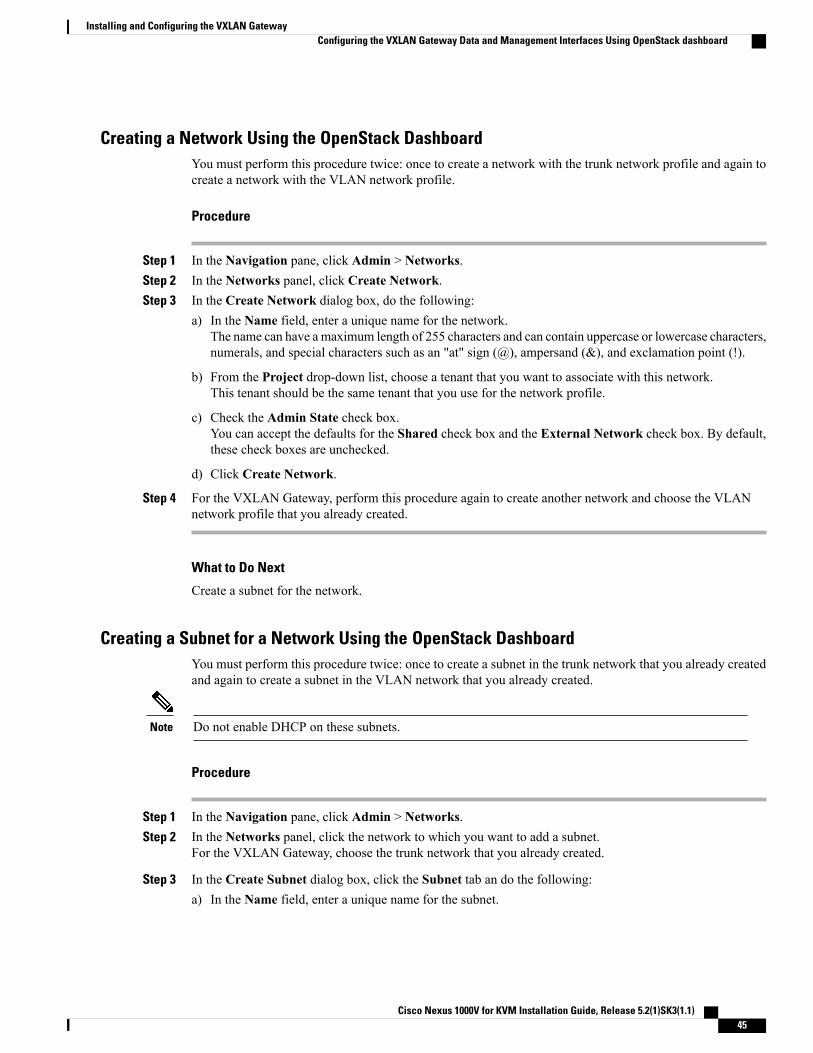
Creating a Network Using the OpenStack DashboardYou must perform this procedure twice: once to create a network with the trunk network profile and again tocreate a network with the VLAN network profile.
Procedure
Step 1 In the Navigation pane, click Admin > Networks.Step 2 In the Networks panel, click Create Network.Step 3 In the Create Network dialog box, do the following:
a) In the Name field, enter a unique name for the network.The name can have a maximum length of 255 characters and can contain uppercase or lowercase characters,numerals, and special characters such as an "at" sign (@), ampersand (&), and exclamation point (!).
b) From the Project drop-down list, choose a tenant that you want to associate with this network.This tenant should be the same tenant that you use for the network profile.
c) Check the Admin State check box.You can accept the defaults for the Shared check box and the External Network check box. By default,these check boxes are unchecked.
d) Click Create Network.
Step 4 For the VXLAN Gateway, perform this procedure again to create another network and choose the VLANnetwork profile that you already created.
What to Do Next
Create a subnet for the network.
Creating a Subnet for a Network Using the OpenStack DashboardYou must perform this procedure twice: once to create a subnet in the trunk network that you already createdand again to create a subnet in the VLAN network that you already created.
Do not enable DHCP on these subnets.Note
Procedure
Step 1 In the Navigation pane, click Admin > Networks.Step 2 In the Networks panel, click the network to which you want to add a subnet.
For the VXLAN Gateway, choose the trunk network that you already created.
Step 3 In the Create Subnet dialog box, click the Subnet tab an do the following:a) In the Name field, enter a unique name for the subnet.
Cisco Nexus 1000V for KVM Installation Guide, Release 5.2(1)SK3(1.1) 45
Installing and Configuring the VXLAN GatewayConfiguring the VXLAN Gateway Data and Management Interfaces Using OpenStack dashboard

The name can have a maximum length of 255 characters and can contain uppercase or lowercase characters,numerals, and special characters such as an "at" sign (@), ampersand (&), and exclamation point (!).
b) In the Network Address field, enter the address for the subnet.The subnet address must be in classless interdomain routing (CIDR) format. For example, 192.168.0.0/16.
c) From the IP Version drop-down list, choose IPv4.d) (Optional) In the Gateway IP field, enter a gateway IP address for the subnet.
Step 4 Optionally, click the Subnet Detail tab and do the following:a) (Optional) Click the Enable DHCP checkbox.b) Enter one or more allocation pools in the Allocation Pools text box.c) Enter one or more name servers in the DNS Name Servers text box.d) Enter one or more host routes in the Host Routes text box.
Step 5 Click Create to create the subnet.Step 6 For the VXLAN Gateway, perform this procedure again to create another network and choose the VLAN
network that you already created.
Booting a VXLAN Gateway VMYou must manually create the port IDs and launch the VM instance using OpenStack commands.
Procedure
Step 1 neutron port-create trunk-network-name --n1kv:profile_id VSM-policy-profile-idCreates the trunk port ID for the VXLAN Gateway data interface.
Step 2 neutron port-create vxgw-mgmt-network-name --n1kv:profile_id VSM-policy-profile-idCreates the management port ID for the VXLAN Gateway management interface.
Step 3 nova boot --image image_id --flavor 3 nic port-id= trunk_port-id nic port-id= access_port-idvxlan_gateway_nameLaunches the VXLAN Gateway VM.
In this command, you must specify the first NIC as a trunk port and the second NIC as an accessport.
Note
Youmust specify flavor 3, because flavor 3 provides the two vCPUs that the VM requires.Note
Step 4 nova listLists the active servers.
Cisco Nexus 1000V for KVM Installation Guide, Release 5.2(1)SK3(1.1)46
Installing and Configuring the VXLAN GatewayConfiguring the VXLAN Gateway Data and Management Interfaces Using OpenStack dashboard

Configuring the VXLAN Gateway Data and Management Interfaces Using theOpenStack CLI
Steps to Configure the VXLAN Gateway Interfaces Using the OpenStack CLI
Before You Begin
Create one or more port profiles in the VSM. For more information, see Configuring a Port Profile for theUplink on the VXLAN Gateway, on page 38 and Configuring a Port Profile for the VTEP on the VXLANGateway, on page 40.
Procedure
PurposeCommand or Action
—If you have not already done so, log in to theOpenStack CLI as a user with adminprivileges.
Step 1
For details, see Creating the VXLANGatewayData Interface, on page 47.
Create the VXLAN Gateway data interface.Step 2
For details, see Creating a VXLAN GatewayManagement Interface, on page 48.
Create theVXLAN Gateway managementinterface.
Step 3
For details, see Booting a VXLAN GatewayVM, on page 46.
Boot the VXLAN Gateway VM.Step 4
Creating the VXLAN Gateway Data Interface
Procedure
PurposeCommand or Action
Creates a network using the network profile.neutron net-create network_nameStep 1
Creates a subnet for the network profile.neutron subnet-createnetwork_name cidr_blocks --namesubnet_name --disable-dhcp
Step 2
Although you configure the VXLANGateway datainterface manually, the create-subnet commandstill requires that you specify an IP address block.However, this value is not used and is ignored.
Note
Lists the policy profiles available in neutron.neutron cisco-policy-profile-listStep 3
Creates a trunk port. For network_name, specify the nameof the network that you created in Step 3. For
neutron port-create network_namen1kv:profilecisco_policy_profile_id
Step 4
Cisco Nexus 1000V for KVM Installation Guide, Release 5.2(1)SK3(1.1) 47
Installing and Configuring the VXLAN GatewayConfiguring the VXLAN Gateway Data and Management Interfaces Using the OpenStack CLI

PurposeCommand or Action
cisco_policy_profile_id, specify the profile with the modetrunk from the list of available profiles obtained in Step 3.
To create a second instance of the VXLANGatewayvirtual machine (for example, for an HA pair),perform this step again.
Note
Creating a VXLAN Gateway Management Interface
Procedure
PurposeCommand or Action
Creates an access network.neutron net-create network_nameStep 1
Creates a subnet for the access networksegment profile.
neutron subnet-create network_namecidr_blocks --name subnet_name
Step 2
Lists the policy profiles available in Neutron.neutron cisco-policy-profile-listStep 3
Creates an access port. Use a Cisco policyprofile ID from the list of available profileslisted in Step 5.
neutron port-create network_namen1kv:profile cisco_policy_profile_id
Step 4
Booting a VXLAN Gateway VMYou must manually launch a VM instance using the OpenStack CLI.
Procedure
PurposeCommand or Action
nova boot --image image_id --flavor 3 --nic port-id=trunk_port-id --nic port-id= access_port-id vxlan_gateway_name
In this command, you must specify the first NIC as atrunk port and the second NIC as an access port. Also,you must specify flavor 3 (m1.medium), because flavor3 provides the two vCPUs that the VM requires.
Note
Launch the VXLANGatewayVM.
Step 1
nova listList the active servers.Step 2
Cisco Nexus 1000V for KVM Installation Guide, Release 5.2(1)SK3(1.1)48
Installing and Configuring the VXLAN GatewayConfiguring the VXLAN Gateway Data and Management Interfaces Using the OpenStack CLI

Example of VXLAN Gateway Interface ConfigurationThis example shows how to configure a VXLAN Gateway VM with a trunk network profile named aug-netand a VLAN network profile named test-2.root@server:~# neutron cisco-credential-create 172.23.181.101 n1kv --tenant-id1234-1234-1234-1234 --user_name admin --password mypwdroot@server:~# neutron cisco-network-profile-create aug-net-prof trunk sub_type vlanroot@server:~# neutron net-create aug-net --n1kv:profile_id999e6dc-7a55-4c4a-839e-9aa22957ba99root@server:~# neutron subnet-create aug-net 110.10.10.0/24 --name augsubnet --disable-dhcproot@server:~# neutron cisco-policy-profile-list+--------------------------------------+---------------+| id | name |+--------------------------------------+---------------+| 0dc6bb6d-2929-466f-abed-6e4c0f25c3be | test-prof || 4c4455e5-95d6-4185-80a1-a028e27fc8bd | trk-policy || 63964f53-178c-440a-8f09-301ce021498d | acc-policy || 652fbfd7-0c40-41d0-bc34-5a0fda4b2ca7 | dhcp_pp || 964fb14c-59cc-48d4-a4d4-abc52965fb7c | q-n1kv-policy |+--------------------------------------+---------------+root@server:~# neutron port-create aug-net --n1kv:profile_id4c4455e5-95d6-4185-80a1-a028e27fc8bdroot@server:~# neutron cisco-network-profile-create test2 vlan --segment_range 400-499--physical_network q-n1kroot@server:~# neutron net-create q-n1k --n1kv:profile_id 2e464910-f452-4865-9793-6bd70a4c0cf6root@server:~# neutron subnet-create q-n1k 110.10.10.0/24 --name q-110.10.10.0/24root@server:~# neutron cisco-policy-profile-list+--------------------------------------+---------------------------+| id | name |+--------------------------------------+---------------------------+| 5cdd9b93-c109-4455-a740-746a9d59c340 | NSM_template_vlan || 691b2497-b435-495a-b140-e3ebe0835e75 | test-2 || 7fc8d34b-cadd-4ca0-a85c-e18aecedd308 | NSM_template_segmentation || 83cc0410-7781-42b5-abb1-3b00921bfcc5 | test-1 |+--------------------------------------+---------------------------+root@server:~# neutron port-create q-n1k --n1kv:profile_id99cc0410-7781-42b5-abb1-3b00921bfcc5root@server:~# nova boot --image vxlan-gateway --flavor 3 --nicport-id=d341926c-21ca-48cd-ae18-c51f899f6d3froot@server:~#
Configuring High Availability
VXLAN Gateway and High AvailabilityThe operation of high availability (HA) involves the following terminology:
• Cluster—A cluster is a pair of gateway modules that operate together as a single HA module. Eachcluster is distinguished by a unique cluster ID. A gateway module that is deployed in a standalone modeof operation is assigned a dummy cluster ID of 0.
• HA role—The gatewaymodules that make up anHA cluster are assigned separate roles. One is designatedas primary and the other as secondary. This role decides which of the two modules goes to active statefirst and which stays in a standby state. These states persist until the active module fails. In the event ofany failure in the active gateway module, the standby gateway module detects the failure and moves tothe active state. This way, one of the two modules is always providing active service.
• HA state—At any given time, only one gateway module from a given cluster is actively performing thegateway function. The other module stays in the standby state pending the failure of the active module.
Cisco Nexus 1000V for KVM Installation Guide, Release 5.2(1)SK3(1.1) 49
Installing and Configuring the VXLAN GatewayConfiguring High Availability
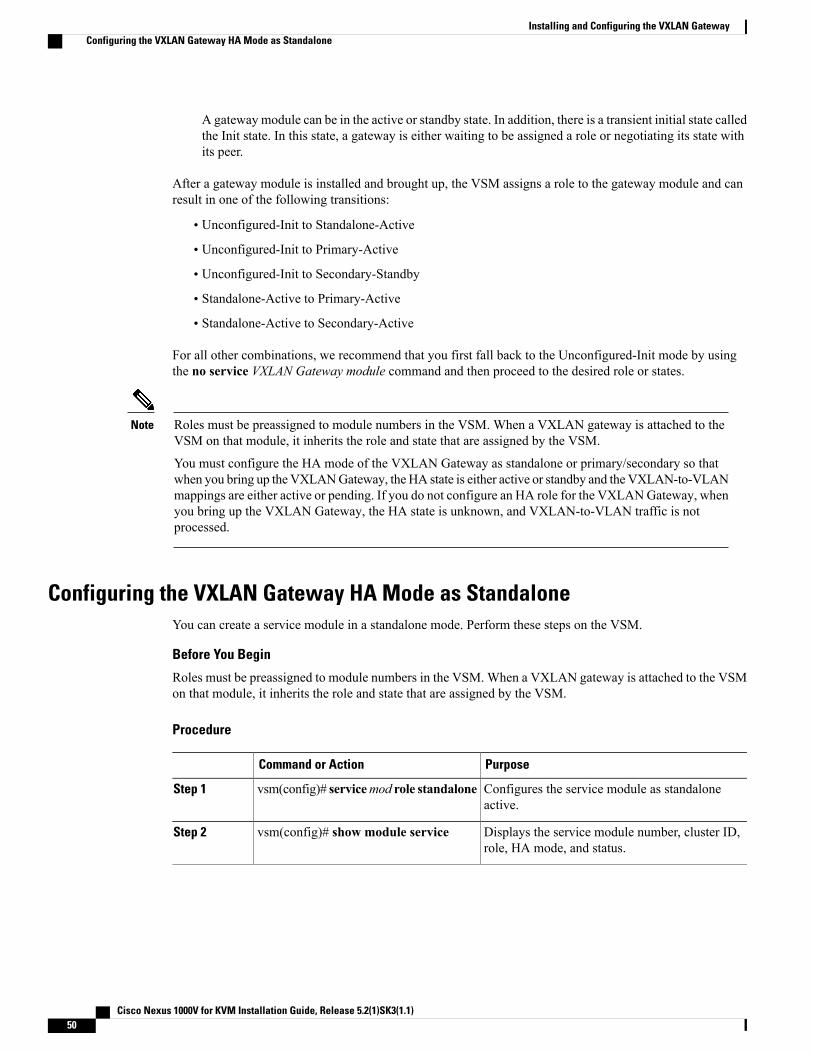
A gateway module can be in the active or standby state. In addition, there is a transient initial state calledthe Init state. In this state, a gateway is either waiting to be assigned a role or negotiating its state withits peer.
After a gateway module is installed and brought up, the VSM assigns a role to the gateway module and canresult in one of the following transitions:
• Unconfigured-Init to Standalone-Active
• Unconfigured-Init to Primary-Active
• Unconfigured-Init to Secondary-Standby
• Standalone-Active to Primary-Active
• Standalone-Active to Secondary-Active
For all other combinations, we recommend that you first fall back to the Unconfigured-Init mode by usingthe no service VXLAN Gateway module command and then proceed to the desired role or states.
Roles must be preassigned to module numbers in the VSM. When a VXLAN gateway is attached to theVSM on that module, it inherits the role and state that are assigned by the VSM.
You must configure the HA mode of the VXLAN Gateway as standalone or primary/secondary so thatwhen you bring up theVXLANGateway, the HA state is either active or standby and theVXLAN-to-VLANmappings are either active or pending. If you do not configure an HA role for the VXLANGateway, whenyou bring up the VXLAN Gateway, the HA state is unknown, and VXLAN-to-VLAN traffic is notprocessed.
Note
Configuring the VXLAN Gateway HA Mode as StandaloneYou can create a service module in a standalone mode. Perform these steps on the VSM.
Before You Begin
Roles must be preassigned to module numbers in the VSM. When a VXLAN gateway is attached to the VSMon that module, it inherits the role and state that are assigned by the VSM.
Procedure
PurposeCommand or Action
Configures the service module as standaloneactive.
vsm(config)# servicemod role standaloneStep 1
Displays the service module number, cluster ID,role, HA mode, and status.
vsm(config)# show module serviceStep 2
Cisco Nexus 1000V for KVM Installation Guide, Release 5.2(1)SK3(1.1)50
Installing and Configuring the VXLAN GatewayConfiguring the VXLAN Gateway HA Mode as Standalone

This example shows how to display the cluster IDmapping and the details about active, standby, and standaloneservice modules:vsm(config)# show module serviceMod Cluster-id Role HA Mode Status--- ---------- ----------- ---------- -------36 0 Standalone Standalone Active
Configuring the VXLAN Gateway as an HA PairYou can create a service module as a HA pair. Perform these steps on the VSM.
Before You Begin
You must create a second instance of the VXLAN Gateway VM.
Procedure
PurposeCommand or Action
Configures the service module in HA and adds aprimary service module to a cluster.
vsm(config)# servicemodNo1 role primaryha-cluster clusterNo
Step 1
Configures another service module as secondaryin the same cluster.
vsm(config)# service modNo2 rolesecondary ha-cluster clusterNo
Step 2
Displays the service module number, cluster ID,role, HA mode, and status.
vsm(config)# showmodule service-moduleStep 3
This example shows how to display the cluster IDmapping and the details about active, standby, and standaloneservice modules:vsm(config)# show module serviceMod Cluster-id Role HA Mode Status--- ---------- ----------- ---------- -------9 1 Primary HA Active10 1 Secondary HA Standby
To switch over between the active and standby VXLAN gateway, enter the following command on the VSM:vsm# service ha-cluster <1-8> switchover
Managing the VXLAN-to-VLAN Mappings on the VXLANGateway
The VLAN-to-VXLAN mappings that are configured on a gateway module can be managed by editing theport profile applied on the gateway uplink modules. To add or remove a mapping, perform these steps on theVSM.
Cisco Nexus 1000V for KVM Installation Guide, Release 5.2(1)SK3(1.1) 51
Installing and Configuring the VXLAN GatewayConfiguring the VXLAN Gateway as an HA Pair

Procedure
PurposeCommand or Action
Enters global configuration mode.vsm# configure terminalStep 1
Creates an encapsulation profile to contain theVLAN-to-VXLAN mappings.
vsm(config)# encapsulation profilesegment name
Step 2
Maps a VLAN to a VXLAN. The VXLAN is specifiedthrough the bridge-domain name.
vsm(config-vxlan-encap-prof)#dot1q VLAN-ID bridge-domainbd-name
Step 3
The bridge-domain name and VLAN ID that youprovide are not created during the port-profileconfiguration. The bridge-domain name and theVLAN ID that you provide should be in an activestate or the mapping is held in an inactive stateuntil you create the bridge-domain name andVLAN ID.
Note
Repeat this step to specify additionalmappings.
Note
To remove a mapping, use the no form of thiscommand.
Note
Exits the current configuration mode.vsm(config-vxlan-encap-prof)# exitStep 4
Specifies the name of the port-profile applied to the VXLANGateway uplink interface.
vsm(config)# port-profileport-profile-name
Step 5
Defines a place holder for mappings. The range is from 1to 4096.
vsm(config-port-prof)# serviceinstance 1 to 4096
Step 6
Port profiles that contain the service instancekeyword cannot be used for a non-VXLANgateway module.
Note
Assigns the specified encapsulation profile to the portprofile.
vsm(config-port-prof-srv)#encapsulation profile name
Step 7
Saves the change persistently through reboots and restartsby copying the running configuration to the startupconfiguration.
vsm(config-port-prof-srv)# copyrunning-config startup-config
Step 8
This example shows how to configure VXLAN-to-VLAN mappings on the VXLAN gateway:
vsm# configure terminalvsm(config)# encapsulation profile segment mgmt_mappingsvsm(config-vxlan-encap-prof)# dot1q 1555 bridge-domain vxlan6000vsm(config-vxlan-encap-prof)# dot1q 1557 bridge-domain vxlan6002vsm(config-vxlan-encap-prof)# dot1q 1558 bridge-domain vxlan6003vsm(config-vxlan-encap-prof)# dot1q 1559 bridge-domain vxlan6004vsm(config-vxlan-encap-prof)# exitvsm(config)# port-profile Uplink-All-VXGWvsm(config-port-prof)# service instance 2
Cisco Nexus 1000V for KVM Installation Guide, Release 5.2(1)SK3(1.1)52
Installing and Configuring the VXLAN GatewayManaging the VXLAN-to-VLAN Mappings on the VXLAN Gateway

vsm(config-port-prof)# encapsulation profile mgmt_mappingsvsm(config-prot-prof-srv)# copy running-config startup-configvsm(config)# show run port-profile Uplink-All-VXGWport-profile type ethernet Uplink-All-VXGWswitchport mode trunkswitchport trunk allowed vlan 1545-1575,1577-1605mtu 1550service instance 2encapsulation dot1q 1555 bridge-domain vxlan6000encapsulation dot1q 1557 bridge-domain vxlan6002encapsulation dot1q 1558 bridge-domain vxlan6003encapsulation dot1q 1559 bridge-domain vxlan6004no shutdownstate enabled
vsm(config)# show port-profile usageport-profile Uplink-All-VXGWport-channel1port-channel5Ethernet7/1Ethernet7/3vsm(config)# show run interface ethernet 7/1 expand-port-profileinterface Ethernet7/1switchport mode trunkswitchport trunk allowed vlan 1545-1575,1577-1605mtu 1550channel-group auto mode activeservice instance 2no shutdownencapsulation dot1q 1557 bridge-domain vxlan6002encapsulation dot1q 1555 bridge-domain vxlan6000encapsulation dot1q 1558 bridge-domain vxlan6003no shutdown
Verifying the VXLAN Gateway ConfigurationTo display the VXLAN gateway (GW) installation and configuration information, perform one of the followingtasks on the VSM:
PurposeCommand
Displays the configuration of the port profileassigned to the VXLAN gateway uplinks.
show running-config port-profile gw-uplink
Displays the configuration of the port profileassigned to the VXLAN VTEP.
show running-config port-profile gw-vtep
Displays the VXLAN gateway servicemodules.show module
Verifies the role of the VXLANgatewaymoduleand displays the cluster ID mapping and thedetails about active, standby, and standaloneservice modules.
show module service
Displays if the VTEPs are configured properly.show vxlan gateway interface
Displays if both the VTEP Virtual Ethernetinterfaces are in up state.
show interface vethernet 6
Cisco Nexus 1000V for KVM Installation Guide, Release 5.2(1)SK3(1.1) 53
Installing and Configuring the VXLAN GatewayVerifying the VXLAN Gateway Configuration

PurposeCommand
Displays if the port channels are up for gatewayservice modules.
show port-channel summary
Displays VXLAN gateway mappings.show bridge-domain mappings
Displays if the VSM is in Advanced mode.show switch edition
Displays if the VXLAN gateway is enabled onthe VSM.
show feature
Displays the status of theVXLANgatewayVSBas it transitions from the VSB DEPLOY INPROGRESS to VSB POWERED ON.
show virtual-service-blade summaryYou must enter this command from the CloudServices Platform.
Note
Displays the VXLAN Gateway configuration.show virtual-service-blade
You must enter this command from the CloudServices Platform.
Note
Displays the VLAN-to-VXLAN mappings forall encapsulation profiles or for the specifiedencapsulation profile.
show encapsulation profile
This example shows how to display the status of the VXLAN gateway VSB:CSP# show virtual-service-blade summary
-------------------------------------------------------------------------------Name HA-Role HA-Status Status Location-------------------------------------------------------------------------------VXLAN-GW PRIMARY ACTIVE VSB POWERED ON PRIMARYVXLAN-GW SECONDARY ACTIVE VSB POWERED ON SECONDARY
This example shows how to display the VXLAN gateway configuration:CSP# show virtual-service-bladevirtual-service-blade VXLAN-GWDescription:Slot id: 1Host Name: VXLAN-GW-DOCSManagement IP: 192.168.1.104VSB Type Name : vx-gw-1.5Configured vCPU: 3Operational vCPU: 3Configured Ramsize: 2048Operational Ramsize: 2048Disksize: 3Heartbeat: 154764
Legends: P - Passthrough--------------------------------------------------------------------------Interface Type MAC VLAN State Uplink-Int
Pri Sec Oper Adm--------------------------------------------------------------------------VsbEthernet1/1 gw-uplink1 0002.3d71.a303 up up Gi3(P) Gi3(P)VsbEthernet1/2 management 0002.3d71.a302 751 up up Gi1 Gi1VsbEthernet1/3 gw-uplink2 0002.3d71.a304 up up Gi4(P) Gi4(P)
internal NA NA NA up upHA Role: Primary
Cisco Nexus 1000V for KVM Installation Guide, Release 5.2(1)SK3(1.1)54
Installing and Configuring the VXLAN GatewayVerifying the VXLAN Gateway Configuration

HA Status: ACTIVEStatus: VSB POWERED ONLocation: PRIMARYSW version:
HA Role: SecondaryHA Status: ACTIVEStatus: VSB POWERED ONLocation: SECONDARYSW version:
VSB Info:Domain ID : 405
This example shows how to display the port-profile configuration assigned to the VXLAN Gateway uplinks:vsm# show running-config port-profile gw-uplink
port-profile type ethernet gw-uplinkswitchport mode trunkswitchport trunk allowed vlan 1,81,751-760mtu 1550channel-group auto mode activeno shutdownstate enabled
This example shows how to display the port-profile configuration assigned to the VXLAN VTEP:vsm# show running-config port-profile gw-vtep
port-profile type vethernet gw-vtepswitchport mode accessswitchport access vlan 760capability vxlantransport ip address 182.168.1.253 255.255.255.0 gateway 182.168.1.1no shutdownstate enabled
This example shows how to display the VXLAN Gateway service modules as soon as they are online:vsm# show moduleMod Ports Module-Type Model Status--- ----- -------------------------------- ------------------ ------------1 0 Virtual Supervisor Module Nexus1000V ha-standby2 0 Virtual Supervisor Module Nexus1000V active *11 332 Virtual Ethernet Module NA ok18 332 Virtual Ethernet Module NA ok20 13 Virtual Service Module VXLAN Gateway ok21 13 Virtual Service Module VXLAN Gateway ok22 13 Virtual Service Module VXLAN Gateway ok
Mod Sw Hw--- ------------------ ------------------------------------------------1 5.2(1)SK1(2.1) 0.02 5.2(1)SK1(2.1) 0.011 5.2(1)SK1(2.1) Linux 3.2.0-23-generic18 5.2(1)SK1(2.1) Linux 3.8.0-29-generic20 5.2(1)SK1(2.1) Linux 2.6.27.1021 5.2(1)SK1(2.1) Linux 2.6.27.1022 5.2(1)SK1(2.1) Linux 2.6.27.10
Mod Server-IP Server-UUID Server-Name--- --------------- ------------------------------------ --------------------1 192.0.2.166 NA NA2 192.0.2.166 NA NA11 192.0.2.147 47DE0F4A-8072-0E4D-A218-84A2C058FF3C vxlan-gw-ubuntu18 192.0.2.54 EE04B285-6BA6-5642-AC8E-EDB12D07811B vxlan-gw-ubuntu220 192.0.2.90 7a4f6171-3235-4fd2-9797-80149df55171 ab-vxgw-111021 192.0.2.53 48ad3898-401f-4377-8de1-dcfa22df78ec VxLanGW22 192.0.2.55 5a996a7e-fa85-4630-89e5-18a3a3b413b8 VxLanGW* this terminal session
Cisco Nexus 1000V for KVM Installation Guide, Release 5.2(1)SK3(1.1) 55
Installing and Configuring the VXLAN GatewayVerifying the VXLAN Gateway Configuration

This example shows how to display the cluster IDmapping and the details about active, standby, and standaloneservice modules:vsm# show module serviceMod Cluster-id Role HA Mode Status--- ---------- ----------- ---------- -------9 1 Primary HA Active10 1 Secondary HA Standby
This example shows how to display the module for virtual Ethernet interface binding:vsm(config-if)# show vxlan gateway interface-----------------------------------------------------------------Port IPAddress Netmask Gateway Mod Status Role-----------------------------------------------------------------Veth6 192.0.2.253 255.255.255.0 192.168.1.1 9 up ActiveVeth22 192.0.2.253 255.255.255.0 192.168.1.1 10 up Standby
This example shows how to display whether both the VTEP virtual Ethernet interfaces are in up state:vsm# show interface vethernet 6Vethernet6 is upPort description is VXLANGW VTEP, Network Adapter 1Hardware: Virtual, address: 0002.3d71.a303 (bia 0002.3d71.a303)Owner is VM "VXLANGW VTEP", adapter is Network Adapter 1Active on module 9Port-Profile is gw-vtepPort mode is access5 minute input rate 8 bits/second, 0 packets/second5 minute output rate 0 bits/second, 0 packets/secondRx6 Input Packets 6 Unicast Packets0 Multicast Packets 588 Broadcast Packets468 Bytes
Tx34321 Output Packets 34321 Unicast Packets33609 Multicast Packets 24 Broadcast Packets 33633 Flood Packets2193700 Bytes0 Input Packet Drops 0 Output Packet Drops
vsm# show interface vethernet 22Vethernet22 is upPort description is VXLANGW VTEP, Network Adapter 1Hardware: Virtual, address: 0002.3d71.a383 (bia 0002.3d71.a383)Owner is VM "VXLANGW VTEP", adapter is Network Adapter 1Active on module 10Port-Profile is gw-vtepPort mode is access5 minute input rate 8 bits/second, 0 packets/second5 minute output rate 0 bits/second, 0 packets/secondRx6 Input Packets 6 Unicast Packets0 Multicast Packets 25 Broadcast Packets468 Bytes
Tx33742 Output Packets 33742 Unicast Packets33609 Multicast Packets 133 Broadcast Packets 33742 Flood Packets2158956 Bytes0 Input Packet Drops 0 Output Packet Drops
This example shows how to display whether the port channels are up for VXLAN Gateway service modules:vsm# show port-channel summaryFlags: D - Down P - Up in port-channel (members)
I - Individual H - Hot-standby (LACP only)s - Suspended r - Module-removedS - Switched R - RoutedU - Up (port-channel)
--------------------------------------------------------------------------------Group Port- Type Protocol Member Ports
Channel--------------------------------------------------------------------------------
Cisco Nexus 1000V for KVM Installation Guide, Release 5.2(1)SK3(1.1)56
Installing and Configuring the VXLAN GatewayVerifying the VXLAN Gateway Configuration

1 Po1(SU) Eth NONE Eth3/3(P) Eth3/4(P) Eth3/5(P)Eth3/6(P)
2 Po2(SU) Eth NONE Eth4/3(P) Eth4/4(P) Eth4/5(P)Eth4/6(P)
3 Po3(SU) Eth NONE Eth5/3(P) Eth5/4(P) Eth5/5(P)Eth5/6(P)
4 Po4(SU) Eth NONE Eth6/3(P) Eth6/4(P) Eth6/5(P)Eth6/6(P)
5 Po5(SU) Eth NONE Eth7/3(P) Eth7/4(P) Eth7/5(P)Eth7/6(P)
6 Po6(SU) Eth NONE Eth8/4(P)7 Po7(SU) Eth LACP Eth9/1(P) Eth9/3(P)8 Po8(SU) Eth LACP Eth10/1(P) Eth10/3(P)
This example shows how to display VXLAN Gateway mappings:vsm# show bridge-domain mappings-------------------------------------------------------------------------------Interface Module Serv Inst Vlan BD-Name-------------------------------------------------------------------------------port-channel7 9 753 753 bd-753port-channel8 10 753 753 bd-753
This example shows how to display the IP address for module binding:vsm(config-if)# show module service mgmt-int--------------------------------------------------------------------------------Mod Interface-Name IP-address Speed MTU--------------------------------------------------------------------------------4 Mgmt0 10.10.10.2 0 05 Mgmt0 10.10.10.3 0 0Remember the management IP address user installs gateway with(in this example 10.10.10.2, which occupies module slot 4)
This example shows how to display whether the VSM is in Advanced mode:vsm# show switch editionSwitch Edition: Advanced
Advanced FeaturesFeature Name Feature State-----------------------------vxlan-gateway enabled
Licenses Available: 1020Licenses In Use: 4License Expiry Date: 13 Jun 2013
This example shows how to display whether the VXLAN Gateway is enabled on the VSM:vsm# show featureFeature Name Instance State-------------------- -------- --------cts 1 enableddhcp-snooping 1 enabledhttp-server 1 enabledlacp 1 enablednetflow 1 disablednetwork-segmentation 1 enabledport-profile-roles 1 disabledprivate-vlan 1 disabledsegmentation 1 enabledsshServer 1 enabledtacacs 1 disabledtelnetServer 1 disabledvtracker 1 enabledvxlan-gateway 1 enabled
Cisco Nexus 1000V for KVM Installation Guide, Release 5.2(1)SK3(1.1) 57
Installing and Configuring the VXLAN GatewayVerifying the VXLAN Gateway Configuration

Perform one of the following tasks on the VXLANGateway. If your VSM is on Layer 3 through managementand your gateway is also on the same management subnet, use the attach module service module numbercommand to acces the gateway CLI. If your VSM is on Layer 3 through control, you can access the gatewayCLI from any machine on that control subnet. This example shows the VSM which is on Layer 3 control.
PurposeCommand
Displays the high availability status.show redundancy config
This example shows how to display the HA status:gw# show redundancy config
HA Manager Node Information:
Cluster Node Count: 2
Local Node:state : ActiveHA mode : High Availabilityuuid : 56fa6753-4dc5-4a7d-ad07-cc817114f838cluster_id : 1node_priority : 2node_type : VXLAN Gatewayipaddr [mgmt] : 192.168.1.104
Peer Node 1:state : Standbyuuid : 4cbd05df-b3e5-468a-9497-89aa3fae8153node_type : VXLAN Gatewayipaddr [mgmt] : 192.168.1.105
This example shows how to display the VLAN-to-VXLAN mappings for all encapsulation profiles:
gw# show encapsulation profile
-------------------------------------------------------------------------------Vlan Bridge-domain-------------------------------------------------------------------------------2100 segment50502055 segment50312056 segment50322057 segment50332058 segment5034
Cisco Nexus 1000V for KVM Installation Guide, Release 5.2(1)SK3(1.1)58
Installing and Configuring the VXLAN GatewayVerifying the VXLAN Gateway Configuration

A P P E N D I X ASample Global Configuration File
This appendix contains the following section:
• Sample Global Configuration File, page 59
Sample Global Configuration Filequantum-gateway:plugin: n1kvext-port: eth1openstack-origin: ppa:cisco-n1kv/icehouse-updates
nova-cloud-controller:network-manager: Neutronopenstack-origin: ppa:cisco-n1kv/icehouse-updatesquantum-plugin: n1kvn1kv-vsm-username: adminn1kv-vsm-password: Abc123n1kv-vsm-ip: 192.0.2.164config-flags: instance_name_template='%(user_id)s-%(display_name)s’
Glance:openstack-origin: distroKeystone:admin-password: openstackopenstack-origin: distro
nova-compute:enable-live-migration: Truemigration-auth-type: noneopenstack-origin: ppa:cisco-n1kv/icehouse-updatesvirt-type: kvmconfig-flags:
auto_assign_floating_ip=True,compute_driver=libvirt.LibvirtDriver,instance_name_template='%(user_id)s-%(display_name)s’openstack-dashboard:openstack-origin: ppa:cisco-n1kv/icehouse-updatesprofile: cisco
Vem:n1kv-source: ppa:cisco-n1kv/n1kv-updatesn1kv-vsm-ip: 192.0.2.164n1kv-vsm-domain-id: 500uplink_profile: phys eth1 profile sys-uplinkhost_mgmt_intf: br0
vxlan-gateway:n1kv-source: ppa:cisco-n1kv/n1kv-updates
vsm-p:n1kv-source: ppa:cisco-n1kv/n1kv-updatesn1kv-vsm-domain-id: 500n1kv-vsm-password: Abc123n1kv-vsm-mgmt-ip: 192.0.2.164
Cisco Nexus 1000V for KVM Installation Guide, Release 5.2(1)SK3(1.1) 59

n1kv-phy-intf-bridge: eth2n1kv-vsm-mgmt-gateway: 192.0.2.161n1kv-vsm-mgmt-netmask: 255.255.255.224n1kv-vsm-role: primaryn1kv-vsm-name: vsm-p
vsm-s:n1kv-source: ppa:cisco-n1kv/n1kv-updatesn1kv-vsm-domain-id: 500n1kv-vsm-password: Abc123n1kv-phy-intf-bridge: eth2n1kv-vsm-role: secondaryn1kv-vsm-name: vsm-s
Cisco Nexus 1000V for KVM Installation Guide, Release 5.2(1)SK3(1.1)60
Sample Global Configuration FileSample Global Configuration File
A P P E N D I X BSetup Script
This appendix contains the following section:
• Setup Script, page 61
Setup ScriptYou can use the following setup script to deploy a small Cisco Nexus 1000V for KVM with OpenStackenvironment for testing purposes.#Deploy Openstack Servicesjuju deploy mysqljuju deploy rabbitmq-serverjuju deploy --config ./openstack.yaml keystonejuju deploy --config ./openstack.yaml --repository=. local:trusty/nova-cloud-controllerjuju deploy --config ./openstack.yaml glancejuju deploy --config ./openstack.yaml --repository=. local:trusty/openstack-dashboardjuju deploy --config ./openstack.yaml --repository=. local:trusty/nova-compute -n 2juju deploy --config ./openstack.yaml --repository=. local:trusty/quantum-gateway# Deploy VEMjuju deploy --config ./openstack.yaml --repository=. local:trusty/vem#Deploy VXGWjuju deploy --config ./openstack.yaml --repository=. local:trusty/vxlan-gateway#Deploy VSM HAjuju deploy --config ./openstack.yaml --repository=. local:trusty/vsm vsm-pjuju deploy --config ./openstack.yaml --repository=. local:trusty/vsm vsm-s
#ADDING RELATIONSjuju add-relation keystone mysqljuju add-relation nova-cloud-controller mysqljuju add-relation nova-cloud-controller rabbitmq-serverjuju add-relation nova-cloud-controller glancejuju add-relation nova-cloud-controller keystonejuju add-relation nova-compute mysqljuju add-relation nova-compute:amqp rabbitmq-server:amqpjuju add-relation nova-compute glancejuju add-relation nova-compute nova-cloud-controllerjuju add-relation glance mysqljuju add-relation glance keystonejuju add-relation openstack-dashboard keystonejuju add-relation quantum-gateway mysqljuju add-relation quantum-gateway nova-cloud-controllerjuju add-relation quantum-gateway rabbitmq-server# VEM is a subordinate charm so we need to add relation to deplOy the VEM on compute andnetwork nodesjuju add-relation nova-compute vem
Cisco Nexus 1000V for KVM Installation Guide, Release 5.2(1)SK3(1.1) 61
juju add-relation quantum-gateway vemjuju add-relation nova-cloud-controller vxlan-gateway
Cisco Nexus 1000V for KVM Installation Guide, Release 5.2(1)SK3(1.1)62
Setup ScriptSetup Script

I N D E X
C
charms 16Nova Cloud Controller 16OpenStack 16OpenStack Horizon 16Quantum Gateway 16
Cisco Nexus 1000V for KVM 1, 29definition 1installing 29
Cloud Services Platform 31config.yaml file 3configuration 3
files 3configuring 40
VXLAN 40Termination 40
Configuring 50, 51High 50
Availability 50VXLAN 51
VLAN 51Mappings 51
D
data interface 47VXLAN Gateway 47
deployment models 7, 8physical 7supported 7virtual machines 8
F
files 3configuration 3
G
global configuration file 3, 59sample 59
H
HA 49VXLAN Gateway 49
high availability 49VXLAN Gateway 49
host-mapping file 3
I
installation 25end-to-end steps 25
installation process 1installing using Juju charms 29
VXLAN Gateway 29
J
Juju 1definition 1
Juju node 4
M
MAAS 1, 4, 26configuring 26definition 1installing 26nodes 4
MAAS server node 4management interface 48
VXLAN Gateway 48
Cisco Nexus 1000V for KVM Installation Guide, Release 5.2(1)SK3(1.1) IN-1

mapping file 3Metal as a Service 1
definition 1
N
network nodes 4network profile 43, 44
trunk 43VLAN 44
networking requirements 11networks 43, 45, 47
creating 45virtual 43, 47
Nexus 1010 31Nexus 1110 31Nexus Cloud Services Platform 31nodes 4
Juju 4MAAS 4Nova compute 4OpenStack 4types 4VSM 4
Nova Cloud Controller charm 16Nova compute nodes 4
O
OpenStack 1definition 1
OpenStack charms 16OpenStack Horizon charm 16OpenStack service node 4
P
physical deployment model 7prerequisites 11, 12
networking 11servers 12
Q
Quantum Gateway charm 16
S
servers 12required 12
subnet 45
T
topologies 7supported 7
V
VEM 29installing 29
verifying the 53VXLAN 53
Gateway 53Installation 53
Configuration 53virtual machine deployment model 8virtual networks 43, 47VLAN 43, 44
network profile 43, 44VM 41
installing VXLAN Gateway as 41VMs 46, 48
VXLAN gateway 46, 48VSM 29, 31
installing on Nexus Cloud Services Platform 31installing using Canonical 29
VSM node 4VXLAN gateway 46, 48
booting VM 46, 48VXLAN Gateway 29, 41, 47, 48, 49
data interface 47HA mode 49installing as a VM 41installing using Juju charms 29management interface 48
Cisco Nexus 1000V for KVM Installation Guide, Release 5.2(1)SK3(1.1)IN-2
Index