Embed Size (px)
Citation preview

Cisco Finesse Administration Guide, Release 12.0(1)First Published: 2019-01-11
Last Modified: 2020-07-02
Americas HeadquartersCisco Systems, Inc.170 West Tasman DriveSan Jose, CA 95134-1706USAhttp://www.cisco.comTel: 408 526-4000
800 553-NETS (6387)Fax: 408 527-0883

THE SPECIFICATIONS AND INFORMATION REGARDING THE PRODUCTS IN THIS MANUAL ARE SUBJECT TO CHANGE WITHOUT NOTICE. ALL STATEMENTS,INFORMATION, AND RECOMMENDATIONS IN THIS MANUAL ARE BELIEVED TO BE ACCURATE BUT ARE PRESENTED WITHOUT WARRANTY OF ANY KIND,EXPRESS OR IMPLIED. USERS MUST TAKE FULL RESPONSIBILITY FOR THEIR APPLICATION OF ANY PRODUCTS.
THE SOFTWARE LICENSE AND LIMITED WARRANTY FOR THE ACCOMPANYING PRODUCT ARE SET FORTH IN THE INFORMATION PACKET THAT SHIPPED WITHTHE PRODUCT AND ARE INCORPORATED HEREIN BY THIS REFERENCE. IF YOU ARE UNABLE TO LOCATE THE SOFTWARE LICENSE OR LIMITED WARRANTY,CONTACT YOUR CISCO REPRESENTATIVE FOR A COPY.
The Cisco implementation of TCP header compression is an adaptation of a program developed by the University of California, Berkeley (UCB) as part of UCB's public domain version ofthe UNIX operating system. All rights reserved. Copyright © 1981, Regents of the University of California.
NOTWITHSTANDING ANY OTHERWARRANTY HEREIN, ALL DOCUMENT FILES AND SOFTWARE OF THESE SUPPLIERS ARE PROVIDED “AS IS" WITH ALL FAULTS.CISCO AND THE ABOVE-NAMED SUPPLIERS DISCLAIM ALL WARRANTIES, EXPRESSED OR IMPLIED, INCLUDING, WITHOUT LIMITATION, THOSE OFMERCHANTABILITY, FITNESS FOR A PARTICULAR PURPOSE AND NONINFRINGEMENT OR ARISING FROM A COURSE OF DEALING, USAGE, OR TRADE PRACTICE.
IN NO EVENT SHALL CISCO OR ITS SUPPLIERS BE LIABLE FOR ANY INDIRECT, SPECIAL, CONSEQUENTIAL, OR INCIDENTAL DAMAGES, INCLUDING, WITHOUTLIMITATION, LOST PROFITS OR LOSS OR DAMAGE TO DATA ARISING OUT OF THE USE OR INABILITY TO USE THIS MANUAL, EVEN IF CISCO OR ITS SUPPLIERSHAVE BEEN ADVISED OF THE POSSIBILITY OF SUCH DAMAGES.
Any Internet Protocol (IP) addresses and phone numbers used in this document are not intended to be actual addresses and phone numbers. Any examples, command display output, networktopology diagrams, and other figures included in the document are shown for illustrative purposes only. Any use of actual IP addresses or phone numbers in illustrative content is unintentionaland coincidental.
All printed copies and duplicate soft copies of this document are considered uncontrolled. See the current online version for the latest version.
Cisco has more than 200 offices worldwide. Addresses and phone numbers are listed on the Cisco website at www.cisco.com/go/offices.
Cisco and the Cisco logo are trademarks or registered trademarks of Cisco and/or its affiliates in the U.S. and other countries. To view a list of Cisco trademarks, go to this URL: www.cisco.comgo trademarks. Third-party trademarks mentioned are the property of their respective owners. The use of the word partner does not imply a partnership relationship between Cisco and anyother company. (1721R)
© 2010–2019 Cisco Systems, Inc. All rights reserved.

C O N T E N T S
Preface xiP R E F A C E
Change History xi
About This Guide xiii
Audience xiii
Related Documents xiv
Communications, Services, and Additional Information xiv
Field Notice xiv
Documentation Feedback xv
Conventions xv
Getting Started 1C H A P T E R 1
User Accounts 1
Administration Tools 1
Cisco Finesse Administration Console 1
Sign In to Cisco Finesse Administration Console 2
CLI 4
Cisco Unified Communications Operating System Administration 4
Sign In to Cisco Unified Communications Operating System Administration 5
Certificate Management 5
Server-Side Certificate Management 5
Obtain and Upload CA Certificate 6
Produce Certificate Internally 7
Client-Side Certificate Acceptance 8
Client Requirements 8
Deploy Root Certificate for Internet Explorer 9
Set Up CA Certificate for Internet Explorer and Edge Browsers 9
Cisco Finesse Administration Guide, Release 12.0(1)iii
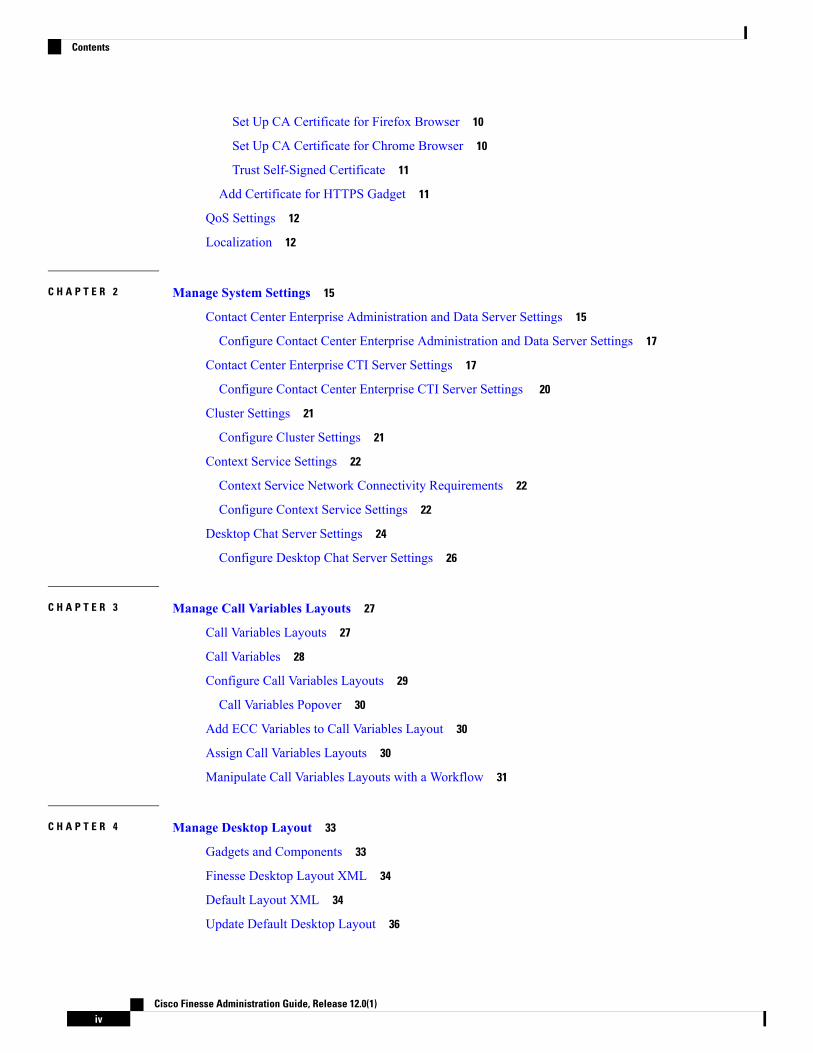
Set Up CA Certificate for Firefox Browser 10
Set Up CA Certificate for Chrome Browser 10
Trust Self-Signed Certificate 11
Add Certificate for HTTPS Gadget 11
QoS Settings 12
Localization 12
Manage System Settings 15C H A P T E R 2
Contact Center Enterprise Administration and Data Server Settings 15
Configure Contact Center Enterprise Administration and Data Server Settings 17
Contact Center Enterprise CTI Server Settings 17
Configure Contact Center Enterprise CTI Server Settings 20
Cluster Settings 21
Configure Cluster Settings 21
Context Service Settings 22
Context Service Network Connectivity Requirements 22
Configure Context Service Settings 22
Desktop Chat Server Settings 24
Configure Desktop Chat Server Settings 26
Manage Call Variables Layouts 27C H A P T E R 3
Call Variables Layouts 27
Call Variables 28
Configure Call Variables Layouts 29
Call Variables Popover 30
Add ECC Variables to Call Variables Layout 30
Assign Call Variables Layouts 30
Manipulate Call Variables Layouts with a Workflow 31
Manage Desktop Layout 33C H A P T E R 4
Gadgets and Components 33
Finesse Desktop Layout XML 34
Default Layout XML 34
Update Default Desktop Layout 36
Cisco Finesse Administration Guide, Release 12.0(1)iv
Contents

Horizontal Header 38
Customize Title and Logo in the Header 38
alternateHosts Configuration 39
Headless Gadget Configuration 39
Customize Icons in Left Navigation Bar 39
Customize Icons for Gadgets 40
List of Icons 42
XML Schema Definition 52
Live Data Reports 55
Prerequisites for Live Data 55
Add Live Data Reports to Finesse 56
Add Live Data Reports to Default Desktop Layout 57
Add Live Data Reports to Custom Desktop Layout 57
Add Live Data Reports to Team Layout 59
Modify Live Data Stock Reports for Finesse 60
Configure Live Data Reports with Multiple Views 61
Manage Phone Books 65C H A P T E R 5
Phone Books and Contacts 65
Add Phone Book 66
Edit Phone Book 67
Delete Phone Book 67
Import Contacts 67
Export Contacts 68
Add Contact 69
Edit Contact 69
Delete Contact 69
Manage Reasons 71C H A P T E R 6
Not Ready Reason Codes 71
Add Not Ready Reason Code 73
Edit Not Ready Reason Code 73
Delete Not Ready Reason Code 73
Sign Out Reason Codes 74
Cisco Finesse Administration Guide, Release 12.0(1)v
Contents

Add Sign Out Reason Code 75
Edit Sign Out Reason Code 75
Delete Sign Out Reason Code 76
Predefined System Reason Codes 76
Manage Reason Code Conflicts During Upgrade 78
Wrap-Up Reasons 78
Add Wrap-Up Reason 80
Edit Wrap-Up Reason 80
Delete Wrap-Up Reason 81
Force Wrap-Up Reason 81
Manage Team Resources 83C H A P T E R 7
Team Resources 83
Assign Phone Books and Reasons to Team 84
Unassign Phone Books and Reasons from Team 85
Assign Custom Desktop Layout to Team 85
Assign Workflows to Team 86
Unassign Workflows from Team 86
Manage Workflows 87C H A P T E R 8
Workflows and Workflow Actions 87
Workflow Triggers and Outbound Calls 91
Add Browser Pop Workflow Action 92
Add HTTP Request Workflow Action 92
Edit Workflow Action 94
Delete Workflow Action 94
Add Workflow 94
Edit Workflow 95
Delete Workflow 95
Manage Security 97C H A P T E R 9
HTTP and HTTPS Support 97
Finesse HTTPS Redirect 97
HSTS 98
Cisco Finesse Administration Guide, Release 12.0(1)vi
Contents

Reset Security or Admin Password 99
Cross-Origin Resource Sharing (CORS) 100
Gadget Source Whitelisting 100
Manage Finesse IP Phone Agent 101C H A P T E R 1 0
Finesse IP Phone Agent 101
One Button Sign In 102
Finesse IP Phone Service Subscription Options 103
Set Up Application User, Web Access, and HTTPS Server Parameters 104
Configure Finesse IP Phone Service in Unified CM 105
Add Service Parameters for One Button Sign In 106
Subscribe Agent Phones to Manual Subscription Service 107
Set Up Agent Access to the Self Care Portal 108
Manage Third-Party Gadgets 111C H A P T E R 1 1
3rdpartygadget Account 111
Upload Third-Party Gadgets 112
Perform Routine Maintenance 115C H A P T E R 1 2
Cisco Finesse Services 115
View, Start, or Stop Services 116
Log Collection 116
Collect Logs using Cisco Unified Real-Time Monitoring Tool 118
Syslog Support for Critical Log Messages 119
Cisco Finesse Notification Service Logging 121
Remote Account Management 121
Cisco Finesse Failover Mechanisms 123C H A P T E R 1 3
CTI Failover 123
AWDB Failover 125
Finesse Desktop Failover 125
Desktop Behavior 127
Finesse IP Phone Agent Failover 131
Cisco Finesse Administration Guide, Release 12.0(1)vii
Contents

Backup and Restore 133C H A P T E R 1 4
Backup and Restore 133
Important Considerations 134
SFTP Requirements 134
Master and Local Agents 135
Master Agent Duties 135
Local Agent Duties 135
Backup Tasks 136
Manage Backup Devices 136
Manage Backup Schedules 136
Perform Manual Backup 137
Check Backup Status 137
Restore the Nodes in HA Setup with Rebuild 138
Supported Cisco Unified Communications OS Services 141C H A P T E R 1 5
Supported Cisco Unified Communications OS Services 141
Cisco Finesse CLI 145A P P E N D I X A
Commands Supported for Cisco Finesse 145
Finesse HTTPS Redirect 145
Cisco Finesse Services 146
Cisco Finesse Trace Logging 147
Toaster Notifications 148
Finesse IPPA Inactivity Timeout 148
Configuring Queue Statistics 149
Cross-Origin Resource Sharing (CORS) 150
Gadget Source Whitelisting 153
Supported Content Security Policy Directives 154
Finesse System Commands 155
Desktop Properties 156
Service Properties 158
Upgrade 158
Shutdown 158
Cisco Finesse Administration Guide, Release 12.0(1)viii
Contents

Replication Status 159
View Property 159
Update Property 159
Signout from Media Channels 160
Certificates for Live Data 161A P P E N D I X B
Certificates and Secure Communications 161
Export Self-Signed Live Data Certificates 161
Import Self-Signed Live Data Certificates 162
Obtain and Upload Third-party CA Certificate 163
Cisco Finesse Administration Guide, Release 12.0(1)ix
Contents

Cisco Finesse Administration Guide, Release 12.0(1)x
Contents

Preface
This guide describes how to administer Cisco Finesse.
• Change History, on page xi• About This Guide, on page xiii• Audience, on page xiii• Related Documents, on page xiv• Communications, Services, and Additional Information, on page xiv• Field Notice, on page xiv• Documentation Feedback, on page xv• Conventions, on page xv
Change HistoryThe following table lists the changes made to this guide for Cisco Finesse 12.0(1) release version:
DateChange
2020Added desktop chat search.
Added Content Security Policy directives.
Added desktop chat organization unit (OU) search.
Added new service property configuration CLI for port 5223.
Added customize icon details.
Cisco Finesse Administration Guide, Release 12.0(1)xi

DateChange
2019Initial Release of Document for Release 12.0(1)
Look and feel of the Admin console is enhanced as part of user interfacerefresh.
Cisco Finesse admin console is supported on Microsoft Edge.
Configure the call header and up to five call variables in the Call VariableLayout. These variables are displayed in the agent's call popover andactive call details in the Team Performance gadget.
Set the CTI Encryption in the CTI Server Settings gadget from theAdministration Console. You can test the CTI connection for the givenconfiguration.
When you modify the layout of the Finesse desktop, it can take up to120 seconds to reflect the changes.
Reason code tables support search across reason codes and reason codelabels.
The following changes are made in the Default Layout XML for 12.0(1):
• managedBy Attribute is added in the Live Data gadget.
• hidden attribute added to support headless gadgets.
• MaxRow is changed from being a query parameter to an attribute.Queue Statistics and Query Parameter gadget URLs are differentand are replaced automatically during an upgrade.
The following attributes are added in the Default Layout XML and canbe customized:
• Horizontal Header
• Title and Logo
• Icons in the left navigation bar
Desktop Chat Server settings can be configured from the admin console.
Desktop Chat failover scenarios are added.
The support for in-built java script components is added.
Cisco Finesse Administration Guide, Release 12.0(1)xii
PrefacePreface

DateChange
The following CLIs are added:
• To view the property values of any property file.
• To set the property values of any property file.
• To enable CORS for both Cisco Finesse and OpenFire and toconfigure the allowed origin list.
• To configure media channels from which the users are signed out.
• To enable or disable Gadget Source Whitelist functionality and toconfigure source(s) in the whitelist.
New configuration parameters are added for the desktop via CLIs:
• To enable or disable active call details in the team performancegadget.
• To enable or disable view history in the team performance gadget.
• To specify unsupported file types in Desktop Chat.
• To set the maximum attachment size in Desktop Chat.
• To configure the Wrap-Up timer via CLI. The showWrapUpTimerproperty can be used to show or hide timer in wrap-up state.
• To configure Force Wrap-Up Reason via CLI for agents by theadministrator.
• To set the desktop notification connection type. By default it isWebSockets.
Workflows and Workflow actions can be created for voice and digitalchannels.
About This GuideThe Cisco Finesse Administration Guide describes how to administer and maintain Cisco Finesse.
AudienceThis guide is prepared for Unified Contact Center Enterprise system administrators who configure, administer,and monitor Cisco Finesse.
For information about administering Finesse within a Unified Contact Center Express environment, seeCiscoUnified Contact Center Express Administration Guide at https://www.cisco.com/c/en/us/support/customer-collaboration/unified-contact-center-express/products-maintenance-guides-list.html.
Cisco Finesse Administration Guide, Release 12.0(1)xiii
PrefaceAbout This Guide
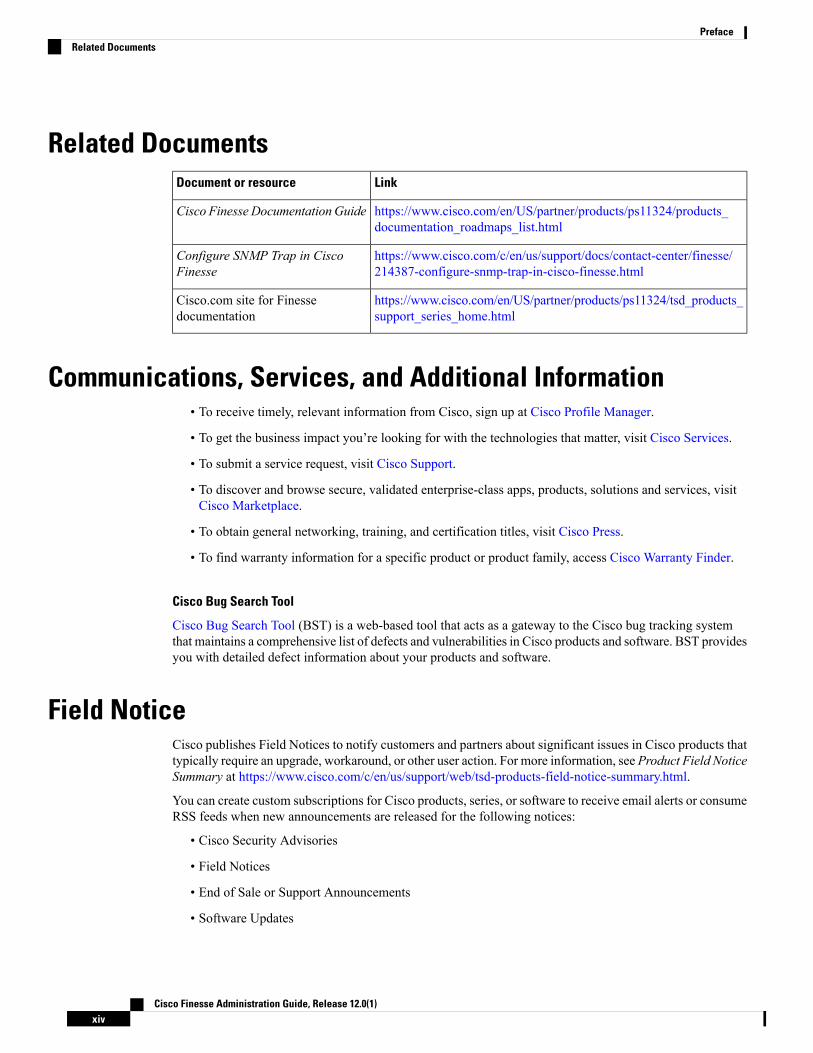
Related DocumentsLinkDocument or resource
https://www.cisco.com/en/US/partner/products/ps11324/products_documentation_roadmaps_list.html
Cisco Finesse Documentation Guide
https://www.cisco.com/c/en/us/support/docs/contact-center/finesse/214387-configure-snmp-trap-in-cisco-finesse.html
Configure SNMP Trap in CiscoFinesse
https://www.cisco.com/en/US/partner/products/ps11324/tsd_products_support_series_home.html
Cisco.com site for Finessedocumentation
Communications, Services, and Additional Information• To receive timely, relevant information from Cisco, sign up at Cisco Profile Manager.
• To get the business impact you’re looking for with the technologies that matter, visit Cisco Services.
• To submit a service request, visit Cisco Support.
• To discover and browse secure, validated enterprise-class apps, products, solutions and services, visitCisco Marketplace.
• To obtain general networking, training, and certification titles, visit Cisco Press.
• To find warranty information for a specific product or product family, access Cisco Warranty Finder.
Cisco Bug Search Tool
Cisco Bug Search Tool (BST) is a web-based tool that acts as a gateway to the Cisco bug tracking systemthat maintains a comprehensive list of defects and vulnerabilities in Cisco products and software. BST providesyou with detailed defect information about your products and software.
Field NoticeCisco publishes Field Notices to notify customers and partners about significant issues in Cisco products thattypically require an upgrade, workaround, or other user action. For more information, see Product Field NoticeSummary at https://www.cisco.com/c/en/us/support/web/tsd-products-field-notice-summary.html.
You can create custom subscriptions for Cisco products, series, or software to receive email alerts or consumeRSS feeds when new announcements are released for the following notices:
• Cisco Security Advisories
• Field Notices
• End of Sale or Support Announcements
• Software Updates
Cisco Finesse Administration Guide, Release 12.0(1)xiv
PrefaceRelated Documents

• Updates to Known Bugs
For more information on creating custom subscriptions, seeMy Notifications at https://cway.cisco.com/mynotifications.
Documentation FeedbackTo provide comments about this document, send an email message to the following address:[email protected].
We appreciate your comments.
ConventionsThis document uses the following conventions:
DescriptionConvention
Boldface font is used to indicate commands, such as user entries, keys, buttons,folder names, and submenu names.
For example:
• Choose Edit > Find.
• Click Finish.
boldface font
Italic font is used to indicate the following:
• To introduce a new term. Example: A skill group is a collection of agentswho share similar skills.
• A syntax value that the user must replace. Example: IF (condition, true-value,false-value)
• A book title. Example: See the Cisco Unified Contact Center EnterpriseInstallation and Upgrade Guide.
italic font
Window font, such as Courier, is used for the following:
• Text as it appears in code or that the window displays. Example:<html><title>Cisco Systems, Inc. </title></html>
window font
Angle brackets are used to indicate the following:
• For arguments where the context does not allow italic, such as ASCII output.
• A character string that the user enters but that does not appear on the windowsuch as a password.
< >
Cisco Finesse Administration Guide, Release 12.0(1)xv
PrefaceDocumentation Feedback

Cisco Finesse Administration Guide, Release 12.0(1)xvi
PrefaceConventions

C H A P T E R 1Getting Started
This chapter describes the interfaces used to configure, administer, and maintain Cisco Finesse and how toaccess them.
• User Accounts, on page 1• Administration Tools, on page 1• Certificate Management, on page 5• QoS Settings, on page 12• Localization, on page 12
User AccountsCredentials for the following user accounts are defined during Cisco Finesse installation:
• Administrator User account: Use this account to access the CLI and Cisco Unified CommunicationsOperating System Administration.
• Application User account: Use this account to access the Cisco Finesse administration console.
Administration Tools
Cisco Finesse Administration ConsoleThe Cisco Finesse administration console is a web-based interface used to configure system settings in CiscoFinesse. The administration console contains tabs to click and access the various administration features. Thetab names and the associated tasks are:
• Settings: Administration & Data server, Configure CTI server, Cluster Settings, Context ServiceManagement, IP Phone Agent Settings, and Desktop Chat server.
• Call Variables Layout:Manage the call and ECC variables that appear on the agent desktop call controlgadget, team performance gadget, and call popover.
• Desktop Layout:Make changes to the default desktop layout for agents and supervisors.
• Phone Books: Add, edit, or delete phone books or phone book contacts.
Cisco Finesse Administration Guide, Release 12.0(1)1

• Reasons: Add, edit, or delete Not Ready reason codes, Sign Out reason codes, or Wrap-Up reasons(Reason Codes are disabled for Packaged CCE deployments).
• Team Resources: Assign desktop layouts, phone books, reason codes, and wrap-up reasons to specificteams.
•Workflows: Create and manage workflows and workflow actions.
The features you configure in the administration console are case-sensitive. For example, you can create twoworkflows named WORKFLOW and workflow; or two phone books named BOOK and book.
Finesse administration tasks are performed only on the primary Finesse server.Note
Sign In to Cisco Finesse Administration ConsoleThe Cisco Finesse administration console supports both HTTP and secure HTTP (HTTPS). Whether theadministration console uses HTTP or HTTPS depends on whether HTTPS Redirect is enabled (by default,HTTPS Redirect is enabled). The URLs in this procedure use HTTP.
When you sign in to Finesse, always use the fully qualified domain name (FQDN) of the Finesse server inthe URL.
Procedure
Step 1 Direct your browser to http://FQDN/cfadmin, where FQDN is the fully qualified domain name of your primaryFinesse server.
Ensure that the self-signed certificate provided with Finesse uses the hostname of the server as theCommon Name for the certificate by default. The hostname in the URL must match the CommonName on the certificate to avoid an address mismatch error.
Note
Step 2 The first time you access the administration console using HTTPS, you are prompted to trust the self-signedcertificate provided with Finesse. The following table describes the steps for each supported browser.
If you are using HTTP to access the administration console, this step is not required.
If you are using HTTPS but have installed a CA Certificate, you can skip this step. For moreinformation about installing a CACertificate, see theCisco Finesse Installation and Upgrade Guide
Note
DescriptionOption
Internet Explorer: a. A page appears that states this site is untrusted.
b. ClickMore information > Go on to the webpage.
Edge: a. A page appears that states this site is untrusted.
b. Click Details and click Go on to the webpage.
Firefox: a. A page appears that states this connection is untrusted.
Cisco Finesse Administration Guide, Release 12.0(1)2
Getting StartedSign In to Cisco Finesse Administration Console
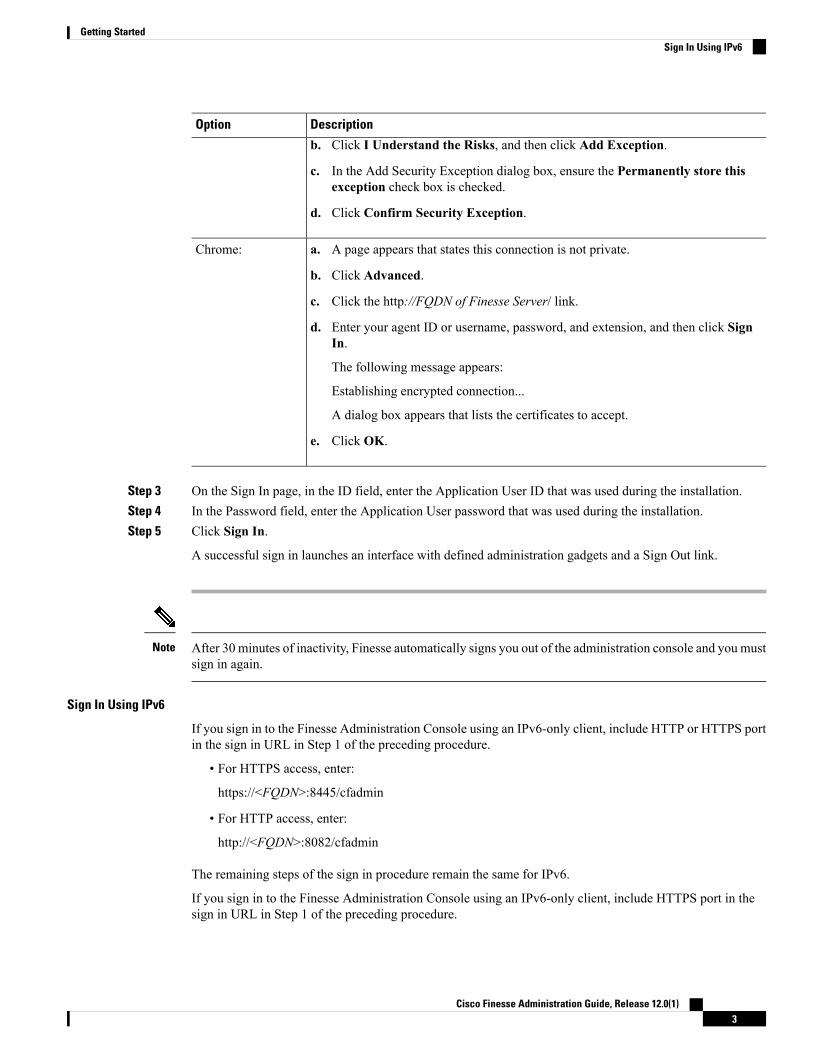
DescriptionOption
b. Click I Understand the Risks, and then click Add Exception.
c. In the Add Security Exception dialog box, ensure the Permanently store thisexception check box is checked.
d. Click Confirm Security Exception.
Chrome: a. A page appears that states this connection is not private.
b. Click Advanced.
c. Click the http://FQDN of Finesse Server/ link.
d. Enter your agent ID or username, password, and extension, and then click SignIn.
The following message appears:
Establishing encrypted connection...
A dialog box appears that lists the certificates to accept.
e. Click OK.
Step 3 On the Sign In page, in the ID field, enter the Application User ID that was used during the installation.Step 4 In the Password field, enter the Application User password that was used during the installation.Step 5 Click Sign In.
A successful sign in launches an interface with defined administration gadgets and a Sign Out link.
After 30 minutes of inactivity, Finesse automatically signs you out of the administration console and you mustsign in again.
Note
Sign In Using IPv6
If you sign in to the Finesse Administration Console using an IPv6-only client, include HTTP or HTTPS portin the sign in URL in Step 1 of the preceding procedure.
• For HTTPS access, enter:
https://<FQDN>:8445/cfadmin
• For HTTP access, enter:
http://<FQDN>:8082/cfadmin
The remaining steps of the sign in procedure remain the same for IPv6.
If you sign in to the Finesse Administration Console using an IPv6-only client, include HTTPS port in thesign in URL in Step 1 of the preceding procedure.
Cisco Finesse Administration Guide, Release 12.0(1)3
Getting StartedSign In Using IPv6

• For HTTPS access, enter:
https://<FQDN>:8445/cfadmin
The remaining steps of the sign in procedure remain the same for IPv6.
Account Locked after Five Failed Sign in Attempts
If an administrator tries to sign in to the Finesse administrator console (or diagnostic portal) with the wrongpassword five times consecutively, Finesse blocks access to that user account for 30 minutes. For securityreasons, Finesse does not alert the user that their account is locked. They must wait 30 minutes and try again.
Similarly, if agents or supervisors sign in to the desktop five times consecutively with the wrong password,Finesse blocks access to that user account. However, in this case, the lockout period is 5 minutes. Thisrestriction also applies when agents and supervisors sign in using the mobile agent or Finesse IP Phone Agent(IPPA).
When an agent or supervisor account is locked, subsequent attempts to sign in, even with correct credentials,reset the lockout period to 5 minutes again. For example, if a locked user tries to sign in again after only 4minutes, the lockout period is reset and the user must wait another 5 minutes. This reset does not apply to theadministrator account.
Note
To view if a user account is locked, enter the file get activelog desktop recurs compress CLI command.
Extract the zipped output and search the catalina.out logs (/opt/cisco/desktop/finesse/logs/catalina.out) for thefollowing message referring to the locked username:
An attempt was made to authenticate the locked user "<username>"
CLIThe CLI provides a set of commands applicable to the Operating System and to Cisco Finesse. These commandsallow basic maintenance and failure recovery, and enable system administration.
You can access the CLI on the primary Finesse server with a monitor and keyboard at the server console orby Secure Shell (SSH). Use the credentials for the Administrator User account to access the CLI.
Cisco Unified Communications Operating System AdministrationThis interface is web-based and is used to perform the following system administration functions:
• Show: View information on cluster nodes, hardware status, network configuration, installed software,system status, and IP preferences.
• Settings: Display and change IP settings, network time protocol (NTP) settings, SMTP settings, time,and version.
You cannot change the IP address of a Finesse server after it is installed.Important
• Security:Manage certificates and set up and manage IPSec policies.
Cisco Finesse Administration Guide, Release 12.0(1)4
Getting StartedAccount Locked after Five Failed Sign in Attempts

• Software Upgrades: Perform and upgrade or revert to a previous version.
• Services: Use the Ping and Remote Support features.
Sign In to Cisco Unified Communications Operating System Administration
Procedure
Step 1 Direct your browser to https://FQDN:8443/cmplatform, where FQDN is the fully-qualified domain name ofyour server.
Step 2 Sign in with the username and password for the Administrator User account.
After you sign in, you can access other Unified Communications Solutions tools from the Navigationdrop-down list.
Note
Certificate ManagementFinesse provides a self-signed certificate that use or provide a CA certificate. You can obtain a CA certificatefrom a third-party vendor or produce one internal to your organization.
Finesse does not support wildcard certificates. After you upload a root certificate signed by a certificateauthority (CA), the self-signed certificates are overwritten.
If you use the Finesse self-signed certificate, agents must accept the security certificates the first time theysign in to the desktop. If you use a CA certificate, you can accept it for the browser on each client or deploya root certificate using group policies.
If there is a mismatch between the server hostname and the certificate hostname, a certificate address mismatchwarning message is displayed in IE. The certificate must be regenerated so that the hostname matches theserver hostname before importing to Finesse. If there is a valid reason for the mismatch, uncheck theWarnabout certificate address mismatch checkbox from Tools > Internet Options > Advanced > Security toallow the certificate to be accepted.
Note
Server-Side Certificate ManagementBy default, Finesse comes with self-signed certificates. If you use these certificates, agents must complete aprocedure to accept the certificates the first time they sign in. To simplify the agent experience, obtain andupload a CA certificate or produce your certificate internally.
Cisco Finesse Administration Guide, Release 12.0(1)5
Getting StartedSign In to Cisco Unified Communications Operating System Administration
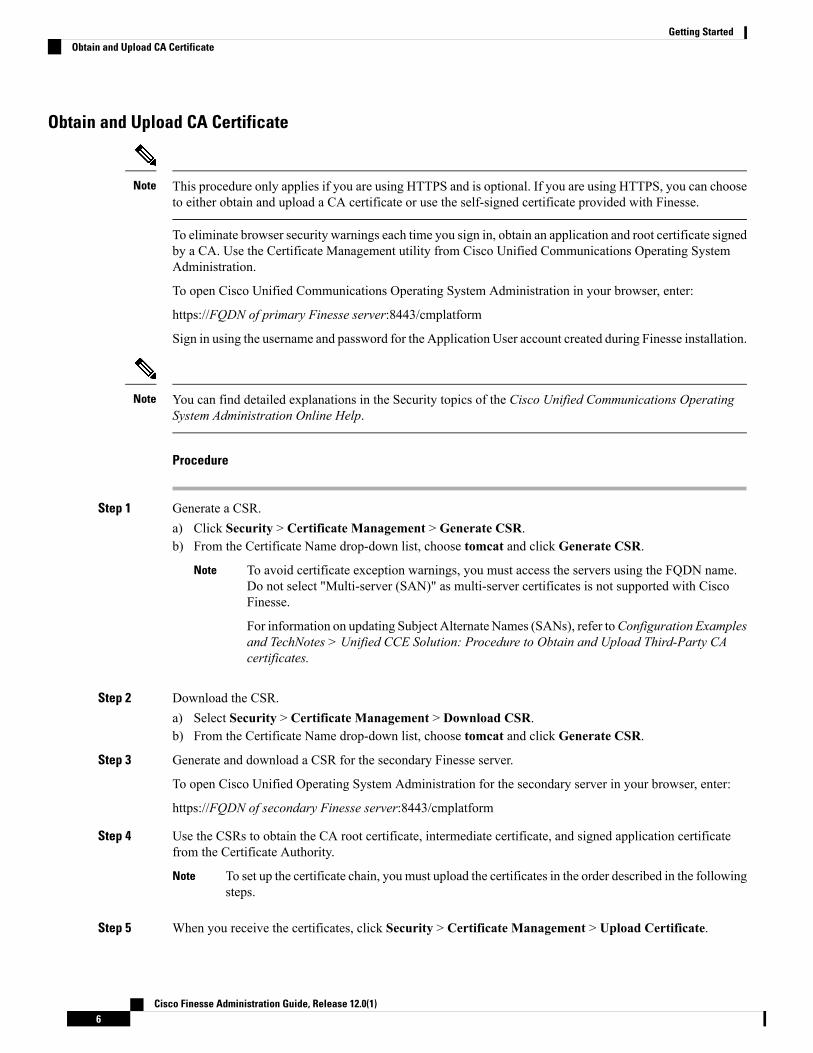
Obtain and Upload CA Certificate
This procedure only applies if you are using HTTPS and is optional. If you are using HTTPS, you can chooseto either obtain and upload a CA certificate or use the self-signed certificate provided with Finesse.
Note
To eliminate browser security warnings each time you sign in, obtain an application and root certificate signedby a CA. Use the Certificate Management utility from Cisco Unified Communications Operating SystemAdministration.
To open Cisco Unified Communications Operating System Administration in your browser, enter:
https://FQDN of primary Finesse server:8443/cmplatform
Sign in using the username and password for the Application User account created during Finesse installation.
You can find detailed explanations in the Security topics of the Cisco Unified Communications OperatingSystem Administration Online Help.
Note
Procedure
Step 1 Generate a CSR.a) Click Security > Certificate Management > Generate CSR.b) From the Certificate Name drop-down list, choose tomcat and click Generate CSR.
To avoid certificate exception warnings, you must access the servers using the FQDN name.Do not select "Multi-server (SAN)" as multi-server certificates is not supported with CiscoFinesse.
For information on updating Subject Alternate Names (SANs), refer toConfiguration Examplesand TechNotes > Unified CCE Solution: Procedure to Obtain and Upload Third-Party CAcertificates.
Note
Step 2 Download the CSR.a) Select Security > Certificate Management > Download CSR.b) From the Certificate Name drop-down list, choose tomcat and click Generate CSR.
Step 3 Generate and download a CSR for the secondary Finesse server.
To open Cisco Unified Operating System Administration for the secondary server in your browser, enter:
https://FQDN of secondary Finesse server:8443/cmplatform
Step 4 Use the CSRs to obtain the CA root certificate, intermediate certificate, and signed application certificatefrom the Certificate Authority.
To set up the certificate chain, you must upload the certificates in the order described in the followingsteps.
Note
Step 5 When you receive the certificates, click Security > Certificate Management > Upload Certificate.
Cisco Finesse Administration Guide, Release 12.0(1)6
Getting StartedObtain and Upload CA Certificate

Step 6 Upload the root certificate.a) From the Certificate Purpose drop-down list, select tomcat-trust.b) In the Upload File field, click Browse and browse to the root certificate file.c) Click Upload File.
Step 7 Upload the intermediate certificate.a) From the Certificate Purpose drop-down list, choose tomcat-trust.b) In the Upload File field, click Browse and browse to the intermediate certificate file.c) Click Upload File.
Step 8 Upload the application certificate.a) From the Certificate Purpose drop-down list, choose tomcat.b) In the Upload File field, click Browse and browse to the application certificate file.c) Click Upload File.
Step 9 After the upload is complete, sign out from the Platform Admin page of Finesse.Step 10 Access the CLI on the primary Finesse server.Step 11 Enter the command utils service restart Cisco Finesse Notification Service to restart the Cisco Finesse
Notification service.Step 12 Enter the command utils service restart Cisco Finesse Tomcat to restart the Cisco Finesse Tomcat service.Step 13 Upload the application certificate to the secondary Finesse server.
The root and the intermediate certificates uploaded to the primary server are replicated to the secondary server.
Step 14 Access the CLI on the secondary Finesse server and restart the Cisco Finesse Notification Service and theCisco Finesse Tomcat Service.
Produce Certificate Internally
Set up Microsoft Certificate Server for Windows Server 2012 R2
A prerequisite of this procedure is that your deployment includes a Windows Server 2012 R2 (Standard)Active Directory server. Perform the following steps to add the Active Directory Certificate Services role onthe Windows Server 2012 R2 (Standard) domain controller.
Before you begin
Microsoft .Net Framework 3.5 Service Pack 1must be installed. See theWindows Server 2012 documentationfor instructions.
Procedure
Step 1 In Windows, open the Server Manager.Step 2 In the Quick Start window, click Add Roles and Features .Step 3 In the Set Installation Type tab, choose Role-based or feature-based installation and click Next.Step 4 In the Server Selection tab, choose the destination server and click Next.Step 5 In the Server Roles tab, check theActive Directory Certificate Services box and clickAdd Features in the
pop-up window.
Cisco Finesse Administration Guide, Release 12.0(1)7
Getting StartedProduce Certificate Internally

Step 6 In the Features and AD CS tabs, click Next to accept default values.Step 7 In the Role Services tab, verify that the Certification Authority box is checked and click Next.Step 8 In the Confirmation tab, click Install.Step 9 After the installation is complete, click theConfigure Active Directory Certificate Service on the destination
server link.Step 10 Verify the credentials (for the domain Administrator user) and click Next.Step 11 In the Role Services tab, check the Certification Authority box and click Next.Step 12 In the Setup Type tab, choose Enterprise CA and click Next.Step 13 In the CA Type tab, choose Root CA and click Next.Step 14 In the Private Key, Cryptography, CA Name, Validity Period, and Certificate Database tabs, click Next
to accept default values.Step 15 Review the information in the Confirmation tab and click Configure.
Download CA certificate
A prerequisite of this procedure is that you are using theWindows Certificate Services. Perform the followingsteps to retrieve the root CA certificate from the certificate authority. After you retrieve the root certificate,each user must install it in the browser used to access Finesse.
Procedure
Step 1 On the Windows domain controller, run the CLI command certutil -ca.cert ca_name.cer, in which ca_nameis the name of your certificate.
Step 2 Save the file. Note where you saved the file so you can retrieve it later.
Client-Side Certificate AcceptanceThere are procedures that agents must perform to accept certificates the first time they sign in. The proceduretype depends on the method you choose to manage certificates and the browser used by the agents.
Client RequirementsFor more information on client requirements, see Compatibility Information athttps://www.cisco.com/c/en/us/support/customer-collaboration/unified-contact-center-enterprise/products-device-support-tables-list.html.
Finesse Desktop client machines should be time synchronized with a reliable NTP server for the correctupdates to the Duration fields within Live data reports.
Note
Cisco Finesse Administration Guide, Release 12.0(1)8
Getting StartedDownload CA certificate
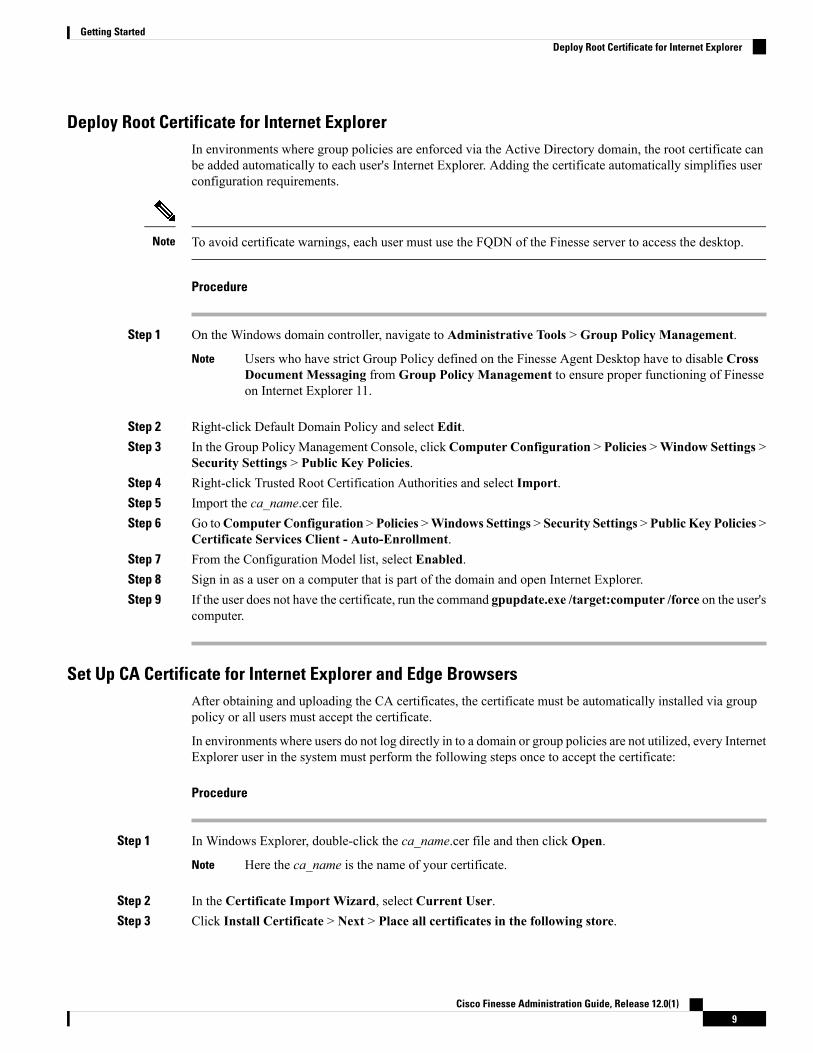
Deploy Root Certificate for Internet ExplorerIn environments where group policies are enforced via the Active Directory domain, the root certificate canbe added automatically to each user's Internet Explorer. Adding the certificate automatically simplifies userconfiguration requirements.
To avoid certificate warnings, each user must use the FQDN of the Finesse server to access the desktop.Note
Procedure
Step 1 On the Windows domain controller, navigate to Administrative Tools > Group Policy Management.
Users who have strict Group Policy defined on the Finesse Agent Desktop have to disable CrossDocument Messaging from Group Policy Management to ensure proper functioning of Finesseon Internet Explorer 11.
Note
Step 2 Right-click Default Domain Policy and select Edit.Step 3 In the Group Policy Management Console, clickComputer Configuration > Policies >Window Settings >
Security Settings > Public Key Policies.Step 4 Right-click Trusted Root Certification Authorities and select Import.Step 5 Import the ca_name.cer file.Step 6 Go toComputer Configuration > Policies >Windows Settings > Security Settings > Public Key Policies >
Certificate Services Client - Auto-Enrollment.Step 7 From the Configuration Model list, select Enabled.Step 8 Sign in as a user on a computer that is part of the domain and open Internet Explorer.Step 9 If the user does not have the certificate, run the command gpupdate.exe /target:computer /force on the user's
computer.
Set Up CA Certificate for Internet Explorer and Edge BrowsersAfter obtaining and uploading the CA certificates, the certificate must be automatically installed via grouppolicy or all users must accept the certificate.
In environments where users do not log directly in to a domain or group policies are not utilized, every InternetExplorer user in the system must perform the following steps once to accept the certificate:
Procedure
Step 1 In Windows Explorer, double-click the ca_name.cer file and then click Open.
Here the ca_name is the name of your certificate.Note
Step 2 In the Certificate Import Wizard, select Current User.Step 3 Click Install Certificate > Next > Place all certificates in the following store.
Cisco Finesse Administration Guide, Release 12.0(1)9
Getting StartedDeploy Root Certificate for Internet Explorer

Step 4 Click Browse and choose Trusted Root Certification Authorities.Step 5 Click OK > Next > Finish.Step 6 Click Yes on the install a certificate from a CA prompt.Step 7 To verify the certificate was installed, from the browser menu on IE, choose Tools > Internet Options.Step 8 In the Content tab, click Certificates.Step 9 In the Trusted Root Certification Authorities tab, ensure that the new certificate appears in the list.Step 10 Restart the browser for certificate installation to take effect.
If using Internet Explorer 11, you may receive a prompt to accept the certificate even if signed byprivate CA.
Note
Set Up CA Certificate for Firefox BrowserEvery Firefox user in the system must perform the following steps once to accept the certificate:
To avoid certificate warnings, each user must use the FQDN of the Finesse server to access the desktop.Note
Procedure
Step 1 From the Firefox browser menu, choose Options.Step 2 Go to Privacy and Security tab.Step 3 Under Certificates section, click View Certificates.Step 4 Select Authorities.Step 5 Click Import and browse to the ca_name.cer file.
Here the ca_name is the name of your certificate.Note
Step 6 Check the Validate Identical Certificates check box.Step 7 Restart the browser for certificate to install.
Set Up CA Certificate for Chrome Browser
Procedure
Step 1 In Chrome browser, go to Settings.Step 2 In Advanced Settings > Privacy and Security, clickManage Certificates.Step 3 Click Trusted Root Certification Authorities tab.Step 4 Click Import and browse to the ca_name.cer file. .
In the Trusted Root Certification Authorities tab ensure the new certificate appears in the list
Cisco Finesse Administration Guide, Release 12.0(1)10
Getting StartedSet Up CA Certificate for Firefox Browser

Step 5 Restart the browser for the certificate to install.
Trust Self-Signed CertificateTrust the self-signed certificate provided by Finesse to eliminate browser warnings each time you sign in tothe administration console or agent desktop.
If you have uploaded a CA certificate, you can skip this procedure.
Procedure
In your browser, enter the URL for the administration console (https://FQDN of the primary Finesseserver/cfadmin) or the agent desktop (https://FQDN of the primary Finesse server/desktop).
Add Certificate for HTTPS GadgetAdd a certificate for a secure HTTP (HTTPS) gadget to load the gadget on the Finesse desktop and successfullyperform HTTPS requests to the Finesse server.
This process allows HTTPS communication between the Finesse gadget container and the third-party gadgetsite for loading the gadget and performing any API calls the gadget makes to the third-party server.
A gadget that loads using HTTPSmay still use HTTP communication between that gadget and the applicationserver where it resides. If all traffic must be secure, the gadget developer must ensure that HTTPS is used tomake API calls to the application server.
Note
The certificate must be signed with a common name. The gadget URL in the desktop layout must use thesame name (whether it uses an IP address or a FQDN) as the name with which the certificate is signed. If thecertificate name and the name in the gadget URL do not match, the connection is not trusted and the gadgetdoes not load.
To find the certificate name, enter the gadget URL in your browser. Click the lock icon in the address bar andthen click View Details. Look for the common name field.
The Finesse host must be able to resolve this name using the DNS host entered during the installation. Toverify that Finesse can resolve the name, run the CLI command utils network ping <hostname>.
Procedure
Step 1 Download the certificate from the third-party gadget host.a) Sign in to Cisco Unified Operating System Administration on the third-party gadget host
(https://FQDN:8443/cmplatform, whereFQDN is the fully qualified domain name of the third-party gadgethost).
b) Click Security > Certificate Management.c) Click Find.
Cisco Finesse Administration Guide, Release 12.0(1)11
Getting StartedTrust Self-Signed Certificate

d) Click tomcat.pem.e) Click Download and save the file on your desktop.
Step 2 Upload the certificate to the primary Finesse server.a) Sign in to Cisco Unified Operating System Administration on the primary Finesse server
(http://FQDN:8443/cmplatform, where FQDN is the fully qualified domain name of the Finesse server).b) Click Security > Certificate Management.c) Click Upload Certificate.d) From the Certificate Name drop-down list, select tomcat-trust.e) Click Browse and navigate to the tomcat.pem file that you downloaded in the previous step.f) Click Upload File.
Step 3 Restart Cisco Finesse Tomcat on the primary Finesse server.Step 4 After synchronization is complete, restart Cisco Finesse Tomcat on the secondary Finesse server.
QoS SettingsThe Cisco Finesse application currently does not support configuration of QoS settings in network traffic.The QoS classification and marking of traffic should be done at the Switch or Router level for signaling trafficto be prioritized, especially if agents are across WAN.
LocalizationCisco Finesse supports localization for the Finesse agent desktop when Finesse is deployed with Unified CCE.Use the Cisco Option Package (COP) file installation to install the languages you require for your agents andsupervisors.
Finesse is installed with US English. If you do not require other languages for your agents and supervisors,you do not need to install the COP files.
An appropriate language needs to be selected before login on the desktop. If not, English will be the defaultlanguage. You cannot uninstall a language pack after it is installed.
Note
Table 1: Supported Languages for Desktop User Interface
Locale FileLanguageLocale FileLanguage
pt_BRPortugueseBg_BGBulgarian
Ro_RORomanianCa_ESCatalan
es_ESSpanishCs_CZCzech
sv_SESwedishHr_HRCroatian
Sk_SKSlovakda_DKDanish
Cisco Finesse Administration Guide, Release 12.0(1)12
Getting StartedQoS Settings

Locale FileLanguageLocale FileLanguage
Sl_SISloveniannl_NLDutch
Sr_RSSerbianen_USEnglish
ja_JPJapanesefi_FIFinnish
zh_CNChinese (simplified)fr_FRFrench
zh_TWChinese (traditional)de_DEGerman
ko_KRKoreanHu_HUHungarian
pl_PLPolishit_ITItalian
ru_RURussiannb_NONorwegian
tr_TRTurkish
After you install the COP files, agents and supervisors can set the language on their desktops in the followingways:
• Choose a language from the language selector drop-down list on the sign-in page.
• Change their browser preferred language.
• Pass the locale as part of the agent desktop URL (for example, an agent who wants to use French canenter the following URL: http://FQDN/desktop?locale=fr_FR)
The following items are localized on the desktop:
• labels for field names, buttons, and drop-down lists
• prompts
• messages
• tool tips
• page titles
• gadget tab names (Finesse gadgets only)
Configuration data defined using the Finesse administration console (such as Not Ready and Sign Out reasoncode labels,Wrap-Up reason labels, and phonebook entries) do not depend on the locale chosen for the desktop.For example, if you have defined a Not Ready reason code with a Chinese label, the label appears on thedesktop in Chinese, regardless of the language the agent chooses when signing in.
If you do not install the language COP files (you use English only for the desktop), you can still use Unicodecharacters for Finesse data such as reason codes, wrap-up reasons, and phonebook entries. For example, ifyou define a reason code using Chinese characters, it appears in Chinese on an English-only desktop.
Note
Call Context data (WrapUp Reasons, call variables, and ECC variables) is Unicode enabled and independentof the desktop locale.
Cisco Finesse Administration Guide, Release 12.0(1)13
Getting StartedLocalization
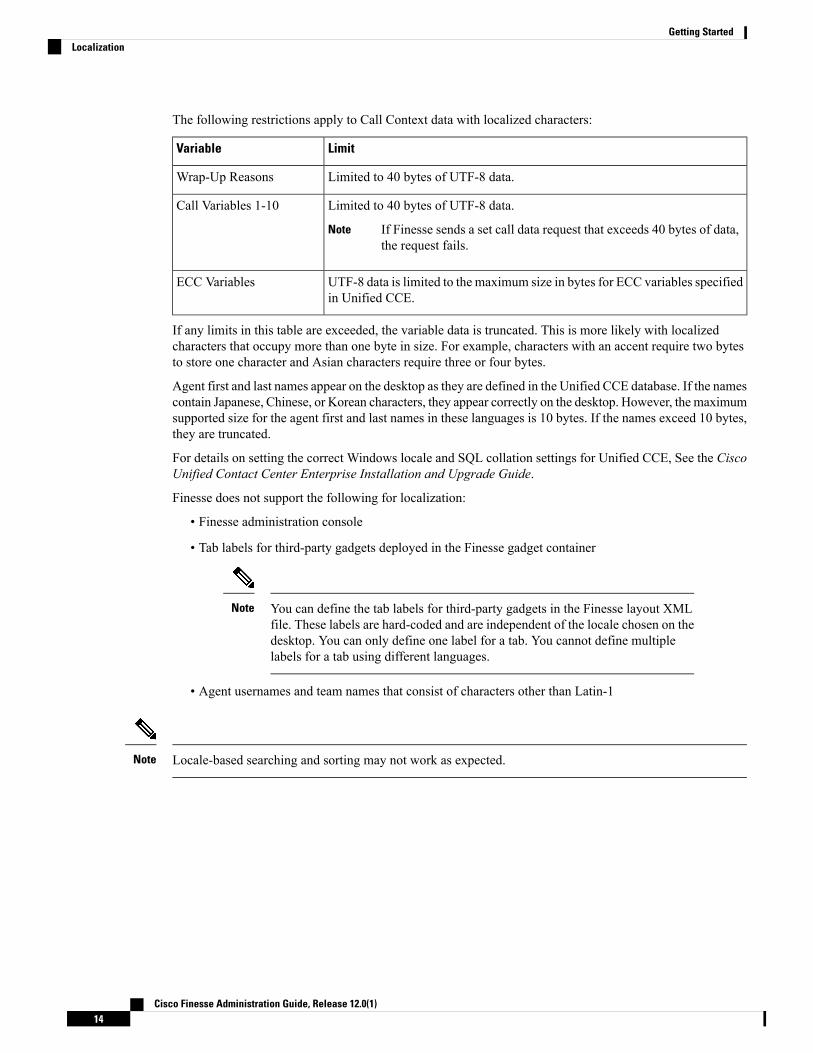
The following restrictions apply to Call Context data with localized characters:
LimitVariable
Limited to 40 bytes of UTF-8 data.Wrap-Up Reasons
Limited to 40 bytes of UTF-8 data.
If Finesse sends a set call data request that exceeds 40 bytes of data,the request fails.
Note
Call Variables 1-10
UTF-8 data is limited to the maximum size in bytes for ECC variables specifiedin Unified CCE.
ECC Variables
If any limits in this table are exceeded, the variable data is truncated. This is more likely with localizedcharacters that occupy more than one byte in size. For example, characters with an accent require two bytesto store one character and Asian characters require three or four bytes.
Agent first and last names appear on the desktop as they are defined in the Unified CCE database. If the namescontain Japanese, Chinese, or Korean characters, they appear correctly on the desktop. However, the maximumsupported size for the agent first and last names in these languages is 10 bytes. If the names exceed 10 bytes,they are truncated.
For details on setting the correct Windows locale and SQL collation settings for Unified CCE, See the CiscoUnified Contact Center Enterprise Installation and Upgrade Guide.
Finesse does not support the following for localization:
• Finesse administration console
• Tab labels for third-party gadgets deployed in the Finesse gadget container
You can define the tab labels for third-party gadgets in the Finesse layout XMLfile. These labels are hard-coded and are independent of the locale chosen on thedesktop. You can only define one label for a tab. You cannot define multiplelabels for a tab using different languages.
Note
• Agent usernames and team names that consist of characters other than Latin-1
Locale-based searching and sorting may not work as expected.Note
Cisco Finesse Administration Guide, Release 12.0(1)14
Getting StartedLocalization
C H A P T E R 2Manage System Settings
You can configure CTI server, Administration &Data server, cluster settings, Finesse IP Phone Agent (IPPA),and Cisco Context Service settings on the Settings tab of the Cisco Finesse administration console.
For information about Finesse IPPA settings, seeManage Finesse IP Phone Agent.
• Contact Center Enterprise Administration and Data Server Settings, on page 15• Contact Center Enterprise CTI Server Settings, on page 17• Cluster Settings, on page 21• Context Service Settings, on page 22• Desktop Chat Server Settings, on page 24
Contact Center Enterprise Administration and Data ServerSettings
Use the Unified CCE Administration & Data Server Settings gadget to configure the database settings. Thesesettings are required to enable authentication for Finesse agents and supervisors.
To connect to the Unified CCE administration database, Finesse supports connections using SQL orWindowsauthentication.
The Finesse JDBC driver is configured to use NTLMv2. Therefore, Finesse can connect to the administrationdatabase even if the administration database is configured to use only NTLMv2.
Primary Administration & Data Server is configured on Side A and Secondary Administration & Data Serveris configured on Side B. Make sure Finesse server on both sides connect to Primary Administration & DataServer on side A and fall back to Secondary Administration & Data Server on side B only when PrimaryAdministration & Data Server goes down.
Note
After you change and save any value on the Contact Center Enterprise Administration & Data Server Settingsgadget, restart the Cisco Finesse Tomcat Service on the primary and secondary Finesse server. If you restartthe Cisco Finesse Tomcat Service, agents must sign out and sign in again. To avoid this, you can make ContactCenter Enterprise Administration&Data Server settings changes and restart the Cisco Finesse Tomcat serviceduring hours when agents are not signed in to the Cisco Finesse desktop.
The following table describes the fields on the Unified CCE Administration & Data Server Settings gadget:
Cisco Finesse Administration Guide, Release 12.0(1)15

Table 2: Field Descriptions
DescriptionField
The hostname or IP address of the Unified CCEAdministration & Data Server.
Primary Host/IP Address
(Optional) The hostname or IP address of the backupUnified CCE Administration & Data Server.
Backup Host/IP Address
The port of the Unified CCE Administration & DataServer.
The default value is 1433.
Finesse expects the primary and backupAdministration & Data Server ports to bethe same, hence the Finesse administrationconsole exposes one port field. You mustensure that the port is the same for theprimary and backupAdministration&DataServers.
Note
Database Port
The name of the AWDatabase (AWDB) (for example,ucceinstance_awdb).
AW Database Name
(Optional) The domain of the AWDB.Domain
The username required to sign in to the AWDB.
If you specify a domain, this user refers tothe Administrator Domain user that theAWDB uses to synchronize with thelogger. In which case, the AWDB servermust use Windows authentication and theconfigured username must be a domainuser.
If you do not specify a domain, this usermust be an SQL user.
Note
Username
The password required to sign in to the AWDB.Password
For more information about these settings, see the Administration Guide for Cisco Unified Contact CenterEnterprise and the Staging Guide for Cisco Unified ICM/Contact Center Enterprise.
Actions on the Unified CCE Administration & Data Server Settings gadget:
• Save: Saves your configuration changes
• Revert: Retrieves the most recently saved enterprise database settings
When you update any of the following fields and click Save, Finesse attempts to connect to the AWDB:
• Primary Host/IP Address
Cisco Finesse Administration Guide, Release 12.0(1)16
Manage System SettingsContact Center Enterprise Administration and Data Server Settings

• Backup Host/IP Address
• Database Port
• AW Database Name
If Finesse cannot connect to the AWDB, an error message appears and you are asked if you still want to save.If you clickYes, the settings are saved. If you clickNo, the settings are not saved. You can change the settingsand try again or click Revert to retrieve the previously saved settings.
When you update the Username or Password fields and click Save, Finesse attempts to authenticate againstthe AWDB. If authentication fails, an error message appears and you are asked if you still want to save. ClickYes to save the settings or click No to change the settings. Click Revert to retrieve the previously savedsettings.
Finesse will not come into service in case of AWDB errors when connecting Cisco Finesse 11.5(1) and higherversions to Unified CCE 11.5(1) and higher versions.
Note
Configure Contact Center Enterprise Administration and Data Server SettingsConfigure the Unified CCEAdministration &Data Server settings to enable authentication for Finesse agentsand supervisors.
Procedure
Step 1 If you are not already signed in, sign in to the administration console.Step 2 In the Unified CCE Administration & Data Server Settings area, enter the Administration & Data Server
settings as described in the preceding table. For more information, see Table 2: Field Descriptions, on page16. Refer to your configuration worksheet if necessary.
Step 3 Click Save.
What to do next
The CTI test functionality documented in the Configure Unified CCE CTI Server Settings topic depends onAWDB connectivity to determine the CTI version. Or else, the test will not go through.
Contact Center Enterprise CTI Server SettingsUse the Contact Center Enterprise CTI Server Settings gadget to configure the A and B Side CTI servers.
All fields on this tab are populated with default system values or with values an administrator has previouslyentered. Change values to reflect your environment and preferences.
For configuring secure connection select the Enable SSL encryption check box.
Test the CTI connection for given configuration using the Test Connection button.
Cisco Finesse Administration Guide, Release 12.0(1)17
Manage System SettingsConfigure Contact Center Enterprise Administration and Data Server Settings

After you make any changes to the values on the Contact Center Enterprise CTI Server Settings gadget, youmust restart all the nodes of Cisco Finesse Tomcat. To make changes to other settings (such as Contact CenterEnterprise Administration&Data Server settings), you canmake those changes and then restart Cisco FinesseTomcat.
If you restart Cisco Finesse Tomcat, agents must sign out and sign in again. As a best practice, make changesto CTI server settings and restart the Cisco Finesse Tomcat Service during hours when agents are not signedin to the Finesse desktop.
The secure encryption and Test Connection functionality is supported only from Unified CCE 12.0.
Note
Although the B Side Host/IP Address and B Side Port fields are not shown as required, A and B Side CTIservers are mandatory for a production deployment of Unified CCE and Cisco Finesse.
Note
The following table describes the fields on the Contact Center Enterprise CTI Server Settings gadget:
ExplanationField
The hostname or IP address of the A Side CTI server.This field is required.
This value is typically the IP address of the PeripheralGateway (PG). The CTI server runs on the PG.
A Side Host/IP Address
The value of this field must match the port configuredduring the setup of the A Side CTI server.
This field is required and accepts values between 1and 65535.
You can find this value using the Unified CCEDiagnostic Framework Portico tool on the PG box.For more information about Diagnostic FrameworkPortico, see the Serviceability Guide for Cisco UnifiedICM/Contact Center Enterprise.
The default value is 42027.
A Side Port
The ID of the Agent PG Routing Client (PIM).
The Agent PG Peripheral ID should be configured tothe same value for the A and B Side CTI server.
This field is required and accepts values between 1and 32767.
The default value is 5000.
Peripheral ID
The hostname or IP address of the B Side CTI server.B Side Host/IP Address
Cisco Finesse Administration Guide, Release 12.0(1)18
Manage System SettingsContact Center Enterprise CTI Server Settings

ExplanationField
The value of this field must match the port configuredduring the setup of the B Side CTI server.
This field accepts values between 1 and 65535.
B Side Port
Check this box to enable secure encryption.Enable SSL encryption
Actions on the Contact Center Enterprise CTI Server Settings gadget:
• Save: Saves your configuration changes.
• Revert: Retrieves the most recently saved server settings.
• Test Connection: Tests the CTI connection.
CTI Test Connection
When you click Test Connection:
1. Input validation is done on the request attributes.
Host/IP Address must not be empty. Port and Peripheral IDs must be within the valid range.
2. Validation is done to check if the provided Host/IP is resolved by Finesse box.
3. Validation is done to check if AW Database is reachable and if a valid path ID is configured for theprovided Peripheral ID.
4. Socket connection is established to the provided Host/IP and port. The connection might fail if there isno route to the provided IP. If SSL encryption box is checked, this step also checks for successful TLShandshake. For TLS handshake to be successful, mutual trust has to be established between Finesse andCTI server.
For information on how to establish trust between Finesse and CTI server, see Security Guide for CiscoUnified ICM/Contact Center Enterprise at https://www.cisco.com/c/en/us/support/customer-collaboration/unified-contact-center-enterprise/products-installation-and-configuration-guides-list.html
5. After successful socket connection, a CTI initialization request is sent to check if the provided host is aCTI host.
If the CTI response is a success for the CTI initialization request and peripheral provided is configuredwith Unified CCE, it is confirmed to be a CTI host.
6. CTI connection is closed by sending a CTI session close request.
Cisco Finesse Administration Guide, Release 12.0(1)19
Manage System SettingsContact Center Enterprise CTI Server Settings

If Test Connection is successful for Side A or B of the CTI cluster and the other side fails, it is a validconfiguration as CTI server works in active-passive mode and connects to the active node. Inactive CTI nodewill refuse connection on the CTI port. However, Administrator has to ensure that the failed side also has avalid entry for CTI host and port field. System cannot verify this due to server restrictions.
If Test Connection is successful on Side A and B of the CTI cluster, then there is an error in the systemconfiguration. Verify that the Side A and B of the CTI node have valid entries for port and host.
Test connection API success result does not guarantee peripheral to be online. It only validates if the peripheralprovided is configured with Unified CCE.
Test connection API with insecure connection parameter will function as intended for earlier versions ofUnified CCE deployments.
Note
Configure Contact Center Enterprise CTI Server SettingsAccess the administration console on the primary Finesse server to configure the A and B Side CTI servers.
After you restart Finesse, it can take approximately 6minutes for all server-related services to restart. Therefore,wait for 6 minutes before you attempt to access the Finesse administration console.
Note
If you are using HTTPS, the first time you access the administration console, you see a browser securitywarning. To eliminate browser security warnings each time you sign in, trust the self-signed certificate providedwith Finesse or obtain and upload a CA certificate.
Note
Procedure
Step 1 Sign in to the administration console on the primary Finesse server:
http://FQDN of Finesse server/cfadmin
Step 2 Sign in with the Application User credentials defined during installation.Step 3 In the Contact Center Enterprise CTI Server Settings area, enter the CTI server settings as described in the
following table. Refer to your configuration worksheet if necessary.
DescriptionField
Enter the hostname or IP address of the A Side CTI server.
This value is typically the IP address of the Peripheral Gateway (PG).The CTI server runs on the PG.
A Side Host/IP Address
Enter the port number of the A Side CTI server. The value of thisfield must match the port configured during the setup of the A SideCTI server.
A Side Port
Cisco Finesse Administration Guide, Release 12.0(1)20
Manage System SettingsConfigure Contact Center Enterprise CTI Server Settings

DescriptionField
Enter the ID of the Agent PG Routing Client (PIM).
The Agent PG Peripheral ID should be configured to the same valuefor the A and B Side CTI servers.
Peripheral ID
Enter the hostname or IP address of the B Side CTI server.B Side Host/IP Address
Enter the port of the B Side CTI server. The value of this field mustmatch the port configured during the setup of the B Side CTI server.
B Side Port
Step 4 Click Save.
Cluster SettingsUse the Cluster Settings gadget to configure a secondary Finesse server. The purpose of a secondary Finesseserver is to handle all agent requests if the primary server goes down.
You must complete this configuration before you install the secondary Finesse server. For more informationabout installing a secondary Finesse server, see the Cisco Finesse Installation and Upgrade Guide.
The following table describes the fields on the Cluster Settings gadget:
ExplanationField
The hostname of the secondary Finesse server.Hostname
Actions on the Cluster Settings gadget:
• Save: Saves your configuration changes
• Revert: Retrieves the most recently saved cluster settings
Configure Cluster SettingsConfigure the cluster settings for the secondary Finesse node. The secondary Finesse node handles agentrequests if the primary server goes down.
Procedure
Step 1 Sign in to the administration console with the Application User credentials.Step 2 In the Cluster Settings area, in the Hostname field, enter the hostname of the secondary Finesse server.Step 3 Click Save.
Cisco Finesse Administration Guide, Release 12.0(1)21
Manage System SettingsCluster Settings

Context Service SettingsCisco Context Service is a cloud-based omnichannel solution for Unified CCE. It captures your customer’sinteraction history by providing flexible storage of customer-interaction data across any channel.
Context Service works out-of-the-box with Cisco Customer Collaboration products. Context Service alsoprovides an SDK interface for integration with your own applications or third-party applications to captureend-to-end customer-interaction data.
For more information about Context Service and to check service availability, see https://help.webex.com/community/context-service.
Context Service Network Connectivity RequirementsContext Service requires the call center components using Context Service to be able to connect to the publicInternet.
Context Service uses port 443 (HTTPS).
The following URLs must be whitelisted in your firewall so that your contact center components can connectto, and receive data from Context Service.
• *.webex.com
• *.wbx2.com
• *.ciscoccservice.com
Use wildcard URLs in your allowed list as Context Service is accessed through multiple subdomains. ContextService subdomain names can dynamically change.
Note
If you register Context Service by enabling the proxy setting option, configure the browser proxy with theURL specified in the Context ServiceManagement Gadget. Refer to the following links to configure the proxysettings for the related browsers:
https://support.google.com/chrome/answer/96815?hl=enChrome
https://support.mozilla.org/en-US/kb/advanced-panel-settings-in-firefox
Firefox
https://windows.microsoft.com/en-in/windows/change-internet-explorer-proxy-server-settings#1TC=windows-7
Internet Explorer
Configure Context Service SettingsUse the Context Service Management gadget to register Cisco Finesse with the Context Service.
Cisco Finesse Administration Guide, Release 12.0(1)22
Manage System SettingsContext Service Settings
Procedure
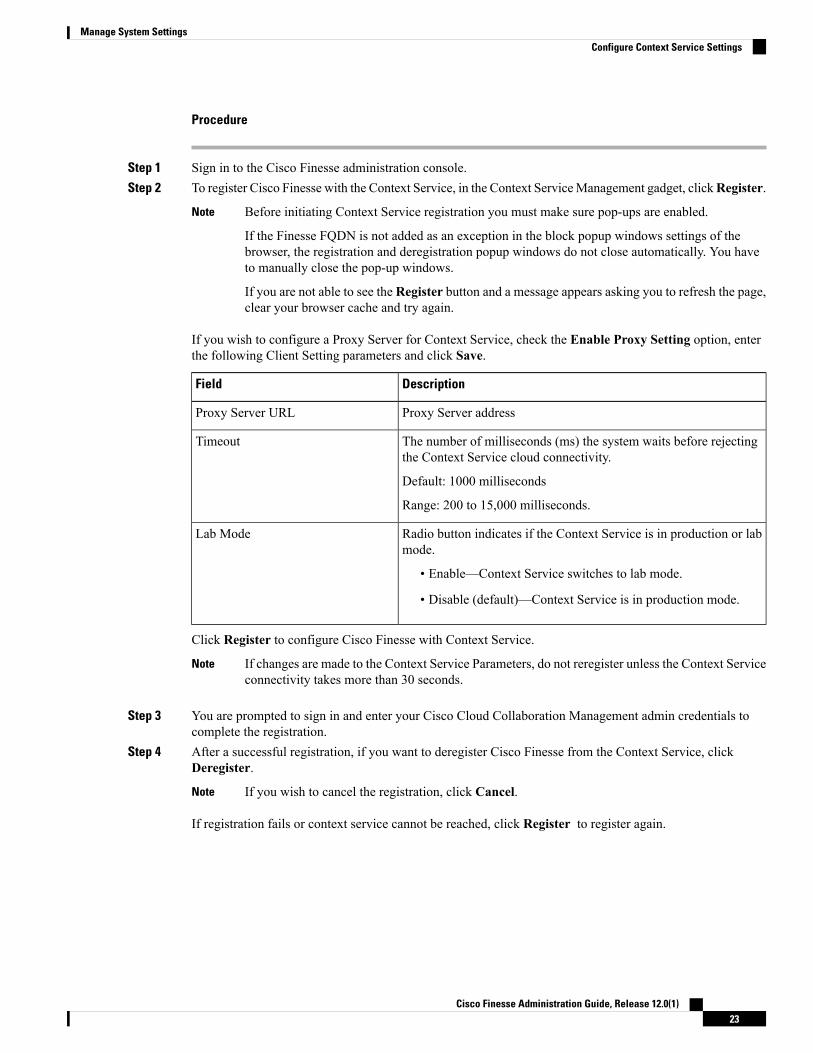
Step 1 Sign in to the Cisco Finesse administration console.Step 2 To register Cisco Finesse with the Context Service, in the Context ServiceManagement gadget, clickRegister.
Before initiating Context Service registration you must make sure pop-ups are enabled.
If the Finesse FQDN is not added as an exception in the block popup windows settings of thebrowser, the registration and deregistration popup windows do not close automatically. You haveto manually close the pop-up windows.
If you are not able to see the Register button and a message appears asking you to refresh the page,clear your browser cache and try again.
Note
If you wish to configure a Proxy Server for Context Service, check the Enable Proxy Setting option, enterthe following Client Setting parameters and click Save.
DescriptionField
Proxy Server addressProxy Server URL
The number of milliseconds (ms) the system waits before rejectingthe Context Service cloud connectivity.
Default: 1000 milliseconds
Range: 200 to 15,000 milliseconds.
Timeout
Radio button indicates if the Context Service is in production or labmode.
• Enable—Context Service switches to lab mode.
• Disable (default)—Context Service is in production mode.
Lab Mode
Click Register to configure Cisco Finesse with Context Service.
If changes are made to the Context Service Parameters, do not reregister unless the Context Serviceconnectivity takes more than 30 seconds.
Note
Step 3 You are prompted to sign in and enter your Cisco Cloud Collaboration Management admin credentials tocomplete the registration.
Step 4 After a successful registration, if you want to deregister Cisco Finesse from the Context Service, clickDeregister.
If you wish to cancel the registration, click Cancel.Note
If registration fails or context service cannot be reached, click Register to register again.
Cisco Finesse Administration Guide, Release 12.0(1)23
Manage System SettingsConfigure Context Service Settings

If you use Firefox, enable the dom.allow_scripts_to_close_windows config to ensure that anyadditional tabs opened for context service registration close as expected. To perform this:
a. Enter about:config in the Firefox browser.
b. Click I accept the risk.
c. Search for dom.allow_scripts_to_close_windows config.
d. Double click to change the value field to True.
e. Restart your browser.
Note
Desktop Chat Server SettingsDesktop Chat is an XMPP browser based chat, which is powered by Cisco Instant Messaging and Presence(IM&P) service. It provides presence and chat capabilities within the Unified CM platform. For more details,see Configuration and Administration of the IM and Presence Service at https://www.cisco.com/c/en/us/support/unified-communications/unified-communications-manager-callmanager/products-installation-and-configuration-guides-list.html.
Desktop Chat connects to Cisco IM&P servers over port 5280 from the browser hosting the agent desktop.IM&P server visibility and port accessibility needs to be ensured if clients intend to use this feature. TheDesktop Chat gadget configures the IM&P host BOSH URL’s used by the desktop to communicate with theIM&P server over BOSH HTTP.
IM&P has a clustered design, where users are distributed across multiple nodes in the cluster. The DesktopChat initially discovers the IM&P nodes that a user has configured, caches this information and communicateswith the actual server for subsequent login, until the browser cache is cleared. To spread the initial discoveryload, it is advisable to configure the nodes in a round robin fashion if the deployment has more than oneFinesse cluster. For example, if there are 5 IM&P nodes configure Finesse cluster A with node 1 & 2, Finessecluster B with nodes 3 & 4, and so on.
Node availability should be considered while configuring the IM&PURL. The secondary node will be availablefor discovery in scenarios where the first node is not reachable. The secondary node will be connected fordiscovery only if the primary node is unreachable.
For the URL to be configured, refer Cisco Unified Presence Administration service, in System, ServiceParameters. Choose the required IM&P server, select Cisco XCPWeb ConnectionManager. The URL bindingpath is listed against the field HTTP Binding Path. The full URL to be configured in Finesse ishttps://<hostname>:5280/URL-binding-path.
Use the Desktop Chat Server Settings to configure chat settings for the Finesse desktop. The following tabledescribes the fields on the Desktop Chat Server Settings gadget.
ExplanationField
Enter the IM&P primary server URL of Desktop Chat.Primary Chat Server
Enter the IM&P secondary server URL of DesktopChat.
Secondary Chat Server
Cisco Finesse Administration Guide, Release 12.0(1)24
Manage System SettingsDesktop Chat Server Settings

Actions on the Desktop Chat Server gadget:
• Save: Saves your configuration changes
• Revert: Retrieves the most recently saved server settings
For Desktop Chat to work without any issues, ensure the following services are running on IM&P:
• Cisco Presence Engine
• Cisco XCP Text Conference Manager
• Cisco XCP Web Connection Manager
• Cisco XCP Connection Manager
• Cisco XCP Directory Service
• Cisco XCP Authentication Service
• Cisco XCP File Transfer Manager
Important
Desktop Chat is supported with the unrestricted versions of IM&P only if Finesse is accessed via HTTP. Toaccess Finesse using HTTP, use the utils finesse application_https_redirect disable CLI.
Note
Desktop Chat Search
To enable this feature in Cisco Finesse, install Finesse 12.0(1)ES4 COP or higher.Note
By default, the desktop chat user search displays all the users from LDAP. You can refine this search to displaythe users from the corresponding customer whose Agent or Supervisor initiated the search, based on theOrganization Unit (OU) defined in Cisco Unified Communications Manager IM and Presence Service. Thisis supported on Cisco Unified Communications Manager IM and Presence Service, Release 12.5(1)SU2 ESbuild version 12.5.1.12900-26 onwards. Contact Cisco TAC for more details.
In Cisco Unified Communications Manager IM and Presence Service, the administrator must map the ClientUser Fields to the Appropriate LDAP User Fields in the Searchable LDAP Attributes table.
Searchable LDAP Attributes (Client-to-LDAP Field Attribute Mappings)
The setting depends on the type of LDAP server that you select, and must exactly match each logical entityon the LDAP server (for example, firstname, lastname, fullname, and so on). Map each Client User to LDAPfield attributes for XMPP user search, as follows:
• Active Directory provides default values in the Client User and LDAP user fields. You can edit eachfield as you require to suit your configuration.
• Generic Directory Server does not provide default values. You must specify which LDAP attributes tomap to each Client User Field for XMPP user search.
Cisco Finesse Administration Guide, Release 12.0(1)25
Manage System SettingsDesktop Chat Server Settings
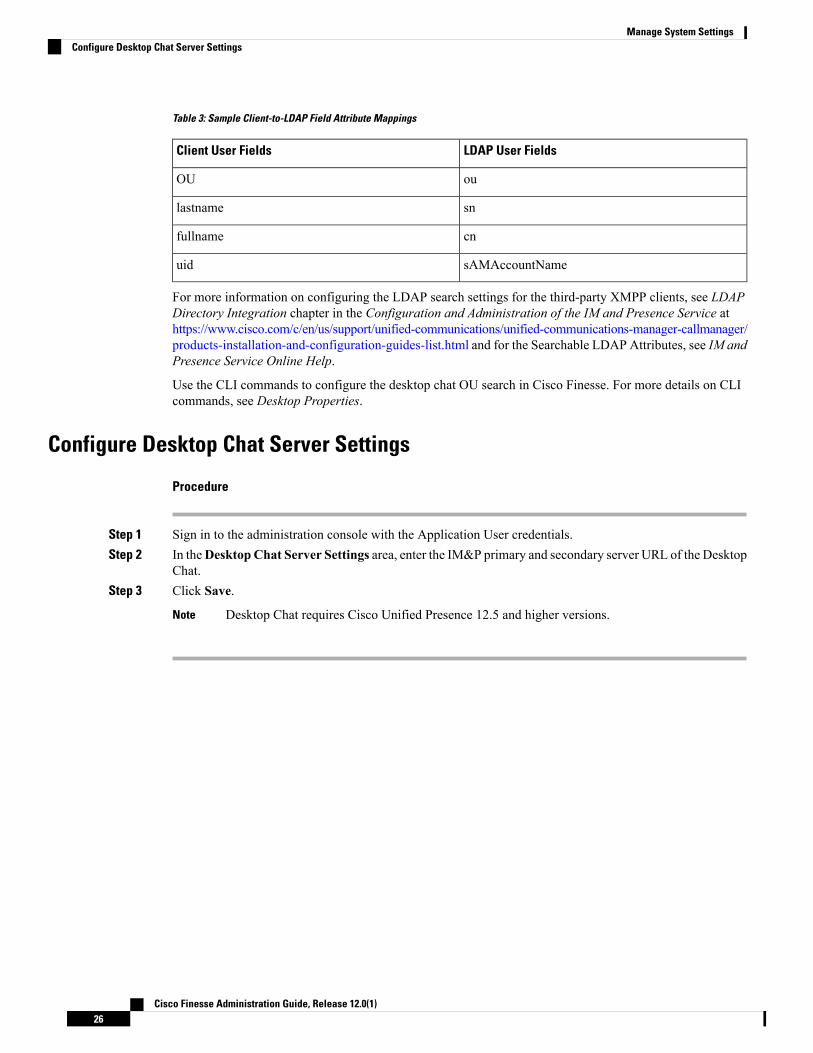
Table 3: Sample Client-to-LDAP Field Attribute Mappings
LDAP User FieldsClient User Fields
ouOU
snlastname
cnfullname
sAMAccountNameuid
For more information on configuring the LDAP search settings for the third-party XMPP clients, see LDAPDirectory Integration chapter in the Configuration and Administration of the IM and Presence Service athttps://www.cisco.com/c/en/us/support/unified-communications/unified-communications-manager-callmanager/products-installation-and-configuration-guides-list.html and for the Searchable LDAP Attributes, see IM andPresence Service Online Help.
Use the CLI commands to configure the desktop chat OU search in Cisco Finesse. For more details on CLIcommands, see Desktop Properties.
Configure Desktop Chat Server Settings
Procedure
Step 1 Sign in to the administration console with the Application User credentials.Step 2 In theDesktopChat Server Settings area, enter the IM&P primary and secondary server URL of the Desktop
Chat.Step 3 Click Save.
Desktop Chat requires Cisco Unified Presence 12.5 and higher versions.Note
Cisco Finesse Administration Guide, Release 12.0(1)26
Manage System SettingsConfigure Desktop Chat Server Settings

C H A P T E R 3Manage Call Variables Layouts
• Call Variables Layouts, on page 27• Call Variables, on page 28• Configure Call Variables Layouts, on page 29• Add ECC Variables to Call Variables Layout, on page 30• Assign Call Variables Layouts, on page 30• Manipulate Call Variables Layouts with a Workflow, on page 31
Call Variables LayoutsYou can use the Call Variables Layouts gadget to define how call variables appear on the Finesse agentdesktop. You can configure up to 200 unique Call Variables Layouts (one default and 199 custom layouts).As part of this functionality:
• Each layout has a name (required) and description (optional).
• After an upgrade from a release earlier than Cisco Finesse Release 11.0, Finesse migrates the previouslyconfigured default layout and assigns it the default name (Default Layout) and description (Layout usedwhen no other layout matches the user layout Custom/ECC Variable).
• You can change the name and description of the default Call Variables Layout.
• You cannot delete the default Call Variables Layout.
• Finesse appends (Default) to the name of the default Call Variables Layout.
• To display a custom Call Variables Layout, in the Unified CCE routing script set the user.Layout ECC
variable to the name of a configured Call Variables Layout. In this case, if no custom layouts match theuser.Layout value (or no custom layouts are configured), Finesse displays the default layout.
• Finesse retains the custom layout as specified by the user.Layout ECC variable on CTI server failover.During PG failover, Finesse changes the active call layout to the default layout while retaining the callvariables and time indicators.
Cisco Finesse Administration Guide, Release 12.0(1)27

Call VariablesEach Call Variables Layout supports one variable in the header of the call control gadget and up to a total of20 variables in two columns below the header (up to 10 in each column). You can use call variables, ExtendedCall Context (ECC) variables, or the following Outbound Option ECC variables:
• BACampaign
• BAAccountNumber
• BAResponse
• BAStatus
• BADialedListID
• BATimeZone
• BABuddyName
Columns can be empty.
The administrator can include the following additional fields in the Call Variables Layout. These variablesappear as a drop-down list in the call variable gadget which the admin can assign to a layout.
• queueNumber
• queueName
• callKeyCallId
• callKeyPrefix
• callKeySequenceNum
• wrapUpReason
The callKeyPrefix indicates the day when the call was routed.
The callKeyCallId indicates the unique number for the call routed on that day.
To uniquely locate the call in Unified CCE database records, concatenate the two variables callKeyPrefix andcallKeyCallId.
Note
To enable Outbound Option data to appear in Cisco Finesse, the administrator must edit the Default Layoutto include some or all Outbound Option variables.
Cisco Finesse Administration Guide, Release 12.0(1)28
Manage Call Variables LayoutsCall Variables

Configure Call Variables LayoutsProcedure
Step 1 From the Manage Call Variables Layouts gadget:
• Click New to create a new Call Variables Layout.
• Choose a layout from the list and click Edit to modify an existing Call Variables Layout (or clickDeleteto remove it).
Step 2 Under Create New Layout (or under Edit <layout name> when editing an existing layout):
• Enter a name for the Call Variables Layout (maximum 40 characters).
• Enter a description of the Call Variables Layout (maximum 128 characters).
Step 3 Under Call Header Layout:
• Enter the display name that you want to appear in the header of the Call Control gadget on the Finessedesktop. For example, Customer Name (maximum 50 characters).
• From the drop-down list, choose the call variable or Outbound Option ECC variable that you want toappear in the header. For example, callVariable3 (maximum 32 characters).
Step 4 In the Call Body Left-Hand Layout and Call Body Right-Hand Layout areas:a) Click Add Row to add a new row (or click the “X” to delete a row).b) For each row:
• Enter the display name that you want to appear on the desktop. For example, Customer Name(maximum 50 characters).
• Enter the corresponding call variable or Outbound Option ECC variable from the drop-down list(maximum 32 characters).
Step 5 Select up to five call variables using the check box. The selected call variables are displayed in agent callpopover and supervisor active call details.
If you do not select any call variables, the first two call variables from the Call Body Left-Handlayout area will be displayed in the agent call popover and supervisor active call details. If there areno call variables in the Left-hand layout area, then the call variables in the Right-Hand Layout willbe selected.
Note
Step 6 Click Save to save the changes, or Cancel to discard the changes.
When you modify the Call Variables Layout of the agent desktop, the changes you make take effectafter three seconds. However, agents or supervisors who are signed in when the changes are mademust sign out and sign back in to see those changes reflected on their desktops.
Note
Cisco Finesse Administration Guide, Release 12.0(1)29
Manage Call Variables LayoutsConfigure Call Variables Layouts
Step 7 To view the latest configured Call Variables Layout, click Refresh from the Manage Call Variables Layoutsgadget.
Call Variables PopoverIn the call layout popover configuration, you can configure the call header and up to five call variables in theCall Variables Layout. These variables are displayed in the agent's call popover and active call details in theTeam Performance gadget for a supervisor.
If you do not select any call variables, the first two call variables from the Call Body Left-Hand layout areawill be displayed in the agent call popover and supervisor active call details. If there are no call variables inthe Left-hand layout area, then the call variables in the Right-Hand Layout will be selected.
In upgrade scenarios, by default, the first two call variables will be displayed in the agent call popover andsupervisor active call details. You can modify the configuration of the popover variables to improve the agentand supervisor experience.
Add ECC Variables to Call Variables LayoutProcedure
Step 1 In the header or the row where you want the ECC variable to appear, from the Variable drop-down list, chooseCustom.
Step 2 In the Custom/ECC Variable Name field, enter the name of the ECC variable you want to appear on the agentdesktop.
Step 3 Click Set.
The ECC variable now appears in the Variable drop-down list for selection.
Assign Call Variables LayoutsProcedure
Step 1 In CCE Configuration Manager, create an ECC variable called user.Layout in the Expanded Call Variablelist.
If a user.layout and a user.Layout are specified, Finesse will prioritize user.layout over user.Layout.If the layout specified in the user.Layout or user.layout is not found, Finesse uses the Default layout.
Note
Cisco Finesse Administration Guide, Release 12.0(1)30
Manage Call Variables LayoutsCall Variables Popover

Step 2 Add user.Layout to the CCE routing script. Use a Set Variable node in an appropriate place in the script toset the value of user.Layout to the name of the call variables layout to display. The layout name should matchthe name of a call variables layout that was created on the Call Variables Layout tab in Finesse Administration.
Manipulate Call Variables Layouts with a WorkflowYou can manipulate the call variables layout that an agent sees when a call is answered by using a workflow.To do so, configure an HTTP Request workflow action and set the value of the ECC variable user. Layout tothe name of the custom layout to display.
For information about how and when workflows are executed, seeWorkflows and Workflow Actions.
For more details, see the section, "Adding an HTTP Request Workflow Action" in the white paper CiscoFinesse: How to Create a Screen-Pop Workflow.
Cisco Finesse Administration Guide, Release 12.0(1)31
Manage Call Variables LayoutsManipulate Call Variables Layouts with a Workflow

Cisco Finesse Administration Guide, Release 12.0(1)32
Manage Call Variables LayoutsManipulate Call Variables Layouts with a Workflow

C H A P T E R 4Manage Desktop Layout
You can define the layout of the Finesse desktop on the Desktop Layout tab.
Requirements, such as processor speed and RAM, for clients that access the Finesse desktop can vary. Desktopsthat receive events for more than one agent (such as agent and supervisor desktops running Live Data reportsthat contain information about other agents and skill groups) require more processing power than desktopsthat receive events for a single agent.
Factors that determine howmuch power is required for the client include, but are not limited to, the following:
• Contact center traffic
• Additional integrated gadgets in the desktop (such as Live Data reports or third-party gadgets)
• Other applications that run on the client and share resources with the Finesse desktop
Important
• Gadgets and Components, on page 33• Finesse Desktop Layout XML, on page 34• Default Layout XML, on page 34• Update Default Desktop Layout, on page 36• Horizontal Header, on page 38• Customize Title and Logo in the Header, on page 38• alternateHosts Configuration, on page 39• Headless Gadget Configuration, on page 39• Customize Icons in Left Navigation Bar, on page 39• XML Schema Definition, on page 52• Live Data Reports, on page 55
Gadgets and ComponentsGadgets
Cisco Finesse is an OpenSocial gadget, which is an XML document that defines metadata for an OpenSocialGadget container. The gadgets are applications that are placed within the Cisco Finesse desktop. This helps
Cisco Finesse Administration Guide, Release 12.0(1)33

administrator to provide access to the contact center agents for all the applications that is required to servicecalls inside a single application.
Cisco Finesse comes with default gadgets such as, the team performance gadget, call control gadget, and callpopover. JavaScript library is available for any customers with specific requirements that are not availableout of the box.
Gadgets are listed in the desktop layout using the <gadget> tag.
Third-party gadgets are hosted on the Cisco Finesse server using the 3rdpartygadget web applicationor on an external web server. Gadgets can make REST requests to services hosted on external servers usingthe Cisco Finesse JavaScript Library API. To avoid browser cross-origin issues, REST requests are proxiedthrough the backend Shindig web application. Third-party gadgets must implement their own authenticationmechanisms for third-party REST services.
For more information about gadgets, see https://developer.cisco.com/docs/finesse/.
Components
Components are simple scripts that are loaded into the desktop directly at predefined positions as directed bythe layout, without an enclosing frame and its document.
Components have been introduced in the desktop to overcome a few rendering limitations and performanceconsiderations inherent to gadgets.
Components are listed in the desktop layout using the <component> tag. Currently, the layout validationsprevent custom components from being created. Hence, only default components are allowed in the desktoplayouts. The default desktop functionalities are currently registered as components to provide flexibility andto reduce the load on the server.
Finesse Desktop Layout XMLThe Finesse Layout XML defines the layout of the Finesse desktop, and the gadgets and components displayedon the desktop.
Use the Manage Desktop Layout gadget to upload an XML layout file to define the layout of the Finessedesktop for agents and supervisors.
Actions on theManage Desktop Layout gadget are as follows.
• Finesse Default Layout XML - Expands to show the layout XML for the default Finesse desktop.
• Restore Default Layout - Restores the Cisco Finesse desktop to the default layout.
• Save - Saves your configuration changes.
• Revert - Retrieves and applies the most recently saved desktop layout.
Default Layout XMLThe Finesse default desktop layout XML for Unified CCE and Packaged CCE contains optional gadgets andnotes. The notes describe how to modify the layout for your deployment type.
Cisco Finesse Administration Guide, Release 12.0(1)34
Manage Desktop LayoutFinesse Desktop Layout XML

Optional Live Data gadgets in the layout XML are commented out. After you install and configure Live Data,remove the comment tags from the reports that you want to appear on the desktop.
Following are the updates available in the default layout XML for Finesse desktop:
• Horizontal Header is available in the layout configuration and the Header can be customized.
• Title and Logo of Finesse desktop can be customized.
• Desktop Chat, TeamMessage, Dialer, Agent Identity, and Non-Voice State Control are added as part ofthe header component.
For upgraded layouts, TeamMessage and Desktop Chat will not appear by default. The XML must becopied from the default layout and added to the respective custom layouts. SeeCisco Finesse Installation& Upgrade Guide.
• Vertical tabs in Finesse desktop are moved to collapsable left navigation bar for which the icons can becustomized.
• Support for inbuilt java script components has been added.
• The ID attribute (optional) is the ID of the HTMLDOM element used to display the gadget or component.The ID should start with an alphabet and can contain alpha numeric characters along with hyphen(-) andunderscore(_).It can be set through the Finesse Administrative portal and has to be unique acrosscomponents and gadgets.
• ThemanagedBy attribute (optional) for Live Data gadgets defines the gadgets which manage these LiveData gadgets. The value of managedBy attribute for Live Data gadgets is team-performance. Thismeans that the rendering of the gadget is managed by the Team Performance gadget. These gadgets arenot rendered by default, but will be rendered when the options Show State History and ShowCall Historyare selected in the Team Performance gadget.
For upgraded layouts, themanagedBy attribute will be introduced, and will have the value of the ID ofthe Team Performance gadget in the same tab. If there are multiple instances of Team Performancegadgets and Live Data gadget pairs, they will be associated in that order. If the ID of the Team Performancegadget is changed, the value of themanagedBy attribute should also be updated to reflect the same IDfor the Live Data gadgets. Otherwise, the Team Performance gadget instance will not show its respectiveLive Data gadgets.
• The Hidden attribute (optional) is used to support headless gadgets. When an attribute is set to"hidden=true", then the gadget is loaded by the container, but will not be displayed. The default valueset for the attribute is "false".
• maxRows is changed from being a query parameter to an attribute.
Example of maxRows being a query parameter:<gadget id="team-performance">/desktop/scripts/js/teamPerformance.js?maxRows=5</gadget>
Example of maxRows being an attribute:<gadget id="team-performance" maxRows="5">/desktop/scripts/js/teamPerformance.js</gadget>
During an upgrade it will be removed from the URL of the team performance gadget and added as anattribute. ThemaxRows attribute (optional) is used to adjust the height of the Team Performance gadget.If there are multiple instances of the Team Performance gadget, each instance height can be set by usingthis attribute. During an upgrade the height of the team performance gadget will be retained. By defaultthemaxRows attribute value is set to 10 rows.
Cisco Finesse Administration Guide, Release 12.0(1)35
Manage Desktop LayoutDefault Layout XML
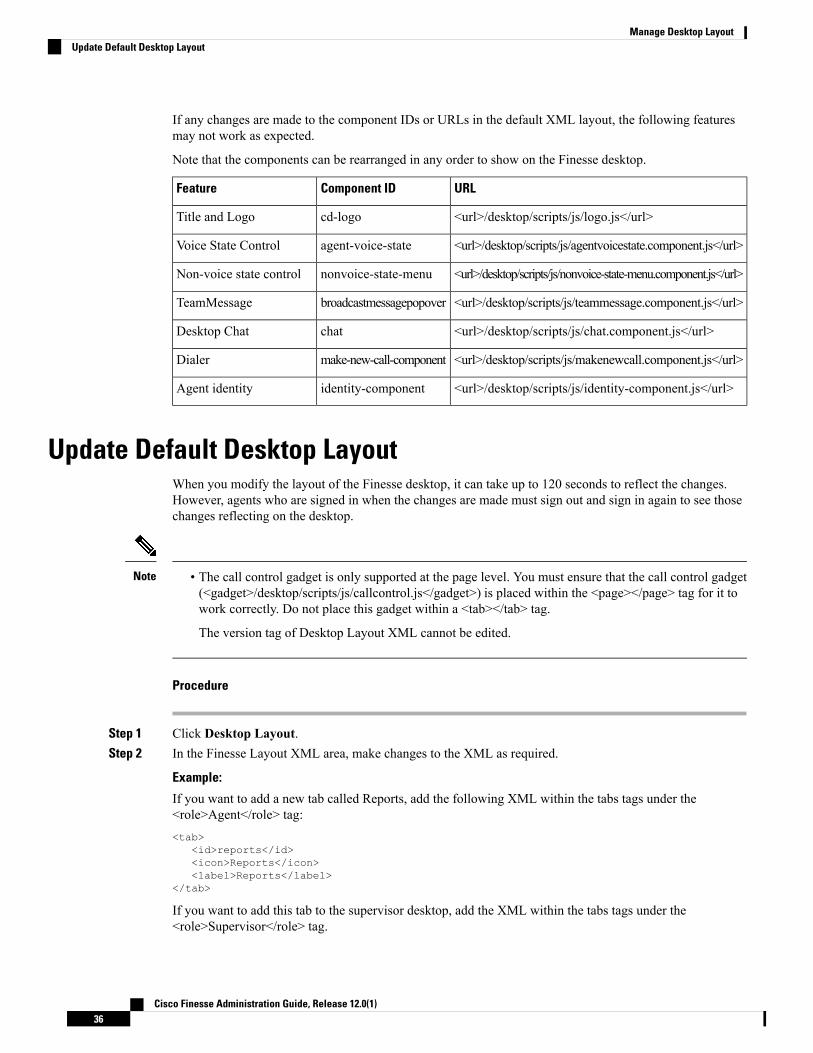
If any changes are made to the component IDs or URLs in the default XML layout, the following featuresmay not work as expected.
Note that the components can be rearranged in any order to show on the Finesse desktop.
URLComponent IDFeature
<url>/desktop/scripts/js/logo.js</url>cd-logoTitle and Logo
<url>/desktop/scripts/js/agentvoicestate.component.js</url>agent-voice-stateVoice State Control
<url>/desktop/scripts/js/nonvoice-state-menu.component.js</url>nonvoice-state-menuNon-voice state control
<url>/desktop/scripts/js/teammessage.component.js</url>broadcastmessagepopoverTeamMessage
<url>/desktop/scripts/js/chat.component.js</url>chatDesktop Chat
<url>/desktop/scripts/js/makenewcall.component.js</url>make-new-call-componentDialer
<url>/desktop/scripts/js/identity-component.js</url>identity-componentAgent identity
Update Default Desktop LayoutWhen you modify the layout of the Finesse desktop, it can take up to 120 seconds to reflect the changes.However, agents who are signed in when the changes are made must sign out and sign in again to see thosechanges reflecting on the desktop.
• The call control gadget is only supported at the page level. You must ensure that the call control gadget(<gadget>/desktop/scripts/js/callcontrol.js</gadget>) is placed within the <page></page> tag for it towork correctly. Do not place this gadget within a <tab></tab> tag.
The version tag of Desktop Layout XML cannot be edited.
Note
Procedure
Step 1 Click Desktop Layout.Step 2 In the Finesse Layout XML area, make changes to the XML as required.
Example:
If you want to add a new tab called Reports, add the following XML within the tabs tags under the<role>Agent</role> tag:<tab>
<id>reports</id><icon>Reports</icon><label>Reports</label>
</tab>
If you want to add this tab to the supervisor desktop, add the XML within the tabs tags under the<role>Supervisor</role> tag.
Cisco Finesse Administration Guide, Release 12.0(1)36
Manage Desktop LayoutUpdate Default Desktop Layout
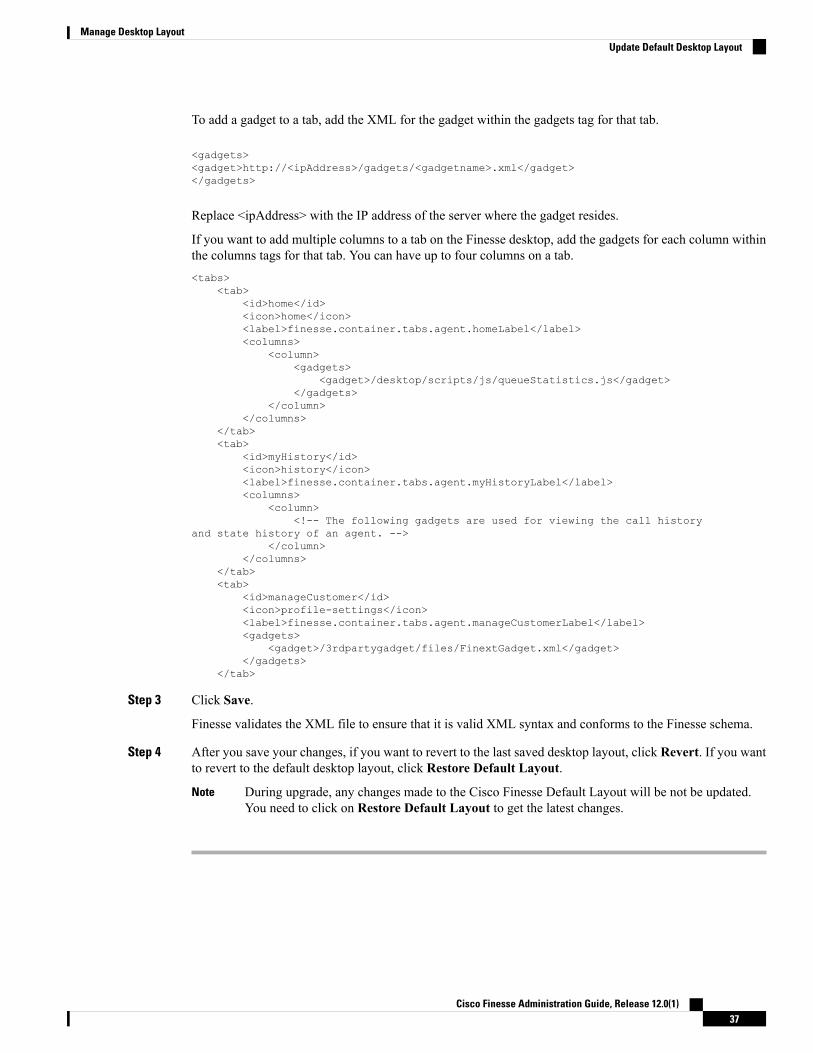
To add a gadget to a tab, add the XML for the gadget within the gadgets tag for that tab.
<gadgets><gadget>http://<ipAddress>/gadgets/<gadgetname>.xml</gadget></gadgets>
Replace <ipAddress> with the IP address of the server where the gadget resides.
If you want to add multiple columns to a tab on the Finesse desktop, add the gadgets for each column withinthe columns tags for that tab. You can have up to four columns on a tab.<tabs>
<tab><id>home</id><icon>home</icon><label>finesse.container.tabs.agent.homeLabel</label><columns>
<column><gadgets>
<gadget>/desktop/scripts/js/queueStatistics.js</gadget></gadgets>
</column></columns>
</tab><tab>
<id>myHistory</id><icon>history</icon><label>finesse.container.tabs.agent.myHistoryLabel</label><columns>
<column><!-- The following gadgets are used for viewing the call history
and state history of an agent. --></column>
</columns></tab><tab>
<id>manageCustomer</id><icon>profile-settings</icon><label>finesse.container.tabs.agent.manageCustomerLabel</label><gadgets>
<gadget>/3rdpartygadget/files/FinextGadget.xml</gadget></gadgets>
</tab>
Step 3 Click Save.
Finesse validates the XML file to ensure that it is valid XML syntax and conforms to the Finesse schema.
Step 4 After you save your changes, if you want to revert to the last saved desktop layout, click Revert. If you wantto revert to the default desktop layout, click Restore Default Layout.
During upgrade, any changes made to the Cisco Finesse Default Layout will be not be updated.You need to click on Restore Default Layout to get the latest changes.
Note
Cisco Finesse Administration Guide, Release 12.0(1)37
Manage Desktop LayoutUpdate Default Desktop Layout
Horizontal HeaderThe Horizontal Header on the Finesse desktop has the following components from left to right. All thesecomponents can be removed and replaced with custom gadgets as required.
• Logo: Default is Cisco logo. Can be customized.
• Product Name: Default is Cisco Finesse. Can be customized.
• Agent State for Voice: Displays agent state for voice call.
• Agent State for Digital Channels: Displays agent state for digital channels.
• Dialer Component: Agent can make a new call.
• Identity Component: Displays agent name and signout functionality with reason codes.
The sum of widths set for all gadgets and components in the header (inside right aligned columns and leftaligned colums) should not exceed the total header width. If it exceeds the header width, some of thegadgets/components will not be visible.
Note
Customize Title and Logo in the HeaderYou can customize the title and logo displayed on the Finesse desktop:
Procedure
Step 1 Click Desktop Layout.Step 2 Enter the product name in the config value tag with title key.Step 3 Upload the logo file just like any third-party gadget.
For more information, see section Upload Third-Party Gadgets in Cisco Finesse Admin Guide.
Step 4 Enter the URL of the logo file in the config value tag with logo key.
Example:<configs>
<!-- The Title for the application which can be customised.--><config value="product.full-name" Key="title"/>
<!-- The logo file for the application--><!--<config key="logo" value="/3rdpartygadgets/<some_sample_image>"/-->
</configs>
The customized logo and product name is displayed on the Finesse desktop.
Cisco Finesse Administration Guide, Release 12.0(1)38
Manage Desktop LayoutHorizontal Header

The file size that can be uploaded for the logo must be kept within 40 pixels. The file types supported are.svg, .png, .gif, and .jpeg/jpg.
Note
alternateHosts ConfigurationThe <gadget> element in the Finesse Layout XML provides an attribute to specify alternate hosts from whichthe gadget can be loaded. This allows the Cisco Finesse desktop to load the gadget using a different host ifthe primary server is unavailable.
The alternateHosts attribute contains a comma-separated list of FQDNs that will be used if theprimary-host-FQDN is unavailable.<gadget alternateHosts="host1,host2,host3,...">
https://<primary-host-FQDN>/<gadget-URL></gadget>
The alternateHosts attribute is only applicable for gadgets with an absolute URL. That is URLs containingthe FQDN of a host, an optional port, and the complete URL path to the gadget. For example: <gadgetalternateHosts="host1,host2">https://primary host/relative_path</gadget>
If loading the gadget from the primary-host fails, the Cisco Finesse container attempts to load the gadget fromthe alternate hosts in the order specified in the alternateHosts attribute.
The Cisco Finesse desktop may fail to load the gadget even if some of the hosts are reachable. In such cases,refresh the Cisco Finesse desktop.
When the gadget is specified with a relative URL, for example: <gadget>/3rdpartygadgets/relative_path</gadget>, the alternateHosts attribute does not apply and is ignored bythe Cisco Finesse desktop.
If the host serving the gadget fails after the Cisco Finesse desktop was successfully loaded, the desktop mustbe refreshed in order to load the gadget from an alternate host. The gadget does not implement its own failovermechanism.
Note
Headless Gadget ConfigurationHeadless gadgets are gadgets which do not need a display space, but can be loaded and run like a backgroundtask in the browser. The Hidden attribute (optional) is used to support headless gadgets in the layout XML.When an attribute is set to "hidden=true", then the gadget is loaded by the container, but will not be displayed.The default value set for the attribute is "false".
Customize Icons in Left Navigation BarYou can add icons (both custom and inbuilt) to the collapsible left navigation bar of the Finesse desktop:
Cisco Finesse Administration Guide, Release 12.0(1)39
Manage Desktop LayoutalternateHosts Configuration

Procedure
Step 1 Click Desktop Layout.Step 2 Enter name of the gadget or component in the id tag.Step 3 Enter the value of the icon in the icon tag.Step 4 Upload the icon file just like any third-party gadget.
For more information, see section Upload Third-Party Gadgets in Cisco Finesse Admin Guide.
When adding a custom icon, provide the path in the icon tag and if you are adding an inbuilt icon,provide the icon value in the icon tag
Note
Example:<tab>
<id>myHistory</id><icon>/3rdpartygadgets/<some_sample_image><label>finesse.container.tabs.agent.myHistoryLabel</label><columns><column><!-- The following gadgets are used for viewing the call history and state
history of an agent. --><gadgets>
<gadget>https://my-cuic-server:8444/cuic/gadget/LiveData/LiveDataGadget
.jsp?gadgetHeight=280&viewId=5FA44C6F930C4A64A6775B21A17EED6A&filterId=agentTaskLog.id=CL%20teamName</gadget>
<gadget>https://my-cuic-server:8444/cuic/gadget/LiveData/LiveDataGadget
.jsp?gadgetHeight=280&viewId=56BC5CCE8C37467EA4D4EFA8371258BC&filterId=agentStateLog.id=CL%20teamName</gadget>
</gadgets></column>
</columns></tab><tab>
<id>manageCustomer</id><icon>/3rdpartygadgets/<some_sample_image><label>finesse.container.tabs.agent.manageCustomerLabel</label><gadgets>
<gadget>/desktop/gadgets/CustomerContext.xml</gadget></gadgets>
</tab>
The file size that can be uploaded in the left navigation bar as custom icons is 25 pixels by 25 pixels.The maximum width of the tab title in the left navigation bar must be 80 pixels or less. The filetypes supported are .svg, .png, .gif, and .jpeg/jpg.
Note
Customize Icons for GadgetsAs part of the Cisco Finesse container, various standard icons are available. Use the following procedure tocustomize the icons for the gadgets hosted in Finesse desktop.
Cisco Finesse Administration Guide, Release 12.0(1)40
Manage Desktop LayoutCustomize Icons for Gadgets
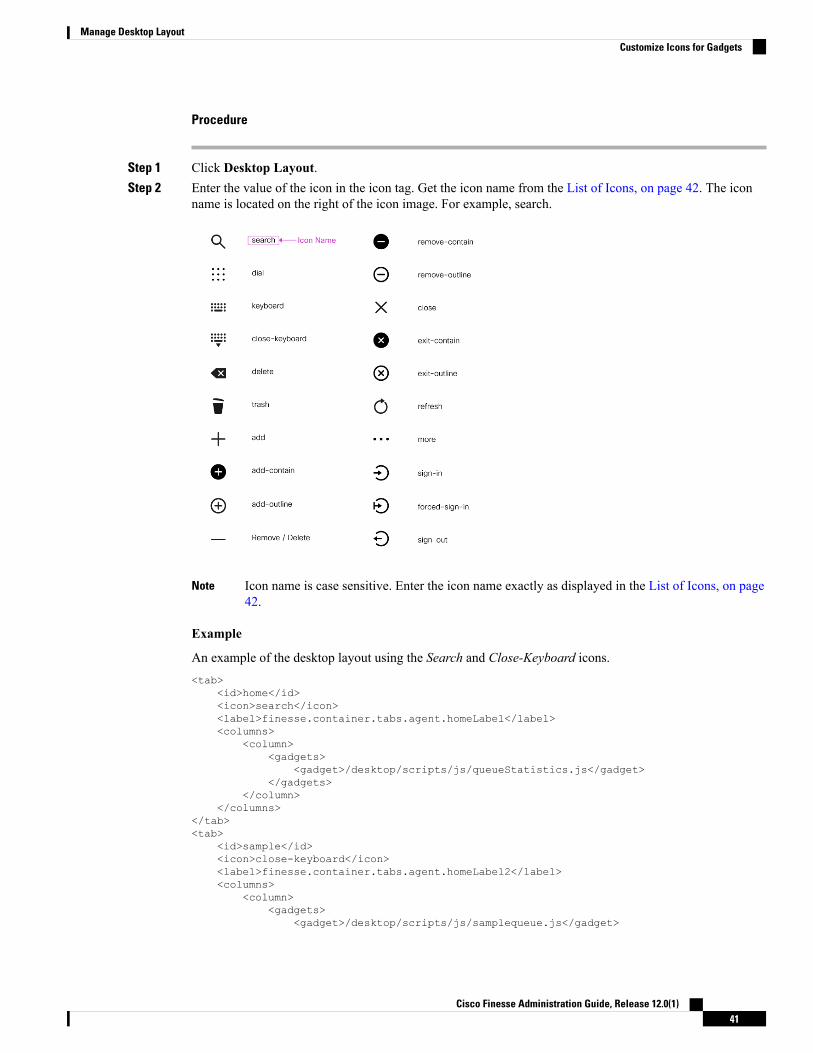
Procedure
Step 1 Click Desktop Layout.Step 2 Enter the value of the icon in the icon tag. Get the icon name from the List of Icons, on page 42. The icon
name is located on the right of the icon image. For example, search.
Icon name is case sensitive. Enter the icon name exactly as displayed in the List of Icons, on page42.
Note
Example
An example of the desktop layout using the Search and Close-Keyboard icons.<tab>
<id>home</id><icon>search</icon><label>finesse.container.tabs.agent.homeLabel</label><columns>
<column><gadgets>
<gadget>/desktop/scripts/js/queueStatistics.js</gadget></gadgets>
</column></columns>
</tab><tab>
<id>sample</id><icon>close-keyboard</icon><label>finesse.container.tabs.agent.homeLabel2</label><columns>
<column><gadgets>
<gadget>/desktop/scripts/js/samplequeue.js</gadget>
Cisco Finesse Administration Guide, Release 12.0(1)41
Manage Desktop LayoutCustomize Icons for Gadgets

</gadgets></column>
</columns></tab>
List of IconsThe following are the icons for Actions.
The following are the icons for Audio.
Cisco Finesse Administration Guide, Release 12.0(1)42
Manage Desktop LayoutList of Icons

The following are the icons for Camera.
The following are the icons for Chat.
Cisco Finesse Administration Guide, Release 12.0(1)43
Manage Desktop LayoutList of Icons

The following are the icons for Collaboration.
The following are the icons for Contacts.
Cisco Finesse Administration Guide, Release 12.0(1)44
Manage Desktop LayoutList of Icons

The following are the icons for Content.
The following are the icons for Editor.
Cisco Finesse Administration Guide, Release 12.0(1)45
Manage Desktop LayoutList of Icons

The following are the icons for Email.
The following are the icons for Hardware.
Cisco Finesse Administration Guide, Release 12.0(1)46
Manage Desktop LayoutList of Icons

The following are the icons for Media.
The following are the icons for Navigation.
Cisco Finesse Administration Guide, Release 12.0(1)47
Manage Desktop LayoutList of Icons

The following are the icons for Network.
The following are the icons for Notifications and Alerts.
Cisco Finesse Administration Guide, Release 12.0(1)48
Manage Desktop LayoutList of Icons

The following are the icons for Phone.
The following are the icons for Sources.
Cisco Finesse Administration Guide, Release 12.0(1)49
Manage Desktop LayoutList of Icons
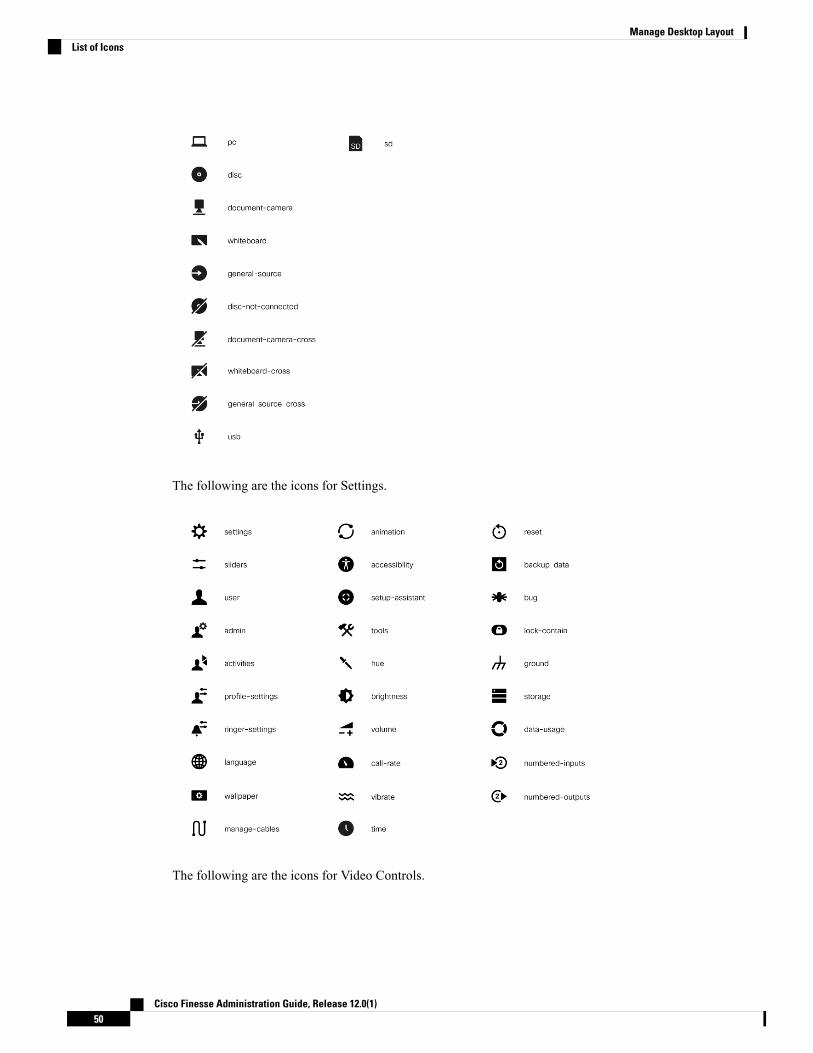
The following are the icons for Settings.
The following are the icons for Video Controls.
Cisco Finesse Administration Guide, Release 12.0(1)50
Manage Desktop LayoutList of Icons

The following are the icons for Miscellaneous Icons.
Formore information on customizing the visual experience, seeVisual Design Kit at https://developer.cisco.com/docs/finesse/#!visual-design-guide.
Cisco Finesse Administration Guide, Release 12.0(1)51
Manage Desktop LayoutList of Icons

XML Schema DefinitionYou must ensure that the XML uploaded conforms to the XML schema definition for Finesse. The XMLschema definition for Finesse is as follows:<?xml version="1.0" encoding="UTF-8"?><xs:schema xmlns:xs="http://www.w3.org/2001/XMLSchema"xmlns="http://www.cisco.com/vtg/finesse" targetNamespace="http://www.cisco.com/vtg/finesse"elementFormDefault="qualified"><!-- definition of version element --><xs:element name="version">
<xs:simpleType><xs:restriction base="xs:double">
<xs:pattern value="[0-9\.]+" /></xs:restriction>
</xs:simpleType></xs:element><!-- The below elements are for common desktop header and configs --><!-- Copied from:
https://github5.cisco.com/ccbu-shared/common-desktop/blob/master/java/layout-manager/src/main/resources/layoutSchema.xsd--><!-- If the common-desktop XSD changes, this too needs to be updated --><!-- Only difference is that, column has been renamed to headercolumn, since column is
alredy there in finesse desktop layout --><xs:complexType name="configs">
<xs:sequence><xs:element name="config" type="config" minOccurs="0" maxOccurs="unbounded" />
</xs:sequence></xs:complexType><xs:complexType name="config">
<xs:attribute name="key"><xs:simpleType>
<xs:restriction base="xs:string"><xs:pattern value="[a-zA-Z]*" />
</xs:restriction></xs:simpleType>
</xs:attribute><xs:attribute name="value" type="xs:string" />
</xs:complexType><xs:complexType name="header">
<xs:choice><xs:sequence>
<xs:element name="leftAlignedColumns" type="listOfColumns" minOccurs="1"maxOccurs="1" />
<xs:element name="rightAlignedColumns" type="listOfColumns" minOccurs="0"maxOccurs="1" />
</xs:sequence><xs:sequence>
<xs:element name="rightAlignedColumns" type="listOfColumns" minOccurs="1"maxOccurs="1" />
</xs:sequence></xs:choice>
</xs:complexType><xs:complexType name="component">
<xs:sequence><xs:element name="url" type="xs:string" minOccurs="1" maxOccurs="1" /><xs:element name="stylesheet" type="xs:string" minOccurs="0" maxOccurs="1" />
</xs:sequence><xs:attribute name="id" use="required">
<xs:simpleType><xs:restriction base="xs:string">
<xs:pattern value=".+" />
Cisco Finesse Administration Guide, Release 12.0(1)52
Manage Desktop LayoutXML Schema Definition

</xs:restriction></xs:simpleType>
</xs:attribute><xs:attribute name="order">
<xs:simpleType><xs:restriction base="xs:string">
<xs:pattern value="[0-9]{0,10}" /></xs:restriction>
</xs:simpleType></xs:attribute>
</xs:complexType><xs:complexType name="listOfColumns">
<xs:sequence><xs:element name="headercolumn" type="headercolumn" minOccurs="1"
maxOccurs="unbounded" /></xs:sequence>
</xs:complexType><xs:complexType name="headercolumn">
<xs:choice minOccurs="0" maxOccurs="1"><xs:element ref="gadget" /><xs:element name="component" type="component" />
</xs:choice><xs:attribute name="width">
<xs:simpleType><xs:restriction base="xs:string">
<xs:pattern value="[0-9]+(px|%)" /></xs:restriction>
</xs:simpleType></xs:attribute>
</xs:complexType><!-- The above elements are for common desktop header and configs --><!-- definition of role type --><xs:simpleType name="role">
<xs:restriction base="xs:string"><xs:enumeration value="Agent" /><xs:enumeration value="Supervisor" /><xs:enumeration value="Admin" />
</xs:restriction></xs:simpleType><!-- definition of simple elements --><xs:element name="id">
<xs:simpleType><xs:restriction base="xs:string">
<xs:pattern value="[a-zA-Z]([-_:\.a-zA-Z0-9])*" /></xs:restriction>
</xs:simpleType></xs:element><xs:element name="label">
<xs:simpleType><xs:restriction base="xs:string">
<xs:minLength value="1" /><xs:pattern value="[^\r\n]+" /><!-- This regex restricts the label string from carriage returns or newline
characters --></xs:restriction>
</xs:simpleType></xs:element><xs:element name="icon" type="xs:anyURI" /><xs:element name="gadget">
<xs:complexType><xs:simpleContent>
<xs:extension base="restrictWhiteSpaces"><!-- <xs:attribute name="staticMessage" type="xs:string"/> --><xs:attribute name="id">
Cisco Finesse Administration Guide, Release 12.0(1)53
Manage Desktop LayoutXML Schema Definition

<xs:simpleType><xs:restriction base="xs:string">
<xs:pattern value="[a-zA-Z]([-_a-zA-Z0-9])*" /></xs:restriction>
</xs:simpleType></xs:attribute><xs:attribute name="alternateHosts" type="xs:string" /><xs:attribute name="managedBy" type="xs:string" /><xs:attribute name="hidden" type="xs:boolean" />
</xs:extension></xs:simpleContent>
</xs:complexType></xs:element><xs:element name="role" type="role" /><xs:element name="gadgets">
<!-- Grouping of a set of gadgets --><xs:complexType>
<xs:sequence minOccurs="0" maxOccurs="unbounded"><!-- No limit to number of gadget URIs for now --><xs:element ref="gadget" /><!-- URI of the gadget xml -->
</xs:sequence></xs:complexType>
</xs:element><xs:simpleType name="restrictWhiteSpaces">
<xs:restriction base="xs:anyURI"><xs:minLength value="1" /><xs:pattern value="\S+" /><!-- This regex restricts anyURI from containing whitespace within -->
</xs:restriction></xs:simpleType><xs:element name="column">
<!-- Grouping of a set of gadgets within a column --><xs:complexType>
<xs:sequence minOccurs="0" maxOccurs="unbounded"><!-- No limit to number of gadget URIs for now --><xs:element ref="gadgets" /><!-- URI of the gadget xml -->
</xs:sequence></xs:complexType>
</xs:element><xs:element name="columns">
<!-- Grouping of a set of columns --><xs:complexType>
<xs:sequence><xs:element ref="column" minOccurs="0" maxOccurs="unbounded" />
</xs:sequence></xs:complexType>
</xs:element><xs:element name="page">
<!-- Grouping of a set of persistent gadgets --><xs:complexType>
<xs:sequence minOccurs="0" maxOccurs="unbounded"><!-- No limit to number of gadget URIs for now --><xs:element ref="gadget" /><!-- URI of the gadget xml -->
</xs:sequence></xs:complexType>
</xs:element><xs:element name="tab">
<xs:complexType><xs:sequence>
<xs:element ref="id" /><!-- Id of the tab selector in the desktop -->
Cisco Finesse Administration Guide, Release 12.0(1)54
Manage Desktop LayoutXML Schema Definition
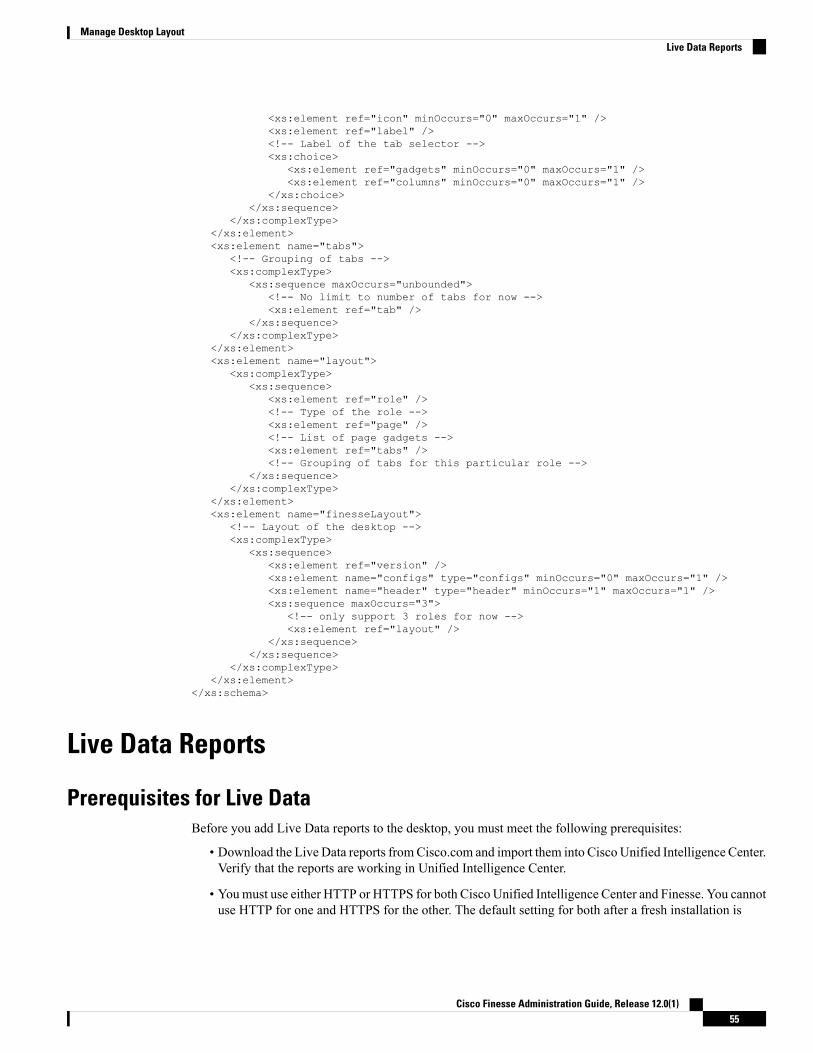
<xs:element ref="icon" minOccurs="0" maxOccurs="1" /><xs:element ref="label" /><!-- Label of the tab selector --><xs:choice>
<xs:element ref="gadgets" minOccurs="0" maxOccurs="1" /><xs:element ref="columns" minOccurs="0" maxOccurs="1" />
</xs:choice></xs:sequence>
</xs:complexType></xs:element><xs:element name="tabs">
<!-- Grouping of tabs --><xs:complexType>
<xs:sequence maxOccurs="unbounded"><!-- No limit to number of tabs for now --><xs:element ref="tab" />
</xs:sequence></xs:complexType>
</xs:element><xs:element name="layout">
<xs:complexType><xs:sequence>
<xs:element ref="role" /><!-- Type of the role --><xs:element ref="page" /><!-- List of page gadgets --><xs:element ref="tabs" /><!-- Grouping of tabs for this particular role -->
</xs:sequence></xs:complexType>
</xs:element><xs:element name="finesseLayout">
<!-- Layout of the desktop --><xs:complexType>
<xs:sequence><xs:element ref="version" /><xs:element name="configs" type="configs" minOccurs="0" maxOccurs="1" /><xs:element name="header" type="header" minOccurs="1" maxOccurs="1" /><xs:sequence maxOccurs="3">
<!-- only support 3 roles for now --><xs:element ref="layout" />
</xs:sequence></xs:sequence>
</xs:complexType></xs:element>
</xs:schema>
Live Data Reports
Prerequisites for Live DataBefore you add Live Data reports to the desktop, you must meet the following prerequisites:
• Download the Live Data reports fromCisco.com and import them into Cisco Unified Intelligence Center.Verify that the reports are working in Unified Intelligence Center.
• Youmust use either HTTP or HTTPS for both Cisco Unified Intelligence Center and Finesse. You cannotuse HTTP for one and HTTPS for the other. The default setting for both after a fresh installation is
Cisco Finesse Administration Guide, Release 12.0(1)55
Manage Desktop LayoutLive Data Reports

HTTPS. If you want to use HTTP, you must enable it on both Cisco Unified Intelligence Center andFinesse.
For more information, see Administration Console User Guide for Cisco Unified Intelligence Center athttps://www.cisco.com/c/en/us/support/customer-collaboration/unified-intelligence-center/products-maintenance-guides-list.html.
• Ensure that user integration synchronization is enabled for Cisco Unified Intelligence Center.
For more information, see Administration Console User Guide for Cisco Unified Intelligence Center athttps://www.cisco.com/c/en/us/support/customer-collaboration/unified-intelligence-center/products-maintenance-guides-list.html.
• For HTTPS, you must upload security certificates to the Finesse, Cisco Unified Intelligence Center andLive Data servers. Finesse, Cisco Unified Intelligence Center, and Live Data are installed with self-signedcertificates. However, if you use the self-signed certificates, agents and supervisors must accept certificatesin the Finesse desktop when they sign in before they can use the Live Data gadget. To avoid thisrequirement, you can provide a CA certificate instead. You can obtain a CA certificate from a third-partycertificate vendor or produce one internal to your organization.
Add Live Data Reports to FinesseTo add Live Data reports to the Finesse desktop. The procedure that you follow depends on several factors,described in the following table.
When to useProcedure
After a fresh installation or after an upgrade if youhave not customized the default desktop layout.
Add Live Data reports to default desktop layout
If you have customized the Finesse desktop layout.Add Live Data reports to custom desktop layout
To the desktop layout for specific teams only.Add Live Data reports to team layout
The line breaks and spaces that appear in the example text of the procedures are provided only for readabilityand must not be included in the actual code.
Note
After you add a gadget, sign in to the Finesse desktop and make sure it appears the way you want. If you usea report with a large number of rows, you may want to adjust the gadget height or the screen resolution onthe computer used to access the desktop to make the report easier to read or make more rows appear on thescreen without needing to scroll down.
Agents who are signed in when you change the desktop layout must sign out and sign back in to see the changeon their desktops.
Note
Cisco Finesse Administration Guide, Release 12.0(1)56
Manage Desktop LayoutAdd Live Data Reports to Finesse

Add Live Data Reports to Default Desktop LayoutThe Finesse default layout XML contains commented XML code for the Live Data report gadgets availablefor the Finesse desktop. The gadgets are divided into two categories: HTTPS version of Live Data gadgetsand HTTP version of Live Data gadgets.
This procedure explains how to add the Live Data report gadgets to the default desktop layout. Use thisprocedure after a fresh installation of Finesse. If you upgraded Finesse and do not have a custom desktoplayout, clickRestore Default Layout on the Manage Desktop Layout gadget and then follow the steps in thisprocedure.
Procedure
Step 1 Click Desktop Layout.Step 2 Remove the comment characters (<!-- and -->) from each report that you want to add to the desktop layout.
Make sure that you choose the reports that match the method that your agents use to access the Finesse desktop(HTTP or HTTPS).
Step 3 Replace “my-cuic-server” with the FQDN of your Cisco Unified Intelligence Center Server.Step 4 Optionally, change the gadget height.
Example:
The height that is specified in the Live Data gadget URLs is 310 pixels. If you want to change the height,change the gadgetHeight parameter in the URL to the desired value. For example, if you want the gadgetheight to be 400 pixels, change the code as follows, replacing 310 with 400:<gadget>https://my-cuic-server:8444/cuic/gadget/LiveData/LiveDataGadget.jsp?
gadgetHeight=400&viewId_1=99E6C8E210000141000000D80A0006C4&filterId_1=agent.id=CL%20teamName&viewId_2=9AB7848B10000141000001C50A0006C4&filterId_2=agent.id=CL%20teamName</gadget>
Tomaintain the optimal display of the gadget with scroll bars, set the value for the gadget height to a minimumof 200 pixels. If the report does not require scroll bars, for example a one-row report, you can set a smallergadget height (for example, 100 pixels). If you do not specify anything for the gadget height (if you removethe 310 from the URL), it defaults to 170 pixels.
Step 5 Click Save.
In a dynamic type gadget, multiple viewId parameters is not supported. Check the URL in the errormessage before proceeding to save the default XML layout. The name value "type=dynamic mustbe part of the gadget URL.
Note
If you select a TDM agent in the Team Performance Gadget, the recent state history data of theselected agent is not populated.
Note
Add Live Data Reports to Custom Desktop LayoutThe Finesse default layout XML contains commented XML code for the Live Data report gadgets availablefor the Finesse desktop. The gadgets are divided into two categories: HTTPS version of Live Data gadgetsand HTTP version of Live Data gadgets.
Cisco Finesse Administration Guide, Release 12.0(1)57
Manage Desktop LayoutAdd Live Data Reports to Default Desktop Layout

To add the Live Data report gadgets to a custom desktop layout.
Procedure
Step 1 Click the Desktop Layout tab.Step 2 Click Finesse Default Layout XML to show the default layout XML.Step 3 Copy the XML code for the report you want to add from the Finesse default layout XML. If your agents use
HTTP to access Finesse, copy the XML code for the HTTP report. If they use HTTPS, copy the XML codefor the HTTPS report.
Example:
To add the Agent Report for HTTPS, copy the following:<gadget>https://my-cuic-server:8444/cuic/gadget/LiveData/LiveDataGadget.jsp?
gadgetHeight=310&viewId_1=99E6C8E210000141000000D80A0006C4&filterId_1=agent.id=CL%20teamName&viewId_2=9AB7848B10000141000001C50A0006C4&filterId_2=agent.id=CL%20teamName
</gadget>
Step 4 Paste the XML within the tab tags where you want it to appear.
Example:
To add the report to the home tab of the agent desktop:<layout><role>Agent</role><page><gadget>/desktop/gadgets/CallControl.jsp</gadget>
</page><tabs><tab><id>home</id><label>finesse.container.tabs.agent.homeLabel</label><gadget>https://my-cuic-server:8444/cuic/gadget/LiveData/LiveDataGadget.jsp?
gadgetHeight=310&viewId_1=99E6C8E210000141000000D80A0006C4&filterId_1=agent.id=CL%20teamName&viewId_2=9AB7848B10000141000001C50A0006C4&filterId_2=agent.id=CL%20teamName
</gadget></tab><tab><id>manageCall</id><label>finesse.container.tabs.agent.manageCallLabel</label>
</tab></tabs>
</layout>
Step 5 Replace my-cuic-server with the FQDN of your Cisco Unified Intelligence Center Server.Step 6 Optionally, change the gadget height.
Example:
The height specified in the Live Data gadget URLs is 310 pixels. If you want to change the height, changethe gadgetHeight parameter in the URL to the desired value. For example, if you want the gadget height tobe 400 pixels, change the code as follows:<gadget>https://my-cuic-server:8444/cuic/gadget/LiveData/LiveDataGadget.jsp?
gadgetHeight=400&viewId_1=99E6C8E210000141000000D80A0006C4&
Cisco Finesse Administration Guide, Release 12.0(1)58
Manage Desktop LayoutAdd Live Data Reports to Custom Desktop Layout

filterId_1=agent.id=CL%20teamName&viewId_2=9AB7848B10000141000001C50A0006C4&filterId_2=agent.id=CL%20teamName</gadget>
Tomaintain the optimal display of the gadget with scroll bars, set the value for the gadget height to a minimumof 200 pixels. If the report does not require scroll bars, for example a one-row report, you can set a smallergadget height (for example, 100 pixels). If you do not specify anything for the gadget height (if you removethe 310 from the URL), it defaults to 170 pixels.
Step 7 Click Save.
Add Live Data Reports to Team LayoutThe Finesse default layout XML contains commented XML code for the Live Data report gadgets availablefor the Finesse desktop. The gadgets are divided into two categories: HTTPS version of Live Data gadgetsand HTTP version of Live Data gadgets.
To add the Live Data report gadgets to the desktop layout of a specific team:
Procedure
Step 1 Click the Desktop Layout tab.Step 2 Click Finesse Default Layout XML to show the default layout XML.Step 3 Copy the XML code for the report you want to add from the Finesse default layout XML. If your agents use
HTTP to access Finesse, copy the XML code for the HTTP report. If they use HTTPS, copy the XML codefor the HTTPS report.
Example:
To add the Agent Report for HTTPS, copy the following:<gadget>https://my-cuic-server:8444/cuic/gadget/LiveData/LiveDataGadget.jsp?
gadgetHeight=310&viewId_1=99E6C8E210000141000000D80A0006C4&filterId_1=agent.id=CL%20teamName&viewId_2=9AB7848B10000141000001C50A0006C4&filterId_2=agent.id=CL%20teamName</gadget>
Step 4 Click Team Resources.Step 5 Select the team from the list of teams for which you want to add the report.Step 6 In the Resources for <team name> area, click the Desktop Layout tab.Step 7 Check the Override System Default check box.Step 8 Paste the XML within the tab tags where you want it to appear.
Example:
To add the report to the home tab of the agent desktop:<layout><role>Agent</role><page><gadget>/desktop/gadgets/CallControl.jsp</gadget>
</page><tabs><tab><id>home</id>
Cisco Finesse Administration Guide, Release 12.0(1)59
Manage Desktop LayoutAdd Live Data Reports to Team Layout

<label>finesse.container.tabs.agent.homeLabel</label><gadget>https://my-cuic-server:8444/cuic/gadget/LiveData/LiveDataGadget.jsp?
gadgetHeight=310&viewId_1=99E6C8E210000141000000D80A0006C4&filterId_1=agent.id=CL%20teamName&viewId_2=9AB7848B10000141000001C50A0006C4&filterId_2=agent.id=CL%20teamName
</gadget></tab><tab><id>manageCall</id><label>finesse.container.tabs.agent.manageCallLabel</label>
</tab></tabs>
</layout>
Step 9 Replace “my-cuic-server” with the FQDN of your Cisco Unified Intelligence Center Server.Step 10 Optionally, change the gadget height.
Example:
The height specified in the Live Data gadget URLs is 310 pixels. If you want to change the height, changethe gadgetHeight parameter in the URL to the desired value. For example, if you want the gadget height tobe 400 pixels, change the code as follows:<gadget>https://my-cuic-server:8444/cuic/gadget/LiveData/LiveDataGadget.jsp?
gadgetHeight=400&viewId_1=99E6C8E210000141000000D80A0006C4&filterId_1=agent.id=CL%20teamName&viewId_2=9AB7848B10000141000001C50A0006C4&filterId_2=agent.id=CL%20teamName</gadget>
Tomaintain the optimal display of the gadget with scroll bars, set the value for the gadget height to a minimumof 200 pixels. If the report does not require scroll bars, for example a one-row report, you can set a smallergadget height (for example, 100 pixels). If you do not specify anything for the gadget height (if you removethe 310 from the URL), it defaults to 170 pixels.
Step 11 Click Save.
Modify Live Data Stock Reports for FinesseTo modify the Live Data stock reports in Cisco Unified Intelligence Center and add the modified report tothe Finesse desktop layout:
To make sure the modified gadget renders in the Finesse desktop, you must give the appropriate permissionfor that report in Cisco Unified Intelligence Center.
Note
Procedure
Step 1 Click the Desktop Layout.Step 2 Click Finesse Default Layout XML to show the default layout XML.Step 3 Copy the gadget URL for the report you want to modify from the Finesse default layout XML and paste it
into a text editor.
Cisco Finesse Administration Guide, Release 12.0(1)60
Manage Desktop LayoutModify Live Data Stock Reports for Finesse
Example:
If you want to modify the Agent Report for HTTPS, copy the following URL and paste it into a text editor:<gadget>https://my-cuic-server:8444/cuic/gadget/LiveData/LiveDataGadget.jsp?
gadgetHeight=310&viewId_1=99E6C8E210000141000000D80A0006C4&filterId_1=agent.id=CL%20teamName&viewId_2=9AB7848B10000141000001C50A0006C4&filterId_2=agent.id=CL%20teamName</gadget>
Step 4 In Cisco Unified Intelligence Center, in Edit view of the report, select the view for which you want to createa gadget URL and then click Links.
The HTML Link field displays the permalink of the customized report.
Step 5 Copy the permalink of the customized report from the HTML Link field, and paste it in a text editor. Thencopy the viewId value from this link into the desired view.
Example:
Copy the viewId, which is underlined in this example, from the permalink for the report.
https://<Server Name>:8444/cuic/permalink/PermalinkViewer.htmx?viewId=5C90012F10000140000000830A4E5B33&linkType=htmlType&viewType=Grid
Step 6 Replace the desired viewId value in the gadget URLwith the viewId value from the permalink of the customizedreport.
For more information on modifying reports, see Cisco Unified Intelligence Center User Guide athttps://www.cisco.com/c/en/us/support/customer-collaboration/unified-intelligence-center/products-user-guide-list.html.
Note
Step 7 Replace my-cuic-server with the FQDN of the Cisco Unified Intelligence Center Server.Step 8 Add the customized gadget URL to the desktop layout XML in the Manage Desktop Layout gadget and click
Save.
Configure Live Data Reports with Multiple ViewsCisco Unified Intelligence Center allows you to display multiple Live Data reports or views on a single gadget.Agents can select the desired view to display from a drop-down list on the gadget toolbar, which lists up tofive report views in Report Name - View Name format.
This procedure describes how to addmultiple Live Data views to the Finesse desktop layout using the viewId_nand filterId_n keys. You can specify up to five report views to appear in your gadget. The first view amongthe five is the default view. There is no defined order for how the remaining views are displayed.
Finesse still supports the display of a single gadget using a single viewId. However, if you specify the singleviewId along with multiple viewId_n keys, the multiple views are used and the single viewId is ignored.
To make sure the modified gadget renders in the Finesse desktop, you must give the appropriate permissionfor that report in Unified Intelligence Center.
Note
Cisco Finesse Administration Guide, Release 12.0(1)61
Manage Desktop LayoutConfigure Live Data Reports with Multiple Views

Procedure
Step 1 For each report or view that you want to include in the gadget, obtain the associated viewId from the permalinkfor the view:a) In Unified Intelligence Center, in Edit view of the report, select the desired view then click Links.
The HTML Link field displays the permalink of the customized report.
b) Copy the permalink of the customized report from theHTMLLink field, and paste it in a text editor, andthen copy the viewID value from the permalink and save it.
Example:
Copy the viewId, which is underlined in this example, from the permalink for the report.
https://<Server Name>:8444/cuic/permalink/PermalinkViewer.htmx?viewId=5C90012F10000140000000830A4E5B33&linkType=htmlType&viewType=Grid
Step 2 From the Finesse default layout XML, copy the gadget URL for one of the Live Data reports and paste it intoa text editor.
Example:
Copy the URL for the Agent Skill Group for HTTPS from the default layout XML and paste it into a texteditor:
<gadget>https://my-cuic-server:8444/cuic/gadget/LiveData/LiveDataGadget.jsp?gadgetHeight=310&viewId_1=9AB7848B10000141000001C50A0006C4&filterId_1=agent.id=CL%20teamName</gadget>
Step 3 To update the URL to refer to a different report view, populate the viewId_1 value (after the equal sign) withthe desired viewId obtained in step 1.
Example:
The following shows the URL updated with the example viewId copied from step 1.
<gadget>https://my-cuic-server:8444/cuic/gadget/LiveData/LiveDataGadget.jsp?gadgetHeight=310&viewId_1=5C90012F10000140000000830A4E5B33&filterId_1=agent.id=CL%20teamName</gadget>
Step 4 For each additional view you want to include:a) At the end of the URL, copy and paste the viewId_1 and agentId_1 strings with a leading ampersand.
Example:
<gadget>https://my-cuic-server:8444/cuic/gadget/LiveData/LiveDataGadget.jsp?gadgetHeight=310&viewId_1=5C90012F10000140000000830A4E5B33&filterId_1=agent.id=CL%20teamName&viewId_1=5C90012F10000140000000830A4E5B33&filterId_1=agent.id=CL%20teamName</gadget>
b) Update the copied viewId_1 and filterId_1 in the URL to the next available integer (in this example,viewId_2 and filterId_2).
Example:
<gadget>https://my-cuic-server:8444/cuic/gadget/LiveData/LiveDataGadget.jsp?gadgetHeight=310&viewId_1=5C90012F10000140000000830A4E5B33&filterId_1=agent.id=CL%20teamName&viewId_2=5C90012F10000140000000830A4E5B33&filterId_2=agent.id=CL%20teamName</gadget>
Cisco Finesse Administration Guide, Release 12.0(1)62
Manage Desktop LayoutConfigure Live Data Reports with Multiple Views

c) Populate the copied viewId value (after the equal sign) with the value defined in the permalink for thedesired report (in this example, 99E6C8E210000141000000D80A0006C4).
Example:
<gadget>https://my-cuic-server:8444/cuic/gadget/LiveData/LiveDataGadget.jsp?gadgetHeight=310&viewId_1=5C90012F10000140000000830A4E5B33&filterId_1=agent.id=CL%20teamName&viewId_2=99E6C8E210000141000000D80A0006C4&filterId_2=agent.id=CL%20teamName</gadget>
d) Make sure that the filterId value matches the type required by the report type, as follows:
• Agent Reports: filterId_N=agent.id=CL%20teamName
• Agent Skill Group Reports: filterId_N=agent.id=CL%20teamName
• Skill Group Reports: filterId_N=skillGroup.id=CL%20teamName
• Precision Queue Reports: filterId_N=precisionQueue.id=CL%20teamName
Step 5 Replace my-cuic-server with the FQDN of your Cisco Unified Intelligence Center Server.Step 6 Add the customized gadget URL to the desktop layout XML in the Manage Desktop Layout gadget and click
Save.
Cisco Finesse Administration Guide, Release 12.0(1)63
Manage Desktop LayoutConfigure Live Data Reports with Multiple Views

Cisco Finesse Administration Guide, Release 12.0(1)64
Manage Desktop LayoutConfigure Live Data Reports with Multiple Views

C H A P T E R 5Manage Phone Books
On the Phone Books tab of the Cisco Finesse administration console, you can create and manage global andteam phone books and phone book contacts. Global phone books are available to all agents; team phone booksare available to agents in that team.
• Phone Books and Contacts, on page 65• Add Phone Book, on page 66• Edit Phone Book, on page 67• Delete Phone Book, on page 67• Import Contacts, on page 67• Export Contacts, on page 68• Add Contact, on page 69• Edit Contact, on page 69• Delete Contact, on page 69
Phone Books and ContactsFinesse supports the following number of phone books:
• 10 global phone books
• 300 team phone books
The system supports a total of 50,000 contacts. The total number of contacts per agent across all phone booksis limited to 1500.
Use theManage Phone Books gadget to view, add, edit, or delete phone books and phone book contacts. Clickthe Name or Assign To headers to sort the phone books in ascending or descending order. Click the last Name,First Name, Number, or Note headers to sort the contacts in ascending or descending order.
The following table describes the fields on the Manage Phone Books gadget:
ExplanationField
The name of the phone book. It must be unique, and can be a maximum of 64alphanumeric characters.
Name
Indicates if the phone book is global (All Users) or team (Teams).Assign To
Cisco Finesse Administration Guide, Release 12.0(1)65

ExplanationField
The last name of a contact. The last name can be a maximum of 128 characters.This field is optional.
Last Name
The first name of a contact. The first name can be a maximum of 128 characters.This field is optional.
First Name
The phone number for the contact. The phone number can be 1-32 characters longand cannot be blank.
Number
Optional text that describes the contact. The note can be a maximum of 128characters.
Note
Actions on the Manage Phone Books gadget:
• New: Add a new phone book or contact
• Edit: Edit an existing phone book or contact
• Delete: Delete a phone book or contact
• Refresh: Reload the list of phone books or contacts from the server
• Import: Import a list of contacts to the phone book
• Export: Export a list of contacts from the phone book
Add Phone BookProcedure
Step 1 In the Manage Phone Books gadget, click New.Step 2 In the Name field, enter a name for the phone book.
Phone book names can be a maximum of 64 characters.Note
Step 3 From the Assign To drop-down, select All Users if the phone book is global or Teams if the phone book isavailable to specified teams.
Step 4 Click Save.
Cisco Finesse Administration Guide, Release 12.0(1)66
Manage Phone BooksAdd Phone Book

Edit Phone BookProcedure
Step 1 In the Manage Phone Books gadget, select the phone book you want to edit.Step 2 Click Edit.Step 3 In the Name field, enter the new name for the phone book. If you want to change who can access the phone
book, in the Assign To drop-down, choose All Users or Teams.Step 4 Click Save.
If you change the Assign To field from Teams to All Users, click Yes to confirm the change.
Delete Phone BookProcedure
Step 1 In the Manage Phone Books gadget, select the phone book that you want to delete.Step 2 Click Delete.Step 3 Click Yes to confirm the deletion of the selected phone book.
Import ContactsThe Import function allows you to replace all the contacts in a phone book with a new list of contacts, or topopulate a new phone book with contacts.
The import list must be in the specified comma separated values (CSV) format, and can contain a maximumof 1500 contacts. Import lists that contain more than 1500 contacts are rejected with an error message.
The CSV file contains the fields described in the following table:
Permitted CharactersCan Be Blank?MaxLength
Field
Alphanumeric characters
The CSV file that contains the contacts toimport must use Latin encoding.
Note
Yes128First Name
Yes128Last Name
No32Phone Number
Yes128Notes
Cisco Finesse Administration Guide, Release 12.0(1)67
Manage Phone BooksEdit Phone Book

The following is an example of a phone book CSV file:"First Name","Last Name","Phone Number","Notes""Amanda","Cohen","6511234","""Nicholas","Knight","612-555-1228","Sales""Natalie","Lambert","952-555-9876","Benefits""Joseph","Stonetree","651-555-7612","Manager"
A phone book CSV file must conform to this format and include the headers in the first line. During import,the file is scanned for illegal characters. If any are found, they are replaced with question marks.
Exported CSV files always show each field enclosed in double quotes to ensure that any commas or doublequotes that are part of the actual filed data are not mistaken for field delimiters. If your data does not includethese characters, you can omit the double quotes in files you prepare for importing.
Note
Procedure
Step 1 In the Manage Phone Books gadget, select the phone book into which you want to import a list of contacts.Step 2 Click Import.Step 3 Click Browse and navigate to the location of the CSV file containing the contacts you want to import.
The CSV file must use Latin encoding.Note
Step 4 Click OK.
Export ContactsThe Export function allows you to extract a list of contacts from an existing phone book. The exported list issaved in CSV format.
Procedure
Step 1 In the Manage Phone Books gadget, select the phone book that contains the contacts you want to export.Step 2 Click Export.Step 3 Click Open to open the CSV file in Excel, or click the Save drop-down list and choose Save, Save as, or
Save and open.Step 4 A message appears that gives you the option to view the downloaded file, open the folder into which the
download was saved, view the Internet Explorer View Downloads window, or dismiss the message withoutviewing the file.
Cisco Finesse Administration Guide, Release 12.0(1)68
Manage Phone BooksExport Contacts

Add ContactProcedure
Step 1 In the Manage Phone Books gadget, select the phone book to which you want to add a contact.
The List of Contacts for <phone book name> area appears.
Step 2 Click New.Step 3 Complete the fields. The First Name, Last Name, and Note fields are optional and have a maximum length
of 128 characters. The Number field is required and has a maximum length of 32 characters.Step 4 Click Save.
Edit ContactProcedure
Step 1 In the Manage Phone Books gadget, select the phone book that contains the contact you want to edit.
The List of Contacts for <phone book name> area appears.
Step 2 Select the contact you want to edit.Step 3 Click Edit.Step 4 Edit the fields that you want to change. The First Name, Last Name, and Note fields are optional and have a
maximum of 128 characters. The Number field is required and has a maximum of 32 characters.Step 5 Click Save.
Delete ContactProcedure
Step 1 In the Manage Phone Books gadget, select the phone book that contains the contact you want to delete.
The List of Contacts for <phone book name> area appears.
Step 2 Select the contact that you want to delete.Step 3 Click Delete.
Cisco Finesse Administration Guide, Release 12.0(1)69
Manage Phone BooksAdd Contact

Step 4 Click Yes to confirm the deletion of the selected contact.
Cisco Finesse Administration Guide, Release 12.0(1)70
Manage Phone BooksDelete Contact
C H A P T E R 6Manage Reasons
The Reasons tab on the Cisco Finesse administration console allows you to view, add, edit, and delete NotReady reason codes, Sign Out reason codes, and Wrap-Up reasons.
The reason codes you configure in Finesse are not automatically populated in Unified CCE. To populate themacross the solution, you must configure the reason codes in both Finesse and Unified CCE.
Reason code tables support search across reason codes and reason code labels. You can configure differentreason codes with the same reason code label across various teams.
Note
• Not Ready Reason Codes, on page 71• Sign Out Reason Codes, on page 74• Predefined System Reason Codes, on page 76• Manage Reason Code Conflicts During Upgrade, on page 78• Wrap-Up Reasons, on page 78
Not Ready Reason CodesNot Ready reason codes represent reasons that agents can select when they change their state to Not Ready.
Use the Manage Reason Codes (Not Ready) gadget to view, add, edit, or delete Not Ready reason codes.Click the Reason Label or Reason Code headers to sort the Not Ready reason codes by label or reason codein ascending or descending order. Click the Type header to sort and display system or custom reason codes.Click the Global header to sort reason codes by whether they are global (Yes) or not (No).
Not Ready reason codes can be global (visible to all agents) or team (visible only to agents on specified teams).
Finesse supports a total of 200 Not Ready reason codes. This includes a maximum of 100 global Not Readyreason codes, and 100 team Not Ready reason codes. The team reason codes can be mapped to any team, andthe same reason code can be mapped to multiple teams.
Note
The following table describes the fields on the Manage Reason Codes (Not Ready) gadget:
ExplanationField
Cisco Finesse Administration Guide, Release 12.0(1)71

The label for the Not Ready reason code.Reason Label
The label has a maximum length of 40 characters and should be unique for eachNot Ready reason code. Alphanumeric and special characters are supported.
The type of reason code (System or Custom).Type
The column is default and can be sorted to display both System reason codes andCustom reason codes.
A code for the Not Ready reason.Reason Code
The code can be any value between 1 and 65535 and must be unique.
Yes/No. Indicates if the reason code is available globally to all agents (Yes) or tospecific teams of agents (No).
Global?
Actions on the Manage Reason Codes (Not Ready) gadget:
• New: Add a new Not Ready reason code
• Edit: Edit an existing Not Ready reason code
• Delete: Delete a Not Ready reason code
• Refresh: Reload the list of Not Ready reason codes from the server
When you add, edit, or delete a Not Ready reason code, the changes you make take effect on the Finessedesktop after three seconds. However, agents who are signed in when the changes are made must sign outand sign back in to see those changes reflected on their desktops.
Note
When an agent signs in to the Finesse desktop, the agent state is set to Not Ready. The agent can then chooseto go to Ready status or choose from one of the configured Not Ready reason codes from the agent statedrop-down list.
If an agent wants to change from Ready to Not Ready status, that agent can choose the appropriate Not Readyreason code from the list of configured codes.
An agent who is on a call can select a state to be applied when the call is complete. For example, if an agentwants to be in Not Ready state when the call ends, that agent can choose Not Ready from the drop-down listwhile still on the call. The Finesse desktop shows the agent in Talking state and a pending state of Not Ready.
If the agent also applies a Not Ready reason code, the desktop shows the pending state with the reason code(in this case, Not Ready - Lunch).
Pending state changes appear on the desktop while the agent's state is Talking (for example, on hold, in aconsult call, conference, or silent monitor call).
During a PG or CTI server failover, the pending state of an agent is not retained.Note
Cisco Finesse Administration Guide, Release 12.0(1)72
Manage ReasonsNot Ready Reason Codes

Add Not Ready Reason Code
Procedure
Step 1 In the Manage Reason Codes (Not Ready) gadget, click New.Step 2 In the Reason Label box, enter a label for the reason code.
Not Ready reason code labels are limited to 40 characters.Note
Step 3 In the Reason Code box, an auto populated reason code is displayed. If you choose not to save the prepopulatedreason code, you can enter your own reason code.
The code must be between 1 and 65532 and must be unique.
Ensure there are no leading or trailing spaces.
Note
Step 4 If the reason code is global, select the Global? check box. If the reason code is specific to a team, clear theGlobal? check box.
By default, the Global? check box is selected.Note
Step 5 Click Save.
The Finesse server removes leading or trailing spaces before saving the Reason Label in the database.Note
Edit Not Ready Reason Code
Procedure
Step 1 In the Manage Reason Codes (Not Ready) gadget, select the reason code that you want to edit.Step 2 Click Edit.Step 3 If you want to change the label for the Not Ready reason code, in the Reason Label field, enter a new label
for the reason code. If you want to change the code, in the Reason Code field, enter the new code. If you wantto change who has access to the code, select or clear the Global? check box.
Step 4 Click Save.
Delete Not Ready Reason Code
An error may occur if an agent selects a Not Ready reason code after it has been deleted. Agents who aresigned in when you make changes to Not Ready reason codes must sign out and sign back in to see thosechanges reflected on their desktops.
Note
Cisco Finesse Administration Guide, Release 12.0(1)73
Manage ReasonsAdd Not Ready Reason Code

Procedure
Step 1 In the Manage Reason Codes (Not Ready) gadget, select the Not Ready reason code that you want to delete.Step 2 Click Delete.Step 3 Click Yes to confirm the deletion of the selected reason code.
Sign Out Reason CodesSign Out reason codes represent reasons that agents can select when they sign out of the Finesse desktop.
Use the Manage Reason Codes (Sign Out) gadget to view, add, edit, or delete Sign Out reason codes. Clickthe Reason Label or Reason Code headers to sort the Sign Out reason codes by label or by reason code, inascending or descending order. Click the Type header to sort and display system or custom reason codes.Click the Global header to sort the reason codes by whether they are global (Yes) or not (No).
Sign Out reason codes can be global (visible to all agents) or team (visible only to agents on specified teams).
Finesse supports 200 Sign Out reason codes. These include 100 global Sign Out reason codes, and 100 SignOut team reason codes. The team reason codes can be mapped to any team, and the same reason code can bemapped to multiple teams.
Note
The following table describes the fields on the Manage Reason Codes (Sign Out) gadget:
ExplanationField
The label for the Sign Out reason code.Reason Label
The label has a maximum length of 40 characters and should be unique for eachSign Out reason code. Alphanumeric and special characters are supported.
The type of reason code (System or Custom).Type
The column is default and can be sorted to display both System reason codes andCustom reason codes.
A code for the Sign Out reason.Reason Code
The code can be any value between 1 and 65535 and must be unique.
Yes/No. Indicates if the reason code is available globally to all agents (Yes) or tospecific teams of agents (No).
Global?
Actions on the Manage Reason Codes (Sign Out) gadget:
• New: Add a new Sign Out reason code
• Edit: Edit an existing Sign Out reason code
• Delete: Delete a Sign Out reason code
Cisco Finesse Administration Guide, Release 12.0(1)74
Manage ReasonsSign Out Reason Codes
• Refresh: Reload the list of Sign Out reason codes from the server
When you add, edit, or delete a Sign Out reason code, the changes youmake take effect on the Finesse desktopafter three seconds. However, agents who are signed in when the changes are made must sign out and signback in to see those changes reflected on their desktops.
Note
When an agent clicks Sign Out on the desktop, any configured Sign Out codes appear in a drop-down list.The agent can then choose the code that represents why that agent is signing out.
Add Sign Out Reason Code
Procedure
Step 1 In the Manage Reason Codes (Sign Out) gadget, click New.Step 2 In the Reason Label box, enter a label for the reason code.
Sign Out reason code labels are limited to 40 characters.Note
Step 3 In the Reason Code box, an auto populated reason code is displayed. If you choose not to save the prepopulatedreason, you can enter your own reason code.
The code must be between 1 and 65535 and must be unique.
Ensure there are no leading or trailing spaces.
Note
Step 4 If the reason code is global, select the Global? check box. If the reason code is specific to a team, clear theGlobal? check box.
By default, the Global? check box is selected.Note
Step 5 Click Save.
Edit Sign Out Reason Code
Procedure
Step 1 In the Manage Reason Codes (Sign Out) gadget, select the reason code that you want to edit.Step 2 Click Edit.Step 3 If you want to change the label of the Sign Out reason code, in the Reason Label field, enter a new label for
the reason code. If you want to change the code, in the Reason Code field, enter the new code. If you want tochange who has access to the code, select or clear the Global? check box.
Cisco Finesse Administration Guide, Release 12.0(1)75
Manage ReasonsAdd Sign Out Reason Code

Step 4 Click Save.
Delete Sign Out Reason Code
An error may occur if an agent selects a Sign Out reason code after it has been deleted. Agents who are signedin when you make changes to Sign Out reason codes must sign out and sign back in to see those changesreflected on their desktops.
Note
Procedure
Step 1 In the Manage Reason Codes (Sign Out) gadget, select the Sign Out reason code that you want to delete.Step 2 Click Delete.Step 3 Click Yes to confirm the deletion of the selected Sign Out reason code.
Predefined System Reason CodesFor Not Ready system reason codes and Sign Out system reason codes, only the reason code label can beedited and saved. The Global attribute and system code cannot be modified. In case the system reason codelabel is modified and you wish to revert to the default label, refer to the following list of predefined systemreason codes:
Reason Label DescriptionReason LabelSystemReason Code
Agent state changed because the agent did not answer thecall.
Not Ready - Call NotAnswered
32767
The system issues this reason code in the following scenarios:Not Ready - Offhook32762
• When the agent goes off-hook to place a call, the Finessedesktop changes the agent status to Not Ready with thisreason code.
• When the agent is in Ready state and a call is placedfrom the ACD (Automatic Call Distribution) line, thesystem issues this reason code.
The CTI OS client disconnected, logging the agent out.Logged Out - SystemDisconnect
50001
A CTI OS component disconnected, causing the agent to belogged out or set to the Not Ready state. This could be due
Logged Out - System Failure50002
Cisco Finesse Administration Guide, Release 12.0(1)76
Manage ReasonsDelete Sign Out Reason Code

to closing the agent desktop application, heart beat time out,or a CTI OS Server failure.
The system issues this reason code when the agent is forciblylogged out in certain cases.
Not Ready - ConnectionFailure
50002
Agent was logged out because the Unified CM reported thedevice out of service.
Logged Out - Device Error50003
Agent was logged out due to agent inactivity as configuredin agent desk settings.
Logged Out - InactivityTimeout
50004
For a Unified CCE agent deployment, where the Agent PhoneLine Control is enabled in the peripheral and the Non ACD
Not Ready - Non ACD Busy50005
Line Impact is configured to impact agent state, the agent isset to Not Ready while talking on a call on the Non ACD linewith this reason code.
Agent was set to Not Ready state because the agent wasrouted two consecutive calls that did not arrive.
Not Ready - Call Overlap50010
Agent was logged out when the agent's skill groupdynamically changed on the Administration & Data Server.
Logged Out - Queue Change50020
If an agent is logged in to a dynamic device target that isusing the same Dialed Number (DN) as the PG static devicetarget, the agent is logged out.
Logged Out - Device Conflict50030
Mobile agent was logged out because the call failed.Logged Out - Mobile AgentCall Fail
50040
Mobile agent state changed to Not Ready because the callfails when the mobile agent's phone line rings busy.
Not Ready - Mobile Call NotAnswered
50041
Mobile agent was logged out because the phone linedisconnected while using nailed connection mode.
Logged Out - Mobile AgentDisconnect
50042
Agent reinitialized (used if peripheral restarts).Not Ready - SystemReinitialized
65535
PG reset the agent, normally due to a PG failure.Not Ready - System Reset65534
An administrator modified the agent's extension while theagent was logged in.
Not Ready - ExtensionModified
65533
Places the agent in the Not Ready state first before forcefullylogging them off.
Not Ready - Starting ForceLogout
20001
Forces the logout request; for example, when Agent Aattempts to log in to Cisco Agent Desktop and Agent B is
Logged Out - Force Logout20002
already logged in under that agent ID, Agent A is askedwhether or not to force the login. If Agent A answers yes,Agent B is logged out and Agent A is logged in. Reports thenshow that Agent B logged out at a certain time with a reasoncode of 20002 (Agent B was forcibly logged out).
Cisco Finesse Administration Guide, Release 12.0(1)77
Manage ReasonsPredefined System Reason Codes

If not already in the Logout state, request is made to placeagent in the Not Ready state. Then logout request is made tolog agent out.
Not Ready - Agent LogoutRequest
20003
The system issues this reason code when the agent’s state isforcibly changed to Not Ready by the Supervisor.
Not Ready - SupervisorInitiated
999
The system issues this reason code when the agent’s state isforcibly changed to Logout by the Supervisor.
Logged Out - SupervisorInitiated
999
The system issues this reason code when the agent is forciblylogged out when there is a connection failure between theCisco Finesse Desktop and the Cisco Finesse Server.
Logged Out - ConnectionFailure
255
Manage Reason Code Conflicts During UpgradeSystem Reason Codes are auto-generated reason codes that may conflict with custom reason codes whenupgrading from an older version to Cisco Finesse 11.6(1). If there is a reason code conflict then the followingmessage appears when you sign in to the administration console:
Custom reason codes conflict with system reason codes. Resolve to avoid reporting inconsistency.
Clear your browser cache to ensure that you are allowed to view and resolve system reason code conflicts.Note
When performing an upgrade from an earlier version in a Unified CCE deployment, modify the followingcustom reason codes: 999, 255, 20001, 20002, 20003, and 50041. This is done to avoid conflict with thesystem reason codes.
Note
All conflicting reason codes are highlighted. To edit, select each conflicting reason code and click Edit. TheEdit Reason Code area appears. Select the reason code from the available options listed or enter any othercode you wish. The code must be unique to the particular category (Not Ready or Sign Out).
Once resolved, the reason code gets sorted based on the reason code number and placed in the table accordingly.
Wrap-Up ReasonsWrap-Up reasons represent the reasons that agents can apply to calls. A Wrap-Up reason indicates why acustomer called the contact center. For example, youmay have oneWrap-Up reason for sales calls and anotherfor support calls.
You can configure Wrap-Up reasons to be available globally to all agents or only to specific teams.
Use the Manage Wrap-Up Reasons gadget to view, add, edit, or delete Wrap-Up reasons. Click the ReasonLabel header to sort the Wrap-Up reasons in ascending or descending order. Click the Global header to sortthe Wrap-Up reasons by whether they are global (Yes) or not (No).
Cisco Finesse Administration Guide, Release 12.0(1)78
Manage ReasonsManage Reason Code Conflicts During Upgrade
Finesse supports a maximum of 100 global and 1500 team Wrap-Up reasons. No more than 100 Wrap-Upreasons can be assigned to any one team.
Note
Finesse supports wrap-up functionality only for incoming calls and Outbound Option Dialer Calls (Finessedoes not support Outbound Option Direct Preview mode). Finesse does not support wrap-up for outgoingcalls placed by agents.
To enable wrap-up, you must configure both of the following attributes in the Unified CCE Agent DeskSettings:
• Set the Work mode on incoming attribute to either Optional or Required.
• Set the Work mode on outgoing attribute to either Optional or Not Allowed.
If the Work mode on incoming attribute is set to Required, agents automatically transition to wrap-up stateafter an incoming or Outbound Option call ends. If the Work mode on incoming attribute is set to Optional,agents must select Wrap-Up from the agent state drop-down list while on a call to transition to wrap-up statewhen the call ends. If the agent does not select Wrap-Up during the call, the agent does not transition towrap-up state when the call ends.
For more information about configuring Agent Desktop Settings, see theConfigurationManager Online Helpfor Unified CCE.
The showWrapUpTimer property can be used to show or hide timer in wrap-up state.
If showWrapUpTimer is set to true then timer is displayed.
If showWrapUpTimer is set to false then timer is hidden.
Note
Wrap-Up timer is configurable. By default wrapUpCountDown property is set to true. The timer counts downby default when the agent is in wrap-up state. For more information, see Desktop Properties.
For Example, if you set the timer to 30 seconds, then by default the timer starts from 30 and ends on zero.
The default behavior can be changed by setting the wrapUpCountDown property to false.
If an agent is configured for wrap-up and selects a pending state during a call, when the call finishes that agentgoes into wrap-up and not the pending state selected during the call. The agent can end wrap-up by eitherselecting a new state (Ready or Not Ready) or letting the wrap-up timer expire. If the agent selects a newstate, the new state overrides the pending state selected during the call. If the wrap-up timer expires, the agenttransitions to the pending state.
Note
The following table describes the fields on the Manage Wrap-Up Reasons gadget:
ExplanationField
The label for the Wrap-Up reason.Reason Label
Cisco Finesse Administration Guide, Release 12.0(1)79
Manage ReasonsWrap-Up Reasons
This label must be unique for each Wrap-Up reason and has a maximum length of39 bytes (which equals 39 US English characters). Both alphanumeric and specialcharacters are supported.
Yes/No. Indicates if the Wrap-Up reason is available globally to all agents (Yes)or to specific teams of agents (No).
Global?
Actions on the Manage Wrap-Up Reasons gadget:
• New: Add a new Wrap-Up reason
• Edit: Edit an existing Wrap-Up reason
• Delete: Delete a Wrap-Up reason
• Refresh: Reload the list of Wrap-Up reasons from the server
When you add, edit, or delete a Wrap-Up reason, the changes you make take effect on the agent or supervisordesktop after three seconds. However, agents who are signed in when the changes are made must sign outand sign in again to see those changes reflected on their desktops.
Note
Add Wrap-Up Reason
Procedure
Step 1 In the Manage Wrap-Up Reasons gadget, click New.Step 2 In the Reason Label field, add a label for the Wrap-Up reason.
Wrap-Up reason labels are limited to 39 bytes.Note
Step 3 If the Wrap-Up reason is global, select the Global? check box. If the Wrap-Up reason is specific to a team,clear the Global? check box.
By default, the Global? check box is selected.Note
Step 4 Click Save.
Edit Wrap-Up Reason
Procedure
Step 1 In the Manage Wrap-Up Reasons gadget, select the Wrap-Up reason that you want to edit.Step 2 Click Edit.
Cisco Finesse Administration Guide, Release 12.0(1)80
Manage ReasonsAdd Wrap-Up Reason

The Edit Wrap-Up Reason area appears.
Step 3 In the Wrap-Up Reason Label field, enter the new label for the Wrap-Up reason. If you want to change whohas access to the Wrap-Up reason, select or clear the Global? check box.
Step 4 Click Save.
Delete Wrap-Up Reason
Procedure
Step 1 In the Manage Wrap-Up Reasons gadget, select the Wrap-Up reason that you want to delete.Step 2 Click Delete.
A question appears asking you to confirm that you want to delete the selected Wrap-Up reason.
Step 3 Click Yes to confirm the deletion of the selected Wrap-Up reason.
Force Wrap-Up ReasonIf the Force Wrap-Up reason is configured, the agent must select a Wrap-Up reason before changing the stateafter the call ends. The agent cannot change the state until theWrap-up reason is applied. TheWrap-Up reasoncan be selected during the call or after the call ends.
The Force Wrap-Up reason is enabled by default. Use the CLI commands to disable and enable this feature.For more information, see Desktop Properties.
Note
Cisco Finesse Administration Guide, Release 12.0(1)81
Manage ReasonsDelete Wrap-Up Reason

Cisco Finesse Administration Guide, Release 12.0(1)82
Manage ReasonsForce Wrap-Up Reason

C H A P T E R 7Manage Team Resources
You can assign phone books, reason codes, wrap-up reasons, custom desktop layouts, and workflows to teamson the Team Resources tab of the administration console.
• Team Resources, on page 83• Assign Phone Books and Reasons to Team, on page 84• Unassign Phone Books and Reasons from Team, on page 85• Assign Custom Desktop Layout to Team, on page 85• Assign Workflows to Team, on page 86• Unassign Workflows from Team, on page 86
Team ResourcesUse the Manage Team Resources gadget on the Team Resources tab to assign and unassign phone books,reasons, custom desktop layouts, and workflows to teams. Click the Name or ID header to sort the teams inascending or descending order.
The Manage Team Resources gadget contains six tabs, each enabling you to assign or unassign resources toa team. The tabs are defined in the following table:
DescriptionTab Name
Use this tab to customize the desktop layout for the team. The default layout is definedin the Manage Desktop Layout gadget. You can define one custom layout for theteam.
Desktop Layout
Use this tab to assign and unassign phone books to the team. Only phone books thatare defined in the Manage Phone Books gadget as available to teams are availablefor assignment.
Phone Books
Use this tab to assign and unassign Not Ready reason codes to the team. Only NotReady reason codes that are defined in theManage Reason Codes (Not Ready) gadgetas available to teams (not global) are available for assignment.
Reason Codes (NotReady)
Use this tab to assign and unassign Sign Out reason codes to the team. Only SignOut reason codes that are defined in the Manage Reason Codes (Sign Out) gadgetas available to teams (not global) are available for assignment.
Reason Codes (SignOut)
Cisco Finesse Administration Guide, Release 12.0(1)83

DescriptionTab Name
Use this tab to assign and unassign Wrap-Up reasons to the team. Only Wrap-Upreasons that are defined in the Manage Wrap-Up Reasons gadget as available toteams (not global) are available for assignment.
Wrap-Up Reasons
Use this tab to assign and unassign workflows to the team. Only workflows that aredefined in the Manage Workflows gadget are available for assignment.
Workflows
Actions on the Manage Team Resources Gadget
• Add: Assign a phone book, reason, or workflow to the team
• Save: Save the phone book, reason, desktop layout assignment, or workflow to the team
• Revert: Cancel any changes made before they are saved
• Refresh: Refresh the list of teams
If you select a team and then click Refresh, the team is deselected and theResources area for that team disappears. The list of teams is refreshed and youmust select a team again.
Note
Add or Delete a Team When Database is Not Accessible
If you add or delete a team when Finesse cannot access the Finesse database, those changes do not appear inthe Finesse administration console unless you restart Cisco Finesse Tomcat or the CTI server.
Assign Phone Books and Reasons to TeamProcedure
Step 1 In the Manage Team Resources gadget, select a team.Step 2 Click the tab for the resource you want to assign for the selected team.Step 3 Click Add.Step 4 Select one or more resources from the list to assign them to the team.
Resources you assign are highlighted in blue in the Add <resources> popup and added to the List of <resources>area.
Step 5 When you finish assigning resources, click Save.
Cisco Finesse Administration Guide, Release 12.0(1)84
Manage Team ResourcesAssign Phone Books and Reasons to Team

You can make changes on all resource tabs and then save them at the same time. If there is an erroron one resource tab but not others, the changes on the tabs with no errors are saved while the changeson the tab with errors are not saved.
Note
Unassign Phone Books and Reasons from TeamProcedure
Step 1 In the Manage Team Resources gadget, select a team.Step 2 Click the tab for the resource you want to unassign from the selected team.Step 3 Click the red X next to the resource you want to unassign.Step 4 Click Save.
Assign Custom Desktop Layout to TeamProcedure
Step 1 In theManage Team Resources gadget, select a team.Step 2 Click Desktop Layout.
The Desktop Layout XML area appears. The area contains the default desktop layout XML.
Step 3 Select the Override System Default check box.
The XML becomes editable.
Step 4 Edit the XML.Step 5 Click Save.
The custom desktop layout replaces the default desktop layout for the team after 10 seconds. If a supervisoror agent is signed in when the change is saved, the change does not take effect on their desktop until thesupervisor or agent signs out and signs in again.
If you clear the Override System Default check box, any changes you made to the XML are lostand the XML in the editing pane reverts to the default desktop layout XML.
Note
Cisco Finesse Administration Guide, Release 12.0(1)85
Manage Team ResourcesUnassign Phone Books and Reasons from Team

If the Supervisor is managing single/multiple teams, the custom layout of the team for which the supervisoris a resource/agent is displayed. However, if the supervisor is not the resource/agent of a team, the defaultlayout is displayed.
Note
Assign Workflows to TeamProcedure
Step 1 In the Manage Team Resources gadget, select a team.Step 2 Click the Workflows tab.Step 3 Click Add.Step 4 Select one or more workflows from the list to assign them to the team.
Workflows you assign are highlighted in blue in the AddWorkflows popup and added to the List ofWorkflowsarea.
Step 5 Workflows are executed in the order they are listed. Use the up and down arrows to move a selected workflowto the desired position in the list.
Step 6 When you has finished assigning workflows, click Save.
You can make changes on all resource tabs and then save them at the same time. If there is an erroron one resource tab but not on others, the changes on the tabs with no errors are saved while thechanges on the tab with errors are not saved.
Note
Unassign Workflows from TeamProcedure
Step 1 In the Manage Team Resources gadget, select a team.Step 2 Click the Workflows tab.Step 3 Click the red X next to the workflow to unassign.Step 4 Click Save.
Cisco Finesse Administration Guide, Release 12.0(1)86
Manage Team ResourcesAssign Workflows to Team

C H A P T E R 8Manage Workflows
On the Workflows tab of the Cisco Finesse administration console, you can create and manage workflowsand workflow actions.
• Workflows and Workflow Actions, on page 87• Add Browser Pop Workflow Action, on page 92• Add HTTP Request Workflow Action, on page 92• Edit Workflow Action, on page 94• Delete Workflow Action, on page 94• Add Workflow, on page 94• Edit Workflow, on page 95• Delete Workflow, on page 95
Workflows and Workflow ActionsYou can use workflows to automate common repetitive agent tasks. A workflow has a unique name and ahelpful description. Use the Manage Workflows and Manage Workflow Actions gadgets to view, add, edit,or delete workflows and workflow actions.
All workflows are team-level workflows. You cannot create a global workflow. If you need a global workflow,create a team workflow and assign it to all teams.
Finesse supports the following number of workflows and workflow actions:
• 100 workflows per Finesse system
• 100 actions per Finesse system
• 20 workflows per team
• 5 conditions per workflow
• 5 actions per workflow
• 5 variables per action
Additionally, following are the fields that can be used to configure workflows:
• queueNumber
• queueName
Cisco Finesse Administration Guide, Release 12.0(1)87

• callKeyCallId
• callKeyPrefix
• callKeySequenceNum
• wrapUpReason
Click the column headers to sort workflows and workflow actions in ascending or descending order.
The following table describes the fields on the Manage Workflows gadget:
ExplanationField
The name of the workflow must be unique and can be a maximum length of 40characters.
Name
The description of the workflow can be a maximum length of 128 characters.Description
The media of the workflow. You can configure the media to Voice and anypreferred Digital Channel.
Media
The following table describes the fields on the Manage Workflow Actions gadget:
ExplanationField
The name of the workflow action must be unique and can be a maximum lengthof 64 characters.
Name
The type of workflow. Possible values are Browser Pop and HTTP Request.Type
Actions on the Manage Workflows and Manage Workflow Actions gadgets:
• New: Add a new workflow or workflow action
• Edit: Edit an workflow or workflow action
• Delete: Delete a workflow or workflow action
• Refresh: Reload the list of workflows or workflow actions from the server
You can configure workflow actions to be handled by the Finesse desktop or in a third-party gadget. Athird-party gadget can be designed to handle the action differently than Finesse does.
Each workflow must contain only one trigger. Triggers are based on Finesse dialog events.
You can configure the trigger only after you select the media.Note
• Voice dialog events include the following:
• When a Call arrives
• When a Call is answered
Cisco Finesse Administration Guide, Release 12.0(1)88
Manage WorkflowsWorkflows and Workflow Actions
If you set a workflow to trigger when a call is answered, the workflow runs whenan agent answers an incoming call or makes an outgoing call, or when a customeranswers an Outbound Option call.
Note
• When a Call ends
• When making a Call
• While previewing an Outbound Option call
• Digital Channels dialog events include the following:
• When a task is offered
• When a task is accepted
• When a task is active
• When a task is paused
• When a task is interrupted
• When a task is closed
The workflow engine uses the following simple logic to determine whether to execute a workflow:
The workflow logic and examples are similar for all media.Note
• Its trigger set and conditions are evaluated against each dialog event received.
• The workflow engine processes workflow events for the first call that matches any configured workflow'strigger set and conditions. No other workflows run until this call has ended. If the agent accepts a secondcall while still on the first call, workflows do not run on the second call even after the first call has ended.
Outbound Preview calls are an exception to this rule. You can have a workflowrun while the agent previews the call and when the agent accepts the call.
Note
• After a workflow for a particular trigger type (for example, Call Arrives) executes, it never triggers againfor the same dialog ID.
The workflow engine caches workflows for an agent when the agent signs in. Workflows do not change forthe agent until the agent signs out and signs in again or refreshes the browser.
Cisco Finesse Administration Guide, Release 12.0(1)89
Manage WorkflowsWorkflows and Workflow Actions

Workflows that trigger when a call arrives, when a call is answered, or when making a call, run whenever thebrowser is refreshed. When an agent refreshes the browser, the workflow engine sees the call as newly arrivedor newly made. If an HTTP request action is part of the workflow, the HTTP request is sent when the agentrefreshes the browser. Applications that receive the HTTP requests must account for this scenario.
Note
An example of a workflow is a Call Arrival event that triggers an action that collects information from thedialog event (for example, the ANI or customer information) and displays a web page containing customerinformation.
You can filter trigger events by the value of the data that comes in the event. You can configure a workflowto execute if any conditions are met or if all conditions are met.
Individual conditions comprise of the following:
• A piece of event data to be examined, for example, DNIS or call variables.
• A comparison between the event data and entered values (for example, contains, is equal to, is not equalto, begins with, ends with, is empty, is not empty, and is in list).
When the trigger and its conditions are satisfied, a list of actions assigned to the workflow are executed. Theactions execute in the listed order.
Workflows run only for agents and supervisors who are Finesse users. The Workflow Engine is a JavaScriptlibrary that runs client-side on a per-user basis within the Finesse desktop application. The desktop retrievesthe workflows to execute for a user from the server when the user signs in or refreshes the browser.
Changes made to a workflow or its actions while a user is signed in are not automatically pushed to that user.Note
It is possible to set workflows, conditions, and actions that are contradictory so that a workflow or actioncannot function. Workflows are not validated.
If multiple workflows are configured for a team, theWorkflow Engine evaluates them in the configured order.TheWorkflow Engine ignores workflows with no actions. When theWorkflow Engine finds a workflow witha matching trigger for the event and the workflow conditions evaluate to true, then that workflow is the oneused and subsequent workflows in the list are not evaluated. Workflows with no conditions evaluate to trueif the event matches the workflow trigger. All workflows are enabled by default. Only one workflow for aspecific user can run at a time.
The Workflow Engine retrieves dialog-based variables used in workflow conditions from the dialog thattriggered the workflow. If a variable is not found in the dialog, then its value is assumed to be empty.
The Workflow Engine executes the actions associated with the matched workflow in the order in which theyare listed. The Workflow Engine executes actions in a workflow even if the previously executed action fails.Failed actions are logged.
The Finesse server controls which calls are displayed to the Finesse user. If the user has multiple calls, theworkflow applies only to the first call that matches a trigger. If the first call displayed does not match anytriggers but the second call does match a trigger, the Workflow Engine evaluates and processes the triggersfor the second call.
Cisco Finesse Administration Guide, Release 12.0(1)90
Manage WorkflowsWorkflows and Workflow Actions
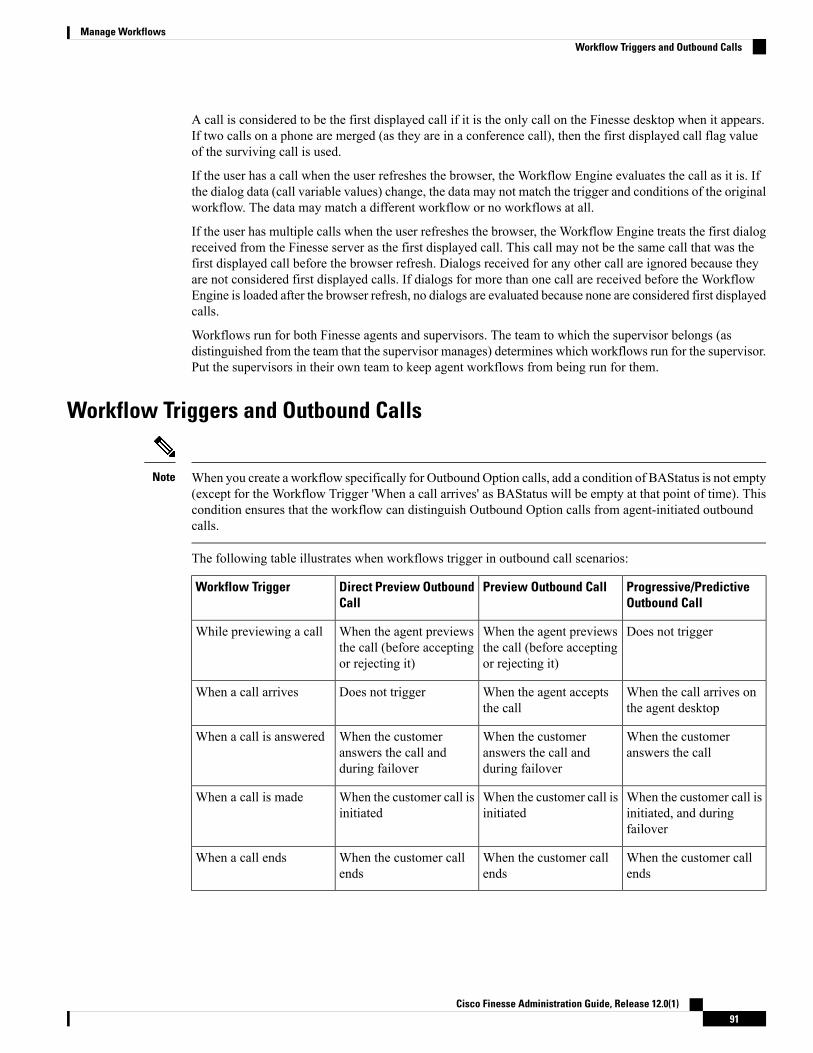
A call is considered to be the first displayed call if it is the only call on the Finesse desktop when it appears.If two calls on a phone are merged (as they are in a conference call), then the first displayed call flag valueof the surviving call is used.
If the user has a call when the user refreshes the browser, the Workflow Engine evaluates the call as it is. Ifthe dialog data (call variable values) change, the data may not match the trigger and conditions of the originalworkflow. The data may match a different workflow or no workflows at all.
If the user has multiple calls when the user refreshes the browser, the Workflow Engine treats the first dialogreceived from the Finesse server as the first displayed call. This call may not be the same call that was thefirst displayed call before the browser refresh. Dialogs received for any other call are ignored because theyare not considered first displayed calls. If dialogs for more than one call are received before the WorkflowEngine is loaded after the browser refresh, no dialogs are evaluated because none are considered first displayedcalls.
Workflows run for both Finesse agents and supervisors. The team to which the supervisor belongs (asdistinguished from the team that the supervisor manages) determines which workflows run for the supervisor.Put the supervisors in their own team to keep agent workflows from being run for them.
Workflow Triggers and Outbound Calls
When you create a workflow specifically for Outbound Option calls, add a condition of BAStatus is not empty(except for the Workflow Trigger 'When a call arrives' as BAStatus will be empty at that point of time). Thiscondition ensures that the workflow can distinguish Outbound Option calls from agent-initiated outboundcalls.
Note
The following table illustrates when workflows trigger in outbound call scenarios:
Progressive/PredictiveOutbound Call
Preview Outbound CallDirect Preview OutboundCall
Workflow Trigger
Does not triggerWhen the agent previewsthe call (before acceptingor rejecting it)
When the agent previewsthe call (before acceptingor rejecting it)
While previewing a call
When the call arrives onthe agent desktop
When the agent acceptsthe call
Does not triggerWhen a call arrives
When the customeranswers the call
When the customeranswers the call andduring failover
When the customeranswers the call andduring failover
When a call is answered
When the customer call isinitiated, and duringfailover
When the customer call isinitiated
When the customer call isinitiated
When a call is made
When the customer callends
When the customer callends
When the customer callends
When a call ends
Cisco Finesse Administration Guide, Release 12.0(1)91
Manage WorkflowsWorkflow Triggers and Outbound Calls
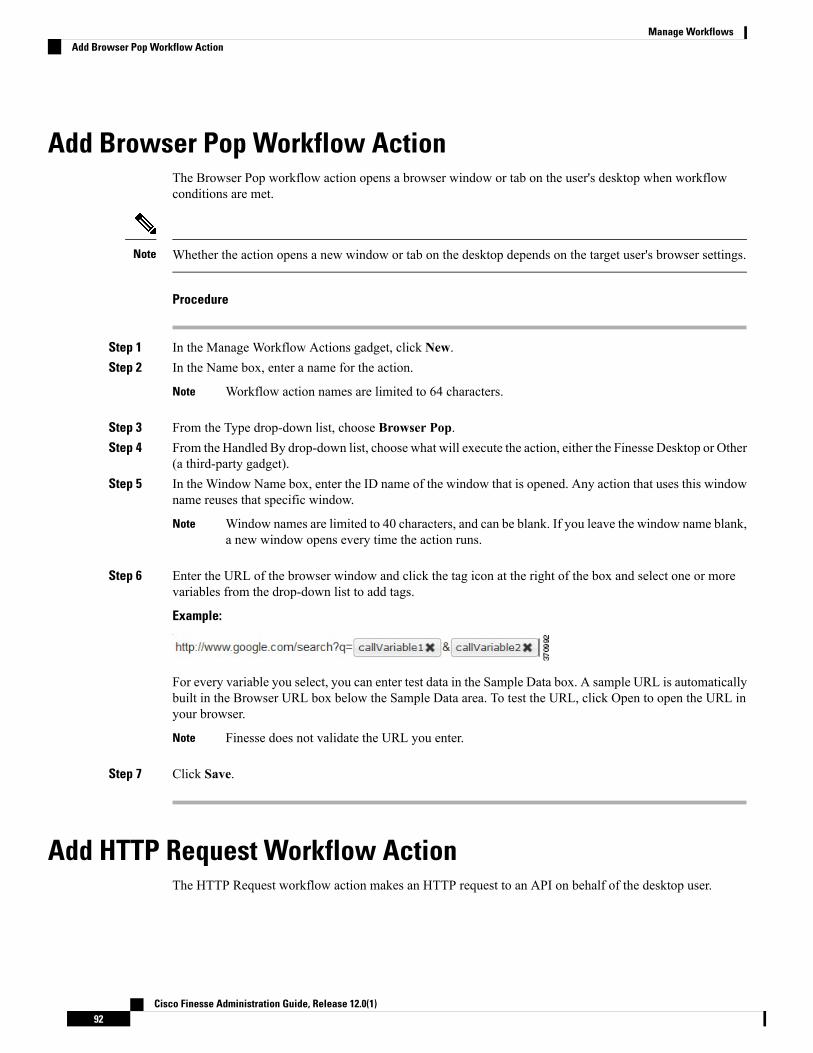
Add Browser Pop Workflow ActionThe Browser Pop workflow action opens a browser window or tab on the user's desktop when workflowconditions are met.
Whether the action opens a new window or tab on the desktop depends on the target user's browser settings.Note
Procedure
Step 1 In the Manage Workflow Actions gadget, click New.Step 2 In the Name box, enter a name for the action.
Workflow action names are limited to 64 characters.Note
Step 3 From the Type drop-down list, choose Browser Pop.Step 4 From the Handled By drop-down list, choose what will execute the action, either the Finesse Desktop or Other
(a third-party gadget).Step 5 In the Window Name box, enter the ID name of the window that is opened. Any action that uses this window
name reuses that specific window.
Window names are limited to 40 characters, and can be blank. If you leave the window name blank,a new window opens every time the action runs.
Note
Step 6 Enter the URL of the browser window and click the tag icon at the right of the box and select one or morevariables from the drop-down list to add tags.
Example:
For every variable you select, you can enter test data in the Sample Data box. A sample URL is automaticallybuilt in the Browser URL box below the Sample Data area. To test the URL, click Open to open the URL inyour browser.
Finesse does not validate the URL you enter.Note
Step 7 Click Save.
Add HTTP Request Workflow ActionThe HTTP Request workflow action makes an HTTP request to an API on behalf of the desktop user.
Cisco Finesse Administration Guide, Release 12.0(1)92
Manage WorkflowsAdd Browser Pop Workflow Action

Procedure
Step 1 In the Manage Workflow Actions area, click New.Step 2 In the Name box, enter a name for the action.
A workflow action name can contain a maximum of 64 characters.
Step 3 From the Type drop-down list, select HTTP Request.Step 4 From the Handled By drop-down list, select what will execute the action, the Finesse desktop or Other (a
third-party gadget).Step 5 From the Method drop-down list, select the method to use.
You can select either PUT or POST.
Step 6 From the Location drop-down list, select the location.
If you are making the HTTP request to a Finesse API, select Finesse. If you are making a request to any otherAPI, select Other.
Step 7 In the Content Type box, enter the content type.
The default content type is application/xml, which is the content type for Finesse APIs. If you are using adifferent API, enter the content types for that API (for example, application/JSON).
Step 8 In the URL box, enter the URL to which to make the request. To add variables to the URL, click the tag iconat the right of the box and select one or more variables from the drop-down list.
The drop-down list contains variables from all the configured media channels.Note
Example:
The following is the URL example for a Finesse API:
If you want to make a request to another API, you must enter the entire URL (for example,http://googleapis.com).
Note
You can click the tag icon at the right of the box and select one or more variables from the drop-down list toadd tags to the URL. In the preceding example, to add the dialogId, click the tag icon and select dialogId fromthe list.
Step 9 In the Body box, enter the text for the request. The body must match the content type (for example, if thecontent types is application/xml, the body must contain XML). To add variables to the body, click the tagicon at the right of the box and select one or more variables from the drop-down list.
For every variable you add, you can enter test data in the Sample Data box.
Step 10 Click Save.
Cisco Finesse Administration Guide, Release 12.0(1)93
Manage WorkflowsAdd HTTP Request Workflow Action

Edit Workflow ActionProcedure
Step 1 In the Manage Workflow Actions gadget, select the action that you want to edit.Step 2 Click Edit.Step 3 Edit the fields that you want to change.Step 4 Click Save.
Delete Workflow ActionProcedure
Step 1 In the Workflow Actions gadget, select the action that you want to delete.Step 2 Click Delete.Step 3 Click Yes to confirm the deletion of the selected action.
Add WorkflowProcedure
Step 1 In the Manage Workflows gadget, click New.Step 2 From the Choose Media drop-down, select the media.
In case of a voice only configuration, the Choose Media drop-down will display only Voice.Note
Step 3 In the Name box, enter the name of the workflow.
The name is limited to 40 characters.Note
Step 4 In the Description box, enter a description of the workflow.
The description is limited to 128 characters.Note
Step 5 In theWhen to perform Actions drop-down list, select the event that triggers the workflow.
The drop-down actions change depending on the selected media.Note
Cisco Finesse Administration Guide, Release 12.0(1)94
Manage WorkflowsEdit Workflow Action

Step 6 In the How to apply Conditions box, select if all conditions are met, or if any conditions are met, and thenclick Add Condition to add up to five conditions.
Variables in the drop-down for conditions are grouped depending on the selected media.Note
Example:
For example, you can specify that the action is taken when CallVariable 1 equals 123 and CallVariable 2begins with 2.
Step 7 In the Ordered List of Actions area, click Add to open the Add Actions area. Click an action in this area toadd it to the Ordered List of Actions.
Step 8 Use the up and down arrows next to the Ordered List of Actions to move actions into the performance order.Step 9 Click Save.Step 10 Assign the workflow to one or more teams.
A workflow does not run until it is assigned to a team.Note
Edit WorkflowProcedure
Step 1 In the Manage Workflows gadget, select the workflow you want to edit.Step 2 Click Edit.
The media for an existing workflow can be changed by editing the workflow.Note
Step 3 Edit the fields that you want to change.Step 4 Click Save.
Delete WorkflowProcedure
Step 1 In the Manage Workflows gadget, select the workflow that you want to delete.Step 2 Click Delete.Step 3 Click Yes to confirm the deletion of the selected workflow.
Cisco Finesse Administration Guide, Release 12.0(1)95
Manage WorkflowsEdit Workflow

Cisco Finesse Administration Guide, Release 12.0(1)96
Manage WorkflowsDelete Workflow
C H A P T E R 9Manage Security
• HTTP and HTTPS Support, on page 97• Finesse HTTPS Redirect, on page 97• Reset Security or Admin Password, on page 99• Cross-Origin Resource Sharing (CORS), on page 100• Gadget Source Whitelisting, on page 100
HTTP and HTTPS SupportThe Cisco Finesse administration console and agent desktop support both HTTP and secure HTTP (HTTPS).To access the administration console using HTTPS, enter the following URL in your browser:
https://FQDN: 8445/cfadmin
Where FQDN is the name of your primary Finesse server and 8445 is the port number.
To access the administration console using HTTP, enter the following URL:
http://FQDN/cfadmin
Similarly, agents and supervisors can access their desktops using HTTP or HTTPS as follows:
• http://FQDN/desktop
• https://FQDN:8445/desktop
For HTTPS access, you can eliminate browser security warnings by choosing to trust the self-signed certificateprovided with Finesse or uploading a CA certificate.
By default, HTTPS access is enabled. You can run the Cisco Finesse HTTPS Redirect CLI command to disableHTTPS and allow HTTP access for the Finesse administration console and the agent desktop.
If you add custom gadgets that perform HTTPS requests to Finesse, you must add a certificate to the Finesseserver for that gadget.
Finesse HTTPS RedirectEnable Cisco Finesse HTTPS Redirect to enforce HTTPS to access the Finesse desktop and administrationconsole. If Cisco Finesse HTTPS Redirect is enabled, agents and supervisors who attempt to access the desktop
Cisco Finesse Administration Guide, Release 12.0(1)97

with HTTP are redirected to HTTPS. Administrators who attempt to access the administration console withHTTP are also redirected to HTTPS.
If Cisco Finesse HTTPS Redirect is disabled, the desktop and the administration console can be accessed withHTTP or HTTPS.
This command does not impact the Finesse REST APIs.Note
In a two-node setup, if you enable or disable HTTPS Redirect only on the primary Finesse server, the settingdoes not replicate to the secondary Finesse server. You must enter the required commands on the primary andsecondary Finesse server.
Use the folloing commands to view the status of, enable, or disable Cisco Finesse HTTPS Redirect:
• utils finesse application_https_redirect status: This command retrieves the status of Cisco FinesseHTTPS Redirect. It displays whether Cisco Finesse HTTPS Redirect is currently enabled or disabled onthe system.
On the secondary server, the HTTPS redirect status appears as enabled for theFinesse Agent Desktop only. For Finesse Admin, the HTTPS redirect statusalways appears as disabled on the secondary server because Finesse Admin isnot available on the secondary server.
Note
• utils finesse application_https_redirect enable: This command enables Cisco Finesse HTTPS Redirect.
You must stop the Cisco Finesse Tomcat Service before you can enable Cisco Finesse HTTPS Redirect.You can use the following command to stop this service: utils service stop Cisco Finesse Tomcat.
If the Cisco Finesse Tomcat Service is not stopped, the command to enable Cisco Finesse HTTPSRedirectfails. This command also fails if Cisco Finesse HTTPS Redirect is already enabled.
After you enable Cisco Finesse HTTPS Redirect, start the Cisco Finesse Tomcat Service using thecommand utils service start Cisco Finesse Tomcat .
• utils finesse application_https_redirect disable: This command disables Cisco Finesse HTTPSRedirect.
You must stop the Cisco Finesse Tomcat Service before you can disable Cisco Finesse HTTPS Redirect.You can use the following command to stop this service: utils service stop Cisco Finesse Tomcat.
If the Cisco Finesse Tomcat Service is not stopped, the command to disable Cisco Finesse HTTPSRedirect fails. This command also fails if Cisco Finesse HTTPS Redirect is already disabled.
After you disable Cisco Finesse HTTPS Redirect, start the Cisco Finesse Tomcat Service using thecommand utils service start Cisco Finesse Tomcat.
HSTSFinesse supports HTTP Strict Transport Security (HSTS) for increased security. HSTS is automatically enabledwhen you enable HTTPS Redirect, in which case the Finesse server sends HTTPS responses indicating tobrowsers that Finesse can only be accessed using HTTPS. If users then try to access Finesse using HTTP, the
Cisco Finesse Administration Guide, Release 12.0(1)98
Manage SecurityHSTS

browser changes the connection to HTTPS before generating any network traffic. This functionality preventsbrowsers from sending requests to Finesse using unencrypted HTTP before the server can redirect them.
Reset Security or Admin PasswordIf you need to reset the security or admin password, you must perform the following steps on the console ofthe system using VSphere. You cannot ssh to the system to run the command.
Procedure
Step 1 Sign in to the platform window with the following username and password:
pwrecovery/pwreset
The following messages appear:
Welcome to Platform password reset.
Admin and Security password reset are possible.
Press any key when ready.
Step 2 Press any key to continue.
The following messages appear:
If you have a CD or DVD in the disk drive, remove it now.
Press any key to continue.
Step 3 If there is a disk in the disk drive, remove it. When you are ready, press any key to continue.
The system checks to ensure that you have removed the disk from the drive.
The following message appears:
Insert a valid CD or DVD into the disk drive.
Step 4 Connect the CD/DVD drive and point it to the ISO image.
The system checks to ensure you have inserted the disk.
After the system verifies that you have inserted a disk, you are prompted to choose one of the followingoptions:
Enter 'a' for admin password reset.
Enter 's' for security password reset.
Enter 'q' for quit.
Step 5 Select the appropriate option and provide the new password.
The system resets the password.
Cisco Finesse Administration Guide, Release 12.0(1)99
Manage SecurityReset Security or Admin Password

Cross-Origin Resource Sharing (CORS)Finesse supports CORS requests and allows the customization of the domains which are allowed to makeCORS requests to the Finesse desktop. Once CORS is enabled via the CLI utils finesse cors enable, theCORS origin request from external domains is blocked by the browser. To enable specific domains to accessFinesse desktop via CORS, the domains need to be added to the CORS origin whitelist using the CLI utilsfinesse cors allowed_origin add. For more information on the CORS CLIs, see Cisco Finesse CLIs.
Gadget Source WhitelistingShindig proxies requests from the Finesse desktop to external servers and this introduces the possibility ofserver side request forgery (SSRF). To prevent SSRF, you can choose to restrict outgoing connections requestedby the gadgets to specific URIs by enabling shindig whitelisting CLIs and adding the required URIs to thewhitelist. For more information on Gadget Source Whitelisting CLIs, see Cisco Finesse CLIs.
Cisco Finesse Administration Guide, Release 12.0(1)100
Manage SecurityCross-Origin Resource Sharing (CORS)

C H A P T E R 10Manage Finesse IP Phone Agent
• Finesse IP Phone Agent, on page 101• One Button Sign In, on page 102• Finesse IP Phone Service Subscription Options, on page 103• Set Up Application User, Web Access, and HTTPS Server Parameters, on page 104• Configure Finesse IP Phone Service in Unified CM, on page 105• Add Service Parameters for One Button Sign In, on page 106• Subscribe Agent Phones to Manual Subscription Service, on page 107• Set Up Agent Access to the Self Care Portal, on page 108
Finesse IP Phone AgentWith Finesse IP Phone Agent (IPPA), agents and supervisors can access Finesse features on their Cisco IPPhones as an alternative to accessing Finesse through the browser. Finesse IPPA supports fewer features thanthe Finesse desktop in the browser, but it does allow agents and supervisors to receive and manage Finessecalls if they lose or do not have access to a computer.
Supervisor Tasks
Finesse IPPA does not support supervisor tasks such as monitor, barge, and intercept, but supervisors cansign in and perform all agent tasks on their IP Phones.
Administration Tasks
After you configure Finesse IPPA, the administration tasks that you perform for the Finesse desktop alsoapply for the supported Finesse IPPA features. For example, the Call Variables Layouts that you configurefor the desktop also apply for Finesse IPPA, although the column layout is modified to fit the IP Phone screen.
Reason Code Limitations
• On the IP Phone, Finesse can display a maximum of 100 Not Ready, Wrap Up, or Sign Out reason codes.If more than 100 codes are configured, the phone lists the first 100 applicable codes (global or applicableteam codes).
• When Finesse IPPA displays reason codes, some IP Phone models truncate the codes due to characterlength limitations on the phone. To ensure they meet your requirements, verify the display of the reasoncodes on all phone models in your environment.
Cisco Finesse Administration Guide, Release 12.0(1)101

HTTP Only
Finesse IPPA phone clients communicate with the Finesse server using HTTP only, whether or not HTTPSaccess is enabled on Finesse.
Failure Behavior
Unlike the Finesse desktop, the Finesse IP Phone Agent does not automatically failover to the alternate Finesseserver. To resume normal operations in a failure scenario, the Finesse IPPA agents must exit from the currentFinesse IP Phone service and manually sign in to another configured Finesse service that connects to analternate Finesse server.
To ensure continued operations in a failure situation, you must configure at least two Finesse IP Phone servicesin Unified CM, each pointing to different Finesse servers.
One Button Sign InWith One Button Sign In, you can set up the Finesse IPPA phones with prepopulated agent ID, extension,and password. In this case, agents can sign in to Finesse on the IP Phone without credentials just by selectingCisco Finesse from the Services menu.
Alternatively, you can set up One Button Sign In and prepopulate only a subset of agent credentials. Forexample:
• You can prepopulate only the agent ID and extension, forcing the agents to manually enter their passwordat sign-in for increased security.
• You can prepopulate only the extension, forcing agents to manually enter their ID and password at sign-in(useful for agents who share the same phone).
You can use Unified CM Administration to prepopulate the agent credentials, or you can set up the agentswith access to the Unified CM Self Care Portal to prepopulate their own credentials.
The following table shows examples of how you can assign the responsibility of defining agent credentialsto the administrator or the agent, or share that responsibility between them:
Entered at Sign-In
(by Agent)
Prepopulated in Self CarePortal
(by Agent)
Prepopulated in UnifiedCM Administration
(by Administrator)
Example Set Up
id
password
-extensionAdministrator populatesthe extension only
password-id
extension
Administrator populatesthe ID and extension
-passwordid
extension
Agents enter passwordonly using Self CarePortal
Cisco Finesse Administration Guide, Release 12.0(1)102
Manage Finesse IP Phone AgentOne Button Sign In

Entered at Sign-In
(by Agent)
Prepopulated in Self CarePortal
(by Agent)
Prepopulated in UnifiedCM Administration
(by Administrator)
Example Set Up
-id
extension
password
-Agents enter allcredentials using SelfCare Portal
passwordid
extension
-Agents enter ID andextension only using SelfCare Portal
Finesse IP Phone Service Subscription OptionsTo set up access to Finesse on agent IP phones in Cisco Unified Communications Manager, you must createthe Finesse IP Phone service to which the phones can subscribe. To set up the Finesse service, you can chooseone of the following options:
• Set up an enterprise subscription to automatically subscribe all IP phones in the cluster to the Finesseservice. (Not supported with One Button Sign In.)
• Set up a manual subscription, and manually subscribe each IP phone to the Finesse service.
• Set up a manual subscription, and set up the agents with access to the Unified CM Self Care Portal tosubscribe to the Finesse service.
The following table lists the Finesse IPPA configuration procedures and indicates which procedures arerequired depending on the subscription option you choose:
Manual SubscriptionEnterprise SubscriptionFinesse IPPA ConfigurationProcedures
Agents Manually SubscribeTheir Phones Using the SelfCare Portal
Administrator ManuallySubscribes the Phones
RequiredRequiredRequiredSet Up Application User, WebAccess, and HTTPS ServerParameters
RequiredRequiredRequiredConfigure Finesse IP Phone Servicein Unified CM
Required only with OneButton Sign In
Required only with One ButtonSign In
Not applicableAdd Service Parameters for OneButton Sign In
Optional. Allows theadministrator to enter agentcredentials for One ButtonSign In.
RequiredNot applicableSubscribe Agent Phones to ManualSubscription Service
Cisco Finesse Administration Guide, Release 12.0(1)103
Manage Finesse IP Phone AgentFinesse IP Phone Service Subscription Options

Manual SubscriptionEnterprise SubscriptionFinesse IPPA ConfigurationProcedures
Agents Manually SubscribeTheir Phones Using the SelfCare Portal
Administrator ManuallySubscribes the Phones
RequiredOptional. Allows agents to entertheir own credentials for OneButton Sign In.
Not applicableSet Up Agent Access to the Self CarePortal
Set Up Application User, Web Access, and HTTPS ServerParameters
To support Finesse IPPA functionality, you must configure an application user in Unified CommunicationsManager that is associated with all Finesse IPPA phones. For proper Finesse IPPA operation, you must alsoset the Web Access and HTTPS Server parameters in Unified CM.
The following steps are required for both manual and enterprise subscriptions:
Before you begin
Set up call capabilities for the agent phones in Cisco Unified Communications Manager.
Procedure
Step 1 Set the following parameters in Unified CM:
• Set theWeb Access parameter to Enabled.
• Set the HTTPS Server parameter to HTTP and HTTPS Enabled.
To set these parameters in Cisco Unified CM Administration, use either of the following pages:
• Phone Configuration page (Product Specific Configuration portion of page): choose Device > Phone.
• Enterprise Phone Configuration page: choose System > Enterprise Phone Configuration.
Step 2 Configure an application user in Unified Communications Manager.a) In Cisco Unified Communications Manager Administration, select User Management > Application
User.b) Click Add New.c) Under User Information, enter a user ID and password for the new user.
The password must be 95 characters or less and must contain ASCII characters only.
d) Under Device Information, in the Available Devices pane, select all phones that Finesse IP Phone Agentswill use and move them to the Controlled Devices pane using the arrows.
e) Under Permissions Information, click Add to Access Control Group.
Cisco Finesse Administration Guide, Release 12.0(1)104
Manage Finesse IP Phone AgentSet Up Application User, Web Access, and HTTPS Server Parameters

f) From the list of search results, select Standard CTI Enabled and Standard CTI Allow Control Of AllDevices and then click Add Selected.
The application user is added to the Standard CTI Enabled and Standard CTI AllowControl Of All Devicesgroups.
g) Click Save at the bottom of the page.
In UCCX deployments, usage of an existing RMCM User for Finesse IPPA is known to causeproblems in functionality, however, the physical phones must be associated with the RMCM User.
Note
Step 3 Enter the application user's credentials in the Finesse IP Phone Agent Settings gadget.a) Sign in to the Cisco Finesse Administration Console.b) Choose Settings > IP Phone Agent Settings.c) Under Phone URL Authentication Settings, enter the same username and password that you entered in
Unified CM for the application user.
The password must be 95 characters or less and must contain ASCII characters only.
d) Click Save.e) Restart Cisco Finesse Tomcat on the primary Finesse server.f) After replication is complete, restart Cisco Finesse Tomcat on the secondary Finesse server.
For Finesse IP Phone Agent (IPPA) from 11.0 (1) onwards, the User Device Profile (UDP) mustbe associated with the Finesse IP Phone Agent Application User along with the physical phones foragents using Extension Mobility. The Finesse Service URL must use the complete FQDN of theUnified CCX server.
Note
Configure Finesse IP Phone Service in Unified CMThe following procedure describes the steps required for manual and enterprise subscription.
Procedure
Step 1 Log in to the Cisco Unified Communications Manager Administration using administrator credentials.Step 2 Select Device > Device Settings > Phone Services.Step 3 Click Add New to create a new IP phone service.Step 4 In the Service Name field, enter Cisco Finesse (or another service name that is appropriate for your
environment).Step 5 In the Service URL field, enter: http://Finesse FQDN:8082/fippa/#DEVICENAME#
The Service URL entry is mandatory for Cisco Unified Communications Manager.Note
Step 6 Ensure that the Service Category is set to XML Service, and the Service Type is set to Standard IP PhoneService.
Step 7 Check the Enable check box.Step 8 Perform one of the following:
Cisco Finesse Administration Guide, Release 12.0(1)105
Manage Finesse IP Phone AgentConfigure Finesse IP Phone Service in Unified CM

• To automatically subscribe all phones in the cluster to the Finesse service, check the EnterpriseSubscription check box, and click Save. Agents and supervisors can now access Cisco Finesse byselecting it from the Services menu on subscribed IP phones.
One Button Sign In is not supported with enterprise subscriptions.Note
• To subscribe only the desired phones to the Finesse service manually, leave theEnterprise Subscriptioncheck box unchecked and click Save.
Step 9 With a two-node Finesse setup (primary and secondary Finesse servers), perform the preceding steps againto create a secondary Finesse service that points to the secondary Finesse server.When you create the secondaryservice, note the following procedural differences:
• At Step 4, in the Service Name field, enter a name that distinguishes the secondary service from theprimary service, such as Cisco Finesse Secondary.
• At Step 5, in the Service URL field, replace Finesse FQDN with the FQDN of the secondary server.
Since Finesse IPPA works only over HTTP, avoid using Secured Phone URL Parameters in UnifiedCM.
Note
Add Service Parameters for One Button Sign InWith One Button Sign In, for any agent credentials that you want prepopulated, youmust set up correspondingservice parameters in Unified CM.
Only perform this procedure if you are setting up One Button Sign In. Otherwise, skip this.
Procedure
Step 1 From Cisco Unified Communications Manager Administration, select the Finesse phone service (underDevice > Device Settings > Phone Services).
Step 2 Click New to the right of the Parameters box.Step 3 Set up service parameters for the agent id, extension, and password credentials as per the following table.
Enter only the parameters that you want prepopulated for the agents. For each parameter, enter the requiredfield values and click Save. To add parameters, click Add New and enter the required values.
DescriptionField
Enter one of the following parameter names as follows:
• Id
• Extension
• Password
The values entered are the exact query string parameters used for the subscriptionURL.
Parameter Name
Cisco Finesse Administration Guide, Release 12.0(1)106
Manage Finesse IP Phone AgentAdd Service Parameters for One Button Sign In

DescriptionField
Enter a descriptive parameter name; for example, id, extension, and password.Parameter DisplayName
Leave the default value blank for all parameters.Default Value
Enter a description of the parameter. The user can access this text when theysubscribe to the service.
Parameter Description
If the administrator prepopulates the parameter in Unified CM Administration,check the Parameter is Required box.
However, if the agent prepopulates the parameter in the Self Care Portal, twooptions are available:
• If the agents prepopulates all defined parameters, check the Parameter isRequired box for each parameter.
• If the agent and administrator share the responsibility of prepopulating theparameters, set only the administrator-defined parameters as required. Thisconfiguration ensures that the administrator can save the subscription withoutprepopulating all parameters. In this case, the administrator first prepopulatesthe required parameters, and then the agents prepopulate the nonrequiredparameters.
Parameter is Required
Check this box for the password only.
This check box masks the password entries in the Self Care Portal, to displayasterisks rather than the user entry.
Parameter is aPassword (maskcontents)
When you save the last parameter, click Save and Close.
What to do next
You can prepopulate the agent credentials when you subscribe the agent phones, or the agents can prepopulatetheir own credentials using the Unified CM Self Care Portal.
Subscribe Agent Phones to Manual Subscription ServiceIf you set up the Finesse service as a manual subscription, you can subscribe the agent phones to the Finesseservice in Unified CM and optionally define agent credentials for One Button Sign In.
If you prefer to allow the agents to subscribe to the Finesse service using the Self Care Portal and prefer notto specify One Button Sign In credentials for the agents, you can skip this procedure.
Procedure
Step 1 From the menu bar, select Device > Phone.
Cisco Finesse Administration Guide, Release 12.0(1)107
Manage Finesse IP Phone AgentSubscribe Agent Phones to Manual Subscription Service
Step 2 Select the phone that you want to subscribe to the Finesse service.Step 3 From theRelated Links drop-down list on the upper right side of the window, select Subscribe/Unsubscribe
Services and click Go.
The Subscribed IP phone services window displays for this phone.
Step 4 From the Select a Service drop-down list, select Cisco Finesse.Step 5 Click Next.Step 6 (Applicable for One Button Sign In only) Enter values for any of the defined service parameters (id, password,
and extension) that you do not want the agents to enter using the Self Service Portal or at sign-in.Step 7 Click the Subscribe button to subscribe this phone to the Cisco Finesse service.
The Cisco Finesse service displays in the Subscribed Services list.
Step 8 Click Save.
The subscribed agents or supervisors can now access Cisco Finesse by selecting it from the Services menuon their IP phones.
Step 9 With a two-node Finesse setup (primary and secondary Finesse servers), perform this procedure again to alsosubscribe the phones to the secondary Finesse service that points to the secondary Finesse server.
Set Up Agent Access to the Self Care PortalYou can optionally set up the agents with access to the Unified CM Self Care Portal to prepopulate their owncredentials and to subscribe to the Finesse service.
If you are not setting up One Button Sign In, or not enabling the agents with access to the Self Care Portal,skip this procedure.
Procedure
Step 1 From the Unified CM Administration page, select System > Enterprise Parameters.Step 2 Under the Self Care Portal Parameters, in the Self Care Portal Default Server field, select the IP address of
the Unified CM Publisher server from the drop-down list and click Save.Step 3 Select User Management > End User.Step 4 Select the user that you want to set up with access to the User Care Portal.Step 5 Under Permissions Information, click Add to Access Control Group.Step 6 From the list of Access Control groups displayed, check Standard CCMEnd Users and clickAdd Selected.Step 7 Click Save.
With access enabled to the Self Care Portal, agents can sign in to the portal at http://<UCM address>/ucmuserto subscribe to the Finesse service and enter their own credentials under Phones > Phone Settings > Services.
Cisco Finesse Administration Guide, Release 12.0(1)108
Manage Finesse IP Phone AgentSet Up Agent Access to the Self Care Portal

In a two-node Finesse setup with two services configured, the agents must enter their credentials on the primaryand secondary Finesse services.
Note
Cisco Finesse Administration Guide, Release 12.0(1)109
Manage Finesse IP Phone AgentSet Up Agent Access to the Self Care Portal

Cisco Finesse Administration Guide, Release 12.0(1)110
Manage Finesse IP Phone AgentSet Up Agent Access to the Self Care Portal

C H A P T E R 11Manage Third-Party Gadgets
• 3rdpartygadget Account, on page 111• Upload Third-Party Gadgets, on page 112
3rdpartygadget AccountThe 3rdpartygadget account is used to upload third-party gadgets to the Finesse server. Before you can usethis account, you must set the password.
If you plan to upload third-party gadgets to the Finesse server, you must have a developer support servicescontract or work with a Cisco partner who has a developer support services contract. For more informationabout uploading third-party gadgets, see the Cisco Finesse Web Services Developer Guide.
Note
To set (or reset) the 3rdpartygadget account password, access the CLI and run the following command:
utils reset_3rdpartygadget_password
You are prompted to enter a password. After you enter a password, you are prompted to confirm the password.
The password for the 3rdpartygadget account must be between 5 and 32 characters long and cannot containspaces or double quotes (").
If the third-party gadget hosted in Cisco Finesse is sending a REST request to the web server via Shindig,using the SHA256 certificate, the maximum key length cannot exceed 2048.
Note
Third-party gadgets are migrated across upgrades and included in DRS backup and restore.Note
Cisco Finesse Administration Guide, Release 12.0(1)111

Upload Third-Party GadgetsAfter you set the password for the 3rdpartygadget account, you can use SFTP to upload third-party gadgetsto the Finesse server, as illustrated in the following example. Note that third-party gadget files must be .xmlfiles. It does not support .jsp files.
Finesse allows you to upload third-party gadgets to your own web server, however, you must ensure that theFinesse server has access to your web server.
Note
my_workstation:gadgets user$ sftp 3rdpartygadget@<finesse>3rdpartygadget@<finesse>'s password:Connected to <finesse>.sftp> cd /filessftp> put HelloWorld.xmlUploading HelloWorld.xml to /files/HelloWorld.xmlHelloWorld.xmlsftp> exit
After you upload a gadget, it is available under the following URL:
http://<finesse>/3rdpartygadget/files/
For Unified CCX deployments you must specify port 8082.Note
To access the gadget uploaded in the previous example, use the following URL:
http://<finesse>/3rdpartygadget/files/HelloWorld.xml
When you add a gadget to the desktop layout, that gadget can be referenced using a relative path. For moreinformation on adding third party gadgets to the Finesse desktop layout, see the sectionManage DesktopLayout in the Cisco Finesse Administration Guide.
To include the gadget that was uploaded in the previous example in the desktop layout, add the followingXML (highlighted) to the layout:
<finesseLayout xmlns="http://www.cisco.com/vtg/finesse"><layout><role>Agent</role><page><gadget>/desktop/gadgets/CallControl.jsp</gadget><gadget>/3rdpartygadget/files/HelloWorld.xml</gadget>
</page>...
</layout><layout><role>Supervisor</role><page><gadget>/desktop/gadgets/CallControl.jsp</gadget><gadget>/3rdpartygadget/files/HelloWorld.xml</gadget>
</page>...
Cisco Finesse Administration Guide, Release 12.0(1)112
Manage Third-Party GadgetsUpload Third-Party Gadgets

</layout></finesseLayout>
You cannot delete, rename or change permissions of a folder while using SFTP in 3rd party gadget accountsfor Unified CCX deployments. To perform these actions, SELinux has to be in permissive mode. This can beaccomplished by executing the following CLI command:
utils os secure permissive
Note
Because of browser caching and caching in the Finesse web server, you may need to clear the browser cacheor restart the Cisco Finesse Tomcat service before gadget changes take effect. If you make a change to agadget and the change is not reflected on the Finesse desktop, clear your browser cache.
If you do not see the changes after you clear the browser cache, use the following CLI command to restartthe Cisco Finesse Tomcat service:
admin:utils service restart Cisco Finesse Tomcat
Note
Third-Party Gadget Limitations
Third-party gadgets must be .xml files. You cannot use .jsp files.
Cisco Finesse Administration Guide, Release 12.0(1)113
Manage Third-Party GadgetsUpload Third-Party Gadgets

Cisco Finesse Administration Guide, Release 12.0(1)114
Manage Third-Party GadgetsUpload Third-Party Gadgets

C H A P T E R 12Perform Routine Maintenance
• Cisco Finesse Services, on page 115• Log Collection, on page 116• Collect Logs using Cisco Unified Real-Time Monitoring Tool, on page 118• Cisco Finesse Notification Service Logging, on page 121• Remote Account Management, on page 121
Cisco Finesse ServicesYou can access the following Finesse services from the CLI:
• Cisco Finesse Notification Service: This service is used for messaging and events. If this service is notstarted, you cannot view call events, agent state changes, or statistics, and the Finesse Desktop will notload after sign-in.
• Cisco Finesse Tomcat: This service contains all deployed Finesse applications. A restart of the CiscoFinesse Tomcat service requires that all agents sign out and sign back in.
The deployed applications in the Cisco Finesse Tomcat service include:
• Finesse Desktop application: Provides the user interface for agents and supervisors.
• Finesse Rest API application: Provides integration with the Cisco CTI Server for the Finesse desktopand Finesse administration application. The APIs available to a user depends on the role associated withthat user's credentials. This application also provides a programming interface that can be used bythird-party applications that are written to use the Finesse REST API.
• Finesse Administration application: Provides the administrative operations for Finesse.
• Finesse Diagnostic Portal application: Provides performance-related information for Finesse.
• Finesse IP PhoneAgent (IPPA) application:Allows agents and supervisors to perform Finesse operationson their Cisco IP Phone.
If a Cisco Finesse service-related problem exists, restart a Finesse service as a last resort. Most service-relatedproblems cannot be corrected by restarting a service. Restart A Cisco DB only if the service is down.
Cisco Finesse Administration Guide, Release 12.0(1)115

To restart the Cisco Finesse Notification Service, you must stop and start services in the following order:
1. Stop the Cisco Finesse Tomcat service.
2. Stop the Cisco Finesse Notification Service.
3. Start the Cisco Finesse Notification Service.
4. Start the Cisco Finesse Tomcat service.
Note
View, Start, or Stop Services
Procedure
Step 1 Sign in to the CLI using the credentials for the Administrator User account.Step 2 To view a list of all services and their states, enter the following command: utils service list.
Services are shown in one of the following states: STOPPED, STARTING, or STARTED.
STOPPEDmeans the service is not running. STARTINGmeans the service is starting operation and performingany initialization. STARTED means the service has successfully initialized and is operational.
Step 3 To start a service, enter the following command: utils service start service name.
Example:
For example, to start Cisco Finesse Tomcat, enter the command utils service start Cisco Finesse Tomcat.Step 4 To stop a service, enter the following command: utils service stop service name.
Example:
For example, to stop Cisco Finesse Tomcat, enter the command utils service stop Cisco Finesse Tomcat.
Log CollectionThese commands prompt you to specify a secure FTP (SFTP) server location to which the files will be uploaded.
To obtain logs:
• Install log: file get install desktop-install.log
Use this command to see the installation log after the system is installed.
This log is written to the SFTP server and stored as a text file written to this path: <IP Address>\<datetime stamp>\install\desktop-install.log
• Desktop logs: file get activelog desktop recurs compress
Use this command to obtain logs for the Finesse web applications. This command uploads a zip file thatcontains the following directories:
Cisco Finesse Administration Guide, Release 12.0(1)116
Perform Routine MaintenanceView, Start, or Stop Services

• webservices: Contains the logs for the Finesse backend that serves the Finesse REST APIs. Themaximum size of an uncompressed desktop log file is 100 MB. The maximum size of this directoryis approximately 4.5 GB. After a log file reaches 100 MB, that file is compressed and a new logfile is generated. Output to the last compressed desktop log file wraps to the log file created next.The log file wrap-up duration can vary, based on the number of users on the system. Timestampsare placed in the file name of each desktop log.
• desktop: Contains logs from the Finesse agent desktop gadget container that holds the Finessedesktop gadgets. Any container-level errors with Finesse agent desktop will appear in these logfiles.
• admin:Contains logs from the Finesse administration gadget container that holds the administrationgadgets. Any container-level errors with the Finesse administration console appear in these log files.
• audit-log: Audit logs contain all admin operations (including Finesse admin UI and RESTclient operations) and supervisor operations for Team Message. The maximum size of anuncompressed audit log file is 100 MB. The maximum size of total audit log files (includingcompressed log files) is approximately 1 GB. After a log file reaches 100 MB, that file iscompressed and a new log file is generated. The log file wrap-up duration can vary, based onthe number of users on the system. The log contains the following parameters:
• Timestamp
• User Id of the administrator
• Method of operation (PUT, POST, DELETE ). GET operations will not be logged
• URL
• Payload
• clientlogs: Contains the client-side logs that are submitted from the Cisco Finesse agent desktop tothe Finesse server. Each log file is no larger than 1.5 MB and contains a timestamp and the agentID of the agent who submitted the file. A new log file is created each time that an agent submitsclient-side logs (the data is not appended to an existing log file). The maximum size of this directoryis 100 MB. The directory holds a maximum number of 25000 clientlog files. When the directoryexceeds the size limit or the file count, the oldest files are deleted.
• openfireservice: Contains startup and shutdown-related information logs for the Cisco FinesseNotification Service.
• openfire: Contains limited error and information logs for the Cisco Finesse Notification Service.
• finesse-dp:Contains startup, error, and information logs generated by the Finesse Diagnostic Portalapplication.
• realm: Contains the logs for authentication requests from clients that are handled by the Finessebackend.
• db: Contains the Finesse database logs.
• /finesse/logs: Contains the logs for the Cisco Finesse Tomcat service.
• fippa: Contains logs for the Finesse IP Phone Agent (IPPA) application.
• finesse-auth: Contains the logs for Finesse authentication with the Cisco Context Service.
Cisco Finesse Administration Guide, Release 12.0(1)117
Perform Routine MaintenanceLog Collection

• jmx: Contains the JMX counters data that is generated by the JMX logger process. It containsimportant jmx counters that are exposed by Finesse and openfire.
These logs are stored in the following path on the SFTP server: <IP address>\<date timestamp>\active_nnn.tgz , where nnn is timestamp in long format.
• Context Service registration log: file get activelog ccbu/logs/fusion-mgmt-connector
Use this command to obtain the fusion-mgmt-connector logs generated by Finesse during the registrationand deregistration with Cisco Context Service.
These logs are stored to the following path on the SFTP server: <IP address>\<date timestamp>\active_nnn.tgz , where nnn is the timestamp in long format.
• Servm log: file get activelog platform/log/servm*.* compress
Use this command to obtain logs that are generated by the platform service manager that manages thestarting and stopping of the Finesse services.
The desktop and servm logs are compressed to one set of files.
These logs are stored to the following path on the SFTP server: <IP address>\<date timestamp>\active_nnn.tgz , where nnn is the timestamp in long format.
• Platform Tomcat logs: file get activelog tomcat/logs recurs compress
These logs are stored to the following path on the SFTP server: <IP address>\<date timestamp>\active_nnn.tgz , where nnn is the timestamp in long format.
• Install log: file get install install.log
These logs are stored to the following path on the SFTP server: <IP address>\<date timestamp>\active_nnn.tgz , where nnn is timestamp in long format.
Log collection may fail when you use the compress flag if there are a lot of log files. If collection fails, runthe command again without the compress flag.
Note
Collect Logs using Cisco Unified Real-Time Monitoring ToolCisco Finesse supports the Cisco Unified Real-Time Monitoring Tool (RTMT) for log collection. Use thefollowing procedure to collect logs using Unified RTMT.
Finesse supports RTMT only for log collection. Other RTMT features are not supported.Note
Before you begin
Download and install RTMT on a client computer from the following URL:
https://FQDN:8443/plugins/CcmServRtmtPlugin.exe
where FQDN is the Fully Qualified Domain Name of the Finesse server.
Cisco Finesse Administration Guide, Release 12.0(1)118
Perform Routine MaintenanceCollect Logs using Cisco Unified Real-Time Monitoring Tool

Procedure
Step 1 Log in to Unified RTMT using Finesse administrator credentials.Step 2 In the tree hierarchy, select Trace & Log Central.Step 3 Double-click Collect Files.
The Trace Collection wizard appears.
Step 4 Select the services and Finesse nodes for which you want to collect logs, and complete the wizard.
What to do next
For detailed instructions, see the Cisco Unified Real-Time Monitoring Tool Administration Guide, which islisted here:
https://www.cisco.com/c/en/us/support/unified-communications/unified-communications-manager-callmanager/products-maintenance-guides-list.html
Syslog Support for Critical Log MessagesCisco Finesse generates syslogs for critical log messages. Use the following procedure to view the logs usingUnified RTMT.
Before you begin
Download and install RTMT on a client computer from the following URL:https://FQDN:8443/plugins/CcmServRtmtPlugin.exe, where FQDN is the Fully QualifiedDomain Name of the Finesse server.
Procedure
Step 1 Log in to Unified RTMT using Finesse administrator credentials.Step 2 In the tree hierarchy, select SysLog Viewer or choose System > Tools > SysLog Viewer > Open SysLog
Viewer.Step 3 From the Select a Node drop-down list, choose the server where the logs that you want to view are stored.Step 4 Under the Logs tab, select Application Logs > CiscoSyslog to view and save the syslog file.
When you double-click the CiscoSyslog message, the Show Detail dialog displays the syslogdefinition and recommended actions in an adjacent pane.
For more information, see Cisco Unified Real-Time Monitoring Tool Administration Guide athttps://www.cisco.com/c/en/us/support/unified-communications/unified-communications-manager-callmanager/products-maintenance-guides-list.html.
Tip
System logmessages generated by Cisco Finesse are also available under SysLogViewer > SystemLogs >messages.
Note
Cisco Finesse Administration Guide, Release 12.0(1)119
Perform Routine MaintenanceSyslog Support for Critical Log Messages

The following are the different types of messages and corresponding descriptions that are captured in theSysLog Viewer > System Logs >messages.
• CTI_SOCKET_ERROR
System has encountered an error connecting to the CTI server.
• CTI_CONNECTION_LOST
System has lost contact with the CTI server.
• CTI_OPEN_FAILURE
CTI Server rejected open request.
• CTI_CONNECTION_RETRIES_EXCEEDED
System has failed to connect to CTI server in the allowed number of retries.
• CTI_CONNECTION_ESTABLISHED
System has successfully connected to CTI server.
• SUBSYS_INIT_ERROR
Error initializing subsystem.
• UNABLE_TO_CONNECT_TO_XMPP_SERVER
Unable to connect xmpp server.
• DB_SS_CONNECTION_CHECK
There was an error connecting to the database.
• cfservice_CORE_ERROR_DB_CONNECTION
Unable to connect to the Database.
• AWDB_NOT_ACCESSIBLE
Unable to connect to AWDB server.
• VOS_DB_ADAPTER_ERROR
There was an error on the VOS DB Adapter operation.
• FINESSE_APP_STARTUP_ERROR
Error during Finesse Application Startup.
• OF_STATE_CHANGED
OF subsystem state successfully changed.
• CONNECTED_TO_XMPP_SERVER
Successfully connected to xmpp server.
• SSO_API_ERROR
Error processing REST API Request for SSO.
• API_ERROR_DETAIL
Cisco Finesse Administration Guide, Release 12.0(1)120
Perform Routine MaintenanceSyslog Support for Critical Log Messages

Error processing REST API request.
Cisco Finesse Notification Service LoggingUse the following commands to view the status of, enable, or disable Cisco Finesse Notification Servicelogging:
• utils finesse notification logging status: This command displays whether Cisco Finesse NotificationService logging is currently enabled or disabled on the system.
Ensure the Cisco Finesse Notification Service is running before you run thecommand to retrieve the status of Cisco Finesse Notification Service logging. Ifthe service is not running, this command fails.
Note
• utils finesse notification logging enable: This command enables Cisco Finesse Notification Servicelogging.
Ensure that the Cisco Finesse Notification Service is running before you run thecommand to enable Cisco Finesse Notification Service logging. If the service isnot running, this command fails. This command also fails if Cisco FinesseNotification Service logging is already enabled.
If you enable logging and then restart the Cisco Finesse Notification Service,logging is automatically disabled.
Note
• utils finesse notification logging disable: This command disables Cisco Finesse Notification Servicelogging.
Ensure that the Cisco Finesse Notification Service is running before you run thecommand to disable Cisco Finesse Notification Service logging. If the service isnot running, this command fails. This command also fails if the Cisco FinesseNotification Service logging is already disabled.
Note
Remote Account ManagementRun the following command to enable, disable, create, and check the status of a remote access account:
utils remote_account
A remote account generates a passphrase that allows Cisco support personnel to get access to the system forthe specified life of the account.
Cisco Finesse Administration Guide, Release 12.0(1)121
Perform Routine MaintenanceCisco Finesse Notification Service Logging

• utils remote_account create account life
account is the account name. life indicates the life of the account in days.
• utils remote_account disable
• utils remote_account enable
• utils remote_account status
Cisco Finesse Administration Guide, Release 12.0(1)122
Perform Routine MaintenanceRemote Account Management

C H A P T E R 13Cisco Finesse Failover Mechanisms
• CTI Failover, on page 123• AWDB Failover, on page 125• Finesse Desktop Failover, on page 125• Desktop Behavior, on page 127• Finesse IP Phone Agent Failover, on page 131
CTI FailoverBenchmark Parameters: For a Contact Center with the capacity of 2000 logged in agents and 6000 to 12000configured agents, it takes up to 120 to 150 seconds (with up to 200 milliseconds WAN delay) for the Finesseserver to recover its state during the CTI Failover in a voice only deployment. Failover involving DigitalChannels can take longer based on the tasks and MRDs configured. The Finesse client desktop failover willbe initiated after the Finesse server is back IN_SERVICE and can take a few more minutes.
CTI failover is when the Finesse server disconnects from one CTI server and reconnects to the same or anotherCTI server during failover.
The prerequisites for successful CTI failover are as follows:
• Unified Contact Center Enterprise (Unified CCE) must be configured in duplex mode.
• The B Side CTI host and port are configured through the Finesse administration console.
In the duplex mode, if Finesse loses connection to the CTI server, it attempts to connect to the server whichis running. Finesse alternates between the configured servers until it makes a successful connection.
While failover is in progress, Finesse transitions to OUT_OF_SERVICE state. During this period, Finessedoes not entertain client requests or send out events. Any request made during this time receives a 503 ServiceUnavailable error message.
After reconnecting to a CTI server and transitioning to IN_SERVICE state, Finesse responds to client requestsand publishes events.
Connection to the CTI server can be lost due to the following reasons:
• Finesse misses three consecutive heartbeats from the connected CTI server.
• Finesse socket opened to the CTI server fails.
Cisco Finesse Administration Guide, Release 12.0(1)123

After failover is complete, the last state of call control, call data, or agent state are published as events to allclients. This allows Finesse clients to reflect an accurate view of the call control, call data, and agent state.
If an agent either makes or answers a call, and then ends that call during failover (that is, the entire call takesplace during failover), the corresponding events are not published.
An agent or supervisor who signs in after being on an active conference with other devices (which are notassociated with another agent or supervisor) may experience unpredictable behavior with the Finesse desktopdue to incorrect call notifications from Unified CCE. These limitations also encompass failover scenarioswhere a failover occurs while the agent or supervisor is participating in a conference call. For example, anagent is in a conference call when the Finesse server fails. When the agent is redirected to the other Finesseserver, that agent may see unpredictable behavior on the Finesse desktop. Examples of unpredictable behaviorinclude, but are not limited to, the following:
• The Finesse desktop does not show all participants in a conference call.
• The Finesse desktop does not show that the signed-in agent or supervisor is in an active call.
• The Finesse receives inconsistent call notifications from Unified CCE.
Despite these limitations, the agent and supervisor can continue to perform normal operations on the phone.Desktop behavior returns to normal after the agent or supervisor drops off the conference call.
Note
Prevent Non-Voice Task RONAs during CTI Reconnect
When CTI disconnection happens, the agent state is changed to WORK, on the respective non-voice MediaRouting Domain (MRD), to prevent tasks getting routed to the disconnected agents. Previous releases ofUnified CCE used to change the agent states back to an available state when the CTI connection isre-established, even though the media handling gadgets and the media channels are not initialized by then.
The media handling gadgets, and the media channels are initialized only after the Finesse desktop failovercompletes.
Due to the significant delay in desktop failing over after the Finesse server reconnects to the CTI server,chances of occurrence of RONA (Redirection on No Answer) are high when dealing with non-voice tasks.
Unified CCE, Release12.5 (1) or later allows the agent state to remain inWORKmode after CTI reconnection.This allows the agents to change to an available state in non-voice MRD explicitly after the Finesse desktopand media channels are initialized. This avoids the task being routed to the user before the agent is ready tohandle non-voice media tasks.
By default, Cisco Finesse Release 12.5(1) retains the earlier behavior, which can be modified using theenableAutoWorkModeStateChange property. By default, this property is set to true, and the administratorcan set to false to change to the new behavior.
This behavior is supported from Unified CCE Release 12.5(1) onwards, and only after the relevant non-voicegadgets or custom desktop or clients support this behavior.
Note
The agents remain in the WORK mode until they are explicitly set to active on the respective MRD using theREST API. This informs the CTI that the media channel is available (and connected) and the tasks can berouted to the respective user on that MRD.
Cisco Finesse Administration Guide, Release 12.0(1)124
Cisco Finesse Failover MechanismsCTI Failover

The Media—Change Agent from Work State to Active API allows a user to change the agentstate from WORK state to active (READY or NOT_READY), which is automatically computed by UnifiedCCE. Users can only use this API when an agent state is WORK.
AWDB FailoverThe prerequisites for AWDB failover are as follows:
• The secondary Administrative Workstation Database (AWDB) is configured.
• The secondary AWDB host is configured through the Cisco Finesse administration console.
• Cisco Finesse can connect to the secondary AWDB host.
• The Distributor service is running on the secondary AWDB host.
Agents and supervisors are authenticated against the AWDB database. When an agent or supervisor makes asuccessful API request (such as a sign in or call control request), the credentials are cached in Cisco Finessefor 30 minutes from the time of the request. After a user is authenticated, that user continues to be authenticateduntil 30 minutes pass, even if both AWDBs are down. Cisco Finesse attempts to reauthenticate the user againstthe AWDB only after the cache expires.
If Cisco Finesse loses connection to the primary Administration &Data server, and the preceding prerequisiteshave been implemented, AWDB failover occurs. After Cisco Finesse loses connection to the primaryAdministration & Data server, it tries to reconnect to the secondary server.
Cisco Finesse repeats this process for every API request until it can connect to one of the Administration &Data servers. During failover, Cisco Finesse does not process any requests, but clients can still receive events.
If Cisco Finesse cannot connect to either of the Administration & Data servers and the cache has expired, thesystems returns the following errors:
• Agents and supervisors who attempt to sign in to the Finesse desktop receive an “Invalid user ID orpassword” error message.
• Administrators cannot update or retrieve settings in the Cisco Finesse administration console.
• Users who are already signed in to Cisco Finesse receive an “Operation timed out” error message.
• Users who make API requests receive an 401 “Unauthorized” HTTP error message.
If Cisco Finesse loses connection to one AWDB and then receives requests, these requests may time out beforeCisco Finesse can detect that the connection is down and connect to the alternate AWDB. In this scenario,the user (administrator, agent, or supervisor) may need to retry the operation for it to succeed.
Finesse Desktop FailoverWith a two-node Finesse setup (primary and secondary Finesse servers), if the server that an agent is connectedto goes out of service, the agent receives a notification that the connection with the server was lost. The Finessedesktop:
• Continues to check whether the current Finesse server recovers its state.
• Checks if the other Finesse server is available and in service.
Cisco Finesse Administration Guide, Release 12.0(1)125
Cisco Finesse Failover MechanismsAWDB Failover

If the other Finesse server is available, the desktop automatically signs the agent into the other server. If thecurrent Finesse server recovers its state, the desktop notifies the agent that it has reconnected.
The Finesse smarter failover logic has three triggers to detect desktop failure:
• The Finesse desktop receives a SystemInfo event that the current server is OUT_OF_SERVICE.
• The user XMPP connection is disconnected.
• The “finesse” XMPP user presence changes to unavailable.
No matter which trigger is detected, the desktop reconnection logic is as follows:
1. Poll SystemInfo for current server every 20 seconds and the other Finesse server between 45-150 seconds.
2. If SystemInfo is IN_SERVICE, check the user XMPP connection.
3. If SystemInfo is IN_SERVICE, check if the lastCTIHeartbeatStatus is a success.
This is to ensure that the second side is healthy before failover, and does not immediately go out of serviceafter the client has failed over . This may occur in CTI failure, since both Finesse servers connect to the samePG and CTI server, and a CTI failure can cause both Finesse servers to disconnect and connect to the alternatePG. Depending on the network topology the second server might be slower to sense a network disconnect.
Note
4. If XMPP is disconnected, make an user XMPP connection request.
5. If user XMPP is connected and the server is IN_SERVICE, refresh the data.
While polling SystemInfo every 20 seconds, the desktop also checks the availability of the alternate serverevery 45-150 seconds. The smarter failover logic prefers to stay with the current server. If the failover logicdetects that the alternate server is available, it checks the current server one more time. If the current serverhas recovered, the desktop reconnects to the current server. If the current server is still down, the desktopconnects the agent to the alternate server. In this case, the agent does not automatically reconnect to the failedserver after it recovers but instead remains connected to the alternate server.
If the user XMPP connection is the source of failure, the desktop makes three attempts to reconnect beforechanging the state of the desktop to disconnected. These attempts occur before the smarter failover logicbegins.
Desktop failover can occur for the following reasons:
• The Cisco Finesse Tomcat Service goes down.
• The Finesse Webapp Service goes down.
• The Cisco Finesse Notification Service goes down.
• Finesse loses connection to both CTI servers.
After Finesse failover, the pending state of an agent will not be displayed oncethe agent fails over to the secondary Finesse node. The pending state change isreflected on the desktop only after the call ends.
Note
Cisco Finesse Administration Guide, Release 12.0(1)126
Cisco Finesse Failover MechanismsFinesse Desktop Failover
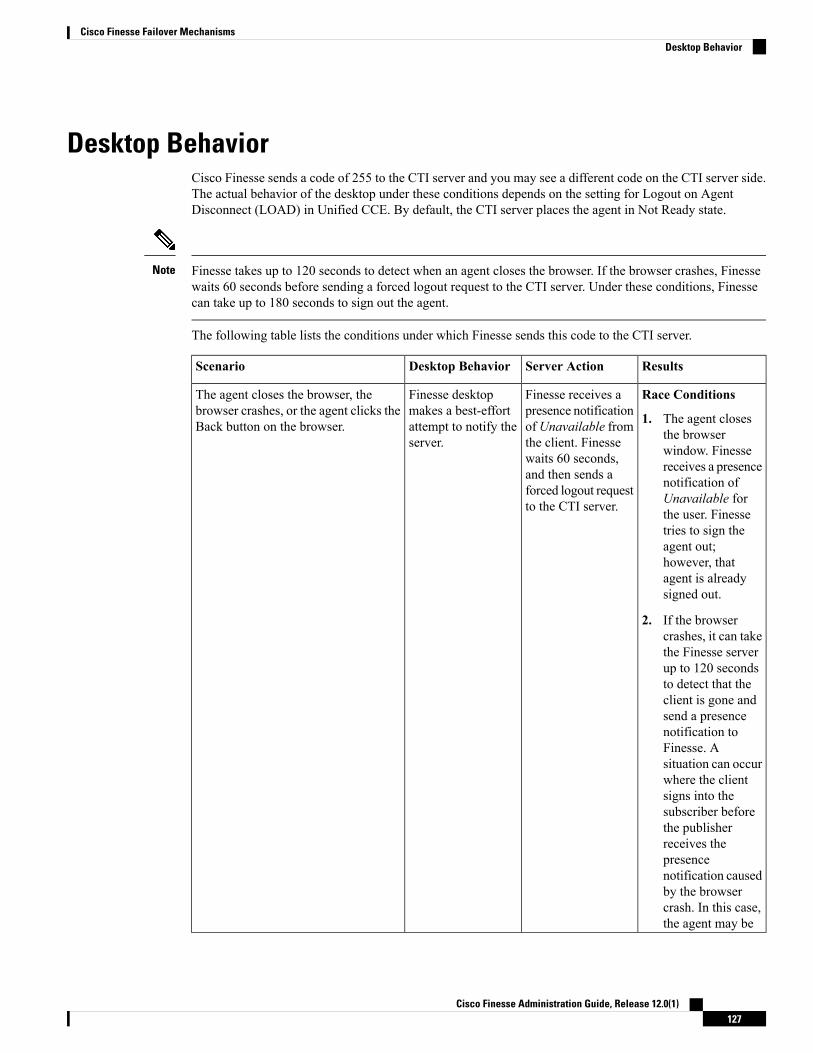
Desktop BehaviorCisco Finesse sends a code of 255 to the CTI server and you may see a different code on the CTI server side.The actual behavior of the desktop under these conditions depends on the setting for Logout on AgentDisconnect (LOAD) in Unified CCE. By default, the CTI server places the agent in Not Ready state.
Finesse takes up to 120 seconds to detect when an agent closes the browser. If the browser crashes, Finessewaits 60 seconds before sending a forced logout request to the CTI server. Under these conditions, Finessecan take up to 180 seconds to sign out the agent.
Note
The following table lists the conditions under which Finesse sends this code to the CTI server.
ResultsServer ActionDesktop BehaviorScenario
Race ConditionsFinesse receives apresence notification
Finesse desktopmakes a best-effort
The agent closes the browser, thebrowser crashes, or the agent clicks theBack button on the browser. 1. The agent closes
the browserofUnavailable fromthe client. Finesse
attempt to notify theserver. window. Finessewaits 60 seconds, receives a presenceand then sends a notification offorced logout request
to the CTI server. Unavailable forthe user. Finessetries to sign theagent out;however, thatagent is alreadysigned out.
2. If the browsercrashes, it can takethe Finesse serverup to 120 secondsto detect that theclient is gone andsend a presencenotification toFinesse. Asituation can occurwhere the clientsigns into thesubscriber beforethe publisherreceives thepresencenotification causedby the browsercrash. In this case,the agent may be
Cisco Finesse Administration Guide, Release 12.0(1)127
Cisco Finesse Failover MechanismsDesktop Behavior

signed out or putinto Not Readystate on thesubscriber.
3. If the Finessedesktop is runningover a slowernetworkconnection,Finesse may notalways receive anUnavailablepresencenotification fromthe client browser.In this situation,the behaviormimics a browsercrash, as describedin the precedingcondition.
4. If agent is in NotReady State beforeFailover, agentmoves to NotReady -Connection Failureafter CTIDisconnect orReconnect.
If agent is inReady State beforeFailover, agentmoves to NotReady -Connection Failureupon his next statechange to NotReady.
—Finesse receives apresence notification
—The client refreshes the browser
ofUnavailable fromthe client. Finessewaits 60 secondsbefore sending aforced logout requestto the CTI server toallow the browser to
Cisco Finesse Administration Guide, Release 12.0(1)128
Cisco Finesse Failover MechanismsDesktop Behavior

reconnect after therefresh.
Race ConditionsThe publisherreceives a presence
Connection to theFinesse server
The client encounters a network glitch(Finesse is IN_SERVICE) A situation can occur
where the forcednotification ofUnavailable from
temporarily goesdown, consequentlythe client fails overto the subscriber.
logout does not happenbefore the client signsin to the subscriber. If
the client. Finesse isIN_SERVICE, so itsends a forced logout the agent is on a call,request to the CTIserver for the agent. the publisher sends the
forced logout requestafter the call ends. Theagent will be signedout or put into NotReady state when thecall ends, even thoughthe client is alreadysigned in to thesubscriber.
If agent is in NotReady State beforeFailover, agent movesto Not Ready -Connection Failureafter CTI Disconnector Reconnect.
If agent is in ReadyState before Failover,agent moves to NotReady - ConnectionFailure upon his nextstate change to NotReady.
The session expirywarning appears 10
The Finesse serverforwards the forced
Finesse desktopsends a forced logout
The Refresh Token has expired. Formore information on tokens, see
minutes and 5 minuteslogout request to theCTI server.
request to the CTIserver.
https://developer.cisco.com/docs/finesse/#single-sign-on-apis. before the Refresh
Token expires. In thelast minute, acountdown timerappears till the RefreshToken expires. Theagent is forcefullylogged out when thetimer reaches zero andmust log in again.
For Unified CCE, thestate of the agent
Cisco Finesse Administration Guide, Release 12.0(1)129
Cisco Finesse Failover MechanismsDesktop Behavior

changes to Log Out orNot Ready based onthe Load parameter setas below.
Load parameter = 0
• When the agent'scurrent state isNot Ready,Ready, orWrap-Up, theagent's state afterforce logout ischanged to NotReady –ConnectionFailure.
• When the agent'scurrent state isTalking, theAgent goes intoNot-Ready –ConnectionFailure state afterthe call ends.
Load parameter = 1
• When the agent'scurrent state isNot Ready,Ready, orWrap-Up, theagent goes toLogged Out –System Failure.
• When the agent'scurrent state isTalking, theAgent goes toLogged Out –System Failureimmediately eventhough the call isstill active.
Desktop Chat Failover
The following table lists the desktop chat failover scenarios:
Cisco Finesse Administration Guide, Release 12.0(1)130
Cisco Finesse Failover MechanismsDesktop Behavior

Desktop Chat BehaviorFailover Type
The desktop chat status is retained, and all active chatsessions are lost.
Cisco IM&P server failover
The desktop chat status is retained, and all active chatsessions are lost.
Finesse server failover
The desktop chat status and all chat sessions areretained.
CTI server failover
Finesse IP Phone Agent FailoverFinesse IPPA failover can occur for the following reasons:
• The Finesse REST API Service transitions to OUT_OF_SERVICE.
• The Finesse Notification Service transitions to OUT_OF_SERVICE.
• If Finesse IPPA detects a server failure before Finesse fails over to the alternate CTI server, then FinesseIPPA declares the Finesse server OUT_OF_SERVICE.
The server that an agent is connected transitions to OUT_OF_SERVICE, the Finesse IP Phone Agent (IPPA)displays a notification that the server is unavailable. Finesse IPPA continues to check whether the currentFinesse server recovers its state and notifies the agent if it reconnects.
Finesse IPPA attempts to reconnect to the server every 5 seconds and declares it OUT_OF_SERVICE afterthree failed attempts. The total time required for the transition to OUT_OF_SERVICE is approximately 15seconds.
Unlike the Finesse desktop, Finesse IPPA does not check whether the subscriber is available. To connect tosubscriber, the agent must exit the publisher, and manually sign into the subscriber.
Finesse IPPA failover logic has the following two triggers to detect failure:
• Finesse IPPA receives a SystemInfo event that the publisher is OUT_OF_SERVICE.
Finesse IPPA polls SystemInfo every 5 seconds to check whether the Finesse server is IN_SERVICE.After three attempts, if the Finesse server is not IN_SERVICE, Finesse IPPA displays a server unavailablemessage to the agent.
• Finesse IPPA receives notification that the Finesse Notification Service is disconnected.
Finesse IPPA tries every 5 seconds to reconnect with the XMPP server. After three attempts, if the FinesseNotification Service cannot be reestablished, Finesse IPPA displays a server unavailable message to theagent.
While the agent is still signed into the current service, Finesse IPPA continues attempting to reestablish theconnections with the Finesse and XMPP servers. If they both resume service, Finesse IPPA displays the SignIn screen and the agent can sign in again and continue as normal.
Alternately, the agent must exit the current Finesse service and try to connect using an alternate Finesseservice.
Cisco Finesse Administration Guide, Release 12.0(1)131
Cisco Finesse Failover MechanismsFinesse IP Phone Agent Failover

Cisco Finesse Administration Guide, Release 12.0(1)132
Cisco Finesse Failover MechanismsFinesse IP Phone Agent Failover
C H A P T E R 14Backup and Restore
• Backup and Restore, on page 133• Important Considerations, on page 134• SFTP Requirements, on page 134• Master and Local Agents, on page 135• Backup Tasks, on page 136• Restore the Nodes in HA Setup with Rebuild, on page 138
Backup and RestoreCisco Finesse uses the backup and restore tools that are provided by the commonCiscoUnified Communicationsplatform services for complete data backup-and-restore capabilities. Cisco DRS allows you to perform regularlyscheduled automatic or user-invoked data backups and to restore data if the system fails.
To access the Disaster Recovery System (DRS) application, direct your browser to the following URL:https://FQDN:8443/drf, where FQDN is the fully-qualified domain name of your Finesse server.
Cisco Finesse does not support One-Step Restore with the DRS application.Note
In the case of high availability (HA), Cisco DRS performs a cluster-level backup, which means that it collectsbackups for all servers to Cisco Finesse and archives the backup data to a remote SFTP server.
DRS backs up and restores its own settings, that is, backup device settings (saved in file drfDevice.xml)and schedule settings ( saved in file drfSchedule.xml) as part of the platform component. Once a serveris restored with these files, you do not need to reconfigure DRS backup device and schedule settings.
Cisco DRS uses the SSL-based communication between the Master Agent and the Local Agent forauthentication and encryption of data between the publisher and subscriber nodes. Cisco DRS uses the IPSeccertificates for its Public/Private Key encryption. If you delete the IPSec truststore (hostname.pem) filefrom the CertificateManagement pages, then Cisco DRSwill not work as expected. If you delete the IPSec-trustfile manually, then you must ensure that you upload the IPSec certificate to the IPSec-trust. For moreinformation about the certificate management, see, Cisco Unified Communications Manager Security Guideat https://www.cisco.com/c/en/us/support/unified-communications/unified-communications-manager-callmanager/products-maintenance-guides-list.html.
Note
Cisco Finesse Administration Guide, Release 12.0(1)133

Important ConsiderationsFollowing are the important considerations when you perform the backup and restore procedures:
• Before you run a backup or a restore, make sure that both nodes in a cluster are running the same versionof Cisco Finesse. If different nodes are running different versions, you will have a certificate mismatchand your backup or restore fails.
• Before you restore Cisco Finesse, make sure that the hostname, IP address, DNS configuration, version,and deployment type matches the hostname, IP address, DNS configuration, version, and deploymenttype of the backup file that you want to restore.
• Before you restore Cisco Finesse, ensure that the version that is installed on the server matches the versionof the backup file that you want to restore. Cisco DRS supports restore only for matching versions ofCisco Finesse. For example, Cisco DRS does not allow you to restore from Version 8.5(1).1000-1 toVersion 9.0(1).1000-1, or from Version 8.5(2).1000-1 to Version 9.0(1).1000-2.
• Schedule backups during off-peak hours to avoid call-processing interruptions and impact to service.
• After you use the recovery disk to bring a server with a corrupted file system into a bootable and semi-functional state, rebuild the server.
If you do not rebuild the server, you may notice missing directories, lostpermissions, or corrupted soft links.
Note
SFTP RequirementsTo back up data to a remote device on the network, you must have an SFTP server that is configured andaccessible from the Cisco Finesse node to run the backup. Cisco allows you to use any SFTP server productsthat have been certified with Cisco through the Interoperability Verification Testing (IVT) process. CiscoDeveloper Network (CDN) partners, such as GlobalSCAPE, certify their products with a specified version.
Cisco uses the following servers for internal testing. You may use one of the servers, but you must contactthe vendor for support:
• Open SSH (see http://sshwindows.sourceforge.net/)
• Cygwin (see http://www.cygwin.com/)
• Titan (see http://www.titanftp.com/)
Cisco does not support use of the SFTP product freeFTPD, because it has a 1-GB file-size limit.
Cisco Finesse Administration Guide, Release 12.0(1)134
Backup and RestoreImportant Considerations

• For issues with third-party products that have not been certified through the IVT process, contact thethird-party vendor for support.
• While a backup or restore is running, you cannot perform any Operating System (OS) Administrationtasks because Cisco DRS blocks all OS Administration requests. However, you can use CLI commandsto back up or restore the system.
Note
Master and Local AgentsAdded content as part of CSCvp71798
The system automatically starts the Master Agent service on each node of the cluster, but it is functional onlyon the first node. Both servers in the Cisco Finesse cluster must have Local Agent running to perform thebackup and restore functions.
By default, a Local Agent automatically gets activated on each node of the cluster.Note
Master Agent DutiesAdded content as part of CSCvp71798
The Master Agent (MA) performs the following duties:
• Stores system-wide component registration information.
• Maintains a complete set of scheduled tasks in an XML file. The MA updates this file when it receivesupdates of schedules from the user interface. The MA sends executable tasks to the applicable LocalAgents, as scheduled. Local Agents execute immediate backup tasks without delay.
• Lets you perform activities such as configuring backup devices, scheduling backups by adding newbackup schedules, viewing or updating an existing schedule, displaying status of executed schedules,and performing system restoration.
• Stores backup data on a remote network location.
Local Agent DutiesIn the Cisco Finesse cluster, the Local Agent runs backup and restore scripts on each node in the cluster.
CiscoDRS uses an SSL-based communication between theMaster Agent and the Local Agent for authenticationand encryption of data between the publisher and subscriber nodes. Cisco DRS uses IPSec certificates for itsPublic/Private Key encryption. This certificate exchange is handled internally; you do not need to make anyconfiguration changes to accommodate this exchange.
Note
Cisco Finesse Administration Guide, Release 12.0(1)135
Backup and RestoreMaster and Local Agents

Backup TasksYou can perform the following backup tasks using Cisco DRS:
• Create and manage backup devices
• Create and manage backup schedules
• Perform manual backup and check backup status
• Estimate size of backup tar file
• View history of last 20 backups
Manage Backup DevicesBefore using Cisco DRS, you must configure the locations where the backup files will be stored. You canconfigure up to ten backup devices. Perform the following steps to configure backup devices.
Procedure
Step 1 Access the DRS application (https://Finesse server IP:8443/drf).Step 2 Select Backup > Backup Device.Step 3 Click Add New to add a new device or click the device name to edit settings of an existing backup device.Step 4 Enter the backup device name and select destination. For more details on the field description, see the detailed
online help provided with the DRS application.Step 5 Click Save.
You cannot delete a backup device that is configured as the backup device in a backup schedule.Note
Manage Backup SchedulesYou can create up to ten backup schedules. Each backup schedule has its own set of properties, including aschedule for automatic backups, and a storage location.
Schedule backups during off-peak hours to avoid call-processing interruptions and impact to service.Caution
Procedure
Step 1 Access the DRS application (https://Finesse server IP:8443/drf).Step 2 Select Backup > Scheduler.
Cisco Finesse Administration Guide, Release 12.0(1)136
Backup and RestoreBackup Tasks
Step 3 Click Add New to add a new schedule or click the schedule name to edit settings of an existing backupschedule.
Step 4 Enter the backup schedule name, select the backup device, and select feature as Finesse.Step 5 Enter the backup date and frequency details as required. For more details on the field description, see the
detailed online help provided with the DRS application.Step 6 Click Save.Step 7 Select a schedule from the Schedule List and then click Enable Selected Schedules.
• If you plan to schedule a backup on a two-node deployment, ensure that both the servers inthe cluster are running the same version of Cisco Finesse and are communicating in the network.Servers that are not communicating at the time of the scheduled backup will not be backed up.
• Do not schedule a backup to run while the Update Database Statistics task is running. Bydefault, this task is set to run every Saturday at 3:00 a.m. and Shrink-repack on Sunday at 3:00a.m..
Note
Perform Manual Backup
Procedure
Step 1 Access the DRS application (https://Finesse server IP:8443/drf).Step 2 Select Backup >Manual Backup.Step 3 Select a backup device and feature as Finesse.Step 4 Click Start Backup to start the manual backup.
Click Estimate Size to get the approximate size of the disk space that the backup file consumes onthe SFTP server.
To perform backup tasks on virtual machines, seeUnified Communications VMware Requirements,at:https://www.cisco.com/c/dam/en/us/td/docs/voice_ip_comm/uc_system/virtualization/virtualization-software-requirements.html.
Note
Check Backup Status
Procedure
Step 1 Access the DRS application (https://Finesse server IP:8443/drf).Step 2 Select Backup > Current Status to check the backup status.
Cisco Finesse Administration Guide, Release 12.0(1)137
Backup and RestorePerform Manual Backup

The backup to the remote server to be completed within 20 hours otherwise the backup sessiontimes out and you will have to start the fresh backup.
Caution
Restore the Nodes in HA Setup with RebuildIn a high availability (HA) setup, if a hard-drive failure or other critical hardware or software failure occurs,you may need to rebuild the primary and the secondary Finesse nodes (publisher and subscriber node). Performthe following steps to restore the Finesse nodes to its last backed up state.
Cisco Finesse data can only be retrieved from the backup file. The recent Finesse configuration data, whichis not backed up, must be manually configured in the Cisco Finesse administration console after the restore.
Caution
Procedure
Step 1 Perform a fresh installation of Finesse. Make sure to install the same version of Finesse, using the sameadministrator credentials, network configuration, and security password that you used for the initial installation.
Step 2 Access the DRS application (https://Finesse server IP:8443/drf).Step 3 From the Restore menu, select Restore Wizard.Step 4 Select a backup device. Choose the location where your backup is stored.Step 5 Select the backup file and feature as Finesse.Step 6 When prompted to choose the nodes, either choose both nodes or choose each node to individually restore
them.Step 7 After the restore process is complete, restart the node.Step 8 Run the following command on the primary Finesse server:
utils dbreplication stop all
Step 9 Run the following CLI command on the primary Finesse server to set up replication:utils dbreplication reset all
The dbreplication reset command can take some time to complete.
Run the CLI command utils dbreplication runtimestate on the primary Finesse node. If the RTMTcounter value for replication status is 2 on all nodes, replication is functioning properly.
Note
Cisco Finesse Administration Guide, Release 12.0(1)138
Backup and RestoreRestore the Nodes in HA Setup with Rebuild

After the installation is complete, check that the dbreplication is functioning and allowing the data to propagatefrom the primary to the secondary node. However, if you need to restore third-party gadgets to the secondarynode, you must either upload them again or run the restore process on the secondary node.
Always check the dbreplication status after any restore, using the CLI command utils dbreplicationruntimestate.
Note
Cisco Finesse Administration Guide, Release 12.0(1)139
Backup and RestoreRestore the Nodes in HA Setup with Rebuild

Cisco Finesse Administration Guide, Release 12.0(1)140
Backup and RestoreRestore the Nodes in HA Setup with Rebuild

C H A P T E R 15Supported Cisco Unified Communications OSServices
• Supported Cisco Unified Communications OS Services, on page 141
Supported Cisco Unified Communications OS ServicesThe following sections list the Cisco Unified Communications OS services that Cisco Finesse supports. Formore information about CLI commands, see Command Line InterfaceGuide for CiscoUnified CommunicationsSolutions.
Other commands listed in the Command Line Interface Guide for Cisco Unified Communications Solutionsare not tested or qualified for Finesse. Some of those commandsmay return only platform-specific information.Others may not work for Finesse. Finesse supports only the commands from the guide that are listed here.
Some of these commands may warn about invalidating a software license. As Finesse is not a licensed server,you can disregard these warnings.
Note
File Commands
• file check
• file delete
• file get
• file list
• file search
• file tail
• file view
Show Commands
• show account
Cisco Finesse Administration Guide, Release 12.0(1)141

• show date
• show disk usage
• show hardware
• show logins
• show myself
• show network
• show network ipprefs
• show open
• show packages
• show perf
• show status
• show tech all
• show tech dberrcode
• show tech gateway
• show tech locales
• show tech params
• show tech prefs
• show tech repltimeout
• show tech runtime
• show tech systables
• show tech systems
• show tech version
• show timezone
• show trace
• show version
• show network ipv6 settings
• show tls server min-version
• show tls client min-version
Utils Commands
• utils core active list
• utils core inactive list
Cisco Finesse Administration Guide, Release 12.0(1)142
Supported Cisco Unified Communications OS ServicesSupported Cisco Unified Communications OS Services

• utils csa enable
• utils csa disable
• utils csa status
• utils dbreplication clusterreset
• utils dbreplication dropadmindb
• utils dbreplication forcedatasyncsub
• utils dbreplication reset
• utils dbreplication runtimestate
• utils dbreplication setrepltimeout
• utils dbreplication stop
• utils diagnose test
• utils firewall ipv4
• utils iostat
• utils network arp
• utils network capture eth0
• utils network connectivity
• utils network host
• utils network ping
• utils network traceroute
• utils ntp
• utils ntp config
• utils ntp restart
• utils ntp server add
• utils ntp server delete
• utils ntp server list
• utils ntp status
• utils ntp start
• utils remote_account
• utils reset_application_ui_administrator_name
• utils reset_application_ui_administrator_password
• utils service
• utils system
Cisco Finesse Administration Guide, Release 12.0(1)143
Supported Cisco Unified Communications OS ServicesSupported Cisco Unified Communications OS Services

• utils system boot
• utils system restart
• utils system upgrade
• utils vmtools status
Set Commands
• set network ipv6 gateway
• set network ipv6 service disable
• set network ipv6 service enable
• set network ipv6 static_address
• set tls server min-version <version>
• set tls client min-version <version>
Cisco SNMP integration with Finesse is restricted to platform MIBs. Finesse does not have anyapplication-specific MIBs.
Note
Cisco Finesse Administration Guide, Release 12.0(1)144
Supported Cisco Unified Communications OS ServicesSupported Cisco Unified Communications OS Services

A P P E N D I X ACisco Finesse CLI
• Commands Supported for Cisco Finesse, on page 145• Finesse HTTPS Redirect, on page 145• Cisco Finesse Services, on page 146• Cisco Finesse Trace Logging, on page 147• Toaster Notifications, on page 148• Finesse IPPA Inactivity Timeout, on page 148• Configuring Queue Statistics, on page 149• Cross-Origin Resource Sharing (CORS) , on page 150• Gadget Source Whitelisting , on page 153• Supported Content Security Policy Directives, on page 154• Finesse System Commands , on page 155• Desktop Properties, on page 156• Service Properties, on page 158• Upgrade, on page 158• Shutdown, on page 158• Replication Status, on page 159• View Property , on page 159• Update Property , on page 159• Signout from Media Channels, on page 160
Commands Supported for Cisco FinesseFinesse supports the following CLI commands and has qualified their use.
Finesse HTTPS RedirectEnable Cisco Finesse HTTPS Redirect to enforce HTTPS to access the Finesse desktop and administrationconsole. If Cisco Finesse HTTPS Redirect is enabled, agents and supervisors who attempt to access the desktopwith HTTP are redirected to HTTPS. Administrators who attempt to access the administration console withHTTP are also redirected to HTTPS.
If Cisco Finesse HTTPS Redirect is disabled, the desktop and the administration console can be accessed withHTTP or HTTPS.
Cisco Finesse Administration Guide, Release 12.0(1)145

This command does not impact the Finesse REST APIs.Note
In a two-node setup, if you enable or disable HTTPS Redirect only on the primary Finesse server, the settingdoes not replicate to the secondary Finesse server. You must enter the required commands on the primary andsecondary Finesse server.
Use the folloing commands to view the status of, enable, or disable Cisco Finesse HTTPS Redirect:
• utils finesse application_https_redirect status: This command retrieves the status of Cisco FinesseHTTPS Redirect. It displays whether Cisco Finesse HTTPS Redirect is currently enabled or disabled onthe system.
On the secondary server, the HTTPS redirect status appears as enabled for theFinesse Agent Desktop only. For Finesse Admin, the HTTPS redirect statusalways appears as disabled on the secondary server because Finesse Admin isnot available on the secondary server.
Note
• utils finesse application_https_redirect enable: This command enables Cisco Finesse HTTPS Redirect.
You must stop the Cisco Finesse Tomcat Service before you can enable Cisco Finesse HTTPS Redirect.You can use the following command to stop this service: utils service stop Cisco Finesse Tomcat.
If the Cisco Finesse Tomcat Service is not stopped, the command to enable Cisco Finesse HTTPSRedirectfails. This command also fails if Cisco Finesse HTTPS Redirect is already enabled.
After you enable Cisco Finesse HTTPS Redirect, start the Cisco Finesse Tomcat Service using thecommand utils service start Cisco Finesse Tomcat .
• utils finesse application_https_redirect disable: This command disables Cisco Finesse HTTPSRedirect.
You must stop the Cisco Finesse Tomcat Service before you can disable Cisco Finesse HTTPS Redirect.You can use the following command to stop this service: utils service stop Cisco Finesse Tomcat.
If the Cisco Finesse Tomcat Service is not stopped, the command to disable Cisco Finesse HTTPSRedirect fails. This command also fails if Cisco Finesse HTTPS Redirect is already disabled.
After you disable Cisco Finesse HTTPS Redirect, start the Cisco Finesse Tomcat Service using thecommand utils service start Cisco Finesse Tomcat.
Cisco Finesse ServicesTo view, start, or stop services:
• show network all detail : View the platform TCP/IP services, UDP services, and Unix domain socketsused by Cisco Finesse:
• utils service list: This command retrieves a list of all services and their status.
Services are shown in one of the following states:
Cisco Finesse Administration Guide, Release 12.0(1)146
Cisco Finesse CLICisco Finesse Services

STOPPED means the service is not running. STARTING means the service is starting operation andperforming any necessary initialization. STARTED means the service has successfully initialized and isoperational.
• utils service start service name: This command starts the named service.
• utils service stop service name: This command stops the named service.
• utils service start Cisco Finesse Tomcat: This commans starts Cisco Finesse Tomcat.
• utils service stop Cisco Finesse Tomcat: This commans stops Cisco Finesse Tomcat.
• utils service restart Cisco Finesse Tomcat: This commans restarts Cisco Finesse Tomcat.
If a Cisco Finesse service-related problem exists, restart the Finesse service. Notethat most service-related problems cannot be corrected by restarting a service.
Note
Cisco Finesse Trace LoggingUse the following commands to toggle trace logs for Cisco Finesse, enable trace logs for Finesse IPPA, andenable debug logs for realm.
Enabling trace logging may cause an overload in the system and must be used for debugging purposes only.Note
• utils finesse trace enable:
This command allows you to:
• Enable trace logs for Cisco Finesse.
• Turn on command dispatcher logs.
• Enable trace logs for Finesse IPPA.
• Enable debug logs for Realm.
• utils finesse trace disable
This command allows you to:
• Disable trace logs for Cisco Finesse.
• Turn off command dispatcher logs.
• Disable trace logs for Finesse IPPA.
• Disable debug logs for Realm.
Cisco Finesse Administration Guide, Release 12.0(1)147
Cisco Finesse CLICisco Finesse Trace Logging

After execution of each command, wait for 60 seconds for the changes to takeeffect.
Note
• utils finesse trace status
This command allows you to displays status as:
• Enabled - When all four actions are enabled.
• Disabled - When all four actions are disabled.
If all actions are not enabled or disabled, a warning message is displayed.
Toaster NotificationsToaster notifications are enabled by default after a fresh installation of Cisco Finesse. Use the following CLIcommands to disable, enable, and check the status of the toaster notifications:
• utils finesse toaster enable [closeTimeout]: This command enables the Cisco Finesse toaster notification.
While enabling toaster notification, use the closeTimeout parameter (timeout inseconds) to set the time interval after which toaster automatically closes. If noparameter is specified, timeout is set to 8 seconds by default. The valid range fortimeout activity is between 5-15 seconds. The browser must be refreshed fortimeout changes to take effect.
The closeTimeout parameter is only available in Windows OS for Chromebrowser. In Mac OS, the Chrome browser automatically closes the toasternotification.
Note
• utils finesse toaster disable: This command disables the Cisco Finesse toaster notification.
• utils finesse toaster status: This command displays the status (enable or disable) of the Cisco Finessetoaster notification.
Cisco Finesse Toaster Notification does not work with Internet Explorer browser.Note
Finesse IPPA Inactivity TimeoutUse the following CLI commands to enable or disable the Inactivity Timeout feature in Finesse IPPA. Youmust either disable the Finesse Inactivity Timeout feature or increase the timeout in the range of 120 secondsto one day (in seconds), so that the Finesse IPPA agent is not logged out if on any other screen:
• utils finesse ippa_inactivity_timeout enable: This command enables Finesse IPPA Inactivity Timeout.
Cisco Finesse Administration Guide, Release 12.0(1)148
Cisco Finesse CLIToaster Notifications

The default time set for inactivity timeout is 120 seconds.Note
• utils finesse ippa_inactivity_timeout disable: This command disables Finesse IPPA Inactivity Timeout.
When inactivity timeout is disabled, you will not be logged out of Finesse IPPA,if the agent is on any other screen.
Note
• utils finesse ippa_inactivity_timeout enable inactivity_timeout: This command enables the FinesseIPPA Inactivity Timeout with timeout set to n seconds.
Minimum value of n must be 120 seconds and maximum value can be up to oneday (86400 seconds).
Note
• utils finesse ippa_inactivity_timeout status: This command checks the status of Finesse IPPA InactivityTimeout.
The Finesse IPPA Inactivity Timeout CLIs should be run on primary and secondary Finesse servers. Enablingor disabling this feature requires a restart of Cisco Finesse Tomcat, and restart must be done in the maintenancewindow. During upgrade, the inactivity timeout configuration is not retained and should be re-configured postupgrade.
To know how this feature works on specific IP phone models, see https://www.cisco.com/c/en/us/support/customer-collaboration/unified-contact-center-enterprise/products-device-support-tables-list.html
Note
Configuring Queue StatisticsThe Queue Statistics gadget is enabled by default as part of Cisco Finesse new installation (Unified CCEonly). When performing a system upgrade from Cisco Finesse 11.5(1), the desktop custom layout needs tobe modified by the administrator for the Queue Statistics gadget to be displayed on the Agent and Supervisordesktop.
Use the following CLI commands to enable and disable the queue statistics polling or check the status of thequeue statistics polling:
• utils finesse queue_statistics enable
• utils finesse queue_statistics disable
• utils finesse queue_statistics status
After performing a system upgrade, during switch-version the queue statistics polling will be enabled bydefault. The procedure to disable the queue statistics polling remains the same.
Cisco Finesse Administration Guide, Release 12.0(1)149
Cisco Finesse CLIConfiguring Queue Statistics
When enabled, Queue Statistics supports a maximum of 1500 users (Agents and Supervisors).Note
Cross-Origin Resource Sharing (CORS)CORS support to third-party web server is disabled by default for Cisco Finesse and OpenFire. Use thefollowing CLIs to enable CORS for Cisco Finesse and OpenFire and configure the allowed origin list:
CORS support to third-party clients is enabled for all origins by default in Cisco Finesse and OpenFire. Thiscorresponds to the enable_all mode below.
Note
After you make changes to the CORS status or to the allowed origin list, restart Cisco Finesse Tomcat andNotification Services for changes to take effect.
Important
• utils finesse cors enable_all: This command allows all origins to make cross domain requests. It respondsand allows CORS preflight requests from any domain to make Finesse API/OpenFire requests.
This is not a secure configuration and is included only to support backwardcompatibility.
Note
• utils finesse cors enable: This command allows CORS for Cisco Finesse APIs and OpenFire requestsfor whitelisted origins. It responds to browser CORS preflight requests and allows valid whitelisteddomains to make Finesse API/OpenFire requests.
Use the utils finesse cors allowed_originCLI to customize the whitelisted origins.Any custom headers used in the CORS requests have to be added using utilsfinesse cors allowed_headers CLI.
Note
• utils finesse cors disable: This command restricts CORS for Cisco Finesse APIs and OpenFire requests.it disallows or prevents CORS preflight requests from any external domain to make Finesse API andOpenFire requests.
If allowed origin list is already present, then the list is preserved and used whenCORS is enabled. Note that the CLI changes are reflected only after you clearyour cache and close and re-open the browser.
Note
• utils finesse cors status: This command displays the CORS status (enable_all, enabled, or disabled) onthe console.
Cisco Finesse Administration Guide, Release 12.0(1)150
Cisco Finesse CLICross-Origin Resource Sharing (CORS)

For allowing any other header, the following set of CLI commands are added to enable CORS for both CiscoFinesse and OpenFire and configure the allowed origin list:
• utils finesse cors allowed_origin list: This command lists all the origins in the allowed origin list.
• utils finesse cors allowed_origin add: This command adds origins to the allowed origin list. Originscan be added by using a comma separated string. For example:
utils finesse cors allowed_origin add http://origin1.com:[port]
utils finesse cors allowed_origin add http://origin1.com: [port], http://origin2.com:[port]
Wildcard character * is not a valid origin in the allowed origin list.Note
• utils finesse cors allowed_origin delete: This command deletes origins from the allowed origin list.
Delete will list all the origins in the allowed origin list, of which origins can bedeleted by selecting the correct choice. For example:
utils finesse cors allowed_origin delete
1: http://google.com
2: https://www.cisco.com
3: https://def.com
4: https://abc.com:8082
a: all
q: quit
Select the index of origin(s) to be deleted [1-4 or a,q]
Note
By default the following headers are allowed and exposed:
• allowed_headers: Content-Type,X-Requested-With,accept,Origin,
Authorization,Access-Control-Request-Method,Access-Control-Request-Headers,requestId,Range.
• exposed_headers: Access-Control-Allow-Origin,Access-Control-Allow-
Credentials,Access-Control-Allow-Methods,Access-Control-Allow-Headers,Access-Control-Max-Age.
These headers cannot be modified. Custom headers can be added or removed using the following CLIs:Note
• utils finesse cors allowed_headers list: This command lists all the allowed headers for CORS. The listis used to validate incoming requests to Finesse.
• utils finesse cors allowed_headers add: This command adds one or more allowed headers for CORS.Multiple headers can be added as a comma separated string. For example:
Cisco Finesse Administration Guide, Release 12.0(1)151
Cisco Finesse CLICisco Finesse CLI
utils finesse cors allowed_headers add header1
utils finesse cors allowed_headers add header1,header2,header3
Wildcard character * is not supported.Note
• utils finesse cors allowed_headers delete: This command lists the choices for deleting the allowedheaders. The choice should be an index as displayed in the list of allowed headers. The list provides theoption to delete a single header or all configured custom headers. For example:
utils finesse cors allowed_headers delete
1: header1
2: header2
a: all
q: quit
Select the index of allowed header to be deleted [1-2 or a,q]: 1
• utils finesse cors exposed_headers list: This command lists all the exposed headers for CORS. The listwill be used by the browser to validate the accessible headers in the response.
• utils finesse cors exposed_headers add: This command adds one or more exposed headers for CORS.Multiple headers can be added by a comma separated string. For example:
utils finesse cors exposed_headers add header1
utils finesse cors exposed_headers add header1,header2,header3
Wildcard character * is not supportedNote
• utils finesse cors exposed_headers delete: This command lists the choices for deleting the exposedheaders. The choice should be an index as displayed in the list of allowed headers. The list providesoption to delete a single header or all configured custom headers. For example:
utils finesse cors exposed_headers delete
1: header1
2: header2
a: all
q: quit
Select the index of exposed header to be deleted [1-2 or a,q]: 1
All CLIs are node specific and must be executed on all nodes in the cluster.
Cisco Finesse Administration Guide, Release 12.0(1)152
Cisco Finesse CLICisco Finesse CLI

Gadget Source WhitelistingShindig proxies requests from the Finesse desktop to external servers and this introduces the possibility ofserver side request forgery (SSRF). To prevent SSRF, you can choose to allow outgoing connections forspecified sources to be used in the gadgets by adding URLs to the whitelist. Note that this functionality isdisabled by default for Cisco Finesse.
Use the following CLIs to enable or disable Gadget Source Whitelist functionality and to configure source(s)in the whitelist:
utils finesse gadget_source_check enable: This command enables whitelist for Cisco Finesse.
utils finesse gadget_source_check disable: This command disables whitelist for Cisco Finesse.
utils finesse gadget_source_check status: This command prints the whitelist status (enabled or disabled) onCisco Finesse console.
utils finesse gadget_source_check whitelist list: This command lists all the source(s) in the whitelist.
utils finesse gadget_source_checkwhitelist add: This command adds source(s) to the whitelist. For Example,
utils finesse gadget_source_check whitelist add https://www.abc.com:8445
utils finesse gadget_source_check whitelist add https://www.abc.com:8445,http://www.abc.com
Wildcard character * is not supported.
The whitelisting feature will not perform hostname resolutions. The format of the whitelist entry should matchthe format in which the gadget requests for a resource.
Note
utils finesse gadget_source_check whitelist delete: This command deletes source(s) from the whitelist. ForExample:
utils finesse gadget_source_check whitelist delete
1: http://origin1:8080
2: https://origin2:8082
a: all
q: quit
Select the index of origin to be deleted [1-2 or a,q]: 1
All CLIs are node-specific and must be executed on all nodes in the cluster.
After any changes are done to gadget source status or to the whitelist, restart Cisco Finesse Tomcat for changesto take effect.
Note
Cisco Finesse Administration Guide, Release 12.0(1)153
Cisco Finesse CLIGadget Source Whitelisting

Supported Content Security Policy Directives
To enable this feature in Cisco Finesse, install Finesse 12.0(1) ES4 COP or higher.Note
Content Security Policy (CSP) is a standardized set of security directives that can inform the browser of thepolicies to be used to help mitigate various forms of attacks. CSP frame-ancestor policy defines the allowablelocations from where the Finesse desktop can be accessed as an embedded HTML content, which can helpprevent click-jacking attacks.
Use the following CLI commands to view, add, or delete the frame-access sources in the response header ofCisco Finesse. This ensures that only the configured sources can embed the Cisco Finesse in an iFrame withintheir HTML pages.
Internet Explorer does not support frame-ancestors, and therefore will not block any websites from loadingCisco Finesse within it.
Note
• utils finesse frame_access_whitelist add [source1,source2]—This command adds one or more framesources, thereby allowing the configured sources to embed the Cisco Finesse in their iFrames. Multiplesources can be provided as a comma-separated list. The source should be of the following format:
• https://<fqdn>:[port]
• https://IP:[port]
• https://<fqdn1>:port, https://<fqdn2>:port
Wildcard character * is also supported for the FQDN and port entries, whichindicates that all the legal FQDN or ports are valid.
Note
admin:utils finesse frame_access_whitelist addhttps://www.abc.com:8445,https://*.abc.com,https://*.abc.com:*,https://10.21.255.25
Source(s) successfully added.Ensure Source(s) is added to the frame access list in all Finesse nodes in the cluster.
Restart Cisco Finesse Tomcat and Cisco Finesse Notification Service for the changes totake effect:utils service restart Cisco Finesse Tomcatutils service restart Cisco Finesse Notification Service
• utils finesse frame_access_whitelist delete—This command displays an indexed list of all the configuredframe sources that have been allowed to access Cisco Finesse. Enter the corresponding index number todelete a single source or all the configured sources.admin:utils finesse frame_access_whitelist delete
1: https://www.abc.com:84452: https://*.abc.com3: https://*.abc.com:*
Cisco Finesse Administration Guide, Release 12.0(1)154
Cisco Finesse CLISupported Content Security Policy Directives

4: https://10.21.255.25a: allq: quit
Select the index of source to be deleted [1-4 or a,q]: 1Sources deleted successfully.
Restart Cisco Finesse Tomcat and Cisco Finesse Notification Service for the changes totake effect:utils service restart Cisco Finesse Tomcatutils service restart Cisco Finesse Notification Service
• utils finesse frame_access_whitelist list—This command lists all the frame sources that are allowed toaccess Cisco Finesse.admin:utils finesse frame_access_whitelist list
The following source(s) are configured in the frame access list:1: https://www.abc.com:84452: https://*.abc.com3: https://*.abc.com:*4: https://10.21.255.25
Finesse System CommandsConfigure the following Cisco Finesse system CLIs:
Notifications
Use the following CLI commands to enable or disable the Cisco Finesse notifications. By default, this featureis disabled.
• To enable: utils finesse notification logging enable
• To disable: utils finesse notification logging disable
Node Statistics
Use the following CLI command to view the run-time statistics for the current node.
• To view: utils finesse node_statistics list
admin:utils finesse node_statistics list
Warning: Running this command frequently will affect system performance.Press ENTER to continue. Press any other key to exit :
Wait while the statistics (updated every 5 secs) are being fetched...
The following are the runtime statistics for the current node.
Active Dialogs Count: 0
Active Tasks Count: 0
Average Configured Media per Agent Count: 0
Average Logged in Media per Agent Count: 0
Cisco Finesse Administration Guide, Release 12.0(1)155
Cisco Finesse CLIFinesse System Commands

Average Skill Groups per Agent Count: 0
Max Skill Groups per Agent Count: 0
Total Time for Finesse to Start (in seconds): 32
Logged in Agents on current node: 0
Unique Configured Skill Groups per Agent Count: 0
For more information, see RuntimeConfigInfo API Parameters section in the Cisco Finesse Web ServicesDeveloper Guide at https://developer.cisco.com/docs/finesse/.
Desktop PropertiesConfigure the desktop properties using the following CLIs for the features:
Active Call Details in the Team Performance Gadget
Use the following CLI commands to enable or disable the active call details.
• To enable: utils finesse set_property desktop showActiveCallDetails true
• To disable: utils finesse set_property desktop showActiveCallDetails false
View History in the Team Performance Gadget
Use the following CLI commands to enable or disable the agent history.
• To enable: utils finesse set_property desktop showAgentHistoryGadgets true
• To disable: utils finesse set_property desktop showAgentHistoryGadgets false
Force Wrap-Up Reason
Use the following CLI commands to enable or disable the force wrap-up reason.
• To enable: utils finesse set_property desktop forceWrapUp true
• To disable: utils finesse set_property desktop forceWrapUp false
Show Wrap-Up Timer
Use the following CLI commands to show or hide the timer in wrap-up state. By default the showWrapUpTimerproperty is set to true.
• To hide the timer in wrap-up state:utils finesse set_property desktop showWrapUpTimer false
• To display the timer in wrap-up state: utils finesse set_property desktop showWrapUpTimer true
Wrap-Up Timer Count Down
Use the following CLI commands to set the wrap-up timer to count down or count up the time. By defaultthe wrapUpCountDown property is set to true.
• To count up the time:utils finesse set_property desktop wrapUpCountDown false
• To count down the time: utils finesse set_property desktop wrapUpCountDown true
Cisco Finesse Administration Guide, Release 12.0(1)156
Cisco Finesse CLIDesktop Properties

Notification Connection Type
Use the following CLI commands to update the desktop notification connection type asWebSockets or BOSH.By default the connection type is WebSockets.
• For WebSockets: utils finesse set_property desktop notificationConnectionType websocket
• For BOSH: utils finesse set_property desktop notificationConnectionType bosh
Desktop Chat Attachment
Use the following CLI commands to enable or disable the attachment support in Desktop Chat. Attachmentsare enabled by default in Desktop Chat.
• To enable: utils finesse set_property desktop desktopChatAttachmentEnabled true
• To disable: utils finesse set_property desktop desktopChatAttachmentEnabled false
Desktop Chat Maximum Attachment Size
Use the following CLI commands to configure the attachment size in Desktop Chat. If you do not configurethe maximum attachment size, then it is set to 5 MB by default.
• utils finesse set_property desktop desktopChatMaxAttachmentSize Attachment Size
For example, to set the maximum attachment size to 2 MB, use:
utils finesse set_property desktop desktopChatMaxAttachmentSize 2097152
The maximum attachment size configurable is up to 10 MB.Note
Desktop Chat Unsupported File Types
The .exe, .msi, .sh, and .bat file types are not supported by default. Use the following CLI commands tooverride the default list and customize the file types that will not be supported in the Desktop Chat. Multiplefile types can be added using a comma separated string.
• utils finesse set_property desktop desktopChatUnsupportedFileTypes File Types
For example, to set the .jar and .bin as unsupported file types, use:
utils finesse set_property desktop desktopChatUnsupportedFileTypes jar,bin
Configure Desktop Chat Organization Unit (OU) Search
To run this CLI in Cisco Finesse, install Finesse 12.0(1)ES4 COP or higher.Note
Use the following CLI commands to configure the OU based user search for the base LDAP context fordesktop chat in HCS for CC. By default, the whole LDAP base context is configured in Cisco UnifiedCommunicationsManager IM and Presence Service LDAP search settings. For more details on desktop searchsee, Desktop Chat Server Settings.
To set field key: utils finesse set_property desktop desktopChatOUSearchFieldKey <value>
To set field value: utils finesse set_property desktop desktopChatOUSearchFieldValue <value>
Cisco Finesse Administration Guide, Release 12.0(1)157
Cisco Finesse CLICisco Finesse CLI
The following example displays the search criteria set for chat users who belong to specific OU.
admin:utils finesse set_property desktop desktopChatOUSearchFieldKey "OU"
Property successfully updated.Ensure property is updated in all Finesse nodes in the cluster.
No service restart required. Ensure browser is refreshed for the changes to take effect.
admin:utils finesse set_property desktop desktopChatOUSearchFieldValue "chat"
Property successfully updated.Ensure property is updated in all Finesse nodes in the cluster.
No service restart required. Ensure browser is refreshed for the changes to take effect.
Service PropertiesConfigure the service properties using the following CLI.
Enable or Disable Secure XMPP Socket—Port 5223
To run this CLI in Cisco Finesse, install Finesse 12.0(1) ES4 COP or higher.
Use the following CLI commands to enable or disable the external access to the Cisco Finesse NotificationService XMPP port (5223). The port must be enabled for external access only if you have third-party solutionsthat connect directly to the Cisco Finesse Notification Service over this port. By default, the port is enabled(value is set to true).
When the port is enabled, it can be accessed by the Cisco Finesse nodes (primary and secondary) and byexternal clients. When the port is disabled, it cannot be accessed by external clients.
• To enable: utils finesse set_property webservices enableExternalNotificationPortAccess true
• To disable: utils finesse set_property webservices enableExternalNotificationPortAccess false
• To display the current status: utils finesse show_property webservicesenableExternalNotificationPortAccess
UpgradeUpgrade-related commands are grouped under utils system upgrade.
utils system upgrade initate: This command allows you to initiate and install upgrades and Cisco OptionPackage (COP) files from both local and remote directories.
utils system upgrade cancel: This command allows you to cancel an upgrade.
ShutdownUse the following command to shut down Finesse:
utils system shutdown
Cisco Finesse Administration Guide, Release 12.0(1)158
Cisco Finesse CLIService Properties

If the virtual hosts running the Finesse servers are also shut down during a maintenance event, to power upFinesse after the maintenance event is complete, you must sign in to the ESXi host or its vCenter with vSphereClient and power up the virtual machines for primary and secondary Finesse servers.
Replication StatusTo check replication status, run the following command on the primary Finesse server:
• utils dbreplication runtimestate
This command returns the replication status on primary and secondary Finesse servers.
• Check the RTMT counter value for replication. If all nodes in the cluster show a replication status of 2,replication is functioning correctly.
• If the RTMT counter value for replication status is 3 or 4 for all nodes in the cluster, replication is setup but an error occurred and replication is not functioning properly.
• If the majority of the nodes show a value of 0 or 1, run the command utils dbreplication reset all fromthe primary Finesse server.
• If any node shows any replication value other than 1 or 2, replication is not set up correctly.
• To fix replication, contact Cisco Technical Support.
View PropertyUse the following CLIs to view the property values across all property files.
• utils finesse show_property fippa property_name: To view the specified Finesse IPPA property'svalue.
• utils finesse show_property desktop property_name: To view the specified desktop property's value.
• utils finesse show_property webservices property_name: To view the specified web service property'svalue.
The View property CLIs do not support multiple values.Note
Update PropertyUse the following CLIs to update the property values across all property files.
• utils finesse set_property desktop property_name property_value: To update an existing propertyvalue used by the Finesse desktop service.
• utils finesse set_property fippa property_name property_value: To update an existing property valueused by the Finesse IPPA service.
Cisco Finesse Administration Guide, Release 12.0(1)159
Cisco Finesse CLIReplication Status

• utils finesse set_property webservices property_name property_value: To update an existing propertyvalue used by the Finesse web service.
Signout from Media ChannelsThe CLI utils finesse user_signout_channel is used by the Administrator to configure the media channelsfrom which the users are signed out.
When signing out from Cisco Finesse, the CLI utils finesse user_signout_channel type lists all the choicesof media channels from which the user is signed out. For example:
utils finesse user_signout_channel type
1: signout user from voice channel.
2: signout user from voice and non-voice media channels configured for Cisco Finesse.
a: signout from all media channels configured for the user.
This is default behavior. It is suitable if the non-voice media is running as a gadget within Finesse Desktopand hence, it is valid to assume that the desktop user cannot handle tasks when signing out of Finesse.
Note
q: quit.
Select the choice of media [1-2 or a,q]: 2
User signout channel type is now changed to "signout user from voice and non-voicemedia channels configuredfor Cisco Finesse."
user_signout_channel type must be updated for all Cisco Finesse nodes in the cluster.
For any changes done to media channels, it will take fifteen minutes for the new media channels signout totake effect.
Note
The CLI utils finesse user_signout_channel status displays the type of media channels from which the useris signed out.
Cisco Finesse Administration Guide, Release 12.0(1)160
Cisco Finesse CLISignout from Media Channels

A P P E N D I X BCertificates for Live Data
• Certificates and Secure Communications, on page 161• Export Self-Signed Live Data Certificates, on page 161• Import Self-Signed Live Data Certificates, on page 162• Obtain and Upload Third-party CA Certificate, on page 163
Certificates and Secure CommunicationsFor secure Cisco Finesse, Cisco Unified Intelligence Center, and Live Data server-to-server communication,perform any of the following:
• Use the self-signed certificates provided with Live Data.
When using self-signed certificates, agents must accept the Live Data certificatesin the Finesse desktop when they sign in before they can use the Live Data gadget.
Note
• Obtain and install a Certification Authority (CA) certificate from a third-party vendor.
• Produce a Certification Authority (CA) certificate internally.
Export Self-Signed Live Data CertificatesLive Data installation includes the generation of self-signed certificates. If you choose to work with theseself-signed certificates (rather than producing your own CA certificate or obtaining a CA certificate from athird-party certificate vendor), first export the certificates from Live Data and Cisco Unified IntelligenceCenter. You must export from both Side A and Side B of the Live Data and Cisco Unified Intelligence Centerservers. Once done, import the certificates into Finesse, importing both Side A and Side B certificates intoeach side of the Finesse servers.
When using other self-signed certificates, agents must accept the Live Data certificates in the Finesse desktopwhen they sign in to use the Live Data gadget.
Cisco Finesse Administration Guide, Release 12.0(1)161
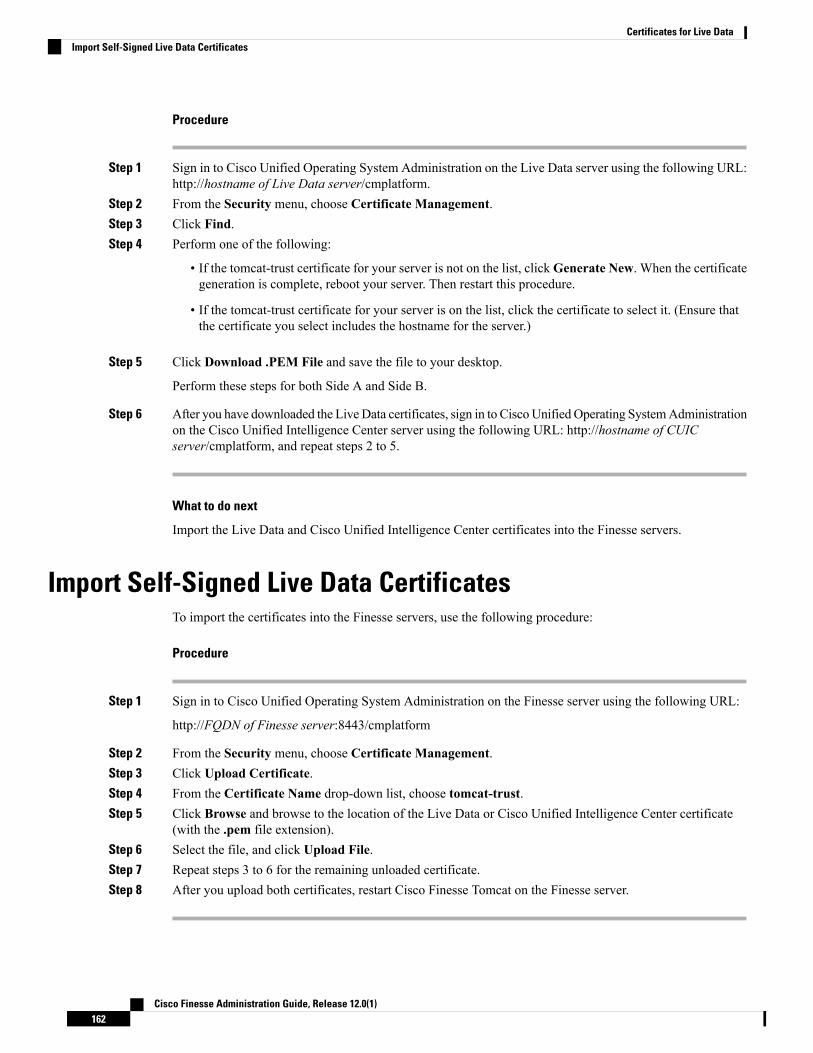
Procedure
Step 1 Sign in to Cisco Unified Operating System Administration on the Live Data server using the following URL:http://hostname of Live Data server/cmplatform.
Step 2 From the Security menu, choose Certificate Management.Step 3 Click Find.Step 4 Perform one of the following:
• If the tomcat-trust certificate for your server is not on the list, clickGenerate New. When the certificategeneration is complete, reboot your server. Then restart this procedure.
• If the tomcat-trust certificate for your server is on the list, click the certificate to select it. (Ensure thatthe certificate you select includes the hostname for the server.)
Step 5 Click Download .PEM File and save the file to your desktop.
Perform these steps for both Side A and Side B.
Step 6 After you have downloaded the LiveData certificates, sign in to CiscoUnifiedOperating SystemAdministrationon the Cisco Unified Intelligence Center server using the following URL: http://hostname of CUICserver/cmplatform, and repeat steps 2 to 5.
What to do next
Import the Live Data and Cisco Unified Intelligence Center certificates into the Finesse servers.
Import Self-Signed Live Data CertificatesTo import the certificates into the Finesse servers, use the following procedure:
Procedure
Step 1 Sign in to Cisco Unified Operating System Administration on the Finesse server using the following URL:
http://FQDN of Finesse server:8443/cmplatform
Step 2 From the Security menu, choose Certificate Management.Step 3 Click Upload Certificate.Step 4 From the Certificate Name drop-down list, choose tomcat-trust.Step 5 Click Browse and browse to the location of the Live Data or Cisco Unified Intelligence Center certificate
(with the .pem file extension).Step 6 Select the file, and click Upload File.Step 7 Repeat steps 3 to 6 for the remaining unloaded certificate.Step 8 After you upload both certificates, restart Cisco Finesse Tomcat on the Finesse server.
Cisco Finesse Administration Guide, Release 12.0(1)162
Certificates for Live DataImport Self-Signed Live Data Certificates

What to do next
Perform these steps for both Side A and Side B.
Obtain and Upload Third-party CA CertificateYou can use a Certification Authority (CA) certificate provided by a third-party vendor to establish an HTTPSconnection between the Live Data, Finesse, and Cisco Unified Intelligence Center servers.
To use third-party CA certificates:
• From the Live Data servers, generate and download Certificate Signing Requests (CSR) for root andapplication certificates.
• Obtain root and application certificates from the third-party vendor.
• Upload the appropriate certificates to the Live Data, Unified Intelligence Center, and Finesse servers.
Follow the instructions provided in the Unified CCE Solution: Procedure to Obtain and Upload Third-PartyCA certificates (Version 11.x) technical note at : https://www.cisco.com/c/en/us/support/docs/customer-collaboration/unified-contact-center-enterprise-1101/200286-Unified-CCE-Solution-Procedure-to-Obtai.html .
Cisco Finesse Administration Guide, Release 12.0(1)163
Certificates for Live DataObtain and Upload Third-party CA Certificate

Cisco Finesse Administration Guide, Release 12.0(1)164
Certificates for Live DataObtain and Upload Third-party CA Certificate