Embed Size (px)
Citation preview

Cherie ’s Favorite HolidayRecipes
Delicious PLANT-BASEDheart-healthy recipesto delight and inspire

All Rights Reserved.
No part of this book may be reproduced or transmitted for resale or any other reason of use by any party.
All other reproduction or transmission, of any form or by any means, electronic or mechanical, including photocopying, recording or by any informational storage or retrieval system, is prohibited without express written permission from Living Light International.
Copyright © 2013 Living Light International, LLC. RawFoodChef.com
Chef Cherie SoriaCherie Soria:facebook.com/ChefCherieSoria
Youtube:youtube.com/LivingLightIntl
Twitter:twitter.com/cheriesoria
LinkedIn:linkedin.com/in/cheriesoria
Visit our website: RawFoodChef.comOur email: [email protected]
Our blog: RawFoodChef.com/blog
Living Light: facebook.com/pages/ Living-Light-Culinary-Institute
Let’s Get Social!
Living Light Marketplace:facebook.com/livinglightmarketplace
We want to stay connected with all of our students and followers from around the world, and we're excited about reaching out to everyone who wants to learn more about the raw food lifestyle and our award-winning culinary and nutrition curriculum. We love sharing free recipes, valuable tips, videos, ebooks and whitepapers, along with up-to-date information about exciting events and our worldwide tours and travels!
We’ll help you make healthy living delicious!
— So Many Great Ways to Keep in Touch—

Welcome to Cherie's Favorite Holiday Recipes
I love the holidays—especially the sharing of favorite foods that remind me of family and
fond memories of childhood. How do I balance that with my raw vegan lifestyle? Easy! I prepare foods that are reminiscent of traditional holiday foods, using the best raw vegan ingredients, and I focus on creating the familiar flavors, textures, and appearance of foods that bring my loved ones so much joy year after year.
In the spirit of the holiday season, I’ve assembled an entire menu of my 12 favorite recipes (plus a few bonus recipes) just perfect for the holidays—and six of the recipes include
videos* illustrating the special tips and tricks I’ve developed over the years, so you’ll be able to achieve the perfect textures and flavors in raw vegan cuisine that some people can only imagine in cooked dishes! In many of the recipes I suggest the use of a dehydrator in place of a stove or oven in order to warm the dishes and create the comfort foods everyone expects during the holidays. If you do not have a dehydrator, you can certainly prepare most of these recipes
using an oven set at the lowest possible temperature (just long enough to warm prior to serving). However, if you want your foods to be as fresh and full of health-promoting nutrients as possible, a dehydrator like the Excalibur is a
great investment in your culinary future. I know I couldn’t do without mine! Either way, you’ll delight your friends and family with the rich textures and flavors of the familiar foods everyone enjoys during the holidays.
We know you’ll have a wonderful time creating the recipes, and you’ll discover special recipes you’ll want to include as “new holiday traditions” year after year. We love helping you make healthy living delicious during the holidays!
You’ll also find more delicious health promoting recipes in my books Angel Foods, Raw Food Revolution Diet, and Raw Food For Dummies. Visit our website RawFoodChef.com for more information about Living Light Culinary Institute classes for everyone from complete novice to professional chef!
Blessings of Radiant Health,
Cherie Soria
Chef Cherie Soria
... delight your friends and family with the rich textures and flavors
of the familiar foods everyone enjoys during the holidays.
*look for the "WATCH" icon

2
Healthy Holiday Menu Indexe³f
Cranberry Apple Ginger Cocktail Page 3
Holiday Nut Nog Page 5
Pecan Pâté Page 6
Candied Pecans Page 7
Apple Fennel Pomegranate Salad on a Bed of Arugula with Orange Poppy Seed Dressing
Page 9
Cranberry Orange Relish Page 10
Holiday Wild Rice Pilaf Page 13
Crispy Leeks Page 14
Green Beans Almondine Page 15
Mashed Celery Root and Parsnip “Potatoes” Page 17
Zucchini Mushroom Loaf Page 19
Triple Mushroom Gravy Page 21
Jalapeño Onion Cornbread Page 23
Black Bottom Pecan Pie Page 24
e³f

3
Cranberry Apple Ginger CocktailWhen creating your holiday menu, don’t forget to include a healthy cocktail everyone can enjoy. One of my favorites is a fresh lively drink made from just three ingredients: cranber-ries, apples, and fresh ginger root. The ginger really makes it come alive and even served chilled it is warming to the body when the weather is cold. So get out your juicer and get ready to make a refreshing cocktail!
Cranberry Apple Ginger CocktailYield: 4 cups
Serves: 4
Equipment needed: Omega Vertical Juicer or Nutrition Center
3 pounds of apples, quartered (Galas or other sweet apples, preferred)
3 cups fresh organic cranberries
1 (½ -inch) piece fresh ginger
Tip:
If your apples are not very sweet or the cranberries are especially sour, you may need to adjust the recipe a little, so taste and adjust the flavor by adding a little sweetener, if needed. Or, include a little more apple to sweeten it up a bit.
Juice is always best served as soon after you make it as possible, but if you need to make it in advance, store juice in a sealed glass container and refrigerate for up to 24 hours. The nice thing about the Omega Vertical juicer is that it is a low rev juicer so the juice doesn’t oxidize as quickly. This means maintains its freshness and nutritional value longer.
Click to
view video

4
To Register: Call (707) 964-2420or visit RawFoodChef.com
No other introductory class compares!
Attend our one-day intensive, entry level class, .FUNdamentals of Raw Living Foods™, which is
the prerequisite for all of our subsequent courses and programs. Enjoy comprehensive instruction while discovering the magic of creating fabulous organic raw vegan cuisine for optimal health and rejuvenation. Thousands of people from over 60 countries have taken this course since it was developed in 1998, and we are continually refining the class to bring you the latest developments in raw culinary arts.
During this introductory workshop, students experience seventeen superb culinary presentations and learn how to create a wide variety of delicious easy-to-prepare recipes. Here’s just a sampling of what attendees will see and taste:
Living Light Culinary Institute
Required Text: Angel Foods: Healthy Recipes for Heavenly Bodies by Cherie Soria - (price $19.95)
Tuition: $375. Includes a delicious organic raw vegan buffet lunch and course manual
Experience Health Transformation!
• appetizers • fruit smoothies • soups • green juices • salad dressings • simple entrées • pâtés • wraps and rolls • nut milks and non-dairy cheeses
• crunchy crackers and other dehydrated goodies • amazing desserts • fermented foods • sprouting and kitchen gardening • essential equipment and supplies used in a raw kitchen
• flavor balancing...
• and much more!
A full buffet lunch of organic raw vegan foods will be provided as well as samples of the foods prepared.
FUNdamentals of Raw Living Foods™
2015 FUNdamentals of Raw Living Foods™ courses:
January 10, February 7,March 7, April 25, May 23, June 20,
August 8, September 5 October 3
Making Healthy Living Delicious!
For more information about Living Light Culinary Institute classes, please call 707-964-2420 or visit RawFoodChef.com

5
Holiday Nut Nog Even if you don’t like eggnog or you just don’t want to eat raw eggs (who can blame you?), this recipe is a people-pleaser! It is rich and creamy and perfect for your holiday parties. This version is alcohol-free, but it doesn’t have to be!
Holiday Nut Nog
Serves: 6
Equipment needed: Blender
1 quart fresh almond milk, strained
2/3 cup macadamia nuts
8 soft pitted dates
2 teaspoons vanilla extract or ½ vanilla bean
2 teaspoons maple syrup
2 teaspoons flax oil
2 frozen peeled bananas
½ teaspoon nutmeg
1. If using vanilla bean, slit the bean lengthwise, scrape out the soft center (seeds) and discard the outer shell.
2. Put the vanilla, almond milk, macadamia nuts, dates, maple syrup, and flax oil in a blender and blend until perfectly creamy.
3. Just before serving, add bananas and blend until smooth. Serve chilled, sprinkled with a little nutmeg.
Note:
Store in a sealed glass jar in the refrigerator for up to 3 days. To make the Nut Nog in advance, complete #1 and #2 and store in the refrigerator until ready to serve; then blend in the frozen bananas just prior to serving.

6
Pecan PâtéThis is one of our favorite appetizers: it’s easy to make and it is absolutely perfect for the holidays! It’s rich and flavorful and you can use it in a number of delicious ways. It is superb on crackers or wrapped in lettuce leaves, and I especially enjoy it on crisp slices of cucumber.
Before starting, make sure you have soaked and dehydrated the pecans in advance to re-move the bitterness that is locked in the skin. Soaking them and drawing out the bitterness also makes nuts easier to digest, so after soaking, rinsing and draining, dehydrate them overnight to return them to their crunchy state. Watch our video in the Excalibur Healthy Holiday Menu series for all kinds of fun tips about dehydrating nuts and even making can-died nuts.
Pecan PâtéMakes: 1 cup
Serves: 6-8
Equipment needed: Omega Nutrition Center Juicer, Excalibur Dehydrator
1½ cups soaked and dehydrated pecans
2 tablespoons minced leek or green onions
1½ tablespoons lemon juice
½ tablespoon tamari
½ teaspoon garlic powder
¼ teaspoon Himalayan crystal salt
2 tablespoons fresh parsley, minced
1. Toss pecans with the leek, lemon juice, tamari, garlic powder and salt together. Save the parsley to add later, otherwise the pate will become green and taste too much like parsley.
2. Using your Omega Nutrition Center Juicer outfitted with the homogenizing attachment (the one without the screen) run the mixture through the chute. It will come through the extruder smooth and buttery. Then, stir in the fresh minced parsley and serve with sliced cucumbers, crackers, or wrapped inside a lettuce leaf with julienned vegetables and sprouts.
3. Store in an airtight container in the refrigerator for up to one week.
Click to
view video

7
Candied PecansCandied nuts are especially delicious as a sweet crunchy topping on a holiday salad like our Apple Fennel Pomegranate Salad on Arugula with Candied Pecans (see recipe).
Most nuts and seeds, particularly those with brown skins, are bitter in flavor, which is why people roast them. But roasting harms the oils in the nuts and actually creates something called free radicals, which are harmful to the body. So instead of roasting nuts, I soak them to make them more digestible and remove the bitterness; then I dehydrate them in the Excalibur. I always have plain soaked and dehydrated nuts on hand to use in recipes and I also flavor nuts and seeds in a variety of ways to use as snacks and in salads.
Candied pecans are delicious as snacks and you can use them in desserts like Pecan Pie and even sprinkle them on top of salads to transform a simple salad using them as a sweet and crunchy element.
Candied Pecans
Yield: 1 cup
Equipment needed: Excalibur Dehydrator
1 cup soaked, rinsed and towel blotted pecan halves
½ cup maple syrup
1 teaspoon cinnamon
Pinch nutmeg
1. Toss the soaked pecans, maple syrup, cinnamon, and nutmeg together and spread them on a Paraflex sheet. Dehydrate at 105 degrees for about 12 hours or until they are crisp.
2. Enjoy as a snack or salad topper, or use in desserts, like Black Bottom Pecan Pie.
3. Store Candied Pecans or other flavored nuts in a sealed glass jar in the refrigerator for up to 3 months. I especially love them on top of my favorite holiday salad.
Click to
view video
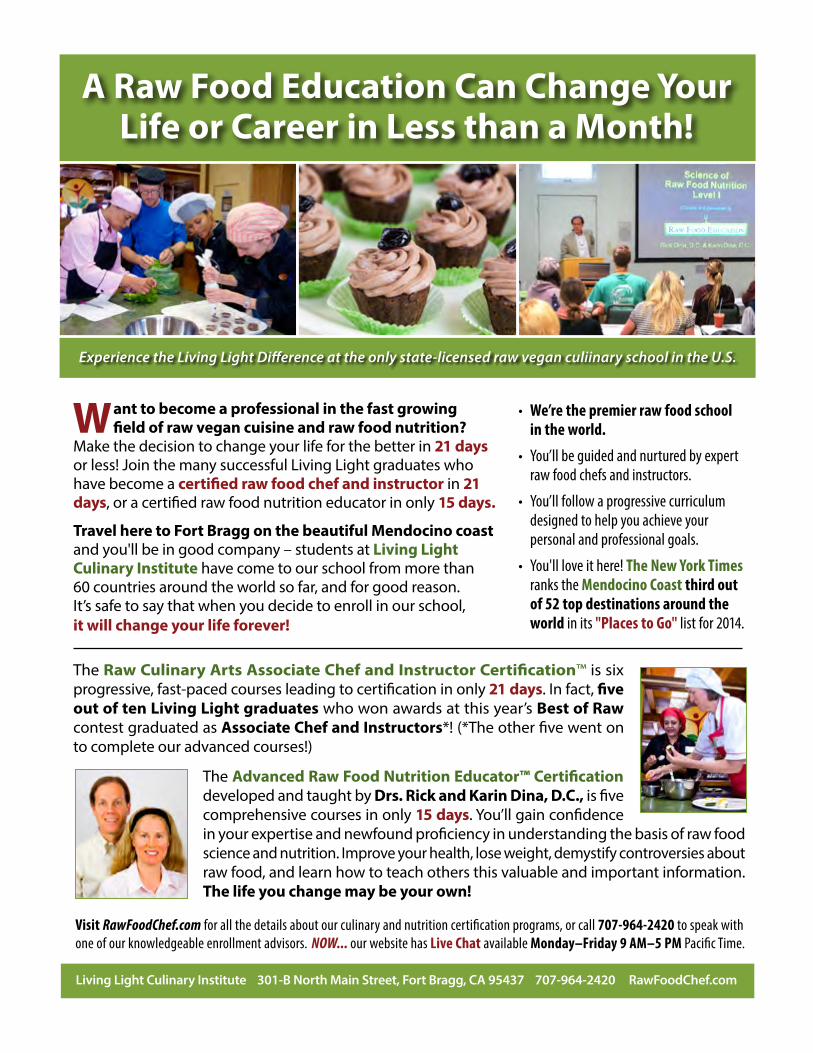
A Raw Food Education Can Change Your Life or Career in Less than a Month!
Want to become a professional in the fast growing field of raw vegan cuisine and raw food nutrition?
Make the decision to change your life for the better in 21 days or less! Join the many successful Living Light graduates who have become a certified raw food chef and instructor in 21 days, or a certified raw food nutrition educator in only 15 days.
Travel here to Fort Bragg on the beautiful Mendocino coast and you'll be in good company – students at Living Light Culinary Institute have come to our school from more than 60 countries around the world so far, and for good reason. It’s safe to say that when you decide to enroll in our school, it will change your life forever!
• We’re the premier raw food school in the world.
• You’ll be guided and nurtured by expert raw food chefs and instructors.
• You’ll follow a progressive curriculum designed to help you achieve your personal and professional goals.
• You'll love it here! The New York Times ranks the Mendocino Coast third out of 52 top destinations around the world in its "Places to Go" list for 2014.
Experience the Living Light Difference at the only state-licensed raw vegan culiinary school in the U.S.
The Raw Culinary Arts Associate Chef and Instructor Certification™ is six progressive, fast-paced courses leading to certification in only 21 days. In fact, five out of ten Living Light graduates who won awards at this year’s Best of Raw contest graduated as Associate Chef and Instructors*! (*The other five went on to complete our advanced courses!)
The Advanced Raw Food Nutrition Educator™ Certification developed and taught by Drs. Rick and Karin Dina, D.C., is five comprehensive courses in only 15 days. You’ll gain confidence in your expertise and newfound proficiency in understanding the basis of raw food science and nutrition. Improve your health, lose weight, demystify controversies about raw food, and learn how to teach others this valuable and important information. The life you change may be your own!
Visit RawFoodChef.com for all the details about our culinary and nutrition certification programs, or call 707-964-2420 to speak with one of our knowledgeable enrollment advisors. NOW... our website has Live Chat available Monday–Friday 9 AM–5 PM Pacific Time.
Living Light Culinary Institute 301-B North Main Street, Fort Bragg, CA 95437 707-964-2420 RawFoodChef.com

9
Apple Fennel Pomegranate Salad on a Bed of Arugula with Orange Poppy Seed Dressing and Candied Pecans If you enjoy the standard Waldorf Salad during the holidays, pump up the volume and try this version instead. It’s lighter, fresher and we think it’s one you’ll want to make year after year!
Apple Fennel Pomegranate Salad on a Bed of Arugula with Orange Poppy Seed Dressing and Candied PecansServes: 6
Dressing
½ cup orange juice
2 tablespoons flax oil
½ tablespoon poppy seeds
½ teaspoon orange zest
½ teaspoon onion powder
Salad
3 red apples, seeded and thinly julienned
1 large fennel bulb, thinly julienned
¼ red onion, julienned paper thin
½ cup celery, sliced thin crosswise
½ cup pomegranate seeds
1 pound arugula
½ cup Candied Pecans (see recipe on page 7)
1. Combine ingredients for the dressing in a large bowl and whisk to blend.
2. Add the remaining ingredients, except arugula and pomegranate seeds, and toss well.
3. Place arugula leaves attractively on a platter.
4. Heap the apple mixture on top and garnish with Candied Pecans (see recipe on page 7).
Serve immediately.
10
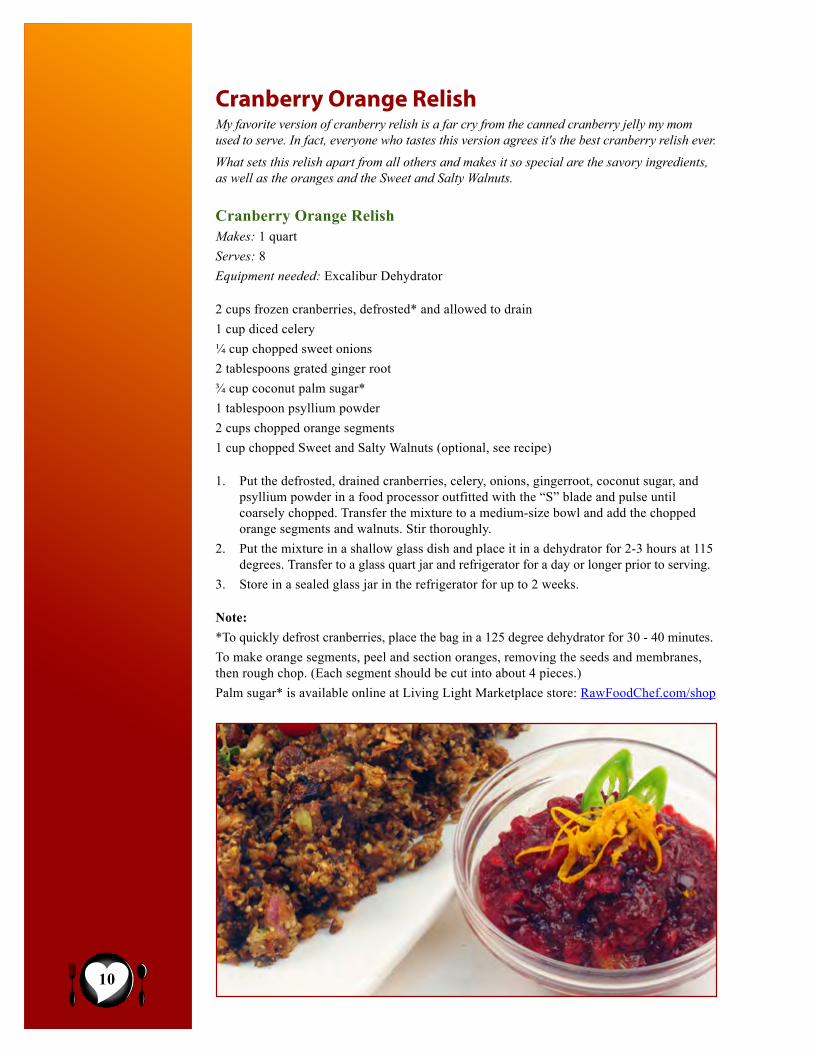
Cranberry Orange Relish My favorite version of cranberry relish is a far cry from the canned cranberry jelly my mom used to serve. In fact, everyone who tastes this version agrees it's the best cranberry relish ever.
What sets this relish apart from all others and makes it so special are the savory ingredients, as well as the oranges and the Sweet and Salty Walnuts.
Cranberry Orange RelishMakes: 1 quart
Serves: 8
Equipment needed: Excalibur Dehydrator
2 cups frozen cranberries, defrosted* and allowed to drain
1 cup diced celery
¼ cup chopped sweet onions
2 tablespoons grated ginger root
¾ cup coconut palm sugar*
1 tablespoon psyllium powder
2 cups chopped orange segments
1 cup chopped Sweet and Salty Walnuts (optional, see recipe)
1. Put the defrosted, drained cranberries, celery, onions, gingerroot, coconut sugar, and psyllium powder in a food processor outfitted with the “S” blade and pulse until coarsely chopped. Transfer the mixture to a medium-size bowl and add the chopped orange segments and walnuts. Stir thoroughly.
2. Put the mixture in a shallow glass dish and place it in a dehydrator for 2-3 hours at 115 degrees. Transfer to a glass quart jar and refrigerator for a day or longer prior to serving.
3. Store in a sealed glass jar in the refrigerator for up to 2 weeks.
Note:
*To quickly defrost cranberries, place the bag in a 125 degree dehydrator for 30 - 40 minutes.
To make orange segments, peel and section oranges, removing the seeds and membranes, then rough chop. (Each segment should be cut into about 4 pieces.)
Palm sugar* is available online at Living Light Marketplace store: RawFoodChef.com/shop

11
Leftovers make great Cranberry Leather!
Cranberry Orange Relish Leather
Equipment needed: Excalibur Dehydrator, blender
1. Blend Cranberry Orange Relish until smooth.
2. Put 2½ cups of the mixture on each dehydrator tray lined with a Paraflex sheet. Evenly spread the mixture, using a medium offset or flat rubber spatula.
3. Dehydrate for about 12 hours at 105 degrees until the top is thoroughly dry, then turn them over onto mesh-lined dehydrator trays (without the Paraflex sheet).Continue dehydrating until the leather is completely dry but still pliable, or 8 to 12 more hours.
4. Store in an airtight container in the fridge for up to three months.
Sweet and Salty WalnutsYields: 2 cups
¼ cup maple syrup
½ teaspoon orange zest
¼ teaspoon salt
2 cup walnut halves, soaked, rinsed and towel dried
1. Mix together syrup, orange zest and salt
2. Coat the walnut halves with the mixture and dehydrate until crisp, about 18 hours.

12
Science of Raw Food Nutrition
Making Healthy Living Delicious!™
Rick Dina, D.C. has been studying and practicing raw food nutrition since 1987. His experience includes working at Hippocrates Health Institute, as a fasting
practitioner, and teaching at Bastyr University. After 10 years in private practice, he is now teaching raw food nutrition full time in various capacities, including lab testing and consulting.
Karin Dina, D.C. has been studying and practicing raw food nutrition since 1990. Her credentials include honors study in naturopathic medicine at Bastyr
University and a doctorate degree in chiropractic. She is now teaching raw food nutrition and writing her first book on the subject.
Science of Raw Food Nutrition™ l This two-day course covers topics in raw food nutrition including raw vegan sources of protein, vitamins, minerals, and essential fatty acids, as well as blood sugar regulation, pH balance, how cooking affects foods, anti-inflammatory nutrition, and weight management. This is a great course for chefs, health educators, or anyone who wants to have the knowledge base to achieve optimum health. Tuition: $375
No Prerequisites
Science of Raw Food Nutrition™ ll This comprehensive five-day course builds upon the knowledge base learned in SRFN I and introduces many new topics that are essential to understanding raw and living food nutrition. This class covers essential information on raw food, living food, vegan, and plant-based diets. Tuition: $1075Prerequisite: Science of Raw Food Nutrition™ I
Benefits of Raw Food Nutrition Educator Certification™ This two-day course follows SRFN II and prepares students to present fundamental raw food nutrition information with authority, accuracy, and confidence. It is highly recommended for health educators and raw food chefs who plan to teach the benefits of raw food nutrition in an articulate and easy to understand manner. All participants will receive a CD containing two turn-key PowerPoint presentations. Tuition: $575
Prerequisite: Science of Raw Food Nutrition™ II
Science of Raw Food Nutrition™ llIJust like SRFN I and II, this class is based in peer-reviewed science and presented in a format both solid enough for those with a science background, yet accessible enough for the rest of us. Best of all, it covers a variety of fascinating NEW hot topics in raw food nutrition! If you'd like to gain a stronger grasp of how your body works, and the important role that food plays in this process, SRFN III offers a fabulous opportunity to take your knowledge of raw food nutrition to the next level. Tuition: $1075
Prerequisite: Science of Raw Food Nutrition™ II
Advanced Raw Food Nutrition Educator Certification™This course is designed to provide you with several helpful tools for honing your skills as a credible raw food nutrition educator by assisting you in fielding the often challenging audience inquiries that come your way. It integrates and refines the information learned in SRFN I, II, III, as well as our Benefits of Raw Food Nutrition Educator Certification™ course, providing in-class practice, individual feedback, and a bonus CD containing lecture notes and a PowerPoint presentation. You will come away from this course prepared to deliver concise, scientifically sound answers to many of the most common questions about raw food nutrition with confidence and finesse. Tuition: $575
Prerequisites: Science of Raw Food Nutrition™ III, Benefits of Raw Food Nutrition Educator Certification™
Drs. Rick & Karin Dina, D.C. developed the Science of Raw Food Nutrition™ Series offered at Living Light. Their mission is to convey to their students accurate, scientifically based, user friendly information about plant-based raw food nutrition, designed to create a learning experience that will assist and empower those on the path to greater health and well-being. Their website is www.rawfoodeducation.com.
To register call
707-964-2420 or visit
RawFoodChef.com for more information
and for a complete list of our classes.
Living Light International 707-964-2420 [email protected] RawFoodChef.com301-B North Main Street, Fort Bragg, located in the Company Store, corner of Main and Redwood Streets

13
Holiday Wild Rice Pilaf Did you know that wild rice is actually a grass seed? It’s high in protein and zinc and other minerals and unlike other forms of rice, doesn’t require cooking to enjoy. Grey wild rice blooms very nicely just by soaking it in a warm environment. We use the Excalibur dehy-drator to soak it overnight and make it soft and chewy; then just add your other ingredients and warm it up in the Excalibur until your guests are ready to eat.
You can find several recipes using wild rice bloomed in this way in my books The Raw Food Revolution Diet and Raw Food for Dummies. This version is hands down, our favor-ite for the holidays.
Holiday Wild Rice Pilaf Makes 8 cups
Serves: 12
Equipment needed: Excalibur Dehydrator
4 ounces grey wild rice, warm soak 24 hours*
1½ stalks diced celery
1 sliced green onion
1½ shredded carrot
¼ cup chopped soaked and dehydrated pecans
3 tablespoons minced parsley
3 thinly sliced shiitake mushrooms
1½ teaspoons poultry seasoning
3 tablespoons rough chopped dried cranberries
1 tablespoon onion powder
¼ teaspoon garlic powder
1. Drain the rice and towel blot.
2. Put the bloomed rice in a large bowl and add the remaining ingredients. Toss well, mixing all ingredients together thoroughly.
3. Put the rice mixture in a 9-inch by 11-inch Pyrex baking dish, or a sealed gallon jar and place it in a warm dehydrator for an hour to enliven the flavors and bring the temperature to warm.
4. Serve immediately or store in a sealed container in the refrigerator for up to 4 days.
*Note: Rinse rice and place in 1/2-gallon jar. Cover with 6 cups of filtered water and place in a 105 degree dehydrator for 18-24 hours. Drain rice, rinse, and drain again thoroughly.
Grey wild rice* is available online at Living Light Marketplace: RawFoodChef.com/shop
¼ cup olive oil
1½ teaspoons lemon juice
1½ tablespoons tamari
1½ teaspoons dark miso
¼ teaspoon orange zest
Click to view video

14
No holiday would be complete without green beans –this version of the popular green bean casserole, which is usually made with canned soup and canned fried onions, is fresh, crisp, and flavor-infused with a pungent marinade, then topped with sliced
almonds and crispy leeks. Nothing is fried or overcooked -- a recipe to live for!
The green beans are marinated and kept warm in the dehydrator until serving time. One of the things we love about using the Excalibur instead of a stove or oven, is that the green beans won’t overcook. If we get a late start eating, the green beans, the gravy, and most other foods we’re making, will not burn or become overcooked – they will just stay warm until we’re ready to serve them.
This is a 2-part recipe: first you make the crispy leeks; then make the green beans.
Crispy LeeksYields: 3 cups
Equipment needed: Excalibur Dehydrator
3 medium thinly sliced leeks
1 tablespoon olive oil
½ teaspoon Himalayan crystal salt
1. Toss leeks in oil and salt. Place the leeks on a Paraflex sheet to dehydrate at 105 de-grees overnight.
Now let’s make the Green Beans Almondine
This recipe was inspired by one of our Living Light chef instructors, Jenny Cornbleet, author of Raw Foods Made Easy for 1 or 2 People. Once you make green beans in your Excalibur, you’ll never go back to the soggy green beans of your childhood!

15
Green Beans AlmondineMakes: 4 cups
Serves: 8
Equipment needed: Excalibur Dehydrator
4 cups green beans, ends trimmed
1 cup thinly sliced almonds
Marinade
8 tablespoons olive oil
3 tablespoons lemon juice
1 tablespoon minced onion
1 clove garlic, crushed
½ teaspoon dry mustard
½ teaspoon salt
¼ teaspoon fresh ground pepper
1. Put the green beans in a colander and set it in a bowl. Pour boiling water over the green beans and allow them to soak for 1-2 minutes, just to tenderize them a little and remove that too-raw taste. (This will not cook them or kill valuable nutrients, as long as you don’t allow them to soak in the water longer than 2 minutes.) Remove the bowl from under the colander and allow the green beans to drain.
2. Combine ingredients for the marinade in a 9-inch by 11-inch Pyrex dish and toss in the green beans and sliced almonds.
3. Slide the dish into the Excalibur dehydrator (it fits in place of three trays). Set the temperature at 125 degrees for a couple of hours to allow them to become warm and infused with flavor. (This setting will not harm the enzymes for this amount of time, since the temperature of the green beans is far lower than the temperature of the air for the first two hours.)
4. To serve, place the green bean mixture on a platter and top with the Crispy Leeks.
Click to view video

Sharpen Up Your Knife Skills!™ One-Day IntensivePrerequisite: none
Good knife skills are the foundation of all culinary art. The textures created by learning various cutting styles in�uence the appearance, �avor and mouthfeel of foods. Sharpen Up Your Knife Skills™ is a course for all levels of expertise, from novice to professional chef. We teach a progressive approach to the development of knife skills through a combination of demos and hands-on practice, and our students gain con�dence as they learn to become more e�cient in food preparation by learning speci�c knife techniques to enhance any recipe.
A premium MAC Santoku knife and apron will be provided for use during the course and is available for purchase at the Living Light Marketplace. Please wear close-toed shoes.
In this class you will learn:• Evaluating knives: which knives for which task• Anatomy of a knife• Knife safety• Ergonomics: proper body positioning• Proper way to grip a knife• Using the rocking motion when slicing• Dice celery, chi�onade Kale, mince herbs• Perfectly portioned cuts: batonnette, julienne, �ne julienne, dice (medium, small, micro), paysane, rondelle-styles, chop• Slice, julienne, and dice onions• Cut, seed, and julienne bell peppers• Fillet and veneer: �llet bell pepper to remove skin, shave thin sheets of ..cucumbers for wraps• Cut fruits: how to open a coconut, segment citrus fruits• Garnishes: green onion �owers and ferns, pepper jacks, radish mushrooms, tomato roses, strawberry fans• How to use a mandoline• Knife care: learn how to keep knives sharp and store them properly
Sharpen Up Your Knife Skills! ™
Living Light Culinary Institute 707-964-2420 [email protected] RawFoodChef.com301-B North Main Street, Fort Bragg, located in the Company Store, corner of Main and Redwood Streets
Class Dates for 2015:January 11, February 8, March 8, April 26, May 24, June 21, August 9, September 6, October 4
When:9:00 AM−6:00 PM (no-host lunch break 1-2 PM)
Where:Living Light Culinary InstituteThe Company StoreCorner of Main and Redwood Streets in Fort Bragg, CA
Tuition:$325
Required:* 3-inch paring knife
Recommended:* Safety glove Knife Skills Illustrated book by Peter Hertzmann*(all available at the Living Light Marketplace)
CLASSES IN RAW VEGAN CUISINEFOR INDIVIDUALS, CHEFS AND INSTRUCTORS

17
Mashed Celery Root and Parsnip “Potatoes”This is our favorite version of a classic holiday tradition, mashed potatoes – except this recipe doesn’t contain any potatoes! Instead, we use root vegetables that are delicious either raw or cooked: celery root and parsnips! It is yummy! And, it satisfies the urge for mashed potatoes and gives us a reason to have Triple Mushroom Gravy! (See recipe.)
For this recipe, we use the Omega Nutrition Center, which is a single-auger juicer to process the root vegetables and make a smoother puree. Then we combine all the ingredients together in a food processer before warming the mixture in the Excalibur dehydrator until serving time.
Mashed Celery Root and Parsnip “Potatoes”Serves: 6-8
Equipment needed: Omega Nutrition Center Juicer, food processor, Excalibur Dehydrator
4 cups peeled and chopped celery root
1 cup peeled and chopped parsnips
1/2 cup peeled and chopped zucchini
1/3 cup warm water
1/2 cup macadamia, cashew, or coconut butter*
2 tablespoon light miso paste (preferably chickpea miso, but any light miso will work)
2 teaspoons onion powder
2 teaspoons nutritional yeast
2 teaspoons flax oil
1 1/2 teaspoons Himalayan crystal salt
1. Using the Omega Nutrition Center juicer outfitted with the homogenizing attachment, run the chopped celery root, parsnips, and zucchini through the juicer to create a puree.
2. Put the pureed vegetables along with the warm water, nut butter, miso paste, onion powder, nutritional yeast, flax oil, and salt in a food processor outfitted with the “S” blade and process until smooth and creamy. (Add a tiny bit more water, if needed to achieve the desired texture.)
3. Put the mixture in a 9-inch by 11-inch glass baking dish and cover with a Paraflex sheet. Slide the dish into the Excalibur dehydrator set at 125 degrees for 1 to 2 hours.
4. Serve warm Triple Mushroom Gravy (see recipe on page 21).
Note: Mashed Celery Root and Parsnip “Potatoes” will keep in a sealed container in the refrigerator for up to 3 days.
*Macadamia, cashew, and coconut butter are available online at Living Light Marketplace: RawFoodChef.com/shop

18Making Healthy Living Delicious!
Pictures speak.a thousand words! Now you can learn
to design stunning pictures of your foods that will WOW your friends on Facebook, on your blog, and in recipe e-books. Gorgeous food photos can do more to build your reputation and showcase your talent than the most well written description of your foods possibly can. Enroll today and learn the tips and tricks for making your foods POP—on the plate and on the page!
Capture the beauty of your culinary creations in photographs— .learn how to plate and style your recipes with panache!
Whether you want to entice your Facebook friends with your stunning food photos or showcase your talents in your own recipe book, website, blogs and brochures, “pictures speak a thousand words!” Now you can learn how to create dazzling dishes especially for photography. Even if your only camera is your cell phone, your raw culinary creations will shine in pictures!
Learn the basics of food styling using color, texture, and contrast in this one-day hands-on workshop. Explore saucing, building height and movement, the positive use of negative space, and how to prepare food for photography. Learn elements of design, including how to choose appropriate tableware and props, and how the perspective of the camera influences what you see in your photographs. This class is for anyone who loves food and wants to share food photographs with others. No prerequisites required. Course required for Gourmet Raw Food Chef Certification™.
2015 Dates (Sundays): January 25, February 22, March 22, May 10, June 7, July 5, August 23, September 20 and October 18.Time: 9:00 AM to 6:00 PM (1-hour no host lunch break)Tuition: $375.00Location: Living Light Culinary StudioRecommended text: The Food Stylists Handbook, by Denise VivaldoRecommended equipment: chef knife, paring knife, appropriate chef wear, camera
301-B North Main Street (located in the Company Store, corner of Main and Redwood streets), Fort Bragg, CA 95437707-964-2420 • [email protected] • RawFoodChef.com
dFood Styling

19
Zucchini Mushroom LoafHere’s the perfect turkey substitute that is ideal for the holidays! It has a meaty texture. We use the Excalibur dehydrator to prepare the walnuts and also to “cook” it to perfection without losing the essential nutrients – after all, this is a healthy holiday recipe! You can even make it in advance and warm it up in the dehydrator when you are ready to serve it. You can form it into a loaf or little croquettes (patties). Leftovers make the best stuffing ever – just crumble the “meaty” Zucchini Mushroom Loaf and add Cranberry Orange Relish, and diced Jalapeño Onion Cornbread – OMG you will NOT believe this combo!
Zucchini Mushroom LoafYield: 1 loaf or 6 croquettes
Serves: 6
Equipment needed: Excalibur Dehydrator, food processor
1½ cups walnuts, soaked and dehydrated
2 cups shredded zucchini
2 tablespoons dark miso
1½ cups minced mushrooms
2/3 cup minced celery
½ cup red minced onion
¼ cup golden flax meal
3 tablespoons minced fresh parsley
2 tablespoon nutritional yeast
1 tablespoon minced fresh sage
½ teaspoon Himalayan crystal salt
½ teaspoon white pepper
½ teaspoon pureed or crushed garlic
1. Place 1 cup of the walnuts in a food processor outfitted with the “S” blade, and process into a meal. Add the zucchini and dark miso and pulse to mix. (Do not over process; the mixture should have a little texture.)
2. Mince the remaining walnuts by hand, or pulse in the food processor until grainy.
3. Place the zucchini-nut mixture and the minced walnuts in a large mixing bowl. Add the remaining ingredients to the mixing bowl, and stir well.
4. Form a small loaf about 3/4-inch thick, or small round croquettes (patties) about 1-inch thick Place the loaf (or croquettes) on a dehydrator tray lined with a Paraflex sheet, and dehydrate at 125 degrees for 2 hours.
5. After 2 hours, remove the Paraflex sheet and turn the loaf or croquettes over. Reduce heat to 105 and continue dehydrating for another 4 hours, or until the desired texture is achieved.
6. Store in an airtight container in the refrigerator for up to three days.
I hope you enjoy my Zucchini Mushroom Loaf and make it part of your holiday tradition.

20
Make Your Passion Your Career — Begin Your Culinary Journey Here!
Living Light Culinary Institute educates and inspires our .students to reach the highest standards of leadership
and professionalism in raw culinary arts. Start with our most popular certification!
The highly-regarded Raw Culinary Arts Associate Chef and Instructor Training™ is designed for all levels of expertise, from novice to professional chef.
This program consists of five classes beginning with a FUNdamentals of Raw Living Foods™, a one-day intensive that includes demonstrations of a variety of techniques and the use of equipment necessary in a raw food kitchen. There are seventeen culinary presentations from sprouting and fermenting to preparing recipes from appetizers to desserts. Following this is Sharpen Up Your Knife Skills™, a full day of hands-on, practical knife skills designed to provide confidence and expertise in raw food preparation. Next, students take Essentials of Raw Living Foods™, five action-packed days of hands-on experience using a variety of culinary skills including recipe development and flavor balancing. Then, students complete the two-day Science of Raw Food Nutrition Course to develop the foundation for the final two weeks of the certification, the Raw Culinary Arts Associate Chef and Instructor Training™ is focused on all-around chef skills and culinary technique, recipe production and development, Food Styling, and finally, learning how to teach raw culinary arts to others.
This course is a prerequisite for Pastry Arts—Unbaked!™ and Gourmet Raw Culinary Arts Certification™.
Making Healthy Living Delicious! TM
Raw Culinary Arts Associate Chef and Instructor Training™
Living Light International, LLC 707-964-2420 [email protected] RawFoodChef.com301-B North Main Street, Fort Bragg (located in the Company Store), corner of Main and Redwood Streets
■ August 8–28■ September 5–25■ October 3–23
2015 Raw Culinary Associate Chef and Instructor Training™■ January 10–30■ February 7–27■ March 7–March 27
■ April 25–May 15■ May 23–June 12■ June 20–July 10
You may receive a discount for this series if you register for any of the 2015 packages which include this culinary certification program.
Call 707-964-2420 to register and for more information
21
Triple Mushroom GravyWhat would a vegetarian holiday be without mushroom gravy? This version takes health and deliciousness to the next level by using nut cream in place of dairy or soy milk, and “cooking” it in the Excalibur Dehydrator to intensify the mushroom flavor and reduce it to a thick and luscious gravy.
One of the things we love about “cooking” in the Excalibur dehydrator is that it can be used to warm soups and gravies without worrying about overcooking. And, they’ll stay warm in the dehydrator until you are ready to serve them. No more worrying about getting the timing exactly right or the gravy scalding or getting too thick!
Triple Mushroom GravyServes: 6
Equipment needed: Excalibur Dehydrator, blender
1/4 cup dried porcini mushrooms
1 cup water
1/3 cup chopped and tightly packed shiitake mushrooms
1/3 cup chopped and tightly packed crimini mushrooms
2 tablespoons minced red onions
2 tablespoons olive oil
2 teaspoons tamari
1/2 teaspoon garlic powder
5/8 cup almonds, soaked for 8-12 hours or overnight
1 pint peeled and chopped zucchini
2 tablespoons minced celery
1/2 tablespoon light miso paste
1/2 tablespoon dark miso paste
1 teaspoon shiitake mushroom powder (optional)
1 teaspoon nutritional yeast
1/4 teaspoon garlic powder
1/4 teaspoon Himalayan crystal salt
1. Soak the porcini mushrooms in 1½ cups water until soft, about 1 hour.
2. In a shallow bowl, whisk together the onions, olive oil, tamari, and garlic powder. Add the shiitake mushrooms and crimini mushrooms and toss until all the mushrooms are thoroughly coated. Set the mushrooms aside to marinade for 30 minutes.
3. Drain the water from the porcini mushrooms and rough chop them. Retain the mush-room soaking water to use in the recipe. Add the half of the porcini mushrooms to the other mushrooms in the marinade. Mince the remaining porcini mushrooms and set aside.
4. Put the almonds and the mushroom-soaking water in a blender and blend to form a thick cream. Pour the cream into a mesh bag and gently squeeze the mixture to remove the pulp. (Only the strained cream will be used for this gravy, but the pulp may be reserved for another use.)
5. Put half the cream into a blender and add the peeled zucchini, celery, light and dark miso, shiitake powder, nutritional yeast, garlic powder, crystal salt, and the mushrooms, along with their marinade, and blend until smooth and creamy. Add the remaining almond cream and pulse to blend. Do not continue blending the gravy once the remaining cream has been mixed in, or it will become frothy. It should just be mixed in. Stir or pulse in the remaining minced porcini mushrooms.
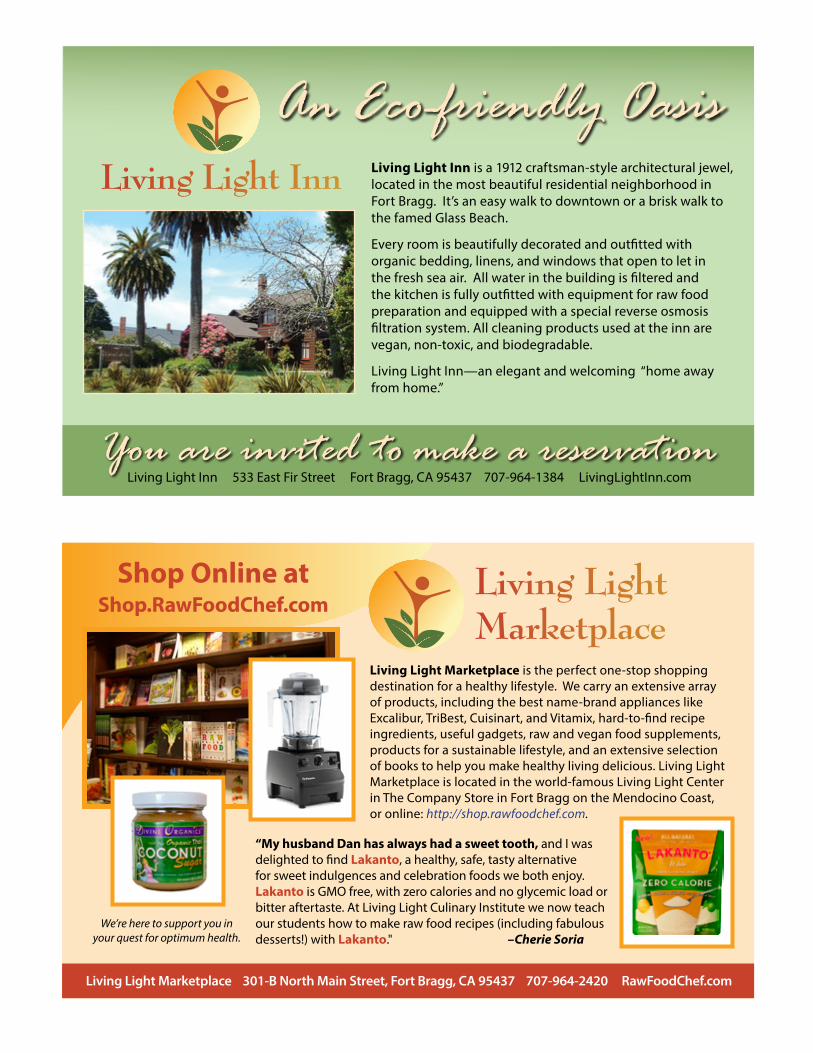
Living Light Marketplace is the perfect one-stop shopping destination for a healthy lifestyle. We carry an extensive array of products, including the best name-brand appliances like Excalibur, TriBest, Cuisinart, and Vitamix, hard-to-find recipe ingredients, useful gadgets, raw and vegan food supplements, products for a sustainable lifestyle, and an extensive selection of books to help you make healthy living delicious. Living Light Marketplace is located in the world-famous Living Light Center in The Company Store in Fort Bragg on the Mendocino Coast, or online: http://shop.rawfoodchef.com.
Living LightMarketplace
Living Light Marketplace 301-B North Main Street, Fort Bragg, CA 95437 707-964-2420 RawFoodChef.com
Shop Online at Shop.RawFoodChef.com
“My husband Dan has always had a sweet tooth, and I was delighted to find Lakanto, a healthy, safe, tasty alternative for sweet indulgences and celebration foods we both enjoy. Lakanto is GMO free, with zero calories and no glycemic load or bitter aftertaste. At Living Light Culinary Institute we now teach our students how to make raw food recipes (including fabulous desserts!) with Lakanto." –Cherie Soria
We’re here to support you in your quest for optimum health.
You are invited to make a reservationLiving Light Inn 533 East Fir Street Fort Bragg, CA 95437 707-964-1384 LivingLightInn.com
An Eco-friendly OasisLiving Light Inn is a 1912 craftsman-style architectural jewel, located in the most beautiful residential neighborhood in Fort Bragg. It’s an easy walk to downtown or a brisk walk to the famed Glass Beach.
Every room is beautifully decorated and outfitted with organic bedding, linens, and windows that open to let in the fresh sea air. All water in the building is filtered and the kitchen is fully outfitted with equipment for raw food preparation and equipped with a special reverse osmosis filtration system. All cleaning products used at the inn are vegan, non-toxic, and biodegradable.
Living Light Inn—an elegant and welcoming “home away from home.”
Living Light Inn

23
Jalapeño Onion Corn BreadThis is a recipe we created a couple of years ago and it has become of our all-time favorites. We especially love it around the holidays as a base for stuffing as well as bread. To make the best stuffing you’ve every had, combine the Zucchini Mushroom Loaf and Cranberry Orange Relish with the Jalapeño Onion Corn Bread and you will WOW your guests!
Jalapeño Onion Corn Bread
Yield: 16 pieces
Serves: 8
Equipment needed: Excalibur Dehydrator, food processor
4 cups fresh or frozen corn kernel
2 cups (Just Corn)* freeze dried corn, ground using a spice grinder or blender
2 cups white almond flour
½ cup coconut butter, warm to soften**
½ cup warm water
1 tablespoon Himalayan crystal salt
½ teaspoon cayenne pepper
¼ cup finely minced onion, rinsed, and towel blotted
One seeded and finely minced jalapeño pepper
1. Put fresh and ground freeze dried corn, almond flour, soft coconut butter, warm water, and Himalayan crystal salt in a food processer and process until smooth.
2. Add the minced onions and jalapeño to the food processer and pulse briefly, just to mix. Do not puree.
3. Spread the batter onto a Paraflex sheet about ½-inch thick. Using a dull knife or spatula, score the batter 4”x 4” to form 16 squares.
4. Dehydrate at 125 degrees for 2 hours. (This will not cook the bread or kill valuable nutrients, as long as you turn the dehydrator down to 105 in 2 hours.)
5. Flip the bread and remove the Paraflex sheet. Reduce the temperature to 105 degrees and dehydrate for another 8 hours or until the bread is pliable but easy to handle without falling apart. Serve warm with pureed avocado or another spread of choice.
6. Allow to cool thoroughly before storing in a sealed container in the refrigerator for up to 1 week.
Note:
* Just Corn and coconut butter are both available online at Living Light Marketplace
** To warm and soften coconut butter, put it in a warm dehydrator (105 degrees) for 30 minutes.
Click to view video

24
Black Bottom Pecan PieThis recipe was an amazing a deep dish pecan pie that we enjoyed it year after year - until our Living Light Pastry Arts Instructor, Vinnette Thompson revised it by adding a chocolate bottom and now it is simply beyond compare!
This is a 5-part recipe, but don’t let that scare you – each part is easy to make and many of the ingredients are the same. Believe me it is worth it!
Black Bottom Pecan PieServes: 12
Equipment needed: Excalibur Dehydrator, food processor
Crust
½ cup soaked and dehydrated almonds*
1½ cups soaked and dehydrated pecans*
¼ cup coconut sugar or evaporated cane sugar
6 soft dates, pitted
½ teaspoon cinnamon
Chocolate Bottom
¾ cup cocoa powder
¾ cup maple syrup
1/3 cup coconut oil, warmed to liquid**
Filling
½ cup coconut oil, warmed to liquid**
¾ cup soft pitted dates
2 tablespoons maple syrup
1 tablespoon vanilla
1¼ cups chopped soaked and dehydrated pecans*
Candied Pecans
½ cup maple syrup
1 teaspoon cinnamon
Pinch nutmeg
1 cup soaked and dehydrated pecan halves*
Chocolate Drizzle
½ cup organic cocoa powder
1/3 cup olive oil
1 ½ cups maple syrup
2 tablespoons vanilla

25
1. To make the Crust: Place almonds, pecans, dates, evaporated cane sugar, and cinnamon in the food processor using the “S” blade, and process until crumbly, yet sticky.Press mixture firmly into a 9-inch pie plate and set aside.
2. To make the Chocolate Bottom: Blend ingredients in a high-speed blender to achieve a smooth consistency. Pour ¾ cup of the mixture into the piecrust and refrigerate until firm, about 2 hours. Save any chocolate mixture that remains to roll into chocolate truffles.
3. To make the Filling: Place dates and coconut oil in the food processor and blend until smooth. Add the rest of the ingredients and continue to blend until smooth. Fold in the chopped pecans by hand and spread on top of the chilled chocolate bottom.
4. To make the Candied Pecans: Mix together syrup, cinnamon and nutmeg. Coat the pecan halves with the mixture and use to decorate the pie. Arrange nuts in symmetrical fashion around the edge of the pie.
5. Chill the pie for a minimum of four hours prior to serving.
6. To make the Chocolate Drizzle: Blend ingredients in a high speed blender until smooth. Drizzle over pie and serve.
7. Store in a sealed container in the refrigerator for up to 1 week or in the or freezer for 3 months.
Notes:
*To soak and dehydrate nuts, cover nuts with water and allow them to soak at room temperature for 8 hours. Then rinse and drain. Dehydrate at 105 degrees on an unlined mesh sheet for 12 hours, or until crisp.
** To warm coconut oil to liquid, measure the recommended amount into a glass jar. Cover the jar and place it in a warm dehydrator (105-125) for 30 minutes.

26
L iving Light Culinary Institute o� ers two Pastry Arts certi� cations. We’ve
discovered that the best way to a cooked food lover’s heart is dessert! Expand your gourmet raw culinary skills or become a raw food pastry chef with Pastry Arts–Unbaked!™ certi� cations.
� is enhanced culinary program focuses on raw vegan dessert production combining theory, demonstration and practical hands-ontraining. Students learn the principles involved in the use of binders, thickeners, emulsi� ers and gelling agents; how to choose the right sweeteners and fats for a variety of classic pastry recipes while discovering the secrets of making exquisite raw desserts that taste even better than famous cooked desserts! Create a variety of professional looking and sublime tasting gourmet raw desserts that tantalize the palate without compromising health!
This certi� cation includes the following courses: FUNdamentals of Raw Living Foods™ Sharpen up Your Knife Skills!™ Essentials of Raw Culinary Arts™ Science of Raw Food Nutrition™ I Raw Culinary Arts Associate Chef & Instructor Training™ Pastry Arts-Unbaked!™
Pastry Arts–Unbaked Certi� cation
� e advanced pastry arts program focuses on gourmet raw vegan dessert preparation and pastry arts recipe development through intensive, practical and comprehensive training. Once con� dent in preparing a variety of classic pastry recipes, students are ready to create their own fabulous gourmet raw vegan desserts. Living Light pastry chef instructors provide supportive and expert guidance to help students develop their own recipes and translate favorite cooked desserts into raw vegan desserts.
This certi� cation includes the following courses: FUNdamentals of Raw Living Foods™ Sharpen up Your Knife Skills!™ Essentials of Raw Culinary Arts™ Science of Raw Food Nutrition™ I Raw Culinary Arts Associate Chef & Instructor Training™ Pastry Arts-Unbaked!™ Pastry Arts-Unbaked!™ Level II
Advanced Pastry Arts–Unbaked Certi� cation
Living Light International • 301-B North Main Street (located in the Company Store, corner of Main and Redwood streets), Fort Bragg, CA 95437707-964-2420 • [email protected] • RawFoodChef.com
Pastry Arts Certifications

27
ONLINE COURSE
25 RAW VEGAN RECIPES AND VIDEO DEMOS
— NO RISK GUARANTEE —
Includes:
Best ofNew Holiday TraditionsLIVING LIGHT CHEFS
Visit RawFoodChef.com to learn about all of our culinary and nutrition classes and programs
9 bonus demos (an additional 2-1/2 hours of valuable culinary demos)
an e-book of the recipes, so that each step will be clear and easy to follow
valuable tips not found in any cookbook!
16 gourmet holiday raw vegan culinary demos with step-by-step details (more than 6 hours total!)
If you are not completely satis�ed with the Best of New Holiday Traditions Online Course, you may contact us within the �rst 3 days of purchase and receive a full refund of the complete purchase price!

Living Light International
301-B North Main Street, Fort Bragg, CA 95437
707-964-2420 • 800-816-2319 • [email protected] • RawFoodChef.com
Since 1998 Living Light Culinary Institute has established itself as the world’s premier gourmet raw culinary school, attracting people from nearly 50 countries around the world, and all walks of life. We offer a variety of practical, yet fun and life-transforming culinary and nutrition programs to suit every student, from novice to professional chef! Whether you want a career in the fast growing arena of gourmet raw foods, or simply want to prepare meals for family and friends, our courses inspire every student to create healthier, more conscious cuisine without sacrificing taste, presentation, or
the emotional satisfaction of food. Living Light Culinary Center is a state-of-the-art facility located on the beautiful Mendocino Coast in Fort Bragg, California, designed to provide the latest advances in raw culinary education and services. Dine on raw vegan cuisine at Living Light Café, find healthy lifestyle products for the raw chef or your home at Living Light Marketplace, and stay at the eco-friendly Living Light Inn for a memorable experience! Please visit RawFoodChef.com for more information about classes, schedules, tuition, registration, and lodging.