Embed Size (px)
Citation preview

CHEM 124
1
DEPARTMENT OF CHEMISTRY
FOURAH BAY COLLEGE – UNIVERSITY OF SIERRA LEONE
CHEM 124
PRACTICAL CHEMISTRY II (to be taken alongside CHEM 121, CHEM 122 and CHEM 123)
CREDIT HOURS 1.5
REQUIREMENTS C- or better in CHEM 114
To be taken alongside CHEM 111, CHEM 122
and CHEM 123
REQUIRED FOR CHEM 214

CHEM 124
2
INTRODUCTION
• CHEM 124 is a continuation of CHEM 114 and covers more of the core practical techniques used in Chemistry
• The course consists of a series of 10 practical experiments based on different chemical principles and introducing different practical techniques
• Working in small groups, students are required to perform a series of practical tasks during the course of each experiment
• Students are expected to keep a clear written record of all practical work carried out and all experiment results obtained
EQUIPMENT REQUIRED
• Students must purchase the manuals required for CHEM 114 and CHEM 124 at the start of the academic
year at a cost of Le 40,000; this cost includes a small caution fee used to cover the annual cost of
replacing any broken glassware; students only taking one of the modules must pay a cost of Le 20,000
• An official FBC Chemistry labcoat must be worn to every practical session. These can be purchased
from the head technician at a cost of Le 70,000; students will not be admitted into any practical session
unless they are wearing an FBC Chemistry labcoat
• Safety glasses must also be worn to every practical session; these are widely available in town; students
will not be admitted into any practical session unless they are wearing safety glasses
• Students should also bring a pen, writing paper and a calculator to every practical session; graph paper is
also required for some reports
• Disposable gloves should be worn during organic chemistry practicals; these will be provided by the
department

CHEM 124
3
DRESS AND BEHAVIOUR EXPECTATIONS
• Students are not permitted to wear open footwear and long hair must be tied back; casual, durable
clothes and trainers are recommended
• Food and drink must not be consumed in any laboratory
• The chemicals and apparatus used in Chemistry can be harmful, especially if not handled correctly;
students are expected to act in a safe and responsible manner at all times; ask the nearest staff member if
you not sure how to handle apparatus or chemical safely
• If students break equipment with a value exceeding the annual contribution, the student is expected to
replace the equipment at his/her own expense
ASSESSMENT
Continuous Assessment – 30%
• Students must submit a full report for each practical to the head technician by 12.00 pm on the Monday
following the practical session
• The report will only be accepted if the student has been marked present at both the beginning and the
end of the practical and if their results have been signed by their allocated lecturer
• Each report is valued at either one credit (10 marks) or two credits (20 marks); the best eight credits
achieved by each student over the semester will be added up to give a total out of 80; this mark will be
divided by 4 to give a final continuous assessment mark out of 30
Practical Examination – 70%
• Students will sit a single practical examination at the end of each semester. This will consist of two
practical exercises and some written questions; there are 70 marks available for the practical exam
• The mark from the continuous assessment and the mark from the practical examination are combined to
give a total mark out of 100, which will determine the students overall grade for the module.

CHEM 124
4
PROCEDURE FOR PRACTICAL SESSIONS
1) Students should arrive promptly for each session and sign in as they enter the laboratory; students may
sign in from 08:30
2) At 09:00 the lecturers will introduce the main chemical concepts underlying the practical, demonstrate
how to use any new apparatus and provide suggestions on how to best carry out the practical
3) At 09:30 the lecturers will ask the students to report to their work stations and check their equipment;
each group will be briefed, issued with any additional equipment they need and be instructed to start the
practical
4) Once all data has been collected, the students should ensure that their rough work is signed by the
lecturer allocated to their work station and then clean and tidy their work station
5) Students should sign out with the head technician once their work station is clean and tidy; they should
do this by 12:30
6) At 12:30 the lecturers will review the theory and provide guidance on completing the report
7) The session should finish promptly at 13:00
REPORTS
• reports must be submitted by 12:00 on the first working day after the practical
• all rough work must be submitted along with the report
• the report should answer all questions
• some of the marks for each report may be awarded based on the group’s performance during the
practical session; students should work safely but quickly, involve the whole group in the practical work,
avoid using more than the allocated quantity of chemicals and use all appropriate safety precautions

CHEM 124
5
CONTENTS
Week Experiment Title
1 Qualitative Analysis I – Identification of Cations
2 Qualitative Analysis II – Identification of Anions
3 Kinetics I: Determination of a rate equation using the initial rates method
4 Kinetics II: Determination of the activation energy of two reactions
5 Organic I – Investigation of solubility and the presence of C=C bonds
6 Organic II – Investigation of alcohols and carbonyls
7 Organic III – Investigation of carboxylic acids, esters and amines
8 Organic IV– Qualitative Analysis of Organic Compounds
9 Calorimetry II – Using Hess’ Law
10 Kinetics III – Determination of an order of reaction using a continuous
monitoring method

CHEM 124
6
Week 1 – Qualitative Analysis of Cations in Solution
Qualitative Analysis is the identification of an unknown substance.
Cations in solution can be identified from:
- the colour of the solution
- whether or not they give a precipitate with certain reagents, the colour of that precipitate and the solubility
of the precipitate in other reagents
- whether or not they form complex ions with certain reagents, observable by the solution turning a
characteristic colour
In this experiment you will be given 20 solutions, labelled A – T. Each solution contains a different one of the
following cations:
NH4+ Na+ K+ Mg2+ Ca2+ Sr2+ Ba2+ Al3+ Sn2+ Pb2+
Cr3+ Mn2+ Fe2+ Fe3+ Co2+ Ni2+ Cu2+ Zn2+ Ag+ Cd2+
You are required to carry out a series of observations and simple chemical tests in order to identify which cation
is in which solution.
The available tests are:
(a) hydrochloric acid followed by dilute ammonia
- dilute HCl will precipitate Ag+ and Pb2+ as chlorides
- AgCl dissolves in dilute NH3 to give a complex ion but PbCl2 does not
Test: add 1 cm3 of dilute HCl to 1 cm3 of the unknown solution; if a precipitate if formed add
dilute NH3 dropwise until the test tube is half-full
(b) hydrogen sulphide
- H2S in acidic conditions will precipitate Ag+, Pb2+, Cu2+, Sn2+ and Cd2+ as sulphides
- the colour of the precipitate can help identify the cation
- Fe3+ can oxidise H2S to a yellow precipitate of sulphur
Test: bubble H2S into 1 cm3 of the unknown solution for 10 seconds; if no precipitate is formed
after 10 s, bubble H2S into the solution for a further 20 s
(c) sodium hydroxide solution
- NaOH will precipitate all cations except NH4+, Na+, K+, Ba2+ and Sr2+ as hydroxides, although
Ca(OH)2 does not form instantly
- the colour of the precipitate can help identify the cation
- Pb(OH)2, Zn(OH)2, Cr(OH)3, Al(OH)3 and Sn(OH)2 are amphoteric and dissolve in excess sodium
hydroxide to give hydroxoanions
Test: add a few drops of dilute NaOH to 1 cm3 of the unknown solution; continue to add NaOH, a
few drops at a time, until the test tube is half-full

CHEM 124
7
(d) ammonia solution
- NH3 is alkaline and will precipitate all cations except NH4+, Na+, K+, Ba2+, Sr2+ and Ca2+ as
hydroxides
- the colour of the precipitate can help identify the cation
- AgOH, Cu(OH)2, Cd(OH)2, Cr(OH)3, Ni(OH)2, Mn(OH)2, Zn(OH)2 and Co(OH)2 dissolve in excess
dilute NH3 to give complex ions
- the colour of the complex can help identify the cation
Test: add a few drops of dilute NH3 to 1 cm3 of the unknown solution; continue to add NH3, a few
drops at a time, until the test tube is half-full
(e) dilute sulphuric acid
- H2SO4 will precipitate Pb2+, Ag+, Ba2+ and Sr2+ ions as sulphates; Ca2+ also forms a precipitate
slowly
Test: add 1 cm3 of dilute H2SO4 to 1 cm3 of the unknown solution
You are NOT required to carry out all five of these tests on every solution; you are only required to carry out
enough tests to identify all 20 cations; should these five tests be insufficient to identify a particular cation, there
are some other tests available to you if you ask a technician:
(i) potassium dichromate and ethanoic acid
precipitates Ag+, Pb2+ and Ba2+ as chromates; the colour of the precipitate can help identify the
cation
(ii) potassium hexacyanoferrate (II) solution
precipitates Cu2+, Fe2+, Fe3+, Zn2+ and Ca2+ as cyanoferrates; the colour of the precipitate can
help identify the cation
(iii) uranyl magnesium acetate solution
precipitates Na+ as a magnesium uranyl acetate

CHEM 124
8
The expected observations for each chemical test are shown below:
Cation Colour in
solution
(a)
HCl
followed
by NH3
(b)
Acidic
H2S
(c)
NaOH until
in excess
(d)
NH3 until in
excess
(e)
H2SO4
Extra Test
1 Ag+ Colourless White ppt
soluble in
NH3
Black ppt Brown ppt brown ppt
soluble in
excess
White ppt K2CrO4/CH3COOH –
red ppt
2 Pb2+ Colourless White ppt
insoluble
in NH3
Black ppt White ppt
soluble in
excess
White ppt
insoluble in
excess
White ppt K2CrO4/CH3COOH –
yellow ppt
3 Cu2+ Pale blue No
reaction
Black ppt Pale blue
ppt
Pale blue
ppt, soluble
in excess to
give deep
blue solution
No reaction K4Fe(CN)6 – red/brown
ppt
4 Sn2+ Colourless No
reaction
Brown
ppt
White ppt
soluble in
excess
White ppt
insoluble in
excess
No reaction
5 Cd2+ Colourless No
reaction
Yellow
ppt
White ppt White ppt
soluble in
excess
No reaction
6 Fe2+ Pale green No
reaction
No
reaction
Dirty green
ppt, turning
orange on
standing
Dirty green
ppt, turning
orange on
standing
No reaction K4Fe(CN)6 – pale blue
ppt
7 Fe3+ Yellow/orange No
reaction
Yellow
ppt
Red-brown
ppt
Red-brown
ppt
No reaction K4Fe(CN)6 – pale blue
ppt
8 Cr3+ Dark green No
reaction
No
reaction
Green ppt,
soluble in
excess
Green ppt,
soluble in
excess
No reaction
9 Ni2+ Green No
reaction
No
reaction
Green ppt Green ppt
soluble in
excess
No reaction
10 Mn2+ Pale pink
/colourless
No
reaction
No
reaction
White ppt,
darkens on
standing,
White ppt
soluble in
excess
No reaction

CHEM 124
9
Cation Colour in
solution
(a)
HCl
followed
by NH3
(b)
Acidic
H2S
(c)
NaOH until
in excess
(d)
NH3 until in
excess
(e)
H2SO4
Extra Test
11 Zn2+ Colourless No
reaction
No
reaction
White ppt
soluble in
excess
White ppt
soluble in
excess
No reaction K4Fe(CN)6 – white ppt
12 Al3+ Colourless No
reaction
No
reaction
White ppt
Soluble in
excess
White ppt No reaction
13 Co2+ Pink No
reaction
No
reaction
Blue ppt,
turning
pink on
standing
Blue ppt,
soluble in
excess
(yellow
solution)
No reaction
14 Ca2+ Colourless No
reaction
No
reaction
Faint white
ppt in
excess
No reaction White ppt
may form
slowly
K4Fe(CN)6 – white ppt
15 Sr2+ Colourless No
reaction
No
reaction
No reaction No reaction White ppt
16 Ba2+ Colourless No
reaction
No
reaction
No reaction No reaction White ppt K2CrO4/CH3COOH –
yellow ppt
17 NH4+ Colourless No
reaction
No
reaction
Pungent
gas evolved
on
warming
No reaction No reaction
18 Na+ Colourless No
reaction
No
reaction
No reaction No reaction No reaction UMA – yellow ppt
19 K+ Colourless No
reaction
No
reaction
No reaction No reaction No reaction
20 Mg2+ Colourless No
reaction
No
reaction
White ppt White ppt No reaction
Report
1) Identify the cation present in solutions A – T and explain how you were able to identify each cation
- Indicate which tests you carried out on each solution
- Indicate your observations in full for each test
- Indicate what you have concluded from each test
2) For the regular tests (a) – (e) which gave a result, write an equation for the reaction taking place.
3) Explain any problems you encountered with identifying the cation present in each solution.

CHEM 124
10
Week 2 – Qualitative Analysis of Anions in Solution
Qualitative Analysis is the identification of an unknown substance.
Anions in solution can be identified from:
- whether or not they give a precipitate with certain reagents, the colour of that precipitate and the solubility
of the precipitate in other reagents
- whether or not they evolve gases with certain reagents, and if so, which gas is evolved
In this experiment you will be given 10 solids, labelled A – J. Each solid contains a different one of the
following ions as well as a K+ or Na+ ion:
CO32- HCO3
- SO42- SO3
2- S2- NO3- NO2
- Cl- Br- I-
You are required to carry out a series of observations and simple chemical tests in order to identify which anion
is in which solid.
The available tests are:
(a) hydrochloric acid
- H+ will give an acid-base reaction with CO32- and HCO3
- to produce CO2, with SO32- to produce SO2,
with S2- to produce H2S, with NO2- to produce NO2; in all cases effervescence will be observed
- The gas evolved can be tested as follows:
CO2 bubble through limewater Turns limewater cloudy
SO2 dichromate paper
bubble through limewater
Turns green
Turns limewater cloudy
NO2 brown gas
H2S smelly gas (rotten eggs)
dichromate paper
lead ethanoate paper
Turns green
Turns black
Test: add 1 cm3 of dilute HCl to a small spatula measure of the unknown solid; if a gas is evolved
check the colour and smell; then add dichromate or lead ethanoate paper as appropriate; if both
tests negative bubble through limewater
(b) barium chloride solution
- Ba2+ will give precipitates with HCO3-, CO3
2-, SO32- which dissolve in HCl with effervescence
- Ba2+ will give a precipitate with SO42- which is insoluble in HCl
Test: dissolve a small spatula measure of the unknown solid in water; add 1 cm3 of BaCl2; if a
precipitate is formed add HCl gradually until in excess

CHEM 124
11
(c) Silver nitrate solution
- Ag+ will give precipitates with CO32-, SO3
2-, S2-, Cl-, Br- and I- and with excess NO2- and SO4
2-
- Ag2CO3 and Ag2SO3 dissolve in HNO3
- All precipitates except AgBr and AgI dissolve in dilute NH3
Test: dissolve a small spatula measure of the unknown solid in water; add 1 cm3 of AgNO3; if a
precipitate is formed, split the precipitate into two portions; to the first add HNO3 and to the
second add NH3
(d) Chlorine water
- Chlorine will oxidise I- and Br-
- the colours of the halogens formed can be used to identify the ion
- organic solvents give more clarity to the colour
Test: dissolve a small spatula measure of the unknown solid in water; add 1 cm3 of chlorine water;
if the solution turns yellow, orange or brown add 1 cm3 of cyclohexane and shake well
You are NOT required to carry out all three of these tests on every anion; you are only required to carry out
enough tests to identify all 10 anions; should these three tests be insufficient to identify a particular anion, there
are some other tests available to you:
(i) magnesium sulphate solution
- Mg2+ will give a precipitate with CO32- but not HCO3
-
Test: Dissolve a small spatula measure of the unknown solid in water; add 1 cm3 of MgSO4
(ii) Potassium manganate (VII) solution
- MnO4- is reduced and decolorised by SO3
2-, NO2- and Cl- it is also reduced by S2-, Br- and I- but the
resulting solutions are also coloured
Test: Dissolve a small spatula measure of the unknown solid in water; add 1 cm3 of acidified
KMnO4

CHEM 124
12
The expected observations for each chemical test are shown below:
Cation Colour in
solution
(a)
(i) HCl to solid
(ii) test on gas
(b)
(i) BaCl2 to
solution
(ii) add HCl
(c)
(i) AgNO3 to
solution
(ii) add HNO3 or
NH3
(d)
(i) add Cl2
(ii) add C6H12
Extra Test
1 CO32- Colourless Effervescence
(CO2)
white ppt soluble
in HCl
White ppt
Soluble in HNO3
and NH3
No reaction White ppt with
MgSO4
2 HCO3- Colourless Effervescence
(CO2)
white ppt soluble
in HCl
White ppt
Soluble in HNO3
and NH3
No reaction No reaction with
MgSO4
3 SO42- Colourless no effervescence white ppt Faint white ppt in
excess
No reaction
4 SO32- Colourless Effervescence
(SO2)
white ppt soluble
in HCl
White ppt
Soluble in HNO3
and NH3
No reaction Decolorises
KMnO4
5 NO3- Colourless no effervescence no reaction No reaction No reaction
6 NO2- Colourless effervescence
(NO2)
no reaction Faint white ppt in
excess
No reaction Decolorises
KMnO4
7 S2- Colourless effervescence
(H2S)
no reaction Black ppt
soluble in NH3
Yellow ppt Decolorises
KMnO4; yellow ppt
8 Cl- Colourless no effervescence no reaction White curdy ppt
soluble in NH3
No reaction Decolorises
KMnO4
9 Br- Colourless no effervescence no reaction Cream ppt Yellow/orange
solution; turns
cyclohexane
orange
Yellow/orange
solution with
KMnO4
10 I- Colourless no effervescence no reaction Yellow ppt Yellow/brown
solution; turns
cyclohexane
purple
Yellow/brown
solution with
KMnO4
Report
1) Identify the anion present in solutions A – J and explain how you were able to identify each anion
- Indicate which tests you carried out on each solution
- Indicate your observations in full for each test
- Indicate what you have concluded from each test
2) For the regular tests (a) – (d) which gave a result, write an equation for the reaction taking place.
3) Explain any problems you encountered with identifying the anion present in each solution.

CHEM 124
13
Week 3 – Determining a Rate Equation Using the Initial Rates Method
Introduction
• Sodium thiosulphate reacts with hydrochloric acid as follows:
Na2S2O3(aq) + 2HCl(aq) → S(s) + SO2(g) + H2O(l)
The sulphur produced in this reaction forms a precipitate which turns the mixture opaque; the rate of this
reaction can be monitored by measuring the time taken for a cross under the reaction mixture to cease to
be visible
• The rate of reaction is inversely proportional to the time taken for the reaction to reach a particular stage:
Relative rate of reaction = 1
time taken
• The rate equation for a chemical reaction is an equation which links the rate of reaction to the
concentrations of the reactants (eg rate = k[A]x[B]y)
• The aim of this experiment is to find the order of reaction with respect to Na2S2O3 and HCl; this can be
done by carrying out the reaction using different molarities of Na2S2O3 and HCl and investigating how
the rate of reaction changes in each case
Background
• The order of reaction with respect to each reactant can be deduced by plotting a graph of concentration
vs initial rate (an initial rate-concentration graph)
• In first-order reactions, rate = k[A]; a graph of initial rate against initial concentration will be a straight
line through the origin of gradient k:
• In second-order reactions, rate = k[A] 2; a graph of initial rate against initial concentration will be a
curve through the origin:
how t he r a t e of a r e a c t i on v e r i e s wi t h
c onc e nt r a t i on - f i r st or de r r e a c t i on
c o n c e n t r a t i o n
how t he r a t e of a r e a c t i on v e r i e s wi t h
c onc e nt r a t i on - se c ond or de r r e a c t i on
c o n c e n t r a t i o n

CHEM 124
14
• In zero order reactions, rate = k; a graph of initial rate against initial concentration will be a horizontal
line:
Procedure
1. Take a piece of filter paper and use a thick pen to draw an X on it.
2. Take a 250 ml conical flask and place it on top of the X on the filter paper.
3. Take a 50 cm3 measuring cylinder and label it “HCl”. Take another 50 cm3 measuring cylinder and
measure it “Na2S2O3”.
4. Measure 50 cm3 of 0.25 moldm-3 Na2S2O3 into the labelled measuring cylinder and then pour it into the
conical flask.
5. Measure out 50 cm3 of 2.0 moldm-3 HCl into the other labelled measuring cylinder. Pour it into the
conical flask and start the stopclock immediately.
6. Record the time taken for the cross to disappear. This is experiment 1.
7. Rinse out the conical flask and repeat the experiment using different concentrations of Na2S2O3 and HCl
as follows:
“HCl cylinder” “Na2S2O3 cylinder”
Experiment
Number
Volume
of
HCl/cm3
Volume
of
water/cm3
[HCl]/
moldm-3
Volume of
Na2S2O3/cm3
Volume
of
water/cm3
[Na2S2O3]
/moldm-3
1 50 0 2.0 50 0 0.25
2 50 0 40 10
3 50 0 30 20
4 50 0 20 30
5 50 0 10 40
6 40 10 30 20
7 30 20 30 20
8 20 30 30 20
9 10 40 30 20
how t he r a t e of a r e a c t i on v e r i e s wi t h
c onc e nt r a t i on - z e r o or de r r e a c t i on
c o n c e n t r a t i o n

CHEM 124
15
Report
1. Complete the table above to show the initial molarity of Na2S2O3 and HCl in each experiment
2. Using the results of your experiments, calculate 1/time taken for each experiment and put your
results in a table as follows:
Experiment [Na2S2O3]
/moldm-3
[HCl]/moldm-3 Time taken/s 1/time taken (s-1)
5
4
3
2
1
Experiment [Na2S2O3]
/moldm-3
[HCl]/moldm-3 Time taken/s 1/time taken (s-1)
9
8
7
6
3
3. Plot a graph of rate of reaction against [Na2S2O3] using experiments 1 – 5
4. Plot a graph of rate of reaction against [HCl] using experiments 3 and 6 – 9
5. Use your graphs to deduce the orders of reaction with respect to HCl and Na2S2O3, write a rate
equation for the reaction and calculate the rate constant.

CHEM 124
16
Week 4 - Determining The Activation Energy Of Two Reactions
Introduction
• Experiment 1
- Persulfate ions reacts with iodide ions to form iodine:
S2O82-(aq) + 2I-(aq) → I2(aq) + 2SO4
2-(aq)
- The iodine produced reacts with thiosulphate ions:
2S2O32-(aq) + I2(aq) → S4O6
2-(aq) + 2I-(aq)
- If persulfate ions react with iodide ions in the presence of a small quantity of thiosulfate ions, no
iodine is detected initially as the iodine reacts instantly with the thiosulfate ions; iodine only
appears when all of the thiosulfate is used up; if starch is present, the presence of iodine will turn
the solution blue-black in colour
- The initial rate of reaction between iodide ions and persulfate ions can therefore be found by
measuring the time taken to liberate sufficient iodine to react with the thiosulfate ions present
and then produce a blue colour with starch solution
- The rate of reaction is proportional to 1/(time taken for blue colour to form)
• Experiment 2
- Manganate (VII) ions react with ethanedioate ions in acidic conditions:
2MnO4- + 5C2O4
2- + 16H+ → 2Mn2+ + 10CO2 + 8H2O
- The reaction is initially slow but speeds up rapidly once enough Mn2+ has been produced to
catalyse the reaction; as a result the solution remains purple (due to MnO4-) for some time before
becoming rapidly decolorised; the initial rate of reaction can therefore be found by measuring the
time taken for the solution to decolorise
- The rate of reaction is proportional to 1/(time taken for solution to decolorise)
• The activation energy of both of these reactions can be found by investigating how the rate of a
reaction varies with temperature
Background
• The rate constant of a chemical reaction is related to the temperature (in K) and the activation energy
according the following equation: k = Aexp(-Ea/RT)
- exp(-Ea/RT) is the fraction of collisions which are successful
- Ea = activation energy (in Jmol-1)
- R = molar gas constant (in Jmol-1K-1)
- T = temperature (in K)
- A is the Arrhenius constant for that reaction

CHEM 124
17
• This equation can be rearranged as follows:
Log(k) = logA – (Ea/R)T
A graph of log(k) (or log 1/time taken) against 1/T (in K) will give a straight line of gradient Ea/R; the
gradient can be used to determine the activation energy of the reaction
Procedure
Experiment 1:
• The following concentrations should be used:
a) Using suitable measuring cylinders, dd 5 cm3 of sodium persulfate solution, 5 cm3 of sodium
thiosulphate solution and 2 cm3 of starch solution to a boiling tube
b) Use a suitable measuring cylinder to add 10 cm3 of potassium iodide solution to a test tube
c) Place a clean dry thermometer into the boiling tube
d) Pour the KI from the test tube into the boiling tube and start timing; shake the mixture to ensure that the
contents are well mixed; record the time taken for the blue colour to appear and also record the initial
and final temperature of the reaction mixture
e) Repeat steps (a) – (c) and then place the boiling tube and the test tube into a water bath until the
temperature in the boiling tube has reached 30 oC; then carry out step (d)
f) Repeat steps (a) – (c) and then place the boiling tube and the test tube into a water bath until the
temperature in the boiling tube has reached 40 oC; then carry out step (d)
g) Repeat steps (a) – (c) and then place the boiling tube and the test tube into a water bath until the
temperature in the boiling tube has reached 50 oC; then carry out step (d)
h) Repeat steps (a) – (c) and then place the boiling tube and the test tube into a water bath until the
temperature in the boiling tube has reached 60 oC; then carry out step (d)

CHEM 124
18
i) Record your results in a table similar to the one below:
Time taken for blue
colour to appear (s)
Initial
Temperature (K)
Final
Temperature (K)
Average
Temperature (K)
Experiment 2:
• The following concentrations should be used:
solution molarity/ moldm-3
KMnO4 0.010
H2C2O4 0.050
H2SO4 1.0
a) Using suitable measuring cylinders, add 5 cm3 of H2SO4 and 10 cm3 of H2C2O4 solution to a boiling
tube
b) Use a suitable measuring cylinder to add 5 cm3 of KMnO4 solution to a test tube
c) Place a clean dry thermometer into the boiling tube
d) Pour the KMnO4 from the test tube into the boiling tube and start timing; shake the mixture to ensure
that the contents are well mixed; record the time taken for the solution to decolorise and also record the
initial and final temperature of the reaction mixture
e) Repeat steps (a) – (c) and then place the boiling tube and the test tube into a water bath until the
temperature in the boiling tube has reached 30 oC; then carry out step (d)
f) Repeat steps (a) – (c) and then place the boiling tube and the test tube into a water bath until the
temperature in the boiling tube has reached 40 oC; then carry out step (d)
g) Repeat steps (a) – (c) and then place the boiling tube and the test tube into a water bath until the
temperature in the boiling tube has reached 50 oC; then carry out step (d)
h) Repeat steps (a) – (c) and then place the boiling tube and the test tube into a water bath until the
temperature in the boiling tube has reached 60 oC; then carry out step (d)

CHEM 124
19
i) Record your results in a table similar to the one below:
Time taken for purple
colour to disappear (s)
Initial
Temperature (K)
Final
Temperature (K)
Average
Temperature (K)
Report
a) For both experiments, record all your results clearly in a table similar to the following:
Time taken/s (1/time taken)/s Log(1/time taken) Average
Temperature/K
(1/temp)/K-1
b) Plot graphs of log (1/time taken) against (1/temperature) for each experiment
c) Deduce the gradient of your line of best fit for each graph and hence calculate the value of the
activation energy for each reaction

CHEM 124
20
Week 5 – Organic Chemistry I
Test 1: Solubility
Introduction
• The solubility of organic molecules in water and in non-polar solvents such as hexane varies
considerably
• Molecules which contain “hydrophilic” groups such as -COOH, -OH and ionic groups tend to be
soluble in water, as water molecules can form strong hydrogen bonds with these groups; the greater
the abundance of these groups on the molecule, the greater the solubility in water
• Molecules which can form hydrogen bonds with water (and are therefore soluble in water) tend to
have limited solubility in non-polar solvents, as these molecules cannot form hydrogen bonds with
non-polar molecules and so bond to themselves in preference
• Molecules which contain “hydrophobic” groups such as large alkyl groups tend to have limited
solubility in water, as water molecules cannot form strong hydrogen bonds with these groups and so
bond to themselves in preference; the larger the alkyl groups, the lower the solubility in water
Procedure
Test for solubility in water:
- Place one drop (if liquid) or two grains (if solid) of the organic substance into a test tube
- Add water, drop by drop, shaking well after each drop is added, until the organic substance has
dissolved
- Continue until a total of 6 drops of water has been added
Test for solubility in non-polar substances:
- Place one drop (if liquid) or two grains (if solid) of the organic substance into a test tube
- Add hexane, drop by drop, shaking well after each drop is added, until the organic substance has
dissolved
- Continue until a total of 6 drops of hexane has been added
Interpretation of Results:
- if the substance dissolves in 1 or 2 drops of the solvent, it is very soluble in that solvent
- if the substance requires 3 - 5 drops of the solvent before dissolving, it is partially soluble in that
solvent
- if the substance requires 6 or more drops the solvent before dissolving, it is sparingly soluble in that
solvent
CHEM 124
21
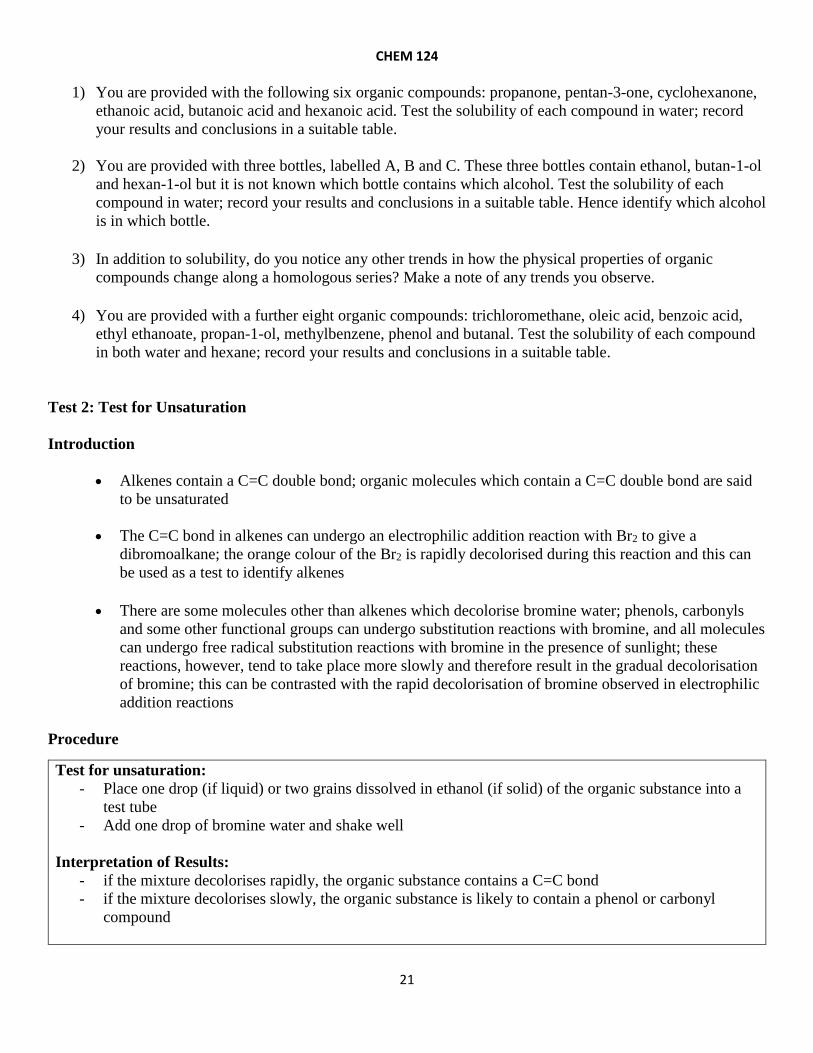
1) You are provided with the following six organic compounds: propanone, pentan-3-one, cyclohexanone,
ethanoic acid, butanoic acid and hexanoic acid. Test the solubility of each compound in water; record
your results and conclusions in a suitable table.
2) You are provided with three bottles, labelled A, B and C. These three bottles contain ethanol, butan-1-ol
and hexan-1-ol but it is not known which bottle contains which alcohol. Test the solubility of each
compound in water; record your results and conclusions in a suitable table. Hence identify which alcohol
is in which bottle.
3) In addition to solubility, do you notice any other trends in how the physical properties of organic
compounds change along a homologous series? Make a note of any trends you observe.
4) You are provided with a further eight organic compounds: trichloromethane, oleic acid, benzoic acid,
ethyl ethanoate, propan-1-ol, methylbenzene, phenol and butanal. Test the solubility of each compound
in both water and hexane; record your results and conclusions in a suitable table.
Test 2: Test for Unsaturation
Introduction
• Alkenes contain a C=C double bond; organic molecules which contain a C=C double bond are said
to be unsaturated
• The C=C bond in alkenes can undergo an electrophilic addition reaction with Br2 to give a
dibromoalkane; the orange colour of the Br2 is rapidly decolorised during this reaction and this can
be used as a test to identify alkenes
• There are some molecules other than alkenes which decolorise bromine water; phenols, carbonyls
and some other functional groups can undergo substitution reactions with bromine, and all molecules
can undergo free radical substitution reactions with bromine in the presence of sunlight; these
reactions, however, tend to take place more slowly and therefore result in the gradual decolorisation
of bromine; this can be contrasted with the rapid decolorisation of bromine observed in electrophilic
addition reactions
Procedure
Test for unsaturation:
- Place one drop (if liquid) or two grains dissolved in ethanol (if solid) of the organic substance into a
test tube
- Add one drop of bromine water and shake well
Interpretation of Results:
- if the mixture decolorises rapidly, the organic substance contains a C=C bond
- if the mixture decolorises slowly, the organic substance is likely to contain a phenol or carbonyl
compound

CHEM 124
22
1) You are provided with the following five organic compounds: hexane, cyclohexene, cinnamic acid,
ethanol and maleic acid. Carry out the unsaturation test on each compound; record your results and
conclusions in a suitable table.
2) You are provided with three further organic compounds: phenol, benzophenone and propanone. Carry
out the unsaturation test on each compound; record your results and conclusions in a suitable table.
3) How did your observations for phenol, benzophenone and propanone compare with those for
cyclohexene, cinnamic acid and maleic acid?
Report
1) Record all your observations and conclusions clearly in a series of tables
2) Draw the structures of all the organic compounds you tested
3) Use your structures to explain your observations and conclusions for each test

CHEM 124
23
Week 6 – Organic Chemistry II
Even-numbered groups should carry out tests 3, 4, 5 and 6 in any order and then carry out test 7.
Odd-numbered groups should carry out test 7 and then tests 3, 4, 5 and 6 in any order.
Test 3: Oxidation of Primary Alcohols, Secondary Alcohols and Aldehydes
• Primary alcohols can be oxidised to aldehydes; secondary alcohols can be oxidised to ketones; tertiary
alcohols cannot be oxidised: R1R2CHOH + [O] → R1COR2 + H2O
• Aldehydes can be further oxidised to carboxylic acids but ketones cannot be oxidised: R1CHO + [O] →
R1COOH
• Acidified potassium dichromate is a good reagent to use for this reaction; during the reaction, the orange
Cr2O72- ion is reduced to the dark green Cr3+ ion and this reaction is clearly visible in a test tube
• Acidified potassium dichromate can therefore be used as a test for primary alcohols, secondary alcohols
and aldehydes (it cannot distinguish between these groups)
Test 3 Procedure:
- Pour 5 drops of the organic compound into a test-tube
- Add 2 drops of potassium dichromate solution
- Add 10 drops of dilute sulphuric acid and shake gently
- Leave to stand in a beaker of hot water for 10 minutes
Interpretation of Results:
- if the mixture turns green or dark brown, the organic substance is either a primary alcohol, secondary
alcohol or aldehyde
Tests 4 and 5: Oxidation of Aldehydes
• The oxidation of aldehydes to carboxylic acids can be achieved with much milder oxidising agents than
those needed to oxidise alcohols to carbonyl compounds; mild oxidising agents such as Fehling’s
solution and Tollen’s reagent are able to oxidise aldehydes to carboxylic acids without also oxidising
alcohols; they are therefore effective as a specific test for aldehydes:
- In Fehling’s solution (Test 4) the blue Cu2+ ion is reduced to the orange precipitate of Cu2O
- In Tollen’s reagent (Test 5) the colourless Ag+ ion is reduced to metallic silver
Test 4 Procedure:
- Pour 1 cm3 of Fehling’s solution 1 into a test tube
- Add Fehling’s solution 2 dropwise until the precipitate just dissolves
- Add ten drops of the organic compound and shake gently
- Leave to stand in a beaker of boiling water for 10 minutes
Interpretation of Results:
- if an orange precipitate appears, the organic compound contains an aldehyde group

CHEM 124
24
Test 5 Procedure:
- Pour 1 cm3 of Tollen’s reagent into a test tube
- Add two drops of the organic compound and shake gently
- Leave to stand in a beaker of boiling water for 10 minutes
Interpretation of Results:
- if a silver mirror or black precipitate appears, the organic compound contains an aldehyde group
Test 6: Condensation reactions of aldehydes and ketones
• Aldehydes and ketones react with 2,4-dinitrophenylhydrazine to give a yellow or orange precipitate
known as a hydrazone derivative: R1COR2 + C6H3N2O4NHNH2 → R1COR2 + C6H3N2O4NHNCR1R2 +
H2O; the precise colour of the precipitate depends on the carbonyl compound used; this reaction is a
good test for carbonyl compounds (it works on aldehydes and ketones but not alcohols)
Procedure:
- Dissolve five drops of the organic substance in 0.5 cm3 of ethanol
- add 3 cm3 of 2,4-dinitrophenylhydrazine solution
- shake the mixture for a few minutes
Interpretation of Results:
- if an orange or yellow precipitate appears, an aldehyde or a ketone is present
1) You are provided with four unknown organic compounds, labelled A, B, C and D. The compounds
are butan-1-ol, methylpropan-2-ol, butanal and butanone. Carry out tests 3 – 6 on each compound
and hence identify which bottle contains which compound.
2) You are provided with one more unknown organic compound; this will either be labelled E, F, G or
H. The compound is either 4-methylpentan-2-one, phenylethanone, cyclohexanone, 2-
hydroxybenzaldehyde and 3-methylbutanal. Carry out either Test 4 or Test 5 on your compound to
determine whether it is an aldehyde or a ketone.

CHEM 124
25
Test 7: Identification of a carbonyl compound by measuring the melting point of its 2,4-DNP-hydrazone
• The reaction of each different carbonyl compound with 2,4-DNPH gives a different precipitate; the
melting point of each derivative varies considerably so if the precipitate can be purified (by
recrystallisation) and its melting point measured, it can be identified by comparing its melting point to
those of known derivatives
• The melting points of the derivatives of E, F, G, H and I are as follows:
Carbonyl Melting point of derivative
4-methylpentan-2-one 124o
Phenylethanone 248o
Cyclohexanone 162o
2-hydroxybenzaldehyde 252o (it also decomposes)
3-methylbutanal 182o
Procedure:
- Dissolve 10 drops of the organic substance in 1 cm3 of ethanol in a test tube
- add 5 cm3 of 2,4-dinitrophenylhydrazine solution
- shake the mixture until a precipitate forms
- filter the mixture and scrape the residue into a boiling tube
- dissolve the residue in the minimum possible quantity of hot ethanol
- allow the solution to cool until the derivative crystallises
- filter the mixture again
- dry the residue in more filter paper and place the residue into an oven until it is completely dry
- take a small sample of the residue and place it into a capillary tube
- measure its melting point
Interpretation of Results:
- the organic substance can be identified as that whose derivative has a melting point closest to the one
you have observed
1) You will be given one of E, F, H, H and I to identify. Carry out test 7 on the compound you are given
and hence identify it
Report
1) Record all your observations and conclusions clearly in a series of tables
2) Identify A, B, C and D, giving your reasons clearly
3) Use Test 7 to identify E, F, G or H, giving your reasons clearly.

CHEM 124
26
Week 7 – Organic Chemistry III
Test 8: The presence of H+ ions in carboxylic acids and esters
• Carboxylic acids and phenols dissociate partially in water to give H+ ions and carboxylate ions:
R-COOH R-COO- + H+ (carboxylic acids)
C6H5OH C6H5O- + H+ (phenols)
The presence of H+ ions can be detected with a simple acid-base indicator; phenolphthalein is
suitable for this purpose; it is colourless in acidic solutions and pink in alkaline solutions
• Esters are gradually hydrolysed in water to produce carboxylic acids and alcohols:
R1-COOR2 + H2O R1-COOH + R2-OH
As a result esters often contain enough H+ ions to decolorise phenolphthalein
Procedure:
- Add 1 cm3 of the organic compound to a test tube (if solid, use a small spatula measure)
- add 2 drops of phenolphthalein indicator and swirl the mixture
Interpretation of Results:
- if the purple colour disappears, an acid, phenol or ester is present
(Note: keep your sample for test 9)
Test 9: Distinguishing between carboxylic acids and esters
• When hydroxide ions are added to carboxylic acids, they are converted into carboxylate salts:
R-COOH + OH- → R-COO- + H2O
This reaction is irreversible and results in the conversion of all of the carboxylic acid to the salt
• When hydroxide ions are added to esters, any R-COOH present in the ester is neutralised; if the
mixture is then warmed, however, the ester will continue to be hydrolysed and will produce more
carboxylic acid; as a result the purple colour will disappear
Procedure:
- Add NaOH, drop by drop, to your solution from Test 8, until the mixture turns purple again
- Warm the solution for a few minutes
Interpretation of Results:
- if the purple colour disappears again, an ester is present

CHEM 124
27
Test 10: The presence of OH- ions in amines
• Amines dissociate partially in water to give hydroxide ions and alkylammonium ions:
R-NH2 + H2O → R-NH3+ + OH-
The presence of OH- ions can be detected with a simple acid-base indicator; bromothymol blue is
suitable for this purpose; it is yellow in acidic solutions and blue in alkaline solutions
Procedure:
- Add 1 cm3 of the organic compound to a test tube (if solid, use a small spatula measure)
- add 2 drops of bromothymol blue indicator and swirl the mixture
Interpretation of Results:
- if the blue colour appears, an amine is present
You are given eight organic compounds, labelled A, B, C, D, E, F, G and H; in no particular order, they are
phenol, ethanol, ethyl ethanoate, phenyl benzoate, cyclohexylamine, butylamine, ethanoic acid and benzoic
acid
1) Carry out Test 8 on all eight compounds; if Test 8 is positive, carry out Test 9.
2) Carry out Test 10 on all eight compounds.
3) Hence draw any conclusions you can about the identity of compounds A – H.
Test 11: Distinguishing between aromatic and aliphatic compounds by burning
• Almost all organic compounds are flammable; the type of flame depends on the % by mass of
carbon present in the compound; the higher the % carbon, the sootier the flame
• Aromatic compounds have a high % carbon and burn with a very sooty flame; aliphatic
compounds have a lower % carbon and burn with a much less sooty flame
Procedure:
- Take a few drops of the organic compound and place on a spatula (if solid, use a small spatula
measure)
- place the compound in a Bunsen flame until it ignites
Interpretation of Results:
- if the flame is very sooty, an aromatic compound is present; otherwise, an aliphatic compound is
present
4) Carry out Test 11 on methylbenzene, then on hexane, and then on compounds A, B, G and H
5) Hence draw any conclusions you can about the identity of compounds A – H.

CHEM 124
28
Report
1) Record all your observations and conclusions clearly in a series of tables
2) Draw the structures of all of the organic compounds A - H
3) Use your structures to explain your observations and conclusions for each test
4) Identify compounds A – H as far as you can

CHEM 124
29
Week 8 – Organic Chemistry IV
• In this final practical session on organic chemistry you will use a combination of the different tests you used in the first three sessions to identify the main functional groups present in a series of compounds; you will have the following tests available:
Test 1: Solubility in water: - Place one drop (if liquid) or two grains (if solid) of the organic substance into a test tube - Add water, drop by drop, shaking well after each drop is added, until the organic substance has dissolved - Continue until a total of 6 drops of water has been added
Interpretation of Results: - if the substance dissolves in 1 or 2 drops of the solvent, it is very soluble in that solvent - if the substance requires 3 - 5 drops of the solvent before dissolving, it is partially soluble in that solvent - if the substance requires 6 or more drops the solvent before dissolving, it is sparingly soluble in that solvent - soluble organic compounds tend to be alcohols or carboxylic acids with short hydrocarbon chains
Test 2: Unsaturation (C=C bond): - Place one drop (if liquid) or two grains dissolved in ethanol (if solid) of the organic substance into a test tube - Add one drop of bromine water and shake well
Interpretation of Results: - if the mixture decolorises rapidly, the organic substance contains a C=C bond - if the mixture decolorises slowly, the organic substance is likely to contain a phenol or carbonyl compound
Test 3: Reducing agents - Pour 5 drops of the organic compound into a test-tube - Add 2 drops of potassium dichromate solution - Add 10 drops of dilute sulphuric acid and shake gently - Leave to stand in a beaker of hot water for 10 minutes
Interpretation of Results: - if the mixture turns green or dark brown, the organic substance is either a primary alcohol, secondary alcohol
or aldehyde
Test 4: Aldehydes - Pour 1 cm3 of Fehling’s solution 1 into a test tube - Add Fehling’s solution 2 dropwise until the precipitate just dissolves - Add ten drops of the organic compound and shake gently - Leave to stand in a beaker of boiling water for 10 minutes
Interpretation of Results: - if an orange precipitate appears, the organic compound contains an aldehyde group

CHEM 124
30
Test 6: Carbonyls - Dissolve five drops of the organic substance in 0.5 cm3 of ethanol - add 3 cm3 of 2,4-dinitrophenylhydrazine solution - shake the mixture for a few minutes
Interpretation of Results: - if an orange or yellow precipitate appears, an aldehyde or a ketone is present
Test 8: Carboxylic acids and Esters - Add 1 cm3 of the organic compound to a test tube (if solid, use a small spatula measure) - add 2 drops of phenolphthalein indicator and swirl the mixture
Interpretation of Results: - if the purple colour disappears, an acid, phenol or ester is present
(Note: if the test is positive, keep your sample for test 9)
Test 9: Esters - Add NaOH, drop by drop, to your solution from Test 8, until the mixture turns purple again - Warm the solution for a few minutes
Interpretation of Results: - if the purple colour disappears again, an ester is present
Test 10: amines - Add 1 cm3 of the organic compound to a test tube (if solid, use a small spatula measure) - add 2 drops of bromothymol blue indicator and swirl the mixture
Interpretation of Results: - if the blue colour appears, an amine is present
Test 11: Combustion flame - Take a few drops of the organic compound and place on a spatula (if solid, use a small spatula measure) - place the compound in a Bunsen flame until it ignites
Interpretation of Results: - if the flame is very sooty, an aromatic compound is present; otherwise, an aliphatic compound is present
Task You are given ten unknown organic compounds, labelled A – J. Your task is to identify the functional group in each, indicate whether the compound is aromatic and suggest a possible chain length for each compound. You do not have to carry every test out on every compound, but you must carry out at least enough test to identify the functional group in each. You should present all test results and conclusions in your final report.
CHEM 124
31
Week 9 – Calorimetry II Experiment 1: Determine the enthalpy change for the following reaction: CaCO3(s) → CaO(s) + CO2(g)
• The enthalpy change for this decomposition reaction is difficult to measure directly; it is, however, possible to measure the enthalpy change of the following reactions directly: CaCO3(s) + 2HCl(aq) → CaCl2(aq) + CO2(g) + H2O(l) (Reaction 1) CaO(s) + 2HCl(aq) → CaCl2(aq) + H2O(l) (Reaction 2)
• From the measurement of these two enthalpy changes, it is possible to determine the enthalpy change for the decomposition of calcium carbonate using Hess’ Law
• The equipment you will need is: one 250 cm3 plastic cup, one 250 cm3 beaker, one thermometer, one 25.0 cm3 pipette, access to a mass balance (minimum 2 dp), access to 2 moldm-3 HCl, access to CaCO3 powder, access to CaO powder
1. Use a pipette to transfer 25 cm3 of 2 moldm-3 HCl into a clean dry plastic cup. 2. Place the plastic cup in a beaker and record the temperature of the acid to the nearest 0.5 oC. 3. Weigh out accurately between 2.50 and 3.00 g of calcium carbonate powder. Record your mass in a suitable
table. 4. Add the calcium carbonate to the acid. Stir the mixture carefully and record the maximum temperature reached
(if the temperature rises) or the minimum temperature reached (if the temperature drops) to the nearest 0.5 oC. 5. Repeat steps 1 – 4, but using 2.50 – 3.00 grams of calcium oxide instead of the calcium carbonate. Experiment 2: Determine the enthalpy change for the following reaction: 2NaHCO3(s) → Na2CO3(s) + CO2(g) + H2O(l)
• The enthalpy change for this decomposition reaction is difficult to measure directly; it is, however, possible to measure the enthalpy change of the following reactions directly: NaHCO3(s) + HCl(aq) → NaCl(aq) + CO2(g) + H2O(l) (Reaction 3) Na2CO3(s) + 2HCl(aq) → 2NaCl(aq) + CO2(g) + H2O(l) (Reaction 4)
• From the measurement of these two enthalpy changes, it is possible to determine the enthalpy change for the decomposition of calcium carbonate using Hess’ Law
• The equipment you will need is: one 250 cm3 plastic cup, one 250 cm3 beaker, one thermometer, one 25.0 cm3 pipette, access to a mass balance (minimum 2 dp), access to 2 moldm-3 HCl, access to NaHCO3 powder, access to anhydrous Na2CO3 powder
6. Repeat steps 1 – 4, but using 2.50 – 3.00 grams of sodium hydrogencarbonate instead of the calcium carbonate. 7. Repeat steps 1 – 4, but using 2.50 – 3.00 grams of anhydrous sodium carbonate instead of the calcium
carbonate.

CHEM 124
32
Experiment 3: Determine the enthalpy change for the following reaction: Na2CO3.10H2O(s) → Na2CO3(s) + 10H2O(l)
• The enthalpy change for this decomposition reaction is difficult to measure directly; it is, however, possible to measure the enthalpy change of the following reactions directly: Na2CO3(s) + 2HCl(aq) → 2NaCl(aq) + CO2(g) + H2O(l) (Reaction 4) Na2CO3.10H2O(s) + 2HCl(aq) → 2NaCl(aq) + CO2(g) + H2O(l) (Reaction 5)
• From the measurement of these two enthalpy changes, it is possible to determine the enthalpy change for the decomposition of calcium carbonate using Hess’ Law
• The equipment you will need is: one 250 cm3 plastic cup, one 250 cm3 beaker, one thermometer, one 25.0 cm3 pipette, access to a mass balance (minimum 2 dp), access to 2 moldm-3 HCl, access to hydrated Na2CO3 powder, access to anhydrous Na2CO3 powder
8. Repeat steps 1 – 4, but using 2.50 – 3.00 grams of hydrated sodium carbonate instead of the calcium carbonate. Experiment 4: Determine the enthalpy change for the following reaction: CuSO4(s).5H2O(l) → CuSO4(s) + 5H2O(l)
• The enthalpy change for this decomposition reaction is difficult to measure directly; it is, however, possible to measure the enthalpy change of the following reactions directly: CuSO4(s) → Cu2+(aq) + SO4
2-(aq) (Reaction 6) CuSO4.5H2O(s) → Cu2+(aq) + SO4
2-(aq) + 5H2O(l) (Reaction 7)
• From the measurement of these two enthalpy changes, it is possible to determine the enthalpy change for the decomposition of calcium carbonate using Hess’ Law
• The equipment you will need is: one 250 cm3 plastic cup, one 250 cm3 beaker, one thermometer, one 50 cm3 measuring cylinder, access to a mass balance (minimum 2 dp), access to hydrated CuSO4 powder, access to anhydrous CuSO4 powder, access to distilled water
9. Weigh a clean dry plastic cup. 10. Using a measuring cylinder, pour approximately 25 cm3 of distilled water into the cup. 11. Weight the cup again with the water in it. 12. Place the plastic cup in a beaker and record the temperature of the acid to the nearest 0.5 oC. 13. Weigh out accurately between 1.00 and 1.50 g of anhydrous copper sulphate powder. Record your mass in a
suitable table. 14. Add the anhydrous copper sulphate to the water. Stir the mixture carefully and record the maximum
temperature reached (if the temperature rises) or the minimum temperature reached (if the temperature drops) to the nearest 0.5 oC.
15. Repeat steps 9 – 14, but using 1.00 – 1.50 grams of hydrated copper sulphate instead of the anhydrous copper
sulphate.

CHEM 124
33
Report
• Your report should include all of your mass readings and temperature readings for all four experiments.
• Your report should include calculations of the enthalpy changes of the following four reactions, with full working shown:
CaCO3(s) → CaO(s) + CO2(g) (Experiment 1) 2NaHCO3(s) → Na2CO3(s) + CO2(g) + H2O(l) (Experiment 2) Na2CO3.10H2O(s) → Na2CO3(s) + 10H2O(l) (Experiment 3) CuSO4(s).5H2O(l) → CuSO4(s) + 5H2O(l) (Experiment 4) You should proceed as follows:
- Use the temperature change and the mass of the solution to calculate the heat transferred during each reaction (assume that the solutions behave as pure water with a density of 1.0 gcm-3 and a specific heat capacity of 4.18 JK-1 g-1)
- For each reaction, calculate the number of moles of each reactant and hence assume which of the reactants is limiting
- Hence calculate the molar enthalpy change for each of reactions 1 – 7 - Derive Hess’ law cycles to show how the molar enthalpy change for the four decomposition reactions above can
be expressed in terms of the molar enthalpy changes for reactions 1 – 7 - Hence calculate the molar enthalpy change for each of the four decomposition reactions
Marks will be awarded as follows:
Process marks
Mass of solid used in each reaction correctly recorded 7
Mass of water used in reactions 6 and 7 correctly recorded 4
Initial and final temperature in each reaction correctly recorded 14
Heat change in each reaction correctly calculated 7
Moles of both reactants in reactions 1 – 5 correctly calculated 10
Limiting reagent correctly identified in reactions 1 – 5 5
Moles of solid used in reactions 6 and 7 correctly calculated 2
Molar enthalpy change of each reaction correctly calculated 7
Hess’ Law cycles correctly deduced for each decomposition reaction 8
Molar enthalpy change of each decomposition reaction correctly calculated 8
TOTAL FOR REPORT 72
Your mark out of 72 will be scaled down to a mark out of 15; additional marks will be awarded as follows:
Achievement marks
Signed in at 9.00 am 1
Signed in at 9.30 am 1
Present at start of practical work, wearing lab coat throughout and wearing suitable footwear 1
Present at start of practical work, wearing eye protection throughout 1
Present at start of practical work, using pipette safely and conducting all work safely and sensibly 1
TOTAL 5
A total of 20 marks is available for this practical.

CHEM 124
34
Week 10 – Kinetics III
Determination of the order of a reaction using a continuous monitoring method Background: continuous monitoring method vs initial rates method
(a) The initial rates method (rate-concentration graphs)
• The initial rates method involves carrying out the same reaction multiple times, using different initial concentrations of the reactants, and measuring the initial rate of reaction in each case; the order of reaction can be deduced from the shape of a graph of initial rate against initial concentration:
(b) The continuous monitoring method (concentration-time graphs)
• The continuous monitoring method involves monitoring the concentration of a single reactant over time in a single reaction; it can only be used when only one reactant’s concentration is changing; the order of reaction can be deduced from the concentration-time graph:
Introduction
• Iodine reacts with propanone in the presence of an acid catalyst as follows: I2(aq) + CH3COCH3(aq) → CH3COCH3I(aq) + HI(aq)
• The quantity of iodine remaining in the reaction mixture can be monitored over time by removing small samples of the reaction mixture, “quenching” the reaction by adding a small quantity of NaHCO3 to remove the acid catalyst, and titrating the sample against Na2S2O3; the Na2S2O3 reacts with the iodine as follows: I2(aq) + 2S2O3
2-
(aq) → S4O62-(aq) + 2I-(aq)
how t he r a t e of a r e a c t i on v e r i e s wi t h
c onc e nt r a t i on - f i r st or de r r e a c t i on
c o n c e n t r a t i o n
how t he r a t e of a r e a c t i on v e r i e s wi t h
c onc e nt r a t i on - se c ond or de r r e a c t i on
c o n c e n t r a t i o n
how t he r a t e of a r e a c t i on v e r i e s wi t h
c onc e nt r a t i on - z e r o or de r r e a c t i on
c o n c e n t r a t i o n

CHEM 124
35
• From this titration, the moles of iodine in the sample, and hence the molarity of iodine in the main reaction mixture, can be deduced; if the sampling is repeated at various time intervals, it is possible to monitor how the concentration of iodine varies over time during the reaction
• If the reacting quantities are set to ensure that the propanone is in large excess, it can be assumed that the concentration of propanone does not change during this reaction, and therefore that iodine is the only reactant whose concentration changes during the reaction; a graph of iodine concentration against time can therefore be plotted and used to determine the initial rate of the reaction and the order of reaction with respect to iodine (continuous monitoring method)
• The experiment can then be repeated using different initial concentrations of propanone; in each case the variation of iodine concentration with time can be plotted; a graph of initial rate against initial propanone concentration can be plotted and used to determine the order of reaction with respect to propanone (initial rate method); alternatively, the ratio of initial rates can be compared to the ratio of initial concentrations
Equipment List: one 50 cm3 burette, one funnel, one 250 cm3 conical flask, two 25 cm3 measuring cylinders, one 25.0 cm-3 pipette, one 10 cm3 pipette, one pipette filler, one stopwatch Chemicals List: access to 1.0 moldm-3 H2SO4 (min) , 1.0 moldm-3 CH3COCH3 (min), 0.02 moldm-3 I2 (min), 0.005 moldm-3 Na2S2O3 (min), 0.50 moldm NaHCO3 (min) 1 cm3 starch solution with dropping pipette Procedure - Experiment 1:
1. Prepare a burette for first use with 0.0050 moldm-3 sodium thiosulphate solution.
2. Using a measuring cylinder, pour 25 cm3 of 1.0 moldm-3 sulphuric acid into a conical flask. Measure the quantity of acid as accurately as possible. Label this flask A.
3. Using the same measuring cylinder, measure out 20 cm3 of 1.0 moldm-3 propanone. Add 5 cm3 of water (so that the total volume is 25 cm3) and pour the mixture into flask A. Measure the quantity of propanone as accurately as possible.
4. Using a 25 cm3 pipette, transfer 50.0 cm3 of 0.020 moldm-3 I2 into a 100 cm3 beaker.
5. Pour the iodine into the conical flask containing the sulphuric acid and the propanone. Start the timer as soon as you do this.
6. Measure out 25 cm3 of 0.5 moldm-3 NaHCO3 using a second measuring cylinder.
7. After the reaction has been going for four minutes, pipette 10 cm3 of the reaction mixture into a new conical flask, labelled flask B. Allow the rest of the reaction mixture in flask A to continue reacting.
8. Add the NaHCO3 from the measuring cylinder to flask B, noting the exact time at which you did so. Do not stop the timer.
9. Titrate the quenched sample of the reaction mixture (flask B) against the sodium thiosulphate. When the mixture is pale yellow, add 1 cm3 of starch solution (a blue colour will appear) using the dropping pipette provided and then continue the titration drop by drop until the blue colour disappears. Record your titre volume.

CHEM 124
36
10. Rinse out flask B with distilled water.
11. Repeat steps 6 – 9 until a total of five samples have been withdrawn, taking care to ensure that the samples are quenched at approximately five-minute intervals (the fifth and final sample should therefore be quenched approximately 25 minutes after the start of the reaction).
12. Once you have quenched five samples, you may stop the timer, discard the remaining contents of flask A and rinse it with distilled water.
13. Record your results in a table similar to the one below:
Time between start of reaction and sample quenching (s)
Final volume of Na2S2O3 (cm3)
Initial volume of Na2S2O3 (cm3)
Volume of Na2S2O3 required (cm3)
Procedure - Experiment 2:
14. Repeat steps 2 – 13 above, but this time during step 3, use 10 cm3 of 1.0 moldm-3 propanone and 15 cm3 of
water (so that the total volume is still 25 cm3) instead of 20 cm3 of propanone and 5 cm3 of water.
Report:
• Your report should include two tables, showing the times and titre volumes for each experiment (10 marks))
• The titre volume of Na2S2O3 can be used to determine the iodine concentration at the time when the sample was quenched: [I2] = titre volume x 2.5 x 10⁻⁴; use this ratio to calculate the iodine concentration at each quenching time (4 marks)
• Hence plot two graphs, on the same axes, showing how [I2] changes with time; include [I2] at t = 0, which is 0.01 moldm-3 (10 marks)
• From the shape of your graphs, deduce the order of reaction with respect to iodine (4 marks)
• Calculate the initial rate of reaction in both experiments (this is the initial gradient of the concentration-time graph) and hence deduce the order of reaction with respect to propanone (4 marks)