Embed Size (px)
Citation preview
DM# 65225v3 Copyright 2013 by Hitachi Medical Systems America, Inc. All rights reserved.
MRCP
14-1
Chapter 14
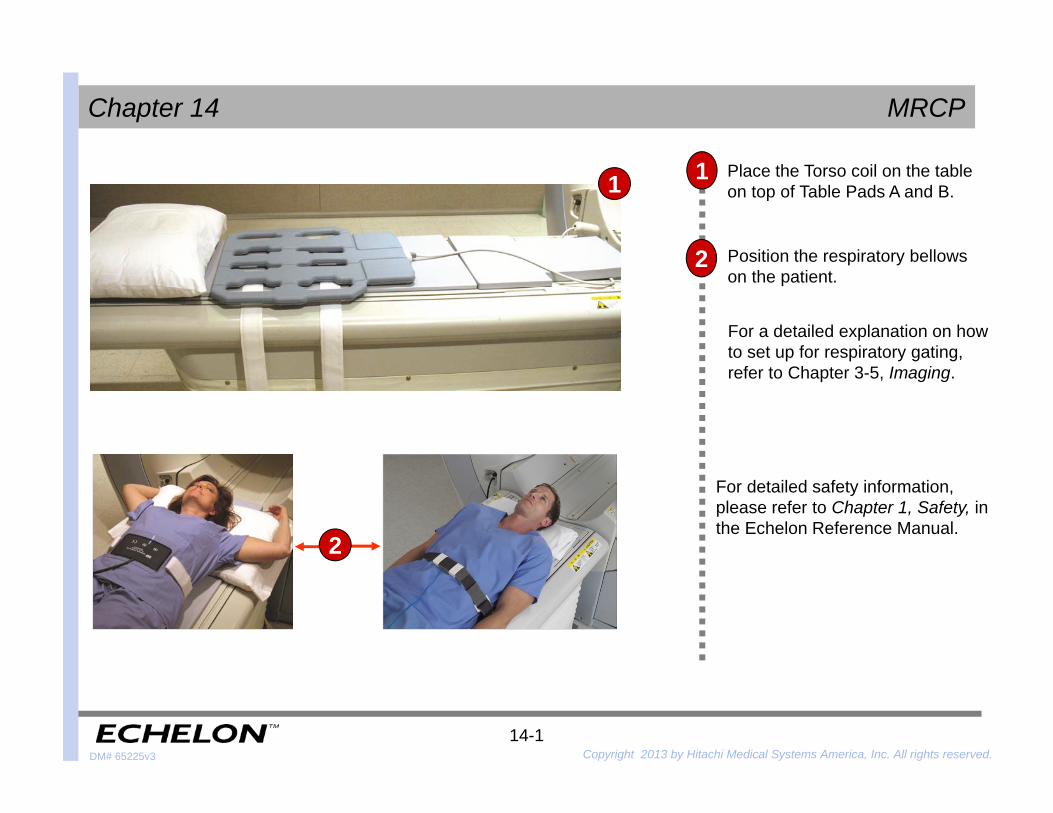
Position the respiratory bellows on the patient.
For detailed safety information, please refer to Chapter 1, Safety, in the Echelon Reference Manual.
For a detailed explanation on how to set up for respiratory gating, refer to Chapter 3-5, Imaging.
Place the Torso coil on the table on top of Table Pads A and B.
1
2
1
2
DM# 65225v3 Copyright 2013 by Hitachi Medical Systems America, Inc. All rights reserved.
MRCP
14-2
Chapter 14
3
5
4
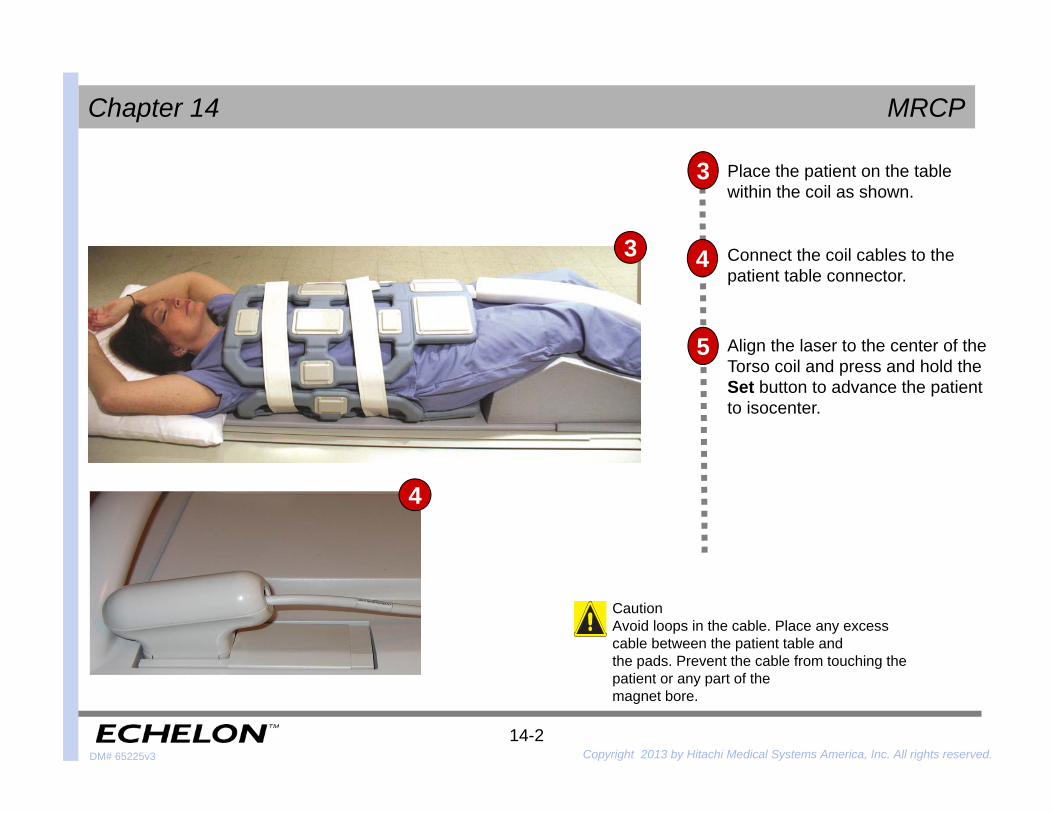
CautionAvoid loops in the cable. Place any excess cable between the patient table andthe pads. Prevent the cable from touching the patient or any part of themagnet bore.
Align the laser to the center of the Torso coil and press and hold the Set button to advance the patient to isocenter.
Place the patient on the table within the coil as shown.
3 Connect the coil cables to the patient table connector.
4
DM# 65225v3 Copyright 2013 by Hitachi Medical Systems America, Inc. All rights reserved.
MRCP
14-3
Chapter 14
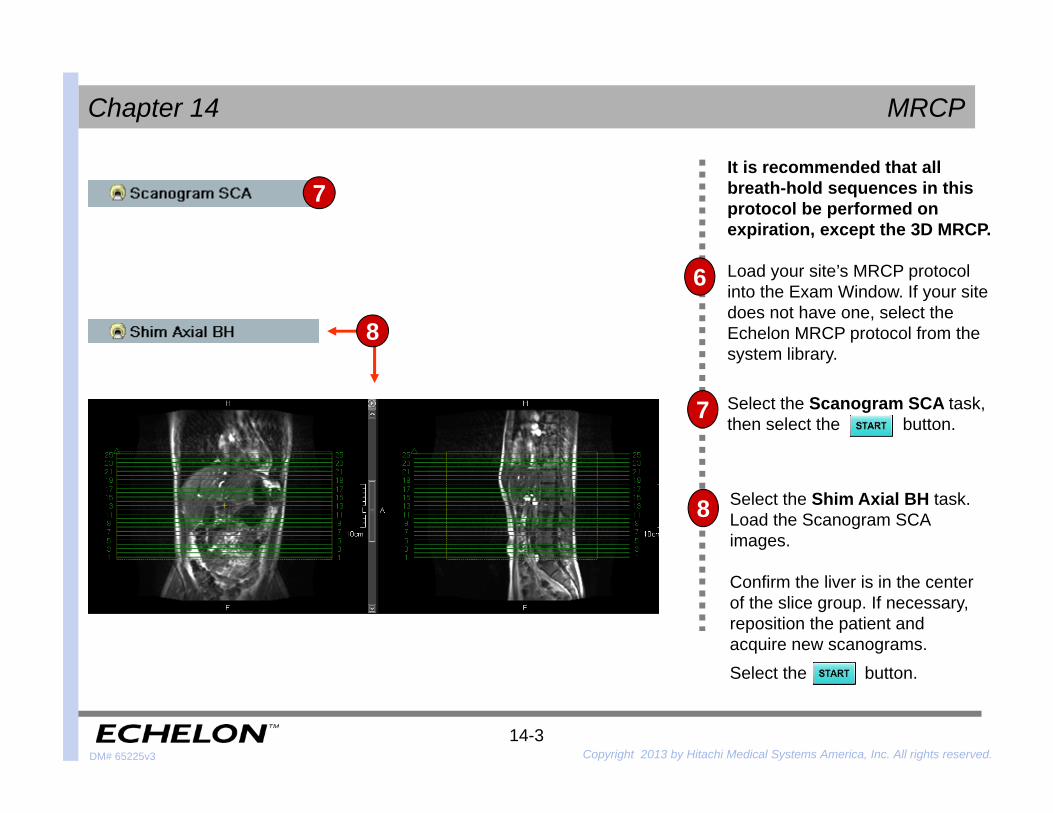
Load your site’s MRCP protocol into the Exam Window. If your site does not have one, select the Echelon MRCP protocol from the system library.
Select the Shim Axial BH task. Load the Scanogram SCA images.
Confirm the liver is in the center of the slice group. If necessary, reposition the patient and acquire new scanograms.Select the button.
6
Select the Scanogram SCA task, then select the button.
7
8
It is recommended that all breath-hold sequences in this protocol be performed on expiration, except the 3D MRCP.
8
7
DM# 65225v3 Copyright 2013 by Hitachi Medical Systems America, Inc. All rights reserved.
MRCP
14-4
Chapter 14
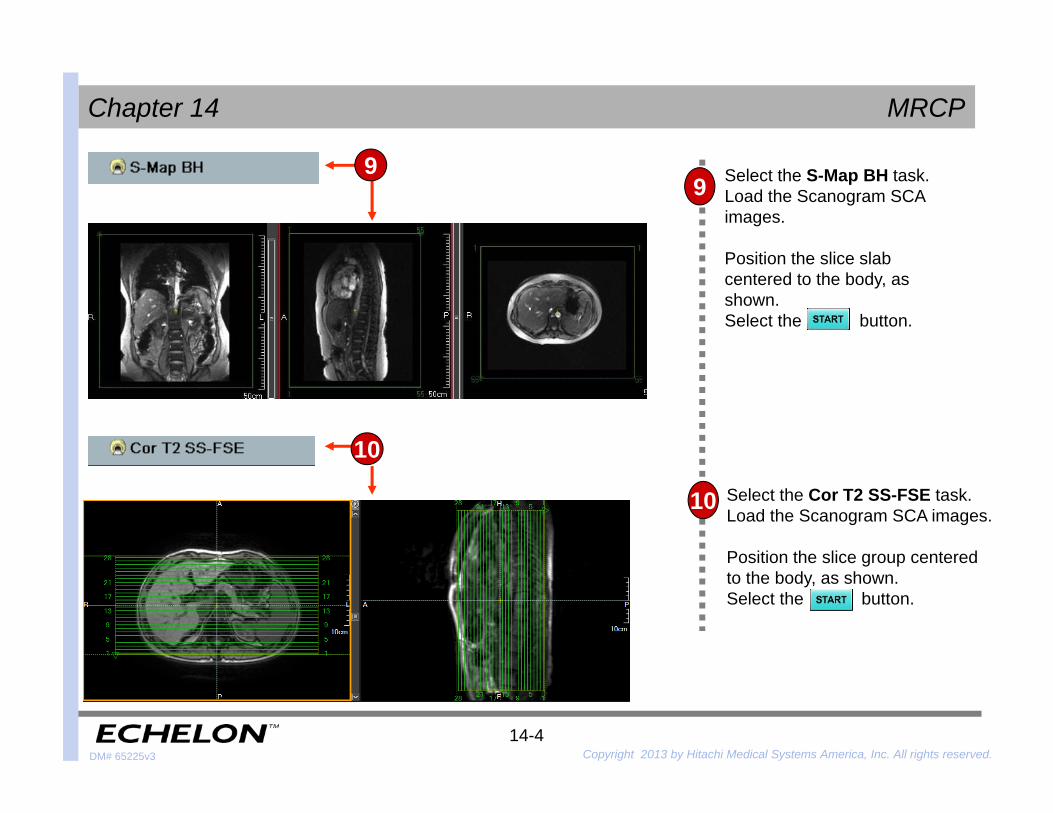
Select the S-Map BH task.Load the Scanogram SCA images.
Position the slice slab centered to the body, as shown.Select the button.
9
10 Select the Cor T2 SS-FSE task. Load the Scanogram SCA images.
Position the slice group centered to the body, as shown.Select the button.
9
10
DM# 65225v3 Copyright 2013 by Hitachi Medical Systems America, Inc. All rights reserved.
MRCP
14-5
Chapter 14
11
12
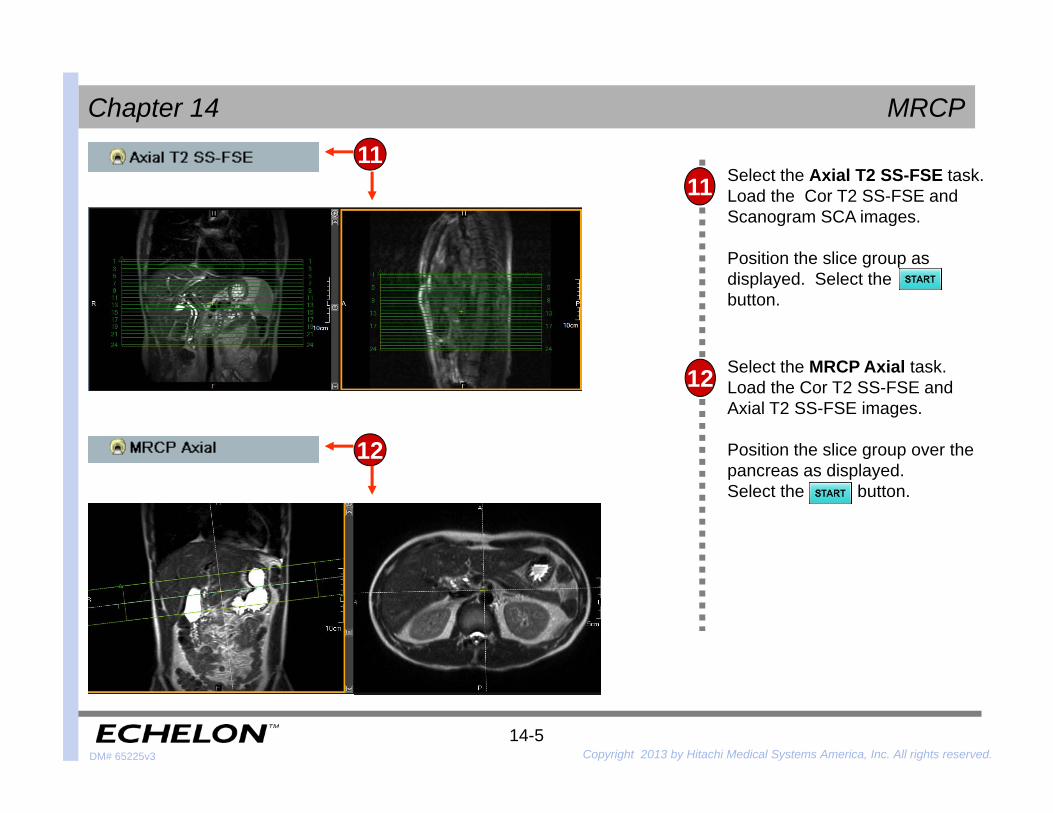
Select the Axial T2 SS-FSE task. Load the Cor T2 SS-FSE and Scanogram SCA images.
Position the slice group as displayed. Select the button.
11
12
Select the MRCP Axial task.Load the Cor T2 SS-FSE and Axial T2 SS-FSE images.
Position the slice group over the pancreas as displayed. Select the button.
DM# 65225v3 Copyright 2013 by Hitachi Medical Systems America, Inc. All rights reserved.
MRCP
14-6
Chapter 14
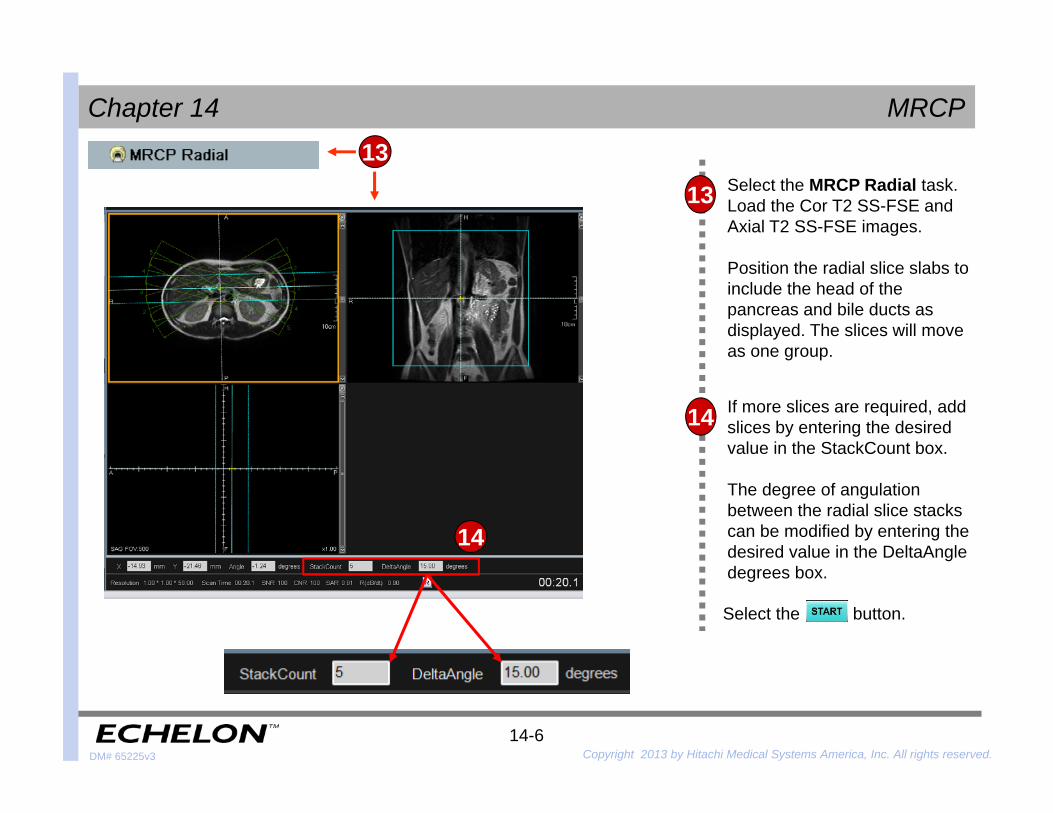
14 If more slices are required, add slices by entering the desired value in the StackCount box.
The degree of angulation between the radial slice stacks can be modified by entering the desired value in the DeltaAngle degrees box.
Select the button.
Select the MRCP Radial task. Load the Cor T2 SS-FSE andAxial T2 SS-FSE images.
Position the radial slice slabs to include the head of the pancreas and bile ducts as displayed. The slices will move as one group.
13
13
14
DM# 65225v3 Copyright 2013 by Hitachi Medical Systems America, Inc. All rights reserved.
MRCP
14-7
Chapter 14
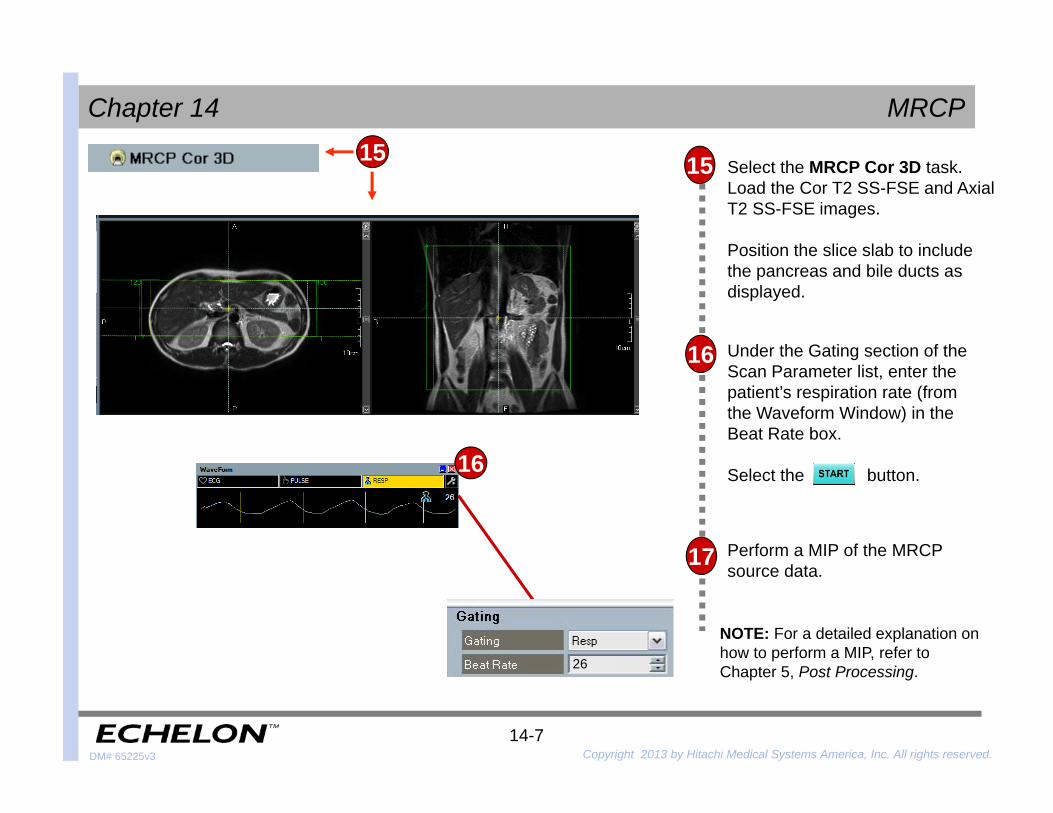
15 Select the MRCP Cor 3D task. Load the Cor T2 SS-FSE and Axial T2 SS-FSE images.
Position the slice slab to include the pancreas and bile ducts as displayed.
16
17
15
Under the Gating section of the Scan Parameter list, enter the patient’s respiration rate (from the Waveform Window) in the Beat Rate box.
Select the button.
Perform a MIP of the MRCP source data.
NOTE: For a detailed explanation on how to perform a MIP, refer to Chapter 5, Post Processing. 26
16
DM# 65225v3 Copyright 2013 by Hitachi Medical Systems America, Inc. All rights reserved.
MRCP
14-8
Chapter 14
This page intentionally left blank.