Embed Size (px)
Citation preview
ACP ThinManager 6.0 233 Display Servers
12 Display Servers
Display Servers are devices that provide content that can be displayed on the client. Examples include the traditional terminal server and IP cameras.
The Terminal Server List Wizard allows configuration of Terminal Services Display Servers. The Camera Configuration Wizard allows configuration of Camera Display Servers
12.1 Terminal Services Display Servers The Terminal Server List Wizard can be launched by:
Right clicking on the Display Servers Terminal Servers branch and choosing the Add Terminal Server command
Right clicking on the Display Servers Terminal Servers branch and choosing the Edit Terminal Server command.
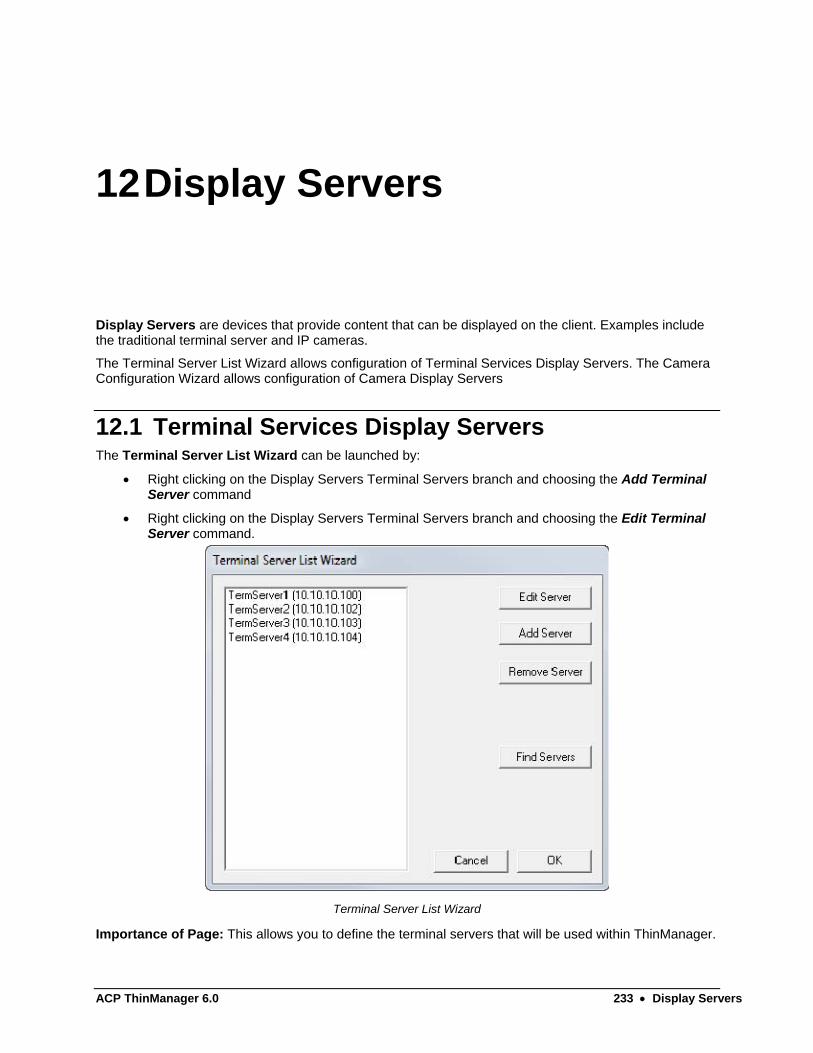
Terminal Server List Wizard
Importance of Page: This allows you to define the terminal servers that will be used within ThinManager.
234 Display Servers ACP ThinManager 6.0
Fields:
{Unnamed) – The list box will contain the names and IP addresses of defined terminal servers.
Buttons:
Edit Server – This will open the properties for a highlighted terminal server in the list.
Add Server - This will launch the Terminal Server Configuration Wizard to allow a new terminal server to be defined.. See
Remove Server – This will remove a highlighted terminal server from the list.
Find Servers - This will launch the Available Terminal Servers window for automated terminal server addition.
Cancel - This will close the wizard without action.
OK – This will close the wizard after accepting changes.
Why Change from Default Settings: The terminals require terminal servers to connect and run sessions on.
12.1.1.1 Available Terminal Servers Search
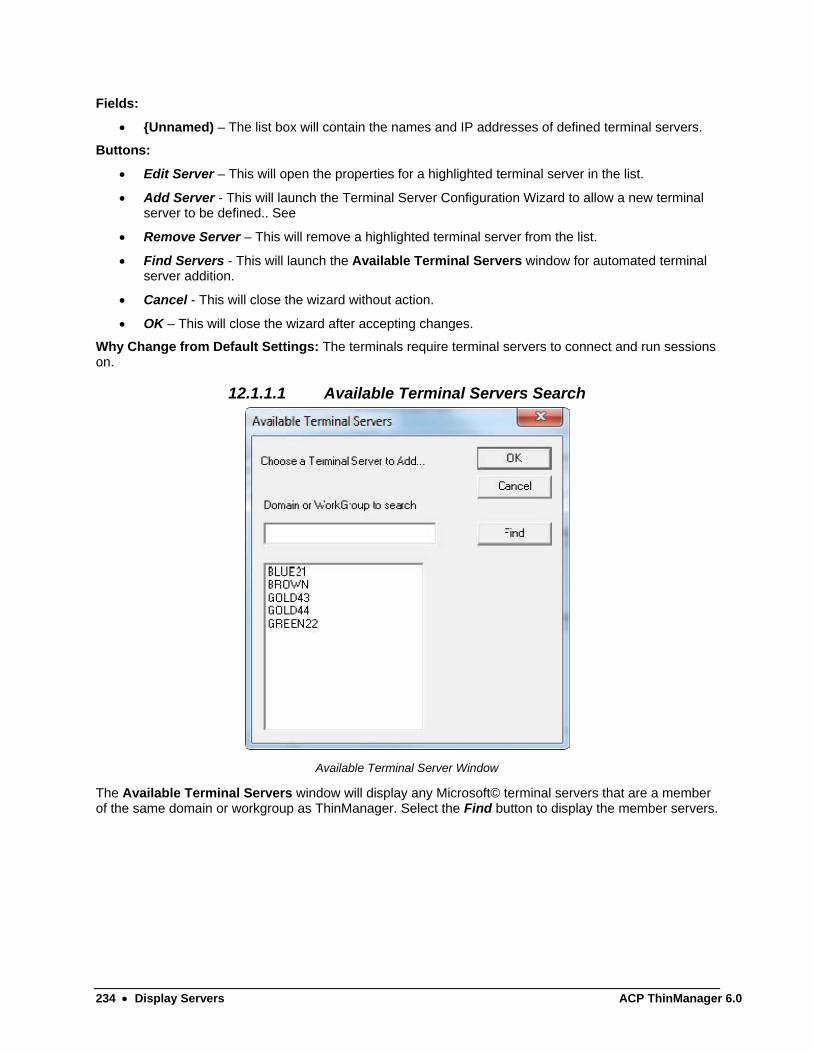
Available Terminal Server Window
The Available Terminal Servers window will display any Microsoft© terminal servers that are a member of the same domain or workgroup as ThinManager. Select the Find button to display the member servers.
ACP ThinManager 6.0 Display Servers 235
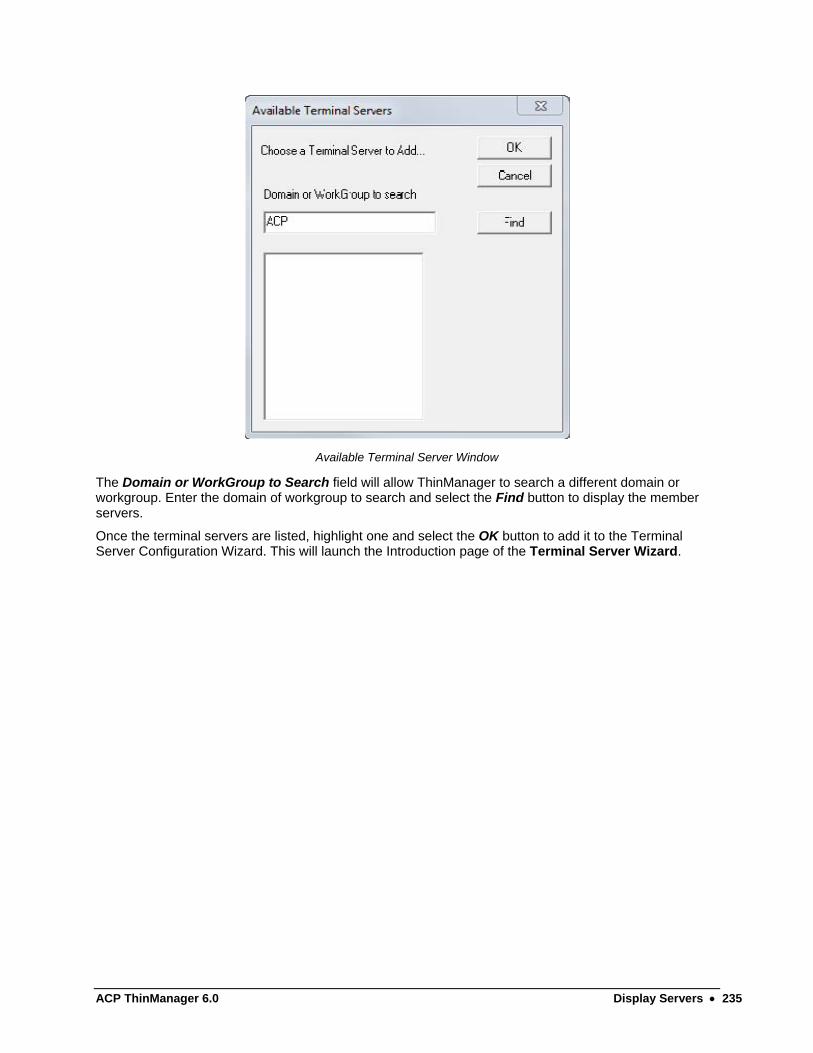
Available Terminal Server Window
The Domain or WorkGroup to Search field will allow ThinManager to search a different domain or workgroup. Enter the domain of workgroup to search and select the Find button to display the member servers.
Once the terminal servers are listed, highlight one and select the OK button to add it to the Terminal Server Configuration Wizard. This will launch the Introduction page of the Terminal Server Wizard.
236 Display Servers ACP ThinManager 6.0
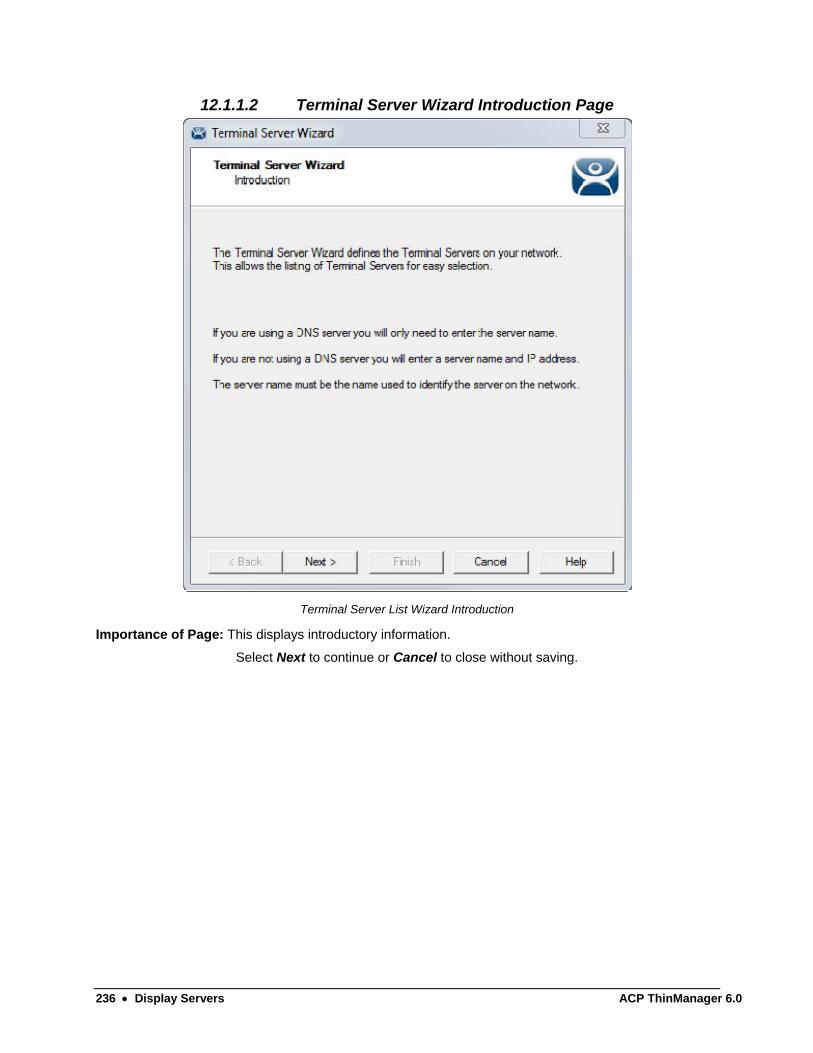
12.1.1.2 Terminal Server Wizard Introduction Page
Terminal Server List Wizard Introduction
Importance of Page: This displays introductory information.
Select Next to continue or Cancel to close without saving.
ACP ThinManager 6.0 Display Servers 237
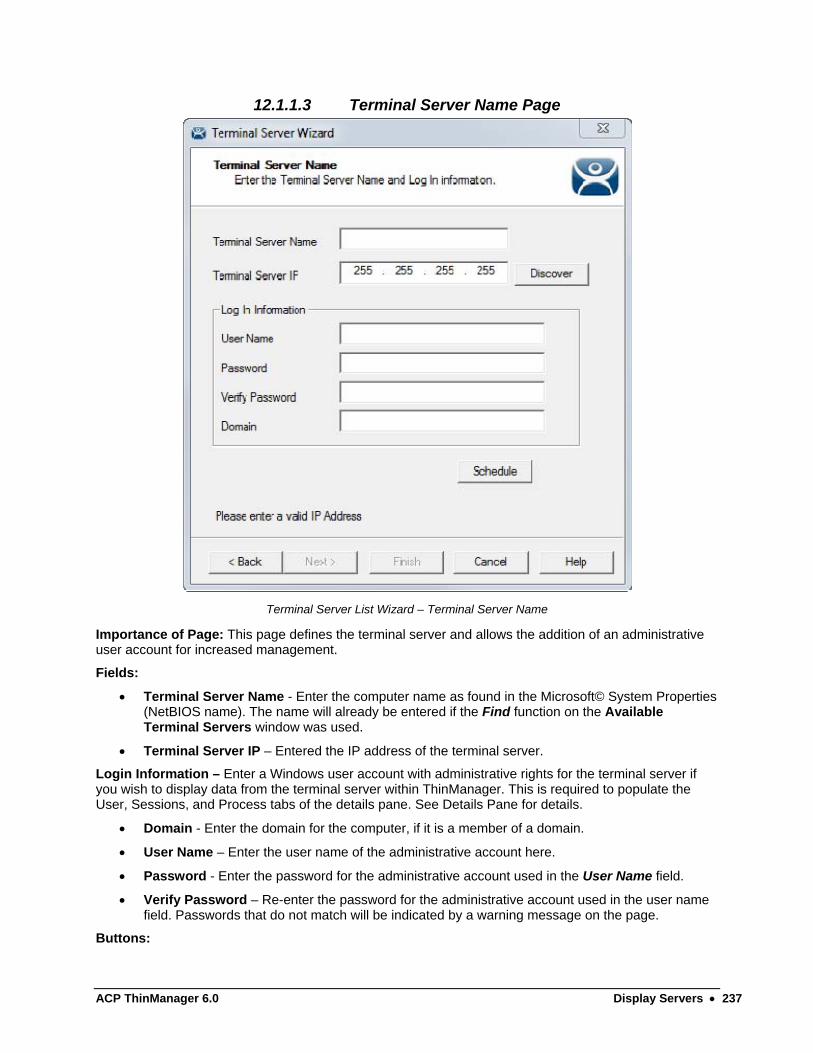
12.1.1.3 Terminal Server Name Page
Terminal Server List Wizard – Terminal Server Name
Importance of Page: This page defines the terminal server and allows the addition of an administrative user account for increased management.
Fields:
Terminal Server Name - Enter the computer name as found in the Microsoft© System Properties (NetBIOS name). The name will already be entered if the Find function on the Available Terminal Servers window was used.
Terminal Server IP – Entered the IP address of the terminal server.
Login Information – Enter a Windows user account with administrative rights for the terminal server if you wish to display data from the terminal server within ThinManager. This is required to populate the User, Sessions, and Process tabs of the details pane. See Details Pane for details.
Domain - Enter the domain for the computer, if it is a member of a domain.
User Name – Enter the user name of the administrative account here.
Password - Enter the password for the administrative account used in the User Name field.
Verify Password – Re-enter the password for the administrative account used in the user name field. Passwords that do not match will be indicated by a warning message on the page.
Buttons:
238 Display Servers ACP ThinManager 6.0
Discover – The Discover button will automatically fill in the IP address for a terminal server listed in the Terminal Server Name field.
Schedule – The Schedule button will launch the Event Schedule for the terminal server. This allows the scheduling of repeated functions like rebooting and disabling. See Scheduling for details.
Why Change from Default Settings: ThinManager uses a connection to the terminal server to pull the process, user, and session information for the detail pane tabs and to determine the load for SmartSession load balancing. Entering a username and password in the User Name and Password fields allows ThinServer to connect to the server for this data.
Select Next to continue, Finish to save and close, or Cancel to close without saving.
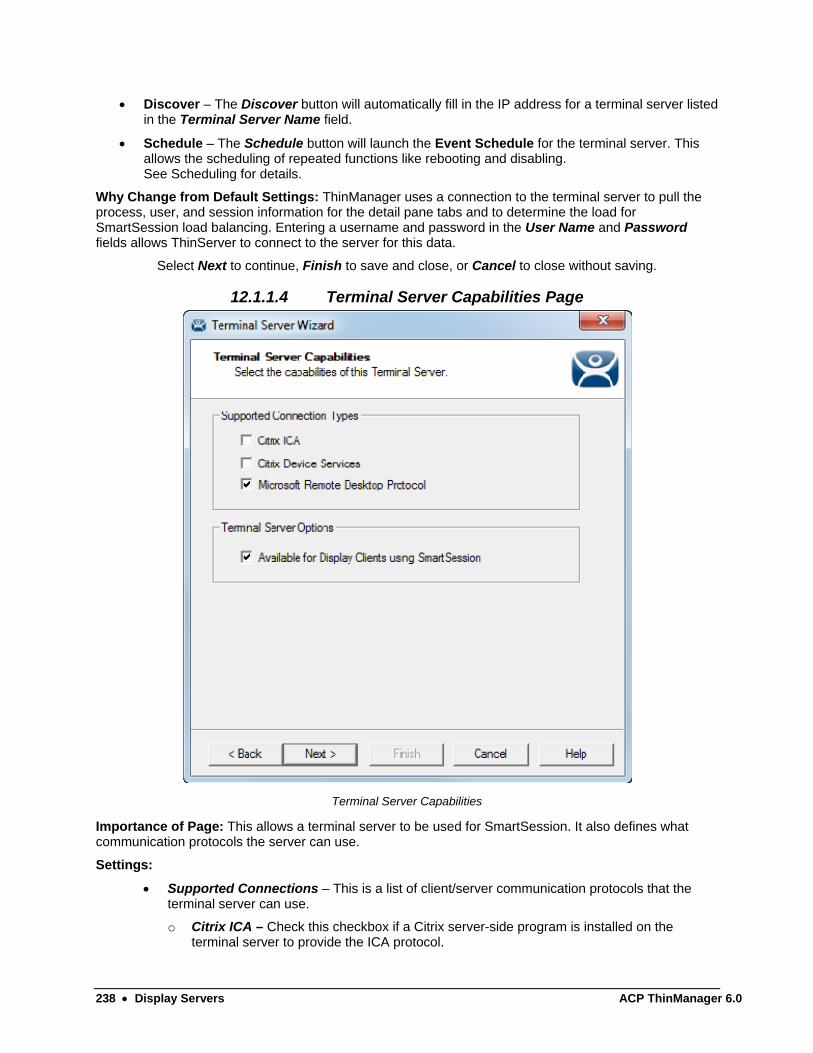
12.1.1.4 Terminal Server Capabilities Page
Terminal Server Capabilities
Importance of Page: This allows a terminal server to be used for SmartSession. It also defines what communication protocols the server can use.
Settings:
Supported Connections – This is a list of client/server communication protocols that the terminal server can use.
o Citrix ICA – Check this checkbox if a Citrix server-side program is installed on the terminal server to provide the ICA protocol.
ACP ThinManager 6.0 Display Servers 239
o Citrix Device Services - Check this checkbox if Citrix Device Services is installed and licensed on the terminal server. Citrix Device Services is a legacy deployment of the ICA client but is no longer supported by Citrix. Thin clients can still connect to terminal servers with Device Services, but no new Device Services terminal servers can be licensed.
o Microsoft Remote Desktop Protocol - RDP is installed by default on Windows Terminal Servers. Uncheck the Microsoft Remote Desktop Protocol checkbox if you don’t want to access to the terminal server with the protocol.
Available for Smart Session Server – This checkbox makes the terminal server available for Application Groups that use SmartSession to provide load balancing. See Display Client SmartSession Settings Page for more details.
Why Change from Default Settings: Add SmartSession if you want to use SmartSession. Add Citrix ICA if that is being used.
Note: Configuring a terminal server to use SmartSession uses a SmartSession license.
Select Next to continue, Finish to save and close, or Cancel to close without saving.
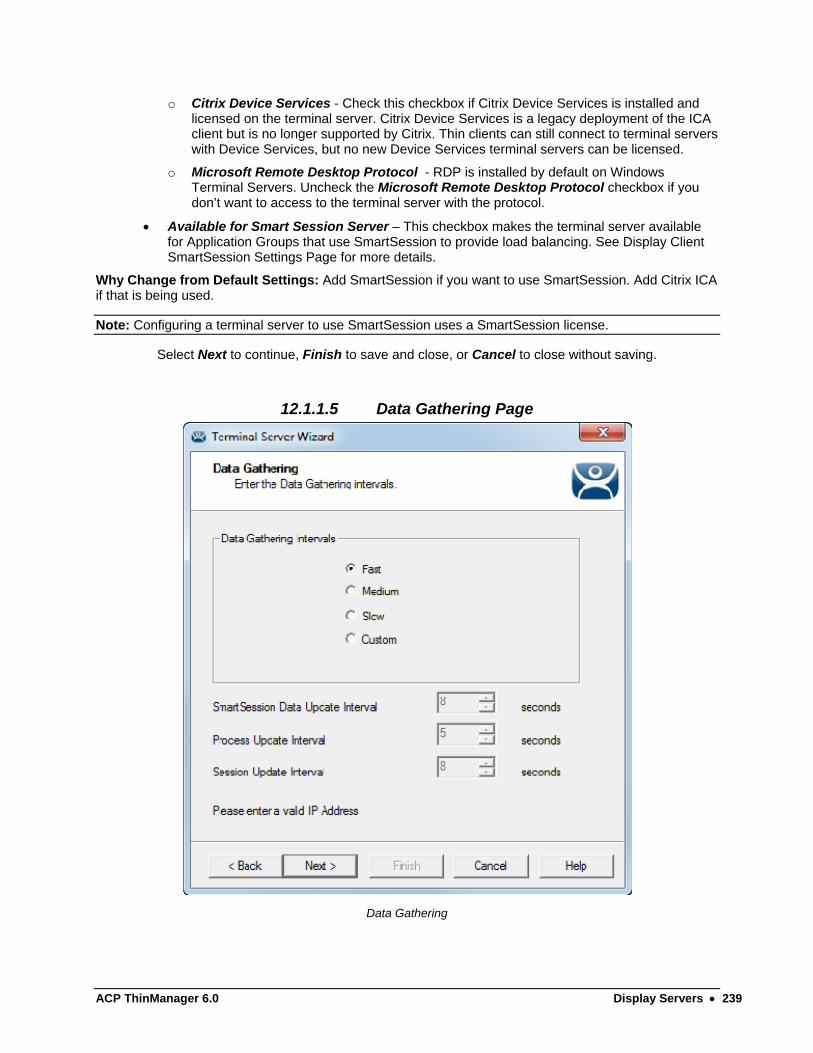
12.1.1.5 Data Gathering Page
Data Gathering

240 Display Servers ACP ThinManager 6.0
Importance of Page: This page sets the frequency that ThinManager polls the terminal servers for user, session, and process information.
Settings:
Data Gathering Intervals (Fast/Medium/Slow) - These settings set the rate of the frequency that ThinManager polls the terminal server for data.
Data Gathering Intervals (Custom) - This setting allows the polling speeds to be set.
o Smart Session Data Update Interval is the amount of time between the retrieval of SmartSession data, CPU usage, memory usage, and session count, from the terminal server. This setting affects the update speed of the Server Rankings used in SmartSession load balancing.
o Process Update Interval is the amount of time between the retrieval of the process information on the terminal server. This setting affects the speed of the update of the process information on the Processes tab for the terminal server.
o Session Update Interval is the amount of time between the retrieval of session data from the terminal server. This setting affects the speed of the update of the user information for the sessions on the Users and Sessions tabs for the terminal server.
Why Change from Default Settings: Faster rates will lead to quicker updates but will add more network traffic. Slowing down the rate will cause less traffic but will slow the update rate a little.
Select Next to continue, Finish to save and close, or Cancel to close without saving.
If this terminal server is used as a SmartSession server, the Next button will go to a SmartSession Configuration page. If this terminal server is not configured as a SmartSession server, the Next button will be grayed out and the Finish button will close the wizard.

ACP ThinManager 6.0 Display Servers 241
12.1.1.6 SmartSession Configuration Page
Terminal Server List Wizard - SmartSession Configuration
Importance of Page: This allows SmartSession data to be tweaked.
ThinManager uses the CPU utilization, Memory utilization, and number of sessions on the terminal server to define the SmartSession terminal server’s available resources. ThinManager uses these resource values to rank the load of the SmartSession servers. ThinManager supplies this load data to the terminals to allow the terminals to connect to the terminal server with the lightest load and greatest available resources.
The SmartSession Configuration page allows the configuration of the three parameters that ThinManager uses to determine availability for SmartSession. ThinManager will scale the range between the Minimum field and Maximum field as 100%.
Settings - The three values used in SmartSession are:
CPU Utilization – The percentage of CPU usage on the terminal server.
Memory Utilization - The percentage of CPU usage on the terminal server.
Sessions – The number of sessions on a terminal server.
Fields:
Minimum – the value that ThinManager will use as the starting point of the load. A value below the Minimum is considered to be unused.
242 Display Servers ACP ThinManager 6.0
Maximum – the value that ThinManager will consider the parameter as reaching 100% utilized and is unavailable.
Why Change from Default Settings: Changing the Minimum and Maximum values will change the range used to calculate SmartSession loads and can influence SmartSession behavior.
Select Finish to save and close or Cancel to close without saving.
12.2 Camera Configuration Wizard The Camera Configuration Wizard allows an IP Camera to be configured as a Display Server within ThinManager.
Launch the Camera Configuration Wizard by right clicking on Cameras in the Display Servers branch and selecting Add Camera.
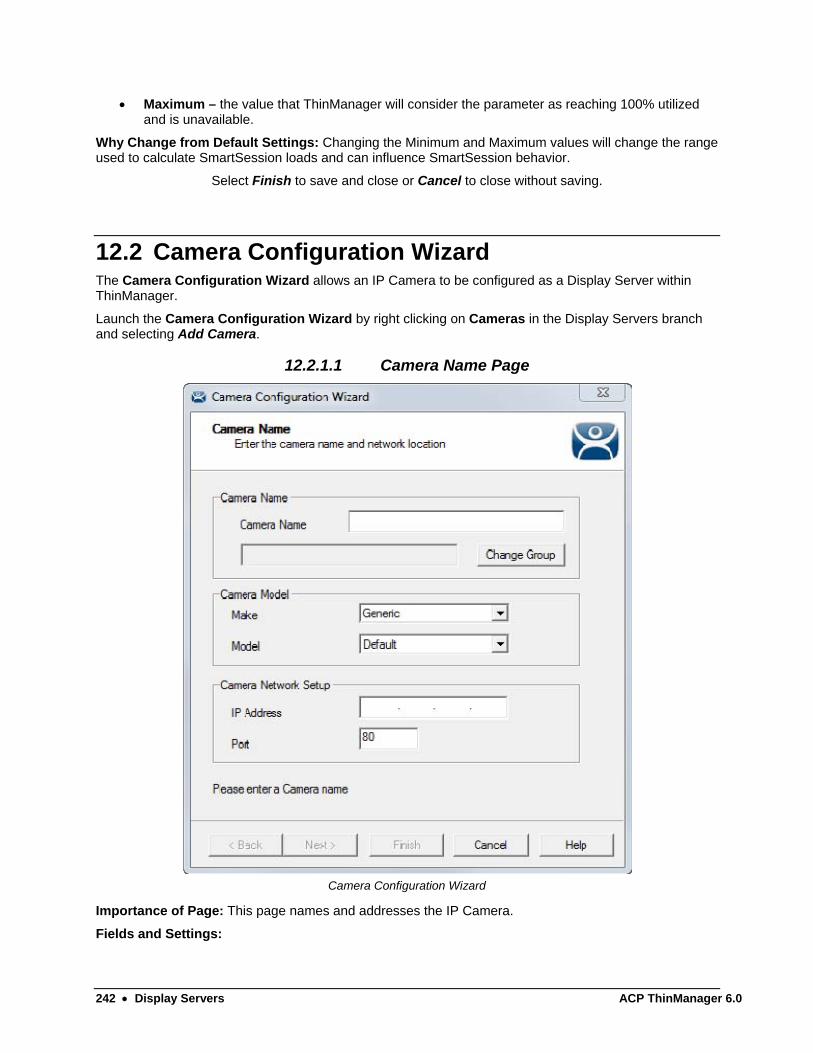
12.2.1.1 Camera Name Page
Camera Configuration Wizard
Importance of Page: This page names and addresses the IP Camera.
Fields and Settings:
ACP ThinManager 6.0 Display Servers 243
Camera Name and Group
o Camera Name – Enter a name for the camera.
o Change Group – This button allows the camera to be added to a Camera Group.
Camera Model
o Make – Use the drop-down to select a manufacturer.
o Model – Use the drop-down to select a model.
Camera Network Setup
o IP Address – Enter the IP address of the IP camera.
o Port – Enter the port used.
Why Change from Default Settings: Each camera needs to be defined.
The first page of the camera configuration wizard requires that a camera name be entered. Select the make and model of the camera you are configuring and the IP address and Port that has been previously assigned to the camera. The IP address and port are set by using the camera manufacturers configuration software or through the use of the camera’s web browser interface.
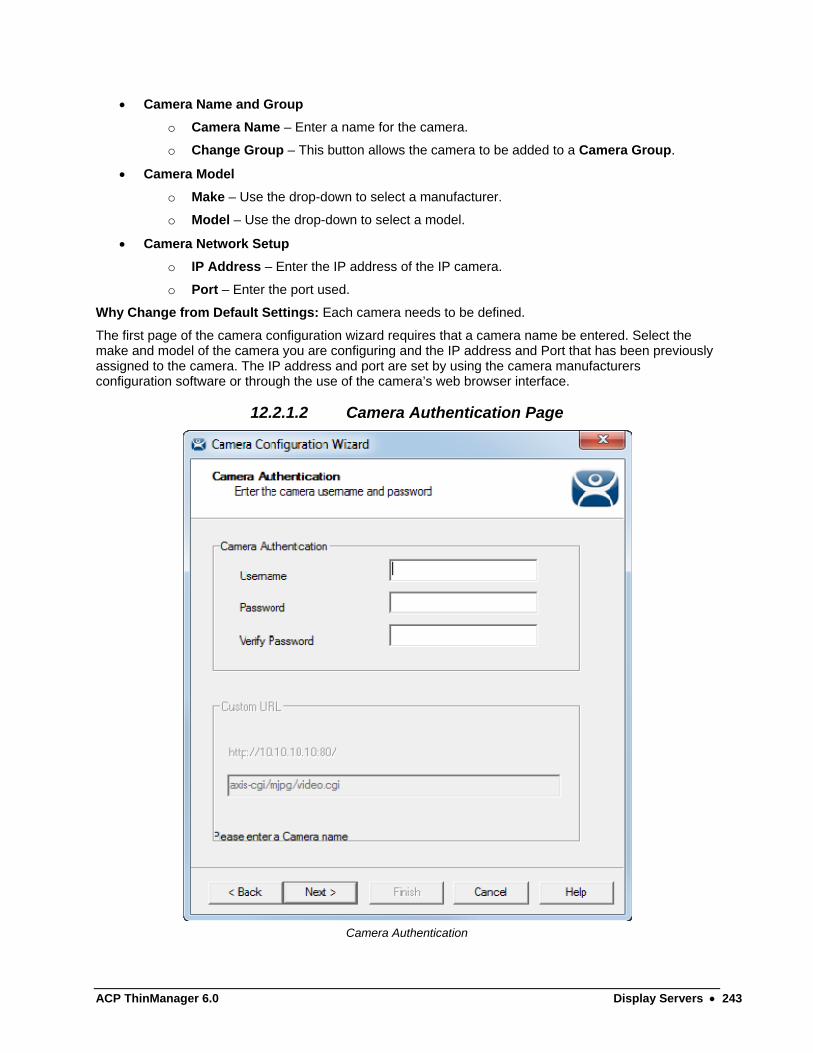
12.2.1.2 Camera Authentication Page
Camera Authentication
244 Display Servers ACP ThinManager 6.0
Importance of Page: This page provides authentication, if needed.
Fields:
Username – Enter a username, if needed.
Password – Enter a password, if needed
Verify Password – Re-enter the password for accuracy.
Why Change from Default Settings: If your camera requires authentication enter it on this page. If the camera has been configured to allow anonymous connections, leave the information blank.
The terminal uses the authentication information when connecting to the camera. Authentication information is setup in the camera by using the camera manufacturers configuration software or through the use of the camera’s web browser interface.
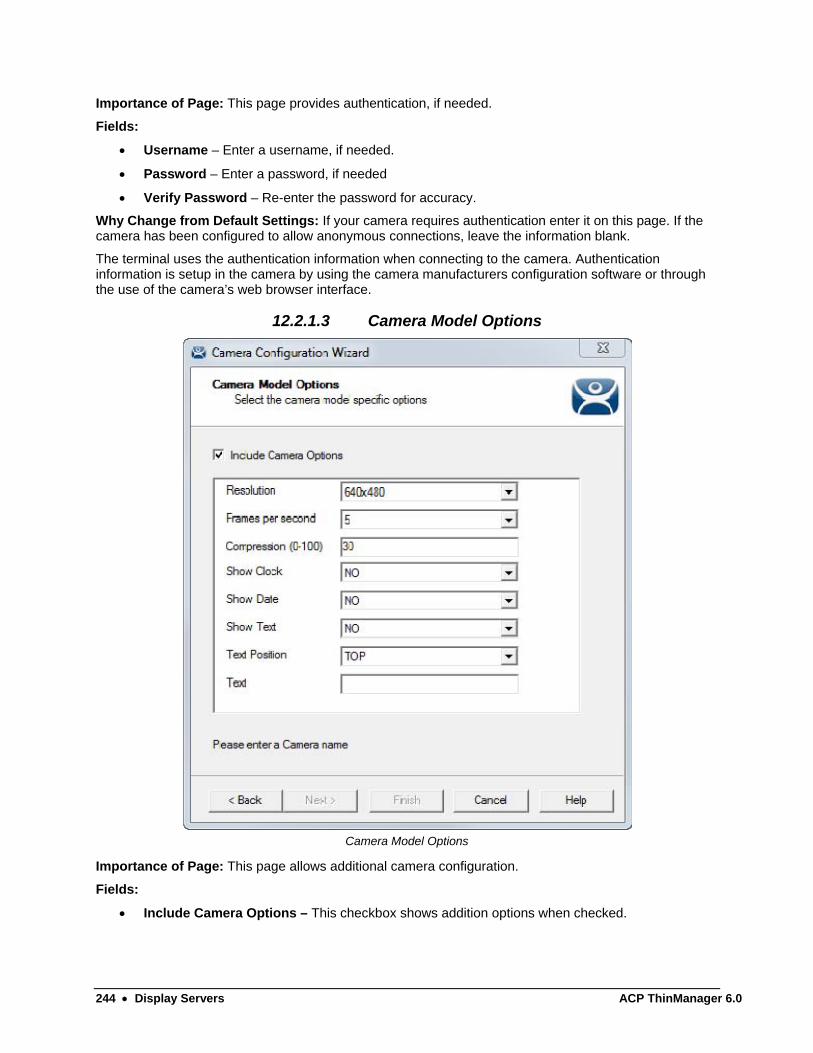
12.2.1.3 Camera Model Options
Camera Model Options
Importance of Page: This page allows additional camera configuration.
Fields:
Include Camera Options – This checkbox shows addition options when checked.

ACP ThinManager 6.0 Display Servers 245
Options – The options shown vary by make and model of the camera hardware. Please see camera documentation for their help.
Why Change from Default Settings: The camera can be controlled in finer deta
Some cameras support additional configuration options. These options can be configured on this page. If you wish to use the default options then leave the Include Camera Options unchecked. The newly created camera will appear in the ThinManager tree as follows.
Camera Tree View
246 Display Servers ACP ThinManager 6.0
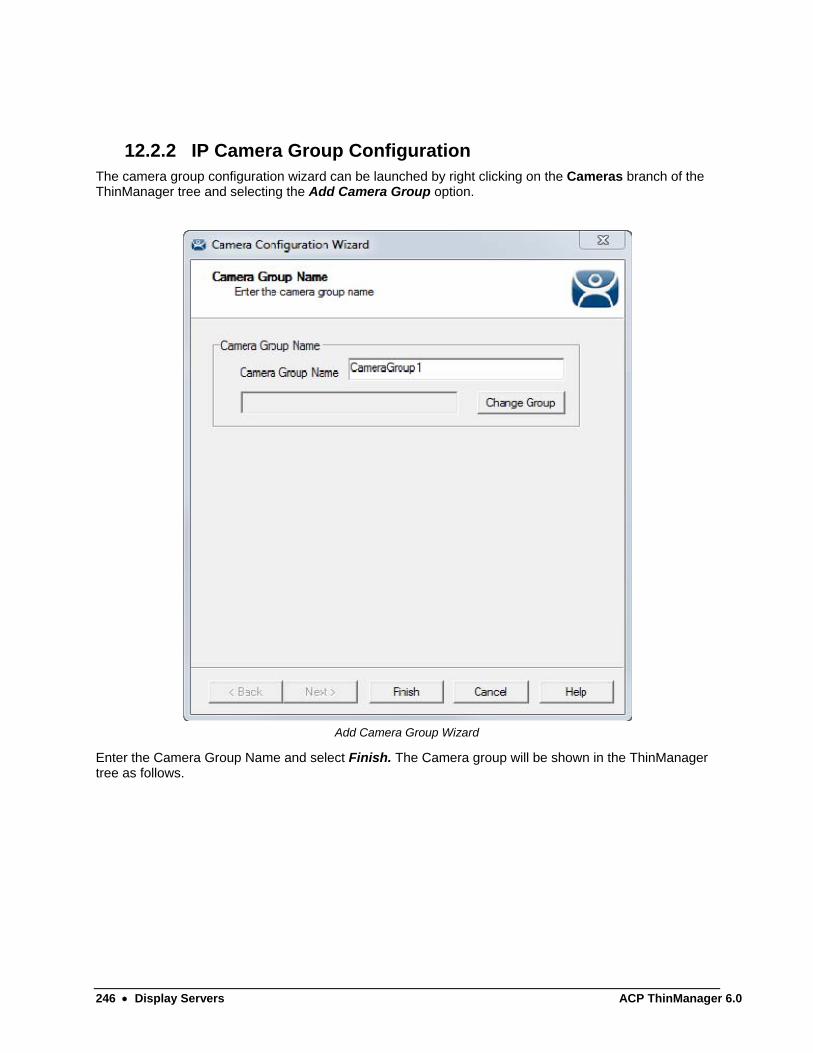
12.2.2 IP Camera Group Configuration The camera group configuration wizard can be launched by right clicking on the Cameras branch of the ThinManager tree and selecting the Add Camera Group option.
Add Camera Group Wizard
Enter the Camera Group Name and select Finish. The Camera group will be shown in the ThinManager tree as follows.

ACP ThinManager 6.0 Display Servers 247
Camera Group Tree View
248 Display Servers ACP ThinManager 6.0
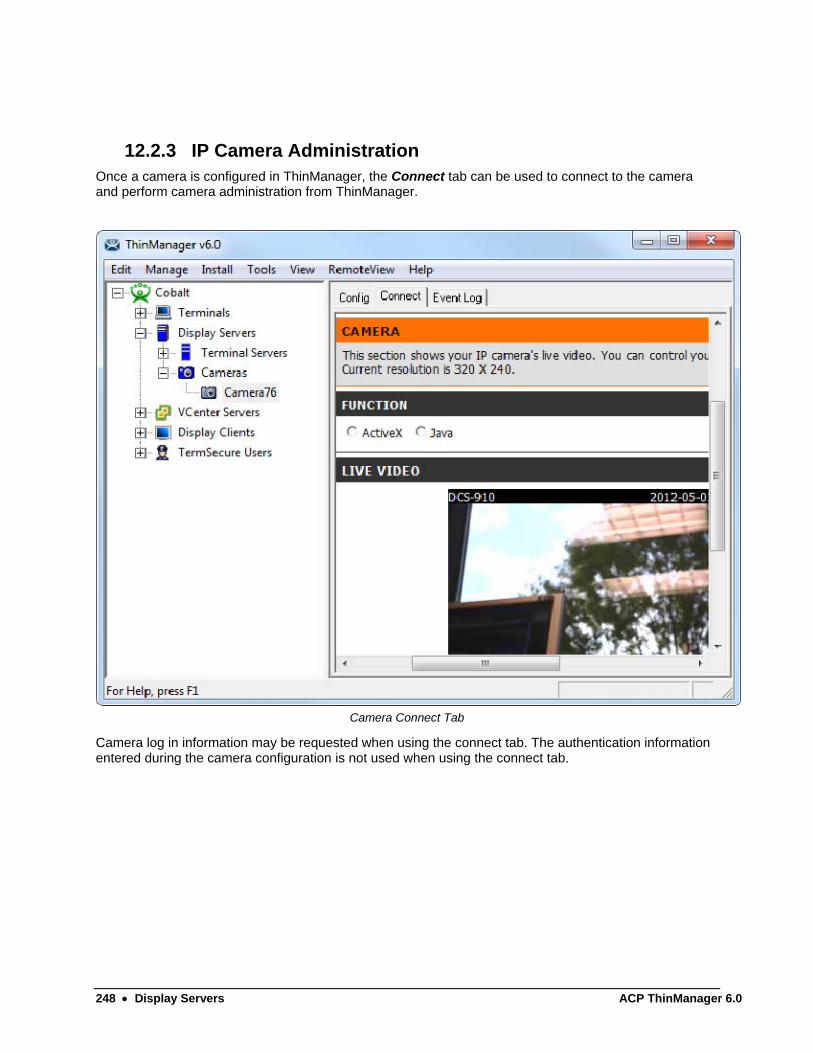
12.2.3 IP Camera Administration Once a camera is configured in ThinManager, the Connect tab can be used to connect to the camera and perform camera administration from ThinManager.
Camera Connect Tab
Camera log in information may be requested when using the connect tab. The authentication information entered during the camera configuration is not used when using the connect tab.