Embed Size (px)
Citation preview
CBCT to Simplant®– Export protocol for Dentsply Sirona

2
This protocol gives a detailed description of the steps to be followed for exporting your images from the Sidexis software in DICOM format. The export protocol is usable with the Dentsply Sirona software products Sidexis XG v2.5 (or higher) or Sidexis 4 v4.1 (or higher). This protocol aims at an optimal visualization of your images in Simplant but does not guarantee easy segmentation.
Part 1: Sidexis softwareSidexis 4:
a) with X-Ray devices Orthophos S or SL:
1. Take a scan according to the Dentsply Sirona instructions together with the Simplant clinical instructions.
2. The volume to be exported is opened in Sidexis 4.
3. Go to the “Output” phase.
3
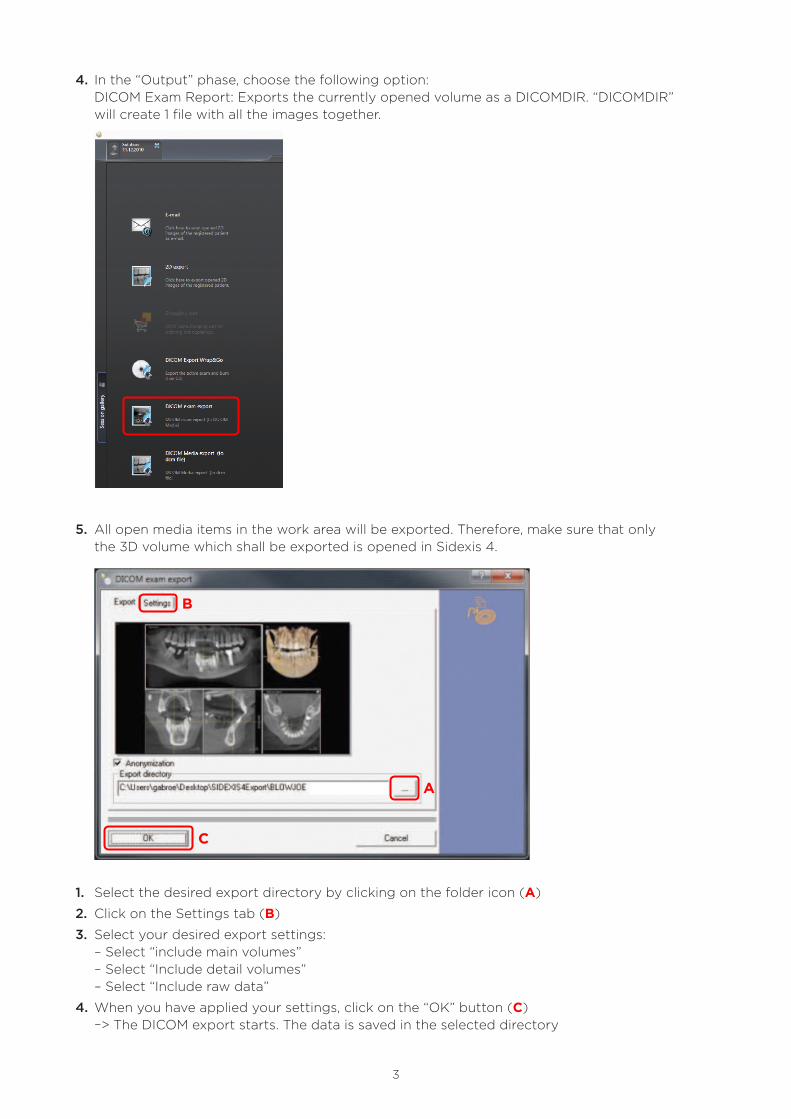
4. In the “Output” phase, choose the following option: DICOM Exam Report: Exports the currently opened volume as a DICOMDIR. “DICOMDIR” will create 1 file with all the images together.
5. All open media items in the work area will be exported. Therefore, make sure that only the 3D volume which shall be exported is opened in Sidexis 4.
1. Select the desired export directory by clicking on the folder icon (A)
2. Click on the Settings tab (B)
3. Select your desired export settings: – Select “include main volumes” – Select “Include detail volumes” – Select “Include raw data”
4. When you have applied your settings, click on the “OK” button (C) –> The DICOM export starts. The data is saved in the selected directory
A
C
B
4
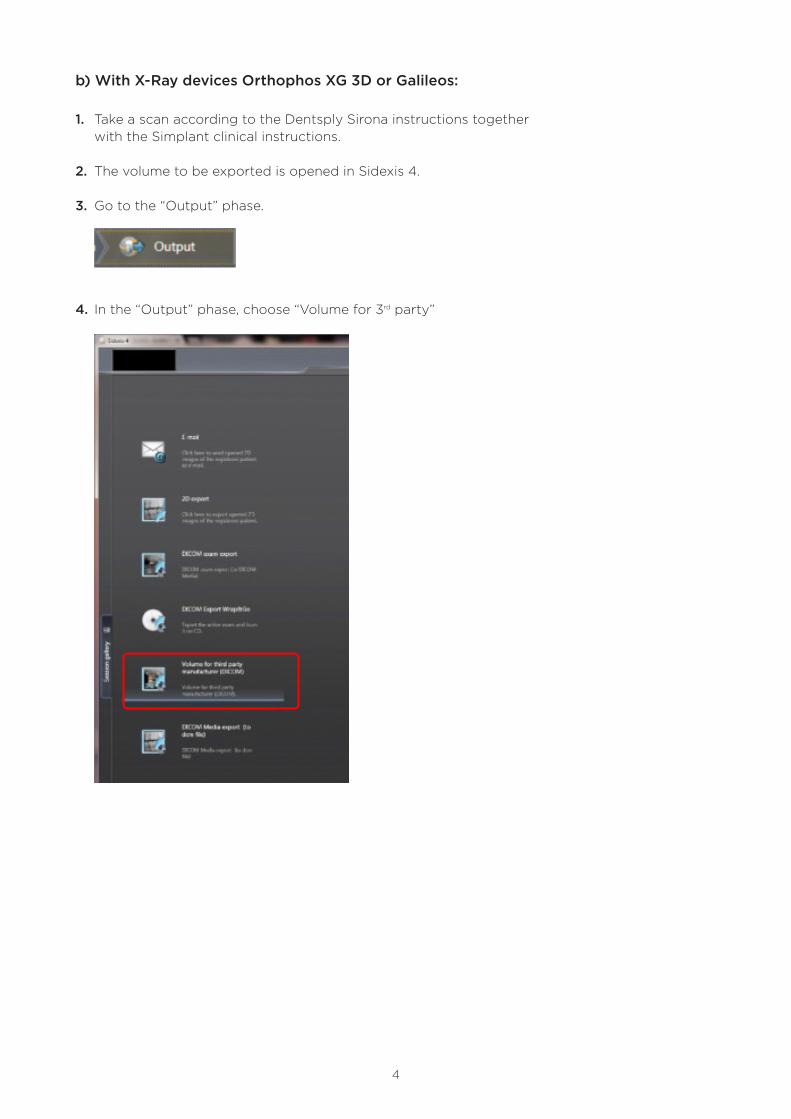
b) With X-Ray devices Orthophos XG 3D or Galileos:
1. Take a scan according to the Dentsply Sirona instructions together with the Simplant clinical instructions.
2. The volume to be exported is opened in Sidexis 4.
3. Go to the “Output” phase.
4. In the “Output” phase, choose “Volume for 3rd party”
5
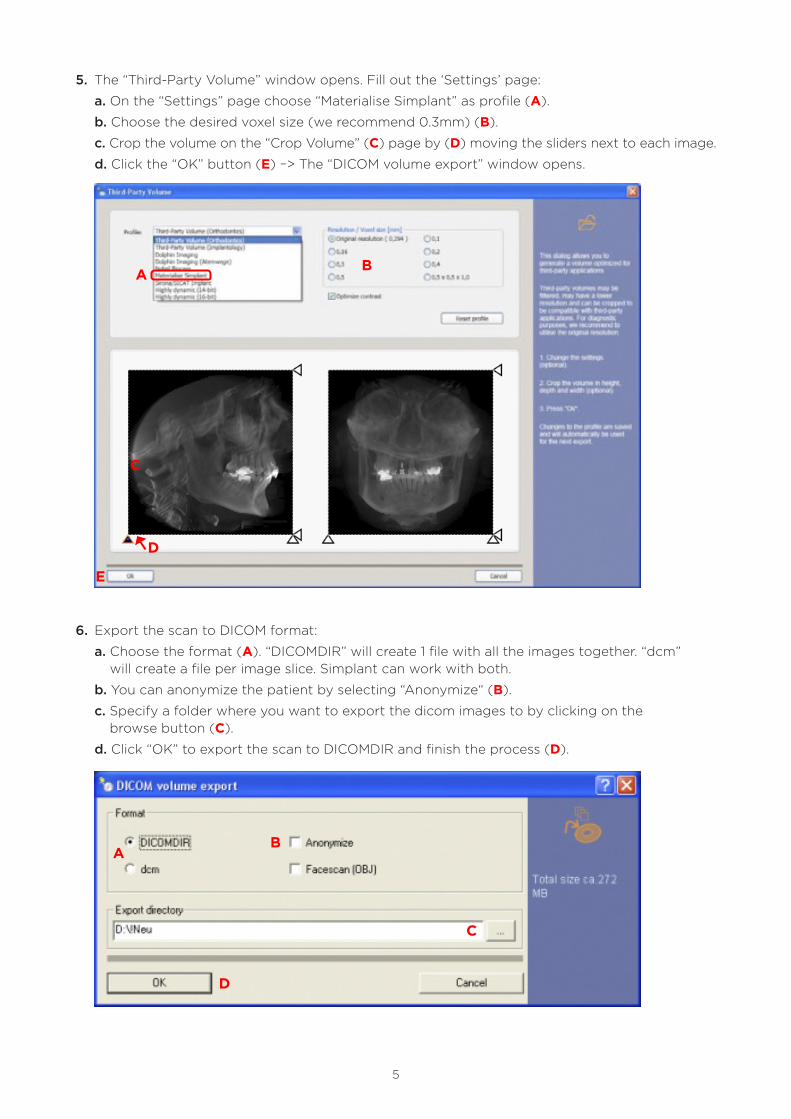
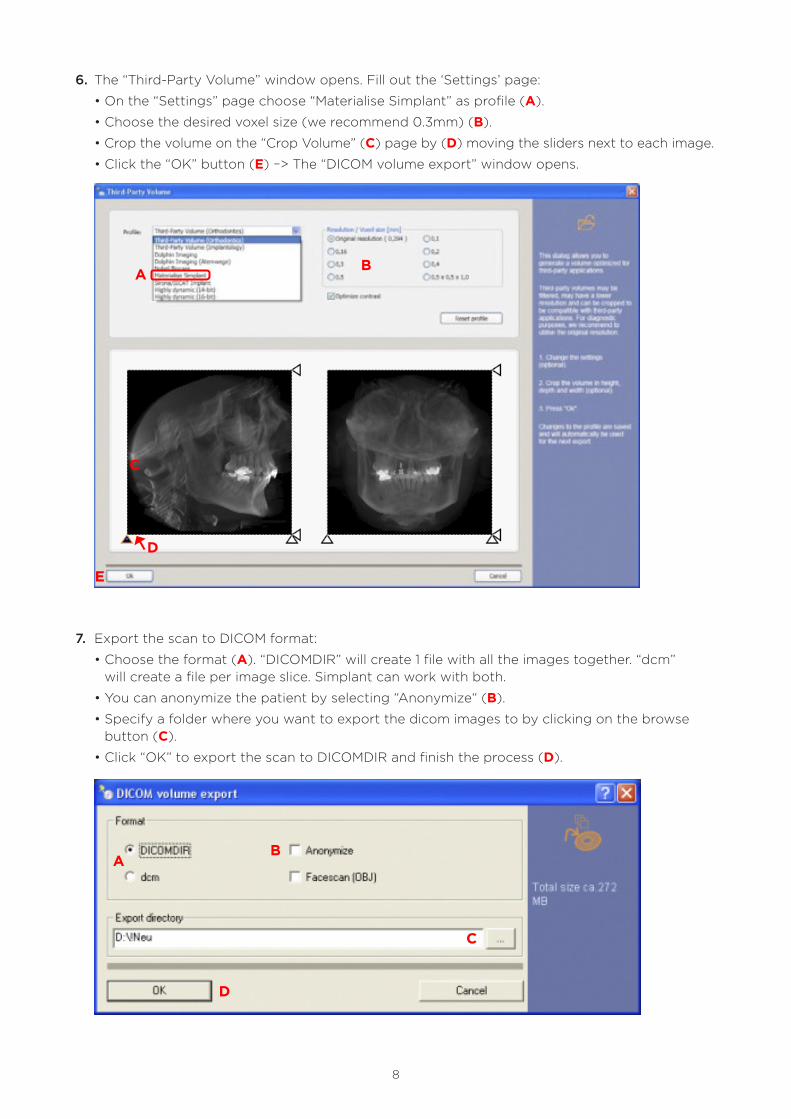
5. The “Third-Party Volume” window opens. Fill out the ‘Settings’ page:
a. On the “Settings” page choose “Materialise Simplant” as profile (A).
b. Choose the desired voxel size (we recommend 0.3mm) (B).
c. Crop the volume on the “Crop Volume” (C) page by (D) moving the sliders next to each image.
d. Click the “OK” button (E) –> The “DICOM volume export” window opens.
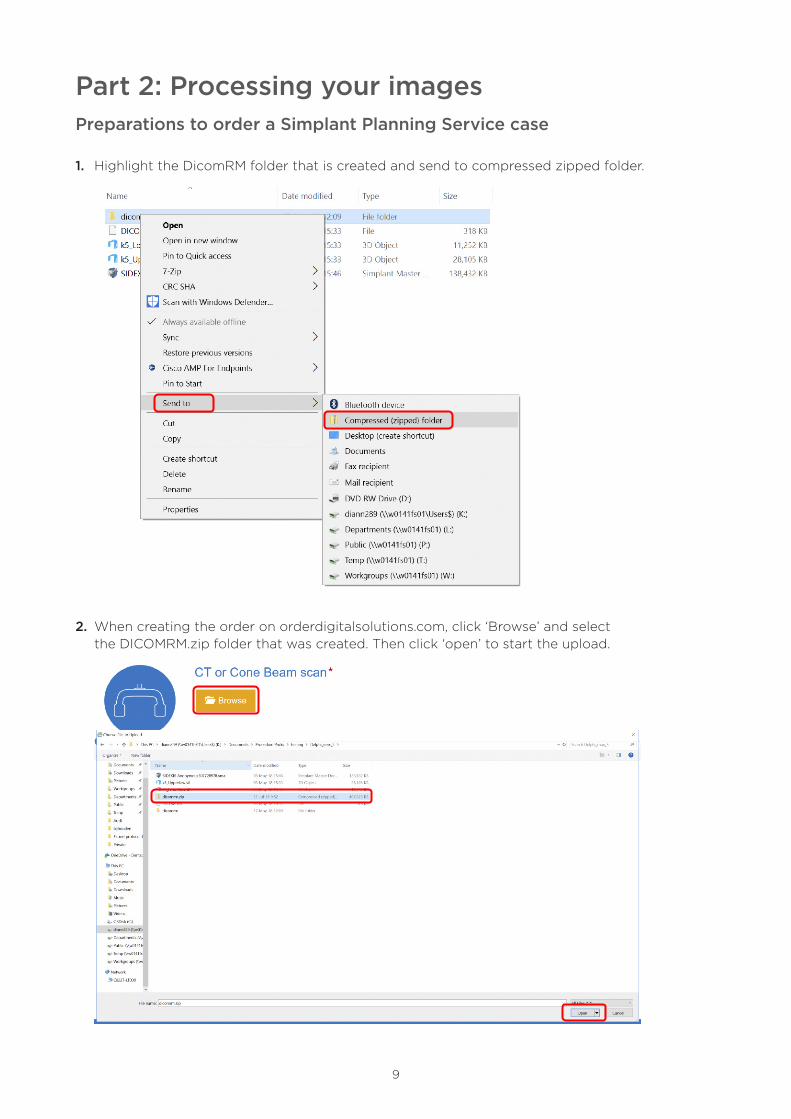
6. Export the scan to DICOM format:
a. Choose the format (A). “DICOMDIR” will create 1 file with all the images together. “dcm” will create a file per image slice. Simplant can work with both.
b. You can anonymize the patient by selecting “Anonymize“ (B).
c. Specify a folder where you want to export the dicom images to by clicking on the browse button (C).
d. Click “OK” to export the scan to DICOMDIR and finish the process (D).
C
D
E
A
A
C
D
B
B
6
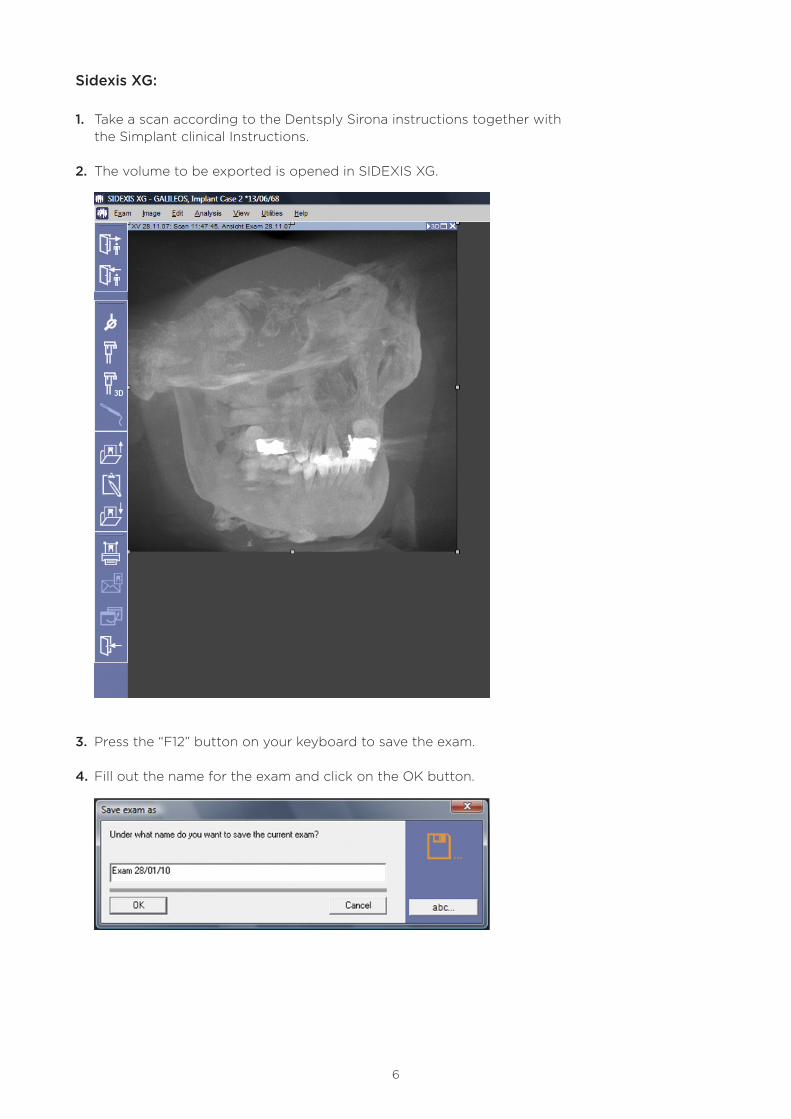
Sidexis XG:
1. Take a scan according to the Dentsply Sirona instructions together with the Simplant clinical Instructions.
2. The volume to be exported is opened in SIDEXIS XG.
3. Press the “F12” button on your keyboard to save the exam.
4. Fill out the name for the exam and click on the OK button.

7
5. In the menu choose Image – Export – “3rd party volume in DICOM-Media”
8
6. The “Third-Party Volume” window opens. Fill out the ‘Settings’ page:
• On the “Settings” page choose “Materialise Simplant” as profile (A).
• Choose the desired voxel size (we recommend 0.3mm) (B).
• Crop the volume on the “Crop Volume” (C) page by (D) moving the sliders next to each image.
• Click the “OK” button (E) –> The “DICOM volume export” window opens.
7. Export the scan to DICOM format:
• Choose the format (A). “DICOMDIR” will create 1 file with all the images together. “dcm” will create a file per image slice. Simplant can work with both.
• You can anonymize the patient by selecting “Anonymize“ (B).
• Specify a folder where you want to export the dicom images to by clicking on the browse button (C).
• Click “OK” to export the scan to DICOMDIR and finish the process (D).
C
D
E
A B
A
C
D
B
9
Part 2: Processing your imagesPreparations to order a Simplant Planning Service case
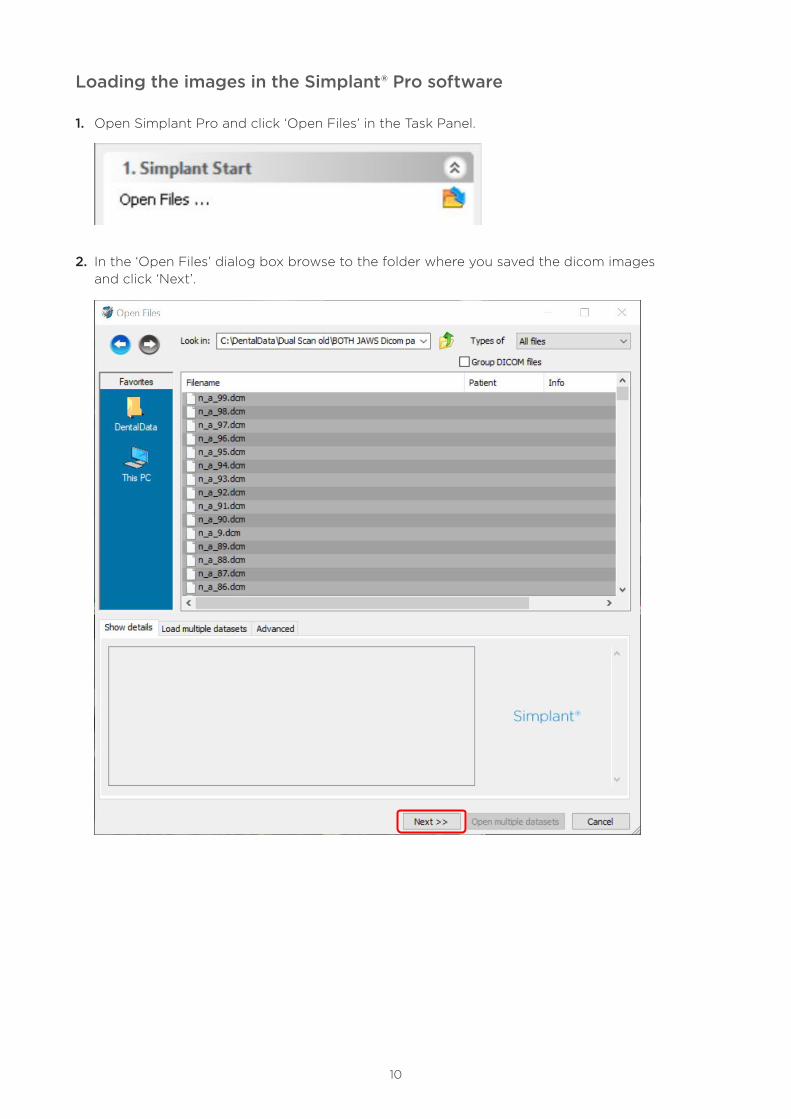
1. Highlight the DicomRM folder that is created and send to compressed zipped folder.
2. When creating the order on orderdigitalsolutions.com, click ‘Browse’ and select the DICOMRM.zip folder that was created. Then click ‘open’ to start the upload.
10
Loading the images in the Simplant® Pro software
1. Open Simplant Pro and click ‘Open Files’ in the Task Panel.
2. In the ‘Open Files’ dialog box browse to the folder where you saved the dicom images and click ‘Next’.

11
3. By clicking ‘next’, the data set becomes grouped. The image information and preview of the axial images can already be checked. Select the data set and click ‘Open File’.
REMARK: Activating the checkbox ‘Group dicom files’ in the previous step will in the future automatically group your dicom files and show you the preview.

12
4. The Image Selector dialog is prompted to the user. In this dialog, the user selects the corresponding anatomy of the images, and selects the required images for importing.

13
If one or more orientation parameters were not exported, review if the orientation that was set is correct. The orientation can be adjusted by selecting the correct orientation parameter in the dropdown (1).
1
14
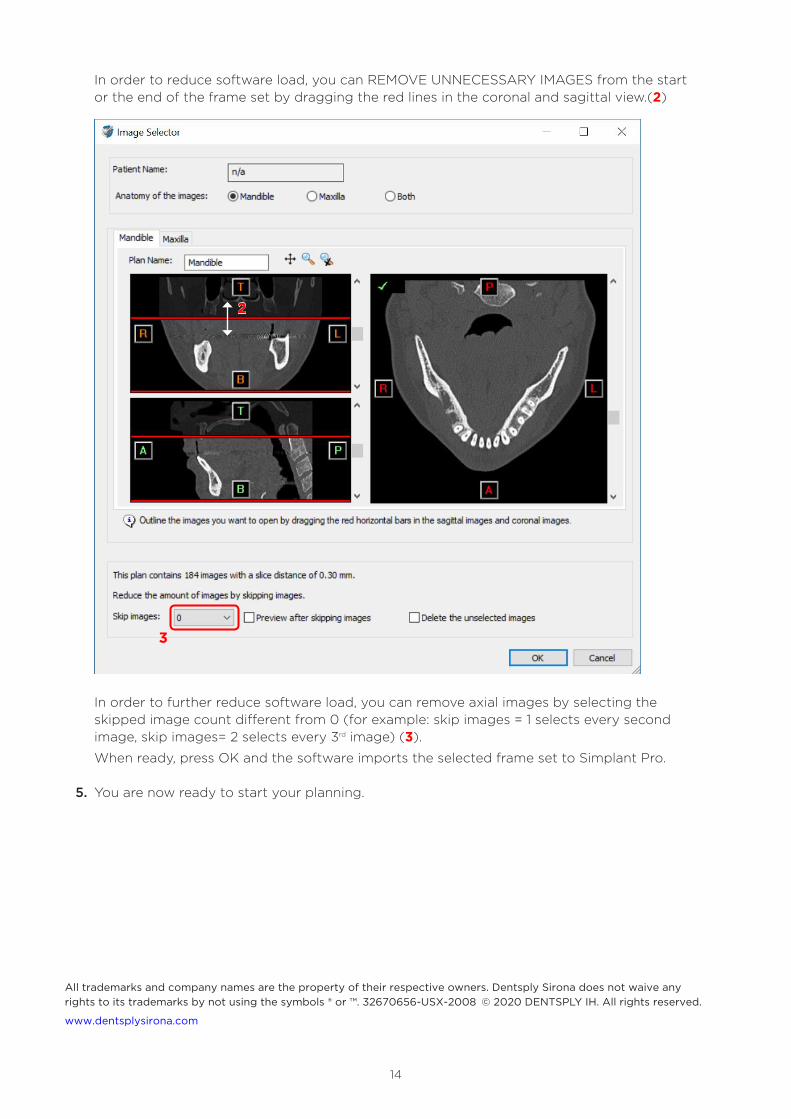
In order to reduce software load, you can REMOVE UNNECESSARY IMAGES from the start or the end of the frame set by dragging the red lines in the coronal and sagittal view.(2)
In order to further reduce software load, you can remove axial images by selecting the skipped image count different from 0 (for example: skip images = 1 selects every second image, skip images= 2 selects every 3rd image) (3).
When ready, press OK and the software imports the selected frame set to Simplant Pro.
5. You are now ready to start your planning.
3
2
All trademarks and company names are the property of their respective owners. Dentsply Sirona does not waive any rights to its trademarks by not using the symbols ® or ™. 32670656-USX-2008 © 2020 DENTSPLY IH. All rights reserved.
www.dentsplysirona.com