Embed Size (px)
Citation preview

Product
Visual Composer
Level
Undergraduate/Graduate
Focus
BAPI
Enterprise Systems
Author
Dave Haseman
Version
7.3
Modified for GSU By:
Duane Truex
Arun Aryal
MOTIVATION
You are a manager of an
organization that is adopting
SAP Enterprise Portals. The
purpose of this case study is
to develop an application
using Visual Composer, The
skills presenting include
creating form and table views, locating a BAPI from an R/3
system and building a model.
PREREQUISITES
None
HINTS
No special hints
ESTIMATED TIME
60 Minutes
SYSTEM REQUIRMENTS
Windows 7
Internet Explorer 11
(Compatibility View Enabled)
Microsoft Silverlight
Current version of the Adobe
Flash Player
Case Study C01 – Sales Orders
CIS8090 NW5 – Intro to Visual Composer

© 2012 SAP AG and W. D. Haseman
System Settings to be done before launching Visual Composer URL:
1. Windows Users –Add URL of Portal in Compatibility view Settings and run Internet explorer with option “Run as Administration” 2. MAC” users: Go to Safari Preferences -> Click –Security tab ->Uncheck Block pop-up windows Students need to access only folder 622 to perform “Create” Portal can also be accessed in “Google Chrome” if view is not proper in IE

© 2012 SAP AG and W. D. Haseman Page 2
j 540000_SalesOrders n
Sales Orders
'iO
, - - -
r--
I S 40000 _ S ales 0 rders
Input Customer Data - 540000
J
- Customer Number
Sales Organization
l oooo300436
11020 I
I Subm I
I
Sales Orders
CIS8090-NW5-C01 -Sales Orders
The application uses a Sales Order BAPI to look up sales orders for a given
Customer.
Sales Documen
0000009305
t Number Purch Order Number
Auftrag 01
Plant
1100
Creation Date
91112003
D
0000009305 Auftrag 01 1100 91112003 0000009305 Auttrag 01 1100 91112003 0000009302 Auftr ag 1100 812912003 0000009302 Auftrag 1100 812912003 0000009302 Auftrag 1100 812912003
D

© 2012 SAP AG and W. D. Haseman Page 3
Procedure:
C1.1
Logon to Visual Composer, using your portal User Id and Password:
The URL for Visual Composer: http://pt6.ucc.uwm.edu/VC
Task 1: Logon
Short Description: The purpose of this exercise is to connect to Visual Composer
CIS8090-NW5-C01 – Sales Orders

© 2012 SAP AG and W. D. Haseman Page 4
CIS8090- NW5-C01 – Sales Orders

© 2012 SAP AG and W. D. Haseman Page 5

© 2012 SAP AG and W. D. Haseman Page 6
C2.1
Create a new model by selecting New under the Model menu:
Select Composite Component, Composite View and then select Local
Repository:
Click on New Development Component:
Enter scccnn_nw5 where ccc is your course number and nn is your user
Task 2: Create New Model
Short Description: The purpose of this exercise is to create new model.
CIS8090-NW5-C01 – Sales Orders

© 2012 SAP AG and W. D. Haseman Page 7
number. The nw5 indicates this is the repository for all exercises in the NW5 –
Into to VC. This name must be all lower case. Click OK. (Do not enter the
string scccnn_nw5 or s40000_nw5)
Enter Scccnn_SalesOrders (where ccc is your course number and nn is your
student number) for the model name (no spaces allowed) and Click on OK.
This will create a blank composite view by the name of Scccnn_SalesOrders:
CIS8090-NW5-C01 – Sales Orders

© 2012 SAP AG and W. D. Haseman Page 8
C3.1
Click on Search:
Select R3 Data Services under Select provider:
Task 3: Add R/3 BAPI
Short Description: The purpose of this exercise is to add an R/3 BAPI.
CIS8090-NW5-C01 – Sales Orders

© 2012 SAP AG and W. D. Haseman Page 9
Select RD1 (assigned IDES system for this course) as the destination:
Enter *salesorder* as the search string and click on Search:
The following list of BAPIs is then presented:
CIS8090-NW5-C01 – Sales Orders

© 2012 SAP AG and W. D. Haseman Page 10
The one we want to use is:
CIS8090-NW5-C01 – Sales Orders

© 2012 SAP AG and W. D. Haseman Page 10
C3.2
Drag the BAPI on to the work area
Define the Ports as follows. Select INPUT under In Port and select the
following Input fields: Customer_Number and Sales_Organization. Unselect
MATERIAL and SALES_ORDER:
Unselect RETURN and select SALES_ORDER under Out Port, click on
Deselect Icon to deselect all fields, click on the Show All to show all the fields:
CIS8090-NW5-C01 – Sales Orders

© 2012 SAP AG and W. D. Haseman Page 11
Then select the following fields: Creation_Date, Plant, Purch_No, SD_Doc:
CIS8090-NW5-C01 – Sales Orders

© 2012 SAP AG and W. D. Haseman Page 12
Then click OK.
C3.3
The next step is to test the BAPI. Right click on the BAPI Icon, and select Test
Data Service:
Click on Input, enter the customer number as 0000300436 (must be 10 digits)
and the sales organization as 1020 and click on the Test button:
Repeat the test for the other customer numbers. When you are done, close the
test Data Service window.
Task 4: Develop Model
Short Description: The purpose of this exercise is to develop the model.
CIS8090-NW5-C01 – Sales Orders
© 2012 SAP AG and W. D. Haseman Page 13
CIS8090-NW5-C01 – Sales Orders
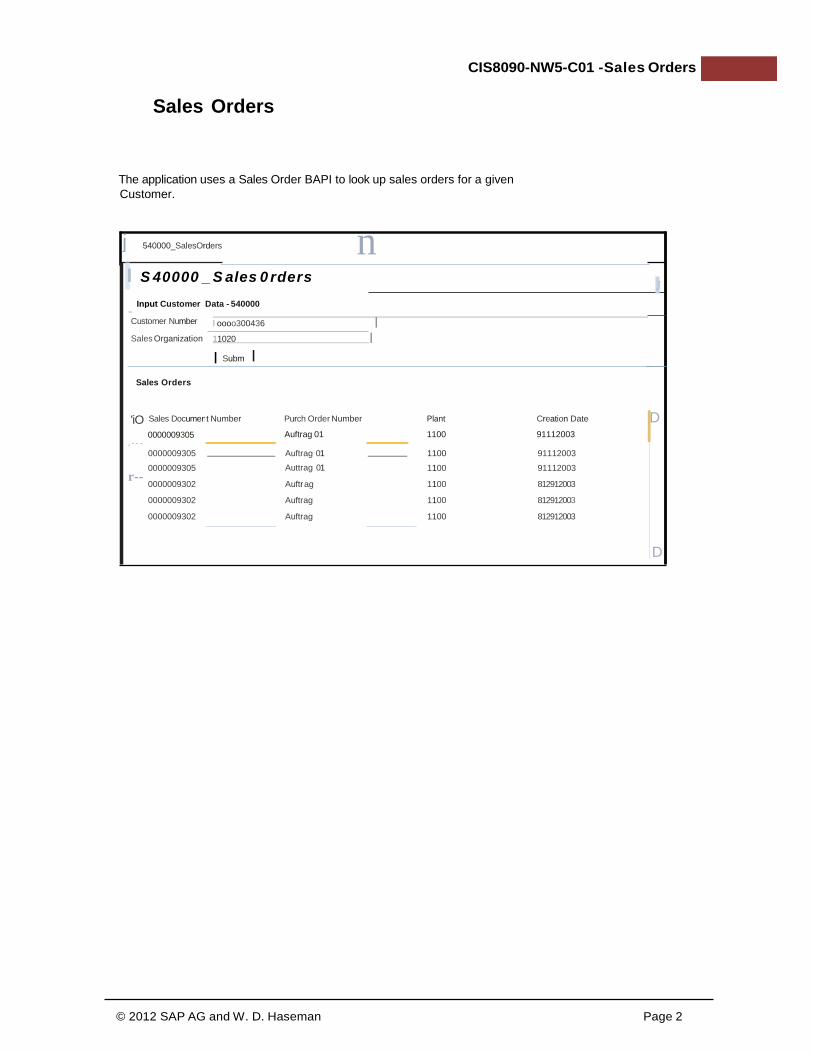
C4.1
Drag the INPUT port from the BAPI onto the work space, selecting Form View:
Click on the INPUT form and rename it by entering Input Customer Data –
Scccnn (where ccc is your course number and nn is your student number) as
the title. Placing you student user as part of the title prevents other students
from stealing your output:
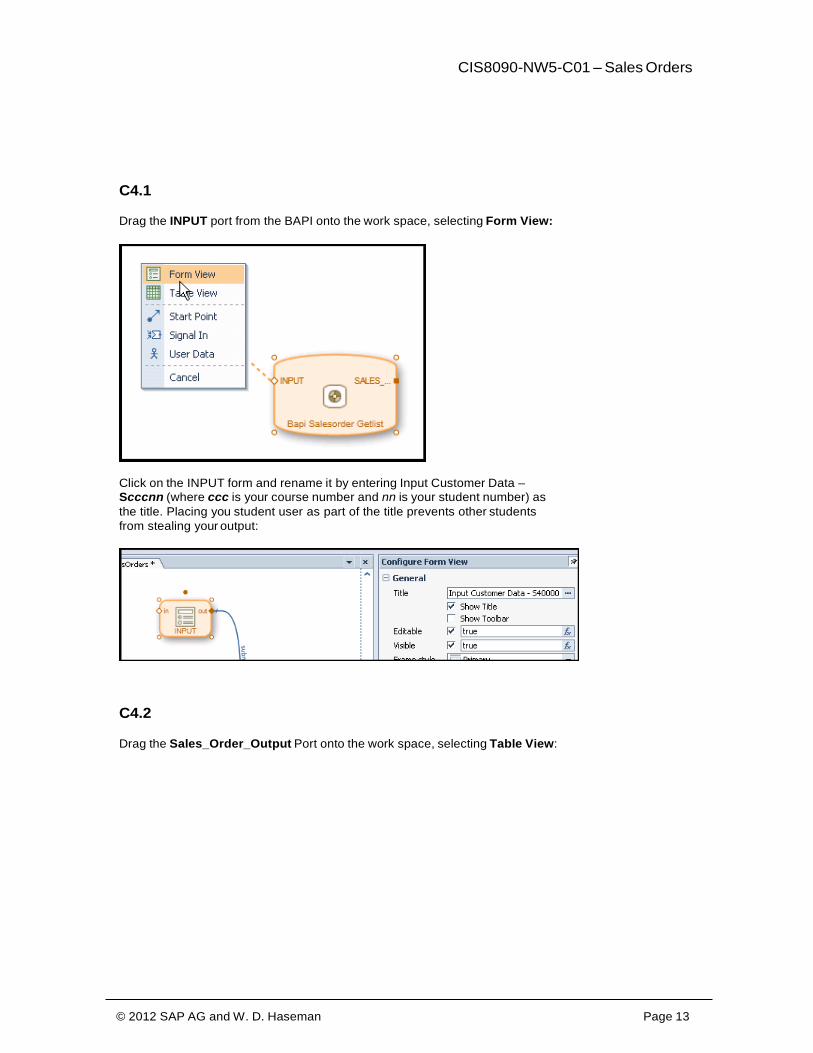
C4.2
Drag the Sales_Order_Output Port onto the work space, selecting Table View:

© 2012 SAP AG and W. D. Haseman Page 14
Rename the Table to Sales Orders:
C4.3
Click on the Layout button on the bottom left of the work space:
CIS8090-NW5-C01 – Sales Orders

© 2012 SAP AG and W. D. Haseman Page 15
The layout for this application appears as follows:
Task 5: Deploy
Short Description: The purpose of this exercise is to compile, deploy and test the
model.
CIS8090-NW5-C01 – Sales Orders
© 2012 SAP AG and W. D. Haseman Page 16
CIS8090-NW5-C01 – Sales Orders
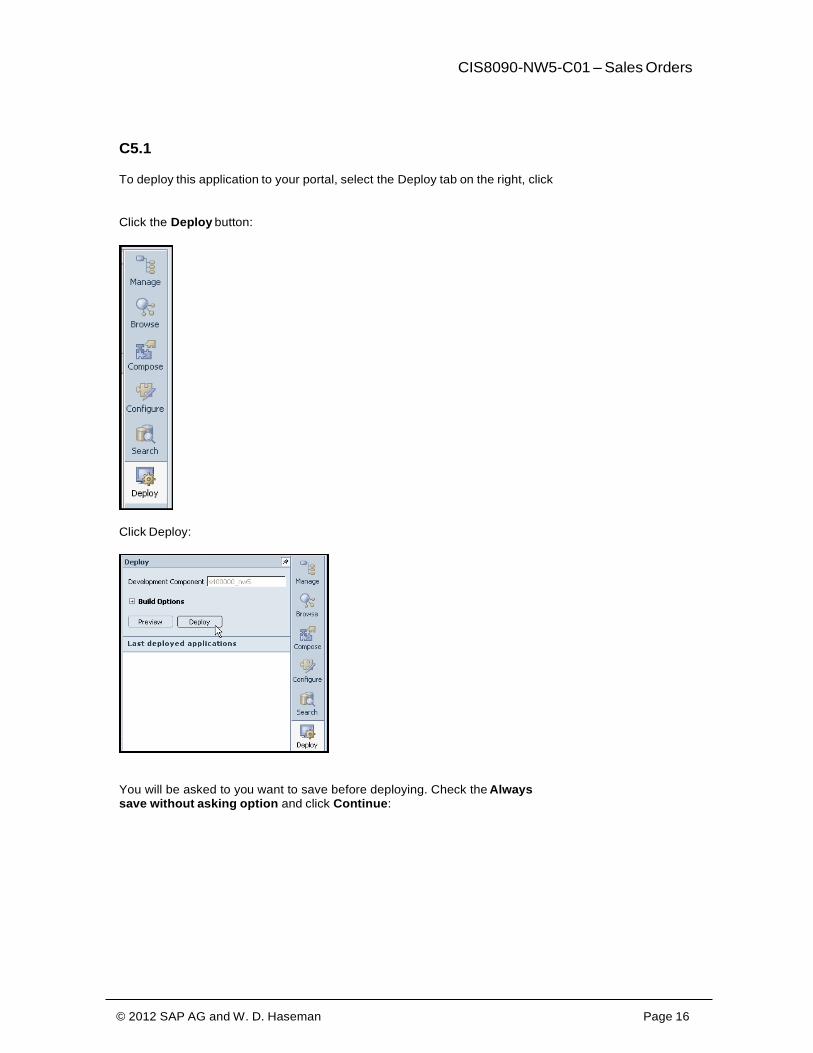
C5.1
To deploy this application to your portal, select the Deploy tab on the right, click
Click the Deploy button:
Click Deploy:
You will be asked to you want to save before deploying. Check the Always
save without asking option and click Continue:

© 2012 SAP AG and W. D. Haseman Page 17
Assuming there are no mistakes (errors), the following appears:
Double click on the model name under Flex:
Enter a customer and sales organization and click submit:
CIS8090-NW5-C01 – Sales Orders

© 2012 SAP AG and W. D. Haseman Page 18
CIS8090-NW5-C01 – Sales Orders
When done viewing output, close window by clicking on the
C6.1
Log in to Enterprise Portal.
This application is saved in the Portal Content Director under Web Dynpro
Java Applications:
Task 6: Adding application to Page
Short Description: The purpose of this exercise is to add the application created by
the Visual Composer to a page

© 2012 SAP AG and W. D. Haseman Page 19
Each application will appear in a folder (alpha order) with the same name as the
Repository. Each of the additional course modules have their own
Development Components (DC), which are shown as folders. The names of
the DC’s start with your scccnn and end with the course component.
For example
nw5_impl Visual Composer
nw6_impl Enterprise Services – VC
nw8_impl NWDS – VC
nw9 NWDS – Deb Dynpro for Java
Any of these applications (no mater what the tool was used to develop them)
can be added to any pages you are constructing.
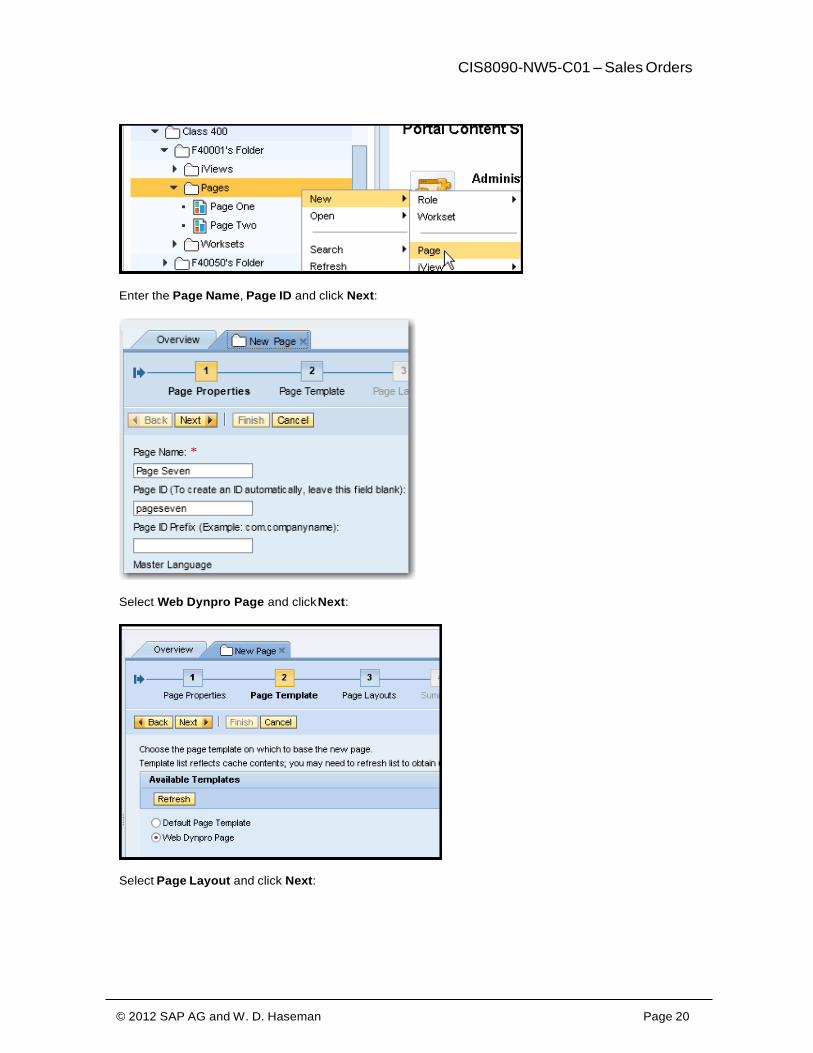
Select the desired folder, right click and select New → Page
CIS8090-NW5-C01 – Sales Orders
© 2012 SAP AG and W. D. Haseman Page 20
CIS8090-NW5-C01 – Sales Orders
Enter the Page Name, Page ID and click Next:
Select Web Dynpro Page and click Next:
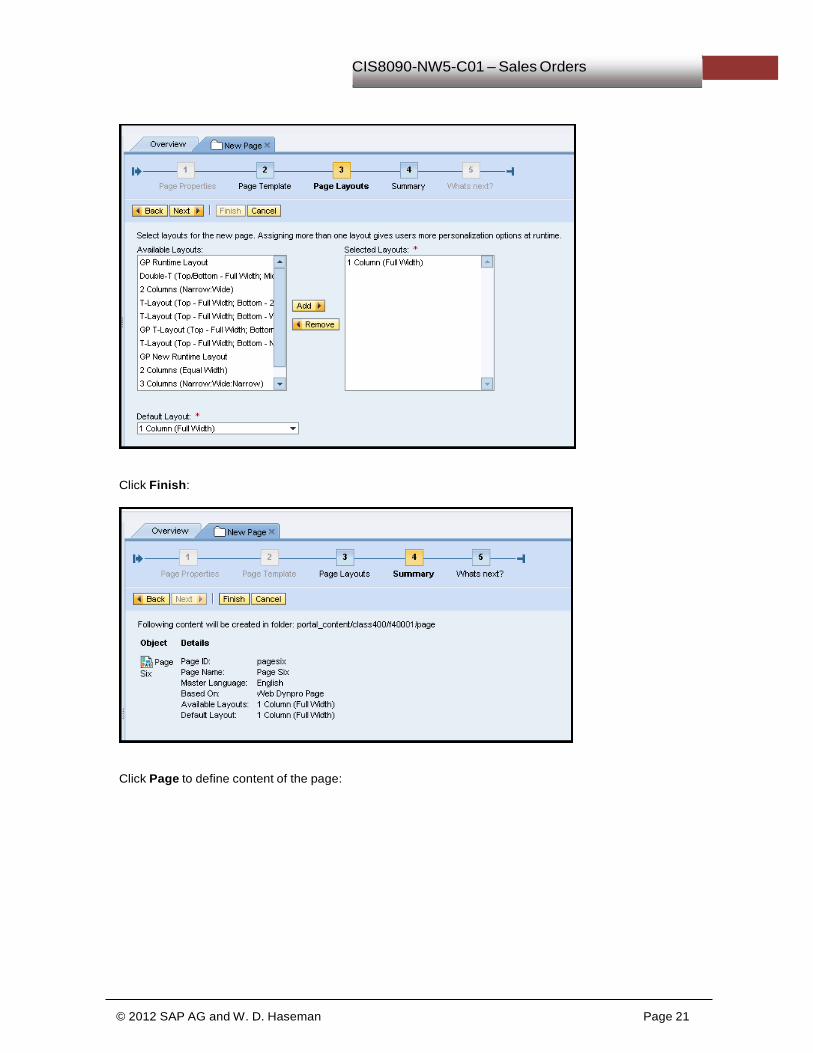
Select Page Layout and click Next:
© 2012 SAP AG and W. D. Haseman Page 21
Click Finish:
Click Page to define content of the page:
CIS8090-NW5-C01 – Sales Orders

© 2012 SAP AG and W. D. Haseman Page 22
CIS8090-NW5-C01 – Sales Orders
Locate your Scccnn_Salesorders in the Web Dynpro Java Applications
folder:
Right click and select Add Application to Page (this is a delta link):
Click Save and then Preview:

© 2012 SAP AG and W. D. Haseman Page 23
Previewed Page:
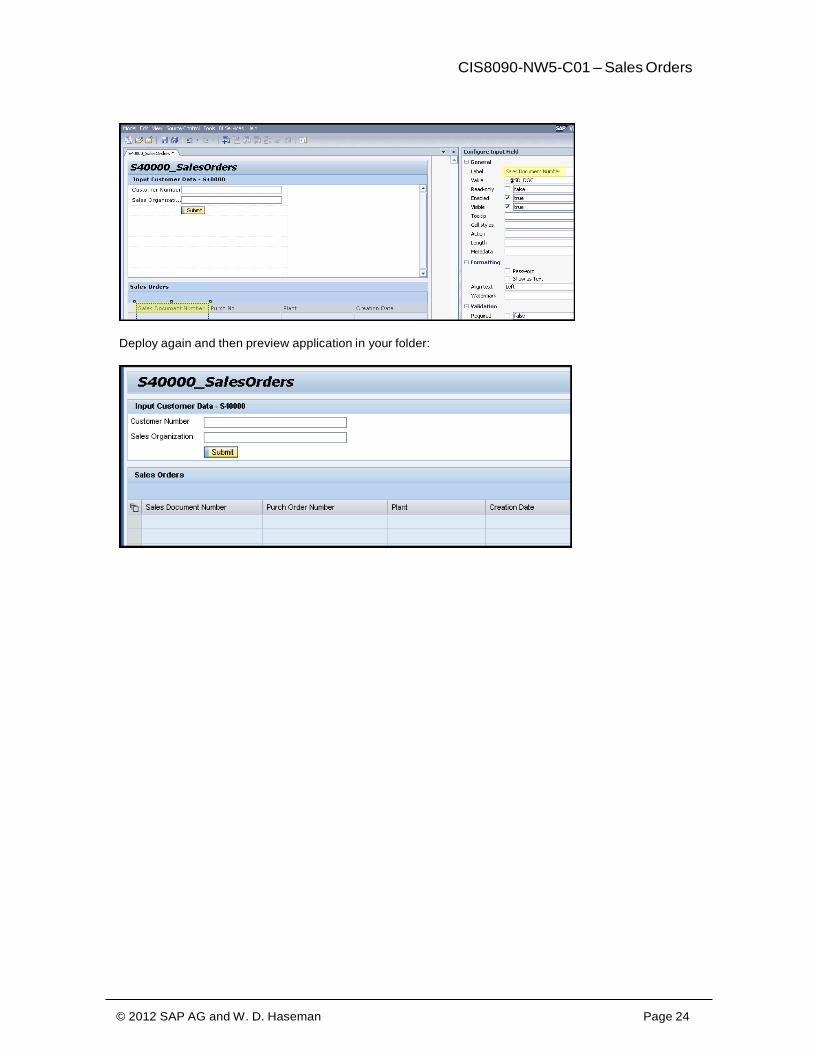
C6.2
The format, labels of the report can be modified in the Layout view and then the
application can be deployed again. Click on the column headings and then
change the value of their titles to match this output:
CIS8090-NW5-C01 – Sales Orders
© 2012 SAP AG and W. D. Haseman Page 24
CIS8090-NW5-C01 – Sales Orders
Deploy again and then preview application in your folder:

© 2012 SAP AG and W. D. Haseman Page 25
C6.3
Final model:
CIS8090-NW5-C01 – Sales Orders