Embed Size (px)
Citation preview

C-5LANDING GEAR
Developed by
AIR FORCE ENGINEERINGand
TECHNICAL SERVICES
Dover AFB, DelawareJuly 1997


FOR TRAINING USE ONLY i
PREFACE
This manual is designed to supplement classroom instruction. Text, diagrams, schemat-ics, and illustrations were derived from the following sources:
LOCKHEED GEORGIA'S CUSTOMER TRAINING GUIDE 1984 EDITION
T.O. 1C-5A-2-10 CHG 28 JUL 92
T.O. 1C-5A-2-10FL-1-1 CHG 18 OCT 90
T.O. 1C-5A-2-10FL-1-2 CHG 27 APRIL 92
This manual is intended to be used as a guide only, and no part of this manual should beused as a technical manual.

FOR TRAINING USE ONLYii
NOTE TO THE READER
Every effort is made to keep this publication current and error free. Revisions, supple-ments, and corrections to this publication will be published when necessary. If you dis-cover an error, it is essential that you let us know.
Please submit recommended changes to:
710 6th ST
Dover AFB DE, 19902-5710
ATTN: Mr. Joseph E. Sellars
Please include the following information with all suggestions:
• Date of Issue
• Page or figure number of suggested change(s)
• Suggested wording or figure
• List source(s) for your suggested change(s)
• Name, phone number, and return address
If you wish to converse with the authors the phone numbers are:
VOICE 302-677-2172 Mr. Sellars APG AFET
E-Mail [email protected]
VOICE 302-677-2171 Mr. Windsor Propulsion AFET
E-Mail [email protected]
FAX 302-677-2173
DDN 445

LANDING GEAR SYSTEMSTABLE OF CONTENTS
FOR TRAINING USE ONLY A
Landing Gear.................................................................................................................... 1-1General Information ......................................................................................................... 1-1
MLG and Door Actuation ........................................................................................... 1-15MLH Shock Strut........................................................................................................ 1-23Proximity Switch System............................................................................................ 1-37MLG Sequence Control Panels Description ............................................................... 1-40MLG Retraction and Extension .................................................................................. 1-45Operational Description of MLG Retraction and Extension ...................................... 1-48
Nose Landing Gear (NLG) and Doors ...........................................................................2-1NLG Mechanical Actuation ........................................................................................2-7NLG Retraction and Extension ...................................................................................2-19Operational Description of NLG Extension and Retraction .......................................2-20
Position and Warning.....................................................................................................2-30Landing Gear Sequence Control Panel Lights ...............................................................2-38NLG Steering .................................................................................................................3-1Caster Powerback and Indication System ......................................................................4-1Kneeling System ............................................................................................................5-1Brake System..................................................................................................................6-1Anti-Skid System ...........................................................................................................6-5Inflight Tire Deflation System .......................................................................................7-1

LANDING GEAR SYSTEMSTABLE OF CONTENTS
FOR TRAINING USE ONLYB
ELECTRICAL AND HYDRAULIC SCHEMATICS
Left Forward MLG Retraction Mode Electrical Schematic Diagram ........................ F1
Left AFT MLG Retraction Mode Electrical Schematic Diagram............................... F2
Left Forward MLG Extension Mode Electrical Schematic Diagram ......................... F3
Left AFT MLG Extension Mode Electrical Schematic Diagram ............................... F4
Left Forward MLG Emergency Extension Mode Electrical Schematic Diagram ...... F5
Left AFT MLG Emergency Extension Mode Electrical Schematic Diagram ............ F6
Bogie Pitch Light Warning System Electrical Schematic Diagram ........................... F7
Gear Handle Warning Light Electrical Schematic Diagram....................................... F8
Landing Gear Warning Horn Electrical Schematic Diagram ..................................... F9
Aft MLG Retraction / Extension Hydraulic Schematic (Sheet 1 of 2) ....................... F10
Aft MLG Retraction / Extension Hydraulic Schematic (Sheet 2 of 2) ....................... F11
Nose Landing Gear Retraction Mode Electrical Schematic Diagram ........................ F12
Nose Landing Gear Extension Mode Electrical Schematic Diagram......................... F13
Nose Landing Gear Emergency Extension Mode Electrical Schematic Diagram...... F14
Nose Landing Gear System Hydraulic Schematic Diagram (Sheet 1 of 2) ............... F15
Nose Landing Gear System Hydraulic Schematic Diagram (Sheet 2 of 2) ............... F16
Brake and Skid Control Electrical (Sheet 1 of 2) ....................................................... F17
Brake and Skid Control Electrical (Sheet 2 of 2) ....................................................... F18
Wheel Anti-Rotation Electrical Schematic Diagram.................................................. F19
Brake and Skid Control Hydraulic Schematic Diagram (Sheet 1 of 3) ..................... F20
Brake and Skid Control Hydraulic Schematic Diagram (Sheet 2 of 3) ..................... F21
Brake and Skid Control Hydraulic Schematic Diagram (Sheet 3 of 3) ..................... F22
Caster / Power-back Electrical Schematic Diagram................................................... F23
Caster / Power-back Electrical Schematic Diagram (Detail A) ................................. F24
NLG Kneeling System Electrical Schematic Diagram............................................... F25
MLG Kneeling System Electrical Schematic Diagram .............................................. F26
Kneeling System Indication Lights Electrical Schematic Diagram............................ F27
Rudder Pedal Disconnect Electrical Schematic Diagram........................................... F28

FOR TRAINING USE ONLY A

FOR TRAINING USE ONLYB

FOR TRAINING USE ONLY C

FOR TRAINING USE ONLYD

FOR TRAINING USE ONLY E

FOR TRAINING USE ONLYF

FOR TRAINING USE ONLY G

FOR TRAINING USE ONLYH

FOR TRAINING USE ONLY Page 1-1
Chapter One — LANDING GEAR
GENERAL INFORMATION
The C-5 aircraft is equipped with a tricycle-type, fully retractable landing gear. The mainlanding gear (MLG) consists of four separate shock struts and bogie assemblies, eachwith six wheel-and-brake assemblies. The four MLG assemblies are mounted in a dualtandem arrangement on each side of the fuselage. The NLG consists of a single, steerableshock strut and integral axle beam assembly with four wheel-and-tire assemblies,mounted on the centerline of the aircraft. The MLG and NLG door systems completelyenclose their respective wheel wells after gear retraction.
Gear retraction, extension, and door operations, are accomplished by a hydrauli-cally powered mechanical actuation system. Emergency gear and door extension is ac-complished by electric motors that connect with the mechanical actuation system.
The caster/powerback system permits free castering of the aft main landing gears forground maneuvering, towing, and taxiing operations. The system also provides a power-back (drive-back) mode of bringing the gears back to a straight ahead centered position.
Each MLG is fitted with six hydraulically actuated, multi-disc brake assemblies.The brakes are manually controlled by metering hydraulic pressure from the pilot brakecontrol valves. An electrically controlled anti-skid system senses and monitors brakingaction for maximum efficiency.
The landing gear system includes three kneeling modes that will accommodatevarious types of cargo loading operations. The three kneeling modes are:
• Level kneeling• Forward kneeling (nose down)• Aft kneeling (tail down)
An electrically powered indicating and warning system provides the flight crewwith all necessary gear and door position indications.

FOR TRAINING USE ONLYPage 1-2
Figure 1-1 LANDING GEAR CONTROL AND INDICATIONS

FOR TRAINING USE ONLY Page 1-3
Figure 1-2 LANDING GEAR CONTROL AND INDICATORS

FOR TRAINING USE ONLYPage 1-4
Figure 1-3 LANDING GEAR CONTROL PANEL MLG3

FOR TRAINING USE ONLY Page 1-5
LANDING GEAR CONTROL LEVER—The landing gear control lever, located onthe right side of the center instrument panel, initiates gear retraction and extension opera-tions. The control lever has two positions, UP and DOWN, which mechanically operatethe landing gear control switches. The control switches, in turn, provide the necessary in-put signals to five landing gear control manifolds which electrically control gear opera-tions. See figure 1-3.
The control lever includes an anti-retraction lock that prevents inadvertent opera-tion of the control lever to the UP position while the aircraft is on the ground. The lockmechanism is electrically disengaged when the touchdown relay is de-energized. The lockmechanism can be overridden manually by a release knob located adjacent to the controllever.
WARNING HORN AND SILENCE SWITCHES—A warning horn on the over-head panel sounds for a variety of unsafe conditions. With the respect to the land-ing gear, the horn sounds during extension if the landing gear is not in the down-and-locked position and one or more of the throttles are in a minimum cruise set-ting with airplane speed below 200 knots. The horn also sounds any time thelanding gear is not down-and-locked and the flaps are in a greater than the ap-proach position. See figure 1-3.
Two switches are provided on the landing gear control panel for manual op-eration of the warning horn. A WARN LIGHT AND HORN TEST button test thehorn and the warning lights on the landing gear control handle. A HORNSILENCE button silences the horn if it is sounding because a throttle(s) is at theminimum cruise setting before the landing gear is in a safe condition. However,the HORN SILENCE will not turn off the horn if it is sounding because the flapcontrol is in the greater than the approach position while the landing gear is not ina safe landing attitude. After the horn has been silenced for one condition, it re-
Figure 1-4 RH SIDE CENTER CONSOLE

FOR TRAINING USE ONLYPage 1-6
tains its warning capability for other conditions, and will sound again if needed byother systems.
GEAR EMERGENCY EXTEND SWITCHES—Five landing gear emergency extendswitches, located on the forward right side of the center console, control the NLG andMLG emergency extend systems. The switches have two positions, EXTEND andNORMAL and are cover-guarded to avoid inadvertent operation. A red light to the left ofthe switches illuminates when either NLG door is open or when the affected MLG as-sembly has rotated to the zero-degree position and the switch is in the extend position.See figure 1-4.
MAIN LANDING GEAR (MLG) AND DOORS—The four MLG assemblies aredesignated as #1 (left fwd), #2 (right fwd), #3 (left aft), #4 (right aft). Each MLG consistsof six wheel-and-brake assemblies attached to a bogie that, in turn, attaches to a shockstrut. See figure 1-5.
STRUT AND BOGIE ASSEMBLIES
The shock strut is mounted to the aircraft by two trunnion pins that insert into two fuse-lage support fittings and bearings. See figure 1-6.
LANDING GEAR GENERAL
Gear retraction consists of two separate movements. The first movement rotates eachshock strut and bogie assembly 90-degrees inboard around the strut vertical axis. Thesecond movement retracts the gear inboard and up into the wheel well. During the in-board and up cycle, the 90-degree relationship of the strut and bogie increases to ap-
Figure 1-5 LANDING GEAR GENERAL MLG5.TIF

FOR TRAINING USE ONLY Page 1-7
proximately 175 degrees as the bogie pitches down. This pitching motion of the bogieallows the gear assembly to assume an almost flat configuration. As the outboard doorreaches the closed position, four door locks mounted on the outboard door lock to main-tain the gear and doors in the up and locked position. The gear extension sequence is thereverse of the retraction sequence.
Each MLG door assembly is made up of an inboard door, outboard door, and twoslot doors. The inboard and outboard doors open during gear extension. The inboard doorcloses after gear extension while the outboard door remains open after gear extension.Two slot doors open to allow outboard door actuating linkage to extend beyond fuselagestructure.
The bogie assembly, attached to the bottom of the strut, consists of a three-armtubular structure. The bogie forms a triangular pattern for the mounting of the wheel andbrake assemblies. See figure 1-6.
One arm of the bogie extends forward with reference to the strut and includes asocket at its forward end that accepts the forward axle beam upon which is mounted twowheel-and-brake assemblies. The two remaining arms extend aft with reference to thestrut, one on the inboard side, the other on the outboard side. Each aft arm includes anintegral axle beam that contains machined bearing lands at each end for mounting twowheel and brake assemblies.

FOR TRAINING USE ONLYPage 1-8
Figure 1-6 MAIN LANDING GEAR ASSEMBLY MLG7

FOR TRAINING USE ONLY Page 1-9
Figure 1-7 MLG EXTENSION/RETRACTION SYSTEM MLG8

FOR TRAINING USE ONLYPage 1-10
Figure 1-8 MLG EXTENSION/RETRACTION ACTUATOR MLG9

FOR TRAINING USE ONLY Page 1-11
Figure 1-9 LH MLG DOOR SHOWN CLOSED MLG10

FOR TRAINING USE ONLYPage 1-12
Figure 1-10 BOGIE PITCHING ACTION DURING GEAR RETRACTION MLG11

FOR TRAINING USE ONLY Page 1-13
MAIN GEAR DOORS—The main gear doors enclose the MLG wheel wells to producean aerodynamically smooth surface once the gear is retracted. There are two main doorsfor each gear: an inboard door and outboard door. Both doors are mechanically linked to acommon gear and door actuation system by a series of drive arms, link arms, torquetubes, and gearboxes. Two slot doors are also provided in the pod structure to permit theoutboard door actuating linkage to extend beyond the fuselage.
Sixteen door lock assemblies are used to hold the MLG outboard doors in a closedposition. Four lock assemblies are used per outboard door with two located on the fwdedge and two on the aft edge. Hydraulic lock actuators, two per outboard door, are usedfor normal operation. Each actuator operates two lock assemblies through a push-pull rodand lever arm connection. Each lock assembly consists of a hook and hook toggle link-age, overcenter detenting linkage, a cartridge-type target assembly, and an emergencyunlock hydraulic actuator. The emergency unlock actuator will unlock the doors if thenormal system fails. Each lock assembly engages a stirrup attached to the aircraft struc-ture at which time the cartridge-type target on each inboard door lock is compressed by asensor bracket attached to the stirrup. As the cartridge-type target comes in close proxim-ity to the sensor, the door closed circuit is completed which signals the door locks to lock.

FOR TRAINING USE ONLYPage 1-14
Figure 1-11 DOOR LOCK ASSEMBLY MLG13

FOR TRAINING USE ONLY Page 1-15
MLG AND DOOR ACTUATION SYSTEM
The mechanical actuation system operates the MLG and doors during the retraction andextension cycles. The four mechanical actuation systems are located within their respec-tive wheel wells. Each system consists of two actuator assemblies interconnected bymeans of a flex shaft. This provides each MLG with a dual drive system. See figure 1-7.
A dual power source for each system is provided at each actuator for each system.A hydraulic motor system provides power input to the actuator during normal operationand an electric motor provides the input for emergency gear extension. Should one of themotors fail during operation, either hydraulic or electric, the interconnecting flex shaftallows driving through both actuators to extend the gear, rather than driving through oneactuator and having to back drive the other actuator through its gearing. This provides amore efficient and reliable system.
The system components are interchangeable fore and aft and left to right with re-spect to each wheel well location.
The actuator consists of a high torque rotary section of the cageless balanced dif-ferential planetary (free planet) type with an integral power drive unit containing both theprimary drive hydraulic motor and an emergency drive electric motor. See figure 1-8.
The gears and bearings of the high torque, low speed, section are lubricated with 1part MIL-L-7808 and 3 parts MIL-G-23827 grease. (To service, remove a bolt in thecover plate at 3 or 9 o'clock, pull another bolt near the top, fill through top hole until itflows out of bottom hole.) The power drive unit, low torque high speed, section is splashlubricated with MIL-L-7808 oil.
All shafts are sealed with dual seals wherever exposed to the outside environment.
The hydraulic motor drives through a brake assembly and operates at 3400 RPMwith a primary drive ratio of 1181:1. This results in a normal extension or retraction timeof 13 seconds.
During normal gear extension with no hydraulic pressure applied to the brake,springs prevent the hydraulic piston from contacting the brake plates, thus allowing freerotation of the shaft. During emergency gear extension, the brake is energized by pressurefrom the emergency door unlock hydraulic system which moves the brake piston and ap-plies a clamping force to the brake plates to lock the shaft. The brake is fully released atall hydraulic pressure up to 500 PSI and fully engaged (locked) at pressures from 1500 to3000 PSI.
The electric motor is a 110/220-Volt AC three phase unit with an integral springengaged brake with dual 28 VDC release coils. The electric motor operates at 7600 RPMthrough an emergency drive ratio of 19,360:1. This results in an emergency extensiontime of less than 170 seconds.
The power drive unit gearbox mounts directly on the hub of the high torque (lowspeed) section of the main housing between the two reaction arms. This gearbox containsreduction gearing and a simple planetary gear input arrangement that is used as a differ-

FOR TRAINING USE ONLYPage 1-16
ential to allow driving with either the primary hydraulic system or the emergency electricdrive system.
The high torque rotary section of the actuator is the final torque-amplifying deviceand does the work of raising and lowering the landing gear, as well as opening and clos-ing the outboard door.
During normal operation electrical power is not supplied to the emergency extendmotor. The result is the electric motor brake, which holds the sun gear of the simpleplanetary arrangement stationary, is engaged allowing the primary system to drive thegear.
The actuator interconnecting flex shaft connects the forward and aft gearboxes to-gether and provides additional protection against gearbox or motor failures. See figure 1-7.
COMPONENT DESCRIPTIONS
The following component descriptions pertain to any one of the four identical systems;therefore, component locations are identical with respect to the individual system instal-lations.
Figure 1-12 MLG ACTUATION SYSTEM MLG14

FOR TRAINING USE ONLY Page 1-17
MLG CONTROL MANIFOLD—The MLG control manifold is a six-port module lo-cated on the cargo compartment sidewall adjacent to its respective wheel well and con-trols all normal extension and retractions.
MLG DOOR UPLOCK VALVE—A MLG door uplock valve is located on the cargocompartment sidewall and controls the door lock/unlock operations. The valve containstwo pilot valves and a double-detented control valve. The pilot valves are controlledelectrically and have manual overrides.
ROTATION MANIFOLD—The rotation manifold is a seven-port module located onthe inboard side of the crosshead assembly and controls normal rotation operation.
ROTATION SEQUENCE INTERLOCK VALVE—The detented, two-position, 3-port, rotation-sequence interlock valve, located on the inboard side of the crosshead nearthe collar lock, is mechanically actuated to either of its two positions and provides rota-tion sequencing operations in relation to collar lock and unlock positions. The sequencevalve prevents bogie rotation during landing gear retraction until the collar lock is un-locked. When collar locking is complete, the collar lock sequence valve is mechanicallytripped, venting pilot pressure from the rotation control valve to the return line.
HYDRAULIC MOTORS—A 3000-PSI, fixed displacement, piston-type hydraulicmotor is mounted to each system main drive gearbox. It provides power for normal gearand door extension and retraction operations. The direction or rotation is controlled by theMLG manifold. Motor speed is regulated by the flow regulator in the hydraulic system.
GEAR-DOWN LOCK/UNLOCK CYLINDER—A hydraulically actuated, gear-downlock/unlock cylinder is located on the knee joint of the side brace assembly and locks orunlocks the main landing gear downlock overcenter linkage. Extension of the piston locksthe overcenter linkage, while retraction of the piston unlocks the overcenter linkage. Seefigure 1-19.
COLLAR LOCK SEQUENCE VALVE—The collar lock sequence valve preventspressure application to the crosshead lock cylinder during rotation thus reducing the in-ternal friction of the related components. The valve is located on the outboard side of thecrosshead and is positioned by mechanical linkage to apply pressure when the gear rotatesto zero position during the extension cycle. In addition, an internal relief valve allows thepressure to bypass when the valve is closed. See figure 1-16.
NORMAL INTERCOLLAR LOCK CYLINDER—A hydraulically operated normalintercollar lock cylinder located on the top, center, outboard side of the crosshead pro-vides normal locking and unlocking of the MLG shock strut collar lock assembly. Thebody is bolted to the crosshead, while the adjustable end of the piston rod is bolted to thelock assembly. See figure 1-16.
Extension of the piston rotates the collar lock assembly, mechanically locking theMLG strut to the positioning collar. Retraction of the piston reverses the previous opera-tion and locks the MLG strut to the rotation collar.
EMERGENCY INTERCOLLAR LOCK CYLINDER—A hydraulically operatedemergency intercollar lock cylinder located on the top, center, outboard side of the

FOR TRAINING USE ONLYPage 1-18
crosshead provides locking of the strut collar lock assembly during emergency extensionand is powered by the APU accumulator. See figure 1-16.
ROTATION CYLINDER—A hydraulically actuated rotation cylinder, mounted to thetop inboard side of the crosshead, rotates the strut and bogie assembly during retractionand extension cycles. The body is mounted to the crosshead, while the piston rod is boltedto the stop plate assembly. The normal rotation cylinder includes the 90-degree rotationswitch and its actuating push rod. See figure 1-13.
EMERGENCY ROTATION CYLINDER—A hydraulically actuated rotation cylindermounted to the top inboard side of the crosshead is provided for emergency strut and bo-gie rotation if the normal rotation cylinder becomes inoperative. On the aft MLGs, theemergency rotation cylinders also function as positioning cylinders if the normal posi-tioning system becomes inoperative. This is accomplished by using the BEEPERswitches located on the copilot's side instrument panel. See figure 1-13.
EMERGENCY CONTROL MANIFOLD—The emergency control manifold is a six-port module located on the cargo compartment sidewall adjacent to the wheel well. Themanifold controls emergency outboard rotation and emergency outboard and inboard po-sitioning operations. The manifold contains three manually or electrically actuated pilotvalves; a two-position, pilot-actuated, emergency system isolation control valve; and athree-position, pilot-actuated, emergency positioning and rotation control valve.

FOR TRAINING USE ONLY Page 1-19
Figure 1-13 AFT MLG COMPONENT LOCATION MLG15

FOR TRAINING USE ONLYPage 1-20
Figure 1-14 FORWARD MLG COMPONENT LOCATION MLG15A

FOR TRAINING USE ONLY Page 1-21
POSITIONING CYLINDERS—Two hydraulically operated positioning cylinders pro-vide caster and positioning of the AFT MLG bogies. The cylinders are attached to the po-sitioning collar and the crosshead. A hydraulic, pilot-operated shutoff valve is mountedon each positioning cylinder. On the FWD MLGs, the positioning cylinders are replacedwith fixed links. See figure 1-13.
DOOR LOCK CYLINDERS—Two door lock cylinders are mounted on each MLGoutboard door. A lock cylinder is mounted adjacent to each door lock mechanism. Usingpush-pull rods and lever arms, two lock mechanisms are actuated by each door lock cylin-der. The door lock/unlock switches are located in the door lock cylinders. See figure 1-11.
EMERGENCY DOOR UNLOCK CYLINDERS—Four emergency door unlock cyl-inders are located on each MLG outboard door. One cylinder is mounted to each doorlock mechanism and serves to unlock the door locks under emergency extend conditions.See figure 1-11.
EMERGENCY DOOR UNLOCK VALVE—The electrically/manually operated,two-position, three-port, emergency door unlock valve is located on the cargo compart-ment sidewall adjacent to its respective wheel well. The unlock valve pressurizes theMLG door locks during emergency conditions, energizes the brake in the MLG gear-boxes, and pressurizes the emergency downlock cylinder.
Figure 1-15 EMERGENCY MLG HYD SYS/APU START SYS INTERFACE MLG16.TIF
FOR TRAINING USE ONLYPage 1-22
Figure 1-16 MLG INTERCOLLAR LOCK MLG17

FOR TRAINING USE ONLY Page 1-23
MLG SHOCK STRUT
The double-acting shock strut is an oleo-pneumatic strut with the following functions:
♦ Arrests vertical motion of the aircraft when landing.♦ Absorbs peak impact loads, which are transmitted to the structure.♦ Minimizes rebound tendency during landing.♦ Provides air spring suspension to support the aircraft during ground operation.♦ Provides directional control for aircraft ground maneuvering.

FOR TRAINING USE ONLYPage 1-24
Figure 1-17 MLG SHOCK STRUT MLG21

FOR TRAINING USE ONLY Page 1-25
CYLINDER AND PISTON ASSEMBLY—The piston includes a metering pin, whichtravels through an orifice plate located in the cylinder chamber. The orifice plate is heldstationary (relative to vertical movement) within the chamber by an orifice support tube.The support tube is connected to the rotation collar located at the top of the strut assem-bly. The outer circumference of the support tube located within the cylinder is verticallysplined in order to mate with a splined collar attached to the top of the piston. This ar-rangement allows vertical movement of the piston while also providing a rotational con-straint between the piston and cylinder when rotation or positioning operations are not ineffect. See figure 1-17.

FOR TRAINING USE ONLYPage 1-26
Figure 1-18 MLG LOWER BEARING MLG20

FOR TRAINING USE ONLY Page 1-27
The piston chamber is divided into two sections by a floating piston. The uppersection, called the primary air chamber, contains hydraulic fluid and a low-pressure aircharge. The lower section, called the secondary air chamber, contains a high-pressure aircharge. During strut compression, hydraulic fluid is forced through the orifice of the ori-fice plate and compresses the air within the primary chamber. The compressed air nowserves as an air spring and attempts to return the piston to an extended position. Due tothe compressed state of the piston, return flow of hydraulic fluid is restricted by the me-tering pin. Under normal operating conditions, only the primary chamber is used. Shoulda vertical load on the strut exceed 1.25 Gs, the floating piston compresses the nitrogen inthe secondary chamber. This creates additional stroke but at a lower spring rate than aconventional oleo-pneumatic strut would experience. Located at the bottom rear side ofeach strut is the nitrogen servicing valve and pressure gage, which is used to service thechamber. Located on the top of the strut is another nitrogen servicing valve and gage usedto service the primary chamber with nitrogen. The servicing valve/gage fitting must beremoved to service the strut with hydraulic fluid. Total stroke of the shock strut is 25inches.
The cylinder outer surface is polished to a bearing finish to allow for vertical yoketravel during kneeling operations. The top end of the cylinder includes horizontal forwardand rearward extending arms, referred to as the crosshead. The crosshead provides neces-sary mount points and support for numerous components used during gear extension, re-traction, and positioning operations. The crosshead also includes mount points for twonon-rotating, hollow core ballscrews used for MLG kneeling. One ballscrew is locatedforward of the strut while the second is located aft. The top and bottom ends of the aftballscrew are equipped with manifolds to provide connection points for wheel brake hy-draulic lines. These lines run from the aircraft, through the aft ballscrew, and on to thebrake assemblies. Also running through the aft ballscrew is the wiring for skid detectors,tire deflation, and the touchdown sensors. See figure 1-18.
The cylinder and piston assembly includes necessary seals and backup rings toretain the oil and air pressure inside the cylinder. Spare seals and backup rings for thelower strut bearing are located on the lower bearing.
POSITIONING COLLAR AND ROTATION COLLAR—This assembly located ontop of the crosshead transmits linear motion of positioning cylinders or rotation cylindersinto a rotating motion of the piston and bogie. A hydraulically operated inter-collar lockunit locks or unlocks the positioning collar to the rotation adapter. The positioning collarmust be locked to the rotation collar to achieve MLG caster operations and unlocked toallow rotation operations. See figure 1-16.
SIDE BRACE ASSEMBLY—The side brace assembly provides lateral support of thegear in the gear down position. The assembly is made up of an upper link, lower link, anda knee joint. See figure 1-19.

FOR TRAINING USE ONLYPage 1-28
The triangle-shaped upper link is trunnion-mounted to the structure. The lowerlink is mechanically attached to the inboard side of the yoke. The upper and lower linkare attached by a knee joint which includes an overcenter locking linkage and hydraulicactuating cylinders and three coiled springs. One actuator is used to lock or unlock theovercenter linkage during normal operations. The second actuator provides gear downlock operations during emergency gear extension. The three coil springs hold the down-lock mechanism in a locked configuration whenever hydraulic pressure is unavailable.
YOKE ASSEMBLY—The yoke assembly attached to each strut includes the following:Two trunnion pins, two retract arms, two retract links, a mount pad for a hydraulickneeling drive unit, kneeling reduction gearing, kneeling sprocket and chain drive, andtwo ball nuts. See figure 1-6.
The trunnion pins serve as pivot and mounting points for the gear assembly to theaircraft. The actuation arms are connected to the gear actuation system, and transfers re-traction and extension inputs to the yoke assembly. The actuation arms are connected tothe trunnion pins.
Figure 1-19 DOWNLOCK MECHANISM MLG18.TIF

FOR TRAINING USE ONLY Page 1-29
The yoke is attached to each strut by the two ball nuts, which connect to the twoballscrews. This type of attachment allows the yoke to move up or down the strut verti-cally whenever the ball nuts are rotated by the sprocket and chain drive assembly. Thesprocket and chain drive assembly is controlled by the hydraulic kneeling drive unit,which is discussed in the kneeling section of this manual. Since the MLG is attached tothe aircraft through the yoke assembly, any vertical movement of the yoke increases ordecreases the distance between the aircraft and the bottom of the strut.
BOGIE ASSEMBLY
The bogie assembly, attached to the bottom of the strut, consists of a three-arm tubularstructure. The bogie forms a triangular pattern for the mounting of the wheel and brakeassemblies. One arm of the bogie extends forward with reference to the strut and includesa socket at its forward end, which accepts the forward axle beam. The beam, in turn,mounts two wheel-and-brake assemblies. The two remaining arms extend aft with refer-ence to the strut, one on the inboard side, the other on the outboard side. Each aft arm in-cludes an axle beam, which contains machined bearing lands at each end for mountingtwo wheel assemblies. See figure 1-6.
An integrally forged flange with three keys is located near each end of the aft ax-les for the attachment of the brake assemblies. The axles are internally threaded at eachend for installation of the wheel retainer nuts.
A built-up bogie assembly is interchangeable between forward and aft positionson the left or right sides.
The bogie is attached to the shock strut by a universal joint consisting of a gud-geon pin and a roll pin. The following components are included in the buildup of eachbogie assembly:
♦ Universal joint♦ Forward floating axle beam♦ Bogie pitch positioner♦ Emergency pitch-stop♦ Brake torque compensator link♦ Roll positioner cylinders♦ Bogie positioning rollers
UNIVERSAL JOINT—The universal joint, consisting of the gudgeon and roll pin, pro-vides the necessary pivot points for pitch and roll axis movement of the bogie in relationto the strut. The gudgeon pin is splined into the roll pin to form a tee-shaped assembly,which allows rotation of the strut about the rollpin and pitch of the bogie about the gud-geon pin. The gudgeon pin is equipped with an arm, which is the anchor point for the aftend of the brake torque compensator link. See figure 1-20.
FORWARD FLOATING AXLE BEAM—The floating axle beam is supported by,and allowed to rotate within, the bogie forward arm socket. Bearing lands are machined ateach end of the axle for mounting the two forward wheel assemblies, and the axle is in-ternally threaded at each end for installation of the wheel retaining nuts. An integralflange with three keys is forged on the outboard half of the axle to mate with three key-
FOR TRAINING USE ONLYPage 1-30
ways in the brake housing to prevent rotation between the brake stators and axle. See fig-ure 1-21.
A lug is provided on the integral flange of the axle for attachment of the braketorque compensator link. Two mechanically linked collars are splined onto the inboardhalf of the axle. One collar includes three keys for inboard brake installation, while thesecond collar provides a mounting point for the pitch positioner rod end. The axle beamis interchangeable between the four possible bogie positions.
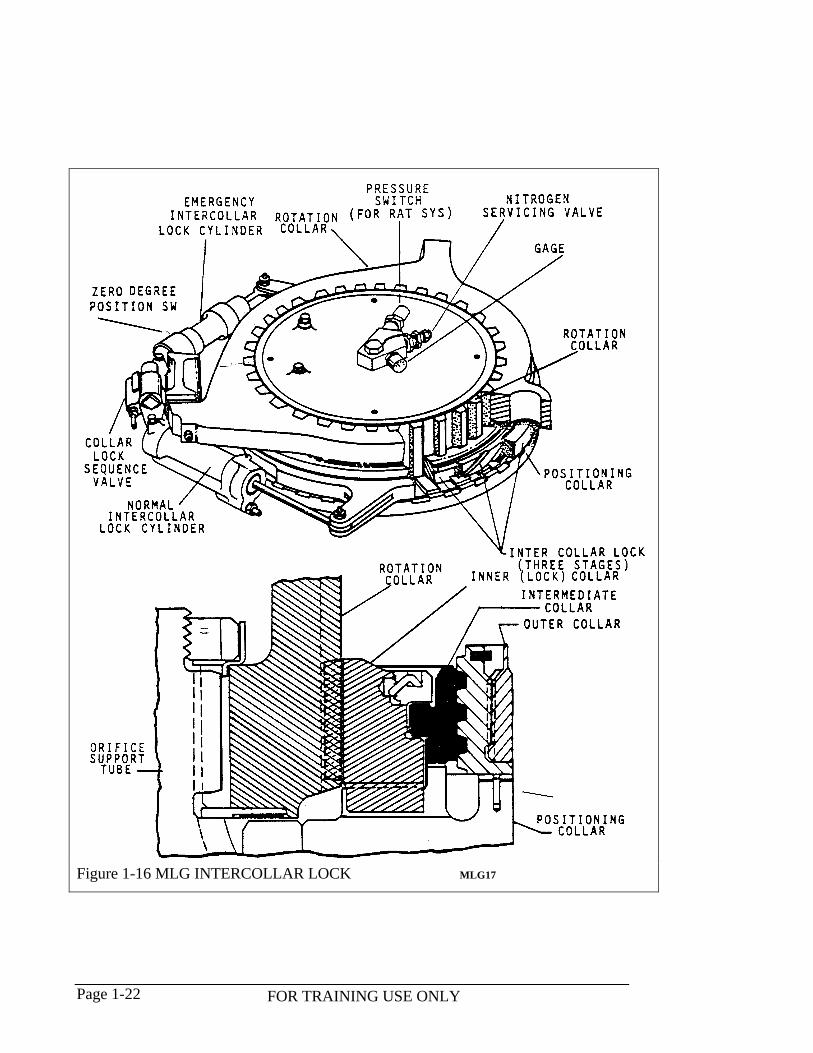
BOGIE PITCH POSITIONER—The pitch positioner is used to maintain a perpendicularrelationship between the vertical line of the strut and the horizontal plane of the bogiewhen the gear is extended. The pitch positioner is located on the inboard side of each bo-gie forward-extending arm and consists of a pneumatically charged cylinder and a self-centering piston. The cylinder is attached to the bogie while the rod end of the piston isattached to the forward floating axle. During bogie pitch changes due to terrain condi-tions, the piston stroke allows approximately 11 degrees pitch up and 15 degrees pitchdown. See figure 1-24.
The pitch positioner includes a valve for servicing and a pressure gage to checkinternal pressure. The positioner is precharged with dry air or nitrogen to a value that cor-responds with a Pressure vs. Temperature Chart located on the positioner.
During retraction of the MLG assembly, the pitch positioner piston must be in-serted into the cylinder beyond its normal travel to allow the perpendicular relationshipbetween the bogie and the strut to form a greater angle for gear retraction. This is accom-plished by directing hydraulic pressure into the cylinder, which repositions the internalstop keys. This allows pitch down of the bogie in order to assume an increased angle ofapproximately 175 degrees in relation to the strut centerline. Hydraulic pressure is di-rected into the cylinder lock chamber by a mechanically actuated hydraulic master cylin-der mounted to the top forward side of the bogie forward extending arm. A roller andlever arm connected to the master cylinder is used to mechanically force hydraulic fluidfrom the master cylinder into the positioner lock chamber and also retracts the pin in theemergency pitch stop cylinder. The above action takes place during gear retraction as theroller and lever arm contacts the retraction guide track located on the top side of thewheel well. The reverse action takes place during MLG extension. Hydraulic fluid is al-lowed to reenter the master cylinder, allowing the positioner stop keys to assume theiroriginal position, thus relocking the rod to the piston.

FOR TRAINING USE ONLY Page 1-31
Figure 1-20 BOGIE AND STRUT UNIVERSAL JOINT MLG22

FOR TRAINING USE ONLYPage 1-32
Figure 1-21 BOGIE PITCH COMPONENTS MLG23

FOR TRAINING USE ONLY Page 1-33
Figure 1-22 MAIN LANDING GEAR PITCH POSITIONING SYSTEM MLG24

FOR TRAINING USE ONLYPage 1-34
Figure 1-23 MLG MASTER CYLINDER MLG25

FOR TRAINING USE ONLY Page 1-35
Figure 1-24 BOGIE PITCH POSITIONERMLG26.TIF

FOR TRAINING USE ONLYPage 1-36
Figure 1-25 MLG PITCH POSITIONER MLG27

FOR TRAINING USE ONLY Page 1-37
Bleeding and refill of the bogiepitch positioning master cylin-der is required when the fluidquantity indicator is recessed0.500 inch or more and con-sidered fully charged when thequantity indicator is betweenflush and 0.125 inch.
EMERGENCY PITCH-STOP—The emergency pitch-stop is a mechanical safety de-vice mounted on the lower aft side of the MLG forward axle pitch collar. This deviceprevents the bogie from pitching down past a certain point in case of a pitch positionermalfunction when the gear is down and locked, and the wheels are off the ground. Seefigure 1-21.
BRAKE TORQUE COMPENSATOR LINK—The brake torque compensator link isa structural member installed adjacent to the longitudinal arm of the bogie center axlebeam. The forward end of the compensator link attaches to a lug on the outboard side ofthe forward axle while the aft end attaches to the gudgeon pin. The compensator linkcounteracts the torquing action, which cause the forward wheels to dip and the rearwheels to rise when the brakes are applied. See figure 1-20.
ROLL POSITIONER CYLINDERS—Two roll positioner cylinders are mounted aft ofthe connecting point between the shock strut and bogie assembly. The two cylinders con-nect to lugs on the shock strut and roll pin. The roll positioner cylinders maintain the bo-gie perpendicular to the shock strut when the wheels are off the ground.
BOGIE POSITIONING ROLLERS—The bogie positioning rollers mount betweenlugs on the forward top side of the bogie assembly and engage the retraction guide trackas the gear retracts into the wheel well. The positioning rollers guide the bogie along theretraction guide track as the bogie pitches from the perpendicular, in relation to the strut,to an angle of 175°. See figure 1-22.
PROXIMITY SWITCH SYSTEM
The proximity switch system consists of a variable reactance sensor and a solid stateswitch. The switch is actuated by bringing a steel plate (target) into proximity with thesensor. The system has no moving parts, will operate for unlimited switching cycles, willnot interfere with other systems, and is fail-safe. The system will not operate if the sensoror wiring to the sensor opens or shorts.
Figure 1-26 MLG BOGIE MASTER CYLINDER

FOR TRAINING USE ONLYPage 1-38
Figure 1-27 PROXIMITY SWITCHES MLG28

FOR TRAINING USE ONLY Page 1-39
Figure 1-28 PROXIMITY SWITCH OPERATION MLG29

FOR TRAINING USE ONLYPage 1-40
The sensor is a magnetic, field-producing, coil-core combination imbedded in ep-oxy or ceramic depending on temperature operation. Electrical connections are perma-nently affixed Teflon-covered wire or threaded stainless steel studs.
The switch is a solid-state circuit, mounted on a printed-circuit board, and nor-mally installed remote from the sensor in a controlled environment.
The sensor can be installed anywhere and exposed to almost any environment. Itis normally installed in a fixed position, with the target affixed to the movable object tobe sensed. The target may be brought into proximity with the sensing surface by any ofthree means: It may move across the sensing surface, move toward the sensing surface, ordecrease the angle to the sensing surface.
The system operates as follows: As the target is brought into proximity with thesensor face, the reactance of the sensor varies. This variation creates a voltage changeacross the sensor coil, which is used to control a transistor switch. The transistor switch israted for the high inrush current associated with lamp circuit operation. As the target ismoved out of proximity, the transistor switch returns to its original condition.
MLG SEQUENCE CONTROL PANELS—DESCRIPTION
The MLG sequence control panels are installed in the cargo compartment for control ofthe landing gear hydraulic and electrical functions during retraction and extension. TheRH and LH MLG sequence control panels are located on the side walls of the center
Figure 1-29 PROXIMITY SENSOR AND TARGETMLG30.TIF

FOR TRAINING USE ONLY Page 1-41
cargo compartment between the two related gear areas. The left panel controls the leftFWD and left AFT gear. The right panel controls the right FWD and the right AFT gear.
Figure 1-30 LH MLG SEQUENCE CONTROL PANEL MLG31

FOR TRAINING USE ONLYPage 1-42
Figure 1-31 RH MLG SEQUENCE CONTROL PANEL MLG32
FOR TRAINING USE ONLY Page 1-43
COMPONENTS—Components used in each panel are similar and they consist of thefollowing items:
♦ Relays♦ Proximity switch cards♦ Functional checkout lights♦ Spare components♦ Light panel decal♦ Test card
RELAYS—Relays are used for relay logic in controlling external relays, hydraulic sole-noid valves, and electrical motors. The relays located on the face of the panel are theplug-in type and are decal numbered or named. Four non-plug-in type, time-delay relaysare located on top of each of the left and right panels. The numbered decals, which iden-tify relays, also correspond to numbers identifying functional checkout lights. Spare re-lays provided on both the RH and LH control panels serve as replacement for relays lo-cated in the center section of the panels. Spares for the time delay relays are located onthe RH MLG sequence control panel. The relay identified as SP is a spare for the 4A or3F time delay relays on either the RH or LH panel. On the LH sequence control panel, therelay identified as SP is a spare for the 1A time delay relay1 on either the RH or LH se-quence control panel.
PROXIMITY SWITCH CARDS—Proximity switch cards are used to control relayoperation. Identification decals are found on the card hold-down bar. Two types of switchcards are used. A circle or square on the decal designates card type. The card number orname found on the decal corresponds to related relays or system function. As an exampleof function, the FWD PITCH and AFT PITCH switch cards control warning lights at theflight station and are not related to relay control. The NLG CENTERED switch functionis an example of a relay operation. If the gear is centered, the normally open CENTEREDproximity switch will be closed and the CENTERED relay will be energized. Contacts ofthe CENTERED relay are located in the gear retraction sequence circuit. With the testswitch in the ON position and the CENTERED relay energized, the CTR (centered)functional checkout light will illuminate. Switch cards coded with a square containingletters SP means that card is a spare card for switch cards coded with squares only.Switch cards coded with a circle containing letters SP means that card is a spare for cardscoded with a circle.
FUNCTIONAL CHECKOUT LIGHTS—The functional checkout lights are the press-to-test type and have either green or blue lenses.
Green lights are used to monitor input and output control signals: gear handle up,up rotate solenoids, etc. The press-to-test feature checks the lamp of the green lights.
Blue lights are used to monitor relay operation. A blue light will illuminate whena corresponding relay is energized. The sequence control panel has a test switch, which isspring-loaded to the ON position that tests lamp integrity of only the blue lights when the
1 Caster time delay relay.

FOR TRAINING USE ONLYPage 1-44
switch is positioned to TEST. When the test switch is in the ON position an observer canmonitor relay operation during gear operation.
The press-to-test feature of the blue lights is used to check for a faulty relay,switch card, or microswitch. A malfunction is indicated if the blue light fails to illuminatewhen operating the gear. If during this time of the operation sequence the light is pressedand the lamp illuminates, a failed relay is indicated. If the lamp remains extinguished, afailed switch card, microswitch, or wiring may be the problem.

FOR TRAINING USE ONLY Page 1-45
MLG RETRACTION AND EXTENSION
GENERAL
There are four identical MLG hydraulic control systems, which provide power for opera-tion of the four gear and door systems during retraction and extension. Normal power forthe left and right forward MLG retraction and extension operations is furnished by theNo.4 hydraulic system. Normal power for the left and right AFT MLG retraction and ex-tension operations is furnished by the No.1 hydraulic system. Each of the four MLG hy-draulic power systems is electrically controlled to initiate a simultaneous, automatic, andin-proper-sequence operation of each gear.
In case of a normal hydraulic system power loss, the affected gear can be pressur-ized by another hydraulic system using the hydraulic power transfer units. In case of a to-tal hydraulic power loss, electric motors are used to provide emergency power for gearand door extension. During emergency operation, the door locks are unlocked by an alter-nate pressure source or an APU accumulator plumbed to individual emergency door lock-unlock cylinders. The No.1 hydraulic system, as an alternate, provides power for emer-gency rotation to the two forward gear assemblies, while the No.4 hydraulic system pro-vides power for emergency rotation of the two aft gear assemblies. APU accumulatorsprovide further reliability for the rotation cycle.
Gear and door cycles are initiated electrically from the flight station by operatingthe gear control handle and using two MLG sequence control panels; one for both leftMLG installations and the other for both right installations. The sequence control panelsare located on the cargo compartment inside wall between the respective wheel well ar-eas. The electrical control system incorporates microswitches and proximity switches thatprovide validation of prerequisite gear and door lock positions so that hydraulic gear anddoor operations may begin once gear commands are given.
The following is a list of microswitches and proximity switches along with theirlocations and functions, which are used during retraction and extension operations. Thislist is typical of a MLG installation.
♦ Two door-lock microswitches, one located on the forward door lock cylinder, and theother located on the aft door lock cylinder. The two microswitches verify eitherlocked or unlocked conditions of the MLG door locks.
♦ Two door-closed proximity switch sensors are located on the forward and aft inboarddoor lock stirrups. Targets are located on the inboard door locks.
♦ A MLG centered proximity switch, on No.3 and No.4 MLG only, verifies that a cen-tered condition of the bogie and strut exists. The proximity switch target is mountedon the MLG positioning collar and its sensor is mounted on the crosshead assembly.
♦ A MLG downlock proximity switch verifies the down and locked or not locked con-ditions of the MLG. The target and sensor are mounted on the overcenter linkage ofthe MLG side brace assembly.
♦ The intercollar lock proximity switch verifies that the MLG intercollar lock assemblyis either locked or unlocked. The sensor is located in the emergency intercollar lockcylinder.
FOR TRAINING USE ONLYPage 1-46
♦ A 90-degree rotation microswitch verifies whether a rotated condition of the bogieand strut exists. The switch is located on the normal rotation cylinder.
♦ Pitch position sensor is located inside the cover at the end of the center axle beam. Itindicates whether the bogie is level for landing. If the bogie is pitched up more than11 degrees or down more than 15 degrees, a signal is sent to light the appropriateBOGIE PITCH light on the pilot's annunciator panel. There is a separate light for eachbogie.
♦ Touchdown position sensor. Each MLG has a touchdown sensor. This sensor is actu-ated by a cam at the knee joint of the touchdown scissors linkage when the shock strutstarts to compress. Either the two forward or the two aft MLG touchdown switchesmust be actuated to initiate a touchdown signal. This signal is used to make variousairplane systems inoperative either in the air or on the ground. Elements within theavionics, guidance, and instrumentation systems are affected.
The following list identifies the solenoids and relays along with their locationsthat are used during normal and emergency MLG operations:
♦ Gear-up solenoid located on the MLG control manifold.♦ Gear-down solenoid located on the MLG control manifold.♦ Gear-down rotate solenoid located on the MLG control manifold.♦ Gear-up rotate solenoid located on the MLG control manifold.♦ Door lock solenoid located on the door uplock selector valve.♦ Door unlock solenoid located on the door uplock selector valve.♦ Emergency isolation solenoid located on the MLG control manifold.♦ Emergency door unlock solenoid located on the emergency door unlock valve.♦ Emergency inboard positioning solenoid located on the MLG emergency control
manifold.♦ Emergency outboard positioning and emergency outboard rotation solenoid located on
the MLG emergency control manifold.♦ Emergency system isolation solenoid located on the MLG emergency control mani-
fold.♦ Emergency MLG motor control relays located in the flight engineer's relay panel♦ Emergency caster/powerback positioning SOV control valve located on the cargo
compartment sidewall adjacent to the respective wheel well.♦ Emergency inboard rotation relay located at the aft electrical equipment rack.

FOR TRAINING USE ONLY Page 1-47
Figure 1-32 MLG AND DOOR HYDRAULIC SYSTEM SCHEMATIC-NORMAL

FOR TRAINING USE ONLYPage 1-48
OPERATIONAL DESCRIPTION OF MLG RETRACTION AND EXTENSION
The following description outlines the normal retraction and extension of the right AFTMLG. The other three main gears are similar. The total operating time is 17 secondsmaximum for retraction and 18 seconds maximum for extension.
GEAR-UP OPERATION—Prior to selection of gear-up, the gear handle is in the downposition. The door unlock, gear-down, and down rotate solenoids are energized, and allthree valves are detented in these positions. The landing gear position indicator showsgreen wheels.
Selection of gear-up initiates the following sequence: The gear handle light comeson and the gear-down, door unlock, and down rotate solenoids are de-energized, but willremain in their detented position. The anti-rotation spin up relay applies power to theGEAR HANDLE UP AND DOOR NOT LOCKED position relay when all wheels on theMLG stop rotating after takeoff. On the aft gears only, the GEAR HANDLE UP ANDDOOR NOT LOCKED position relay will not energize until the center relay is energizedby the center position sensor on the centered aft gears. Energizing the GEAR HANDLEUP AND DOOR NOT LOCKED position relay will energize the up rotate solenoidwhich positions the rotate pilot valve. The up rotate solenoid remains energized duringgear retraction, keeping the normal rotation cylinder pressurized for the bogie to combatair loads and maintain alignment with the guide track. Pilot pressure shifts the rotationcontrol valve from the detented down rotate position to the up rotate position and hydrau-lic pressure is applied to the following components:
1. Intercollar lock/unlock cylinder—The cylinder unlocks and mechanically opens therotation sequence interlock valve.
2. Rotation manifold—Ports pilot pressure from the shuttle valve within the rotationmanifold through the mechanically opened rotation sequence interlock valve whichpositions the rotation valve in the rotation manifold.
3. Normal rotation cylinder—Receives pressure from the hydraulically piloted rotationvalve within the rotation manifold to rotate the bogie from 0-degree to 90-degree.
The position indicator shows red wheels.
Upon completion of bogie 90-degree rotation, the 90-degree microswitch energizes the90-degree position relay, which completes the circuit to the gear-up solenoid. Pressure isthen applied to the retract/extend control valve in the MLG control manifold. Pilot pres-sure from the energized solenoid operated gear-up pilot valve shifts the retract/extendcontrol valve to the gear-up position which ports pressure simultaneously to the follow-ing:
♦ MLG downlock/unlock cylinder—Unlocks the side brace overcenter linkage.♦ MLG actuators motors—Drives the hydraulic motors to retract the gear and close the
doors.

FOR TRAINING USE ONLY Page 1-49
♦ Door uplock manifold—Pressurizing the door lock cylinders to hold the door locksunlocked due to the de-energized door lock control valve being in the detented unlockposition.
The landing gear position indicator shows in transit.
Upon completion of gear-up and doors closed, as sensed by the door closedproximity sensors, the door closed relays are energized. This completes the circuit to en-ergize the lock solenoid in the door uplock manifold, which ports pilot pressure to lockthe door locks.

FOR TRAINING USE ONLYPage 1-50
Figure 1-33 MLG EMERGENCY ROTATION HYDRAULIC SCHEMATIC

FOR TRAINING USE ONLY Page 1-51
Figure 1-34 MLG RELAY OPERATION

FOR TRAINING USE ONLYPage 1-52
Figure 1-35 MLG NORMAL RETRACTION/EXTENSION

FOR TRAINING USE ONLY Page 1-53
Upon completion of door locking, the door lock limit switches close, energizingthe door lock relays and repositioning the door lock relay switches. This de-energizes theGEAR HANDLE UP AND DOOR NOT LOCKED position relay, which de-energizesthe gear-up solenoid and the up rotate solenoid. The rotation control valve in the MLGcontrol manifold is centered. The door lock solenoid remains energized.
The landing gear position indicator shows UP and the light in the gear controlhandle goes out.
GEAR-DOWN OPERATION—Prior to selection of gear-down, the gear handle is inthe UP position. The door closed relays are energized completing the circuit to energizethe door lock solenoid. The gear-down time delay is energized. The landing gear positionindicator shows UP. Selection of gear-down initiates the following sequence:
The gear handle light comes on. The door lock solenoid de-energizes and the un-lock solenoid energizes to release the door locks when the retract/extend control valveshifts from its center position and ports pressure to the door lock manifold. The up rotatesolenoid energizes, positioning the rotation control valve to port pressure to the rotationcylinder keeping the bogie at 90-degree to prevent the bogie from turning in the guidetrack as the gear comes out of the wheel well. The GEAR-DOWN TIME DELAYRELAY remains energized momentarily (approximately 1.75 seconds), and power is di-rected through the GEAR-DOWN TIME DELAY switch and the forward and aft doorclosed switches to energize the gear-up solenoid. This positions the gear-up pilot valvewhich pilots the retract/extend control valve to direct system pressure to the up side of thehydraulic motors. This pulls the gear-up, and unloads the door locks. The energized un-lock solenoid will position its pilot valve to shift the lock control valve to direct systempressure to the door lock cylinders and unlock the door locks while the doors are un-loaded.
Once the GEAR-DOWN TIME DELAY RELAY'S time has expired, power isswitched from the GEAR-UP solenoid to the GEAR-DOWN solenoid, shifting theRETRACT/EXTEND control valve to drive the hydraulic motors, opening the doors andlowering the landing gear. Pressure is also directed to the lock side of the gear downlockcylinder to lock the gear in the downlock once it is fully extended. The landing gear posi-tion shows IN-TRANSIT.
Once the gear moves into the downlock, the following occurs: The downlockproximity sensor energizes the downlock relay, which closes the downlock switch. Thenpower is directed from the up rotate solenoid to the down rotate solenoid. The energizeddown rotate solenoid positions the down rotate pilot valve to port pilot pressure to therotation control valve in the MLG control manifold. Pilot pressure shifts the rotationcontrol valve to the down rotate position, and system pressure is directed to the rotationmanifold, collar lock sequence valve, MLG brake manifold, kneel control manifold, andthe caster/powerback positioning manifold (aft gears only).
Hydraulic pressure shifts the shuttle valve in the rotation manifold and flowsthrough the shuttle valve to the mechanically positioned open rotation sequence interlockvalve to the pilot section of the rotation valve. Pilot pressure positions the rotation valvein the rotation manifold, and system pressure is ported to the normal rotation cylinder to

FOR TRAINING USE ONLYPage 1-54
rotate the bogie from the 90-degree to 0-degree position. The landing gear position indi-cator shows red wheels.
As the bogie reaches 0-degree, it mechanically opens the collar lock sequencevalve which ports pressure to the lock side of the normal intercollar lock cylinder, lockingthe intercollar lock. Final movement of the collar lock mechanically positions the rotationsequence interlock valve, which now vents pilot pressure from the rotation valve in therotation manifold and closes the rotation valve.
The 0-degree collar lock relay switch in the locked position prevents the MLGfrom going to an up rotate condition should the downlock relay switch fail in the NOTlocked position. The landing gear position indicator shows green wheels.
NOTE: The gear-down solenoid, door unlock solenoid, and down rotate solenoidremain energized. This provides hydraulic pressure as follows:
• To the MLG actuators (to maintain the door open position which eliminates door vi-bration during landing and roll out).
• To the door lock actuators (to hold the door locks in an open condition).• To the MLG caster/powerback system, the kneeling system, and the brakes.
The retract/extend control valve and the rotation control valve in the MLG mani-fold are detented in the gear-down and down rotation positions respectively to assure hy-draulic pressure will be available to the brake system, the MLG caster/powerback system,the kneeling system, and the gear extension system if electrical failure occurs.
MLG EMERGENCY EXTENSION—If the MLG cannot be extended by the normalmethod, an emergency extend system using electric motors is provided. When the emer-gency extend system is selected, the main drive input shafts and hydraulic motors are pre-vented from rotating by hydraulically actuated brakes and the electric motors drive thegearboxes using the differential principle. When the gear is down, hydraulic system No.1and No.4, as alternate systems, supply pressure for the emergency downlock actuator andfor the emergency rotation cylinder. In the event that the hydraulic system used as anemergency backup pressure source is inoperable, the APU start accumulators plumbedinto the systems function as backup hydraulic sources. System accumulator No.1 suppliespressure to the forward main gears and system accumulator No.4 supplies pressure to theaft main gears. A hand pump is provided at each APU accumulator installation and isplumbed into the respective pressure line to provide further backup as an emergency pres-sure source.
Four MLG EMERGENCY EXTEND switches located on the forward right sideof the center console control emergency extension. Positioning an EMERGENCYEXTEND switch to EXTEND causes the red light in the landing gear control handle toilluminate and energizes the following relays and solenoids:
♦ Emergency isolation pilot valve in the MLG control manifold. The pilot valve oper-ates the emergency isolation directional control valve, which cuts off normal systempressure and vents the normal system to return.
♦ The unlock solenoid in the door emergency unlock valve to allow the ALT hydraulicsystem, if available, or APU accumulator pressure to unlock the emergency door un-

FOR TRAINING USE ONLY Page 1-55
lock actuators, to apply pressure to the emergency downlock actuator, and to lock thegearbox brakes between the hydraulic motors and the gearboxes. The position indi-cator now shows IN TRANSIT.
♦ The FWD and AFT emergency motor control relays allowing the emergency drivemotors to open the doors and extend the gear. The AFT emergency motor control re-lay cuts power to the emergency outboard positioning pilot valve.
♦ Sends power to release the FWD and AFT emergency drive brake No.1 and No.2.♦ The 90-degree rotation relay energizes the emergency inboard positioning pilot valve.
The solenoid pilot valve positions the emergency positioning directional controlvalve. It directs pressure to the inboard positioning side of the emergency rotationcylinder to keep the gear rotated inboard while the gear extends.
Once the gear extends and locks in the downlock, the position indicator showsRED WHEELS. The DN switch (down lock relay) in the MLG sequence control panelopens to cut power to the FWD and AFT emergency motor control relays. They stop thetwo motors and de-energize the motor brakes. The DN lock switch cuts power to the 90-degree rotation relay. This de-energize the emergency inboard positioning pilot valve andenergizes the emergency outboard positioning pilot valve. The emergency positioning di-rectional control valve then directs pressure to the outboard positioning side of the emer-gency rotation cylinder to rotate the bogie 90-degree to the 0-degree position.
Once the bogie rotates to 0-degree and the collar locks, the collar lock switchcloses to illuminate the EMERGENCY SW ON light. When the EMERGENCYEXTEND switch is returned to NORMAL, the EMERGENCY SW ON light extin-guishes. All remaining emergency solenoids are de-energized.

FOR TRAINING USE ONLYPage 1-56
Figure 1-36 LEFT FWD MLG EMERGENCY SCHEMATIC

FOR TRAINING USE ONLY Page 1-57
Figure 1-37 LEFT AFT EMERGENCY EXTENSION SCHEMATIC

![arXiv:1407.0927v1 [cs.SE] 3 Jul 2014Landing-Gear Extended Landing-Gear Retracted Landing-Gear Box Landing Wheel Door Figure 1: Landing Gear System such as airport runways [11]. Three](https://img.dokumen.tips/doc/110x75/5e9397289f16a23cdf089611/arxiv14070927v1-csse-3-jul-2014-landing-gear-extended-landing-gear-retracted.jpg)


![Landing Gear Accessories - goldlinequalityparts.com€¦ · 12 Landing Gear Accessories Landing Gear Accessories 13 [254.0mm] 10.00" [254.0mm] 10.00" [111.3mm] 4.38" [304.8mm] 12.00"](https://img.dokumen.tips/doc/110x75/5f42201687106b11477aac9b/landing-gear-accessories-12-landing-gear-accessories-landing-gear-accessories.jpg)