Embed Size (px)
DESCRIPTION
Self help guide to supercomputing through application of render farm concepts
Citation preview

tomshardware.com
Building Your Own Render Farm
original (http://www.tomshardware.com/reviews/render-farm-node,2340.html)
Everyone reads articles about the immense number of processor hours required to create visual effects and animations for the latest films and TV shows.
For example, render times totaled 40 million hours (http://www.hp.com/hpinfo/newsroom/press/2009/090327xa.html?mtxs=rss-corp-news) for Monsters vs. Aliens, 30 million
hours (http://www.nationalpost.com/arts/awards/story.html?id=1143943) for Madagascar: Escape 2 Africa, and 6.6 million hours for Revenge of the Sith.
()
A good render time for television visual effects is anywhere between 30 minutes to one hour
per frame, while multiple hours per frame is common for feature films. Some of the IMAX
resolution frames required for Devastator, a character in Transformers 2: Revenge of the
Fallen (http://www.showbizmonkeys.com/movies.php?id=1182), took up to 72 hours per frame. How do studios
get around this? They use render farms, which are banks of machines with the express purpose
of rendering finished frames. In addition to the systems that animators use, render farms
simultaneously use many dedicated processors for rendering. For instance, Industrial Light
and Magic had a render farm with 5,700 processor cores (http://www.studiodaily.com/main/topstory/11019.html)
(and 2,000 cores in their artists' machines) when Transformers 2 was produced. Even a small
facility with only a dozen animators is likely to have more than a hundred processor cores at
their disposal.
Do You Need A Render Farm?
Use of render farms isn't and shouldn't be just restricted to large studios and 3D artists. Smaller studios have their own render farms and many freelance
artists have them as well. Compositors and freelance motion-graphics artists can also make use of them. Some editing systems support the use of
additional machines called render nodes to accelerate rendering, and this type of setup can be extended to architectural visualization and even digital
audio workstations.
If you are working as a freelance artist in the above-mentioned media, toying with the idea, or doing so as a hobbyist, then building even a small farm
will greatly increase your productivity compared to working on a single workstation. Studios can even use this piece as a reference for building new
render farms, as we're going to address scaling, power, and cooling issues.
(http://www.jeremymassey.com/)
If you're looking at buying a new machine and are thinking of spending big bucks to get a bleeding-edge system, you
might want to step back and consider whether it would be more effective to buy the latest and greatest workstation or
to spend less by investing in a few additional systems to be used as dedicated render nodes.
Most 3D software and compositing applications include network rendering capabilities, and many also have some
form of a network rendering controller. So, the additional nodes can be managed from your workstation, making it
possible to run them as headless systems with no mouse, keyboard, or monitor. Adding a Virtual Network Computing
(VNC) client to each node allows you to remotely manage the nodes without the additional expense associated with
adding a multi-channel system keyboard, video, and mouse (KVM) switch for separate access to each.
Buying The Farm
There are three ways to approach acquiring systems for a render farm: building your own, having a builder make them for you, or buying pre-built boxes.
Each approach has its own set of advantages and disadvantages, which we discuss below. Each approach also involves progressively higher price tiers,
which range from cheap to insane.
A useful tip is to make sure the processors in your render farm are the same as the processors in your workstation, as there may be differences in
rendering between processor architectures, which could mean small differences in your final rendered frames. However, these potential compatibility
problems are today the exception rather than the rule, but it is still something to be cautious about. For the purposes of this article, assume that we're
talking about Intel-based render nodes, although they could just as easily center on AMD CPUs.
A popular option for the freelance artists out there is building your own nodes. The advantages are similar to the benefits of building your own PC rather
than buying an off-the-shelf system: direct control over the components that go into the build and lower per-unit costs. However, the disadvantages are
also the same: you have to support the failure of individual pieces yourself or pay someone else to come in and work on them when they break.

()
These days it really makes sense to go ahead and use rack-mounted enclosures. You'll spend a little more, but the space and power savings will be well
worth it. A 1U chassis, like the Supermicro CSE-512L-260, retails for around $100 and includes a 260 W power supply. More than likely, a node will use
its own onboard graphics rather than a discrete graphics card, so there's a significant power savings right off the bat. Most 3D animation and
compositing renderers rely on the CPU instead of GPU, while the possibility of GPU-based rendering will be discussed below. If your nodes are going to
be mission-critical, you may want to look for units with redundant power supplies, but this will significantly increase the per-unit cost.
For the rack itself, you can either spend the money and buy a professional unit (Ed.: I have one of these (http://catalog.belkin.com/IWCatProductPage.process?
Product_Id=202101) in my garage) or you can instead convert pieces of furniture with the correct dimensions to house your nodes. The RAST or EINA
bedside tables from IKEA, for example, plus a pair of Raxxess rack rails (which you can find, oddly enough, at music stores) do the job at a budget price.
Instead of using rackmount enclosures, it is also entirely possible to use traditional cases with MicroATX motherboards, such as the Antec
(http://www.tomshardware.com/reviews/render-farm-node,2340-2.html) NSK-1380 or a barebone cube like one of Shuttle's XPC chassis. A cube chassis is small, can be
purchased with low-wattage and high-efficiency power supplies, and in some cases can be stackable. You can't get quite the processing density available
through rackmount units, but you can use less-specialized components for cooling, while no riser card is needed to add a discrete graphics. Plus, the
system can perform other functions by serving as a secondary workstation, home-theater PC (HTPC), and so on.
Picking a motherboard for the system is actually an easier prospect (you can even choose from the sub-$100 motherboards that we reviewed here).
(http://www.tomshardware.com/reviews/intel-p45-core,2110.html) It should be noted, however, that only one of these boards has onboard graphics, which you should
consider necessary for these nodes (think G41/G43/G45 instead of the non-integrated graphics versions of those chipsets). In fact, if you don't intend to
ever put a graphics card in any of these nodes, you can get an even cheaper motherboard that doesn't have a PCI Express (PCIe) x16 slot on it (instances
in which you may put a graphics card in a render node will be discussed below). It is likely, though, that you'll want to pick a board with four memory
slots instead of two.
For memory, 4 GB is a good start. With the availability of inexpensive 4 GB kits (reviewed here (http://www.tomshardware.com/reviews/ddr2-ram-memory,2079.html)), there's
no reason not to. If you are using a dual-core processor and your renderer is a 32-bit application, then 4 GB means you'd have just short of the maximum
RAM for each core (which is a good idea if your renderer doesn't multi-thread properly). If you're using a 64-bit renderer, then more memory will likely
be better. We are, of course, discussing using DDR2 memory because in this type of system configuration, there is no real advantage to using DDR3
memory, and the price difference increases the cost of your nodes without a significant performance benefit.
Processor selection is dependent on two things: how much you're able to spend and resulting value. Even more so than normal desktop systems, render
nodes are sensitive to these factors. There is a certain point on the processor performance curve where the next increment in compute speed results in a
pricing jump that is out of order with the increase in performance. However, with today's higher bus speeds, too little cache on a processor can leave it
starved for data. So, for discussion's sake, we'll shy away from Celerons as the bottom-end processor and instead use low-end dual-core Pentiums.
()
Using a lower-cost dual-core Pentium can give you a very inexpensive render node with a minimum sacrifice of performance. The Cinema 4D Release 10
chart (http://www.tomshardware.com/charts/desktop-cpu-charts-q3-2008/Cinema-4D-Release-10,835.html) shows the performance curve. While dual-core Pentiums and Celerons are
not in these charts, you can see that there are spots in the Intel processor lineup where there is a significant jump in price for very little increase in
performance. Find the price that you are willing to pay and then look at the best performance for your price range.
A dual-core Pentium, a slightly faster Core 2 Duo, or even a low-end Core 2 Quad are all good choices for building a node. It's really all about how much
you want to spend here, because this is the single most expensive component required for each node. At the other end of the spectrum, building a Core i7
-based system is going to increase the price of the entire node out of proportion to its increased performance. However, if you want to moderately future-
proof your nodes and increase the likelihood of being able to get a processor upgrade for it later, you may want to consider that route.
()
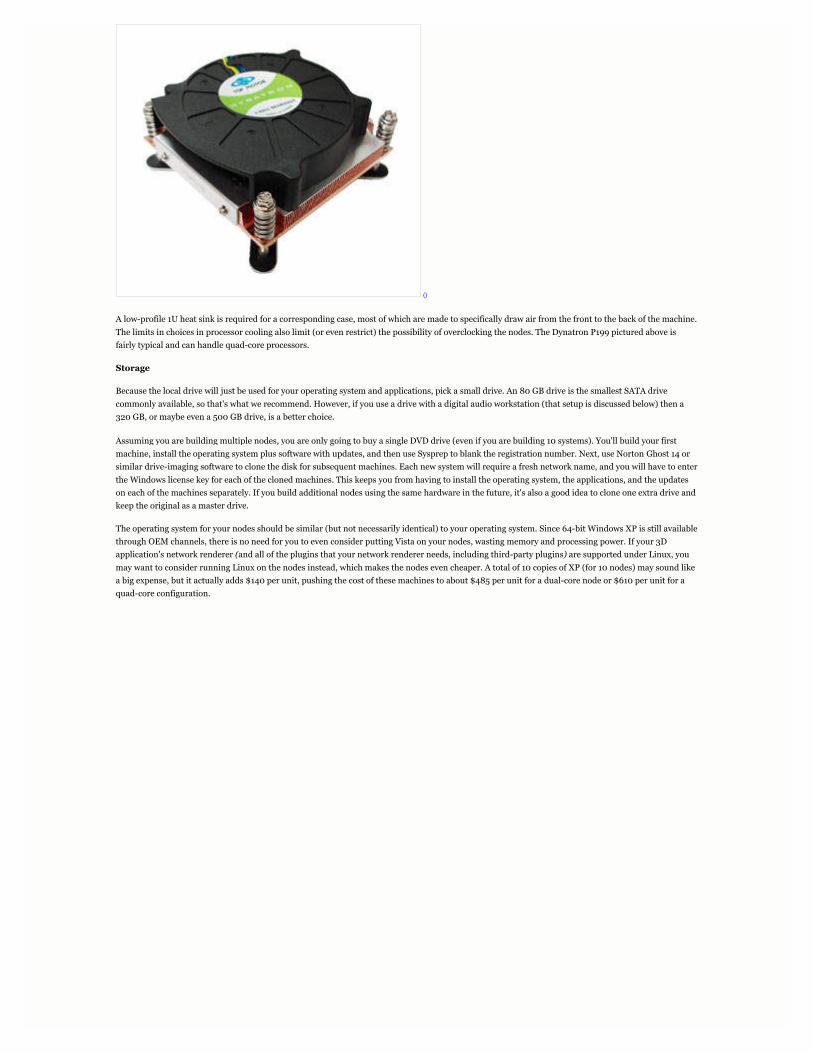
A low-profile 1U heat sink is required for a corresponding case, most of which are made to specifically draw air from the front to the back of the machine.
The limits in choices in processor cooling also limit (or even restrict) the possibility of overclocking the nodes. The Dynatron P199 pictured above is
fairly typical and can handle quad-core processors.
Storage
Because the local drive will just be used for your operating system and applications, pick a small drive. An 80 GB drive is the smallest SATA drive
commonly available, so that's what we recommend. However, if you use a drive with a digital audio workstation (that setup is discussed below) then a
320 GB, or maybe even a 500 GB drive, is a better choice.
Assuming you are building multiple nodes, you are only going to buy a single DVD drive (even if you are building 10 systems). You'll build your first
machine, install the operating system plus software with updates, and then use Sysprep to blank the registration number. Next, use Norton Ghost 14 or
similar drive-imaging software to clone the disk for subsequent machines. Each new system will require a fresh network name, and you will have to enter
the Windows license key for each of the cloned machines. This keeps you from having to install the operating system, the applications, and the updates
on each of the machines separately. If you build additional nodes using the same hardware in the future, it's also a good idea to clone one extra drive and
keep the original as a master drive.
The operating system for your nodes should be similar (but not necessarily identical) to your operating system. Since 64-bit Windows XP is still available
through OEM channels, there is no need for you to even consider putting Vista on your nodes, wasting memory and processing power. If your 3D
application's network renderer (and all of the plugins that your network renderer needs, including third-party plugins) are supported under Linux, you
may want to consider running Linux on the nodes instead, which makes the nodes even cheaper. A total of 10 copies of XP (for 10 nodes) may sound like
a big expense, but it actually adds $140 per unit, pushing the cost of these machines to about $485 per unit for a dual-core node or $610 per unit for a
quad-core configuration.

Component Dual-Core Price Quad-Core Price
Casing Supermicro CSE-512L-260 $94.99 Supermicro CSE-512L-260 $94.99
Motherboard ASUS (http://www.tomshardware.com/reviews/render-farm-node,2340-3.html) P5B-VM SE $59.99 Asus P5B-VM SE $59.99
Processor Intel Core 2 Duo E7200 $91.99 Intel Core 2 Quad Q8200 $164.99
Heat Sink Dynatron P199 $30.99 Dynatron P199 $30.99
Memory Patriot Viper PVS24G6400LLK – (2 GB x 2) $51.99 Two Patriot Viper PVS24G6400LLK – (2 GB x 4) $103.98
Hard Drive Seagate Barracuda 7200.10 ST380215A 80 GB $36.99 Seagate Barracuda 7200.10 ST380215A 80 GB $36.99
Operating System Windows XP Pro 64-bit $139.99 Windows XP Pro 64-bit $139.99
Total (With Shipping) $485.11 $610.10
So here’s what we’re looking at for a per-node price, with both dual- and quad-core processors. Remember, these are prices we found when this article
was written, and they should change in the near future.
If you're looking at installing a large number of render nodes in your home, you need to consider both power and cooling. We’re talking about multiple
systems sitting in an enclosed space, which will consume a lot of power and generate significant heat in a very small area. You should consequently think
about how many nodes will fit in the space allotted.
For a freelancer using a home studio, you may actually be tempted to build 10 identical boxes, but keep power consumption in mind. The electrical
standard in U.S. homes is 110 V at 15 amps, which means 1,650 W is the maximum for a typical circuit. Some houses may have 20 amp breakers, which
gives you a little more leeway, but putting 10 nodes on a circuit means you'd better build extremely efficient systems. If someone turns on a hair dryer on
the same circuit, you'll hear the breaker flip pretty quickly.
If you really need to put 10 nodes in your home, you may want to split them up into two groups of five. Those five may still consume most of the power
available to the circuit they are on. However, keep in mind that with a low thermal design power (TDP) processor, these systems should only consume
about 140 W of power apiece at 100% utilization, depending on the actual processor used, motherboard, chipset, and hard drive. Across 10 systems,
that’s 1,400 W, which is still very close to the maximum yield of an average household line.
After power, your next concern should be cooling. Several 1U computer systems placed in a tight space will generate plenty of warm air behind the boxes.
In order to boost airflow efficiency, most IT departments maintain a hot aisle/cold aisle layout. With a hot aisle/cold aisle layout, the systems draw in
cool air from one side, which is then exhausted out the other side. To a lesser degree, you can apply this data center concept to your setup at home to
handle the airflow for several nodes. Make sure, for example, that there is cool airflow at the front of the systems and a way to evacuate the air behind
them (don't put the back of your rack against the wall).
You also need to worry about redundancy. If one node goes down, you could potentially lose that portion of your render farm. If you can spare the
expense, you could build a spare node to swap in as needed, but then you have to suppress the urge to use it as a node and defeat the purpose of having it
as a spare.
()
Serving Files
With multiple render nodes, it is important host the files for your software somewhere else other than on your production workstation, especially if
you're trying to use the workstation while the other systems render. It is thus a good idea to either buy a network attached storage (NAS) box
(http://www.tomshardware.com/reviews/promise-ns4300n-nas,2047.html) or build a small Linux server to handle the file-hosting chores to keep your workstation from being
taxed by serving files for other systems.
Depending on personal preference, you can either "publish" the files to the server before starting a render or you can actually work with the files from
the server all the time. The first option means your workstation will have fast local access when interactivity is important, while the second option means
you will avoid missing files and broken internal links when moving things to the server. Troubleshooting these kinds of render problems can get very
tedious, and if you're not careful, you can end up spending hours rendering an entire scene only to discover afterward that a texture in the scene was
either missing or not the correct version.

If you’re not currently working with your 3D files on a remote system or file server, then you have to move those files to the server and go through and fix
these potential problems. After doing that, it would be a good idea to get into the habit of working with all of your scenes remotely so that the content is
automatically on the remote file system, allowing you to avoid having to move the scenes over to the server when rendering tasks are performed.
You can step in a different direction by having a small value-added reseller (VAR) build the nodes for you. The obvious advantage is that a VAR has to
support the node when it breaks. But if you buy your boxes online (as opposed to locally), you'll likely have to ship defective units back to the VAR for
repairs. You're also stuck with whatever hardware the VAR offers, while specifying your own configurations may drive up the price if you start asking for
components that it doesn't stock.
()
Many places will also start looking at you strangely when you ask for these types of configurations because they have no experience with people wanting
to build their own render farms. When VARs do build systems like this, they usually expect to put some type of server operating system on the machine.
If you don’t specify otherwise, they might think you're talking about some type of low-spec file or transaction server. However, once you explain to them
what you need, most places should be able to build the nodes fairly close to the same specs as if you were building them yourself, but at a slightly higher
price. Then, once you receive the node, you have to install all of your applications to each system separately or invest in management tools that allow you
to do bulk installs.
If you get a VAR to build your nodes for you, you’ve opened up several new possibilities. One “put-all-your-eggs-in-one-basket” option might involve a
single 1U enclosure like the Supermicro SuperServer 6015T, which has two dual-socket Xeon LGA 771-based processors in a 1U rack unit, meaning you
can put 16 3.2 GHz processor cores in a single 1U enclosure. Of course, this unit also has a 980 W power supply and, at its peak power load, its power
requirement is similar to that of 10 1U nodes.
If you need a lot of processor power in a very small space, a few Supermicro systems might be a good idea, especially if you are running a virtual studio
where you have access to better power circuitry and ventilation designed to handle this kind of setup. These Supermicro high-density systems are going
to get very warm.
()
Another option is investing in ATXBlade (http://www.atxblade.com/) units. ATXBlades are like the blade servers you may have seen, but they use commodity ATX
motherboards and can be configured like a normal system. Additionally, they allow you to fit 10 nodes into 8U worth of space. However, ATXBlades only
accommodate a limited range of motherboard products and other components. Still, you can get the ATXBlade chassis and blade units with
motherboards and no other components, and then you can build the nodes yourself. In discussing these, we've kind of diverged from a home-freelancer
setup into a small-studio discussion because the setups we're talking about are getting progressively more expensive, and also are consuming more
power and generating more heat. An ATXBlade unit consumes 2,000 W at 100% CPU and I/O utilization, which is more power than is available on an
average single-household circuit, making this an option for a small boutique studio.
Buying From a Tier-One Vendor
"Buying commercial" involves going to a so-called big-box vendor for your render nodes. The big advantage to this option is that a large vendor is going
to have a well-trained support staff if you're a business customer. Both Dell and HP have departments that are experienced in supporting 3D animation,
editing, and compositing software if you are a business (and not a home) customer. Business support also means you can get someone on the phone
24/7, and in most cases if you spend the money, you can get next business-day (or even next-day) on-site repairs.
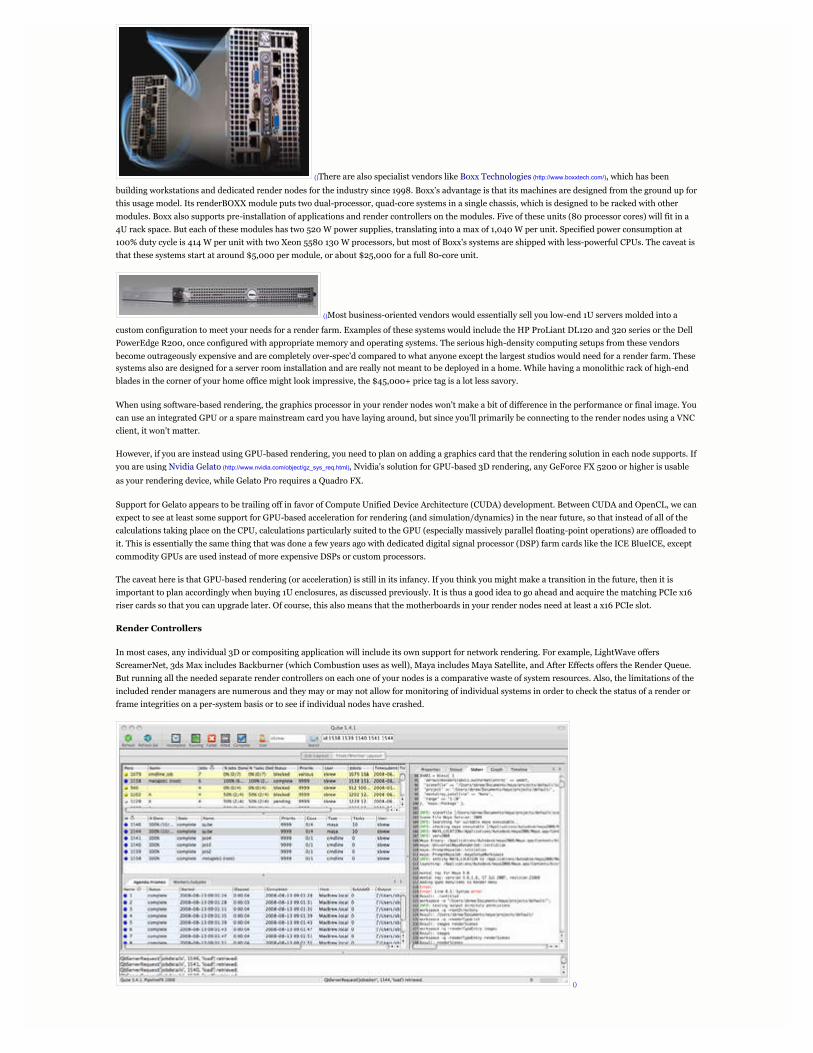
()There are also specialist vendors like Boxx Technologies (http://www.boxxtech.com/), which has been
building workstations and dedicated render nodes for the industry since 1998. Boxx’s advantage is that its machines are designed from the ground up for
this usage model. Its renderBOXX module puts two dual-processor, quad-core systems in a single chassis, which is designed to be racked with other
modules. Boxx also supports pre-installation of applications and render controllers on the modules. Five of these units (80 processor cores) will fit in a
4U rack space. But each of these modules has two 520 W power supplies, translating into a max of 1,040 W per unit. Specified power consumption at
100% duty cycle is 414 W per unit with two Xeon 5580 130 W processors, but most of Boxx's systems are shipped with less-powerful CPUs. The caveat is
that these systems start at around $5,000 per module, or about $25,000 for a full 80-core unit.
()Most business-oriented vendors would essentially sell you low-end 1U servers molded into a
custom configuration to meet your needs for a render farm. Examples of these systems would include the HP ProLiant DL120 and 320 series or the Dell
PowerEdge R200, once configured with appropriate memory and operating systems. The serious high-density computing setups from these vendors
become outrageously expensive and are completely over-spec'd compared to what anyone except the largest studios would need for a render farm. These
systems also are designed for a server room installation and are really not meant to be deployed in a home. While having a monolithic rack of high-end
blades in the corner of your home office might look impressive, the $45,000+ price tag is a lot less savory.
When using software-based rendering, the graphics processor in your render nodes won't make a bit of difference in the performance or final image. You
can use an integrated GPU or a spare mainstream card you have laying around, but since you'll primarily be connecting to the render nodes using a VNC
client, it won't matter.
However, if you are instead using GPU-based rendering, you need to plan on adding a graphics card that the rendering solution in each node supports. If
you are using Nvidia Gelato (http://www.nvidia.com/object/gz_sys_req.html), Nvidia's solution for GPU-based 3D rendering, any GeForce FX 5200 or higher is usable
as your rendering device, while Gelato Pro requires a Quadro FX.
Support for Gelato appears to be trailing off in favor of Compute Unified Device Architecture (CUDA) development. Between CUDA and OpenCL, we can
expect to see at least some support for GPU-based acceleration for rendering (and simulation/dynamics) in the near future, so that instead of all of the
calculations taking place on the CPU, calculations particularly suited to the GPU (especially massively parallel floating-point operations) are offloaded to
it. This is essentially the same thing that was done a few years ago with dedicated digital signal processor (DSP) farm cards like the ICE BlueICE, except
commodity GPUs are used instead of more expensive DSPs or custom processors.
The caveat here is that GPU-based rendering (or acceleration) is still in its infancy. If you think you might make a transition in the future, then it is
important to plan accordingly when buying 1U enclosures, as discussed previously. It is thus a good idea to go ahead and acquire the matching PCIe x16
riser cards so that you can upgrade later. Of course, this also means that the motherboards in your render nodes need at least a x16 PCIe slot.
Render Controllers
In most cases, any individual 3D or compositing application will include its own support for network rendering. For example, LightWave offers
ScreamerNet, 3ds Max includes Backburner (which Combustion uses as well), Maya includes Maya Satellite, and After Effects offers the Render Queue.
But running all the needed separate render controllers on each one of your nodes is a comparative waste of system resources. Also, the limitations of the
included render managers are numerous and they may or may not allow for monitoring of individual systems in order to check the status of a render or
frame integrities on a per-system basis or to see if individual nodes have crashed.
()

()
In order to efficiently manage multiple systems and multiple renderers, centralized render controllers are thus required. There are several applications
that can control multiple software programs from a single render controller. To name a few, Qube! (http://www.pipelinefx.com/products/overview.php),
ButterflyNetRender (http://www.liquiddreamsolutions.com/web5/index.php), Deadline (http://www.franticfilms.com/software/products/deadline/overview/), Rush (http://seriss.com/rush/), and
RenderPal (http://www.renderpal.com/) are all commercial products. Moreover, there are literally dozens of shareware, freeware, and open-source controllers
available as well. Going over the various features of these different render controllers would be an article in itself. Suffice to say that most of them
actively monitor the systems for output, check the output frames for integrity, and notify you upon completion of a job. Some also support features like
sending SMS messages. More advanced solutions allow for remote management, priority assignment, and handling of some of the local setup tasks
themselves.
When shopping for a render controller, first look to see if your solution of choice supports the software you plan to use. Then, look at the features you
need and compare your budget.
For those of you working with digital audio instead of 3D and 2D rendering, there are methods you can use to add slave systems to your primary DAW
that can be especially helpful if you are trying to use a large number of virtual instruments for a live performance. Virtual instruments can range from
synthesizers like Reaktor 5 (http://www.native-instruments.com/index.php?id=reaktor5&L=1) to software samplers like HALion 3
(http://www.steinberg.net/en/products/vstinstruments/halion3_product.html). Plug-in effects processors run the gamut from reverb and equalization to vocal tuning and other
types of advanced audio processing. Soft-synths and effects tend to be processor-intensive. Meanwhile, software samplers need to move multiple
streams of audio data from the hard drive through effects and out to your audio I/O, making them more I/O intensive than 3D rendering, but requiring
more random accesses than something like video editing. Either type of software package can rapidly tax a system beyond its limits. Naturally, stacking
the two together is even more demanding.
()
The easiest way to create a slave for your DAW is to buy an off-the-shelf device, such as the Muse Research Receptor (http://www.museresearch.com/). Pick one up,
put it on your network, install your plugins on it, and then offload them from your primary system. This configuration yields an immediate performance
benefit, with no tweaking needed to get it all working. This is great for a musician who isn't so technically-inclined. However, Receptor units are a bit
pricey, especially for the hardware you’re getting. In essence, a standard Receptor 2 is a single-core 2.7 GHz Linux box with 4 GB of RAM, a 250 GB hard
drive, audio interface, and the vendor’s proprietary Linux VST host. Total cost? Roughly $2,000. The Receptor 2 Pro offers a dual-core unit and a larger
hard drive, starting at about $600 more.
For those more technically-minded enthusiasts on a budget, it might make sense to look for another solution. Without the audio card, the Receptor 2
base unit is really just a sub-$400 PC, while the Receptor 2 Pro consists of less than $600 in hardware.
If you're willing to lose the dedicated controls on the front, you can use the same approach we’ve applied in building render nodes to building a slave for
your DAW. Install FX-Max' FX Teleport (http://www.fx-max.com/fxt/) on the node, and from your primary DAW you can add plugins that will run on the node.
The node doesn't need any fancy audio I/O options because FX Teleport will stream the audio over the network and back to your DAW software.
There are also other solutions, such as ipMIDI (http://www.nerds.de/en/ipmidi.html), which allow you to send MIDI over Ethernet or synchronize multiple DAWs
together for a fraction of the cost of the Muse Research systems. However, you should note that this method would likely mean having additional
licenses for your DAW software and VST plugins, while using FX Teleport apparently does not. From there, you can easily build a much lower-priced
machine that far outstrips the performance of available Receptor systems. Quad-core DAW slaves, anyone?

Here's where it comes down to numbers. We're going to assume that you intend to buy a workstation. The operative question here is, would it be better
to buy a faster workstation or save money by purchasing a render node or two to run with it?
This CineBench (http://www.maxon.net/index.php?id=162) test chart shows a fairly linear progression up the scale of processing power. Keep in mind that the bottom
two processors show a sudden drop in xCPU scores (xCPU is when CineBench is running multi-threaded, while it runs as many threads as there are
processor cores) because they are only dual-core CPUs. The information in this chart allows you to use simple math to see how much performance an
extra node or two would offer.
Say your workstation is a Core i7-940-based machine, which turns a CineBench score of 14,544. For the price difference between that processor and the
Core i7-965 Extreme, you can build an entire Core 2 Duo E7200 render node, which would give you a combined CineBench score of 19,762, far exceeding
the performance of a Core i7-965. If you had a workstation using a Core i7-920 instead, the savings, when put in your render node, would allow you to
build the node using a Core 2 Quad Q9550 and give you a combined CineBench score of 24,389, which is very close to doubling performance. Note: the
ability to show combined performance by simply adding the CineBench scores is why it was used for this comparison.
The other performance advantage to having render nodes is that they can be rendering while you are working on your workstation, thus maintaining full
interactivity and enabling you to use your processor's resources while the nodes are crunching away on a rendering task. For a complex project, this
capability can become very important.
Conclusion
So there you have it, all the secrets to building your own render farm. Hopefully, many of you will be able to put this information to good use. While
some specific elements of this article will be dated in six months, its general principles have been relevant for years and should continue to be useful. In
the future, Tom's Hardware will look at workstations and test render nodes as well.
Original URL:http://www.tomshardware.com/reviews/render-farm-node,2340.html