Embed Size (px)
Citation preview

bRDC User Guide External 10/15/2021
©2021 CIT Group Inc. All rights reserved. CIT and the CIT logo are registered trademarks of CIT Group Inc. Deposit and loan products are offered through CIT Bank, N.A., the FDIC-insured national bank subsidiary of CIT Group Inc.
bRDC Deposit User Guide
bRDC User Guide 1
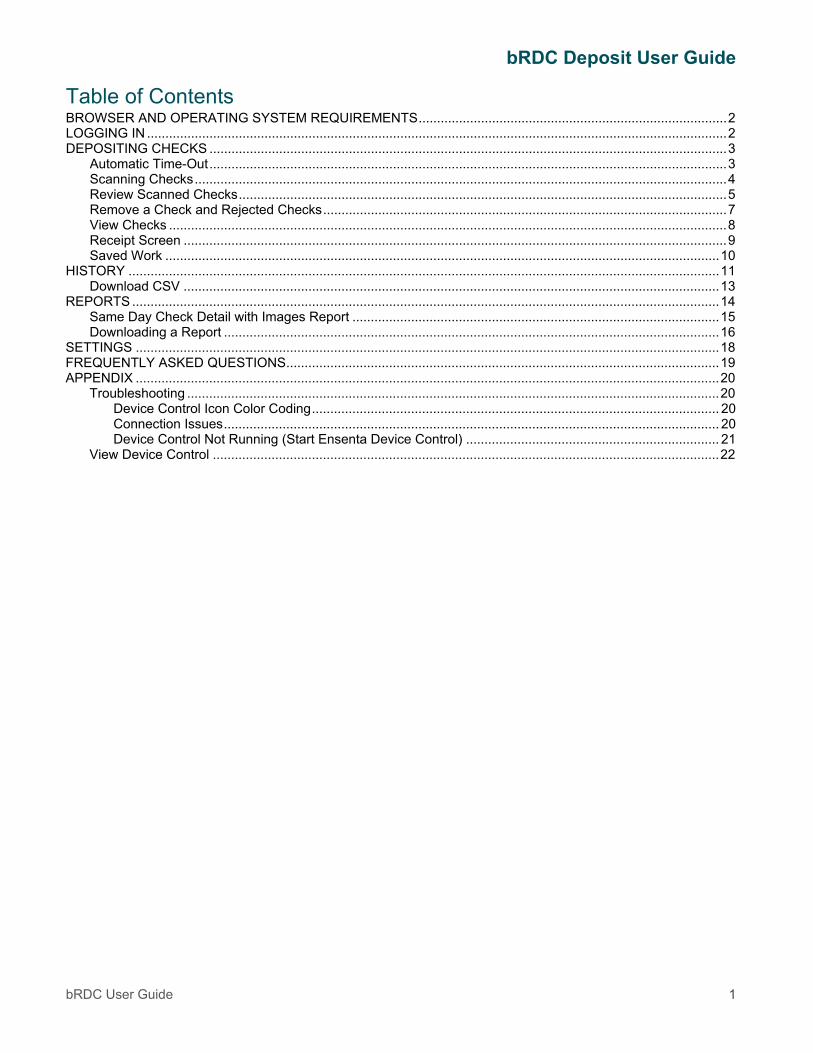
Table of Contents BROWSER AND OPERATING SYSTEM REQUIREMENTS .................................................................................... 2 LOGGING IN .............................................................................................................................................................. 2 DEPOSITING CHECKS ............................................................................................................................................. 3
Automatic Time-Out ............................................................................................................................................. 3 Scanning Checks ................................................................................................................................................. 4 Review Scanned Checks ..................................................................................................................................... 5 Remove a Check and Rejected Checks .............................................................................................................. 7 View Checks ........................................................................................................................................................ 8 Receipt Screen .................................................................................................................................................... 9 Saved Work ....................................................................................................................................................... 10
HISTORY ................................................................................................................................................................. 11 Download CSV .................................................................................................................................................. 13
REPORTS ................................................................................................................................................................ 14 Same Day Check Detail with Images Report .................................................................................................... 15 Downloading a Report ....................................................................................................................................... 16
SETTINGS ............................................................................................................................................................... 18 FREQUENTLY ASKED QUESTIONS ...................................................................................................................... 19 APPENDIX ............................................................................................................................................................... 20
Troubleshooting ................................................................................................................................................. 20 Device Control Icon Color Coding ............................................................................................................... 20 Connection Issues ....................................................................................................................................... 20 Device Control Not Running (Start Ensenta Device Control) ..................................................................... 21
View Device Control .......................................................................................................................................... 22

bRDC Deposit User Guide
bRDC User Guide 2
Browser and Operating System Requirements Deposit scanning currently supports Microsoft Windows 8.1 and 10, or Windows Server 2012 (or later). Systems are required to have Microsoft Edge v87 (or greater) browser, Microsoft .Net 4.7 installed, and a USB 2.0 connection (or greater). bRDC is also compatible with web browser IE 11, Mozilla Firefox, and MAC OS.
Logging In
Scanner RDC is easily accessed from Commercial Online Banking.
From the home page, click on Services and then select Scanner RDC.
bRDC Deposit User Guide
bRDC User Guide 3
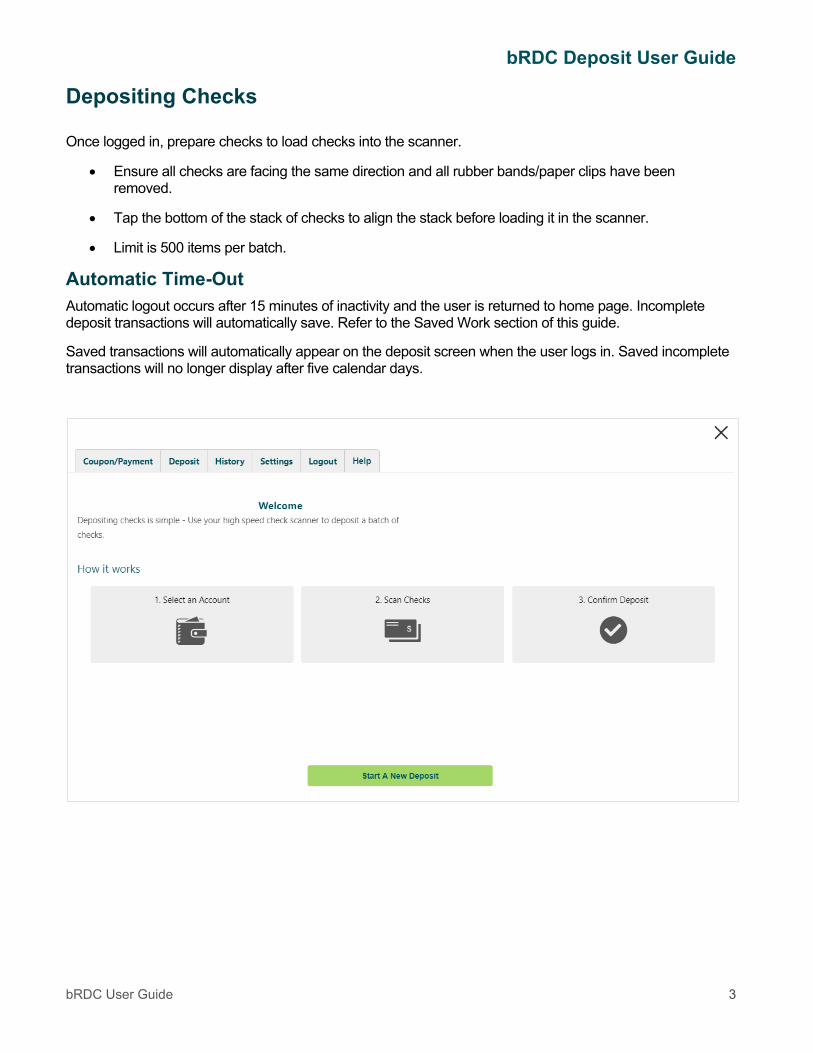
Depositing Checks
Once logged in, prepare checks to load checks into the scanner.
• Ensure all checks are facing the same direction and all rubber bands/paper clips have been removed.
• Tap the bottom of the stack of checks to align the stack before loading it in the scanner.
• Limit is 500 items per batch.
Automatic Time-Out Automatic logout occurs after 15 minutes of inactivity and the user is returned to home page. Incomplete deposit transactions will automatically save. Refer to the Saved Work section of this guide.
Saved transactions will automatically appear on the deposit screen when the user logs in. Saved incomplete transactions will no longer display after five calendar days.
bRDC Deposit User Guide
bRDC User Guide 4
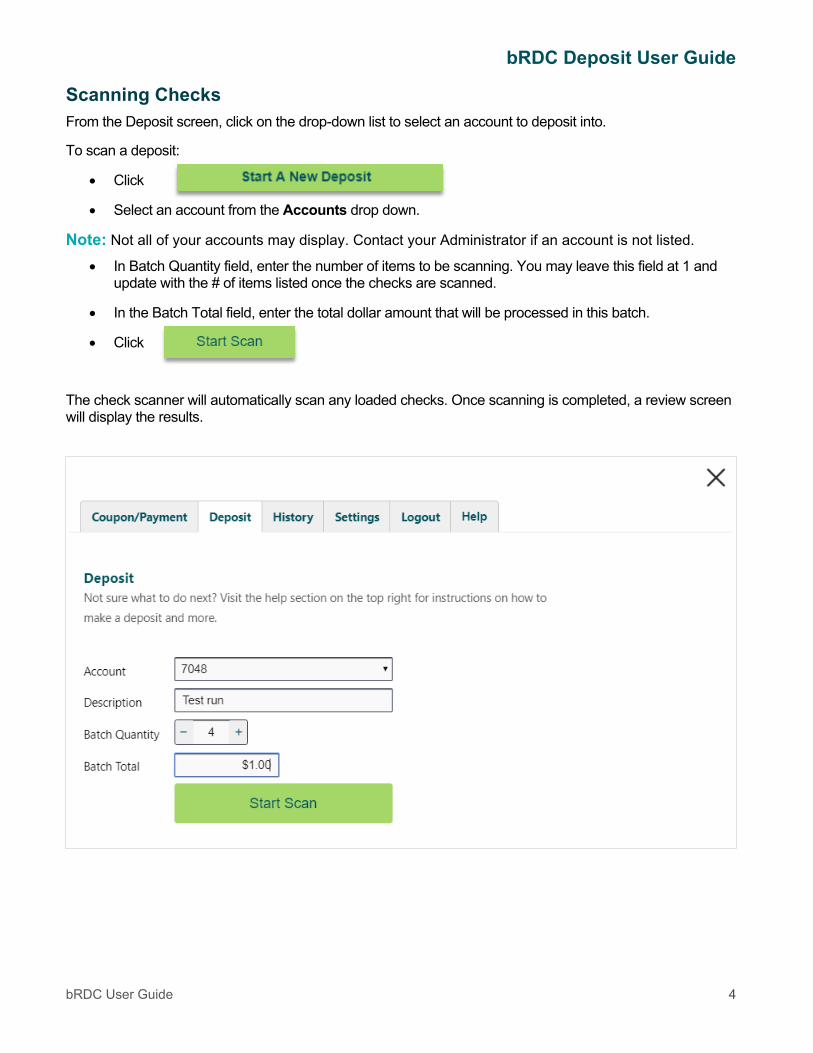
Scanning Checks From the Deposit screen, click on the drop-down list to select an account to deposit into.
To scan a deposit:
• Click
• Select an account from the Accounts drop down.
Note: Not all of your accounts may display. Contact your Administrator if an account is not listed.
• In Batch Quantity field, enter the number of items to be scanning. You may leave this field at 1 and update with the # of items listed once the checks are scanned.
• In the Batch Total field, enter the total dollar amount that will be processed in this batch.
• Click
The check scanner will automatically scan any loaded checks. Once scanning is completed, a review screen will display the results.

bRDC Deposit User Guide
bRDC User Guide 5
Review Scanned Checks All checks read by the scanner will display.
The Batch Total at the bottom of the screen will display the number of checks scanned and the total amount of all checks accepted in the scan.
If a check is rejected for any reason, it will not be added to the Batch Total.
Verify the Batch Quantity and Batch Total at the top of the screen match the Batch Total on the bottom of the screen.

bRDC Deposit User Guide
bRDC User Guide 6
Once the totals have been adjusted and the batch is in balance, the submit button is activated.
To scan additional checks, place the checks in the scanner and click on to begin.
Click on to complete the deposit. A deposit confirmation screen will appear.

bRDC Deposit User Guide
bRDC User Guide 7
Remove a Check and Rejected Checks Checks can be removed from a batch by clicking the trash can icon. Once selected, the check is removed, and the batch totals will automatically update.
To add a removed check back into the batch, click on the plus icon.
If an uploaded check is rejected, it will display in red on the results screen along with a reject reason. Rejected checks (red) are automatically removed from the batch totals.
The Submit button remains disabled until the batch totals are in balance.

bRDC Deposit User Guide
bRDC User Guide 8
View Checks To view a check, click on the to open a view window. Use the tool bar to adjust the size of the check image as needed.
The check amount can be corrected from the view check window.
Click through the number tiles listed on the left to view each check within the deposit.
Click on ‘Back to List’ to return to the Deposit list view.
bRDC Deposit User Guide
bRDC User Guide 9
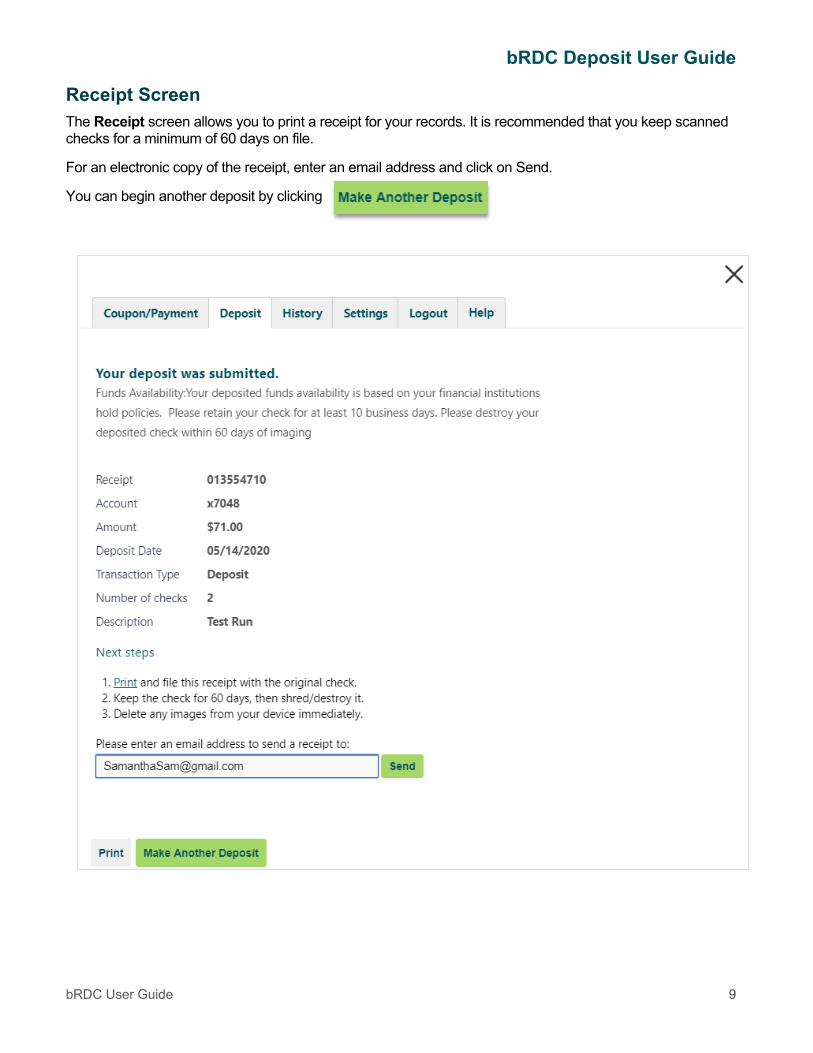
Receipt Screen The Receipt screen allows you to print a receipt for your records. It is recommended that you keep scanned checks for a minimum of 60 days on file.
For an electronic copy of the receipt, enter an email address and click on Send.
You can begin another deposit by clicking

bRDC Deposit User Guide
bRDC User Guide 10
Saved Work If you need to leave RDC during a deposit, you can easily pick up where you left off from the deposit screen. Incomplete deposit transactions will automatically save when you exit RDC.
Saved transactions will automatically appear on the deposit screen when the user logs in. Saved incomplete transactions will no longer display after five calendar days.
Note: Deposits are only visible to the original user who scanned the checks.
Actions for saved deposit transactions include:
Icon Action
Resume the selected transaction in order to edit, add additional checks or complete transaction.
Delete the transaction without resuming.
Clear all unfinished saved transactions.
Collapse/un-collapse saved transactions window.

bRDC Deposit User Guide
bRDC User Guide 11
History History will display deposits listed by deposit date and receipt number. If multiple checks were scanned during a deposit, checks will be aggregated under one entry.
Each entry includes images from the deposit and the status of the deposit.
Select a deposit to view a list of checks and images scanned during that deposit.
Note: The status on the history screen updates periodically throughout the day. You may receive an alert while the user interface displays an outdated status.
You can research individual checks by clicking on the search icon.
A new window will display the check image. Click on the check image to expand to full view.

bRDC Deposit User Guide
bRDC User Guide 12
Status Definitions:
Status Definition Submitted The deposit was submitted by the customer
Approved An item or deposit was flagged for review, it was then reviewed/ approved
by Bank
Split Item(s) are flagged for review but not reviewed/ approved by the Bank before the next file cutoff time. The item(s) that weren't flagged were received in the next file cutoff time.

bRDC Deposit User Guide
bRDC User Guide 13
Download CSV Click on Download CSV to download information appearing in the History screen.
Transactions will download as .CSV file.

bRDC Deposit User Guide
bRDC User Guide 14
Reports The following bRDC Reports are available:
• Deposit Summary Report – a deposit list, subtotaled by transaction, for each day.
• Check Details Report – lists individual check details.
• Check Details with Images Report – lists individual check details with check images.

bRDC Deposit User Guide
bRDC User Guide 15
Same Day Check Detail with Images Report A Check Detail Report with images is available on the day of deposit. To run this report from the Home page,
• Select History • Select Reports • From the drop-down list select customer date range • In the To/From fields, select the current date • In the Check Detail with Images tile, click on Download Report

bRDC Deposit User Guide
bRDC User Guide 16
Downloading a Report From History, click on Reports and select a date option or enter a custom date range.
Click on the Download Report button to generate the report.
Once the report is generated, open or save the report, as needed.

bRDC Deposit User Guide
bRDC User Guide 17
Deposit Summary Report
Check Detail Report
Check Detail with Images Report
bRDC Deposit User Guide
bRDC User Guide 18
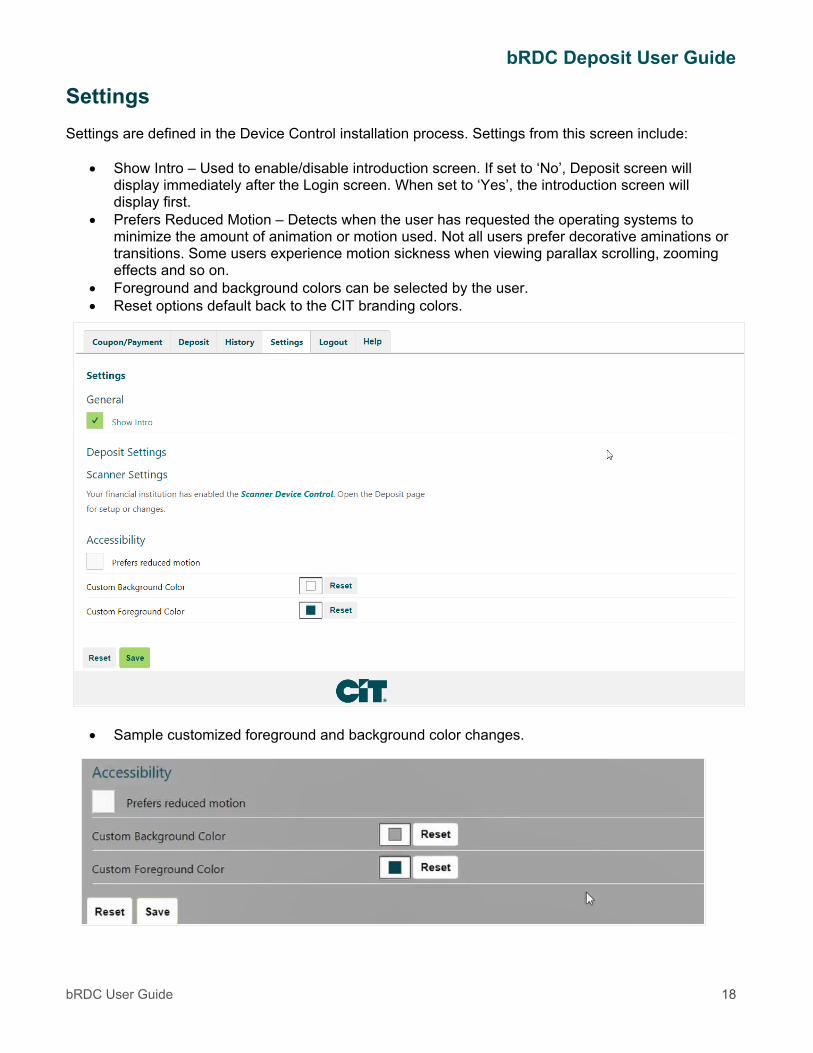
Settings Settings are defined in the Device Control installation process. Settings from this screen include:
• Show Intro – Used to enable/disable introduction screen. If set to ‘No’, Deposit screen will display immediately after the Login screen. When set to ‘Yes’, the introduction screen will display first.
• Prefers Reduced Motion – Detects when the user has requested the operating systems to minimize the amount of animation or motion used. Not all users prefer decorative aminations or transitions. Some users experience motion sickness when viewing parallax scrolling, zooming effects and so on.
• Foreground and background colors can be selected by the user. • Reset options default back to the CIT branding colors.
• Sample customized foreground and background color changes.
bRDC Deposit User Guide
bRDC User Guide 19
Frequently Asked Questions
1. What do I do with rejected items? o Commercial Online Banking - Mail to closest branch or Deposit in person. Damaged items go
back to the maker of the check to request a new one.
o bRDC (direct deposit) Community Association Banking – Mail check(s) with deposit ticket(s) to 4950 S 48th Street, Phoenix, AZ 85040 Attention: Deposit Processing. Damaged items go back to the maker of the check to ask for a new one. Rejected items should be an infrequent occurrence. If you are experiencing and increase in rejects, please reach out to your RM.
o RPE (Lockbox Coupon/Payment) Community Association Banking – Mail payment(s) to
4950 S 48th Street, Phoenix, AZ 85040 Attention: Lockbox Processing. Damaged items go back to the maker of the check to ask for a new one. Rejected items should be an infrequent occurrence. If you are experiencing and increase in rejects, please reach out to your RM.
2. How are updates pushed out to Remote Deposit Capture (RDC)?
o Updates will be made directly by vendor and pushed out to RDC.
3. Who do I contact if I have problems with Remote Deposit Capture (RDC), the installation or scanning?
o Commercial customers – Contact Business Client Services at 866-668-7022 or 866.351.5646, option 2
o Community Association Banking – Contact your Relationship Managers for assistance

bRDC Deposit User Guide
bRDC User Guide 20
Appendix Troubleshooting
Device Control Icon Color Coding The Device Control icon is located in the application tray. The color of the icon indicates the status of Device Control.
• Green – online • Blue – device Control is attempting to connect to the scanner • Yellow – device Control is connected and ready to scan • Red – indicates an error. The error message appears on the
desktop with instructions
Connection Issues If the following error message appears, ensure the power and USB cable are security connected, then click on Reconnect.
bRDC Deposit User Guide
bRDC User Guide 21
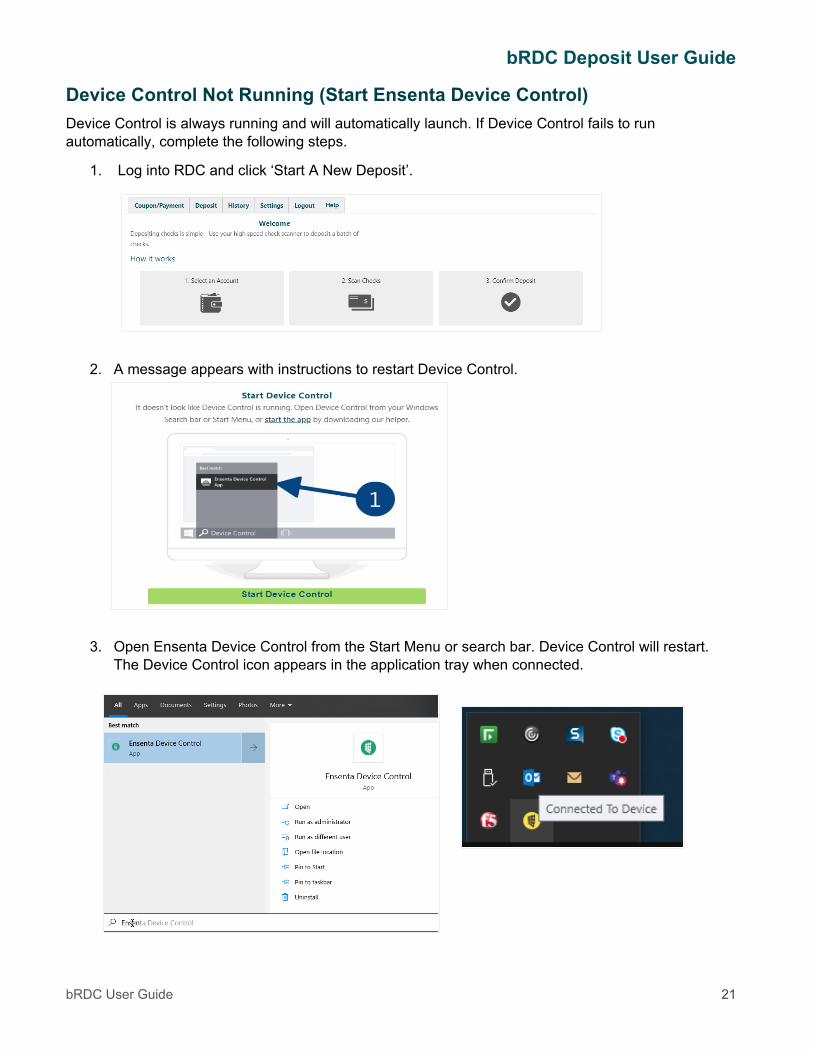
Device Control Not Running (Start Ensenta Device Control) Device Control is always running and will automatically launch. If Device Control fails to run automatically, complete the following steps.
1. Log into RDC and click ‘Start A New Deposit’.
2. A message appears with instructions to restart Device Control.
3. Open Ensenta Device Control from the Start Menu or search bar. Device Control will restart. The Device Control icon appears in the application tray when connected.
bRDC Deposit User Guide
bRDC User Guide 22
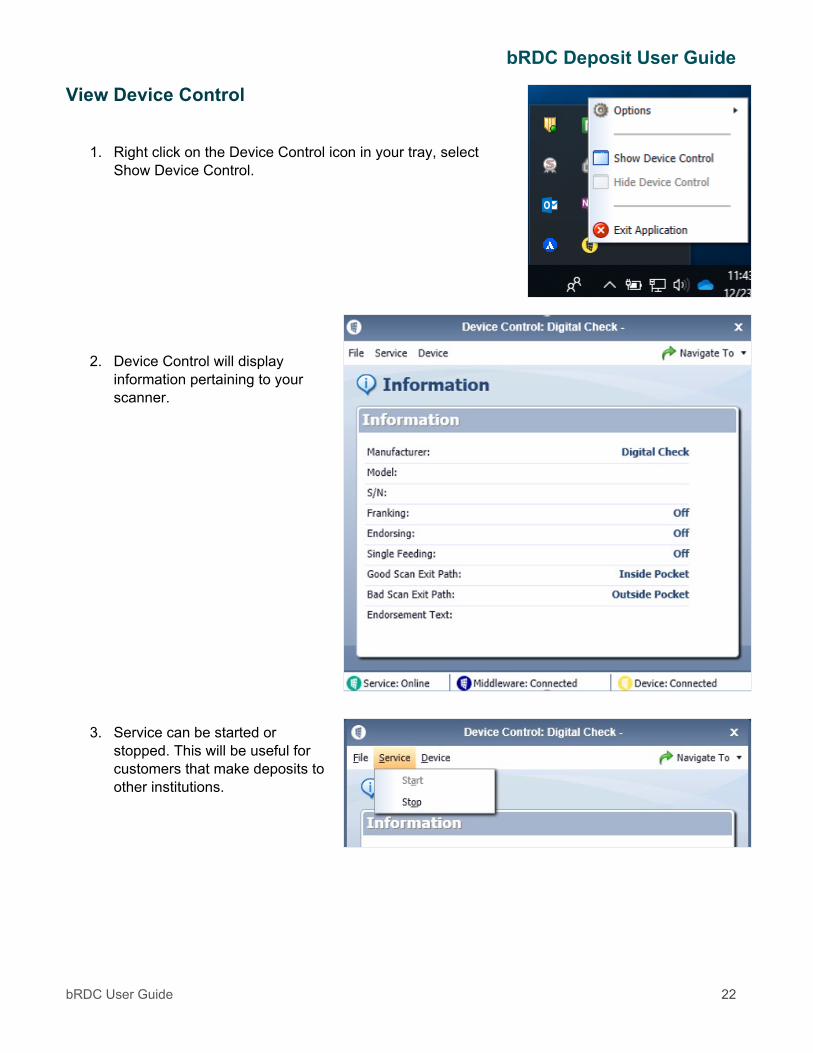
View Device Control
1. Right click on the Device Control icon in your tray, select Show Device Control.
2. Device Control will display information pertaining to your scanner.
3. Service can be started or stopped. This will be useful for customers that make deposits to other institutions.