Embed Size (px)
Citation preview

BLOOD SAMPLING FORNURSES
ByGina Pitts, BA,RGN, Npdip, FAETC
Nurse Practitioner

OBJECTIVES
To provide a foundation of knowledge andskill in the practice of phlebotomy
Select appropriate equipment
Practice skills

DEFINITIONS• Phlebotomy is derived
from the Greek wordsphlebo, which relates toveins, and tomy, whichrelates to cutting.
3
g• Phlebotomy is the
incision of a vein for thepurpose of collectingblood
• A phlebotomist is theindividual who performsphlebotomy
OUTCOME OF SESSION
Preparation procedures, including clientidentification procedures.P f d itPreferred venous access sitesClient care during and after Venepunctureprocedure.Safety and infection control procedures

ANATOMY OF THE SKIN1.2.3.4.5.6.7.8.9.10

SITES FOR VENEPUNCTURE
Veins in the brachial area arethe most commonly used.There are four potential sites:
Basilic veinMedian basilic veinMedian cephalic veinCephalic vein
These veins are large withthick walls and wide lumens.

ANATOMY OF ARTERIES ANDVEINS

ANATOMY OF ARM NERVES
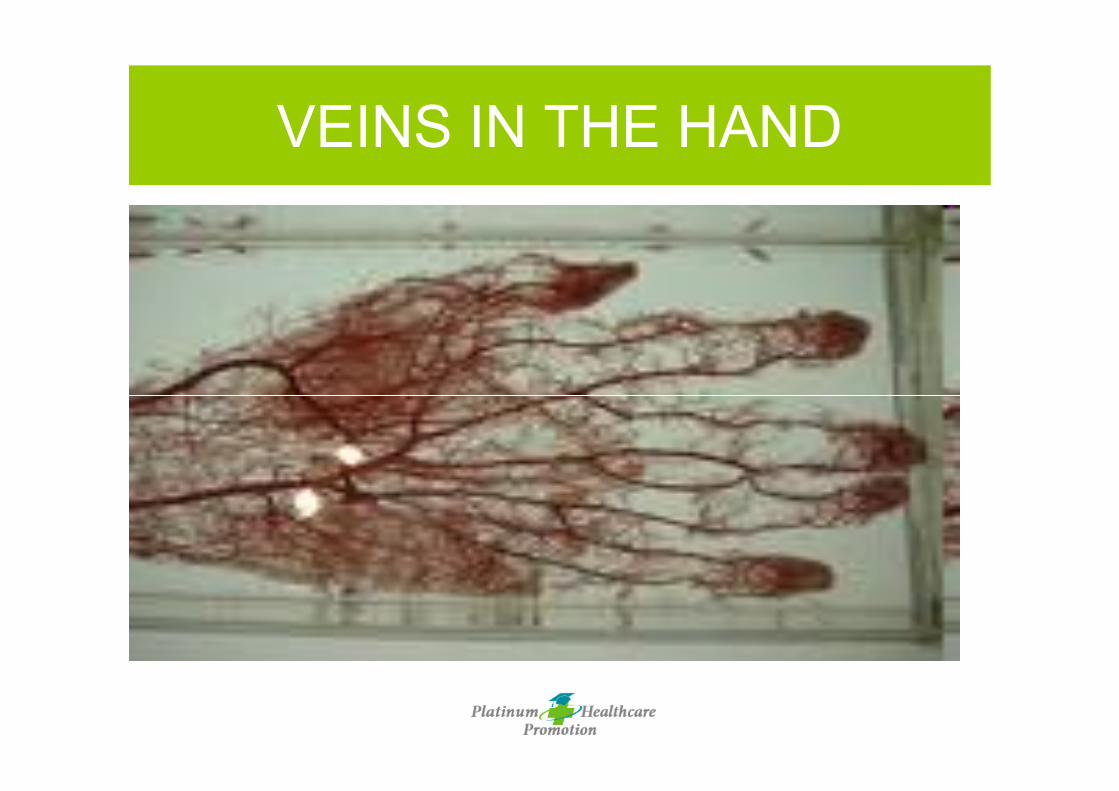
VEINS IN THE HAND

VEINS OF THE HANDS1. Digital Dorsal veins
2. Dorsal Metacarpalveins
3. Dorsal venousnetwork
4. Cephalic vein
5. Basilic vein

PATIENT ASSESMENT
• Be observant and alert• Look for the likelihood of fainting• Ask if the patient has fasted or not• Ask if the patient has fasted or not• Check sensitivity to latex• Recheck & document if?
– Patient is a potential bleeder– Patient has a history of fainting

Cross checkmultipleidentifiers:ID band, verbal,test requisitionRecheck &document if?
ID does notmatch other
IDENTIFICATION
identifiers

HAND HYGIENE & GLOVINGPROCEDURES
• Hand hygiene and use of gloves shouldbe considered routine procedure– Washing hands and using alcohol wipes
• This is done as soon as you come intovisual contact with the patient and beforeyou begin the procedure
• Glove removal and hand hygiene shouldbe performed after each patient encounter

SUPPLIES
• Check date of expiry• Biohazards• Paperwork• Patient care• Storage of samples

POSITION PATIENT/ LOCATEVEIN
� Find comfortable, safeposition
� Apply clean tourniquet� Vein palpitation� Select correct site� Select correct site� Recheck & document
if?◦ Patient has IV◦ Patient has poor vein
selection◦ Patient is obese

OTHER RESPONSIBILITIES• Adherences to organizational policies
– Safety– Infection control– Fire & safety
C i ti kill
16
• Communication skills– Verbal– Nonverbal– Listening skills
• Efficiency and quality– Productivity– Quality
COMMUNICATION– Avoid complex medical jargon
• Pt’s must not be told “this won’t hurt”.– Patient should be forewarned and prepared for pain.
• Efforts must be made to insure that sensory impairments such as deafness orblindness are overcome
– Ask “Do you understand?” or “Do you want me to explain the procedure again?”to verify that you are being heard & understood
• Tone of voice should match the words that are spoken.p– Avoid sarcasm– Use calm soothing confident tones
• In emergency situations– Require extra speed and accuracy without jeopardizing personal touch– Be conscious of a patient’s privacy, dignity and individual needs
• Bedside manner– Pleasant facial expression– Neat appearance– Minimize negative effects of the situation

IMPORTANT FACTORS AFFECTINGQUALITY
• Anticoagulants and preservatives– Phlebotomists are responsible for
• filling specimen tubes in the correct order so thatcarryover of anticoagulants to other tubes will notoccur
• mixing the specimens wit the anticoagulant
18
g p gpromptly after blood is drawn
– When restocking• collection tubes with a shelf life nearest the current
date at the front of the shelf so that these tubes arefirst
• be cognizant of expiration dates– Phlebotomists should know how to store or preserve
specimen tubes if the blood specimen is not to betested immediately
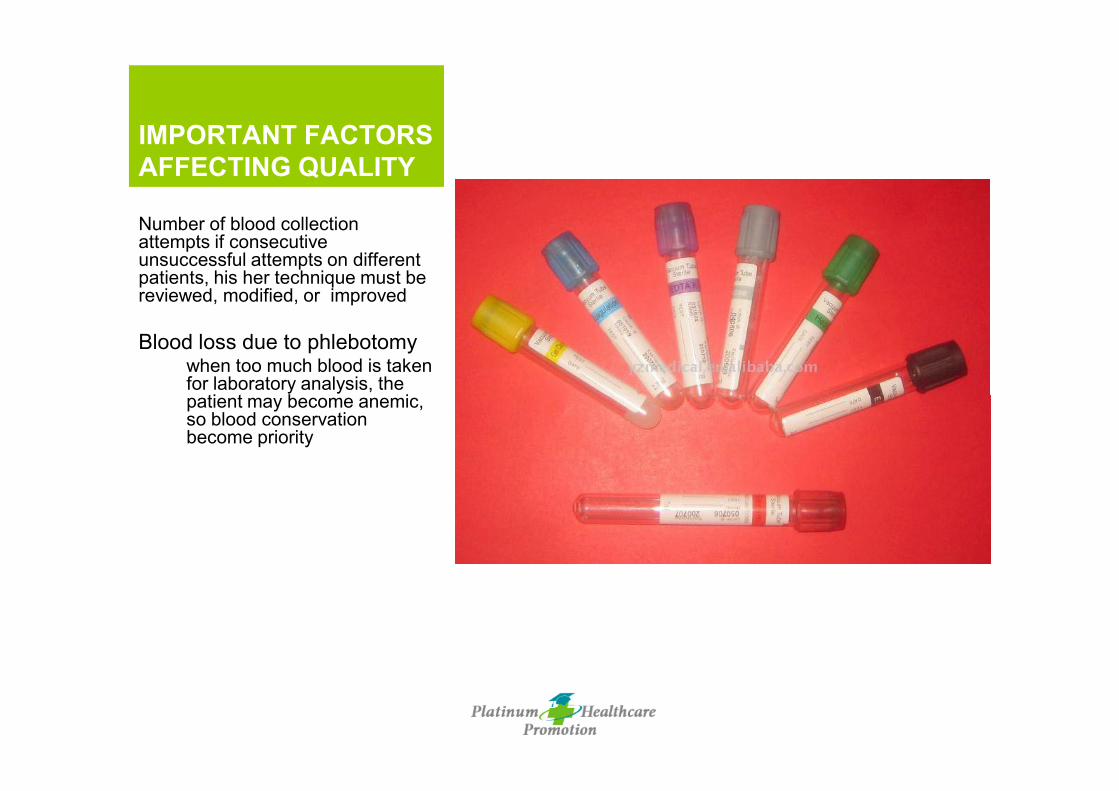
IMPORTANT FACTORSAFFECTING QUALITY
Number of blood collectionattempts if consecutiveunsuccessful attempts on differentpatients, his her technique must bereviewed, modified, or improved
Blood loss due to phlebotomywhen too much blood is takenfor laboratory analysis, the
ti t b ipatient may become anemic,so blood conservationbecome priority

CLINICAL ALERTS WITHVENIPUNCTURE
• Serious damage can occur if a nerve is accidentallynicked, probed or punctured. Puncture of an arterymay result in excessive bleeding and an hematomaformation
• Do no use the veins in an arm if?– IV lines in both arms– Burned or scarred areas– Cast(s) on arm(s)– Thrombosed veins– Mastectomy on both sides

USE OF A TOURNIQUET(Application)
1. Wash/ sanitize hands, put on gloves2. Use a clean latex- free tourniquet3. Stretch the end of the tourniquet aroundq
the patients arm about 3 inches about thepuncture area. Tuck a section next to theskin, making a partial loop
4. Tourniquet should be tight but not painful.Do not leave on for more than 1 minutes

TOURNIQUET RELEASE1. When it is time to release the tourniquet,
the partial loop should release easily.Release it after the needle puncture,when blood has begun to flow into thewhen blood has begun to flow into thecollection tube
2. Once released, the tourniquet can remainloosely on the arm or surface of workarea

COLLECT BLOODSPECIMEN(S)
• Needle puncture• Use correct tube in
correct order• Release tourniquetRelease tourniquet• Discontinue if?
– Complication withsupplies andequipment
– Patient feels faint ordizzy or othercomplications
PREFORMING AVENIPUNCTURE
� Assemble equipment in the presence of the patient. Offer to answerany questions
� Prepare equipment according to the manufacturer’s instructions� Position patient’s arm slightly bent, in a downward manner. Apply
the tourniquet and check for potential puncture sites. Choose a veinq p pthat feels the fullest
� Select the site and decontaminate the patient’s skin. Ask patient to“please close his/her fist” to make veins more prominent. Patientshould not pump their hand
� Mention to patient that they might feel a stick or slight prick. Patientmay feel faint or lose consciosness after this point

PREFORMING AVENIPUNCTURE
� Remove the needle cap carefully. Needle cannot touch anything thatmay contaminate it.
� Hold the needle assembly in one hand while the thumb of the otherhand anchors he vein 1 to 2 inches below the puncture site. Positionthe needle so that it is parallel or running in the same direction asth i I t th dl i kl ith th b l id d tthe vein. Insert the needle quickly with the bevel side up and to a15- 30 degree angle with the skin. A slight “pop” should be heard
� Press the evacuated tube gently onto the sheathed needle. Bloodshould begin to flow. Palpate gently if it does not
� As the blood flow, ask patient to release fist and release thetourniquet. Push evacuated tube into the holder so that blood canenter. Orient tube in a downward position.

PREFORMING AVENIPUNCTURE
� Allow flow into the tube until it stops so that the proper dilution ofblood additive can occur. Watch to see how the blood flow ceases.If multiple tubes are being collected, remove each tube from theholder with a gentle twist and pull motion and replace it with the nexttubeWh ll t b h b fill d d d f th h ld� When all tubes have been filled and removed from the holder,withdraw the needle and hold a gauze pad over the site
� Instruct patient to apply pressure on gauze over site, while youresheath or cover the needle
� Apply pressure until bleeding stops. Label specimens appropriately� Dispose of contaminated supplies, wash hands and sanitize� Deliver sample immediately to the laboratory

PREPARE SPECIMEN FORTRANSPORT
� Label specimens◦ Patient’s full name◦ Patient’s number◦ Date of collection◦ Time of collection◦ Health care worker’s initial◦ Patient’s room #, bedPatient s room #, bed
assignment� Place in secure container� *If biohazard container is full?◦ Report it◦ Discard waste in another
container� *Maintain hygiene◦ Safely discard waste◦ Perform hand hygiene

POTENTIALCOMPLICATIONS
Sepsis (infection)HematomaCellulitesThrombosisPhlebitisAir embolismBest site for venipuncture itat the antecubital area ofarm and puncture in themedian cubital vein

EQUIPMENT & PREVENTATIVEMAINTENANCE
• Always have to handemergency andmonitoring equipmentsuch as
Th t
29
– Thermometers– Sphygmomanometers
-AdrenalineAnd Updated CPRskills

Now it is your turn!y