Embed Size (px)
Citation preview

Name__________________________
Biology Activity Book
(Teacher Guide)
To be completed with Edgenuity Biology A & B
Developed with funding from
www.kbsgatewayproject.weebly.com
Table of Contents
1. Plop Plop Fizz Fizz Scientific Process 3 2. The Enormous Letter ‘E’ Intro to Using Compound Microscope 7? 3. Fermentation in a Bag Cellular Respiration 11? 4. Mitosis Investigation Cell Division 15? 5. Plant Paternity Test Heredity 19? 6. Peppered Moth Scavenger Hunt Natural Selection 23? 7. How Much Food? Cycling of Matter 27? 8. Cutting Down the Rain Human Impact on the Environment 31?
Use the QR codes to access a video for each activity

Plop Plop Fizz Fizz Scientific Process
Edgenuity Unit: Scientific Knowledge Lesson: Analyzing Data/Drawing Conclusions Time: 30-60 minutes http://kbsgatewayproject.weebly.com/plop‐plop‐fizz‐fizz.htmlLearningTargetI can make predictions based on prior knowledge, test them using an experiment, and analyze my results.
Materials
3 Alka-Seltzer tablets 3 plastic cups (18 oz.) Salt Teaspoon
Vinegar Water Stopwatch or clock with second hand
The fizzing you see when you drop an Alka-Seltzer tablet in water is the same sort of fizzing that you see from baking powder. A baking powder reaction is caused by an acid reacting with baking soda (sodium bicarbonate). If you look at the ingredients for Alka-Seltzer, you will find that it contains citric acid and sodium bicarbonate (baking soda). When you drop the tablet in water, the acid and the baking soda react -- this produces the fizz. The question for this investigation will be: “What factors will make an Alka-Seltzer tablet dissolve faster?” You will compare 3 factors:
Room temperature water Acidic water Salt water
The control group is the group that is separated from the rest of the investigation; the factors will not influence this group. What should be your control group? The cup with just water will be the control The independent variable is the factor that changes between groups, for this investigation the independent variable will be the type of water (acidic, salt, etc). The dependent variable is what changes or is different because of the independent variable. Based on the original question, what will you observe as the dependent variable? Dependent variable: length of time for tablet to completely dissolve Develop your hypothesis by completing this statement: Alka-Seltzer will dissolve fastest in ____________ water, and slowest in ____________water. I think this because ___________________________________________________________. Procedures: Label and fill the 3 cups halfway (~9 oz.) with the following:
1- Room temperature water 2- Room temperature water with 2 tsp. vinegar 3- Room temperature water with 1 tsp. salt
Drop one Alka-Seltzer tablet into Cup 1 and use the stopwatch to keep track how long it takes to dissolve completely. Record your results here:

Type of Water Dissolve Time
Water
Vinegar (acidic water)
Salt Water
Repeat with Cups 2 and 3. What factors made the Alka-Seltzer tablet dissolve faster? In a complete sentence, answer the question: Did your results support your hypothesis? Why or why not?
The Enormous Letter ‘E’ Introduction to Compound Microscope
Edgenuity Unit: Cell Biology Lesson: Plant and Animal Cells Time: 30-60 minutes http://kbsgatewayproject.weebly.com/the-enormous-letter-e.html Learning Target
1. I can identify the functional parts of a compound microscope 2. I can demonstrate how to prepare a wet mount slide
Materials
Compound microscope Small tweezers Letter ‘e’s Clear microscope slides
Cover slips Eyedropper Hand lens
The compound microscope was first used in the late 1500s, but was not used in biology until a hundred years later. At first it was just a novelty, but in 1660, Italian Marcello Malpighi used the microscope to view blood capillaries in the tails of live fish. The first compound microscopes could magnify over 100x, but the quality of the glass in lenses was poor and objects could not be seen clearly. An optical compound microscope developed in 2011 can magnify an object over 6,500x. Procedures: Begin by becoming familiar with all labels on the microscope. (Always carry microscope with 2 hands by holding the arm and base.) Turn microscope light on and set magnification to lowest power:
a. RED – 4x (lowest) b. YELLOW – 10x c. BLUE – 40x d. WHITE – 100x (highest)

Credit:www.biologycorner.com
The largest knob controls major adjustments (start with stage as low as possible and then adjust), the smaller knob controls fine-tuning. Clean a microscope slide with water and tissue. (CAREFUL! They break easily.) Use an eyedropper to place one single drop of water in the middle of the slide. Use tweezers to place the letter ‘e’ right side up on top of the drop of water. Gently place the cover slip on the edge of the drop of water and then lower the cover slip over the letter ‘e’ (Watch the video a couple times for this one!) Before you use the microscope, use a hand lens to observe the slide.
Draw a picture of what you observe below: Place the slide onto the microscope stage and focus the image on the lowest power (4x). Draw a picture of what you observe: View the letter ‘e’ with a higher magnification. (Change the power to yellow, blue, or white.) 10x (Yellow):

40x (Blue): 100x (White): Why is important to use a clean slide and cover slip? To see a clear image, you want to avoid smudges and scratches that can blur. Which magnification (power) gave you the clearest image of the letter ‘e’? Usually the 40x magnification What is the difference between a compound microscope and a simple microscope? A simple microscope uses 1 lens; a compound microscope uses 2 or more lenses. What are some reasons that scientists would use a compound microscope? Plant and animal cells, blood traces, virus and bacteria, etc.
Fermentation in a Bag Cellular Respiration
Edgenuity Unit: Cell Biology Lesson: Energy in Cells
Time: ~60 minutes http://kbsgatewayproject.weebly.com/fermentation‐in‐a‐bag.htmlLearning Target
I can construct an explanation for the production of gas during fermentation.
Materials
Dry active yeast Sugar 100mL graduated cylinder
Teaspoon Snack-size Ziplock bags Bag labels
To release stored energy from glucose (sugar) molecules, humans and other animals use a type of cellular respiration called aerobic respiration. This process requires oxygen (aerobic means “with oxygen”). Some organisms do not use oxygen, however. In this case, the respiration is anaerobic. Fermentation is the metabolic process used by yeast and other living organisms without oxygen (anaerobic). Yeast use this process to convert sugar into ethyl alcohol (with carbon dioxide as a byproduct). The ethyl alcohol can then be distilled into pure ethanol that can be used to fuel vehicles. While most fuel ethanol in the US is currently made from corn grain, the Great Lakes Bioenergy Research Center is studying the use of corn stalks and other cellulosic biomass (like grasses from prairies) as an alternative source. Procedures: In a pre-labeled Ziplock snack bag, combine 1 tsp. of sugar and 1 tsp. of yeast.

Add 50mL of warm tap water and zip the bag closed, removing as much air as possible. Mix gently. Lay bag on a flat surface and watch for results (15-20 minutes). Observe and answer the following questions: If the bag is inflating, what is filling it up? Carbon Dioxide Warning: the bag will expand - it may even pop! Be sure to monitor the bag and release the gas if it becomes too inflated. Are you observing fermentation? How do you know? Yes, sugar is being consumed and has (CO2) is being produced Where are the new gas particles coming from? The new particles are from the glucose being metabolized by the yeast Discard bag and contents into garbage and make sure any mess is cleaned up!
Mitosis Investigation Cell Division
Edgenuity Unit: Cell Processes Lesson: Mitosis Time: ~30 minutes http://kbsgatewayproject.weebly.com/mitosis‐investigation.htmlLearning Target
I can identify and label the steps of mitosis.
Materials
Compound microscope Prepared slides of onion root tips
Cells divide in multicellular organisms for growth and to replace dead cells. Cells divide through a process called mitosis that makes sure each new cell contains a nucleus and chromosomes
identical to the original cell. The regular sequence of events for cells is called the cell cycle: Each cell goes through five main steps:
Interphase Prophase Metaphase Anaphase Telophase
Turn on microscope and adjust to the lowest power (4x –
Red). Hold a slide with onion root tips up to the light (there will be three root tips on a slide). Look for the pointed ends where the cells were actively dividing. Place the slide on the microscope stage with the root tips pointing away from you. Use the low-power objective to find a root tip and focus with the coarse adjustment (large knob) until it is clearly visible. Just above the root “cap” is a region that contains many new small cells. These cells were in process of dividing when the slide was prepared. Center the image and switch to high power. Observe the box-like cells that are arranged in rows. The chromosomes of these cells have been stained to make them easily visible. Select one cell with chromosomes that are clearly visible. (Remember to only use the small knob fine adjustment when using high power.) Sketch the cell that you selected in the box below:
Credit:HartnellCollegeBiology

2. Look at the rest of the cells and select four cells whose internal appearances are different
from each other and the first cell that you sketched. Sketch these four cells in the remaining boxes.
3. Use the pictures below to identify and label the phases of each sketch.
Credit:NancyClarkBiology
4. Look at the rows of cells in the microscope and count how many are in each different phase.
Use the data table to record the numbers for each phase.
Stage of Cell Cycle Number of Cells
Interphase Most
Prophase
Metaphase Usually the least
Anaphase
Telophase
What stage was the majority of cells in? Interphase What evidence shows that mitosis is a continuous process instead of a series of separate events? Some of the cells cannot be clearly identified within a particular phase, so they can be best described as “between phase.” The visible evidence of cells changing form one phase to the other shows that it is a continuous process. Source: Nancy Clark Biology

Plant Paternity Test Heredity Investigation
Edgenuity Unit: Heredity Lesson: Laws of Inheritance Time: 7 weeks ~ 45 minutes per week http://kbsgatewayproject.weebly.com/plant‐paternity‐test.htmlLearning Target
I can explain the inheritance of a trait in Fast Plants.
Materials
Wisconsin Fast Plant seeds o Non-purple stem (P1) o Purple stem (P2) o F1 non-purple stem
4 deli container growing systems o 16 oz deli container o 8 oz deli container o Wicking cord or string
Light box – growing house o 2 crates o Aluminum foil o Hanging light fixture o 24 watt CFL
Potting soil Wisconsin Fast Plant fertilizer Labels Q-tips
Genes Every cell in plants and animals contains DNA that is made up of thousands of genes. Every cell (except gametes) has two copies of each gene (one from each parent) and the two sets of genes are different from each other. Cells with two copies of genes are called diploid. During meiosis, each gene pair is spilt apart randomly so that the resulting gametes (eggs or sperm/pollen) have a single copy of reassorted genes. Cells that have only one set of genes are called haploid. During mating, two parents each contribute a single gamete. The two gametes fuse and create a single diploid offspring. Alleles Each gene can have a different form, called an allele. Different alleles are represented by the same letter, but coded by capitalization. Dominant alleles are capitalized and recessive alleles are lower case (e.g. Pp). The interaction of paired alleles, along with environment, determines the phenotype (the gene’s expression) of the offspring. Recessive alleles are expressed when paired with another recessive allele (pp). This activity will investigate a purple pigment found in many plants, Anthocyanin (anl), and how the gene is passed from parents to offspring. It is best observed when plants are between 4 and 7 days old. You will be testing the inheritance of a specific trait by growing Fast Plants for two generations.

Procedure: Day 0
1. Plant the seeds from the mother plants (P1) in 1 container and plant seeds from first generation (F1) in 3 containers using the following directions:
2. Poke a hole in the center of the bottom of the 8 oz. deli container. 3. Cut a wick 12-14 cm long, wet thoroughly with water and insert 2 cm into the bottom of
8 oz deli container. 4. Pour ¼ cup (2 oz.) of soil into the 8 oz. container. 5. Spread 18 pellets of fertilizer evenly on top of the soil. 6. Add ½ (4 oz.) cup of soil on top of fertilizer pellets. 7. Sprinkle water over soil until it is dripping from the wick. 8. Label containers based on the seeds that were planted. 9. Place 5 seeds in a circle pattern on top of the soil. 10. Cover seeds with ¼ cup of soil. 11. Pour 1 cup (8 oz.) of water into the 16 oz. deli container. 12. Set the small container on top of the larger container. 13. Place in light box and cover front (the plants will need plenty of water and 24 hours of
light!) Days 4-7
1. Observe the stem and leaf color of the young P1 and F1 plants. 2. Record the number of individuals with each trait in the table below.
List each
phenotype Purple stem Green stem Purple leaf Green leaf
P1 generation
F1 generation
3. Discard the P1 plants but continue to maintain the F1 plants. 4. Thin F1 plants to 2 per container. 5. Explain how you think stem and leaf colors are inherited in Fast Plants.
6. Predict the father’s (P2) stem and leaf colors based on your explanation. Days 15-17
1. Pollinate the entire population of F1 plants for 3 days. Use Q-tips to spread pollen from one flower to another. Make sure all flowers receive pollen from more than one plant.
Fast Plants require outcrossing to reproduce. This can happen in the wild with help from pollinators (like bees) or can be aided by wind.
2. Based on your hypothesis, predict the stem color of the second-generation offspring (F2) that will result from the pollination you did today.
Day 18
1. Cut off any new flower buds that were not pollinated on previous days Day 37

1. Stop watering plants. Let them dry out for a full week Day 44
1. Harvest the seeds from the F1 plants (these will be the F2 seeds) 2. Place the F2 seeds in a manila envelope and label them 3. Remove plants from the first generation and clean deli containers and dry (so they can be
reused the next day) Day 45
1. Plant the F2 seeds following the growing directions from Day 0 Day 49
1. Observe the stem color of the young F2 plants
2. Record the number of individuals with each trait in the table below
List each phenotype Purple stem Green stem Purple leaf Green leaf
F2 generation
3. Put your claims to the test! Was the ratio of the phenotypes in the F2 generation what
you predicted it would be? Was it even close? A χ2 (chi-squared) test will compare your observations with your hypothesis.
Chi-square is a statistical test commonly used to compare observed data with data we would expect to obtain according to a specific hypothesis. For example, if, according to Mendel's laws, you expected 10 of 20 offspring from a cross to be male and the actual observed number was 8 males, then you might want to know about the "goodness to fit" between the observed and expected. Were the deviations (differences between observed and expected) the result of chance, or were they due to other factors. How much deviation can occur before you, the investigator, must conclude that something other than chance is at work, causing the observed to differ from the expected. The chi-square test is always testing what scientists call the null hypothesis, which states that there is no significant difference between the expected and observed result.
Step 1. What is your null hypothesis? Step 2- Determine the ratio of phenotypes you expected in the F2 generation, based on your hypothesis. Phenotype Expected Number of Plants (e) 1. ____purple stem_________ _________________ 2. ____green stem__________ _________________ 3. ____purple leaf___________ _________________ 4. ____green leaf____________ _________________ Step 3 - Record the ratio of phenotypes you observed in the F2 generation. Phenotype Observed Number of Plants (o) 1. ____purple stem_________ _________________ 2. ____green stem__________ _________________ 3. ____purple leaf__________ _________________ 4. ____green leaf___________ _________________ Step 4 - Fill out the following table. Note: For o and e values, use the actual numbers of plants, not percentages or ratios.
List Each Phenotype: 1 2 3 4
Observed value (o)
Expected value (e)
Deviation (d) = o-e
Deviation squared (d2)

d2/e
Add all of the d2/e values together to get the χ2 value.
Step 5 Calculate the degrees of freedom by subtracting one from the number of phenotypes. degrees of freedom = (Number of phenotypes possible) – 1 Step 6 Determine whether to accept or reject your hypothesis. Find the probability that the deviation of the observed values from the expected values was a chance occurrence. Look up your degrees of freedom in the table below. Find where your χ2 value falls in that row.
Probability value: If the probability is 5% or greater, then you can accept your hypothesis. If the probability is less than 5%, then reject your hypothesis. Do you accept or reject your null hypothesis? Why? What does it mean? Day 50 1. Plant the P2 seeds following the growing directions from Day 0.
Day 53 1. Observe the stem color of the young P2 plants. Record your observations in the table.
List each phenotype Purple stem Green stem Purple leaf Green leaf
F1 generation
Does this activity show how traits are passed from parents to offspring? Why or Why not?

Peppered Moth Investigation Natural Selection
Edgenuity Unit: Evolution Lesson: Factors Affecting Natural Selection Time: 30-60 minutes http://kbsgatewayproject.weebly.com/peppered‐moth‐investigation.htmlLearning Target
I can explain how natural selection impacts phenotypes and genotypes of a species over time.
Materials
Paper punch 2 small plastic cups
Two sheets dark gray paper Two sheets medium gray paper Two sheets light gray paper
Before the year 1845, in the city of Manchester, England a population of light gray colored moths known as Peppered moths lived in the surrounding forests. They would cling to the trunks of trees that were themselves covered with a light gray colored bark. The fact that these moths were able to blend in with this light gray background served as an advantage, providing protection in the form of camouflage from birds (predators). However, the coloration of moths is controlled by a gene with alleles than can be expressed in different shades of gray. Because of this genetic variation, dark and medium gray colored moths were sometimes born. Around 1845 the city started becoming more industrialized, with factories pouring black coal smoke into the air. This pollution fell into the surrounding forests and slowly turned the bark of the trees to a darker gray color thereby making the lighter gray moths more
vulnerable to predation. Suddenly the dark gray colored moths possessed an advantage. As a result, over a period of approximately fifty years the moth population experienced a “shift” in the frequency of the alleles that determine moth coloration. In this example, the trait of coloration is the targeted selection while the agent of selection is
the predation. This investigation will allow you to role-play as the predator. Procedures: Label the following papers on one side:
Light Gray – Environment 1. Medium Gray – Environment 2. Dark Gray – Environment 3.
Fill a plastic cup with room temperature or cool water. Punch out 30 circles each from the three UNLABELED sheets . Ask a neighbor or the teacher to place 10 dark, 10 medium, and 10 light gray dots on the Environment 1 sheet without you watching.
When your assistant is finished setting up, dip your pointer finger in the cup of water. You’ll be using this finger to pick up the dots. Begin with “Environment 1” and pick up as many dots as you can in 10 seconds with your wet finger. Place these into an empty plastic cup and record the colors in the table below:
Light Gray Dots Medium Gray Dots Dark Gray Dots
Light Gray Environment 1
Medium Gray Environment 2
Dark Gray Environment 3
Repeat with Environments 2 & 3 and record in the table.
Complete the following questions remembering that dots represented peppered moths.
What color was the majority of peppered moths in Manchester before 1845? Was the shift coloration, from light gray to dark gray, a beneficial change for the moth population as a whole? Why or why not? In this investigation, which “moths” had the best chance for survival in environment 1? Why?
WikipediaCommons:Khaydack

Light gray, they were better camouflaged. In this investigation, which “moths” had the worst chance for survival in environment 1? Why? Dark gray, the predator saw them easier. In this investigation, which “moths” had the best chance for survival in environment 2? Why? Medium gray, they were better camouflaged. In this investigation, which “moths” had the best chance for survival in environment 3? Why? Dark gray, they were better camouflaged. What do you think would happen to the peppered moth population if after the industrial revolution the trees changed back to their original light gray colored bark? The light gray phenotype would increase because of natural selection over time. In your opinion, is natural variation within a population beneficial to the long-term survival of a population (or species) as a whole? Please explain, why or why not. Yes, There would be an increased chance that at least some of the population would survive if the condition in an environment changed.
Investigating Plant Nutrition Fast Plants and Fertilizer
Edgenuity Unit: Ecology Lesson: Cycles of Matter Time: 4 weeks 60 minutes on Day 0 and ~5 minutes per day after http://kbsgatewayproject.weebly.com/feed‐your‐plants.html
http://kbsgatewayproject.weebly.com/peppered‐moth‐investigation.html Learning Target
I can design an experiment to determine the best amount of nutrients to add for plant growth.
Materials
Wisconsin Fast Plant seeds (standard) 4 deli container growing systems
o 16 oz. deli container o 8 oz. deli container o Wicking cord or string
Labels Q-tips
Light box – growing house o 2 crates o Aluminum foil o Hanging light fixture o 24 watt CFL
Potting soil Wisconsin Fast Plant fertilizer
Green plants make their own food through the process called photosynthesis, but they also require nutrients they obtain from the soil. Nutrients in Fast Plant fertilizer are nitrogen, phosphorus, and potassium. Farmers need to decide each season how much fertilizer they should add to their fields. If fertilizer additions are doubled, will the crops produce more than previous years? Fertilizer can be expensive – will the additional yield cover the costs of more fertilizer use? Fertilizer that is not used by plants can have harmful environmental impacts, including eutrophication. During eutrophication, nitrogen and phosphorous are washed into lakes and cause too much algae to grow, which can decrease the amount of oxygen available to rest of the living things. Notes on Nutrients in Fertilizer Nitrogen
o Optimum: Plants are rich green and protein content increases. o Deficient: Plants are stunted and light green in color; lower leaves are yellow, stem is
slender. o Excessive: Plants have very lush foliage with sappy, soft stems; flowering is delayed.
Phosphorous
o Optimum: Plants have a vigorous start due to stimulated root formation and growth; phosphorus also stimulates flowering and aids in seed formation.
o Deficient: slower growth and delayed flower and pod development; leaves are dark green and dull; root system is poor with little branching; stem is slender.
o Excessive: Plants have very lush foliage with sappy, soft stems; flowering is delayed. Potassium
o Optimum: plants have increased vigor and disease resistant. o Deficient: Leaves can be mottled; flowers do not achieve vibrant yellow color; stem is
slender. o Excessive: Plants have dark foliage and stiff stems and leaf branches.

Day 0 1. Answer the questions below: If nutrients are important for your plants to grow, develop, and reproduce, is there some particular amount of fertilizer that is best for the plants? In the previous investigation with Fast Plants, there was a suggested amount of fertilizer to add. Do you think that there is a minimum amount of fertilizer that plants must have to grow, develop, flower, and produce seed? How can you find out? If fertilizer is good for plants, is more fertilizer always better? How can you find out? What are some characteristics that you could observe to determine the best amount of fertilizer to add? Circle the one characteristic that you will observe. 2. Complete the top row of the data table by writing in the characteristic that you will be
observing. You will complete the rest of the table with your daily observations. Days Characteristic: Days Characteristic:
1 15
2 16
3 17
4 18
5 19
6 20
7 21
8 22
9 23
10 24
11 25
12 26
13 27
14 28
Procedures: 3. Plant the seeds in 4 containers using the following directions: 4. Poke a hole in the center of the bottom of the 8 oz. deli container. 5. Cut a wick 12-14 cm long, wet thoroughly with water and insert 2 cm into bottom of 8 oz.
deli container. 6. Pour ¼ cup of soil into the 8 oz. container. 7. Label containers based on the amount of fertilizer that was added. 8. Spread fertilizer pellets evenly on top of the soil. Put a different amount in each container
and make sure that one container has NO fertilizer added. 9. Add ½ cup of soil on top of fertilizer pellets. 10. Sprinkle water over soil until it is dripping from the wick. 11. Place 5 seeds in a circle pattern on top of the soil. 12. Cover seeds with ¼ cup of soil. 13. Pour 1 cup of water into the 16 oz. deli container. 14. Set the small container on top of the larger container. 15. Place in light box and cover front (the plants will need plenty of water and 24 hours of
light!) Days 1-28 1. Make an observation each day and record it in the previous table. Day 28 1. Compare your observations to your predictions before you started. Answer the following
questions:
If nutrients are important for your plants to grow, develop, and reproduce, is there a particular amount of fertilizer that is best for the plants? What evidence backs up your answer? Do you think there is a minimum amount of fertilizer that plants must have to grow, develop, flower, and produce seeds? What evidence backs up your answer? If fertilizer is good for plants, is more fertilizer always better? What evidence backs up your answer?
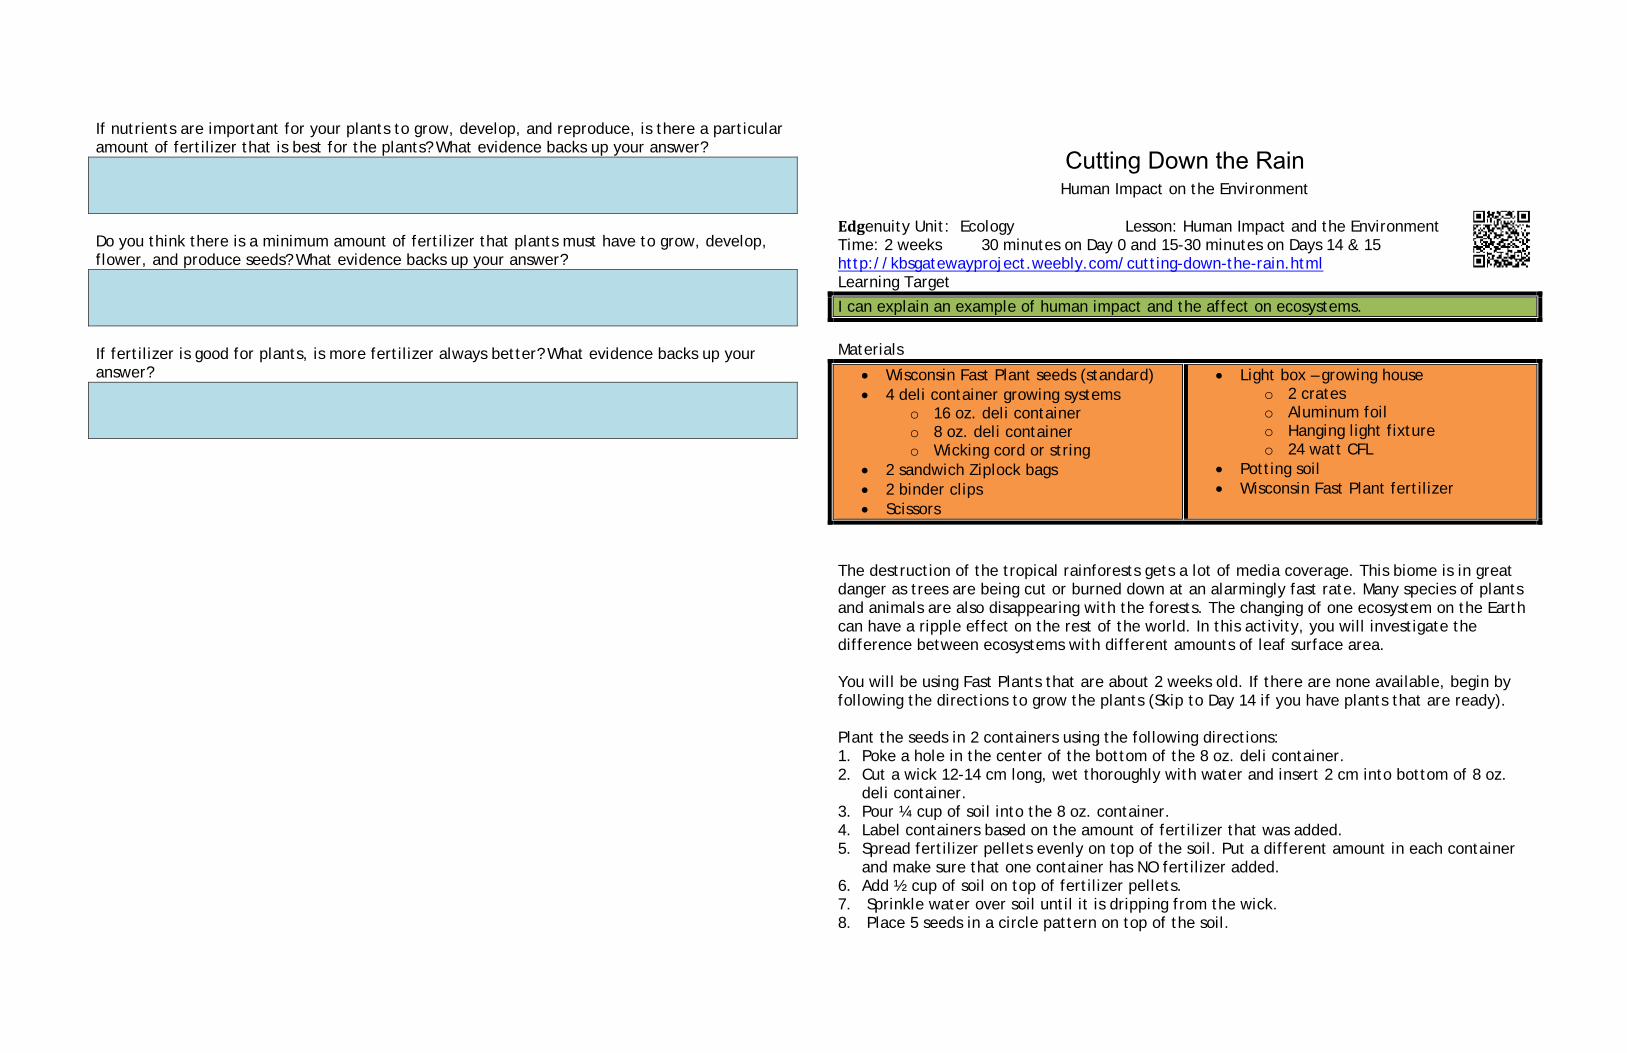
Cutting Down the Rain Human Impact on the Environment
Edgenuity Unit: Ecology Lesson: Human Impact and the Environment Time: 2 weeks 30 minutes on Day 0 and 15-30 minutes on Days 14 & 15 http://kbsgatewayproject.weebly.com/cutting-down-the-rain.html Learning Target
I can explain an example of human impact and the affect on ecosystems.
Materials
Wisconsin Fast Plant seeds (standard) 4 deli container growing systems
o 16 oz. deli container o 8 oz. deli container o Wicking cord or string
2 sandwich Ziplock bags 2 binder clips Scissors
Light box – growing house o 2 crates o Aluminum foil o Hanging light fixture o 24 watt CFL
Potting soil Wisconsin Fast Plant fertilizer
The destruction of the tropical rainforests gets a lot of media coverage. This biome is in great danger as trees are being cut or burned down at an alarmingly fast rate. Many species of plants and animals are also disappearing with the forests. The changing of one ecosystem on the Earth can have a ripple effect on the rest of the world. In this activity, you will investigate the difference between ecosystems with different amounts of leaf surface area. You will be using Fast Plants that are about 2 weeks old. If there are none available, begin by following the directions to grow the plants (Skip to Day 14 if you have plants that are ready). Plant the seeds in 2 containers using the following directions: 1. Poke a hole in the center of the bottom of the 8 oz. deli container. 2. Cut a wick 12-14 cm long, wet thoroughly with water and insert 2 cm into bottom of 8 oz.
deli container. 3. Pour ¼ cup of soil into the 8 oz. container. 4. Label containers based on the amount of fertilizer that was added. 5. Spread fertilizer pellets evenly on top of the soil. Put a different amount in each container
and make sure that one container has NO fertilizer added. 6. Add ½ cup of soil on top of fertilizer pellets. 7. Sprinkle water over soil until it is dripping from the wick. 8. Place 5 seeds in a circle pattern on top of the soil.

9. Cover seeds with ¼ cup of soil. 10. Pour 1 cup of water into the 16 oz. deli container. 11. Set the small container on top of the larger container. 12. Place in light box and cover front (the plants will need plenty of water and 24 hours of
light!) 13. Check on water daily.
Day 7 1. Keep the 3 best plants in each container and remove all others. Day 14 1. Cover one fast plant with a plastic bag. Secure bag with binder clip. Be careful not to break
or damage the plant while putting on the bag. This plant represents an intact tropical rainforest.
2. Using the scissors, snip off all the leaves on the other plant. Cover this plant as in step 2. This plant represents an area in which the tropical rain forest has been cut down.
3. Return the plants to the light box.
Day 15 1. Observe the plants to answer the following questions:
What are the differences between the “ecosystems” that you observed? Where do you think the water on the bag came from? If the “ecosystem” with leaves cycled more water into the atmosphere (bag), what can you infer about the amounts of water cycled into the air by undisturbed forests compared to cleared areas? Explain why the destruction of forests might lead to change in rainfall.
Why should people who live in other areas of the world be concerned about clearing of tropical rainforests?