Embed Size (px)
DESCRIPTION
do it yourself bee sucker
Citation preview

http://www.instructables.com/id/Bee-Sucker/
Home Sign Up! Browse Community Submit
All Art Craft Food Games Green Home Kids Life Music Offbeat Outdoors Pets Photo Ride Science Tech
Bee Suckerby bert.da.bee on June 23, 2009
Table of Contents
Bee Sucker . . . . . . . . . . . . . . . . . . . . . . . . . . . . . . . . . . . . . . . . . . . . . . . . . . . . . . . . . . . . . . . . . . . . . . . . . . . . . . . . . . . . . . . . . . . . . . . . . . . . . . . . . . . . . . . . . . 1
Intro: Bee Sucker . . . . . . . . . . . . . . . . . . . . . . . . . . . . . . . . . . . . . . . . . . . . . . . . . . . . . . . . . . . . . . . . . . . . . . . . . . . . . . . . . . . . . . . . . . . . . . . . . . . . . . . . . . 2
Step 1: The outer box . . . . . . . . . . . . . . . . . . . . . . . . . . . . . . . . . . . . . . . . . . . . . . . . . . . . . . . . . . . . . . . . . . . . . . . . . . . . . . . . . . . . . . . . . . . . . . . . . . . . . . . 2
Step 2: The inner mesh . . . . . . . . . . . . . . . . . . . . . . . . . . . . . . . . . . . . . . . . . . . . . . . . . . . . . . . . . . . . . . . . . . . . . . . . . . . . . . . . . . . . . . . . . . . . . . . . . . . . . . 8
Step 3: Fitting da Hoover . . . . . . . . . . . . . . . . . . . . . . . . . . . . . . . . . . . . . . . . . . . . . . . . . . . . . . . . . . . . . . . . . . . . . . . . . . . . . . . . . . . . . . . . . . . . . . . . . . . . . 13
Step 4: The inner mesh construction . . . . . . . . . . . . . . . . . . . . . . . . . . . . . . . . . . . . . . . . . . . . . . . . . . . . . . . . . . . . . . . . . . . . . . . . . . . . . . . . . . . . . . . . . . . . 15
Step 5: Outer bottom cover . . . . . . . . . . . . . . . . . . . . . . . . . . . . . . . . . . . . . . . . . . . . . . . . . . . . . . . . . . . . . . . . . . . . . . . . . . . . . . . . . . . . . . . . . . . . . . . . . . . 17
Step 6: The top cover . . . . . . . . . . . . . . . . . . . . . . . . . . . . . . . . . . . . . . . . . . . . . . . . . . . . . . . . . . . . . . . . . . . . . . . . . . . . . . . . . . . . . . . . . . . . . . . . . . . . . . . 20
Step 7: The portal... ;-) . . . . . . . . . . . . . . . . . . . . . . . . . . . . . . . . . . . . . . . . . . . . . . . . . . . . . . . . . . . . . . . . . . . . . . . . . . . . . . . . . . . . . . . . . . . . . . . . . . . . . . 21
Step 8: The Kreepy Krauly bits... . . . . . . . . . . . . . . . . . . . . . . . . . . . . . . . . . . . . . . . . . . . . . . . . . . . . . . . . . . . . . . . . . . . . . . . . . . . . . . . . . . . . . . . . . . . . . . . 23
Step 9: Pressure controller . . . . . . . . . . . . . . . . . . . . . . . . . . . . . . . . . . . . . . . . . . . . . . . . . . . . . . . . . . . . . . . . . . . . . . . . . . . . . . . . . . . . . . . . . . . . . . . . . . . 24
Step 10: Suck some bees . . . . . . . . . . . . . . . . . . . . . . . . . . . . . . . . . . . . . . . . . . . . . . . . . . . . . . . . . . . . . . . . . . . . . . . . . . . . . . . . . . . . . . . . . . . . . . . . . . . . 24
Step 11: Release . . . . . . . . . . . . . . . . . . . . . . . . . . . . . . . . . . . . . . . . . . . . . . . . . . . . . . . . . . . . . . . . . . . . . . . . . . . . . . . . . . . . . . . . . . . . . . . . . . . . . . . . . . 26
Related Instructables . . . . . . . . . . . . . . . . . . . . . . . . . . . . . . . . . . . . . . . . . . . . . . . . . . . . . . . . . . . . . . . . . . . . . . . . . . . . . . . . . . . . . . . . . . . . . . . . . . . . . . . . 27
Comments . . . . . . . . . . . . . . . . . . . . . . . . . . . . . . . . . . . . . . . . . . . . . . . . . . . . . . . . . . . . . . . . . . . . . . . . . . . . . . . . . . . . . . . . . . . . . . . . . . . . . . . . . . . . . . . . 27

http://www.instructables.com/id/Bee-Sucker/
Intro: Bee SuckerIf you've ever had trouble with bees you probably know how difficult it is to get rid of them without you being stung or the bees being killed. If you smoke them out, youhave no control over where they make their next home and you can't use the "stinking" honey. After surfing the net and talking to a couple of people in the know I cameup with a practical design that will make the transfer to their "lekker" new home as trauma free as possible.
Image Notes1. The Bee Sucker
Step 1: The outer boxFor this step you will need four planks cut in standard lengths and heights as you would for a normal Langstroth hive supper. (You will need to measure your own hives.The idea is to place the full bee vacuum on top of the hive already filled with brood taken from the wild to ease the transfer of bees to their new home.)
Image Notes1. The four planks as would be used for a normal supper.

http://www.instructables.com/id/Bee-Sucker/
Image Notes1. Make marks where you want the biscuits to be placed. Assign numbers orletters to matching pairs.

http://www.instructables.com/id/Bee-Sucker/
Image Notes1. Use a biscuit machine to cut the selected spaces.
Image Notes1. Finished cut-outs for biscuits.

http://www.instructables.com/id/Bee-Sucker/
Image Notes1. Place clamps and other materials in such a way that it would be easilyreachable when you start assembly.
Image Notes1. Fill biscuit cut-outs with cold glue.

http://www.instructables.com/id/Bee-Sucker/
Image Notes1. Press biscuits into cut-outs filled with cold glue.
Image Notes1. Press planks together. Remember to pair up the assigned numbers or letters.

http://www.instructables.com/id/Bee-Sucker/
Image Notes1. Complete assembly…
Image Notes1. Clamp assembly.

http://www.instructables.com/id/Bee-Sucker/
Image Notes1. Remove excess cold glue with a wet cloth.
Step 2: The inner meshYou will need two peaces shade netting the size of the longest Langstroth supper dimension and four frames four fifths the length of the netting. The frames can be of anythickness as long as it will allow air to flow freely.

http://www.instructables.com/id/Bee-Sucker/
Image Notes1. The four frames.
Image Notes1. Use cold glue only on one side of the frame.

http://www.instructables.com/id/Bee-Sucker/
Image Notes1. Spread the glue over the side that is going to be netted.
Image Notes1. Use panel pins to secure the netting. I used one in each corner…

http://www.instructables.com/id/Bee-Sucker/
Image Notes1. Bend the panel pins over.
Image Notes1. Spread cold glue over the netting that is on the frame.
http://www.instructables.com/id/Bee-Sucker/
Image Notes1. Clamp two frames together to make a “wafer” of wood and netting. When theframes have set remove the clamps.
Image Notes1. Remove excess netting with a sharp knife.

http://www.instructables.com/id/Bee-Sucker/
Image Notes1. Completed inner mesh panels.
Step 3: Fitting da HooverThis is where you should get creative if you're not going to buy a vacuum cleaner for sucking up bees. Take the hose fitting least/never used on your vacuum cleaner... Inthis step you will need a hose fitting and some Pratley Putty.
http://www.instructables.com/id/Bee-Sucker/
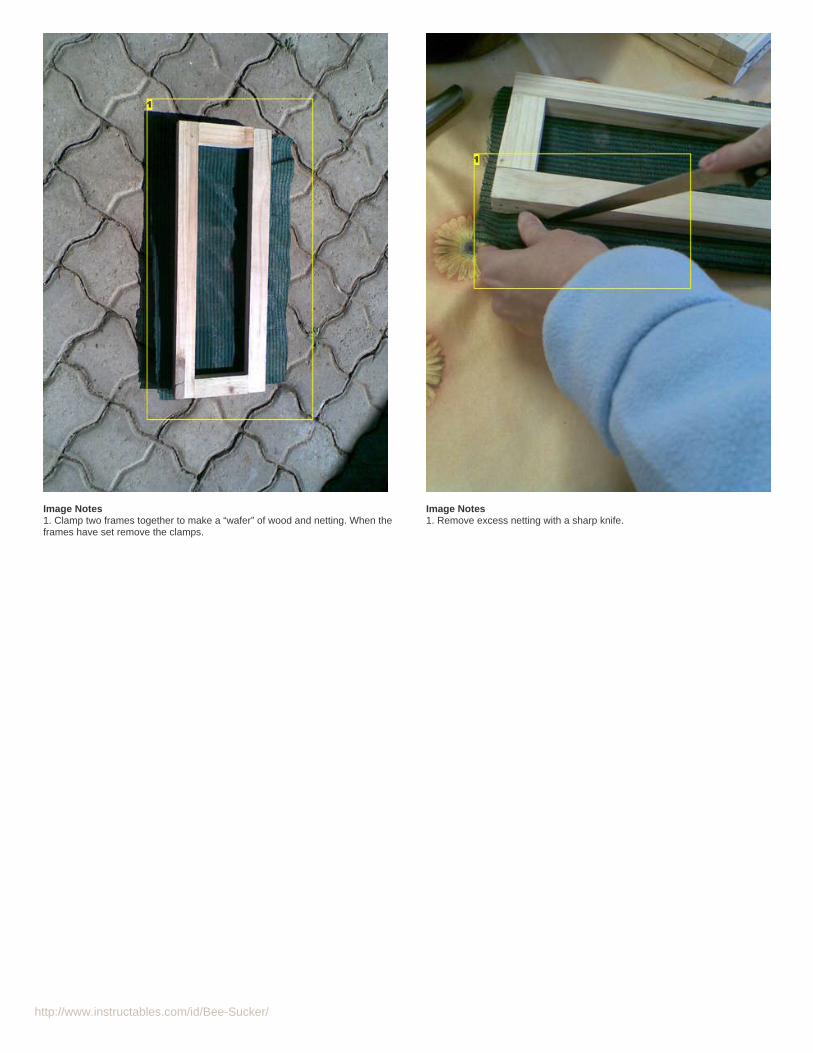
Image Notes1. Place the fitting in the middle of a "short" side of your "supper". Draw the outsidediameter of the hose on to the wood. Chisel it out - and be patient!
Image Notes1. Affix the fitting on the inside of the supper with a self tapping screw.

http://www.instructables.com/id/Bee-Sucker/
Image Notes1. This is how it is supposed to look on the outside of the supper.
Image Notes1. Make the fitting airtight on the inside of the supper with Pratley Putty.2. Pratley Steel - Quickset putty. Miracles are made from this... ;-)
Step 4: The inner mesh constructionIn this step we complete the entire internal construction of the bee sucker. You will again need to make use of the biscuit machine and fix the internal structure to theouter supper. In this step you will also need to affix the rails for the bottom drawer.

http://www.instructables.com/id/Bee-Sucker/
Image Notes1. Cut a peace of wood the same height as your supper but to your desiredlength. This peace will cover the vacuum cleaner fitting and give strength to theinner structure of the bee sucker.2. Affix a “wing” on both sides of the front end of the inner construction. Makesure that you do not make the “wings” to long – the inner construction must fitinto the outer “supper”.
Image Notes1. Affix the inner construction to the outer “supper” via the wings. A couple ofscrews will work just as fine as four biscuits. Clamp together with G-clamps.2. Screw the rails of the bottom rail onto the bottom part of the supper. Eitherside op the supper can be used as the bottom as there is currently no differencebetween the two.
Image Notes1. Cut the inner rail as thick as the board that should fit in to it. It sounds like

http://www.instructables.com/id/Bee-Sucker/
common sense but if you cut it thicker the bee sucker won't work!2. You can fix the rail to the inner construction with a screw in the rail… If youdon't do it the rail will brake off after prolonged use.
Step 5: Outer bottom coverThe following step is essential as it will determine if your bee sucker will ultimately work. The goal is to make the container airtight.
You will need a pressed wood board, some panel pins, cold glue and patience as this step can take a really long time.
Image Notes1. Measure your board and cut it.
Image Notes1. Make sure that you cut on the inner line as this will guarantee a snug andairtight fit.

http://www.instructables.com/id/Bee-Sucker/
Image Notes1. Make sure your cut out fits...
Image Notes1. If you see glue on the inside don't worry - nobody will ever be able to seethe inside. :-)

http://www.instructables.com/id/Bee-Sucker/
Image Notes1. Spread cold glue over the entire area to be covered by the outer board. Don'tbe shy with the glue – you can’t come back to this step!
Image Notes1. Fix the board to the supper with panel pins and clamp together.
http://www.instructables.com/id/Bee-Sucker/
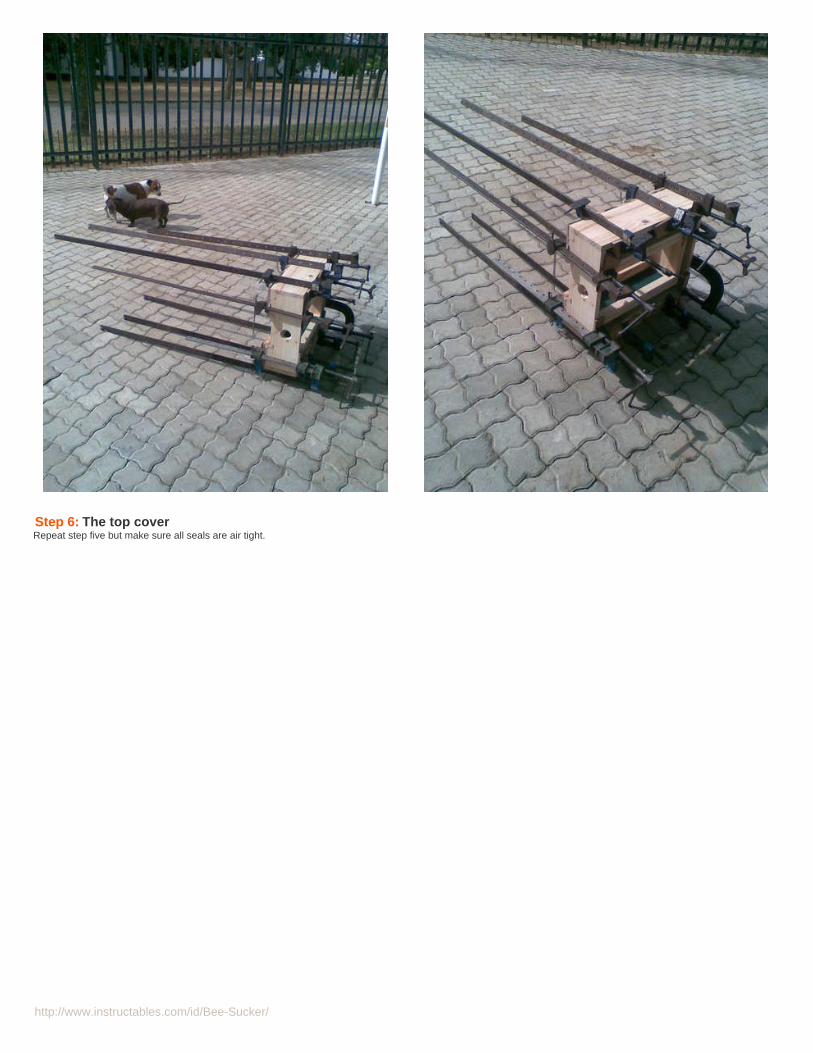
Step 6: The top coverRepeat step five but make sure all seals are air tight.

http://www.instructables.com/id/Bee-Sucker/
Step 7: The portal... ;-)Before commencing with this step you should paint your bee sucker.
In this step you require a piece of Perspex the size of your supper, double sided tape and some screws.
http://www.instructables.com/id/Bee-Sucker/
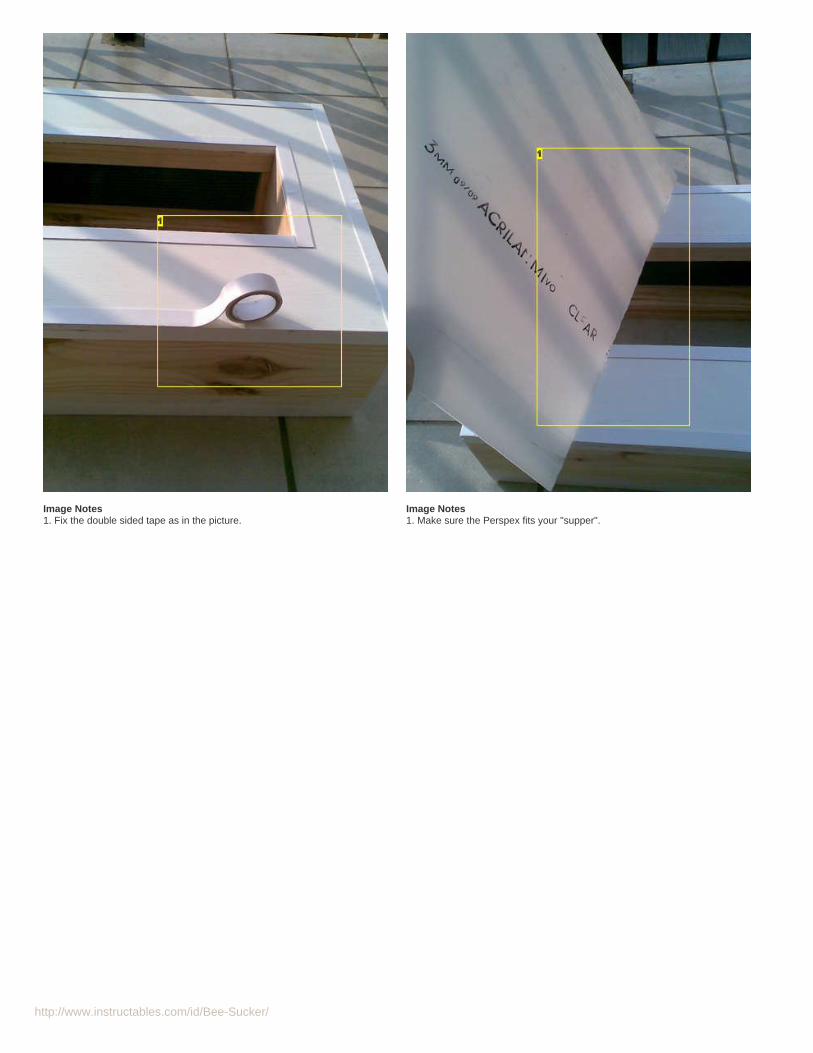
Image Notes1. Fix the double sided tape as in the picture.
Image Notes1. Make sure the Perspex fits your "supper".

http://www.instructables.com/id/Bee-Sucker/
Image Notes1. Fix the Perspex to the supper with the double sided tape and screws.
Step 8: The Kreepy Krauly bits...Flare a Kreepy Krauly pipe and fix it to the inside of your bee sucker with screws. Seal it with the stuff miracles are made of.

http://www.instructables.com/id/Bee-Sucker/
Step 9: Pressure controllerCut a hole on one side of the bee sucker. Cover it with a movable peace of plastic. You will use this to regulate the pressure inside the bee sucker. If you give to muchpressure/suction you will kill the bees.
Step 10: Suck some beesPlay around with pressure and make sure you don't kill the bees. If you have the correct suction you can even suck in the queen without killing her.

http://www.instructables.com/id/Bee-Sucker/

http://www.instructables.com/id/Bee-Sucker/
Step 11: ReleaseWhen all is said and done, take your catch and place the bee sucker on top of their new home filled with brood taken from their old home. Release the trap door/tray andleave them be for a couple of hours. Come back when the sucker is empty, remove it and put the hive cover back.
Seal all other exits and entrances to the sucker i.e. holes previously used by hoses and pressure control mechanisms.

http://www.instructables.com/id/Bee-Sucker/
Image Notes1. Trap door/tray.
Related Instructables
Happy Home forour friends theMason Bees! bydanica
Save the beesfrom extinction!You CAN do it.by gaiatechnician
E-Z Catch byCraigHarrison
Bee Hive in aBucket byThinkenstein
Make a cob BeeBlock forsolitary bees(video) bygaiatechnician
Plying on aSpinOlution BeeTravel Wheel(video) byaskthebellwether
Comments
14 comments Add Comment
otismbakerjr says: May 27, 2010. 10:10 AM REPLYWVBeekeepersHusband:To those who would like to get started in beekeeping...1] 1st. check with your local or state AG dept / agent for - Beekeeping groups in your area. Great scoure for help and hive sales to get started with.
2]Local bees help prvent the spread of unwanted (africanized bees).
3]USA - Dadant [www.dadant.com] and Walter T. Kelley [kellybees.com] also sale bees packages and starter hive kits and whatever else you might need.
Also try reversing your setup with the BeeVac on the bottom and the hive body on the top. Bees prefer to travel up thaan down.
Sunlight to bees mean fly-hunt-harvest.
By the way GREAT Design - I like the fact that you made it to fit the hive body, by using a short honey super for your out body.

http://www.instructables.com/id/Bee-Sucker/
thelastonekills says: Mar 12, 2010. 10:31 PM REPLYi am interested in getting a bee hive any one know how or where
linuxthefish says: Jan 3, 2010. 9:49 AM REPLY cool
TehLonelyOne says: Oct 8, 2009. 5:30 AM REPLYWhat a great device! and a great instructable. I was thinking of building one of these, but every swarm I've caught is sitting in a tree (easy to catch!) and I'venever relocated a wild hive.
eulaliaaaa! says: Jul 13, 2009. 11:23 AM REPLYIs this thing for wild bees or for your own hive? We have two hives at home, and they sometimes fly away.
bert.da.bee says: Jul 13, 2009. 10:32 PM REPLYI use the Bee Sucker for wild/feral bees. Your bees may be flying away because they are swarming (there is an extra mated queen in the hive and she istaking about half of all the worker bees with her to start a new hive/nest).
pdub77 says: Jul 10, 2009. 6:45 PM REPLYThat's awesome. Been reading a lot and hope to start beekeeping spring next year. I've heard of using a suction device to catch a swarm or move a hive, butnever seen anything like this. Good work.
sleepydog says: Jun 28, 2009. 9:34 PM REPLYNice build! Do you have to be concerned about heating up the bees with sunlight coming thru the window? How many swarms have you used this on? Howlarge is your shopvac?
bert.da.bee says: Jun 30, 2009. 6:17 AM REPLYThanx, I usually work under a tree or inside a house, so the bees don't get exposed that much. The moment I place the sucker on top of the new hive Icover the "window". (The hive lid fits perfectly.) Maybe someone with a bit more knowledge can shine some light regarding your question on the effectsof sunlight on bees. I had the privilege of sucking two hives to date - both are doing fine. I will be removing another two this coming Saturday. (It is winterin South Africa so swarms are not that active...) The vacuum is a 1800W Hoover wet & dry.
curious.matt says: Jun 25, 2009. 7:27 PM REPLYcool i am a beekeeper this might acculy work.
garrett10 says: Jun 24, 2009. 5:19 AM REPLYthe title sounds so wrong
slimguy379 says: Jun 23, 2009. 2:03 PM REPLYlol im an apiculturist, and idk if ill use this, but the uprise in bee related instructables is greatly appreciated... keep em coming
depotdevoid says: Jun 23, 2009. 1:27 PM REPLYVery nice, I know someone who works with bees that might like this. I'll forward it along.
ry25920 says: Jun 23, 2009. 12:27 PM REPLYWow.... giggle... this really sucks. Literally. But good job on the details. 3 stars.