Embed Size (px)
Citation preview

OWNER’S GUIDEBEACHCOMBER HOT TUBS
ESMS

Record Important details of your new Beachcomber Hot Tub
MODEL NUMBER: DATE OF PURCHASE:
HOT TUB SERIAL NUMBER: STORE NAME:
GUARANTEE NUMBER: STORE PHONE:
Your hot tub is an investment in your health and happiness. This Owner’s Guide is intended to give you
instructions on the basic operation of your hot tub. For the most up-to-date and current statistics on
Beachcomber Hot Tubs, refer to our website. You can also find all Beachcomber Owner’s Guides online.
www.beachcomberhottubs.com
CONGRATULATIONS

Important Safety Instructions . . . . . . . . . . . . . . . . . . . . . . . . . . . . . . . . . . . . . . . . . . . . . . . . . . . . . . . . . . . . . . . . . . . . . . . . . . . . . . . . . . . 3
Beachcomber Hot Tub Components Overview . . . . . . . . . . . . . . . . . . . . . . . . . . . . . . . . . . . . . . . . . . . . . . . . . . . . . . . . . . . . . . . . . . . . . . 9
Basic Hot Tub Configurations . . . . . . . . . . . . . . . . . . . . . . . . . . . . . . . . . . . . . . . . . . . . . . . . . . . . . . . . . . . . . . . . . . . . . . . . . . . . . . . . . . . 10
Starting Up your Beachcomber Hot Tub for the First Time . . . . . . . . . . . . . . . . . . . . . . . . . . . . . . . . . . . . . . . . . . . . . . . . . . . . . . . . . . . 10
LEEPTM Portable Equipment Configuration Diagrams . . . . . . . . . . . . . . . . . . . . . . . . . . . . . . . . . . . . . . . . . . . . . . . . . . . . . . . . . . . . . . . . 11
HYBRID4TM Edition Equipment Configuration Diagrams . . . . . . . . . . . . . . . . . . . . . . . . . . . . . . . . . . . . . . . . . . . . . . . . . . . . . . . . . . . . 12
700 Series (Europe Only) ET-7 Topside Control Panel Operating Instructions . . . . . . . . . . . . . . . . . . . . . . . . . . . . . . . . . . . . . . . . . . . 13
ET-70 Topside Control Panel Operating Instructions . . . . . . . . . . . . . . . . . . . . . . . . . . . . . . . . . . . . . . . . . . . . . . . . . . . . . . . . . . . . . . . 16
ET-55 Topside Control Panel Operating Instructions . . . . . . . . . . . . . . . . . . . . . . . . . . . . . . . . . . . . . . . . . . . . . . . . . . . . . . . . . . . . . . . . . 18
ET-50 Topside Control Panel Operating Instructions . . . . . . . . . . . . . . . . . . . . . . . . . . . . . . . . . . . . . . . . . . . . . . . . . . . . . . . . . . . . . . . 20
Diagnostic Display Messages and Troubleshooting Guide . . . . . . . . . . . . . . . . . . . . . . . . . . . . . . . . . . . . . . . . . . . . . . . . . . . . . . . . . . . 22
Operation of Hot Tub Features . . . . . . . . . . . . . . . . . . . . . . . . . . . . . . . . . . . . . . . . . . . . . . . . . . . . . . . . . . . . . . . . . . . . . . . . . . . . . . . . . . 24
EverliteTM 4 Operating Instructions . . . . . . . . . . . . . . . . . . . . . . . . . . . . . . . . . . . . . . . . . . . . . . . . . . . . . . . . . . . . . . . . . . . . . . . . . . . . . . . 26
EverliteTM 6 Operating Instructions . . . . . . . . . . . . . . . . . . . . . . . . . . . . . . . . . . . . . . . . . . . . . . . . . . . . . . . . . . . . . . . . . . . . . . . . . . . . . . . 26
Hot Tub Water Care and Maintenance Notes . . . . . . . . . . . . . . . . . . . . . . . . . . . . . . . . . . . . . . . . . . . . . . . . . . . . . . . . . . . . . . . . . . . . . . 27
Hot Tub Water Care and Maintenance . . . . . . . . . . . . . . . . . . . . . . . . . . . . . . . . . . . . . . . . . . . . . . . . . . . . . . . . . . . . . . . . . . . . . . . . . . . . 28
Filter Care and Maintenance . . . . . . . . . . . . . . . . . . . . . . . . . . . . . . . . . . . . . . . . . . . . . . . . . . . . . . . . . . . . . . . . . . . . . . . . . . . . . . . . . . . . 29
HeatshieldTM Care and Maintenance . . . . . . . . . . . . . . . . . . . . . . . . . . . . . . . . . . . . . . . . . . . . . . . . . . . . . . . . . . . . . . . . . . . . . . . . . . . . . . 30
Draining your Beachcomber Hot Tub . . . . . . . . . . . . . . . . . . . . . . . . . . . . . . . . . . . . . . . . . . . . . . . . . . . . . . . . . . . . . . . . . . . . . . . . . . . . . . 31
Vacation Instructions . . . . . . . . . . . . . . . . . . . . . . . . . . . . . . . . . . . . . . . . . . . . . . . . . . . . . . . . . . . . . . . . . . . . . . . . . . . . . . . . . . . . . . . . . . . . 31
Winter Operation Information . . . . . . . . . . . . . . . . . . . . . . . . . . . . . . . . . . . . . . . . . . . . . . . . . . . . . . . . . . . . . . . . . . . . . . . . . . . . . . . . . . . 31
Winter Shutdown Procedures . . . . . . . . . . . . . . . . . . . . . . . . . . . . . . . . . . . . . . . . . . . . . . . . . . . . . . . . . . . . . . . . . . . . . . . . . . . . . . . . . . . 32
Beachcomber Hot Tub Accessories . . . . . . . . . . . . . . . . . . . . . . . . . . . . . . . . . . . . . . . . . . . . . . . . . . . . . . . . . . . . . . . . . . . . . . . . . . . . . . . 33
Hot Tub Specifications and Details . . . . . . . . . . . . . . . . . . . . . . . . . . . . . . . . . . . . . . . . . . . . . . . . . . . . . . . . . . . . . . . . . . . . . . . . . . . . . . . 35
HeatshieldTM Specifications and Details . . . . . . . . . . . . . . . . . . . . . . . . . . . . . . . . . . . . . . . . . . . . . . . . . . . . . . . . . . . . . . . . . . . . . . . . . . . 36
The Beachcomber Guarantee . . . . . . . . . . . . . . . . . . . . . . . . . . . . . . . . . . . . . . . . . . . . . . . . . . . . . . . . . . . . . . . . . . . . . . . . . . . . . . . . . . . 37
This Owner’s Guide is for hot tubs manufactured from November 1st, 2009.
TABLE OF CONTENTS

3 www.beachcomberhottubs.com
⚠ WARNING: CHILDREN SHOULD NOT USE SPAS OR HOT TUBS WITHOUT ADULT SUPERVISION.
⚠ WARNING: DO NOT USE SPAS OR HOT TUBS UNLESS ALL SUCTION GUARDS ARE INSTALLED TO PREVENT BODY AND HAIR ENTRAPMENT.
⚠ WARNING: PEOPLE USING MEDICATIONS AND/OR HAVING AN ADVERSE MEDICAL HISTORY SHOULD CONSULT A PHYSICIAN BEFORE
USING A SPA OR HOT TUB.
⚠ WARNING: PEOPLE WITH INFECTIOUS DISEASES SHOULD NOT USE A SPA OR HOT TUB.
⚠ WARNING: TO AVOID INJURY, EXERCISE CARE WHEN ENTERING OR EXITING THE SPA OR HOT TUB.
⚠ WARNING: DO NOT USE DRUGS OR ALCOHOL BEFORE OR DURING THE USE OF A SPA OR HOT TUB TO AVOID UNCONSCIOUSNESS AND
POSSIBLE DROWNING.
⚠ WARNING: PREGNANT OR POSSIBLY PREGNANT WOMEN SHOULD CONSULT A PHYSICIAN BEFORE USING A SPA OR HOT TUB.
⚠ WARNING: WATER TEMPERATURE IN EXCESS OF 38 °C CAN BE INJURIOUS TO YOUR HEALTH.
⚠ WARNING: BEFORE ENTERING THE SPA OR HOT TUB, MEASURE THE WATER TEMPERATURE WITH AN ACCURATE THERMOMETER.
⚠ WARNING: DO NOT USE A SPA OR HOT TUB IMMEDIATELY FOLLOWING STRENUOUS EXERCISE.
⚠ WARNING: PROLONGED IMMERSION IN A SPA OR HOT TUB CAN BE INJURIOUS TO YOUR HEALTH.
⚠ WARNING: DO NOT PERMIT ELECTRIC APPLIANCES (SUCH AS A LIGHT, TELEPHONE, RADIO, OR TELEVISION) WITHIN 1.5 M OF THIS SPA
OR HOT TUB.
CAUTION: MAINTAIN WATER CHEMISTRY IN ACCORDANCE WITH MANUFACTURER’S INSTRUCTIONS.
Use the temperature adjustment keys on the control panel to adjust and select a water temperature. Refer to the temperature adjustment instructions for your topside control panel type. Always check the temperature of the water before entry with an accurate thermometer. Recommended time in water at 100°F / 38°C is 10 minutes. WATER TEMPERATURE MAY NEED TO BE DECREASED FOR CHILDREN OR THE ELDERLY. PROLONGED IMMERSION IN HOT WATER MAY INDUCE HYPERTHERMIA.
AVOIDING THE RISK OF HYPERTHERMIA:
The causes, symptoms, and effects of hyperthermia may be described as follows. Hyperthermia occurs when the internal temperature of the body reaches a level several degrees above the normal body temperature of 37 °C. The symptoms of hyperthermia include drowsiness, lethargy, and an increase in the internal temperature of the body.
THE EFFECTS OF HYPERTHERMIA INCLUDE:
• Unawareness of impending hazard; • Physical inability to exit spa; • Failure to perceive heat; • Fetal damage in pregnant women; and • Failure to recognize the need to exit spa; • Unconsciousness and danger of drowning.
⚠ WARNING: THE USE OF ALCOHOL OR DRUGS CAN GREATLY INCREASE THE RISK OF FATAL HYPERTHERMIA IN HOT TUBS AND SPAS.
IMPORTANT SAFETY INSTRUCTIONSREAD AND FOLLOW ALL INSTRUCTIONS

4
DIRECTIVES DE SÉCURITÉ IMPORTANTES LISEZ ET SUIVEZ TOUTES LES DIRECTIVES SUIVANTES
⚠ AVERTISSEMENT: NE JAMAIS LAISSER DES ENFANTS UTILISER LE SPA SANS SURVEILLANCE D’UN ADULTE
⚠ AVERTISSEMENT: NE JAMAIS UTILISER LE SPA SI LES GARDES D’ASPIRATION NE SONT PAS TOUTES EN PLACE AFIN D’ÉVITER
QUE LES CHEVEUX OU UNE PARTIE DU CORPS PUISSENT ÊTRE ASPIRÉS
⚠ AVERTISSEMENT: LES PERSONNES SOUS MÉDICAMENTS ET (OU) ONT DES PROBLÈMES DE SANTÉ DEVRAIENT CONSULTER UN
MÉDECIN AVANT D’UTILISER LE SPA
⚠ AVERTISSEMENT: LES PERSONNES ATTEINTES DE MALADIES INFECTIEUSES NE DEVRAIENT PAS UTILISER LE SPA
⚠ AVERTISSEMENT: FAIRE PREUVE DE PRUDENCE EN ENTRANT DANS LE SPA ET EN SORTANT AFIN D’ÉVITER LES RISQUES
DE BLESSURE
⚠ AVERTISSEMENT: NE PAS CONSOMMER DE DROGUE OU D’ALCOOL AVANT ET PENDANT L’UTILISATION DU SPA AFIN D’ÉVITER
TOUT RISQUE D’ÉVANOUISSEMENT OU DE NOYADE
⚠ AVERTISSEMENT: LES FEMMES ENCEINTES, QUE LEUR GROSSESSE SOIT CONFIRMÉE OU NON, DEVRAIENT CONSULTER UN
MÉDECIN AVANT D’UTILISER LE SPA
⚠ AVERTISSEMENT: UNE TEMPÉRATURE DE L’EAU SUPÉRIEURE À 38 °C PEUT ÊTRE DANGEREUX POUR VOTRE SANTÉ
⚠ AVERTISSEMENT: AVANT D’UTILISER LE SPA, MESURER LA TEMPÉRATURE DE L’EAU À L’AIDE D’UN THERMOMÈTRE PRÉCIS
⚠ AVERTISSEMENT: NE PAS UTILISER LE SPA IMMÉDIATEMENT APRÈS UNE ACTIVITÉ PHYSIQUE INTENSE
⚠ AVERTISSEMENT: L’UTILISATION PROLONGÉE D’UN SPA PEUT ÊTRE DANGEREUSE POUR VOTRE SANTÉ
⚠ AVERTISSEMENT: NE PAS PLACER D’APPAREIL ÉLECTRIQUE (COMME UN LUMINAIRE, TÉLÉPHONE, RADIO, OU TÉLÉVISEUR) À
MOINS DE 1.5 M DU SPA
ATTENTION : LA TENEUR DE L’EAU EN MATIÈRES DISSOUTES DOIT ÊTRE CONFORME AUX DIRECTIVES DU FABRICANT.
Utilisez les touches de réglage de la température sur le panneau de commande pour régler et sélectionnez une température d’eau. Référez aux instructions de réglage de la température pour votre panneau de commande. Vérifiez toujours la température de l’eau à l’aide d’un thermomètre avant d’entrer dans le hot tub. Durée recommandée lorsque la température de l’eau est de 100°F / 38°C est 10 minutes. IL PEUT ÊTRE NÉCESSAIRE DE RÉDUIRE LA TEMPÉRATURE DE L’EAU POUR LES ENFANTS OU LES PERSONNES ÂGÉES. L’IMMERSION PROLONGÉE DANS L’EAU CHAUDE PEUT PROVOQUER L’HYPERTHERMIE.
HYPERTHERMIE:
Les causes, symptômes et effets de l’hyperthermie peuvent être décrits comme suit. L’hyperthermie survient lorsque la température interne du corps atteint un niveau de plusieurs degrés au-dessus de la température normale de 37 °C. Les symptômes de l’hyperthermie comprennent la somnolence, la léthargie et une augmentation de la température interne du corps. Les effets de l’hyperthermie comprennent
LES EFFETS :
• inconscience d’un danger imminent; • inaptitude physique à sortir du spa; • incapacité de percevoir la chaleur; • lésions du fœtus chez la femme enceinte; et • incapacité de reconnaitre la nécessite de sortir du spa; • évanouissement et danger de noyade.
⚠ AVERTISSEMENT: LA CONSOMMATION D’ALCOOL OU DE DROGUE AUGMENTE CONSIDÉRABLEMENT LES RISQUES
D’HYPERTHERMIE MORTELLE DANS UNE CUVE DE RELAXATION.

5 www.beachcomberhottubs.com
AVOIDING THE RISK TO CHILDREN
WARNING: To reduce the risk of injury, do not permit children to use this product unless they are closely supervised at all times
DANGER: Risk of Accidental Drowning
• Extreme caution must be exercised to prevent unauthorized access by children. To avoid accidents, ensure that children cannot use this hot tub or spa unless they are supervised at all times
AVOIDING THE RISK OF ELECTROCUTION:
WARNING: For outdoor use only. This unit is not intended for indoor use.
• A wire connector is provided on this unit to connect a minimum 8 AWG (8.4 mm²) solid copper conductor between this unit and any metal equipment, metal enclosures of electrical equipment, metal water pipe or conduit within 5 feet (1.5m) of the unit.
DANGER: Risk of injury
• For cord connected units: a) Replace damaged cord immediately. b) Do not bury cord. c) Connect to a grounded, grounding type receptacle only.
DANGER: Risk of Electric Shock.
• Install at least 5 feet (1.5m) from all metal surfaces. As an alternative, a hot tub or spa may be installed within 5 feet of metal surfaces if each metal surface is permanently connected by a minimum 8 AWG (8.4 mm²) of solid copper conductor to the wire connector on the terminal box that is provided for this purpose.
• Do not permit any electrical appliance, such as a light, telephone, radio or television, within 5 feet (1.5m) of a hot tub or spa.
AVOIDING THE RISK OF INJURY:
DANGER: Risk of Injury. The suction fittings in this hot tub or spa are sized to match the specific water flow created by the pump. Should the need arise to replace the suction fittings or the pump, be sure that the flow rates are compatible.
Never operate a hot tub or spa if the suction fittings are broken or missing. Never replace a suction fitting with one rated less than the flow rate marked on the original suction fitting.
WARNING: To reduce the risk of injury:
• The water in a hot tub or spa should never exceed 40°C (104°F). Water temperatures between 38°C (100°F) and 40°C are considered safe for a healthy adult. Lower water temperatures are recommended for young children and when hot tub or spa use exceeds 10 minutes. Prolonged immersion in a hot tub or spa may be injurious to your health.
• Since excessive water temperatures have a high potential for causing fetal damage during the early months of pregnancy, pregnant or possibly pregnant women should limit hot tub or spa water temperatures to 38°C (100°F). Pregnant or possibly pregnant women should consult a physician before using a hot tub or spa.
• Before entering a hot tub or spa, the user should measure the water temperature with an accurate thermometer since the tolerance of water temperature-regulating devices varies.
• The use of alcohol, drugs or medication before or during hot tub or spa use may lead to unconsciousness with the possibility of drowning.
• Obese persons and persons with a history of heart disease, low or high blood pressure, circulatory system problems or diabetes should consult a physician before using a hot tub or spa. Persons with infectious diseases should not use a hot tub or spa.
• Persons using medication should consult a physician before using a hot tub or spa since some medication may induce drowsiness while other medication may affect heart rate, blood pressure, and circulation.
• Do not enter a hot tub or spa immediately following strenuous exercise.
• To avoid injury, exercise care when entering or exiting the hot tub or spa.
IMPORTANT SAFETY INSTRUCTIONS READ AND FOLLOW ALL INSTRUCTIONS

6
ELECTRICAL EQUIPMENT:
CONNECT ONLY TO CIRCUITS PROTECTED BY A CLASS A GFCI. A DISCONNECTING MEANS MUST BE INSTALLED WITHIN SIGHT FROM THE EQUIPMENT AND AT LEAST 5 FEET (1.52 M) FROM THE INSIDE WALLS OF THE POOL, SPA OR HOT TUB. USE COPPER CONDUCTORS ONLY
When using this electrical equipment, basic safety precautions should always be followed including the following:
• A green colored terminal, or terminal marked G, GR, Ground, Grounding or the international grounding symbol is located inside the supply terminal box or compartment. To reduce the risk of electric shock, this terminal must be connected to the grounding means provided in the electrical supply service panel with a continuous copper wire equivalent in size to the circuit conductors supplying this equipment.
• At least two lugs marked “BONDING LUGS” are provided on the external surface or on the inside of the supply terminal box or compartment. To reduce the risk of electric shock, connect the local common bonding grid in the area of the hot tub or spa to these terminals with an insulated or bare copper conductor not smaller than No. 6 AWG
• All field installed metal components such as rails, ladders, drains or other similar hardware within 3 meters / 9.84 feet of the hot tub or spa shall be bonded to the equipment grounding bus with copper conductors not smaller than No. 6 AWG
• There are no user serviceable parts within the management system. The high voltage can cause injury or death.
• The hot tub or spa must be hooked up to a Ground Fault Circuit Interrupter (G.F.C.I.) by a licensed electrician.
• Use the test button on your G.F.C.I monthly to ensure it is working properly.
• CAUTION: Wiring Connected in this box must be rated at 300V.
AUDIO COMPONENTS:
When using audio components, basic safety precautions should always be followed including the following:
• CAUTION: Risk of Electric Shock. Do not leave compartment door open.
• CAUTION: Risk of Electric Shock. Replace components only with identical components.
• Do not operate the audio controls while inside the hot tub or spa.
• WARNING: Prevent Electrocution. Do not connect any auxiliary components (for example cable, additional speakers, headphones, additional audio/video components, etc) to the system.
• These units are not provided with an outdoor antenna; when provided, it should be installed in accordance with Article 810 of the National Electrical Code, ANSI/NFPA 70.
• Do not service this product yourself as opening or removing covers may expose you to dangerous voltage or other risk of injury. Refer all servicing to qualified personnel.
• When the power supply connections or power supply cord(s) are damaged; if water is entering the audio/video compartment or any electrical equipment compartment area; if the protective shields or barriers are showing signs of deterioration; or if there are signs of other potential damage to the unit, turn off the unit and refer servicing to a qualified service personnel.
• This unit should be subjected to periodic routine maintenance (for example, once every 3 months) to make sure that the unit is operating properly.

7 www.beachcomberhottubs.com
SAFETY SIGN INSTALLATION:
• Each Beachcomber Hot Tub is shipped with a Safety Sign in the owner’s package.
• This Safety Sign is to be permanently located where visible to the users of this hot tub or spa. It is important that all users, both frequent and occasional, are aware of this sign and its warning.
• Additional or replacement copies of this sign can be obtained from Beachcomber Hot Tubs by calling:
HOT TUB WATER CARE
WARNING:
• Do not enter a hot tub without adequate sanitization/disinfection.
• Always follow the label instructions and warnings on Beachcomber water care chemical bottles.
• Prevent unauthorized child access to avoid the risk of drowning.
• When shock treating hot tub water, leave the cover slightly open to allow vapor to escape for 1 hour. High levels of sanitizer damages the underside of the cover, which is not covered by guarantee.
• Do not allow children to use a hot tub without adult supervision.
• Keep potential harmful products out of reach of children at all times.
General Safety and Handling:
• Reactions could occur that may emit harmful gases. Pouring the chemical into the larger body of water is the proper way to handle application of product to the hot tub.
• Always ensure to add the water care products towards the center of the hot tub, with the circulation system running.
• Never mix water care products with each other.
• Always follow directions from the bottle. Serious injury could occur if label instructions are not followed.
• Do not allow moisture to come in contact inside the bottle with any treatment product.
Storage and Disposal:
• All products should be stored at room temperature, away from potential flame or spark.
• Do not let products freeze or overheat.
• Avoid storing water care products directly on the ground.
• Ensure that there is a door or brace to keep the water care product from falling if stored up on a shelf.
• Government regulations require that bottles be triple rinsed before recycling.
IMPORTANT SAFETY INSTRUCTIONS READ AND FOLLOW ALL INSTRUCTIONS
Vancouver Home Office 1-800-663-6557
Toronto Centre 1-800-268-3966
Montreal Centre 1-866-389-7878

8
Emergency Chemical Spill Guidelines:
Minor Spill:
In the event of a spill involving the release of a type or quantity of a chemical which does not pose an immediate risk to health and does not involve chemical contamination to the body:
• Isolate the area. Evacuate the immediate area if necessary.
• Control Spread of spill, this may include covering or damming floor drains, and removing ignition sources.
• Establish exhaust ventilation. Vent vapors to outside of building only (open windows and doors).
• Refer to Material Safety Data Sheets for cleanup information.
• Locate spill kit. Choose appropriate personal protective equipment (goggles, face shield, impervious, gloves, lab coat, apron, etc.).
• Wet mop spill area. Be sure to decontaminate broom, dustpan, etc.
• Put all contaminated items (gloves, clothing, etc.) into a sealed 5 gallon container or plastic bag.
• Call local authorities for proper waste management control for your area.
Major Spill:
In the event of a major spill which:
1. Involves the release of a type or quantity of a chemical that poses an immediate risk to health;
2. Involves an uncontrolled fire or explosion:
• Evacuate nonessential personnel from the spill area and/or activate the nearest fire alarm.
• Call 911 and give details of the accident including location, types of hazardous materials involved, and whether there is personal injury.
• If the accident involves personal injury or chemical contamination, resort to MSDS First Aid Measures for information due to exposure, ingestion and/or inhalation.
At the same time:
• Attend to injured by moving the victim from the immediate area of fire, explosion, or spill (if this can be done without further injury to the victim or you).
• Locate nearest emergency eyewash or safety shower. Remove any contaminated clothing from the victim and flush all areas of the body contacted by chemicals with copious amounts of water for 15 minutes.
• If feasible without causing harm to yourself control Spread of spill, this may include covering or damming floor drains, and removing ignition sources.
IMPORTANT BEACHCOMBER GUARANTEE GUIDELINES:
Read this important information for your safety and convenience:
1. Read this Owner’s Guide thoroughly and follow the safety guidelines provided.
2. If you have questions not covered in this guide, call your local store, or in North America, call 1-800-663-6557, or 604-591-8611.
3. Follow water care instructions and label instructions. Failure to do so can result in damage to the hot tub or the equipment.
4. Always leave your HeatshieldTM open half way when shocking your water.
5. Always supervise children in and around a hot tub. Do not allow children to use the hot tub unsupervised.
6. Test your GFCI circuit protector at least once a month to ensure it is working correctly.
7. Rinse your MicrofilterTM once a week to maintain water clarity.
8. Always check the water temperature before entry. Do not enter a hot tub if the temperature is higher than 104ºF / 40ºC.
9. Always check the sanitizer level for adequate levels. Failure to do so can cause respiratory and skin problems or disease.
10. Do not walk or sit on or put heavy weight on the HeatshieldTM cover. This can cause the foam inserts to break.
11. Do not leave the hot tub exposed to the sun if empty. Always cover the hot tub with your HeatshieldTM cover.
12. Always supervise children in and around a hot tub or pool.
13. Do not attempt to repair or service equipment. Consult your local Beachcomber store for expert and qualified service.
14. Do not attempt to drain and refill your hot tub during freezing temperatures.
15. Avoid using glassware in or around your hot tub.
16. Do not operate the hot tub with inadequate water level.
17. Do not use drugs or alcohol in or around a hot tub.

9 www.beachcomberhottubs.com
Beachcomber Hot Tub Components Overview
Familiarize yourself with the components of your personal Beachcomber Hot Tub. Some of these features shown may be optional at extra cost and are shown here for the safety and convenience of our worldwide customers.
1
2
16
17
34
56 6
8
9
10
11
12
13
1415
7
1. Moulded Cup Holder Handgrips
2. EclipseTM Lighting Fixtures
3. Roman ArchTM Waterfall Control Valve
4. Filter Lid for MicrofilterTM and Skimmer Basket
5. Roman ArchTM Waterfall Jets
6. Air Injection Controls
7. Energy Saver Management System Topside Control Pad
8. Reflex Foot MassageTM RFM Control Valve
9. Beachcomber FLEXJETSTM
10. Checkerplate Non-slipTM Access
11. Cooling Seat
12. Hot Tub Internal Light
13. Reflex Foot MassageTM RFM Jets
14. VGB Approved Suction Fittings
15. Gravity Floor Drain
16. Crescent Moon Lighting
17. Energy Saver Management (ESMS)
CA
B
D
E
F
A. Perma-Seal Foundation (on hot tub bottom)
B. Electrical Conduit Access (on both sides)
C. Quintessential Surround Sound System
D. Garden EverliteTM Sconce (on all four sides)
E. All-Weather SAFEAXISSTM Steps (HYBRID4TM Edition only)
F. EnviroskirtTM Cabinetry

10
For HYBRID4TM Edition Hot Tubs, the external pumping and heating equipment arrives in its own separate HYBRID4TM Equipment Box. The equipment must be hooked up to the hot tub using the separate instructions provided on the HYBRID4TM Equipment Box. For either LEEPTM or HYBRID4TM hot tubs, electrical connections must be performed by a qualified electrician. After the proper electrical connections have been performed to your proper standard codes, the qualified installer must follow these steps:
1. Check all union fittings on the HYBRID4TM or LEEPTM pumping and heating equipment to ensure gaskets are in place with a tight fit. Hand-tightening is sufficient. If leaking is noted at these fittings, the gasket may be missing, not seated properly or the fitting may not be tight enough. Unscrew the union and check.
2. Fill the hot tub with water from a garden hose. You can place the hose directly in the hot tub, or attach it to the drain/fill valve located down by the pumps, to fill from the bottom. We recommended running water through the garden hose to waste for 10 seconds, before filling the hot tub to ensure fresh water from the hose source.
3. Fill the hot tub to the half way mark on the skimmer opening as shown. For Hush Pump SystemTM equipped hot tubs, the level can be lowered to one third up the skimmer opening, allowing for more displacement if the hot tub is subjected to use by more than the recommended number of people for that model. Do not allow the water to go below this level.
4. Open the air bleed valve to release any air trapped in the external plumbing (see equipment configuration diagrams in this guide). There is one air bleed valve on the model 320 hot tub, and all 300, 500 and 700 series hot tubs equipped with the Hush Pump SystemTM.
5. With the air bled from the system, you can now turn on the power at the GFCI. Once the control panel is on, use the instructions on the following pages to complete your start up. Refer to the instructions for the control panel that matches your system.
Water Level
Normal water level is half way up the skimmer opening.
Starting Up your Beachcomber Hot Tub for the First Time
Beachcomber manufactures hot tubs in two configurations: the HYBRID4TM Edition featuring the equipment outside of the hot tub cavity under a safety step, and the LEEP Portable which features the equipment tucked inside the hot tub cabinetry behind an access door.
Basic Hot Tub Configurations
The LEEPTM Portable Hot Tub The HYBRID4TM Edition Hot Tub

11 www.beachcomberhottubs.com
Original LEEPTM Portable Hot Tub, Hush Pump System™
Hush Pump System™
Knife Valve
Knife ValvePump 1
Return Line
Pump 1Suction Line
2 - Pump 2 Knife Valves
Pump 1Pump 2
ManagementSystem
Pump 2Return Line
Hush Pump SystemTM
Return to Heater Line
Hush PumpSystemTM
Suction Line
Pump 2Suction Linenot shownon diagram
Heater Return Line Turbo Air Intake Line
2 - Knife Valves
Air Bleed Valve
Original LEEPTM Portable Hot Tub, 2 Speed Pump Version
Knife Valve Knife Valve
Pump 1
Pump Returnto Heater Line
Pump 1Suction Line
Management System
Air Bleed Valve (320 Only)
Heater Return Line
LEEPTM Portable Equipment Configuration Diagrams
Use these diagrams for component location on all Beachcomber LEEP Portable models. See Beachcomber Hot Tub Specifications and Details on page 35 for Electrical Requirements.
Please Note: Your hot tub may or may not be equipped with features shown in this Owner’s Guide. Beachcomber makes continual changes, upgrades and improvements; if you need more specific information on your hot tub, please call your local Beachcomber store, or use the contact information in this guide. Diagram shown is 700 series with Optional Turbo. For 300 and 500 series the configuration is same except minus pump 2 and Turbo.

12
Turbo
Pump 2Pump 1
Return Lines
Suction Lines
Hush Pump SystemTM
Return to Heater LineManagement
System
Air IntakeLine
Total 6Knife Valves
HYBRID4TM Edition Hot Tub, Hush Pump SystemTM & Turbo Version
Pump 2Suction Linenot shownon diagram
Air Bleed Valve
Hush Pump System™
Pump 2Pump 1
Return Lines
Suction Lines
Hush Pump SystemTM
Return to Heater LineManagement
System
Total 6Knife Valves
HYBRID4TM Edition Hot Tub, Hush Pump SystemTM & Turbo Version
Pump 2Suction Linenot shownon diagram
Air Bleed Valve
Hush Pump System™
HYBRID4TM Edition Equipment Configuration Diagrams
Use these diagrams for component location on all Beachcomber HYBRID4TM Edition models. See Beachcomber Hot Tub Specifications and Details on page 35 for Electrical Requirements.
Please Note: Your hot tub may or may not be equipped with features shown in this Owner’s Guide. Beachcomber makes continual changes, upgrades and improvements; if you need more specific information on your hot tub, please call your local Beachcomber store, or use the contact information in this guide. Diagram shown is 700 series with optional Turbo and pump 2. For 300 and 500 series minus pump 2 and Turbo.

13 www.beachcomberhottubs.com
Start Up
When your hot tub is first activated, it will go into priming mode (after displaying some configuration information). The priming mode will last up to 4 minutes; then circulation will start, then heat icon will come on for 6 seconds, and then flicker for 90 seconds. Then heater will come on to heat water to set temperature. It is recommended that priming mode be allowed to finish, preventing any pumps from operating dry. If you are positive all pumps are primed you can exit priming mode early by pressing or .
Temperature Adjustment
Temp range is: 80°F - 104°F / 26.0°C – 40.0°C The factory pre-set temperature is set at 100°F / 37.5°C. The last measured temperature is constantly displayed on the LCD. See edit menu in Owner’s Guide to select F° or C°. Note: On non Hush Pump SystemTM hot tubs, the current water temperature will only be displayed if the 2 speed filter pump has been running for two minutes.
Warm / Cool
Press the or button twice to display the set temperature. Each time either button is pressed again, the set temperature will increase or decrease depending on which button is pressed. After three seconds, the LCD will automatically display the last measured water temperature.
Heating Modes
To change to the desired heating mode, press to enter mode programming, press to cycle through to desired mode (LCD flashes until confirmed), then press to confirm selection.
There are 3 Heating Modes – Standard, Economy and Sleep Modes.
Standard Mode maintains the set temperature at all times. Note that the last measured hot tub temperature displayed is current only when the pump has been running for at least 2 minutes. The STANDARD icon will display until the mode is changed.
Economy Mode heats the hot tub to the set temperature only during filter cycles. The ECONOMY icon will display until mode is changed. Pressing 1 while in Economy mode puts the hot tub in Standard-In-Economy mode, which operates the same as Standard Mode, then reverts to Economy Mode automatically after 1 hour. Use this mode to activate the heater if using the hot tub when not in filter cycle. During this time, a press of the button will revert to Economy Mode immediately.
Sleep Mode heats the hot tub within 20°F / 11°C of the set temperature only during filter cycles. The SLEEP icon will display until mode is changed. Use this mode when going on holidays.
Massage 1
Press 1 button once to turn pump 1 on to low speed, press 1 again for the pump’s high speed, and once more to turn off
the pump. Low speed turns off automatically after 2 hours and high speed turns off automatically after 15 minutes. Massage pump 1 comes on for a 1 minute purge at the start of each filter cycle.
Massage 2
Press 2 button once to turn pump 2 on to low speed, press 2 again for the pump’s high speed, and once more to turn off
the pump. Low speed and high speed turn off automatically after 15 minutes. Massage pump 2 comes on for a 1 minute purge at the start of each filter cycle.
Turbo (optional)
Press the button to turn Turbo on and off. Turbo will automatically turn off after 15 minutes. Turbo comes on for a 10 second purge at the start of each filter cycle.
Light
Press the button to turn the hot tub light on, press again to turn off. Light will automatically turn off after 3 hours.
700 Series (Europe Only) ET-7 Topside Control Panel Operating Instructions

14
Standby Mode
Pressing or followed by 2 will turn off all hot tub functions temporarily. SbY will appear on your display. This is helpful when changing a MicrofilterTM cartridge. Press any button to exit standby mode. Note: If hot tub is in a heat cycle when standby is selected the 2 speed pump or Hush Pump SystemTM will run for approximately 15 seconds.
Time of Day and Filter Cycles Setting
On all systems, the 2 speed filter pump or Hush Pump SystemTM and ozone generator will run during filtration. There are two filter cycles per day. The start/end times of each cycle are programmable. Programming filter times on Hush Pump SystemTM equipped hot tubs are used to tell the system how many hours a day to turn the heater on when in Economy mode.
To Program:
1. Press then .
2. Use the and buttons to adjust the time of day in hours, press the again to adjust the time in minutes. Use the and buttons to adjust the minutes. Press to enter new time.
3. You will see PROGRAM, FILTER 1 (F1), START TIME appears on the display. Press or to choose the filter start time hour. Enter the hour by pressing .
4. Press or to choose the filter start time minutes. Each press will change the start time by 5 minutes. Enter the minutes by pressing .
5. Press to see the PROGRAM, FILTER 1(F1), end TIME. Adjust the time as done above.
6. Press to see the PROGRAM, FILTER 2(F2), START TIME. Proceed as above.
7. Press to see PROGRAM, FILTER 2(F2), end TIME. Adjust the time as done above.
8. The time that now appears allows you to turn your hot tub light on automatically. Adjust time as done above.
9. Program the time you want your light to turn off.
10. Press will enter the new filter cycle times into the system and display the current water temperature.
Panel Inversion
Press the or button, followed by the or button to change the numbers in the display to read upside down. Press the same sequence to set back.
Locking The Panel
Press , 1 then within 3 seconds. When locked, the PL indicator light will light up. All buttons are frozen except the button. To unlock the panel, press , 1 then .
Locking the Set Temperature
Press or then , 1 and within 3 seconds to activate the lock. The TL indicator light will light up when temperature is locked. To unlock the set temperature, press or
then , 1 and .
Periodic Reminder Messages
(press the button to reset a displayed reminder message)
rPH: Test and adjust pH chemical levels as per Beachcomber instructions. Reminder is every 7 days.
rCL: Remove, clean, and reinstall MicrofilterTM as per Beachcomber instructions. Reminder is every 30 days.
rt9: Test & reset GFCI as per Beachcomber instructions. Reminder is every 30 days.
rdr: Drain and refill hot tub as per Beachcomber instructions. Reminder is every 90 days.
rCO: Clean and condition HeatshieldTM as per Beachcomber instructions. Reminder is every 180 days.
rCH: Install new MicrofilterTM. Reminder is every 365 days.
To suppress reminders, refer to the user edit menu.
Diagnostic Display Messages
OHH or OHS: Overheat-DO NOT ENTER HOT TUB
ICE: Potential Freeze
SnA: Hot tub is shut down
Snb: Hot tub is shut down
SnS: Sensor out of balance
HFL: Could indicate flow problem
LF: Persistent low flow problems
dr: Inadequate water detected
drY: Inadequate water detected
Pr: Hot tub in priming mode
-- : Temperature unknown
-: Temperature not current or in Economy or Sleep mode.
PLEASE REFER TO TROUBLE SHOOTING GUIDE FOR A COMPLETE EXPLANATION OF DIAGNOSTIC MESSAGES.
User Edit Menu
This feature is only available on 700 Series hot tubs in Europe. There are three selections in the User Edit Menu:
1. Suppress Reminders: This SST2 system will display a number of reminders prompting you to perform certain maintenance tasks. If you do not want these reminders to be displayed, you can suppress them.
2. Temperature Display: You can change your temperature display from Fahrenheit to Celsius.
3. Time Display: You can change the time clock display from the 12 hour am/pm to a 24 hour time clock.

15 www.beachcomberhottubs.com
WARNING SHOCK HAZARD! NO USER SERVICEABLE PARTS. DO NOT ATTEMPT SERVICE OF THIS CONTROL. CONTACT YOUR RETAIL STORE OR SERVICE PROVIDER FOR ASSISTANCE. FOLLOW ALL OWNER’S GUIDE POWER CONNECTION INSTRUCTIONS. INSTALLATION MUST BE PERFORMED BY A LICENSED ELECTRICIAN AND ALL GROUNDING CONNECTIONS MUST BE PROPERLY INSTALLED.
ALWAYS TEST WATER TEMPERATURE PRIOR TO ENTRY USING THE TOPSIDE CONTROL PAD. ENSURE COMFORT BY ALSO CHECKING WATER WITH AN ACCURATE THERMOMETER.
TAMPERING WITH OR MODIFYING THIS EQUIPMENT MAY VOID YOUR GUARANTEE.
Accessing the User Edit Menu
Press the then 1, then , USr will be displayed. Then press 1 to display Sr.n (Suppress reminders). To suppress press
1 again to make the n flash. Press to change the n to a Y and then press 1 to confirm, then button twice to exit. Reminders will now be removed.
If you want to change the temp display from Fahrenheit to Celsius use the same procedure as above to get to Sr.n but then press to go to tc.n then 1 to make the n flash, to change the n to Y and then 1 to confirm.
If you want to change the time display from am/pm to 24 use the same procedures as above to get to Sr.n and then press twice to get to 24.n then press 1 to get the n to flash, press to change the n to Y and then 1 to confirm then twice to exit.

16
Start Up
Before turning on the power make sure you have read the Start Up instructions on page 10. When your hot tub power is first turned on it will display a series of numbers identifying the software version and the voltage input. It will then go into a 4 minute priming mode indicated by a Pr on the LCD display. During priming mode the Hush Pump SystemTM will circulate the water through the filter and heating system to allow the temperature to be read. If your tub is not Hush Pump SystemTM equipped the jet pump will not turn on until the prime mode times out or the button is pressed to time out early. During prime mode the jet pumps can be turned on to make sure they are fully primed and moving water in the tub. Do not allow an unprimed jet pump to run for more than 10 seconds. If the fill water temperature is below 44°F / 7°C freeze protection will activate all pumps immediately. While the circulation pump is running the display will show and ICE will display a - - °F indicating current temperature is not known. This will take two minutes. Once temperature is known it will be displayed on the LCD.
Temperature Adjustment
The temperature range is 80°F - 104°F / 26°C – 40°C. The default is 100°F/37.5°C. Any temp changes are saved in the system memory if power is interrupted. Use the button to increase and the button to lower the set points. After showing set temp the LCD will revert back to current water temp.
Note: if set temp is lowered more than 3°F / 1.5°C below current water temp the Hush Pump System™ will stop. The circulation will restart every 30 minutes to check if water temp has come down to set temp. It will also run continually during programmed times.
Heating Modes
To change to the desired heating mode, press or followed by . Repeat these button presses to cycle through each heating mode.
There are 3 Heating Modes – Standard, Economy and Sleep Modes.
Std – Standard Mode: (Default mode) In Standard Mode the water is always heated to the set temperature. The display will show the current temperature and the word STANDARD.
Ecn – Economy Mode: In Economy Mode the water is heated only during the filter cycle times. Default times are 8:00 am to 10:00 am for cycle 1 and 8:00 pm to 10:00 pm for cycle 2. If using economy you may need to alter these times to make sure the water is at your desired temp during your usual tub use times. The display will alternate between Ecn and the current temperature and display the word ECONOMY. SLP – Sleep Mode: In Sleep Mode the water is only heated to within 20°F / 11°C of your set point and the heater only comes on during the programmed filter cycle times. This mode is typically only used for vacation time. The display will alternate between the current temperature and SLP.
Massage 1
To activate this jet pump press the 1 button once to activate low speed, The icon will flash off and on, on the LCD display. Press again to activate high speed and the icon will become solid on the display. Press a third time to turn the pump off. The low speed will turn off automatically after 4 hours and the high speed will turn off after 15 minutes.
Note: If the hot tub is Hush Pump SystemTM equipped, the low speed of Massage 1 will come on automatically for 1 minute at the start of each filter cycle to purge the plumbing lines. If the purge time is not at the time of day you want, change the filter times.
Massage 2
To activate this jet pump press the 2 button once to activate low speed, The icon will flash off and on, on the LCD display. Press again to activate high speed and the icon will become solid on the display. Press a third time to turn the pump off. The low speed and the high speed will turn off automatically after 15 minutes.
Note: If the hot tub is Hush Pump SystemTM equipped, the low speed of Massage 2 will come on automatically for 1 minute at the start of each filter cycle to purge the plumbing lines. If the purge time is not at the time of day you want, change the filter times.
(Please see page 35 for Hot Tub Models using ET-70 Control Panel)
ET-70 Topside Control Panel Operating Instructions

17 www.beachcomberhottubs.com
Turbo (optional)
To activate, press the button once to turn on and again to turn off. The Turbo will turn off automatically after 15 minutes. The Turbo will come on automatically for 30 seconds at the start of each filter cycle to purge the Turbo plumbing. If the purge time is not at the time of day you want change the filter times.
Light
To activate, press the button once to turn on and again to turn off. The light will automatically turn off after 4 hours. If your tub has an EverliteTM 6 or any additional lighting features see the instructions in this Owner’s Guide.
Standby Mode
The Standby feature is used primarily to temporarily shut the circulation pump off before removing the MicrofilterTM for cleaning or replacement. This prevents debris or objects from entering the circulation pump while the skimmer basket and filter are out. Standby can also be used if you want to have total quiet while using the hot tub; however, during this time the hot tub will not heat. Use the instructions below to put your hot tub into Standby. Please note: Do not use Standby to drain and refill your hot tub. Always shut off power at the main breaker before draining your hot tub to prevent damage to the hot tub equipment.
Press then to put the tub into Standby; display will show stby. Press any button to take the hot tub out of standby.
Setting the Time
To set time to your local time press , then the and Set Time appears. Press to advance the time or the to back up the time. The time will quickly advance, 5 seconds after pressing or
. Use the same button to stop the clock at the desired time.
Setting Filter Cycles
Filter cycles come preset from the factory. For hot tubs without the Hush option, filter cycles are default to run two hours each time, twice a day. For hot tubs with the Hush option, filter cycles are default to 24 hours.
Filter cycle duration and frequency are adjustable and can be changed by following the instructions below.
Once time of day is set press the button to set start time of Filter cycle 1. If your hot tub is Hush Pump SystemTM equipped, changing filter cycles does not affect the time the pump runs. It tells the system when to turn on the heater if you are using the Economy heat setting. If your tub is non Hush Pump SystemTM, changing the cycle time tells the two - speed pump 1 when to operate for a filter cycle. Avoid programming a long filter cycle that runs during the day time hours in hot summer weather as it could cause the water to overheat. Use the or buttons to advance or backup the Filter 1 start time. Press the same button to stop the time once you reach the desired start time. Press the button to advance to the Filter 1 stop time and use the same procedure as above to adjust. Press the
again to select Filter 2 start time then use the same procedure as above to adjust, then press to select Filter 2 stop time and once set, press to exit the menu.
Make sure you do not program the cycles to overlap the start or stop time of either cycle. Any changes to filter cycles and time are stored in the system memory and will be retained in the event of a power outage.
Locking The Panel
This feature might be used if you do not want anyone to operate the tub in your absence. To lock the panel press, , then (Pump1), then within three seconds. A pad lock icon will appear on the LCD. To unlock press , then (Pump 1), then within three seconds.
Locking the Set Temperature
This feature might be used to prevent other tub users such as children from adjusting the tub set temperature. To lock the set temperature press, then then 1 then within 3 seconds. To unlock press then then 1 then within 3 seconds.
Diagnostic Display Messages
If nothing appears on the display screen, power to the Hot Tub is off.
-°F: Current temperature not known
OHH: Possible overheated heater: do not enter Hot Tub
OHS: Possible overheated Hot Tub: do not enter Hot Tub
SnA: Sensor problem
Snb: Sensor problem
SnS: Sensors out of balance
HFL: Possible flow through heater problem
LF: Confirmed flow through heater problem
dr: Possible dry heater problem
drY: Confirmed dry heater problem
ICE: Freeze condition sensed
Stby: Tub is in standby
PLEASE REFER TO TROUBLE SHOOTING GUIDE FOR A COMPLETE EXPLANATION OF DIAGNOSTIC MESSAGES.
SHOCK HAZARD! NO USER SERVICEABLE PARTS. DO NOT ATTEMPT SERVICE OF THIS CONTROL. CONTACT YOUR RETAIL STORE OR SERVICE PROVIDER FOR ASSISTANCE. FOLLOW ALL OWNER’S GUIDE POWER CONNECTION INSTRUCTIONS. INSTALLATION MUST BE PERFORMED BY A LICENSED ELECTRICIAN AND ALL GROUNDING CONNECTIONS MUST BE PROPERLY INSTALLED.
ALWAYS TEST WATER TEMPERATURE PRIOR TO ENTRY USING THE TOPSIDE CONTROL PAD. ENSURE COMFORT BY ALSO CHECKING WATER WITH AN ACCURATE THERMOMETER.
TAMPERING WITH OR MODIFYING THIS EQUIPMENT MAY VOID
YOUR GUARANTEE.
WARNING

18
Start Up
Before turning on the power, make sure you have read the Start Up instructions on page 10. When your hot tub power is first turned on it will display a series of numbers identifying the software version and the voltage input. It will then go into a 4 minute priming mode indicated by a Pr on the LCD display. During priming mode the Hush Pump SystemTM will circulate the water through the filter and heating system to allow the temperature to be read. If your hot tub is not Hush Pump SystemTM equipped, the jet pump will not turn on until the prime mode times out or the button is pressed to time out early. During prime mode the jet pump can be turned on to make sure they are fully primed and moving water in the hot tub. Do not allow an unprimed jet pump to run for more than 10 seconds. If the fill water temperature is below 44°F / 7°C freeze protection will activate all pumps immediately. While the circulation pump is running the display will show a - - indicating current temperature is not known. This will take two minutes. Once temperature is known it will be displayed on the LCD.
Temperature Adjustment
The temperature range is 80°F - 104°F / 26.0°C – 40.0°C. The default is 100°F/37.5°C. Any temp changes are saved in the system memory if power is interrupted. Press the button to increase or lower the set points. If the is pressed the set point will flash. Each press will move the set point 1 degree. If the set point is moving the wrong direction then stop pressing, let the temperature display stop flashing, then press again to move the set point in the other direction. After adjusting the set temp, the LCD will revert back to the current water temperature.
Note: if set temp is lowered more than 3°F / 1.5°C below current water temp, the Hush Pump SystemTM will stop. The circulation will restart every 30 minutes to check if water temp has come down to set temp. It will also run continually during programmed times.
Heating Modes
To change to the desired heating mode, press the temperature set button then the light button.
There are 3 Heating Modes – Standard, Economy and Sleep Modes.
St – Standard Mode: (Default mode) In Standard Mode the water is always heated to the set temperature. The display will show the temperature always with Hush Pump SystemTM equipped systems. If non Hush Pump SystemTM, current water temperature will be shown when the pump is running and when pump is not running. If your hot tub is not equipped with a Hush Pump SystemTM, the 2 speed pump will come on every 30 minutes outside of filter cycles to poll for current water temperature. If you do not want this to happen, use the Economy mode below.
Ec – Economy Mode: In Economy Mode the water is heated only during the filter cycle times. The factory default is F4 (4 hours), 2C (twice a day) for HYBRID4TM hot tubs and F2 (2 Hours), 2C (twice a day) for LEEPTM hot tubs. If using the Economy mode, you may need to alter these times to make sure the water is your desired temperature during your usual hot tub usage times. The first filter cycle starts 6 minutes after power is turned on. The display will alternate between the current temperature and Ec.
SL – Sleep Mode: In Sleep Mode the water is only heated to within 20°F / 11°C of your set point and the heater only comes on during the programmed filter cycle times. This mode is typically only used for vacation time. The display will alternate between the current temperature and SL.
Massage
To activate this jet pump, press the button once to activate low speed, twice to activate high speed and three times to turn the pump off. The low speed will turn off automatically after 4 hours and the high speed will turn off after 15 minutes. If the hot tub is Hush Pump SystemTM equipped, the low speed of the jet pump will come on automatically for 1 minute at the start of each filter cycle to purge the plumbing lines.
Turbo (optional)
To activate this press the button once to turn on and twice to turn off. The Turbo will turn off automatically after 15 minutes. The Turbo will come on automatically for 30 seconds at the start of each filter cycle to purge the Turbo plumbing.
ET-55 Topside Control Panel Operating Instructions(Please see page 35 for Hot Tub Models using ET-55 Control Panel)

19 www.beachcomberhottubs.com
Light
To activate this press the button once to turn on and again to turn off. The light will automatically turn off after 4 hours. If your tub has an EverliteTM 6 or any additional lighting features see the instructions on page 22 of this manual.
Standby Mode
The Standby feature is used primarily to temporarily shut the circulation pump off before removing the MicrofilterTM for cleaning or replacement. This prevents debris or objects from entering the circulation pump while the skimmer basket and filter are out. Standby can also be used if you want to have total quiet while using the hot tub; however, during this time the hot tub will not heat. Use the instructions below to put your hot tub into Standby. Please note: Do not use Standby to drain and refill your hot tub. Always shut off power at the main breaker before draining your hot tub to prevent damage to the hot tub equipment.
Press then to put the tub into Standby; display will show sy. Press any button to take the hot tub out of standby.
Setting Filter Cycles
Filter cycles come preset from the factory. For hot tubs without the Hush option, filter cycles are default to run two hours each time, twice a day. For hot tubs with the Hush option, filter cycles are default to 24 hours.
Filter cycle duration and frequency are adjustable and can be changed by following the instructions below.
Press the then press to bring up F2 keep pressing to select F4, F6, F8, FC (F2, F4, F6, F8 and FC denote filter cycle length; where F2 is a 2 hour filter cycle, F4 is a 4 hour filter cycle, etc. and FC is a 12 hour filter cycle). Then press to bring up 2C (two cycles per day). If you want to change press to select 1d (day cycle which will start 6 minutes after turning power off and back on) and again to select 1n (night cycle which starts 12 hours after turning power off and back on). Press to exit programming.
Note: If your tub is Hush Pump SystemTM equipped the Filter Cycles settings only affect the times the heater will be able to operate when using the Economy heating Mode.
Diagnostic Display Messages
If nothing appears on the display screen, power to the Hot Tub is off.
-: Current temperature not known
HH: Possible overheated heater: do not enter Hot Tub
HS: Possible overheated Hot Tub: do not enter Hot Tub
SA: Sensor problem
Sb: Sensor problem
Sn: Sensors out of balance
HL: Possible flow through heater problem
LF: Confirmed flow through heater problem
dr: Possible dry heater problem
dY: Confirmed dry heater problem
SHOCK HAZARD! NO USER SERVICEABLE PARTS. DO NOT ATTEMPT SERVICE OF THIS CONTROL. CONTACT YOUR RETAIL STORE OR SERVICE PROVIDER FOR ASSISTANCE. FOLLOW ALL OWNER’S GUIDE POWER CONNECTION INSTRUCTIONS. INSTALLATION MUST BE PERFORMED BY A LICENSED ELECTRICIAN AND ALL GROUNDING CONNECTIONS MUST BE PROPERLY INSTALLED.
ALWAYS TEST WATER TEMPERATURE PRIOR TO ENTRY USING THE TOPSIDE CONTROL PAD. ENSURE COMFORT BY ALSO CHECKING WATER WITH AN ACCURATE THERMOMETER.
TAMPERING WITH OR MODIFYING THIS EQUIPMENT MAY VOID YOUR GUARANTEE.
WARNING
IC: Freeze condition sensed
Sy: Tub is in standby.
PLEASE REFER TO TROUBLE SHOOTING GUIDE FOR A COMPLETE EXPLANATION OF DIAGNOSTIC MESSAGES.

20
Start Up
Before turning on the power, make sure you have read the Start Up instructions on page 10. When your hot tub power is first turned on it will display a series of numbers identifying the software version and the voltage input. It will then go into a 4 minute priming mode indicated by a Pr on the LCD display. During priming mode the Hush Pump SystemTM will circulate the water through the filter and heating system to allow the temperature to be read. If your hot tub is not Hush Pump SystemTM equipped, the jet pump will not turn on until the prime mode times out or the button is pressed to time out early. During prime mode the jet pump can be turned on to make sure they are fully primed and moving water in the hot tub. Do not allow an unprimed jet pump to run for more than 10 seconds. If the fill water temperature is below 44°F / 7°C freeze protection will activate all pumps immediately. While the circulation pump is running the display will show a - - indicating current temperature is not known. This will take two minutes. Once temperature is known it will be displayed on the LCD.
Temperature Adjustment
The temperature range is 80°F - 104°F / 26°C – 40°C. The default is 100°F / 37.5°C. Any temp changes are saved in the system memory if power is interrupted. Press the button to increase or lower the set points. If the is pressed the set point will flash. Each press will move the set point 1 degree. If the set point is moving the wrong direction then stop pressing, let the temperature display stop flashing, then press again to move the set point in the other direction. After adjusting the set temp, the LCD will revert back to the current water temperature.
Note: if set temp is lowered more than 3°F / 1.5°C below current water temp, the Hush Pump SystemTM will stop. The circulation will restart every 30 minutes to check if water temp has come down to set temp. It will also run continually during programmed times.
Heating Modes
To change to the desired heating mode, press the temperature set button then the light button.
There are 3 Heating Modes – Standard, Economy and Sleep Modes.
St – Standard Mode: (Default mode) In Standard Mode the water is always heated to the set temperature. The display will show the temperature always with Hush Pump SystemTM equipped systems. If non Hush Pump SystemTM, current water temperature will be shown when the pump is running and when pump is not running. If your hot tub is not equipped with a Hush Pump SystemTM, the 2 speed pump will come on every 30 minutes outside of filter cycles to poll for current water temperature. If you do not want this to happen, use the Economy mode below.
Ec – Economy Mode: In Economy Mode the water is heated only during the filter cycle times. The factory default is F4 (4 hours), 2C (twice a day) for HYBRID4TM hot tubs and F2 (2 Hours), 2C (twice a day) for LEEPTM hot tubs. If using the Economy mode, you may need to alter these times to make sure the water is your desired temperature during your usual hot tub usage times. The first filter cycle starts 6 minutes after power is turned on. The display will alternate between the current temperature and Ec.
SL – Sleep Mode: In Sleep Mode the water is only heated to within 20°F / 11°C of your set point and the heater only comes on during the programmed filter cycle times. This mode is typically only used for vacation time. The display will alternate between the current temperature and SL.
Massage
To activate this jet pump, press the button once to activate low speed, twice to activate high speed and three times to turn the pump off. The low speed will turn off automatically after 4 hours and the high speed will turn off after 15 minutes. If the hot tub is Hush Pump SystemTM equipped, the low speed of the jet pump will come on automatically for 1 minute at the start of each filter cycle to purge the plumbing lines.
Note: If the hot tub is Hush Pump SystemTM equipped, the low speed of Massage 1 will come on automatically for 1 minute at the start of each filter cycle to purge the plumbing lines. If the purge time is not at the time of day you want, change the filter times.
ET-50 Topside Control Panel Operating Instructions(Please see page 35 for Hot Tub Models using ET-50 Control Panel)

21 www.beachcomberhottubs.com
Sn: Sensors out of balance
HL: Possible flow through heater problem
LF: Confirmed flow through heater problem
dr: Possible dry heater problem
dY: Confirmed dry heater problem
IC: Freeze condition sensed
Sy: Tub is in Standby
PLEASE REFER TO TROUBLE SHOOTING GUIDE FOR A COMPLETE EXPLANATION OF DIAGNOSTIC MESSAGES.
Turbo (optional)
To activate this press the button once to turn on and twice to turn off. The Turbo will turn off automatically after 15 minutes. The Turbo will come on automatically for 30 seconds at the start of each filter cycle to purge the Turbo plumbing.
Light
To activate this press the button once to turn on and again to turn off. The light will automatically turn off after 4 hours. If your tub has an EverliteTM 6 or any additional lighting features see the instructions on page 22 of this manual.
Standby Mode
The Standby feature is used primarily to temporarily shut the circulation pump off before removing the MicrofilterTM for cleaning or replacement. This prevents debris or objects from entering the circulation pump while the skimmer basket and filter are out. Standby can also be used if you want to have total quiet while using the hot tub; however, during this time the hot tub will not heat. Use the instructions below to put your hot tub into Standby. Please note: Do not use Standby to drain and refill your hot tub. Always shut off power at the main breaker before draining your hot tub to prevent damage to the hot tub equipment.
Press then to put the tub into Standby. Display will show SY. Press any button to take the hot tub out of standby.
Setting Filter Cycles
Filter cycles come preset from the factory. For hot tubs without the Hush option, filter cycles are default to run two hours each time, twice a day. For hot tubs with the Hush option, filter cycles are default to 24 hours.
Filter cycle duration and frequency are adjustable and can be changed by following the instructions below.
Press the then press to bring up F2 keep pressing to select F4, F6, F8, FC (F2, F4, F6, F8 and FC denote filter cycle length; where F2 is a 2 hour filter cycle, F4 is a 4 hour filter cycle, etc. and FC is a 12 hour filter cycle). Then press to bring up 2C (two cycles per day). If you want to change press to select 1d (day cycle which will start 6 minutes after turning power off and back on) and again to select 1n (night cycle which starts 12 hours after turning power off and back on.). Press to exit programming.
Note: If your tub is Hush Pump SystemTM equipped the Filter Cycles settings only affect the times the heater will be able to operate when using the Economy heating Mode.
Diagnostic Display Messages
If nothing appears on the display screen, power to the Hot Tub is off.
-: Current temperature not known
HH: Possible overheated heater: do not enter Hot Tub
HS: Possible overheated Hot Tub: do not enter Hot Tub
SA: Sensor problem
Sb: Sensor problem
SHOCK HAZARD! NO USER SERVICEABLE PARTS. DO NOT ATTEMPT SERVICE OF THIS CONTROL. CONTACT YOUR RETAIL STORE OR SERVICE PROVIDER FOR ASSISTANCE. FOLLOW ALL OWNER’S GUIDE POWER CONNECTION INSTRUCTIONS. INSTALLATION MUST BE PERFORMED BY A LICENSED ELECTRICIAN AND ALL GROUNDING CONNECTIONS MUST BE PROPERLY INSTALLED.
ALWAYS TEST WATER TEMPERATURE PRIOR TO ENTRY USING THE TOPSIDE CONTROL PAD. ENSURE COMFORT BY ALSO CHECKING WATER WITH AN ACCURATE THERMOMETER.
TAMPERING WITH OR MODIFYING THIS EQUIPMENT MAY VOID YOUR GUARANTEE.
WARNING

22
Message Meaning Action Required
No message on display. Power has been shut off to hot tub. GFCI breaker is on but the control panel is blank. System fuse(s) are blown.
The control panel will be disabled until power returns. System resets time of day on each power-up. Hot tub settings are preserved. Call your store for service.
OHH or HH
“Overheat”- The hot tub has shut down. One of the sensors has detected 118°F / 47.8°C at the heater.
DO NOT ENTER THE WATER. Remove the HeatshieldTM cover and allow water to cool. Once the heater has cooled, reset by pushing any button. Check to see whether the knife valve on return side of the heater is closed. If closed, ensure that all knife valves are in the up or open position. If hot tub does not reset, shut off power to the hot tub and call your Beachcomber store.
OHS or OH
“Overheat”- The hot tub has shut down. One of the sensors has detected that the hot tub water is 110°F / 43.3°C.
DO NOT ENTER THE WATER. Remove the hot tub HeatshieldTM and allow water to cool. At 107°F / 41.7°C. the hot tub should automatically reset. Follow action required for “OHH”. If hot tub does not reset, shut off power to the hot tub and call your store.
ICE or IC“Ice”- Potential freeze condition detected. No action required. The Pumps and blower will automatically
activate regardless of hot tub status.
SY or STBYHot tub is in Standby mode. Make sure the MicrofilterTM is back in place before pressing any
button to remove from Standby.
SnA or SAHot tub is shut down. The sensor that is plugged into the sensor “A” jack is not working.
If the problem persists, contact your store. (May appear temporarily in an overheat situation and disappear when heater cools.)
Snb or SbHot tub is shut down. The sensor that is plugged into the sensor “B” jack is not working.
If the problem persists, contact your store for service.
SnS or Sn
Sensors are out of balance. If this is alternating with the temperature, it may just be a temporary condition. If the display shows only this message (periodically blinking), the hot tub is shut down.
If problem persists, contact your store for service. Follow action required for “SnA”.
LF
Persistent low flow problems. (Display on the fifth occurrence of the “HFL” message within 24 hours. Heater is shut down, but the other hot tub functions continue to operate normally.
Follow action required for the “HFL” message. Heating capacity of the hot tub will not reset automatically; you may press any button to reset.
HFL or HL
A substantial difference between the temperature sensors was detected. This could indicate a flow problem.
Check water level in hot tub. Refill if necessary. If the water level is okay, make sure the pumps have been primed. If problem persists try these solutions:
MicrofilterTM is dirty: Turn power to tub off at GFCI or power disconnect, remove MicrofilterTM and clean or replace.
Air lock in system: Locate air bleed thumb screws and open partially to release air in piping. Debris in Hush Pump SystemTM: Call your store for service or shut down system, close all knife valves and remove face plate from Hush Pump SystemTM to remove debris. Circulation pump failed or frozen: If freezing suspected, place trouble light or space heater around equipment to thaw out pump and external piping and call your store for service.
Diagnostic Display Messages and Troubleshooting Guide

23 www.beachcomberhottubs.com
Message Meaning Action Required
drPossible inadequate water flow detected in heater after a 2nd heater test.
Check that all knife valves are open, then check water level in hot tub. Refill if necessary. If the water level is okay, make sure the pumps have been primed. Press any button to reset.
drY or dYConfirmed inadequate water flow detected after 3rd dr.
Use same action as DR. Make sure circulation pump is running. If circulating pump is not running call your store for service.
PrWhen your hot tub is first actuated, it will go into Priming Mode.
The Priming Mode will last up to 4 minutes and then the hot tub will begin to heat and maintain water temperature in Standard Mode.
--F / --CTemperature unknown. After the pump has been running for 2 minutes, the temperature will
be displayed.
Std / St Standard
The hot tub heater is operating in Standard Mode.
No action required. Refer to Heating modes page to change this mode.
Ecn / Ec Economy
The hot tub heater is operating in Economy mode. Only heats during filter cycle.
No action required. Refer to Heating modes page to change this mode.
SLP / SL SLEEP
The hot tub heater is operating in Sleep Heating mode. Heat stays off until temperature drops to 20°F/10°C
No action required. Refer to Heating modes page to change this mode.

24
Operation of Hot Tub Features
FLEXJETSTM Inserts
The jets in a Beachcomber Hot Tub are known as FLEXJETSTM and are available in four sizes; small, medium, large and extra large. They are interchangeable within the same sizes. Simply turn them counter-clockwise to unscrew. To reinstall, turn the jet insert clockwise to screw them back in. The jets can also be individually turned off or on by turning the jet face. Turning it clockwise will turn off the water flow and counter-clockwise turns on the water flow. To turn on the neck jet, twist the jet face counter-clockwise; to turn off, twist it clockwise. If this jet does not turn off, contact your local dealer for more information.
Reflex Foot MassageTM (RFM) Diverter Valve
This top side valve diverts water flow between either the RFM foot jets or the seat jets. On 700 series hot tubs it diverts water flow from massage 2 pump between the RFM foot jets or the seat jets on the left side of the hot tub. NOTE: Always turn the pump to low speed or off before attempting to turn the RFM Diverter Valve. Failure to do this could cause the handle to break due to the high velocity of water moving through the valve. NOTE: When the hot tub is not being used, the diverter valve handle must be left in the center position. This ensures that water in both zones is always in circulation during periods of non use.
Air Control Valves
There are two air control valves located on either side of the touch pad, as shown. These air controls improve the massage experience in your hot tub by adding more turbulence to the water flow. To turn on the air, turn the knob counter-clockwise. On all models, more air is drawn in when the jet pump is on high speed than when the pump is on low speed. On 300, and 500 series hot tubs, the left air control services all the seat jets. If equipped with the Reflex Foot MassageTM (RFM) option, the right air control services the RFM jets (or footwell jets on non-RFM equipped models) when the water flow is diverted to them, and the left air control services all the seat jets. On 700 series hot tubs, the left air control allows air flow to jets running off Massage Pump 1. The right air control allows air flow to jets running off Massage Pump 2. The right air control would also allow air flow to the RFM jets if the diverter valve is diverting water flow from Massage Pump 2 to the RFM jets.
FLEXJETSTM Inserts
RFM Diverter Valve
Air Control Valves
Quintessential Surround Sound (QSS) System
To operate the Quintessential Surround Sound System, press the on button on the Touch pad on skirt console or the on button on the skimmer lid console. To pair with your device, press the mode button to put into pairing mode. For the cabinet console system the code is 6000. For the skimmer lid system the code is 5555. See the inserted operation guide in this manual for detailed instructions.
QSS System
Hot Tub Underwater Lighting
All Beachcomber Hot Tubs come standard with either a 12 volt incandescent light or a digital Everlite™ LED light. Refer to EverliteTM Instructions on page 26. Your local Beachcomber store is best equipped to replace either unit. Drain the hot tub and locate the lens removal tool included with the hot tub. Carefully unscrew the light lens. Carefully pull out the light unit and replace with a new one, available from your local Beachcomber store. Screw the lens back in until tight, but do not over tighten.
EverliteTM LED Lighting
Roman ArchTM Waterfall
Hot tubs equipped with the optional Roman ArchTM Waterfall feature shown at left, will have a topside control valve to increase or decrease the water flow to the Waterfall. The Waterfall feature receives its flow from the Hush Pump SystemTM. If your hot tub is equipped with the EclipseTM Lighting Feature, the Waterfall will also be backlit. NOTE: The control valve must be partially left open when the hot tub is not in use. If the water is not operating at normal flow, remove the front covers by turning them clockwise a 1/4 turn, remove the internal nozzle and rinse off debris.Roman ArchTM Waterfall

25 www.beachcomberhottubs.com
Blade Waterfall
Hot tubs equipped with the optional Blade Waterfall feature shown at left, will have a topside control valve to increase or decrease the water flow to the Waterfall. The Waterfall feature receives its flow from the Hush Pump SystemTM. If your hot tub is equipped with the EclipseTM Lighting Feature, the Waterfall will also be backlit. NOTE: The control valve must be partially left open when the hot tub is not in use. If the water is not operating at normal flow, remove the front covers by turning them clockwise a 1/4 turn, remove the internal nozzle and rinse off debris. If water flow is not normal, remove front cover to access inside screen and rinse off debris.
Turbo
The optional (only at time of order) Turbo increases the amount of air turbulence that comes out of the jets. It enhances massage pressure, turbulence and water action. With the Turbo activated and air controls closed, air from the Turbo will come out of the 4 relief jets found in the foot well of the hot tub.
Turbo
Hush Pump SystemTM
Hush Pump SystemTM
The Hush Pump SystemTM is a very quiet, low energy consumption, high flow circulation and filtration pump that looks after the filter and heating functions of your hot tub. It comes set from the factory to operate 24 hours a day.
Ozone
Your hot tub may be factory equipped with an optional Ozonator unit, or factory pre-plumbed to accept the installation of an Ozonator. Ozonators produce a O3 ozone gas, and injects it into the hot tub water to oxidize organic contaminants in the water and improve water clarity. Please note: an Ozonator is not designed to replace your main sanitizer or disinfectant system. The Ozonator is equipped with a small viewing window. When ozone gas is produced, a purple glow will appear with a green indicator light on the front to indicate the unit is on. The life expectancy of the AGP Ozonator is 3 to 5 years depending on whether it is running 24/7 with HYBRID4TM or on filter cycles with LEEPTM no Hush Pump SystemTM.
Ozone
NO USER SERVICEABLE PARTS. DO NOT ATTEMPT TO SERVICE AN OZONATOR OR ANY OTHER PART OF YOUR BEACHCOMBER HOT TUB EQUIPMENT PAK. CONTACT YOUR LOCAL STORE FOR SERVICE AND/OR REPLACEMENT. THE USE OF AN OZONATOR IS NOT A REPLACEMENT FOR A WATER SANITIZING PROGRAM. FAILURE TO PROPERLY SANITIZE HOT TUB WATER CAN CAUSE IRRITATION AND/OR DISEASE.
WARNING
ClearTech UVC ReadyTM
NO USER SERVICEABLE PARTS. DO NOT ATTEMPT TO SERVICE A CLEARTECH UV UNIT OR ANY OTHER PART OF YOUR BEACHCOMBER HOT TUB EQUIPMENT PAK. CONTACT YOUR LOCAL STORE FOR SERVICE AND/OR REPLACEMENT. DO NOT VIEW THE UV BULB IN OPERATION. UV RAYS CAN CAUSE IRRITATION AND/OR BLINDNESS. THE USE OF A CLEARTECH UV UNIT IS NOT A REPLACEMENT FOR A WATER SANITIZING PROGRAM. FAILURE TO PROPERLY SANITIZE HOT TUB WATER CAN CAUSE SKIN OR LUNG IRRITATION AND/OR DISEASE.
ClearTech UVCTM
Your hot tub may be equipped with ClearTech. This unit uses a specialized ultra violet light bulb which produces UV light. The ClearTech UVC unit reduces the amount of sanitizer that is required to maintain a government approved sanitizer level. The UV bulb is rated at 15,000 hours. The glass sleeve covering the bulb should be inspected and cleaned (if necessary) at each drain and fill. For service or replacement, consult your Beachcomber store.
WARNING
Blade Waterfall

26
EverliteTM 4 Operating Instructions
EverliteTM 6 Operating Instructions
1. Beachcomber Mode: The light will sequence from Red, to Green, to Blue continuously. Press the light button once to start the ‘Beachcomber Mode’. The light will stay on each solid color for three seconds. The color will blend with the next color for four seconds before the next color becomes a solid. To turn off, press the button once.*
2. Freeze Mode: As it cycles through the ‘Beachcomber Mode’, the light can be frozen on any solid or blended color. Choose a color, and then touch the button twice (off, then on) within four seconds to switch to ‘Freeze Mode’. To turn off, press the button once.
3. Pulse Mode: This is a random cycling mode, which imitates the soothing rhythm of a heartbeat. When in the ‘Freeze Mode’, touch the button twice (off, then on) within four seconds to switch to ‘Pulse Mode’. To turn off, press the button once.
4. White Mode: This mode recreates natural white light. When in the ‘Pulse Mode’, touch the button twice (off, then on) within four seconds to switch to ‘White Mode’. To turn off, press the button once.
*Note: If the light is left off for more than 10 seconds, it will revert back to ‘Beachcomber Mode’ when switched back on.
1. Beachcomber Mode A: The light will sequence from Red, to Green, to Blue continuously. Press the light button once to start the ‘Beachcomber Mode A’. The light will stay on each solid color for three seconds. The color will blend with the next color for four seconds before the next color becomes a solid. To turn off, press the button once.*
2. Freeze Mode: As it cycles through the ‘Beachcomber Mode A’, the light can be frozen on any solid or blended color. Choose a color, and then touch the button twice (off, then on) within four seconds to switch to ‘Freeze Mode’. To turn off, press button once.
3. Pulse Mode: This is a random cycling mode, which imitates the soothing rhythm of a heartbeat. When in the ‘Freeze Mode’, touch the button twice (off, then on) within four seconds to switch to ‘Pulse Mode’. To turn off, press button once.
4. White Mode: This mode recreates natural white light. When in the ‘Pulse Mode’, touch the button twice (off, then on) within four seconds to switch to ‘White Mode’. To turn off, press the button once.
5. Beachcomber Mode B: All lights above waterline are turned on, while all underwater lights are off. When in the ‘White Mode’, touch the button twice (off, then on) within four seconds to switch to ‘Beachcomber Mode B’. To turn off, press the button once.
6. Beachcomber Mode C: All the lights below the waterline are turned on, while all the lights above the water line are off. When in the ‘Beachcomber Mode B’, touch the button twice (off, then on) within four seconds to switch to ‘Beachcomber Mode C’. To turn off, press the button once.
*Note: If the light is left off for more than 10 seconds, it will revert back to ‘Beachcomber Mode A’ when switched back on.
Whirlpool Jet
320 Whirlpool Diverter Jet
The 5” Grey Whirlpool jet has two settings. In one position all water flow from the pump will come out of only that jet. In the other position all the water flow will come out of the seat jets. When turning the jet from one position to the other make sure the pump is on low speed or in Stand By.
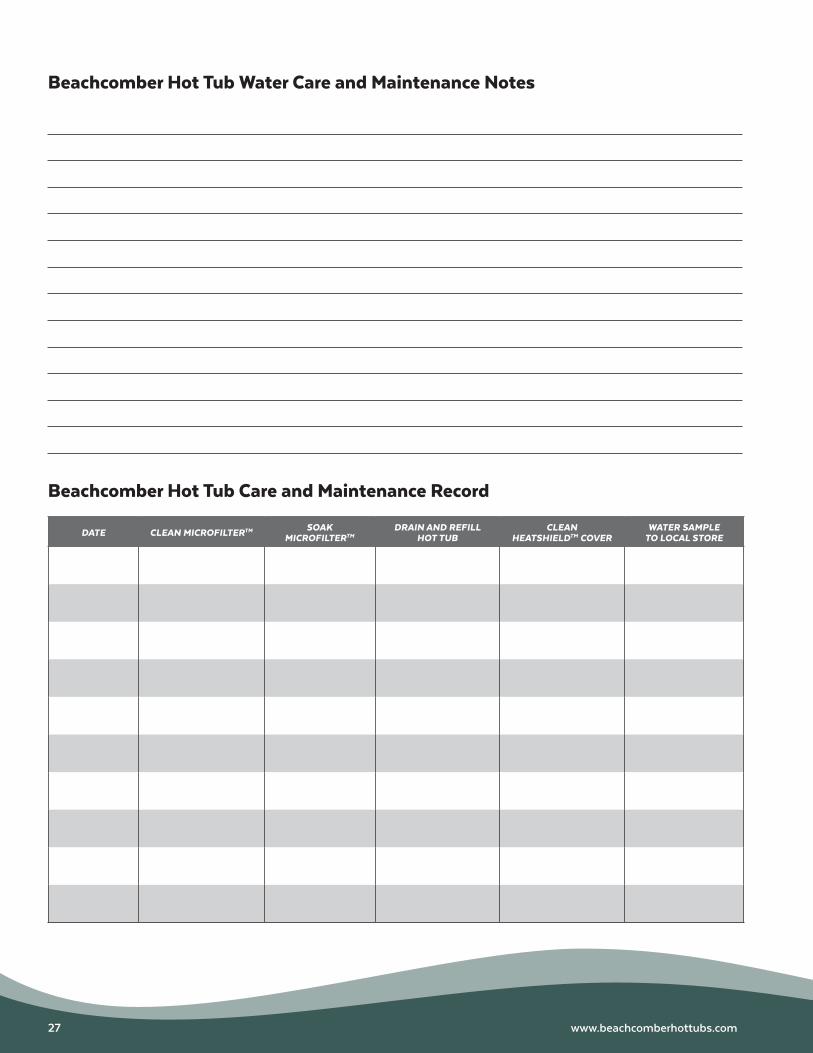
27 www.beachcomberhottubs.com
Beachcomber Hot Tub Water Care and Maintenance Notes
DATE CLEAN MICROFILTERTM SOAK MICROFILTERTM
DRAIN AND REFILL HOT TUB
CLEAN HEATSHIELDTM COVER
WATER SAMPLE TO LOCAL STORE
Beachcomber Hot Tub Care and Maintenance Record

28
Hot Tub Water Care and Maintenance
Recommended Parameters & Levels
• CARE FREE is a 4-in-1 weekly water care system that replaces traditional water conditioners such as sequestering agents, oxidizers, biofilm disruptors and clarifiers. It is designed to use in conjunction with the CARE FREE BOOSTTM sanitizer.
• CARE FREE BOOSTTM is a chlorine based sanitizer that controls the growth of bacteria and algae in hot tub waters and when paired with CARE FREE form the industry’s gold standard in water care systems. Add after each use or weekly as required.
• SOFT is a universal water enhancer that creates soothing comfortable water, improves water quality, and helps stabilize pH levels. Soft is blended from natural occurring borate salts and is an excellent skin moisturizer, especially for those who suffer from dry skin conditions. Add before each use or weekly as desired.
Care Free Hot Tub Water Care System
Parameter Range Recommended Level
Free Chlorine (Cl) 3 – 5 ppm
Bromine (Br) 3 – 5 ppm (Canada) / 4 - 6 ppm (USA)
pH 7.2 – 7.8
Total Alkalinity (TA) 100 – 120 ppm
Calcium Hardness (CH) 150 – 200 ppm
Total Dissolved Solids (TDS) 1500 ppm over initial level
Low Sanitizer (0 - 1)
Cloudy
Slimy
Odourous
Damage to patios, railings, concrete
Effects of Unbalanced Sanitizer (Cl or Br)
High Sanitizer (10+)
Clear
Clean
Chemical Smell
Bleaching of bathing suits
Effects of Unbalanced Total Alkalinity (TA)
• Total Alkalinity is the measure of the ability of water to resist or “buffer” changes in pH. Highly unbalanced water condition will cause damage to heater elements, light rings, stainless steel fittings, dials, heatshields and pump components.
Low Total Alkalinity
Corrosive Water
pH Bounce
Greenish water
High Total Alkalinity
Scaling Water
pH drifts up
Cloudy water

29 www.beachcomberhottubs.com
• Remove once per week and rinse with water.
• Once per month, MICROFILTERTM should be cleaned, alternating monthly between FILTER CURE and FILTER PURE, soaking it for 12-18 hours.
• Rinse MICROFILTERTM very well to prevent any residual filter cleaning product entering the hot tub water.
• Always have two MICROFILTERTM, one in hot tub and one clean and ready to be installed.
• Advantages of a clean MICROFILTERTM include: clean water, better circulation, lower sanitizer, overall better performance.
MICROFILTERTM Care and Maintenance
Effects of Unbalanced Calcium Hardness (CH)
• Calcium Hardness is a measure of the amount of calcium present in the water.
• Water that contains high levels of calcium and magnesium salts is called hard water. “Calcium Carbonate” scale may be present in hard water, in the form of white residue on massage inserts, heaters, filters and hot tub controls. If left for longer periods, calcium scale can become hardened and impossible to remove. Due to increased aeration and agitation, calcium deficient water will cause foaming in hot tub water. Hard water can significantly impair the heating ability of the hot tub heater element and cause increased costs to keep the hot tub to temperature.
• Water that contains little or no calcium/magnesium is called soft water. Soft Water feels “slippery”, and is aggressive and damaging to concrete areas surrounding the hot tub.
Low Calcium Hardness
Aggressive water
Foam
Etching of plaster or concrete
Odour
Etching to patio, concrete, spa equipment
High Calcium Hardness
Scaling Water
Cloudy Water
Plugged filters
Reduced circulation
Lowered heater efficiency
• Acidic water can cause pitting of the heater components and damage the equipment.
• Basic water forces the calcium dissolved in the water out of solution, causing cloudy water and scaling.
• The pH also has a dramatic effect on the sanitizer effectiveness in the water. A high pH level results in greatly reduced sanitizer effectiveness, especially in chlorine systems.
• Factors that contributes pH change in a hot tub are: addition of fresh water, rain, bather use/sweat, detergent and oils from bathers, dust, biofilm, leaves and environmental debris, improper testing, drop in alkalinity, carry-out or splash-out, evaporation, chemicals.
Low pH (Acidic – below 7.2)
Corrosive Water
Pitting of heater and pump components
Metals dissolve
Skin/eye irritation
Damage to patios, railings, concrete
Effects of Unbalanced pH
High pH (Basic – above 7.8)
Scaling Water
Cloudy water
Sanitizer inefficiency
Skin/eye irritation
Reduced circulation

30
• Please contact your nearest Beachcomber Hot Tubs Store for free water testing and more information.
Symptom Diagnosis
Cloudy WaterFactors that affect water to be cloudy: High TDS Level, Lack of Sanitizer, High/Low pH, Poor Filtration, Plugged Holiday tender.
Coloured WaterFactors that affects coloured water: Well water, Copper from equipment and pipes that dissolve into water due to improper water balance.
Skin IrritationsFactors that may cause skin irritation: Improper TA & pH balance, Chloramines, NO Sanitizer level, extended bathing sessions, High TDS level.
Foam Factors that may cause foaming: Low calcium hardness, high TDS.
Odour Factors that may cause odour: Alkalinity/pH level, Low TA and/or Sanitizer.
Scaling Caused by high pH level.
Scum LinesCaused by combination of: High TDS, low sanitizer levels, dry filters, plugged or nonfunctional floating dispensers or holiday tenders.
Biofilm (White Algae)Nature’s way to provide bacteria with a suitable coating in which to proliferate and survive even in a harsh environment.
Common Water Care Issues
UL Certified according to the ASTM F1346-91 standards for Hot Tub safety covers.
• Never allow children or pets to sit, play or stand on top of the hot tub cover.
• Please use the handle when lifting the HeatshieldTM.
• Use COVER CARE as part of your regular hot tub maintenance on the hot tub cover as conditioner to protect from sun’s damaging rays.
NOTE: Use PUREZYMETM to eliminate organic odours and scum that can occur on the underside of the hot tub cover.
CAUTION: The hot tub HeatshieldTM cover is strong enough to withstand up to 2 feet of snow. It is not designed to support the weight of children, pets or adults. This extra weight will break the foam inners and lead to premature failure of the HeatshieldTM which is not covered under the Beachcomber Guarantee.
HeatshieldTM Care and Maintenance
Metals and Minerals
• Dissolved metals have the ability to stain surfaces and discolor water if not properly controlled.
• Total Dissolved Solids (TDS) is a measure of accumulated dissolved materials in solution (not suspended particles) in hot tub water.
• As more water care products are added, especially granulars, the TDS level will climb.
• When TDS level reaches 1500 ppm over start up TDS, it may cause clouding, odour, listless water and chemical inefficiency.
• Contributors to TDS levels include: hair, evaporation, sweat and skin particles, lint, fecal matter, environmental debris (leaves, pine needles, dirt etc.), dust, pollen, expectorant (spit), lotions, nasal discharge, cyanuric acid (from stabilized chlorines such as Chlor Blast and Care Free Boost), oils, urine, inert solids from granular products.
Metal Stain Color Water Color
Copper blue-green to black stain blue-green or black
Iron yellowish, red-brown yellow-brown
Manganese grey to black stain, violet coffee-brown

31 www.beachcomberhottubs.com
Winter Operation InformationAll Beachcomber Hot Tubs have built in freeze protection for their equipment. If your hot tub is not Hush Pump SystemTM equipped, the freeze protection will activate the pump(s) on low speed for approximately 2 minutes if a temperature of 44˚ F / 7˚ C or below is detected at the heater housing. If your hot tub is Hush Pump SystemTM equipped, the only time freeze protection will activate is if the hot tub is left in standby mode long enough to allow water at the heater to reach 44˚ F / 7˚ C or if your hot tub is filled with water that is 44˚ F / 7˚ C or lower. There is also a small water line that runs from pump to pump that assists in protecting against freezing, by increasing circulation between the pumps.
ENSURE AN UNATTENDED HOT TUB HAS A SECURED AND LOCKED HEATSHIELDTM COVER TO PREVENT UNWANTED ENTRY. BEACHCOMBER HOT TUBS IS NOT RESPONSIBLE FOR DAMAGE CAUSED TO PROPERTY OR PERSON BY HOT TUBS THAT ARE LEFT UNATTENDED FOR PERIODS OF TIME.
BEACHCOMBER HOT TUBS IS NOT RESPONSIBLE FOR NEGLECT DURING FREEZING TEMPERATURES, WHICH IS BEYOND THE CONTROL OF ANY MANUFACTURER. IF POWER IS OUT DURING FREEZING TEMPERATURES, YOU MUST TAKE ACTION TO PROTECT YOUR HOT TUB AND ITS EQUIPMENT, JUST AS YOU WOULD WITH YOUR VEHICLE, OR YOUR HOME AND PROPERTY.
WARNING WARNING
Draining your Beachcomber Hot Tub
Vacation Instructions
Change three to four times a year or more if bather load is high. To calculate the change frequency, use the following formula:
# Days = 1/3 (Volume in US Gallons) ÷ Max # of daily bathers
1. Turn power off at the G.F.C.I. breaker or power disconnect switch (do not use the standby feature).
2. Locate the black drain/fill valve, found inside behind the door on a Portable LEEPTM model or under the step on the HYBRID4TM Edition. Remove the safety cap from the fitting threaded on to the valve.
3. Attach the female end of your garden hose and place the other end at a level lower than the drain/fill valve to ensure complete draining. To open, turn the on/off knob on top of the drain valve clockwise to open and start the draining.
4. Draining time will vary from model to model.
5. Once the hot tub is drained and empty, disconnect the garden hose and close the valve.
If you are leaving your hot tub full and running while on vacation for 3-5 days, do the following:
1. Check and adjust TA level if necessary.
2. Shock-treat the water to raise the sanitizer level. Leave the hot tub HeatshieldTM half open for 1 hour.
3. Lock your HeatshieldTM on the hot tub to maintain a safe environment for pets or children. If you are in a high wind area, install Hurricane Straps (available from your local Beachcomber store) to secure the HeatshieldTM to your hot tub.
Upon returning do the following:
1. Check pH and sanitizer level and adjust if necessary.
If leaving for 5-14 days and no one can come by to maintain the hot tub, do the following:
1. Put heater in Sleep Mode. Sanitizers may last longer in cooler water.
2. Check and adjust pH and Total Alkalinity level if necessary.
3. Use either a Beachcomber floating tablet dispenser or a Holiday Tender tablet dispenser to automatically dispense either Bromine Disc or MiniDisc in your hot tub water to maintain water disinfection. Use the low setting on these devices as the demand for disinfectant will be low during this time.
4. Lock the HeatshieldTM and attach a Hurricane Strap in high wind areas. Upon returning, put heater back into Standard Mode.

32
Shutdown Procedures
Troubleshooting Guide
Winter Precautions: If your equipment is not working during freezing temperatures, you should first contact your local Beachcomber store or a local service provider for immediate assistance. To prevent damage caused by the equipment freezing, place a small space heater or trouble light down by the equipment. Position the heater or light so that it does not melt or come in contact with plastic parts, to avoid equipment damage. You can also block off the step or door vent to keep in the heat during this time, but it must be removed once the freezing weather is no longer present.
Extended Power Outages: In most communities, power is restored relatively quickly. But in the event of a prolonged power outage, first shut off the power at the main panel. Close the knife valves to keep the hot water in the hot tub, and remove the drain plugs or pull out one of the small braided hoses on the front of the pumps to drain all the water from the external plumbing lines and the pumps. When power is out, check your hot tub each day to monitor its condition. DO NOT ALLOW FREEZING TO TAKE PLACE. Beachcomber Hot Tubs is not responsible for damage caused to hot tubs that are left without power in prolonged freezing conditions.
BEACHCOMBER IS NOT RESPONSIBLE FOR DAMAGE TO PERSONS OR PROPERTY FOR EQUIPMENT PAK REMOVAL. CONTACT YOUR LOCAL BEACHCOMBER STORE OR SERVICE PROVIDER FOR INFORMATION.
If leaving for a long period of time in severely cold weather and no one can come by to maintain the hot tub, do the following:
1. Drain the hot tub as outlined in this Owner’s Guide.
2. Using a wet dry vac, blow out all return lines from jet pumps and the Heater tube if Hush Pump SystemTM installed. Then change suction mode to vacuum and remove water from from all pump wet ends and any water in tub including floor drain.
3. If you do not have a Shop Vac then once tub is drained remove a valve assembly between front of pump and tub to access the small braided hose. Squeeze clamp to slide it up hose then pull hose off fitting. On single pump tubs remove the slotted drain plug below the pump intake union. Removing these allows the last bit of water in the bottom half of the pump to drain out.
4. Remove the MicrofilterTM cartridge and store in a dry place.
5. Lock HeatshieldTM and attach Hurricane strapping if in high wind areas.
6. Provide extra support for the HeatshieldTM if in extreme heavy snow by placing a 4 x 8 sheet of 3/4” plywood on top of the HeatshieldTM. Covering the HeatshieldTM with a tarp will help protect it from snow and ice that could build up.
BEACHCOMBER HOT TUBS IS NOT RESPONSIBLE FOR DAMAGE TO HOT TUBS THAT ARE LEFT UNATTENDED.
PROBLEM SYMPTOM MOST LIKELY CAUSE SOLUTION
G.F.C.I. breaker will not stay on or trips intermittently.
If hot tub is new; the load neutral wire has been inserted on the neutral buss in the panel. Load neutral wire should be inserted into the G.F.C.I. load neutral connection.
Call your Electrician to change location of the load neutral wire.
Heater element is defective and leaking current to ground. Call your store for service to replace the heater element.
G.F.C.I. is worn out or defective. Class A, G.F.C.I. breakers should not trip below 5 milliamps of current leakage.
Call your electrician to replace your G.F.C.I.
Jet pump is surging on high speed.
Water level is too low on hot tubs that use a jet pump for filtering.
Raise water level in hot tub to at least ½ way up the skimmer opening.
Plug in center of MicrofilterTM basket is not in place on non Hush Pump SystemTM equipped hot tub.
Install plug in basket, insert from top of basket.
RFM jet nozzles are pointed toward the large suction fittings in the foot well.
Redirect nozzles up and away from the large suction fittings. Turn off all air control for RFM jets.
Neck jet does not shut off.
Internal portion of two piece neck jet has been unscrewed by turning too far to the left.
Carefully pry the faceplate off with a flat head screw driver and then thread internal back in. Then pop face plate back on and tighten internal by turning face plate clockwise.

33 www.beachcomberhottubs.com
Beachcomber Hot Tub Accessories
Robes
Beachcomber’s classic midweight terry cloth robes are one of life’s sweetest and most practical luxuries. The mid-length helps dry you off faster and the thick Turkish weave with deep pockets will keep you warm and cozy long after your hot tub soak or shower.
Hot Tub Scoop
Ideal for removing floating debris in hot tubs with a unique circular design to suit hot tub contours and made with UV stabilized materials to withstand outdoor use.
Beach Towels
Beachcomber Towels made with 900g cotton velvet pile for luxurious comfort.
Towels
White Embroidered Towels. Classic midweight terry cloth with thick Turkish weave.
Hot Tub Vac
The simple action of placing the vac in the water creates suction that draws in water and debris from the hot tub as you push the button at the top of the handle. This all-in-one tool also has a flip-down skimmer net and brush attachment.
Hot Tub Brush
Cleans hot tub interior quickly. Ideal for use in all hot tubs. Has a unique contoured design that gets into corners and UV stabilized material for longevity.

34
Beachcomber Plus Bluetooth® Speaker
This waterproof, 6 watt output speaker, boasts digital signal processor for enhanced Bluetooth® connection for better sound.
Disc Dispenser
This is the Beachcomber’s Floating Disc Dispenser, for use with Bromo or Chlor Water Care Programs.
Hydro Mop
Beachcomber’s Hydro Mop enhances water clarity by absorbing oils from the water surface.
LEEPTM Step
Beachcomber’s LeepTM Step is a great way to make it easy to climb into your Beachcomber Hot Tub.
Fresh Fill
The Fresh FIll hot tub pre-filter easily connects to your garden hose and works with all hot tubs. The Fresh Fill utilizes food grade activated carbon and proprietary filtration media for the removal of metals, volatile organic compounds and suspended solids before they reach your hot tub.
Signature Scentsations
Hot tub fragrances that enhances the hot tub soaking experience with pleasing natural fragrances. These botanical water essences are derived from natural sources, they are pH neutral, and do not affect water balance.

35 www.beachcomberhottubs.com
Model
North American Control Panel
Seating Capacity
Seating Configuration Dimensions Dry
WeightFilled Weight
Water Capacity
North American Electrical Standards
750 ET-70 87 active seats
+ 1 cooling seat
89 x 89 x 38”
226 x 226 x 97cm
800 lbs
363 kg
4446 lbs
2017 kg
437 US gallons
1654 litres
240 Volt; 60 Amp 6/3, Wire GFCI
Protector Circuit
740 ET-70 6
5 active seats
+ 1 lounger, and
a cooling bench
89 x 89 x 38”
226 x 226 x 97cm
800 lbs
363 kg
4162 lbs
1888 kg
403 US gallons
1526 litres
240 Volt; 60 Amp 6/3, Wire GFCI
Protector Circuit
730/725 ET-70 6
4 active seats
+ 1 lounger
+ 1 cooling seat
80 x 88 x 38”
203 x 224 x 97cm
675 lbs
306 kg
3470 lbs
1574 kg
335 US gallons
1268 litres
240 Volt; 50 Amp 6/3, Wire GFCI
Protector Circuit
720 ET-70 76 active seats
+ 1 cooling seat
80 x 88 x 38”
203 x 224 x 97cm
675 lbs
306 kg
3695 lbs
1676 kg
362 US gallons
1370 litres
240 Volt; 50 Amp 6/3, Wire GFCI
Protector Circuit
710/715 ET-70 4
3 active seats
+ 1 lounger, and
a cooling bench
70 x 86 x 38”
178 x 218 x 97cm
700 lbs
318 kg
3037 lbs
1378 kg
280 US gallons
1060 litres
240 Volt; 50 Amp 6/3, Wire GFCI
Protector Circuit
580/680 ET-55 88 active seats and
a cooling bench
89” x 89” x 38”
226 x 226 x 97cm
725 lbs
329 vkg
4312 lbs
1956 kg
430 US gallons
1628 litres
240 Volt; 50 Amp 6/3, Wire GFCI
Protector Circuit
590/579/
669/689ET-55 7
7 active seats, and
a cooling bench
89 x 89 x 38”
226 x 226 x 97cm
725 lbs
329 kg
4312 lbs
1956 kg
430 US gallons
1628 litres
240 Volt; 50 Amp 6/3, Wire GFCI
Protector Circuit
570/578/565/
667/687ET-55 6
6 active seats, and
a cooling bench
80 x 88 x 38”
203 x 224 x 97cm
650 lbs
295 kg
3670 lbs
1665 kg
362 US gallons
1370 litres
240 Volt; 50 Amp 6/3, Wire GFCI
Protector Circuit
550/650/
565L/685ET-55 5
4 active seats
+ 1 lounger, and
a cooling bench
80 x 88 x 38”
203 x 224 x 97cm
650 lbs
295 kgs
3820 lbs
1733 kg
379 US gallons
1435 litres
240 Volt; 50 Amp 6/3, Wire GFCI
Protector Circuit
540/664/684 ET-55 55 active seats, and
a cooling bench
70 x 86 x 38”
178 x 218 x 97cm
600 lbs
272 kgs
3103 lbs
1408 kgs
300 US gallons
1136 litres
240 Volt; 40 Amp 8/3, Wire GFCI
Protector Circuit
530/538/
663/683ET-55 4
4 active seats, and
a cooling bench
70 x 86 x 38”
178 x 218 x 97cm
600 lbs
272 kgs
3394 lbs
1540 kgs
335 US gallons
1268 litres
240 Volt; 40 Amp 8/3, Wire GFCI
Protector Circuit
520/008 ET-55 2 2 loungers57 x 75 x 30”
145 x 191 x 76cm
425 lbs
193 kgs
1885 lbs
855 kgs
175 US gallons
662 litres
240 Volt; 40 Amp 8/3, Wire GFCI
Protector Circuit or 120 Volt; 15
Amp, GFCI Protector Plug in Cord
380/480/
658/678ET-50 7
6 active seats
+ 1 cooling seat
89 x 89 x 38”
226 x 226 x 97cm
725 lbs
329 kgs
4212 lbs
1911 kgs
418 US gallons
1582 litres
240 Volt; 40 Amp 8/3, Wire GFCI
Protector Circuit
360/460/
365/656/676ET-50 6
6 active seats, and
a cooling bench
80 x 88 x 38”
203 x 224 x 97cm
650 lbs
295 kgs
3528 lbs
1601 kgs
345 US gallons
1306 litres
240 Volt; 40 Amp 8/3
Wire GFCI Protector Circuit
350/435/
365L/655/675ET-50 5
4 active seats
+ 1 lounger, and
a cooling bench
80 x 88 x 38”
203 x 224 x 97cm
650 lbs
295 kgs
3778 lbs
1714 kgs
375 US gallons
1420 litres
240 Volt; 40 Amp 8/3, Wire GFCI
Protector Circuit
340/654/674 ET-50 55 active seats, and
a cooling bench
70 x 86 x 34”
178 x 218 x 86cm
640 lbs
290 kgs
3143 lbs
1426 kgs
300 US gallons
1136 litres
240 Volt; 40 Amp 8/3, Wire GFCI
Protector Circuit
320/321 ET-50 66 active seats, and
a cooling bench
Diameter 78 x 34”
198 x 86cm
425 lbs
193 kgs
2444 lbs
1109 kgs
242 US gallons
916 litres
120 Volt; 15 Amp, GFCI Protector
Plug in Cord
007/607 ET-50 22 seats, and
2 cooling benches
46 x 86 x 30”
117 x 218 x 76cm
386 lbs
175 kgs
1679 lbs
762 kgs
155 US gallons
587 litres
240 Volt; 40 Amp 8/3, Wire GFCI
Protector Circuit or 120 Volt; 15
Amp, GFCI Protector Plug in Cord
009 ET-50 4
2 active seats + 1
lounger + 1 multi-level
cooling seat
63 x 81 x 32”
160 x 206 x 81cm
450 lbs
204 kgs
2500 lbs
1133 kgs
240 US gallons
908 litres
240 Volt; 40 Amp 8/3, Wire GFCI
Protector Circuit or 120 Volt; 15
Amp, GFCI Protector Plug in Cord
Hot Tub Specifications and Details

36
Find More Information on The Beachcomber Voice
Your Beachcomber Hot Tub purchase is very important to us. We would like to know about your buying experience and your level of satisfaction with us, our Beachcomber store and your new hot tub. Please take a few minutes to log on to our website to take a short questionnaire. Your feedback helps us improve our service to you and gives us valuable insight into your purchase experience. Log on to our website today.
Thank you for your time!
www.beachcomberhottubs.com
Please share your Beachcomber Life at #beachcomberhottubs.
HeatshieldTM Specifications and Details
The following table specifies HeatshieldTM covers that are recommended for use with your Beachcomber Hot Tub to maximize the energy efficiency of your hot tub.
The covers listed below have been tested with each Beachcomber Hot Tub Model for the purposes of Energy Efficiency as stipulated by the California Energy Commission according to test procedures in California Title 20 and ANSI/APSP-14.
BEACHCOMBER HOT TUB Model HEATSHIELDTM COVER MODEL COVER SIZE
750, 740, 590/579/669/689, 580/680, 380/480/658/678
97XX898915SF89" x 89"
226 x 226 cm
730/725, 720, 570/578/565/ 667/687, 550/650/565L/685,
360/460/365/656/676, 350/435/365L/655/675
97XX808815SF, 97XX808815OF80" x 88"
203 x 224 cm
710/715, 540/664/684, 530/538/663/683,
340/654/67497XX708615SF, 97XX708615OF
70" x 86" 178 x 218 cm
520 97XX577515SF, 97XX577515OF57" x 75"
145 x 191 cm
320/321 97XX78RD15SF78" DIA
198 cm DIA
007/607 97xx4585155F45” x 85”
114 x 216cm

37 www.beachcomberhottubs.com
We don’t hide behind the spa industry standard ‘disclaimers’. Beachcomber is and always will be a company built on care for the health, happiness, and well-being of our customers, staff, stores and corporate partners. This is not an abstract ideal, but a very real presence that you should expect to experience in all your dealings with Beachcomber.
We are family owned, and do not answer to distant shareholders. We support our customers and their ongoing satisfaction with the finest quality, and the best value in the most comfortable hot tub, worldwide. Our independently owned stores hold the same integrity, values and care for the Beachcomber Hot Tub owner, as we do. In fact, since 1978 we have looked after our customers and treated them like family.
The Beachcomber Guarantee
Beachcomber Standard Protection Guarantee
Beachcomber Premium Protection Guarantee
Shell Structure for Life
Beachcomber guarantees to the original owner that the Structural Laminated Fiberglass Composition of your hot tub will never leak. If a failure occurs, we will supply the materials and technical labor for the repair.
Life Life
Acrylic Surface Guarantee
Beachcomber guarantees that the hot tub’s acrylic finish will be free from defects in materials and workmanship for 5 years from the date of delivery. If a failure occurs, we will supply the materials and technical labor for the repair.
5 years 5 years
Component Guarantee
Beachcomber guarantees the following factory installed components: Management System, Massage Pumps, Hush Pump SystemTM, Motors, Heater Assembly, Control Panels, EverliteTM, EclipseTM Lighting, Guiding Lite, Garden EverliteTM, Enviroskirt Cabinetry, Ozone Generator, ClearTech UVC Water Care System, Quintessential Air Connect Surround Sound Music System, Internal and External Plumbing, and Light Lenses; will be free from defects in materials and workmanship for the duration of the guarantee. If a failure occurs, we will supply the materials and technical labor for the repair. *The ClearTech UVC ReadyTM, Ozone Generator, and all Lighting, such as EverliteTM, EclipseTM Lighting, Guiding Light, Garden EverliteTM, Crescent MoonTM Lighting, etc. are not covered under the 5-Year Beachcomber Premium Protection Guarantee. The ClearTech UVC bulb is only covered for 1 year from original date of delivery.
2 years 5 years*
Exchange Guarantee
Beachcomber guarantees that the factory supplied hot tub HeatshieldTM Cover, jetting massage inserts, steps, filter baskets, MicroFilterTM lid and remote controls will be free from defects in materials and workmanship for two years from the date of delivery. If a failure occurs, you can exchange the failed component at your local Beachcomber Store.
2 years 2 years
Owner Transfer Option
The remaining portion of the Beachcomber Standard Protection Guarantee is transferable to a new owner for a small fee, once in the life of the guarantee. It is the new owner’s responsibility to contact a Beachcomber representative to arrange for a customer-paid installation inspection of the hot tub to activate the Guarantee transfer. The transfer fee, hot tub serial number and inspection sheet must be received by the Beachcomber Guarantee office within 60 days of ownership transfer to be valid.
2 years 2 years
Smart Sense Heater Guarantee
Beachcomber guarantees that the Smart Sense Heater Assembly will be free from defect in materials and workmanship. If a failure occurs, we will supply the materials and technical labor for the repair.
2 years 5 years
No-Leak Plumbing Guarantee
Beachcomber guarantees against leaks caused by defects in materials and workmanship. This Guarantee covers leaks from internal and external plumbing and light lenses. If a failure occurs, we will supply the materials and technical labor for the repair.
2 years 5 years
Enviroskirt Cabinetry Guarantee
Beachcomber guarantees that the Enviroskirt Cabinetry will be free from defects in materials and workmanship. If a failure occurs, we will supply the materials and technical labor for the repair.
2 years 5 years

38
To receive service from a qualified Beachcomber service representative, your Beachcomber Hot Tub must be registered and you may be asked to provide an original bill of sale. Your Beachcomber Standard Protection Guarantee and if applicable, Premium Protection Guarantee starts from the original date of delivery. You may be assessed a reasonable travel cost for service at your home. It is the hot tub owner’s full responsibility to provide unencumbered access to the equipment for service, removal, and/or re-installation of the hot tub for required repairs. If Beachcomber determines that repair of the hot tub is not feasible, we reserve the right to provide a replacement hot tub equal in value to the current fair market value.
In this case the owner is responsible for expenses including removal, shipping and reinstallation of the existing or replacement hot tub. Upon replacement of a hot tub, the Guarantee will cover the remaining portion of the existing Guarantee from the original installation date.
The Guarantee does not cover fading from natural aging and/or damage from excessive chemical use on all hot tub finishes, cabinetry, fixtures, steps and the HeatshieldTM Cover, or crazing of the acrylic surface as these are not considered defects in materials and workmanship. Beachcomber Hot Tubs installed for commercial applications are excluded from all Guarantee coverage. The Beachcomber Standard Protection Guarantee and Premium Protection Guarantee cannot anticipate, nor does it cover damage or failure that has occurred as a result of product abuse, accidents, power disturbances, vandalism, acts of God or nature and other causes which are out of any manufacturer’s control.
All Beachcomber Hot Tubs must be used, installed and maintained as directed by the supplied Owner’s Guide to receive Guarantee coverage. The Beachcomber Standard Protection and Beachcomber Premium Protection Guarantee are valid only in the country of purchase. Service after the sale is the responsibility of the store from which you purchased your Beachcomber Hot Tub.
All Guarantees must be registered online at www.beachcomberguarantee.com/register within 30 days of delivery.
REGISTER YOUR STANDARD GUARANTEE ONLINE TODAYRegister online in order to activate your Beachcomber Guarantee: www.beachcomberhottubs.com/register
Online registration must be completed within 30 days of hot tub delivery. Before you go online, ensure you have two things:
1. A scanned copy or photo of the Beachcomber Hot Tub Setup and Install Checklist. (A Beachcomber Hot Tub representative will have completed the Checklist and given you a copy)
2. A scanned copy or photo of the Sales Invoice.
For all other questions, please call our Guarantee department: 1-800-663-6557 or visit us online for more information: www.beachcomberhottubs.com
SIMPLICITY GIVES YOU PEACE OF MIND
EASY GUIDELINES TO ENSURE PERFORMANCE OF GUARANTEE
UPGRADE TO OUR PREMIUM GUARANTEE
Typical limited spa industry warranties protect the manufacturer, not the customer. They are often ambiguous and filled with outright exclusions, limitations and disclaimers in their product. Beachcomber understands that buying a hot tub is a major purchase, and few people understand what can go wrong. We strive to look after our customers, and that is why The Beachcomber Standard Protection Guarantee is designed to protect you, not us. We are proud of the position Beachcomber has taken in looking after our customers before, during, and after they purchase our hot tubs.
The Beachcomber Standard Protection Guarantee is included with all of our hot tubs.
Contact your Beachcomber Hot Tub dealer to upgrade to our Premium Guarantee, if you haven’t already done so.

Our Commitment to Your Family
Keith and Judy Scott
Founders of Beachcomber Hot Tubs
A Beachcomber Hot Tub is an investment in you and your family. Since 1978, our
extended family of stores around the world have been helping people just like you to
make a solid, informed decision about buying a hot tub. We have always believed in
giving the information and education needed to make that important decision. We
know that the sale really begins after you have your Beachcomber in your home.
Our desire for you is to have the best experience possible with your new Beachcomber
Hot Tub, that’s why our stores are equipped to help you with any additional needs
you may have. From our family to yours, thank you for putting your trust in us and
our products. We are pleased that you have chosen Beachcomber, and hope you
recommend us to your friends and relatives.
Stock Code: 2092025 02/2020