Embed Size (px)
Citation preview

BACKPACKING
HIKING

BACKPACKING 101 “Backpacking is a leisurely stroll through the woods with your kitchen and
bedroom on your back.”
14 Backpacking Essentials Map
Compass Flashlight/ Headlamp
Extra Food Extra Clothes
Sunglasses First Aid Kit Pocket Knife
Waterproof Matches Fire starter
Water/ Filter/ Bottles Whistle
Insect Repellents or Clothing Sunburn Preventatives

Three-Season Gear Checklist Clothing
Outerwear Waterproof/breathable jacket Waterproof/breathable pants Fleece/synthetic jacket or wool sweater Waterproof gaiters (optional) Synthetic hiking pants Synthetic shorts Base Layer Mid-weight long john top Mid-weight long john bottoms Long sleeve T-shirt Synthetic T-shirt Synthetic briefs
Accessories Wool or fleece hat Mid-weight wool or fleece gloves Footwear Camp footwear (optional) Waterproof hiking boots (optional) Wool or synthetic socks (3) Liner socks (2) Extras Sun hat Bandanna
Snow/Winter Gear Checklist Clothing
Outerwear
Waterproof/breathable jacket Waterproof/breathable pants Insulated parka Fleece jacket or wool sweater Waterproof gaiters Synthetic or soft-shell hiking pants Fleece pants
Base Layer
Expedition-weight long john bottoms Expedition-weight long john top Mid-weight long john top Mid-weight long john bottoms Long sleeve T-shirt Synthetic briefs
Accessories
Wool or fleece hat Balaclava Mid-weight wool or fleece gloves Heavyweight wool or fleece mittens Synthetic liner gloves Waterproof over mitts
Footwear
Insulated camp booties Waterproof hiking boots (insulated is best) Wool or synthetic socks (3) Liner socks (2)
Extras
Sun hat Bandanna

Gear
Internal or external frame backpack Three-season tent Convertible or four-season tent Down or synthetic sleeping bag (15° to 30°F) Down sleeping bag (0° to -30°F) Inflatable sleeping pad Closed-cell foam sleeping pad Trekking poles Canister stove and fuel canisters Lighter and waterproof matches Cook set Eating utensils, bowl, and insulated mug Headlamp w/extra batteries and bulb 32 oz. water bottles (filter, tablets, or drops) (2) Water bottle parkas (2) Pocketknife or multitool Compass or GPS (and map) Sunglasses First-aid kit with personal medications Personal locator beacon (optional) Stuff sacks Assorted zipper-lock bags Sunscreen (SPF 15+) Lip balm (SPF 15+) Bear-bagging rope (or canister) if necessary Toilet paper and trowel Pee bottle Chemical heat packs
Winter additions in italics.

Packing List: Kitchen Kit Stove Windscreen Fuel bottle Fire starter Stove repair kit Cook pots/lids Frying pan (optional) Pot gripper Small scrubber sponge
Small sieve (for straining dishwater) Cup(s) Spoon(s) Bowl(s) Condiments Lighter/matches Dishcloth Extra plastic bags
Homemade First Aid Kit
There are plenty of pre-packaged first aid kits out there but here are some good ingredients that should go in most kits for most
types of hikes. Keep in mind that the longer the hike, or the larger the group, the more safety gear you should bring.
Tweezers
Safety Pins Antibiotic Ointment
Antiseptic Towelettes Wound Closure Strips
Moleskin or duct tape for blisters Band-aids
ACE bandage Bandanna (for splints)
Ibuprofen Antihistamine
Gatorade powdered drink (emergency electrolytes, energy)
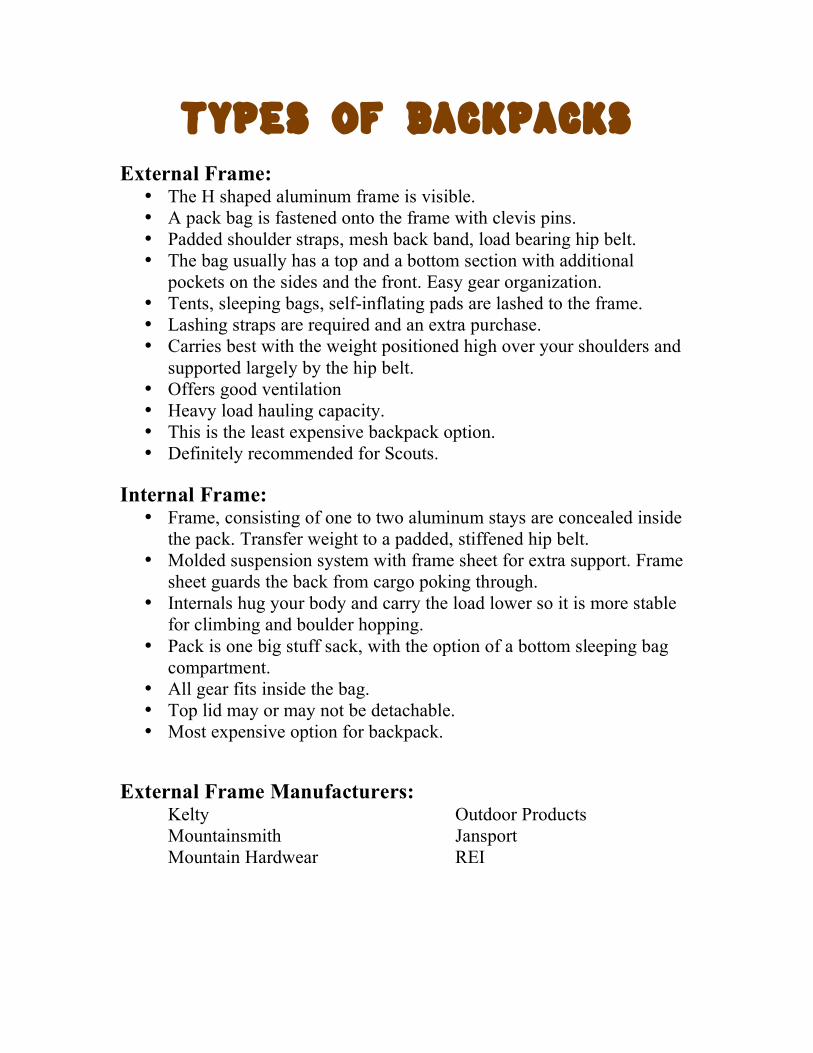
Types of Backpacks External Frame:
• The H shaped aluminum frame is visible. • A pack bag is fastened onto the frame with clevis pins. • Padded shoulder straps, mesh back band, load bearing hip belt. • The bag usually has a top and a bottom section with additional
pockets on the sides and the front. Easy gear organization. • Tents, sleeping bags, self-inflating pads are lashed to the frame. • Lashing straps are required and an extra purchase. • Carries best with the weight positioned high over your shoulders and
supported largely by the hip belt. • Offers good ventilation • Heavy load hauling capacity. • This is the least expensive backpack option. • Definitely recommended for Scouts.
Internal Frame:
• Frame, consisting of one to two aluminum stays are concealed inside the pack. Transfer weight to a padded, stiffened hip belt.
• Molded suspension system with frame sheet for extra support. Frame sheet guards the back from cargo poking through.
• Internals hug your body and carry the load lower so it is more stable for climbing and boulder hopping.
• Pack is one big stuff sack, with the option of a bottom sleeping bag compartment.
• All gear fits inside the bag. • Top lid may or may not be detachable. • Most expensive option for backpack.
External Frame Manufacturers: Kelty Outdoor Products Mountainsmith Jansport Mountain Hardwear REI

Internal Frame Manufacturers: ArcTeryx Gregory Osprey Kelty North Face Mountainsmith EMS Lowe Alpine L. L. Bean REI
Guide to Backpacks by Alicia MacLeay October 11, 2005
Ah, to go a-wandering with a knapsack on your back. Whether you’re setting off on a trail run or a weeklong backpacking trip, you’ll need a way to carry your gear. External Frame Backpacks These mid- to expedition-sized backpacks are available in sizes suitable for a weekend overnight to a winter camping expedition. More rigid than internal packs, externals can carry heavy loads over moderate trails. Internal Frame Backpacks Also available as mid- to expedition-sized backpacks and in sizes for a weekend overnight to a winter camping expedition. Internals are narrower and more adjustable than external backpacks for better ease of movement and balance. Daypacks Are designed for day hikes and (for minimalists) the occasional overnight. They may be frameless rucksacks or incorporate a stiff frame sheet or metal stay for support. Hydration Packs Mainly consist of a hydration bladder and tube for drinking water on the go, although some packs have pockets and space to carry along gear. Waist Packs Also known as lumbar packs, fanny packs, and hip packs, these small packs allow you to carry a few essentials on short outings.

Child Carriers There’s no need to leave Junior behind when you hit the trail. Just load him or her into a kid carrier and head out. How to Choose a Backpack Like most outdoor gear, choosing a backpack depends on what you plan on doing with it primarily. Consider how long you will be gone on trips (a day, overnight, a week), how much gear you’ll need, or want, to bring along (are you a minimalist fastpacker or deeply attached to your creature comforts), and when you’ll be out (winter requires more and heavier gear). Answering these questions will help you determine the first factor in selecting a backpack—capacity. How Big? Pack sizes vary between manufacturers and capacity needs depend on the individual. However, in general the following ranges are a good starting point: 1,800-2,500 cubic inches (30-40 liters)—for hiking trips with a daypack 3,000-5,000 cubic inches (50-80 liters)—for overnight and multi-day backpacking trips up to a week More than 5,000 cubic inches (80 liters and more)—for trips longer than a week or winter overnights Choose a backpack that will fit the greatest amount of gear you’ll need to carry. Don’t forget the group gear you’ll need to bring along too. That said, don’t buy a pack that’s bigger than you need. You’ll be tempted to carry more than necessary or will end up with a floppy, half-filled pack. Depending on your range of activities you may need more than one backpack. Perhaps a large internal frame pack for multi-day backpacking trips and a small daypack for day hikes. If you’ll be carrying specialty gear like ice axes, snowshoes, or a snowboard, look for a pack with features or accessories designed to hold those items, rather than trying to jury-rig them on later.
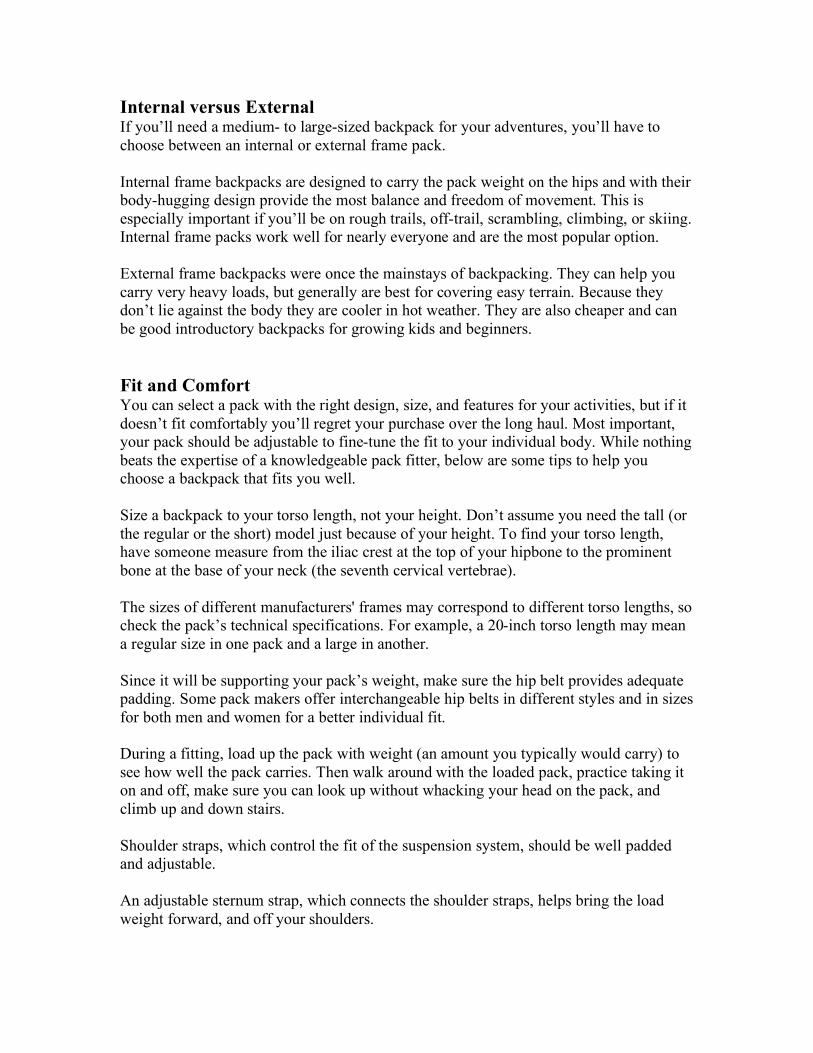
Internal versus External If you’ll need a medium- to large-sized backpack for your adventures, you’ll have to choose between an internal or external frame pack. Internal frame backpacks are designed to carry the pack weight on the hips and with their body-hugging design provide the most balance and freedom of movement. This is especially important if you’ll be on rough trails, off-trail, scrambling, climbing, or skiing. Internal frame packs work well for nearly everyone and are the most popular option. External frame backpacks were once the mainstays of backpacking. They can help you carry very heavy loads, but generally are best for covering easy terrain. Because they don’t lie against the body they are cooler in hot weather. They are also cheaper and can be good introductory backpacks for growing kids and beginners. Fit and Comfort You can select a pack with the right design, size, and features for your activities, but if it doesn’t fit comfortably you’ll regret your purchase over the long haul. Most important, your pack should be adjustable to fine-tune the fit to your individual body. While nothing beats the expertise of a knowledgeable pack fitter, below are some tips to help you choose a backpack that fits you well. Size a backpack to your torso length, not your height. Don’t assume you need the tall (or the regular or the short) model just because of your height. To find your torso length, have someone measure from the iliac crest at the top of your hipbone to the prominent bone at the base of your neck (the seventh cervical vertebrae). The sizes of different manufacturers' frames may correspond to different torso lengths, so check the pack’s technical specifications. For example, a 20-inch torso length may mean a regular size in one pack and a large in another. Since it will be supporting your pack’s weight, make sure the hip belt provides adequate padding. Some pack makers offer interchangeable hip belts in different styles and in sizes for both men and women for a better individual fit. During a fitting, load up the pack with weight (an amount you typically would carry) to see how well the pack carries. Then walk around with the loaded pack, practice taking it on and off, make sure you can look up without whacking your head on the pack, and climb up and down stairs. Shoulder straps, which control the fit of the suspension system, should be well padded and adjustable. An adjustable sternum strap, which connects the shoulder straps, helps bring the load weight forward, and off your shoulders.

A padded back or frame sheet will keep your stove, tent poles, and other hard objects from jabbing you in the back. Women and others with short torsos, like kids, should consider backpacks sized for them. Many pack manufacturers produce women-specific or short torso versions.
Backpacking Tents: There are three types of backpacking tents:
• Three season • Convertible • Four season
Three seasons means exactly that – three-season use. These tents are good for spring, summer and fall season camping. Most have fiberglass tent poles. Higher cost brands have aluminum poles. All have rain flies. Some only cover the top half of the tent while others have the fly extend all the way to the ground. Tent weights are around 3 to 9 pounds. The 3-pound tent is a solo tent. Aluminum pole tents weigh less than fiberglass pole tents. These tents can be priced from $50.00 (Wal-Mart variety) to ones to over $300.00 for high end. Convertible tents are tents that can be used in all seasons and weather. They have zipper panels in the roof to allow or restrict airflow depending upon temperatures. Panels are zipped open for warmer weather. Winter weather has the panels zipped closed. Poles are aluminum for added strength. Fabric material is usually heavier. Rain flies extend to ground level. Zippers are heavy duty. Total weight can be from 7 to 10 pounds for a two-man tent. One can expect to pay from $300.00 to $500.00 for a convertible tent Four season tents are built for camping year round – especially in snow and high winds. Fabric and poles are stronger than three seasons to withstand high winds and the weight of snow and ice. Weight increases because of materials used. Rain flies extend to the ground level. Zippers are heavy duty.
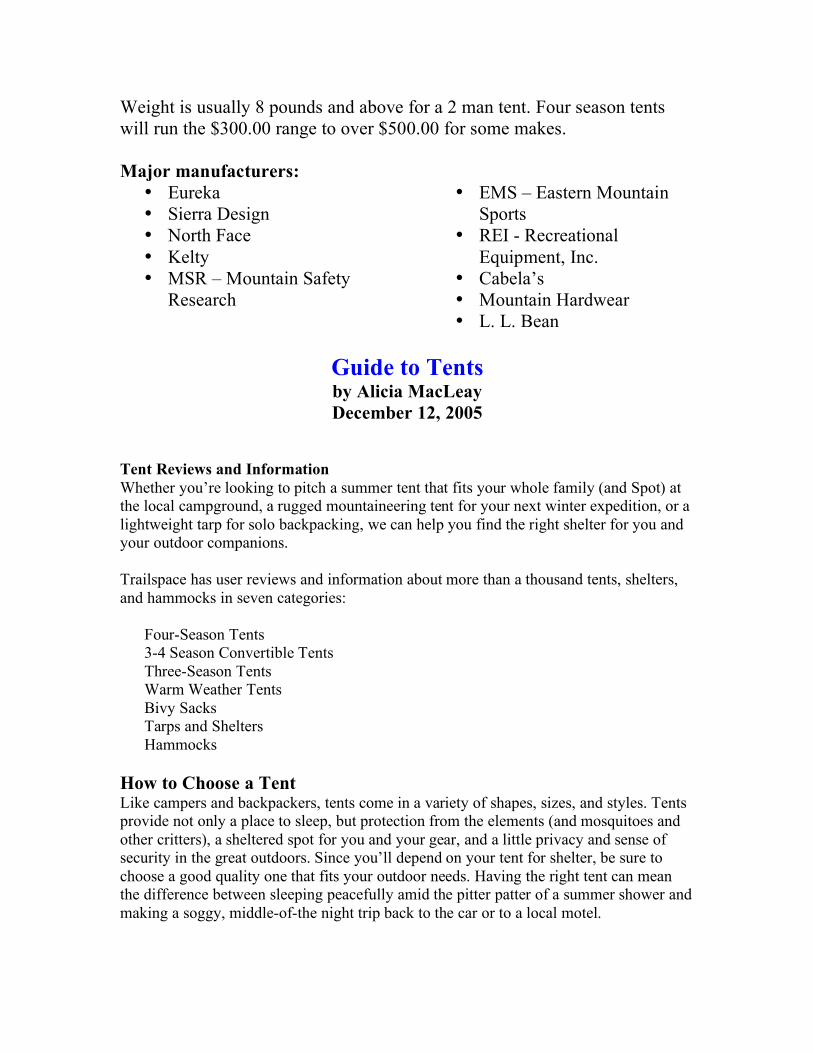
Weight is usually 8 pounds and above for a 2 man tent. Four season tents will run the $300.00 range to over $500.00 for some makes. Major manufacturers:
• Eureka • Sierra Design • North Face • Kelty • MSR – Mountain Safety
Research
• EMS – Eastern Mountain Sports
• REI - Recreational Equipment, Inc.
• Cabela’s • Mountain Hardwear • L. L. Bean
Guide to Tents by Alicia MacLeay December 12, 2005
Tent Reviews and Information Whether you’re looking to pitch a summer tent that fits your whole family (and Spot) at the local campground, a rugged mountaineering tent for your next winter expedition, or a lightweight tarp for solo backpacking, we can help you find the right shelter for you and your outdoor companions. Trailspace has user reviews and information about more than a thousand tents, shelters, and hammocks in seven categories: Four-Season Tents 3-4 Season Convertible Tents Three-Season Tents Warm Weather Tents Bivy Sacks Tarps and Shelters Hammocks How to Choose a Tent Like campers and backpackers, tents come in a variety of shapes, sizes, and styles. Tents provide not only a place to sleep, but protection from the elements (and mosquitoes and other critters), a sheltered spot for you and your gear, and a little privacy and sense of security in the great outdoors. Since you’ll depend on your tent for shelter, be sure to choose a good quality one that fits your outdoor needs. Having the right tent can mean the difference between sleeping peacefully amid the pitter patter of a summer shower and making a soggy, middle-of-the night trip back to the car or to a local motel.
When Will You Use the Tent? In what seasons and conditions will you use your tent? Knowing when, where, and how you camp will help you select the right shelter for you and your adventure. Choose a tent that can handle the most severe conditions you expect to encounter, but don’t buy more tent than you truly need. Four-season tents, with extra poles to withstand heavy snow and high winds and designed for extremely cold temperature, are essential for winter use, or any time you might encounter winter-like conditions. Also known as mountaineering tents, they are the heaviest and sturdiest of the bunch and can be used year-round, but are generally too hot and heavy for warm weather. If you plan on winter camping, get a four-season tent. Examples of four-season tents include: the Mountain Hardwear Trango 2, the Sierra Designs Stretch Dome, The North Face Mountain 25, the Bibler Fitzroy, and the Eureka! Alpenlite XT. 3-4 season convertible tents convert from four-season to three-season use with the removal of a couple of poles or panels. They tend to be heavier than standard three-season models, but offer greater versatility than a three- or four-season tent alone. They can also save you money since you buy one tent instead of two. Examples of convertible tents include: the Marmot Swallow, the MSR Fusion 2, and the Sierra Designs Omega. Three-season tents are designed for spring, summer, and fall use. While not designed to withstand heavy snow loads, they should hold up if you encounter a light early- or late-season snowfall. Most recreational hikers and backpackers choose a three-season tent for non-winter excursions. Examples of three-season tents include: the Eureka! Timberline 4, the REI Quarter Dome UL, the Marmot EOS 1P, the Sierra Designs Light Year CD, and the MSR Trekker Tent. Warm weather, or summer, tents are lightweight and usually have lots of mesh for excellent ventilation in warm and humid weather and for protection from bugs. They’ll keep you from sweltering inside a stuffy tent during a heat wave, but don’t expect to use one when the temperature drops. Examples of warm weather tents include: the Paha Que' ScreenRoom and the Wenzel Cedar Brook. Bivy sacks are small, solo shelters with just enough room for you and your sleeping bag. For climbers or cyclists whose number one priority is shaving weight, they are an excellent option. They also can serve as an emergency shelter. Claustrophobic? Choose something else. Examples of bivy sacks include: the Integral Designs Salathe, the Outdoor Research Bug Bivy and Advanced Bivy, and the Bibler Tripod Bivy. By sacrificing a floor and inner tent, tarps and shelters offer basic protection from rain and wind at a very low weight. These are for true minimalists who don’t mind sleeping on the ground and being closer to the elements of nature. They also provide extra shelter from the sun and rain at camp and make great kitchen or dining areas. Examples of tarps and shelters include: the MSR Twin Peaks and Outfitter Wing, the Kelty Noah’s Tarp 9, 12, and 16, the GoLite Hex 3 Shelter, and the Black Diamond Mega Bug.

Want to avoid pitching a tent on rocky, wet, or uneven terrain? Hammocks are yet another option for the minimalist or low-impact camper. Lighter and smaller than tents, hammocks hang above the ground and allow for more off-trail campsite options. Most have a net or other covering to keep out insects. You’ll need a couple of trees to set one up though; so don’t bring a hammock on your desert trip. Examples of hammocks include: the Hennessy Explorer Deluxe Asym, Expedition Asym and Ultralight Backpacker, the Clark Jungle Hammock Tent, and the Crazy Creek Crazy Crib LEX with Tarp. Capacity Most tents are classified by sleeping capacity—solo, two-person, on up to expansive six- and even eight-person family models. So you need to know how many people you’ll typically be camping with to select the right size. How much space each person—and their gear—needs can be subjective. For those who only need a minimal space to sleep a bivy sack or hammock will do just fine. Others want room to sit (or even stand up), spread out their gear, and make themselves at home. Most campers and backpackers fall somewhere in the middle. Not sure what two- or three-person really means? A tent's stated sleeping capacity usually does not include much (or any) space for your gear and there’s no sizing standard between tent manufacturers. However, most manufacturers provide size specifications for their tents. Look for the dimensions of the tent’s footprint or floor space. Then lay out your own ground pad(s) and sleeping bag(s), measure them, and compare that to the tent manufacturer’s floor space to determine if you’d be comfortable. You’ll also want to consider how much headroom there is if you want to be able to sit up and how much storage room any vestibules provide. If you or any of your tent mates are on the large size or will have extra gear (as in winter) that you need to keep in the tent, consider going up a tent size. Two people might consider a three-person model for the essential extra room it provides. You’ll also want to consider how much time you’ll spend in your tent. Is it for sleeping only or will you be spending a lot of time hanging out at camp? Weight While you may be thinking, “why not just get the bigger tent?”, remember—the bigger the tent, the heavier it is. If canoeing or car camping, weight may not be a major factor. But, if you’ll be backpacking, climbing, or cycling, every ounce you carry matters. Choose a tent that will fit you and any gear you need to bring into the tent or vestibule and that you’ll feel comfortable in. But don’t overdo the size at the cost of added weight or your back won’t forgive you.

Tent Designs Freestanding tents can stand alone without stakes or guy lines and can be easily moved or have dirt and other debris shaken out without being disassembled. They still need to be staked out though or a strong wind could blow your campsite right off the mountain. Most four-season tents utilize a rounded, geodesic dome design, which makes them stable and able to withstand heavy snow loads and wind. They also provide decent interior space and headroom, should you find yourself snowbound inside one for a few days. Tunnel tents are narrow and rectangular. Many three-season models come in this design. Since their rain flies lie flatter, they are not designed to handle heavy snow loads. Large family cabin tents with high ceilings and nearly vertical walls are very spacious and provide plenty of space for people and their belongings. They can be good for families staying at campgrounds, but are very heavy, harder to set up, and not very weatherproof. Other Considerations A footprint or ground cloth under your tent will prolong its life. Some tent manufacturers make footprints specifically for their tents. You can make your own though by cutting a piece of clear plastic or Tyvek a few inches smaller than the footprint of your tent. Making it smaller than the tent prevents it from catching rainwater and funneling that water under your tent. Practice setting your tent up in the backyard before you take it into the backcountry. You’ll want to know how things fit together and if you’re missing a pole before you arrive at a wooded campsite in the dark. Once your tent is set up in the backyard or garage apply seam sealer to its seams, paying special attention to the floor and rain fly. Seam sealing will help keep moisture from rain and dew outside. Some tents come with factory-taped seams. Although they offer more protection than unsealed seams, these should still be seam sealed for maximum waterproofness. Be sure to carefully follow both the tent manufacturer and seam sealer’s instructions and have adequate ventilation during the sealing process. Depending on how often you use your tent and the quality of your seam sealer, you may want to repeat this process yearly. A gear loft or tent attic added to the ceiling of your tent can provide extra storage room and better organization inside the tent.

Backpacking Stoves Backpacking stove are exactly that – stoves you carry in your pack. They are small, light weight and easy to use. They use propane or white gas (liquid) or propane/ butane cartridge. White gas stoves operate on the principle of converting a liquid to a gas under pressure. Propane or propane/ butane mix comes in canisters already under pressure. Brands of stoves: MSR Pocket Rocket $ 39.95 MSR Whisperlite $ 69.95 MSR Simmerlite $ 99.95 MSR Dragonfly $129.95 Coleman Exponent 442 $ 65.00 JetBoil Personal $ 99.00 MSR WindPro $ 89.00
Sleeping Bags Sleeping bags come in two basic designs – rectangular and mummy. In general, a mummy bag weighs less because of its shape. It also warms up faster because there is less internal space to heat. The are two basic types of fill used in sleeping bags – synthetic and goose down. The synthetic will theoretically keep you warm when wet. Down does not. A down bag is lighter in weight and preferred by many backpackers. But you have to take care to insure the bag stays dry. When purchasing a bag, consider the length of the bag as well as the width (girth). If you can, take your shoes off and crawl into the bag to see if you are comfortable. It’s the best way to tell if you fit. Most bags can be purchased in a regular or long length. Women’s sizes are also available. Sleeping bags can range from $50.00 all the way up to $700.00 plus. Down is more expensive than synthetic fill.

Also be advised that there are no industry standards for temperature ratings. How a bag will function in cold temperatures will also depend on your body type and what you wear in the bag. Bag Manufacturers: Partial listing Sierra Design Mountain Hardwear The North Face Marmot REI Kelty EMS Slumerjack Cabela’s L. L. Bean
Sleeping Pads There is nothing more aggravating than a poor night’s sleep. A good sleeping pad can make all the difference in the world. Most campers purchase the self-inflating pads. They are easy to operate – unroll them, open the valve and let the air inflate the mattress. And they are comfortable. Air pads come in thicknesses from a ½ inch up to 3 inches. Widths are usually 20 inches or 25 inches. Lengths can be from 48 inches (3/4 pad) to 77 inches. There are also the closed cell foam pads. Extremely light weight, many find them comfortable and durable. The choice is yours. In the last few years, a new type of inflatable pad has come out – insulated. The insulation used is either down or synthetic. The reviews of these pads has been exceptional. The two major companies right now our Big Agnes and Exped from Outdoor Research. These pads are pricy. The major manufacturer of self-inflating pads is Therma-Rest.

Retail/ Catalogue/ Online
Companies In today’s fast paced world, many do business and buying on the Internet. It is a great resource for researching and purchasing camping equipment. Listed are some of the more popular and reliable companies. L. L. Bean Cabela’s Campmor REI Bass Pro Shoppe Sierra Trading Post.com Eastern Mountain Sports (EMS) Ramsey Outdoors Trailspace.com Moosejaw Backcountry.com Altrec Campsaver.com Books: The Basic Essentials of Backpacking Harry Roberts ICS Books, Inc. One Tower Plaza 107 E. 89th Avenue Merrillville, IN 46410 Guide to the Appalachian Trail Jim Chase Stackpole Books Harrisburg, PA 17105 Adventure Guide to New England Stephen Jermanok MacMillian Travel New York, NY 10019

The Backpacker’s Handbook Chris Townsend Ragged Mountain Press/ McGraw-Hill Camden, ME 04843

EXTERNAL FRAME PACK

INTERNAL FRAME PACK

HIKING
A LEISURELY STROLL IN THE WOODS

There is nothing more satisfying that to leave the hustle of our hectic lives and take a stroll in the woods. And Connecticut is blessed with a plethora of hiking trails. Some are easy and flat and others, like the Appalachian Trail, are more difficult and challenging. The scenery and vistas we can experience are worth the time and energy. Just the fact of getting out can be invigorating and sometimes therapeutic. But hiking is not a foot race to the finish line. Take the time on your hike to enjoy what Mother Nature has to offer. While we like to go to the woods and mountains to get away from it all, we don’t want to put our lives in jeopardy. So here are some recommendations for hikers of all ages. Boots: When hiking, nothing is more important than your feet. So you need to have the proper footwear. Look for boots that are that are waterproof or at least water resistant, provide non-slip soles, toe protection and firm angle support. You also want a good pair of hiking socks. They are reinforced in the toe and heel and have some cushion. Some of us still like the old stand-by polypro liners and wools socks. But the new synthetic brands work well too. You best bet is to go to a known outfitter and get fitted properly. And make sure you are wearing the socks you are going to hike in. Try on several pairs of boots to see which are more comfortable. You will have to walk around to get the feel of the boot. After you make your purchase, take the time to break your boots in properly. It will be worth the effort when you finally hit the trail. As for our youngster we take out, they need not have the high tech footwear. A good pair of sneakers or work boots will work just fine for day hikes. Daypack: Nothing fancy here. Retailers are loaded with daypacks. Find one that feels comfortable and will hold the gear you need to take, including water bottles. Camelback, the hydration bladder people have come out with some great daypacks that no only have your water, but plenty of space for those things you need for the day.

Clothing: Bring sufficient clothing for the season and for rain. Remember the layered look is in. This is New England and the phrase “cotton kills” is more than appropriate. Cotton t-shirts, cotton socks and jeans and sweatshirts are out. Cotton retains moisture and takes forever to dry. Look to wear synthetic clothing like nylon pants, fleece vests, sweaters and jackets. Make sure your clothing is loose fitting. You need the room to stretch and move on the trail. And don’t overlook wool. Wool is one of nature’s best insulators and most durable fabrics. Food: Hiking burns up the calories. Cold weather demands body heat and burns up calories. While you may diet at home, eat high-energy foods on the trail. One of the best trail snacks is GORP – good old raisins and peanuts. Add some M & M’s and you have the perfect trail food. Dried fruit is also good for the trail. Water: Drink, drink and drink some more. Dehydration is the enemy of a hiker. Constantly sip water as you hike. You may also want to carry a water filter with you when you hike. You cannot trust any water source. Filter you water when you need to refill. If you don’t have a filter, make sure you carry at least 2 bottles (32 oz. each) with you. Flashlight/ Extra batteries: Even though you decide to hike during the daylight hours, a little extra precaution in never a bad idea. Pocket Knife: A little tool that has a thousand uses in a must.
Map and Compass: If you are just day hiking on established trails, the map and compass are not a must. However, if you want to do a little exploration off the trail, learning to use a map and compass is an excellent idea. Hiking Staff: Never a bad idea. It can be a branch or limb you find and carve for your use. It can be one of the high tech ones in a store. They do help your balance. Extras: Number 1 in extras is toilet paper. You never know when you have to go. Insect repellent (in season), a hat, sunscreen and gloves are always a good idea. Trail Etiquette:
• Treat the land with care to preserve its beauty • Do not cut, deface or destroy trees, flowers or any other natural or
constructed features • Do not damage fences or leave gates open • Do not litter. Pack it in and pack it out • Be careful with fire. • Walk single file in a straight line • Have an average speed hiker lead • Be considerate of others on the trail • Keep to defined trails
And finally: Take nothing but pictures, leave nothing but footprints, kill nothing but time.

Books: Fifty Hikes in Connecticut (A Guide to Short Walks and Day Hikes in the Nutmeg State) Gerry and Sue Hardy Backcountry Publications P. O. Box 175 Woodstock, VT 05091 Exploring the Appalachian Trail (Hikes in Southern New England) David Emblidge Stackpole Books Mechanicsburg, Pennsylvania Connecticut Walk Book Edited by John S. Burlew Connecticut Forest and Park Association Inc. 16 Meriden Road Route 66 Middlefield Rockfall, CT 06481