Embed Size (px)
Citation preview

AUX Audio Input Repair for 2009-2013 ToyotaCorolla
This guide will help fix the poor responsiveness of the AUX audio jack when connecting your AUXcord in. If changing your AUX cord does fix the problem, this could be your next best approach.
Written By: Binh Duong
AUX Audio Input Repair for 2009-2013 Toyota Corolla
© iFixit — CC BY-NC-SA www.iFixit.com Page 1 of 6

INTRODUCTION
This guide will first show you how to disassemble the interior of a Corolla 2010 to get to the AUXinput. Then we are going to locate the component to be soldered (but be EXTRA CAREFUL when yousolder).
TOOLS:Soldering Gun / Iron and Solder (1)
Flathead 3/32" or 2.5 mm Screwdriver (1)
Toothpick (1)
AUX Audio Input Repair for 2009-2013 Toyota Corolla
© iFixit — CC BY-NC-SA www.iFixit.com Page 2 of 6
Step 1 — Disassemble car to get to the AUX device
Don't be afraid to use extra force to get these components to open.
1) There is two side of the component to remove for the first picture
Before removing component in the third picture, there are two screws to be removed (one on eachside).
Step 2 — Disassembling continue....
Pull the component out in the first picture with force!
Reach underneath the white component connected to wire and along there, push to remove it fromthe AUX component (black rectangle thing)
Once the white component detached, simply push AUX component out (toward you).
AUX Audio Input Repair for 2009-2013 Toyota Corolla
© iFixit — CC BY-NC-SA www.iFixit.com Page 3 of 6
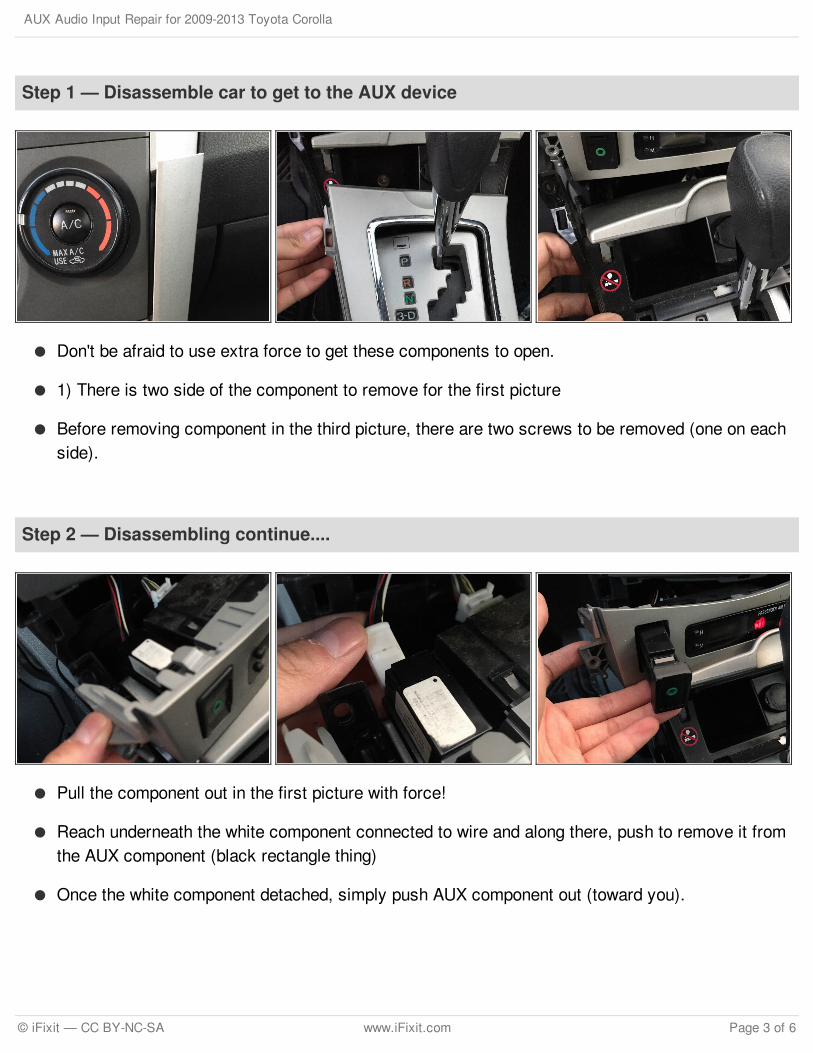
Step 3 — Removing the plastic that mechanically keeps the AUX device stable
Apply pressure where the toothpick is pointing and remove the cap at the same time. (Can gettricky)
Finally, like the third picture, remove the AUX circuit with force but try to be gentle also.
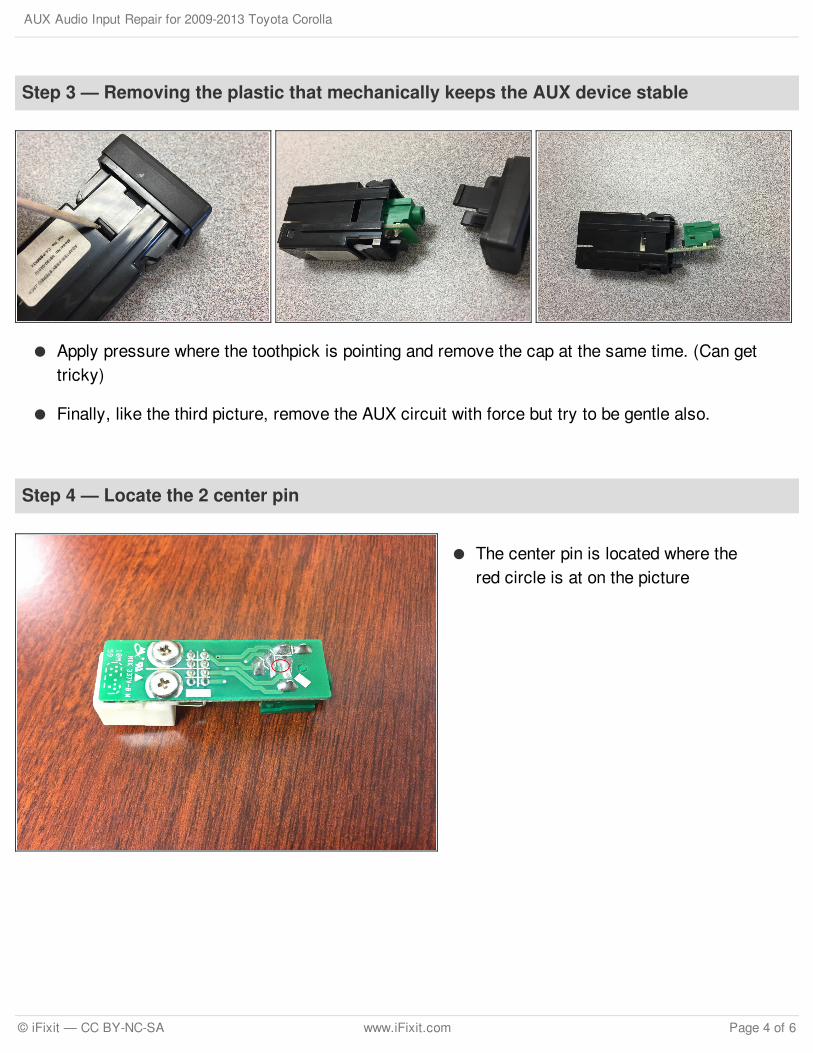
Step 4 — Locate the 2 center pin
The center pin is located where thered circle is at on the picture
AUX Audio Input Repair for 2009-2013 Toyota Corolla
© iFixit — CC BY-NC-SA www.iFixit.com Page 4 of 6
Step 5 — Solder
Hold the soldering gun in one handand the solder in another. Lightlytouch them together where the pin isshown in previous step.
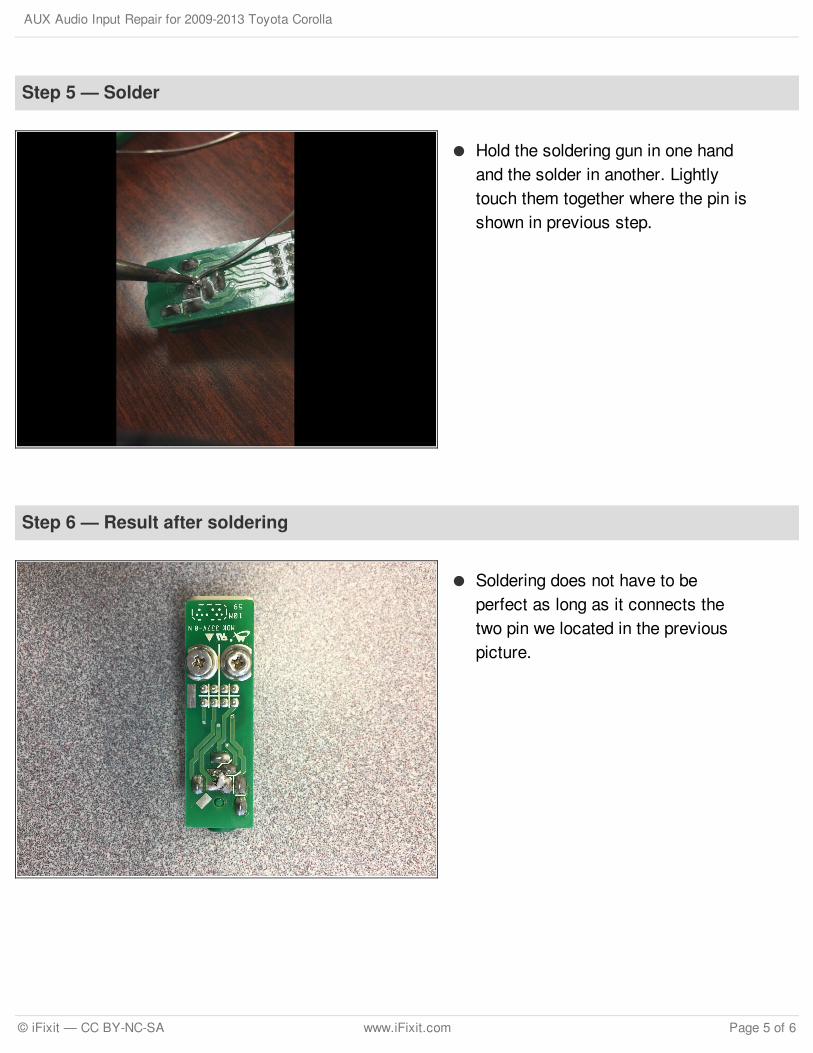
Step 6 — Result after soldering
Soldering does not have to beperfect as long as it connects thetwo pin we located in the previouspicture.
AUX Audio Input Repair for 2009-2013 Toyota Corolla
© iFixit — CC BY-NC-SA www.iFixit.com Page 5 of 6
Hopefully this guide will save you time if done correctly and will definitely save you money. Local Toyotashop will charge over $100 just for an inspection and that doesn't include repairing the AUX input.
This document was last generated on 2017-08-16 08:27:30 AM.
Step 7 — Reassemble car back
Insert wisdom here.
AUX Audio Input Repair for 2009-2013 Toyota Corolla
© iFixit — CC BY-NC-SA www.iFixit.com Page 6 of 6