Embed Size (px)
DESCRIPTION
1
Citation preview
58 | December 2004
TUTORIAL

TUTORIAL
ADVANCED BRUSHES & TEXTURES
ILLUSTRATOR CS
Complex digital work is often generic and uninspired, especially when time is of the essence. So why not use Illustrator’s custom brushes to give your work an original hand-drawn feel? Illustrator pro Dave Curd explains how
Christmas 2004 | 59
3 Once you’ve altered the fl ower, drag it back into the Brushes pallet. When the
New Brush dialog appears, choose Art Brush. Name the brush, and then choose Method> HueShift. Your custom brush will now appear permanently in the Brushes pallet.
5 At this point, take a few minutes to try out all of the brushes. Doodle, sketch and
play with colour and line weight. It’s important that you get a handle for what these can do, as in the next step you’ll need to start drawing the fi nal image. As soon as you are comfortable, close brushprimer.ai and open drawing.ai, also included on the CD.
TUTORIAL
Ë There is a fi ne line between interesting repetition and boring
pattern. This line is often blurred, if not dashed outright, in digital illustration thanks to our good buddy Copy and Paste.
Pattern in design and illustration can be interesting, but duplicated shapes betray a work’s origin and can rob it of mystery. With deadlines looming, it’s hard to resist the temptation of Copy and Paste, so we need to fi nd tools that encourage us to fl ex those artistic muscles, and meet our deadlines. Enter advanced brushes for Adobe Illustrator CS.
This tutorial will demonstrate how to marry the best of both worlds using a few rather complex custom brushes – or seemingly complex elements that vary from one to the next but are all made with a single brush stroke. The possibilities are endless, but here we’ll concentrate on creating a forest scene with trees, fl owers and a happy lumberjack. From there, you’ll briefl y use Photoshop to introduce texture, do a little rendering, and fi nally composite your vector art with a nice chunk of wood. This will further add to the image’s hand-drawn charm and character.
By completing this tutorial you will learn three important skills. One, you will have a stronger handle on how brush creation works. Two, you will be more comfortable drawing with the Pencil tool instead of going point to point, and three, you will see how a few easy steps in Photoshop can make your digital art looka little less, well, digital.
1 Open the fi le BrushPrimer.ai provided in the download. The key to effective brush
use in Illustrator is much the same as when you use normal strokes – you’ll need to vary the line weight and colour. Notice the difference brushes make on a standard one-point path.
2 To see how these images were created, left click the brush Flower 1 in the
Brushes pallet and drag it onto your work area. Notice that this brush is just a small illustration of a fl ower. Select it and use the Pencil tool to change the shape of its edges.
Illustration and tutorial by Dave Curd www.davecurd.com
4 You can now play around with your new brush. Note that a quick stroke of the
pencil tool “n” will yield the best results. The fl ower will warp and distort with the length of your stroke. Its scale depends on your stroke weight, and by choosing Hue Shift you can change its colour, too.
DOWNLOAD
TIME LENGTH
1 hour
INFO
Dave Curd is a freelance illustrator with a penchant for
adventure and a thirst for the high seas, battle, and treasure. Swing by www. davecurd.com to send him your tutorial results!

TUTORIAL
ILLUSTRATOR CS
7 Start on area number one, the two fl owers. Choose a colour for the fl ower’s
stems, select Twig from the Brushes pallet and pull a few lines to match up with the sketch. Now select Flower 2 and completethe fl ower. You can then use small strokes of Basic Brush to add grass.
6 You’ll now be looking at the rough sketch, also made with a custom brush. The
“sketch” layer is locked, so create a new one and work on top of it. It’s also worth noting that for reference, the sketch is divided into numbered areas. 9 Now for area three. While it’s possible
to create the tree’s trunk with strokes,it’s a waste of paths for a shape this largeand simple. Trace the tree’s trunk and main branches with a dark fi ll colour and give it smaller branches with quick strokes of Twig. Use a few more strokes of Flower 1 to give the tree life. Finally, send the tree to the back using Ctrl+Shift+[ so that it rests behind the bush.
11 Within area fi ve, build up the bush and cat tails using the same
techniques as step 8. You can now add the branches with the creatively named Branch and Branch 2 brushes. Again, remember to vary the line weight. The leaves are made up of single oversized strokes of Basic Brush. Make your brush smaller and add highlights and details to fi ll the bush out.
10 Move onto area four, the clouds. Have fun with these – make the shapes as
complex or simple as you like, or trace the sketch. I like the textural look of the Crunchy brush, but experiment with the others to see if you favour another. Again, be sure to vary the line weight and colour.
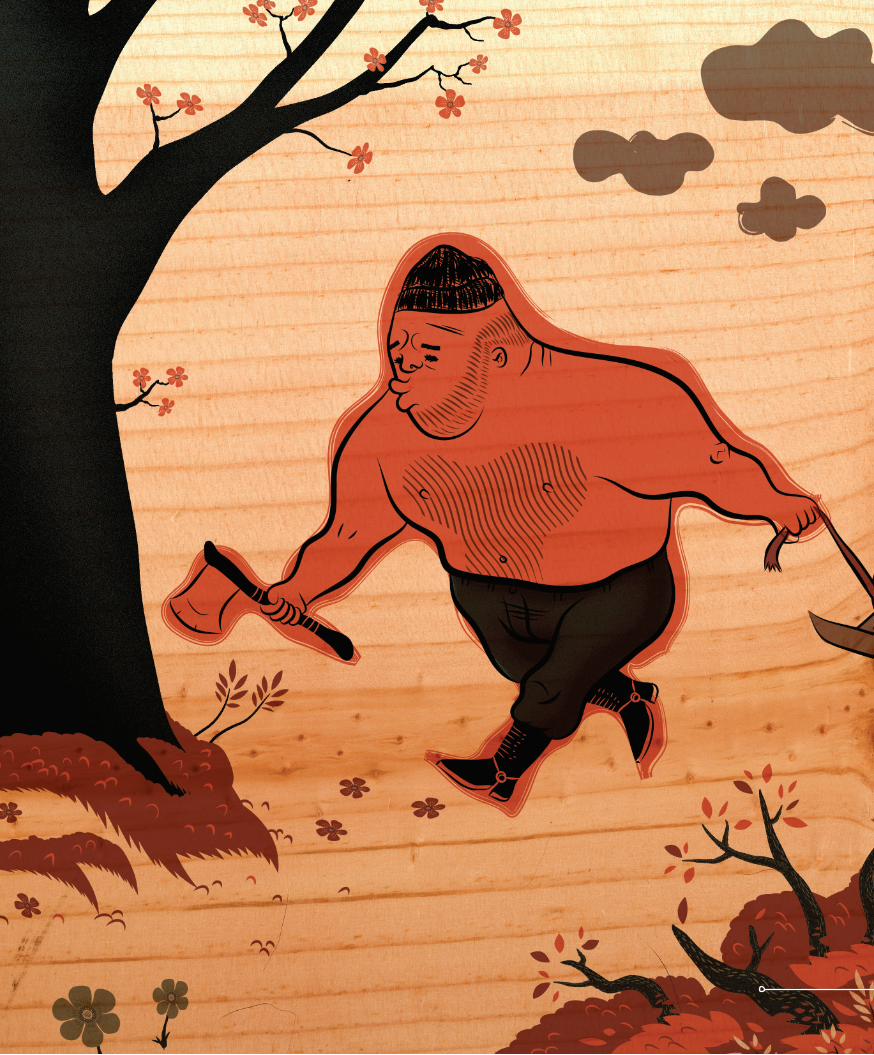
12 Area six, the lumberjack. Use large, sweeping strokes of Basic Brush to
form the outlines, and smaller choppy strokes for details such as his beard and ears. His boots are black fi lled shapes and the shoelaces and highlights are cut out with white strokes. Create his lips with black strokes and white fi lls so that they mask the line of his cheek.
8 Onto area two, the bushes. Using a dark stroke, pull several “random daggers” to
give the bush mass. Next, give the bush some highlights by using a light coloured Basic Brush to pull several U-shaped strokes. Finally, to make the long cat tail-like plants, make the stems with Clipped Dagger and give them petals with two quick strokes of Leaves.
60 | Christmas 2004
Dissolve has grain, tooth and character. Rendering with Dissolve instead of Normal gives work an airbrush-like texture and it is forgiving in terms of blending and shading. Its grit and almost clunky quality imbues work with confi dence, and its graphic nature is ideal for projects with a limited pallet. Best of all, it’s one of Photoshop’s least used features, so it’ll automatically give your work that unique look and feel.
DISSOLVE – WHAT IS IT GOOD FOR?
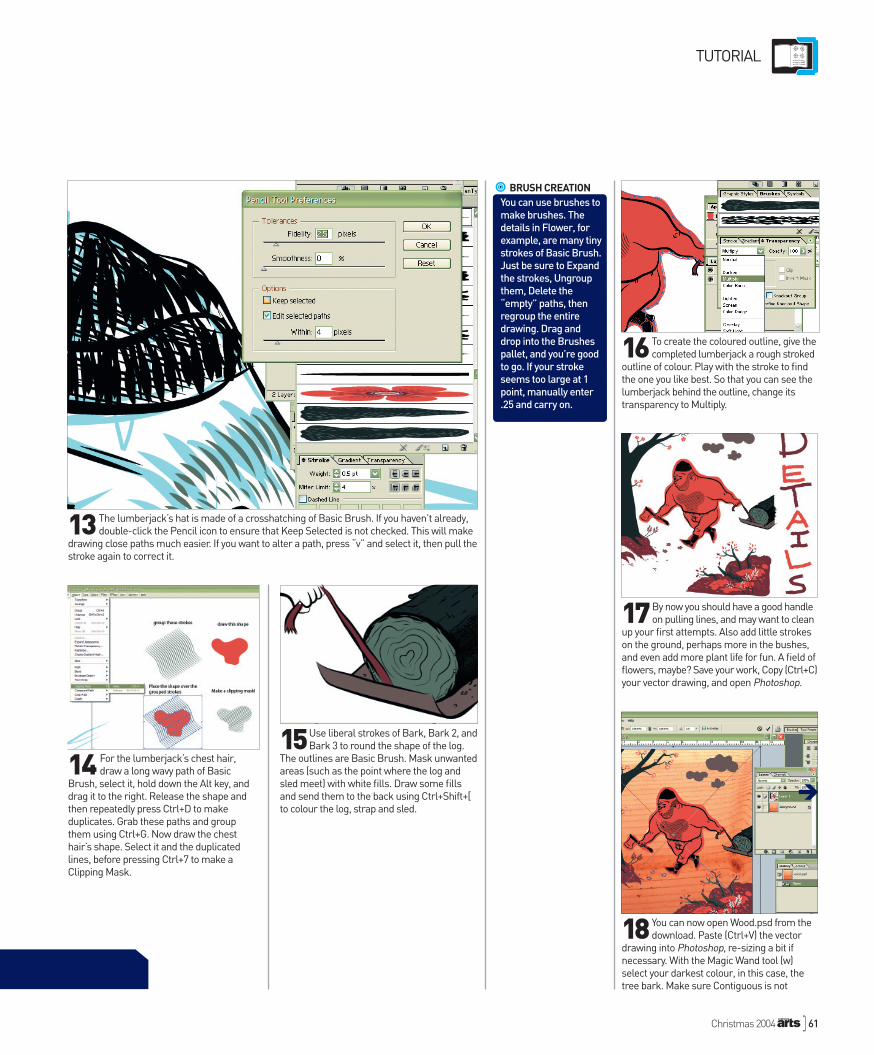
14 For the lumberjack’s chest hair, draw a long wavy path of Basic
Brush, select it, hold down the Alt key, and drag it to the right. Release the shape and then repeatedly press Ctrl+D to make duplicates. Grab these paths and group them using Ctrl+G. Now draw the chest hair’s shape. Select it and the duplicated lines, before pressing Ctrl+7 to make a Clipping Mask.
Christmas 2004 | 61
15 Use liberal strokes of Bark, Bark 2, and Bark 3 to round the shape of the log.
The outlines are Basic Brush. Mask unwanted areas (such as the point where the log and sled meet) with white fi lls. Draw some fi lls and send them to the back using Ctrl+Shift+[ to colour the log, strap and sled.
16 To create the coloured outline, give the completed lumberjack a rough stroked
outline of colour. Play with the stroke to fi nd the one you like best. So that you can see the lumberjack behind the outline, change its transparency to Multiply.
13 The lumberjack’s hat is made of a crosshatching of Basic Brush. If you haven’t already, double-click the Pencil icon to ensure that Keep Selected is not checked. This will make
drawing close paths much easier. If you want to alter a path, press “v” and select it, then pull the stroke again to correct it.
18 You can now open Wood.psd from the download. Paste (Ctrl+V) the vector
drawing into Photoshop, re-sizing a bit if necessary. With the Magic Wand tool (w) select your darkest colour, in this case, the tree bark. Make sure Contiguous is not
17 By now you should have a good handle on pulling lines, and may want to clean
up your fi rst attempts. Also add little strokes on the ground, perhaps more in the bushes, and even add more plant life for fun. A fi eld of fl owers, maybe? Save your work, Copy (Ctrl+C) your vector drawing, and open Photoshop.
TUTORIAL
You can use brushes to make brushes. The details in Flower, for example, are many tiny strokes of Basic Brush. Just be sure to Expand the strokes, Ungroup them, Delete the “empty” paths, then regroup the entire drawing. Drag and drop into the Brushes pallet, and you’re good to go. If your stroke seems too large at 1 point, manually enter .25 and carry on.
BRUSH CREATION

TUTORIALTUTORIAL
ILLUSTRATOR CS
20 Now choose a slightly darker colour and press B for Brush. Use a Soft Round
brush of 300 pixels and set its mode to Dissolve and Opacity at 30. Lightly render the shapes to imply depth and texture. Don’t overwork it; one or two passes should be plenty.
21 Deselect your shapes. Using a Hard Round brush of 100 pixels, Normal
mode and 100 per cent Opacity, give your man some pants. Once coloured, select the pants with the magic wand (w) and render them with the brush set to Dissolve (see step 19). Finally, select the artwork layer and change its Blending Mode to Multiply.
22 You now know how to create and use complex brushes and the toothy magic
that is Dissolve. And if you didn’t know by now, almost everything looks cooler on wood. From here, keep drawing with brushes until it’s natural for you. Remember, digital can be as quirky and organic as traditional!
19 Choose a slightly darker colour and press Shift+F5 to fi ll. Choose Fill>
Dissolve and set the Opacity to 30 per cent. Press OK and you’ll see that the darkest areas of your illo now have a nice toothy texture.
SUPER 8 ON DIGITALHow to digitise and add audio to your cine camera footage
NEXT ISSUE IN
Pencil tool lines (n) look good when pulled with a mouse, but I highly recommend using a stylus and tablet for best results.
If the stylus feels too slick when pulling lines, put paper over your tablet and draw on that. It will give you a tactile resistance that feels more natural, thus helping your lines!
Remember, if the line doesn’t feel right, select it (“v”+click) and trace the stroke until you have the kinks worked out!
THE PENCIL TOOL