Embed Size (px)
Citation preview
An Easy Method for Mixing Acrylic Paint for Skin Tones
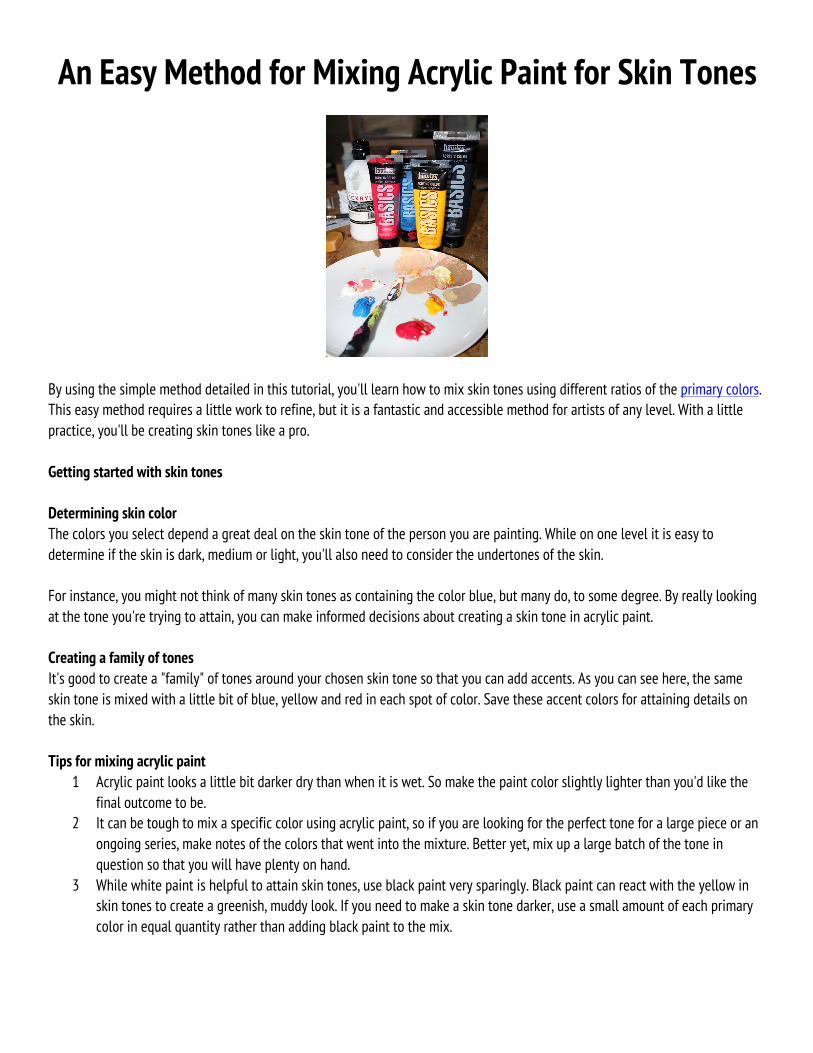
By using the simple method detailed in this tutorial, you'll learn how to mix skin tones using different ratios of the primary colors. This easy method requires a little work to refine, but it is a fantastic and accessible method for artists of any level. With a little practice, you'll be creating skin tones like a pro. Getting started with skin tones
Determining skin color The colors you select depend a great deal on the skin tone of the person you are painting. While on one level it is easy to determine if the skin is dark, medium or light, you'll also need to consider the undertones of the skin. For instance, you might not think of many skin tones as containing the color blue, but many do, to some degree. By really looking at the tone you're trying to attain, you can make informed decisions about creating a skin tone in acrylic paint. Creating a family of tones It's good to create a "family" of tones around your chosen skin tone so that you can add accents. As you can see here, the same skin tone is mixed with a little bit of blue, yellow and red in each spot of color. Save these accent colors for attaining details on the skin. Tips for mixing acrylic paint
1 Acrylic paint looks a little bit darker dry than when it is wet. So make the paint color slightly lighter than you'd like the final outcome to be.
2 It can be tough to mix a specific color using acrylic paint, so if you are looking for the perfect tone for a large piece or an ongoing series, make notes of the colors that went into the mixture. Better yet, mix up a large batch of the tone in question so that you will have plenty on hand.
3 While white paint is helpful to attain skin tones, use black paint very sparingly. Black paint can react with the yellow in skin tones to create a greenish, muddy look. If you need to make a skin tone darker, use a small amount of each primary color in equal quantity rather than adding black paint to the mix.
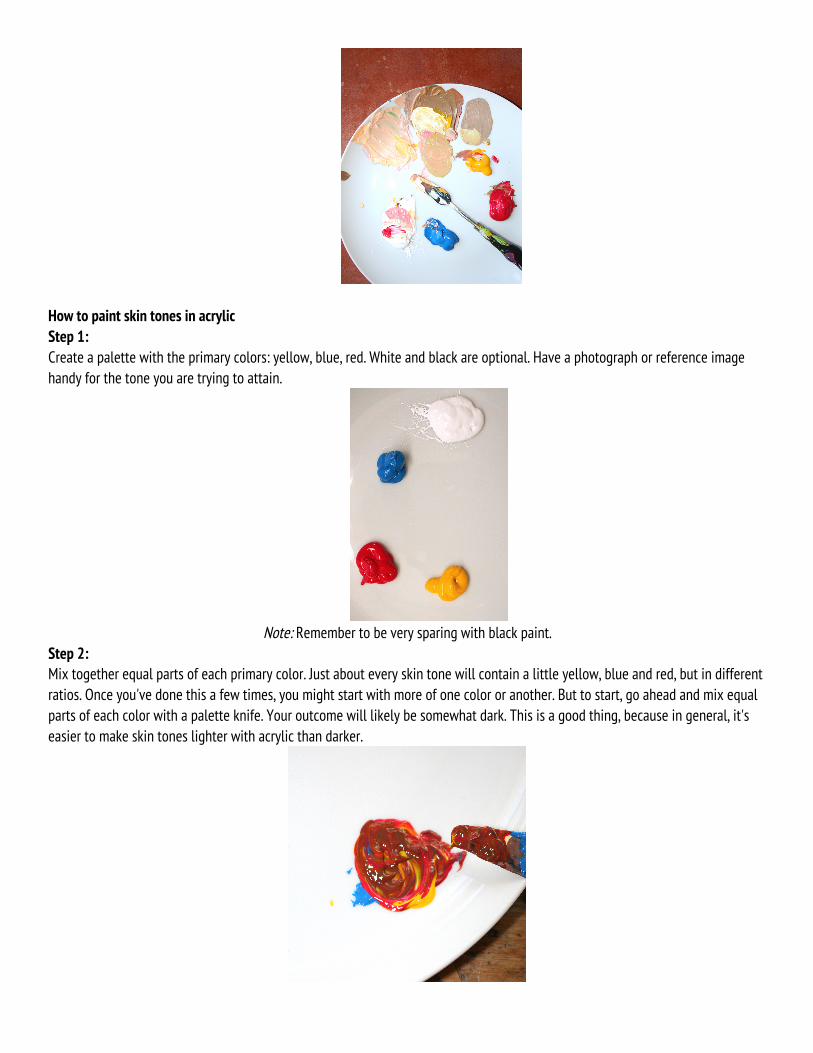
How to paint skin tones in acrylic Step 1: Create a palette with the primary colors: yellow, blue, red. White and black are optional. Have a photograph or reference image handy for the tone you are trying to attain.
Note: Remember to be very sparing with black paint.
Step 2: Mix together equal parts of each primary color. Just about every skin tone will contain a little yellow, blue and red, but in different ratios. Once you've done this a few times, you might start with more of one color or another. But to start, go ahead and mix equal parts of each color with a palette knife. Your outcome will likely be somewhat dark. This is a good thing, because in general, it's easier to make skin tones lighter with acrylic than darker.
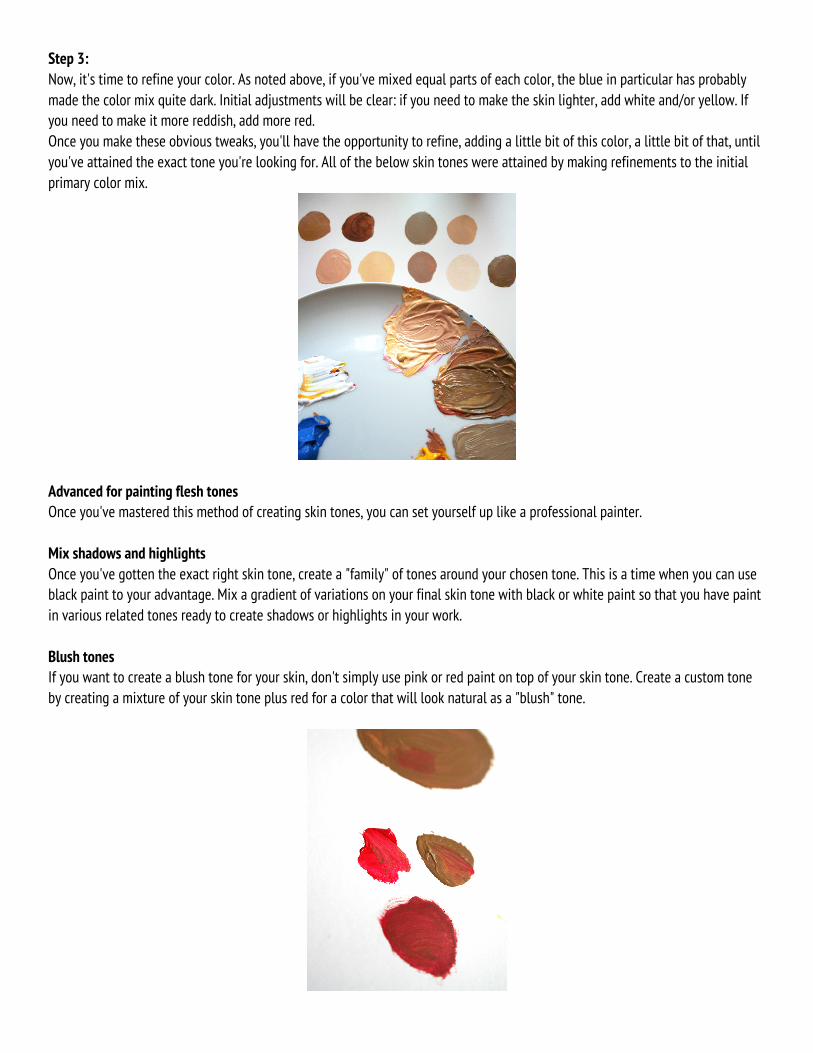
Step 3: Now, it's time to refine your color. As noted above, if you've mixed equal parts of each color, the blue in particular has probably made the color mix quite dark. Initial adjustments will be clear: if you need to make the skin lighter, add white and/or yellow. If you need to make it more reddish, add more red. Once you make these obvious tweaks, you'll have the opportunity to refine, adding a little bit of this color, a little bit of that, until you've attained the exact tone you're looking for. All of the below skin tones were attained by making refinements to the initial primary color mix.
Advanced for painting flesh tones Once you've mastered this method of creating skin tones, you can set yourself up like a professional painter. Mix shadows and highlights Once you've gotten the exact right skin tone, create a "family" of tones around your chosen tone. This is a time when you can use black paint to your advantage. Mix a gradient of variations on your final skin tone with black or white paint so that you have paint in various related tones ready to create shadows or highlights in your work. Blush tones If you want to create a blush tone for your skin, don't simply use pink or red paint on top of your skin tone. Create a custom tone by creating a mixture of your skin tone plus red for a color that will look natural as a "blush" tone.
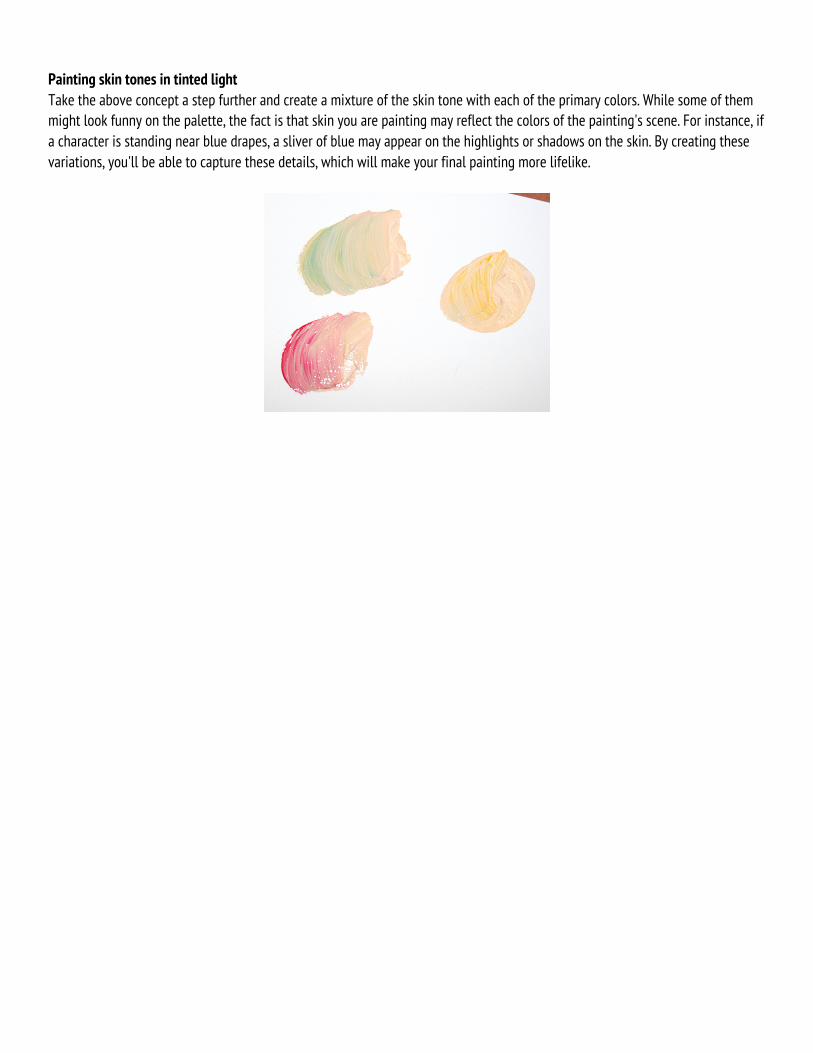
Painting skin tones in tinted light Take the above concept a step further and create a mixture of the skin tone with each of the primary colors. While some of them might look funny on the palette, the fact is that skin you are painting may reflect the colors of the painting's scene. For instance, if a character is standing near blue drapes, a sliver of blue may appear on the highlights or shadows on the skin. By creating these variations, you'll be able to capture these details, which will make your final painting more lifelike.
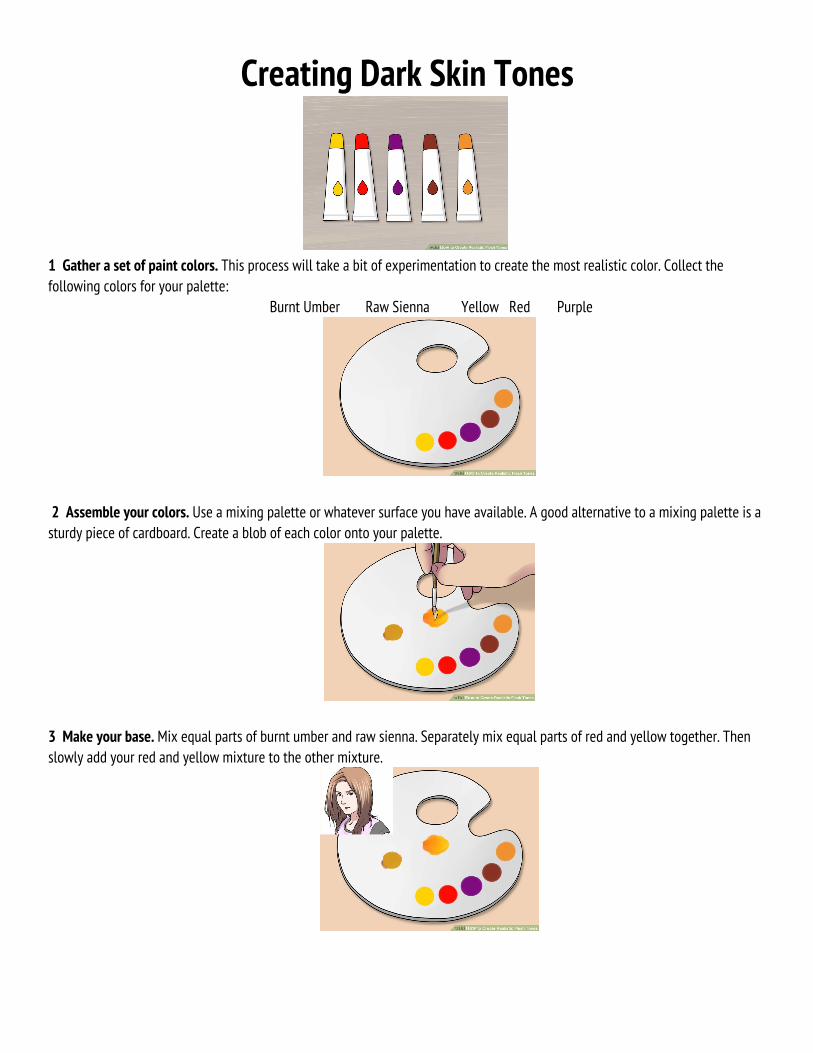
Creating Dark Skin Tones
1 Gather a set of paint colors. This process will take a bit of experimentation to create the most realistic color. Collect the following colors for your palette:
Burnt Umber Raw Sienna Yellow Red Purple
2 Assemble your colors. Use a mixing palette or whatever surface you have available. A good alternative to a mixing palette is a sturdy piece of cardboard. Create a blob of each color onto your palette.
3 Make your base. Mix equal parts of burnt umber and raw sienna. Separately mix equal parts of red and yellow together. Then slowly add your red and yellow mixture to the other mixture.
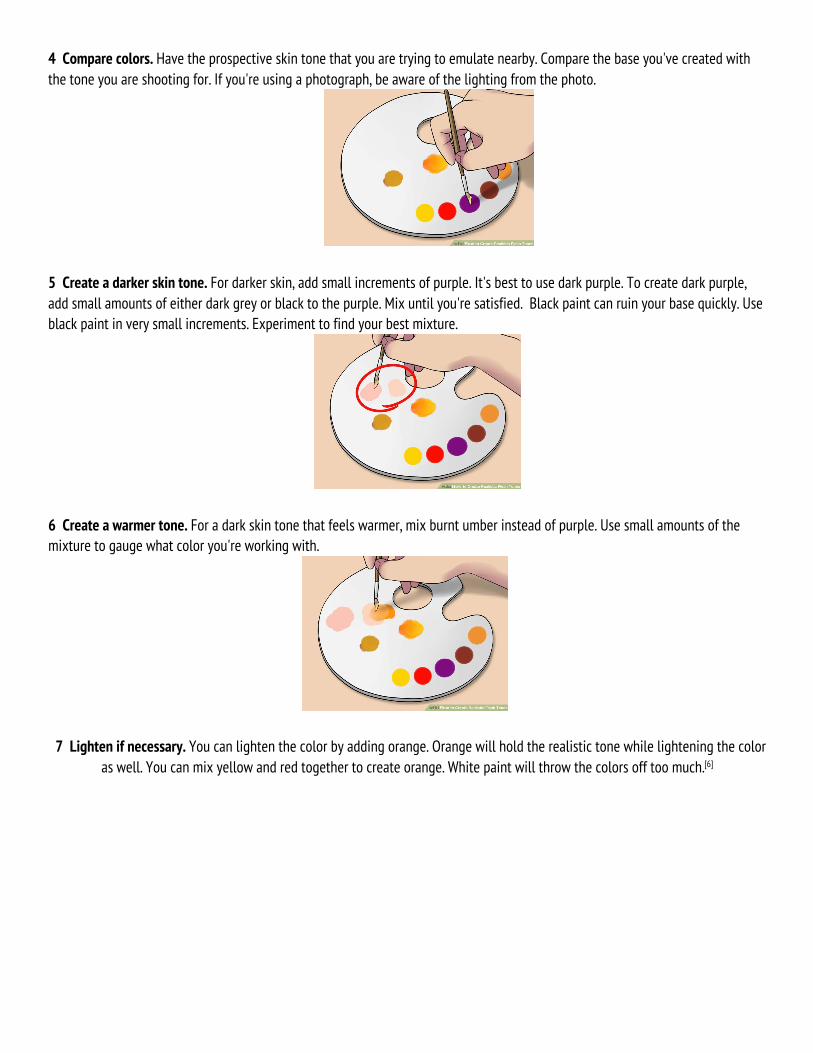
4 Compare colors. Have the prospective skin tone that you are trying to emulate nearby. Compare the base you've created with the tone you are shooting for. If you're using a photograph, be aware of the lighting from the photo.
5 Create a darker skin tone. For darker skin, add small increments of purple. It's best to use dark purple. To create dark purple, add small amounts of either dark grey or black to the purple. Mix until you're satisfied. Black paint can ruin your base quickly. Use black paint in very small increments. Experiment to find your best mixture.
6 Create a warmer tone. For a dark skin tone that feels warmer, mix burnt umber instead of purple. Use small amounts of the mixture to gauge what color you're working with.
7 Lighten if necessary. You can lighten the color by adding orange. Orange will hold the realistic tone while lightening the color as well. You can mix yellow and red together to create orange. White paint will throw the colors off too much.[6]