Embed Size (px)
Citation preview
1
The LEGO Foundation
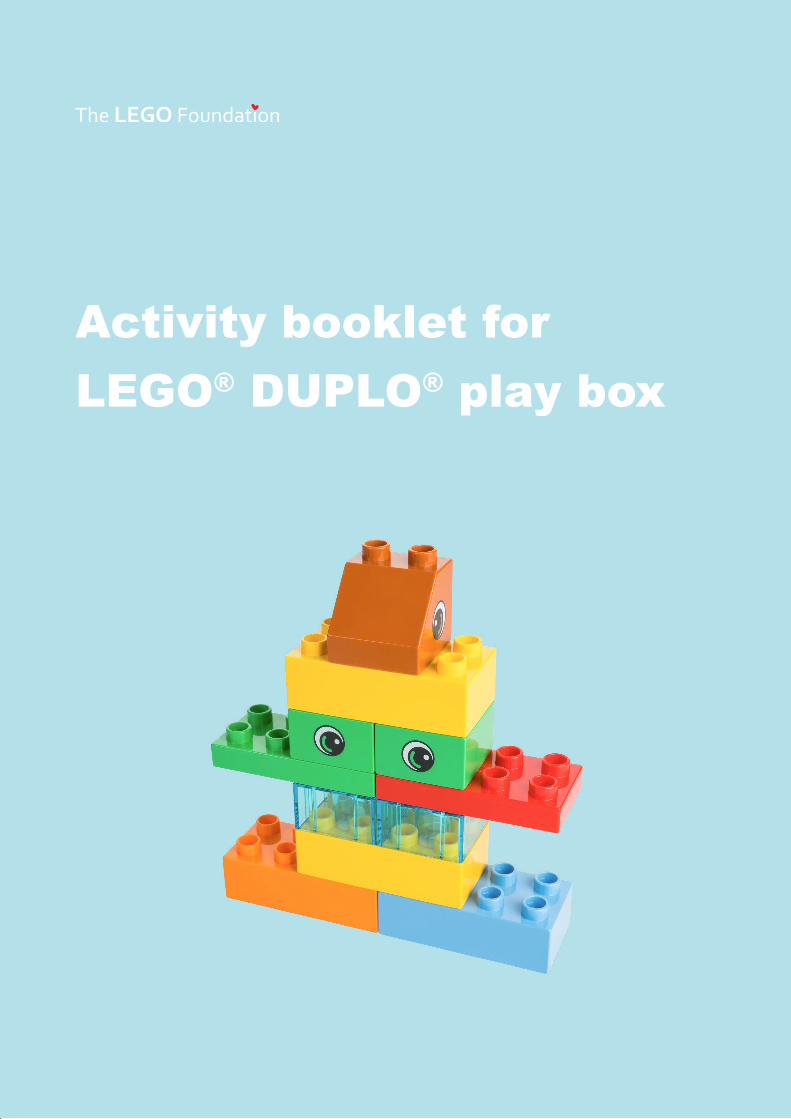
Activity booklet for LEGO® DUPLO® play box
32
Table of ContentsTable of Contents
Table of Contents
Introduction • 4Learning through Play • 4About the LEGO Foundation • 5Developing the whole child • 6The role of the adult • 7Tips for conducting the activities • 8Getting started • 12Discover DUPLO • 13What is it? • 14Copy Cat • 15Nifty Numbers • 16Mysterious Bag • 17
Introduction • 4
Getting started • 12
Let’s move • 18
Brain boosters • 24
Let’s move • 18Bricksxercise • 19Double Trouble • 20Run, Brick, Run • 21Balancing Act • 22Twister • 23Brain boosters • 24Kim’s Game • 25Colour Sorting • 26Listen and Build • 27Tricky Perspective • 28Brickstistics • 29Positioning • 30Measuring Fun • 31
Imagine and create • 32Build a Snake • 33Animals with Superpowers • 34Anna the Elephant • 35Build a Scene • 36Home on Mars • 37Story-telling • 38Creationary • 39Time to reflect • 40Emotions • 41How are you? • 42Build a Friend • 43Build a Memory • 44Picture Frame • 45
Working together • 46Blind Build • 47Wall Build • 48Communicator • 49Build a Tower • 50Team Model • 51Bridge Build • 52Tips and tricks • 53Creating your own activities • 54Activity template • 55
Imagine and create • 32
Time to reflect • 40
Working together • 46
Tips and tricks • 53
LEGO and DUPLO are trademarks of the LEGO Group. ©2016 The LEGO Group We would like to thank Care for Education for their contribution to this booklet.

4 5
Introduction Introduction
Learning through Play
About the LEGO FoundationThe LEGO Foundation is a Danish corporate foundation, which aims to make children’s lives better – and communities stronger – by building a future where learning through play empowers children to become creative, engaged, life-long learners. We do this by making sure the fundamental value of play is understood, embraced and acted upon. Our focus is on children aged 0-12, with a special emphasis on early childhood where children develop most rapidly, both physically and mentally.
Play is our brain’s favourite way to learn! Research shows that play is one way children develop some of the most important skills for being lifelong learners. Play enables us to explore, practice and try out ways of tackling similar challenges in the real world. Skills like problem-solving, creativity, empathy, communication and teamwork all have their foundations in play.When children learn through play, they are personally motivated by the satisfaction of being embedded in the activity, at their level of challenge and interest. This means children are joyful, actively engaged with their bodies and minds, taking risks and experimenting, to come up with ideas and questions, creating things and solving problems. Learning through play is about “how” you learn, it need not be constrained by “what” you learn or “where” you learn.

6 7
Introduction
Developing the whole child
Play helps children develop a broad set of skills that will enable them to become lifelong learners, such skills can be grouped into five categories as shown in the picture. The activities in this booklet have been designed around these skills. Each activity usually involves a mix of skills, even though it has one main development area.
Introduction
The role of the adult
Children learn from your example. What you do inspires the language they use, how they try to solve problems and how they work together with others.
Here are some good ways to support the children during play-based learning activities:
• Empower the children to try on their own – let them be in the driver seat, and guide them if they get frustrated or ask for help.
• Encourage them as they try, give useful hints and ideas, and use an encouraging tone.
• Sit next to the children, notice what they do, and use this as a cue when you help them.
• Be curious and ask open questions like “what are you making?” and “how did you solve it?”
• Encourage the children to create and share stories.• Show equal interest in all the children, by moving around.• Demonstrate that in many activities there isn’t only one right answer
– there are in fact many different ways of doing things. The different builds do not have to be lifelike, either – the most important thing is the explanation of the models.
• Give the children choices and make sure they play an active role in completing each challenge.
• Allow the children to themselves direct the activity, for example by changing something in the activity.
• Let the children be “in the flow” in the activity, and try to avoid interrupting them if they are deep in concentration.
• Don’t let the children comment on each other’s models in a negative way.

8 9
Introduction
Tips for conducting activities
To do before the activity• Read through the activity description to make sure you understand
the steps involved and the purpose of the activity.• Make sure the activity is appropriate for the number of children you
have, and for their age group. Modify the activity if needed.• Think about how to scale the activity up or down in order to challenge
the children at the right level.• Check that you have the materials and bricks needed to run the
activity.• If needed, arrange the room or the space to fit the activity.
Structure of a play-based activity using LEGO® DUPLO® bricks1. Introduction to the topic – Start by introducing the topic of the activity
and explaining the instructions.2. Building time – Time for the children to build. If the activity is individual,
this can be done quietly.3. Sharing and reflection – Once the building activity has been
completed, it is important that each child is able to share his/her model with at least one other child, or the whole group. Here the adult facilitation role is very important, as is asking open-ended questions.
Introduction
LEGO® DUPLO® vocabulary
2*2 brick2*4 brick Base plates
Stud
Other types of bricks
DUPLO figures
Basic bricks

30-405-10 10-20 20-30
10 11
Introducing the activities Icons used in the booklet
The icons below indicate if the children will work on their own, in pairs or in different sized groups during the activity.
This booklet includes activities that best suited for children between the ages of 2 and 7. Some activities are better for children aged 2–4, and others for children aged 5–7.
The activities in this booklet are structured into six different areas to help you find a suitable activity:
Getting startedIntroductory activities to introduce games that use LEGO® DUPLO® bricks.
Let’s moveActivities that encourage the children to move their bodies.
Brain boostersPracticing problem-solving and concentration through fun activities.
Imagine and createSparking children’s imagination and creativity.
Time to reflectReflection, thinking and exploring emotions.
Working togetherLearning to collaborate in pairs and groups.
Activity with more than 6 children working together.
The following icons indicate the estimated duration of each activity. This varies depending on the group, so please read the activity description before starting, to see what works for each particular group.
IntroductionIntroduction
Activity done individually. Activity done in pairs.
Activity done in groups of 3-6 children.
12
The LEGO Foundation
13
Getting started
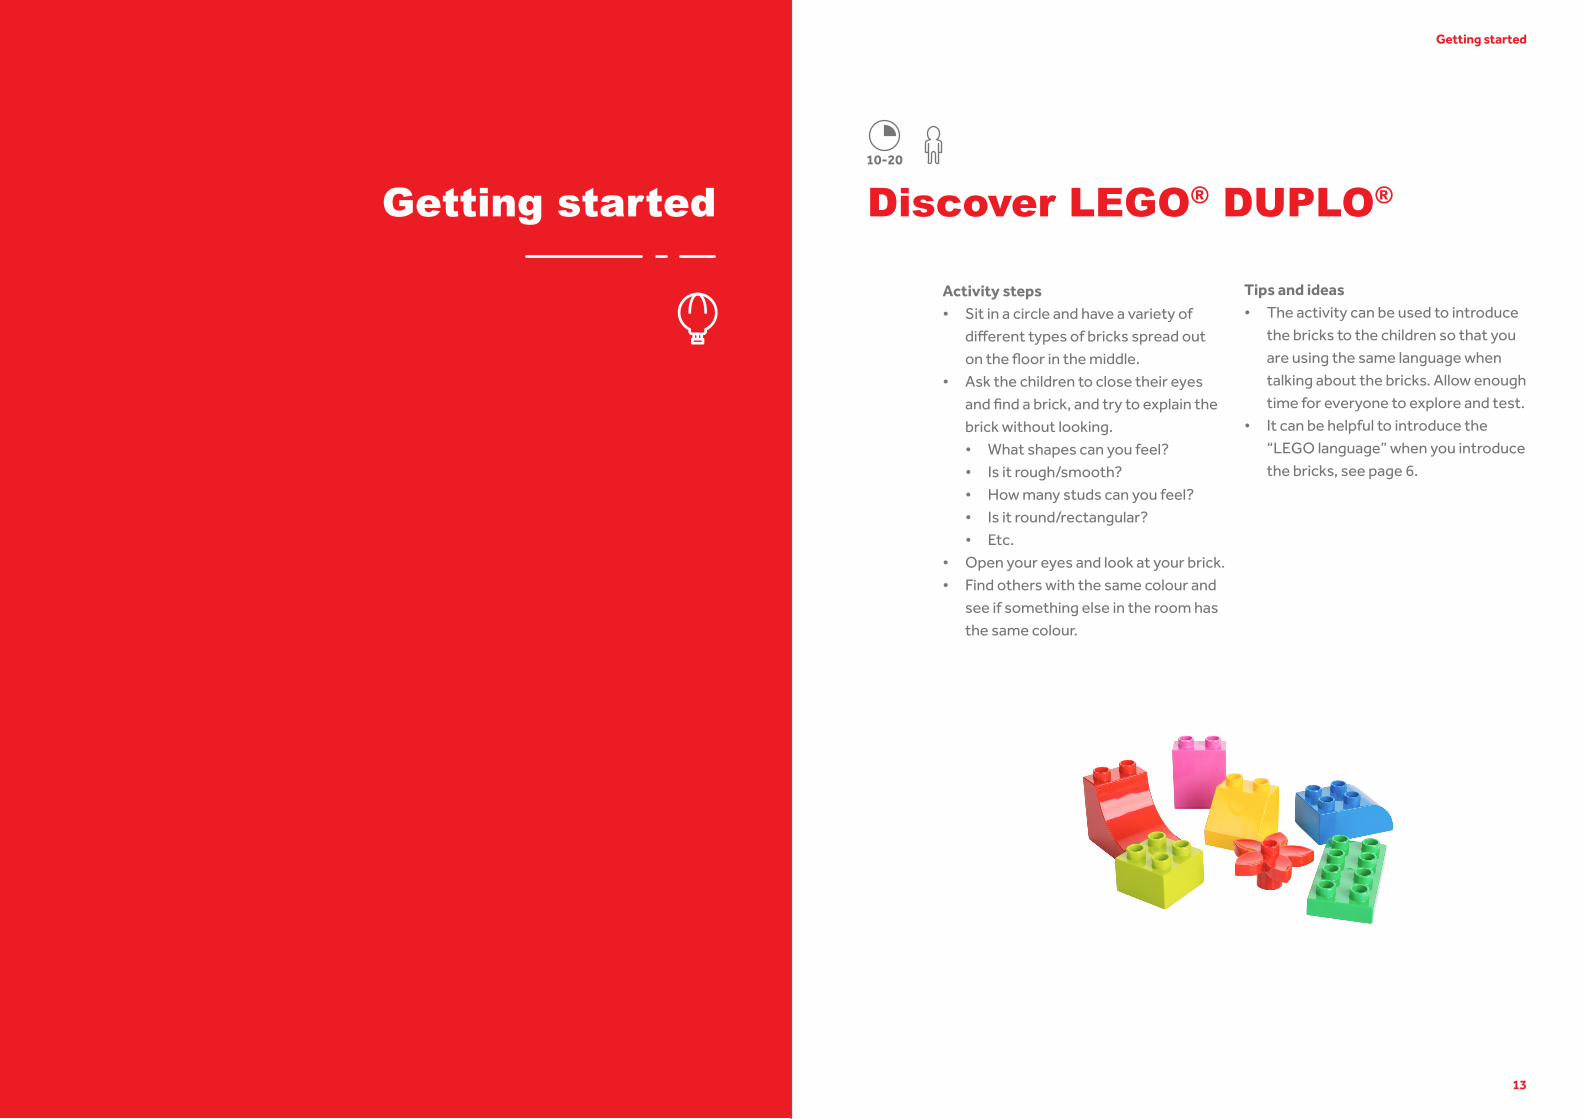
Discover LEGO® DUPLO®
Activity steps• Sit in a circle and have a variety of
different types of bricks spread out on the floor in the middle.
• Ask the children to close their eyes and find a brick, and try to explain the brick without looking.• What shapes can you feel?• Is it rough/smooth?• How many studs can you feel?• Is it round/rectangular?• Etc.
• Open your eyes and look at your brick.• Find others with the same colour and
see if something else in the room has the same colour.
Tips and ideas• The activity can be used to introduce
the bricks to the children so that you are using the same language when talking about the bricks. Allow enough time for everyone to explore and test.
• It can be helpful to introduce the “LEGO language” when you introduce the bricks, see page 6.
10-20
Getting started

14 15
Getting started
What is it?
Activity steps• Ask the children to select any 9 bricks
from the pile of bricks.• Each child builds a model using only
those bricks.• The children present their model to
each other, in pairs.• Ask a few children to present to the
whole group. You can support their presentation by asking open-ended questions such as:• Does it have a name?• What can it do?
Tips and ideas• You can guide the children on what
to build by selecting a topic for their builds, such as a house, school, an animal, a vehicle, a monster, etc.
• Make sure that everyone gets to share his or her model with at least one other child.
Getting started
Copy Cat
Activity steps• Build a simple model using four to six
bricks.• Present the model to the children.• You then ask the children to find the
same type of bricks, and to copy the model.
• Ask the children to compare the model and ask:• Are they the same?• If not, what is different? Can you
change it?
Tips and ideas• Make sure there are enough of the
same types of bricks for the children to build the same model.
• After the first round, let one of the children build a model and let the other children copy it.
5-1010-20

16 17
Nifty Numbers
Activity steps• Sit together around a pile of bricks.• Ask the children to:
• Find a 2*4 brick in their favourite colour.
• Hold the brick up – can they see anyone in the group with a brick of the same colour?
• Run to their “colour friends” and stand together.
• Find out which is the biggest colour group.
• Estimate how many bricks those in the colour group think they have.
• Count them, stack them into a tower.
• Compare the towers from each group by putting the towers next to each other.
• Identify which colour tower is the most/least/the same/equal, etc.
• Arrange the towers from smallest to biggest/tallest to shortest, etc.
• Discuss – how many more/less, etc.
Tips and ideas• The instructions are suggestions
for what you can do to introduce the children to colour and sizes. Feel free to add or change the steps.
10-20
Mysterious Bag
Activity steps• Fill a non-transparent bag with about
10 bricks from the play box, such as an animal, a tree, a fence, a window, a brick, a building plate, etc.
• Sit with a group of no more than 10 children, and pass the bag around the group.
• Each child feels in the bag and selects an object (without looking).
• That child then describes what s/he is feeling and tries to guess what it is.
• The child then removes the object from the bag and discovers how well his/her fingers could “see”. Everyone in the group has a turn.
Tips and ideas• If needed, support the child by asking
questions, or let the other children ask questions.
10-20
Getting startedGetting started

18
The LEGO Foundation
19
Bricksxercise
Activity steps• Children sit around a pile of bricks.• Ask the children to pick up any two
2*4 bricks, stand up, and join the two bricks together.
• Challenge children to:• Throw the bricks up in the air and
catch them again.• What do you feel when you catch
the bricks?• Can you do it 5 times without
dropping them?• Try throwing them up higher!• Throw the bricks from their left
hand to their right hand and back.• See how many times you can do it.• Balance the bricks on their head/
right shoulder/left shoulder/knee/foot … etc.
• Hold the bricks under their chin/between your knees/feet/elbows … etc.
• Work with a partner to throw one set of bricks to each other.
• When you can do that well, add the other set of bricks
Tips and ideas• Adapt the activity based on the
group – start easy and gradually make it more difficult when you see the children are feeling comfortable.
• If there isn’t enough space indoors for the children to move around, you can do this activity outdoors.
10-20
Let’s move
Let’s move

20 21
Double Trouble
Activity steps• Ask the children to pair up and have a
pile of basic bricks close to them.• In this activity, the children can only
use one hand each, and together using one hand each they are to place the bricks (short end to short end) on top of each other, thus building a tower.
• Ask the children to try to use both their left and right hand.
Tips and ideas• With younger children, you can ask
them to balance the bricks on the long side or on top of each other instead.
• The activity can be done individually as well as in pairs.
Let’s move
10-20
Let’s move
Run, Brick, Run
Activity steps• Arrange the room or area so the
children start on one side and have to run to the other (if needed, mark with a rope/string/tape).
• Divide the children into groups of 4–6. Each group should build the tallest tower possible by placing one brick at a time on the other side of the room.
• Allow the groups some time to discuss how they are going to carry out the task, and to plan how they should build the tallest tower.
• One child from each group starts and runs to the other side of the room, places his/her brick and runs back to send off the next group member. The next child runs to the build, and places his/her brick on top of the other brick.
• Continue until the time is finished – 5-10 minutes, for example.
Tips and ideas• The activity can become more
difficult if you say that each brick can only cover (for example) 2 studs.
• You can also have the rule that if the tower falls over the group has to start over again, or (for example) remove 4 bricks from their build.
• You could also ask them to crawl, jump, walk backwards, etc. instead of running.
10-20

22 23
Balancing Act
Activity steps• Ask the children to stand up in pairs
and choose one brick together.• Give instructions to the children:
• Try to balance the brick between your hands and walk around in a circle.
• Now try to balance it between your heads.
• Continue the game and try different ways of balancing the brick, using feet, elbows, knees, etc.
Tips and ideas• To make the activity more difficult,
the pairs can try to balance more than one brick at the same time – between their heads and hands at the same time, for example.
• Try to adapt
10-20
Twister
Activity steps• Each child picks up one brick of each
colour – blue, green, red and yellow – and holds it in their hands. They then go to an area large enough to enable each child to make bigger movements – for example, outdoors on grass, or in a play area.
• The children drop their bricks close to them, and make sure that the bricks are spread out, and not on top of each other or too far away.
• Give instructions to the children on how they need to move the different parts of their bodies:• Left foot on green brick• Right foot on red brick• Right hand on yellow brick• Left hand on blue brick
• They can then start again with the left foot, and/or change the colour.
Tips and ideas• You could carry out the activity as a
competition. For example, when a child falls over or cannot reach a brick they are out of the game.
• You can also make the game more challenging by adding specific parts of the body to the game – nose on green, left elbow on blue, right knee on red, etc.
10-20
Let’s move Let’s move

24
The LEGO Foundation
25
Kim’s Game
Activity steps• Sit around a pile of bricks and have a
piece of fabric, towel or blanket.• Secretly arrange a few bricks (a
house, an animal, a person, a brick, a fence, etc.) on a base plate. The number of bricks depends on the level of the children.
• You then shows this arrangement to the children for a few seconds, before covering it up.
• The children attempt to find the same bricks they saw on the base plate from within the pile.
• At a higher level, the children could attempt to build the bricks in the same position that they were shown.
Tips and ideas• You can also let the children do this
activity in pairs, one child arrange the model and the other attempt to copy.
• Make sure the children are able to find the bricks you use in your build within their pile.
10-20
Brain boostersBrain boosters
Brain boosters

26 27
Brain boosters
Colour Sorting
Activity steps• Divide the children into groups of
4–6 children and give each group a standard colour (such as blue, green, red and yellow). Make sure you pick colours that have plenty of bricks in the pile.
• Spread the big pile of bricks on the floor.
• Each group has to find the bricks in their particular colour, and to place these in their own pile.
• When the group has found all the bricks in their colour, let the children first guess how many bricks of their colour they have and afterwards ask them to count the bricks in their pile.
Tips and ideas• As an additional step, you can let the
groups build a model of their choice using only bricks of the group’s colour. Let the groups present what they have built to the whole group.
• You can have a theme for the build in the end of the activity – e.g. city, transport or food.
20-30
Listen and Build
Activity steps• Ask the children to each find a blue
2*4 brick, a red 2*4 brick and a green 2*4 brick.
• Then secretly build a model with those 3 bricks and keep them covered so that the children cannot see what you have built.
• Describe to the children how you built the model. The children should then try to build it in the same way.
• The children have to listen carefully, and not ask any questions.
• Show your model and let the children compare it to theirs – discuss and share findings. Ask the children:• Was it difficult? Why?• What was hard in listening and
then building?
Tips and ideas• Once the children are familiar with the
activity, they can do it in pairs, with one child describing the model and the other building.
Brain boosters
5-10

28 29
Tricky Perspective
Activity steps• Build a model where you cannot see
how the whole bricks are placed, as in the picture below.
• Make sure each child has the same types of bricks as you used to make the model.
• Show the model to the group only from one angle. This means the children have to figure out how the bricks are placed even though they cannot see it from all angles.
• After finishing building, let the children look at the model from all angles and then ask them:• Why was it hard to build this
model?• How did you figure out how to build
the model?
Tips and ideas• Since this activity is a bit difficult,
start very simple with only a few bricks, and then make it more difficult over time.
• You can also let the children to do this activity in pairs or small groups, when one child builds the model and the rest try to copy.
5-10
Brickstistics
Activity steps• Ask the children one question and
give each possible answer a colour. For example How did you get here today?• Green = walked• Blue = bike• Yellow = bus• Red = other
• Each child answers the question by finding the right colour of the brick.
• The bricks are stacked together by colour.
• Count the number of bricks in each colour/tower and talk about which bar is the highest/shortest/biggest/smallest.
Tips and ideas• You can also translate the brick bar
graph into a bar graph on paper as an introduction to statistics.
20-30
Brain boostersBrain boosters

30 31
Positioning
Activity steps• Ask the children find one brick with
each of five different colours – red, blue, yellow, orange and green. You can also choose other colours, depending on availability.
• Tell the children to:• Use their right hand to place the
red brick on the top left-hand corner of their desk.
• Put their right hands behind their backs, use their left hands to pick up the yellow brick and place it in the top left-hand corner of their desk.
• Put the blue brick in the middle of their desk.
• Use both their hands at the same time to pick up the orange and the green bricks, to click the green brick on top of the orange brick, and to place them in the bottom left-hand corner of their desk.
Tips and ideas• This is a simple activity for
introducing positioning. You can use different instructions for this activity.
• The activity can also be used when learning a new language, to practice colours and positioning in the new language.
5-10
Measuring Fun
Activity steps• Divide the children into groups of
3–6 and introduce them to how they can measure different objects by measuring height by stacking the bricks vertically or placing them horizontally to measure length. The children can measure the surfaces of an object by testing how many bricks are needed to fill the surface.
• Ask them to go around in the room and measure different objects by using standard bricks – either 2*2 or 2*4.
Tips and ideas• Children can build their own ruler by
combining the bricks and use this to measure the size of different bigger objects in the room, or outside.
• You can also use the studs as a unit to count with.
• During this activity, you can talk about formal measuring (metre, centimetre, etc.) but also talk about informal measuring (an arm’s length, the height of a child, etc.).
20-30
Brain boostersBrain boosters

32
The LEGO Foundation
33
Build a Snake
Activity steps• Children sit around a pile of bricks.• Ask children to:
• Close your eyes and imagine seeing a snake.
• How does the snake move?• What shapes does it make as it
moves?• Ask the children to build a snake using
any of the bricks.• Allow each (or a few) member of the
group to talk a little bit about their snake – what kind of snake is it, where does it live, does it have a special name …?• Think of “s” words that describe
the way the snake moves (slink, slither, slide …).
• Try moving your body like a snake.• See if you can make one long
snake by all linking arms or holding on to each other’s shoulders, etc. and move around the room like one long snake.
Tips and ideas• Optional addition to the activity – play
some “snaky” music and children could interpret the music as they move their body like a snake.
• You can pick a different animal than a snake, but make sure it is easy to build for the children.
20-30
Imagine and create Imagine and create
Imagine and create

34 35
Animals with Superpowers
Activity steps• Ask the children to think about
different superpowers, and let them name a few for the full group.
• Then ask the children to think about an animal they like, and build that animal and let it have a superpower.
• In pairs, the children introduce their animal and what superpower it has. Ask them to be curious about each other’s animals by asking questions, such as:• What is the name of your animal?• What superpower does it have?
What can it do?• How can you see that your animal
has a superpower?
Tips and ideas• The purpose of the activity is to
spark the children’s imaginations, so it is a good idea to think about other variations of this activity.
• You can also allow the children to use additional materials in their build, such as paper, fabric, etc.
Imagine and create
10-20
Imagine and create
Anna the Elephant
Activity steps• Let the children sit around the pile of
bricks.• Introduce the children to Anna the
elephant – have a toy elephant or build one with bricks. Explain to the children that Anna doesn’t have a home, and that we have to help build one for her. But they also need to remember that Anna often escapes from her caretaker, so they have to build a home she cannot escape from.
• Ask the children to build a house for Anna – either individually or in small groups of 2–3.
• After the children have started and built a part of the home, now say that Anna’s caretaker needs to be able to feed her through an opening.
• Next step: ask the children to make sure that Anna has something fun to play with in her home.
• Continue adding more needed features for the home.
Tips and ideas• Do not tell the children all the
instructions at once, because it is important that the children learn to process new instructions. Take one step at a time, and it is okay that the children have to remove and rebuild parts of their build.
• Make sure that you have enough bricks so each child can build a suitable home for Anna the elephant.
20-30

36 37
Build a Scene
Activity steps• Read a story to the children.• Divide the children into small groups
of 4–6.• Ask each group to pick a scene from
the story they just heard that they want to build. Give the groups a minimum of 10 minutes to build.
• After finishing building, the groups have to decide how to present their model through role play, and each member of the group needs to have a role.
• Each group gets a chance to present their built. Remember to ask each group some open-ended questions, such as:• Why did you choose to build that
scene?• (Point at a part of the build) What
is that? What does it do?• What was it like to work in the
group?• If you had more time or more
bricks, what would you have added to your build?
Tips and ideas• Instead of reading a story, you can
ask the groups to think about a story they know.
• You can also give the groups different parts of the story to choose their scene from, in order to get different parts of the story built.
30-40
Home on Mars
Activity steps• Let the children close their eyes, and
then read them a story about how you are all travelling from Earth to Mars. For example, “Please take your seats and fasten your seatbelts, we are now taking off to travel to Mars. We have been selected to be the first humans to live there for one year. *Bump bump bump* We have now landed on Mars and the first we need to do is to try to build homes”.
• Afterwards, ask the children to build what they think a home on Mars would look like.
• Let the children present their Mars homes to each other.
Tips and ideas• The purpose of this activity to let
the children think outside the box, and use their imaginations, so please consider other similar activities to help achieve this.
• If the children are not familiar with what Mars is, say that you are going to a place far away that no-one has ever been to.
• Open-ended questions to ask the children about their build:• What is that? (point to an
interesting selection of bricks)• What is special about your home
on Mars?• How does it differ from a home on
Earth?• Etc.
20-30
Imagine and create Imagine and create

38 39
Story-telling
Activity steps• In small groups of 3–4, ask the
children to build a simple model using a maximum of 20 bricks.
• The groups should then come up with a story about the model.
• Each group tells their story to the rest of the group.
• Each person in the group must take part in the presentation.
• Ask the groups:• Did you all help build the model?• Did everyone in the group have a
turn to tell a part of the story?
Tips and ideas• To modify this activity, you can ask
the children to present their model through role play.
• With older children, you can bridge this activity into a writing task where the children have to write the story on a piece of paper, either in groups or individually.
20-30
Creationary
Activity steps• Divide the children into smaller
groups, and let each group have a pile of bricks.
• One member of each group will get a word from the adult without the rest of the group being able to hear it. Examples of words could be “sun”, “water”, “tree”, “car”, “ball” etc.
• The child has to try to explain the word by building a model using the bricks – and the child is not allowed to say anything other than “yes” if the children in the group guess correctly.
• When the group has guessed right, a new member of the group gets a new word from the adult.
Tips and ideas• Make sure you have enough time so
everyone gets to try to build.• Instead of asking the children to come
to you for a new word to build, you can create flashcards.
• If you are doing the activity with older children, you can have more complicated words or sentences, such as “man in the moon”, “volcano” etc.
20-30
Imagine and create Imagine and create

40
The LEGO Foundation
41
Emotions
Activity steps• Sit in a circle with different coloured
bricks in the middle.• Ask the children to mention emotions
they know.• Get the children to think which brick
would be the best match for each emotion e.g. a red brick with “angry” or a flower with “happy”.
Tips and ideas• When you have associated emotions
with different bricks, you can illustrate different emotions by (for example) doing a “happy face” and asking the children to find the brick they think represents that emotion.
• If you are working with children who have experienced trauma, you might need to be sensitive to what emotions might arise within the group.
10-20
Time to reflectTime to reflect
Time to reflect

42 43
Time to reflect
How are you?
Activity steps• Put the bricks in a pile on the floor.• Ask the children to find one brick to
illustrate how they feel.• Ask if anyone in the group wants to
share with the group why they chose that brick.
Tips and ideas• This might be a sensitive activity for
some children, so do not force anyone to share, and listen carefully to what the children are saying.
• Tell the other children not to comment on each other’s bricks, or on what they say.
5-10
Time to reflect
Build a Friend
Activity steps• Let the children sit around a pile of
bricks.• Discuss friends/friendships, qualities
of a good friend, etc.• Ask the children individually to build a
friend, using any bricks.• In pairs, let the children introduce
their friends to each others’.
Tips and ideas• You can also let the children use other
type of materials to dress up their friends – paper, balloons, plastic, leaves, flowers, etc.
• As additional parts of activity, ask the children to form groups of 3–4 and make up a story about their friends, write a poem about friendship or find a poem to read about friendship, make up a song and a dance to use with their models. Each small group has a turn to perform something for the rest of the group.
20-30

44 45
Build a Memory
Activity steps• Ask the children to close their eyes
and think about a happy moment with their family or friends.
• Then ask the children to build this moment.
• Let the children explain their build.
Tips and ideas• You can change what they are to
build and think about, but be cautious about selecting sad moments since you don’t know what it might bring up.
• If the children would find it difficult to think about things from memory, try to narrow it down to something they did over the weekend, during the lunch break, etc.
10-20
Picture Frame
Activity steps• Each child is to build a frame and place
a drawing or a picture of themselves inside the frame.
• Let the children decorate the frame with bricks that represent who they are or how they are feeling.
• If the children want to, ask them to show their frame to a small group or the full group, and ask them to explain how they chose to decorate their frame.
Tips and ideas• You can ask the children to re-build
the frame from time to time.• You can also have a reflection
discussion on how they see themselves and talk about the fact that everyone has a different self-image.
20-30
Time to reflectTime to reflect

46
The LEGO Foundation
47
Blind Build
Activity steps• Let the children sit around a pile of
bricks.• Ask the children to pair up and select
two or three same-sized bricks (colour does not matter).
• One of the pair is blindfolded or closes his/her eyes, while the other builds something with those two or three bricks.
• The builder then puts his/her model into the partner’s hands, who then feels the shape.
• The partner then attempts to build the same model (colour will not matter), while keeping their eyes closed. As a variation, you could allow them to have their eyes open at this stage.
• Swap over so that both children have a turn to build with the blindfold on.
• Afterwards you can ask the children to reflect upon the activity by asking:• What was the most difficult in
explaining or listening?• How did you deal with the
challenge?
Tips and ideas• To vary this activity, you could allow
the partner to give clues to the child who is blindfolded while building.
• As the children become more confident, try building with more bricks.
10-20
Working together Working together
Working together

48 49
Wall Build
Activity steps• Let the children sit around a pile of
bricks.• Introduce the group to the activity
by saying: Let’s see if we can build a strong wall to protect the flowers from the rabbits.
• Guide the children to understanding how the interlocking of the bricks makes the wall strong.
• Each group should have an opportunity to explain their design and show what they have built.
Tips and ideas• Once the children are able to build a
strong wall, you can add variations to the instructions, such as:• Build a wall with a pattern.• Build a wall that can turn a corner.• Build a wall that has steps leading
up to the top of the wall.• Build a wall that has spaces in it.
Working together
20-30
Working together
Communicator
Activity steps• Prepare a model using basic bricks
and place it somewhere in the room where the children cannot see it.
• Divide the children into groups of 4–6, and ask them to pick one person from the group – the communicator.
• The communicator goes to see how the model is built and returns to explain it to his/her group. The group should try to build according to the instructions, and the communicator is not allowed to build and has to keep his/her hands behind his/her back.
• The communicator can go back and forth several times to check and remember details.
• Continue until the groups have finalised the model, then bring it out and compare whether it is the same.
• Ask the groups:• What was easy or difficult about
remembering the model?• Which “tricks” did you use to
remember?• What was it like trying to follow the
instructions?• How can you help each other in
the next round?
Tips and ideas• Make sure your model only has bricks
that the groups can find.• If you want to challenge the
groups further, ask them to swap communicator after half the time has passed.
10-20

50 51
Build a Tower
Activity steps• Working in groups, the children are
to build the tallest and most stable tower within a limited time, such as 10 minutes.
• After the time has ended, ask the children which tower is the tallest – measure it if necessary.
• Afterwards, test the stability of the tower by shaking the table or base plate, and/or create wind using thick cardboard, paper or some similar material.
• After the stability test, see which tower is still the tallest – which is the winning group? Some towers may have fallen down.
• Ask the groups to think about what made the tower stable, and what they could have changed to make it more stable.
Tips and ideas• You can do different variations of
the tower either by including design criteria – such as “a red brick needs to be on top”, “it needs to have two windows, and be built on wheels” etc.
• If you have more time, you can test-shake all the towers hard so that most of them fall and then give the groups more time to re-build and strengthen their towers before the final test.
20-30
Team Model
Activity steps• Divide the children into groups of
4–6, and let each group sit around a pile of bricks.
• One child selects any two bricks from the pile and connects them using both hands.
• The child passes the model to the child on the left – that child uses both hands at the same time to select any two bricks and adds them to the model.
• Continue in this way until all the children in the group have had a turn.
• The last child to build must name the model, describe it and explain its function.• Can you tell the group the model’s
name and function, and describe it?• How many bricks are there in your
model? Estimate first, then count.
Tips and ideas• You can let the children do this game
while remaining quiet.• When the children use both hands
at the same time, this helps them to practice using both sides of the body at the same time, in a controlled way.
10-20
Working together Working together

5352
Bridge Build
Activity steps• Divide the children into groups of
3–4 children.• The groups are to build a bridge that
can cross “the river” (a piece of paper) and at the same time hold the weight of an object (you decide what object).
• Give the children time to discuss and plan how they will span the river.• Guiding questions
• How can you measure the length you need to span with bricks?
• What would make the bridge stable? What will happen if it is heavy?
• How will you organise the different tasks in your group?
• Allow the children time to build their bridge.
• Test the strength of each bridge with the object you decided.
Tips and ideas• To make the activity more difficult
you can ask the children to build the bridge with as few bricks as possible, and yet still be able to carry the weight.
• You can also say that a boat needs to be able to pass under the bridge – build the boat out of the bricks or using something else that would symbolise a boat.
10-20
Tips and tricks
Hands-on and offA good rule to learn for activities with bricks is ‘hands-off’ during instructions. Then start an activity by calling ‘hands-on’. Try to discuss how to remember the rule and make it like a game with the children.
Scooping up the bricksWhen you do group activities, try to spread out a thin blanket or bed sheet on the floor, and build on this. Once the activity is finished, you can scoop up all the bricks in one go.
Storing the bricksStore the bricks in boxes when not in use, and try to avoid leaving them in sunlight. If you wish, you can store the bricks in separate boxes for standard bricks, vehicles, base plates and other type of bricks – so they are easier to find.
Clean the LEGO® DUPLO® bricksYou can use mild soap or washing liquid in warm water (no hotter than 40°C) and wash the bricks using a soft cloth, sponge or soft brush. Just rinse the bricks with water, and leave out them to dry (not in direct sunlight!).
Make stable structuresIf you build by stacking bricks directly on top of each other, the tower or structure you make is less stable. Try instead to interlock the bricks, much like a mason building a house with concrete or clay bricks.
Build on hard and stable surfacesIt is much easier to build on a surface, which is hard, smooth and stable, like a table or tiled floor.
Six BricksSix Bricks is a concept specially developed by the LEGO Foundation, and consists of many shorter activities that you can do using only six DUPLO bricks. Each DUPLO play box contains twelve Six Bricks sets. More information is available on the LEGO Foundation website.
Activity booklet using LEGO® bricksA second booklet has been developed to target children above the age of 7, using LEGO® bricks. Many of the activities in that booklet could be modified to also be used for DUPLO. Please have a look if you want some more inspiration for activities!
Tips and tricksWorking together
54 55
Creating your own activities
Let the activities in this booklet be a source of inspiration, but don’t let them limit you. Continue developing and creating your own activities.
Here are a few tips to think about when developing your own activities:
• Always think about the purpose of the activity and what skills you want the children to practice during the activity.
• Think about what space and environment you are working in.• Consider the steps involved in the activity and have a look at page xx.• Make sure that you have a “low entry” to ensure that everyone
succeeds – but at the same time have a “high ceiling” in order to keep everyone challenged.
• Try to think how to integrate play-based activities in your existing schedule at your centre/school/facility – maybe an activity from this booklet can be modified and integrated to help you explain a particular subject.
• Keep your activities simple!• The next page has a template to help you when developing your own
activities.• You can also let the children come up with their own activities.
Most importantly – try out your new activities!
Activity template
Title of your activity:
Duration:
Number of children:
Activity steps:•••••
Tips and ideas:••
Photo or illustration of your activity:
Tips and tricksTips and tricks

56
The LEGO Foundation
Get to know us better at LEGOFoundation.comFollow us on Twitter @LEGOFoundation
Like us on Facebook www.facebook.com/LEGOfoundation
Email us at [email protected]
The LEGO FoundationKoldingvej 2
7190 Billund, Denmark CVR number: 12 45 83 39