Embed Size (px)
Citation preview

Crystal Surround Air Track (Active Speaker System)
user manual
imagine the possibilitiesThank you for purchasing this Samsung product.
To receive more complete service, please register your product at
www.samsung.com/register
HW-D550HW-D551

�
featuresActive Speaker SystemThis unit features an Active Speaker System that provides high sound quality in a single slim unit.This unit does not require any satellite loudspeakers or speaker cabling, which are normally associated with conventional surround sound systems.
Multi-function Remote ControlThe supplied remote control can be used to control the TV connected to this unit.The remote control has a TV hotkey that enables you to perform various operations with the simple press of a button.
Special Sound modeYou can select from 7 different sound modes (MUSIC, NEWS, DRAMA, CINEMA, SPORTS, GAME, PASS (Original Sound)) depending on the type of content you want to enjoy.
Compatibility with various audio TechnologiesThis unit employs decoders compatible with Dolby Digital and DTS (Digital Theater Systems).
− DolbyDigital
This is the standard audio signal format used on DVDs and other purely digital media. This surround technology delivers high-quality digital audio of up to 5.1 discrete channels to produce a directional and more realistic effect.
− DTS(DigitalTheaterSystems)
DTS provides a discrete 5.1 CH digital audio signal for both music and movie content and uses less compression than Dolby Digital for richer sound.
Wireless SubwooferSamsung’s wireless module does away with cables running between the main unit and the subwoofer. Instead, the subwoofer connects to a compact wireless module that communicates with the main unit.
3D Depth Sound
The 3D sound feature adds depth and spaciousness to your listening experience.
HDMI
HDMI transmits video and audio signals simultaneously, and provides a clearer picture. And the unit supply ARC function so you can listen TV sound with Crystal Surround Air Track by using only HDMI Cable. (This function is only available if an ARC-compliant TV is connected.)

�
En
G
The accessories may look slightly different than those pictured above.▪
WHAT’SinclUDEDCheck for the supplied accessories below.
HDMicable(Atoctype)(AH39-01135A)
Remotecontrol/Batteries(AAAsize)
(AH59-02330A/ 4301-000116)
Bracket-WallMount(AH61-02952A)
UserManual(AH68-02334A)
Audiocable(AH39-01077A)
ToroidalFerritecore(3301-000144)
POWER TV POWER
AUDIO
MUTE
TV INFO
AUTOPOWER
AV SYNC
AH59-02330A
VOL TVCH
SOUNDMODE
3DSOUND
S.VOL INPUTSELECT
DIMMER
S/W LEVEL
HDMISPK CONTROL
DRC
(For Subwoofer power cable 1EA)
�
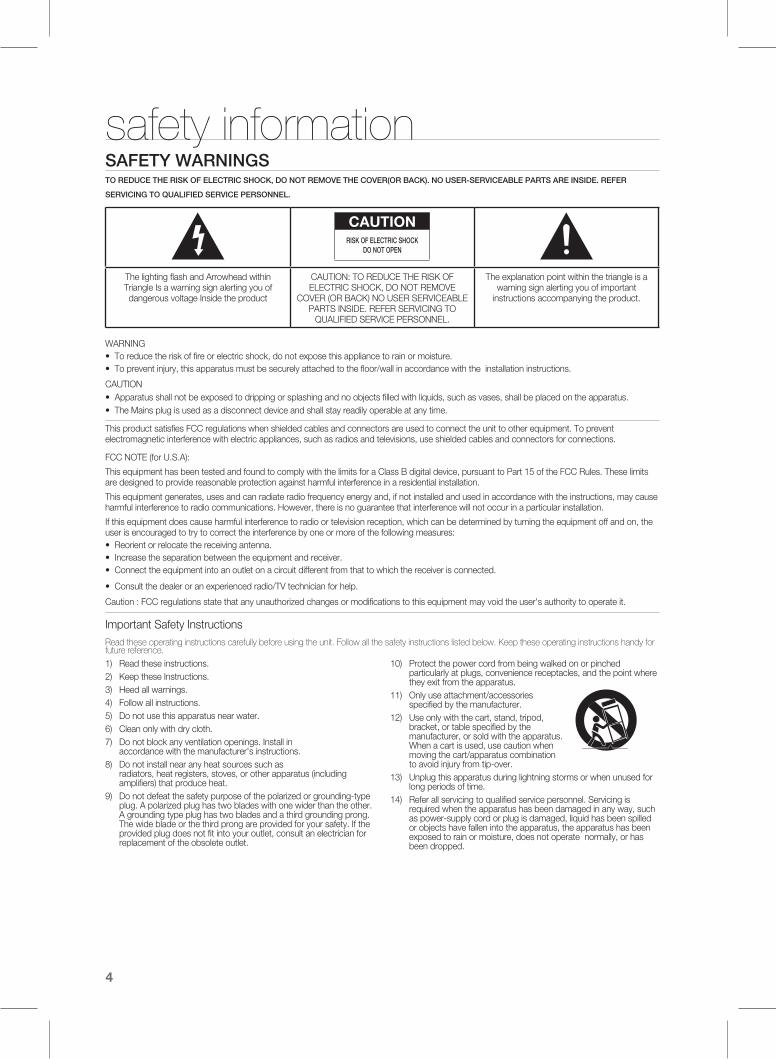
SAFETyWARningSTOREDUcETHERiSKOFElEcTRicSHOcK,DOnOTREMOVETHEcOVER(ORBAcK).nOUSER-SERVicEABlEPARTSAREinSiDE.REFER
SERVicingTOQUAliFiEDSERVicEPERSOnnEl.
CAUTIONRISK OF ELECTRIC SHOCK
DO nOT OPEn
The lighting flash and Arrowhead within Triangle Is a warning sign alerting you of dangerous voltage Inside the product
CAUTION: TO REDUCE THE RISK OF ELECTRIC SHOCK, DO NOT REMOVE
COVER (OR BACK) NO USER SERVICEABLE PARTS INSIDE. REFER SERVICING TO
QUALIFIED SERVICE PERSONNEL.
The explanation point within the triangle is a warning sign alerting you of important
instructions accompanying the product.
WARNINGTo reduce the risk of fire or electric shock, do not expose this appliance to rain or moisture.To prevent injury, this apparatus must be securely attached to the floor/wall in accordance with the installation instructions.
CAUTIONApparatus shall not be exposed to dripping or splashing and no objects filled with liquids, such as vases, shall be placed on the apparatus. The Mains plug is used as a disconnect device and shall stay readily operable at any time.
This product satisfies FCC regulations when shielded cables and connectors are used to connect the unit to other equipment. To prevent electromagnetic interference with electric appliances, such as radios and televisions, use shielded cables and connectors for connections.
FCC NOTE (for U.S.A):
This equipment has been tested and found to comply with the limits for a Class B digital device, pursuant to Part 15 of the FCC Rules. These limits are designed to provide reasonable protection against harmful interference in a residential installation.
This equipment generates, uses and can radiate radio frequency energy and, if not installed and used in accordance with the instructions, may cause harmful interference to radio communications. However, there is no guarantee that interference will not occur in a particular installation.
If this equipment does cause harmful interference to radio or television reception, which can be determined by turning the equipment off and on, the user is encouraged to try to correct the interference by one or more of the following measures:
Reorient or relocate the receiving antenna.Increase the separation between the equipment and receiver.Connect the equipment into an outlet on a circuit different from that to which the receiver is connected.
Consult the dealer or an experienced radio/TV technician for help.
Caution : FCC regulations state that any unauthorized changes or modifications to this equipment may void the user's authority to operate it.
Important Safety InstructionsRead these operating instructions carefully before using the unit. Follow all the safety instructions listed below. Keep these operating instructions handy for future reference.
••
••
•••
•
1) Read these instructions.2) Keep these Instructions.3) Heed all warnings.4) Follow all instructions.5) Do not use this apparatus near water.6) Clean only with dry cloth.7) Do not block any ventilation openings. Install in
accordance with the manufacturer's instructions.8) Do not install near any heat sources such as
radiators, heat registers, stoves, or other apparatus (including amplifiers) that produce heat.
9) Do not defeat the safety purpose of the polarized or grounding-type plug. A polarized plug has two blades with one wider than the other. A grounding type plug has two blades and a third grounding prong. The wide blade or the third prong are provided for your safety. If the provided plug does not fit into your outlet, consult an electrician for replacement of the obsolete outlet.
10) Protect the power cord from being walked on or pinched particularly at plugs, convenience receptacles, and the point where they exit from the apparatus.
11) Only use attachment/accessories specified by the manufacturer.
12) Use only with the cart, stand, tripod, bracket, or table specified by the manufacturer, or sold with the apparatus. When a cart is used, use caution when moving the cart/apparatus combination to avoid injury from tip-over.
13) Unplug this apparatus during lightning storms or when unused for long periods of time.
14) Refer all servicing to qualified service personnel. Servicing is required when the apparatus has been damaged in any way, such as power-supply cord or plug is damaged, liquid has been spilled or objects have fallen into the apparatus, the apparatus has been exposed to rain or moisture, does not operate normally, or has been dropped.
safety information

5
En
G
PREcAUTiOnS
Ensure that the AC power supply in your house complies with the identification sticker located on the back of your product. Install your product horizontally, on a suitable base (furniture), with enough space around it for ventilation (3~4 inches). Make sure the ventilation slots are not covered. Do not place the unit on amplifiers or other equipment which may become hot. This unit is designed for continuous use. In order to disconnect the unit completely from the power supply, remove the main plug from the wall outlet, especially when left unused for a long period of time.
During thunderstorms, disconnect the AC main plug from the wall outlet. Voltage peaks due to lightning could damage the unit.
Protect the product from moisture (i.e. vases) , and excess heat (e.g.fireplace) or equipment creating strong magnetic or electric fields Disconnect the power cable from the AC supply if the unit malfunctions. Your product is not intended for industrial use. Use of this product is for personal use only.
Condensation may occur if your product has been stored in cold tem-peratures. If transporting the unit during the winter, wait approximately 2 hours until the unit has reached room temperature before using.
Do not expose the unit to direct sunlight or other heat sources.This could lead to overheating and malfunction of the unit.
The batteries used with this product contain chemicals that are harmful to the environment. Do not dispose of batteries in the general household trash.
The batteries used with this product contain chemicals that are harmful to
Phones
3.9 inch 3.9 inch
2.7 inch
3.9 inch

�
contentsfeATuReS
22 Features3 What’sincluded
SAfeTy InfoRMATIon
44 Safetywarnings5 Precautions
geTTIng STARTeD
77 Beforereadingtheuser’smanual
DeSCRIpTIonS
88 Frontpanel9 Rearpanel
ReMoTe ConTRol
1010 Touroftheremotecontrol
ConneCTIonS
1111 Installingthewallmount12 Connectingthewirelesssubwoofer13 Attachingthetoroidalferritecoretothepower
cordofthesubwoofer13 Installingtoroidalferritetosubwoofer14 UseiPod/iPhonewithawirelessdockcradle
foriPod/iPhone(SoldSeparately(HT-WDC10))14 Howtolinkthewirelesstransmitterwiththe
mainunit15 ConnectingtheCrystalSurroundAirTrack
TRoubleSHooTIng
2121 Troubleshooting
AppenDIx
2222 Specifications
funCTIonS
1717 Basicfunctions17 Advancedfunctions20 Softwareupgrade

�
En
G●
GE
TT
InG
ST
aR
TE
D
BEFOREREADingTHEUSER’SMAnUAlMake sure to check the following terms before reading the user manual.
iconsthatwillbeusedinmanual
icon Term Definition
cautionThis involves a case where a function does not operate or settings may be canceled.
note This involves tips or instructions on the page that help each function operate.
Abouttheuseofthisuser’smanual
Be sure to be familiar with Safety Instructions before using this product. ( See page 4 )
If a problem occurs, check the Troubleshooting. ( See page 21 )
copyright
©2011 Samsung Electronics Co.,Ltd.
All rights reserved; no part or whole of this user’s manual may be reproduced or copied without the prior written permission of Samsung Electronics Co.,Ltd.
1)
2)
getting started

�
descriptionsFROnTPAnEl
DiSPlAy Displays the current mode.
inPUTMODE Selects the HDMI, Optical, Audio or W.iPod input.
SOUnDMODESelects the sound mode.(MUSIC, NEWS, DRAMA, CINEMA, SPORTS, GAME, PASS (Original Sound))
VOlUME+/- Controls the volume level.
POWERBUTTOn Turns the Crystal Surround Air Track on and off.
When you turn on the power of this unit, there will be a 4 to 5 second delay before it reproduces sound.
▪
1 � � � 5

�
En
G●
DE
SC
RIP
TIO
n
REARPAnEl
USBPORT(FORS/WUPDATESOnly)
You can update this unit's software through the USB port.
AUDiOinJAcK Connect to the analog output of an external device.
DigiTAlAUDiOin1,2
Connect to the digital (optical) output of an external device.
HDMiOUTJAcK Outputs digital video and audio signals simultaneously using an HDMI cable.
HDMiin1,2JAcKS Receives digital video and audio signals simultaneously using an HDMI cable.
POWERSUPPlycABlE
Plug the power supply cable into the AC wall outlet.
When disconnecting the power cable from the wall outlet, hold the plug. Do not pull the cable.
Do not connect this unit or other components to the main power until all connections between components are complete.
▪
▪
ONLY FOR UPDATE
�
�
OPTICAL
DIGITALAUDIO IN 2
AUDIO IN
DIGITALAUDIO IN 1 (TV)
�
HDMI
OUT(ARC)
HDMI
IN 2
HDMI
IN 1
5
ONLY FOR UPDATE
ONLY FOR UPDATE
1
5
�
�

10
remote controlTOUROFTHEREMOTEcOnTROl
The remote control can operate TVs made by SAMSUNG only.
Depending on the TV you are using, you may not be able to operate your TV with this remote control. In this case, operate the TV using the TV's remote control.
▪▪
Installing batteries in the Remote Control
1. Lift the cover at the back of the remote control upward as shown.
2. Install two AAA size batteries. Make sure to match the “+” and “–” ends of the batteries with the diagram inside the compartment.
3. Replace the cover. Assuming typical TV usage, the batteries last for about one year.
operation Range of the Remote ControlThe remote control can be used up to approximately 23 feet (7 meters) in a straight line. It can also be operated at a horizontal angle of up to 30° from the remote control sensor.
poWeR buTTonTurns the Crystal Surround Air Track on and off.
VoluMeAdjusts the volume level of the unit.
MuTeMutes the sound from the unit. Press again to restore the sound to the previous volume level.
S/W leVel, AV SynCAdjusts the Subwoofer level.Used to help sync video to audio when connected to a digital TV.
TV poWeR buTTonTurns your Samsung TV on and off.
AuTo poWeRSynchronizes the Air Track via Optical connection via the Optical jack so it turns on automatically when you turn on your TV.
SounD MoDeSelects the sound mode. (MUSIC, NEWS, DRAMA, CINEMA, SPORTS, GAME, PASS (Original Sound))
TV CHAnnelSwitches between the available TV channels.
InpuT SeleCTSelects the HDMI, the Digital (Optical), the Audio or the W.iPod input.
POWER TV POWER
AUDIO
MUTE
TV INFO
AUTOPOWER
AV SYNC
AH59-02330A
VOL TVCH
SOUNDMODE
3DSOUND
S.VOL INPUTSELECT
DIMMER
S/W LEVEL
HDMISPK CONTROL
DRC
AuDIoThis button allows you to choose to listen to audio from the Air track or your TV.
Anynet+Anynet+ is a function that enables you to control other Samsung Devices with your Samsung TV's remote control.
DIMMeR, DRCYou can control the brightness of the Display.You can use this function to enjoy Dolby Digital sound when watching movies at low volume at night (Standard, MAX, MIN).
SMART VoluMeRegulates and stabilizes the volume level against a drastic volume change.
3D SounDThis feature adds depth andspaciousness to the sound.
TV InfoUse this to display the TV channel information.

11
En
G●
CO
nn
EC
TIO
nS
inSTAllingTHEWAllMOUnTYou can use the wall mount bracket to mount this unit on a wall.
Do not hang onto the installed unit and avoid any impact to the unit.Secure the unit firmly to the wall so that it does not fall off. If the unit falls off, it may result in an injury or damage to the product.When the unit is installed on a wall, please make sure that a child does not pull any of connecting cables, as it may cause it to fall.For the optimal performance in a wall mount installation, keep the speaker system at least 2 inches (5 cm) distant from the TV.
▪▪
▪
▪
2. Then, fit the unit into the corresponding slots of the wall mount bracket. For secure installation, make sure the mounting studs slide firmly down into the bottom of the slots.
1. Place the wall mount bracket on a wall surface and then secure it with two screws (not supplied).
3. This is the completion of the suggested wall mount installation.
connections
Installation precautionsDo not install on a place other than a vertical wall.For the installation, avoid a location with high temperature or humidity, or wall that cannot sustain the weight of the set.Check the strength of the wall. If the strength of the wall is insufficient for the product installation, make sure to reinforce the wall before the installation.Check the material of the wall. If the wall is made of plaster board, marble, or iron board, purchase and use the appropriate fixing screws.Cables connecting to external devices need to be connected to the set before installing.Be sure to turn off and unplug the unit before installation. Otherwise, it may cause electric shock.
••
•
•
••
1 �
� inches (5 cm) or more

1�
cOnnEcTingTHEWiRElESSSUBWOOFERThe Subwoofer's linking ID is preset at the factory and the main unit and sub should link (connect wirelessly) automatically when main unit is turned on. If the link indicator does not light when main unit and subwoofer are turned on, please set the ID by following the process below.
Before moving or installing the product, be sure to turn off the power and disconnect the power cord.If the main unit is powered off, the wireless subwoofer will be in the standby mode and the STANDBY LED on the upper side will come on after 30 seconds Link indicator (Blue LED) blinking.If you use a device that uses the same frequency (5.2GHz or 5.8GHz) near the system, some sound interruption may be heard due to interference.The transmission distance of the wireless signal between the main unit and sub is about 33 ft., but may vary depending on your operating environment. If a steel-concrete or metallic wall is between the main unit and the wireless subwoofer, the system may not operate at all, because the wireless signal cannot penetrate metal.If the main unit doesn't make wireless connection, follow steps 1-4 above to retry the connection between the main unit and wireless subwoofer.
The wireless receiving antenna is built into the wireless subwoofer. Keep the unit away from water and moisture.For optimal listening performance, make sure that the area around the wireless subwoofer location is clear of any obstructions.
▪
▪
▪
▪
▪
▪
▪
1. Plug the power cords of the main unit and subwoofer into an AC power supply.
2. Press the ID SeT button on the back of the subwoofer with a small, pointed object for 5 seconds.
The STANDBY indicator is turned off and the LINK indicator (Blue LED) blinks quickly.•
STANDBY
LINK
POWER TV POWER
AUDIO
MUTE
TV INFO
AUTOPOWER
AV SYNC
AH59-02330A
VOL TVCH
SOUNDMODE
3DSOUND
S.VOL INPUTSELECT
DIMMER
S/W LEVEL
HDMISPK CONTROL
DRC
POWER TV POWER
AUDIO
MUTE
TV INFO
AUTOPOWER
AV SYNC
AH59-02330A
VOL TVCH
SOUNDMODE
3DSOUND
S.VOL INPUTSELECT
DIMMER
S/W LEVEL
HDMISPK CONTROL
DRC
3. While the main unit is powered off (STANDBY mode), press MuTe on the remote control for 5 seconds.
4. The Power Indicator on the main unit lights off and on, then returns to STAnDby mode.
The main unit and the subwoofer are now linked (connected).The Link indicator (blue LED) on the subwoofer is turned on.You can enjoy better sound from the wireless subwoofer by selecting the sound mode. ( See page 18 )
•••

1�
En
G●
CO
nn
EC
TIO
nS
aTTaCHInG THE TOROIDaL FERRITE CORE TO THE POWER CORD OF THE SubWOOFERIf you attach a Toroidal ferrite core to the power cord of the Subwoofer, it will help to prevent RF interference from radio signals.
Pull the fi xing tab of the Toroidal ferrite core to open it.
Make three loops in the power cable of the subwoofer.
Attach the Toroidal ferrite core to the Subwoofer power cord as the fi gure shows and press it until it clicks.
1.
2.
3.
InSTaLLInG TOROIDaL FERRITE TO SubWOOFER
Lift up to release the lock and open the core.
Make two rounds on the coil with the power cable. (Start winding at 5-10cm away from the switch).
Close the lock back.

1�
USEiPod/iPhoneWiTHAWiRElESSDOcKcRADlEFORiPod/iPhone(SoldSeparately(HT-WDc10))
You can enjoy fi ner quality of music through the speaker by sending iPod/iPhone’s audio signal using a Wireless Transmitter. To link the main unit with wireless transmitter, you have to make ID setting when both main unit and wireless transmitter are turned on.Turn on the main unit and connect the iPod/iPhone to the Wireless transmitter.Then press InpuT SeleCT button on the remote control to select "W iPod" mode.The InpuT SeleCT mode of the main unit will switches as follows. Repeatedly press DIGI.1 ➡ DIGI.2 ➡ ANALOG ➡ W iPod ➡ HDMI.1 ➡ HDMI.2 ( See page 19 ) The Sound bar will not be turned off if iPod/iPhone is not connected to the Wireless Transmitter.For more information on HT-WDC10, refer to the HT-WDC10’s user manual.
“Made for iPod,” and “Made for iPhone” mean that an electronic accessory has been designed to connect specifi cally to iPod or iPhone, respectively, and has been certifi ed by the developer to meet Apple performance standards. Apple is not responsible for the operation of this device or its compliance with safety and regulatory standards. Please note that the use of this accessory with iPod or iPhone may affect wireless performance.iPhone, iPod, iPod classic, iPod nano, and iPod touch are trademarks of Apple Inc., registered in the U.S. and other countries.The volume control may not be operated normally except at the referred models. If there is any error happened at the models above, please update the software of iPod/iPhone at the lastest version.
▪
▪
▪
iPod/iPhoneMODElSTHATcAnBEUSEDWiTHTHiSPRODUcT
iPodtouch(1st,2nd,3rd,and4th
generation)iPodclassic iPodwithvideo
iPodnano(1st,2nd,3rd,4th,5th,
and6thgeneration)iPhone4 iPhone3gS
iPhone3g iPhone
1. Turn off your Home Theater (HW-D550, HW-D551).2. Press the hold "3DSOUnD" button on the remote control for 5 seconds.
The standby light on the HW-D550, HW-D551 will blink once.3. Connect the iPod/iPhone to the Wireless transmitter.4. Turn on the iPod/iPhone. Press the "iDSET" button on the back
of the Wireless transmitter for 5 seconds. The link light on the wireless transmitter will blink fast.
5. Turn on your Home Theater(make sure the wireless transmitter's Link LED in ON). To listen to music from your iPod/iPhone over the Home Theater, select the iPod mode as the Home Theater's source.
You can control the speaker volume of iPod/iPhone with a volume wheel or a volume bar. When iPod/iPhone is stopped or in a power saving mode, a Wireless transmitter is turned to the Sleep Mode.When iPod/iPhone is turned to the Deep Sleep Mode, the Wireless transmitter is off.
•
•
HOWTOlinKTHEWiRElESSTRAnSMiTTERWiTHTHEMAinUniT
Set an ID of the Subwoofer before setting a Transmitter ID. ( See page 12 )
POWER TV POWER
AUDIO
MUTE
TV INFO
AUTOPOWER
AV SYNC
AH59-02330A
VOL TVCH
SOUNDMODE
3DSOUND
S.VOL INPUTSELECT
DIMMER
S/W LEVEL
HDMISPK CONTROL
DRC
POWER TV POWER
AUDIO
MUTE
TV INFO
AUTOPOWER
AV SYNC
AH59-02330A
VOL TVCH
SOUNDMODE
3DSOUND
S.VOL INPUTSELECT
DIMMER
S/W LEVEL
HDMISPK CONTROL
DRC
STANDBY
LINK
CHARGE
If you use the main unit nearby a wireless device such as a laptop computer, an AP, or Wifi , any unstable operation error can happen.Do not pairing the subwoofer and iPod/iPhone at the same time. If you pairing at the same time, iPod/iPhone and subwoofer may not connect to the Sound bar.
▪
▪

15
En
G●
CO
nn
EC
TIO
nS
cOnnEcTingTHEcRySTAlSURROUnDAiRTRAcK
HDMI is a standard digital interface for connection to such devices as a TV, projector, DVD player, Blu-ray player, set top box and more.
HDMI removes any loss of signal from analog conversion, enabling you to enjoy video and audio sound quality as it was originally created in the digital source.
HDMI ouT (ARC)
The ARC function will be activated in the DIGI.1 mode.
Connect an HDMI cable from the HDMI OUT jack on the back of the product to the HDMI IN jack on your TV.
This product supports the ARC (Audio Return Channel) functions via an HDMI cable. Note that the ARC function is supported by the HDMI OUT (ARC) port only.
The ARC function allows digital audio to output via the HDMI OUT (ARC) port. It can be enabled only when the Air Track is connected to a TV that supports the ARC function.
Anynet+ must be turned on.
AnD,
HDMI In 1,2Connect an HDMI cable from the HDMI IN jack on the back of the product to the HDMI OUT jack on your digital devices.
The small side of the HDMI cable is connected with the Air Track. The provided accessory HDMI cable is for connecting SAT and TV. In case of connecting devices having distance longer than the provided cable, purchase an A-to-C (Mini) type cable.When buying HDMI cable for connecting source devices, choose A-to-C (Mini) type cable of enough length for the connection.
•
•
•
•
•
▪▪
▪
ONLY FOR UPDATE
HDMI
OUT(ARC)
HDMI
IN 2
HDMI
IN 1
HDMI OUT (ARC)
HDMI IN 1,2
OPTICAL OUT
HDMicable
DigitalDevices
HDMicable
ctype(SmallSide)
ctype(SmallSide)
Atype(largeSide)
Atype(largeSide)

1�
cOnnEcTingTHEcRySTAlSURROUnDAiRTRAcKThis section explains two ways (digital and analog) of connecting the unit to the TV.
This unit is equipped with two optical digital jacks and one audio analog jack for connecting a TV.
AuDIo InConnect AUDIO IN on the main unit to the AUDIO OUT of the TV or Source Device. Be sure to match connector colors.
or,
DIgITAl AuDIo In (opTICAl) 1,2Connect the Digital Input on the main unit to the OPTICAL OUT of the TV or Source Device.
Do not connect the power cord of this product or your TV to the wall outlet until all connections between components are complete.Before moving or installing this product, be sure to turn off the power and disconnect the power cord.If you select 'ANALOG' without connecting the Audio Cable, the set is turned off automatically after 20 minutes.If a TV or any device connected to Air Track with the optical cable is off and there is no digital input, the Air Track is turned off after 20 minutes. (If there has been no input signal for over 20 minutes from DIGITAL AUDIO IN 1 or 2, the Air Track will be turned off.)When Air Track isn't linked with HT-WDC10 model in the W.iPod mode, Air Track will turn off after 20 minutes.
▪
▪
▪
▪
▪
ONLY FOR UPDATE
OPTICAL
DIGITALAUDIO IN 2
AUDIO IN
DIGITALAUDIO IN 1 (TV)
AUDIO IN
AUDIO OUT
L
R
OPTICAL OUT
Red
White
DIGITAL AUDIO IN 1, 2
Audiocable
Opticalcable
or
BD/DVDplayer/Set-topbox/
gameconsole
or

1�
En
G●
Fu
nC
TIO
nS
Turning the power on/off
1. Touch poWeR ( ) on the front panel. or, Press poWeR on the remote control to turn on the power.
2. Touch poWeR ( ) on the front panel. or, Press poWeR on the remote control again to turn off the power.
Adjusting the volume
Touch VoluMe +/– on the front panel.
or,
Press VoluMe +/– on the remote control to increase or decrease the volume level.
The numeric value of the volume level appears in the front panel display.
The volume level increases or decreases when you press VOLUME +/–.
If you want to enjoy the sound only from the Crystal Surround Air Track, you must turn off the TV's speakers in the Audio Setup menu of your TV. Refer to the owner's manual supplied with your TV.
•
▪▪
functions
Muting the sound
This is useful when answering a doorbell or telephone call.
1. Press MuTe ( ) on the remote control to mute the sound.
2. Press MuTe on the remote control again (or press VoluMe +/–) to restore the sound.
using the 3D Depth Sound function
The 3D sound feature adds depth and spaciousness to the sound by using 3D SounD button.
Press 3D SounD on the remote control.
Each time the button is pressed, the selection changes as follows : 3D SOUND ON ➡ 3D SOUND OFF
When you turn on the 3D Depth Sound, the Sound Mode will automatically change to PASS.
•
▪
ADVAnCeD funCTIonS
bASIC funCTIonS
POWER TV POWER
AUDIO
MUTE
TV INFO
AUTOPOWER
AV SYNC
AH59-02330A
VOL TVCH
SOUNDMODE
3DSOUND
S.VOL INPUTSELECT
DIMMER
S/W LEVEL
HDMISPK CONTROL
DRC
POWER TV POWER
AUDIO
MUTE
TV INFO
AUTOPOWER
AV SYNC
AH59-02330A
VOL TVCH
SOUNDMODE
3DSOUND
S.VOL INPUTSELECT
DIMMER
S/W LEVEL
HDMISPK CONTROL
DRC
POWER TV POWER
AUDIO
MUTE
TV INFO
AUTOPOWER
AV SYNC
AH59-02330A
VOL TVCH
SOUNDMODE
3DSOUND
S.VOL INPUTSELECT
DIMMER
S/W LEVEL
HDMISPK CONTROL
DRC
POWER TV POWER
AUDIO
MUTE
TV INFO
AUTOPOWER
AV SYNC
AH59-02330A
VOL TVCH
SOUNDMODE
3DSOUND
S.VOL INPUTSELECT
DIMMER
S/W LEVEL
HDMISPK CONTROL
DRC
POWER TV POWER
AUDIO
MUTE
TV INFO
AUTOPOWER
AV SYNC
AH59-02330A
VOL TVCH
SOUNDMODE
3DSOUND
S.VOL INPUTSELECT
DIMMER
S/W LEVEL
HDMISPK CONTROL
DRC
POWER TV POWER
AUDIO
MUTE
TV INFO
AUTOPOWER
AV SYNC
AH59-02330A
VOL TVCH
SOUNDMODE
3DSOUND
S.VOL INPUTSELECT
DIMMER
S/W LEVEL
HDMISPK CONTROL
DRCPOWER TV POWER
AUDIO
MUTE
TV INFO
AUTOPOWER
AV SYNC
AH59-02330A
VOL TVCH
SOUNDMODE
3DSOUND
S.VOL INPUTSELECT
DIMMER
S/W LEVEL
HDMISPK CONTROL
DRC
POWER TV POWER
AUDIO
MUTE
TV INFO
AUTOPOWER
AV SYNC
AH59-02330A
VOL TVCH
SOUNDMODE
3DSOUND
S.VOL INPUTSELECT
DIMMER
S/W LEVEL
HDMISPK CONTROL
DRC

1�
using the sound modeYou can select from 7 different sound modes (MUSIC, NEWS, DRAMA, CINEMA, SPORTS, GAME, PASS (Original Sound)) depending on the type of sources you want to enjoy.
Press SounD MoDe on the remote control SOUNDMODE ,SOUND
MODE or touch SounD MoDe (SOUNDMODE )
on the front panel repeatedly to select the sound mode you want.
Select pASS mode if you want to enjoy the original sound.
It is recommended that you select a Sound Mode based on the source material and your personal taste.
When you choose the Sound Mode (except PASS), the 3D Depth Sound will automatically be turned OFF.
using the TV functions
1. Press TV poWeR on the remote control of this unit.
2. Press TV Info on the remote control to display the TV channel information.
3. Press TV CH on the remote control to select the TV channel.
The remote control can operate TVs made by SAMSUNG only.
using the AuTo poWeR lInK functionThe Crystal Surround Air Track is automatically turned on when you turn the power on of a TV or any device connected to the Air Track with the optical cable.
Press AuTo poWeR on the remote control of this unit.
Auto power link function turns on and off each time you press AuTo poWeR.
AUTOPOWERlinK DisplayOn POWER LINK ONOFF POWER LINK OFF
If a TV or any device connected to Air Track with the optical cable is off and there is no digital input, the Air Track is turned off after 20 minutes.
Only if Anynet+ function is 'off', the unit will work.
•
▪
▪
▪
•
▪
▪
using the S/W leVel functionYou can control the base volume with S/W Level button on the Remote control.
1. Press the S/W leVel button on the Remote control.
2. “SW 00” is appeared on the Display.
3. Press “+” on the leVel key if you want to increase the subwoofer volume. You can set it from SW+01 to SW+06.
4. Press “-” on the leVel key if you want to decrease the subwoofer volume. You can set it from SW-01 to SW-06.
POWER TV POWER
AUDIO
MUTE
TV INFO
AUTOPOWER
AV SYNC
AH59-02330A
VOL TVCH
SOUNDMODE
3DSOUND
S.VOL INPUTSELECT
DIMMER
S/W LEVEL
HDMISPK CONTROL
DRC
POWER TV POWER
AUDIO
MUTE
TV INFO
AUTOPOWER
AV SYNC
AH59-02330A
VOL TVCH
SOUNDMODE
3DSOUND
S.VOL INPUTSELECT
DIMMER
S/W LEVEL
HDMISPK CONTROL
DRC
POWER TV POWER
AUDIO
MUTE
TV INFO
AUTOPOWER
AV SYNC
AH59-02330A
VOL TVCH
SOUNDMODE
3DSOUND
S.VOL INPUTSELECT
DIMMER
S/W LEVEL
HDMISPK CONTROL
DRC
POWER TV POWER
AUDIO
MUTE
TV INFO
AUTOPOWER
AV SYNC
AH59-02330A
VOL TVCH
SOUNDMODE
3DSOUND
S.VOL INPUTSELECT
DIMMER
S/W LEVEL
HDMISPK CONTROL
DRC
POWER TV POWER
AUDIO
MUTE
TV INFO
AUTOPOWER
AV SYNC
AH59-02330A
VOL TVCH
SOUNDMODE
3DSOUND
S.VOL INPUTSELECT
DIMMER
S/W LEVEL
HDMISPK CONTROL
DRC
POWER TV POWER
AUDIO
MUTE
TV INFO
AUTOPOWER
AV SYNC
AH59-02330A
VOL TVCH
SOUNDMODE
3DSOUND
S.VOL INPUTSELECT
DIMMER
S/W LEVEL
HDMISPK CONTROL
DRC
POWER TV POWER
AUDIO
MUTE
TV INFO
AUTOPOWER
AV SYNC
AH59-02330A
VOL TVCH
SOUNDMODE
3DSOUND
S.VOL INPUTSELECT
DIMMER
S/W LEVEL
HDMISPK CONTROL
DRC
POWER TV POWER
AUDIO
MUTE
TV INFO
AUTOPOWER
AV SYNC
AH59-02330A
VOL TVCH
SOUNDMODE
3DSOUND
S.VOL INPUTSELECT
DIMMER
S/W LEVEL
HDMISPK CONTROL
DRC
1�
En
G●
Fu
nC
TIO
nS
using the AV SynC functionVideo may look slower than the audio if it is connected with digital TV.If this occurs, adjust the audio delay time to match the video.
Press AV SynC +/–. button on the remote control of this unit.
You can use + , - button to set the audio delay time between 0 ms and 300 ms.
using the DRC functionThis feature balances the range between the loudest and quietest sounds. You can use this function to enjoy Dolby Digital sound when watching movies at low volume at night.
Press DRC on the remote control of this unit.
Each time the button is pressed, the selection changes as follows : DRC MIN ➡ DRC STANDARD ➡ DRC MAX
using the DIMMeR functionThis feature control the brightness of the Display.
Press DIMMeR on the remote control of this unit.
Each time the button is pressed, the selection changes as follows : DIMMER ON ➡ DIMMER OFF
using the S.VoluMe functionThis will regulate and stabilize the volume level against a drastic volume change in case of a channel change or scene transition.
Press S.Vol on the remote control of this unit.Each time the button is pressed, the selection changes as follows : SMART VOLUME ON ➡ SMART VOLUME OFF
•
•
•
•
POWER TV POWER
AUDIO
MUTE
TV INFO
AUTOPOWER
AV SYNC
AH59-02330A
VOL TVCH
SOUNDMODE
3DSOUND
S.VOL INPUTSELECT
DIMMER
S/W LEVEL
HDMISPK CONTROL
DRC
POWER TV POWER
AUDIO
MUTE
TV INFO
AUTOPOWER
AV SYNC
AH59-02330A
VOL TVCH
SOUNDMODE
3DSOUND
S.VOL INPUTSELECT
DIMMER
S/W LEVEL
HDMISPK CONTROL
DRC
POWER TV POWER
AUDIO
MUTE
TV INFO
AUTOPOWER
AV SYNC
AH59-02330A
VOL TVCH
SOUNDMODE
3DSOUND
S.VOL INPUTSELECT
DIMMER
S/W LEVEL
HDMISPK CONTROL
DRC
POWER TV POWER
AUDIO
MUTE
TV INFO
AUTOPOWER
AV SYNC
AH59-02330A
VOL TVCH
SOUNDMODE
3DSOUND
S.VOL INPUTSELECT
DIMMER
S/W LEVEL
HDMISPK CONTROL
DRC
POWER TV POWER
AUDIO
MUTE
TV INFO
AUTOPOWER
AV SYNC
AH59-02330A
VOL TVCH
SOUNDMODE
3DSOUND
S.VOL INPUTSELECT
DIMMER
S/W LEVEL
HDMISPK CONTROL
DRC
POWER TV POWER
AUDIO
MUTE
TV INFO
AUTOPOWER
AV SYNC
AH59-02330A
VOL TVCH
SOUNDMODE
3DSOUND
S.VOL INPUTSELECT
DIMMER
S/W LEVEL
HDMISPK CONTROL
DRC
POWER TV POWER
AUDIO
MUTE
TV INFO
AUTOPOWER
AV SYNC
AH59-02330A
VOL TVCH
SOUNDMODE
3DSOUND
S.VOL INPUTSELECT
DIMMER
S/W LEVEL
HDMISPK CONTROL
DRC
POWER TV POWER
AUDIO
MUTE
TV INFO
AUTOPOWER
AV SYNC
AH59-02330A
VOL TVCH
SOUNDMODE
3DSOUND
S.VOL INPUTSELECT
DIMMER
S/W LEVEL
HDMISPK CONTROL
DRC
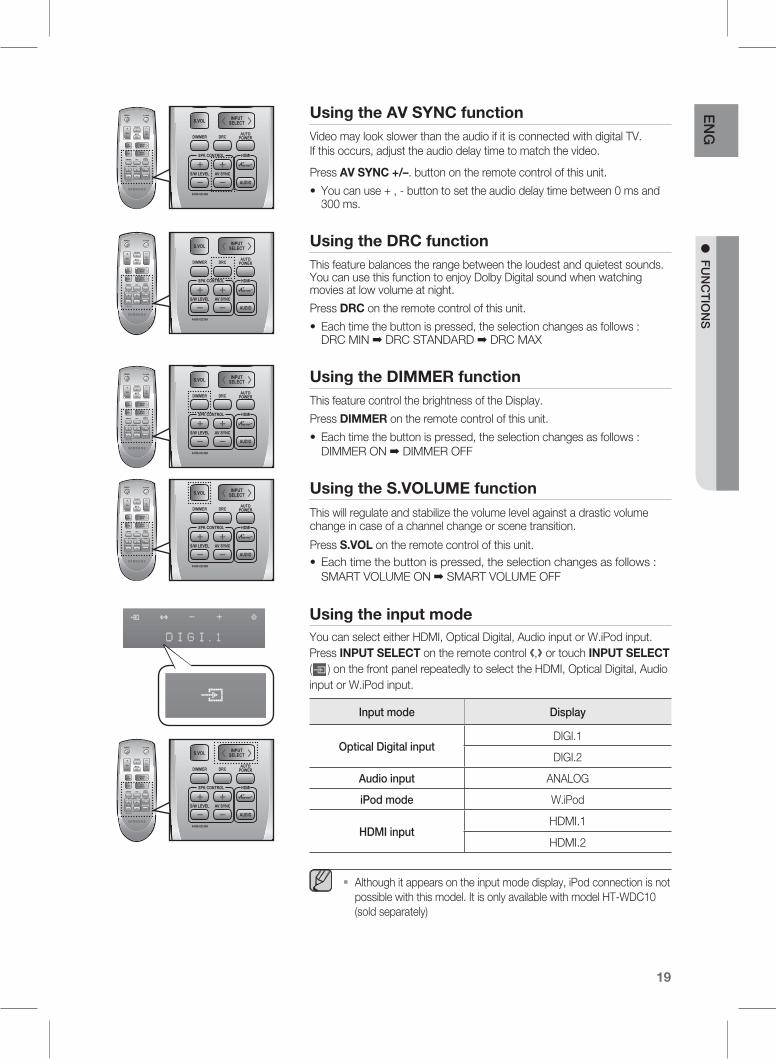
using the input modeYou can select either HDMI, Optical Digital, Audio input or W.iPod input. Press InpuT SeleCT on the remote control SOUND
MODE ,SOUNDMODE or touch InpuT SeleCT
(SOUNDMODE ) on the front panel repeatedly to select the HDMI, Optical Digital, Audio
input or W.iPod input.
inputmode Display
OpticalDigitalinputDIGI.1
DIGI.2
Audioinput ANALOG
iPodmode W.iPod
HDMiinputHDMI.1
HDMI.2
Although it appears on the input mode display, iPod connection is not possible with this model. It is only available with model HT-WDC10 (sold separately)
▪
POWER TV POWER
AUDIO
MUTE
TV INFO
AUTOPOWER
AV SYNC
AH59-02330A
VOL TVCH
SOUNDMODE
3DSOUND
S.VOL INPUTSELECT
DIMMER
S/W LEVEL
HDMISPK CONTROL
DRC
POWER TV POWER
AUDIO
MUTE
TV INFO
AUTOPOWER
AV SYNC
AH59-02330A
VOL TVCH
SOUNDMODE
3DSOUND
S.VOL INPUTSELECT
DIMMER
S/W LEVEL
HDMISPK CONTROL
DRC

�0
using the Anynet+(HDMI-CeC) function
Anynet+ is a function that enables you to control other Samsung Devices with your Samsung TV's remote control.
Anynet+ function turns on and off each time you press Anynet+.
1. Connect the product to a Samsung TV with the HDMI cable. (See page 15)
2. Set the Anynet+ function on your TV. (See the TV instruction manual for more information.)
The Anynet+ function supports some buttons of the remote control. (TV POWER, TV INFO, TV CH)
Depending on your TV, certain HDMI output resolutions may not work.
Please refer to the user’s manual of your TV. Please check the
logo (If your TV has an logo, then it supports Anynet+ function.)
AuDIo button
This button enables you to select between listening to audio from your TVor audio from the Air Track when connected via HDMI.
Press AuDIo on the remote control of this unit.
AUDiOMODE MODE ScrollDisplay Display
HDMiinTV HDMI AUDIO TV SND TV
AVR HDMI AUDIO AVR HDMI
ARcTV SOUND TV S MUTE
AVR SOUND AVR TV ARC
▪
▪
▪
POWER TV POWER
AUDIO
MUTE
TV INFO
AUTOPOWER
AV SYNC
AH59-02330A
VOL TVCH
SOUNDMODE
3DSOUND
S.VOL INPUTSELECT
DIMMER
S/W LEVEL
HDMISPK CONTROL
DRC
POWER TV POWER
AUDIO
MUTE
TV INFO
AUTOPOWER
AV SYNC
AH59-02330A
VOL TVCH
SOUNDMODE
3DSOUND
S.VOL INPUTSELECT
DIMMER
S/W LEVEL
HDMISPK CONTROL
DRC
Insert a USB drive containing the firmware upgrade into the USB port on the back of the main unit.Please be careful to not disconnect the power or remove the USB drive while upgrades are being applied. The main unit will turn off automatically after completing the firmware upgrade. When software is upgraded, settings you have made will return to their default (factory) settings. We recommend you write down your settings so that you can easily reset them after the upgrade.If the firnware fails to upgrade, we recommend formatting the USB data in FAT16 and trying again.For upgrading purposes, do not format USB data in NTFS because it is not a supported file system.Depending on the manufacturer, the USB may not be supported.
▪▪
▪▪▪
SOFTWAREUPgRADE
Samsung may offer upgrades for the Crystal Surround Air Track's system's firmware in the future.Please visit Samsung.com or contact the Samsung call center to receive information about downloading upgrades and using a USB drive. Upgrades will be possible by connecting a USB drive to the USB port located on your Air Track.
ONLY FOR UPDATE
ONLY FOR UPDATE
ONLY FOR UPDATE
POWER TV POWER
AUDIO
MUTE
TV INFO
AUTOPOWER
AV SYNC
AH59-02330A
VOL TVCH
SOUNDMODE
3DSOUND
S.VOL INPUTSELECT
DIMMER
S/W LEVEL
HDMISPK CONTROL
DRC
POWER TV POWER
AUDIO
MUTE
TV INFO
AUTOPOWER
AV SYNC
AH59-02330A
VOL TVCH
SOUNDMODE
3DSOUND
S.VOL INPUTSELECT
DIMMER
S/W LEVEL
HDMISPK CONTROL
DRC

�1
En
G●
TR
Ou
bLE
SH
OO
TIn
G
Before requesting service, please check the following.
Symptom check Remedy
Theunitwillnotturnon. • Is the power cord plugged into the outlet?
• Connect the power plug to the outlet.
Afunctiondoesnotworkwhenthebuttonispressed.
• Is there static electricity in the air?
• Disconnect the power plug and connect it again.
Soundisnotproduced. • Is the unit properly connected to your TV?
• Is the Mute function on?
• Is the volume set to minimum?
• Connect it correctly.
• Press the Mute button to cancel the function.
• Adjust the volume.
PicturedoesnotappearonaTVwhenthefunctionisselected.
• Is the TV connected properly?
• Connect it correctly.
Remotecontroldoesnotwork. • Are the batteries drained?
• Is the distance between remote control and main unit too far?
• Replace with new batteries.
• Operate at a close distance.
Thesoundfromtheleft/rightchannelsisreversed.
• Are the left/right audio output cables from the TV connected properly?
• Check the left/right channel and connect it/them correctly.
troubleshooting

��
SPEciFicATiOnS
Modelname HW-D550/HW-D551
gEnERAl
Powersupply AC 120V, 60Hz
Standbypowerconsumption 0.75W
Powerconsumption
Mainunit 45W
Subwoofer 20W
WeightMainunit 4.41 Ibs
Subwoofer 12.01Ibs
Dimensions(WxHxD)
Mainunit 41.65 x 3.15 x 1.58 inches
Subwoofer 6.89 x 13.78 x 11.61 inches
Operatingtemperaturerange +41°F to +95°F
Operatinghumidityrange 10 % to 75 %
AMPliFiER
Ratedoutputpower
Mainunit 80W/CH, 4Ω, THD = 10%, 1kHz
Subwoofer 150W, 3Ω, THD = 10%, 100Hz
Inputsensitivity/Impedance 570mV/20KΩ
S/Nratio(analoginput) 70dB
Separation(1kHz) 70dB
FREQUEncyRESPOnSE
Analoginput 20Hz~20kHz(±3dB)
Digitalinput/48kHzPCM 20Hz~20kHz(±3dB)
* S/N ratio, distortion, separation and usable sensitivity are based on measurement using AES (Audio Engineering Society) guidelines.
*: Nominal specification
- Samsung Electronics Co., Ltd reserves the right to change the specifications without notice.
- Weight and dimensions are approximate.
appendix

WARRAnTy
liMiTEDWARRAnTyTOORiginAlPURcHASERThis SAMSUNG brand product, as supplied and distributed by Samsung Electronics America, Inc. (SAMSUNG) and delivered new, in the original carton to the original consumer purchaser, is warranted by SAMSUNG against manufacturing defects in materials and workmanship for a limited warranty period of:
One(1)yearPartsandlabor*
(*90DaysPartsandlaborforcommercialUse)
This limited warranty begins on the original date of purchase, and is valid only on products purchased and used in the United States. To receive warranty service, the purchaser must contact SAMSUNG for problem determination and service procedures. Warranty service can only be performed by a SAMSUNG authorized service center. The original dated bill of sale must be presented upon request as proof of purchase to SAMSUNG or SAMSUNG's authorized service center. Transportation of the product to and from the service center is the responsibility of the purchaser.
SAMSUNG will repair or replace this product, at our option and at no charge as stipulated herein, with new or reconditioned parts or products if found to be defective during the limited warranty period specified above. All replaced parts and products become the property of SAMSUNG and must be returned to SAMSUNG. Replacement parts and products assume the remaining original warranty, or ninety (90) days, whichever is longer.
SAMSUNG’s obligations with respect to software products distributed by SAMSUNG under the SAMSUNG brand name are set forth in theapplicable end user license agreement. Non-SAMSUNG hardware and software products, if provided, are on an “AS IS” basis. Non-SAMSUNG manufacturers, suppliers, publishers, and service providers may provide their own warranties.
This limited warranty covers manufacturing defects in materials and workmanship encountered in normal, and except to the extent otherwise expressly provided for in this statement, noncommercial use of this product, and shall not apply to the following, including, but not limited to: damage which occurs in shipment; delivery and installation; applications and uses for which this product was not intended; altered product or serial numbers; cosmetic damage or exterior finish; accidents, abuse, neglect, fire, water, lightning or other acts of nature; use of products, equipment, systems, utilities, services, parts, supplies, accessories, applications, installations, repairs, external wiring or connectors not supplied and authorized by SAMSUNG, or which damage this product or result in service problems; incorrect electrical line voltage, fluctuations and surges; customer adjustments and failure to follow operating instructions, cleaning, maintenance and environmental instructions that are covered and prescribed in the instruction book; product removal or reinstallation; reception problems and distortion related to noise, echo, interference or other signal transmission and delivery problems. SAMSUNG does not warrant uninterrupted or error-free operation of the product.
THERE ARE NO EXPRESS WARRANTIES OTHER THAN THOSE LISTED AND DESCRIBED ABOVE, AND NO WARRANTIES WHETHER EXPRESS OR IMPLIED, INCLUDING, BUT NOT LIMITED TO, ANY IMPLIED WARRANTIES OF MERCHANTABILITY OR FITNESS FOR A PARTICULAR PURPOSE, SHALL APPLY AFTER THE EXPRESS WARRANTY PERIODS STATED ABOVE, AND NO OTHER EXPRESS WARRANTY OR GUARANTY GIVEN BY ANY PERSON, FIRM OR CORPORATION WITH RESPECT TO THIS PRODUCT SHALL BE BINDING ON SAMSUNG. SAMSUNG SHALL NOT BE LIABLE FOR LOSS OF REVENUE OR PROFITS, FAILURE TO REALIZE SAVINGS OR OTHER BENEFITS, OR ANY OTHER SPECIAL, INCIDENTAL OR CONSEQUENTIAL DAMAGES CAUSED BY THE USE, MISUSE OR INABILITY TO USE THIS PRODUCT, REGARDLESS OF THE LEGAL THEORY ON WHICH THE CLAIM IS BASED, AND EVEN IF SAMSUNG HAS BEEN ADVISED OF THE POSSIBILITY OF SUCH DAMAGES. NOR SHALL RECOVERY OF ANY KIND AGAINST SAMSUNG BE GREATER IN AMOUNT THAN THE PURCHASE PRICE OF THE PRODUCT SOLD BY SAMSUNG AND CAUSING THE ALLEGED DAMAGE. WITHOUT LIMITING THE FOREGOING, PURCHASER ASSUMES ALL RISK AND LIABILITY FOR LOSS, DAMAGE OR INJURY TO PURCHASER AND PURCHASER’S PROPERTY AND TO OTHERS AND THEIR PROPERTY ARISING OUT OF THE USE, MISUSE OR INABILITY TO USE THIS PRODUCT SOLD BY SAMSUNG NOT CAUSED DIRECTLY BY THE NEGLIGENCE OF SAMSUNG. THIS LIMITED WARRANTY SHALL NOT EXTEND TO ANYONE OTHER THAN THE ORIGINAL PURCHASER OF THIS PRODUCT, IS NONTRANSFERABLE AND STATES YOUR EXCLUSIVE REMEDY.
Some states do not allow limitations on how long an implied warranty lasts, or the exclusion or limitation of incidental or consequential damages, so the above limitations or exclusions may not apply to you. This warranty gives you specific legal rights, and you may also have other rights which vary from state to state.
To obtain warranty hardware service, please contact SAMSUNG customer care center.

Area Contact Center Web Site` North AmericaCanada 1-800-SAMSUNG (726-7864) www.samsung.comMexico 01-800-SAMSUNG (726-7864) www.samsung.comU.S.A 1-800-SAMSUNG (726-7864) www.samsung.com` Latin AmericaArgentine 0800-333-3733 www.samsung.comBrazil 0800-124-421 / 4004-0000 www.samsung.comChile 800-SAMSUNG (726-7864) www.samsung.comColombia 01-8000112112 www.samsung.comCosta Rica 0-800-507-7267 www.samsung.comDominica 1-800-751-2676 www.samsung.comEcuador 1-800-10-7267 www.samsung.comEl Salvador 800-6225 www.samsung.comGuatemala 1-800-299-0013 www.samsung.comHonduras 800-7919267 www.samsung.comJamaica 1-800-234-7267 www.samsung.comNicaragua 00-1800-5077267 www.samsung.comPanama 800-7267 www.samsung.comPeru 0-800-777-08 www.samsung.comPuerto Rico 1-800-682-3180 www.samsung.comTrinidad & Tobago 1-800-SAMSUNG (726-7864) www.samsung.com
Venezuela 0-800-100-5303 www.samsung.com` EuropeAlbania 42 27 5755 -
Austria 0810 - SAMSUNG (7267864, € 0.07/min) www.samsung.com
Belgium 02-201-24-18www.samsung.com/ be (Dutch) www.samsung.com/ be_fr (French)
Bosnia 05 133 1999 -Bulgaria 07001 33 11 www.samsung.comCroatia 062 SAMSUNG (062 726 7864) www.samsung.com
Czech800-SAMSUNG (800-726786)
www.samsung.comSamsung Zrt., česká organizační složka, Oasis Florenc, Soko-lovská394/17, 180 00, Praha 8
Denmark 70 70 19 70 www.samsung.comFinland 030 - 6227 515 www.samsung.comFrance 01 48 63 00 00 www.samsung.com
Germany 01805 - SAMSUNG (726-7864 € 0,14/Min) www.samsung.com
Hungary 06-80-SAMSUNG (726-7864) www.samsung.comItalia 800-SAMSUNG (726-7864) www.samsung.comKosovo +381 0113216899 -Luxemburg 261 03 710 www.samsung.comMacedonia 023 207 777 -Montenegro 020 405 888 -
Netherlands 0900-SAMSUNG (0900-7267864) (€ 0,10/Min) www.samsung.com
Norway 815-56 480 www.samsung.com
Poland 0 801 1SAMSUNG (172678) / 022-607-93-33 www.samsung.com
Portugal 80820-SAMSUNG (726-7864) www.samsung.com
Rumania
1. 08010 SAMSUNG (72678) - doar din reţeaua Romtelecom, tarif local
2. 021.206.01.10 - din orice reţea, tarif normal
www.samsung.com
Area Contact Center Web Site
Serbia 0700 Samsung (0700 726 7864) www.samsung.com
Slovakia 0800-SAMSUNG (726-7864) www.samsung.comSpain 902-1-SAMSUNG (902 172 678) www.samsung.comSweden 0771 726 7864 (SAMSUNG) www.samsung.com
Switzerland 0848-SAMSUNG (7267864, CHF 0.08/min)
www.samsung.com/ch www.samsung.com/ ch_fr/(French)
U.K 0330 SAMSUNG (7267864) www.samsung.comEire 0818 717100 www.samsung.comLithuania 8-800-77777 www.samsung.comLatvia 8000-7267 www.samsung.comEstonia 800-7267 www.samsung.com` CISRussia 8-800-555-55-55 www.samsung.comGeorgia 8-800-555-555 -Armenia 0-800-05-555 -Azerbaijan 088-55-55-555 -
Kazakhstan 8-10-800-500-55-500 (GSM: 7799) www.samsung.com
Uzbekistan 8-10-800-500-55-500 www.samsung.comKyrgyzstan 00-800-500-55-500 www.samsung.comTadjikistan 8-10-800-500-55-500 www.samsung.com
Ukraine 0-800-502-000www.samsung.ua www.samsung.com/ ua_ru
Belarus 810-800-500-55-500 -Moldova 00-800-500-55-500 -` Asia PacificAustralia 1300 362 603 www.samsung.comNew Zealand 0800 SAMSUNG (0800 726 786) www.samsung.comChina 400-810-5858 / 010-6475 1880 www.samsung.com
Hong Kong (852) 3698 4698www.samsung.com/hk www.samsung.com/ hk_en/
India 3030 8282 / 1800 110011 / 1800 3000 8282 / 1800 266 8282 www.samsung.com
Indonesia 0800-112-8888 / 021-5699-7777 www.samsung.com
Japan 0120-327-527 www.samsung.comMalaysia 1800-88-9999 www.samsung.com
Philippines1-800-10-SAMSUNG(726-7864) / 1-800-3-SAMSUNG(726-7864) / 1-800-8-SAMSUNG(726-7864) / 02-5805777
www.samsung.com
Singapore 1800-SAMSUNG (726-7864) www.samsung.comThailand 1800-29-3232 / 02-689-3232 www.samsung.comTaiwan 0800-329-999 www.samsung.comVietnam 1 800 588 889 www.samsung.com` Middle EastBahrain 8000-4726 www.samsung.comEgypt 08000-726786 www.samsung.comJordan 800-22273 www.samsung.comMorocco 080 100 2255 www.samsung.comOman 800-SAMSUNG (726-7864) www.samsung.comSaudi Arabia 9200-21230 www.samsung.comTurkey 444 77 11 www.samsung.comU.A.E 800-SAMSUNG (726-7864) www.samsung.com` AfricaNigeria 0800-SAMSUNG (726-7864) www.samsung.comSouth Africa 0860-SAMSUNG (726-7864 ) www.samsung.com
Contact SAMSUNG WORLD WIDEIf you have any questions or comments relating to Samsung products, please contact the SAMSUNG customer care center.

QUESTIONS OR COMMENTS?
COUNTRY CALL OR VISIT US ONLINE AT WRITE
IN THE US1-800-SAMSUNG
(7267864)www.samsung.com/us
Samsung Electronics America, Inc.85 Challenger Road Ridgefield Park,
NJ 07660-0511
Code no. AH68-02334A(00)