Embed Size (px)
Citation preview
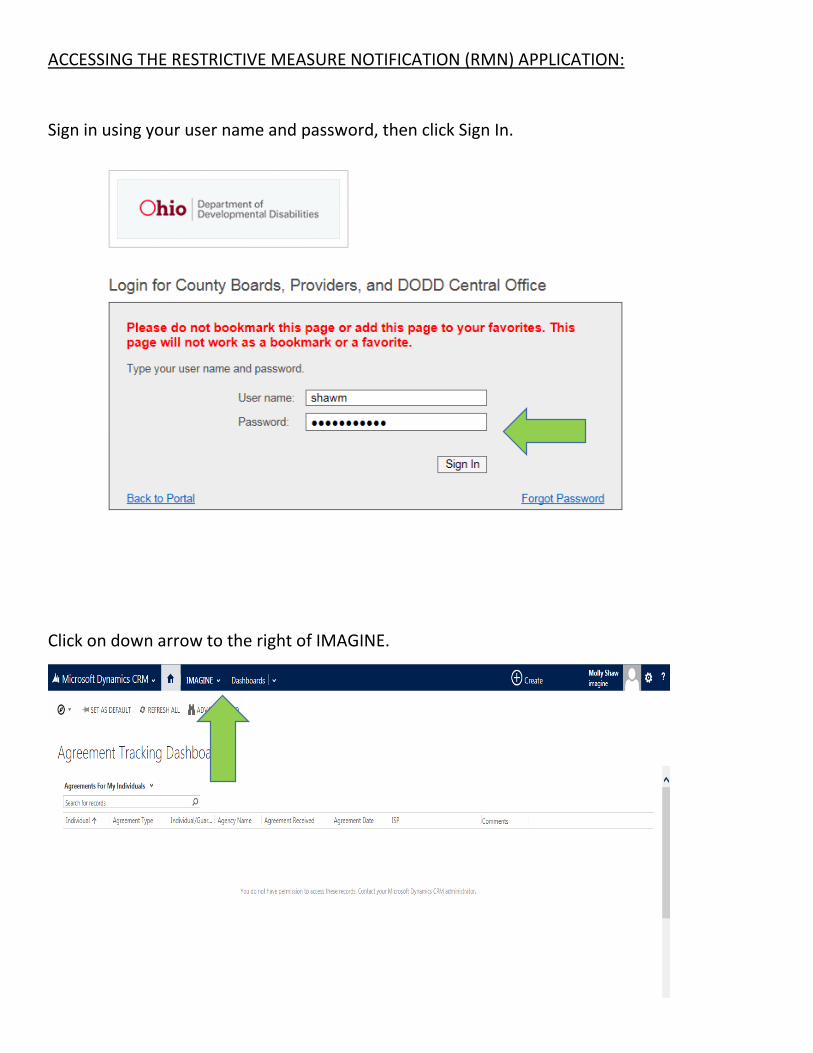
ACCESSING THE RESTRICTIVE MEASURE NOTIFICATION (RMN) APPLICATION:
Sign in using your user name and password, then click Sign In.
Click on down arrow to the right of IMAGINE.

Click on the Restrictive Measure Notification tile.

CREATING A NEW RMN RECORD:
To create a new record, click on +NEW.
Click on the field below Individual, then click on the magnifying glass to search for the name.

Click on the name of the person for whom you wish to create a new RMN record. The person’s date of birth and county of service will pre-populate.
Enter information in all fields with a red asterisk about the person who developed the behavioral support strategies.

Select Initial for the type of behavioral support strategy, enter dates, and then click Save.

After clicking Save, a + symbol will appear at on the bottom left side of the screen. Click on the + symbol to enter information about the strategy.
Click on the box(es) to enter information about the strategy.

Scroll down to continue entering information. If the restrictive measure has been court ordered, please click the box under Court Ordered. For rights restrictions, please enter a brief description of the restriction. After you have selected all of the appropriate boxes and entered required information for the strategy, click on Save & Close at the top of the screen.
If the person has more than 1 restrictive strategy (and the strategy’s author and dates are identical), click on the + icon again to enter information about the other strategies. Note: If a person has multiple strategies with different dates and/or strategy authors, you will need to enter separate RMN records.

Once all strategy information has been entered, change the status of the RMN record to Submit, then click Save & Close.
You will then be able to see the person’s record, along with any other records you have access to view. You can also verify the status of the record. If the status is Submit then you have successfully submitted the RMN record.

RENEWING AN RMN RECORD ANNUALLY:
Instead of entering identical information annually for an RMN record, you may simply update the record’s dates (assuming no other information has changed).
Select the record you wish to renew by clicking on the person’s name.
Click the Annual box, then click Save & Close. You will notice the lock icon next to each of the dates on this screen which prohibits them from being changed.

After clicking Save & Close, click on the person’s record again, then you will be able to change the dates. Update all dates, change the status to Submit, then click Save & Close to save the renewed record.
You can verify the record was changed and saved by seeing the new dates and confirming status is Submit.

REVISING AN RMN RECORD:
Locate the record you wish to revise and click on the person’s name.
Click the Revision box, then click Save & Close.

After clicking Save & Close, choose the person’s record again by clicking on their name. The person may have several records so be sure to select the record you want to revise. It’s helpful to look at the “Created On” date and the “Status.”
Click on the Targeted Behavior you wish to revise.

Check/uncheck the boxes in order to revise the record. In this example, the Home box under Location was unchecked because the person no longer had the restrictive measure implemented at this location. After revising the record, click Save & Close.
Then change the status to Submit and click Save & Close again.

DISCONTINUING AN RMN RECORD:
Locate the record you wish to discontinue and click on the person’s name.
Click on the Discontinued box, enter the reason for the discontinuation, then click on Save & Close

You can verify the record has been discontinued by clicking on the down area next to Active Restrictive Measure Notification and clicking on Inactive Restrictive Measure Notification.
You should see the record and it will be listed as Inactive under the Status heading.

RUNNING REPORTS ON YOUR AGENCY’S RMN RECORDS:
Click on the down arrow to the right of the eye/compass icon. Select Restrictive Measures Notification, then choose RMN Reports by double clicking.
Select the report you want to run by double clicking on it (there are several report options available).

Select the criteria for the report. In this example you only need to select a start and end date (each report may have different criteria available). Choose the start and end date for the data you want in the report and click View Report.
Note: it may take a bit of time for the report to run (up to several minutes). You will see this screen while the system is generating the report.

RMN APPLICATION ASSISTANCE/QUESTIONS:
For technical issues and support: Phone – 1.800.617.6733 Option 4 Email – [email protected]
For business related issues and questions: Phone – 1.800.617.6733 Option 5