Embed Size (px)
DESCRIPTION
Acc Math 1 Feb 15 th. What you need today in class: Turn in homework pp. 26 Get a compass and protractor Those who did not complete yesterday’s activity need to get their materials and complete it quickly!. WARM-UP: #1 Copy the diagram and label the measure of each angle (all 8). - PowerPoint PPT Presentation
Citation preview

Acc Math 1 Feb 15th
What you need today in class: Turn in homework pp. 26Get a compass and protractor
Those who did not complete yesterday’s activity need to get their materials and complete it quickly!
WARM-UP:
#1 Copy the diagram and label the measure of each angle (all 8)
133o

Check Homework p. 26
1. G
2. W3. U
4. ASA5. SSS6. NOT POSSIBLE7. ASA OR AAS8. ASA9. NOT POSSIBLE10.SSS11.ASA12.SAS13.AAS

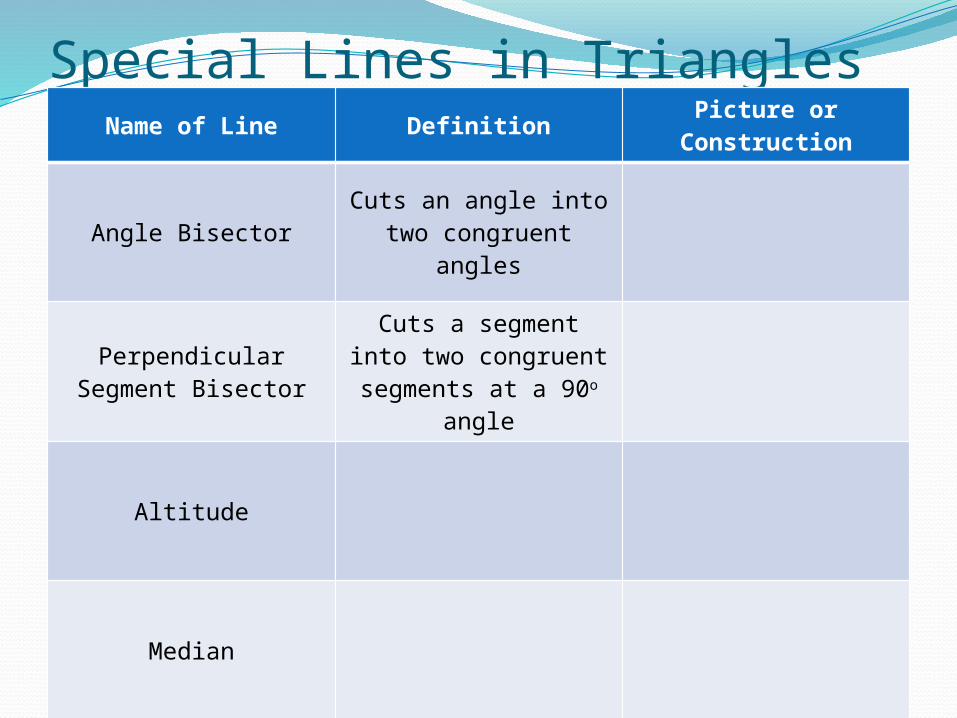
Special Lines in TrianglesName of Line Definition Picture or Construction
Angle Bisector
Perpendicular Segment Bisector
Altitude
Median

Special Lines in TrianglesName of Line Definition Picture or Construction
Angle Bisector Cuts an angle into two congruent angles
Perpendicular Segment Bisector
Altitude
Median
Special Lines in TrianglesName of Line Definition Picture or Construction
Angle Bisector Cuts an angle into two congruent angles
Perpendicular Segment Bisector
Cuts a segment into two congruent segments at a
90o angle
Altitude
Median

Special Lines in TrianglesName of Line Definition Picture or Construction
Angle Bisector Cuts an angle into two congruent angles
Perpendicular Segment Bisector
Cuts a segment into two congruent segments at a
90o angle
AltitudeHeight of a triangle;
Perpendicular from base to vertex
Median

Special Lines in TrianglesName of Line Definition Picture or Construction
Angle Bisector Cuts an angle into two congruent angles
Perpendicular Segment Bisector
Cuts a segment into two congruent segments at a
90o angle
AltitudeHeight of a triangle;
Segment drawn perpendicular from base to
vertex
MedianA segment from the
midpoint of a side to the opposite vertex

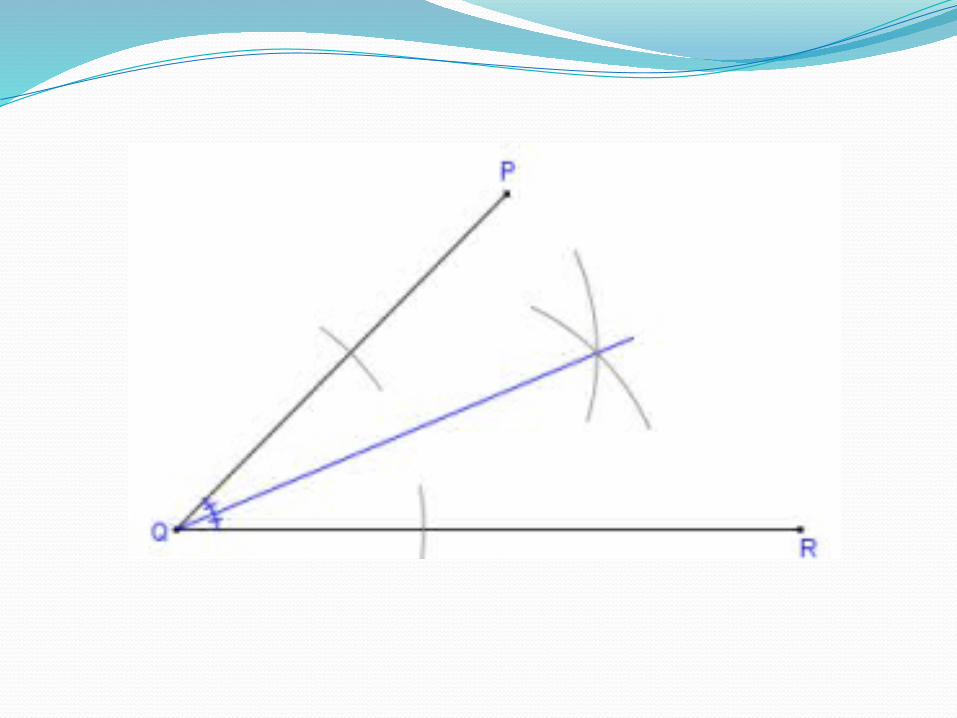
Place the compass point on the angle’s vertex.

Adjust the compass to a medium wide setting. The exact width is not important.

Without changing the compass width, draw an arc across each leg of the angle.

Place the compass on the point where one arc crosses a leg and draw an arc in the interior of the angle.

Without changing the compass width, repeat for the other leg so that the two arcs cross.

Use a straightedge to draw a line from the vertex to the point where the arcs cross.

Place the compass on one end of the line segment.
Set the compass width to approximately two thirds the line length. Actual width does not mater

Hold the compass in place and without changing the width , draw an arc above and below the line. (You can also draw it through the line)

Without changing the compass width, move the compass point to the other endpoint of the segment. Draw another arc above and below the line so that the arcs cross the first ones.
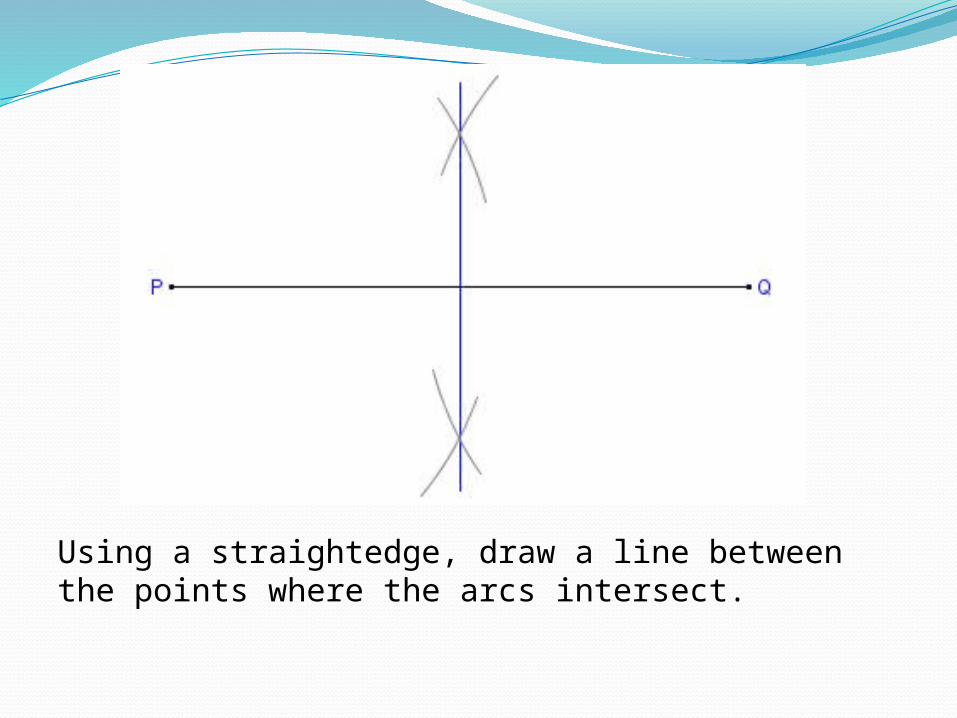
Using a straightedge, draw a line between the points where the arcs intersect.

Start with a line and point which is not on that line.

Place the compass on the given external point (R)

Set the compass width to approximately 50% more than the distance to the line. The exact width does not matter.
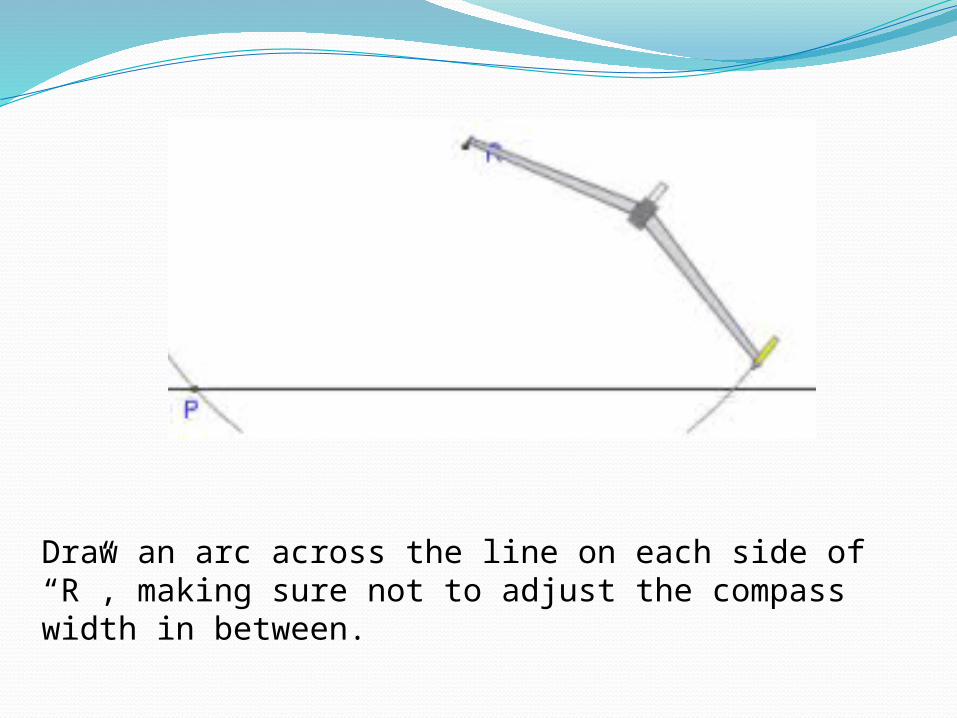
Draw an arc across the line on each side of “R”, making sure not to adjust the compass width in between.

At this point, you can adjust the compass width. From each point where the arcs intersect the segment, draw and arc below the line so that the arcs cross. Keep the width the same when drawing both of these arcs.

Using a straightedge, draw a line from point “R” to where the arcs intersect.


![arXiv:1001.0659v2 [math-ph] 16 Feb 2010 · 2018. 11. 22. · arXiv:1001.0659v2 [math-ph] 16 Feb 2010 On theVeldkampSpaceof GQ(4,2) MetodSaniga Astronomical Institute, Slovak Academy](https://img.dokumen.tips/doc/110x75/60368e336d038e4d1f5d7533/arxiv10010659v2-math-ph-16-feb-2010-2018-11-22-arxiv10010659v2-math-ph.jpg)


![arXiv:1601.01965v2 [math-ph] 2 Feb 2016](https://img.dokumen.tips/doc/110x75/61bd11a061276e740b0f082e/arxiv160101965v2-math-ph-2-feb-2016.jpg)
![arXiv:2002.02136v1 [math-ph] 6 Feb 2020](https://img.dokumen.tips/doc/110x75/61d5f1242b2da574ab5c1d23/arxiv200202136v1-math-ph-6-feb-2020.jpg)
![arXiv:2002.06839v1 [math-ph] 17 Feb 2020](https://img.dokumen.tips/doc/110x75/61c9880f308b3d19bf3cced9/arxiv200206839v1-math-ph-17-feb-2020.jpg)
![arXiv:1209.5665v2 [math-ph] 4 Feb 2014](https://img.dokumen.tips/doc/110x75/61c93be1e83e844fc94de4c2/arxiv12095665v2-math-ph-4-feb-2014.jpg)


