Embed Size (px)
Citation preview
������������������������������������������������������������������������������������������������������������������������������������������������������������������������������������������������������������������������������������������������������������������������������������������������������������������������������������������������������������������������������������������������������������������������
@@@@@@@@@@@@@@@@@@@@@@@@@@@@@@@@@@@@@@@@@@@@@@@@@@@@@@@@@@@@@@@@@@@@@@@@@@@@@@@@@@@@@@@@@@@@@@@@@@@@@@@@@@@@@@@@@@@@@@@@@@@@@@@@@@@@@@@@@@@@@@@@@@@@@@@@@@@@@@@@@@@@@@@@@@@@@@@@@@@@@@@@@@@@@@@@@@@@@@@@@@@@@@@@@@@@@@@@@@@@@@@@@@@@@@@@@@@@@@@@@@@@@@@@@@@@@@@@@@@@@@@@@@@@@@@@@@@@@@@@@@@@@@@@@@@@@@@@@@@@@@@@@@@@@@@@@@@@@@@@@@@@@@@@@@@@@@@@@@@@@@@@@@@@@@@@@@@@@@@@@@@@@@@@@@@@@@@@@@@@@@@@@@@@@@@@@@@@@@@@@@@@@@@@
������������������������������������������������������������������������������������������������������������������������������������������������������������������������������������������������������������������������������������������������������������������������������������������������������������������������������������������������������������������������������������������������������������������������
ÀÀÀÀÀÀÀÀÀÀÀÀÀÀÀÀÀÀÀÀÀÀÀÀÀÀÀÀÀÀÀÀÀÀÀÀÀÀÀÀÀÀÀÀÀÀÀÀÀÀÀÀÀÀÀÀÀÀÀÀÀÀÀÀÀÀÀÀÀÀÀÀÀÀÀÀÀÀÀÀÀÀÀÀÀÀÀÀÀÀÀÀÀÀÀÀÀÀÀÀÀÀÀÀÀÀÀÀÀÀÀÀÀÀÀÀÀÀÀÀÀÀÀÀÀÀÀÀÀÀÀÀÀÀÀÀÀÀÀÀÀÀÀÀÀÀÀÀÀÀÀÀÀÀÀÀÀÀÀÀÀÀÀÀÀÀÀÀÀÀÀÀÀÀÀÀÀÀÀÀÀÀÀÀÀÀÀÀÀÀÀÀÀÀÀÀÀÀÀÀÀÀÀÀÀÀÀÀÀÀÀÀÀÀÀÀÀÀÀÀÀÀÀÀÀÀÀÀÀÀÀÀÀÀÀÀÀÀÀÀÀÀÀÀÀÀÀÀÀÀÀÀÀÀÀÀÀÀÀÀÀÀÀÀÀÀÀÀÀÀÀÀÀÀÀÀÀÀÀÀÀÀÀÀÀÀÀÀÀÀÀÀÀÀÀÀÀÀÀÀÀÀÀÀÀÀÀÀÀÀÀÀÀÀÀÀÀÀÀÀÀÀÀÀÀÀÀÀÀÀÀÀÀÀÀÀÀÀÀÀÀÀÀÀÀÀÀÀÀÀÀÀÀÀÀÀÀÀÀÀÀÀÀÀÀÀÀÀÀÀÀÀÀÀÀÀÀÀÀÀÀÀÀÀÀÀÀÀÀÀÀÀÀÀÀÀÀÀÀÀÀÀÀÀÀÀÀÀ
������������������������������������������������������������������������������������������������������������������������������������������������������������������������������������������������������������������������������������������������������������������������������������������������������������������������������������������������������������������������������������������������������������������������
yyyyyyyyyyyyyyyyyyyyyyyyyyyyyyyyyyyyyyyyyyyyyyyyyyyyyyyyyyyyyyyyyyyyyyyyyyyyyyyyyyyyyyyyyyyyyyyyyyyyyyyyyyyyyyyyyyyyyyyyyyyyyyyyyyyyyyyyyyyyyyyyyyyyyyyyyyyyyyyyyyyyyyyyyyyyyyyyyyyyyyyyyyyyyyyyyyyyyyyyyyyyyyyyyyyyyyyyyyyyyyyyyyyyyyyyyyyyyyyyyyyyyyyyyyyyyyyyyyyyyyyyyyyyyyyyyyyyyyyyyyyyyyyyyyyyyyyyyyyyyyyyyyyyyyyyyyyyyyyyyyyyyyyyyyyyyyyyyyyyyyyyyyyyyyyyyyyyyyyyyyyyyyyyyyyyyyyyyyyyyyyyyyyyyyyyyyyyyyyyyyyyyyyy
Instruction ManualManual de instrucciones Manuale d'istruzione

"IMPORTANT SAFETY INSTRUCTIONS"When using this machine, basic safety precautions should always be taken ,
including the following:
"Read all instructions before using."
DANGER – To reduce the risk of electric shock:1. The machine should never be left unattended when plugged in. Always unplug this machine from the electrical outlet
immediately after using and before cleaning.2. Always unplug before changing the light bulb.
Replace bulb with same type rated 12 volts 5 watts (for Model STAR 240E, STAR 230E).Replace bulb with same type rated 15 watts (for Model PS-57, PS-55, PS-53).
WARNING – To reduce the risk of burns, fire, electric shock, or injury to persons:1. Do not allow this machine to be used as a toy. Close attention is necessary when the machine is used by or near children.2. Use this machine only for its intended use as described in this manual. Use only accessories recommended by the
manufacturer as contained in this manual.3. Never operate this machine if it has a damaged cord or plug, if it is not working properly, if it has been dropped or damaged,
or dropped into water. Return the machine to the nearest authorized dealer or service center for examination, repair,electrical or mechanical adjustment.
4. Never operate the machine with any air openings blocked. Keep ventilation openings of the machine and foot control freefrom the accumulation of lint, dust, and loose cloth.
5. Never drop or insert any object into any opening.6. Do not use outdoors.7. Do not operate where aerosol (spray) products are being used or where oxygen is being administered.8. To disconnect, turn the main switch to the symbol “O” position which represents off, then remove plug from outlet.9. Do not unplug by pulling on cord. To unplug, grasp the plug, not the cord.10. Keep fingers away from all moving parts. Special care is required around the machine needle.11. Always use the proper needle plate. The wrong plate can cause the needle to break.12. Do not use bent needles.13. Do not pull or push fabric while stitching. It may deflect the needle causing it to break.14. Switch the machine to the symbol “O” position when making any adjustments in the needle area, such as threading needle,
changing needle, threading bobbin, or changing the presser foot, and the like.15. Always unplug the machine from the electrical outlet when removing covers, lubricating, or when making any of the user
service adjustments mentioned in the instruction manual.16. The machine is not intended for use by young children or infirm persons without supervision.17. Young children should be supervised to ensure that do not play with this machine.
"SAVE THESE INSTRUCTIONS""This machine is intended for household use."

“IMPORTANTES INSTRUCCIONES DESEGURIDAD”
Cuando se usa una máquina de coser, debe seguirse unas precauciones básicas yque vienen incluidas a continuación.
“Leer las instrucciones antes de usar”
PELIGRO – Para reducir el riesgo de una descarga eléctrica.1. La máquina no debe dejarse nunca desatendida mientras esté conectada. Desconectar la máquina de la red eléctrica inmediatamente
después de su uso y antes de limpiarla.2. Antes de cambiar la bombilla, asegúrese siempre de que la máquina de coser está apagada.
Cambie la bombilla por otra del mismo tipo de 12 V y 5 W (para los modelo STAR 240E, STAR 230E).Cambie la bombilla por otra del mismo tipo de 15 W (para los modelo PS-57, PS-55, PS-53).
CUIDADO – Para reducir el riesgo de quemaduras, fuego, descargas eléctricas o causar daños a personas.1. No usar la máquina como un juguete.
Prestar atención si fuese necesario cuando la máquina está siendo usada por niños o cerca de ellos.2. Usar la máquina de coser solamente como se describe en este manual.
Usar únicamente los accesorios recomendados por el fabricante y que vienen especificados en este manual.3. Nunca haga funcionar la máquina de coser si el cordón de alimentación o la clavija están deteriorados, si no funciona correctamente,
si se ha caído o si estuvo mojada. Entregar la máquina de coser al centro de servicio autorizado más cercano para que la examinen,la reparen o hagan los ajustes eléctricos o mecánicos que correspondan.
4. No usar la máquina con los orificios de ventilación bloqueados. Mantener los orificios de ventilación de la máquina de coser y el pedalsin acumulacíon de povo. Suciedad y restos de tejido.
5. No introducir no insertar objetos en los orificios de ventilación.6. No usar al, aire libre.7. No usar mientras se estén utilizando productos aerosoles (spray) o en lugares donde se esté administrando oxígeno.8. Para desconectar, girar el interruptor hasta la posición del símbolo “O” que representa off, luego desconectar el enchufe de la red.9. Nunca desconectar el enchufe tirando del cable. Para desconectar la máquina, tirar de la clavija y no del cable.10. Mantener los dedos alejados de todas las partes movibles de la máquina. Tener un cuidado especial con la aguja.11. Usar siempre la placa de agujas apropiada. Una placa de agujas impropia puede producir la rotura de la aguja.12. No usar agujas torcidas.13. No presionar ni tirar del tejido mientras se está cosiendo. Esto podría doblar la aguja y romperla.14. Apagar la máquina de coser, poniendo el interruptor principal en la posición cerrada (en “O”) cuando quiera realizar algún ajuste en
el área de la aguja tal como enhebrar la aguja, cambiarla, bobinar la canilla, cambiar el prensatelas y operaciones similares.15. Desconectar siempre la máquina de la red eléctrica cuando se retiren las tapas, para lubricar, o cuando quiera realizar algún tipo de
ajuste mecánico tal como mencionado en el manual de instrucciones.16. La máquina de coser no está pensada para el uso de los niños o personas enfermas sin supervisión.17. Evite que los niños jueguen con la máquina de coser.
“CONSERVE ESTE MANUAL DE INSTRUCCIONES”“Esta máquina de coser es para uso doméstico”

“IMPORTANTI ISTRUZIONI DI SICUREZZA”Quando usate la macchina per cucire, rispettate sempre le precauzioni di sicurezza,
incluso quanto qui di seguito specificato.
“Leggete tutte le istruzioni prima dell’uso.”
PERICOLO – Per ridurre il rischio di shock elettrico.1. La macchina per cucire non deve essere mai lasciata abbandonata quando la spina è inserita. Rimuovete sempre la spina
della macchina per cucire subito dopo avere finito di lavorare e prima di procedere alla sua pulizia.2. Staccare sempre la spina della macchina per cucire prima di procedere alla sostituzione della lampadina.
Utilizzare una lampadina dello stesso tipo da 12 volt, 5 watt (per i modelli STAR 240E, STAR 230E).Utilizzare una lampadina dello stesso tipo da 15 watt. (per i modelli PS-57, PS-55, PS-53).
ATTENZIONE – Per ridurre il rischio di bruciature, incendi, shock elettrico o danni alle persone.1. Non permettete che venga usata come un giocattolo.
Fare molta attenzione quando la macchina viene usata vicino a bambini.2. Usate questa macchina per cucire solo per l’uso cui è destinata, come descritto all’interno del manuale.
Usare solo accessori consigliati dal produttore, come specificato qui di seguito.3. Non usate mai questa macchina da cucire nel caso la spina o il cavo di alimentazione risultassero danneggiati, oppure nel
caso non funzionasse correttamente, fosse caduta o si fosse danneggiata, o fosse caduta nell’acqua. Riportate la macchinada cucire al più vicino rivenditore o centro di assistenza autorizzato per far eseguire un controllo, interventi di riparazioneo regolazioni elettriche o meccaniche.
4. Non usate la macchina per cucire con le aperture dell’aria bloccate. Mantenere le aperture di ventilazione della macchinaper cucire ed il reostato privi di fili, polvere o stoffa.
5. Non far cadere né inserire alcun oggetto in nessuna delle aperture.6. Non usate la macchina all’aperto.7. Non fate funzionare la macchina nel caso vengano usati prodotti aerosol (spray) o ossigeno.8. Per scollegare, girate l’interruttore principale in posizione “O” (che significa OFF = spento), quindi toglieri la spina dalla presa
di corrente.9. Non scollegate la spina tirandola dal cavo. Togliete la spina impugnando la spina stessa e non il cavo di alimentazione.10. Tenete le dita lontano da tutte le parti in movimento, specialmente attorno all’ago della macchina per cucire.11. Usate sempre la placca appropriata all’ago in uso. Una placca sbagliata potrebbe provocare la rottura dell’ago.12. Non usate aghi piegati.13. Non tirate o spingete il tessuto mentre cucite, poiché ciò potrebbe far piegare l’ago e quindi romperlo.14. Spegnete la macchina da cucire spostando l’interruttore sulla posizione “O” quando eseguite qualsiasi operazione in
prossimità dell’ago, come ad esempio l’infilatura o la sostituzione dell’ago, l’infilatura della spolina o la sostituzione delpiedino premistoffa ed altre simili operazioni.
15. Disinserite sempre la spina di alimentazione della macchina da cucire dalla presa elettrica quando togliete i coperchi,lubrificate la macchina, oppure quando effettuate una qualunque delle operazioni di manutenzione citate nel manualed’istruzioni.
16. La macchina da cucire non deve essere utilizzata dai ragazzi o dalle persone invalide senza controllo.17. I ragazzi devono essere sorvegliati per evitare che giochino con la macchina da cucire.
“CONSERVATE QUESTE ISTRUZIONI”“La presente macchina per cucire è destinata all’uso domestico.”

FOR USERS IN UK, EIRE, MALTA AND CYPRUS ONLY.If this machine is fitted with a 3 pin non-rewireable BS plug then please read the following.
IMPORTANT (in the United Kingdom)
Main supply (AC 230/240V~, 50Hz)
DO NOT cut off the main plug from equipment. If the plugfitted is not suitable for the power point in your home or thecable is too short to reach a power point, then obtain anappropriate safety approved extension lead or consult yourdealer.
BE SURE to replace the fuse only with an identical approvedtype, as originally fitted and to replace the fuse cover.
If none the less the main plug is cut off be sure to remove thefuse and dispose of the plug immediately, to avoid a possibleshock hazard by inadvertent connection to the main supply.
IMPORTANT (in the other countries)
If the available socket outlet is not suitable for the plugsupplied with this equipment, it should be cut off and anappropriate three pin plug fitted. With alternative plugs anapproved fuse must be fitted in the plug.
NOTE: The plug severed from the main leads must bedestroyed as a plug with bared flexible cords is hazardous ifengaged in a live socket outlet. In the event of replacing theplug fuse, use a fuse approved by ASTA to BS 1362, i.e.carrying the ASA mark, rating as marked on plug.
Always replace the fuse cover. Never use plugs with the fusecover omitted.
WARNING: DO NOT CONNECT EITHER WIRE TO THEEARTH TERMINAL WHICH IS MARKED WITHTHE LETTER ‘E’, BY THE EARTH SYMBOL OR COL-OURED GREEN OR YELLOW.
The wires in this main lead are coloured in accordance withthe following code:
Blue NeutralBrown Live
As the colours of the wiring in the main lead of this appliancemay not correspond with the coloured markings identifyingthe terminals in your plug, proceed as follows:
The wire which is coloured blue must be connected to theterminal which is marked with the letter ‘N’ or coloured blackor blue.
The wire which is coloured brown must be connected to theterminal which is marked with the letter ‘L’ or coloured red orbrown.
Connecting Plugs and Main Power / Sewing Light Switch
12
( Model STAR 240E, STAR 230E )

1. Connect the power cord or three-prong plug into themachine.
2. Connect the electrical supply plug into a wall outlet.
- When leaving the machine unattended, the main switch ofthe machine should be switched off or the plug must beremoved from the socket outlet.
Turn on or off the switch for the main power and sew-light.
1 Turn on2 Turn off
- When servicing the machine, or when removing covers orchanging bulbs, the machine or the electrical set mustunplugged.
12
(Model PS-57, PS-55, PS-53)

PLEASE READ BEFORE USING THIS MACHINEFor safe operation1. Be sure to keep your eye on the needle while sewing. Do not touch the balance wheel, thread take-up, needle, or other
moving parts.2. Remember to turn off the power switch and unplug the cord when:
• Operation is completed• Replacing or removing the needle or any other parts• A power failure occurs during use• Maintaining the machine• Leaving the machine unattended.
3. Do not store anything on the foot controller.4. Plug the machine directly into the wall. Do not use extension cords.
For a longer service life1. When storing this machine, avoid direct sunlight and high humidity locations. Do not use or store the machine near a space
heater, iron, halogen lamp, or other hot objects.2. Use only neutral soaps or detergents to clean the case. Benzene, thinner, and scouring powders can damage the case
and machine, and should never be used.3. Do not drop or hit the machine.4. Always consult the operation manual when replacing or installing any assemblies, the presser feet, needle, or other parts
to assure correct installation.
For repair or adjustmentIn the event a malfunction occurs or adjustment is required, first follow the troubleshooting table in the back of the operationmanual to inspect and adjust the machine yourself. If the problem persists, please consult your local authorized dealer.

LEA ESTE MANUAL ANTES DE USAR ESTA MÁQUINAPara un funcionamiento seguro1. Esté siempre atento a la aguja cuando cosa. No toque la polea, el tirahilo, la aguja u otras piezas móviles.2. Acuérdese de apagar la máquina y desenchufarla de la corriente cuando:
• Termine la labor• Recambie o retire la aguja y otras piezas• Ocurra un fallo eléctrico durante la costura• Realice tareas de mantenimiento• Deje la máquina desatendida
3. No deje ningún objeto encima del pedal.4. Enchufe la máquina directamente a la toma de contacto de la pared. No utilice alargos.
Para un servicio más duradero1. Evite exponer la máquina a la luz directa del sol y no la guarde en sitios húmedos. No utilice o guarde la máquina cerca de una fuente
de calor, plancha, lámpara halógena u otros objetos candentes.2. Utilice sólo detergentes o jabones neutros para limpiar la carcasa. Gasolina, diluyentes y polvos de limpieza pueden dañar la carcasa
y la máquina; no los utilice nunca.3. No deje caer o golpee la máquina.4. Consulte siempre el manual de funcionamiento cuando tenga que reponer o instalar cualquier pieza, como el pie prensatela o la aguja.
Así, asegurará una adecuada instalación.
Para reparaciones o ajustesEn el caso de que ocurra una malfunción o se requiera un reajuste, consulte primero la tabla de solución de problemas al final del manualde funcionamiento para inspeccionar y ajustar usted mismo la máquina. Si el problema continúa, recurra a su distribuidor autorizado local.
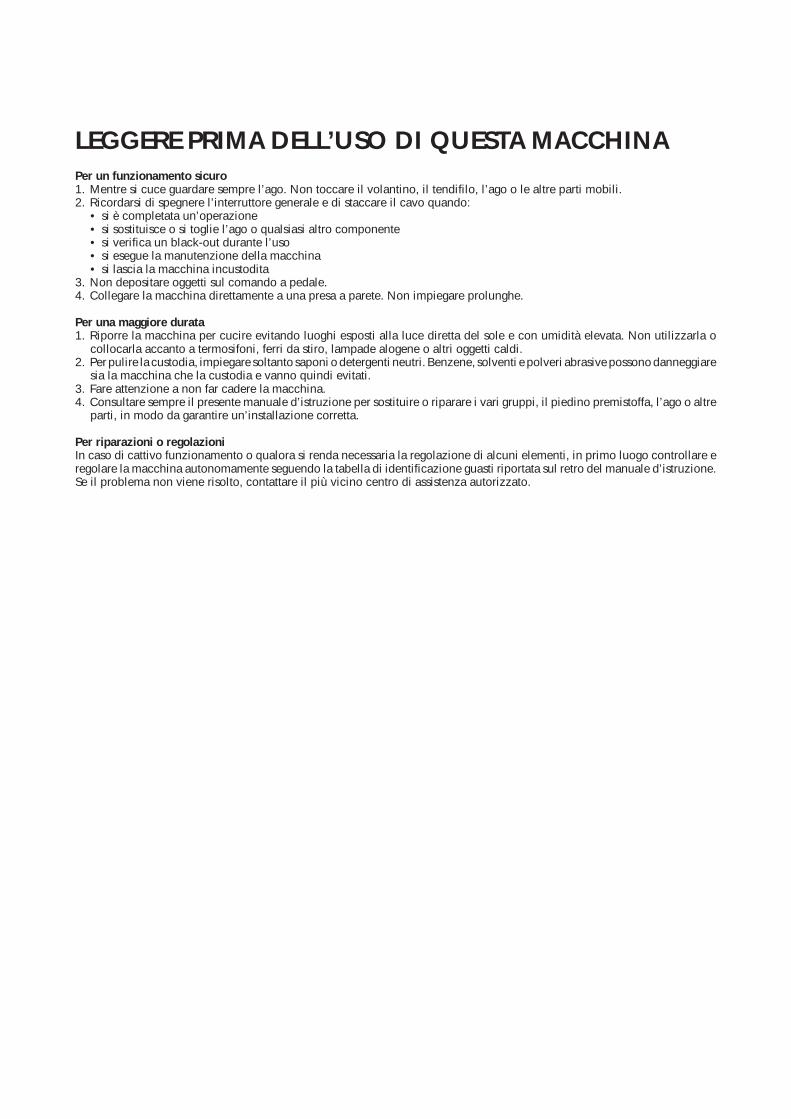
LEGGERE PRIMA DELL’USO DI QUESTA MACCHINAPer un funzionamento sicuro1. Mentre si cuce guardare sempre l’ago. Non toccare il volantino, il tendifilo, l’ago o le altre parti mobili.2. Ricordarsi di spegnere l’interruttore generale e di staccare il cavo quando:
• si è completata un’operazione• si sostituisce o si toglie l’ago o qualsiasi altro componente• si verifica un black-out durante l’uso• si esegue la manutenzione della macchina• si lascia la macchina incustodita
3. Non depositare oggetti sul comando a pedale.4. Collegare la macchina direttamente a una presa a parete. Non impiegare prolunghe.
Per una maggiore durata1. Riporre la macchina per cucire evitando luoghi esposti alla luce diretta del sole e con umidità elevata. Non utilizzarla o
collocarla accanto a termosifoni, ferri da stiro, lampade alogene o altri oggetti caldi.2. Per pulire la custodia, impiegare soltanto saponi o detergenti neutri. Benzene, solventi e polveri abrasive possono danneggiare
sia la macchina che la custodia e vanno quindi evitati.3. Fare attenzione a non far cadere la macchina.4. Consultare sempre il presente manuale d’istruzione per sostituire o riparare i vari gruppi, il piedino premistoffa, l’ago o altre
parti, in modo da garantire un’installazione corretta.
Per riparazioni o regolazioniIn caso di cattivo funzionamento o qualora si renda necessaria la regolazione di alcuni elementi, in primo luogo controllare eregolare la macchina autonomamente seguendo la tabella di identificazione guasti riportata sul retro del manuale d’istruzione.Se il problema non viene risolto, contattare il più vicino centro di assistenza autorizzato.

KNOWING YOUR SEWING MACHINE
PRINCIPAL PARTS ......................................................... 1ACCESSORIES ............................................................... 5
Optional Accessories .............................................. 5OPERATING YOUR SEWING MACHINE ....................... 7
Connecting Plugs ................................................... 7Main Power/Sewing Light Switch ........................... 9Foot Controller ...................................................... 10Checking the Needle ............................................ 11Replacing the Needle ........................................... 11Changing the Presser Foot .................................. 13Flat Bed Attachment ............................................. 14
VARIOUS CONTROLS .................................................. 15Pattern Selection Dial ........................................... 15Recommended Widths and Lengths for Stitches ... 17Stitch Length Dial ................................................. 26Stitch Width Dial ................................................... 28Reverse Sewing Lever ......................................... 29Feed Dog Position Switch .................................... 30Start/Stop Button .................................................. 31Sewing Speed Controller ...................................... 32Converting to Free-arm Style ............................... 32
THREADING THE MACHINE ........................................ 33Winding the Bobbin .............................................. 33Lower Threading................................................... 37Upper Threading................................................... 39Using Needle Threader ........................................ 41Manually Drawing Up Lower Thread .................... 43Twin Needle Sewing ............................................. 44Thread Tension .................................................... 46
FABRIC/THREAD/NEEDLE COMBINATIONS .............. 47
STRAIGHT AND ZIGZAG STITCHING
PLEASE READ BEFORE SEWING ............................... 49Straight Stitching .................................................. 50Zigzag Stitching .................................................... 53
BUILT-IN STITCHES
Blind Hem Stitching .............................................. 54Shell Tuck Stitching .............................................. 55Elastic Stitching .................................................... 56Double Action Stitching ........................................ 57Scallop Stitching ................................................... 58Decorative Stitching.............................................. 59Patchwork ............................................................. 60Overedge Stitching ............................................... 61Feather Stitching .................................................. 62Triple Zigzag Stretch Stitching.............................. 62
TABLE OF CONTENTS
BUTTONHOLE AND BUTTON SEWING
Making a Buttonhole (For 1-step BH Type) .......... 63Odd-shaped buttons that do not fit intothe button holder plate .......................................... 65Making a Buttonhole (For 4-step BH Type ) ......... 66Buttonhole Fine Adjustment ................................. 69Button Sewing ...................................................... 72
USING ATTACHMENTS AND APPLICATIONS
Zipper Insertion..................................................... 73Gathering .............................................................. 73Darning ................................................................. 75Appliqués .............................................................. 76Monogramming and Embroidering ....................... 77
OPTIONAL ACCESSORIESUsing the Walking Foot ........................................ 79Using the Spring-action Quilting Foot ................... 81Using the 1/4-Inch Quilting Foot ........................... 83
MAINTENANCE
Changing the Light Bulb ....................................... 85Cleaning ............................................................... 87Performance Check List ....................................... 89Repacking the Machine ........................................ 95
INDEX
TAB
LE O
F CO
NTE
NTS
KN
OW
ING
YO
UR
SE
WIN
G M
AC
HIN
ES
TR
AIG
HT
AN
DZ
IGZ
AG
ST
ITC
HIN
GB
UILT-IN
ST
ITC
HE
SB
UT
TON
HO
LE A
ND
BU
TTO
N S
EW
ING
US
ING
ATTACH
ME
NTS
AN
D A
PP
LICATIO
NS
MA
INT
EN
AN
CE
IND
EX

CONTENIDO
CONOZCA SU MÁQUINA DE COSER
ELEMENTOS PRINCIPALES ................................................. 2ACCESORIOS .......................................................................... 6
Accesorios opcionales..................................................... 6FUNCIONAMIENTO DE LA MÁQUINA DE COSER.......... 8
Conexión de los enchufes ............................................... 8Interruptor principal/luz de cosido .................................. 9Pedal ............................................................................. 10Verificación de la aguja ................................................ 12Cambio de la aguja ....................................................... 12Cambio del prensatelas ................................................. 13Plataforma ..................................................................... 14
DISTINTOS MANDOS .......................................................... 16Selector de puntadas ..................................................... 16Anchos y largos recomendados para cada puntada ..........20Selector de largo de puntada ......................................... 27Selector de ancho de puntada........................................ 28Pulsador de retroceso .................................................... 29Palanca de los alimentadores ........................................ 30Pulsador de puesta en Marcha/Parada .......................... 31Palanca de control de zona de velocidad ...................... 32Conversión en modalidad de brazo libre ...................... 32
ENHEBRADO DE LA MÁQUINA ....................................... 34Bobinado de la canilla ................................................... 34Enhebrado inferior ........................................................ 38Enhebrado superior ....................................................... 40Uso del enhebrador ....................................................... 42Levantar manualmente el hilo inferior .......................... 43Costura con aguja doble ................................................ 44Tensión de los hilos ...................................................... 46
COMBINACIONES DE TEJIDO/HILO/AGUJA .................. 47
PUNTADAS RECTAS Y ZIGZAG
LEA ESTO POR FAVOR ANTES DE COSER ..................... 49Puntadas rectas .............................................................. 51Puntadas zigzag ............................................................ 53
PUNTADAS INCORPORADAS
Puntadas invisibles ........................................................ 54Puntada ondas ............................................................... 55Puntada elástica ............................................................. 56Puntada de acción doble ............................................... 57Puntada festón ............................................................... 58Puntadas decorativas ..................................................... 59Patchwork ..................................................................... 60Puntada por encima de la orilla ..................................... 61Puntada pluma .............................................................. 62Triple puntada zigzag elástica....................................... 62
OJALES Y COSTURA DE BOTONES
Para coser ojales (Para tipo BH en una operación) ...........64Botones con formas extrañas que no caben en el soportedel botón ....................................................................... 65Para coser ojales(Para tipo BH en cuatro operaciones) ........................... 66Ajuste fino de los ojales ................................................ 70Costura de botones ........................................................ 72
USO DE ACCESORIOS Y APLICACIONES
Inserción de cremalleras ............................................... 74Fruncido ........................................................................ 74Zurcido .......................................................................... 75Aplicaciones ................................................................. 76Monogramas y bordados ............................................... 78
ACCESORIOS OPCIONALESUtilización del pie caminante ....................................... 80Utilización del prensatelas enguatador accionadopor muelle ..................................................................... 82Utilización del prensatela para pespunte 1/4 ................ 84
MANTENIMIENTO
Cambio de la bombilla .................................................. 86Limpieza ....................................................................... 88Listado de posibles incidencias ..................................... 91Embalaje de la máquina ................................................ 95
ÍNDICE

INDICE DEGLI ARGOMENTI
CONOSCERE LA MACCHINA DA CUCIRE
PARTI PRINCIPALI ............................................................ 2ACCESSORI ...................................................................... 6
Accessori opzionali ................................................. 6FUNZIONAMENTO DELLA MACCHINA DA CUCIRE ...... 8
Collegamento elettrico ............................................ 8Interruttore principale/luce area di lavoro ................ 9Reostato a pedale .................................................. 10Controllo dell’ago.................................................. 12Sostituzione dell’ago ............................................. 12Sostituzione del piedino premistoffa ...................... 13Scomparto piano ................................................... 14
DISPOSITIVI DI CONTROLLO........................................ 16Selettore dei punti ................................................. 16Ampiezze e lunghezze dei punti consigliate .......... 23Selettore della lunghezza del punto ....................... 27Manopola dell’ampiezza del punto ....................... 28Leva di cucitura di ritorno ..................................... 29Tasto abbassa-trasportatore .................................... 30Pulsante Avvio/Stop ............................................... 31Cursore di controllo velocità ................................. 32Cucitura a braccio libero ....................................... 32
PROCEDURE DI INFILATURA ........................................ 34Avvolgimento del rocchetto ................................... 34Infilatura inferiore .................................................. 38Infilatura superiore ................................................ 40Come utilizzare l’infila-ago ................................... 42Tiraggio manuale del filo inferiore ......................... 43Cucitura con ago gemello ...................................... 44Tensione del filo .................................................... 46
COMBINAZIONE TESSUTO/FILO/AGO ......................... 48
CUCITURA CON PUNTO DIRITTO E ZIG-ZAG
LEGGERE PRIMA DI CUCIRE .......................................... 49Punto diritto .......................................................... 51Punto zigzag.......................................................... 53
PUNTI INCORPORATI
Punto orlo invisibile .............................................. 54Punto conchiglia ................................................... 55Punto elastico ........................................................ 56Punto doppio ........................................................ 57Punto smerlo ......................................................... 58Punto decorativo ................................................... 59Lavori di patchwork ............................................... 60Rifinitura a sopraggitto ........................................... 61Punto piuma .......................................................... 62Punto zigzag triplo ................................................ 62
OCCHIELLI E BOTTONI
Esecuzione di un occhiello(per il tipo BH a 1 operazione) .............................. 64Bottoni di forma strana che non si adattano nellaplacca per bottoni ................................................. 65Esecuzione di un occhiello(per il tipo BH a 4 operazioni) ............................... 66Regolazione della densità dei puntidell’occhiello ........................................................ 70Cucitura di bottoni ................................................ 72
GUARNIZIONI E APPLICAZIONI
Applicazione di cerniere ....................................... 74Arricciature ........................................................... 74Rammendo ............................................................ 75Applicazioni .......................................................... 76Monogrammi e ricami ........................................... 78
ACCESSORI OPZIONALIUtilizzazione del piedino semovente .................... 80Utilizzazione del piedino per trapunteazionato a molla .................................................... 82Utilizzazione del piedino per patchwork ............... 84
MANUTENZIONE
Sostituzione della lampadina ................................. 86Pulizia ................................................................... 88Tabella di controllo del funzionamento ................. 93Imballaggio della macchina................................... 95
INDICE

1
5 21
D
34
9 0
C
8
B
7
6
A
L
E
G
H
I
M
J
K
F
PRINCIPAL PARTS(Model STAR 240E, STAR 230E)
1 BOBBIN WINDER (Page 33)Winds the thread onto the bobbin to be used for the lower thread.
2 STITCH LENGTH DIAL (Page 15, 26)Controls the length of the stitches.
3 SPOOL PIN AND SPOOL CAP (Page 33, 39)
4 STITCH WIDTH DIAL (Page 28)Controls the stitch width.
5 UPPER TENSION CONTROL DIAL (Page 46)Controls the tension of the upper thread.
6 BUTTONHOLE LEVER (Page 63)
7 NEEDLE THREADER (Page 41)
8 FLAT BED ATTACHMENT WITH ACCESSORY COMPART-MENT (Page 14, 32)
9 ZIGZAG PRESSER FOOT (Page 5, 13)
: START/STOP BUTTON (Page 31)Touch to start or stop machine.
A FEED DOG POSITION SWITCH (Page 30)
B REVERSE SEWING LEVER (Page 29)Push for stitching in the reverse direction.
C SEWING SPEED CONTROLLER (Page 32)Controls the speed range.
D PATTERN INDICATION WINDOW (Page 15)Shows the stitch number to be performed.
E HOLE FOR VERTICAL SPOOL PIN (Page 44)Used to hold a second spool of thread for twin needle sewing.
F BALANCE WHEEL
G PATTERN SELECTION DIAL (Page 15)Turn in either direction to select the desired stitch.
H MAIN POWER/SEWING LIGHT SWITCH (Page 9)Turn on/off the main power/sewing light switch.
I FOOT CONTROLLER JACK (Page 10)Insert for foot controller operation.
J CORD JACK (Page 7)Connect machine to power supply.
K BUTTONHOLE FINE ADJUSTMENT SCREW (Page 69)
L PRESSER FOOT LEVER (Page 39)
M FOOT CONTROLLER (Page 10)Used to control sewing speed/start and stop.
TAB
LE O
F CO
NTE
NTS
KN
OW
ING
YO
UR
SE
WIN
G M
AC
HIN
ES
TR
AIG
HT
AN
DZ
IGZ
AG
ST
ITC
HIN
GB
UILT-IN
ST
ITC
HE
SB
UT
TON
HO
LE A
ND
BU
TTO
N S
EW
ING
US
ING
ATTACH
ME
NTS
AN
D A
PP
LICATIO
NS
MA
INT
EN
AN
CE
IND
EX

2
PARTI PRINCIPALI(Modello STAR 240E, STAR 230E)
1 DISPOSITIVO DI AVVOLGIMENTO SPOLINA (Pagina 34)Per avvolgere il rocchetto con il filo da utilizzare inferiormente.
2 SELETTORE DELLA LUNGHEZZA DEL PUNTO (Pagina 16, 27)Permette di regolare la lunghezza dei punti.
3 PORTAROCCHETTO E FERMAROCCHETTO (Pagina 30, 40)
4 MANOPOLA DELL’AMPIEZZA DEL PUNTO (Pagina 28)Permette di regolare l’ampiezza dei punti.
5 REGOLATORE DI TENSIONE SUPERIORE (Pagina 46)Consente di regolare la tensione del filo superiore.
6 LEVA DELL'OCCHIELLO (Pagina 64)
7 INFILA-AGO (Pagina 42)
8 SCOMPARTO PIANO CON ACCESSORI (Pagina 14, 32)
9 PIEDINO PREMISTOFFA A ZIGZAG (Pagina 6, 13)
: PULSANTE AVVIO/STOP (Pagina 31)Premerlo per avviare o fermare la macchina.
A TASTO ABBASSA-TRASPORTATORE (Pagina 30)
B LEVA DI CUCITURA DI RITORNO (Pagina 29)Premerlo per eseguire cuciture a marcia indietro.
C CURSORE DI CONTROLLO VELOCITA’ (Pagina 32)Controlla la velocità della macchina.
D FINESTRELLA INDICATORE PUNTO (Pagina 16)Mostra il numero del punto da eseguire.
E FORO PER PORTAROCCHETTO VERTICALE (Pagina 44)Sostiene un secondo rocchetto di filo per cuciture con agogemello.
F VOLANTINO
G SELETTORE DEI PUNTI (Pagina 16)Ruotarlo in entrambe le direzioni per selezionare il punto deside-rato.
H INTERRUTTORE PRINCIPALE/LUCE AREA DI LAVORO (Pagina 9)Per accendere e spegnere la macchina da cucire e allo stessotempo la luce dell'area di lavoro.
I PRESA DEL REOSTATO A PEDALE (Pagina 10)Inserirvi il connettore del reostato per azionare la macchinatramite reostato.
J CONNETTORE DEL CAVO DI ALIMENTAZIONE (Pagina 8)Collega la macchina da cucire all’alimentazione elettrica.
K VITE DELL'EQUILIBRATORE DELL'OCCHIELLO (Pagina 70)
L LEVA DEL PIEDINO PREMISTOFFA (Pagina 40)
M REOSTATO A PEDALE (Pagina 10)Utilizzato per controllare la velocità, l'avviamento e l'arrestodella macchina per cucire.
ELEMENTOS PRINCIPALES(Modelo STAR 240E, STAR 230E)
1 DISPOSITIVO DE BOBINADO DE LA CANILLA (Página 34)Hace bobina para la canilla que va a ser utilizada como hilo inferior.
2 SELECTOR DE LARGO DE PUNTADA (Página 16, 27)Controla el largo de las puntadas.
3 EJE DEL CARRETE Y PORTA CARRETES (Página 34, 40)
4 SELECTOR DE ANCHO DE PUNTADA (Página 28)Controla el ancho de las puntadas.
5 DISCO DE CONTROL DE LA TENSIÓN SUPERIOR (Página46)Controla la tensión del hilo superior.
6 PALANCA DE OJALES (Página 64)
7 ENHEBRADOR DE AGUJAS (Página 42)
8 PLATAFORMA CON COMPATIMENTO DE ACCESORIOS(Página 14, 32)
9 PRENSATELAS ZIGZAG (Página 6, 13)
: BOTÓN DE PUESTA EN MARCHA/PARADA (Página 31)Apriete el botón para poner la máquina en marcha o pararla.
A PALANCA DE ALIMENTADORES (Página 30)
B PULSADOR DE RETROCESO (Página 29)Apriete el pulsador para coser hacia atrás.
C PALANCA DE CONTROL DEL RANGO DE VELOCIDAD (Página32)Controla el rango de velocidad.
D INDICADOR DE PUNTADA (Página 16)Muestra el número de puntada que se debe realizar.
E ORIFICO PARA EL PORTA CARRETES VERTICAL (Página44)Sirve para poner un segundo carrete de hilo, para coser con una agujadoble.
F RUEDA MANUAL/POLEA
G SELECTOR DE PUNTADAS (Página 16)Gírelo en cualquier sentido para seleccionar la puntada deseada.
H INTERRUPTOR PRINCIPAL/LUZ DE COSIDO (Página 9)Enciende o apaga la máquina así como la luz de costura.
I CONECTADOR DEL PEDAL (Página 10)Inserte la clavija del pedal para que éste funcione.
J CLAVIJA DEL CORDÓN DE ALIMENTACIÓN (Página 8)Permite conectar la máquina a una toma de corriente.
K TORNILLO DE AJUSTE FINO DE LOS OJALES (Página 70)
L PALANCA DEL PRENSATELAS (Página 40)
M PEDAL (Página 10)Se utiliza para controlar la velocidad, el inicio y el final del cosido.

3
J
D
FG
I
E
C
H
PRINCIPAL PARTS(Model PS-57, PS-55, PS-53)
1 BOBBIN WINDER (Page 33)Winds the thread onto the bobbin to be used for the lower thread.
2 STITCH LENGTH DIAL (Page 15, 26)Controls the length of the stitches.
3 SPOOL PIN AND SPOOL CAP (Page 33, 39)
4 STITCH WIDTH DIAL (Page 28)Controls the stitch width.
5 UPPER TENSION CONTROL DIAL (Page 46)Controls the tension of the upper thread.
6 BUTTONHOLE LEVER (Page 63)
*PS-57, PS-55 only
7 NEEDLE THREADER (Page 41)
8 FLAT BED ATTACHMENT WITH ACCESSORY COMPART-MENT (Page 14, 32)
9 ZIGZAG PRESSER FOOT (Page 5, 13)
: REVERSE SEWING LEVER (Page 29)Push for stitching in the reverse direction.
A FEED DOG POSITION SWITCH (Page 30)
B PATTERN INDICATION WINDOW (Page 15)Shows the stitch number to be performed.
C HOLE FOR VERTICAL SPOOL PIN (Page 44)Used to hold a second spool of thread for twin needle sewing.
D BALANCE WHEEL
E PATTERN SELECTION DIAL (Page 15)Turn in either direction to select the desired stitch.
F MAIN POWER/SEWING LIGHT SWITCH (Page 9)Turn on/off the main power/sewing light switch.
G FOOT CONTROLLER JACK (Page 7)Insert the foot controller plug for operation and connect themachine to the power supply.
H BUTTONHOLE FINE ADJUSTMENT SCREW (Page 69)
I PRESSER FOOT LEVER (Page 39)
J FOOT CONTROLLER (Page 10)Used to control sewing speed/start and stop.
5 21
B
34
: A9
8
7
6*
TAB
LE O
F CO
NTE
NTS
KN
OW
ING
YO
UR
SE
WIN
G M
AC
HIN
ES
TR
AIG
HT
AN
DZ
IGZ
AG
ST
ITC
HIN
GB
UILT-IN
ST
ITC
HE
SB
UT
TON
HO
LE A
ND
BU
TTO
N S
EW
ING
US
ING
ATTACH
ME
NTS
AN
D A
PP
LICATIO
NS
MA
INT
EN
AN
CE
IND
EX

4
PARTI PRINCIPALI(Modello PS-57, PS-55, PS-53)
1 DISPOSITIVO DI AVVOLGIMENTO SPOLINA (Pagina 34)Per avvolgere il rocchetto con il filo da utilizzare inferiormente.
2 SELETTORE DELLA LUNGHEZZA DEL PUNTO (Pagina 16, 27)Permette di regolare la lunghezza dei punti.
3 PORTAROCCHETTO E FERMAROCCHETTO (Pagina 34, 40)
4 MANOPOLA DELL’AMPIEZZA DEL PUNTO (Pagina 28)Permette di regolare l’ampiezza dei punti.
5 REGOLATORE DI TENSIONE SUPERIORE (Pagina 46)Consente di regolare la tensione del filo superiore.
6 LEVA DELL'OCCHIELLO (Pagina 64)* Solo PS-57, PS-55
7 INFILA-AGO (Pagina 42)
8 SCOMPARTO PIANO CON ACCESSORI (Pagina 14, 32)
9 PIEDINO PREMISTOFFA A ZIGZAG (Pagina 6, 13)
: LEVA DI CUCITURA DI RITORNO (Pagina 29)Premerlo per eseguire cuciture a marcia indietro.
A TASTO ABBASSA-TRASPORTATORE (Pagina 30)
B FINESTRELLA INDICATORE PUNTO (Pagina 16)Mostra il numero del punto da eseguire.
C FORO PER PORTAROCCHETTO VERTICALE (Pagina 44)Sostiene un secondo rocchetto di filo per cuciture con agogemello.
D VOLANTINO
E SELETTORE DEI PUNTI (Pagina 16)Ruotarlo in entrambe le direzioni per selezionare il punto deside-rato.
F INTERRUTTORE PRINCIPALE/LUCE AREA DI LAVORO (Pagina 9)Per accendere e spegnere la macchina da cucire e allo stessotempo la luce dell'area di lavoro.
G PRESA DEL REOSTATO A PEDALE (Pagina 8)Inserirvi il connettore del reostato per azionare la macchinatramite reostato.
H VITE DELL'EQUILIBRATORE DELL'OCCHIELLO (Pagina 70)
I LEVA DEL PIEDINO PREMISTOFFA (Pagina 40)
J REOSTATO A PEDALE (Pagina 10)Utilizzato per controllare la velocità, l'avviamento e l'arrestodella macchina per cucire.
ELEMENTOS PRINCIPALES(Modelo PS-57, PS-55, PS-53)
1 DISPOSITIVO DE BOBINADO DE LA CANILLA (Página 34)Hace bobina para la canilla que va a ser utilizada como hilo inferior.
2 SELECTOR DE LARGO DE PUNTADA (Página 16, 27)Controla el largo de las puntadas.
3 EJE DEL CARRETE Y PORTA CARRETES (Página 34, 40)
4 SELECTOR DE ANCHO DE PUNTADA (Página 28)Controla el ancho de las puntadas.
5 DISCO DE CONTROL DE LA TENSIÓN SUPERIOR (Página46)Controla la tensión del hilo superior.
6 PALANCA DE OJALES (Página 64)* PS-57, PS-55 solamente
7 ENHEBRADOR DE AGUJAS (Página 42)
8 PLATAFORMA CON COMPATIMENTO DE ACCESORIOS(Página 14, 32)
9 PRENSATELAS ZIGZAG (Página 6, 13)
: PULSADOR DE RETROCESO (Página 29)Apriete el pulsador para coser hacia atrás.
A PALANCA DE ALIMENTADORES (Página 30)
B INDICADOR DE PUNTADA (Página 16)Muestra el número de puntada que se debe realizar.
C ORIFICIO PARA EL PORTABOBINAS VERTICAL (Página44)Sirve para poner un segundo carrete de hilo para coser con una agujadoble.
D RUEDA MANUAL/POLEA
E SELECTOR DE PUNTADAS (Página 16)Gírelo en cualquier sentido para seleccionar la puntada deseada.
F INTERRUPTOR PRINCIPAL/LUZ DE COSIDO (Página 9)Encienda/apague el interruptor principal/luz de cosido.
G RECEPTÁCULO DEL PEDAL (Página 8)Inserte la clavija del pedal para que éste funcione y enchufe la máquinaa la fuente de alimentación.
H TORNILLO DE AJUSTE FINO DE LOS OJALES (Página 70)
I PALANCA DEL PRENSATELAS (Página 40)
J PEDAL (Página 10)Se utiliza para controlar la velocidad, el inicio y el final del cosido.

5
1 X59370-051 2 SA156XA5539-051
3 X57117-051 4 X57521-001
5 XA4911-151(STAR 240E, STAR 230E PS-57, PS-55)
6 130012-054 7 130013-054
8 X59476-051 9 130920-051
< X55467-051 A X54243-001
1 SA140X81065-002
2 SA129X81021-002
ACCESSORIES1 Zipper Foot (1 pc.)
2 Bobbin (3 pcs.) SA156 (For U.S.A)
XA5539-051 (For other countries)
Replacements (10-piece set)
3 Needle Pack (Regular Single Needle No. 14) (3 pcs.)
4 Twin Needle (1 pc.)
5 Buttonhole Foot (1 pc.)
6 Spool Cap (Large) (1 pc.)
7 Spool Cap (Small) (1 pc.)
8 Cleaning Brush (1 pc.)
9 Extra Spool Pin (1 pc.)
< Screwdriver (1 pc.)
A Seam Ripper (1 pc.)
B Hard Case (1 pc.) (Model STAR 240E, STAR 230E)
C Dust Cover (1 pc.) (Model PS-57, PS-55, PS-53)
Parts Code for Zigzag Presser Foot: 137748-101Parts Code for Spool Cap (Medium): X55260-153
(Model STAR 240E, STAR 230E)Foot Controller: Model N5VParts Code: XA3931-051
NOTE (For U.S.A. only):This foot controller can be used for Model STAR 240E, STAR 230E.
(Model PS-57, PS-55, PS-53)Foot Controller: Model NParts Code: J00360-051 (110/120V Area)
XA6400-051 (220/240V Area)XA6402-051 (U.K.)XA6404-051 (Australia, New Zealand)XA6434-051 (110/220V Dual Ara)
NOTE (For U.S.A. only):Foot Controller: Model NParts Code: J00360-051 (110/120V Area)This foot controller can be used for Model PS-57, PS-55, PS-53.
The above accessories are stored in the flat bed attachment. Theseaccessories have been designed to help complete most sewingtasks.
X59369-251(PS-53)
B X52769-656 C X53984-054
3 SA125X80980-002
Optional Accessories
1 Walking Foot SA140 (For U.S.A)X81065-002 (For other countries)
2 Springaction Quilting FootSA129 (For U.S.A)X81021-002 (For other countries)
3 1/4-Inch Quilting FootSA125 (For U.S.A)X80980-002 (For other countries)
NOTE:The content of accessories depends on model.
TAB
LE O
F CO
NTE
NTS
KN
OW
ING
YO
UR
SE
WIN
G M
AC
HIN
ES
TR
AIG
HT
AN
DZ
IGZ
AG
ST
ITC
HIN
GB
UILT-IN
ST
ITC
HE
SB
UT
TON
HO
LE A
ND
BU
TTO
N S
EW
ING
US
ING
ATTACH
ME
NTS
AN
D A
PP
LICATIO
NS
MA
INT
EN
AN
CE
IND
EX

6
ACCESSORI1 Piedino per cerniere (1 pz.)
2 Spoline (3 pz.) SA156 (Per USA)
XA5539-051 (Per gli paesi)
Sostituzioni (set di 10 pezzi)
3 Confezione di aghi (ago singolo normale N° 14) (3 pz.)
4 Ago gemello (1 pz.)
5 Piedino per occhielli (1 pz.)
6 Fermarocchetto (grande) (1 pz.)
7 Fermarocchetto (piccolo) (1 pz.)
8 Spazzolino (1 pz.)
9 Portarocchetto ausiliario (1 pz.)
0 Cacciavite (1 pz.)
A Taglia-asole (1 pz.)
B Custodia rigida (1 pz.) (Modello STAR 240E, STAR 230E)
C Copertura antipolvere (1 pz.) (Modello PS-57, PS-55, PS-53)
Codice parte per il piedino per cerniere: X137748-101Codice parte per il Fermarocchetto (medio): X55260-153
(Modello STAR 240E, STAR 230E)Reostato a pedale: modello N5VCodice parte: XA3931-051
NOTA (Solo per USA):Questo reostato a pedale può essere utilizzato per macchina dacucire Modello STAR 240E, STAR 230E.
(Modello PS-57, PS-55, PS-53)Reostato a pedale: modello NCodice parte: J00360-051 (paesi con corrente elettrica a 110/120V)
XA6400-051 (paesi con corrente elettrica a 220/240V)XA6402-051 (Regno Unito)XA6404-051 (Australia, Nuova Zelanda)XA6434-051 (paesi con doppia corrente elettrica a 110/220V)
NOTA (Solo per USA):Reostato a pedale: modello NCodice parte: J00360-051 (paesi con corrente elettrica a 110/120V)Questo reostato a pedale può essere utilizzato per macchina dacucire modello PS-57, PS-55, PS-53.
Gli accessori a corredo della macchina si trovano nell'appositocontenitore posto all'interno del piano di lavoro. Questi accessorisono stati studiati per aiutare chi cuce ad eseguire una vasta gammadi lavori.
ACCESORIOS1 Pata de cremalleras (1 pza)
2 Canilla (3 pzas) SA156 (para EE UU)
XA 5539-051 (para otros países)
Recambios (paquete de 10 piezas)
3 Paquete de agujas (agujas simples normales No 14) (3 pzas)
4 Aguja doble (1 pza)
5 Prensatelas para ojales (1 pza)
6 Tope para carretes (grande) (1 pza)
7 Tope para carretes (pequeño) (1 pza)
8 Cepillo (1 pza)
9 Porta carretes extra (1 pza)
: Destornillador (1 pza)
A Cortador para abrir costuras (1 pza)
B Caja rígida (1 pza) (Modelo STAR 240E, STAR 230E)
C Funda guardapolvo (1 pza) (Modelo PS-57, PS-55, PS-53)
Código del prensatelas para la puntada zigzag: 137748-101Código del prensatelas para la tope para carretes (mediana): X55260-153
(Modelo STAR 240E, STAR 230E)Pedal: modelo N5VCódigo: XA3931-051
NOTA (sólo para EE UU):Este pedal puede utilizarse para los modelos de máquinas de coser STAR240E, STAR 230E.
(Modelo PS-57, PS-55, PS-53)Pedal: modelo NCódigos: J00360-051 (110/120 V Área)
XA6400-051 (220/240 V Área)XA6402-051 (RU)XA6404-051 (Australia y Nueva Zelanda)XA6434-051 (110/220 V Área Dual)
NOTA (sólo para EE UU):Pedal: modelo NCódigo: J00360-051 (110/120 V Área)Este pedal puede utilizarse para el modelo de máquina de coser PS-57, PS-55, PS-53.
Los accesorios anteriores están almacenados en la mesa extensible. Hansido diseñados para ayudar en la realización de la mayoría de tareas decosido.
Accesorios opcionales
1 Pie caminante SA140 (para EE UU)X81065-002 (para otros países)
2 Prensatelas enguatadorSA129 (para EE UU)X81021-002 (para otros países)
3 Prensatela para pespunte 1/4SA125 (para EE UU)X80980-002 (para otros países)
NOTA:El contenido de los accesorios depende del modelo.
Accessori opzionali
1 Piedino semovente SA140 (Per USA)
X81065-002 (Per gli paesi)2 Piedino per trapunte azionato a molla
SA129 (Per USA)X81021-002 (Per gli paesi)
3 Piedino per patchworkSA125 (Per USA)X80980-002 (Per gli paesi)
NOTA:Il contenuto degli accessori dipende dai modelli.

7
OPERATING YOURSEWING MACHINE
Connecting Plugs
1. Connect the power cord plug into the machine.2. Connect the power supply plug into a wall outlet.
CAUTION1. When leaving the machine unattended, the main switch of
the machine should be switched off or the plug must beremoved from the socket-outlet.
2. When servicing the machine, or when removing covers orchanging bulbs, the machine or the electrical set must beunplugged.
3. For U.S.A. onlyThis appliance has a polarized plug (one blade wider thanthe other). To reduce the risk of electric shock, this plug isintended to fit in a polarized outlet only one way. If the plugdoes not fit fully in the outlet, reverse the plug.If it still does not fit, contact a qualified electrician to installthe proper outlet. Do not modify the plug in any way.
WARNING• Use only regular household electricity for the power
source. Using other power sources may result in fire,electric shock, or damage to the machine.
• Turn off the main power and remove the plug in thefollowing circumstances:- When you are away from the machine- After using the machine- When the power fails during use- When the machine does not operate correctly due to
a bad connection or a disconnection- During electrical storms
CAUTION• Do not use extension cords or multi-plug adapters with
many other appliances plugged in to them. Fire orelectric shock may result.
• Do not touch the plug with wet hands. Electric shockmay result.
• When unplugging the machine, always turn off the mainpower first. Always grasp the plug to remove it from theoutlet. Pulling on the cord may damage the cord, or leadto fire or electric shock.
• Do not allow the power cord to be cut, damaged, modi-fied, forcefully bent, pulled, twisted, or bundled. Do notplace heavy objects on the cord. Do not subject the cordto heat. These things may damage the cord and causefire or electric shock. If the cord or plug is damaged, takethe machine to your authorized dealer for repairs beforecontinuing use.
• Unplug the power cord if the machine is not to be usedfor a long period of time. Otherwise a fire may result.
(Model STAR 240E, STAR 230E)
(Model PS-57, PS-55, PS-53)
TAB
LE O
F CO
NTE
NTS
KN
OW
ING
YO
UR
SE
WIN
G M
AC
HIN
ES
TR
AIG
HT
AN
DZ
IGZ
AG
ST
ITC
HIN
GB
UILT-IN
ST
ITC
HE
SB
UT
TON
HO
LE A
ND
BU
TTO
N S
EW
ING
US
ING
ATTACH
ME
NTS
AN
D A
PP
LICATIO
NS
MA
INT
EN
AN
CE
IND
EX

8
FUNZIONAMENTO DELLAMACCHINA DA CUCIRE
Collegamento elettrico
1. Inserire il connettore del cavo di alimentazione nella macchina dacucire.
2. Inserire la spina di alimentazione in una presa elettrica a muro.
ATTENZIONE1. Quando si lascia la macchina incustodita, spegnere l’interruttore
generale della macchina o scollegare la spina dalla presa aparete.
2. Quando si eseguono interventi di assistenza sulla macchina oquando si rimuovono le coperture o si sostituiscono le lampadi-ne, scollegare la macchina da cucire dalla presa o toglierel’alimentazione elettrica alla macchina.
3. Solo per USAQuesta macchina è corredata di una spina di alimentazionepolarizzata per corrente alternata (una spina dotata di unospinotto più largo dell'altro). Come misura di sicurezza, questaspina può essere inserita nella presa in un solo senso. Se non siriesce ad inserire la spina fino in fondo, provare girando la spina.Se anche in questo caso la spina non entra nella presa, rivolgersiad un elettricista per sostituire la presa con una adatta. Nonsmontare la spina polarizzata rendendo inefficace il dispositivodi sicurezza.
AVVERTENZA• Utilizzare soltanto corrente derivante da una presa normale
per uso domestico. L’uso di sorgenti di alimentazione diversepuò provocare rischi di incendio, scossa elettrica o danni allamacchina.
• Spegnere la macchina e scollegare la spina nelle seguentisituazioni:- Quando si lascia incustodita la macchina- Dopo aver utilizzato la macchina- Se si verifica un’interruzione di corrente durante l’uso- Quando la macchina non funziona in modo corretto a
causa di un collegamento errato o di un avvenutoscollegamento
- Durante temporali con scariche elettriche
ATTENZIONE• Non utilizzare cavi di prolunga o adattatori multi-presa con
molteplici apparecchiature collegate contemporaneamente.Vi sono rischi di incendio o di scossa elettrica.
• Non toccare la spina con le mani umide. Vi sono rischi discossa elettrica.
• Prima di scollegare la macchina dalla presa di corrente,spegnere sempre l’interruttore generale della macchina. Perscollegare il cavo, afferrare sempre la spina. Se si scollega ilcavo agendo su di esso, possono verificarsi rischi di incendioo di scossa elettrica.
• Fare attenzione a non tagliare, danneggiare, modificare,piegare eccessivamente, tirare, attorcigliare o ingarbugliareil cavo. Non collocare oggetti pesanti sul cavo. Non esporreil cavo a sorgenti di calore. Tali condizioni possono danneg-giare il cavo e causare rischi di incendio o di scossa elettrica.Se il cavo o la spina è danneggiato, portare la macchina pressoun rivenditore autorizzato prima di continuare ad utilizzarla.
• Se la macchina da cucire deve restare a lungo inutilizzata,scollegare il cavo dalla presa di corrente. In caso contrario,vi sono rischi di incendio.
FUNCIONAMIENTO DE LAMÁQUINA DE COSER
Conexión de los enchufes
1. Conecte la clavija del cordón de alimentación a la máquina.2. Conecte el enchufe de alimentación a una toma de corriente.
PRECAUCIÓN1. Si deja la máquina desatendida, debe apagar el interruptor prin-
cipal de la corriente o desenchufar el cable de la toma de corriente.2. Cuando repare la máquina, retire tapas o cambie la bombilla,
desenchufe la máquina de la corriente.3. Sólo para EE UU
Esta máquina está provista de un enchufe polarizado (un bornemás ancho que el otro). Como medida de seguridad, existe una solamanera de introducir el enchufe en la toma de corriente. Si nopuede introducir el enchufe a fondo en la toma de corriente,cambie de lado el enchufe. Si sigue sin poderlo introducir, póngaseen contacto con un electricista cualificado para que le instale unatoma de corriente adecuada. No intente modificar el enchufe.
AVISO• Utilice sólo la corriente de casa normal para la alimentación de
la máquina. El uso de otras fuentes de alimentación puedeprovocar incendio, descarga eléctrica o averías en la máquina.
• Apague la máquina y desenchufe el cable de la corriente en lasiguientes situaciones:- Cuando esté alejado de la máquina- Después de usar la máquina- Cuando la alimentación se corta durante el funcionamiento- Si la máquina no funciona correctamente debido a una
mala conexión o a una desconexión- Durante tormentas con relámpagos
PRECAUCIÓN• No utilice cables de alargo ni adaptadores con demasiados
aparatos conectados. Podría producirse un incendio o unadescarga eléctrica.
• No toque el enchufe con las manos mojadas. Podría recibir unadescarga eléctrica.
• Desenchufe siempre la máquina antes de desmontarla. Sujetesiempre el enchufe para sacarlo de la toma de corriente. Si tiradel cable, podría dañarlo o provocar un incendio o una descar-ga eléctrica.
• No corte, estropee, cambie, fuerce, doble, estire, tuerza oenrolle el cable. No apoye objetos pesados sobre el cable. Noexponga el cable al calor. Todo esto podría estropear el cabley causar un incendio o una descarga eléctrica. Si el cable estáestropeado, lleve la máquina a su distribuidor autorizado paraque la repare antes de utilizarla de nuevo.
• Desenchufe el cable de la corriente si no va a utilizar lamáquina durante un largo período de tiempo. De otra manera,podría producirse un incendio.

9
12
12
Main Power/SewingLight Switch
This switch turns the main power/sewing light on or off.
1 Turn on (toward the “I” mark)2 Turn off (toward the “O” mark)
Interruttore principale/lucearea di lavoro
Questo interruttore accende e spegne sia la macchina che la lucedell’area di lavoro.
1 Acceso (verso il simbolo “I”)2 Spento (verso il simbolo “O”)
Interruptor principal/luz de cosido
Este interruptor permite apagar y encender la máquina y la luz.
1 Encender (hacia la marca “I”)2 Apagar (hacia la marca “O”)
(Model STAR 240E, STAR 230E)
(Model PS-57, PS-55, PS-53)
TAB
LE O
F CO
NTE
NTS
KN
OW
ING
YO
UR
SE
WIN
G M
AC
HIN
ES
TR
AIG
HT
AN
DZ
IGZ
AG
ST
ITC
HIN
GB
UILT-IN
ST
ITC
HE
SB
UT
TON
HO
LE A
ND
BU
TTO
N S
EW
ING
US
ING
ATTACH
ME
NTS
AN
D A
PP
LICATIO
NS
MA
INT
EN
AN
CE
IND
EX

10
Pedal
Al presionar ligeramente el pedal, la máquina funcionará a baja velocidad.Al aumentar la presión, se incrementa también la velocidad de la máquina.Al soltar el pedal, la máquina se para. Asegúrese siempre de no ponerningún objeto sobre el pedal cuando la máquina no esté utilizada.
1 Pedal
PRECAUCIÓNEvite que trozos de tela y polvo entren en el pedal. De lo contrario,podría producirse un incendio o una descarga eléctrica.
(Modelo STAR 240E, STAR 230E)1. Con la máquina de coser apagada introduzca la clavija del pedal en la
toma apropiada.
1 Pedal2 Toma del pedal
* El ajuste del selector de velocidad determina la velocidad máxima decosido del pedal.
* Cuando utilice el pedal, el botón Inicio/Parada no afectará a la costura.
NOTA (sólo para EE UU):(Modelo STAR 240E, STAR 230E)Pedal: modelo N5VEste pedal puede utilizarse para los modelos de máquinas de coser STAR240E, STAR 230E.(Modelo PS-57, PS-55, PS-53)Pedal: modelo NEste pedal puede utilizarse para el modelo de máquina de coser PS-57, PS-55, PS-53.
Foot Controller
When the foot controller is depressed lightly, the machine will runat a low speed. When the pressure on the foot controller isincreased, the machine’s speed will increase. When pressure onthe foot controller is released, the machine will stop. Care should betaken that nothing is placed on the foot controller when the machineis not in use.
1 Foot controller
CAUTIONDo not allow fabric pieces and dust to collect in the footcontroller. Doing so could cause a fire or an electric shock.
(Model STAR 240E, STAR 230E)1. With the sewing machine turned off, insert the foot controller
plug into its jack on the sewing machine.
1 Foot controller2 Foot controller jack
* The speed set using the sewing speed controller is the footcontroller’s maximum sewing speed.
* When the foot controller is being used, the Start/Stop button hasno effect on the sewing.
NOTE (For U.S.A. only):(Model STAR 240E, STAR 230E)Foot Controller: Model N5VThis foot controller can be used for Model STAR 240E, STAR 230E.(Model PS-57, PS-55, PS-53)Foot Controller: Model NThis foot controller can be used for Model PS-57, PS-55, PS-53.
1
2
1
(Model STAR 240E, STAR 230E)
Reostato a pedale
Premendo leggermente sul reostato, la macchina funzionerà a bassa velocità.Aumentando la pressione sul reostato, la velocità della macchina aumenterà.Sollevando il piede dal reostato, la macchina si fermerà. Si raccomanda di nonappoggiare nessun oggetto sul reostato quando la macchina è inattiva.
1 Reostato a pedale
ATTENZIONENon lasciare che ritagli di stoffa e accumuli di polvere sidepositino nel comando a pedale. In caso contrario, potrebberoverificarsi rischi di incendio o di scossa elettrica.
(Modello STAR 240E, STAR 230E)1. Con la macchina per cucire spenta, inserire la spina del reostato
a pedale nel connettore della macchina per cucire.
1 Reostato a pedale2 Connettore del reostato a pedale
* La velocità impostata con la leva di regolazione velocità è lavelocità di cucitura massima del reostato a pedale.
* Mentre viene usato il reostato a pedale, il pulsante di Avvio/Stopnon ha alcuna influenza sulla cucitura.
NOTA (Solo per USA):(Modello STAR 240E, STAR 230E)Reostato a pedale: modello N5VQuesto reostato a pedale può essere utilizzato per macchina dacucire modello STAR 240E, STAR 230E.(Modello PS-57, PS-55, PS-53)Reostato a pedale: modello NQuesto reostato a pedale può essere utilizzato per macchina dacucire modello PS-57, PS-55, PS-53.
TAB
LE O
F CO
NTE
NTS
KN
OW
ING
YO
UR
SE
WIN
G M
AC
HIN
ES
TR
AIG
HT
AN
DZ
IGZ
AG
ST
ITC
HIN
GB
UILT-IN
ST
ITC
HE
SB
UT
TON
HO
LE A
ND
BU
TTO
N S
EW
ING
US
ING
ATTACH
ME
NTS
AN
D A
PP
LICATIO
NS
MA
INT
EN
AN
CE
IND
EX

11
1
2
3
4
Checking the Needle
The sewing needle must always be straight and sharp for smoothsewing.
To Check the Needle Correctly:To check the needle, place the flat side of the needle on a flatsurface. Check the needle from the top and the sides. Throw awayany bent needles.
1 Parallel space2 Level surface (bobbin cover, glass, etc.)
* Place a level surface under the needle.
Replacing the Needle
CAUTION• Turn the main power switch to OFF before changing the
needle. If the main power is left on and Start/Stop buttonis pressed or foot controller is stepped on, the machinewill start and injury may result.
• Use only sewing machine needles for home use. Otherneedles may bend or break and cause injury.
• Never sew with a bent needle. A bent needle will easilybreak and cause injury.
1. Remove the power supply plug from the outlet.
2. Raise the needle bar to its highest position.
3. Lower the presser foot.
4. Remove the needle by loosening the needle clamp screw.
1 Presser foot lever
CAUTIONDo not loosen or tighten the needle clamp screw with a strongforce, otherwise it may be damaged.
5. With the flat side of the needle facing the back, insert the newneedle all the way to the top of the needle stopper (viewingwindow) in the needle clamp. Use a screwdriver to securelytighten the needle clamp screw.
2 Needle stopper3 Hole for setting needle4 Flat side of needle
CAUTIONBe sure to push in the needle until it touches the stopper,and securely tighten the needle clamp screw with a screw-driver. If the needle is not completely inserted or the needleclamp screw is loose, the needle may break or the machinemay be damaged.
1
2
TAB
LE O
F CO
NTE
NTS
KN
OW
ING
YO
UR
SE
WIN
G M
AC
HIN
ES
TR
AIG
HT
AN
DZ
IGZ
AG
ST
ITC
HIN
GB
UILT-IN
ST
ITC
HE
SB
UT
TON
HO
LE A
ND
BU
TTO
N S
EW
ING
US
ING
ATTACH
ME
NTS
AN
D A
PP
LICATIO
NS
MA
INT
EN
AN
CE
IND
EX

12
Controllo dell’ago
Per ottenere una cucitura scorrevole, l’ago utilizzato deve esseresempre ben diritto ed appuntito.
Per verificare che l’ago non sia piegato:Per verificare l’ago, posizionare la parte piana dell’ago su unasuperficie piana. Osservare attentamente l’ago dalla parte superioree sui lati. Gettare gli aghi che risultano piegati.
1 Spazio parallelo2 Superficie piana (sportello spolina, vetro, ecc.)
* Posizionare l’ago su una superficie piana.
Sostituzione dell’ago
ATTENZIONE• Prima di sostituire l’ago, spegnere la macchina portando
l’interruttore su OFF. Se la macchina è accesa e vienepremuto inavvertitamente il pulsante Avvio/Stop o il reostatoa pedale la macchina inizierà a operare con possibili rischi dilesioni personali.
• Utilizzare esclusivamente aghi da macchina da cucire peruso domestico. Gli altri tipi di ago possono piegarsi o romper-si e provocare lesioni personali.
• Non cucire con un ago piegato. Gli aghi piegati possonorompersi facilmente e causare lesioni personali.
1. Disinserire la spina di alimentazione dalla presa di corrente.
2. Far salire la barra dell’ago fino alla sua posizione più alta.
3. Abbassare il piedino premistoffa.
4. Togliere l'ago allentando il morsetto dell'ago.
1 Leva del piedino premistoffa
ATTENZIONENon applicare pressione sulla vite della ghiera di serraggio ago. Incaso contrario, l’ago o la macchina potrebbe danneggiarsi.
5. Con il lato piatto dell’ago rivolto verso la parte posteriore dellamacchina, inserire completamente il nuovo ago sulla parte supe-riore dell’arresto per ago (finestra di visione) della ghiera diserraggio ago. Utilizzare un cacciavite per serrare saldamente lavite della ghiera di serraggio ago.
2 Arresto per ago3 Foro per inserimento ago4 Lato piatto dell’ago
ATTENZIONEAssicurarsi di spingere l’ago fino a farlo toccare l’arresto eserrare saldamente la vite con un cacciavite. Se l’ago non ècompletamente inserito o la vite della ghiera di serraggio ago èallentata, l’ago potrebbe rompersi o la macchina potrebbedanneggiarsi.
Verificación de la aguja
La aguja de costura siempre debe estar bien recta y afilada para una buenacostura.
Para comprobar la aguja:Para revisar la aguja, coloque la parte plana de la aguja sobre una superficieplana. Compruebe la aguja por la parte superior y los laterales. Tire lasagujas que estén dobladas.
1 Espacio paralelo2 Superficie plana (tapa de la bobina, cristal, etc.)
* Coloque la superficie plana debajo de la aguja.
Cambio de la aguja
PRECAUCIÓN• Desenchufe la máquina de coser de la alimentación antes de
cambiar la aguja. Si deja la máquina enchufada a la corrientey aprieta el botón Marcha/Parada o pisa el pedal, la máquinase pondrá en marcha y podría causar lesiones.
• Utilice sólo agujas de máquina de coser para uso doméstico.Otras agujas podrían doblarse o romperse y causar lesiones.
• Nunca cosa con una aguja doblada. Una aguja doblada serompe fácilmente y podría hacerle daño.
1. Retire el enchufe de alimentación de la toma de corriente.
2. Levante la barra de la aguja a su posición más alta.
3. Baje el prensatelas.
4. Retire la aguja, aflojando la abrazadera de la aguja.
1 Palanca del prensatelas
PRECAUCIÓNNo apriete el tornillo de la presilla de la aguja. De lo contrario, podríaestropear la aguja o la máquina.
5. Con la parte plana de la aguja mirando hacia la parte trasera de lamáquina, inserte la nueva aguja hasta el final de la cavidad (mirilla) enla presilla de la aguja. Utilice el destornillador para apretar bien eltornillo de la presilla de la aguja.
2 Cavidad3 Orificio para la aguja4 Parte plana de la aguja
PRECAUCIÓNAsegúrese de empujar la aguja hasta que llegue al tope de lacavidad y apriete fuertemente el tornillo de la presilla de la agujacon un destornillador. Si la aguja no está completamente insertadao el tornillo de la presilla de la aguja está suelto, la aguja podríaromperse o la máquina podría estropearse.

13
Changing the Presser Foot
CAUTION• Always turn off the power before changing the presser
foot. If the power is on and the Start/Stop button ispressed or foot controller is stepped on, the machinewill start and may cause injury.
• Always use the correct presser foot for the selectedstitch pattern. If the wrong presser foot is used, theneedle may strike the presser foot and bend or break,and may cause injury.
• Only use presser feet for this machine. Using otherpresser feet may lead to accident or injury.
It may be necessary to change the presser foot according to yoursewing needs.
SNAP-ON TYPE1. Raise the needle to its highest position by turning the balance
wheel toward you (counter clockwise) and raise the presser footlever.
2. Release the foot by raising the lever located at the back of theholder.
3. Place a different presser foot on the needle plate so that the baron the presser foot is in line with the slot on the shank.
4. Lower the presser foot lever and fix the presser foot onto theshank. If the presser foot is in the correct location, the bar shouldsnap in.
Cambio del prensatelas
PRECAUCIÓN• Desenchufe siempre la máquina de la alimentación antes de
cambiar el pie prensatela. Si la máquina de coser está enchu-fada a la corriente y pulsa el botón Marcha/Parada o si pisa elpedal, la máquina se pondrá en funcionamiento y podríahacerse daño.
• Utilice siempre el pie prensatela adecuado para el pespunteseleccionado. Si utiliza un pie prensatela inadecuado, la agujapodría chocar contra el pie prensatela y doblarse o romperse,lo que puede causar lesiones.
• Use el pie prensatela sólo para esta máquina de coser. Si usaotro pie prensatela, podría causar una avería o hacerse daño.
Según sus necesidades de costura, puede ser necesario cambiar elprensatelas.
TIPO DE ENGANCHE DE GOLPE1. Levante la aguja a su posición más alta, girando la ruedecilla hacia
usted (en el sentido contrario al de las manecillas de un reloj) y levantela palanca del prensatelas.
2. Suelte el prensatelas levantando la palanca que hay en la parte traseradel soporte.
3. Coloque otro prensatelas en la placa de agujas de tal forma que la barradel prensatelas quede alineada con la ranura del soporte.
4. Baje la palanca del prensatelas y fije el prensatelas en el soporte. Si elprensatelas está bien colocado, la barra debe engancharse de golpe.
Sostituzione del piedino premistoffa
ATTENZIONE• Prima di sostituire il piedino premistoffa, spegnere sempre la
macchina. Se la macchina è accesa e si preme inavvertitamenteil pulsante Avvio/Stop o il reostato a pedale la macchinainizierà a operare con rischi di lesioni personali.
• Utilizzare sempre il piedino premistoffa appropriato per ilmotivo di punto selezionato. Se si utilizza un piedinopremistoffa errato, l’ago potrebbe colpire il piedino e piegarsio rompersi, con rischi di lesioni personali.
• Utilizzare esclusivamente piedini premistoffa studiati perquesta macchina. L’uso di altri tipi di piedino può provocaredanni o lesioni personali.
In base alle esigenze del lavoro da eseguire, può rendersi necessariosostituire il piedino premistoffa.
PIEDINO DI TIPO A SCATTO1. Far salire l’ago fino alla sua posizione più alta girando il volantino
verso se stessi (in senso antiorario) e sollevare la leva del piedinopremistoffa.
2. Staccare il piedino sollevando la levetta situata dietro il gambo.3. Posizionare il nuovo piedino sulla placca dell’ago in modo che il
perno del piedino sia allineato rispetto alla scanalatura delgambo.
4. Abbassare la leva del piedino in modo che il piedino si innesti nelgambo. Se il piedino è nella posizione corretta, il perno scatteràin posizione.
TAB
LE O
F CO
NTE
NTS
KN
OW
ING
YO
UR
SE
WIN
G M
AC
HIN
ES
TR
AIG
HT
AN
DZ
IGZ
AG
ST
ITC
HIN
GB
UILT-IN
ST
ITC
HE
SB
UT
TON
HO
LE A
ND
BU
TTO
N S
EW
ING
US
ING
ATTACH
ME
NTS
AN
D A
PP
LICATIO
NS
MA
INT
EN
AN
CE
IND
EX

14
Plataforma
Los accesorios están almacenados en un compartimiento situado debajode la tapa de la plataforma. Para abrir la tapa, tire de ella hacia usted.
Scomparto piano
Gli accessori si trovano nello scomparto sotto il coperchio delscomparto piano, che può essere aperto tirandolo verso sé stessi.
Flat Bed Attachment
The accessories are stored in a compartment under the flat bedattachment cover, which can be opened by flipping it toward you.
TAB
LE O
F CO
NTE
NTS
KN
OW
ING
YO
UR
SE
WIN
G M
AC
HIN
ES
TR
AIG
HT
AN
DZ
IGZ
AG
ST
ITC
HIN
GB
UILT-IN
ST
ITC
HE
SB
UT
TON
HO
LE A
ND
BU
TTO
N S
EW
ING
US
ING
ATTACH
ME
NTS
AN
D A
PP
LICATIO
NS
MA
INT
EN
AN
CE
IND
EX

15
VARIOUS CONTROLS
Pattern Selection Dial
CAUTIONWhen you use the Pattern Selection Dial to select a pattern,turn the balance wheel to the front (counter-clockwise) byhand to set the needle in the highest position before selectingthe pattern. If the needle is in the down position when thePattern Selection Dial is turned, the needle, presser foot, orfabric may be damaged.
To select a stitch, simply turn the Pattern Selection Dial, located onthe right side of the machine. The Pattern Selection Dial may beturned in either direction. The following page shows the recom-mended range of stitch lengths and widths.
1 Pattern selection dial2 Pattern number
The stitches that are available depend on the Stitch Length Dialsetting. If the Stitch Length Dial is set between 0 and 4.5, any of thestitches in the top row can be selected. If the Stitch Length Dial isset to SS, any of the stitches in the bottom row can be selected.
3 Stitch length dial
(Model STAR 240E, STAR 230E, PS-57, PS-55)
NOTE:Since the Pattern Selection Dial is not a continuous dial, it cannotbe turned directly from the last stitch to the first one or from the firststitch to the last one. To select the first stitch when the last one isdisplayed or to select the last stitch when the first one is displayed,turn the Pattern Selection Dial in the opposite direction until thedesired stitch is displayed.
1
2
3
4
23F
1
SS
3
3
··
·
STAR 240EPS-57
20 21 22 23 24 25 26 27 28 29 30 31 32 33 34 35 36 37
1 2 3 4 5 6 7 8 9 10 11 12 13 14 15 16 17 18 19
37
TAB
LE O
F CO
NTE
NTS
KN
OW
ING
YO
UR
SE
WIN
G M
AC
HIN
ES
TR
AIG
HT
AN
DZ
IGZ
AG
ST
ITC
HIN
GB
UILT-IN
ST
ITC
HE
SB
UT
TON
HO
LE A
ND
BU
TTO
N S
EW
ING
US
ING
ATTACH
ME
NTS
AN
D A
PP
LICATIO
NS
MA
INT
EN
AN
CE
IND
EX

16
DISTINTOS MANDOS
Selector de puntadas
PRECAUCIÓNCuando utilice el selector de puntadas, antes de seleccionar la puntadagire la ruedecilla hacia delante (hacia la izquierda) con la mano paraponer la aguja en la posición más alta. Si gira el selector de puntadacon la aguja en la poción bajada, la aguja, el prénsatelas o el tejidopodrían dañarse.
Para seleccionar una puntada, sólo hace falta girar el selector de puntadas,situado en la derecha de la máquina. Este selector se puede girar encualquier sentido. En la página siguiente, se indican las zonas recomenda-das de largos y anchos de puntadas.
1 Selector de puntadas2 Número de puntada
Las puntadas disponibles dependen de la posición del selector de largo depuntada. Si está situado entre 0 y 4,5, pueden seleccionarse todas laspuntadas que aparecen en la fila superior. Si está situado en SS, puedenseleccionarse todas las puntadas que aparecen en la fila inferior.
3 Selector de largo de puntada
(Modelo STAR 240E, STAR 230E, PS-57, PS-55)
NOTA:El selector de puntada no es un selector continuo, y, por tanto, no puedegirarse directamente desde la última puntada hasta la primera o viceversa.Para seleccionar la primera puntada cuando está seleccionada la última, oviceversa, gire el selector de puntada en sentido opuesto hasta queaparezca la puntada deseada.
DISPOSITIVI DI CONTROLLO
Selettore dei punti
ATTENZIONEQuando si usa il selettore dei punti per selezionare un punto, girareil volantino verso il davanti (senso antiorario) con la mano perportare l’ago alla posizione più alta prima di selezionare il punto. Sel’ago si trova nella posizione abbassata quando si gira il selettore deipunti, l’ago, il piedino premistoffa o il tessuto possono esseredanneggiati.
Per selezionare un determinato punto, ruotare verso sinistra o destrail selettore dei punti situato sul fianco destro della macchina. Sullapagina seguente sono indicati i valori di lunghezza e ampiezzaconsigliati per i vari punti.
1 Selettore dei punti2 Numero dei punti
I punti disponibili dipendono dalla regolazione della manopola dellalunghezza del punto. Se la manopola è regolata tra 0 e 4,5 si puòselezionare qualsiasi punto della fila superiore. Se la manopola èregolata su SS, si può selezionare qualsiasi punto della fila inferiore.
3 Manopola della lunghezza del punto
(Modello STAR 240E, STAR 230E, PS-57, PS-55)
NOTA:Dato che il selettore dei punti non funziona in modo continuo, nonpuò essere girato direttamente dall'ultimo punto al primo o dal primopunto all'ultimo. Per selezionare il primo punto quando è visualizzatol'ultimo, o per selezionare l'ultimo punto quando è visualizzato ilprimo, girare il selettore dei punti nella direzione opposta fino aquando non viene visualizzato il punto desiderato.
STAR 230EPS-55
15 16 17 18 19 20 21 22 23 24 25 26 27
1 2 3 4 5 6 7 8 9 10 11 12 13 14
PS-53
9 10 11 12 13 14 15
2 31
4 5 6 7 8

17
RECOMMENDED WIDTHS AND LENGTHS FOR STITCHES
(Model STAR 240E, PS-57)
PATTERN
STITCH NAMERECOMMENDED WIDTH RECOMMENDED INSTRUCTION
[mm(inch)] LENGTH [mm(inch)] MANUAL PAGE
1-STEP AUTOMATIC 3-5 (Dial 4-7) F-1.563BUTTONHOLE (1/8-3/16) (1/64-1/16)
STRAIGHT STITCH6.5 1-4.5
50, 73, 75(1/4) (1/16-3/16)
ZIGZAG STITCH0-6.5 F-4.5
53, 72, 76, 77(0-1/4) (1/64-3/16)
BLIND HEM STITCH3-6.5 F-2
54(1/8-1/4) (1/64-1/16)
SHELL TUCK STITCH3-6.5 F-3
55(1/8-1/4) (1/64-1/8)
ELASTIC STITCH3-6.5 F-2.5
56(1/8-1/4) (1/64-3/32)
STRETCH BLIND HEM STITCH3-6.5 F-1.5
54(1/8-1/4) (1/64-1/16)
SCALLOP STITCH3-6.5 F-1.5
58(1/8-1/4) (1/64-1/16)
DOUBLE ACTION STITCH 3-6.5 F-3BRIDGING STITCH 57RAMPART STITCH (1/8-1/4) (1/64-1/8)
ELASTIC SHELL TUCK STITCH3-6.5 F-3
61(1/8-1/4) (1/64-1/8)
BEAD STITCH
59ARROWHEAD STITCH 3-6.5 F-1PARALLELOGRAM STITCH (1/8-1/4) (1/64-1/16)
TRIANGLE STITCH
LIGHTNING STITCH 6.5 F-1SQUARE STITCH 59DECORATIVE STITCH (1/4) (1/64-1/16)
TRIPLE STRETCH STITCH6.5 SS Fixed
50(1/4) 2.5 (3/32)
TRIPLE ZIGZAG STRETCH 3-6.5 SS Fixed62STITCH (1/8-1/4) 2.5 (3/32)
ELASTIC OVERLOCK STITCH3-6.5 SS Fixed
61(1/8-1/4) 2.5 (3/32)
ELASTIC OVERLOCK STITCH3-6.5 SS Fixed
61(1/8-1/4) 2.5 (3/32)
FEATHER STITCH3-6.5 SS Fixed
62(1/8-1/4) 2.5 (3/32)
COMB STITCH3-6.5 SS Fixed
61(1/8-1/4) 2.5 (3/32)
DECORATIVE STITCH6.5 SS Fixed
59(1/4) 2.5 (3/32)
FAGOTING STITCH3-6.5 SS Fixed
60(1/8-1/4) 2.5 (3/32)
DECORATIVE STITCH3-6.5 SS Fixed
59(1/8-1/4) 2.5 (3/32)
DECORATIVE HEM STITCH3-6.5 SS Fixed
57(1/8-1/4) 2.5 (3/32)
DECORATIVE STITCH6.5 SS Fixed
59(1/4) 2.5 (3/32)
LINK STITCH3-6.5 SS Fixed
60(1/8-1/4) 2.5 (3/32)
TAB
LE O
F CO
NTE
NTS
KN
OW
ING
YO
UR
SE
WIN
G M
AC
HIN
ES
TR
AIG
HT
AN
DZ
IGZ
AG
ST
ITC
HIN
GB
UILT-IN
ST
ITC
HE
SB
UT
TON
HO
LE A
ND
BU
TTO
N S
EW
ING
US
ING
ATTACH
ME
NTS
AN
D A
PP
LICATIO
NS
MA
INT
EN
AN
CE
IND
EX

18
RECOMMENDED WIDTHS AND LENGTHS FOR STITCHES
(Model STAR 230E, PS-55)
PATTERN
STITCH NAMERECOMMENDED WIDTH RECOMMENDED INSTRUCTION
[mm(inch)] LENGTH [mm(inch)] MANUAL PAGE
1-STEP AUTOMATIC 3-5 (Dial 4-7) F-1.563BUTTONHOLE (1/8-3/16) (1/64-1/16)
STRAIGHT STITCH6.5 1-4.5
50, 73, 75(1/4) (1/16-3/16)
ZIGZAG STITCH0-6.5 F-4.5
53, 72, 76, 77(0-1/4) (1/64-3/16)
BLIND HEM STITCH3-6.5 F-2
54(1/8-1/4) (1/64-1/16)
SHELL TUCK STITCH3-6.5 F-3
55(1/8-1/4) (1/64-1/8)
ELASTIC STITCH3-6.5 F-2.5
56(1/8-1/4) (1/64-3/32)
STRETCH BLIND HEM STITCH3-6.5 F-1.5
54(1/8-1/4) (1/64-1/16)
SCALLOP STITCH3-6.5 F-1.5
58(1/8-1/4) (1/64-1/16)
DOUBLE ACTION STITCH 3-6.5 F-3BRIDING STITCH 57
RAMPART STITCH (1/8-1/4) (1/64-1/8)
ELASTIC SHELL TUCK STITCH3-6.5 F-3
61(1/8-1/4) (1/64-1/8)
BEAD STITCH 3-6.5 F-159ARROWHEAD STITCH (1/8-1/4) (1/64-1/16)
TRIPLE STRETCH STITCH6.5 SS Fixed
50(1/4) 2.5 (3/32)
TRIPLE ZIGZAG STRETCH 3-6.5 SS Fixed62STITCH (1/8-1/4) 2.5 (3/32)
ELASTIC OVERLOCK STITCH3-6.5 SS Fixed
61(1/8-1/4) 2.5 (3/32)
ELASTIC OVERLOCK STITCH3-6.5 SS Fixed
61(1/8-1/4) 2.5 (3/32)
FEATHER STITCH3-6.5 SS Fixed
62(1/8-1/4) 2.5 (3/32)
COMB STITCH3-6.5 SS Fixed
61(1/8-1/4) 2.5 (3/32)
DECORATIVE STITCH6.5 SS Fixed
59(1/4) 2.5 (3/32)
FAGOTING STITCH3-6.5 SS Fixed
60(1/8-1/4) 2.5 (3/32)
DECORATIVE STITCH3-6.5 SS Fixed
59(1/8-1/4) 2.5 (3/32)
DECORATIVE HEM STITCH3-6.5 SS Fixed
57(1/8-1/4) 2.5 (3/32)
DECORATIVE STITCH6.5 SS Fixed
59(1/4) 2.5 (3/32)
TAB
LE O
F CO
NTE
NTS
KN
OW
ING
YO
UR
SE
WIN
G M
AC
HIN
ES
TR
AIG
HT
AN
DZ
IGZ
AG
ST
ITC
HIN
GB
UILT-IN
ST
ITC
HE
SB
UT
TON
HO
LE A
ND
BU
TTO
N S
EW
ING
US
ING
ATTACH
ME
NTS
AN
D A
PP
LICATIO
NS
MA
INT
EN
AN
CE
IND
EX

19
RECOMMENDED WIDTHS AND LENGTHS FOR STITCHES
(Model PS-53)
PATTERN STITCH NAMERECOMMENDED WIDTH RECOMMENDED INSTRUCTION
mm (inch) LENGTH mm (inch) MANUAL PAGE
4-STEP AUTOMATIC 3-5 (Dial 4-7) F-1.566BUTTONHOLE (1/8-3/16) (1/64-1/16)
STRAIGHT STITCH6.5 1-4.5
50, 73, 75(1/4) (1/16-3/16)
ZIGZAG STITCH0-6.5 F-4.5
53, 72, 76, 77(0-1/4) (1/64-3/16)
DOUBLE ACTION STITCH3-6.5 F-3
57(1/8-1/4) (1/64-1/8)
STRETCH BLIND HEM STITCH3-6.5 F-1.5
54(1/8-1/4) (1/64-1/16)
BLIND HEM STITCH3-6.5 F-2
54(1/8-1/4) (1/64-1/16)
SHELL TUCK STITCH3-6.5 F-3
55(1/8-1/4) (1/64-1/8)
ELASTIC STITCH3-6.5 F-2.5
56(1/8-1/4) (1/64-3/32)
TRIPLE STRETCH STITCH6.5 SS Fixed
50(1/4) 2.5 (3/32)
TRIPLE ZIGZAG STRETCH 3-6.5 SS Fixed62STITCH (1/8-1/4) 2.5 (3/32)
FAGOTING STITCH3-6.5 SS Fixed
60(1/8-1/4) 2.5 (3/32)
COMB STITCH3-6.5 SS Fixed
61(1/8-1/4) 2.5 (3/32)
ELASTIC OVERLOCK STITCH3-6.5 SS Fixed
61(1/8-1/4) 2.5 (3/32)
ELASTIC OVERLOCK STITCH3-6.5 SS Fixed
61(1/8-1/4) 2.5 (3/32)
FEATHER STITCH3-6.5 SS Fixed
62(1/8-1/4) 2.5 (3/32)
TAB
LE O
F CO
NTE
NTS
KN
OW
ING
YO
UR
SE
WIN
G M
AC
HIN
ES
TR
AIG
HT
AN
DZ
IGZ
AG
ST
ITC
HIN
GB
UILT-IN
ST
ITC
HE
SB
UT
TON
HO
LE A
ND
BU
TTO
N S
EW
ING
US
ING
ATTACH
ME
NTS
AN
D A
PP
LICATIO
NS
MA
INT
EN
AN
CE
IND
EX

20
ANCHOS Y LARGOS RECOMENDADOS PARA CADA PUNTADA
(Modelo STAR 240E, PS-57)
PUNTADA
NOMBREANCHO ECOMENDADO EN LARGO RECOMENDADO EN PÁGINA DEL
[mm (pulgadas)] [mm (pulgadas)] MANUAL
OJAL AUTOMÁTICO 3-5 (Dial 4-7) F-1,564DE 1 PASO (1/8-3/16) (1/64-1/16)
PUNTADA RECTA6,5 1-4,5
51, 74, 75(1/4) (1/16-3/16)
PUNTADA ZIGZAG0-6,5 F-4,5
53, 72, 76, 78(0-1/4) (1/64-3/16)
PUNTADA INVISIBLE3-6,5 F-2
54(1/8-1/4) (1/64-1/16)
PUNTADA ONDAS3-6,5 F-3
55(1/8-1/4) (1/64-1/8)
PUNTADA ELÁSTICA3-6,5 F-2,5
56(1/8-1/4) (1/64-3/32)
PUNTADA INVISIBLE 3-6,5 F-1,554 ELÁSTICA (1/8-1/4) (1/64-1/16)
PUNTADA FESTÓN3-6,5 F-1,5
58(1/8-1/4) (1/64-1/16)
PUNTADA DE ACCIÓN DOBLE 3-6,5 F-3PUNTADA PUENTE 57
PUNTADA ONDAS ABIERTAS (1/8-1/4) (1/64-1/8)
PUNTADA ONDAS 3-6,5 F-361ELÁSTICAS (1/8-1/4) (1/64-1/8)
PUNTADA FESTÓN DOBLEPUNTADA FLECHA 3-6,5 F-1
PUNTADA PARALELOGRAMO (1/8-1/4) (1/64-1/16)59
PUNTADA TRIÁNGULO
PUNTADA ESCALERA 6,5 F-1PUNTADA FESTÓN DOBLE 59PUNTADA DECORATIVA (1/4) (1/64-1/16)
TRIPLE PUNTADA PESPUNTO6,5 SS Fija
51(1/4) 2,5 (3/32)
TRIPLE PUNTADA ZIGZAG 3-6,5 SS Fija62ELÁSTICA (1/8-1/4) 2,5 (3/32)
PUNTADA OVERLOCK 3-6,5 SS Fija61ELÁSTICA (1/8-1/4) 2,5 (3/32)
PUNTADA OVERLOCK 3-6,5 SS Fija61ELÁSTICA (1/8-1/4) 2,5 (3/32)
PUNTADA PLUMA3-6,5 SS Fija
62(1/8-1/4) 2,5 (3/32)
PUNTADA PEINE3-6,5 SS Fija
61(1/8-1/4) 2,5 (3/32)
PUNTADA DECORATIVA6,5 SS Fija
59(1/4) 2,5 (3/32)
PUNTADA FAGOTING3-6,5 SS Fija
60(1/8-1/4) 2,5 (3/32)
PUNTADA DECORATIVA3-6,5 SS Fija
59(1/8-1/4) 2,5 (3/32)
PUNTADA DECORATIVA 3-6,5 SS Fija57INVISIBLE (1/8-1/4) 2,5 (3/32)
PUNTADA DECORATIVA6,5 SS Fija
59(1/4) 2,5 (3/32)
PUNTADA DE UNIÓN3-6,5 SS Fija
60(1/8-1/4) 2,5 (3/32)

21
ANCHOS Y LARGOS RECOMENDADOS PARA CADA PUNTADA
(Modelo STAR 230E, PS-55)
PUNTADA
NOMBREANCHO ECOMENDADO EN LARGO RECOMENDADO EN PÁGINA DEL
[mm (pulgadas)] [mm (pulgadas)] MANUAL
OJAL AUTOMÁTICO 3-5 (Dial 4-7) F-1,564DE 1 PASO (1/8-3/16) (1/64-1/16)
PUNTADA RECTA6,5 1-4,5
51, 74, 75(1/4) (1/16-3/16)
PUNTADA ZIGZAG0-6,5 F-4,5
53, 72, 76, 78(0-1/4) (1/64-3/16)
PUNTADA INVISIBLE3-6,5 F-2
54(1/8-1/4) (1/64-1/16)
PUNTADA ONDAS3-6,5 F-3
55(1/8-1/4) (1/64-1/8)
PUNTADA ELÁSTICA3-6,5 F-2,5
56(1/8-1/4) (1/64-3/32)
PUNTADA INVISIBLE 3-6,5 F-1,554 ELÁSTICA (1/8-1/4) (1/64-1/16)
PUNTADA FESTÓN3-6,5 F-1,5
58(1/8-1/4) (1/64-1/16)
PUNTADA DE ACCIÓN DOBLE 3-6,5 F-3PUNTADA PUENTE 57
PUNTADA ONDAS ABIERTAS (1/8-1/4) (1/64-1/8)
PUNTADA ONDAS 3-6,5 F-361ELÁSTICAS (1/8-1/4) (1/64-1/8)
PUNTADA FESTÓN DOBLE 3-6,5 F-159PUNTADA FLECHA (1/8-1/4) (1/64-1/16)
TRIPLE PUNTADA PESPUNTO6,5 SS Fija
51(1/4) 2,5 (3/32)
TRIPLE PUNTADA ZIGZAG 3-6,5 SS Fija62ELÁSTICA (1/8-1/4) 2,5 (3/32)
PUNTADA OVERLOCK 3-6,5 SS Fija61ELÁSTICA (1/8-1/4) 2,5 (3/32)
PUNTADA OVERLOCK 3-6,5 SS Fija61ELÁSTICA (1/8-1/4) 2,5 (3/32)
PUNTADA PLUMA3-6,5 SS Fija
62(1/8-1/4) 2,5 (3/32)
PUNTADA PEINE3-6,5 SS Fija
61(1/8-1/4) 2,5 (3/32)
PUNTADA DECORATIVA6,5 SS Fija
59(1/4) 2,5 (3/32)
PUNTADA FAGOTING3-6,5 SS Fija
60(1/8-1/4) 2,5 (3/32)
PUNTADA DECORATIVA3-6,5 SS Fija
59(1/8-1/4) 2,5 (3/32)
PUNTADA DECORATIVA 3-6,5 SS Fija57INVISIBLE (1/8-1/4) 2,5 (3/32)
PUNTADA DECORATIVA6,5 SS Fija
59(1/4) 2,5 (3/32)

22
ANCHOS Y LARGOS RECOMENDADOS PARA CADA PUNTADA
(Modelo PS-53)
PUNTADA NOMBREANCHO ECOMENDADO EN LARGO RECOMENDADO EN PÁGINA DEL
[mm (pulgadas)] [mm (pulgadas)] MANUAL
OJAL AUTOMÁTICO DE 3-5 (Dial 4-7) F-1,5664 PASO (1/8-3/16) (1/64-1/16)
PUNTADA RECTA6,5 1-4,5
51, 74, 75(1/4) (3/64-3/16)
PUNTADA ZIGZAG0-6,5 F-4,5
53, 72, 76, 78(0-1/4) (1/64-3/16)
PUNTADA DE ACCIÓN 3-6,5 F-357DOBLE (1/8-1/4) (1/64-1/8)
PUNTADA INVISIBLE 3-6,5 F-1,554ELÁSTICA (1/8-1/4) (1/64-1/16)
PUNTADA INVISIBLE3-6,5 F-2
54(1/8-1/4) (1/64-1/16)
PUNTADA ONDAS3-6,5 F-3
55(1/8-1/4) (1/64-1/8)
PUNTADA ELÁSTICA3-6,5 F-2,5
56(1/8-1/4) (1/64-3/32)
TRIPLE PUNTADA 6,5 SS Fija51PESPUNTO (1/4) 2,5 (3/32)
TRIPLE PUNTADA ZIGZAG 3-6,5 SS Fija62ELÁSTICA (1/8-1/4) 2,5 (3/32)
PUNTADA FAGOTING3-6,5 SS Fija
60(1/8-1/4) 2,5 (3/32)
PUNTADA PEINE3-6,5 SS Fija
61(1/8-1/4) 2,5 (3/32)
PUNTADA OVERLOCK 3-6,5 SS Fija61ELÁSTICA (1/8-1/4) 2,5 (3/32)
PUNTADA OVERLOCK 3-6,5 SS Fija61ELÁSTICA (1/8-1/4) 2,5 (3/32)
PUNTADA PLUMA3-6,5 SS Fija
62(1/8-1/4) 2,5 (3/32)

23
AMPIEZZE E LUNGHEZZE DEI PUNTI CONSIGLIATE
(Modello STAR 240E, PS-57)
PUNTO
NOME PUNTOAMPIEZZA PREDEFINITA LUNGHEZZA
PAGINA[mm(inch)] CONSIGLIATA [mm(inch)]
OCCHIELLO AUTOMATICO 3-5 (Manopola 4-7) F-1,564IN 1 TEMPI (1/8-3/16) (1/64-1/16)
PUNTO DIRITTO6,5 1-4,5
51, 74, 75(1/4) (1/16-3/16)
PUNTO ZIGZAG0-6,5 F-4,5
53, 72, 76, 78(0-1/4) (1/64-3/16)
PUNTO ORLO INVISIBILE3-6,5 F-2
54(1/8-1/4) (1/64-1/16)
PUNTO CONCHIGLIA3-6,5 F-3
55(1/8-1/4) (1/64-1/8)
PUNTO ELASTICO3-6,5 F-2,5
56(1/8-1/4) (1/64-3/32)
PUNTO ELASTICO INVISIBILE3-6,5 F-1,5
54(1/8-1/4) (1/64-1/16)
PUNTO SMERLO3-6,5 F-1,5
58(1/8-1/4) (1/64-1/16)
PUNTO DOPPIO 3-6,5 F-3PUNTO A PONTE 57PUNTO BASTIONE (1/8-1/4) (1/64-1/8)
PUNTO A CONCHIGLIA 3-6,5 F-361 ELASTICO (1/8-1/4) (1/64-1/8)
PUNTO PERLAPUNTO FRECCIA 3-6,5 F-1
PUNTO PARALLELOGRAMMA (1/8-1/4) (1/64-1/16)59
PUNTO TRIANGOLO
PUNTO SCINTILLA 6,5 F-1PUNTO QUADRO 59PUNTO DECORATIVO (1/4) (1/64-1/16)
PUNTO ELASTICO TRIPLO6,5 SS Fissa
51(1/4) 2,5 (3/32)
PUNTO ZIGZAG TRIPLO3-6,5 SS Fissa
62(1/8-1/4) 2,5 (3/32)
PUNTO SOPRAGGITTO 3-6,5 SS Fissa61ELASTICO (1/8-1/4) 2,5 (3/32)
PUNTO SOPRAGGITTO 3-6,5 SS Fissa61ELASTICO (1/8-1/4) 2,5 (3/32)
PUNTO PIUMA3-6,5 SS Fissa
62(1/8-1/4) 2,5 (3/32)
PUNTO PETTINE3-6,5 SS Fissa
61(1/8-1/4) 2,5 (3/32)
PUNTO DECORATIVO6,5 SS Fissa
59(1/4) 2,5 (3/32)
PUNTO FAGOTING3-6,5 SS Fissa
60(1/8-1/4) 2,5 (3/32)
PUNTO DECORATIVO3-6,5 SS Fissa
59(1/8-1/4) 2,5 (3/32)
PUNTO ORLO DECORATIVO3-6,5 SS Fissa
57(1/8-1/4) 2,5 (3/32)
PUNTO DECORATIVO6,5 SS Fissa
59(1/4) 2,5 (3/32)
PUNTO MAGLIA3-6,5 SS Fissa
60(1/8-1/4) 2,5 (3/32)

24
AMPIEZZE E LUNGHEZZE DEI PUNTI CONSIGLIATE
(Modello STAR 230E, PS-55)
PUNTO
NOME PUNTOAMPIEZZA PREDEFINITA LUNGHEZZA
PAGINA[mm(inch)] CONSIGLIATA [mm(inch)]
OCCHIELLO AUTOMATICO 3-5 (Manopola 4-7) F-1,564IN 1 TEMPI (1/8-3/16) (1/64-1/16)
PUNTO DIRITTO6,5 1-4,5
51, 74, 75(1/4) (1/16-3/16)
PUNTO ZIGZAG0-6,5 F-4,5
53, 72, 76, 78(0-1/4) (1/64-3/16)
PUNTO ORLO INVISIBILE3-6,5 F-2
54(1/8-1/4) (1/64-1/16)
PUNTO CONCHIGLIA3-6,5 F-3
55(1/8-1/4) (1/64-1/8)
PUNTO ELASTICO3-6,5 F-2,5
56(1/8-1/4) (1/64-3/32)
PUNTO ELASTICO 3-6,5 F-1,554INVISIBILE (1/8-1/4) (1/64-1/16)
PUNTO SMERLO3-6,5 F-1,5
58(1/8-1/4) (1/64-1/16)
PUNTO DOPPIO 3-6,5 F-3PUNTO A PONTE 57PUNTO BASTIONE (1/8-1/4) (1/64-1/8)
PUNTO A CONCHIGLIA 3-6,5 F-361ELASTICO (1/8-1/4) (1/64-1/8)
PUNTO PERLA 3-6,5 F-159PUNTO FRECCIA (1/8-1/4) (1/64-1/16)
PUNTO ELASTICO TRIPLO6,5 SS Fissa
51(1/4) 2,5 (3/32)
PUNTO ZIGZAG TRIPLO3-6,5 SS Fissa
62(1/8-1/4) 2,5 (3/32)
PUNTO SOPRAGGITTO 3-6,5 SS Fissa61ELASTICO (1/8-1/4) 2,5 (3/32)
PUNTO SOPRAGGITTO 3-6,5 SS Fissa61ELASTICO (1/8-1/4) 2,5 (3/32)
PUNTO PIUMA3-6,5 SS Fissa
62(1/8-1/4) 2,5 (3/32)
PUNTO PETTINE3-6,5 SS Fissa
61(1/8-1/4) 2,5 (3/32)
PUNTO DECORATIVO6,5 SS Fissa
59(1/4) 2,5 (3/32)
PUNTO FAGOTING3-6,5 SS Fissa
60(1/8-1/4) 2,5 (3/32)
PUNTO DECORATIVO3-6,5 SS Fissa
59(1/8-1/4) 2,5 (3/32)
PUNTO ORLO DECORATIVO3-6,5 SS Fissa
57(1/8-1/4) 2,5 (3/32)
PUNTO DECORATIVO6,5 SS Fissa
59(1/4) 2,5 (3/32)

25
AMPIEZZE E LUNGHEZZE DEI PUNTI CONSIGLIATE
(Modello PS-53)
PUNTO
NOME PUNTOAMPIEZZA PREDEFINITA LUNGHEZZA
PAGINA[mm(inch)] CONSIGLIATA [mm(inch)]
OCCHIELLO AUTOMATICA 3-5 (Manopola 4-7) F-1,566IN 4 TEMPI (1/8-3/16) (1/64-1/16)
PUNTO DIRITTO6,5 1-4,5
51, 74, 75(1/4) (3/64-3/16)
PUNTO ZIGZAG0-6,5 F-4,5
53, 72, 76, 78(0-1/4) (1/64-3/16)
PUNTO DOPPIO3-6,5 F-3
57(1/8-1/4) (1/64-1/8)
PUNTO ELASTICO INVISIBILE3-6,5 F-1,5
54(1/8-1/4) (1/64-1/16)
PUNTO ORLO INVISIBILE3-6,5 F-2
54(1/8-1/4) (1/64-1/16)
PUNTO CONCHIGLIA3-6,5 F-3
55(1/8-1/4) (1/64-1/8)
PUNTO ELASTICO3-6,5 F-2,5
56(1/8-1/4) (1/64-3/32)
PUNTO ELASTICO TRIPLO6,5 SS Fissa
51(1/4) 2,5 (3/32)
PUNTO ZIGZAG TRIPLO3-6,5 SS Fissa
62(1/8-1/4) 2,5 (3/32)
PUNTO FAGOTING3-6,5 SS Fissa
60(1/8-1/4) 2,5 (3/32)
PUNTO PETTINE3-6,5 SS Fissa
61(1/8-1/4) 2,5 (3/32)
PUNTO SOPRAGGITTO 3-6,5 SS Fissa61 ELASTICO (1/8-1/4) 2,5 (3/32)
PUNTO SOPRAGGITTO 3-6,5 SS Fissa61ELASTICO (1/8-1/4) 2,5 (3/32)
PUNTO PIUMA3-6,5 SS Fissa
62(1/8-1/4) 2,5 (3/32)

26
1
32
1
2
3 4
· ·
· 4 · 3 · 2 · 1 · F · 0 ................. SS
AAAAA
Stitch Length Dial
Depending on your selected stitch, you may need to adjust the stitchlength for best results.The numbers marked on the Stitch Length Dial represent the lengthof the stitch in millimeters (mm).THE HIGHER THE NUMBER, THE LONGER THE STITCH.The “0” setting does not feed the material. This is used for sewingon a button.The “F” area is used for making a Satin Stitch (a dense zigzag stitch)which can be used in making buttonholes and decorative stitches.The position needed for making the Satin Stitch varies according tothe material and thread being used. To determine the exact dialposition, you should first test the stitch and length settings on ascrap of fabric to observe the feeding of the material.
1 Stitch length dial2 Length3 Fine → SS4 Coarse
CAUTIONDo not set the Stitch Length Dial in the range shown by AAAAA. Ifthe machine is started while the dial is set in the range shownby AAAAA, the fabric will not feed correctly and the fabric ormachine may be damaged.
Turn the dial to the left past “0” for the SS position.
SS (Fixed 2.5)
CAUTIONIf the stitches get bunched together, lengthen the stitchlength and continue sewing. Do not continue sewing with-out lengthening the stitch length, otherwise the needle maybreak and cause injury.
TAB
LE O
F CO
NTE
NTS
KN
OW
ING
YO
UR
SE
WIN
G M
AC
HIN
ES
TR
AIG
HT
AN
DZ
IGZ
AG
ST
ITC
HIN
GB
UILT-IN
ST
ITC
HE
SB
UT
TON
HO
LE A
ND
BU
TTO
N S
EW
ING
US
ING
ATTACH
ME
NTS
AN
D A
PP
LICATIO
NS
MA
INT
EN
AN
CE
IND
EX

27
Selector de largo de puntada
Según la puntada seleccionada, puede ser necesario ajustar su largo paralograr mejores resultados.Los números indicados en el disco representan el largo de las puntadas enmilímetros.CUANTO MAS ALTO EL NUMERO, MAS LARGA LA PUNTADA.El ajuste “0” no alimenta el tejido. Sirve para coser un botón.La zona “F” se usa para realizar bordados de realce (una puntada densa enzigzag), que puede servir para coser ojales o como puntadas decorativas.La posición necesaria para realizar puntadas de realce varia dependiendodel tejido e hilo utilizados. Para determinar la posición exacta del botón,conviene primero probar la puntada y los ajustes de largo en un pedazo detejido para ver como se alimenta el material.
1 Selector de largo de puntada2 Largo3 Fina → SS4 Más largo
PRECAUCIÓNNo ponga el selector de puntada en el rango mostrado por AAAAA. Si ponela máquina en marcha con el selector puesto en el rango mostrado porAAAAA, el tejido no avanzará correctamente y el tejido o la máquinapodrían dañarse.
Para colocarse en la posición SS , gire el selector hacia la izquierda másallá de “0”.
SS (Fija 2,5)
PRECAUCIÓNSi las puntadas se amontonan, alargue la longitud de la puntada ysiga cosiendo. No continúe cosiendo sin alargar la puntada; de locontrario, podría romper la aguja y causar lesiones.
Selettore della lunghezza del punto
In base al tipo di punto selezionato, può essere necessario regolarnela lunghezza per ottenere un risultato ottimale.I numeri sul selettore rappresentano la lunghezza dei punti inmillimetri (mm).QUANTO PIU’ ALTO E’ IL NUMERO, TANTO PIU’ LUNGO E’PUNTO.Con la regolazione “0” il tessuto non viene alimentato dal trasporta-tore. Questa regolazione è adatta per cuciture di bottoni.L'area marcata con “F” va utilizzata per eseguire il punto satin (unasuccessione di punti zigzag molto fitti), che può essere utilizzato perfare asole e punti decorativi. La regolazione più idonea per il puntopassato varia in base al tipo di tessuto e al filo che si voglionoutilizzare. Per stabilire la regolazione esatta, è bene prima provare ilpunto e la lunghezza scelta su un campione di stoffa per verificare iltrasporto del tessuto.
1 Selettore della lunghezza del punto2 Lunghezza3 Fine → SS4 Punti radi
ATTENZIONENon regolare il selettore della lunghezza del punto nella gammaindicata da AAAAA. Se la macchina viene avviata menre il selettore èregolato nella gamma indicata da AAAAA, il tessuto non avanza corret-tamente e il tessuto o la macchina possono essere danneggiati.
Girare il selettore a sinistra oltre “0” per la posizione SS .
SS (Fissa 2,5)
ATTENZIONESe i punti sono troppo ravvicinati, aumentare la lunghezza delpunto e continuare a cucire. Non continuare a cucire senzaaumentare la lunghezza del punto; in caso contrario, l’agopotrebbe rompersi causando lesioni personali.
1
32
1
2
3 4
· ·
· 4 · 3 · 2 · 1 · F · 0 ................. SS
AAAAA

28
7 65 2
1 0
1
Stitch Width Dial
Depending on the stitch selected, you may need to adjust the stitchwidth.The numbers marked on the dial represent the stitch width.THE HIGHER THE NUMBER, THE WIDER THE STITCH.
1 Stitch width dial
CAUTIONDo not adjust the stitch width while the needle is in the fabric.Otherwise, the needle or fabric may be damaged.
NOTE:When you choose the Straight Stitch or the Triple Stretch Stitch youcan change the needle position from left to right.
Selector de ancho de puntada
Según el modelo de puntada seleccionado, se necesitará o no ajustar elancho de puntada.Los números indicados en el selector representan el ancho de las puntadas.A MAYOR NUMERO SELECCIONADO, MAYOR ANCHO DE PUN-TADA.
1 Selector de ancho de puntada
PRECAUCIÓNNo ajuste el ancho de puntada mientras la aguja esté metida en eltejido. De lo contrario, la aguja o el tejido podrían dañarse.
NOTA:Cuando elige la puntada recta o la triple puntada elástica, es posiblecambiar la posición de la aguja de izquierda a derecha.
Manopola dell’ampiezza del punto
In base al tipo di punto selezionato, può essere necessario regolarnel’ampiezza.I numeri sulla manopola rappresentano l’ampiezza del punto.QUANTO PIU’ ALTO E’ IL NUMERO, TANTO PIU’ AMPIO E’ ILPUNTO.
1 Manopola dell’ampiezza del punto
ATTENZIONENon regolare l’ampiezza del punto mentre l’ago è nel tessuto,altrimenti l’ago o il tessuto possono essere danneggiati.
NOTA:Cucendo con il punto dritto o con il punto elastico triplo, è possibilecambiare la posizione dell'ago da sinistra a destra.
TAB
LE O
F CO
NTE
NTS
KN
OW
ING
YO
UR
SE
WIN
G M
AC
HIN
ES
TR
AIG
HT
AN
DZ
IGZ
AG
ST
ITC
HIN
GB
UILT-IN
ST
ITC
HE
SB
UT
TON
HO
LE A
ND
BU
TTO
N S
EW
ING
US
ING
ATTACH
ME
NTS
AN
D A
PP
LICATIO
NS
MA
INT
EN
AN
CE
IND
EX

29
1
Reverse Sewing Lever
Reverse sewing is used for back tacking and reinforcing seams.
(Model PS-57, PS-55, PS-53)To sew in reverse, push the Reverse Sewing Lever in as far aspossible and hold in that position while pressing lightly on the footpedal. To sew forward, release the Reverse Sewing Lever. Themachine will then sew forward.
(Model STAR 240E, STAR 230E)To sew in reverse when the foot controller is not used, push theReverse Sewing Lever in as far as possible and hold it. Themachine will sew slowly in reverse.When the foot controller is used, push this lever and hold it whilepressing lightly on the foot pedal. Then, the machine will sew atordinary speed in reverse.
1 Reverse sewing lever
Pulsador de retroceso
La costura hacia atrás se usa para remates y para reforzar las costuras.
(Modelo PS-57, PS-55, PS-53)Para coser hacia atrás, apriete a fondo el pulsador de retroceso y mantén-galo en esa posición mientras presiona ligeramente el pedal. Para volvera coser hacia adelante, suelte el pulsador.
(Modelo STAR 240E, STAR 230E)Mientras presiona el pedal, apriete el pulsador y manténgalo apretado. Lamáquina coserá a velocidad normal y al revés.Al soltar el pulsador, la máquina va a volver a coser hacia adelante.Si aprieta el pulsador y lo mantiene apretado sin presionar el pedal, lamáquina va a coser despacio hacia atrás.
1 Pulsador de retroceso
Leva di cucitura di ritorno
La cucitura di ritorno è indicata fissare e rinforzare le cuciture.
(Modello PS-57, PS-55, PS-53)Per cucire a marcia indietro, spingere più a fondo possibile il leva dicucitura di ritorno e mantenerlo in quella posizione premendo allostesso tempo leggermente sul reostato a pedale. Per cucire a marciaavanti, rilasciare il leva, e la macchina tornerà a cucire nel modonormale.
(Modello STAR 240E, STAR 230E)Per cucire a marcia indietro quando non si usa il reostato di controllo,premere a fondo il leva di cucitura di ritorno e tenerlo premuto. Lamacchina cucirà lentamente a marcia indietro.Quando si usa il reostato di controllo, tenere premuto questo leva epremere leggermente sul reostato di controllo. La macchina cucirà amarcia indietro a velocità normale.
1 Leva di cucitura di ritorno
TAB
LE O
F CO
NTE
NTS
KN
OW
ING
YO
UR
SE
WIN
G M
AC
HIN
ES
TR
AIG
HT
AN
DZ
IGZ
AG
ST
ITC
HIN
GB
UILT-IN
ST
ITC
HE
SB
UT
TON
HO
LE A
ND
BU
TTO
N S
EW
ING
US
ING
ATTACH
ME
NTS
AN
D A
PP
LICATIO
NS
MA
INT
EN
AN
CE
IND
EX

30
3 2 1
Feed Dog Position Switch
Use the Feed Dog Position Switch to raise or lower the feed dogsaccording to the job that is being done. When monogramming,embroidering, darning or sewing on buttons, the feed dogs shouldbe lowered. (The garment will not be fed.)
NOTE:When raising or lowering the feed dogs, move the Feed DogPosition Switch as far as possible to the appropriate side. Since thefeed dogs can not be lowered using the Feed Dog Position Switchimmediately after they are raised, turn the balance wheel towardyou once and after the feed dogs are raised, lower them using theFeed Dog Position Switch.
1 Feed dog position switch2 Down position3 Up position
Palanca de los alimentadores
Utilice la palanca de los alimentadores para levantar o bajar los dientes delos alimentadores de conformidad con el trabajo a realizar. Para monogra-mas, bordados, zurcidos o para la costura de botones, los alimentadoresdeben ser bajados (para que el tejido no se alimente).
NOTA:Al subir o bajar los alimentadores, conviene desplazar la palanca de losalimentadores lo más posible hacia la posición deseada. Dado que losalimentadores no pueden ser bajados con la palanca inmediatamentedespués de su subida, gire primero la ruedecilla hacia usted y, cuando losalimentadores se encuentren subidos, bájelos con la palanca arriba men-cionada.
1 Palanca de los alimentadores2 Posición baja3 Posición alta
Tasto abbassa-trasportatore
Utilizzare la tasto abbassa-trasportatore per sollevare o abbassare lagriffa di trasporto in base al lavoro da eseguire. Quando si devonoeseguire monogrammi, lavori di ricamo, di rammendo o cuciture dibottoni, la griffa di trasporto va abbassata (il tessuto non verra’trasportato).
NOTA:Quando si solleva o si abbassa la griffa di trasporto, spostare la tastoabbassa-trasportatore il più a fondo possibile verso la posizioneappropriata. Poiché la griffa di trasporto non può essere abbassatatramite la tasto abbassa-trasportatore immediatamente dopo esserestata sollevata, far compiere al volantino un giro girandolo verso sestessi e, dopo che la griffa di trasporto viene sollevata, abbassarlaagendo sulla tasto abbassa-trasportatore.
1 Tasto abbassa-trasportatore2 Indicatore di posizione alzata3 Posizione abbassata
TAB
LE O
F CO
NTE
NTS
KN
OW
ING
YO
UR
SE
WIN
G M
AC
HIN
ES
TR
AIG
HT
AN
DZ
IGZ
AG
ST
ITC
HIN
GB
UILT-IN
ST
ITC
HE
SB
UT
TON
HO
LE A
ND
BU
TTO
N S
EW
ING
US
ING
ATTACH
ME
NTS
AN
D A
PP
LICATIO
NS
MA
INT
EN
AN
CE
IND
EX

31
1
(Model STAR 240E, STAR 230E)
Start/Stop Button
Pressing the Start/Stop Button once starts the machine; pressingthe button again stops the machine.
• The machine sews at a slow speed when sewing with the buttonheld down.
• The needle stops in its highest position when sewing stops.
1 Start/Stop button
(Model STAR 240E)When you turn on the main power switch, the Start/Stop Button lightwill be red, and will change to green after about 1 second. Thisshows that sewing is possible. When you turn off the power, the lightof the button will also turn off.While the bobbin is being wound (the bobbin winder shaft is movedto the right), the button lights up in orange.
(Modelo STAR 240E, STAR 230E)
Pulsador de puesta enMarcha/Parada
Presione una vez el pulsador de puesta en Marcha/Parada para conectar lamáquina de coser; presione el botón otra vez para pararla.
• La máquina cose a baja velocidad si se cose con el pulsador apretadohacia abajo.
• La aguja se detiene en su posición más elevada cuando se deja de coser.
1 Pulsador de puesta en Marcha/Parada
(Modelo STAR 240E)Cuando active el interruptor de alimentación principal, el pulsador depuesta en Marcha/Parada se encenderá en rojo, y cambiará a verde despuésde 1 segundo aproximadamente. Esto muestra que es posible coser.Cuando desconecte la alimentación, también se apagará la luz del pulsa-dor.Cuando la canilla se está bobinando (el eje de hacer canilla se desplaza ala derecha), el pulsador emite una luz naranja.
(Modello STAR 240E, STAR 230E)
Pulsante Avvio/Stop
Premere il pulsante Avvio/Stop una volta per avviare la macchina dacucire, premere di nuovo il tasto per fermare la macchina.
• La macchina cuce a bassa velocità quando si cuce con il pulsantepremuto.
• L'ago si ferma nella posizione più alta quando la macchina siferma.
1 Pulsante Avvio/Stop
(Modello STAR 240E)Quando si accende con l'interruttore di alimentazione principale, laspia del pulsante Avvio/Stop diventa rossa e quindi verde dopo 1secondo circa. Questo indica che è possibile cucire. Quando sispegne l amacchina, anche la spia del pulsante si spegne.Durante l'avvolgimento della spolina (il portarocchetto si è spostatosulla destra), il pulsante diventa arancione.
TAB
LE O
F CO
NTE
NTS
KN
OW
ING
YO
UR
SE
WIN
G M
AC
HIN
ES
TR
AIG
HT
AN
DZ
IGZ
AG
ST
ITC
HIN
GB
UILT-IN
ST
ITC
HE
SB
UT
TON
HO
LE A
ND
BU
TTO
N S
EW
ING
US
ING
ATTACH
ME
NTS
AN
D A
PP
LICATIO
NS
MA
INT
EN
AN
CE
IND
EX

32
1
1
1
(Model STAR 240E, STAR 230E)
Sewing Speed Controller
Controls the speed range.When the foot controller is used, you can control maximum speedwith the sewing speed controller.The sewing speed controller should be set at right (fastest) positionfor normal usage with foot controller.
1 Sewing speed controller
Converting to Free-arm Style
Free-arm sewing is convenient for sewing tubular and hard-to-reach areas on a garment. To change your machine to the free-armstyle, simply lift out the flat bed attachment.
1 Slide the flat bed attachment to the left.
1 Flat bed attachment
(Modelo STAR 240E, STAR 230E)
Palanca de control dezona de velocidad
Controla la zona de velocidad.Si se usa el pedal, se puede controlar una velocidad máxima gracias a lapalanca de control de zona de velocidad.La palanca debe estar puesta a la derecha (velocidad más rápida) para unuso normal del pedal.
1 Palanca de control de la zona de velocidad
Conversión en modalidadde brazo libre
La costura con brazo libre es práctica para coser zonas tubulares y difícilesde acceso en los tejidos. Para transformar su máquina en esa modalidad,sólo hace falta levantar el plataforma y sacarlo.
1 Deslice el plataforma hacia la izquierda.
1 Plataforma
(Modello STAR 240E, STAR 230E)
Cursore di controllo velocità
Controlla la velocità della macchina.Se si utilizza il reostato a pedale, è possibile controllare la velocitàmassima agendo sul cursore di controllo velocità. Il cursore dovràessere spostato tutto a destra (massima velocità) per il normaleimpiego con reostato a pedale.
1 Cursore di controllo velocità
Cucitura a braccio libero
L’utilizzo della macchina a braccio libero è ideale per eseguirecuciture tubolari e di parte di tessuto altrimenti difficili da raggiunge-re. Per passare alla cucitura a braccio libero è sufficiente estrarre ilscomparto piano dalla macchina.
1 Estrarre il scomparto piano tirandolo verso sinistra.
1 Scomparto piano
TAB
LE O
F CO
NTE
NTS
KN
OW
ING
YO
UR
SE
WIN
G M
AC
HIN
ES
TR
AIG
HT
AN
DZ
IGZ
AG
ST
ITC
HIN
GB
UILT-IN
ST
ITC
HE
SB
UT
TON
HO
LE A
ND
BU
TTO
N S
EW
ING
US
ING
ATTACH
ME
NTS
AN
D A
PP
LICATIO
NS
MA
INT
EN
AN
CE
IND
EX

33
THREADINGTHE MACHINE
Winding the Bobbin
CAUTION• If the thread spool and/or spool cap are set incorrectly,
the thread may tangle on the spool pin.• Use the spool cap (large, medium, or small) that is
closest in size to the thread spool. If a spool cap smallerthan the thread spool is used, the thread may becomecaught in the slit on the end of the spool.
1. Place the spool of thread on the horizontal spool pin and firmlyhold it with a spool cap so that the spool of thread will not turn.Pass the thread through the thread guide as shown following thedotted line on the machine.
CAUTIONUse only bobbins recommended by the manufacturer ofthis machine (see page 5). Using other bobbins may resultin damage or injury.
(Model STAR 240E, STAR 230E)2. Place the bobbin on the bobbin winder shaft. Push the bobbin
winder shaft to the right.
1 Spring on the shaft2 Groove of the bobbin
* Align the groove of the bobbin with the spring on the shaft.
3. Wind the thread clockwise around the bobbin four or five times,pass the end of the thread through the slit in the bobbin winderseat, and then pull the thread in the direction shown in theillustration. Use the cutter to cut the thread.
3 Bobbin winder seat
(Model PS-57, PS-55, PS-53)2. Pass the end of the thread through the hole on the bobbin from
the inside.Place the bobbin onto the bobbin winder shaft and slide thebobbin winder shaft to the right. Turn the bobbin clockwise, byhand, until the spring on the shaft slides into the groove of thebobbin.
1 Spring on the shaft2 Groove of the bobbin3 Bobbin winder seat
3. While holding the end of the thread, gently depress the footcontroller to wind the thread around the bobbin a few times.Then stop the machine.Trim the excess thread above the bobbin.
1
2
2
1
2
1
1
3
2
3
13
2
(Model STAR 240E, STAR 230E)
(Model PS-57, PS-55, PS-53)
TAB
LE O
F CO
NTE
NTS
KN
OW
ING
YO
UR
SE
WIN
G M
AC
HIN
ES
TR
AIG
HT
AN
DZ
IGZ
AG
ST
ITC
HIN
GB
UILT-IN
ST
ITC
HE
SB
UT
TON
HO
LE A
ND
BU
TTO
N S
EW
ING
US
ING
ATTACH
ME
NTS
AN
D A
PP
LICATIO
NS
MA
INT
EN
AN
CE
IND
EX

34
PROCEDURE DI INFILATURA
Avvolgimento del rocchetto
ATTENZIONE• Se il rocchetto di filo e/o il fermo per rocchetto sono
posizionati in modo non corretto, il filo potrebbe ingarbu-gliarsi sul portarocchetto.
• Utilizzare il fermo per rocchetto (piccolo, medio o grande)con le dimensioni più simili al rocchetto di filo. Se si utilizzaun fermo per rocchetto con dimensioni inferiori al rocchettodi filo, il filo potrebbe rimanere preso nella fessura sul bordodel rocchetto.
1. Mettere una spoletta di filo sul portaspoletta orizzontale e fissarlacon un fermaspoletta in modo che la spoletta di filo non giri. Farpassare il filo attraverso il guidafilo come illustrato seguendo lalinea tratteggiata sulla macchina.
ATTENZIONEUtilizzare esclusivamente spoline consigliate dal produttore diquesta macchina (vedere pagina 6). L’uso di altri tipi di spolinapuò causare danneggiamenti o lesioni personali.
(Modello STAR 240E, STAR 230E)2. Inserire il rocchetto sull'alberino di avvolgimento e spostare
l'alberino verso destra.
1 Molla sull'alberino2 Scanalatura del rocchetto
* Allineare la scanalatura del rocchetto con la molla sull'alberino.
3. Avvolgere il filo in senso orario attorno al rocchetto 4 o 5 volte,passare l'estremità del filo attraverso la fessura della sede diavvolgimento del rocchetto, quindi tirare il filo nella direzioneindicata nella figura. Utilizzare il tagliafilo per tagliare il filo.
3 Sede di avvolgimento del rocchetto
(Modello PS-57, PS-55, PS-53)2. Far passare il capo del filo nel foro sul rocchetto dall’interno.
Inserire il rocchetto sull’alberino di avvolgimento e spostarel’alberino verso destra. Girare il rocchetto in senso orario con lamano fino a che la molla dell’alberino entra nella scanalatura delrocchetto sul rocchetto.
1 Molla sull'alberino2 Scanalatura del rocchetto3 Sede di avvolgimento del rocchetto
3. Tenendo il capo del filo, premere leggermente il reostato dicontrollo per avvolgere il filo di qualche giro sul rocchetto. Poifermare la macchina.Tagliare via il filo in eccesso sopra il rocchetto.
ENHEBRADO DE LAMÁQUINA
Bobinado de la canilla
PRECAUCIÓN• Si el carrete de hilo o la tapa del carrete no están colocados
correctamente, el hilo podría enredarse en el portacarrete.• Utilice la tapa del carrete (grande, mediana o pequeña) que
mejor se adapte a la medida del carrete de hilo. Si la tapa delcarrete es más pequeña que el carrete de hilo, éste podríaengancharse en la ranura en el borde del carrete.
1. Coloque un carrete de hillo en el eje horizontal previsto y manténgalofirmente con un tope para que no dé vueltas. Pase el hilo por la guía,siguiendo la línea de puntos marcada en la máquina.
PRECAUCIÓNUse sólo bobinas recomendadas por el fabricante de esta máquina(vea página 6). El uso de otras bobinas puede causar daños olesiones.
(Modelo STAR 240E, STAR 230E)2. Coloque la canilla en el eje de hacer canilla.
Empuje el eje de hacer canilla hacia la derecha.
1 Resorte del eje2 Surco de la canilla
* Alinee el surco de la canilla con el resorte del eje.
3. Dé cuatro o cinco vueltas de hilo alrededor de la canilla en el sentidode las agujas del reloj, pase el final del hilo a través de la ranura de labase del girador de la canilla y empuje el hilo en la dirección que indicael dibujo.Corte el hilo con el cortador.
3 Base del girador de la canilla
(Modelo PS-57, PS-55, PS-53)2. Pase extremo del hilo por el orificio de la canilla a partir del nterior.
Coloque la canilla en el eje del girador de canilla y deslice dicho ejehacia la derecha. Gire la canilla en el sentido de las manecillas de unreloj, con la mano, hasta que el muelle impulsor del eje se deslicedentro de la ranura de la canilla.
1 Muelle impulsor2 Ranura de la canilla3 Base del girador de la canilla
3. Sujetando el extremo del hilo, presione suavemente el pedal para queel hilo dé vueltas alrededor de la canilla. Luego pare la máquina.Deshaga el exceso de hilo arriba de la canilla.

35
(Model STAR 240E, STAR 230E)4. Slide the sewing speed controller to its maximum (as far to the
right as possible).5. Push the Start/Stop button. The machine will stop automatically
when the bobbin is full.6. After the bobbin has stopped moving, push the Start/Stop button
to stop the machine.
1 Sewing speed controller
CAUTIONWhen removing the bobbin, do not pull on the bobbin winderseat. Doing so could loosen or remove the bobbin winder seat,resulting in damage to the machine.
7. Cut the thread, slide the bobbin winder shaft to the left andremove the bobbin.
(Mode PS-57, PS-55, PS-53)4. Step down on the foot controller to start.5. After the machine stops automatically when the bobbin is full,
take your foot off of the foot controller.
CAUTIONWhen removing the bobbin, do not pull on the bobbin winderseat. Doing so could loosen or remove the bobbin winder seat,resulting in damage to the machine.
6. Cut the thread, slide the bobbin winder shaft to the left andremove the bobbin.
NOTE:The needle bar does not move when the bobbin winding shaft is slidto the right.Immediately after winding the bobbin, it is normal to hear the soundof the clutch engaging when beginning to sew or manually turningthe balance wheel.
CAUTIONBe sure to follow the process described. If the thread is notcut completely, and the bobbin is wound, when the threadruns low it may tangle around the bobbin and cause theneedle to break.
CAUTIONSetting the bobbin improperly may cause the thread ten-sion to loosen, breaking the needle and resulting in injury.
1 Wound evenly2 Wound poorly
1 2
(Model STAR 240E, STAR 230E)
(Model PS-57, PS-55, PS-53)
1
TAB
LE O
F CO
NTE
NTS
KN
OW
ING
YO
UR
SE
WIN
G M
AC
HIN
ES
TR
AIG
HT
AN
DZ
IGZ
AG
ST
ITC
HIN
GB
UILT-IN
ST
ITC
HE
SB
UT
TON
HO
LE A
ND
BU
TTO
N S
EW
ING
US
ING
ATTACH
ME
NTS
AN
D A
PP
LICATIO
NS
MA
INT
EN
AN
CE
IND
EX

36
(Modello STAR 240E, STAR 230E)4. Spostare la leva di controllo della velocità sulla posizione veloce
(per quanto possibile verso destra).5. Premere il pulsante Avvio/Stop. La macchina si ferma
automaticamente quando il rocchetto è pieno.6. Dopo che il rocchetto si è fermato, premere il pulsante Avvio/Stop
per fermare la macchina.
1 Cursore di controllo velocita’
ATTENZIONEQuando si rimuove la spolina, non tirare agendo sull’alloggiamentodell’avvolgitore spolina. In caso contrario, l’alloggiamento potrebbeallentarsi o staccarsi, provocando danni alla macchina.
7. Tagliare il filo, spostare verso sinistra l'alberino di avvolgimentodel rocchetto e togliere il rocchetto.
(Modello PS-57, PS-55, PS-53)4. Premere il reostato a pedale per iniziare a cucire.5. Dopo che la macchina si è fermata automaticamente quando il
rocchetto è pieno, togliere il piede dal reostato.
ATTENZIONEQuando si rimuove la spolina, non tirare agendo sull’alloggiamentodell’avvolgitore spolina. In caso contrario, l’alloggiamento potreb-be allentarsi o staccarsi, provocando danni alla macchina.
6. Tagliare il filo, spostare verso sinistra l'alberino di avvolgimentodel rocchetto e togliere il rocchetto.
NOTA:La barra dell'ago non si muove quando l'alberino di avvolgimentospoletta viene spostato verso destra.Dopo aver avvolto il rocchetto, appena si avvia la macchina o si girail volantino si potrà udire un rumore dovuto all'innesto della frizione.
ATTENZIONEAttenersi alla procedura descritta. Se il filo non viene tagliatocompletamente e la spolina viene avvolta, quando il filo comin-cia a scarseggiare potrebbe impigliarsi attorno alla spolina eprovocare la rottura dell’ago.
ATTENZIONEUn’impostazione non corretta della spolina può provocarel’allentamento della tensione del filo, la rottura dell’ago edeventuali lesioni personali.
1 Avvolgimento regolare2 Avvolgimento scadente
(Modelo STAR 240E, STAR 230E)4. Deslice la palanca del control de velocidad hacia la derecha y a fondo
(velocidad máxima).5. Presione el pulsador de puesta en Marcha/Parada. La máquina se
parará automáticamente cuando la canilla esté llena.6. Cuando la canilla se haya detenido, presione el pulsador de puesta en
Marcha/Parada para desconectar la máquina.
1 Palanca de control del rango de velocidad
PRECAUCIÓNCuando extraiga la bobina, no presione la base del girador de canilla.De lo contrario, podría aflojar o sacar la base del portabobina yprovocar una avería en la máquina de coser.
7. Corte el hilo, deslice el eje de hacer canilla hacia la izquierda y retirela canilla.
(Modelo PS-57, PS-55, PS-53)4. Pise el pedal para comenzar a coser.5. Cuando la máquina se detenga automáticamente porque la canilla está
llena, retire el pie del pedal.
PRECAUCIÓNCuando extraiga la bobina, no presione la base del girador de canilla.De lo contrario, podría aflojar o sacar la base del portabobina yprovocar una avería en la máquina de coser.
6. Corte el hilo, deslice el eje de hacer canilla hacia la izquierda y retirela canilla.
NOTA:La barra de la aguja no se despla zará cuando el eje de bobinado de lacanilla se deslice hacia la derecha.Inmediatamente después de bobinar la canilla, si empieza a coser o gira lapolea, normalmente oirá el sonido del encaje del embrague.
PRECAUCIÓNAsegúrese de seguir el proceso descrito. Si no corta el hilo comple-tamente y la bobina está enrollada, es posible que, cuando el hilocorra lentamente, éste se enrolle alrededor de la bobina y rompala aguja.
PRECAUCIÓNSi la bobina no está colocada correctamente, el hilo puede perdertensión, romper la aguja y causar alguna lesión.
1 Bobinado correcto2 Bobinado incorrecto

37
12
1
2
Lower Threading
CAUTIONSetting the bobbin improperly may cause the thread ten-sion to loosen, breaking the needle and resulting in injury.
1 Wound evenly2 Wound poorly
CAUTIONBe sure to turn off the power. If you accidentally press theStart/Stop button or step on the foot controller and themachine begins to operate, injury could result.
1. Raise the needle to its highest position by turning the balancewheel toward you (counterclockwise) and raise the presser footlever.
2. Slide the button and open the cover.
1 Slide button2 Cover
3. Insert bobbin and deliver thread end through the slit, then pull thethread to cut.
CAUTIONBe sure the bobbin is set so the thread unrolls in the correctdirection. If the thread unrolls in the wrong direction, it maycause the thread tension to be incorrect or the needle tobreak.
4. Replace the bobbin cover. Place the left tab in place (see arrow1 at left), then press lightly on the right side (see arrow 2 at left)until the cover clicks into place.
* You can begin sewing immediately without drawing up thebobbin thread.
1 2
TAB
LE O
F CO
NTE
NTS
KN
OW
ING
YO
UR
SE
WIN
G M
AC
HIN
ES
TR
AIG
HT
AN
DZ
IGZ
AG
ST
ITC
HIN
GB
UILT-IN
ST
ITC
HE
SB
UT
TON
HO
LE A
ND
BU
TTO
N S
EW
ING
US
ING
ATTACH
ME
NTS
AN
D A
PP
LICATIO
NS
MA
INT
EN
AN
CE
IND
EX

38
Infilatura inferiore
ATTENZIONEUn’impostazione non corretta della spolina può provocarel’allentamento della tensione del filo, la rottura dell’ago edeventuali lesioni personali.
1 Avvolgimento regolare2 Avvolgimento scadente
ATTENZIONEAssicurarsi di spegnere. Se si preme accidentalmente il tastoStart o il reostato di controllo e la macchina inizia a funzionare,si potrebbe rimanere feriti.
1. Far salire l’ago fino alla sua posizione più alta girando il volantinoverso se stessi (in senso antiorario) e sollevare la leva del piedinopremistoffa.
2. Far scorrere il pulsante di apertura ed aprire il coperchio.
1 Pulsante scorrevole2 Coperchio
3. Inserire la spolina in modo che il filo fuoriesca nella direzioneindicata dalla freccia.
ATTENZIONEAssicurarsi che la spolina sia posizionata in modo che il filo sisvolga nella direzione corretta. Nel caso lo svolgimento del filofosse nella direzione errata, la tensione del filo potrebbe risultarenon appropriata o l’ago potrebbe rompersi.
Enhebrado inferior
PRECAUCIÓNSi la bobina no está colocada correctamente, el hilo puede perdertensión, romper la aguja y causar alguna lesión.
1 Bobinado correcto2 Bobinado incorrecto
PRECAUCIÓNAsegúrese de desconectar la alimentación. Si presiona accidental-mente el botón de puesta en Marcha/Parada o pisa el pedal y lamáquina se pone en marcha, podrá hacerse daño.
1. Levante la aguja a su posición más alta, girando la ruedecilla haciausted (en el sentido contrario al de las manecillas de un reloj) y levantela palanca del prensatelas.
2. Deslice el botón y abra la tapa.
1 Deslizar el botón2 Tapa
3. Introduzca la canilla y pase el cabo del hilo por la ranura. Luego, tiredel hilo para cortarlo.
PRECAUCIÓNAsegúrese de que la bobina está colocada de tal manera que el hilose enrolla en la dirección correcta. Si el hilo se enrolla en ladirección equivocada, la tensión del hilo podría ser incorrecta o laaguja podría romperse.
4. Rimettere in posizione lo sportello della spolina Collocare inposizione la linguetta sinistra (vedere la freccia 1 a sinistra), quindipremere leggermente sul lato destro (vedere la freccia 2 a sinistra)fino a far scattare in posizione lo sportello.
* Si può subito iniziare a cucire senza tendere il filo.
4. Abra la tapa de la bobina. Coloque la presilla izquierda (vea la flecha1 a la izquierda) y luego presione ligeramente en la parte derecha (veala flecha 2 a la izquierda) hasta que la tapa se ajuste en su lugar.
* Puede empezar a coser inmediatamente, sin necesidad de levantar elhilo de la bobina.

39
Upper Threading
1. Raise the presser foot using the Presser Foot Lever.2. Raise the needle to its highest position by turning the balance
wheel toward you (counterclockwise).
1 Presser foot lever
3. Place a spool of thread on the horizontal spool pin and press aspool cap onto the spool pin to hold the thread spool firmly inplace.
The thread end should come from the bottom front of the spool.
CAUTION• If the thread spool and/or spool cap are set incorrectly,
the thread may tangle on the spool pin and cause theneedle to break.
• Use the spool cap (large, medium, or small) that isclosest in size to the thread spool. If a spool cap smallerthan the thread spool is used, the thread may becomecaught in the slit on the end of the spool and cause theneedle to break.
CAUTIONBe sure to thread the machine properly. Improper threadingcan cause the thread to tangle and break the needle, leadingto injury.
4. Deliver the upper thread as shown in this diagram.5. Make sure to guide the thread through the thread take-up lever
from the right to the left.
2 Thread take-up lever
6. Place thread behind the guide above the needle.
NOTE:If the thread take-up lever is lowered, the upper thread can not bewrapped around the thread take-up lever. Be sure to raise thePresser Foot Lever and the thread take-up before feeding the upperthread.Incorrectly feeding the thread may cause sewing problems.
1
2
5
1
24
3
TAB
LE O
F CO
NTE
NTS
KN
OW
ING
YO
UR
SE
WIN
G M
AC
HIN
ES
TR
AIG
HT
AN
DZ
IGZ
AG
ST
ITC
HIN
GB
UILT-IN
ST
ITC
HE
SB
UT
TON
HO
LE A
ND
BU
TTO
N S
EW
ING
US
ING
ATTACH
ME
NTS
AN
D A
PP
LICATIO
NS
MA
INT
EN
AN
CE
IND
EX

40
Infilatura superiore
1. Sollevare il piedino premistoffa tramite l’apposita leva.2. Far salire l’ago fino alla sua posizione più alta girando il volantino
verso se stessi (in senso antiorario).
1 Leva del piedino premistoffa
3. Mettere una spoletta di filo sul portaspoletta orizzontale e bloc-carla in posizione applicando un fermaspoletta.
L'estremita del filo deve uscire dalla parte anteriore in basso dellaspoletta.
ATTENZIONE• Se il rocchetto di filo e/o il fermo per rocchetto sono
posizionati in modo non corretto, il filo potrebbe ingarbu-gliarsi sul portarocchetto e provocare la rottura dell’ago.
• Utilizzare il fermo per rocchetto (piccolo, medio o grande)con le dimensioni più simili al rocchetto di filo. Se si utilizzaun fermo per rocchetto con dimensioni inferiori al rocchettodi filo, il filo potrebbe rimanere preso nella fessura sul bordodel rocchetto e provocare la rottura dell’ago.
ATTENZIONEAssicurarsi di eseguire in modo appropriato l’infilatura. In casocontrario, il filo potrebbe impigliarsi e rompere l’ago, conconseguenti rischi di lesioni personali.
4. Far seguire al filo superiore il percorso illustrato nel seguentedisegno.
5. Accertarsi di infilare il filo nella leva tendifilo passando da destraverso sinistra.
2 Leva tirafilo
6. Disporre il filo dietro il guidafilo sopra l’ago.
NOTA:Se la leva tendifilo è abbassata, il filo superiore non può essereavvolto intorno alla leva tendifilo. Assicurarsi di sollevare la leva delpiedino premistoffa e il tendifilo prima di eseguire il trasporto del filosuperiore.Si possono avere dei problemi nel caso di trasporto errato.
Enhebrado superior
1. Levante el prensatelas con la palanca correspondiente.2. Levante la aguja a su posición más alta, girando la ruedecilla hacia
usted (en el sentido contrario al de las manecillas de un reloj).
1 Palanca del prensatelas
3. Coloque un carrete de hilo en el portabobinas horizontal previsto ymanténgalo firmemente con el fleje para que no se mueva.
El final del hilo debe proceder de la parte inferior del carrete.
PRECAUCIÓN• Si el carrete de hilo o la tapa del carrete no están colocados
correctamente, el hilo podría enredarse en el portacarrete yromper la aguja.
• Utilice la tapa del carrete (grande, mediana o pequeña) quemejor se adapte a la medida del carrete de hilo. Si la tapa delcarrete es más pequeña que el carrete de hilo, éste podríaengancharse en la ranura en el borde del carrete y romper laaguja.
PRECAUCIÓNAsegúrese de enhebrar correctamente. Si no enhebra la agujacorrectamente, podría enredarse el hilo y romperse la aguja, loque puede causar lesiones.
4. Enhebre el hilo superior tal como indica el diagrama.5. Asegúrese de guiar el hilo por la palanca tirahilos, de la derecha a la
izquierda.
2 Palanca tirahilos
6. Coloque el hilo detrás de la guía, arriba de la aguja.
NOTA:Si la palanca tirahilos está bajada, el hilo superior no podrá enrrollarsealrededor de la palanca tirahilos. Asegúrese de levantar la palanca delprensatelas y el tirahilos antes de cargar el hilo superior.Si carga incorrectamente el hilo, pueden surgir problemas al coser.
5
1
24
3

41
Using Needle Threader
Turn power switch to “O”.1. Lower the presser foot lever.2. Turn the balance wheel toward you (counter-clockwise) to raise
the needle holder to the highest position.
1 Needle holder2 Needle threader lever
CAUTIONWhen using the needle threader, be sure the needle holder isin the highest position. Otherwise, the hook may be damaged.
3. While lowering the needle threader lever, hook the thread ontothe guide.
4. Pull down the needle threader lever as much as possible, thenrotate the lever toward the back of the machine (away from you).Make sure that the hook passes through the eye of the needleand grabs the thread.
• Hold the thread in front of the needle in order to make sure thatthe hook grabs it.
1 Needle holder2 Needle threader lever3 Guide4 Hook holder
5. While lightly holding the thread, rotate the needle threader levertoward the front of the machine (toward you). The hook will pullthe thread through the needle.
5 Hook6 Thread
6. Raise the needle threader lever and pull out about 5 cm (2") ofthread through the needle toward the back of the sewingmachine.
CAUTIONThe needle threader can only be used with home sewingmachine needles size 75/11-100/16. Check the table onpage 47 for appropriate needle and thread combinations.Note that, if you are using transparent nylon mono-filamentthread, only needles in the range of 90/14-100/16 can beused.
CAUTIONThe needle threader can not be used to thread the needlewhen you are using decorative threads or specialty needleslike the twin needle and wing needle. When using thosetypes of threads or needles, thread the eye of the needlemanually. Make sure the main power switch is OFF whenthreading the needle manually.
1
2
3
42
1
5 56
TAB
LE O
F CO
NTE
NTS
KN
OW
ING
YO
UR
SE
WIN
G M
AC
HIN
ES
TR
AIG
HT
AN
DZ
IGZ
AG
ST
ITC
HIN
GB
UILT-IN
ST
ITC
HE
SB
UT
TON
HO
LE A
ND
BU
TTO
N S
EW
ING
US
ING
ATTACH
ME
NTS
AN
D A
PP
LICATIO
NS
MA
INT
EN
AN
CE
IND
EX
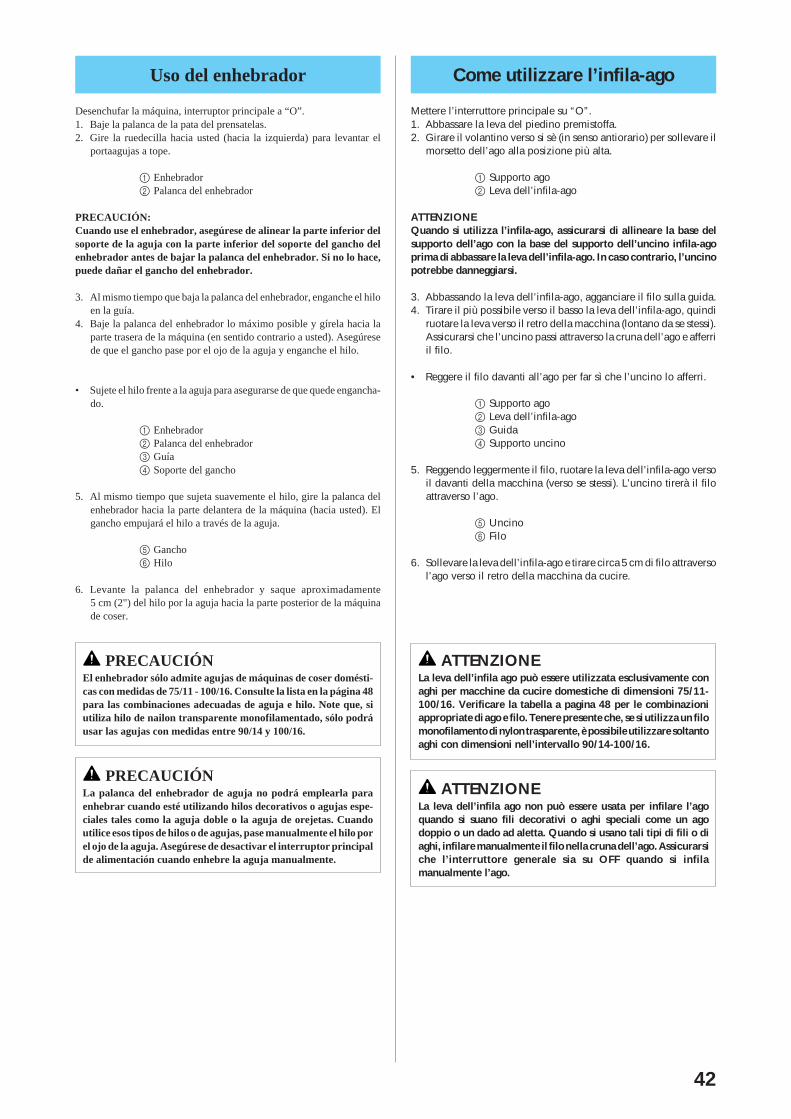
42
Come utilizzare l’infila-ago
Mettere l’interruttore principale su “O”.1. Abbassare la leva del piedino premistoffa.2. Girare il volantino verso si sè (in senso antiorario) per sollevare il
morsetto dell’ago alla posizione più alta.
1 Supporto ago2 Leva dell’infila-ago
ATTENZIONEQuando si utilizza l’infila-ago, assicurarsi di allineare la base delsupporto dell’ago con la base del supporto dell’uncino infila-agoprima di abbassare la leva dell’infila-ago. In caso contrario, l’uncinopotrebbe danneggiarsi.
3. Abbassando la leva dell’infila-ago, agganciare il filo sulla guida.4. Tirare il più possibile verso il basso la leva dell’infila-ago, quindi
ruotare la leva verso il retro della macchina (lontano da se stessi).Assicurarsi che l’uncino passi attraverso la cruna dell’ago e afferriil filo.
• Reggere il filo davanti all’ago per far sì che l’uncino lo afferri.
1 Supporto ago2 Leva dell’infila-ago3 Guida4 Supporto uncino
5. Reggendo leggermente il filo, ruotare la leva dell’infila-ago versoil davanti della macchina (verso se stessi). L’uncino tirerà il filoattraverso l’ago.
5 Uncino6 Filo
6. Sollevare la leva dell’infila-ago e tirare circa 5 cm di filo attraversol’ago verso il retro della macchina da cucire.
ATTENZIONELa leva dell’infila ago può essere utilizzata esclusivamente conaghi per macchine da cucire domestiche di dimensioni 75/11-100/16. Verificare la tabella a pagina 48 per le combinazioniappropriate di ago e filo. Tenere presente che, se si utilizza un filomonofilamento di nylon trasparente, è possibile utilizzare soltantoaghi con dimensioni nell’intervallo 90/14-100/16.
ATTENZIONELa leva dell’infila ago non può essere usata per infilare l’agoquando si suano fili decorativi o aghi speciali come un agodoppio o un dado ad aletta. Quando si usano tali tipi di fili o diaghi, infilare manualmente il filo nella cruna dell’ago. Assicurarsiche l’interruttore generale sia su OFF quando si infilamanualmente l’ago.
Uso del enhebrador
Desenchufar la máquina, interruptor principale a “O”.1. Baje la palanca de la pata del prensatelas.2. Gire la ruedecilla hacia usted (hacia la izquierda) para levantar el
portaagujas a tope.
1 Enhebrador2 Palanca del enhebrador
PRECAUCIÓN:Cuando use el enhebrador, asegúrese de alinear la parte inferior delsoporte de la aguja con la parte inferior del soporte del gancho delenhebrador antes de bajar la palanca del enhebrador. Si no lo hace,puede dañar el gancho del enhebrador.
3. Al mismo tiempo que baja la palanca del enhebrador, enganche el hiloen la guía.
4. Baje la palanca del enhebrador lo máximo posible y gírela hacia laparte trasera de la máquina (en sentido contrario a usted). Asegúresede que el gancho pase por el ojo de la aguja y enganche el hilo.
• Sujete el hilo frente a la aguja para asegurarse de que quede engancha-do.
1 Enhebrador2 Palanca del enhebrador3 Guía4 Soporte del gancho
5. Al mismo tiempo que sujeta suavemente el hilo, gire la palanca delenhebrador hacia la parte delantera de la máquina (hacia usted). Elgancho empujará el hilo a través de la aguja.
5 Gancho6 Hilo
6. Levante la palanca del enhebrador y saque aproximadamente5 cm (2") del hilo por la aguja hacia la parte posterior de la máquinade coser.
PRECAUCIÓNEl enhebrador sólo admite agujas de máquinas de coser domésti-cas con medidas de 75/11 - 100/16. Consulte la lista en la página 48para las combinaciones adecuadas de aguja e hilo. Note que, siutiliza hilo de nailon transparente monofilamentado, sólo podráusar las agujas con medidas entre 90/14 y 100/16.
PRECAUCIÓNLa palanca del enhebrador de aguja no podrá emplearla paraenhebrar cuando esté utilizando hilos decorativos o agujas espe-ciales tales como la aguja doble o la aguja de orejetas. Cuandoutilice esos tipos de hilos o de agujas, pase manualmente el hilo porel ojo de la aguja. Asegúrese de desactivar el interruptor principalde alimentación cuando enhebre la aguja manualmente.

43
Manually Drawing UpLower Thread
When sewing gathers or darts, the lower thread can be manuallydrawn up so that it will have some excess.
1. Pass the thread along the groove in the direction of the arrow,and leave it there without cutting it.
• The bobbin cover should still be removed.
2. While lightly holding the end of the upper thread, slowly turn thebalance wheel to the front (counter-clockwise) once by hand tolower and then raise the needle.
3. Pull on the upper thread to draw up the lower thread.
4. Pull out about 10 cm (4") of both threads and place them towardthe back of the machine under the presser foot.
1 Upper thread2 Lower thread
1
2
txt_SpTiraggio manuale del filo inferiore
Quando si cuciono crespe o pieghine, il filo inferiore può essere tesomanualmente in modo che sia un po' in eccesso.
1. Passare il filo lungo la scanalatura nella direzione della freccia emantenerlo così senza tagliarlo.
• Il coperchio della spolina deve essere tolto.
2. Tenendo leggermente l'estremità del filo superiore, girarelenatmente con la mano una volta il volantino verso il davanti (insenso antiorario) per abbassare e quindi sollevare l'ago.
3. Tirare il filo superiore per tendere il filo inferiore.
4. Staccare circa 10 cm di entrambi i fili e metterli sul retro dellamacchina sotto il reostato.
1 Filo superiore2 Filo inferiore
Levantar manualmenteel hilo inferior
Al coser fruncidos o pinzas, puede levantar manualmente el hilo inferiorpara que haya un cierto exceso de hilo.
1. Pase el hilo por la ranura siguiendo la dirección de la flecha y déjeloahí sin cortarlo.
• La tapa de la canilla no debe estar colocada.
2. Coja con suavidad el final del hilo superior y dé con cuidado una vueltacon la mano a la ruedecilla hacia delante (hacia la izguierda) para bajarla aguja.
3. Tire del hilo superior para levantar el hilo inferior.
4. Saque unos 10 cm (4") de ambos hilos y colóquelos en dirección a laparte trasera de la máquina, debajo del prensatelas.
1 Hilo superior2 Hilo inferior
TAB
LE O
F CO
NTE
NTS
KN
OW
ING
YO
UR
SE
WIN
G M
AC
HIN
ES
TR
AIG
HT
AN
DZ
IGZ
AG
ST
ITC
HIN
GB
UILT-IN
ST
ITC
HE
SB
UT
TON
HO
LE A
ND
BU
TTO
N S
EW
ING
US
ING
ATTACH
ME
NTS
AN
D A
PP
LICATIO
NS
MA
INT
EN
AN
CE
IND
EX

44
Twin Needle Sewing
Your machine is designed for twin needle sewing, which allows youto sew with two top threads. You can use the same color or twodifferent colors of thread for making decorative stitches. Any of thepatterns, except the buttonhole pattern, can be sewn with the twinneedle. When using the Straight Stitch, the Stitch Width Dial shouldbe set so that the needle is in the center position (between 3 and 4).However, when other patterns are used, set the Stitch Width Dialbetween 0 and 5. See page 28 for details on adjusting the StitchWidth Dial.
CAUTION• Use only twin needles made for this machine (part code
X57521-001). Other needles could break, resulting indamage.
• When sewing with the twin needle, be sure the StitchWidth Dial is not set above 5 since this may cause theneedle to hit the needle plate and break.
• Do not sew with bent needles. The needle could breakand cause injury.
• When using the twin needle, be sure to use zigzagpresser foot only.
INSERTING THE TWIN NEEDLEInsert in the same way a single needle is inserted (refer to page 11).The flat side of the needle should face toward the back and therounded side should face toward you.
txt_Sp
Cucitura con ago gemello
Questa macchina da cucire è predisposta all’uso dell’ago gemello,che consente di cucire contemporaneamente con due fili. E’ possibileeseguire punti decorativi utilizzando fili dello stesso colore o di duecolori diversi. Con l’ago gemello si possono eseguire tutti i puntitranne la cucitura di asole. Cucendo con il punto diritto, la manopoladell’ampiezza del punto dovrà essere regolata in modo tale che l’agosi trovi in posizione centrale (fra 3 e 4). Quando si eseguono invecealtri punti, regolare la manopola dell’ampiezza del punto fra 0 e 5.Per ulteriori dettagli sulla regolazione della manopola dell’ampiezzadel punto, vedere a pagina 28.
ATTENZIONE• Utilizzare esclusivamente aghi doppi studiati per questa
macchina (codice parte X57521-001). Aghi di altro tipopotrebbero rompersi e causare danneggiamenti.
• Quando si cuce con l’ago gemello, accertarsi che la manopo-la dell’ampiezza del punto non si trovi su una posizionesuperiore a 5, per evitare che l’ago colpisca la placca dell’agoe si spezzi.
• Non cucire con aghi piegati. L’ago potrebbe rompersi ecausare lesioni personali.
• Quando si utilizza l’ago doppio, assicurarsi di utilizzareesclusivamente il piedino premistoffa a zigzag.
INSERIMENTO DELL’AGO GEMELLOPer inserire l’ago gemello, procedere come per l’inserimento dell’agosingolo (vedere a pag. 12). L’ago va posizionato con la parte piattadell’ago rivolta indietro e la parte arrotondata rivolta verso se stessi.
Costura con aguja doble
Su máquina de coser ha sido concebida para poder utilizar una aguja dobley permitir la costura con dos hilos superiores. Puede usar el mismo colorde hilo o dos hilos de colores distintos para puntadas decorativas. La agujadoble permite coser cualquiera de los patrones, exceptuando él para hacerojales. Sin embargo, cuando selecciona la puntada recta, el selector deancho de puntada debe estar ajustado de tal forma que la aguja se encuentreen la posición central (entre 3 y 4). Para los otros modelos de puntadas,dicho selector puede estar ajustado entre 0 y 5. Véase la página 28 paramayores detalles sobre el ajuste del selector de ancho de puntada.
PRECAUCIÓN• Utilice sólo las agujas dobles específicas para esta máquina
(código de pieza X57521-001). De lo contrario, la aguja podríaromperse y causar una avería.
• Al coser con una aguja doble, debe asegurarse que el selectorde ancho de puntada no está ajustado en un valor superior a 5ya que en esas circunstancias, la aguja podría golpear la placade agujas y romperse.
• No cosa con agujas dobladas. De otra manera, la aguja podríaromperse y causar lesiones.
• Si usa la aguja doble, asegúrese de usar solamente el pieprensatela de zigzag.
PARA INTRODUCIR LA AGUJA DOBLEIntrodúzcala de la misma manera que una aguja simple (véase página 12).La parte plana de la aguja debe estar cara hacia atrás mientras que la parteredonda está cara a usted.
TAB
LE O
F CO
NTE
NTS
KN
OW
ING
YO
UR
SE
WIN
G M
AC
HIN
ES
TR
AIG
HT
AN
DZ
IGZ
AG
ST
ITC
HIN
GB
UILT-IN
ST
ITC
HE
SB
UT
TON
HO
LE A
ND
BU
TTO
N S
EW
ING
US
ING
ATTACH
ME
NTS
AN
D A
PP
LICATIO
NS
MA
INT
EN
AN
CE
IND
EX

45
A
B
1
2
PLACING THE EXTRA SPOOL PINPlace the vertical spool pin in the hole found on top of the machinenear the horizontal spool pin. Place the second spool of thread ontothe vertical spool pin as shown in fig. A .
TWIN NEEDLE THREADINGEach needle should be threaded separately.
1. Threading the Right NeedleFollow the same instructions for single needle threading usingthe thread from the spool on the extra spool pin. See page 39 formore details.
2. Threading the Left NeedleThread the left needle in the same manner that the right needlewas threaded, but do not pass the thread through the threadguide above the needle before passing it through the eye of theleft needle as shown below in fig. B .
1 Right needle thread passes through this guide.2 Left needle thread passes in front of this guide.
CAUTIONThe needle threader can not be used. Thread the twin needleby hand, from front to back. Using the needle threader mayresult in damage to the machine.
COLOCADO EL EJE DE CARRETE SUPLEMENTARIOColoque el eje de carrete vertical en el orificio previsto arriba de lamáquina, cerca del eje horizontal. Instale el segundo carrete de hilo en eleje vertical, tal como ilustrado en la fig. A.
ENHEBRADO DE LA AGUJA DOBLECada una de las agujas debe ser enhebrada por separado.
1. Enhebrado de la aguja derechaObserve las mismas instrucciones que para el enhebrado de una solaaguja, pero utilizando el hilo del carrete colocado en el porta carretesextra. (véase página 40 para mayores detalles al respecto).
2. Enhebrado de la aguja izquierdaEnhebre la aguja izquierda de la misma manera que la aguja derecha.Sin embargo, no hay que pasar el hilo por la guía que se sitúa arriba dela aguja. Conviene pasarlo directamente por el ojo de la aguja izquier-da, tal como ilustrado arriba en la fig. B.
1 El hilo de la aguja derecha pasa por la guía.2 El hilo de la aguja izquierda pasa delante de la guía.
PRECAUCIÓNNo utilice el enhebrador. Enhebre la aguja doble con la mano, dedelante atrás. Si usa el enhebrador, podría estropear la máquina.
APPLICAZIONE DEL PORTASPOLETTA AUSILIARIOInserire il portaspoletta verticale nell’apposito foro situato sullamacchina vicino al portaspoletta orizzontale. Mettere la secondaspoletta di filo sul portaspoletta verticale come illustrato in fig. A.
INFILATURA DELL’AGO GEMELLOInfilare ogni ago separatamente.
1. Infilatura dell’ago destroSeguire le stesse istruzioni relative all’infilatura dell’ago singoloutilizzando il filo della spoletta montata sul portaspoletta ausilia-rio. Vedere a pag. 40 per istruzioni più dettagliate.
2. Infilatura dell’ago sinistroInfilare l’ago sinistro nello stesso modo dell’ago destro, ma non farpassare il filo per il guidafilo sopra l’ago prima di averlo infilatonella cruna dell’ago sinistro come illustrato di seguito in fig. B.
1 l filo dell’ago destro passa per questa guida.2 Il filo dell’ago sinistro passa davanti a questa guida.
ATTENZIONENon è possibile utilizzare la leva infila ago. Infilare l’ago doppiomanualmente, dalla parte anteriore a quella posteriore. L’uso dellaleva infila ago può comportare danneggiamenti alla macchina.
TAB
LE O
F CO
NTE
NTS
KN
OW
ING
YO
UR
SE
WIN
G M
AC
HIN
ES
TR
AIG
HT
AN
DZ
IGZ
AG
ST
ITC
HIN
GB
UILT-IN
ST
ITC
HE
SB
UT
TON
HO
LE A
ND
BU
TTO
N S
EW
ING
US
ING
ATTACH
ME
NTS
AN
D A
PP
LICATIO
NS
MA
INT
EN
AN
CE
IND
EX

46
Thread Tension
Thread tension will affect the quality of your stitches. It may need tobe adjusted when you change fabric or thread type.
NOTE:It is recommended that a test sample be made on a fabric scrapbefore sewing on your project.
Possible misadjustments and their results.Upper tension is too tight. (Fig. A)Locks appear on the surface of the fabric.
<Solution>Decrease the tension by turning the Upper Tension ControlDial to a lower number.
Upper tension is too loose. (Fig. B)Locks appear on the reverse side of the fabric.
<Solution>Increase the tension by turning the Upper Tension Control Dialto a higher number.
CORRECT TENSION (Fig. C)Correct tension is important since too much or too little tensionwill weaken your seams or cause puckers on your fabric.
1 Surface2 Reverse side3 Upper thread4 Lower thread5 Locks appear on surface of fabric6 Locks appear on reverse side of fabric
4 35 ~ ~
4 35 ~ ~
txt_Sp
1
2
3
4
1
2
3
4
5
1
2
3
4
6
Tensión de los hilos
La tensión de los hilos afectará la calidad de las puntadas: puede requerircierto ajuste cuando cambia de tejido o hilo.
NOTA:Le recomendamos hacer una prueba en un pedazo de tela antes de empezara coser en el tejido de trabajo.
Ajustes erróneos posibles y sus resultadosEl hilo superior es demasiado tirante (Fig. A)Aparecen bagas en la superficie del tejido.
<Solución>Disminuya la tensión al poner el disco en un número inferior.
La tensión del hilo superior es insuficiente (Fig. B)Aparecen bagas en el revés del tejido.
<Solución>Aumente la tensión al poner el disco en un número superior.
TENSIÓN CORRECTA (Fig. C)Es ecesario tener una tensión correcta dado que una tensión insufi-ciente o demasiado fuerte va a debilitar sus costuras o fruncir eltejido.
1 Derecho2 Revés3 Hilo superior4 Hilo de bobina5 Aparece pelusa en la superficie del tejido6 Aparece pelusa en el reverso del tejido
A
B
C
Tensione del filo
La tensione del filo influenzerà la qualità dei vostri punti. Puònecessitare una regolazione quando si cambia tessuto o tipo di filo.
NOTA:Si consiglia di fare una prova su un pezzo di stoffa prima di cucireil vostro modello.
Eventuali regolazioni erronee e relative conseguenze.La tensione superiore è troppo alta. <Fig. A>Il tessuto si arriccia.
<soluzione>Diminuire la tensione girando il regolatore di tensione superio-re su un numero più basso.
La tensione superiore è troppo bassa. <Fig. B>Il tessuto si arriccia sul rovescio.
<soluzione>Aumentare la tensione girando il regolatore di tensione supe-riore su un numero più alto.
Tensione corretta <Fig. C>La tensione corretta è importante poiché una tensione troppoalta o troppo bassa indebolisce le cuciture o provoca dellepieghettature sul tessuto.
1 Diritto2 Rovescio3 Filo superiore4 Filo spolina5 Arricciature sulla superficie del tessuto6 Arricciature sul lato rovescio del tessuto
TAB
LE O
F CO
NTE
NTS
KN
OW
ING
YO
UR
SE
WIN
G M
AC
HIN
ES
TR
AIG
HT
AN
DZ
IGZ
AG
ST
ITC
HIN
GB
UILT-IN
ST
ITC
HE
SB
UT
TON
HO
LE A
ND
BU
TTO
N S
EW
ING
US
ING
ATTACH
ME
NTS
AN
D A
PP
LICATIO
NS
MA
INT
EN
AN
CE
IND
EX

47
FABRIC/THREAD/NEEDLE COMBINATIONS
NOTE:1. For transparent nylon thread, always use needle 90/14 - 100/16.2. The same thread is usually used for the bobbin thread and upper threading.
CAUTIONBe sure to follow the needle, thread, and fabric combinations listed in the table. Using an improper combination, especially aheavyweight fabric (i.e., denim) with a small needle (i.e., 65/9 - 75/11), may cause the needle to bend or break, and lead to i njury.Also, the seam may be uneven, the fabric may pucker, or the machine may skip stitches.
Medium weight fabric
Lightweight fabric
Heavyweight fabric
Stretch fabric
For top stitching
CottonSynthetic mercerizedSilk or silk finished
CottonSynthetic mercerizedSilkCottonSynthetic mercerizedSilkThread for knits
Synthetic mercerizedSilk
Fabric
BroadclothTaffetaFlannel,GabardineLawn, BatisteGeorgetteChallis, SatinDenimCorduroyTweedJerseyTricot
60 - 8060 - 8050 - 80
60 - 8060 - 8050 - 8030 - 50
5050
50 - 60
3030
75/11 - 90/14
65/9 - 75/11
90/14 - 100/16
Ball point needle (golden colored)75/11 - 90/14
90/14 - 100/16
SizeThread
Size of needleType
COMBINACIONES DE TEJIDO/HILO/AGUJA
NOTA:1. Para hilo de nailon transparente, use siempre agujas 90/14 - 100/16.2. Para el hilo de la bobina y el hilo superior, se suele utilizar siempre el mismo hilo.
PRECAUCIÓNAsegúrese de utilizar las combinaciones de aguja, hilo y tejido listadas en la tabla. Si sigue una combinación inadecuada, especialmente unatela gruesa, como el mahón, con una aguja pequeña (65/9 - 75/11), podría doblar o romper la aguja y causar lesiones. Además, la costura puederesultar irregular, la tela puede fruncirse o se pueden escapar pespuntes.
Tejido mediano
Tejido ligero
Tejido pesado
Tejido elástico
Para costuras sobrepuestas
AlgodónMercerización sintéticaSeda o acabados de seda
AlgodónMercerización sintéticaSedaAlgodónMercerización sintéticaSedaHilo para punto calado
Mercerización sintéticaSeda
Tejido
PañoTafetánFranela,GabardinaLino, BatistaPunto GeorgetteChallis, SaténMahónCorduraCheviotJerseyPunto
60 - 8060 - 8050 - 80
60 - 8060 - 8050 - 8030 - 50
5050
50 - 60
3030
75/11 - 90/14
65/9 - 75/11
90/14 - 100/16
Aguja de punta redonda (color dorado)75/11 - 90/14
90/14 - 100/16
MedidaHilo
Medida de la agujaTipo
TAB
LE O
F CO
NTE
NTS
KN
OW
ING
YO
UR
SE
WIN
G M
AC
HIN
ES
TR
AIG
HT
AN
DZ
IGZ
AG
ST
ITC
HIN
GB
UILT-IN
ST
ITC
HE
SB
UT
TON
HO
LE A
ND
BU
TTO
N S
EW
ING
US
ING
ATTACH
ME
NTS
AN
D A
PP
LICATIO
NS
MA
INT
EN
AN
CE
IND
EX

48
COMBINAZIONE TESSUTO/FILO/AGO
NOTA:1. Per filo di nylon trasparente, utilizzare sempre aghi 90/14 - 100/16.2. In genere, viene utilizzato lo stesso tipo di filo per il filo della spolina e per l’infilatura superiore.
ATTENZIONEAccertarsi di seguire le combinazioni di ago, filo e tessuto elencate nella tabella. L’uso di combinazioni non appropriate, in modo particolaresu tessuto pesante (ad esempio, denim), con un ago piccolo (ad esempio, 65/9 - 75/11), può causare il piegamento o la rottura dell’agoe provocare lesioni personali. Inoltre, la cucitura di giunzione potrebbe risultare irregolare, il tessuto potrebbe arricciarsi o la macchinapotrebbe saltare dei punt.
Tessuto medio
Tessuto leggero
Tessuto pesante
Tessuto elastico
In caso di filo elastico
Tessuto
Panno rasatoTaffetaFlanella,GabardineBatistaGeorgetteChallis, SatinDenimVelluto a costeTweedJerseyMaglia
60 - 8060 - 8050 - 80
60 - 8060 - 8050 - 8030 - 50
5050
50 - 60
3030
75/11 - 90/14
65/9 - 75/11
90/14 - 100/16
Ago con punta a sfera (colore dorato)75/11 - 90/14
90/14 - 100/16
DimensioniFilo
Size of needleTipo
CotoneSintetico mercerizzatoSeta o finitura in seta
CotoneSintetico mercerizzatoSetaCotoneSintetico mercerizzatoSetaFilo per maglieria
Sintetico mercerizzatoSeta

49
PLEASE READ BEFORE SEWING
CAUTION• To avoid injury, pay special attention to the needle while the machine is in operation. Keep your hands away from moving
parts while the machine is in operation.• Do not stretch or pull the fabric during sewing. Doing so may lead to injury.• Do not use bent or broken needles. Doing so may lead to injury.• Take care that the needle does not strike basting pins or other objects during sewing. Otherwise, the needle may break and
cause injury.• If stitches become bunched, lengthen the stitch length setting before continuing sewing. Otherwise, the needle may break
and cause injury.• Always use the correct presser foot. If the wrong presser foot is used, the needle may strike the presser foot and bend or
break, resulting in injury.• When you turn the balance wheel by hand, always turn it to the front (counter-clockwise). Turning it the other way may cause
the thread to tangle, and result in damage to the needle or fabric or injury.
LEGGERE PRIMA DI CUCIRE
ATTENZIONE• Per evitare lesioni personali, fare particolare attenzione all’ago quando la macchina è in azione. Tenere le mani lontane dalle parti in
movimento quando la macchina è in funzione.• Non estendere o tirare il tessuto durante le operazioni di cucitura. In caso contrario, vi sono rischi di lesioni personali.• Non utilizzare aghi piegati o rotti. In caso contrario, vi sono rischi di lesioni personali.• Assicurarsi che l’ago non colpisca gli spilli di imbastitura o altri oggetti durante la cucitura. In caso contrario, l’ago potrebbe rompersi
e provocare lesioni personali.• Se i punti sono troppo ravvicinati, aumentare l’impostazione di lunghezza del punto prima di continuare a cucire. In caso contrario,
l’ago potrebbe rompersi e provocare lesioni personali.• Utilizzare sempre il piedino premistoffa corretto. Se si utilizza un piedino premistoffa errato, l’ago potrebbe colpire il piedino e piegarsi
o rompersi, con rischi di lesioni personali.• Quando si gira il volantino con la mano, girarlo sempre verso il davanti (senso antiorario). Girandolo nell’altro senso si può ingarbugliare
il filoe causare danni all’ago o al tessuto o lesioni personali.
LEA ESTO POR FAVOR ANTES DE COSER
PRECAUCIÓN• Para evitar lesiones, preste especial atención a la aguja cuando la máquina esté en funcionamiento. Mantenga las manos alejadas de las
piezas móviles mientras la máquina esté en funcionamiento.• No empuje o estire la tela durante la costura. Podría causar daños.• No utilice agujas dobladas o rotas. Podría causar daños.• Asegúrese de que la aguja no tropieza con las patillas del hilvanado durante la costura. De otra manera, la aguja podría romperse y causar
lesiones.• Si las puntadas se amontonan, alargue la puntada antes de continuar. De otra manera, la aguja podría romperse y causar lesiones.• Coloque siempre el pie prensatela adecuado. Si utiliza un pie prensatela inadecuado, la aguja podría chocar contra el pie prensatela y
doblarse o romperse, lo que puede causar lesiones.• Cuando gire la ruedecilla a mano, gírela siempre hacia delante (hacia la izquierda). Si la gira hacia el otro lado el hilo podrá enredarse,
y hacer que la aguja o el tejido se dañen o usted se lastime.
TAB
LE O
F CO
NTE
NTS
KN
OW
ING
YO
UR
SE
WIN
G M
AC
HIN
ES
TR
AIG
HT
AN
DZ
IGZ
AG
ST
ITC
HIN
GB
UILT-IN
ST
ITC
HE
SB
UT
TON
HO
LE A
ND
BU
TTO
N S
EW
ING
US
ING
ATTACH
ME
NTS
AN
D A
PP
LICATIO
NS
MA
INT
EN
AN
CE
IND
EX

50
Straight Stitching
Pattern Stitch Length Stitch Width
(Straight Stitch) 1-4.56.5
(Triple Stretch Stitch) SS
STARTING SEWING1. Turn the Pattern Selection Dial to show your desired stitch in the
Pattern Indication Window. Setting the Pattern Selection Dial toStraight Stitch or Triple Stretch Stitch is required.
2. Raise the needle to its highest position and lift the presser footlever.
3. Pull the upper thread toward the back of the presser foot.4. Place the fabric under the presser foot and position the needle
1 cm (3/8") from the edge of the fabric.5. Lower the presser foot.
(Model PS-57, PS-55, PS-53)6. To backtack, push down the Reverse Sewing Lever as far as
possible, then step down on the foot controller to start reversesewing.
7. Release the Reverse Sewing Lever and start sewing in theforward direction by applying pressure to the foot controller.
(Model STAR 240E, STAR 230E)6. To backtack, push down the Reverse Sewing Lever as far as
possible to start reverse sewing.7. Release the Reverse Sewing Lever and press the Start/Stop
Button to start sewing in the forward direction.* When the foot controller is used, step 6 and 7 are the same as
for Model PS-57, PS-55, PS-53.
* Reverse sewing is used for locking the end of seams and wherereinforcement is needed.
CAUTIONBe sure the needle does not strike a basting pin, or anyother objects, during sewing. The thread could tangle or theneedle could break, causing injury.
CHANGING SEWING DIRECTION1. Stop the machine at the point where you wish to change
direction with the needle still in the fabric.2. Raise the presser foot and turn the fabric to line up its new
direction using the needle as a turning point.3. Lower the presser foot and start sewing in the new direction.
FINISHING SEWINGReverse stitching is used to lock the threads at the end of the seamor wherever reinforcement is needed.1. Stitch to the end of the seam and stop.2. Push the Reverse Sewing Lever and stitch backwards for 1 cm
(3/8") from the end of the fabric.
TAB
LE O
F CO
NTE
NTS
KN
OW
ING
YO
UR
SE
WIN
G M
AC
HIN
ES
TR
AIG
HT
AN
DZ
IGZ
AG
ST
ITC
HIN
GB
UILT-IN
ST
ITC
HE
SB
UT
TON
HO
LE A
ND
BU
TTO
N S
EW
ING
US
ING
ATTACH
ME
NTS
AN
D A
PP
LICATIO
NS
MA
INT
EN
AN
CE
IND
EX

51
Punto diritto
Punto Lunghezza punto Ampiezza punto
(Punto diritto) 1-4,56,5
(Punto elastico triplo) SS
COME INIZIARE UNA CUCITURA1. Ruotare il selettore di punti finché il punto desiderato non appare
nella finestrella indicatore del punto. Disporre il selettore sulpunto dritto o sul punto elastico triplo, in base alle necessità.
2. Far salire l’ago fino alla sua posizione più alta e sollevare la levadel piedino premistoffa.
3. Tirare il filo superiore dietro il piedino premistoffa.4. Stendere il tessuto sotto il piedino premistoffa e posizionare l’ago
a circa 1 cm dal margine.5. Abbassare il piedino premistoffa.
(Modello PS-57, PS-55, PS-53)6. Per fissare il punto, spingere più a fondo possibile il leva di
cucitura di ritorno, poi premere il reostato di controllo per iniziarela cucitura a marcia indietro.
7. Rilasciare il leva di cucitura di ritorno e iniziare a cucire a marciaavanti premendo il reostato di controllo.
(Modello STAR 240E, STAR 230E)6. Per fissare il punto, spingere più a fondo possibile il leva di
cucitura di ritorno per iniziare la cucitura a marcia indietro.7. Rilasciare il leva di cucitura di ritorno e premere il pulsante Avvio/
Stop per iniziare a cucire a marcia avanti.* Quando si usa il reostato di controllo, i punti 6 e 7 sono uguali a
quelli per il modello PS-57, PS-55, PS-53.
* La cucitura a marcia indietro è usata per fermare la fine di un orloo quando serve un rinforzo.
ATTENZIONEAssicurarsi che l’ago non colpisca uno spillo di imbastitura, oaltri oggetti, durante la cucitura. Il filo potrebbe ingarbugliarsi ol’ago potrebbe rompersi con possibili lesioni personali.
CAMBIO DI DIREZIONE1. Arrestare la macchina nel punto in cui si desidera cambiare la
direzione della cucitura lasciando l’ago infilato nel tessuto.2. Sollevare il piedino premistoffa e ruotare il tessuto intorno all’ago
nella direzione voluta.3. Abbassare il piedino premistoffa e riprendere a cucire nella nuova
direzione.
COME TERMINARE UNA CUCITURALa cucitura a marcia indietro va eseguita per fissare i fili al terminedella cucitura o quando si vogliono ottenere cuciture di rinforzo.1. Cucire fino al margine del tessuto e arrestare la macchina.2. Spingere il leva di cucitura di ritorno e cucire a marcia indietro per
1 cm dal bordo del tessuto.
Puntadas rectas
Modelo de puntada Largo de puntada Ancho de puntada
(Puntada recta) 1-4,56,5
(Triple puntada pespunto) SS
PARA EMPEZAR A COSER1. Gire el selector de puntada hasta que la puntada que desea aparezca en
el indicador de puntada. Es necesario situar el selector de puntada enpuntada recta o en triple puntada pespunte.
2. Levante la aguja a su posición más alta y levante la palanca delprensatelas.
3. Tire el hilo superior hacia la parte de atrás del prensatelas.4. Coloque el tejido debajo del prensatelas y posicione la aguja a 1 cm (3/
8") de la orilla del tejido.5. Baje el prensatelas.
(Modelo PS-57, PS-55, PS-53)6. Para retroceder, baje a fondo el pulsador de retroceso, luego presione
el pedal para empezar a coser hacia atrás.7. Suelte el pulsador de retroceso y empiece a coser hacia delante
presionando el pedal.
(Modelo STAR 240E, STAR 230E)6. Para retroceder, baje a fondo el pulsador de retroceso para empezar a
coser hacia atrás.7. Suelte el pulsador de retroceso y apriete el botón de puesta en Marcha/
Parada para empezar a coser hacia delante.* Cuando utilice el pedal, los pasos 6 y 7 son iguales que para los modelo
PS-57, PS-55, PS-53.
* El cosido hacia atrás se utiliza para rematar el final de costuras ycuando es necesario reforzar.
PRECAUCIÓNAsegúrese de que la aguja no roza el alfiler o cualquier otro objeto.El hilo podría enrollarse o la aguja podría romperse y causarlesiones.
CAMBIO DE SENTIDO DE COSTURA1. Pare la máquina donde quiera cambiar de sentido, con la aguja picada
en el tejido.2. Levante el prensatelas y gire el tejido en la dirección que debe seguir,
usando la aguja como placa giratoria.3. Baje el prensatelas y empiece a coser en la nueva dirección tal como
ilustrado.
PARA TERMINAR LAS COSTURASLa puntada de retroceso se usa para trabar los hilos al final de una costurao en cualquier punto donde sea necesario reforzar la costura.1. Cosa hasta el final de la costura y pare.2. Apriete el pulsador de retroceso y cosa hacia atrás sobre 1 cm (3/8") a
partir de la orilla del tejido.

52
REMOVING THE MATERIAL FROM THE MACHINE
(Model PS-57, PS-55, PS-53)1. Stop the machine.
Raise the needle to its highest position and make sure that thethread take-up lever is also in its highest position.
(Model PSTAR 240E, STAR 230E)1. Press the Start/Stop Button again. The needle stops in its
highest position.
2. Lift the presser foot and pull the fabric out gently to the left side.3. Cut both threads with the thread cutter located on the left side of
the machine.
1 Thread cutter
4. To prepare the machine for the next seam, pull about 10 cm (4")of thread through the toes of the presser foot toward the back ofthe machine.
TOP STITCHING AND STRETCH MATERIALSStraight Stitch is used for top stitching and sewing lightweightfabrics.Triple Stretch Stitch is used for stretch fabrics.
1
COME ESTRARRE IL TESSUTO DALLA MACCHINA
(Modello PS-57, PS-55, PS-53)1. Arrestare la macchina.
Sollevare l'ago nella posizione più alta e accertarsi che anche laleva tenditrice del filo sia nella posizione più alta.
(Modello STAR 240E, STAR 230E)1. Premere di nuovo il pulsante Avvio/stop. L'ago si ferma nella
posizione più alta.
2. Alzare il piedino premistoffa ed estrarre il tessuto tirandolodelicatamente verso sinistra.
3. Tagliare i due fili con il tagliafilo incorporato situato sul fiancosinistro della macchina.
1 Tagliafilo
4. Per predisporre la macchina alla cucitura successiva, tirare circa10 cm di filo attraverso la scanalatura del piedino premistoffaverso la parte posteriore della macchina.
PUNTO DIRITTO E TESSUTI ELASTICIIl punto diritto è indicato per impunture diritte e per cuciture su tessutileggeri.Il punto elastico triplo è indicato per cuciture su tessuti elastici.
PARA RETIRAR EL TEJIDO DE LA MÁQUINA
(Modelo PS-57, PS-55, PS-53)1. Pare la máquina.
Levante al máximo la aguja y asegúrese de que la palanca del tirahilostambién está en su posición más elevada.
(Modelo STAR 240E, STAR 230E)1. Presione de nuevo el pulsador de puesta en Marcha/Parada. La aguja
se detiene en su posición más alta.
2. Levante el prensatelas y saque suavemente el tejido por la izquierda.3. Corte ambos hilos con el cortador ubicado en la parte izquierda de la
máquina.
1 Cortador de hilos
4. Con el fin de dejar la máquina preparada para la próxima costura, tireunos 10 cm (4") del hilo inferior y páselo por los salientes delprensatelas hacia la parte posterior de la máquina.
PUNTADAS EN DERECHO Y TEJIDOS ELÁSTICOSLa puntada recta sirve para la costura superior y para la costura de tejidosligeros.La puntada de triple pespunte se usa para los tejidos elásticos.
TAB
LE O
F CO
NTE
NTS
KN
OW
ING
YO
UR
SE
WIN
G M
AC
HIN
ES
TR
AIG
HT
AN
DZ
IGZ
AG
ST
ITC
HIN
GB
UILT-IN
ST
ITC
HE
SB
UT
TON
HO
LE A
ND
BU
TTO
N S
EW
ING
US
ING
ATTACH
ME
NTS
AN
D A
PP
LICATIO
NS
MA
INT
EN
AN
CE
IND
EX

53
Zigzag Stitching
Pattern Stitch Length Stitch Width
(Zigzag Stitch) F-4.5 0-6.5
ZIGZAG STITCHSelect the Zigzag Stitch using the Pattern Selection Dial. Then,select the Stitch Length and the Stitch Width.It is recommended to sew using the Straight Stitch at the beginningand end of the Zigzag Stitches.(This acts as a reinforcement stitch.)
SATIN STITCHWhen the Zigzag Stitch length is set in the “F” range, it produces aSatin Stitch (a dense Zigzag Stitch). The Satin Stitch can be usedfor making decorative stitches. Select the Zigzag Stitch, then set thestitch length in the “F” range and set the desired stitch width.When sewing a satin stitch, use a slightly loose upper threadtension to produce more beautiful stitches.
Punto zigzag
Punto Lunghezza punto Ampiezza punto
(Punto zigzag) F-4,5 0-6,5
PUNTO ZIGZAGSelezionare il punto zigzag ruotando il selettore dei punti, quindiregolare la lunghezza e l’ampiezza del punto.Si consiglia di eseguire una cucitura con il punto diritto all’inizio ealla fine delle cuciture con punto zigzag.(In questo modo si ottiene una cucitura di rinforzo.)
PUNTO SATINQuando la manopola della lunghezza è ruotata sull’area “F”, siproduce un punto satin (una successione di punti zigzag molto fitti).Il punto satin è utile per eseguire punti decorativi. Selezionare ilpunto zigzag, quindi regolare la lunghezza ruotando la manopolasull’area “F” e regolare l’ampiezza sul valore desiderato.Quando si cuce con il punto satin, utilizzare una tensione leggermen-te più bassa del filo superiore, per ottenere dei punti più belli.
Puntadas zigzag
Modelo de puntada Largo de puntada Ancho de puntada
(Puntada zigzag) F-4,5 0-6,5
PUNTADA ZIGZAGSeleccione la puntada zigzag con el selector de puntadas. Luego, elija ellargo y ancho de la puntada.Se recomienda coser siempre unas puntadas rectas al principio y al finalde una costura de puntadas zigzag.(Actúa como puntada de refuerzo.)
PUNTADA DE REALCECuando se define el largo de la puntada en la parte “F”, se coserán puntadastupidas (puntada zigzag muy cerradas) que pueden servir para hacerpuntadas decorativas. Seleccione la puntada zigzag y luego coloque elselector de largo de puntada en la zona “F” y ajuste el ancho deseado.Al coser bordados de realce, disminuya ligeramente la tensión del hilosuperior y conseguirá puntadas más bonitas.
TAB
LE O
F CO
NTE
NTS
KN
OW
ING
YO
UR
SE
WIN
G M
AC
HIN
ES
TR
AIG
HT
AN
DZ
IGZ
AG
ST
ITC
HIN
GB
UILT-IN
ST
ITC
HE
SB
UT
TON
HO
LE A
ND
BU
TTO
N S
EW
ING
US
ING
ATTACH
ME
NTS
AN
D A
PP
LICATIO
NS
MA
INT
EN
AN
CE
IND
EX

54
Blind Hem Stitching
Pattern Stitch Length Stitch Width
(Blind Hem Stitch) F-23-6.5
(Stretch Blind Hem Stitch) F-1.5
The Blind Hem Stitch is used to finish the edge of a project like thehem of a pair of pants without the stitch showing. Use the Blind HemStitch for any non-stretch fabrics and the Stretch Blind Hem Stitchfor stretch fabrics.
1. Both the threads should be the same color as the fabric.2. Fold back the fabric to the desired location of the hem as shown
in fig. A . Then, fold the edge of the fabric as in fig. B . Leave a6 mm (15/64") overlap at the edge.
3. Set the Pattern Selection Dial to Blind Hem Stitch or StretchBlind Hem Stitch and set the stitch length and width.
4. Sew on the fold as in fig. C .5. When the fabric is unfolded you will have a Blind Stitch hem as
shown in fig. D .
1 Right side of fabric2 Wrong side of fabric
NOTE:The Stretch Blind Hem Stitch is useful for stretch fabrics.
A B C D
1
2
1
1 1 2
22
Punto orlo invisibile
Punto Lunghezza punto Ampiezza punto
(Punto orlo invisibile) F-23-6,5
(Punto elastico invisibile) F-1,5
Il punto orlo invisibile permette di rifinire gli orli di indumenti, comead esempio l’orlo dei pantaloni, senza che la cucitura sia visibile.Utilizzare il punto orlo invisibile per cucire su tessuti non elastici edil punto elastico invisibile su tessuti elastici.
1. I due fili devono essere dello stesso colore del tessuto.2. Ripiegare in sotto il tessuto formando un orlo dell’altezza deside-
rata, come illustrato in fig. A. Quindi, piegare l’orlo comeillustrato in fig. B, formando una piega di 6 mm sull’orlo.
3. Disporre il selettore dei punti sulla posizione Punto orlo invisibileo Punto elastico invisibile e regolare la lunghezza del punto.
4. Cucire sulla piega come illustrato in fig. C.5. Stendendo il tessuto si otterrà un orlo a punto invisibile come
mostrato in fig. D.
1 Rovescio del tessuto2 Diritto del tessuto
NOTA:Il punto elastico invisibile è adatto per tessuti elastici.
Puntadas invisibles
Modelo de puntada Largo de puntada Ancho de puntada
(Puntada invisible) F-23-6,5
(Puntada invisible elástica) F-1,5
La puntada de dobladillo invisible sirve para terminar la orilla de unaprenda, tal como el borde inferior de los pantalones, sin que se vea lacostura. Utilice la puntada de dobladillo invisible para todos los tejidosque no sean elásticos y la puntada invisible elástica para los tejidoselásticos.
1. Ambos hilos deben ser del mismo color que el tejido.2. Doble el tejido según la orilla que desee hacer tal como ilustra la fig.
A. Luego, dele la vuelta tal como indica la fig. B. Deje unos 6 mm (15/64") sin coser para esconderlos.
3. Ponga el selector de puntada en puntada invisible o puntada invisibleelástica y ajuste el largo y ancho de la puntada.
4. Cosa en el pliegue tal como muestra la fig. C.5. Al desdoblar el tejido, tendrá un dobladillo con puntada invisible tal
como lo muestra la fig. D.
1 Lado derecho de la te2 Dorso de la tela
NOTA:La puntada invisible elástica se recomienda para tejidos elásticos.
TAB
LE O
F CO
NTE
NTS
KN
OW
ING
YO
UR
SE
WIN
G M
AC
HIN
ES
TR
AIG
HT
AN
DZ
IGZ
AG
ST
ITC
HIN
GB
UILT-IN
ST
ITC
HE
SB
UT
TON
HO
LE A
ND
BU
TTO
N S
EW
ING
US
ING
ATTACH
ME
NTS
AN
D A
PP
LICATIO
NS
MA
INT
EN
AN
CE
IND
EX

55
Shell Tuck Stitching
Pattern Stitch Length Stitch Width
(Shell Tuck Stitch) F-3 3-6.5
The Shell Tuck Stitch can be used to sew a picot (lace like) edge ona lightweight fabric.
1. Set the Pattern Selection Dial to Shell Tuck Stitch.2. Sew the fabric on the bias, placing it under the presser foot so
that the straight stitches are sewn on the seamline and thezigzag stitches are sewn slightly over the folded edge.
3. This stitch requires a tighter thread tension than normal.4. Sew at a slow speed.
Punto conchiglia
Punto Lunghezza punto Ampiezza punto
(Punto conchiglia) F-3 3-6,5
Il punto conchiglia permette di eseguire delle rifiniture a picot (similial merletto) lungo i bordi di tessuti leggeri.
1. Disporre il selettore dei punti sul punto conchiglia.2. Cucire il tessuto di sbieco, guidandolo sotto il piedino premistoffa
in modo che i punti diritti cadano sulla linea di cucitura e i puntia zig-zag appena sopra la piega.
3. Per questo punto è necessaria una tensione del filo più stretta delnormale.
4. Cucire a bassa velocità.
Puntada ondas
Modelo de puntada Largo de puntada Ancho de puntada
(Puntada ondas) F-3 3-6,5
La puntada ondas puede usarse para coser una puntilla (como encaje) enun tejido fino.
1. Ponga el selector de puntada en la puntada ondas.2. Cosa el tejido en el sesgo, situándolo debajo del prensatelas de tal
forma que la puntada recta se cosa en líneas formando costura y que laspuntadas zigzag cosan las puntillas de los dobladillos.
3. Este trabajo requiere aumentar un poco más la tensión de hilo que encondiciones normales.
4. Coser a velocidad lenta.
TAB
LE O
F CO
NTE
NTS
KN
OW
ING
YO
UR
SE
WIN
G M
AC
HIN
ES
TR
AIG
HT
AN
DZ
IGZ
AG
ST
ITC
HIN
GB
UILT-IN
ST
ITC
HE
SB
UT
TON
HO
LE A
ND
BU
TTO
N S
EW
ING
US
ING
ATTACH
ME
NTS
AN
D A
PP
LICATIO
NS
MA
INT
EN
AN
CE
IND
EX

56
Elastic Stitching
Pattern Stitch Length Stitch Width
(Elastic Stitch) F-2.5 3-6.5
The Elastic Stitch can be used for 3 functions: mending, sewingelastic or joining fabric. Each is explained below.Set the Pattern Selection Dial to Elastic Stitch.
MENDING1. Place the reinforcement fabric under area to be mended.
2. Following the line of the tear, sew using the Elastic Stitch asillustrated in fig. A .
SEWING ELASTIC1. Place the elastic on the fabric.
2. As you sew, stretch the elastic both in the front and behind thepresser foot as shown in fig. B .
JOINING FABRICThe Elastic Stitch can be used to join two pieces of fabric togetherand is very effective when sewing knitted fabrics. When nylonthread is used, the stitch will not be visible.
1. Place the edge of the two pieces of fabric together and centerthem under the presser foot.
2. Sew them together using the Elastic Stitch taking care to keepthe two fabric edges close together as shown in fig. C .
Punto elastico
Punto Lunghezza punto Ampiezza punto
(Punto elastico) F-2,5 3-6,5
Il punto elastico è indicato per eseguire tre funzioni: rammendo,cucitura di elastici o giunture di tessuti. Queste tre applicazioni sonodescritte di seguito.Disporre il selettore dei punti sul punto elastico.
RAMMENDO1. Applicare una tela di rinforzo sotto l’area da rammendare.
2. Seguendo il margine dello strappo, cucire con il punto elasticocome illustrato in fig. A.
CUCITURA DI ELASTICI1. Applicare l’elastico sul tessuto.
2. Durante la cucitura, tenere teso l’elastico sia davanti che dietro ilpiedino premistoffa, come illustrato in fig. B.
GIUNTURE DI TESSUTIIl punto elastico permette di cucire insieme due pezzi di tessuto edè molto efficace su tessuti a maglia. Usando il filo di nylon, il puntosarà invisibile.
1. Congiungere i bordi dei due tessuti e centrarli sotto il piedinopremistoffa.
2. Eseguire la cucitura lungo i margini con il punto elastico tenendoben accostatati i margini, come mostrato in fig. C.
A
B
C
Puntada elástica
Modelo de puntada Largo de puntada Ancho de puntada
(Puntada elástica) F-2,5 3-6,5
Se puede usar la puntada elástica para tres operaciones: los remiendos, lainserción de gomas elásticas y como puntada de unión para juntar dostejidos.Ponga el selector de puntadas en la puntada elástica.
REMIENDOS1. Coloque la tela de refuerzo debajo de la zona a rematar.2. Siguiendo la línea de la rasgadura, cosa con la puntada elástica tal
como ilustrado en la fig. A.
INSERCION DE GOMAS ELASTICAS1. Ponga la goma sobre el tejido.2. A medida que esté cosiendo, estire el elástico tanto delante como detrás
del prensatelas tal como se muestra en la fig. B.
PUNTADA DE UNIONLa puntada elástica puede servir para unir dos trozos de tejido y resultamuy eficiente para la costura de prendas de punto. Si se usa un hilo denilón, la puntada resultará invisible.
1. Junte las orillas de ambos trozos de tejido y céntrelas debajo delprensatelas.
2. Cosalas juntas con la puntada elástica, teniendo sumo cuidado enmantener las dos orillas de los tejidos muy juntas, tal como se apreciaen la fig. C.
TAB
LE O
F CO
NTE
NTS
KN
OW
ING
YO
UR
SE
WIN
G M
AC
HIN
ES
TR
AIG
HT
AN
DZ
IGZ
AG
ST
ITC
HIN
GB
UILT-IN
ST
ITC
HE
SB
UT
TON
HO
LE A
ND
BU
TTO
N S
EW
ING
US
ING
ATTACH
ME
NTS
AN
D A
PP
LICATIO
NS
MA
INT
EN
AN
CE
IND
EX

57
Double Action Stitching
Pattern Stitch Length Stitch Width
(Double Action Stitch)
(Bridging Stitch) F-3 3-6.5
(Rampart Stitch)
(Decorative Hem Stitch) SS 3-6.5
These stitches are used for joining two pieces of fabric, for example,when making patchwork.Set the Pattern Selection Dial to Double Action Stitch, BridgingStitch, etc.
Punto doppio
Punto Lunghezza punto Ampiezza punto
(Punto doppio)
(Punto a ponte) F-3 3-6,5
(Punto bastione)
(Punto orlo decorativo) SS 3-6,5
Questi punti consentono di cucire insieme due pezzi di tessuto, adesempio per realizzare un lavoro di patchwork.Disporre il selettore dei punti sul punto doppio o sul punto a ponte.
Puntada de acción doble
Modelo de puntada Largo de puntada Ancho de puntada
(Puntada de acción doble)
(Puntada puente) F-3 3-6,5
(Puntada ondas abiertas)
(Puntada decorativaSS 3-6,5
invisible)
Estas puntadas sirven para unir piezas de tejido o realizar trabajos comoel patchwork.Coloque el selector de puntadas en la puntada de acción doble o en lapuntada puente.
TAB
LE O
F CO
NTE
NTS
KN
OW
ING
YO
UR
SE
WIN
G M
AC
HIN
ES
TR
AIG
HT
AN
DZ
IGZ
AG
ST
ITC
HIN
GB
UILT-IN
ST
ITC
HE
SB
UT
TON
HO
LE A
ND
BU
TTO
N S
EW
ING
US
ING
ATTACH
ME
NTS
AN
D A
PP
LICATIO
NS
MA
INT
EN
AN
CE
IND
EX

58
Scallop Stitching
Pattern Stitch Length Stitch Width
(Scallop Stitch) F-1.5 3-6.5
This machine automatically produces a Scallop Stitch which maybe used as a decorative edging.
1. Set the Pattern Selection Dial to Scallop Stitch.2. Sew the Scallop Stitch along the edge of the material.3. If desired, trim around the scallop with scissors to create a
scalloped edge. Be careful not to cut the thread.
Punto smerlo
Punto Lunghezza punto Ampiezza punto
(Punto smerlo) F-1,5 3-6,5
Il punto smerlo incorporato permette di eseguire delle rifinituredecorative lungo le costure.
1. Disporre il selettore dei punti sul punto smerlo.2. Cucire lungo il margine del tessuto.3. Se desiderato, rifilare i margini delle costure con le forbici per
ottenere un bordo smerlato, facendo attenzione a non tagliare ilfilo.
Puntada festón
Modelo de puntada Largo de puntada Ancho de puntada
(Puntada festón) F-1,5 3-6,5
Esta máquina puede realizar automáticamente unas ondas decorativas quepueden servir para decorar los bordes de la tela.
1. Coloque el selector de puntadas en la puntada festón.2. Cosa las ondas decorativas a lo largo del borde del material.3. Si lo desea, corte el borde con tijeras, siguiendo las ondas para crear un
borde festonado. Sin embargo, tenga sumo cuidado en no cortar el hilo.
TAB
LE O
F CO
NTE
NTS
KN
OW
ING
YO
UR
SE
WIN
G M
AC
HIN
ES
TR
AIG
HT
AN
DZ
IGZ
AG
ST
ITC
HIN
GB
UILT-IN
ST
ITC
HE
SB
UT
TON
HO
LE A
ND
BU
TTO
N S
EW
ING
US
ING
ATTACH
ME
NTS
AN
D A
PP
LICATIO
NS
MA
INT
EN
AN
CE
IND
EX

59
SSSS
SS
Decorative Stitching
Pattern Stitch Length Stitch Width
(Bead Stitch)
(Arrowhead Stitch)3-6.5
(Parallelogram Stitch)
(Triangle Stitch) F-1
(Lighting Stitch)
(Square Stitch) 6.5
(Decorative Stitch)
(Decorative Stitch) 3-6.5
(Decorative Stitch)6.5
These stitches can be used for making decorative top stitching andfor smocking.Set the Pattern Selection Dial to Triangle Stitch, Bead Stitch, etc.
Punto decorativo
Punto Lunghezza punto Ampiezza punto
(Punto perla)
(Punto freccia)3-6,5
(Punto parallelogramma)
(Punto triangolo) F-1
(Punto scintilla)
(Punto quadro) 6,5
(Punto decorativo)
(Punto decorativo) 3-6,5
(Punto decorativo)6,5
Questi punti possono essere usati per eseguire cuciture esternedecorative e punti smock.Disporre il selettore dei punti sul punto triangolo o sul punto perla.
Puntadas decorativas
Modelo de puntada Largo de puntada Ancho de puntada
(Puntada festón doble)
(Puntada flecha)3-6,5
(Puntada paralelogramo)
(Puntada triángulo) F-1
(Puntada escalera)
(Puntada festón doble) 6,5
(Puntada decorativa)
(Puntada decorativa) 3-6,5
(Puntada decorativa)6,5
Estas puntadas pueden utilizarse para hacer puntadas decorativas en losbordes y para smocking.Coloque el selector de puntadas en la puntada triángulo o en la puntada defestón doble.
TAB
LE O
F CO
NTE
NTS
KN
OW
ING
YO
UR
SE
WIN
G M
AC
HIN
ES
TR
AIG
HT
AN
DZ
IGZ
AG
ST
ITC
HIN
GB
UILT-IN
ST
ITC
HE
SB
UT
TON
HO
LE A
ND
BU
TTO
N S
EW
ING
US
ING
ATTACH
ME
NTS
AN
D A
PP
LICATIO
NS
MA
INT
EN
AN
CE
IND
EX

60
Patchwork
Pattern Stitch Length Stitch Width
(Fagoting Stitch)SS 3-6.5
(Link Stitch)
These stitches are used to join two pieces of fabric while leaving aspace between their edges.
1. Fold over the edges of the two pieces of fabric for the hem andbaste the edges to a thin piece of paper leaving a small spacebetween them.
2. Set the Pattern Selection Dial to Fagoting Stitch or Link Stitch.3. Stitch along the edge, pulling both threads slightly when begin-
ning to sew.• Use thicker than normal threads for sewing.4. After sewing, remove the basting and the paper. Finish by tying
knots on the reverse side at the beginning and the end of theseams.
1 First needle drop1.5 mm
1
Lavori di patchwork
Punto Lunghezza punto Ampiezza punto
(Punto fagoting)SS 3-6,5
(Punto maglia)
Questi punti consentono di cucire insieme due pezzi di tessutolasciando uno spazio fra i due bordi.
1. Piegare il bordo dei due pezzi di tessuto per realizzare l’orlo eimbastire i bordi con della carta sottile lasciando fra di loro unapiccola distanza.
2. Disporre il selettore dei punti sul punto fagoting o il punto maglia.3. Cucire lungo il bordo tirando leggermente entrambi i fili all’inizio
della cucitura.• Utilizzare per la cucitura del filo più spesso del normale.4. Terminata la cucitura, rimuovere l’imbastitura e la carta e fissare
annodando sul rovescio all’inizio e alla fine della cucitura.
1 Primo punto di caduta dell’ago
Patchwork
Modelo de puntada Largo de puntada Ancho de puntada
(Puntada fagoting)SS 3-6,5
(Puntada de unión)
Estas puntadas sirven para juntar dos piezas de tejido dejando un espacioentre las dos orillas.)
1. Doble las orillas de las dos piezas de tejido para el dobladillo ehilvánelas a un papel fino dejando un pequeño espacio entre ambaspiezas.
2. Sitúe el selector de puntada en puntada fagoting o puntada de unión.3. Cosa a lo largo de las orillas, tirando ligeramente de ambos hilos al
comienzo.• Use hilos más gruesos de lo normal.4. Después de coser, quite los hilvanes y el papel. Anude los cabos de los
hilos del comienzo y final de la costura por el revés.
1 Primer pespunto de la aguja.
TAB
LE O
F CO
NTE
NTS
KN
OW
ING
YO
UR
SE
WIN
G M
AC
HIN
ES
TR
AIG
HT
AN
DZ
IGZ
AG
ST
ITC
HIN
GB
UILT-IN
ST
ITC
HE
SB
UT
TON
HO
LE A
ND
BU
TTO
N S
EW
ING
US
ING
ATTACH
ME
NTS
AN
D A
PP
LICATIO
NS
MA
INT
EN
AN
CE
IND
EX

61
A
B
C
Overedge Stitching
Pattern Stitch Length Stitch Width
(Elastic Shell Tuck Stitch) F-3
(Elastic Overlock Stitch)*3-6.5
(Elastic Overlock Stitch) SS
(Comb Stitch)
These stitches are used to join together seams and finish them inone operation. The Elastic Overlock Stitches are useful whensewing stretch materials.
1. Set the Pattern Selection Dial to Comb Stitch, either ElasticOverlock Stitch, or Elastic Shell Tuck Stitch.
2. Position the fabric under the presser foot so that the seamline (orarrowhead point) is approximately 3 mm (1/8") to the left of thecenter of the presser foot. This stitch works best with a seamallowance of approximately 6.5 mm (1/4") as this allows the right(zigzag) side of the stitch to overlock the cut edge of the fabricas shown in fig. A .
3. If the seam allowance is wider than the stitch pattern, trim awayany excess fabric after stitching.
A finished Elastic Overlock Stitch is shown in fig. B .* When sewing the Elastic Overlock Stitch, position the fabric so
that its edge is on the left of the needle. (See fig. C )
Rifinitura a sopraggitto
Punto Lunghezza punto Ampiezza punto
(Punto a conchiglia elastico) F-3
(Punto sopraggito elastico)*3-6,5
(Punto sopraggitto elastico) SS
(Punto pettine)
Questi punti consentono di ottenere cuciture elastiche e contempora-neamente già rifinite con una sola operazione. I punti sopraggittoelastico e sopraggitto inclinato sono indicati per cucire tessuti elastici.
1. Disporre il selettore dei punti sul punto pettine, sul punto sopraggittoinclinato, sul punto sopraggitto elastico o sul punto a conchigliaelastico.
2. Stendere il tessuto sotto il piedino premistoffa in modo che ilmargine della cucitura della punta di freccia si trovi a circa 3 mmdal centro del piedino. La distanza dal margine ottimale pereseguire questo punto è di circa 6,5 mm, in quanto la cucitura azig-zag eseguita a destra del punto sopraggitta adeguatamente ilmargine del tessuto, come mostrato in fig. A.
3. Nel caso la distanza dal margine sia più ampia dell’ampiezza delpunto, ritagliare il tessuto in eccesso al termine della cucitura.
La fig. B mostra una rifinitura eseguita con il punto sopraggittoelastico.* Quando si cuce il punto sopraggitto elastico, posizionare il
tessuto in modo che il suo bordo sia a sinistra. (Vedere la fig. C)
Puntada por encima de la orilla
Modelo de puntada Largo de puntada Ancho de puntada
(Puntada ondas elásticas) F-3
(Puntada overlock elástica)*3-6,5
(Puntada overlock elástica) SS
(Puntada peine)
Estas puntadas se usan para juntar costuras y acabarlas en una solaoperación. Las puntadas overlock elásticas son útiles para cuando se cosenmateriales elásticos.
1. Sitúe el selector de puntada en puntada peine, puntada overlockestrecha, puntada overlock elástica o puntada ondas elástica.
2. Coloque el tejido debajo del prensatelas para que la línea de costura(con la puntada de flecha) quede unos 3 mm (1/8") a la izquierda delcentro del prensatelas. Esta puntada da los mejores resultados con unatolerancia de costura de unos 6,5 mm (1/4") dado que así permite a laparte derecha (zigzag) de la puntada enganchar la orilla cortada deltejido tal como ilustrado en la fig. A.
3. Si la tolerancia de costura es más ancha que la puntada, corte cualquierpedazo de tejido que sobre después de coser.
En la fig. B, puede ver una puntada overlock elástica acabada.* Cuando cosa con la puntada overlock elástica, ponga el tejido de forma
que su borde quede a la izquierda de la aguja. (Consulte la Fig. C)
TAB
LE O
F CO
NTE
NTS
KN
OW
ING
YO
UR
SE
WIN
G M
AC
HIN
ES
TR
AIG
HT
AN
DZ
IGZ
AG
ST
ITC
HIN
GB
UILT-IN
ST
ITC
HE
SB
UT
TON
HO
LE A
ND
BU
TTO
N S
EW
ING
US
ING
ATTACH
ME
NTS
AN
D A
PP
LICATIO
NS
MA
INT
EN
AN
CE
IND
EX

62
Feather Stitching
Pattern Stitch Length Stitch Width
(Feather Stitch) SS 3-6.5
Use the Feather Stitch as a decorative top stitch or when hemmingblankets, tablecloths or draperies or when embroidering.
1. Set the Pattern Selection Dial to Feather Stitch.2. Place the fabric right side up and sew 1 cm (3/8") from the edge
of the fabric.3. Trim close to the stitching.This stitch will prevent the fabric from unravelling.
Triple Zigzag Stretch Stitching
Pattern Stitch Length Stitch Width
(Triple Zigzag Stretch Stitch) SS 3-6,5
This stitch can be used to sew heavyweight stretch fabrics wher-ever a Zigzag Stitch could be used. The Triple Zigzag Stretch Stitchcan also be used as a decorative top stitch.Set the Pattern Selection Dial to Triple Zigzag Stretch Stitch.
Punto piuma
Punto Lunghezza punto Ampiezza punto
(Punto piuma) SS 3-6,5
Il punto piuma è indicato per cuciture esterne decorative, per rifiniregli orli di coperte,tovaglie o tendaggi, oppure per eseguire ricami.
1. Disporre il selettore dei punti sul punto piuma.2. Sistemare il tessuto e cucire a 1 cm dal bordo.3. Rifilare il tessuto vicinissimo alla cucitura.Questo punto impedirà al tessuto di sfilacciarsi.
Punto zigzag triplo
Punto Lunghezza punto Ampiezza punto
(Punto zigzag triplo) SS 3-6,5
Questo punto è indicato per cucire su tessuti elastici pesanti laddoveè possibile applicare il punto zig-zag. Il punto zigzag triplo è indicatoanche per eseguire cuciture esterne decorative.Disporre il selettore dei punti sul punto zigzag triplo.
Puntada pluma
Modelo de puntada Largo de puntada Ancho de puntada
(Puntada pluma) SS 3-6,5
La puntada pluma puede usarse como puntada de tope decorativo o parael dobladillo de frazadas, manteles, cortinas o bien para bordado.
1. Coloque el selector de puntadas en la puntada pluma.2. Coloque el tejido con el derecho arriba y cosa 1 cm (3/8") a partir de
la orilla.3. Corte el tejido cerca de las puntadas.Esta puntada impedirá que el tejido se deshilache.
Triple puntada zigzag elástica
Modelo de puntada Largo de puntada Ancho de puntada
(Triple puntada SS 3-6,5
zigzag elástica)
Esta puntada puede servir para coser materiales gruesos y pesados siemprey cuando una puntada zigzag pueda utilizarse. Esta puntada elástica detriple pespunto o puntada festón triple también puede servir como puntadadecorativa en el derecho del tejido.Coloque el selector de puntadas en la triple puntada zigzag elástica.
TAB
LE O
F CO
NTE
NTS
KN
OW
ING
YO
UR
SE
WIN
G M
AC
HIN
ES
TR
AIG
HT
AN
DZ
IGZ
AG
ST
ITC
HIN
GB
UILT-IN
ST
ITC
HE
SB
UT
TON
HO
LE A
ND
BU
TTO
N S
EW
ING
US
ING
ATTACH
ME
NTS
AN
D A
PP
LICATIO
NS
MA
INT
EN
AN
CE
IND
EX

63
(Model STAR 240E, STAR 230E, PS-57, PS-55)
Making a Buttonhole(For 1-step BH Type)
Pattern Stitch Length Stitch Width Foot
F-1.53-5
Buttonhole Foot(Dial 4-7)
NOTE:1. It is recommended to practice making a buttonhole on a scrap
piece of fabric before attempting it on the actual garment.2. When making buttonholes on soft fabrics, place a stabilizer
material on the underside of the fabric.
One-step buttonhole-making is a simple process that providesreliable results.MAKING A BUTTONHOLE1. Using tailor’s chalk, mark the position of the buttonhole on the
fabric.2. Set the Pattern Selection Dial to Buttonhole.
NOTE:Set the Stitch Width Dial to “7” for a buttonhole with an actual widthof 5 mm or to “4” for a 3-mm-width buttonhole.
3. Attach the buttonhole foot, pull open the button holder and inserta button. (See fig. B )
* The size of the buttonhole is determined by the button insertedinto the button holder.
4. Align the red line on the presser foot with the mark on the fabric,then lower the Presser Foot Lever. Be sure to pass the threadunder the presser foot and pull it toward you. (See fig. C )
NOTE:Do not lower the Presser Foot Lever while pushing in the area of thepresser foot marked a in fig.C . Otherwise the buttonhole will notbe sewn with the correct size.
1 Do not close this gap.(Fig.A )2 Align the lines on the presser foot.
5. Pull down the buttonhole lever to its lowest position, then lightlypush it toward the back of the machine. (See fig. D )
3 Button holder4 Mark on fabric5 Line on presser foot
6. Hold the upper thread and step down on the foot controller (orpress the Start/Stop Button) to begin sewing.
CAUTIONPulling the thread too strongly may bend or break theneedle, and lead to injury.
7. Stitches 1, 2, 3 and 4 are automatically sewn, then stop themachine.
A
D
5
4
a
B
3
1
A
2
3
2 4
1
C
TAB
LE O
F CO
NTE
NTS
KN
OW
ING
YO
UR
SE
WIN
G M
AC
HIN
ES
TR
AIG
HT
AN
DZ
IGZ
AG
ST
ITC
HIN
GB
UILT-IN
ST
ITC
HE
SB
UT
TON
HO
LE A
ND
BU
TTO
N S
EW
ING
US
ING
ATTACH
ME
NTS
AN
D A
PP
LICATIO
NS
MA
INT
EN
AN
CE
IND
EX
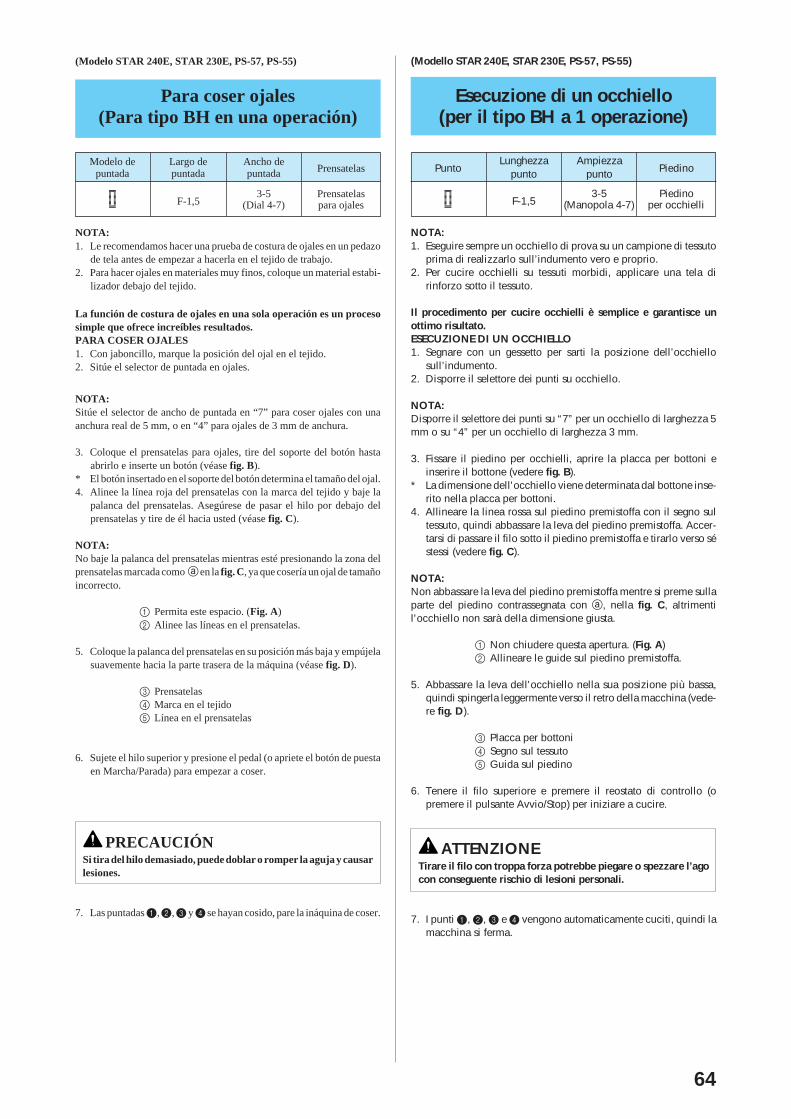
64
(Modello STAR 240E, STAR 230E, PS-57, PS-55)
Esecuzione di un occhiello(per il tipo BH a 1 operazione)
PuntoLunghezza Ampiezza
Piedinopunto punto
F-1,53-5 Piedino
(Manopola 4-7) per occhielli
NOTA:1. Eseguire sempre un occhiello di prova su un campione di tessuto
prima di realizzarlo sull’indumento vero e proprio.2. Per cucire occhielli su tessuti morbidi, applicare una tela di
rinforzo sotto il tessuto.
Il procedimento per cucire occhielli è semplice e garantisce unottimo risultato.ESECUZIONE DI UN OCCHIELLO1. Segnare con un gessetto per sarti la posizione dell’occhiello
sull’indumento.2. Disporre il selettore dei punti su occhiello.
NOTA:Disporre il selettore dei punti su “7” per un occhiello di larghezza 5mm o su “4” per un occhiello di larghezza 3 mm.
3. Fissare il piedino per occhielli, aprire la placca per bottoni einserire il bottone (vedere fig. B).
* La dimensione dell'occhiello viene determinata dal bottone inse-rito nella placca per bottoni.
4. Allineare la linea rossa sul piedino premistoffa con il segno sultessuto, quindi abbassare la leva del piedino premistoffa. Accer-tarsi di passare il filo sotto il piedino premistoffa e tirarlo verso séstessi (vedere fig. C).
NOTA:Non abbassare la leva del piedino premistoffa mentre si preme sullaparte del piedino contrassegnata con a, nella fig. C, altrimentil'occhiello non sarà della dimensione giusta.
1 Non chiudere questa apertura. (Fig. A)2 Allineare le guide sul piedino premistoffa.
5. Abbassare la leva dell'occhiello nella sua posizione più bassa,quindi spingerla leggermente verso il retro della macchina (vede-re fig. D).
3 Placca per bottoni4 Segno sul tessuto5 Guida sul piedino
6. Tenere il filo superiore e premere il reostato di controllo (opremere il pulsante Avvio/Stop) per iniziare a cucire.
ATTENZIONETirare il filo con troppa forza potrebbe piegare o spezzare l’agocon conseguente rischio di lesioni personali.
7. I punti 1, 2, 3 e 4 vengono automaticamente cuciti, quindi lamacchina si ferma.
(Modelo STAR 240E, STAR 230E, PS-57, PS-55)
Para coser ojales(Para tipo BH en una operación)
Modelo de Largo de Ancho dePrensatelaspuntada puntada puntada
F-1,53-5 Prensatelas
(Dial 4-7) para ojales
NOTA:1. Le recomendamos hacer una prueba de costura de ojales en un pedazo
de tela antes de empezar a hacerla en el tejido de trabajo.2. Para hacer ojales en materiales muy finos, coloque un material estabi-
lizador debajo del tejido.
La función de costura de ojales en una sola operación es un procesosimple que ofrece increíbles resultados.PARA COSER OJALES1. Con jaboncillo, marque la posición del ojal en el tejido.2. Sitúe el selector de puntada en ojales.
NOTA:Sitúe el selector de ancho de puntada en “7” para coser ojales con unaanchura real de 5 mm, o en “4” para ojales de 3 mm de anchura.
3. Coloque el prensatelas para ojales, tire del soporte del botón hastaabrirlo e inserte un botón (véase fig. B).
* El botón insertado en el soporte del botón determina el tamaño del ojal.4. Alinee la línea roja del prensatelas con la marca del tejido y baje la
palanca del prensatelas. Asegúrese de pasar el hilo por debajo delprensatelas y tire de él hacia usted (véase fig. C).
NOTA:No baje la palanca del prensatelas mientras esté presionando la zona delprensatelas marcada como a en la fig. C, ya que cosería un ojal de tamañoincorrecto.
1 Permita este espacio. (Fig. A)2 Alinee las líneas en el prensatelas.
5. Coloque la palanca del prensatelas en su posición más baja y empújelasuavemente hacia la parte trasera de la máquina (véase fig. D).
3 Prensatelas4 Marca en el tejido5 Línea en el prensatelas
6. Sujete el hilo superior y presione el pedal (o apriete el botón de puestaen Marcha/Parada) para empezar a coser.
PRECAUCIÓNSi tira del hilo demasiado, puede doblar o romper la aguja y causarlesiones.
7. Las puntadas 1, 2, 3 y 4 se hayan cosido, pare la ináquina de coser.

65
(Modelo STAR 240E, STAR 230E, PS-57, PS-55)
Botones con formas extrañas que nocaben en el soporte del botón
Añada el diámetro del botón a su grosor y coloque la escala del prensatelasde ojales en esta medida. La distancia entre dos líneas de igual longitud dela escala es de 0,5 cm. (3/16")
Ejemplo:Para un botón cuyo diámetro es de 1,5 cm (9/16") y de 1 cm (3/8") degrosor, la escala debe situarse en 2,5 cm (1").
1 Grosor [1 cm (3/8")]2 Diámetro [1,5 cm (9/16")]3 Soporte del botón4 Escala5 Diámetro + grosor [2,5 cm (1")]6 0,5 cm (3/16")
2
1
5
6
4
3
(Model STAR 240E, STAR 230E, PS-57, PS-55)
Odd-shaped buttons that do notfit into the button holder plate
Add the button diameter to its thickness, then set the buttonholepresser foot scale to this measurement. The distance in the scalebetween two lines of the same length is 0.5 cm (3/16").
Example:For a button with a diameter of 1.5 cm (9/16") and a thickness of1 cm (3/8"), the scale should be set at 2.5 cm (1").
1 Thickness [1 cm (3/8")]2 Diameter [1.5 cm (9/16")]3 Button holder plate4 Scale5 Diameter + thickness [2.5 cm (1")]6 0.5 cm (3/16")
(Modello STAR 240E, STAR 230E, PS-57, PS-55)
Bottoni di forma strana che non siadattano nella placca per bottoni
Aggiungere il diametro del bottone al suo spessore, quindi regolarela gradazione del piedino premistoffa dell'occhiello su questa misu-ra. La distanza tra due guide della stessa lunghezza è 0,5 cm.
Esempio:Per un bottone di diametro 1,5 cm ed uno spessore di 1 cm, lagradazione deve essere fissata a 2,5 cm.
1 Spessore (1 cm)2 Diametro (1,5 cm)3 Placca per bottoni4 Gradazione5 Diametro + spessore (2,5 cm)6 0,5 cm
TAB
LE O
F CO
NTE
NTS
KN
OW
ING
YO
UR
SE
WIN
G M
AC
HIN
ES
TR
AIG
HT
AN
DZ
IGZ
AG
ST
ITC
HIN
GB
UILT-IN
ST
ITC
HE
SB
UT
TON
HO
LE A
ND
BU
TTO
N S
EW
ING
US
ING
ATTACH
ME
NTS
AN
D A
PP
LICATIO
NS
MA
INT
EN
AN
CE
IND
EX

66
(Model PS-53)
Making a Buttonhole(For 4-step BH Type )
Pattern Stitch Length Stitch Width Foot
F-1.5 3-5 Buttonhole Foot(Dial 4-7)
NOTE:1. It is recommended to practice making a buttonhole on a scrap
piece of fabric before attempting it on the actual garment.2. When making buttonholes on soft fabrics, place a stabilizer
material on the underside of the fabric.
Buttonhole-making is a simple process that provides reliableresults.MAKING A BUTTONHOLE1. Using tailor’s chalk, mark the position and length of the button-
hole on the fabric.2. Attach the buttonhole foot and push the frame back until it stops
with the plastic insert in the front of the frame.3. The front bar tack will be sewn first. Place the fabric under the
presser foot so that the center of the front bar tack mark isdirectly under the center of the presser foot and aligned with thetwo red lines as shown.
1 Front of chalk mark2 Red lines
1
2
(Modello PS-53)
Esecuzione di un occhiello(per il tipo BH a 4 operazioni)
PuntoLunghezza Ampiezza
Piedinopunto punto
F-1,53-5 Piedino
(Manopola 4-7) per occhielli
NOTA:1. Eseguire sempre un occhiello di prova su un campione di tessuto
prma di realizzarlo sull’indumento vero e proprio.2. Per cucire occhielli su tessuti morbidi, applicare una tela di
rinforzo sotto il tessuto.
Il procedimento per cucire occhielli è semplice e garantisce unottimo risultato.ESECUZIONE DI UN OCCHIELLO1. Segnare con un gessetto per sarti la posizione e la lunghezza
dell’occhiello sul tessuto.2. Fissare il piedino per occhielli e spingere indietro il telaio fino a
che si ferma con l’inserto di plastica davanti al telaio.3. Viene cucita prima la barretta frontale. Posizionare il tessuto sotto
il piedino premistoffa in modo che il centro della barretta frontalesia direttamente sotto il centro del piedino premistoffa e allineatocon le due righe rosse come mostrato sotto.
1 Davanti del segno del gessetto2 Linee guida rosse
(Modelo PS-53)
Para coser ojales(Para tipo BH en cuatro operaciones)
Modelo de Largo de Ancho dePrensatelaspuntada puntada puntada
F-1,53-5 Prensatelas
(Dial 4-7) para ojales
NOTA:1. Se recomienda practicar la costura de ojales en un pedazo de tejido
antes de hacerlo realmente en las prendas.2. Para hacer ojales en materiales muy finos, coloque un material estabi-
lizador debajo del tejido.
La función que le permite coser ojales es un proceso simple que ofreceincreíbles resultados.PARA COSER OJALES1. Con jaboncillo, marque la posición y el largo del ojal en el tejido.2. Instale la pata para ojales y vuelva a empujar el marco hasta que se pare
y la inserción plástica se encuentre delante del marco.3. Primero, se cose el remate de la parte delantera del ojal. Coloque el
tejido debajo del prensatelas de tal manera que la marca del centro dela barra caiga directamente debajo del centro del prensatelas y quedealineada con las dos líneas rojas, tal como ilustra.
1 Parte delantera de la marca con jaboncillo.2 Líneas rojas
TAB
LE O
F CO
NTE
NTS
KN
OW
ING
YO
UR
SE
WIN
G M
AC
HIN
ES
TR
AIG
HT
AN
DZ
IGZ
AG
ST
ITC
HIN
GB
UILT-IN
ST
ITC
HE
SB
UT
TON
HO
LE A
ND
BU
TTO
N S
EW
ING
US
ING
ATTACH
ME
NTS
AN
D A
PP
LICATIO
NS
MA
INT
EN
AN
CE
IND
EX

67
Step 2(Left side)
Step 4(Right side)
MAKING A BUTTONHOLE
Step Sewn Portion Pattern How to Sew
1. Set the pattern selection dial to “a”.2. Lower the presser foot and sew 5 to 6 stitches.3. Stop the machine when the needle is at the left side of the stitches, then raise
the needle from the material.
1. Turn the pattern selection dial to “b”.2. Sew the predetermined length of the tailor’s chalk line.3. Stop the machine when the needle is at the left side of the stitch, then raise the
needle.
1. Turn the pattern selection dial to “c” (same position as in step 1).2. Sew 5 to 6 stitches.3. Stop the machine when the needle is at the right side of the stitch, then raise the
needle from the material.
1. Set the pattern selection dial to “d”.2. Sew the right side until the needle reaches the stitches sewn in step 1.
Step 1(Front bartack)
Step 3(Back bartack)
a
b
c
d
PARA COSER OJALES
Pasos Parte Cosida Número de puntada Como Coser
1. Ponga el selector de puntada en “a”.2. Baje el prensatelas y cosa de 5 a 6 puntadas.3. Pare la máquina cuando la aguja esté a la izquierda de las puntadas, luego levante la
aguja del tejido.
1. Gire el selector de puntada en “b”.2. Cosa la línea del jaboncillo de la longitud predeterminada.3. Pare la máquina cuando la aguja esté a la izquierda de la puntada y luego levante la
aguja.
1. Gire el selector de puntada en “c” (en la misma posición que en el a paso 1).2. Cosa 5 ó 6 puntadas.3. Pare la máquina cuando la aguja esté a la derecha de la puntada y luego levante la aguja
del tejido.
1. Ponga el selector de puntada en “d”.2. Cosa la parte derecha hasta que la aguja llegue a las puntadas cosidas en el Paso 1.
a
b
c
d
Paso 1(Remate de lapartedelantera)
Paso 2(Ladoizquierdo)
Paso 3(Remate de laparte trasera)
Paso 4(Ladoderecho)
ESECUZIONE DI UN OCCHIELLO
Fase Lato cucito Punto Come cucire
1. Disporre il selettore dei punti su “a”.2. Abbassare il piedino per asole ed eseguire 5 o 6 punti.3. Quando l’ago si trova a sinistra della cucitura, arrestare la macchina e alzare l’ago
dal tessuto.
1. Disporre il selettore dei punti su “b”.2. Cucire per la lunghezza prestabilita della linea segnata col gesso.3. Quando l’ago si trova a sinistra della cucitura, arrestare la macchina e alzare l’ago
dal tessuto.
1. Disporre il selettore dei punti su “c” (stessa posizione della fase 1).2. Eseguire 5 o 6 punti.3. Quando l’ago si trova a destra della cucitura, arrestare la macchina e alzare l’ago
dal tessuto.
1. Disporre il selettore dei punti su “d”.2. Cucire il lato destro dell’asola finché l’ago non incontra la cucitura eseguita nella
fase 1.
Fase 1(barrettafrontale)
Fase 2(lato sinistro)
Fase 3(barrettaposteriore)
Fase 4(lato destro)
a
b
c
d
TAB
LE O
F CO
NTE
NTS
KN
OW
ING
YO
UR
SE
WIN
G M
AC
HIN
ES
TR
AIG
HT
AN
DZ
IGZ
AG
ST
ITC
HIN
GB
UILT-IN
ST
ITC
HE
SB
UT
TON
HO
LE A
ND
BU
TTO
N S
EW
ING
US
ING
ATTACH
ME
NTS
AN
D A
PP
LICATIO
NS
MA
INT
EN
AN
CE
IND
EX

68
(Model STAR 240E, STAR 230E, PS-57, PS-55, PS-53)
SECURING THE STITCHING AND CUTTING THE BUTTON-HOLE
1. To secure the stitching, turn the material 90 degreescounterclockwise and sew Straight Stitches to the end of thefront bar tack of the buttonhole.
2. Remove the material from the machine. It is recommended thatpins be placed across both ends of the buttonhole as protectionagainst cutting the stitches.
3. Cut an opening in the middle of the buttonhole with a seam rippertool. Be careful not to cut through any stitches.
CAUTIONWhen using the seam ripper to open the buttonhole, do notput your hand or finger in the path of the ripper. The rippermay slip and cause injury.
(Modello STAR 240E, STAR 230E, PS-57, PS-55, PS-53)
FISSAGGIO DELLA CUCITURA E APERTURA DELL’OCCHIELLO
1. Per fissare i punti, ruotare il tessuto di 90 gradi in senso antiorarioed eseguire dei punti diritti fino alla fine della barretta frontaledell’occhiello.
2. Estrarre il tessuto dalla macchina. Si consiglia di infilare degli spillisulle due estremità dell’occhiello per evitare di tagliare la cucituradelle barrette.
3. Tagliare l’apertura al centro dell’occhiello con un taglia cuciture,facendo attenzione a non scucire i punti.
ATTENZIONEQuando si utilizza la taglierina per asole per aprire l’asola, nonfrapporre la mano o le dita nel percorso della taglierina. Lataglierina potrebbe scivolare e causare lesioni personali.
(Modelo STAR 240E, STAR 230E, PS-57, PS-55, PS-53)
PARA COMPLETAR LAS PUNTADAS Y CORTAR EL OJAL
1. Para asegurar las puntadas, gire el tejido a 90 grados en el sentidocontrario al de las manecillas de un reloj y cosa unas Puntadas Rectashasta el final de la línea del remate de la parte delantera.
2. Retire el tejido de la máquina. Se recomienda colocar alfileres enambos extremos del ojal para evitar el corte de las puntadas.
3. Corte una apertura en el medio del ojal con el cortador especial quesirve para abrir costuras. Tenga cuidado en no cortar ninguna puntada.
PRECAUCIÓNCuando use el abreojales para abrir el ojal, no ponga la mano o eldedo en la dirección del corte. Se le podría escapar el abreojales yhacerse daño.
TAB
LE O
F CO
NTE
NTS
KN
OW
ING
YO
UR
SE
WIN
G M
AC
HIN
ES
TR
AIG
HT
AN
DZ
IGZ
AG
ST
ITC
HIN
GB
UILT-IN
ST
ITC
HE
SB
UT
TON
HO
LE A
ND
BU
TTO
N S
EW
ING
US
ING
ATTACH
ME
NTS
AN
D A
PP
LICATIO
NS
MA
INT
EN
AN
CE
IND
EX

69
Buttonhole Fine Adjustment
If the stitching on the two sides of the buttonhole do not appearuniform, the following adjustments can be made.
1. Set the Stitch Length Dial at “F-1.5” and stitch the right side ofthe buttonhole on a scrap of fabric while observing how thematerial is fed.
2. If the right side of the buttonhole is too coarse or fine, adjust thefeeding of the material with the Stitch Length Dial.
1 Right row2 Stitch length3 Shorter4 Longer5 Adjusted stitch
3. After obtaining a satisfactory feeding on the right side, stitch theleft side of the buttonhole and observe the feeding.
4. If the left side is too coarse or fine compared to the right side,adjust the buttonhole fine adjustment screw as described below.
If the left side is too coarse, turn the screw with the enclosedlarge screwdriver in the – direction.If the left side is too fine, turn the screw with the enclosed largescrewdriver in the + direction.
This adjustment allows both sides of the buttonhole to appearuniform.
6 Stitch length dial7 Buttonhole fine adjusting screw8 Right row9 Adjusted stitch
23 4
F
1
F
5
F
5
7
6
8
+ –
9 9
+ –
TAB
LE O
F CO
NTE
NTS
KN
OW
ING
YO
UR
SE
WIN
G M
AC
HIN
ES
TR
AIG
HT
AN
DZ
IGZ
AG
ST
ITC
HIN
GB
UILT-IN
ST
ITC
HE
SB
UT
TON
HO
LE A
ND
BU
TTO
N S
EW
ING
US
ING
ATTACH
ME
NTS
AN
D A
PP
LICATIO
NS
MA
INT
EN
AN
CE
IND
EX

70
Regolazione della densità dei puntidell’occhiello
Se la cucitura ai due lati dell’occhiello non appare uniforme, èpossibile eseguire le seguenti regolazioni.
1. Ruotare la selettore della lunghezza del punto su “F-1,5” e cucireil lato destro dell'occhiello su un campione di prova osservandoil modo in cui avviene il trasporto del tessuto.
2. Se i punti sul lato destro dell'occhiello sono troppo fitti o tropporadi, regolare il trasporto del tessuto ruotando il selettore dellalunghezza del punto.
1 Lato destro2 Lunghezza del punto3 Corta4 Lunga5 Punto equilibrato
3. Una volta ottenuto un trasporto soddisfacente per il lato destro,cucire il lato sinistro dell'occhiello e osservare il modo in cuiavviene il trasporto del tessuto.
4. Se i punti del lato sinistro sono troppo fitti o troppo radi rispettoal lato destro, regolare la vite dell'equilibratore dell'occhiellocome descritto di seguito.
Se i punti del lato destro sono troppo fitti, girare la vitedell’equilibratore usando il cacciavite grande in dotazione verso ladirezione –.Se i punti del lato destro sono troppo radi, girare la vitedell’equilibratore usando il cacciavite grande in dotazione verso ladirezione +.
Questa regolazione consente di ottenere una densità dei puntiuniforme per entrambi i lati dell’occhiello.
6 Selettore della lunghezza del punto7 Vite dell’equilibratore dell’occhiello8 Lato destro9 Punto equilibrato
Ajuste fino de los ojales
Si las puntadas en ambos lados del ojal no parecen ser uniformes, sepueden hacer los siguientes ajustes.
1. Sitúe el selector de largo de puntada en “F-1,5” y cosa la parte derechadel ojal en un pedazo de tejido, vigilando la alimentación del tejido.
2. Si la parte derecha del ojal es demasiado gruesa o fina, ajuste laalimentación del tejido con el selector de largo de puntada.
1 Lado derecho2 Largo de puntada3 Más corto4 Más largo5 Puntada ajustada
3. Una vez obtenida una buena alimentación en el lado derecho, cosa laparte izquierda del ojal y vigile la alimentación.
4. Si la parte izquierda es demasiado gruesa o fina respecto a la derecha,ajuste el tornillo de ajuste fino del ojal, tal como se describe acontinuación.
Si la parte derecha es demasiada gruesa, con el destornillador grandeincluido, gire el tornillo en el sentido del –.Si la parte derecha es demasiada fina, gire dicho tornillo en el sentidodel +.
Este ajuste permite que ambos lados del ojal parezcan uniformes.
6 Dial de longitud de puntada7 Tornillo de ajuste fino de ojal8 Lado derecho9 Puntada ajustada

71
For 1-Step BH Type(Model STAR 240E, STAR 230E, PS-57, PS-55)When the buttonhole is not sewn correctly:There are two different procedures for correcting buttonholesewing, depending on which part of the buttonhole is not sewncorrectly.
Correction Procedure 1 (See fig. A )1. Raise the Presser Foot Lever, then remove the fabric, upper
thread and lower thread.2. Pull the buttonhole lever slightly toward you.3. Sew about 10 stitches with no fabric, upper thread, or lower
thread in the machine.4. Place the fabric under the presser foot, and set the upper and
lower thread again, then lightly push the buttonhole lever towardthe back of the machine and sew the buttonhole from thebeginning.
Correction Procedure 2 (See fig. B )1. Raise the Presser Foot Lever, then remove the fabric and all of
the sewn thread.2. Place the fabric under the presser foot again, then lightly push
the buttonhole lever toward the back of the machine and sew thebuttonhole from the beginning.
NOTE:When you are finished sewing all buttonholes be sure to raise thebuttonhole lever.If the buttonhole lever is pushed toward the back of the machinewhile sewing any stitch other than a buttonhole, the buttonhole feedwill be used and the stitch will not be sewn correctly.If the buttonhole lever is accidentally pushed when you are sewinga stitch other than a buttonhole, remove the fabric and thread fromthe machine, raise the buttonhole lever, and sew about 20 stitches.Then sew the intended stitch.
A
B
Per il tipo BH a 1 operazione(Modello STAR 240E, STAR 230E, PS-57, PS-55)Se l'occhiello non viene cucito correttamente, vi sono due diverseprocedure per ottenere una cucitura corretta, a seconda della partedell'occhiello che è stata cucita in modo errato.
Procedura correttiva 1 (vedere fig. A)1. Sollevare la leva del piedino premistoffa, poi togliere il tessuto, il
filo superiore e il filo inferiore.2. Tirare la leva dell'occhiello leggermente verso sé stessi.3. Cucire circa 10 punti senza tessuto, filo superiore o filo inferiore
nella macchina.4. Posizionare il tessuto sotto il piedino premistoffa, inserire di
nuovo il filo superiore e il filo inferiore e poi premere leggermentela leva occhielli verso il retro della macchina per cucire l’occhiellodall’inizio.
Procedura correttiva 2 (vedere fig. B)1. Sollevare la leva del piedino premistoffa, togliere il tessuto e il filo
che è stato cucito.2. Mettere nuovamente il tessuto sotto il piedino premistoffa, quindi
premere leggermente la leva dell'occhiello verso il retro dellamacchina e cucire l'occhiello dall'inizio.
NOTA:Quando si è finito di cucire tutti gli occhielli, assicurarsi di sollevarela leva dell’occhiello.Se si spinge la leva dell'occhiello verso il retro della macchinadurante la cucitura di punti diversi dall'occhiello, verrà utilizzato iltrasporto dell'occhiello e il punto non sarà cucito correttamente.Se si spinge accidentalmente la leva dell’occhiello durante la cuci-tura di altri tipi di punto, tagliare tessuto e filo dalla macchina, alzarela leva dell’occhiello e cucire circa 20 punti. Poi cucire il puntodesiderato.
Para tipo BH en una operación(Modelo STAR 240E, STAR 230E, PS-57, PS-55)Ojales mal cosidos:Existen dos procedimientos diferentes para corregir el cosido de losojales, en función de la parte del ojal que se ha cosido de formaincorrecta.
Procedimiento de corrección 1 (Véase fig. A)1. Suba la palanca del prénsatela, y después retire el tejido, y los hilos
superior e inferior.2. Tire ligeramente hacia usted de la palanca de ojales.3. Cosa unas diez puntadas sin el tejido, ni los hilos superior e inferior en
la máquina.4. Ponga el tejido debajo del prénsatela, y vuelva a colocar los hilos
superior e inferior, presione ligeramente la palanca de ojales hacia laparte trasera de la máquina y cosa el ojal desde el principio.
Procedimiento de corrección 2 (véase fig. B)1. Levante la palanca del prensatelas y retire el tejido y todo el hilo cosido.2. Vuelva a colocar le tejido debajo del prensatelas, presione ligeramente
la palanca de ojales hacia la parte trasera de la máquina y cosa el ojaldesde el principio.
NOTA:Cuando haya terminado de coser todos los ojales, asegúrese de subir lapalanca de ojales.Si se empuja hacia la parte posterior de la máquina la palanca de ojales alcoser una puntada que no sea un ojal, entrará en acción la alimentación deojales y la puntada no se coserá correctamente.Si empuja accidentalmente la palanca de ojales cuando esté cosiendo conuna puntada que no sea la de ojal, retire el tejido y el hilo de la máquina,suba la palanca de ojales, y cosa una 20 puntadas. Después cosa con lapuntada que realmente quiere.
TAB
LE O
F CO
NTE
NTS
KN
OW
ING
YO
UR
SE
WIN
G M
AC
HIN
ES
TR
AIG
HT
AN
DZ
IGZ
AG
ST
ITC
HIN
GB
UILT-IN
ST
ITC
HE
SB
UT
TON
HO
LE A
ND
BU
TTO
N S
EW
ING
US
ING
ATTACH
ME
NTS
AN
D A
PP
LICATIO
NS
MA
INT
EN
AN
CE
IND
EX

72
Button Sewing
Pattern Stitch Length Stitch Width Foot
(Zigzag Stitch) 0 Less than 6.5
1. Measure the distance between the holes and set the appropriatestitch width using the Stitch Width Dial. For example, if thedistance between the holes is 1.5 mm, set the stitch width to 1.5.
2. Change the foot to the Zigzag presser foot.3. Lower the feed dogs by setting the Feed Dog Position Switch to
the Down Position as shown on page 30.4. Place a button between the foot and the fabric and make sure
that the needle enters the holes without hitting the button. If it hitssee Step 1.
5. At a slow speed, sew approximately 10 stitches.6. Remove the material from the machine. Cut the upper and lower
threads and tie both threads at the back of the material.
CAUTIONMake sure the needle does not strike the button duringsewing. The needle may break, leading to injury.
Zigzag PresserFoot
Cucitura di bottoni
PuntoLunghezza Ampiezza
Piedinopunto punto
(Punto0 Meno di 6,5 Piedino premistoffa
zigzag) a zigzag
1. Misurare la distanza fra i fori del bottone e regolare l’ampiezza delpunto adatta ruotando la manopola dell’ampiezza del punto. Adesempio, se la distanza fra i fori è 1,5 mm, regolare l’ampiezza delpunto su 1,5.
2. Rimuovere il piedino premistoffa e applicare il piedino premistoffaa zigzag.
3. Abbassare la griffa di trasporto spostando la leva abbassa-traspor-tatore sulla posizione abbassata, come illustrato a pagina 30.
4. Inserire il bottone fra il piedino e il tessuto accertandosi che l’agoentri nei fori senza colpire il bottone. Altrimenti ripetere il punto 1.
5. Eseguire circa 10 punti a bassa velocità.6. Estrarre il tessuto dalla macchina. Tagliare il filo superiore e
inferiore e legare i capi sul rovescio del tessuto.
ATTENZIONEAssicurarsi che l’ago non colpisca il bottone durante la cucitura.L’ago potrebbe rompersi causando lesioni personali.
Costura de botones
Modelo de Largo de Ancho dePrensatelaspuntada puntada puntada
(Puntada0 Menos de 6,5
Prénsatelas zigzag) para zigzag
1. Mida la distancia entre los orificios y ajuste el ancho de puntadacorrespondiente con el selector adecuado. Por ejemplo, si la distanciaes de 1,5 mm, ajuste el ancho de puntada en 1,5.
2. Cambie el prensatelas por uno para zigzag.3. Baje los dientes de los alimentadores poniendo su palanca en la
posición baja, tal como se indica en la página 30.4. Coloque un botón entre el prensatelas y el tejido y asegúrese de que la
aguja pase por los agujeros sin picar el botón. Si golpea el botón, véaseel punto 1.
5. Cosa unas 10 puntadas a baja velocidad.6. Retire el tejido de la máquina. Corte los hilos inferior y superior y haga
un nudo con ambos en el revés del tejido.
PRECAUCIÓNAsegúrese de que la aguja no roza el botón mientras cose. La agujapodría romperse y causar lesiones.
TAB
LE O
F CO
NTE
NTS
KN
OW
ING
YO
UR
SE
WIN
G M
AC
HIN
ES
TR
AIG
HT
AN
DZ
IGZ
AG
ST
ITC
HIN
GB
UILT-IN
ST
ITC
HE
SB
UT
TON
HO
LE A
ND
BU
TTO
N S
EW
ING
US
ING
ATTACH
ME
NTS
AN
D A
PP
LICATIO
NS
MA
INT
EN
AN
CE
IND
EX

73
Zipper Insertion
Pattern Stitch Length Stitch Width Foot
(Straight Stitch) 2-3 3.5 (center) Zipper Foot
The zipper foot is used to sew various types of zippers and caneasily be positioned to the right or left side of the needle.When sewing the right side of the zipper, attach the shank to the leftpin of the zipper foot. When sewing the left side of the zipper, attachthe shank to the right pin of the zipper foot. (See fig. A )
1. Set the Pattern Selection Dial to Straight Stitch. Set the StitchLength between 2 and 3.Set the Stitch Width 3.5 (center).
2. Lower the presser foot lever and fix either the left or right pin ofthe zipper foot onto the shank.
3. Fold the edge of the material 2 cm (3/4") and place the zipperunder the folded portion.
4. Lower the needle into the notch located either on the left or rightside of the zipper foot.
CAUTIONTurn the balance wheel to make sure the needle does notstrike the presser foot. If another stitch is selected, theneedle will strike the presser foot, causing the needle tobreak, possibly leading to injury.
5. Sew from the bottom of the zipper toward the top on both sides.The needle should be positioned on the zipper side of the footfor best results. (See fig. B )
6. To sew the opposite side of the zipper, releasethe foot by pressing the button located at the back of the presserfoot, install the zipper foot on the other side of the zipper andcontinue sewing using the other side notch.
1 Zipper foot2 Right pin for sewing the left side of the zipper3 Left pin for sewing the right side of the zipper
CAUTIONMake sure the needle does not strike the zipper duringsewing. If the needle strikes the zipper, the needle maybreak, leading to injury.
A
B
1 2
3
Gathering
Pattern Stitch Length
(Straight Stitch) 4
1. Set the Pattern Selection Dial to Straight Stitch.2. Loosen the tension of the upper thread so that the lower thread
lies on the underside of the material.3. Sew a single row or multiple rows of Straight Stitch.4. Pull the lower thread(s) to gather the material.
TAB
LE O
F CO
NTE
NTS
KN
OW
ING
YO
UR
SE
WIN
G M
AC
HIN
ES
TR
AIG
HT
AN
DZ
IGZ
AG
ST
ITC
HIN
GB
UILT-IN
ST
ITC
HE
SB
UT
TON
HO
LE A
ND
BU
TTO
N S
EW
ING
US
ING
ATTACH
ME
NTS
AN
D A
PP
LICATIO
NS
MA
INT
EN
AN
CE
IND
EX

74
Applicazione di cerniere
PuntoLunghezza Ampiezza
Piedinopunto punto
(Punto 2-3 3,5 Piedino per diritto) (centro) cerniere
Applicando il piedino per cerniere è possibile cucire vari tipi dicerniere; questo piedino può essere montato con facilità a destra o asinistra dell’ago.Per cucire il lato destro della cerniera, innestare il gambo sul pernosinistro del piedino per cerniere.Per cucire il lato sinistro della cerniera, innestrare il gambo sul pernodestro del piedino per cerniere. (Vedere fig. A)
1. Disporre il selettore dei punti sul punto diritto. Regolare lalunghezza del punto fra 2 e 3.Regolare la larghezza del punto su 3,5 (centro).
2. Abbassare il piedino premistoffa e innestare il gambo sul pernosinistro o su quello destro del piedino per cerniere.
3. Piegare di 2 cm il bordo del tessuto e disporre la cerniera sotto lapiega.
4. Abbassare l’ago nella scanalatura situata a sinistra o a destra delpiedino per cerniere.
ATTENZIONERuotare il volantino per assicurarsi che l’ago non colpisca ilpiedino premistoffa. Se si seleziona un altro tipo di punto, l’agoandrà a battere sul piedino premistoffa e potrà rompersi, causan-do lesioni personali.
5. Cucire il nastro della cerniera partendo dal fondo verso il davantisu entrambi i lati. Per ottenere un buon risultato, l’ago vaposizionato dal lato della cerniera del piedino. (Vedere fig. B)
6. Per cucire l’altro lato della cerniera, staccare il piedino percerniere premendo il bottoncino situato dietro il piedinopremistoffa, applicarlo in modo che la scanalatura sia rivoltadall’altro lato della cerniera e riprendere a cucire.
1 Piedino per cerniere2 Perno destro per la cucitura del lato sinistro della
cerniera3 Perno sinistro per la cucitura del lato destro della
cerniera
ATTENZIONEAssicurarsi che l’ago non colpisca la cerniera durante la cucitu-ra. Se l’ago colpisce la cerniera, potrebbe rompersi e causarelesioni personali.
Arricciature
Punto Lunghezza punto
(Punto diritto ) 4
1. Disporre il selettore dei punti sul punto diritto.2. Allentare la tensione del filo superiore in modo che il filo inferiore
si trovi sotto il tessuto.3. Cucire una o più file di punti diritti.4. Tirare il filo (o i fili) inferiore per arricciare il tessuto.
Inserción de cremalleras
Modelo de Largo de Ancho dePrensatelaspuntada puntada puntada
(Puntada 2-3 3,5 Pata de
recta) (centro) cremalleras
La pata de cremalleras sirve para coser varios tipos de cremalleras y puedecolocarse fácilmente hacia la izquierda o derecha de la aguja.Cuando la cremallera se cose por el lado derecho, instale la pata deslizán-dola hacia la izquierda. Cuando se cose la cremallera por el lado izquierdo,instale la pata deslizándola hacia la derecha, tal como lo muestra la fig. A.
1. Coloque el selector de puntadas en la puntada recta. Ajuste el largo depuntada entre 2 y 3.Sitúe el ancho de punzada en 3.5(center).
2. Baje la palanca del prensatelas y coloque el eje izquierdo o derecho dela pata de cremalleras en la zanca.
3. Doble la orilla del tejido a 2 cm (3/4") y coloque la cremallera debajode la parte doblada.
4. Baje la aguja en la hendidura situada a la izquierda o derecha de la patade cremalleras.
PRECAUCIÓNGire la rueda de graduación para comprobar que la aguja no rozael pie prensatela. Si selecciona otro tipo de puntada, la agujachocará contra el pie prensatela, romperá la aguja y podrá hacersedaño.
5. Cuesa a partir de la parte inferior de la cremallera hacia la partesuperior, por ambos lados. Para mejores resultados, se debe colocar laaguja del lado de la pata y de la cremallera. Véase fig. B para mayoresdetalles.
6. Para coser el lado opuesto de la cremallera, suelte la pata al apretar elbotón situado en su parte posterior, instale la pata en el otro lado de lacremallera y siga cosiendo, pasando la aguja por la hendidura del otrolado.
1 Pata de cremalleras2 Eje derecho para coser la parte izquierda de la crema-
llera3 Eje izquierdo para coser la parte derecha de la crema-
llera
PRECAUCIÓNAsegúrese de que la aguja no roza la cremallera mientras cose. Sila aguja choca contra la cremallera, podría romperse y causarlesiones.
Fruncido
Modelo de puntada Largo de puntada
(Puntada recta) 4
1. Coloque el selector de puntadas en la puntada recta.2. Suelte la tensión del hilo superior para que el hilo inferior se encuentre
tirante en el revés del tejido.3. Cosa una línea simple o varias líneas de puntadas rectas.4. Tire del o de los hilos inferiores para fruncir el tejido.

75
Darning
Pattern Stitch Length Foot Feed Dog
(Straight Stitch) Any Down Position
1. Lower the feed dogs by setting the Feed Dog Position Switch tothe Down Position as shown on page 30.
2. Set the Pattern Selection Dial to Straight Stitch.3. Place the portion to be darned under the presser foot together
with a fabric for reinforcement.4. Lower the presser foot.5. Begin sewing alternating between gently drawing the work away
from you and pulling it toward you.6. Repeat this motion until the portion to be darned is filled with
parallel lines of stitching.
Zigzag PresserFoot
Rammendo
Punto Lunghezza punto Piedino Trasportatore
(Punto Qualsiasi Piedino Posizione
diritto) premistoffa a zigzag abbassata
1. Abbassare la griffa di trasporto spostando la tasto abbassa-traspor-tatore sulla posizione abbassata, come illustrato a pagina 30.
2. Disporre il selettore dei punti sul punto diritto.3. Mettere la parte da rammendare sotto il piedino premistoffa
assieme ad una tela di rinforzo.4. Abbassare il piedino premistoffa.5. Iniziare a cucire allontanando leggermente il tessuto da sé stessi
e quindi tirandolo verso sé stessi.6. Ripetere questo movimento finché la parte da rammendare non è
coperta da file parallele di punti.
Zurcido
Modelo de puntada Largo de puntada Prensatelas Alimentadores
(Puntada Cualquiera Prénsatelas Bajados recta) para zigzag
1. Baje los alimentadores poniendo la palanca correspondiente en laposición baja tal como se explica en la página 30.
2. Coloque el selector de puntadas en la puntada recta.3. Ponga la parte de tejido que se debe zurcir debajo del prensatelas, con
un tejido de refuerzo.4. Baje el prensatelas.5. Empiece a coser empujando y tirando alternativamente del tejido.
Cuando la placa de zurcir está puesta en la máquina, los sobre el tejido.6. Repita esta operación hasta que el zurcido se haya completado,
creando unas cuantas líneas de puntadas paralelas.
TAB
LE O
F CO
NTE
NTS
KN
OW
ING
YO
UR
SE
WIN
G M
AC
HIN
ES
TR
AIG
HT
AN
DZ
IGZ
AG
ST
ITC
HIN
GB
UILT-IN
ST
ITC
HE
SB
UT
TON
HO
LE A
ND
BU
TTO
N S
EW
ING
US
ING
ATTACH
ME
NTS
AN
D A
PP
LICATIO
NS
MA
INT
EN
AN
CE
IND
EX

76
Appliqués
Pattern Stitch Length
(Zigzag Stitch) F-2
An appliqué is created by cutting a contrasting piece of fabric intoa shape to be used as a decoration on a garment or project.
1. Baste the cut design to the fabric in the location where desired.2. Carefully sew around the edge of the cutout design with a Zigzag
Stitch in the fine stitch length.3. Cut away the surplus fabric outside of the stitching.4. Remove the basting, if necessary.
NOTE:Make reinforcing Straight Stitches at the beginning and the end ofthe stitching to secure.
CAUTIONBe careful that the needle does not strike a basting pinduring sewing. Striking a pin can cause the needle to break,resulting in injury.
Applicazioni
Punto Lunghezza punto
(Punto zigzag) F-2
Un’applicazione si ottiene sagomando un pezzo di tessuto da inserirecome contrasto per creare una decorazione su un indumento o unlavoro di cucito in genere.
1. Imbastire l’applicazione sul tessuto nella posizione desiderata.2. Cucire accuratamente seguendo il contorno del motivo con un
punto zigzag a lunghezza molto corta.3. Tagliare via il tessuto in eccesso esterno alla cucitura.4. Se necessario, togliere l’imbastitura.
NOTA:Fissare l’applicazione con cuciture di rinforzo con punto dirittoall’inizio e alla fine della cucitura.
ATTENZIONEAssicurarsi che l’ago non colpisca uno spillo di imbastituradurante la cucitura. In caso contrario, l’ago potrebbe rompersie provocare lesioni personali.
Aplicaciones
Modelo de puntada Largo de puntada
(Puntada zigzag) F-2
Si queremos colocar un aplique de piel etc. que haga contraste, parautilizarla como decoración en una prenda.
1. Hilvane la aplicación recortada al tejido, en donde desee ponerla.2. Cosa cuidadosamente los bordes del diseño con una puntada zigzag en
un largo de puntada fino.3. Recorte el tejido sobrante que quede fuera del pespunte.4. Quite los hilvanes, si fuera necesario.
NOTA:Haga unas puntadas rectas como refuerzo al principio y al final de laspuntadas para que no puedan deshacerse.
PRECAUCIÓNAsegúrese de que la aguja no tropieza con los alfileres durante lacostura. Si tropieza con un alfiler, podría romperse la aguja ycausar lesiones.
TAB
LE O
F CO
NTE
NTS
KN
OW
ING
YO
UR
SE
WIN
G M
AC
HIN
ES
TR
AIG
HT
AN
DZ
IGZ
AG
ST
ITC
HIN
GB
UILT-IN
ST
ITC
HE
SB
UT
TON
HO
LE A
ND
BU
TTO
N S
EW
ING
US
ING
ATTACH
ME
NTS
AN
D A
PP
LICATIO
NS
MA
INT
EN
AN
CE
IND
EX
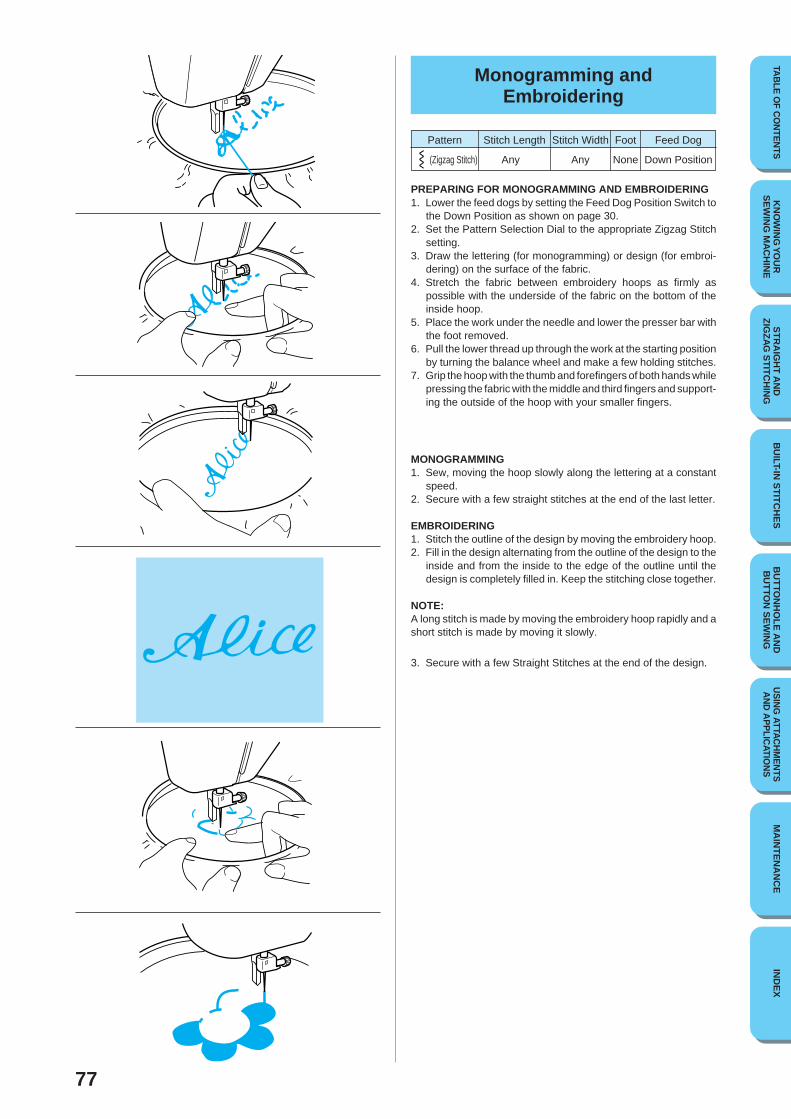
77
Monogramming andEmbroidering
Pattern Stitch Length Stitch Width Foot Feed Dog
(Zigzag Stitch) Any Any None Down Position
PREPARING FOR MONOGRAMMING AND EMBROIDERING1. Lower the feed dogs by setting the Feed Dog Position Switch to
the Down Position as shown on page 30.2. Set the Pattern Selection Dial to the appropriate Zigzag Stitch
setting.3. Draw the lettering (for monogramming) or design (for embroi-
dering) on the surface of the fabric.4. Stretch the fabric between embroidery hoops as firmly as
possible with the underside of the fabric on the bottom of theinside hoop.
5. Place the work under the needle and lower the presser bar withthe foot removed.
6. Pull the lower thread up through the work at the starting positionby turning the balance wheel and make a few holding stitches.
7. Grip the hoop with the thumb and forefingers of both hands whilepressing the fabric with the middle and third fingers and support-ing the outside of the hoop with your smaller fingers.
MONOGRAMMING1. Sew, moving the hoop slowly along the lettering at a constant
speed.2. Secure with a few straight stitches at the end of the last letter.
EMBROIDERING1. Stitch the outline of the design by moving the embroidery hoop.2. Fill in the design alternating from the outline of the design to the
inside and from the inside to the edge of the outline until thedesign is completely filled in. Keep the stitching close together.
NOTE:A long stitch is made by moving the embroidery hoop rapidly and ashort stitch is made by moving it slowly.
3. Secure with a few Straight Stitches at the end of the design.
TAB
LE O
F CO
NTE
NTS
KN
OW
ING
YO
UR
SE
WIN
G M
AC
HIN
ES
TR
AIG
HT
AN
DZ
IGZ
AG
ST
ITC
HIN
GB
UILT-IN
ST
ITC
HE
SB
UT
TON
HO
LE A
ND
BU
TTO
N S
EW
ING
US
ING
ATTACH
ME
NTS
AN
D A
PP
LICATIO
NS
MA
INT
EN
AN
CE
IND
EX

78
Monogrammi e ricami
PuntoLunghezza Ampiezza
Piedino Trasportatorepunto punto
(Punto Qualsiasi Qualsiasi Nessuno Posizione zigzag) abbassata
PREPARAZIONE PER LA CUCITURA DI MONOGRAMMI E RICAMI1. Abbassare la griffa di trasporto spostando la tasto abbassa-traspor-
tatore sulla posizione abbassata, come illustrato a pagina 30.2. Ruotare il selettore dei punti sul punto zigzag prescelto.3. Disegnare le lettere che comporranno il monogramma o il motivo
ornamentale da rammendare sul diritto del tessuto.4. Mettere il tessuto in un cerchietto da ricamo tenendolo ben teso,
con il rovescio del tessuto sotto al cerchietto interno.5. Porre il lavoro sotto l’ago e abbassare la barra di pressione a cui
sarà stato tolto in precedenza il piedino premistoffa.6. Girando il volantino, tirare su il filo inferiore facendolo passare
attraverso il lavoro nella posizione di inizio e cucire alcuni puntidi rinforzo.
7. Usando entrambe le mani, tenere il cerchietto fra il pollice el’indice e nello stesso tempo premere il tessuto con il medio el’anulare reggendo con i mignoli il bordo esterno del cerchietto.
MONOGRAMMI1. Cucire muovendo il cerchietto lentamente seguendo le lettere del
monogramma a velocità costante.2. Terminata l’esecuzione dell’ultima lettera, fissare la cucitura con
alcuni punti diritti.
RICAMI1. Cucire il contorno del motivo muovendo il cerchietto da ricamo.2. Riempire il disegno cucendo con movimento alternato dal con-
torno verso l’interno e dall’interno verso il bordo del contorno,finché il motivo non è completamente pieno. Cucire mantenendole linee dei punti ravvicinate.
NOTA:Muovendo il cerchietto da ricamo velocemente si otterranno deipunti più lunghi, mentre muovendolo lentamente si verranno prodot-ti dei punti più corti.
3. Terminata l’esecuzione del motivo, fissare la cucitura con alcunipunti diritti.
Monogramas y bordados
Modelo de Largo de Ancho dePrensatelas Alimentadorespuntada puntada puntada
(Puntada Cualquiera CualquieraQuitarlo, sin Bajados zigzag) prensatelas
PREPARACIÓN PARA MONOGRAMAS Y BORDADOS1. Baje los alimentadores poniendo la palanca correspondiente en la
posición baja tal como se explica en la página 30.2. Ponga el selector de puntadas en la puntada zigzag apropiada.3. Dibuje las letras (para monogramas) o el diseño (para bordados) en el
derecho del tejido.4. Estire el tejido en el bastidor tanto como pueda y si es posible con el
revés abajo del círculo interior.5. Coloque la tela debajo de la aguja y baje la barra del prensatelas,
aunque no haya ningún prensatelas puesto.6. Girando la ruedecilla, pase el hilo inferior por el trabajo y cosa unas
cuantas puntadas para asegurarlo.7. Sujete el bastidor con el pulgar e índice de cada mano, presione el tejido
con los dedos medios y anulares y aguante los exteriores del bastidorcon los meñiques.
MONOGRAMAS1. Cosa moviendo el bastidor lentamente por las letras, a una velocidad
constante.2. Termine con unas puntadas rectas de seguridad al final de la última
letra.
BORDADOS1. Remarque el contorno del diseño, moviendo el bastidor de acuerdo con
el dibujo.2. Rellene el motivo de puntadas, adelantando alternativamente del
contorno hacia el interior y del interior hacia la orilla del contorno hastaque el motivo quede completamente cubierto de puntadas, teniendosiempre cuidado en mantener las puntadas muy juntas.
NOTA:Se pueden realizar puntadas largas al mover el bastidor rápidamente ypuntadas cortas al moverlo lentamente.
3. Termine con unas puntadas rectas de seguridad al final del dibujo.

79
OPTIONAL ACCESSORIES
Using the Walking Foot
Pattern Stitch Length Stitch Width
(Straight Stitch)1-4.5
3-4
(Zigzag Stitch) 0-6.5
This foot is very useful for sewing materials such as vinyl cloth,synthetic leather, thin leather, etc. These materials are difficult tofeed when sewing. The walking foot prevents such materials fromcrumpling, slipping or sticking between presser foot and materialdue to even feeding of upper and lower materials.
NOTE:Use this foot only for straight sewing and zigzag stitching. Do notuse other patterns.
1. Remove the power supply plug from the outlet.2. Raise the needle and the presser foot.3. Loosen the presser foot screw to remove the presser foot holder.
(See fig. A )4. Attach the forked section of the connecting lever to the needle
clamp, install the walking foot to the presser bar. (See fig. B )5. Lower the presser foot lever and then tighten the accessory
presser bar holder fixing screw. (See fig. C )
1 Forked part of operation lever2 Presser bar holder
1 Use a screwdriver
CAUTION• Use the screwdriver to tighten the screw securely. If the
screw is loose, the needle may strike the presser footand cause injury.
• Be sure to turn the balance wheel toward the front of themachine to check that the needle does not strike thepresser foot. If the needle strikes the presser foot, injurymay result.
• Be careful not to touch the needle doring this time,otherwise injury may result.
CAUTIONWhen sewing with the walking foot, sew at medium to lowspeeds.
1
2
C
B
A
1
TAB
LE O
F CO
NTE
NTS
KN
OW
ING
YO
UR
SE
WIN
G M
AC
HIN
ES
TR
AIG
HT
AN
DZ
IGZ
AG
ST
ITC
HIN
GB
UILT-IN
ST
ITC
HE
SB
UT
TON
HO
LE A
ND
BU
TTO
N S
EW
ING
US
ING
ATTACH
ME
NTS
AN
D A
PP
LICATIO
NS
MA
INT
EN
AN
CE
IND
EX

80
ACCESSORI OPZIONALI
Utilizzazione del piedino semovente
Punto Lunghezza punto Ampiezza punto
(Punto diritto)1-4,5
3-4
(Punto zigazg) 0-6,5
Questo piedino è molto utile per cucire materiali come tessuti invinile, pelle sintetica, pelle fine, ecc. Il trasporto di questi materiali èdifficile e il piedino semovente ne impedisce il raggrinzimento, loscivolamento o il bloccaggio nel piedino premistoffa a causa ditrasporto irregolare dei materiali superiore e inferiore.
NOTA:Si puó usare questo piedino solo per cucire punto diritto e zigzag.Non usare altri punti.
1. Togliere la spina dalla presa di corrente.2. Sollevare l'ago e il piedino premistoffa.3. Allentare la vite del piedino premistoffa per togliere il supporto del
piedino (vedere fig. A).4. Fissare la sezione a forcella della leva di collegamento al morsetto
dell'ago, installare il piedino semovente sull'asta premistoffa(vedere fig. B).
5. Abbassare la leva del piedino premistoffa, quindi serrare la vite difissaggio del supporto dell'asta premistoffa (vedere fig. C).
1 Sezione a forcella della leva di collegamento2 Supporto asta premistoffa
1 Utilizzare un cacciavite
ATTENZIONE• Utilizzare il cacciavite per serrare saldamente la vite. Se la
vite è allentata, l’ago potrebbe colpire il piedino premistoffae provocare lesioni personali.
• Assicurarsi di ruotare il volantino verso la parte anterioredella macchina per verificare che l’ago non tocchi il piedinopremistoffa. Se l’ago tocca il piedino premistoffa, possonoverificarsi lesioni personali.
• Fare attenzione a non toccare l’ago durante questa operazio-ne, per evitare lesioni personali.
ATTENZIONEQuando si cuce con il piedino mobile, utilizzare una velocità damedia a minima.
ACCESORIOS OPCIONALES
Utilización del pie caminante
Modelo de puntada Largo de puntada Ancho de puntada
(Puntada recta)1-4,5
3-4
(Puntada zigazg) 0-6,5
Este pie resulta muy útil para coser materiales como la tela de vinilo, elcuero sintético, cuero fino etc. Es complicado alimentar la máquina conestos materiales, y el pie caminante impide que se arruguen, que resbaleno que queden trabados en el prensatelas al coser al mismo tiempo losmateriales superior e inferior.
NOTA:Sólo puede utilizar este pie para coser puntadas rectas y puntadas zigzag.No lo use para otras puntadas.
1. Retire el enchufe de la toma de corriente.2. Levante la aguja y el prensatelas.3. Afloje el tornillo del prensatelas para retirar el soporte del prensatelas
(véase fig. A).4. Sujete la horquilla de la palanca de conexión a la abrazadera de la aguja
e instale el pie caminante en la barra prensadora (véase fig. B).5. Baje la palanca del prensatelas y apriete el tornillo de fijación del
soporte de la barra prensadora accesoria (véase fig. C).
1 Horquilla de la palanca de operaciones.2 Soporte de la barra prensadora.
1 Utilice o un destornillador
PRECAUCIÓN• Use el destornillador para apretar el tornillo fuertemente. Si el
tornillo está suelto, la aguja podría chocar contra el pieprensatela y causar lesiones.
• Gire la rueda de graduación hacia la parte delantera de lamáquina de coser para comprobar que la aguja no roza el pieprensatela. Si la aguja roza el pie prensatela, podría hacersedaño.
• Procure no tocar la aguja durante la operación, pues podríahacerse daño.
PRECAUCIÓNCuando cosa con el pie móvil, ajuste la velocidad entre media y baja.

81
OPTIONAL ACCESSORIES
Using the Spring-actionQuilting Foot
Pattern Stitch Length Stitch Width Feed Dog
(Straight Stitch) Any 3.5 (center) Down position
The Spring -action Quilting Foot is useful for darning and freemotionmachine quilting.1. Remove the power supply plug from the outlet.2. Raise the needle and the presser foot.3. Loosen the presser foot screw to remove the presser foot holder.
(See fig. A )4. Attach the quilting foot, making sure that part indicated by A in
the illustration is above the needle clamp screw, then lower thePresser Foot Lever and tighten the presser foot screw.
* Be sure that the needle clamp screw is firmly tightened.(See fig. B )
1 Use a screwdriver.2 Presser Foot Screw3 Needle Clamp Screw
CAUTION• Be careful not to touch the needle during this time,
otherwise injury may result.• Use the screwdriver to tighten the presser foot holder
screw securely. If the screw is loose, the needle maystrike the presser foot and cause injury.
• Be sure to turn the balance wheel toward the front of themachine to check that the needle does not strike thepresser foot. If the needle strikes the presser foot, injurymay result.
5. Lower the feed dogs by setting the Feed Dog Position Switch tothe Down Position as shown on page 30.
6. Set the Pattern Selection Dial to Straight Stitch.* Before starting to sew, draw the quilting design on the fabric.
7. Use both hands to keep the fabric firmly stretched and move thefabric to sew over the drawn design. (See fig. C )
B Quilting design (Line)
8. The stitch length depends on how quickly the fabric is movedand on the machine’s sewing speed. Sew slowly and move thefabric at a constant speed to sew uniform stitches. (See fig. D )(Model STAR 240E, STAR 230E)
B
A
1
A
3
2
D
C
B
(Model STAR 240E, STAR 230E)
TAB
LE O
F CO
NTE
NTS
KN
OW
ING
YO
UR
SE
WIN
G M
AC
HIN
ES
TR
AIG
HT
AN
DZ
IGZ
AG
ST
ITC
HIN
GB
UILT-IN
ST
ITC
HE
SB
UT
TON
HO
LE A
ND
BU
TTO
N S
EW
ING
US
ING
ATTACH
ME
NTS
AN
D A
PP
LICATIO
NS
MA
INT
EN
AN
CE
IND
EX

82
ACCESSORI OPZIONALI
Utilizzazione del piedino pertrapunte azionato a molla
PuntoLunghezza Ampiezza
Trasportatorepunto punto
(Punto diritto) Qualsiasi 3,5 (centro) Posizione abbassata
Il piedino per trapunte azionato a molla è utile per foderare di tessutotrapuntato.1. Togliere la spina dalla presa di corrente.2. Sollevare l'ago e il piedino premistoffa.3. Allentare la vite del piedino premistoffa per togliere il supporto del
piedino (Vedere fig. A).4. Fissare il piedino per trapunte, accertandosi che la parte indicata
con A nella figura sia fissata sulla vite di bloccaggio dell'ago,quindi abbassare la leva del piedino premistoffa e serrare la vitedel piedino.
* Accertarsi che la vite di bloccaggio dell'ago sia ben serrata(vedere fig. B).
1 Utilizzare un cacciavite.2 Vite del piedino premistoffa3 Vite di bloccaggio dell'ago
ATTENZIONE• Fare attenzione a non toccare l’ago durante questa operazio-
ne, per evitare lesioni personali.• Utilizzare il cacciavite per serrare saldamente la vite del
supporto. Se la vite è allentata, l’ago potrebbe colpire ilpiedino premistoffa e provocare lesioni personali.
• Assicurarsi di ruotare il volantino verso la parte anterioredella macchina per verificare che l’ago non tocchi il piedinopremistoffa. Se l’ago tocca il piedino premistoffa, possonoverificarsi lesioni personali.
5. Abbassare i trasportatori mettendo la tasto abbassa-trasportatorenella posizione abbassata, come indicato a pagina 30.
6. Regolare il selettore dei punti sul punto dritto.* Prima di iniziare a cucire, disegnare il motivo da trapuntare sul
tessuto.
7. Con ambedue le mani tenere il tessuto ben teso e spostarlo percucire sopra il disegno (vedere fig. C).
B Motivo da trapuntare (linea)
8. La lunghezza del punto dipende da quanto velocemente si spostail tessuto e dalla velocità della macchina. Cucire lentamente espostare il tessuto a velocità costante per cucire in modo uniforme(vedere fig. D).(Modello STAR 240E, STAR 230E)
ACCESORIOS OPCIONALES
Utilización del prensatelas enguatadoraccionado por muelle
Modelo de Largo de Ancho deAlimentadorespuntada puntada puntada
(Puntada recta) Cualquiera 3,5 (centro) Posición baja
El prensatelas enguatador accionado por muelle sirve para zurcir y paracoser acolchados con libertad de movimiento de la máquina.1. Retire el enchufe de la toma de corriente.2. Levante la aguja y el prensatelas.3. Afloje el tornillo del prensatelas y retire el soporte del prensatelas
(véase fig. A).4. Coloque el prensatelas enguatador y asegúrese de que la parte indicada
como A en el dibujo queda sujeta al tornillo de la abrazadera de laaguja. Baje la palanca del prensatelas y apriete el tornillo del prensatelas.
* Asegúrese de que el tornillo de la abrazadera de la aguja está bienapretado (véase fig. B).
1 Utilice o un destornillador2 Tornillo del prensatelas3 Tornillo de la abrazadera de la aguja
PRECAUCIÓN• Procure no tocar la aguja durante la operación, pues podría
hacerse daño.• Use el destornillador para apretar fuertemente tornillo del
soporte del pie prensatela. Si el tornillo está suelto, la agujapodría chocar contra el pie prensatela y causar lesiones.
• Gire la rueda de graduación hacia la parte delantera de lamáquina de coser para comprobar que la aguja no roza el pieprensatela. Si la aguja roza el pie prensatela, podría hacersedaño.
5. Afloje los alimentadores situando la palanca de los alimentadores enposición baja, tal como aparece en la página 30.
6. Sitúe el selector de puntada en puntada recta.* Antes de empezar a coser, dibuje el acolchado en el tejido.
7. Sujete firmemente el tejido con las dos manos, manténgalo estirado ycósalo siguiendo el dibujo (véase fig. C).
B Dibujo del acolchado (línea)
8. El largo de puntada depende de la velocidad con que se mueve el tejidoy de la velocidad de cosido de la máquina. Cosa lentamente y muevael tejido a una velocidad constante para conseguir unas puntadasuniformes (véase fig. D).(Modelo STAR 240E, STAR 230E)
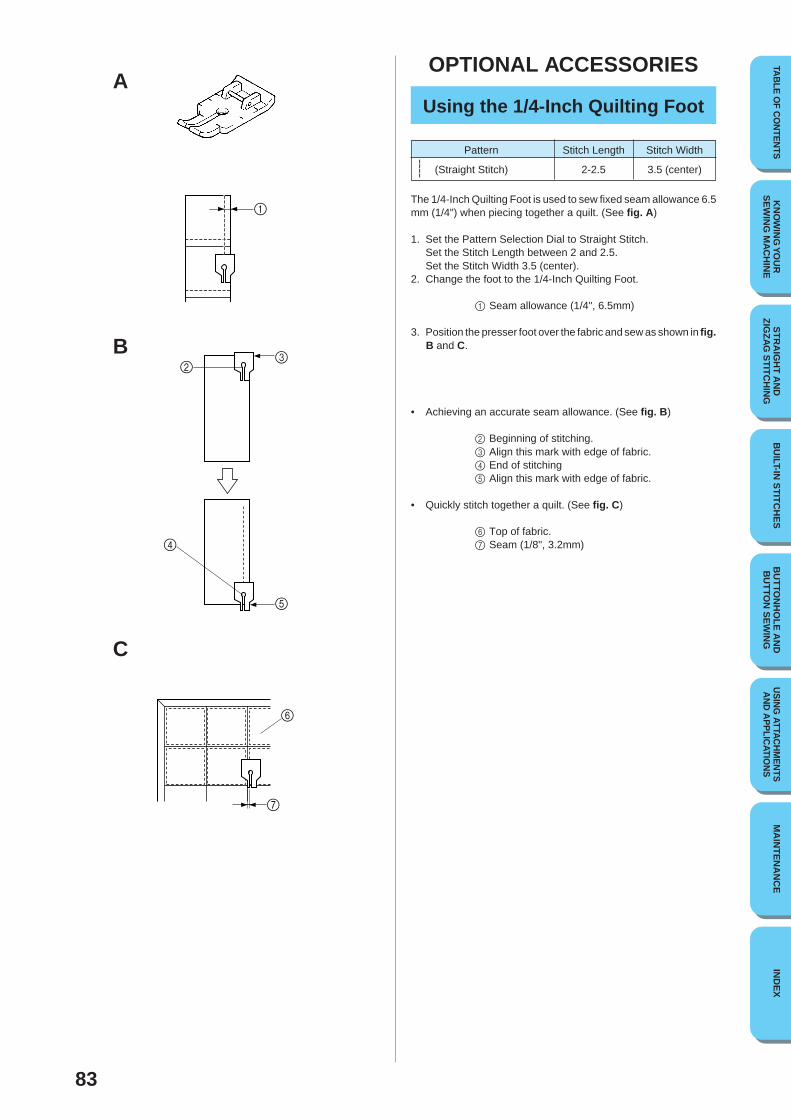
83
OPTIONAL ACCESSORIES
Using the 1/4-Inch Quilting Foot
Pattern Stitch Length Stitch Width
(Straight Stitch) 2-2.5 3.5 (center)
The 1/4-Inch Quilting Foot is used to sew fixed seam allowance 6.5mm (1/4") when piecing together a quilt. (See fig. A )
1. Set the Pattern Selection Dial to Straight Stitch.Set the Stitch Length between 2 and 2.5.Set the Stitch Width 3.5 (center).
2. Change the foot to the 1/4-Inch Quilting Foot.
1 Seam allowance (1/4", 6.5mm)
3. Position the presser foot over the fabric and sew as shown in fig.B and C.
• Achieving an accurate seam allowance. (See fig. B )
2 Beginning of stitching.3 Align this mark with edge of fabric.4 End of stitching5 Align this mark with edge of fabric.
• Quickly stitch together a quilt. (See fig. C )
6 Top of fabric.7 Seam (1/8", 3.2mm)
1
32
4
5
6
7
A
B
C
TAB
LE O
F CO
NTE
NTS
KN
OW
ING
YO
UR
SE
WIN
G M
AC
HIN
ES
TR
AIG
HT
AN
DZ
IGZ
AG
ST
ITC
HIN
GB
UILT-IN
ST
ITC
HE
SB
UT
TON
HO
LE A
ND
BU
TTO
N S
EW
ING
US
ING
ATTACH
ME
NTS
AN
D A
PP
LICATIO
NS
MA
INT
EN
AN
CE
IND
EX

84
ACCESSORI OPZIONALI
Utilizzazione del piedino per patchwork
Punto Lunghezza punto Ampiezza punto
(Punto diritto) 2-2,5 3,5 (centro)
Il piedino per patchwork è utilizzato per cucire con una tolleranza dicucitura fissa di 6,5 mm (1/4"), quando si eseguono lavori di trapunta(vedere fig. A).
1. Regolare il selettore dei punti sul punto diritto.Regolare la lunghezza del punto tra 2 e 2,5.Regolare la ampiezza del punto su 3,5 (centro).
2. Mettere il piedino nella posizione piedino per patchwork.
1 Tolleranza della cucitura (1/4", 6,5 mm)
3. Posizionare il piedino premistoffa sul tessuto e cucire comeindicato nelle fig. B e C.
• Permette di ottenere una tollere una tolleranza di cucitura accu-rata. (vedere fig. B)
2 Inizio della cucitura3 Allineare questo segno con l'orlo del tessuto.4 Fine della cucitura5 Allineare questo segno con l'orlo del tessuto.
• Cucire rapidamente una trapunta. (vedere fig. C)
6 Parte superiore del tessuto7 Cucitura (1/8", 3,2 mm)
ACCESORIOS OPCIONALES
Utilización del prensatela parapespunte 1/4
Modelo de puntada Largo de puntada Ancho de puntada
(Puntada recta) 2-2,5 3,5 (centro)
El prensatela para pespunte 1/4 se utiliza para coser costuras con unaanchura fija de 6,5 mm (1/4") al juntar las partes de un acolchado (véasefig. A).
1. Sitúe el selector de puntadas en puntada recta.Sitúe el selector de largo de puntada entre 2 y 2,5.Sitúe el ancho de puntada en 3,5 (centro).
2. Coloque el prensatela para pespunte 1/4.
1 Anchura de la costura (1/4", 6,5 mm)
3. Coloque el prensatelas sobre el tejido, y cosa tal como se indica en lasfig. B y C.
• Para hacer una anchura de la costura correcta. (véase fig. B)
2 Principio de la puntada3 Alinee esta marca con el borde del tejido.4 Final de la puntada5 Alinee esta marca con el borde del tejido.
• Cosido rápido de un acolchado. (véase fig. C)
6 Parte superior del tejido.7 Costura (1/8", 3,2 mm)

85
Changing the Light Bulb
CAUTION• Turn off the main power switch and unplug the machine
before changing the light bulb. If the main power switchis on when the light bulb is changed, an electric shockmay result. If the machine is on and Start/Stop button ispressed or foot controller is stepped on, injuries mayresult.
• To avoid burns, give the light bulb time to cool beforechanging it.
1. Remove the power supply plug from the outlet.2. Loosen the screw on the reverse side of sewing head as shown
in fig. A .3. Remove the light cover from the machine as illustrated in fig. A .
(Model STAR 240E, STAR 230E)
4. Replace the sewing light bulb. (See fig. B )
1 Bulb1 Pull out2 Push in
(Model PS-57, PS-55, PS-53)4. Replace the sewing light bulb. (See fig. B )
1 Bulb1 Loosen2 Tighten
5. Reattach the light cover and fasten the screw as shown in fig.C.
B
A
1
1
2
1
1
2
B
C
(Model STAR 240E, STAR 230E)
(Model PS-57, PS-55, PS-53)
TAB
LE O
F CO
NTE
NTS
KN
OW
ING
YO
UR
SE
WIN
G M
AC
HIN
ES
TR
AIG
HT
AN
DZ
IGZ
AG
ST
ITC
HIN
GB
UILT-IN
ST
ITC
HE
SB
UT
TON
HO
LE A
ND
BU
TTO
N S
EW
ING
US
ING
ATTACH
ME
NTS
AN
D A
PP
LICATIO
NS
MA
INT
EN
AN
CE
IND
EX

86
Sostituzione della lampadina
ATTENZIONE• Prima di sostituire la lampadina, spegnere sempre la macchi-
na e scollegarla dalla presa di corrente. Se l’interruttoreprincipale è su ON quando si sostituisce la lampadina, si puòsubire una scossa elettrica. Se la macchina è accesa e vienepremuto inavvertitamente il pulsante Avvio/Stop o il reostatoa pedale, possono verificarsi lesioni personali.
• Per evitare bruciature, attendere che la lampadina si raffred-di prima di sostituirla.
1. Disinserire la spina di alimentazione dalla presa elettrica.2. Allentare la vite sul lato posteriore della macchina come mostrato
in fig. A.3. Rimuovere la placca frontale dalla macchina come illustrato in
fig. A.
(Modello STAR 240E, STAR 230E)4. Sostituire la lampadina. (Vedere fig. B)
1 Lampadina1 Estratto2 Foglio
(Modello PS-57, PS-55, PS-53)4. Sostituire la lampadina. (Vedere fig. B)
1 Lampadina1 Allentare2 Serrare
5. Rimontare la placca frontale e stringere la vite come mostrato infig. C.
Cambio de la bombilla
PRECAUCIÓN• Apague y desenchufe la máquina de coser de la corriente antes
de cambiar la bombilla. Si cambia la bombilla con la máquinaencendida, podrá sufrir una descarga eléctrica. Si la máquinaestá enchufada y aprieta por accidente el botón Marcha/Parada o pisa el pedal, podría hacerse daño.
• Para evitar quemaduras, deje enfriar la bombilla antes decambiarla.
1. Desenchufe la máquina.2. Afloje el tornillo de la cubierta de la máquina, tal como se indica en la
fig. A.3. Retire la cubierta de la máquina tal como se indica en la fig. A.
(Modelo STAR 240E, STAR 230E)4. Cambie la bombilla tal como se muestra en la fig. B.
1 Bombilla1 Tirar2 Presionar
(Modelo PS-57, PS-55, PS-53)4. Cambie la bombilla tal como se muestra en la fig. B.
1 Bombilla1 Aflojar2 Apretar
5. Vuelva a colocar la cubierta y apriete el tornillo tal como indica la fig.C.

87
Cleaning
CAUTIONBe sure to unplug the machine before cleaning it. Other-wise, electric shock or injury may result.
1. Remove the power supply plug from the outlet.2. Raise the needle and the presser foot.3. Loosen the presser foot screw and the needle clamp screw to
remove the presser foot holder and the needle. (See fig. A )4. Remove the needle plate using a coin to remove the screws.
(See fig. B )
1 Use a coin or screwdriver.
5. Turn the balance wheel toward you until the notch of shuttlealigns with the shelf of race as shown in the illustration.
2 Notch of shuttle race3 Shelf of race
CAUTIONBe sure to turn the balance wheel towards the front of themachine. Turning the balance wheel in the other direction maydamage the machine.
6. Remove the race. (See fig. C )7. Clean out lint and dust.* Use soft fabric to clean the race. DO NOT OIL the race or shuttle.
(See fig. D )
4 Race5 Shuttle
* DO NOT OIL.
CAUTION• Do not use a damaged race or shuttle. Otherwise, the
thread may tangle and cause a poor finish, or the needlemay break. You can get the proper parts from yourauthorized dealer.
• Be sure to insert the race in the correct position. Other-wise, the needle may break.
8. Assemble the race first then the needle plate.When installing the race, be sure that the notch of shuttle is in thesame position that it was when the shuttle hook was removedand that the shelf on the race aligns with the spring.Install the needle plate by sliding it to the left (the reverse of itsremoval procedure).
6 Notch of shuttle7 Shelf8 Spring
A
B
1
32
C
D
4
5
6
78
TAB
LE O
F CO
NTE
NTS
KN
OW
ING
YO
UR
SE
WIN
G M
AC
HIN
ES
TR
AIG
HT
AN
DZ
IGZ
AG
ST
ITC
HIN
GB
UILT-IN
ST
ITC
HE
SB
UT
TON
HO
LE A
ND
BU
TTO
N S
EW
ING
US
ING
ATTACH
ME
NTS
AN
D A
PP
LICATIO
NS
MA
INT
EN
AN
CE
IND
EX

88
Pulizia
ATTENZIONEAssicurarsi di scollegare la macchina dalla presa di correnteprima di pulirla. In caso contrario, vi sono rischi di scossaelettrica o lesioni personali.
1. Disinserire la spina di alimentazione dalla presa.2. Far salire l’ago ed il piedino premistoffa nella posizione piu alta.3. Allentare la vite del piedino premistoffa e la vite del morsetto
dell’ago per smontare il supporto del piedino e l’ago. (Vedere fig.A)
4. Rimuovere la placca dell’ago svitando le viti con una moneta(vedere fig. B).
1 Utilizzare una moneta o un cacciavite.
5. Girare verso di sé il volantino fino a quando la tacca sulla guidadella navetta è allineata al piano della guida, come mostrato nellafigura.
2 Tacca sulla guida della navetta3 Piano della guida
ATTENZIONEAssicurarsi di ruotare il volantino verso la parte anteriore dellamacchina. Se il volantino viene ruotato nella direzione opposta, sipotrebbe danneggiare la macchina.
6. Estrarre la capsula del crochet. (Vedere fig. C)7. Togliere rimasugli di filo e polvere.
* Pulire il crochet con un pezzo di stoffa morbida. NON oliare ilcrochet o il suo alloggiamento. (Vedere fig. D)
4 Capsula del crochet5 Guida della navetta
* NON LUBRIFICARE
ATTENZIONE• Se la guida navetta o la navetta risulta danneggiato, non
utilizzarla. In caso contrario, il filo potrebbe ingarbugliarsi ecausare una finitura scadente, oppure l’ago potrebbe rom-persi. Per acquistare le parti appropriate, rivolgersi al riven-ditore autorizzato.
• Assicurarsi di inserire la guida navetta nella posizione corret-ta. In caso contrario, l’ago potrebbe rompersi.
8. Montare prima la guida quindi la placca dell'ago.Installando la guida, accertarsi che la tacca della navetta si trovinella stessa posizione in cui era prima di togliere il crochet dellanavetta, e che il piano sulla guida sia contro la molla.Installare la placca dell'ago facendola scorrere verso sinistra(l'opposto della procedura di rimozione).
6 Tacca sulla guida della navetta7 Piano8 Molla
Limpieza
PRECAUCIÓNAsegúrese de desenchufar la máquina antes de limpiarla. De otramanera, podría recibir una descarga eléctrica.
1. Retire la clavija de la toma de corriente.2. Levante la aguja y el prensatelas.3. Suelte el tornillo del prensatelas y el tornillo de ajuste de la aguja para
sacar el soporte del prensatelas y la aguja. Véase fig. A.4. Retire la placa de agujas con una moneda para aflojar los tornillos.
(véase fig. B).
1 Utilice una moneda o un destornillador
5. Gire la ruedecilla hacia usted hasta que la muesca en la pista de lalanzadera quede alineada con la repisa de la pista gancho de lalanzadera, tal como se indica en el dibujo.
2 Muesca en la pista de la lanzadera3 Repisa de la pista
PRECAUCIÓNGire la rueda de graduación hacia la parte delantera de la máquina.Si gira la rueda en el otro sentido, podría averiar la máquina.
6. Retire el garfio de la lanzadera. Véase fig. C.7. Limpie el polvo y las suciedades.* Utilice un trapo suave para limpiar el garfio de la lanzadera. NO
ENGRASE el garfio de la lanzadera o la pista. Véase fig. D.
4 Garfio de la lanzadera5 Pista de la lanzadera
* NO LUBRICAR.
PRECAUCIÓN• No utilice un cangrejo o una lanzadera estropeados. De otra
manera, el hilo podría enrollarse y causar un acabado feo o laaguja podría romperse. Puede adquirir las piezas adecuadasen cualquier tienda especializada.
• Asegúrese de que coloca el cangrejo en la posición correcta. Sino, la aguja podría romperse.
8. Monte la pista, y a continuación la placa de agujas.Al instalar el gancho la pista, asegúrese de que la muesca de lalanzadera sigue en la misma posición en que estaba cuando se retiró elgancho de la lanzadera, y asegúrese de que la repisa sobre la posta estáalineada con el muelle.Coloque la placa de agujas deslizándola hacia la izquierda (en elsentido opuesto a cuando la retiró).
6 Muesca en la pista de la lanzadera7 Repisa8 Muelle

89
NoPage 47NoPage 87
NoPage 11NoPage 37
Bobbin is notthreaded properly in
the race.
Inferior needle isused.
Lint is clinging to thebottom of the needle
plate.
The combination ofneedle size/thread
size/fabric isincorrect.
SKIPPEDSTITCHES LOOP IN SEAM FABRIC
PUCKERS
CONTACT YOUR LOCAL SERVICE CENTER
LOWER THREADBREAKS
UPPER THREADBREAKS
PERFORMANCE CHECK LISTWhenever sewing difficulties are encountered, review the section in this instruction manual that details the operation you are performing tomake sure you are correctly using the machine. If the problem continues, the following check list may help you to improve the operation.If you still have difficulties, contact your nearest authorized service center.
With the model STAR 240E and STAR 230E, you can use the sewing speed controller to adjust the sewing speed. When sewing at the slowestspeed, skipped stitches may easily occur depending on the type of thread and fabric used. If this occurs, sew at a faster speed.
NoPage 39
Upper thread is notcorrectly installed.
NoPage 37 NoPage 11 NoPage 46 NoPage 46
Lower thread istangled.
Needle is incorrectlyinserted.
Thread tension isincorrect.
Thread tension istoo tight.
NoPage 39
Upper thread istangled.
NoPage 39
Threading is notcorrect.
NoPage 46
Upper threadtension is too tight.
NoPage 47 NoPage 11
Wrong needle isused.
The combination ofneedle size/thread
size/fabric isincorrect.
NoPage 39
Spool of thread isnot correctly
installed.
NoPage 11
Needle is bent ornot sharp.
NoPage 47
The combination ofneedle size/thread
size/fabric isincorrect.
NoPage 39
Threading is notcorrect.
TAB
LE O
F CO
NTE
NTS
KN
OW
ING
YO
UR
SE
WIN
G M
AC
HIN
ES
TR
AIG
HT
AN
DZ
IGZ
AG
ST
ITC
HIN
GB
UILT-IN
ST
ITC
HE
SB
UT
TON
HO
LE A
ND
BU
TTO
N S
EW
ING
US
ING
ATTACH
ME
NTS
AN
D A
PP
LICATIO
NS
MA
INT
EN
AN
CE
IND
EX

90
NoPage 10
Foot controller is notused correctly.
MACHINE ISNOISY OR SLOW
MACHINE DOESNOT START
CONTACT YOUR LOCAL SERVICE CENTER
FABRIC DOESNOT FEEDPROPERLY
NoPage 26
Stitch Length Dial isset at no feeding.
("0")
NoPage 87 NoPage 7
Lint is clinging to thebottom of the needle
plate.
Power supply plug isremoved from outlet.
NoPage 47
The combination ofneedle size/thread
size/fabric isincorrect.
NoPage 9
Main power switchis turned off.
NoPage 11
Inferior needle isused.
NoPage 33
The bobbin windershaft is slid to the
right.
NoPage 39
Thread is tangled.
NoPage 30
Feed Dog PositionSwitch in down
position.
NoPage 63
(Model STAR 240E,
STAR 230E, PS-57, PS-55)
The buttonhole lever ispushed toward the back
of the machine.
NEEDLEBREAKS
NoPage 11
Needle is notcorrectly inserted.
NoPage 11
Inferior needle isused.
NoPage 47
The combination ofneedle size/thread
size/fabric isincorrect.
No
Fabric is pulledexcessively. Let thefeed dogs move thefabric. Do not pull
the fabric.
Page 10
(Model STAR 240E,
STAR 230E)
Start/Stop button will notwork when foot controlleris plugged into machine.
TAB
LE O
F CO
NTE
NTS
KN
OW
ING
YO
UR
SE
WIN
G M
AC
HIN
ES
TR
AIG
HT
AN
DZ
IGZ
AG
ST
ITC
HIN
GB
UILT-IN
ST
ITC
HE
SB
UT
TON
HO
LE A
ND
BU
TTO
N S
EW
ING
US
ING
ATTACH
ME
NTS
AN
D A
PP
LICATIO
NS
MA
INT
EN
AN
CE
IND
EX

91
LISTADO DE POSIBLES INCIDENCIAS
NoPágina 47NoPágina 88
NoPágina 12NoPágina 38
La canilla no está bienenhebrada en el garfio
Se está usando unaaguja inferior
Hay polvo en el fondode la placa de agujas
La combinacióntamaño de aguja/
grueso de hilo/tejidono es correcta
SALTO DEPUNTADAS
BAGAS EN LASPUNTADAS
ARRUGAS ENEL TEJIDO
PONGASE EN CONTACTO CON EL SERVICIO TECNICO LOCAL
ROTURA DELHILO INFERIOR
ROTURA DELHILO SUPERIOR
NoPágina 40
El hilo superior noestá bien enhebrado
NoPágina 38 NoPágina 12 NoPágina 46 NoPágina 46
El hilo inferior estáenredado
La aguja está malcolocada
La tensión de los hilosno es correcta
La tensión de los hiloses demasiada fuerte
NoPágina 40
El hilo superior estáenredado
NoPágina 40
Los hilos no estánbien enhebrados
NoPágina 46
El hilo superior esdemasiado tirante
NoPágina 47 NoPágina 12
El tamaño de la agujano corresponde
La combinacióntamaño de aguja/
grueso de hilo/tejidono es correcta
NoPágina 40
El carrete está malcolocado
NoPágina 12
La aguja está dobladao gastada
NoPágina 47
La combinacióntamaño de aguja/
grueso de hilo/tejidono es correcta
NoPágina 40
El hilo no está bienenhebrado
Cada vez que encuentre dificultades al coser, vuelva a consultar la parte de este manual de instrucciones que detalla la operación que está realizando, paracomprobar que usa correctamente la máquina. Si el problema persiste, el siguiente listado le puede ayudar a mejorar el funcionamiento.Si persiste el problema a pesar de estas medidas, póngase en contacto con el servicio técnico autorizado más cercano.
Con el modelo STAR 240E y STAR 230E, podrá utilizar el controlador de velocidad de cosido para ajustar la velocidad de cosido. Cuando cosa a lavelocidad más baja, podrán ocurrir fácilmente saltos de puntada dependiendo del tipo de hilo y de tejido utilizados. Si se diera el caso, cosa a una velocidadmayor.

92
NoPágina 10
No se usa bien elpedal
LA MAQUINA ESRUIDOSA O
FUNCIONA MUYDESPACIO
LA MAQUINA NOARRANCA
PONGASE EN CONTACTO CON EL SERVICIO TECNICO LOCAL
EL TEJIDO NOARRASTRA BIEN
NoPágina 27
El selector de largo depuntada está puestopara que el tejido no
alimente “0”
NoPágina 88 NoPáginae 8
Hay polvo en la placade agujas Está desenchufada
NoPágina 47
La combinacióntamaño de aguja/
grueso de hilo/tejidono es correcta
NoPágina 9
El interruptorprincipal está apagado
NoPágina 12
Se está usando unaaguja inferior
NoPágina 34
El eje de bobinado dela canilla está
deslizado hacia laderecha
NoPágina 40
El hilo está enredado
NoPágina 30
La palanca de losalimentadores está en
la posición baja
NoPágina 64
(Modelo STAR 240E,
STAR 230E, PS-57, PS-55)
La palanca de ojalesestá colocada hacia
atrás.
LA AGUJA SEROMPE
NoPágina 12
La aguja está malcolocada
NoPágina 12
Se está usando unaaguja inferior
NoPágina 47
La combinacióntamaño de aguja/
grueso de hilo/tejidono es correcta
No
Se tira del tejido condemasiada fuerza.
Deje que el arrastre loaliment solos. No tire
del tejido.
Página 10
(Modelo STAR 240E,
STAR 230E)
El botón Arrancar/parar nofuncionará cuando el pedal esté
enchufado a la máquina.

93
TABELLA DI CONTROLLO DEL FUNZIONAMENTO
NoPag. 48NoPag. 88
NoPag. 12NoPag. 38
Il rocchetto non èavvolto
correttamente nelcrochet.
Si sta usando un agodi misura inferiore.
Il filo si sfilacciasotto la placca
dell’ago.
La combinazione fraago,filo e tessuto è
sbagliata.
PUNTI SALTATI PUNTI LENTI ARRICCIAMENTODEL TESSUTO
RIVOLGERSI AL CENTRO DI ASSISTENZA
IL FILOINFERIORESI ROMPE
IL FILOSUPERIORESI ROMPE
NoPag. 40
L’infilatura superiorenon è corretta.
NoPag. 38 NoPag. 12 NoPag. 46 NoPag. 46
Il filo inferiore èaggrovigliato.
L’ago non è inseritocorrettamente.
La tensione non ècorretta.
La tensione del filo ètroppo stretta.
NoPag. 40
Il filo superiore èaggrovigliato.
NoPag. 40
L’infilatura non ècorretta.
NoPag. 46
La tensione del filosuperiore è troppo
stretta.
NoPag. 48 NoPag. 12
Si sta usando un agosbagliato.
La combinazione fraago, filo e tessuto è
sbagliata.
NoPag. 40
La capsula non èinserita
correttamente.
NoPag. 12
L’ago è piegato ospuntato.
NoPag. 48
La combinazione fraago, filo e tessuto è
sbagliata.
NoPag. 40
L’infilatura non ècorretta.
Ogni qualvolta si incontrino delle difficoltà nell'esecuzione del lavoro, riguardare la parte di questo manuale d' istruzioni relativa alladeterminata operazione che si vuole eseguire per assicurarsi che si stia utilizzando la macchina nel modo corretto. Se il problema persiste, laseguente tabella può essere di aiuto per risolvere l'inconveniente.Se si incontrano ancora difficoltà, rivolgersi al più vicino centro di assistenza autorizzato.
Per il modello STAR 240E e STAR 230E si può usare il controllore di velocità di cucitura per regolare la velocità di cucitura. Quando si cucealla velocità più bassa, possono essere facilmente saltati dei punti a seconda del tipo di filo e di tessuto usati. In questo caso, cucire ad una velocitàpiù alta.
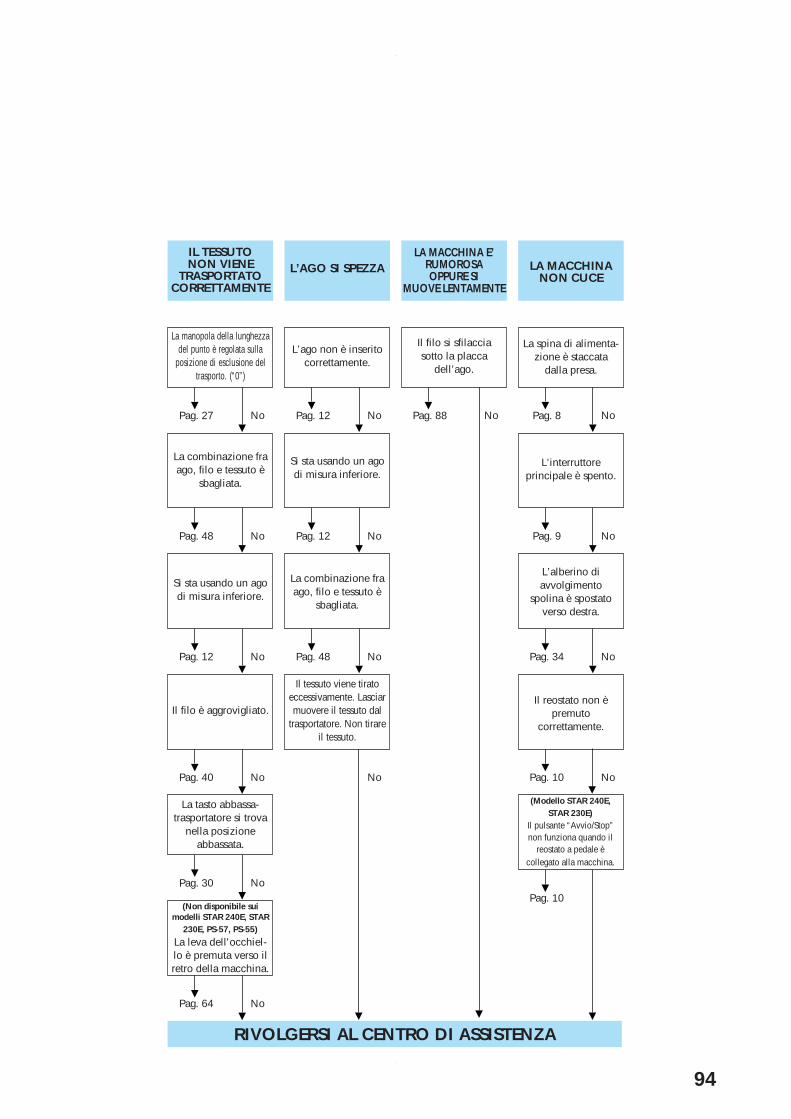
94
NoPag. 10
Il reostato non èpremuto
correttamente.
LA MACCHINA E’RUMOROSAOPPURE SI
MUOVE LENTAMENTE
LA MACCHINANON CUCE
RIVOLGERSI AL CENTRO DI ASSISTENZA
IL TESSUTONON VIENE
TRASPORTATOCORRETTAMENTE
NoPag. 27
La manopola della lunghezzadel punto è regolata sulla
posizione di esclusione deltrasporto. (“0”)
NoPag. 88 NoPag. 8
Il filo si sfilacciasotto la placca
dell’ago.
La spina di alimenta-zione è staccata
dalla presa.
NoPag. 48
La combinazione fraago, filo e tessuto è
sbagliata.
NoPag. 9
L’interruttoreprincipale è spento.
NoPag. 12
Si sta usando un agodi misura inferiore.
NoPag. 34
L’alberino diavvolgimento
spolina è spostatoverso destra.
NoPag. 40
Il filo è aggrovigliato.
L’AGO SI SPEZZA
NoPag. 12
L’ago non è inseritocorrettamente.
NoPag. 12
Si sta usando un agodi misura inferiore.
NoPag. 48
La combinazione fraago, filo e tessuto è
sbagliata.
No
Il tessuto viene tiratoeccessivamente. Lasciarmuovere il tessuto dal
trasportatore. Non tirareil tessuto.
Pag. 10
(Modello STAR 240E,STAR 230E)
Il pulsante “Avvio/Stop”non funziona quando il
reostato a pedale ècollegato alla macchina.
NoPag. 30
La tasto abbassa-trasportatore si trova
nella posizioneabbassata.
NoPag. 64
(Non disponibile suimodelli STAR 240E, STAR
230E, PS-57, PS-55)
La leva dell'occhiel-lo è premuta verso ilretro della macchina.

95
Repacking the Machine
Keep the carton and packing materials for future use. It maybecome necessary to reship the machine. Improper packing orimproper packing material could result in damage during shipping.Instructions for repacking the machine are illustrated.
* Hard case (1) and packing materials (2, 3) are included onlywith STAR 240E and STAR 230E.
IMPORTANTThis packing material is designed to prevent damage intransit. Save this packing material in the event it is needed totransport this machine.
Embalaje de la máquina
Guarde la caja de cartón y el embalaje por si acaso necesita transportar lamáquina en el futuro. Un embalaje inadecuado o con materialesinapropiados puede causarle daños a la máquina durante el transporte.Para embalar la máquina correctamente, sírvase seguir las instruccionesque se ilustran.
* La caja rígida (1) y materiales de embalaje (2, 3) solamente seincluyn con los modelos STAR 240E y STAR 230E.
IMPORTANTEEl material de embalaje está diseñado para prevenir daños duranteel transporte. Guárdelo siempre en caso de que tenga que volver atransportar la máquina.
1
2
3
(Model STAR 240E, STAR 230E)
(Model PS-57, PS-55, PS-53)
Imballaggio della macchina
Conservare il cartone e i materiali di imballaggio per usi futuri, nelcaso si debba trasportare la macchina. Un imballaggio inadeguato ol’utilizzo di materiali di imballaggio inadatti possono danneggiare lamacchina durante il trasporto. Sono illustrate le istruzioni per esegui-re l’imballaggio della macchina.
La valigetta (1) e il materiale di imballaggio (2, 3) sono inclusi solocon la STAR 240E e STAR 230E.
IMPORTANTEI materiali di imballaggio sono studiati in modo da proteggerela macchina durante il trasporto. Conservare questi materialinel caso si debba trasportare la macchina da cucire.
TAB
LE O
F CO
NTE
NTS
KN
OW
ING
YO
UR
SE
WIN
G M
AC
HIN
ES
TR
AIG
HT
AN
DZ
IGZ
AG
ST
ITC
HIN
GB
UILT-IN
ST
ITC
HE
SB
UT
TON
HO
LE A
ND
BU
TTO
N S
EW
ING
US
ING
ATTACH
ME
NTS
AN
D A
PP
LICATIO
NS
MA
INT
EN
AN
CE
IND
EX

96
Page1/4-Inch Quilting Foot ............................................... 5, 83
AAccessories .................................................................... 5Appliqués ..................................................................... 76Arrowhead Stitch .......................................................... 59
BBead Stitch ................................................................... 59Blind Hem Stitch ........................................................... 54Bobbin Winder .............................................................. 33Bridging Stitch .............................................................. 57Button Sewing .............................................................. 72Buttonhole Fine Adjustment Screw .............................. 69Buttonhole Lever .......................................................... 63
CChanging Light Bulb ..................................................... 85Changing the Presser Foot .......................................... 13Checking the Needle .................................................... 11Cleaning ....................................................................... 87Comb Stitch .................................................................. 61Connecting Plugs ........................................................... 7
DDarning......................................................................... 75Decorative Hem Stitch ................................................. 57Decorative Stitch .......................................................... 59Double Action Stitch ..................................................... 57
EElastic Overlock Stitch ................................................. 61Elastic Shell Tuck Stitch ............................................... 61Elastic Stitch ................................................................. 56Embroidering ................................................................ 77
FFabric/Thread/Needle Combinations ........................... 47Fagoting Stitch ............................................................. 60Feather Stitch ............................................................... 62Feed Dog Position Switch ............................................ 30Flat Bed Attachment with AccessoryCompartment ......................................................... 14, 32Foot Controller ............................................................. 10
GGathering ..................................................................... 73
HHole for Vertical Spool Pin ........................................... 44
LLightning Stitch............................................................. 59Link Stitch..................................................................... 60Lower Threading .......................................................... 37
MMain Power/Sewing Light Switch ................................... 9Manually Drawing Up Lower Thread ............................ 43Monogramming ............................................................ 77
Page
NNeedle
Inspection ........................................................... 11Replacement ...................................................... 11
Needle Threader .......................................................... 41
OOveredge Stitching....................................................... 61
PParallelogram Stitch ..................................................... 59Patchwork .................................................................... 60Pattern Indication Window ........................................... 15Pattern Selection Dial ................................................... 15Performance Check List ............................................... 89Presser Foot Lever ....................................................... 39Principal Parts ................................................................ 1
RRace ............................................................................ 87Rampart Stitch ............................................................. 57Repacking the Machine................................................ 95Reverse Sewing Lever ................................................. 29
SSatin Stitch Foot ..................................... 3, 53, 58, 59, 76Scallop Stitch ............................................................... 58Sewing Light
Light Bulb Replacement ..................................... 85Switch ................................................................... 9
Sewing Speed Controller ............................................. 32Shell Tuck Stitch .......................................................... 55Shuttle .......................................................................... 87Spool Pin and Spool Cap ....................................... 33, 39Springaction Quilting Foot ........................................ 5, 81Square Stitch ................................................................ 59Start/Stop Button .......................................................... 31Stitch Length Dial ................................................... 15, 26Stitch Width Dial ........................................................... 28Straight Stitch ................................................... 50, 73, 75Stretch Blind Hem Stitch .............................................. 54
TThread Tension ............................................................ 46Triangle Stitch .............................................................. 59Triple Stretch Stitch ...................................................... 50Triple Zigzag Stretch Stitch .......................................... 62Twin Needle Sewing .................................................... 44
UUpper Tension Control Dial .......................................... 46Upper Threading .......................................................... 39Using Needle Threader ................................................ 41
WWalking Foot ............................................................ 5, 79Winding the Bobbin ...................................................... 33
ZZigzag Presser Foot ................................................. 5, 13Zigzag Stitch .............................................. 53, 72, 76, 77Zipper Foot ............................................................... 5, 73Zipper Insertion ............................................................ 73
TAB
LE O
F CO
NTE
NTS
KN
OW
ING
YO
UR
SE
WIN
G M
AC
HIN
ES
TR
AIG
HT
AN
DZ
IGZ
AG
ST
ITC
HIN
GB
UILT-IN
ST
ITC
HE
SB
UT
TON
HO
LE A
ND
BU
TTO
N S
EW
ING
US
ING
ATTACH
ME
NTS
AN
D A
PP
LICATIO
NS
MA
INT
EN
AN
CE
IND
EX

97
Página
AAccesorios ............................................................................... 6Aguja
Cambio ........................................................................ 12Verificación ................................................................ 12
Ajuste fino de los ojales ........................................................ 70Aplicaciones .......................................................................... 76
BBobinado de la canilla ........................................................... 34Bombilla
Cambio ........................................................................ 86Interruptor ..................................................................... 9
Bordados ................................................................................ 78Botón de puesta en marcha/parada ........................................ 31
CCambio de la bombilla .......................................................... 86Cambio del prensatelas .......................................................... 13Combinaciones de tejido/hilo/aguja ...................................... 47Conexión de los enchufes ........................................................ 8Costura con aguja doble ........................................................ 44Costura de botones ................................................................ 72
DDisco de control de la tensión superior ................................. 46Dispositivo de bobinado de la canilla .................................... 34
EEje del carrete y porta carretes ........................................ 34, 40Elementos principales .............................................................. 2Embalaje de la máquina......................................................... 95Enhebrado inferior ................................................................. 38Enhebrado superior ................................................................ 40Enhebrador de agujas ............................................................ 42
FFruncido ................................................................................. 74
GGarfio de la lanzadera ............................................................ 88Guía de localización de errores ............................................. 91
IIndicador de puntada ............................................................. 16Inserción de cremalleras ........................................................ 74Interruptor principal/luz de cosido .......................................... 9
LLimpieza ................................................................................ 88Listado de posibles incidencias ............................................. 91
MMonogramas .......................................................................... 78
OOrifico para el porta carretes vertical .................................... 44
Página
PPalanca de alimentadores ...................................................... 30Palanca de control del rango de velocidad ............................ 32Palanca de ojales .................................................................... 64Palanca del prensatelas .......................................................... 40Pata de cremalleras ............................................................ 6, 74Patchwork .............................................................................. 60Pedal .................................................................................... 10Pie caminante .................................................................... 6, 80Pista de la lanzadera .............................................................. 88Palanca de control de zona de velocidad ............................... 32Plataforma con compartimento de accesorios ................. 14, 32Prensa telas zigzag ............................................................. 6, 13Prensatela para pespunte 1/4 ............................................. 6, 84Prénsatela para puntada de realce .................... 4, 53, 58, 59, 76Prensatelas enguatador ...................................................... 6, 82Pulsador de retroceso ............................................................. 29Puntada de acción doble ........................................................ 57Puntada de unión ................................................................... 60Puntada decorativa ................................................................. 59Puntada decorativa invisible .................................................. 57Puntada elástica ..................................................................... 56Puntada escalera .................................................................... 59Puntada fagoting .................................................................... 60Puntada festón ....................................................................... 58Puntada festón doble ............................................................. 59Puntada flecha ....................................................................... 59Puntada invisible ................................................................... 54Puntada invisible elástica ...................................................... 54Puntada ondas abiertas .......................................................... 57Puntada ondas elásticas ......................................................... 61Puntada ondas ........................................................................ 55Puntada overlock elástica ...................................................... 61Puntada paralelogramo .......................................................... 59Puntada peine ........................................................................ 61Puntada pluma ....................................................................... 62Puntada por encima de la orilla ............................................. 61Puntada puente ...................................................................... 57Puntada recta ............................................................. 51, 74, 75Puntada triángulo ................................................................... 59Puntada zigzag ..................................................... 53, 72, 76, 78
SSelector de ancho de puntada ................................................ 28Selector de largo de puntada............................................ 16, 27Selector de puntadas .............................................................. 16
TTensión de los hilos ............................................................... 46Tornillo de ajuste fino de los ojales ....................................... 70Triple puntada pespunto ........................................................ 51Triple puntada zigzag elástica ............................................... 62
UUso del enhebrador ................................................................ 42
VVerificación de la aguja ......................................................... 12
ZZurcido .................................................................................. 75

98
Pagina
AAgo
Controllo ............................................................. 12Sostituzione ......................................................... 12
Accessori ........................................................................ 6Applicazione di cerniere ............................................... 74Applicazioni ................................................................. 76Arricciature ................................................................... 74Avvolgimento del rocchetto .......................................... 34
CCapsula del crochet ...................................................... 88Collegamento elettrico .................................................... 8Combinazione tessuto/filo/ago ...................................... 48Come utilizzare l’infila-ago ........................................... 42Controllo dell'ago ......................................................... 12Cucitura con ago gemello ............................................. 44Cucitura di bottoni ........................................................ 72Cursore di controllo velocita ......................................... 42
DDispositivo di avvolgimento spolina ............................. 34
FFinestrella indicatore punto ........................................... 16Foro per portarocchetto verticale .................................. 45
GGuida della navetta ....................................................... 88
IImballaggio della macchina .......................................... 95Infilatura inferiore ......................................................... 38Infilatura superiore ........................................................ 40Interruttore principale/luce area di lavoro ....................... 9
LLavori di patchwork ...................................................... 60Leva del piedino premistoffa ......................................... 40Leva dell'occhiello ........................................................ 64Leva di cucitura di ritorno ............................................. 29Luce area di lavoro
Interruttote ............................................................. 9Sostituzione della lampadina ............................... 86
L’infila-ago .................................................................... 42
MManopola della lunghezza del punto ..................... 16, 27Manopola dell’ampiezza del punto ............................... 28Monogrammi ................................................................ 78
OOcchielli ....................................................................... 64
PParti principali ................................................................ 2Piedino per cerniere .................................................. 6, 74Piedino per patchwork .............................................. 6, 84Piedino per trapunte azionato a molla ...................... 6, 82Piedino premistoffa a zigzag ..................................... 6, 13Piedino semovente .................................................... 6, 80Portarocchetto e fermarocchetto ............................. 34, 40Presa del reostato a pedale .............................................. 8Pulizia ........................................................................... 88
Pagina
P
Pulsante Avvio/Stop ...................................................... 31Punto a conchiglia elastico ........................................... 61Punto a ponte ................................................................ 57Punto bastione .............................................................. 57Punto conchiglia ........................................................... 55Punto decorativo ........................................................... 59Punto diritto ...................................................... 51, 74, 75Punto doppio ................................................................ 57Punto elastico ............................................................... 56Punto elastico invisibile ................................................ 54Punto elastico triplo ...................................................... 51Punto fagoting ............................................................... 60Punto freccia ................................................................. 59Punto maglia ................................................................. 60Punto orlo decorativo .................................................... 57Punto orlo invisibile ...................................................... 54Punto parallelogramma ................................................. 59Punto perla ................................................................... 59Punto pettine ................................................................. 61Punto piuma ................................................................. 62Punto quadro ................................................................ 59Punto scintilla ............................................................... 59Punto smerlo ................................................................. 58Punto sopraggitto elastico ............................................. 61Punto triangolo ............................................................. 59Punto zigzag ............................................... 53, 72, 76, 78Punto zigzag triplo ........................................................ 62
RRammendo ................................................................... 75Regolatore di tensione superiore ................................... 46Regolazione della densità dei punti dell' occhiello ....... 70Reostato a pedale .......................................................... 10Ricami .......................................................................... 78Rifinitura a sopraggitto .................................................. 61Risoluzione dei problemi .............................................. 93
SScomparto piano con accessori ............................... 14, 32Selettore dei punti ......................................................... 16Selettore della lunghezza del punto ........................ 16, 27Sostituzione del piedino premistoffa ............................. 13Sostituzione della lampadina ........................................ 86
TTabella di controllo del funzionamento ........................ 93Tasto abbassa-trasportatore ........................................... 30Tensione del filo ........................................................... 46
VVite dell'equilibratore dell'occhiello ............................. 70

ENGLISHESPAÑOLITALIANO194277-012 Printed in Taiwan