Embed Size (px)
Citation preview

This presentation was created by Peggy Hart, Travis County Master Gardener, towards partial completion of the requirements for a Master Gardening Vegetable Specialist certification.
This presentation and activities are geared to students in the lower grades (K-1) who may have had various levels of exposure and experience with vegetable gardening. The curriculum includes suggested slides to use on a specific gardening lesson, as well as complementary Inside (journal update) and Outside (in the garden) Activities. Insights into what worked well are also provided.
Delivery:
The curriculum was created and delivered to two 1st grade classes at Gullett Elementary School, Austin, TX in fall 2014.
There were a total of 33 students in the two classes. The teacher was fully supportive and involved with the program. Each student kept a journal about his/her gardening experience and was responsible for his/her individual garden (~1.5’ x1.5’) plot within one of the four 1st
grade gardens. The four 16’x4’ raised garden beds made with stone borders had already been established.
Thursday was defined as “Gardening Day” with about 1 hour dedicated for each class toward a gardening class segment and hands-on activity as part of the science curriculum.
2

The activity had both an inside and outside component. Typically, the lesson ran for 15-20 minutes and the remainder of the time with the students either updating their journals or out in the garden.
The gardening program was fully integrated with other class learnings, such as, math, vocabulary, writing, etc. For example, the teacher captured and posted the gardening vocabulary presented as part of the classroom segment. The students were encouraged to include these new words in their journal entries. The hands-on gardening experience gave meaning to abstract concepts, such as “timeline” or “number line” when translated into “Vegetable Germination/Harvest Timeline.” The teacher encouraged the students to add drawings and color it to make their journals personal.
Active teacher and parental(s) assistance were very instrumental in making the Student Gardening Project a success.
Sources for this presentation include:
Dr. Joe Masabni, Extension Vegetable Specialist, Dept.of Hort Sciences, Texas A&M AgrilifeExtension Services, College Station, TX
Paul E. Eyre, Jefferson County Master Gardener Specialist, Beaumont, TX, for his presentation template and a variety of photos of vegetables
Erfan Vafaie, Extension Program Specialist, Texas A&M AgriLife Research and Extension Center, Overton, for “Integrated Pest Management: Fruits and Vegetables”
Junior Master Gardener Teacher/Leadership Guide, Texas A&M Agrilife Extension Service
Wikipedia for information on a variety of the subjects.
2

Lesson 1: (slides 3-6) Growing Plants - What Do Plants Need to Grow?
This is a general introduction for the students to vegetable gardening, which engages the students in
a discussion of what plants need to grow.
Inside Activity:
Hand out the students’ journals. Introduce them to keeping a gardening journal by having
them write down the date and a title for this week’s activity. They can personalize their
journals with decorations and drawings.
You can give each student a popsicle stick to decorate and write his/her name to use to
identify each of their garden plots. They can add the stick to their garden plots when ready.
Outside Activity:
Getting the beds ready to plant. The students can pull weeds, add compost and rake the soil in
preparation for planting.
Note: Beds should already be established. Raised beds are highly recommended and should be no
wider than 4 feet . This allows individual plots to be created that are no larger than 2’ wide thereby
allowing easy access for the students.
JMG: Chapter 1, page 11
4

Lesson 1: (slides 3-6) Growing Plants - Six Elements Plants Need to Grow
Start a discussion on what people need to be able to live. The students like being able to offer their opinions on what plants need to grow. It allows for a good class discussion.
On a poster make a list of the five basic needs all people share: food, water, air, shelter and clothing. Ask a student to identify the items that the group thinks plants must have to live. Ask if plants need anything that people do not. On the left side of a poster write the word PLANT and tell the gardeners that everything a plant needs is in that word.
JMG: Chapter 1, page 11
5

Lesson 1: (slides 3-6) Growing Plants - Six Elements Plants Need to Grow
Images of the elements plants need to grow.
6

Gullett 1st Grade Gardens – Preparing the Beds
Splitting the classes into small groups with 4:1 student/adult ratio for working in the garden is highly recommended. Gardening tools and gardening materials (e.g. compost) should be available. After the beds are prepared, an adult can subdivide the beds so each student has his/her own plot, which gives the students a strong sense of ownership and excitement about their garden.
Depending on the number of adults available to assist, the class can be divided so some students work inside while others work outside, that is, one group can be updating their journal in the classroom while the other group is outside in the garden. They can switch after a suitable amount of time.
The beds are ready to go, and the students are eager to start planting.
Amelia wrote a garden cheer:
Plant, Plant.
P, L, A, N, T. That spells plant
7

Water and soil make it grow, make it grow.
Sunlight makes you know it’s time to grow delicious food, delicious food.
A hah, A hah.
Clara was even ready to plant a peach tree because she “loves eating peaches and the juice is good too.”
Photos by Peggy Hart from the Gullett 1st Grade Garden
7

Lesson 2: (slide 7-16) Parts of the Plant - What parts of the plant do you eat?
This is another general topic to introduce gardening and the value of eating vegetables to the
students.
Bring a selection of vegetables for each of the different parts of the plant. Point out the different parts
of the plant using the drawing. Show a vegetable and ask the students to identify which part of the
plant it is. The students like to share their preferences for the types of vegetables that they like to
eat.
Show them the different seeds or transplants that they will be planting. (Options will vary depending
on if it is a winter or spring garden.) Ask them what part of the plant each is.
Inside activity:
The students can select the vegetables seeds or transplants that they want to plant in their
garden. Each student is given popsicle sticks to decorate and write his/her the names of the
plants that they will be planting. The students can update their journal with what they planted
and draw pictures of their plants.
. Be sure to use permanent markers or the labels will wash off in any rains or from watering.
Outside activity: The student can plant in their garden.
JMG: chapter 1 page 11
8

Lesson 2: (slide 7-16) Parts of the Plant
What parts of the plant do we eat?
Have the students identify the different parts of the plant
1. Leaf
2. Flower
3. Fruit
4. Stem
5. Seed
6. Root
JMG: chapter 1 page 11
9

Lesson 2: (slide 7-16) What parts of the plant do you eat? – Leaves of the plant
Examples of leafy vegetables that we eat.
Photos by Paul Eyre
10

Lesson 2: (slide 7-16) What parts of the plant do you eat? – Flower of the Plant
Examples of the flowers of the plant that we eat.
Photos:
Cauliflower- http://en.wikipedia.org/wiki/Cauliflower
Broccoli – Peggy Hart from Gullet School Garden
12

Lesson 2: (slide 7-16) What parts of the plant do you eat? – Fruit of the Plant
Examples of the fruit of the plant that we eat.
Photos:
Peppers – http://en.wikipedia.org/wiki/Bell_pepper
Tomatoes and cucumbers photos – Paul Eyre
13

Lesson 2: (slide 7-16) What parts of the plant do you eat? – Stem of the Plant
Examples of stems of the plant that we eat.
Photos:
Celery photo – Paul Eyre
Asparagus-http://en.wikipedia.org/wiki/Asparagus
Rhubarb-http://en.wikipedia.org/wiki/Rhubarb
14

Lesson 2: (slide 7-16) What parts of the plant do you eat? – Root of the Plant
Examples of roots of the plant that we eat.
Photos by Paul Eyre
15

Lesson 2: (slide 7-16) What parts of the plant do you eat? – Seed of the Plant
Examples of seeds of the plant that we eat.
Photos by Paul Eyre
16

Gullett 1st Grade Gardens – Planting Time
The students got to choose 2 items to plant. Carrot and lettuce seeds were mixed with sand and provided in small dixy cups so they could be sprinkled over an area or in a row in their plot. This did not always work so assistance on spreading the seeds out over an area and not pouring the seeds in one place may be needed.
Transplants included broccoli, cabbage or basil. It’s best if your transplants are in containers that can be planted directly in the garden so the transplants don’t need to be removed from the pot. Help for the students to dig a big enough hole to plant their transplant may be needed.
Students inserted the popsicle stick with name of their selected seeds/plants in their plots. Be sure to use permanent markers so the names will not wash off in an rains or from watering. They planted and watered their plots. Students updated their journals every “Gardening Day.”
The students love digging and planting in their garden. When asked what vegetable they would like to grow, they answered:
Kiki said, “I would grow basil because it smells really good and my Dad loves it.”
17

Riley and Jill both agreed that tomatoes were their favorite (fruit) vegetable and they loved them (respectively).
Owen said,” I would grow carrots because they are really yummy.”
Elise would grow “cilantro because it smells good and tastes good.”
Photos by Peggy Hart from the Gullett 1st Grade Garden
17

Lesson 3: (slide 17-19) Planting for the season
Plants like to live in certain conditions, and just as children could not live outside in a cold winter, some plants cannot live and grow where it is too hot or too cold. Cool weather plants include peas, lettuce, or broccoli while warm weather plants include tomatoes, peppers or cucumbers.
In Texas, there are two growing seasons. Warm weather plants can be planted after the possibility of a frost has passed in the spring. In Austin, that is usually in mid-March. Additionally, warm weather plants can also be planted in late summer, giving the plants time to grow in the early fall before the first frost.
Inside Activity: Students updated their journals. They also can tape or glue some of the seeds of the plants they had planted previously in their journals.
Outside Activity: Students tended their plots, pulled weeds and watered. They identified any changes to update their journals.
JMG: Chapter 7, pg 163
18

Gullett 1st Grade Gardens – Planting Time
We chose primarily cool weather crops: lettuce, broccoli, cabbage, and carrots.
Carrots and lettuce were started from seeds. Carrots are a wonderful crop for a
student garden. The students got SO excited about harvesting and eating them.
The size of the carrot does not matter. Although they take longer to grow, I highly
recommend carrots as part of a school garden.
Photos by Peggy Hart from the Gullett 1st Grade Garden
19

Gullett 1st Grade Gardens – Planting Time
We chose primarily cool weather crops: lettuce, broccoli, cabbage, and carrots. Broccoli and cabbage transplants were used. We also chose basil, which needs to be protected from extreme cold and did not survive our first frost.
The students definitely had a favorite vegetable. Some of them we could plant now, and some would have to wait to spring.
Ava and Merrill both would like to grow strawberries while Rylie could grow cauliflower and Merrill could grow broccoli now.
Photos by Peggy Hart from the Gullett 1st Grade Garden
20

Lesson 4: (slides 20-26) Soil
Ask the students what they think the soil provides plants. Plants grow in soil, which anchors the
roots, holds the water and provide the nutrients plants need to grow. Soil is composed of many
materials.
The students can see what soil is made up of by testing a sample. Fill one or more large jars half-full
with soil from the soil sample and the rest of the way with water. The gardeners can take turns
shaking a jar for several minutes until the larger clumps are broken apart. Let the jar sit for 1 minute
and use a permanent marker to draw a line to mark what has settled. Tell the gardeners that sand
makes up the heaviest particles and have sunk more quickly to the bottom. Allow the jar to settle for
24 hours without moving it. Continue the experiment.
Inside Activity: The students can write in their journals what the observed from the Shake, Rattle and
Roll experiment above.
Outside Activity:
The students can get a sample of soil for testing by digging about 6 inches with a trowel or
shovel. (Or a sample can be provided.) Otherwise, they can tend their garden. Pull weeds.
Notice any changes to the garden from last week to update their journal.
JMG: Chapter 2 pages 25-32
21

Lesson 4: (slices 20-26) Soil - What is soil made up of?
Soil is the basic building block. It is composed of many materials. The main ingredient in soil is rock
that has been broken into tiny particles over time. It also contains decomposing plants and animals,
such as leaves that have fallen from trees. These are broken down by another soil ingredient,
microorganizism, which are creatures living in the soil that are too small to see without a microscope.
Finally, the soil also contains water, air and nutrients.
Shake, Rock and Roll Experiment (cont.) After 24 hours without moving the jar observe the mixture.
The top layer will be clay; the middle, silt; and the bottom, sand. Any material floating on the water
surface is organic matter.
JMG: Chapter 2 pages 25-32
22

Lesson 4: (slices 20-26) Soil
If there is too much water, then the soil becomes like a swamp or pond. Some
plants like that environment, like a lily pad, but vegetables would not do well in such
a condition.
JMG: Chapter 2 pages 25-32
25

Lesson 4: (slices 20-26) Soil
Then just the opposite. If there is a lot of air and little water, then there can be a
desert or beach. Again, this would not be a good growing environment for
vegetables.
JMG: Chapter 2 pages 25-32
26

Gullett 1st Grade Gardens – Updating their Journals
Students updated their journal with any changes they saw in their gardens. They included samples of
seedlings if any had started sprouting. They also added their observations from the soil experiment.
The photos show the students working on their journals, which can simple spiral-bound notebooks.
The teacher created a Garden bulletin board with vocabulary, seed packets and general information
about gardening.
Some students would do gardening when they grow up.
Kate would because she wants to be a teacher [and have a school garden].”
Jacob would because he would have his vegetables to sell.
Lucy plans to live on a farm.
Jill would grow vegetables for her Mom, Dad and Grandma.
Photos by Peggy Hart from the Gullett 1st Grade
27

Lesson 5: (slides 27-32) Soil Texture
Soil is made up of different little pieces called particles. We’ve talked about the three main kinds of different-sized particles: sand, silt and clay. Now they can feel their texture and observe their differences.
If you could look at soil particles under a microscope, sand would look the biggest. The next smallest particle is silt. The smallest particle is clay, which could not be seen with only your eyes. What do they observe?
Inside Activity:
Provide samples of the three elements of soil. Let the students feel them and discuss what differences they discover. The students love this activity and touch all the samples, so it can get a bit messy. Having an area outside or using a covered table may be options.
Outside Activity:
When out in their garden, the students can compare what their garden soil feels like compared to the individual components.
Tend their garden. Water. Pull weeds. Notice any changes to the garden from last week to add to their journals.
28

Lesson 5: (slides 27-32) Soil Texture – Sand
Sand is the heaviest and corsest of the three components.
They can feel the sand both wet and dry to notice if there is any difference.
29

Lesson 5: (slides 27-32) Soil Texture – Silt
Flour can be substituted for silt. Silt is smooth and powdery when dry and not sticky
when wet.
30

Lesson 5: (slides 27-32) Soil Texture – Clay
Modeling clay can be substituted for clay-heavy soil that might be found outside.
Dried clay can be compared to wet clay. If clay gets very wet, it is sticky and slick.
The students love to handle the clay. Be prepared for many worms and creatures
being created!
31

Lesson 5: (slides 27-32) Soil Texture – Loam
When you have a good mixture of the particles and organic materials, soil is ideal
for planting a garden.
The students can take their samples and mix them together to see if it looks more
like loam. Of course, organic material can also be added.
32

Gullett 1st Grade Garden – First Frost
Good things and bad things can happen. The basil could not stand the cold night temperatures even when we covered it.
Some of the students who had planted basil were sad to lose their plants. Replacing the basil with other cool weather transplants was done so that each child had plants growing in their gardens.
The students kept track of their gardening activity by writing in their journal. Some surprises they had while gardening included:
Jacob said, Vegetable plants make flowers.”
Merrill said, “You can plants anything in it like flowers and food.”
Photos by Peggy Hart from the Gullett 1st Grade Garden
33

Lesson 6: (slides 33-36) Vegetable Growing Timeline
A timeline is a way of displaying a list of events in chronological order. Timelines can make use any time scale, depending on the subject and data. Most timelines use a linear scale, where a unit of distance is equal to a set amount of time. A timeline of evolution can be over millions of years, whereas others can track time in seconds or minutes.
Inside Activity:
Create a harvest timeline. Look at the back of the seed packets and determine the length of time to harvest. Identify the start date and count the number of days until harvest. Identify where their plants are on the timeline. The students can add the timeline to their journals.
Outside Activity:
Tend their garden. Determine where on the timeline their plants may be. For example, have the seed sprouted above ground or germinated?
34

Lesson 6: (slides 24-37) Vegetable Growing Timeline
How can we know when our plants will be ready to harvest? A timeline is a tool to
use. Discuss the how the information is provided on the back of the seed packet to
create their timeline. Make a timeline for the vegetables planted in their garden.
35

Gullett 1st Grade Garden - Vegetable Growing Timeline
The students created their timeline in their journals.
Photos by Peggy Hart from the Gullett 1st Grade
37

Lesson 7: (slides 37-39) Fertilizer
Compost, manures and other organic amendments are usually very effective in
adding nutrients to the soil and modifying its structure. Organic matter is an
excellent soil enhancer for both clayey and sandy soils. Organic matter can be
added to the soil in the form of compost as part of preparing the beds for planting.
Other times fertilizer can be added. It is important to follow the directions on the
back of the package.
Inside Activity: Show the students the instructions on the back of the fertilizer
package.
Outside Activity: Tend their gardens. Water and weed as necessary. Note
changes to add to journal.
Photos by Peggy Hart from Children’s Garden at San Antonio, TX Botanical
Gardens
38

Lesson 7: (slides 37-39) Fertilizer
Other times fertilizer can be added. It is important to follow the directions on the
back of the package.
39

Lesson 8: (slides 40-45) Integrated Pest Management
In the garden, pest insects feed on plants and disrupt their growth cycle and cause
stress to the plants, which makes them less healthy.
The goal of Integrated pest management (IPM) is to avoid or prevent damage from
pests. Implementing IPM means having a plan; expect the problems that might
occur so you can avoid and prevent them before they occur and cause damage.
Invest a certain amount of time and effort into checking plants for the presence of
insects and other arthropods. If you find your garden has pest potential, decide how
best to treat it. Then check plants again to assess how well the treatment worked.
Some pests include:
Cut worms which are smooth larvae that curl into a “C” when disturbed. They feed
at night and hide in soil or under debris during the day
(Info and photo from Dr. Allen Knutson and Dr. Mike Merchant)
Squash Vine Borer (photo by Barbara) is a key pest of winter squash, gourds and
pumpkins. Unfortunately, it is usually noticed only after it has done its damage.
Symptoms appear in mid summer when a long runner or an entire plant wilts
42

suddenly. Infested vines usually die beyond the point of attack.
Tomato Hornworm: The adult moth, sometimes referred to as a "sphinx", "hawk", or
"hummingbird" moth, is a large, heavy-bodied moth with narrow front wings. The moth is a
mottled gray-brown color with yellow spots on the sides of the abdomen and a wing spread
of 4 to 5 inches. The hindwings have alternating light and dark bands. Eggs of the tomato
hornworm are deposited singly on both the lower and upper surface of leaves in late spring.
The eggs hatch in six to eight days and are oval, smooth, light green to yellow in color, and
measure 0.10 cm in diameter.
Larvae are pale green with white and black markings (A black projection or "horn" on the last
abdominal segment gives the caterpillar the name. "hornworm." The larva is the damaging
stage and feeds initially on the upper portions of leaves, leaving behind dark green or black
droppings. The larvae blend in with the plant canopy, and therefore go unnoticed until most
of the damage is done.
Striped Cucumber Beetle (photo by Allen Knutson and Mike Merchant) are about ¼
inch and have chewing mouth parts. The eat leaves of cucurbits, melons, and corn
and seedling plants causing the wilting, stunting and death of the plants.
Sources:
“Integrated Pest Management, Fruits and Vegetables” by Erfan Vafaie, Extension Program Specialist, Texas A&M AgriLife Research and Extension Center, Overton
Squash Vine Borer - Ric Bessin, Extension Entomologist, University of Kentucky College of Agriculture, http://www2.ca.uky.edu/entomology/entfacts/ef314.asp
Tomatoe Hornworm - By S.J. Wold-Burkness & W.D. Hutchison, Department of Entomology,
University of Minnesota, http://www.vegedge.umn.edu/vegpest/hornworm.htm
Cucumber Beetle - http://en.wikipedia.org/wiki/Striped_cucumber_beetle
JMG: Insect Management, Chapter 4, pg 102-104
42

Lesson 8: (slides 40-45) Integrated Pest Management
There are four kinds of beneficial insects: predators, parasites, pollinators and poopers.
Some predators include:
Ladybug and its larvae: Feeds on aphids
Praying Mantis: Insects are their primary prey, but as they grow can feed on caterpillars, scorpians
Lacewing: Feeds on aphids (photo by Peter J. Bryant)
Some parasites include:
Wasps: Almost every pest insect species has at least one wasp species that preys upon it or
parasitizes it, making wasps critically important in natural control of their numbers, or natural
biocontrol. The majority of wasp species (well over 100,000 species) are "parasitic" (technically
known as parasitoids), and they simply lay eggs, often directly into the body of the host.
Some poopers include:
Pill Bug eat feces, mold, and leftovers.
Sources:
43

“Integrated Pest Management, Fruits and Vegetables” by Erfan Vafaie, Extension Program Specialist,
Texas A&M AgriLife Research and Extension Center, Overton
http://en.wikipedia.org/wiki/Coccinellidae
http://en.wikipedia.org/wiki/Mantis
http://en.wikipedia.org/wiki/Chrysopidae
http://en.wikipedia.org/wiki/Wasp
http://en.wikipedia.org/wiki/Armadillidiidae
JMG: Chapter 4, page 102-104
43

Lesson 8: (slides 40-45) Integrated Pest Management
Some pollinators include:
Honey Bee: A honey bee is any member of the genus Apis, primarily distinguished by the production
and storage of honey and the construction of perennial, colonial nests from wax.
Butterflies are part of the class of Insects in the order Lepidoptera. Adult butterflies have large, often
brightly colored wings, and conspicuous, fluttering flight. Some, like the Monarch, will migrate over
long distances. Some butterflies have parasitic relationships with organisms including protozoans,
flies, ants, other invertebrates, and vertebrates. Some species are pests because in their larval
stages they can damage domestic crops or trees; however, some species are agents of pollination of
some plants, and caterpillars of a few butterflies (e.g., Harvesters) eat harmful insects.
Sources:
“Integrated Pest Management, Fruits and Vegetables” by Erfan Vafaie, Extension Program
Specialist, Texas A&M AgriLife Research and Extension Center, Overton
http://en.wikipedia.org/wiki/Honey_bee
http://en.wikipedia.org/wiki/Monarch_butterfly
JMG: Chapter 4, page 102-104
44

Lesson 8: (slides 40-45) Integrated Pest Management
Learn the ways to manage pests in the least harmful way.
Source:
“Integrated Pest Management, Fruits and Vegetables” by Erfan Vafaie, Extension
Program Specialist, Texas A&M AgriLife Research and Extension Center, Overton
45

Gullett’s 1st Grade Garden – Studying Insects
Observing a caterpillar found on a broccoli plant.
We noticed that there were a number of leaves on the cabbage and broccoli plants
that had been eaten. We turned over the leaves and found a number of c
caterpillars. We took off the leaves and removed the pests.
Photos by Peggy Hart from Gullett 1st Grade
46

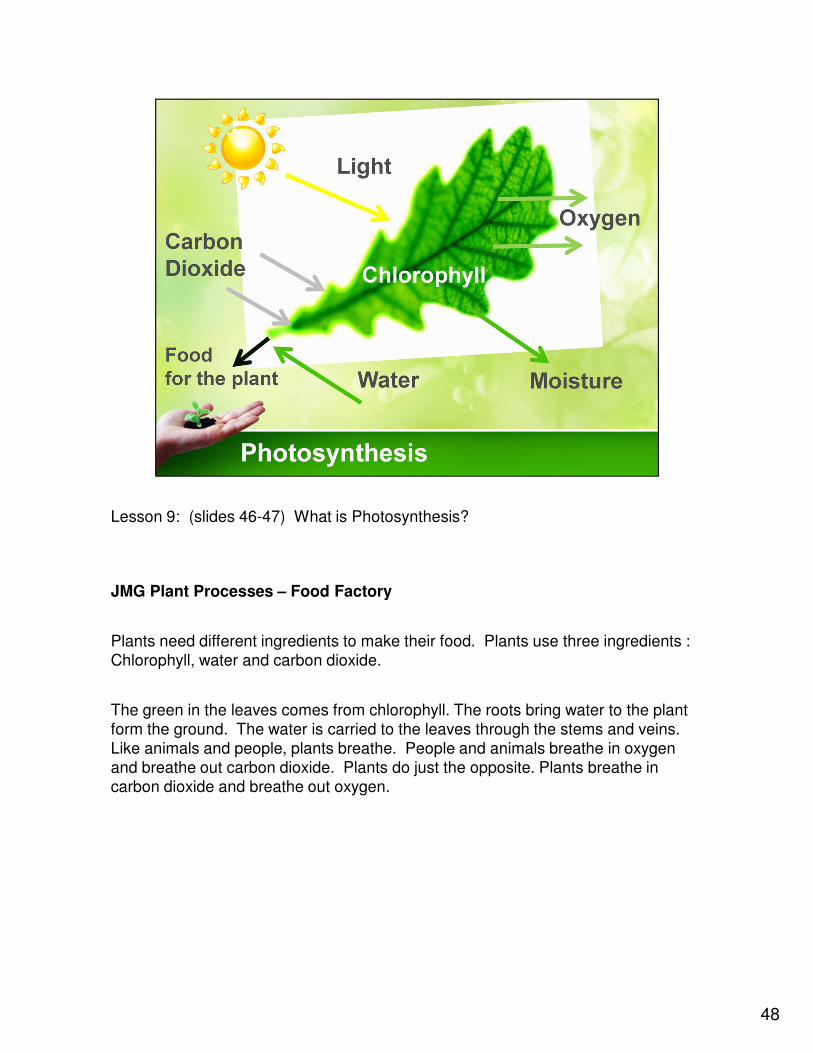
Lesson 9: (slides 46-47) What is Photosynthesis?
Photosynthesis may sound like a big word, but it's actually pretty simple. You can divide it into two parts: "Photo" is the Greek word for "Light," and "synthesis," is the Greek word for "putting together," which explains what photosynthesis is. It is using light to put things together.
You may have noticed that all animals and humans eat food, but plants don't eat anything. Photosynthesis is how plants eat.
They use this process to make their own food. Since they don't have to move around to find food, plants stay in one place, since they can make their food anywhere as long as they have three things. The three things are Carbon Dioxide, Water, and Light. You have probably heard of Carbon dioxide. It is a chemical that is in the air. Every time you breathe in, you breath in a bunch of chemicals in the air, including oxygen and carbon dioxide.
Here's what photosynthesis looks like:
Carbon Dioxide + Water + Light ----> Sugar + Oxygen
Plants breathe, just like us. They even have little openings that can look like mouths, but
47

they are too small for us to see without a microscope. When we breathe in, we want to breath in oxygen. Plants want to breathe in carbon dioxide. Plants also drink. This is why you need to water plants or they will die. They use their roots to suck water up into their bodies, and their little mouths to breath in the carbon dioxide. Once they have both of these things, all they need is light. Leaves are made up of a bunch of tiny cells, where this happens. Inside the cells are tiny little things called chloroplasts. Chloroplasts are what makes leaves green, and they are also what takes the carbon dioxide, the water, and the light, and turns them into sugar and oxygen.
The sugar is then used by the plants for food, and the oxygen is breathed out into the atmosphere. This process as a whole is "photosynthesis."
Things You Need to Know About Photosynthesis
This happens to EVERY plant. Without photosynthesis, plants wouldn't exist. Humans and animals do the exact opposite of photosynthesis. They breathe in oxygen and breathe out carbon dioxide. This means that we give plants more carbon dioxide, and they give us more oxygen. Without plants we wouldn't be able to survive, but there is enough carbon dioxide in the atmosphere that plants would still exist without us!
The atmosphere is full of carbon dioxide. Carbon dioxide is a greenhouse gas, meaning that if it is in the atmosphere, it holds heat close to the earth, which makes our planet warm. If we didn't have carbon dioxide, we wouldn't be a warm planet, we would be cold like the moon. If we had too much carbon dioxide, we would be like Venus, which is a really hot planet. Plants keep our atmosphere from getting too much carbon dioxide and heating up by turning a lot of it into oxygen.
Inside Activity:
Have the students act out photosynthesis having representatives of each of the parts. Draw and color the process of photosynthesis in their journals.
Outside Activity: Tend to their gardens. Water and weed as necessary. Note changes to update in their journals.
JMG: Chapter 1, page 17
Photosynthesis for Kids www.photsysnthesisforkids.com
Photos by Paul Eyre
47
Lesson 9: (slides 46-47) What is Photosynthesis?
JMG Plant Processes – Food Factory
Plants need different ingredients to make their food. Plants use three ingredients :
Chlorophyll, water and carbon dioxide.
The green in the leaves comes from chlorophyll. The roots bring water to the plant
form the ground. The water is carried to the leaves through the stems and veins.
Like animals and people, plants breathe. People and animals breathe in oxygen
and breathe out carbon dioxide. Plants do just the opposite. Plants breathe in
carbon dioxide and breathe out oxygen.
48

Lesson 10: (slides 48-50) Flowering Plant Classification - Introduction
Without a classification system, identifying the millions of plants in the world would be difficult. Scientists have ways of organizing plants. They look at different plant parts, such as flowers, leaves, stems and fruits and group together the plants that are similar.
Scientists divide flowering plants into two main groups: monocots and dicots. The veins in the monocot leaves all go the same direction or parallel. Veins in dicot leaves go different directions, and are called netted. Another way to differentiate a monocot and dicot is from the seed. A monocot seed is in one piece whereas a dicot comes in more than one piece. For example a corn seed is a monocot while peanut seeds are dicots.
MONOCOTS, such as the False Garlic shown here, produce flowers in which petals and other flower parts all typically number 3, or a multiple of 3. False Garlic's blossom has six petal-like segments and six stamens. The veins in monocot leaves are usually but not always aligned parallel with one another, as in blades of grass. Cut across a monocot's stem and the water-bearing tubes inside are scattered throughout the pith, not arranged in concentric rings like the rings of a tree. When a monocot's seed sprouts, the first leaf up is a single spike looking like a simple blade of grass arising from the soil. In fact, the Grass Family is the most common monocot family in our backyards, but there are other important monocot families, including the Lily (False Garlic's family) Orchid, Amaryllis, Iris, Canna, Banana, Sedge, Rush, and Palm Families. About 65,000 monocot species are known worldwide.
49

DICOTS have flowers in which the petals and other parts usually number 4, 5, or multiples of 4 or 5. The Ruellia clearly shows a typical dicot's floral structure -- 5 petals and 4 anthers visible. Veins in dicot leaves usually branch and then join back together, forming netlikepatterns of the kind seen in most tree leaves. Cut across a dicot's stem, and the water-bearing tubes inside are arranged in concentric rings. The vast majority of trees are dicots, and tree rings are such concentric rings. When a dicot's seed sprouts, the seedling raises two leaves, or cotyledons, above the ground, with the future stem arising between them.
Nearly all our deciduous trees and common flowering bushes and vines are dicots, but nearly all grasses and grasslike things are monocots.
Inside Activity:
Observe the difference in the leaves from dicot and monocot plants. They can do a leaf rubbing or put a leaf in their journal and identify the different structure of the veins.
Outside Activity:
The students can collect different kinds of leaves from home or the school yard. Bring samples of leaves from both dicot and monocots plants to observe the difference.
http://www.backyardnature.net/monodico.htm
JMG: Chapter 1, pg 6-7
49

Lesson 10: (slides 48-50) Classification – Leaves
Leaves come in various shapes and sizes and are typically flat and thin, thereby maximizing the surface area directly exposed to light and promoting photosynthesis. They are arranged on the plant so as to expose their surfaces to light as efficiently as possible without shading each other. The internal organization of most kinds of leaves has evolved to maximize exposure of the chloroplasts to light and to increase the absorption of carbon dioxide. Gas exchange is controlled by stomata, which open or close to regulate the exchange of carbon dioxide, oxygen, and water vapor with the atmosphere.
Leaves differ in their shape, their edges, how they are arranged on the stem and the design of their veins. The vein is the part of the leaf that transports the water and food to and from the roots. The veins in the monocot leaves all go the same direction or parallel. Veins in dicot leaves go different directions , and are called netted
Nearly all our deciduous trees and common flowering bushes and vines are dicots, but nearly all grasses and grasslike things are monocots.
http://en.wikipedia.org/wiki/Leaf
JMG: Chapter 1, pg 6-7
50

Gullett’s 1st Grade Gardens – Leaves
The students identified the different structure of the veins in leaves from different
trees (dicots) and sea oak grass (monocot). They either taped a sample leaf in their
journal or traced and colored one.
Jill said she was surprised “to learn about dicot and monocot plants.”
Photos by Peggy Hart from Gullett 1st Grade
51

Lesson 11: (slides 51-53) Flowering Plant Classification - Seeds
The dicotyledons, also known as dicots, were one of the two groups into which all the flowering plants were formerly divided. The name, dicot, refers to one of the typical characteristics of the seed which typically has two embryonic leaves or cotyledons. There are around 200,000 species within this group.
The other group of flowering plants were called monocotyledons or monocots, typically having one cotyledon. Historically, these two groups formed the two divisions of the flowering plants.
Diagram of a generalized dicot seed:
A. Seed Coat
B. Cotyledon – first two leaves of the seedling
C. Hilum –place where attached to plant
D. and E. Baby Plant with stem and roots
With the dicots, the cotyledons is pulled upward, above the soil surface, as it first grows. In contrast some monocots, such as grasses, push the shoot tip toward the soil surface. Since this growth occurs above the cotyledon, it is left in place in the soil where it was planted.
52
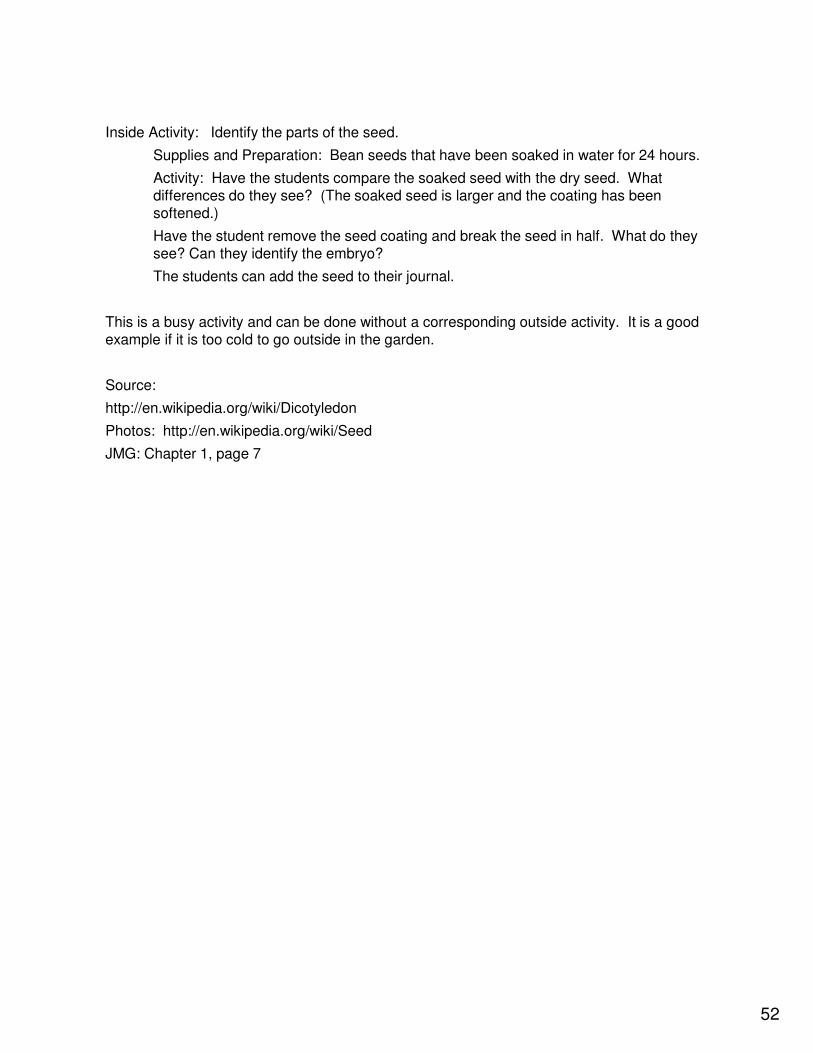
Inside Activity: Identify the parts of the seed.
Supplies and Preparation: Bean seeds that have been soaked in water for 24 hours.
Activity: Have the students compare the soaked seed with the dry seed. What differences do they see? (The soaked seed is larger and the coating has been softened.)
Have the student remove the seed coating and break the seed in half. What do they see? Can they identify the embryo?
The students can add the seed to their journal.
This is a busy activity and can be done without a corresponding outside activity. It is a good example if it is too cold to go outside in the garden.
Source:
http://en.wikipedia.org/wiki/Dicotyledon
Photos: http://en.wikipedia.org/wiki/Seed
JMG: Chapter 1, page 7
52
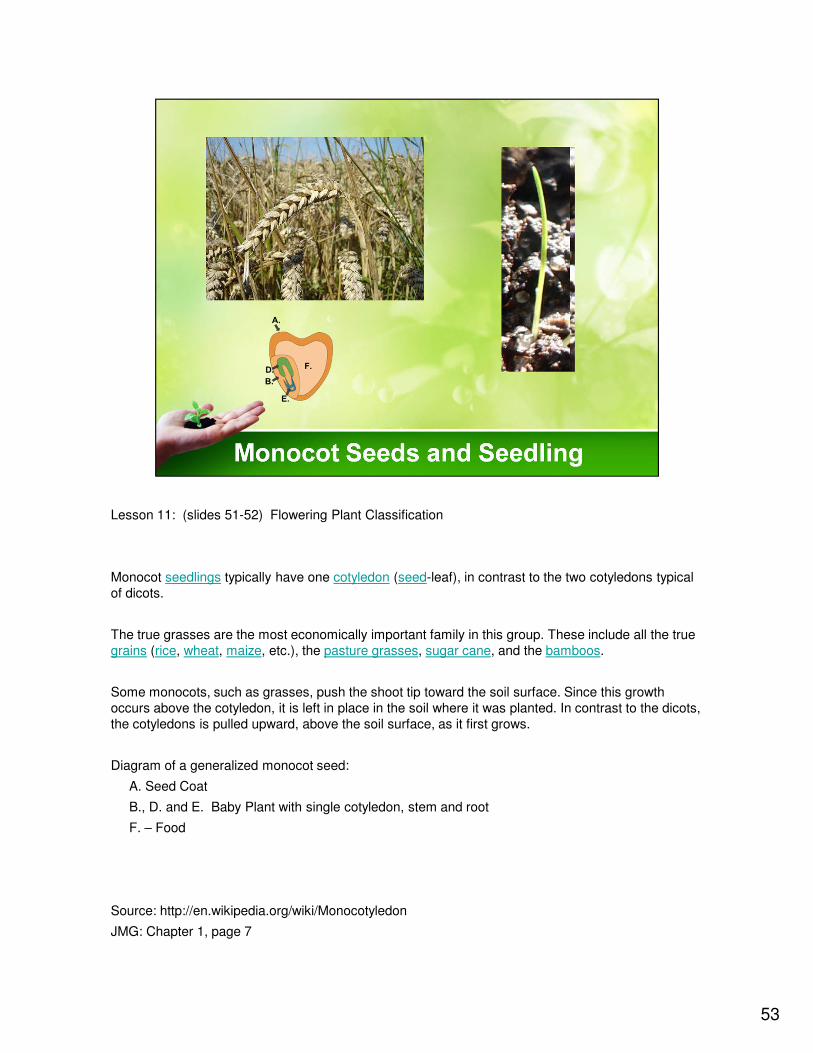
Lesson 11: (slides 51-52) Flowering Plant Classification
Monocot seedlings typically have one cotyledon (seed-leaf), in contrast to the two cotyledons typical
of dicots.
The true grasses are the most economically important family in this group. These include all the true
grains (rice, wheat, maize, etc.), the pasture grasses, sugar cane, and the bamboos.
Some monocots, such as grasses, push the shoot tip toward the soil surface. Since this growth
occurs above the cotyledon, it is left in place in the soil where it was planted. In contrast to the dicots,
the cotyledons is pulled upward, above the soil surface, as it first grows.
Diagram of a generalized monocot seed:
A. Seed Coat
B., D. and E. Baby Plant with single cotyledon, stem and root
F. – Food
Source: http://en.wikipedia.org/wiki/Monocotyledon
JMG: Chapter 1, page 7
53

Lesson 12: (slides 53-54) Seed Germination
Germination is the growth of a plant contained within a seed; it results in the formation of the seedling. All fully developed seeds contain an embryo or baby plant, with food reserves, wrapped in a seed coat. Under proper conditions, the seed begins to germinate and the embryonic tissues resume growth, developing towards a seedling.
Seed germination depends on both internal and external conditions. The most important external factors include temperature, water, oxygen and sometimes light or darkness. Various plants require different variables for successful seed germination.
Water is required for germination. Mature seeds are often extremely dry and need to take in significant amounts of water before growth can occur. Most seeds need enough water to moisten the seeds but not enough to soak them. The uptake of water by seeds leads to the swelling and the breaking of the seed coat. When seeds are formed, most plants store a food reserve with the seed, which provides nourishment to the growing embryo. When the seed imbibes water, it breaks down these stored food resources into nutrients After the seedling emerges from the seed coat and starts growing roots and leaves, the seedling's food reserves are typically exhausted; at this point photosynthesis provides the energy needed for continued growth and the seedling now requires a continuous supply of water, nutrients, and light.
54
Oxygen is required by the germinating seed and is used as the main source of the seedling's energy until it grows leaves Oxygen is found in soil spaces. If a seed is buried too deeply within the soil or the soil is waterlogged, the seed can be oxygen starved.
Temperature affects growth rates and the needs can differ over a wide range of temperatures. Seeds often have a temperature range within which they will germinate, and they will not do so above or below this range. The most common annual vegetables have optimal germination temperatures between 75-90 F (24-32 C), though many species (e.g. radishes or spinach) can germinate at significantly lower temperatures, as low as 40 F (4 C), thus allowing them to be grown from seeds in cooler climates.
Light or darkness can be an environmental trigger for germination. Most seeds are not affected by light or darkness, but many seeds, including species found in forest settings, will not germinate until an opening in the canopy allows sufficient light for growth of the seedling.In nature, some seeds require particular conditions to germinate, such as the heat of a fire (e.g., many Australian native plants), or soaking in a body of water for a long period of time. Others need to be passed through an animal's digestive tract to weaken the seed coat enough to allow the seedling to emerge.
Inside Activity: Seed Germination Activity
Supplies: Seeds to germinate. (Bean and corn seeds are good choices since it shows germination for both dicot and monocot seeds, respectively.) Plastic baggie and paper towel.
Preparation: Soak the seeds for about 12 hours to ready the seeds for germination.
Activity: Have the students dampen the paper towel and gently spread the seeds out on the paper towel. Close the baggie and place in a sunny place, e.g. window sill. The students can take their seed baggie home if there is not a suitable place in the classroom.
The students should report to the teacher when they first see signs of growth from the seed, logging the changes in their journal.
This is a busy activity and can be done without a corresponding outside activity. It is a good activity if it is too cold to go outside to garden.
http://en.wikipedia.org/wiki/Germination
54

Gullett’s 1st Grade Gardens – Seed Germination
The students did an experiment of Seed Germination. They created an
environment for seeds to germinate so students could see the initial growth of a
seed.
Bean and corn seeds were used it shows germination for both dicot and monocot
seeds, respectively. The seeds were first soaked for about 12 hours to get them
ready to germinate.
The students dampened the paper towel and gently spread the seeds out on the
paper towel. The closed the baggie and put it in a sunny place, e.g. window sill.
The students can take their seed baggie home if there is not a suitable place in the
classroom. The students should report to the teacher when they first see signs of
growth from the seed, logging the changes in their journal.
Photos by Peggy Hart from Gullett 1st Grade
55

Lesson 13: (slide 55-57) Harvesting
When a gardener works hard to grow the fresh vegetables and herbs that will end up in your kitchen the work isn’t over until the food is harvested. How does a gardener know when to harvest vegetables?
Vegetables can be picked at different times depending on how you like to eat them. For example, if growing sugar peas, pods can be picked small or you can let the peas grow round and plump in the pod. Lettuce should be picked before it flowers, which usually happens when it gets to warm for the lettuce.
Be sure to wash the vegetables. Rinse root crops and scrub them lightly with a vegetable brush if needed. Have fun and enjoy them either raw right out of the garden or with some cooking.
Outside Activity: The students can harvest the vegetables from their garden.
Inside Activity: Measure and weigh the vegetables. Present the harvest to the class. Enter the information into their journal.
JMG Chapter 7 pages 171
56

Gullett’s 1st Grade Gardeners – Harvest – Weighing and Recording their Harvest
The students weighed, measured and recorded their results. They also presented their crops to the class. The students guessed how large a veggie might be and then measured it. Some, however, had already washed and eaten many veggies from their crop. One girl proudly discussed her crop and said “I ate it all.”
Students shared what they liked best about gardening.
Elise said, “I like planting and harvesting.”
Waylon said, “I like gardening because plants give you food.”
Riley said, “I like working in the garden.”
Clara said, “I like gardening and planting trees because it makes new homes for animals. It also helps clean the air we breathe.”
Photos by Peggy Hart from Gullett 1st Grade
58

Lesson 13: (slide 58-59) Growing Season - Starting seeds for a spring garden
Plants like to live in certain conditions, and just as children could not live outside in a cold winter, some plants cannot live and grow where it is too hot or too cold. Cool weather plants include peas, lettuce, broccoli while warm weather plants include tomatoes, peppers or cucumbers.
In Texas, there are two growing seasons. Warm weather plants can be planted after the possibility of a frost has passed in the sprint. In Austin, that is usually in mid-March. Additionally warm weather plants can also be planted in late summer giving the plants time to grow in the early fall before the first frost.
In sowing, little if any soil is placed over the seeds. More precisely, seeds can be generally sown into the soil by maintaining a planting depth of about 2-3 times the size of the seed.
Seedlings are generally transplanted when the first pair of true leaves appear.
Inside Activity:
Starting warm weather plants from seed. Select a variety of warm weather plants. The students should fill their pots with a starting soil mixture and moisten it with a
59

spray bottle. Each student was given 3-4 seeds to plant. The pots were taken home by the Gardening Teacher to care for until they are ready to plant.
The students can update their journals on what they planted and tape a selection of seeds too.
Outside Activity: If possible, do this activity outside on a picnic table or suitable area.
http://en.wikipedia.org/wiki/Seedling
http://en.wikipedia.org/wiki/Sowing
http://www.gardeners.com/how-to/how-to-start-seeds/5062.html
JMG: Chapter 7, pg 163
59

Gullett’s 1st Grade Garden – Starting seeds indoors
The students were able to choose from a variety of seeds to plant.
The students are getting ready for their spring garden now.
Lucy, Ben and Rylie would all grow watermelon because it is their favorite fruit and
yummy.
Photos by Peggy Hart from Gullett 1st Grade
60

Good luck and have fun gardening!
The Gullett 1st Grade class thought so.
Stella was surprised that “gardening is more fun than I thought.”
Kiki said, “Planting is brilliant.”
Kate wrote a garden poem:
I love planting. It is fun!
I love planting, because it is yum.
One more thing before I go,
I love to see them grow
61