Embed Size (px)
Citation preview

www.ifscoatings.com
A GUIDE TO APPLYING POWDER COATINGS:YOUR SECRET WEAPON TO CREATE HIGH-QUALITYFINISHES AND HAPPY CUSTOMERS
The Different Types of Powder Coatings
QC Testing For Your Powder Coating Line
The Different Types of Pretreatments for Powder Coatings
How to Apply a Two Coat System
Spraying Metallics with Powder Coatings: What you Need to Know
Special Effect Powder Coatings and How To Apply Them
Appearance Issues: When Powder Coating Jobs Go Wrong
Powder Coating Application Issues, Problems & Fixes
Fluidization and Fluidizing Bed Issues - Powder Coatings
Cured Film Properties - Issues, Causes and Solutions
The Trials and Tribulations of Hoses and Pumps
The Little Things: Keeping Order in Your Job Shop
TABLE OF CONTENTS
01
05
08
15
24
29
02
06
10
18
26
30
www.ifscoatings.com
A GUIDE TO APPLYING POWDER COATINGS

The Different Types of Powder Coatings
Whether you’re new to powder coatings or an experienced pro, you’re probably well aware that powder coating is a fantastic painting method that creates a tough, durable and beautiful finish. No matter whether you’re using a single gun and small oven or a large fully automated line, the process is basically the same. A powder spray gun is used, which when triggered gives an electrostatic charge to the powder particles passing through it. As the parts to be coated are grounded, the powder is attracted towards the part via the electrostatic process. Once the powder is applied the parts are cured in an oven, which melts and cross-links the powder over the surface of the part and creates a tough, scratch resistant and beautiful finish.
There are literally thousands of different applications for powder coatings. Powder coating is used mainly on metals, so is perfect for industrial parts, medical devices, architectural applications, automotive refinishing, bicycle parts, household appliances, furniture, enclosures, trailers, lighting…the list goes on!
There are many different types of powders used, each with their own characteristics and applications, so making sure you have the right type of powder, and THEN choose the color is very
www.ifscoatings.com
A GUIDE TO APPLYING POWDER COATINGS 01

important for a successful application. Check out the different types of powder and the benefits they will bring to the parts.
There are so many advantages to using powder coatings – too many to cover in this blog post – but some of the obvious ones include lack of solvents. This means no volatile organic compounds (VOCs) are released, a great advantage especially when compared to traditional liquid paints. This makes them safer to work with, dispose of and transport and brings unbeatable environmental advantages to you and your customer.
Powder coating allows for much thicker coatings than liquid paint, without running or sagging. With liquid paint, horizontal and vertical painted surfaces often have differences in appearances, but powder coating typically provides a uniform visual appearance regardless of orientation.
Powder coating allows for much thicker coatings than liquid paint without running or sagging. With liquid paint, horizontal and vertical painted surfaces often have differences in appearances, but powder coating typically provides a uniform visual appearance regardless of orientation.
Powder coating also offers a wide range of specialty effects that are hard to achieve through traditional methods. The list goes on, and we could get into better scratch resistance, toughness,
and hardness than traditional liquid paints, but let’s take a look at some of the different powders used that help achieve these characteristics.
EpoxiesEpoxies were the first widely used powders. They are very durable, offer excellent hardness and have arguably the best chemical and corrosion resistance of all available powders. Another plus of this type of powder is its ease of use and a wide range of cure schedules. Epoxies adhere to metals extremely well, with various pretreatments of the metal providing excellent adhesion, including phosphate coating and sandblasting.
The drawback of epoxy powders is that they do not weather well. Exterior exposure can cause them to fade and chalk in the sun. They weather poorly and will often start to degrade on the surface after a few months. This makes epoxies better suited to indoor applications.
A final note on epoxies is that many primers are epoxies due to their adhesion strength and corrosion resistance. Since they do not handle the sun well, their use as a pre-coat underneath another paint type utilizes their strengths while covering their weaknesses.
www.ifscoatings.com
A GUIDE TO APPLYING POWDER COATINGS 02

PolyestersPolyesters are the most commonly used powders and offer great value for money. The two most widely used types of polyester powder: TGIC (tri glycidyl isocyanurate) and non-TGIC, which is also known as TGIC-free or sometimes a ‘Primid’. Both TGIC and TGIC-free polyesters offer good mechanical resistance, including great flexibility and impact resistance, and good chemical resistance. One draw of this powder is its low cure temperature. This low-temperature requirement makes it better for sensitive items. Polyesters will also provide good overbake resistance to yellowing, which makes them really easy to use and Standard Polyesters will offer 1-3 years of good UV resistance, so they work well for all interior and some exterior applications. A huge advantage of standard polyesters is the enormous choice of colors, gloss levels and special effects they’re available in. It’s almost limitless! Polyesters have solid all around properties and are a common first choice for many applications.
It seems kind of obvious, but TGIC-free polyesters offer all the advantages of TGIC polyesters, without the TGIC! They can also give a higher first pass transfer efficiency, but are more sensitive to excess film thickness and provide less overbake resistance than TGICs.
As the workhorse of powder coatings, it’s not surprising that there aren’t that many drawbacks to polyesters. If you’re coating
pieces that will be permanently outside and therefore need good wearability and durability, then consider the super durable polyester instead. Limited exterior durability is a standard polyester’s main disadvantage.
Super Durable PolyestersSuper Durable Polyesters have fast become the superhero of polyester powders. As the name suggests these excellent value powders offer superior durability when compared with a standard polyester. They are designed to hold their color and gloss to within set limits for 5 to 10 years more when compared to a standard polyester. Not only is their color and gloss protection better, but they also provide better humidity and corrosion resistance. These Super Durables have become hugely popular over the last few years as their increased capabilities and great value for the money have made them popular for interior applications where improved fade resistance is required and all manner of outdoor applications.
Epoxy-Polyester HybridsEpoxies and polyesters are often mixed together to form hybrids. These hybrids remain closely related to pure epoxies but offer superior weather degradation properties. These hybrids can be mixed in various ratios to emphasize the characteristics of either the epoxy or polyester. The polyester will enhance the overbake
www.ifscoatings.com
A GUIDE TO APPLYING POWDER COATINGS 03

resistance when compared with a straight epoxy and they also create ultra-smooth, thin films. The combination of the resins can also make them more economical than a pure epoxy. The polyester does reduce the corrosion and chemical resistance of the epoxies and doesn’t really add any outdoor weatherability to the product. Hybrids are widely used on items that require good cosmetic appeal along with good functional properties. Hybrids can be used in some of the same areas that epoxies are used, but are typically found on indoor appliances and other household items like furniture, shelving, interior lighting, and power tools. Domestic appliances like stoves, washers, and dryers are a common application for hybrids.
FluoropolymersFluoropolymers are typically used in architectural markets due to their phenomenal weathering properties and world-class color and gloss retention. Their corrosion resistance and excellent weatherability make them extremely popular for exterior architectural applications like curtain wall, windows, doors and more. The two most common types of Fluoropolymers found in powder coatings are FEVE and PVDF. PVDF Fluoropolymers always need a primer beneath them – whether liquid or powder and are much more difficult to bond when creating metallic powders. FEVE resins are the most popular within the powder community for their superior one coat capability and incredible
exterior performance. FEVE based Fluoropolymer metallics can also be bonded so that when applied, the metallic flake is more evenly distributed throughout the powder for a more consistent appearance. Fluoropolymer powders are usually only available to members of a Certified Applicator program, as up to 20-year warranties are available on these products when applied by a certified applicator to architectural aluminum. One popular brand of fluoropolymer is IFS 500FP, which is a high performance, FEVE based Fluoropolymer and adds better abrasion resistance to the standard fluoropolymer characteristics. IFS 500FP can be seen on a huge range of projects from the DSNY building and the beautiful new slender skyscraper at 111 57th in Manhattan, to 9th and Lenora in Seattle and the Winstar Casino in Oklahoma.
UrethanesUrethanes are chemically similar to polyesters, with a difference in curing agents. Urethanes offer a very smooth finish and very good exterior durability as well as excellent chemical and corrosion resistance which makes them ideal for things like fuel tanks. Other common applications include agricultural equipment, air conditioners, car rims and doorknobs. They are used on door knobs, oven knobs and other such applications because fingerprints are not as visible. One drawback of urethane paint is that at higher mil thicknesses it can begin to outgas and become brittle. You may also notice an odor during application and cure
www.ifscoatings.com
A GUIDE TO APPLYING POWDER COATINGS 04

and smoke can also be created in the oven during cure, so keep an eye on your application and cure parameters when applying. Urethanes are also usually more expensive than other types of powders due to the resin cost.
Wrapping It UpPowder coatings are a truly great coating choice with so many product options depending on what you need them to do. And that’s before we even get to the thousands of colors and special effects available! The various powders used in the powder coating industry have different characteristics that make them ideal for different applications. We hope that the above information can give you guidance on the right powder for your needs. The advantages of powder coating over traditional liquid paint are pretty clear. Armed with this detailed product knowledge you can find the right powder to best fit your application.
For further questions or inquiries drop us a line at [email protected]
www.ifscoatings.com
A GUIDE TO APPLYING POWDER COATINGS 05

QC Testing for Your Powder Coating Line
What is QC TestingNo matter what you’re powder coating, no matter the size of the line and no matter the type of powder or color you’re shooting, everyone wants to do a great coating job. We all work hard to make sure our customers are satisfied and their powder coated product looks great and performs well. Quality Control Testing, or QC testing as its better known, is a simple way to ensure you’re powder coated film is going to do just that – perform well. And the good news? It’s simple, cheap and easy to do.
You know how it goes. You’re only shooting the color once and it has to match the standard the coating company supplied - that’s what your customer wants. Of course as well as looking great, we also want some basic performance from that coating too. Performing some simple QC tests will ensure that the powder is going to adhere, protect, decorate and perform exactly as it should when it’s on the part. This gives you the confidence to be proud of a high quality and reliable service and leaves your customers with a happy experience that will make them want to work with you again.
www.ifscoatings.com
A GUIDE TO APPLYING POWDER COATINGS 06

There are a few simple QC tests that are easy and quick to perform so let’s take a look at some of those tests, why we need to do them and what we need to look for along the way.
Who Should QC Test?
QC procedures can easily be continued by you to make sure that the product will perform as per the Technical Data Sheet (TDS) we provide for you. This ensures that the application is completed to the required level and that your customer will receive the high-quality coating job they ordered.
If you’re not familiar with the TDS here is some insight... at IFS Coatings, we produce a tech data sheet for each product we make. On that tech data sheet, you’ll find a description of the product, the typical physical properties you can expect the powder to provide if applied properly, such as gloss level, hardness, flexibility and adhesion, application tips, cure schedule and storage requirements.
The TDS gives you a basic level of performance – a quality spec – that the powder can achieve if applied properly. They provide a lot of useful information to you, but you shouldn’t always assume the powder will meet the spec - applying it correctly is a big part of achieving that performance. Here are some of the simple tests that can be performed and what to watch out for.
What are the Simple Tests That You Should be Doing?So we now we know who should be QC testing and of we know why we do it, but what should be testing for and how? Let us explain...
At IFS we understand quality. As manufacturers and suppliers of high-quality industrial powder coatings, our production facilities and internal quality control systems are designed with superior quality in mind and we use the most advanced technologies and experienced staff to QC test our powder at the IFS facilities.
We undertake QC before, during and at the end of the production of each product we manufacture. BUT… the QC testing doesn’t and shouldn’t stop there. Everyone – no matter what you’re shooting or the type of powder operation you have – can perform simple QC for peace of mind.
www.ifscoatings.com
A GUIDE TO APPLYING POWDER COATINGS 07

Film Thickness Testing: The Film Thickness Meter
Best used on a flat surface, they’re easy to use. With most meters, you press it to the surface, hold it there a few seconds and get a reading. The reading will tell you what the film thickness at that specific place is. You should repeat the test in several places across the part. It’s going to vary, (hopefully only slightly, so you should perform the test in several places to get an average and be sure you’re in the required film thickness range.
There are a range of meters available. The latest and greatest can produce the film thickness grade information as soon as a surface is touched, others take a little longer and many are magnetic.
Knowing your substrate is also important. The meters can measure coating on aluminum or steel but be sure that yours can test for both as certain gauges won’t measure aluminum.
Why is this important? Well, most gauges are based on the magnetics of steel or the rebound of the signal from steel. Obviously aluminum doesn’t react the same way, so a different type of gauge or a combo gauge will need to be used if you’re going to be measuring both substrates.
As with most things in life, you can spend as much or as a little, as you like for a film thickness meter. You can certainly find a cheaper film thickness meter around the $100 mark. The little
Film thickness – and a constant, level thickness at that – is important. It affects how the coating looks (no one wants a patchy effect) but also overall performance.
The simple way to check film thickness is with a Film Thickness Meter or Gauge.
Image Credit: PosiTector
www.ifscoatings.com
A GUIDE TO APPLYING POWDER COATINGS 08

magnetic ones and the low film mils from one to three mills, are pretty accurate and can certainly do the job. That’s pretty inexpensive and may be all you need. A middle of the range, high quality, good working gauge that you can calibrate and zero out for bare metal can range from $400-$800. Of course, if you want to go all out you can also spend $2,000!
Film Thickness Testing - What Makes It Fail?The thing to remember is that Film thickness, of course, is a
range. Failure, therefore, would be in a case where there would be too little or too much, or too much variation. Too little is poor appearance, incomplete coverage of the substrate and failure of other tests such as corrosion and color. On the other end of the scale, too much can lead to poor appearance and failure of other tests such as impact and flexibility.
Solving film thickness:
Problem
Uneven film thickness Distance betweengun and part is too close
Powder is deliveredinconsistently
Irregular voltage
Distance betweengun and part is too close
Distance betweengun and part is too close
Check the entire system(from voltage source to
electrode) to ensurecontinuous electrical charge.
Possible Cause Solution
The Solvent Rub Test
How about another example? Let’s take a solvent rub test. This test method is used to measure the degree of cure of a coating. Making sure your coating is fully cured is super important – it simply won’t perform if it’s not! It’s done by checking the degree of resistance the cured film demonstrates to a solvent.
The two main solvents used in the rub test are acetone and more commonly, Methyl Ethyl Ketone (MEK), which is what most coaters use. The MEK test is an ASTM standard. The test requires you to take a Q-Tip or a cotton swab and then wet that swab with acetone or MEK before firmly pushing on the product
www.ifscoatings.com
A GUIDE TO APPLYING POWDER COATINGS 09

surface and rubbing back and forth. In general, 25 double rubs are performed. Pressing all the way up and all the way down is classed as one double rub. The number of rubs that a coating will pass will vary between product type or the resin system used in it. Some products, like epoxies, will handle 50 double rubs.
When you finish your 25 double rubs there is a chance that you will see some slight de-glossing of the coating. Most of the time a little bit of de-glossing of the coating is still a pass.
However, what we would really call a fail is when you really start to get down into that coating and the coating is removing onto your Q-Tips.
A little bit of color on the end of the Q-Tip is okay, but if you really feel like the coat is softened and it’s coming away and your Q-Tip is covered, you’ve got a problem. It’s not cured properly.
There is one little caveat to the test, however. There are certain resin systems that from past experience don’t do as well with the solvent resistance test whether they are fully cured or not. It’s something our technical service reps have seen a number of times. A solvent rub test would fail miserably and of course, we assume the coating is not cured.
However, they then discovered that the resin itself doesn’t perform in the solvent test, cured or uncured. It’s always best to
check with your manufacturer if you’re testing a new product with a different resin system.
So what should you do if the test does fail? Recheck your oven temperature and dwell time. Did the part have time to reach temperature and THEN spend the required amount of time in the oven? We know what the air temperature is in the oven, but the part won’t instantly be at temperature the moment it goes in – especially with thicker parts. You may be able to put the part back in the oven and ‘top up’ the cure, or you may need to recoat and re-cure. You can always check with IFS for technical advice if you’re having recurring problems.
Solvent Rub Checks - What Makes a Fail?Additionally, If you looked at the results of your solvent rub test and you’re seeing a fail, there could be several different reasons, but the most common are typically going to be the temperature and/or the time of which the powder was cured.
Check the tech data sheet - it’s going to give you the oven temperature needed to cure the coating and the amount of time it needs in the oven. For example, if a powder was applied and then failed a QC test, you may want to go back and turn the oven temperature up another 10 or 15 degrees to see if that resolves the problem. Alternatively, it may be that it did not spend enough
www.ifscoatings.com
A GUIDE TO APPLYING POWDER COATINGS 10

time in the oven. Or, as previously mentioned, perhaps the part had not been given the time to reach temperature, as it’s only when the part reaches temperature, that the cure time begins.
What’s more, you may encounter the issue of having different thicknesses of metals. Of course, the thicker the metal, the longer it’s going to take to come up to temperature and for that temperature to hold to get a full cure.
So, If you do have a failure, start looking in your oven. Am I leaving it in there long enough? Is the temperature high enough? Have I performed oven maintenance so I know it’s performing as required?
ExperienceA note regarding the above points is that a lot of that solvent testing comes back to experience. There are things that you may let go with a little transfer, there are other things you won’t let go with a little transfer without knowing the full background of what the product will or won’t do. It’s a general test and over time you will get to know what is working and what isn’t.
The Pencil Hardness Test
Once you’ve established good cure, the ‘pencil hardness test’ is an effective method to test coatings for their hardness and their scratch wear resistance. ASTM test method D 3363 allows the use of pencils of known hardness to be moved over the surface of the test sample at a fixed angle and pressure to perform the test.
As you may well be aware, pencils come in a hardness range with a ‘B’ pencil being the softest category and ‘H’ pencils being
Image Credit: elcometer
www.ifscoatings.com
A GUIDE TO APPLYING POWDER COATINGS 11

the hardest. Within each category, there is also a numerical domination, such as 2H or 6H, which indicates hardness within that category. As the numbers increase so does the hardness, so 4H is harder than an H pencil.
With good quality powder coatings, you’ll usually end up in the H range. So, if the TDS or your customer requires a 2H pencil hardness, then that’s the pencil that should be used,
To complete the test, you simply sharpen your pencil, then create a flat end with a piece of sandpaper and place it at a 45-degree angle to the coated surface. Press it down into the coating and then push. If that pencil cuts down to the metal, then it failed that test. If there is no scratch on the paint, then it is considered a pass.
This is a simple and cheap test that is easily performed to demonstrate the quality of your application and there are a few things to consider...
Get yourself a good set of pencils and remember that old pencils, junk pencils, or not a name brand will get you different results all day long. If you’re going to use a pencil test, we recommend you buy a decent turquoise brand pencil and for consistency, always use them. You can buy them at most art stores and they are available in the full hardness range. Think about testing
an additionally coated piece till it fails – you may find that the hardness rating you can offer goes beyond what is required – a great selling point for you!
Also, remember that each person and pencil may get a different result because of the manual nature of the process. Being consistent with the pencils you are using and the pressure that you apply will ensure fair results. Regularly performing the test will help you get to know your own scales and strengths.
Pencil Hardness Testing - What Makes It Fail?A pencil test will most likely fail as a result of two things... Under cure or over cure. So again, be sure to look at the tech data sheet for the guidance on the correct curing details.
www.ifscoatings.com
A GUIDE TO APPLYING POWDER COATINGS 12

adhesive tape is applied to that area, pressed down real good and then the tape is removed. That area is then judged to see if any paint was removed from the cross-sections that were cut. No coating removal is a good pass. If there is a little corner here or there that has been pulled off it would likely still be ok and would pass the test.
To determine this, there is an ASTM rating scale to make the decision - a 5B result is usually the sweet spot.
The best way to make sure that you have been doing the test correctly is to get an official cross hatch adhesion test kit and maintain it. That way you are guaranteed quality and accurate test results each and every time. Kits cost between $30-$100.
Remember this is a simple, fast and cheap test to perform, and we highly recommend you get hold of a solid adhesion testing kit and make it part of your QC process.
Crosshatch Adhesion - What Makes It Fail?What makes the coating fail a crosshatch adhesion test? Well, you’ve really only got two possible scenarios. One, you could have a bad pre-treatment or a poor substrate where the substrate is not clean enough or has not been correctly prepared, which leads to adhesion failures.
The Cross Hatch Adhesion Test is a very popular test to assess the adhesion of the coating and essentially provides a visual assessment of the quality of the bond to the substrate.
The test is performed by making a series of cuts through the coating (There are kits available for this as it is important that you use the preferred blade devices for each film). Generally, 5 cuts are made with 5 sharp blades reasonably close together in one direction.
Then cut across that direction so you’ve cut through the paint to the metal five times left and right, and five times up and down. It should look like a tic-tac-toe grid when you’re done.Once you have your tic-tac-toe grid, the pressure sensitive
Crosshatch Adhesion Test
www.ifscoatings.com
A GUIDE TO APPLYING POWDER COATINGS 13

Checking your pretreatment process, the quality and cleanliness of the substrate should be your first port of call. The second reason for a testing fail could be if the paint is under cured. Check out the simple ways to check for that we covered in the Solvent rub testing section.
Visual Checks
So far we have covered QC tests that require some hands-on tools and physical movement but we can also learn a lot from simple visual checks. Yes, it sounds pretty obvious and super simple but there are still a number of things to consider when
completing visual checks. Where should you look at it? On the floor? Outside? Inside? Here are some points to take note of...
It’s important that your visual tests are consistent with how your customer will check and use the coated product. If your customer is going to look at the product in one light then you should test it in the same light.
If you want more of a controlled testing system than going outside or inside, many job shops use light boxes to control the light. This is more of an investment, as light boxes range in cost but they will provide consistent results. The other element to the lighting is the distance from which you are viewing the surface, especially when checking for any type of surface defects. You will get a different result if you look at a 90-degree angle at arm’s length than from a 45-degree angle closer up. Our advice would be to do the visual test with lighting in an office-type setting, out on the shop floor and outside in the daylight too – cover all bases.
Mica metallics, for example, can look like a different color in the light or the dark which can produce conflicting opinions on the color, so it is essential that all parties are aligned and that the test measurements and conditions are clearly stipulated.
Of course, you could be opening a can of worms if there are too many variables at play but visual tests are what your customer
www.ifscoatings.com
A GUIDE TO APPLYING POWDER COATINGS 14

will instantly do when they receive the coated part, so agreeing what it should look like up front is important.
Visual Checks - What Makes a Fail?Visually you could see all manner of defects in the paint – craters, orange peel, window framing…the list goes on. Each of those can be a result of a change or problem in the application process, and we cover in our . Right now, let’s deal with the basics – color and gloss.
Depending on the color being used, the results may vary slightly, generally speaking, if it darkens or yellows and you see some de-glossing, there’s a good chance the coating is over-cured. If it is lighter than it should be or bluer in shade and your gloss is too high, there is a good chance the coating is under cured.
If you’re seeing yellowing to the color it could be due to a film thickness variation, or that the coating is over cured or could even be caused by oven exhaust. Problematic, but all easy to check and solve.
SummaryThese are just a handful of Quality Control tests that are cheap, easy and simple to perform. You can and should be implementing them regularly to ensure high-quality processes, products, and
happy customers. At the end of the day, they will give you peace of mind that the coated parts going out of your door are acceptable.
You may not want to do them all or may feel that not all are applicable to every part you coat, but the solvent rub test and cross hatch adhesion test are a basic minimum which will give you great results. Of course, on a visual level you will want to see that the color and gloss is right, if not, we all know the customer will be the first one to complain! Keep your reputation as a first class coater in check by visually inspecting each job that leaves your shop.
Fortunately, there isn’t anything hard about any of the tests above. They are simple and relatively cheap to perform. As with most things, however, consistency is key. Make sure you, your customers and your colleagues or employees are testing in the same way; in the same light, at the same angle, with the same pencils, kits, and meters etc. And remember that experience will count for a lot over time, so the more you test, the more comfortably and quickly you will be able to make a decision on how to pass or solve any questionable results.
For further questions or inquiries drop us a line at [email protected]
www.ifscoatings.com
A GUIDE TO APPLYING POWDER COATINGS 15
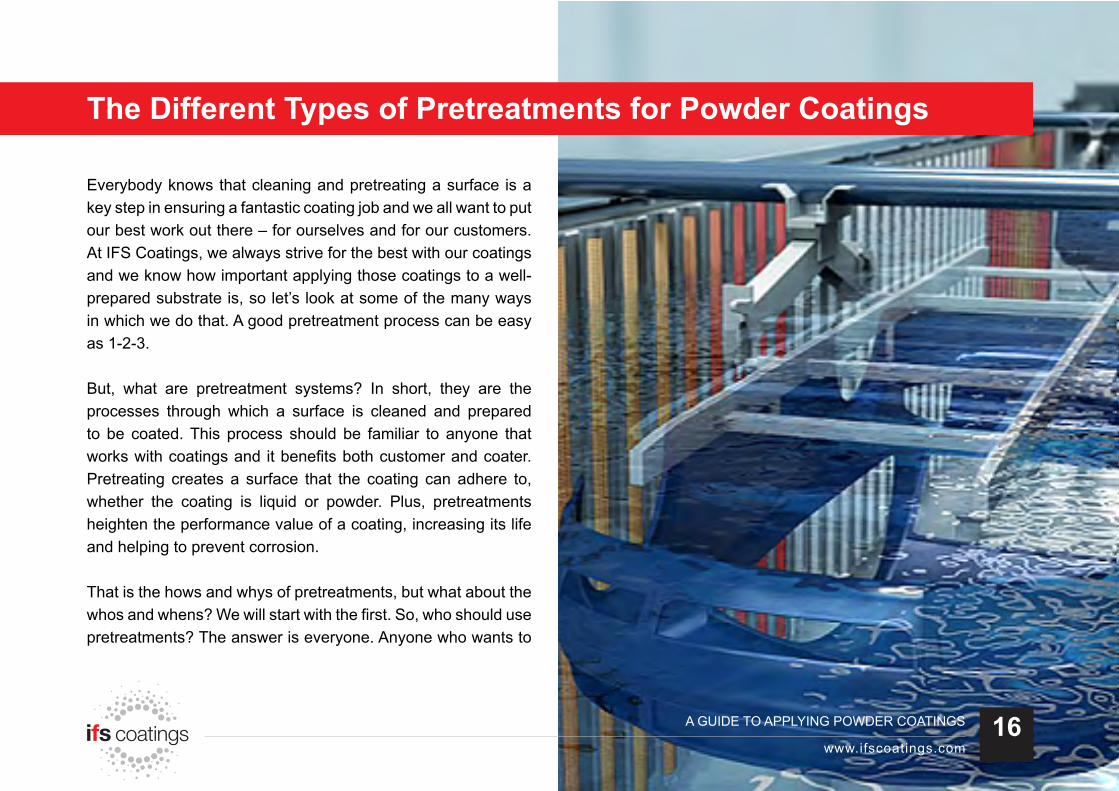
The Different Types of Pretreatments for Powder Coatings
Everybody knows that cleaning and pretreating a surface is a key step in ensuring a fantastic coating job and we all want to put our best work out there – for ourselves and for our customers. At IFS Coatings, we always strive for the best with our coatings and we know how important applying those coatings to a well-prepared substrate is, so let’s look at some of the many ways in which we do that. A good pretreatment process can be easy as 1-2-3.
But, what are pretreatment systems? In short, they are the processes through which a surface is cleaned and prepared to be coated. This process should be familiar to anyone that works with coatings and it benefits both customer and coater. Pretreating creates a surface that the coating can adhere to, whether the coating is liquid or powder. Plus, pretreatments heighten the performance value of a coating, increasing its life and helping to prevent corrosion.
That is the hows and whys of pretreatments, but what about the whos and whens? We will start with the first. So, who should use pretreatments? The answer is everyone. Anyone who wants to
www.ifscoatings.com
A GUIDE TO APPLYING POWDER COATINGS 16

dust off their hands at the end of the day knowing they have shipped out a quality product should pretreat their substrates.
Plain and simple, a substrate must be prepped before you apply any sort of coating to the surface. The point of pretreatment is to prepare the surface for a coating – of any sort – and prevent it from degrading down the line.
There are many different ways of pretreating and various types of pretreatment available and often it will depend on the substrate you’re coating, the end use of the part you’re coating or the size of your coating line. There are automatic and manual pretreatment processes, multi-stage and single stage, and some that are better for steel than aluminum. The good news is there is a wealth of information available and some great pretreatment suppliers with the knowledge to help you make the right decision for your line.
So let’s look at the different stages of a great pretreatment system and then the various combinations of these stages that are possible.
We’ll get into more details about these below – but, when should retreatments be performed?
Pretreatment ProcessesAll good pretreatment processes begin with a basic cleaning process. If nothing else, this is the stage that every job shop should perform.
The Cleaner Stage
Whether you are a new or old hat at prepping surfaces, you know that the cleaner stage is the most important and essential stage in prepping any substrate. Oil, grime, and dirt can ruin even the most carefully applied coatings, affecting the finish and how the product you are applying performs – in the long and short term. You don’t want your time and money wasted, nor do you want a dissatisfied customer breathing down your neck.
www.ifscoatings.com
A GUIDE TO APPLYING POWDER COATINGS 17

Cleaning is what every stage after this relies on, including successful powder application. The following pretreatment stages simply won’t work properly if this isn’t done properly. There are many different types of cleaners with acids and solvents being the most commonly used. Typically these cleaning solutions are sprayed onto the part or the substrate is dipped into a pool of the solution.
Heating the cleaning solution will often cause the cleaning agent to work better. Using the parameters given to you by your pre-treat supplier are going to be key. On top of that, making sure you run the process immediately and don’t let the newly cleaned part sit is important. You can’t clean it, walk away from it for 10 minutes and come back to it and spray it some more, then let it sit before it dries. You have to build a continuous process based on the product that you’re using.
The Rinse StageAfter cleaning comes the rinsing stage. Getting rid of all of that dirt, grime and likely the occasional dead bug is important, but so is removing the remnants of whatever chemical you used to clean the surface. This is key to keeping the coatings uncontaminated. While these rinses can be done with plain city tap water, using Reverse Osmosis (RO) or Deionized (DI) rinses is preferred. This simply means water that has been treated, removing fluorides,
chlorides and all the other stuff added to water these days, that are essentially chemicals that we don’t need getting involved in the coating process
When performing rinses, dry the surface as quickly as possible to avoid flash rust on the newly prepped surface. Remember, any runoff needs to be disposed of carefully.
www.ifscoatings.com
A GUIDE TO APPLYING POWDER COATINGS 18

Preparing the surface to accept product for the best results possible requires some sort of conditioning agent. Essentially, the conditioner is applied, sets the surface to a certain pH level, and then locks that pH level in. Doing this creates a surface that is ready to accept the next layer of preparation.
The Conditioning Stage
like laying down a protective barrier that will prevent corrosion and oxidization of the metal, giving it a longer life.
Once the conversion coating has been applied, another rinse stage is required, performed just like the previous rinse stage.
Adding any sort of phosphate stage to your pretreatment process means enhancing the performance attributes and quality of your work for the customer. A job done well is a job done right.
Moving on to…
The Zinc Phosphate StageWe’re calling it the zinc phosphate stage, as zinc phosphate is highly regarded as an excellent chemical conversion coating, but it could also be iron phosphate or zirconium, which will also do a good, protective job. What this stage does is, not surprisingly, create a layer of zinc phosphate on the substrate. This is sort of
www.ifscoatings.com
A GUIDE TO APPLYING POWDER COATINGS 19

The Sealer StageSealing helps the paint adhere to the surface, which means a higher quality finish on the end product, both initially and down the line.
There are several kinds of sealers, including chrome sealers, non-chrome sealers, and dry-in-place sealers. These allow for a stronger performance with corrosion resistance – an essential quality for any substrates that will be exposed to the elements. It should be noted here that chrome is extremely hazardous and dangerous to work with. Specialist equipment and training are required to work with it. In some states in the US, the use of chrome has been banned.
At the end of this stage, you will want to do another rinse, but it must be an RO or DI rinse – meaning no chlorides or fluorides in the water.
The Dry-Off Oven
The final stage is simply drying the part. It may sound obvious, but it is extremely important. The newly prepped substrate must be dry, otherwise, the powder will not apply correctly. A dry off oven basically quickly removes any moisture left on the part from the last rinse. The longer moisture stays on the part, the more susceptible it is to a layer of ‘flash rust’ forming. Getting the part dry quickly reduces the chance and also slightly heats the part ready for powder application. Clearly, the 8 stage process we just walked through is a major undertaking and an automatic line process, with all the cost, space, water treatment and maintenance requirements that come with it. For large volume lines where consistency of pretreatment, high corrosion performance, and
www.ifscoatings.com
A GUIDE TO APPLYING POWDER COATINGS 20

warranties this multi-stage pretreatment process will deliver excellent results.
However not every coater either needs or wants to delve this deeply into pretreatment. Fortunately, the pretreatment suppliers have created a selection of smaller spray systems that also offer great results.
One alternative may be a shorter cycle that follows the following stages
1. Spray cleaner2. Phosphate conditioner (this combines the conditioning and
zinc phosphate stages into one)3. Rinse4. Dry off
Or a shorter cycle again utilizes the “all in one” approach which uses ‘wand’ style equipment (like the weed killer spray solutions you see in hardware stores) and includes:
1. Spray clean/condition/phosphate (the pretreatment supplier provides the solution and equipment to enable this one stage pretreat)
2. Rinse3. Dry off
Good for lower volume lines, both these options will still give a good pre-treat performance and still provide significant corrosion performance when compared with non-treated metals. Of course, it’s always important to follow the advice of the pretreatment supplier and again, ensure the process is completed continuously. You can’t walk away mid-process, leave it, and then come back to it. It simply won’t work.
These chemical pretreatment options are usually appropriate for aluminum substrates. Pretreating steel tends to follow mechanical pretreatment.
Shot Blasting as PretreatmentGood news for those that do not like working with caustic chemicals! Shot blasting is another way to clean a substrate and is perfect for steel or for parts where the size of the part of the line makes chemical pretreatment impossible.
www.ifscoatings.com
A GUIDE TO APPLYING POWDER COATINGS 21

Shot blasting is pretty self-explanatory – the substrate is ‘blasted’ with different types of shot; walnut shells, sand, metal soda ash – you name it, there are many different types of shot!
What sort of shot you use depends on the substrate you are prepping. For example, heavier, aggressive shots can damage aluminum, even warp it. Alternatively, finer, mild shots on cold rolled steel can turn a relatively short job into a much longer one. Your shot supplier will be able to advise you on the best type of shot for your needs.
The key with shot blasting is to aim for a “bright white clean”. This is where the surface has been removed to the extent that a bright, ‘white’ looking surface is revealed. Okay, it’s not actually white; it’s essentially a gleaming surface, but it’s best known as the “bright white clean”.
When the part is blasted, a blast profile is created and what helps the powder to adhere to the part.
This is a great way to remove mill scale, rust builds up (rust can occur when the part is just lying around waiting to be coated), oils, dirt, weld splatter and more.
Shot blasting also produces heat. A lot of heat. Be mindful of this, especially if you’re working with thin or aluminum parts. On
the other hand, this can make it a good alternative for larger or thicker parts that take longer to heat up.
Shot Plus PrimerAn alternative, pretreatment to plain shot blasting is to combine a shot blast with a zinc rich or epoxy primer. Using this method, you clean the substrate with the shot blast and lay down a corrosion resistant layer through the primer that the coating can adhere to.
Primers do a great job of adding a protective layer beneath the top coat. Not only do they prep the surface for the top coat to be applied, but they add a protective barrier which will help with corrosion protection.
www.ifscoatings.com
A GUIDE TO APPLYING POWDER COATINGS 22

Ensure that you clean the substrate absolutely, otherwise any coatings that you apply will be rendered useless.
Take note, zinc rich primer does not apply as easily as a top coat. It doesn’t always fluidize like top coat powders do, but you can overcome this with patience and experience – you may have to adjust your gun settings a little - and maybe a bit of swearing, in time.
To SummarizeFrom cleaning to conditioning to sealing, there are plenty of ways for you to pretreat a substrate in preparation for coating. Each stage has its own good and bad points. What products and stages you use all depend on what you want to achieve for your customers. The whole point of pretreatment is to prep the substrate to properly accept a coating, keep it in top nick for as long as possible and prevent corrosion – and wash away all manner of dirt and bug guts.
These stages and times are in place for a reason, because if you don’t follow them your results get poor fast. For many smaller job shops, the least amount of pretreating possible is preferred due to cost concerns. However, it goes without saying that the more pretreatment you do, the better results you will achieve and this is what will have customers returning to you time and time again.
If you can, or if you want the best results humanly possible, then the five stage process this guide walks you through is your best bet.
With all of this information at the tip of your fingers, you are now fully prepared to craft your own pretreatment methods and we advise you get support from your chemical supplier to help set things up.
A Final Top TipThink about it - the cleaner stage is extremely important. It doesn’t matter if you have the best pretreating system in the world if you don’t clean the surface properly it is not going to work. Also, stick to the parameters specific to the products you are using and build a process based off of the product that you are using.
For further questions or inquiries drop us a line at [email protected]
www.ifscoatings.com
A GUIDE TO APPLYING POWDER COATINGS 23

How to Apply a Two Coat System
So you have your substrate, all prepped and ready and it is time to lay down some coating. There is a great selection of products available that offer protection and decoration. Some of these products can be used as a two coat system, so let’s dive right in and check two coat systems out.
What is a Two Coat System?At the basic level, a two coat system is a method in which two coatings are applied to the same substrate. The most common two coat systems involve laying down a primer, curing it, and then applying and curing a top coat. Sometimes, the first application is a color coat, with the second application being a clear top coat. Pretty simple, right?
Why Should You Use Two Coat Systems?Two coat systems can offer some great benefits. Do you want the metal to rust, corrode, or oxidize? Of course not. A two coat system is one way to achieve great corrosion protection, as applying an epoxy or zinc rich powder primer beneath your top coat can do just that. This is an especially great option if you are working with steel, or have limited pretreatment available.
www.ifscoatings.com
A GUIDE TO APPLYING POWDER COATINGS 24

Two coat systems can also be used if designers want to add a bit of extra flair and pizzazz to a surface, perhaps in the form of a high gloss clear coat. Similarly, they may also want to add some further protection or functionality. For example, certain domestic appliance manufacturers add a fingerprint-free clear powder, on top of their chosen look, to improve the ability to prevent fingerprint marks.
Some powders come with the recommendation of a clear coat for exterior use as well. This is often true of special effects powders and can be a good idea to extend their corrosion resistance and life expectancy. However, it is important to note that for high grade, exterior architectural applications, putting a powder with basic exterior weathering capabilities down and then adding a clear coat designed to pass higher weathering specifications, will not increase the weathering capability of that first coat sufficiently to meet the demanding architectural specs!
Two coat systems can also help enhance colored coatings with bright pigments. For example, at T, IFS Coatings’ sister brand, to achieve the ever popular neon colors, we recommend laying down a white coating (crystal white) first and then applying the Polychem neon color. The combination of the bright white base coat with the neon on top really makes the color pop.
In fact, any sort of coating that has a special effect, like metallics,
glow in the dark, and translucent will benefit from a base coat applied beneath them. There is a reason why artists paint on white canvases 90% of the time. A white base enhances the vividness of any color.
There are many more reasons why you might do a two coat system, like a thicker film build requirement to improve the barrier between the elements and the substrate.
There are some great advantages to two coat systems, so read on to discover the hows and whys.
Who Should Use Two Coat Systems?The great thing about two coat systems is that they are easy to use – so anyone can perform them!
So let’s check out the top tips for application and achieving the very best results!
www.ifscoatings.com
A GUIDE TO APPLYING POWDER COATINGS 25

2 Coat, 2 Cure Systems will need a full or almost full cure on this first coat. Likewise, don’t overbake it! Overbaking the first coat can really affect inter-coat adhesion! Then simply apply and cure the second coat.
Watch the thickness of the base coat. Too thick, and you will have trouble applying the topcoat. Remember with powder coating, the electric charge will not pass through a thick base layer as easily as it would a thinner one (it always needs good ground).
Two Coat Systems: The Pros and ConsApplying more product to a substrate may mean adding time and money to a job. Whether or not it is worth it, is up to you. The advantages in increased performance and product longevity are often well worth it though.
Plus, if you apply the first layer on too thick, you will either have an uneven – and likely unattractive – top coat or if you apply a clear top coat on too thick you will find that it turns milky. Not something you want to give to a client.
In the pro column, using a two coat system can be a pretty dang simple way to really enhance the corrosion performance of your coatings – not to mention the added benefits in looks and lifetime.
This method is likely very familiar to most of you. Laying down a primer or base coat, curing it, and then applying your top coat and curing that is a dance as easy as singing your A, B, C’s. This method is also used for a top coat and clears.
This process is easily applied after pretreatment – whatever the type of pretreatment you are using. After pretreatment, simply apply your first coat and cure it in line with Technical Data Sheet (TDS) requirements. It’s good to note that most of the time you
www.ifscoatings.com
A GUIDE TO APPLYING POWDER COATINGS 26

The Do’s and Do Not’s of Applying a Two Coat System
• First up! Good ground is essential for clear coats! If you do not have good ground, you will have problems with starring or back ionization. Starring looks like you have a sand dollar on the surface, and they can be as small as a pencil eraser and as big as a dime! Back ionization gives the coating a rough look – more like a grapefruit peel than orange peel. This might mean cleaning excess or baked on powder from the racks and hooks so you have good metal to metal contact. You should aim for one megohom or less resistance to ground at 500 volts – you can measure whether or not you have good ground by getting an ohmmeter, which measures electrical resistance and you can pick one up for under $50.
• Test any product (by itself or with another) on panels or pieces before coating anything for a client. That way you will truly get a feel for how the products work and can make any necessary adjustments before coating the part.
• In pretreating, make sure the part is properly rinsed and dried. Also, do not let the pretreat simply dry in place. Leaving it to dry on its own means water spots can form. Even when you paint over these spots, you will see little dry spots underneath the coating and worst case scenario, these spots can even blister.
• Many powder products may work as a two coat process but have not been designed as such. Conversely, many simply won’t work together. Unfortunately, learning what does and
Unclean Substrate
Below, we have compiled a list of tips that our tech service team have learned over their many years of applying powder! Like with any coating, experience helps, but some of it can be trial and error, so give it a go!
www.ifscoatings.com
A GUIDE TO APPLYING POWDER COATINGS 27

does not work together often comes down to trial and error. Staying within the same brand of powder for both coats at least allows you some consistency and enables you to check with the manufacturer for recommendations if problems occur!
• Do not overbake in between coats. Doing so can cause inter-coat adhesion problems.
• Remember, with two coat systems the thicker film build also reduces the ability of the top coat powder to take a charge. Good film thickness is key.
• Similarly, it is tempting to do so, but do not lay on a clear topcoat thickly. It’s easy to do as clear coats often apply well, but the thicker you apply a clear coat, the less clear it becomes, often taking a milky coloration. You may not even realize you’re doing it, so be careful. Investing in a film thickness gauge will enable you to quickly check and measure the exact thickness of a coating once it has been cured; you can pick up a decent gauge for a few hundred bucks.
• Check the cure requirement of both coats. Are both low cure formulations or is one a regular cure and the other a low cure? You need to take this into consideration and adjust your cure schedule accordingly. For example, if you’re using a regular cure primer, make sure it’s fully cured or almost fully cured
before you apply a low cure top coat. If you don’t, the primer won’t perform as it’s designed to as it never fully cured.
• Another common sense tip here, but do not let the product get contaminated – both in its container or while it is on the substrate, especially between coats. Dust, dirt and even the oil from your hands can cause trouble down the line – from starring to leaving a fingerprint on the paint - and then you end up sealing it in with a clear topcoat. So, don’t leave too long between applying coats and do not handle the substrate between applications or cures. Keep your products sealed in their containers when not in immediate use.
Contamination of the surface - bad pretreat.
www.ifscoatings.com
A GUIDE TO APPLYING POWDER COATINGS 28

A lot of these tips that we have covered come will a fair bit of trial by error, not all ovens work the same and nor do all metal substrates accept the product in the same way. The great thing about powder coating is anyone can do it and the more you do it, the better you become! The more experienced you are, the more likely it is that most of this will be second nature to you.
Dry On Dry
Pros and ConsIt certainly has its advantages, including reducing the need to move parts in and out of the oven which of course comes with the risk of contamination, and less time and energy spent in the application and curing process. Cycling through the application, curing, cooling, testing process adds time and money to any job. A dry on dry two coat system can save you both, by, essentially, cutting out the middleman.
The not-so-great aspects of this two coat method are that you can’t just slap any two primers and topcoats together and have it work. You may get lucky, but the only way to achieve guaranteed results is to use products that are formulated to work together in a dry on dry process. Otherwise? You may get a peeling, cracked mess of a coat. Not a good end game.
Adjust the KV settings on the guns between coats. Lowering the KVs when applying the primer and then readjusting the settings higher again for the top coat can help reduce the chance of back ionization or KV rejection. Play with it and see what works best on your system.
What’s more, applying your first coat of powder while the part is still warm from the dry-off oven can help attract the powder and actually cause it to gel slightly, starting the cure and quickening
The Dry on Dry, or CoCure process, has picked up in popularity over the last few years. A CoCure or dry on dry process involves pretreating the part as usual and then applying your first coat. Then, without curing the first coat, apply your second coat. The final step sees both coats cured together.
www.ifscoatings.com
A GUIDE TO APPLYING POWDER COATINGS 29

the process. This is especially true if you’re working with thick or heavy parts.
To Wrap It Up…A two coat system is a great way to enhance and protect your substrate, either from the weather or from sticky fingers. Some powder coatings are designed as two coat systems, others simply happen to work together. So often, deciding to use a two coat system will depend on what you are coating and what you need the product to achieve. Using steel and looking for improved weathering? That zinc rich primer and top coat designed for exterior applications are a no brainer. Looking to achieve that bright neon glow or extreme chrome effect? Get that bright base coat down first. There are many great two coat products available.
For further questions or inquiries drop us a line at [email protected]
www.ifscoatings.com
A GUIDE TO APPLYING POWDER COATINGS 30

Spraying Metallics with Powder Coatings: What you Need to Know
Metallics are powder coatings which have a metallic or sparkle effect added to them. These metallic pigments are usually aluminum flake or mica and can be different colors and sizes. There are those that will be very obviously sparkly or glittery, others shimmery, and some will have more subtle sparkle effects. So, for this guide, we should specify that we aren’t talking about coatings that give the appearance of metal - what we are talking about are metallic coatings that have a sparkling effect.
Now, there are two basic types of metallic: bonded and unbonded.Both metallics are capable of a sparkling effect. Where they differ, is in how they are made.
BondedBonded metallics are coatings in which the effect pigments (the metallic or mica flakes) adhere to the powder coating particles. Doing this creates a more consistent application, as opposed to dry blend/unbonded, and enables a much better performance once reclaimed.
www.ifscoatings.com
A GUIDE TO APPLYING POWDER COATINGS 31

How are bonded metallics achieved, you may ask? Well, a bonded metallic coating is made by heating the powder coating until the outside is slightly sticky. The metallic pigments are then added and will adhere to the powder coating particles. Voila!
At IFS Coatings, we also have a special process when bonding AAMA 2605 coatings to ensure that we do not damage the integrity of the treatment on the aluminum flakes.
AdvantagesAny powder metallic offers a truly unique appearance to the part. Generally, it is easier to apply bonded metallics than unbonded, as the spray dispersion is much smoother than unbonded metallics. This results in a smoother application, and a cleaner and more consistent finish.
But…
DisadvantagesDue to the extra processes, bonded metallics are run though, they are typically more expensive than unbonded metallics. In the long run, though, bonded metallics might well be worth the extra cost.
There is also the issue that you cannot purchase a small amount of bonded metallics. Due to the machines and processes that
bond the metallic to the pigment, it just is not feasible to make a batch any smaller than a certain size.
UnbondedAs you may guess from the name, unbonded metallics are powders that have not been put through the bonding process. Rather than that, the metallic flake and the powder are put into what is, essentially, a blender. That is whizzed around and boxed up. It is a simpler, speedier, and cheaper process as opposed to what is used to create bonded metallics. While that may sound ideal, let’s go through the advantages and disadvantages first.
AdvantagesAs unbonded metallics are not put through a bonding process, they can be purchased in smaller batches than bonded metallics. Because of this, it is also much cheaper than bonded metallics and your order can often be shipped out to you much quicker.
However, it does have its downsides…
DisadvantagesUnbonded metallics require more attention to detail when in use, such as when spraying the substrate or cleaning equipment. As the metallic and powder particles have not been bonded together,
www.ifscoatings.com
A GUIDE TO APPLYING POWDER COATINGS 32

it can be far more difficult to get a smooth and consistently metallic coat. The sparkles can pull to the edges or disperse unevenly on the coated part.
When spraying metallics, we recommend feeding the spray out of a fluidizing hopper - avoiding box feeders if you can. Taking this step will assist in increasing the evenness of the flow as you spray, ensuring that your gun is being fed a rolling mixture of the powder. Otherwise – and especially with unbonded metallics – you might get clumps of pigment and metallic flakes. This creates an uneven coat and is not an attractive final product.
Encapsulated Metallic ParticlesOften, and especially in the architectural world, the question of ‘why doesn’t this metallic powder coat require a clear coat for protection?’ is asked. In short – particularly with our powders that meet and exceed the requirements of the AAMA specifications – we use encapsulated metallic pigments. These are metallics that have been made using metallic flakes that have been through an extra treatment process. This process creates a metallic powder that can be applied to a substrate and does not require a clear coat.
At IFS Coatings, all of the metallics that we use in our coatings are encapsulated to some degree. The aluminum pigments that we use for general applications have a basic encapsulation that assists in weathering and chemical resistance. The pigments that we use for AAMA coatings have a more complete encapsulation that allows for significantly better weathering and chemical resistance.
Keep in mind that metallic powders with more complete encapsulated metallic flakes are more expensive.
So, now we’ve covered bonded vs. unbonded, let’s discuss what’s involved in creating a great metallic look.
www.ifscoatings.com
A GUIDE TO APPLYING POWDER COATINGS 33

The LookWhere metallics differ from other coatings, really, is how they look on the final product. Typically, metallics have a sparkling finish, unless your job shop is trying to mimic an anodized finish. Solids are just that: a solid color. IFS Coatings has a range of metallics, including standard metallics, like Silver Sparkle and Gold Nugget, chrome effects, like New X Chrome, and anodized colors that use metallic, like Dark Bronze. There are also translucents with a sparkle to them, such as Starbrite Copper and Translucent Red.
The PricingAs for pricing, metallics are more expensive than solids, especially if you are using a bonded metallic. This is because of the extra processes involved in actually creating a bonded metallic powder. Plus, some metallics require a clear top coat, and others require a base coat. Even if the particular metallic you are using only needs one of those requirements, it is an extra step in the manufacturing process and therefore cost added onto a job.
StorageStorage of metallics is very similar to how you store any other powder coating. Keeping the temperature 80 degrees or below, with between 40% and 60% relative humidity, is ideal. At IFS
Coatings, for most powders, the Golden temperature is 75 degrees Fahrenheit. Asides from temperature, metallic can be stored in the same way as solid powders – air-tight containers that keep contaminants out. Depending on the size of your job shop, bear in mind you may also need to store the power in smaller quantities.And speaking of quantities…
Minimum Quantity and Lead TimeThere is always a lead time for custom powder jobs, but where solids and unbonded metallics have a 7-10 day custom lead time, bonded metallics are usually more like a three week lead time. This is because the process of making a metallic requires more steps than making a solid powder. First, the base is made, and then it is moved through a bonding process.
Because of this extra process for bonded metallics, the minimum order size is also larger – around 220lbs. Why is such a limit placed on an order? Well, simply put, the machines we use to bond the metallic particles to the powder require a certain amount of product for them to work. Keep in mind that this is for custom orders, though. Stocked metallics can be bought in much smaller quantities. So a great tip that many people use is, if there is a highly popular metallic at your job shop, then think about buying it in in bulk.
www.ifscoatings.com
A GUIDE TO APPLYING POWDER COATINGS 34

So, Who Can Spray Metallics?The good news is any job shop can use metallics. In the past five years, the amount and number of metallics that we can make have broadened. So the variety of special effects that job shops can now offer customers, outside of solid colors, has grown wildly. Metallics are so eye catching it’s a great way to promote your capabilities as a job shop!
About the Actual Spraying Process…Metallics can be more difficult to spray than solid color powders. Essentially, the electrostatics, among other things, have an effect on the way the metallic flakes in the powder orient. A small change in flake orientation can change the color of the coating, especially when there is a large contrast between the base color and the color of the metallic flake.
And then there is the equipment. Most of the new equipment these days have factory settings, which often includes a metallic setting. Whether or not these settings actually work well can be a bit of a toss-up. Sometimes they do the job, and sometimes they don’t and you have to adjust the settings yourself.
Regardless, for most metallic applications, you may find that you’ll have great success if you turn down your kVs and your micro amps. A good range is between 60 and 75, with the micro amps between 25 to 35.
KV’s, micro amps, gun-to-substrate distance, good grounding, and gun speed can all affect how the final product looks on the substrate and how smoothly it applies. Ramp your kV’s too high and the metal flakes will not lay right on the substrate, giving a grainy texture to the surface. Apply the powder too fast, and you can waste a lot of product. This is why metallics are somewhat
www.ifscoatings.com
A GUIDE TO APPLYING POWDER COATINGS 35

trickier to apply than standard powder coatings; there is a lot that can go wrong. However, overcoming most of this just comes down to experience. The more you use metallics, the better you will become at applying them – with fewer rejects as the in’s and out’s become second nature to you.
How to Spray MetallicsNew or old hat at spraying powders, metallics are different enough that they require just a little more attention to detail. We have put together a guide of useful steps that will help you either sharpen or create a process for your job shop.
FirstEnsure that you have a properly prepared substrate. It must be cleaned thoroughly and consistently. You likely already know the pitfalls of curing a coating over improperly pretreated substrate. And the results? Not good. Whether you shot blast or treat with caustic cleaners, make sure that you have done a thorough job.
If you are not applying some sort of base coat, then ensure that your substrate is free of marks and stains, as well as contaminants. Metallics do not act like concealer, so dark spots, streaks, and stains will likely show through - even through a thicker coat.
SecondMake certain that you have good earthen ground. So, ensure that the racks and hooks have good ground and metal to metal contact.
Third Fluidize the metallic well, but not to the point of geysers blowing. Steadily boiling soup is the consistency that you want, with little bubbles of air disturbing the surface.
Fourth Check that your equipment is cleaned properly of all contaminants, especially if you are spraying a black or a pale metallic.
We would even suggest having dedicated fluidizing hoppers and hoses for metallics. If your job shop sprays a lot of metallics, having a dedicated set of equipment for them is a good investment.
FifthThe newer powder coating equipment sometimes has a factory setting for metallic. If your equipment has a factory metallic setting, this will be a good starting point for their application. Otherwise, start with settings between 60kVs and 75kVs to 40 micro amps. Now, you have your electrostatics good to go.
www.ifscoatings.com
A GUIDE TO APPLYING POWDER COATINGS 36

SixCheck those pressure settings. You want a good, even spray during the application process. That means pressure, but also the distance between the gun and the substrate. With more complicated substrates, this can be tricky, especially if it has any deep recesses. Use your judgment, adjust the settings as you need to keep the gun steady and you will be fine.
SevenBefore curing anything, check whether or not the powder you are using requires a clear coat – especially if it is going to be exposed to the elements. Some metallics are formulated using encapsulated metallics so that they do not need a top coat of any kind. Other metallics will need a clear top coat, and if so, be careful not to over-cure the metallic base coat before applying the clear top coat. This will help to avoid inter coat adhesion issues.
Follow the guidelines on your supplier’s products, and be aware that not all products, like base and top coats, are formulated the same. Some will work together, and some will not. Be sure to use products designed to work together.
EightOnce you have an even coating on the substrate, it is curing
time. Pay close attention to the manufacturer’s temperature and cure time directions.
As an example, if the instructions say to cure for ten minutes at 400 degrees, it means ten minutes once the part has reached 400 degrees. The cure time does not include pre-heating the oven or waiting for the part to reach that temperature. Larger ovens and larger parts especially can take some time to warm up to the required temperature.
Eight-ishIf needed, apply the clear top coat evenly. Ensure that you have good earthen ground, and this will help keep back ionization down. Be aware of your gun-to-part distance. Apply a clear coat too thick and it can take on a milky or yellow tinge. Once again, check the manufacture’s specifications, but a general rule of thumb is keeping it between 1.5 to 2 mills in thickness.
NineCure for the final time and you are done.
If the metallic does not need a top coat, do not feel like you should lay one down anyway. Applying and curing another coat adds time and cost to a job, and increases the chances of having a reject.
www.ifscoatings.com
A GUIDE TO APPLYING POWDER COATINGS 37

Dos and Don’tsCheck out the ‘do’s and dont’s’ for applying metallics!
Do use rinse air if your guns are equipped with that feature. Otherwise, the metallic will build up on the end of the gun…until it suddenly releases. And then you will have a big, metallic splotch on the substrate. Not an ideal outcome, right? So, keep an eye on the nozzle of your gun and turn up the rinse air setting so that it stays clean.
Do not spray and pray! Have sample panels, using different types of substrate and different products, for both you and your customers. This way, you will work out the kinks in your process – or with a new product, if you are unfamiliar with it – and know exactly what the finished product will look like.
Do keep your gun-to-surface distance in mind. We said it before, but it bears repeating. It is an important step to remember!
Do not be heavy-handed with clear coats. Asides from what we said earlier, clear coats can also subtract from the vibrancy of metallics. Using a high-gloss clear coat is a good way to get around this issue. Avoid low gloss coats, they can diminish the brightness of the sparkle further.
Do be sure to always fluidize your powders during the application process. This is doubly important for unbonded metallics, as if you do not fluidize properly you will get ugly lumps of resin, pigment, and metallic flakes shooting out of your gun.
Do be aware that if you are applying your metallic as part of a two coat process – perhaps a chrome look – the metallics will look different sprayed over different colors. If you spray a chrome metallic over a black base, the final look will appear very different as opposed to a chrome metallic sprayed over a white base. Have multiple sample panels and play with different combinations so that you know what it will look like.
To Polish It Off…Metallics are a great way to add special effects, from soft glitters to bright sparkles, to a coating. They come in a wide range, from chrome effects to bright, silver sparkles and can be purchased either bonded or unbonded. Bonded has the advantage of being easier to apply and ensure a beautiful, consistent, and even finish, while unbonded is cheaper and can be bought in smaller quantities. Both have their disadvantages too, with bonded being quite pricey and unbonded tricky to apply smoothly. With practice, spraying metallics gets easier, and these beautiful metallic effects offer job shops a fantastic spectrum of coatings for their customers.
www.ifscoatings.com
A GUIDE TO APPLYING POWDER COATINGS 38

Bear in mind, if your customer is used to liquid metallic there can be some differences. The maximum metallic loading in a powder is significantly less than the metallic loading of a liquid. While exact numbers depend on the particular pigment, a general rule is that small flakes, for example, those used to make a sheen or anodized silver, have a maximum loading of around 5%, and a large sparkle flake can go upwards of 10% maximum loading. This differs to liquid paints that can have a metallic loading of around 20%. If you push too much of the metallic flake into the powder, you can get all sorts of problems - application issues, dry spray and issues with powder sloughing right off the substrate.
So, to wrap everything up, we have some final tips for you!
Final Top Tips:• If a customer wants or requires a metallic with a clear top coat,
consider showing them a sample of what the final product will look like; this includes a panel with a base coat and a clear coat. By doing this you can avoid potential headaches by simply showing the customer exactly how the finish will appear.
• Metallic colors can change slightly depending on variations in film thickness. Keep a sharp eye on the substrate during the application process, and carefully evaluate the coating before curing it to ensure even consistent pigmentation.
• With certain metallics, like mica, the angle and lighting can alter their appearance. When laying out the details of a job, ask the customer how each surface will sit, what angle will it rest at, and advise that there will be variations in how the metallic effect appears depending on the lighting. Sample panels can really help you out here, to show the customer exactly what you mean.
• Metallic flakes come in different sizes, and occasionally, smaller metallics can be a slight problem. During the spray process, there can be issues with the flakes sticking to the end of the gun. Keep a sharp eye out for this, and stop and clean the gun when needed.
For further questions or inquiries drop us a line at [email protected]
www.ifscoatings.com
A GUIDE TO APPLYING POWDER COATINGS 39
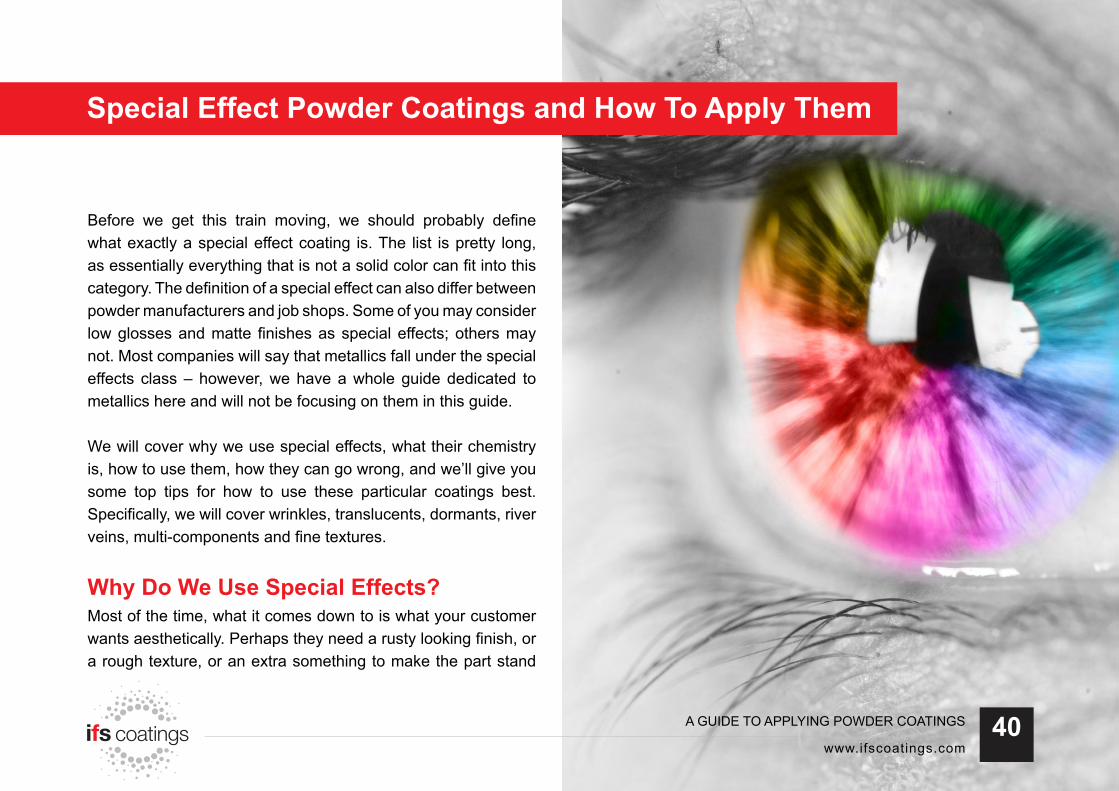
Special Effect Powder Coatings and How To Apply ThemSpecial Effect Powder Coatings and How To Apply Them
Before we get this train moving, we should probably define what exactly a special effect coating is. The list is pretty long, as essentially everything that is not a solid color can fit into this category. The definition of a special effect can also differ between powder manufacturers and job shops. Some of you may consider low glosses and matte finishes as special effects; others may not. Most companies will say that metallics fall under the special effects class – however, we have a whole guide dedicated to metallics here and will not be focusing on them in this guide.
We will cover why we use special effects, what their chemistry is, how to use them, how they can go wrong, and we’ll give you some top tips for how to use these particular coatings best. Specifically, we will cover wrinkles, translucents, dormants, river veins, multi-components and fine textures.
Why Do We Use Special Effects?Most of the time, what it comes down to is what your customer wants aesthetically. Perhaps they need a rusty looking finish, or a rough texture, or an extra something to make the part stand
www.ifscoatings.com
A GUIDE TO APPLYING POWDER COATINGS 40

out from the crowd. It is usually driven by the customer needing a specific aesthetic, or designers aiming for particular looks. However, the need for a special effect could also come from the need to hide a substrate surface that doesn’t look good. This is the main functional reason for using them.
What Can Affect a Coating Like This?Typically, what kind of special effect you use is not affected by what the substrate itself is. However, pretreatment systems can affect how well a coating applies and cures. Galvanized, especially hot dip galvanized, the substrate can cause issues with outgassing – which we will talk more about in the next guide, Appearance Issues: When Jobs Go Wrong. A wrinkle effect can be botched by an improperly cleaned surface. Translucents need a clean, even substrate, with a uniform appearance, otherwise results in the final coat will vary.
Then there is the application process itself. Like with any coating, if it is not applied correctly, it will likely not cure properly, resulting in, if not an outright reject, an unattractive finish. Some powders will even change in color or pigmentation depending on how thick the film is.
Let’s get into these issues in more depth, starting with…
WrinklesMost commonly, wrinkles are typically a polyester or urethane chemistry, occasionally an epoxy. Check out our blog on the different types of powder chemistries and the advantages of each to fully understand the best applications for urethane powders.
Now, wrinkles can be a tricky coating to get right. So as we always say, if you’re new to working with urethanes, this is probably a coating you want to test out on some sample panels before moving on to coat the part. So let’s break down where things can go wrong with this special effect. First up, the application and substrate! If your surface is not consistent in cleanliness and
www.ifscoatings.com
A GUIDE TO APPLYING POWDER COATINGS 41

texture, the wrinkle effect will look different; some spots may work well, and others not so well – if at all. Secondly, the oven. If the temperature varies, say, by a few degrees in one corner, then you are going to get varied results in your finish. Check your oven settings and test out a few panels to ensure everything is in tip-top shape. Urethane wrinkles can also be sensitive to heavy film build on the edges – so be mindful of that when applying them. When wrinkles are done right, they look amazing. Get it wrong, though, and you have a doozy of a reject to deal with.
Why Use Wrinkles?Wrinkles offer a very specific look. Smooth, classy and sophisticated, wrinkles are a comparatively mild special effect that can add real depth to a color and are pretty good at hiding the substrate. Not only are they a great visual effect but they also have decent weathering, good hardness, corrosion resistance, chemical resistance, and they are a great special effect for covering up surface imperfections.
In general, urethane based coatings are good for chemical resistance. They are durable too. But, they do bring a lot of process issues with them. Like wrinkles themselves, if urethanes aren’t applied right, they go very, very wrong.
How Do I Apply Wrinkles?The key to a good wrinkle is preparation. Have a good pre-treatment system in place. No matter if you shot blast or use chemical pretreat, keep it consistent across the board. Clean all contaminants, especially oil, from the part and ensure the pretreat is applied evenly as any dirt or contaminants can interfere with how the wrinkles form.
Next, depending on whether you use a batch oven or automatic system, you need to be sure that it is a conventional fire oven. You need to be able to ramp up the temperature quickly at the start of the cure cycle to ensure consistent wrinkling in the coating. In our general experience working with wrinkles in an infrared oven can be extremely tricky and is best avoided!
As for the actual application, it applies like any other powder. The trick is to settle on a film thickness that achieves the effect you and your customer want, as a thinner film may not wrinkle to the same degree as a thicker film. Be certain to always refer to the Technical Data Sheet for accurate thicknesses and cure times.
www.ifscoatings.com
A GUIDE TO APPLYING POWDER COATINGS 42

Translucent powders offer a unique finish in a variety of colors. As the name suggests, translucents cover the substrate, provide color (and they can even have metallic added) to the part, but allow a hint of the substrate to show through. Many customers love that effect of a beautiful hue with the suggestion of natural metal showing through and built in.
It is pretty common to find translucents in either polyester or urethane chemistries. With the latter, note the pitfalls we listed
above. Polyester tends to be more forgiving than urethanes in that department, though it is somewhat limited in smoothness and exterior durability. At the line level, polyesters are easier to deal with, and urethanes, while trickier, can offer a better overall flow and appearance.
A big pitfall with translucents is that it is very easy to have uneven pigmentation on the substrate, especially if it is an irregular shape – like a table leg. There can be visible differences with as little as half-millimeter variations in film thickness. Due to their nature, these special effect coatings will also allow the nature of the substrate beneath to show through. This can be the main reason why a translucent is used. If it isn’t, laying down a white or silver basecoat is a step you can take – this is especially useful if the surface is not uniform in coloring.
Why Use Translucents?As we said above, sometimes designers and customers want the metal beneath to show through, just with a bit of pizzazz on top. Translucents are the best way to achieve such a look. Other times, translucents offer an impressive brightness as compared to other coatings. This special effect also works extremely well on stainless steel, and due to the high percentage of resin in them, they apply pretty well.
Translucents
www.ifscoatings.com
A GUIDE TO APPLYING POWDER COATINGS 43

How Do I Apply Translucents?Any marks, scuffs, blemishes, and discolorations on the substrate will show through a translucent coating. If a pre-treatment does not remove them, then you will need to lay down a base coat of some kind. IFS bright chrome is often used to cover a less than perfect substrate and lay down a bright, even base, before applying the translucent coating on top. This creates a really bright, beautiful finish.
Beyond that, what getting a great result using translucents comes down to is applying the powder evenly to the surface. Keep the gun steady, watch your gun to surface distance, and time how long you spray each section.
DormantsDormants have grown in popularity over the last few years and are bright, almost candy effects but with more depth, brilliance and shine. Dormant special effects are a two-coat system, as a base coat and top coat is applied and baked separately. The base coat, which typically has metallic pigment in it, has a color that will transfer up into the clear top coat upon curing of the second coat. So it’s the top coat, which is actually clear, that really draws the dormant color out and brings the dormant to life. For example, a red will appear as a dull pink before the top coat is added This also means that you need to make sure you use
the base coat and top coat designed to work together, otherwise you risk all sorts of problems.
The top coat is a clear powder, which is great news as that means they are resin rich. So when purchasing formant effects make sure you get the base color coat and a clear that is designed to give the dormant effect and work together. As dormants are a two coat system, check out our blog and top tips for applying two coats!
www.ifscoatings.com
A GUIDE TO APPLYING POWDER COATINGS 44

Why Do We Use Dormants?While needing a top coat means adding time onto a job, dormants are wonderfully bright colors with more depth and sheen to them. Bicycles are one product that has really utilized dormants in recent years – so imagine that deep, intense color on the frame and you have a good idea of what they look like. Dormant systems also transfer color much more consistently than translucents and are more forgiving than the latter when it comes to film builds and uniform pigmentation. The use of a top coat also offers additional weathering protection and corrosion resistance.
How Do I Apply Dormants?It is pretty simple. You lay down a base coat – your color – and bake. Then you lay down your top coat, and bake. Easy as that.
Watch out for back ionization when applying the clear! Use a recoat setting and follow our tips for reducing back ionization or KV rejection. Another thing to consider is where the substrate will be located. Indoors, or outside? Check with your powder manufacturer what chemistry their dormant powder is available in and whether it is suitable for the end use.
River Vein
A river vein is a particularly unique effect. Both IFS and Polychem have a huge range of river veins available in a wide range of colors. It’s definitely worth checking out what they look like with one of our color cards – they’re really popular but are best seen in the flesh (as it were) – pictures don’t do them justice.
Usually, river veins come in polyester technology, though they are available in other chemistries such as hybrids and epoxies too. It is easy for appearance issues to crop up with this special
www.ifscoatings.com
A GUIDE TO APPLYING POWDER COATINGS 45

effect. Paying close attention to your film thickness and what the TDS calls for will help here. If it requires three to four mills, you really want to be in that range.
Film build really is absolutely key when it comes to applying river veins. Due to the nature of the effect, spray it too thin, then in the “valleys” of the special effect, you can actually see the substrate showing though – not the look we are going for. Consistency is key.
Consistency and film build also affect how the veins themselves appear, especially if you are doing a batch of, for example, tables for a customer. You want uniformity across the line. If your film is thicker on some tables and thinner on the others, the deviations will be visible. Not a good outcome.
When it comes to deciding between hybrid, polyester, or epoxy chemistry for river vein powders, knowing where the coated end product will be situated will help. Hybrids offer more resistance than polyesters, however, hybrids will chalk if placed outside. Cross reference what your customer needs with what powders you use.
Why Do We Use River Veins?Aesthetically, they offer an interesting look. Plus, if a surface looks….shall we say, like an ugly duckling, river veins can bring out the transformation into a beautiful swan? Okay, that was a metaphor that reached a little far, but you get the picture.
How Do I Apply River Veins?Generally, river veins are applied like any other powder – stick to the guidelines and mind the information on the TDS. Pretreat, apply, bake, and top coat if necessary. Ta-da! And remember, watch your consistency and film build at every step!
If you are reclaiming these products, you want to be sure to keep a high percentage of virgin in the reclaim, otherwise you might start to see some shifts.
Multi-ComponentsHow to describe multi-components? Seeing is believing, but many of our customers are simply amazed that such a beautiful effect can be created in a single coat. Gets OEM free panels from Polychem to check out some awesome multi-component looks. Trust us – pictures simply don’t do them justice. Given the versatility of multi-components, it is easier to say that what chemistry you use depends on where the coated end product will
www.ifscoatings.com
A GUIDE TO APPLYING POWDER COATINGS 46
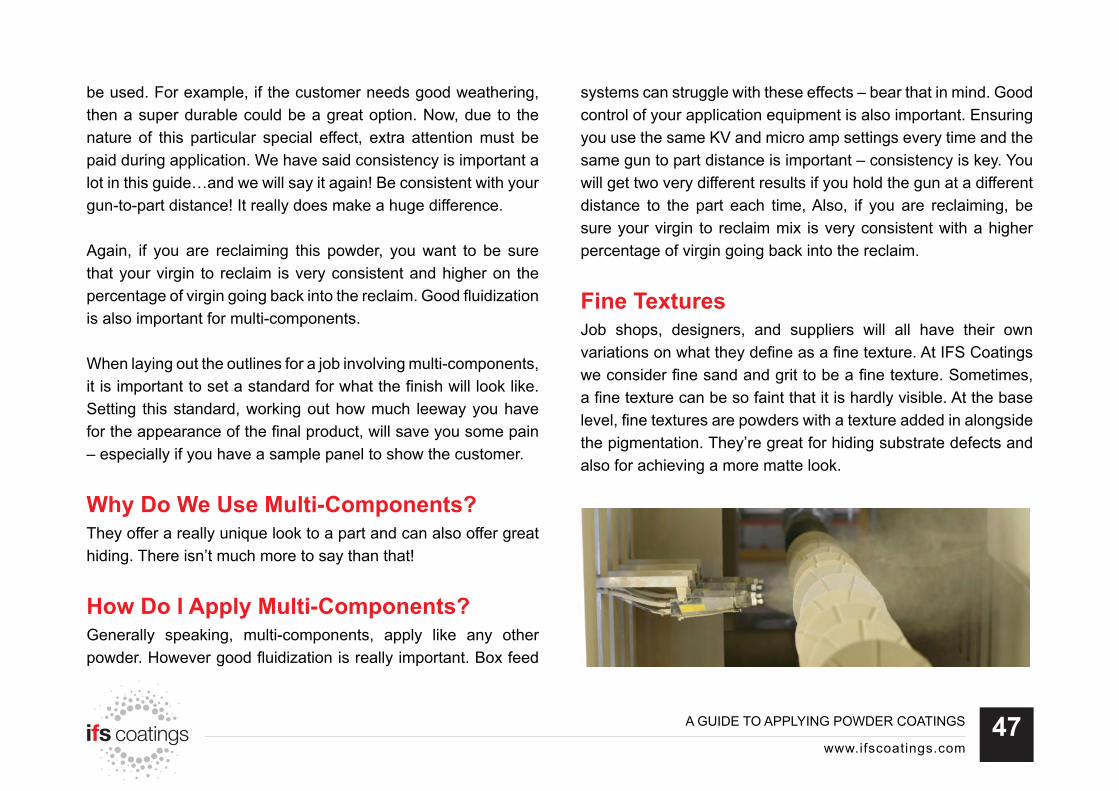
be used. For example, if the customer needs good weathering, then a super durable could be a great option. Now, due to the nature of this particular special effect, extra attention must be paid during application. We have said consistency is important a lot in this guide…and we will say it again! Be consistent with your gun-to-part distance! It really does make a huge difference.
Again, if you are reclaiming this powder, you want to be sure that your virgin to reclaim is very consistent and higher on the percentage of virgin going back into the reclaim. Good fluidization is also important for multi-components.
When laying out the outlines for a job involving multi-components, it is important to set a standard for what the finish will look like. Setting this standard, working out how much leeway you have for the appearance of the final product, will save you some pain – especially if you have a sample panel to show the customer.
Why Do We Use Multi-Components?They offer a really unique look to a part and can also offer great hiding. There isn’t much more to say than that!
How Do I Apply Multi-Components?Generally speaking, multi-components, apply like any other powder. However good fluidization is really important. Box feed
systems can struggle with these effects – bear that in mind. Good control of your application equipment is also important. Ensuring you use the same KV and micro amp settings every time and the same gun to part distance is important – consistency is key. You will get two very different results if you hold the gun at a different distance to the part each time, Also, if you are reclaiming, be sure your virgin to reclaim mix is very consistent with a higher percentage of virgin going back into the reclaim.
Fine TexturesJob shops, designers, and suppliers will all have their own variations on what they define as a fine texture. At IFS Coatings we consider fine sand and grit to be a fine texture. Sometimes, a fine texture can be so faint that it is hardly visible. At the base level, fine textures are powders with a texture added in alongside the pigmentation. They’re great for hiding substrate defects and also for achieving a more matte look.
www.ifscoatings.com
A GUIDE TO APPLYING POWDER COATINGS 47

Because of this added texture, one thing to be noted is that the more texture you build up in a film, the lower the gloss effect will become. Another factor to keep in mind is that textures, fine or heavy, can cause a fair bit of wear and tear on your equipment. Reclaiming equipment, fluidizing hoppers, hoses, and the internals of spray guns can all be affected. If you are spraying textures frequently, dedicated equipment might be in order – you do not want a texture powder to contaminate another.
Why Do We Use Fine Textures?Let’s be honest, okay? Sometimes fine textures are used to cover up cruddy welds and surfaces. It can be for a specific look a designer wants, of course, and heavy textures are often used to create anti-skid surfaces – like RV steps. But, textures are often used as a concealer.
How Do I Apply Fine Textures? Fine textures are somewhat more forgiving than the other special effects we have covered. In general, so long as you are consistent in film thickness, it applies and cures like any other coating. Still, a good rule of thumb is not to go too heavy or too light. Keep it just right.
One final time…Consistency. Is. Key! Texture builds up quicker than you think, and it will be rather obvious if the film is not
uniform in thickness. Mind your gun distance. Clear up exactly what is required of the product with the customer, too, and figure out how much leeway you have concerning the look of the finish. Not every texture will come out looking exactly the same, and it is important that customers know this – we would even suggest a full agreement that the customer signs off on before you start the job. Good practice no matter what the effect.
To Top It All Off…We have covered special effects including wrinkles, translucents, river veins, dormants, multi-components and fine textures. They are a versatile category of coatings that offer unique and interesting aesthetics and come with their own pros and cons. While some are trickier to apply than others, learning the ins and outs of them in a step in the right direction to mastering their techniques. The more you learn, the more you can offer your customers.
For further questions or inquiries drop us a line at [email protected]
www.ifscoatings.com
A GUIDE TO APPLYING POWDER COATINGS 48

Special Effect Powder Coatings and How To Apply ThemAppearance Issues: When Powder Coating Jobs Go Wrong
Rejects are the bane of any job shop’s existence when applying powder coatings. Pulling apart out of the oven only to see whorls of orange peel powder, sections where the coating has sagged, or opacity issues bring a particular kind of dread alongside the question of what happened?
Appearance issues are those immediately visible defects found after a cure. They come in all shapes and sizes, and in this guide, we are going to cover the different types of defects, how they occur, and how to prevent them.
Let’s get started with…
BloomingA lot of the time, blooming occurs when there are issues with the resin. More so with cheaper resins. Blooming looks like a foggy, hazy or smoky distortion in the resin, and if it does occur, shows up more noticeably on blacks, dark blues, dark greens, or, dark substrate. Blooming is caused by is either a poor resin – and then the only thing to do is to talk to your powder supplier about using a better resin (which will likely also be more expensive!) or
www.ifscoatings.com
A GUIDE TO APPLYING POWDER COATINGS 49

when a coating is cured on too low of a temperature, especially when the metal is on the thicker side. Occasionally, high humidity causes, or contributes, to blooming as well. Luckily, most of the time this ‘fog’ like, white powdery residue can be wiped off with a wet cloth.
You can prevent blooming by carefully managing your oven. Crank up the temperature, especially for thicker substrates, so that the metal heats up faster and the part and powder gets to a higher temperature quicker. Or, chat to your powder coatings supplier about the different product possibilities with different resins.
BlushingBlushing (sometimes also called telegraphing) is when a substance pulls through the coating from the substrate, discoloring the finish. You’ll probably notice that you’ll have one spot where it’s perfectly fine, and then you’ll have another area that you’ll see this blushing or telegraphing. These marred sections can be large, small, and in between. This is caused by a number of factors, the most common being an improper pretreat. Anything on the surface, from the ink of a marker to the residue left behind from stickers and stamps, can telegraph through the coating. Another factor that can cause blushing is aluminum oxidation. If your coating is light in color, these marks will show through starkly, and the coating won’t be the only thing blushing then.
Image Credit: Hmgpaint
Image Credit: Hmgpaint
www.ifscoatings.com
A GUIDE TO APPLYING POWDER COATINGS 50

The key to preventing blushing is to keep a close eye on your pretreatment process. If you are working on an aluminum substrate, you need to sand the oxidization away, and if there are any marks (like writing) still on any substrate after a pretreat you will need to go in and grind it down – plus another pretreat to prepare the newly bared surface. However, if your pretreat system uses zirconium, don’t go bonkers with it. Otherwise, you may end up with flash rust, which can cause blushing as well.
Picture Framingicture framing usually occurs around the outer edge of a part or an opening on a part. This results in a thicker film build around the edges, which is where the namesake of this appearance issue comes from – as, in the end, it looks like a picture frame. What causes picture framing is when too much powder is applied to the edges of a substrate and you almost get an orange peel effect. At times, like with translucents, you can also get changes in texture.
What causes these nasty defects though? Well, sometimes you have too much flow. Other times, you are building too much film on the substrate and it is pulling away at the edges. These are the two main reasons why picture framing occurs, and you can prevent it by paying particular attention to the gun and spray dispersal during the application process. If you are spraying by
hand, try not to aim directly at the edges and let the racks take care of the edges for you. Also, watch your flow. Adjust the settings on your gun to reduce powder flow, and consider lowering your KVs.
If your job shop coats very large orders or has a big returning customer, then another thing to consider is building a dedicated rack that has a rod – basically, a raw bridge to keep the powder from building up too much in the corners. Adding a rubber bar around the rack can also help with reducing the number of rejects due to picture framing. This often described as a ‘rob bar’ is used as a means to help with this defect.
www.ifscoatings.com
A GUIDE TO APPLYING POWDER COATINGS 51

Outgassinghis can be a thorny problem in any job shops side, as a coating with outgassing is terribly easy to spot. What happens is, during the curing process, little pockets of moisture or contaminants rupture on the surface of the substrate and work their way through the baking coating. A lot of the time, outgassing occurs when the substrate you are coating is cast steel or cast aluminum, as they contain tiny pockets of moisture. During the bake, those pockets literally rupture and outgas. The result is…well, visualize a geyser blowing, albeit on a smaller scale. Like little volcanoes on the surface of the powder coating.
As you can imagine, outgassing makes a mess of a coating.
The main reason behind why this problem happens is something is happening with the surface of the substrate before coating – most commonly porosity below the surface of the substrate or oxidation on the surface. We all know that oxidation can kick off a whole plethora of issues. If you are working with hot dip galvanized or aluminum and it is left lying around or outside, it can easily begin to oxidize. This will result in outgassing if the oxidation is not removed before coating. How to deal with all this nonsense though?
One option is to put the part in the oven before applying any coating. Half an hour, at 450 degrees – or just hotter than the
curing temperature, in the oven will cause the substrate to outgas. Doing this pre-emptively to applying a coating is the best and simplest way to prevent outgassing from destroying a finish. Or, you can add a formulation into your primer or powder that is outgas-forgiving. Both IFS Coatings and our sister brand, Polychem, make OGF powders to help circumvent outgassing.
As a last tip for outgassing…if your job shop uses hot dip galvanized and the substrate forms white rust, then you need to mechanically or chemically remove it. Otherwise, you will get outgassing. It is truly a bear to fix, so preemptive measures are your best bet.
www.ifscoatings.com
A GUIDE TO APPLYING POWDER COATINGS 52

Fisheyes and CratersFisheyes are, essentially, the more severe version of craters. Whereas craters will look like small dips in the coating with a thin film still covering the substrate, fisheyes go all the way down – the coating has moved away entirely, leaving the substrate bared. Needless to say, it’s a very unattractive outcome.
A fair amount of the time, fisheyes are caused by contaminants like oil, silicone, or water; either in the powder itself, on the substrate, or contaminating both during application. Oil and silicone are particularly notorious for causing fisheyes. Now, some powders can handle contaminants better than others, so keep that in mind if you are looking to re-supply. Take care when applying high flow resins as they are more susceptible to developing fisheyes and craters.
Compatibility testing should be done before applying powder coating over any surface previously coated with anything other than powder. Some aerosol spray paints contain silicone, which will cause fisheyes and craters in powder applied over them. Additionally, fibers from grinding discs, adhesive from sandpaper, and secondary operations, like buckshot preventers, can cause craters and fisheyes.
How to solve this problem though? Clean and well-maintained equipment is key. A good, clean, filtered air supply is key. Inspect
your air lines and ensure the air is clean and dry. You can also check the filters and drain or install traps. Oil may also be one of the contaminants so check the oil absorption unit for excessive signs of oil.
Make sure the gun, hopper and spray booth are completely cleaned and that the powder was stored correctly. In doing this you will be checking for and eliminating incompatible materials throughout the process e.g. silicones and lubricants;
Make sure you clean the guns, hoses, and hoppers thoroughly after each color change to eliminate cross contamination of different coatings and ensure the parts are completely dry before entering the spray booth.
image credit: modeltech
www.ifscoatings.com
A GUIDE TO APPLYING POWDER COATINGS 53

Poor Color and OpacityThe name speaks for itself, really. Either the color has shifted from what it should look like, or the pigmentation is uneven on the coating. There are a few factors that cause these issues. Overbaking is a big one – if overbaked, white pigments, pale colors, warm colors and clears can darken and yellow. Another factor is when the supplier itself is trying to cut costs by removing a portion of the pigmentation from the powder – such as creating an unnatural white pigment by replacing a percentage of the titanium dioxide with calcium carbonate, which is a filler. If this is
a new problem with a product you’ve ordered before, or you’ve asked for some value engineering to be done to the product talk to your powder supplier about any changes that may have been made. Sometimes, it really just does come down to what product you are using, not how you are using it.
Asides from sticking with reputable brands and checking the listed materials and percentages on the products you use, you can solve this appearance issue easily enough. Be mindful of your film thickness, and follow the Technical Data Sheets instructions to the letter. If the TDS states a 400 degrees’ peak metal temperature for 10 minutes, make sure the part is at 400 degrees for the required time, not just the air temperature. The time in the oven is also important - leaving it in for 30 minutes will cause visible issues and leaving it in less will cause functional issues.
One more thing that you can do, which is really helpful in any scenario, is have sample panels that you and the customer can see beforehand. Try different film thicknesses on different colored substrates – using a yellow on a dark substrate will be different than using yellow on a light substrate – and, most importantly, show the customer what the end result will look like.
Image credit: Dulux
www.ifscoatings.com
A GUIDE TO APPLYING POWDER COATINGS 54

Poor Flow and Orange PeelAh, orange peel. A terrible, annoying foe to any job shop. You know what it looks like, so we’ll jump right into what causes it. If you build the film up too thick, you will get orange peel. If you have poor ground, you will get orange peel. If you have the gun too close to the substrate causing it to kV reject, you will get, you guessed it, orange peel. Lay another coat over a mild orange peel and you will just make everything worse.
So! To avoid this nastiness, just follow these steps: keep your film even and in line with the TDS, mind your gun-to-surface distance, have good ground, and control your kVs and micro amps. Pay attention to the settings on your gun too. You may, or may not be surprised by just how many things can affect an application. Don’t worry, though, we are here to help!
SagsThis particular problem is not overly common in powder coatings; mostly, it is an issue with liquid paints. But, it can still crop up from time to time with powders, especially when the film build is excessively thick, or the formula of the product itself has too much flow. Sags occur in the oven, when the powder goes through the flow and gel stages, without the oven being the correct temperature, the film starts to move. Literally, the product sags.
www.ifscoatings.com
A GUIDE TO APPLYING POWDER COATINGS 55

Also, if the part itself if too hot when powder is applied, sagging can happen. So, to get around this issue, the best thing you can do is mind the temperature of the substrate and oven. Sags are ugly problems and are not easy to fix. Refer to your TDS or call your supplier if you are ever unsure about a product or having issues with it.
PinholingPinholing looks similar to outgassing, only on a smaller scale – with tiny, almost microscopic indentations on the coating. Depending on how bad the pinholing is, it can even evolve to looking like a large crater.
Often, what causes pinholing is when incompatible products are used together. Basically, they act as contaminants to one and
other, and it shows. For example, if you run a super durable and throw a polyester in behind it, and they are not designed to work together, you can see a fine pinholing and gloss reduction after curing.
You can avoid pinholing by keeping your equipment clean, including hoses, hoppers, and guns. Having dedicated equipment for different colors and products is a good idea too. Also, in some cases, if the pinholing is showing up in the oven, you can crank the temperature up and cure out the contaminants.
Gloss
Image credit: powdercoatguide
www.ifscoatings.com
A GUIDE TO APPLYING POWDER COATINGS 56

Inconsistencies in gloss are noticeable and irritating to see, as a gloss is often the final touch to a coating that brings pigments and metallics to luster. What causes a gloss coat to fail is often overbaking, causing the coat to dull in places, or even take on a yellow tinge. Other times, like pin holing, using incompatible products together will cause a reject. This can also be caused by using two different products on the same machine without cleaning it properly in between applications.
Keep your gloss, well, glossy by ensuring that you clean your equipment thoroughly and are using products designed to work together.
Film Thickness
Film Thickness Appearance Issues: When Powder Coating Jobs Go Wrong Pretty straightforward, this one. Typically, this is an application issue. Gun spits or surges can muck up the spraying process, resulting in uneven dispersals of powder. Avoid this by maintaining your equipment regularly, make sure hoses aren’t tangled or kinked, and be certain that you have good ground. Keep the racks clean and check that the hooks have good metal to metal contact. Finally, during the application itself, ensure the powder is fluidizing correctly and the gun is spraying an even and consistent layer.
To Wrap Up…In this guide, we have covered the many ways a job can go wrong in terms of appearance. Rejects are infuriating to deal with and often result in time and money being wasted. Knowing what problems occur, why they occur, and how to prevent them, are a few steps you can take to keeping your job shop in top shape. Most of the issues we spoke about in this guide can be circumvented by maintaining and cleaning your equipment persistently, minding the TDS guidelines, and using products formulated to work together.
For further questions or inquiries drop us a line at [email protected]
www.ifscoatings.com
A GUIDE TO APPLYING POWDER COATINGS 57

Special Effect Powder Coatings and How To Apply ThemPowder Coating Application Issues, Problems & Fixes
We all know applying powder coatings can sometimes be tricky. Sometimes, jobs go wrong. For every coating that comes out perfect, there will be a reject down the line somewhere. The more experience you gain, the risks of a blundered coating are reduced, and we’re here to nudge a bit more knowledge your way. We talk about appearance issues in another guide which you can see here, but right now, we are going to dig into application issues. This is when issues arise in the actual process of applying a powder coating to a substrate, the result of which is often a reject.
As you will read, there is a host of potential issues, many of which stem from not having good ground. Gun settings, film build, improperly maintained equipment, and gun to part distance can all affect an application negatively as well. There are more, and we’ll get into them all, starting with…
Poor Charge, Low Film Build, and Insufficient WrapThis trio of issues is like a terrible three-in-one package. All of the above, either alone or together can cause the coating to
www.ifscoatings.com
A GUIDE TO APPLYING POWDER COATINGS 58

look bad. Quite often a grainy effect, or tight orange peel, is what you end up with. This can often be caused by low film build, as, simply put, there’s not enough coating on the part to create the nice smooth surface you’re looking for. Plus, if you have a low film build with certain colors, you will see the substrate right through it – yellows and whites are often the culprits.
The ProblemThe most common cause of these issues is poor grounding. Now, there is an EFTA standard for what your ground should be, and if that is not met, no matter how you fiddle with your gun settings or gun to surface distance, the powder just will not take a charge; keep this in mind for the rest of the guide, because good ground is going to pop up a lot. Of course, ground is not the only factor in this issue. Your gun settings may actually be the problem. Too much powder flow and incorrect kV levels can affect an application for the worse.
The FixStraight away, make sure that you have a good earthen ground. There needs to be some kind of connection from your part – the substrate being coated – to that earthen ground, be it racks or hangers etc. Also, ensure that these connecting parts are clean, because if there is not good metal to metal contact the charge will not pass through as easily. Truthfully, a regular maintenance
and cleaning system is a good process to have in place. Powder builds up on racks, electrodes, and hooks, and needs to be cleaned away regularly – i.e.: don’t just paint until you can’t paint anymore and then grind it down.
Now, for the gun settings: check your kV levels and powder flow, especially with consideration to what each individual powder requires. If you do fiddle with the settings frequently and see this application issue crop up, double-check the Technical Data Sheet or call up your supplier for the correct kV and flow settings.
Depending on how old your equipment is, something may have actually broken in the gun itself. Multipliers, cables, pumps, and boards can all go bad, basically. You can physically check the kVs coming out of your gun with a kV Meter. A decent one can be picked up for under $50. You will also want to make sure that no powder is getting into where it shouldn’t, like the controls of your equipment. That is just a whole mess of trouble waiting to happen.
As for flow…if your gun is spraying too much powder it can cause you not to get the proper charge, and will waste a lot of product. Another thing that can cause powder wastage, and improper application, is the humidity in the room. Too much or too little humidity can interfere with the spraying process. You want to try and maintain a constant temperature or relative humidity - both
www.ifscoatings.com
A GUIDE TO APPLYING POWDER COATINGS 59

This can be a tricky issue to get your head around. Basically, when parts have internal corners or an odd geometry, due to how the electrostatics travel through the metal, the powder will not apply to these areas easily. This is called a Faraday Cage. The powder is, in a word, stubborn, and will want to pull away from the corners towards the flat areas or edges. This results in areas of a surface that are left bare of powder – usually the corners or recesses and once cured, leave such areas vulnerable to corrosion.
The ProblemMost of us who have worked with powder have come across the Faraday Cage effect! They are difficult and frustrating to deal with, but what causes them? As it turns out, a whole lot of things can be the cause. Grounding and gun settings, like we covered above, but also not enough powder flow, gun to part distance, poor spray pattern, and too fine powder can produce a Faraday Cage effect.
in the storage areas and application rooms. Ideally, the range to keep in is between 50+/- 10 for humidity and 70°+/- 10° for temperature.
Reclaiming powders can cause issues. If the particles are too small, they will not carry a charge as easily. Maintain a proper ratio of virgin to reclaim and you can avoid issues arising due to this particular factor.
Poor Penetration of Powder into Faraday Cage Areas
www.ifscoatings.com
A GUIDE TO APPLYING POWDER COATINGS 60

The FixThere are some methods to preventing and working around a Faraday Cage effect, and we will start with powder flow. If you do not have enough powder coming out of the gun itself, it is going to make it even harder to get the powder into those internal corners. If this is the case, adjust your flow and increase the amount of powder leaving the gun.
Now, gun to part distance. You need to mind how much time you spend with the gun, especially so with automatic systems, and where it is positioned with respect to the part. You cannot just
push a part through the application and expect the Faraday Cage areas to be filled. What it boils down to is pay attention to your gun. The tip can wear out, or a clot can form on the end – both issues can spoil how the powder will exit the gun.
Again, if your reclaimed powder is too fine, it will not carry a charge as well, meaning the risk of a Faraday Cage is increased. Check your mix of virgin to reclaim powder.
This is not an end all solution to beating a Faraday Cage, but heating the substrate before spraying can help the powder disperse more evenly into those tough areas. Doing this increases the overall film build and how well powder grips to the internal corners.
Back Lonization and kV Rejection
www.ifscoatings.com
A GUIDE TO APPLYING POWDER COATINGS 61

Each part is only capable of taking so much charge. Go over that amount, and it will start to reject the charge. This results in the coating behaving differently, kind of like it is standing up or looks different in that area, and once it is cured, you will see the defect in that area of the part. Worse still, you can get back ionization. In itself, back ionization gives a ruddy look to a coating, but this whole application issue can take on a number of unpleasant appearances, including orange peel and starring. Not a good look, and not a good outcome.
The ProblemPoor grounding and too fine powder can contribute to this application issue, for the same reasons we have highlighted above, though they are not the main suspects. Mostly, what causes such a reject to form is forcing a part to accept more charge than it can handle, or continuing to apply powder once that limit has been overloaded.
The Faraday Cage issue can be a factor here as well. Due to the way the electrostatics work and how the powder attracts to some areas more readily than others, it is easy to accidentally over-apply powder in the areas not suffering from the Faraday Cage effect. These areas with too much powder will suffer from back ionization and from defects like orange peel. Back ionization can form when your gun to part distance, kVs, and microamps aren’t monitored closely enough. Even if true back ionization does not develop, you still might lose some of the smoothness in the finish.
The FixAs before, check for good ground. Reducing your micro amps and kV settings can help get around this application issue, as can decreasing your powder flow. Taking these steps will lower the load and voltage that you are applying to the substrate.
An ideal gun to part distance is typically eight to ten inches on automatic lines. Handguns are slightly different but don’t go thinking that you need to stick the nozzle right to the part – that will blow off more powder than it applies. Spraying by hand is something that experience will help with, but a good rule of thumb is to keep the distance around 6-10 inches.
Gun Spitting, Surging, and Inconsistent Powder Feed
www.ifscoatings.com
A GUIDE TO APPLYING POWDER COATINGS 62

It is hard to withhold a scream of rage when, right in the middle of an application, your gun spits out a wad of powder and ruins an otherwise good coating. It is blindingly frustrating when your gun surges with a sudden influx of powder. This group of issues is definitely what one might define as a pain in the backside, as they result in uneven coatings with a marred finish.
The ProblemToo much fluidization is possibly the biggest player here. What happens is that there is way too much fluidization going on in the fluidizing hopper and you are getting lots of air bubbles. This means that the flow coming out of the gun is not a consistent mix of air and powder; there is too much air. What else can cause surges and spits though?
Glad you asked! Build upon the tip of the gun, and on the electrode, can cause spits when that residue build up decides to break off all at once. Also, worn out pumps or venturi tubes can contribute here, as can kinks in the hose – and if your hose is really long that can factor in too, as the longer the hose, the more air, power, and powder it needs for a consistent flow.
Humidity can affect your air as well. Water in the airline will mess everything up, creating impact fusion or powder clumping – all of this causes spitting as the clumps come loose. Essentially, the more moisture in the air, the heavier the powder will become as it pulls the water particles in.
The FixDepending on how new your equipment is, hose length has already been factored in by the manufacturer, as some automatic booths have different settings for each hose depending on how long they are. The best thing to do is to check with your equipment manufacturer what the ideal hose length should be for your system. So, to prevent spits, surges, and inconsistent powder feed, check your equipment, make sure the hoses themselves are not being restricted in any manner, do not go crazy with the fluidization and clean your equipment regularly.
Reclaimed powder does not act the same as virgin powder. It does not fluidize as well as virgin, nor does it travel through hoses or charge as well. This makes it more likely to have these application issues. Judge whether or not the benefits of reclaiming powder outweigh the risks depending on what your job shop and clients require.
Poor Spray PatternThis is a pretty straightforward issue, caused, by and large, by not maintaining equipment to the degree it requires. The powder does not spray out of the gun evenly, causing inconsistency in film build and pigmentation.
www.ifscoatings.com
A GUIDE TO APPLYING POWDER COATINGS 63

The ProblemLet’s face it, equipment gets well used and gets old. Poor spray patterns can arise when parts of your gun, hoses, and pumps aren’t cleaned properly or have just come to the end of their life. Sometimes, this shows as powder residue building up in the equipment. Other times, the flow is not as strong or consistent as it should be, meaning a worn or broken pump.
Some companies make equipment with air settings geared towards spray patterns. If you are having issues, go over the manual or talk to your manufacturer.
The FixEasy problem, easy solution. All you have to do is narrow down where the problem is and replace the part. Or, clean the part thoroughly – particularly if your equipment is part of an automatic line. Preventive maintenance is going to be your key step to avoiding poor spray patterns.
Poor Powder Thickness or CoverageFilm thickness and coverage truly affects the overall finish of a coating. Too thick, and you will run into issues like orange peel or sagging; too thin, and you will be able to see the substrate – and any blemishes on it – easily through the film. Grounding
makes an unsurprising appearance as a culprit here, however improper settings on your equipment, worn equipment, improper rack design, part presentation and gun to part distance, powder flow, and low humidity all factor in as well.
The ProblemSo, grounding. Yes, grounding, again, is often the problem. If you do not have good ground, you are just not going to be able to get the powder to adhere to the substrate evenly. All sorts of problems crop up, not just poor powder thickness and coverage – and not just the application issues we are talking about here either! Bad grounding also has a tendency to magnify how severely other problems form too, like how quickly and how badly back ionization can form.
Poor powder thickness and coverage also comes down to your gun settings. If you are not getting the proper kVs, you will lose film build. This, too, can pop up if the equipment is worn – check out how we covered this in the previous application issue.
One thing that we have yet to cover is poor rack design. If you are doing multiple parts at once, and they are not spaced far enough apart the powder will be pulled in different directions. Minor differences in, for example, how well each individual part is grounded, can mean that certain parts will attract more powder than others. As such, some parts will be more coated than others.
www.ifscoatings.com
A GUIDE TO APPLYING POWDER COATINGS 64

Another point to consider, with automatic lines, is that the part presentation can be a huge issue. Depending on the size and shape of the piece to coat, how it is oriented during the spraying process can really affect the film build. If the front end is six inches from the gun, and the back half is 12 inches from the gun, then you are going to get different film thicknesses on both ends.
And again, humidity will cause you to lose film build. How? Well, as the water in the air travels through the hose it builds up a static charge – a charge which is the opposite of what your gun is using to make the powder adhere to the substrate. All of this causes your film build to go down significantly.
The FixWe will say it plainly, powder is a great insulator. The more powder that builds up on your rack, or if you are recoating a piece and there is already a layer of powder down, the part is being insulated from the ground. You will see a difference even in back to back jobs if you don’t clean the racks in between sprays. This plays into the poor rack design issue, as if some hooks are cleaner than others, the charge each part carries will differ. So! Ensure that your lovely, clean racks are well spaced for the type of piece you’re coating when spraying multiple parts at once.
Now about that part presentation…this is a tricky one to solve if you are not spraying by hand – unless you do decide to switch
over to this method for oddly shaped pieces – so your best bet is to tailor the gun settings as needed, and check your powder flow, gun to part distance, and the borders of your electrostatic equipment.
We talked about the importance of preventive maintenance above already, as well as the importance of humidity control, so we’ll just move onto our second last application issue…
Powder Sagging
www.ifscoatings.com
A GUIDE TO APPLYING POWDER COATINGS 65

We explained powder sagging in detail in one of our previous guides when we talked about appearance issues, but the gist of it is that far too much powder has been applied to a surface, creating a film so thick that during the cure it physically sags under its own weight. This is most is most common in urethane based coatings.
The ProblemIn the Faraday Cage section, we spoke about how heating a substrate before spraying can help powder apply better. However, heat it too much and the powder will melt and flow on contact – this can even go beyond sagging and icicle, a term applied when the coating will actually snap off like an icicle.
As for film thickness, if you have built up too much powder, as it goes through the gel and flow stages, the sheer weight of it all follows gravities bidding and, literally, sags.
The FixSagging is relatively simple to avoid. Keep your film thickness to what your supplier and/or TDS specify, reduce the amount of powder coming out of your gun, and do not heat the substrate too much prior to coating the Surface.
FoamingOur last application issue is foaming of the surface. Our experts have generally seen this occur most with urethane based powders. So what happens is, if you let your film build get too high, the Ecap gets trapped on the surface, builds and it looks like foam. Even in Primid or non-TGIC polyesters, you can get a water vapor giving a similar effect. It’s perhaps not so much like foaming but it certainly creates an unwanted effect. Either way, it is not an attractive finish.
The ProblemFoaming happens when the film build is too thick. The Ecap is trapped all over the surface of the substrate and during the cure, it tries to escape. This creates a foaming effect, or excessive pinholing, depending on your luck.
The FixThis is an easy one. Mind your film thickness and increase the line speed or reduce the oven temperature. Dust your hands off and call it a day, buddy.
www.ifscoatings.com
A GUIDE TO APPLYING POWDER COATINGS 66

To Finish Up…Application issues pop up in any and every job shop. No matter how much experience you have, you will come across some, if not all, of these at least once in your career. They are annoying, as all rejects are, but can be prevented. As you have probably gathered from the dozen (or more?) times we mentioned it in this guide, good ground is essential to ensuring that powder adheres consistently and evenly across a surface. We cannot emphasize enough how important preventive maintenance on your equipment is too. Keep it clean, and keep it in shape!
From Faraday Cage effects to sagging to poor spray patterns, we have covered it all. Arm your job shop with this knowledge, and you will be better prepared to churn out great coatings!
For further questions or inquiries drop us a line at [email protected]
www.ifscoatings.com
A GUIDE TO APPLYING POWDER COATINGS 67

Fluidization and Fluidizing Bed Issues - Powder Coatings
Ensuring that the powder is fluidizing properly is essential to a successful powder coating application. So what is fluidizing? Basically... it is using air to turn powder into a ‘liquid’ state. A good fluidizing hopper will often have the appearance of a simmering pot of stew. But why do we need to fluidize the powder though? Well, by fluidizing powders they become easier to apply – both in the terms of an even application and how smoothly the powder flows through the guns.
Check out some of the more common fluidization issues we’ve all experienced below. Some of these are common problems, others not so much but we will delve into the problem, the cause and some prevention tips and solutions.
Powder Blowing Out and Around the Hopper The title is pretty self-explanatory as to how this issue appears, and you will know it when you see it. Typically, powder acts this way when the powder level itself or the fluidizing pressure are too high – it can also be a combination of these two. Other causes of this issue are the powder being too fine, blocked hoppers, and poor venting.
www.ifscoatings.com
A GUIDE TO APPLYING POWDER COATINGS 68

So, how to we solve this? Let’s work our way through the list above. First up, powder levels. A good idea is to mark a level on the fluidizing hopper that acts as a guideline for what to never exceed. A good guideline to follow is that the hopper should never be more than 2/3 full. This way you will know when the hopper is or is close to being, overfilled.
As for the powder being too fine, you first need to establish if the powder is too fine due to the percentage of virgin to reclaim or because the manufacturer has made the particle size too small. If it is the former, and you reclaim powder yourself, increase the percentage of virgin to reclaim. As for the latter issue, contact the manufacturer and relay the problem so you can discuss with them the next steps.
Reclaim powder is hygroscopic, which means that it will pull moisture from the air if given the chance. If reclaimed powder is too fine and sucks up a lot of moisture you may start to get fluidizing problems – the sort that ends up with you cranking up the psi or fluidizing pressure on the hopper to compensate for the heavier particles. Solve this by having a good, clean air supply, and perhaps fluidizing the powder half an hour or so before spraying to liberate some of the moisture from the powder particles. Virgin powder must be clean and very dry, so if it isn’t, this is a good step to take.
No Air Percolating Through the Surface of the Powder Simply put, this issue is when the air is not penetrating the powder. Usually, the cause of this is insufficient air pressure, a clogged membrane, blocked membrane, too fine powder, or the powder itself has become compacted.
Typically, the powder should be in a rolling state, where the air is evenly distributed through the fluidizing membrane and the powder. If this is not the case, check your airlines, the air pressure, and look for any kinks, damages, or blockages in the hoses. Clogged membranes, either damaged or contaminated with oil or water, need to be replaced. No ifs, and’s, or buts, if you have a clogged membrane, it’s got to go.
Moving onto blocked membranes (which are not the same as clogged membranes), the way to solve this issue is to, shockingly, clean the blockages. If the powder is too fine, adjust the ratio of virgin to reclaim. And lastly, if the powder has become compacted, for whatever reason, you have to break it back up with a clean, wooden stirring device and fluidize with dry air. Take care not to damage the fluidizing membrane at the bottom of the hopper with the stirring device, though.
www.ifscoatings.com
A GUIDE TO APPLYING POWDER COATINGS 69

Also, do keep a sharp eye on your ratio of reclaim to virgin, as too much reclaim will cause the powder to perform differently, and may also cause back ionization to occur.
StratificationSometimes, powders will stratify in the hopper. Stratification is when particles – due to different weights – separate into different layers during fluidization. This is particularly common with unbonded metallics (which we have covered here), where the different gravities of the metallic flakes and the powder will cause them to separate. Such separation causes the color of the coating to shift in pigmentation and the uniformity of the sparkle effect (if it is a metallic) to fluctuate.
Stratification in other powders does not show quite as easily as it does with metallics. So, to solve this particular issue with metallics, you will either need to use bonded metallics or reduce the fluidizing pressure. Or both! Also, manually mixing the powder particles back together, and adding more virgin, can help depending on the scenario.
Concerning metallics, if you are reclaiming them, you want to keep the ratio around 80% virgin to 20% reclaim to keep the color uniform.
Two Top Tips from the Experts?As we covered above, there are a fair number of ways for a job to go wrong when it comes to fluidization. Blockages, stratification, gun spits, the works. So, to pre-empt the issues above, we have compiled a few extra tips.
One, control the humidity of the room as best you can. The more humidity in the air, the more risk you run of the powder absorbing moisture. Or worse yet, if the application room itself is hot and humid, the particles will begin to clump together before they even hit the substrate. Now, if these clumps form inside the hopper, they can cause all sorts of chaos. At best, they will cause small gun spits. At worst, they will start to build up in the pump, hose, or inside the gun, and grow larger until they either block the hose or come loose in a surge.
Two, preventive maintenance is going to be your best bet when it comes to avoiding issues in this area. Fluidizing membranes have a life expectancy, and many manufacturers recommend checking them at least once a year. Keeping them clean, especially free of oil and water, based on manufacturer’s specifications will save you some pain. As for fluidizing in general, at IFS Coatings we honestly recommend checking your equipment every day. Do it all; pumps, hoppers, guns, pick up tubes, membranes, and hoses. Better to find a broken piece of equipment in the morning than half-way through an application, right?
www.ifscoatings.com
A GUIDE TO APPLYING POWDER COATINGS 70

Fluidizing Beds
These days, most coating lines, large or small, use hand or automatic powder guns to apply their powder. However fluidized beds are an older way of applying powder coatings, and though they are probably not as widely used as they once were, they are still in use today. Not as common as they once were, they still, have their place and of course, still have a set of potential issues that go with them. Some job shops favor them – typically
for small parts and valve bodies – so we are going to cover some of the issues you might come across in using them.
So, just what are fluidizing beds? Given that these are not overly common anymore, you may recognize fluidizing beds by sight rather than by name. Basically, a fluidizing bed fluidizes by virtue of a fluidizing plate or membrane (now say that out loud three times fast). This plate is plastic and filled with hundreds of thousands of small holes - think of an air hockey table – which the air is diffused through, thereby creating a curtain of air that keeps powder suspended.
While we’re on this, there are two ways that fluidizing beds are used. The first is where you heat the part and then run it through a fluidized bed. This causes the powder to adhere, melt, and fuse to the part. After this, the part goes into the oven and the powder is cured. The second manner of using fluidized beds is when an electrostatic charge is applied during the coating process.
Why aren’t Fluidizing Beds Popular? For the most part, money. Fluidizing beds, by virtue of their size, require a lot of power and powder to get going. Also, they are not as efficient, or product saving, as spraying by hand gun or on an automatic line. As better equipment became available over the years, fluidizing beds fell out of popularity for these reasons.
www.ifscoatings.com
A GUIDE TO APPLYING POWDER COATINGS 71

Fluidizing Bed Issues There are all manner of ways for jobs to go wrong. Fluidizing beds, just like with most job shop equipment, come with their own particular baggage. Let’s jump right into it, starting with…
Particle SizeIf the powder, due to reclaiming or efforts on the manufacturer’s part, is too fine it can cause all manner of trouble. With a fluidizing bed, powder that is too fine can cause irregular coverage. Keeping a close eye on the powder levels and the actual amount of powder on the bed is a smart idea.
Pick up tubes are usually positioned roughly an inch above the bottom of the fluidizing membrane. If you have too much powder flowing into the hopper, it will sink to the bottom and cause all sorts of problems. Newer equipment circumvents issues like this by having many settings that you can adjust depending on what the job needs.
Part Temperature and Dwell TimeIf your job shop uses the method where you preheat the substrate before moving it through the powder application process, then you should pay close attention to the temperature and dwell times.
Depending on the parts thickness, density, shape, and recommended dwell time, the temperature it is heated to needs to be adjusted. If the part is too hot, the heat with fuse loose particles together before they even touch the part. Similarly, powder not making it on the area can be heated and fused by the part passing through the fluidized bed. These clumps will float around the fluidized bed and will eventually sink to the bottom. If they are not screened out using a filter, they can also cause rat holing as they build up on the membrane and block air holes.
Now, if you leave a part in the bed for longer than advised, the film build will continue to thicken. As many job shops know (and dread) thick film builds can cause appearance issues from orange peel to sagging, to discoloration of clear coats.
It goes without saying that paying super close attention to the temperature of the part going into the fluidized bed and the amount of time it spends in there (line speed) is essential.
Air Supply and Rat HolesA bad air supply – bad either from damaged equipment, clogs or not being clean – is an issue that crops up a lot. Not just in fluidizing beds, but all around. Bad air supply can muck up an application, intercoat adhesion, and, crucially for this guide, the
www.ifscoatings.com
A GUIDE TO APPLYING POWDER COATINGS 72

fluidizing plates. If the air is contaminated, by grime, dirt, oil or water, those particles will cling to any surface they can – and that’s if they don’t contaminate the powder itself.
But, we are talking about fluidization beds right now, and boy howdy does a dirty air supply mess everything up. Fluidizing plates, in particular, have issues when the holes in the membrane get blocked. As said holes are tiny, it does not take much for them to become clogged, and once they are you get a problem called rat holing.
An ugly name for an ugly problem, right? Rat holes are basically when, due to clogged air holes, the air, and therefore the powder, pushes through unevenly across the fluidized bed. Where the air does push through, it is more concentrated and causes geysering.
Speaking of contamination…Typically, if a job shop uses fluidized beds they have multiple beds for different chemistries to avoid cross-contamination between formulas, and they can also swap them out for color changes. Sometimes this means separate fluidized beds, and other times it means using a roll on / roll off systems where they can swap out beds as needed. Keep this in mind when considering your own systems.
To Wrap Up…Fluidizing beds may not be as commonly used as they once were, but they are still a solid piece of equipment for those using them. They have their share of problems, what with needing a set amount of powder to function and daily maintenance, but keep them clean, mind your powder levels, and follow our tips for good fluidization and you’ll be golden.
For further questions or inquiries drop us a line at [email protected]
www.ifscoatings.com
A GUIDE TO APPLYING POWDER COATINGS 73

Cured Film Properties - Issues, Causes and Solutions
There is always a deep sense of satisfaction when you pull a substrate out of the curing oven and find no visual imperfections. As with most job shops, there are a number of different tests that you can perform to test the quality and consistency of the film and various other cured film properties. Now, when we say ‘cured film properties’, what we are actually talking about is which particular aspect of the film is being tested, for example, adhesion or pencil hardness.
It is always important to test the durability and quality of a job before sending it off to the customer, so we will be covering the most important cured film property issues, what causes them, and how to solve them. But first off, one piece of advice for across the board: always get the customer to specify what they expect the final product to look like and if there are any specific performance requirements from the coating. Sample panels, especially samples of the coating and substrate the customer wants, are an excellent prop for such discussions. Clarify exactly what is needed of the coating so that no one is going into a job blind.
www.ifscoatings.com
A GUIDE TO APPLYING POWDER COATINGS 74

Also, some of these issues are product and/or substrate specific. What tests are performed all depends on what equipment a job shop uses, on what kind of substrate, and what is needed of the coating. This is another important reason why it is a great idea to have a chat with your customer and determine what they need and are expecting. And of course, referring to the TDS will be a big help here!
That done, let’s get to it!
Impact Resistance and/or FlexibilityThe biggest factor affecting impact resistance is under or over-curing. While different product types, for example, urethanes and polyesters, have different impact resistance performance, generally it all comes down to the time and temperature in the oven. Now, the next possible tangle in this line comes from improper substrate prep. Many of you reading this already know how vital pretreatment and cleaning the substrate is in any job; you can use the best paint in the world, but if you do not pretreat properly the coating may struggle to pass the impact resistance test.
(Really, you’ll see pretreatment and cleaning crop up a lot in this guide as most issues with application and cure go back to doing neither properly.)
One other thing that can adversely affect a films impact resistance is if the film is too thick. The thicker the film (even just going over three mills) the less impact resistance you will get in the end. Two to three mils (max) is a good ballpark to stay in!
The FixRefer to your TDS and whatever guidelines your suppliers/manufacturers have laid out and adjust your dwell time, cure time, and oven temperature accordingly. Every minute and
Cracked formation from impact - Image Credit: Paint Defects: Powder Coating: Failures & Analyses
www.ifscoatings.com
A GUIDE TO APPLYING POWDER COATINGS 75

degree counts! If you are following these directions and still have problems, then look at your lines pretreatment process/’s and cleaning method/’s. A good coating can still fail many tests, not just impact resistance and flexibility, because of poor prep. First off, check your equipment and concentrations, and maybe even contact the pretreatment supplier.
Avoid the guesswork of playing with equipment settings and concentrations by testing a coating on B1000 ACP panels. These are cleaned and pretreated already and can save you some time by essentially troubleshooting your system. If the film passes the impact resistance test, then it is your pre treat system that needs adjusting.
Poor AdhesionLargely, what causes issues with adhesion is the same as what affects impact resistance – poor pretreat and cleaning. However, one thing that we did not mention above is that if a substrate is not a uniform thickness, and a job shop does not account for this, problems can arise in the oven. It comes down to how those differing thicknesses in the substrate heat up; a one-inch area will heat up faster than a three-inch thick area. This can also apply to different types of substrate. Consult with your substrate supplier if you have issues here. Otherwise, refer to the advice above for adhesion problems!
Poor Corrosion ResistanceGuess what causes this issue? You are right! Poor pretreatment, cleaning, and/or under-curing. But also, low film build. This issue, in particular, is a biggie if the coating is going to be exposed to the elements, and if the substrate is not prepared, cured, or coated with a thick enough film, corrosion issues will pop up down the line.
The Fix Different substrates need different pretreatment systems. Cold rolled steel performs differently than aluminum, for example, and they require different formulas and systems. Using shot blast
Under Cured
www.ifscoatings.com
A GUIDE TO APPLYING POWDER COATINGS 76

may be the right fix for one, but may irrevocably damage another. So! Sit down with the customer and clear up what they expect concerning corrosion resistance and lay down what your job shop is capable of providing. Any job shop that does not take this step is potentially setting them up for failure – not just concerning corrosion resistance.
Poor Abrasion Resistance or Pencil Hardness Straight up, if a film is under-cured, it is not going to perform as it should. It is a shame when this happens, as visually the coating looks good, but it just fails any pencil hardness test – sometimes so badly that what you’ve got is a reject. For the most part, an under-cure is caused by improper dwell time and oven temperature.
The FixRun an oven recorder profile to see if the oven is functioning as it should – like getting to the right temperature within a certain time. If everything is ship shape with the oven, then perhaps you need to take another look at the required temperature and dwell time for the substrate and coating. Generally, increasing the temperature and dwell time in the oven will improve this issue, but it’s easy to slip from under-cured to over-cured – cook it too much and the film will become brittle, perhaps even damaging the polymer. Refer to your supplier or TDS for accurate information.
GlossThe gloss of a coating can be affected by under or over-curing. Simple, right? Now, while not a common test, it is an easily measurable one – any experienced job shop will usually be able to tell immediately if the gloss coat has not come out as it should. If you have a coating that is supposed to be a 40 gloss, yet comes out of the oven as an 80 or 90, you will be able to spot it right off the bat – and so will the customer.
Mandrel Bend - Image Credit: Paint Defects: Powder Coating: Failures
& Analyses
www.ifscoatings.com
A GUIDE TO APPLYING POWDER COATINGS 77

The FixFixing this issue depends a little on what kind of oven your job shop uses. Gas-fired convection oven or infrared oven? Both have their own pros and cons, but gloss levels, in particular, can be slightly trickier to fix with infrared ovens. As infrareds work by line-of-sight, a part can come out of the oven with a high gloss in some areas and low gloss in others. Unfortunately, the only way to really get around issues with gloss, concerning infrared ovens, is to have a chat with your manufacturer about the pitfalls of infrared versus gas-fired convection. Happily enough, if it is your dwell time and/or temperature that is effecting the gloss, all you have to do is adjust the time and temperature. Easy enough!
ChippingOf all the visual defects that you can get with coatings, chipping might be the most unpleasant – it looks bad for you as a job shop, opens up a substrate for corrosion, and just looks awful. What causes chipping though? Like all of the cured film issues we are covering, it comes back to the cure. But chipping can also come from film thickness and the pretreatment. How though?
Well, if the surface is not prepped properly, the powder will not be able to adhere to the surface. As for the film build, more isn’t always better. Too thick and chipping, among other things, will result.
The FixThe best way to prevent these issues is to pay close attention to your equipment. What are the settings on your gun? Check the KVs and cut back if you need to. What is the feed pressure? Maybe turn that down a notch. Plus, pay close attention to your spray time and gun to surface distance. Often, it is the little things that sneak up on you that can ruin a job.
Sometimes, what it really comes down to is the product itself; what it is formulated to do, how you cure it, and what type of substrate the coating is being applied to. When choosing a product, don’t just decide based on color or special effect – check out which product types suit your job shops needs best.Delmenation
www.ifscoatings.com
A GUIDE TO APPLYING POWDER COATINGS 78

To Wrap Things Up…So many of the issues outlined above stem from poor surface preparation, film build or cure. Fortunately, these are all things that you can control reasonably easily and there are some pretty simple fixes. So armed with your customer’s expectations, the TDS, great surface prep and good line management, you can reduce rejects and create great work!
For further questions or inquiries drop us a line at [email protected]
www.ifscoatings.com
A GUIDE TO APPLYING POWDER COATINGS 79

The Trials and Tribulations of Hoses and Pumps
Simple as they might seem, the hoses and pumps of your application and fluidizing equipment are some of the most important parts. If they do not work properly, break, or are contaminated, the whole system goes kaput – likely leaving you with a reject at the end of a job. Within this guide, we will be going over some great tips for the care and maintenance of hoses and pumps, as well as covering some of the main issues that can appear.
Let’s start with…
PumpsThe main type of pumps used today for powder coatings are Venturi pumps, and pumps are sort of like the heart of your equipment. They blow air across the top of the pickup tube, which creates a negative pressure. In addition to the powder feed air, there is an atomizer which mixes additional air into the powder being conveyed through the hoses and aids in a consistent flow. Now, what the pumps do is basically control the ratio of powder feed air to atomized air.
www.ifscoatings.com
A GUIDE TO APPLYING POWDER COATINGS 80

MaintenancePutting it simply, pumps need to be maintained frequently and consistently. Depending on how much you use them, the various parts pumps are made of will wear – and faster than you think too. A good habit to get into is to check over the wear parts every day, as powder is abrasive. Better to find any problems at the start of a shift than for it to crop up in the middle of an application. Gun surges, gun spits, and inconsistent flow are some of the issues that can occur because of a faulty or broken pump. Best to avoid them, right?
Common Issues
Impact FusionIf your pressure levels are too high, you may encounter a problem known as impact fusion. Basically, inside of the pump powder starts to build up. As it builds up, the air powder flow will become restricted. (At this point many people will turn up the feed pressure, which only worsens the problem.) As the impact fusion worsens problems such as gun spits and surges can occur. Most manufacturers will have some sort of gauge that will let you know when it is time to replace a wear part. Be sure to check your manufacturers guidelines for when and how to check for wear.
Pick-up tubes are another part that should, like pumps and hoses,
be checked for wear and tear on a regular basis. The O-rings, in particular, must be given regular maintenance because if they are damaged or torn extra air will be pulled in; which can cause a number of problems, including gun spits and surges.
Another way that you can control, or even avoid, impact fusion is to reduce the air pressure settings of the guns and transfer pumps. Transfer pumps are used in reclaim systems to move air and powder through and back towards a feed hopper, and just like their cousins, transfer pumps require regular maintenance.
Moisture in the air supply or in the environment can also cause impact fusion. As we’ve covered previously, powder is hygroscopic, meaning that it will pull moisture in from the air if it is there. Once that moisture is on the powder, it starts to form clumps that will grow bigger and bigger, and possibly even start to clog up the hoses, guns, and pumps. To keep moisture from the air supply, install additional coalescing filters, and an air chiller as extra insurance. Finally, if you can, control the amount of moisture in the environment of the application room via the air conditioning system; humidity is what creates moisture in the air, so keep things dry and cool.
Sometimes in transit powder can compact and almost clump together. Breaking the powder up beforehand will help the box feeder create a smooth flow of powder. You can do this nice and
www.ifscoatings.com
A GUIDE TO APPLYING POWDER COATINGS 81

simply by lightly rolling the bag of powder around or running the powder through a 60 mesh screen, before then popping it back in the box.
Other Issues
There are a few little things that can build up into one, big problem. Like if the fluidizing membrane gets water in it and the fluidization is poor, the pickup tubes and pumps will start to create a void in the fluidized powder inside the hopper. Once that void collapses, you’ll get gun surges and spits – sort of our go-to bad guy for this guide.
Proper maintenance is really the only way to avoid all of these problems. So, make sure checking pumps and hoses, especially wear parts, is on your daily maintenance list and check it twice.
Knowing how your equipment functions is a good way to avoid making a silly mistake, like mixing up your powder feed with your atomized air feed. Also, when cleaning pumps, you might want to get into the habit of disconnecting the air lines connected to them. If powder is accidentally blown back up into the controllers or valves, the lifespan of the equipment will be reduced.
www.ifscoatings.com
A GUIDE TO APPLYING POWDER COATINGS 82

HosesHoses are literally just the hoses that carry the fluidized powder from the pump to the gun. Over the years, hoses have been modified to perform better. Where hoses were once made of synthetic rubber, they are now often made of a form of conductive plastic. This reduces the amount of static charge that a powder can pick up as it moves through the tubes. The addition of a conductive strip, or wire, redirects what static charge does build up towards the grounding of the hopper.
On a typical powder gun you will generally have two controls, one for the powder feed, and one for the atomizing. Depending on how you set everything up, these settings will allow you to have a stream of powder, or a consistent flow of powder, from the fluidizing hopper through the hoses to the gun.
MaintenanceLike pumps, hoses require consistent maintenance. They also require cleaning in between jobs – that is, if you are changing colors or chemistries. Say you were spraying a red, and then a clear topcoat. In between jobs, the hoses, pump, gun and such should be cleaned to avoid contaminating the powder. At IFS Coatings, we would even recommend having different sets of hoses for light colors, dark colors, and different chemistries. Hoses can be expensive, but so too can having to redo a job because of a reject.
www.ifscoatings.com
A GUIDE TO APPLYING POWDER COATINGS 83

Now, not all hoses are the same. Some are made from different materials and depending on what the chemistry of your powder is you may need to use different types of hoses (by this, we mean that the hoses are physically made of). For example, fluoropolymers will turn into a semi-solid state in certain types of hoses – like vinyl – and will start to build up inside the hose itself. If you ever run into an issue like this, talk to the manufacturer of both the powder and the equipment.
If you ever need to replace a hose, we truly recommend that you buy said replacement/s from the people that manufacture the equipment you use. Sometimes, different brands just are not compatible.
Common Issues
LengthYou do not want too much of a hose run. The longer a hose is the more chances there are for things to go wrong, and the more power and pressure you need to move an even flow of powder through it. Keep your hoses to a maximum length of 25 feet where possible.
Do not just pick up a hose and jump right into spraying the substrate, especially if the hose is on the longer side. See, powder has just been sitting in that hose, perhaps some will even
have sunk to the bottom, so when you turn it on for the first time there will be a huge surge of powder. Point the gun away from the substrate until the air and powder regulates itself to a smooth flow. Easy done!
Constricted HosesIt is actually pretty easy to strangle the powder flow and air supply in a hose, even by stepping on it. Sometimes the damage is permanent too. This damage can be caused by bending the hose to the point where it kinks, stepping on it, or laying/rolling equipment over it. This is especially common when job shops spray by hand; a wayward foot or bending the hose to do the underside of a substrate can do more damage than some people realize.
But what does a constricted hose actually cause? Gun spits, for one. Surges, for another. The best way to avoid these problems is to just be spatially aware during an application. That is if it isn’t already second nature! Otherwise, keep your hoses free and clear of other equipment.
If your job shop uses non-conductive hoses, your applicator must be careful about the hose coming in contact with any metallic surfaces – like a stray piece of metal on the ground – as this will cause arcing. The static charge that powder gathers as it moves through the hose will literally arc to that metal, possibly
www.ifscoatings.com
A GUIDE TO APPLYING POWDER COATINGS 84

even burning a hole through the hose. Either keep a sharp eye for metal on the ground or swap your hoses for conductive ones.
Final TipsTypically, when an issue with pumps or hoses occurs, what you will see are gun surges and spits. From there, diagnosing the problem is a simple process of elimination. First, check if your powder feed and atomizing settings are dialed in right. Second, be sure that your hoses aren’t kinked or constricted. Third, see if there is a steady flow of powder coming out of the gun, and adjust the powder to air ratio if needed. Fourth, if you hadn’t already, check the wear parts inside of the pump. And fifth, dig around for any signs of impact fusion inside the pump. If you still haven’t found the problem, it might be time to call your manufacturer.
As for those final tips…we have two great ones to finish up this guide with!
One, preventative maintenance is our motto for this guide. Stopping a problem before it even becomes a problem is your best line of defense. Always check the pump before the start of a shift. Take it apart and check for wear and impact fusion, and never, ever clean the inside of a pump with any kind of metal cleaning scour. It will do more harm than good, creating little gouges inside the pump that will be a ripe starting point for impact fusion to form. A wooden popsicle stick is actually a good alternative for metal brushes.
It may seem like a waste of time to check the pumps every day, but it really is a great investment of your time! Overall, checking the guns, pumps, and hoses will not take that long, and it is better to find an issue before the fact than after.
And two, if you have an issue with moisture and the powder starts to ball up inside the fluidizing hopper, and gets into the pickup tubes, it will start to congest the powder flow. Powder should always be free flowing and fluidizing properly in the hopper. If it isn’t, a whole mess of issues will crop up. Smaller particles may even flow up and start creating impact fusion in the pumps. Take our advice above with regards to controlling moisture and humidity, and you’ll be alright.
To recap, we have gone over two the most important parts of job shop equipment: hoses and pumps. There are a number of ways that jobs can go wrong that involve these two parts, but a proper, daily maintenance schedule and some attention to detail will solve most of the said problems. Take care of your equipment, and it will take care of you!
For further questions or inquiries drop us a line at [email protected]
www.ifscoatings.com
A GUIDE TO APPLYING POWDER COATINGS 85

The Little Things: Keeping Order in Your Job Shop
A job shop can be a hectic, at times chaotic, place to work. Depending on how big your shop is, there can be a lot of people on the floor at a time, multiple parts being run through various stages, and all sorts of jobs lining up to be done. No matter how much experience you have running or working in a job shop, you probably have a good idea of how quickly problems can arise – and not just rejects, mind you. Malfunctioning equipment, bad communication, and irregular maintenance will all cause problems, big and small, down the line.
Which brings us to this guides topic: maintaining a good line and keeping your job shop in order. We have put together some all-around great advice for just how to do this! Heads up, some of this may seem basic, especially if you’re old hat in the industry, but the more you know the better prepared you will be for unexpected issues.
Housekeeping and Preventive Maintenance Take care of your equipment and it will take care of you, or something to that effect. Preventive maintenance is perhaps the
www.ifscoatings.com
A GUIDE TO APPLYING POWDER COATINGS 86

best way to keep things running smoothly. Hoses, pumps, wear parts, box feeders, and fluidizing hoppers all need to be taken care of frequently and consistently.
Previously, we have covered how easily cross-contamination can manifest, especially when dark and light powders are put through the same equipment. This is why blowing out the hoses, gun, pick up tubes, checking the fluidizing membrane, and cleaning the fluidizing hopper (if your shop uses one) properly is essential when changing between different colors or chemistries; it also helps stay atop of impact fusion. Also, when blowing out equipment like pumps, detach the atomization hoses otherwise powder will get blown back up into the controls. Pumps also need to be monitored for wear and impact fusion, and never cleaned with abrasive tools like scours – it will do more harm than good.
One cannot just drop a pickup tube into a box feeder and leave the box wide open. All sorts of nonsense can blow inside, from dirt to bugs. A contaminated coating can easily lead to a reject, and contamination can come from not cleaning the hoses and pumps properly as well. If your job shop uses fluidizing hoppers and/or box feeders, something that needs close attention are the O-rings in the pumps. These must be monitored closely, especially if they are conductive as if these go bad the gun will start surging.
What else does preventive maintenance cover though? The pre-treatments! As pre-treating is one of the most important steps in a job, keeping the equipment and supplies in order is vital. Check all the stages, ensure that you are complying with chemical suppliers requirements concerning concentrations, check the nozzle pressure, the temperature, the dwell time, all of that. It is also a good idea to keep your water tanks on a dump schedule. The fresh water you refill these tanks with should also be tested dissolved solids. Another thing that should be checked frequently for plugs or wear is the nozzles on the washer risers. Hard water can also cause issues by causing scale to form, so the risers and nozzles need to be checked frequently as well.
A daily checklist should include turning on the pumps and checking that the nozzles are spraying properly. Plus, if you are going to be doing pre-treatments that day, all the equipment and such should be given a thorough once-over. This includes checking the titration for the pre-treat system.
Ovens need to be maintained too. If you don’t have an oven recorder, then one of the best ways to test that an oven is reaching the temperatures it should is to use a handheld infrared thermometer – which is not overly expensive. Cleaning ovens and application areas is necessary to avoid cross-contamination as well; powder is like sand, in that it gets everywhere you don’t want it to.
www.ifscoatings.com
A GUIDE TO APPLYING POWDER COATINGS 87

What other equipment needs to be cleaned on a regular basis? The racks! Racks with powder build-up may not provide a good ground. Whatever cleaning method you choose, burning, grinding, what-have-you, set it up to happen on a regular schedule. Bad ground causes a plethora of annoying issues.
Coaters, listen up! Do not spray anything but powder in your spraying room. No liquids, no aerosols, no WD40. These items can potentially contaminate your current work and future work if they come in contact with an open box of powder or your powder application equipment.
Overall, when it comes to housekeeping and preventive maintenance, having a clear daily checklist for how to go about it all, including changeovers, is important; someone needs to be accountable for this process.
Powder StorageWe have said it before, and we will say it again: powder must be stored in a cool, dry place. Proper storage makes all the difference, especially with the more sensitive powders. Ideally, powder should be stored in temperature controlled areas, 80 degrees or less with 50%± 10% humidity. Remember, the more moisture in the air, the quicker clumps, lumps, and bumps will form in the powder. If you prefer to use box feeders, powder
really must be kept in optimal condition, otherwise, you’ll start to get impact fusion and gun spits.
Proper storage does not have to be an elaborate setup. A simple storage room with a wall unit works, so long as the air filters are kept clean. Do what works for you, really.
Record KeepingDo you know what powder you have, how old it is and how long it’s been there? Is it still good? Is it labeled correctly? To avoid problems down the line, and make the most of the powder you’ve bought, keep detailed records of your supplies. Supplier, product name, description, code, batch number – if available – and date of purchase should all be noted down. If you have a problem with a powder these records will certainly help, as will snapping photos for image records.
Other important records to keep tight hold of are the Technical Data Sheet and SDS. Sticking to the numbers provided on these sheets will go a long way to ensuring coatings come out of the oven as they should. Also, be sure that your oven can reach the temperature on the sheet. It is also a good idea to buy a gauge that can measure the thickness of a film.
Make sure you have both a Safety Data Sheet (SDS) and a Technical Data Sheet. Your powder provider can send you these
www.ifscoatings.com
A GUIDE TO APPLYING POWDER COATINGS 88

electronically or physically if you don’t get one with your order.
How much powder you use is another detail to keep track of. Keeping inventory between jobs, weighing the powder box before and after spraying is a simple way to monitor your expenses and manage your power output. Sudden spikes or drops in output can hint at problems with your equipment too!
What else should be tracked? Well, creating references, especially for ongoing or repeat jobs, by recording gun settings, kVs, powder settings, micro amps, pre-treat, oven settings, and such, will be extremely beneficial in the long run. You can even draw back to these records if problems crop up during a job to double-check that everything is set as it should be. Keeping these records, and other things like the housekeeping we mentioned above, available for your operators is handy.
Keep records of maintenance checks and repairs/replaced parts and job requirements. It may seem tedious and redundant, but clearly laying out what is going on, when, and how, goes a long way to keeping order. It all needs to be tracked to some degree.
Color Library
Color libraries are a useful tool. At IFS Coatings, we provide free samples of color cards, brochures, and sample panels. Job shops can keep these on hand as references for themselves and for customers. Of course you can pass these materials off to your customers so that they always have some resources from you on hand all the time. Most suppliers will have a range of samples on hand; there are lots of materials that are available to job shops that are free, all you have to do is ask.
www.ifscoatings.com
A GUIDE TO APPLYING POWDER COATINGS 89

Wallboards are available too – you can grab one of ours for around $250. These are a great idea for job shops of all sizes and work hard for you; they make your walls look great and display your color capability really easily. These boards display around 400 colors and special effects, as well as having space for color cards or brochures and straight away the customer can see what your job shop is capable of and how the final coating will appear.
Color cards are great, but building your own color library is hugely beneficial! Every time you get new colors or products, spray up some extra panels – this is also an easy way to test out new products.
To Wrap Up…Whew, that as a lot. Right? So, while there might seem like a boatload of things that you need to watch out for and do, it can only benefit your job shop. Keeping detailed records, staying on top of preventive maintenance and housekeeping, having proper storage, and building a color library are all fantastic ways to keep order of the chaos. Plus, most of our suggestions above don’t cost a dime. In fact, it will probably save you money – and a fair bit of frustration – down the line.
For further questions or inquiries drop us a line at [email protected]
www.ifscoatings.com
A GUIDE TO APPLYING POWDER COATINGS 90