Embed Size (px)
Citation preview
Instructors Guide to:
Miniature Golf Course Obstacle This exercise is a good activity to allow for all ability levels and can combine gears and strength lessons.
Have the teachers use the design process to develop their ides. Ask questions to remind them of the constraints of the problem: A golf ball must still be able to get to the hole, so size must be considered. The obstacle must be able to withstand being hit with a golf ball. Show the golf course they are designing for and the ball they will be using.
Some examples for this project are windmills, houses with doors that open and close, gates that slide back and forth.
Encourage the teachers to use different types of gears and, if there is time, to program their obstacle.

In the Classroom:Grade Level: 2nd and up Time: +1 Hour Building Skills: Structural/Durability
Programming Skills: Timing Controls/Touch Sensor
Miniature Golf Obstacle
You would never think that a miniature golf game contains so much math and engineering! Building the courses and obstacles requires engineering skill, and playing miniature golf involves trigonometry and forces.
ChallengeBuild your own obstacle for a miniature golf course. You must have at least one moving part. Make sure that your obstacle can withstand being hit by a golf ball.
MaterialsRCX, sensors, any LEGO TM pieces, large plates to build structure
on
Skills LearnedThe students will learn that basic structures will not hold up to being stuck by a golf ball. They will discover that multiple supports are needed to balance the forces experienced. The students will also discover that it is very difficult to control the direction of a ball since the speed and direction of the putt will vary from person to person. Therefore, the design will require a sense of tolerances.

General Procedure1. Using a large enough plate or series of plates, assemble the
properly sized area of construction.2. Determine a path for the golf ball, and construct a path for it.
Ensure that a ball a can travel the entire length of the path before constructing anything else.
3. Construct obstacles (i.e. Timed motion)4. Construct scenery or a building around the path without
interfering with the path unless it is an intended obstacle.
Specific Procedure (Construction Site)
1. Using 2 plates, construct a playing field that, when combined, equal a size of approximately 60x30 dots.
2. Prepare two motors by attaching full sized tires. Also, place a “2x4 plate” and 2 “1x2 plates” on the base of the motor to create a flat bottom.
3. Using weighted blocks as a base, build two towers of “2x8 size”, and 6 high. These towers will serve as supports for 2 motors, so make sure they are secure. Attach two “L Brackets” to the towers, and assemble a bridge across. The bridge will be a series of plates and blocks of size (2x4). In order of pieces the bridge goes as such: Left: [L Brackets][Plate][Block X3][Motor][Block X3]
Center: [2 L Brackets attached by 2 “2x4 plates”]Right: [Plate X2][Block X2][Motor][Block X3][L
Brackets] (Image provided below)

Note: The construction of the bridge is specific to the size of a golf ball. The bridge propels the golf ball forward when stuck.
4. Place 2 “1x16 beams” down about 8 spaced apart, and insert axels through each of the holes to create a conveyer belt. Secure them with bushings. Place 2 angled blocks down in front of the conveyor to create a small ramp onto the belt. Build up from the beams using more beams. Alternate between using 2 “1x2 Beams” stacked together and “1x16 beams” on both sides. When you’ve reached a height of 15, place axels through the highest beam in every other hole, and hang axels (with pegs) from the raised axels. Secure these with bushings.
5. Construct a platform that is 8 blocks high and at least 4 deep with beams. Attach a motor with an axel extender on top of the platform. Create a fan by attaching 4 angled beams onto an axel, then attach that axel to the axel extender on the motor. Position the fan just off the surface of the ground.
6. Position the 3 objects in series, and ensure safe spacing. Fence off the area around the path of the ball.
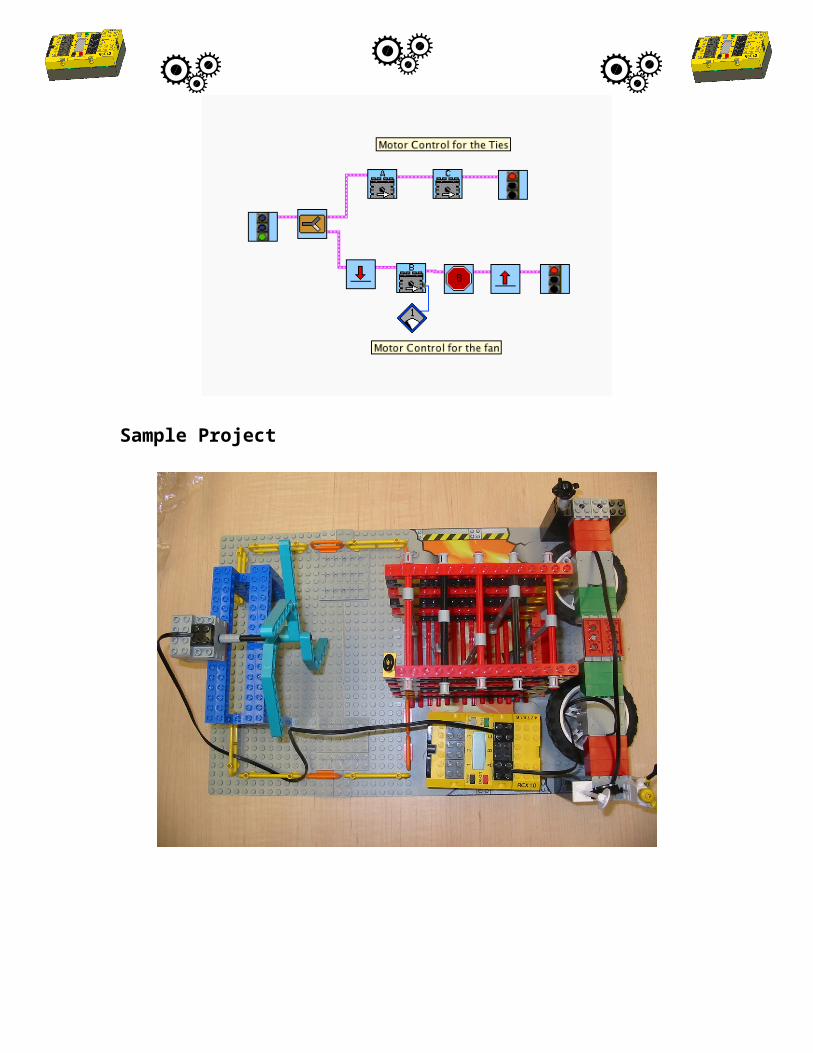
7. Programming: The motors for the tires should be running together at full power in the same direction. Simply stack them on the same RCX output (lets say A), and ensure that one motor is inverted (backwards). This will cause the motors to run in opposite directions. If they spin in a direction that spits the ball back at you, simply flip their direction on the RCX. The fan can spin at its slowest speed if you create a jump loop in which the motor turns on and then shuts off immediately. The motor speed should be at 1 for the fan. (See example program.)

Lego Tips Construction is straightforward and specific to the student’s creativity and ideas. Key things to remember are using multiple supports and allowing for tolerance of sizes of all various golf ball paths possibly traveled. A large portion of the programming is dependent on the design, so trial and error will be very important. Have the students try rolling a ball into the obstacle and note errors in timing and such, then try to change the program. Bear in mind there is no correct program; anything that creates difficulty in a ball successfully clearing the obstacle is appropriate.
Extensions1. Build and design a putter that can propel the ball at various
speeds! Have the students assemble a miniature golf course and play through it. Keep score and give prizes!
Sample Program
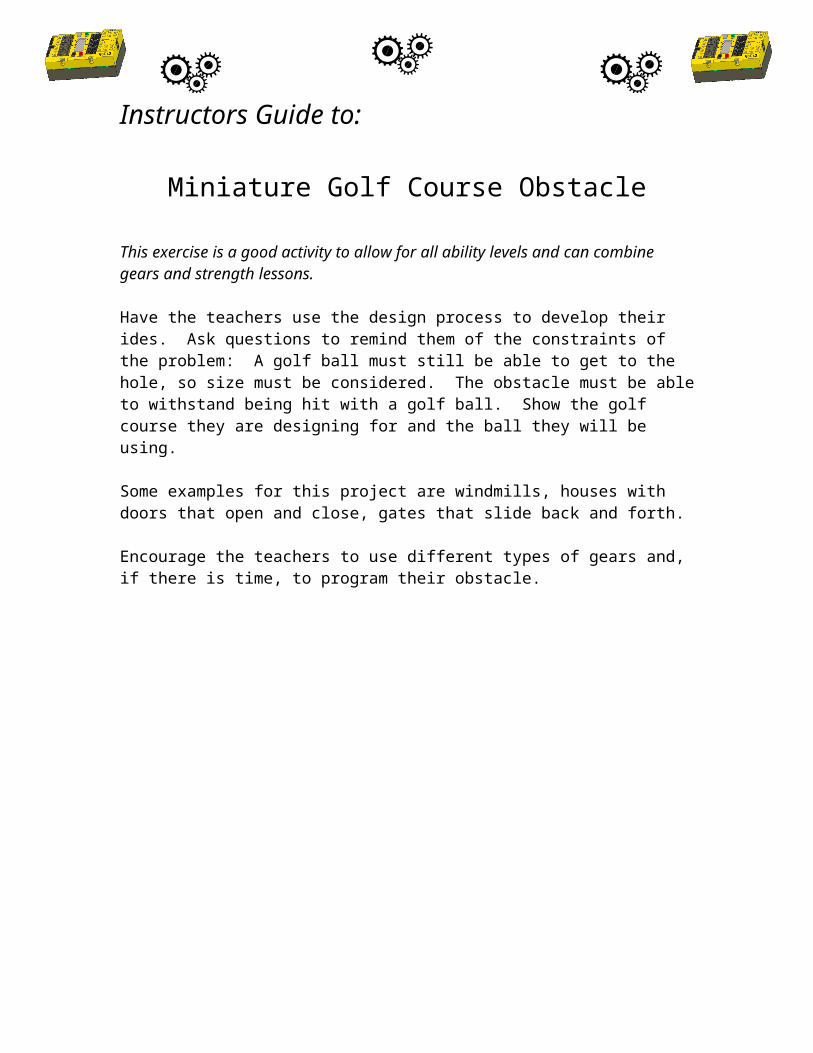
Sample Project