Embed Size (px)
Citation preview

Chemistry: Reactions
The Self-Warming/Cooling Device The following learning activities were backwards planned to facilitate the development of students’ knowledge and skills for mastery
of this NGSS Performance Expectation. Not all of the dimensions and CCSS are covered in the following activities and teachers are
encouraged to address them where possible.
MS-PS1-6 Matter and its Interactions
Students who demonstrate understanding can: MS-PS1-6.
Undertake a design project to construct, test, and modify a device that either releases or absorbs thermal energy by chemical processes.* [Clarification Statement: Emphasis is on the design, controlling the transfer of energy to the environment, and modification of a device using factors such as type and concentration of a substance. Examples of designs could involve chemical reactions such as dissolving ammonium chloride or calcium chloride.] [Assessment Boundary: Assessment is limited to the criteria of amount, time, and temperature of substance in testing the device.]
The performance expectation above was developed using the following elements from the NRC document A Framework for K-12 Science
Education:
Science and Engineering
Practices
Constructing Explanations and Designing Solutions Constructing explanations and designing solutions in 6–8 builds on K–5 experiences and progresses to include constructing explanations and designing solutions supported by multiple sources of evidence consistent with scientific knowledge, principles, and theories.
Undertake a design project, engaging in the design cycle, to construct and/or implement a solution that meets specific design criteria and constraints.
Disciplinary Core Ideas
PS1.B: Chemical Reactions
Some chemical reactions release energy, others store energy.
ETS1.B: Developing Possible Solutions
A solution needs to be tested, and then modified on the basis of the test results, in order to improve it. (secondary)
ETS1.C: Optimizing the Design Solution
Although one design may not perform the best across all tests, identifying the characteristics of the design that performed the best in each test can provide useful information for the redesign process - that is, some of the characteristics may be incorporated into the new design. (secondary)
The iterative process of testing the most promising solutions and modifying what is proposed on the basis of the test results leads to greater refinement and ultimately to an optimal solution. (secondary)
Crosscutting Concepts
Energy and Matter
The transfer of energy can be tracked as energy flows through a designed or natural system.
Connections to other DCIs in this grade-band: MS.PS3.D Articulation of DCIs across grade-bands: HS.PS1.A ; HS.PS1.B ; HS.PS3.A ; HS.PS3.B ; HS.PS3.D Common Core State Standards Connections:
ELA/Literacy -
RST.6-8.3 Follow precisely a multistep procedure when carrying out experiments, taking measurements, or performing technical tasks. (MS-PS1-6)
WHST.6-8.7
Conduct short research projects to answer a question (including a self-generated question), drawing on several sources and generating additional related, focused questions that allow for multiple avenues of exploration. (MS-PS1-6)

Lesson Plans for Chemistry Unit
Lesson 1: Intro to Atom: What’s Inside?
Objective: Students will be able to understand the relative size of an atom, examine properties that are used to
identify objects, test for those properties, and form a hypothesis about the identity of an unknown object.
Learning Goal: Atoms are the tiny particles that make up all matter. Students conclude different materials have
different properties because they are made of different atoms.
Vocabulary: matter, atom, physical property, chemical property, volume, mass, density
Engage:
1. Students are asked about the smallest object they have ever seen, and then share in their groups.
Students are then asked, what is the object they chose made of? (i.e. paper, dirt, etc.) And then what is
that object made of? And so on…until the class comes to the idea that objects must be made of smaller
particles that we cannot see. So how small is this particle? (The ATOM)
2. Ask students, “If I gave you one atom of gold for every second that has elapsed since The Big Bang,
how much or many atoms would you have? What would the pile look like or compare to?”
3. Ask students, “What are you thinking? A teaspoon of gold? A bucketful of gold? A truckful?” One atom
for every second since the beginning of time, don't underestimate it! Second by second, we pass through
the radiation dominated moments after the big bang, the era in which matter started to collapse into
stars, the time that planets like our earth formed around the Sun; we pass the earliest periods of life on
earth, and on and on. And with each second of these epochs an atom gets added to the offer.
Here is a gold coin weighing one ounce. How many of these would you have?
Not even one of these coins would be given.
At right is a fragment that is 1.5% of the original coin.
It is about the smallest fragment that is easy to show.
The astonishing result is that even this fragment is too big. It is 3,000 times too big!

My offer turns out to be very far from generous. As many atoms of gold as seconds since the big bang amounts
to a speck of gold weighing 0.14 milligrams and worth 0.21 cents.
Teacher note: 1 milligram = the brain of a small worker bee or a very, very small snowflake, brand new
dollar bill cut into 1000 pieces.
Explore: How can scientists gather information about a particle that is so small they cannot see it? Scientists
must perform tests on the particle (or object).
4. Students are asked to brainstorm information that they need to know in order to identify an object? As a
class, students develop a list of properties that can help identify an object.
Teacher note: A class T-chart can be developed listing physical and chemical properties and ones that
can be tested for in class.
5. Students are then presented with covered boxes that have objects with the same volume but different
masses (density cubes made of different atoms), and asked to design and perform tests to eventually
hypothesize about the identity of the object and what is made out of.
Teacher note: a variety of different objects made of different materials can be used also
Explain: 6. Students record their observations on the handout and conclude about the identity of object.
7. Teacher leads class discussion on how properties can identify an object and how other tests may need to
be performed to come to a conclusion (magnetism, conductivity, etc).
Teacher note: Discussion can be extended to specifically talk about the experiments performed to gain
information about the atom (Rutherford, Thomson, etc.)
8. Students record their observations on the handout and conclude about the identity of object.
Teacher note: Pictures of how atoms are arranged differently in different materials can be shown
http://www.middleschoolchemistry.com/multimedia/chapter3/lesson1#metal
Elaborate: 9. Students compare their methods and findings with other groups, revise any tests, identify .
any errors and revise their hypothesis
10. Students share their conclusions and find out what was inside the box.
Evaluate: 11. Students complete handout and answer questions:
a) What are the smallest particles that make up all matter? How small are they?
b) Why do different objects have different properties?
Students should make the connection that different objects are made of different atoms, and thus have
different properties.
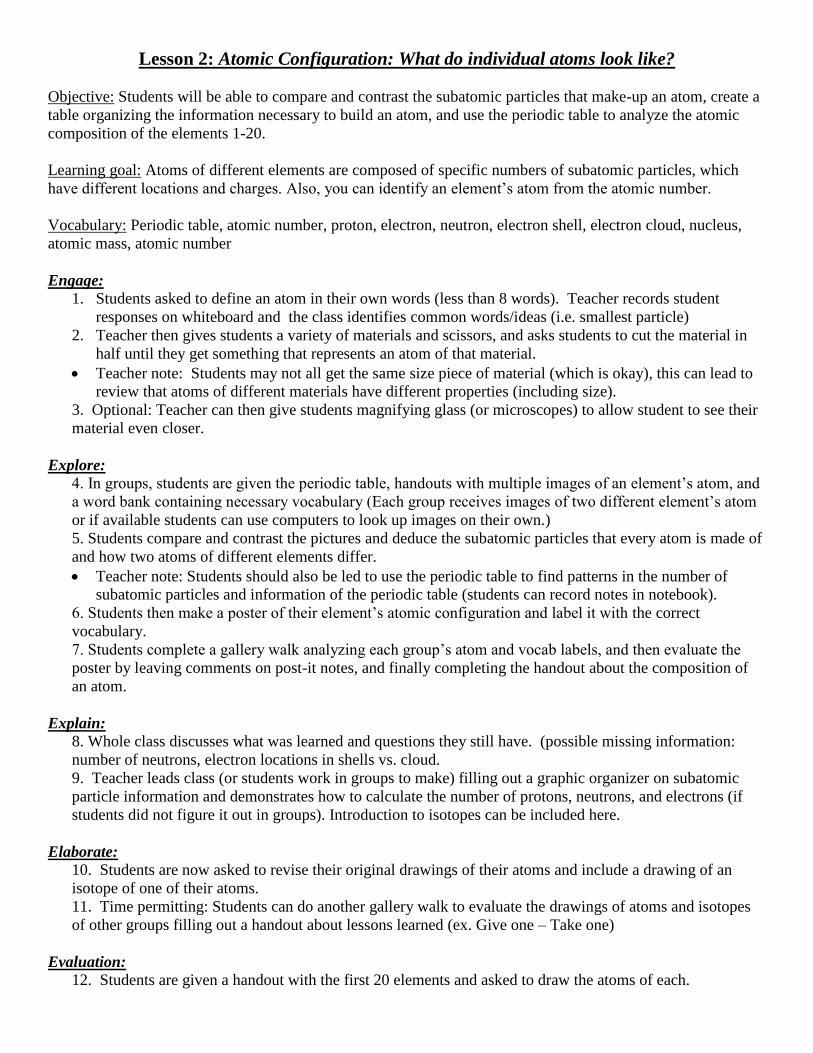
Lesson 2: Atomic Configuration: What do individual atoms look like?
Objective: Students will be able to compare and contrast the subatomic particles that make-up an atom, create a
table organizing the information necessary to build an atom, and use the periodic table to analyze the atomic
composition of the elements 1-20.
Learning goal: Atoms of different elements are composed of specific numbers of subatomic particles, which
have different locations and charges. Also, you can identify an element’s atom from the atomic number.
Vocabulary: Periodic table, atomic number, proton, electron, neutron, electron shell, electron cloud, nucleus,
atomic mass, atomic number
Engage:
1. Students asked to define an atom in their own words (less than 8 words). Teacher records student
responses on whiteboard and the class identifies common words/ideas (i.e. smallest particle)
2. Teacher then gives students a variety of materials and scissors, and asks students to cut the material in
half until they get something that represents an atom of that material.
Teacher note: Students may not all get the same size piece of material (which is okay), this can lead to
review that atoms of different materials have different properties (including size).
3. Optional: Teacher can then give students magnifying glass (or microscopes) to allow student to see their
material even closer.
Explore: 4. In groups, students are given the periodic table, handouts with multiple images of an element’s atom, and
a word bank containing necessary vocabulary (Each group receives images of two different element’s atom
or if available students can use computers to look up images on their own.)
5. Students compare and contrast the pictures and deduce the subatomic particles that every atom is made of
and how two atoms of different elements differ.
Teacher note: Students should also be led to use the periodic table to find patterns in the number of
subatomic particles and information of the periodic table (students can record notes in notebook).
6. Students then make a poster of their element’s atomic configuration and label it with the correct
vocabulary.
7. Students complete a gallery walk analyzing each group’s atom and vocab labels, and then evaluate the
poster by leaving comments on post-it notes, and finally completing the handout about the composition of
an atom.
Explain:
8. Whole class discusses what was learned and questions they still have. (possible missing information:
number of neutrons, electron locations in shells vs. cloud.
9. Teacher leads class (or students work in groups to make) filling out a graphic organizer on subatomic
particle information and demonstrates how to calculate the number of protons, neutrons, and electrons (if
students did not figure it out in groups). Introduction to isotopes can be included here.
Elaborate:
10. Students are now asked to revise their original drawings of their atoms and include a drawing of an
isotope of one of their atoms.
11. Time permitting: Students can do another gallery walk to evaluate the drawings of atoms and isotopes
of other groups filling out a handout about lessons learned (ex. Give one – Take one)
Evaluation:
12. Students are given a handout with the first 20 elements and asked to draw the atoms of each.
Follow-up Activities:
1) Matching the element to the atom information. The first 20 elements are posted around the room and
students are asked to place cards with information about an element’s atom on the corresponding poster.
2) http://www.middleschoolchemistry.com/multimedia/chapter4/lesson1#protons_and_electrons
This website shows animations of how protons and electrons react to each other as a result of their charge
It also contains a lesson using a plastic grocery bag to demonstrate the charges of protons and electrons and
how they react: http://www.middleschoolchemistry.com/lessonplans/chapter4/lesson1
3) http://phet.colorado.edu/en/simulation/balloons
This is also a simulation that shows the attractive force of static electricity
Interactive websites can also be used to reinforce content about atomic configuration.
Interactive Building Atoms Websites:
http://www.ljcreate.com/products/atom_builder.asp
http://www.kscience.co.uk/animations/atom.htm
http://phet.colorado.edu/en/simulation/build-an-atom
http://www.pbs.org/wgbh/aso/tryit/atom/builder.html
Overall Tutorial: http://www.teachersdomain.org/asset/lsps07_int_theatom/

Lesson 3: Atomic Configuration -- Building Atoms
Objective: Students will be able to construct three atoms using the information from the Periodic Table and
analyze their compositions to identify trends/patterns in atomic configuration within groups and periods of the
Periodic Table.
Learning Goal: Atoms of different elements are composed of specific numbers of subatomic particles, which
have different locations and charges. Also, you can identify an element’s atom from the atomic number. Trends
identified: Atomic number (# of protons) increases across periods. Valence electrons are constant within a
group.
Vocabulary: Period, group, valence electron, electrons orbitals (shells), electron cloud, mass number
Engage:
1. Students are shown quick video clip reminding/reinforcing information on atoms:
http://ed.ted.com/lessons/just-how-small-is-an-atom
2. Students are then given a handout with different sized objects and asked to use images to represent
subatomic particles. (students can use graphic organizer from previous lesson)
3. More attention the relative sizes of the nucleus, protons, neutrons, and electrons for atom building.
Which objects would best represent the subatomic particles based on size? Class discuss/defend their
choices.
Explore:
4. Students are given periodic table and supplies for building models of atoms (and use graphic organizer
from previous lesson)
5. In groups, students are asked to build 3-5 atoms from the 1st 18 elements of the periodic table. Elements
are assigned by teacher to ensure that all 18 elements are built by the class. (Depending on size of class, you
may have to split the class in half and have the two sides of the class building the 1st 18 elements, so you
have two complete models of each of the 1st 18 elements.
6. Students construct models and put them in order according to the periodic table. The different groups
come together and put all the models in order (models of elements 1-18). The students then analyze atomic
models and identify the trends in atomic configuration across periods and down groups, and record their
ideas on the handout.
Explain:
7. Teacher leads discussion of patterns found with atomic configuration within the periodic table.
8. Teacher introduces concept of valence electrons, and how they are related to the properties of the
element, then asks students to revisit their atomic models to see if valence electrons show a trend.
Elaborate:
8. Teacher reminds students of the pattern within a group for valence electrons and asks students to predict
if elements in the same group would be more or less similar to each other compared to elements in other
groups and to justify their answer.
9. Teacher shows videos of sodium, potassium, calcium reacting with water and an acid. (Demonstrations
can also be done if chemicals available)
http://www.middleschoolchemistry.com/multimedia/chapter4/lesson3#potassium_in_water
10. Students record observations about videos, and conclude about the similarities/differences in how
elements react across period and down groups.

Evaluation:
11. Student handout is used for evaluation of student learning.
Follow-up Activities:
12. Students match element cards showing info about electron configuration with the correct element (1-20)
poster around the room. This activity is similar to previous lesson, just with information now focusing on
electrons.

Lesson 4: Atoms forming molecular compounds
Objective: Students will be able to construct simple and extended models of molecules choosing correct sized
materials (based on size of atom).
Learning goal: Compounds are made from different atoms, which combine with one another in various ways.
Atoms can bond together to form simple structures (only a few atoms) and extended structures with many atoms
bonded together.
Vocabulary: molecule, molecular compound, chemical bonds, chemical formula, subscript
Engage:
1. Students are given images of molecular structures of various molecules (ex. Graphite, diamond, salt,
hydrocarbons, water, etc.) along with corresponding chemical formulas and names, and then asked to match
the pictures with the correct labels. Students asked to give reasons for their choices and to record any
differences in the images of different molecular structures. (Hopefully students see that the chemical
formula (subscript) gives number of atoms of each element, molecules can be bonded in different ways, and
molecules can be small or large depending on amount of atoms)
2. Students can record thoughts on handout or notebook
Explore:
3. Students, in pairs, are then asked to build models of other common compounds with simple structures and
with extended structure.
4. Students fill out corresponding handout that lists the chemical formulas. Students use the subscripts to
count the number of atoms in each molecule and make a drawing that shows the structure of the molecule.
5. Teacher checks off on student handout when groups have correctly modeled the compound.
Explain:
6. Teacher discusses with class how the different bonding and structures that atoms can make can allow for
the elements in the periodic table to make all the substances in the universe.
7. Teacher shows images of extended structures of very large molecules for students to see how big
molecules can be (hundreds of atoms)
Elaborate: (Optional information)
8. Molecules can also include single, double, and triple bonds to allow for even more substances to be
made. Students can be asked to make compounds containing single, double, and triple bonds.
9. Teacher relates Lewis-dot diagrams to number of bonds an element will form. Students are given
handout showing Lewis-dot diagrams for elements 1-20 and compare it to the handout showing electron
configuration
10. Students make connection that the Lewis-dot diagrams show electrons in the outer most electron level
(or valence electrons) and teacher points out that these are the electrons involved with bonding.
11. Teacher shows students that atoms will make bonds to ensure that they have a full electron shell.
12. Students are asked to make models of some simple molecules that will have double and triple bonds
(Examples include: C2H4, C2H2, etc.
Evaluation:
13. Student models and handouts are used for evaluation.

Lesson 5: Molecular compounds and their properties
Objective: Students will be able to compare and contrast the properties of individual elements and the properties
of compounds that those elements form.
Learning Goal: Compounds are made of elements with their own individual properties that are different from
the properties of the compounds they make up.
Vocabulary: Compounds, physical properties, chemical properties, density, melting point, boiling point (other
properties as needed), reactivity
Engage: (Students introduced to final project: design of self-warming glove
1. Students are given elements that will be used in the exo/endothermic reactions in later lesson (Teacher
can have students look at pictures of elements, actual samples, or use Internet to research)
2. Students are asked “How are these elements different? How can we tell them apart?”
3. In pairs, students are asked to research and record the individual element’s properties (density, melting
point, boiling point, solubility, color, magnetism, flammability, hardness/brittle, etc.) that make up the
compounds. Each pair gets 2-4 elements, and told that they will share findings with other groups to
have a complete list of the properties of the elements in the compounds.
4. Students fill out a table recording the properties of their elements.
Explore:
5. Students are given the chemical compounds that will be used and formed in the exo/endothermic
reactions used in designing their self-warming/cooling device.
6. Students will then be assigned to research the properties of 2-3 compounds that they will use in their
final project.
7. Students record the properties of the compounds, and compare them with the properties of the elements
that make up the compounds.
Explain:
8. Students share their results with the class.
9. Students conclude about the relationship between individual elements’ properties and the properties of
the compounds they make.
10. Teacher ensures that the connection is made: When elements combine to form compounds, the
compounds have their own properties that are different from the individual atoms that make up the
compounds.
Elaborate:
11. Students are given the actual chemicals to analyze and observe with magnifying glass (students can
compare observational data with research), other tools to observe chemicals can be given if available
(boiling point of liquids can be compared, density can be calculated, etc.)
12. Students continue recording observable properties on data sheet
Evaluate:
13. Student handout used as evaluation
14. Optional: Students asked to write a one sentence summary comparing the properties of individual
elements and the compounds that they make.

Lesson 6: Physical vs. Chemical Changes Objective: Students will be able to analyze a change to determine evidence present to classify changes as either
physical or chemical.
Learning goal: Physical changes do not change the substance, only change appearance. Chemical changes
result in the formation of a new substance with different properties (due to the rearranging of atoms).
Vocabulary: physical change, chemical change, reactant, product, chemical equation
Engage:
1. Students research (use textbook/internet) definitions of physical and chemical changes and an example
of each. Teacher can give more examples if necessary.
2. Students are then given a handout with examples of both type of changes (written out and pictures) and
asked to classify each as either a physical change or chemical change, and give a reason for their choice
(i.e. what is the evidence a new substance is produced)
3. Student answers can be gone over, but will be revisited and revised later
Explain/Explore:
4. Teacher demonstrates the burning of a candle and explains the reaction using the terms: reactant,
product, chemical reaction
5. Students are asked to identify the reactants and products in this reaction (handout)
6. Students are shown how atoms are rearranged in the combustion reaction of methane:
http://www.middleschoolchemistry.com/multimedia/chapter6/lesson1#chemical_reaction_methane
Students are asked, “Where do the atoms come from that make up the compounds in the products?” This
is the introduction to the conservation of mass and the idea of atoms being rearranged during chemical
changes.
7. Students are reminded that the formation of a new substance (the product) is the key evidence for
chemical changes.
8. Students now go back to the chemical changes they looked at in the engage portion and asked to identify
the new substance, and for evidence that can be observed that proves a new substance was formed.
9. Students are asked “How they know a new substance is formed?” “Where did the atoms come from that
formed the new substance?”
10. In groups students create a list of possible evidence to look for that proves a new substance has formed.
11. Students share the list of criteria to look for to prove a new substance and thus a chemical change has
occurred: gas produced, solid produced, temperature change, new color formed, new properties
observed.
Elaborate:
12. Students are given a handout with the chemical equations that show the reactions they categorized
above.
a. Ice melting, water boiling, apple turning brown, wood burning, water forming, photosynthesis,
etc.
13. Students label the reactants, products formed during the chemical reaction along with the evidence that
proves the chemical change
Evaluation:
14. Handouts used during lesson

Lesson 7: Chemical reactions: Investigating Temperature change as evidence
Objective: Students will be able to evaluate a change as either chemical or physical (based on criteria) and use
evidence to prove if the change is exothermic or endothermic.
Learning Goal: Chemical changes must produce a new substance. Exothermic reactions release energy and
endothermic reactions absorb energy.
Vocabulary: Chemical change, physical change, endothermic, exothermic, reactants, products
Engage:
1. Students are asked to build a simple model of water, H2O, with any classroom supplies (idea is to make
sure students have a something representing a chemical bond)
2. Students are asked to discuss in groups, “What holds the atoms in water together? Does it take energy to
hold atoms together? Do you think energy is needed to form a chemical bond? What happens to energy
when a chemical bond breaks?”
3.Teacher demonstrates an exothermic or endothermic reaction for class. Teacher presents students with the
chemical equation, and drawings of the molecular compounds involved (to have students see the chemical
bonds holding the atoms together). Teacher asks students, “What holds the atoms together in the molecular
compounds? Just by looking at the chemical equation, what happens to bonds during the reaction?” Then,
asks questions in above activity, “What do you think must be needed in order to break bonds or form bonds?
So when bonds break, there must be a change in energy and when bonds form there must be a change in
energy.”
Explore: 4. Students are reminded of culminating project: design of self-heating/cooling device for application of
their choice i.e. glove, coaster, headband that cools or warms (Teacher can choose to go as in-depth as
needed about project at this point, earlier, or later)
5. Teacher explains during chemical reactions chemical bonds are formed or break apart, and that there is a
change in energy. Energy is either released or absorbed. (Final Project: Do students want a reaction that
absorbs energy or released it.) Teacher discusses (and modeled earlier) how you can measure the energy
released or absorbed (by touch, not very accurate, or with a thermometer).
6. Students are presented with various chemicals, supplies, etc. to design experiments in order to help them
choose what chemicals to use in their self-warming/cooling device.
7. Teacher can divide chemicals as needed. This will depend of amount of chemicals available, number of
students, time concerns, etc. (recommended amount is
8. Ideally, pairs of students will choose from the chemicals to design a test to see: Does a chemical reaction
or physical change has occurred? What is the evidence? Is energy released or absorbed? How much energy
is released or absorbed? Would this be a possible reaction you could use in you final project?
Exothermic/Endothermic Chemicals List:
Exothermic Reactions Endothermic Reactions
Steel wool and vinegar (copper wool as another
example)
Citric acid solutions and baking soda
Laundry detergent and water Vinegar and baking soda
Calcium chloride and water Ammonia chloride and water
Magnesium sulfate (Epsom salt) and water
Other chemicals to investigate: alka-seltzer and water, etc

9. Students choose which chemicals they want to use and design an experiment to investigate if the
chemicals they chose produce chemical changes (or just physical), and if there is an exothermic or
endothermic reaction. Students limited to 3-5 grams of each chemical to carry out initial investigations.
Teacher note: Depending on time, students can prepare a formal lab report or some shortened version to
analyze and present their results of the experiment. Students should make a materials list and
procedures for their experiment that is reviewed by teacher to ensure safety and reliability of results.
Groups share experimental procedures with other group (then checked by teacher) and revise as needed.
10. Students perform experiment and record observations/results on handout to report to class. Groups of
students may pick the same chemicals for their experiment; however teacher should ensure that most
chemicals are used to give students a variety of results to choose from when designing their self-
warming/cooling device.
11. Students share results by one or more of the following (students record results of other groups on
handout): 1) present results to whole class, 2) Gallery walk looking at results with group member explaining
the results at each poster, 3) student pairs make appointments with other groups to share findings.
12. Students fill out handout (which includes table of reactants used, products formed, type of change,
evidence of change, and temperature change) after sharing results of experiment
Explain: 13. Teacher goes over vocabulary to use when classifying the reactions (endothermic/exothermic) and some
other common examples students may know about and asks them to classify as either exo/endo: burning
wood or paper, etc.
14. Teacher has students label the reactions, done in pairs, as exo or endothermic on handout. Class
discusses which reactions may be used in the self-warming/cooling device.
15. In groups, students brainstorm other factors that may influence choice of chemicals in design of device,
for example: cost of chemicals, safety of chemicals, amount of chemicals needed, amount of temperature
change, ideas to have chemicals mix in the device, etc.
Elaborate:
16. Students evaluate the results of the experiments, choose and justify the chemicals (two combinations of
chemicals to use) that they will test to use in their self-warming/cooling device. (For example: One group of
students may choose baking soda and vinegar, and magnesium sulfate and water to further investigate later.)
17. Students can research other chemicals (not available in class) that might make good choices or predict
compounds (based on elements in the same group having similar characteristics) that could be used.
18. Students begin to brainstorm a device that could use the chemicals to self-warm or cool itself.
Evaluation:
19. Student choice and justification of chemicals serves as assessment.

Lesson 8: Conservation of Mass
Objective: Students will be able to choose the correct reactants and products that demonstrate the conservation
of mass and justify their decision with evidence.
Learning Goal: The Law of Conservation of Mass states that atoms are not created or destroyed in a chemical
reaction (mass of reactants must equal the mass of products).
Vocabulary: The Law of Conservation of Mass, mass, subscript, coefficient, chemical equation
Engage: 1. Teacher asks students about energy in a chemical reaction (teacher has students discuss the following
questions in groups). What happens to energy in a chemical reaction? (energy is released or absorbed)
What causes the release or absorption of energy? (chemical bonds are forming or breaking to form new
substances) What has to be produced in order for you to know a chemical reaction occurred? What do
you think happens to mass in a chemical reaction? Does the mass of reactants differ from the mass of
products? Does the mass change (increase, decrease, stay equal)? If yes, where does it go? If no, how
do you get a new substance?
2. Connection to final project: When you choose your chemicals for your self-warming/cooling device
will the mass increase or decrease after the reaction?
3. In groups, students are then asked to make a hypothesis to answer the question: What happens to mass in
a chemical reaction? Hypothesis takes the form of: If I mix baking soda and vinegar to produce a
chemical reaction, then the mass of my reactants will be __________________________than the mass
of my products. Students are reminded of examples of chemical reactions: wood burning, cake baking,
food digesting, iron rusting, etc. to use as a guide for their hypothesis.
4. The class will then use baking soda and vinegar (or another simple reaction) to design an experiment to
test their hypothesis. (This can be done as a demonstration if time or supplies are an issue. Students
should still be asked to prepare a procedure and the teacher can use 3-4 groups’ procedures as a demo to
show differences and compare for accuracy.)
Explore:
5. Teacher reviews procedure for experiments with students (teacher guides students with amounts to mix),
and ensures students have a procedure that includes finding mass of reactants and mass of products.
6. Students (or whole class if done as demo) are given materials to carry out their experiment (Teacher
may or may not guide students to capture the gas produced depending on procedures students come up
with. It may be beneficial for some students to not capture the gas to lead to a class discussion of
measurement error.)
7. Students record their results in data table, obtain two or three other groups results, and analyze results
for trends and patterns in mass of reactants and products
8. Students use results to make a conclusion about the mass in chemical reactions.
Explain:
9. Teacher shows the balanced chemical equation for the reaction of baking soda and vinegar.
10. Teacher labels (or asks students to label) reactants and products, teacher then introduces students to the
subscript and coefficients in the chemical equation and their definitions.
11. Teacher has students count the atoms on each side of the equation and relates this to being “balanced”.
12. After the students count the atoms, teacher asks, “Based on the same number of atoms being present in
reactants and products, what do you think should always happen to mass in a chemical reaction?”
13. Teacher again points out that chemical bonds are being broken and formed but the atoms are not lost or
gained, they are just rearranged.

14. Teacher now performs baking soda and vinegar experiment to show students how mass is conserved and
reminds students that the Law of Conservation of Mass is a scientific law (has not been proven
otherwise to date).
Elaborate: 15. Students review their results and discuss reasons why some of their data does not show the conservation
of mass.
16. Class shares reasons why the mass of product may not be equal in an experiment. Example: wood
burning: gas (smoke) escapes into the air); measurement errors, etc.
17. Students given reactants and products of chemical equations (used in exo/endo experiments) on index
cards and asked to match reactant and product to ensure conservation of mass is shown.
18. Students are then given unbalanced chemical reactions of varying difficulty depending on class.
19. Teacher goes over the steps to balancing chemical equations as a whole class
20. Students balance the chemical equations, and include a count of atoms as justification of the
conservation of mass
Evaluation:
21. Student handout on balancing chemical equations serves as assessment.
22. Students asked to put the Law of Conservation of Mass in their own words.
Continued practice assignment: Students are given 10 cards each with a reactant and a product written on them
and asked to count the atoms and match the correct reactant with the resulting product. Students must also
show count of atoms as evidence of atoms being equal.
Website with steps to balance equations and handouts with equations to balance:
www.chemistry.about.com/cs/stoichiometry/a/aa042903a.htm
www.chemicalformula.org

Lesson 9: Modeling atoms in molecular compounds (subscripts and coefficients)
Objective: Students will be able to design models that represent reactants and products from chemical reactions.
Learning Goal: Students visually represent the difference between a subscript and coefficient in a chemical
formula to justify the conservation of mass.
Vocabulary: molecular compound, coefficient, subscript, chemical formula, reactant, product, atom,
conservation of mass
Engage/Explore:
1. In groups, students are given materials for making models of molecular compounds.
2. Students receive the index cards (from previous lesson) which have chemical formulas (of reactants and
products) from the exo/endothermic reactions previously performed and asked to make a model of the
molecular compounds from the supplies given.
3. Students label each model with chemical formula.
4. Teacher circulates room guiding students as needed.
5. Students complete a gallery walk evaluating the models built by other groups (students can complete
handout listing ideas learned or leave post-it notes with comments on other groups’ models.
Teacher note: Students can research the actual bonding and structure of the compounds (for accuracy).
Explain:
6. Teacher discuses with class the meaning of subscript with students using models to justify their answers.
7. Teacher ensures students understand no subscript is understood to be 1, and each new element is shown
by a capital letter
8. (depending on materials) Teacher has students (take apart or leave models) attempt to build models
when coefficients are used.
9. Teacher has students analyze other groups’ models and evaluate, and redesign theirs.
10. Teacher goes over models and how coefficients affect the model (showing students how the amount of
the compound changes, not the actual compound itself)
Elaborate:
11. Students are given chemical formulas to model that represent reactants and products from
exo/endothermic reactions.
12. Students use materials to model and show the addition of molecular compounds and the result of
changing coefficients.
Teacher note: Student extension could be done on the actual bonding and structure of the compound.
Evaluate:
13. Teacher circulates room to assess models students have made
14. Teacher asks students to draw models representing molecular compounds with multiple coefficients.
Lesson 10: Modeling a Balanced chemical reaction
Objective: Students will be able to develop and use a model to describe how the total number of atoms does not
change in a chemical reaction and thus mass is conserved.
Learning Goal: Coefficients are changed when balancing a chemical equation to ensure that atoms are equal on
both sides of the equation (reactants and products). A balanced chemical equation shows an equal number of
atoms for each element in the reactants and products.
Vocabulary: reactant, product, Law of Conservation of Mass, atom, chemical formula
Engage/Explore:
1. Students are given (or research) the chemical equations for the reactions that they have chosen to use in
their design of a self-warming/cooling device.
2. Students are given assignment of making a model with justification of the balanced chemical equation of
the chemical reaction they will possibly use for their final project.
Explain:
3. Teacher goes over criteria and rubric of assignment and gives materials for students to use.
4. Students prepare a written justification/explanation of their balanced equation.
Elaborate:
5. Students present their model to class and provide justification and explanation of their representation of
a balanced chemical equation.
Evaluation:
6. Rubric is used to assess students’ project and presentations.

Lesson 11: Experiment with choice of chemicals to use in final project design (Focus is on
amount of chemical to use)
Objective: Students will be able design an experiment to test the amount of heat released by a chemical
reaction, then choose chemicals (and amounts to use) for their final project and provide justification for their
choice.
Learning Goal: Chemical reactions can be classified as exothermic or endothermic depending on if energy is
released or absorbed.
Vocabulary: Exothermic, endothermic, reactant, product, compound, energy
Engage:
1. In groups, students are given the chemicals they chose to test for their final project design of self-
warming/cooling device from lesson 7.
2. Students are asked to create a list of materials (and amounts) needed for the experiments and create a
procedure that will serve as the directions for their experiment (students will be performing these
experiments to justify their choice of chemicals for final project). Students will be given 25 grams and
50 mL of chemicals to experiment with. Students are asked to measure at least 2 different amounts of
chemical to use with the same amount of liquid, and then to change amount of liquid at least once)
3. Students will then create a hypothesis to predict the result of the experiment.
Explore:
4. Students practice reading their procedure to other group members, and with materials (except for
chemicals at this point) to see if members of group can follow the procedures and no steps are missing. -
-- Other option: Groups can give procedures to other groups to follow to ensure all steps are included
and all safety procedures followed.
Explain:
5. Teacher demonstrates following a procedure to produce a chemical reaction (baking soda and vinegar or
other reaction), highlighting important/necessary steps that must be included in all students’ procedures
and materials (i.e. safety precautions, temperature measured, amount of chemicals to use, etc.)
6. Optional: Teacher then asks a student group to read their procedure and to see if the procedures are
complete.
7. Teacher ensures procedures include step to measure how long the reaction produces heat.
Elaborate:
8. Students revise procedures as necessary to ensure reliable results, no steps are missing, and safety
precautions are followed.
9. Students create a data table that will be used to record their results (includes temp. change, amount of
chemical used, and time of heat production).
10. Students identify other groups with the same chemicals used and different chemicals used to discuss
results after experiments are completed.
Evaluation:
11. Students’ procedures and experimental design will be assessed when experiments are performed.
Lesson 12: Experiment with choice of chemicals to use in final project design (continued)
Objective: Students will be able design an experiment to test the amount of heat released by a chemical
reaction, then choose chemicals (and amounts to use) for their final project and provide justification for their
choice.
Learning Goal: Chemical reactions can be classified as exothermic or endothermic depending on if energy is
released or absorbed. Also, the type and amount of chemicals used effect on temperature change.
Vocabulary: Exothermic, endothermic, reactant, product, compound, energy
Engage:
1. Students are given materials to perform experiment from the list they’ve created.
2. Students review materials list and procedure to make sure no revisions are needed.
Explore:
3. Students perform experiments they have designed by following their procedures and recording the
results in their data tables (Students have also made hypotheses previously to guide their thinking).
4. Students share results of their experiments with other groups so all students have the results of the
experiments performed to inform their choice of chemicals for use in the final project.
Explain:
5. Teacher goes over student results with whole class, identifies and discusses measurement errors,
differences in data, and/or experimental errors that may influence data.
Elaborate:
6. Teacher reminds students how the results of experiments are used to inform choices for final project
design.
7. Teacher goes over other criteria students must consider besides just being an “exothermic reaction”.
Teacher asks students to brainstorm in groups what other factors must be considered when making a
self-warming/cooling piece of device. Examples: safety of mixing the chemicals, how will the chemicals
mix in your piece of clothing, amount of chemicals needed, how long do the chemicals stay hot, etc.
8. Students analyze results of the class’s experiments, and taking into account the other factors involved
make their final conclusion (choice) as to which chemicals they will choose for the design of their final
project (self-warming clothing). Students should provide a justification for their choice
Evaluation:
9. Students complete a handout (form) that goes over plan for self-warming/cooling device providing
justification for choice based on evidence gathered and class discussion.
Lesson 13: Design of self-warming/cooling device with use of exo/endothermic reactions
Objective: Students will be able to evaluate the results of their (and classes) chemical reactions and class
discussions to design and then construct a self-warming/cooling device for use.
Learning Goal: Students undertake a design project to construct, test, and modify a device that either releases or
absorbs thermal energy by chemical processes.
Vocabulary: use and review all previously learned vocabulary from the unit.
Engage:
1. If available, teacher shows students a clip from EdTube or movie clip showing hypothermia and goes
over areas most commonly affected. Students can also read article, etc. to gather some quick
information about hypothermia, heat stroke, etc (other examples of cooling and warming devices) to
inform their choice of a device.
2. If not done previously, students are given specific assignment criteria for final project design: self-
warming clothing.
3. In groups, students decide on type of device they will design.
Explore:
4. If available, teacher gives students materials (from T4T) that they can choose from to make their device
(ex. glove, coaster, headband, hat, etc.). If no materials, options for materials to be used can be
researched, examples shown, or given to class.
5. EXTRA: Students can research properties of materials (given in class) to help decide on which would be
best to use (i.e. melting point of material, cost, flammability, weight, etc.)
6. Students decide on material (or combination of materials) they will use in their design of their device.
Explain:
7. Teacher discusses with class the parameters and criteria for device (how will it be assessed/presented)
8. Teacher goes over assignment rubric with class.
Elaborate:
9. Students begin to design their device with a diagram first with labels and explanation of device.
10. Students make a poster diagram of their piece of clothing with appropriate labels, that address the
following:
What type of device will they make? Why? What will it be used for?
How will the chemicals be kept separate? Stored?
How will the chemicals mix when device is being used?
What materials (fabric) will the device be made of? Will it be a combination of materials? Why?
11. Students complete a gallery walk analyzing and commenting on classmates’ designs.
12. Students revise design diagram based on peer and teacher comments.
13. If materials available, students construct their piece of self-warming piece clothing
Evaluation:
14. Students’ final design of self-warming clothing will be evaluated based on assignment rubric.