Embed Size (px)
Citation preview

TIBCO Designer™
User’s Guide
Software Release 5.8.0
November 2012

Important Information
SOME TIBCO SOFTWARE EMBEDS OR BUNDLES OTHER TIBCO SOFTWARE. USE OF SUCH EMBEDDED OR BUNDLED TIBCO SOFTWARE IS SOLELY TO ENABLE THE FUNCTIONALITY (OR PROVIDE LIMITED ADD-ON FUNCTIONALITY) OF THE LICENSED TIBCO SOFTWARE. THE EMBEDDED OR BUNDLED SOFTWARE IS NOT LICENSED TO BE USED OR ACCESSED BY ANY OTHER TIBCO SOFTWARE OR FOR ANY OTHER PURPOSE.
USE OF TIBCO SOFTWARE AND THIS DOCUMENT IS SUBJECT TO THE TERMS AND CONDITIONS OF A LICENSE AGREEMENT FOUND IN EITHER A SEPARATELY EXECUTED SOFTWARE LICENSE AGREEMENT, OR, IF THERE IS NO SUCH SEPARATE AGREEMENT, THE CLICKWRAP END USER LICENSE AGREEMENT WHICH IS DISPLAYED DURING DOWNLOAD OR INSTALLATION OF THE SOFTWARE (AND WHICH IS DUPLICATED IN THE LICENSE FILE) OR IF THERE IS NO SUCH SOFTWARE LICENSE AGREEMENT OR CLICKWRAP END USER LICENSE AGREEMENT, THE LICENSE(S) LOCATED IN THE “LICENSE” FILE(S) OF THE SOFTWARE. USE OF THIS DOCUMENT IS SUBJECT TO THOSE TERMS AND CONDITIONS, AND YOUR USE HEREOF SHALL CONSTITUTE ACCEPTANCE OF AND AN AGREEMENT TO BE BOUND BY THE SAME.
This document contains confidential information that is subject to U.S. and international copyright laws and treaties. No part of this document may be reproduced in any form without the written authorization of TIBCO Software Inc.
TIBCO, The Power of Now,TIBCO Adapter, TIBCO Administrator, TIBCO ActiveMatrix BusinessWorks, TIBCO Designer, TIBCO Enterprise Message Service, TIBCO Rendezvous, TIBCO Repository, and TIBCO Runtime Agent are either registered trademarks or trademarks of TIBCO Software Inc. in the United States and/or other countries.
EJB, J2EE, and all Java-based trademarks and logos are trademarks or registered trademarks of Sun Microsystems, Inc. in the U.S. and other countries.
All other product and company names and marks mentioned in this document are the property of their respective owners and are mentioned for identification purposes only.
THIS SOFTWARE MAY BE AVAILABLE ON MULTIPLE OPERATING SYSTEMS. HOWEVER, NOT ALL OPERATING SYSTEM PLATFORMS FOR A SPECIFIC SOFTWARE VERSION ARE RELEASED AT THE SAME TIME. SEE THE README FILE FOR THE AVAILABILITY OF THIS SOFTWARE VERSION ON A SPECIFIC OPERATING SYSTEM PLATFORM.
THIS DOCUMENT IS PROVIDED “AS IS” WITHOUT WARRANTY OF ANY KIND, EITHER EXPRESS OR IMPLIED, INCLUDING, BUT NOT LIMITED TO, THE IMPLIED WARRANTIES OF MERCHANTABILITY, FITNESS FOR A PARTICULAR PURPOSE, OR NON-INFRINGEMENT.
THIS DOCUMENT COULD INCLUDE TECHNICAL INACCURACIES OR TYPOGRAPHICAL ERRORS. CHANGES ARE PERIODICALLY ADDED TO THE INFORMATION HEREIN; THESE CHANGES WILL BE INCORPORATED IN NEW EDITIONS OF THIS DOCUMENT. TIBCO SOFTWARE INC. MAY MAKE IMPROVEMENTS AND/OR CHANGES IN THE PRODUCT(S) AND/OR THE PROGRAM(S) DESCRIBED IN THIS DOCUMENT AT ANY TIME.
THE CONTENTS OF THIS DOCUMENT MAY BE MODIFIED AND/OR QUALIFIED, DIRECTLY OR INDIRECTLY, BY OTHER DOCUMENTATION WHICH ACCOMPANIES THIS SOFTWARE, INCLUDING BUT NOT LIMITED TO ANY RELEASE NOTES AND "READ ME" FILES.
This Product is covered by U.S. Patent No. 6,970,981.
Copyright © 1999-2012 TIBCO Software Inc. ALL RIGHTS RESERVED.
TIBCO Software Inc. Confidential Information

TIBCO Designer User’s Guide
| iii
Contents
Figures . . . . . . . . . . . . . . . . . . . . . . . . . . . . . . . . . . . . . . . . . . . . . . . . . . . . . . . . . . . . . . . . . . . . . . . . ix
Tables . . . . . . . . . . . . . . . . . . . . . . . . . . . . . . . . . . . . . . . . . . . . . . . . . . . . . . . . . . . . . . . . . . . . . . . . . xi
Preface . . . . . . . . . . . . . . . . . . . . . . . . . . . . . . . . . . . . . . . . . . . . . . . . . . . . . . . . . . . . . . . . . . . . . . . xiii
Changes from the Previous Release of this Guide . . . . . . . . . . . . . . . . . . . . . . . . . . . . . . . . . . . . . . . . . . . . . . . .xiv
Related Documentation . . . . . . . . . . . . . . . . . . . . . . . . . . . . . . . . . . . . . . . . . . . . . . . . . . . . . . . . . . . . . . . . . . . . . xv
TIBCO Designer Documentation . . . . . . . . . . . . . . . . . . . . . . . . . . . . . . . . . . . . . . . . . . . . . . . . . . . . . . . . . . xv
Other TIBCO Product Documentation . . . . . . . . . . . . . . . . . . . . . . . . . . . . . . . . . . . . . . . . . . . . . . . . . . . . . . xv
Typographical Conventions . . . . . . . . . . . . . . . . . . . . . . . . . . . . . . . . . . . . . . . . . . . . . . . . . . . . . . . . . . . . . . . . . xvii
Connecting with TIBCO Resources . . . . . . . . . . . . . . . . . . . . . . . . . . . . . . . . . . . . . . . . . . . . . . . . . . . . . . . . . . . .xix
How to Join TIBCOmmunity . . . . . . . . . . . . . . . . . . . . . . . . . . . . . . . . . . . . . . . . . . . . . . . . . . . . . . . . . . . . . .xix
How to Access All TIBCO Documentation . . . . . . . . . . . . . . . . . . . . . . . . . . . . . . . . . . . . . . . . . . . . . . . . . . .xix
How to Contact TIBCO Support . . . . . . . . . . . . . . . . . . . . . . . . . . . . . . . . . . . . . . . . . . . . . . . . . . . . . . . . . . .xix
Chapter 1 Getting Started With TIBCO Designer . . . . . . . . . . . . . . . . . . . . . . . . . . . . . . . . . . . . . .1
Welcome to TIBCO Designer. . . . . . . . . . . . . . . . . . . . . . . . . . . . . . . . . . . . . . . . . . . . . . . . . . . . . . . . . . . . . . . . . . 2
Starting TIBCO Designer . . . . . . . . . . . . . . . . . . . . . . . . . . . . . . . . . . . . . . . . . . . . . . . . . . . . . . . . . . . . . . . . . . . . . 3
Startup Options . . . . . . . . . . . . . . . . . . . . . . . . . . . . . . . . . . . . . . . . . . . . . . . . . . . . . . . . . . . . . . . . . . . . . . . . 3
TIBCO Designer Administration. . . . . . . . . . . . . . . . . . . . . . . . . . . . . . . . . . . . . . . . . . . . . . . . . . . . . . . . . . . . . . . . 6
TIBCO Designer Interface Overview . . . . . . . . . . . . . . . . . . . . . . . . . . . . . . . . . . . . . . . . . . . . . . . . . . . . . . . . . . . . 8
Main Window . . . . . . . . . . . . . . . . . . . . . . . . . . . . . . . . . . . . . . . . . . . . . . . . . . . . . . . . . . . . . . . . . . . . . . . . . . 8
Project Panel . . . . . . . . . . . . . . . . . . . . . . . . . . . . . . . . . . . . . . . . . . . . . . . . . . . . . . . . . . . . . . . . . . . . . . . . . . 9
Palette Panel . . . . . . . . . . . . . . . . . . . . . . . . . . . . . . . . . . . . . . . . . . . . . . . . . . . . . . . . . . . . . . . . . . . . . . . . . 11
Design Panel . . . . . . . . . . . . . . . . . . . . . . . . . . . . . . . . . . . . . . . . . . . . . . . . . . . . . . . . . . . . . . . . . . . . . . . . . 11
Configuration Panel . . . . . . . . . . . . . . . . . . . . . . . . . . . . . . . . . . . . . . . . . . . . . . . . . . . . . . . . . . . . . . . . . . . . 12
Working With Palettes . . . . . . . . . . . . . . . . . . . . . . . . . . . . . . . . . . . . . . . . . . . . . . . . . . . . . . . . . . . . . . . . . . . . . . 13
Current Selection and Palette Panel Display . . . . . . . . . . . . . . . . . . . . . . . . . . . . . . . . . . . . . . . . . . . . . . . . . 13
Using the Palette Browser . . . . . . . . . . . . . . . . . . . . . . . . . . . . . . . . . . . . . . . . . . . . . . . . . . . . . . . . . . . . . . . 14
Showing and Hiding Palettes . . . . . . . . . . . . . . . . . . . . . . . . . . . . . . . . . . . . . . . . . . . . . . . . . . . . . . . . . . . . . 15
Choosing Palette Mode or Non-palette Mode. . . . . . . . . . . . . . . . . . . . . . . . . . . . . . . . . . . . . . . . . . . . . . . . . 16
Displaying Palettes in a Separate Window. . . . . . . . . . . . . . . . . . . . . . . . . . . . . . . . . . . . . . . . . . . . . . . . . . . 17
Working With User Palettes . . . . . . . . . . . . . . . . . . . . . . . . . . . . . . . . . . . . . . . . . . . . . . . . . . . . . . . . . . . . . . 17
Customizing the Display . . . . . . . . . . . . . . . . . . . . . . . . . . . . . . . . . . . . . . . . . . . . . . . . . . . . . . . . . . . . . . . . . . . . 19
Choosing Panel Layout . . . . . . . . . . . . . . . . . . . . . . . . . . . . . . . . . . . . . . . . . . . . . . . . . . . . . . . . . . . . . . . . . 19

TIBCO Designer User’s Guide
iv | Contents
Accessing Documentation. . . . . . . . . . . . . . . . . . . . . . . . . . . . . . . . . . . . . . . . . . . . . . . . . . . . . . . . . . . . . . . . . . . 21
Chapter 2 Managing Projects and Resources . . . . . . . . . . . . . . . . . . . . . . . . . . . . . . . . . . . . . . . 23
Overview of Projects . . . . . . . . . . . . . . . . . . . . . . . . . . . . . . . . . . . . . . . . . . . . . . . . . . . . . . . . . . . . . . . . . . . . . . . 24
Project Structure . . . . . . . . . . . . . . . . . . . . . . . . . . . . . . . . . . . . . . . . . . . . . . . . . . . . . . . . . . . . . . . . . . . . . . 24
Using a Version Control System . . . . . . . . . . . . . . . . . . . . . . . . . . . . . . . . . . . . . . . . . . . . . . . . . . . . . . . . . . 25
Project Templates . . . . . . . . . . . . . . . . . . . . . . . . . . . . . . . . . . . . . . . . . . . . . . . . . . . . . . . . . . . . . . . . . . . . . 25
Creating Projects. . . . . . . . . . . . . . . . . . . . . . . . . . . . . . . . . . . . . . . . . . . . . . . . . . . . . . . . . . . . . . . . . . . . . . . . . . 26
Validating Projects. . . . . . . . . . . . . . . . . . . . . . . . . . . . . . . . . . . . . . . . . . . . . . . . . . . . . . . . . . . . . . . . . . . . . . . . . 27
Saving Projects . . . . . . . . . . . . . . . . . . . . . . . . . . . . . . . . . . . . . . . . . . . . . . . . . . . . . . . . . . . . . . . . . . . . . . . . . . . 29
Opening and Reopening Projects . . . . . . . . . . . . . . . . . . . . . . . . . . . . . . . . . . . . . . . . . . . . . . . . . . . . . . . . . . . . . 31
Adding Resources To Your Project . . . . . . . . . . . . . . . . . . . . . . . . . . . . . . . . . . . . . . . . . . . . . . . . . . . . . . . . . . . . 32
If Adding a Resource Results in an Error. . . . . . . . . . . . . . . . . . . . . . . . . . . . . . . . . . . . . . . . . . . . . . . . . . . . 33
Preventing Certain File Types From Appearing in Projects . . . . . . . . . . . . . . . . . . . . . . . . . . . . . . . . . . . . . . 33
Working With Global Variables . . . . . . . . . . . . . . . . . . . . . . . . . . . . . . . . . . . . . . . . . . . . . . . . . . . . . . . . . . . . . . . 35
Global Variables Editor . . . . . . . . . . . . . . . . . . . . . . . . . . . . . . . . . . . . . . . . . . . . . . . . . . . . . . . . . . . . . . . . . 35
Limiting Global Variables in EAR Files and Design-time Libraries. . . . . . . . . . . . . . . . . . . . . . . . . . . . . . . . . 38
Deleting Projects . . . . . . . . . . . . . . . . . . . . . . . . . . . . . . . . . . . . . . . . . . . . . . . . . . . . . . . . . . . . . . . . . . . . . . . . . . 39
Tips and Tricks for Working With Projects. . . . . . . . . . . . . . . . . . . . . . . . . . . . . . . . . . . . . . . . . . . . . . . . . . . . . . . 40
Chapter 3 Working with a Revision Control System. . . . . . . . . . . . . . . . . . . . . . . . . . . . . . . . . . 41
Overview . . . . . . . . . . . . . . . . . . . . . . . . . . . . . . . . . . . . . . . . . . . . . . . . . . . . . . . . . . . . . . . . . . . . . . . . . . . . . . . . 42
Icons Used by RCS Projects . . . . . . . . . . . . . . . . . . . . . . . . . . . . . . . . . . . . . . . . . . . . . . . . . . . . . . . . . . . . . 43
Deleting RCS Projects . . . . . . . . . . . . . . . . . . . . . . . . . . . . . . . . . . . . . . . . . . . . . . . . . . . . . . . . . . . . . . . . . . 43
File Sharing. . . . . . . . . . . . . . . . . . . . . . . . . . . . . . . . . . . . . . . . . . . . . . . . . . . . . . . . . . . . . . . . . . . . . . . . . . . . . . 45
Preparing for File Sharing on Microsoft Windows . . . . . . . . . . . . . . . . . . . . . . . . . . . . . . . . . . . . . . . . . . . . . 45
Preparing for File Sharing on UNIX . . . . . . . . . . . . . . . . . . . . . . . . . . . . . . . . . . . . . . . . . . . . . . . . . . . . . . . . 45
Using File Sharing . . . . . . . . . . . . . . . . . . . . . . . . . . . . . . . . . . . . . . . . . . . . . . . . . . . . . . . . . . . . . . . . . . . . . 45
Microsoft Visual SourceSafe . . . . . . . . . . . . . . . . . . . . . . . . . . . . . . . . . . . . . . . . . . . . . . . . . . . . . . . . . . . . . . . . . 48
Visual SourceSafe Setup . . . . . . . . . . . . . . . . . . . . . . . . . . . . . . . . . . . . . . . . . . . . . . . . . . . . . . . . . . . . . . . . 48
Using Microsoft Visual SourceSafe . . . . . . . . . . . . . . . . . . . . . . . . . . . . . . . . . . . . . . . . . . . . . . . . . . . . . . . . 48
Perforce Fast Software Configuration Management System . . . . . . . . . . . . . . . . . . . . . . . . . . . . . . . . . . . . . . . . 51
Prerequisites . . . . . . . . . . . . . . . . . . . . . . . . . . . . . . . . . . . . . . . . . . . . . . . . . . . . . . . . . . . . . . . . . . . . . . . . . 51
Using Perforce . . . . . . . . . . . . . . . . . . . . . . . . . . . . . . . . . . . . . . . . . . . . . . . . . . . . . . . . . . . . . . . . . . . . . . . . 52
XML Canon . . . . . . . . . . . . . . . . . . . . . . . . . . . . . . . . . . . . . . . . . . . . . . . . . . . . . . . . . . . . . . . . . . . . . . . . . . . . . . 55
Features. . . . . . . . . . . . . . . . . . . . . . . . . . . . . . . . . . . . . . . . . . . . . . . . . . . . . . . . . . . . . . . . . . . . . . . . . . . . . 55
Prerequisites . . . . . . . . . . . . . . . . . . . . . . . . . . . . . . . . . . . . . . . . . . . . . . . . . . . . . . . . . . . . . . . . . . . . . . . . . 56
Checking In and Acquiring Resources. . . . . . . . . . . . . . . . . . . . . . . . . . . . . . . . . . . . . . . . . . . . . . . . . . . . . . 56
Viewing Revision Control Information . . . . . . . . . . . . . . . . . . . . . . . . . . . . . . . . . . . . . . . . . . . . . . . . . . . . . . 62
Deleting XML Canon Projects . . . . . . . . . . . . . . . . . . . . . . . . . . . . . . . . . . . . . . . . . . . . . . . . . . . . . . . . . . . . 63
Tips and Tricks. . . . . . . . . . . . . . . . . . . . . . . . . . . . . . . . . . . . . . . . . . . . . . . . . . . . . . . . . . . . . . . . . . . . . . . . 63

TIBCO Designer User’s Guide
Contents | v
ClearCase . . . . . . . . . . . . . . . . . . . . . . . . . . . . . . . . . . . . . . . . . . . . . . . . . . . . . . . . . . . . . . . . . . . . . . . . . . . . . . .65
Creating or Modifying a ClearCase Project. . . . . . . . . . . . . . . . . . . . . . . . . . . . . . . . . . . . . . . . . . . . . . . . . . .65
CVS . . . . . . . . . . . . . . . . . . . . . . . . . . . . . . . . . . . . . . . . . . . . . . . . . . . . . . . . . . . . . . . . . . . . . . . . . . . . . . . . . . . .67
Working with CVS . . . . . . . . . . . . . . . . . . . . . . . . . . . . . . . . . . . . . . . . . . . . . . . . . . . . . . . . . . . . . . . . . . . . . .67
PVCS Version Manager . . . . . . . . . . . . . . . . . . . . . . . . . . . . . . . . . . . . . . . . . . . . . . . . . . . . . . . . . . . . . . . . . . . . .70
Creating or Modifying a PVCS Project . . . . . . . . . . . . . . . . . . . . . . . . . . . . . . . . . . . . . . . . . . . . . . . . . . . . . .70
Scriptable RCS Adapter . . . . . . . . . . . . . . . . . . . . . . . . . . . . . . . . . . . . . . . . . . . . . . . . . . . . . . . . . . . . . . . . . . . . .71
Execution Environment . . . . . . . . . . . . . . . . . . . . . . . . . . . . . . . . . . . . . . . . . . . . . . . . . . . . . . . . . . . . . . . . . .71
Configuration Commands . . . . . . . . . . . . . . . . . . . . . . . . . . . . . . . . . . . . . . . . . . . . . . . . . . . . . . . . . . . . . . . .73
RCS Commands . . . . . . . . . . . . . . . . . . . . . . . . . . . . . . . . . . . . . . . . . . . . . . . . . . . . . . . . . . . . . . . . . . . . . . .75
Example Script Implementation . . . . . . . . . . . . . . . . . . . . . . . . . . . . . . . . . . . . . . . . . . . . . . . . . . . . . . . . . . .78
Working with the Scriptable RCS Adapter . . . . . . . . . . . . . . . . . . . . . . . . . . . . . . . . . . . . . . . . . . . . . . . . . . .87
Tips and Tricks for Using Version Control Systems . . . . . . . . . . . . . . . . . . . . . . . . . . . . . . . . . . . . . . . . . . . . . . . .91
Chapter 4 Sharing Resources with Other Projects . . . . . . . . . . . . . . . . . . . . . . . . . . . . . . . . . . . 93
Overview . . . . . . . . . . . . . . . . . . . . . . . . . . . . . . . . . . . . . . . . . . . . . . . . . . . . . . . . . . . . . . . . . . . . . . . . . . . . . . . .94
Creating an AliasLibrary. . . . . . . . . . . . . . . . . . . . . . . . . . . . . . . . . . . . . . . . . . . . . . . . . . . . . . . . . . . . . . . . . . . . .95
To Create an Alias for an AliasLibrary: . . . . . . . . . . . . . . . . . . . . . . . . . . . . . . . . . . . . . . . . . . . . . . . . . . . . . .95
To Add a Previously Defined Alias to an AliasLibrary . . . . . . . . . . . . . . . . . . . . . . . . . . . . . . . . . . . . . . . . . . .97
To Delete an Alias From an AliasLibrary. . . . . . . . . . . . . . . . . . . . . . . . . . . . . . . . . . . . . . . . . . . . . . . . . . . . .97
Creating a Design-time Library . . . . . . . . . . . . . . . . . . . . . . . . . . . . . . . . . . . . . . . . . . . . . . . . . . . . . . . . . . . . . . .98
Adding a Design-time Library to a Project . . . . . . . . . . . . . . . . . . . . . . . . . . . . . . . . . . . . . . . . . . . . . . . . . .100
Updating a Resource in a Design-time Library . . . . . . . . . . . . . . . . . . . . . . . . . . . . . . . . . . . . . . . . . . . . . . .101
Deleting Resources in a Design-time Library . . . . . . . . . . . . . . . . . . . . . . . . . . . . . . . . . . . . . . . . . . . . . . . .102
Showing or Hiding Design-time Libraries . . . . . . . . . . . . . . . . . . . . . . . . . . . . . . . . . . . . . . . . . . . . . . . . . . .102
Managing Aliases. . . . . . . . . . . . . . . . . . . . . . . . . . . . . . . . . . . . . . . . . . . . . . . . . . . . . . . . . . . . . . . . . . . . . . . . .103
Creating an Alias. . . . . . . . . . . . . . . . . . . . . . . . . . . . . . . . . . . . . . . . . . . . . . . . . . . . . . . . . . . . . . . . . . . . . .103
Deleting an Alias . . . . . . . . . . . . . . . . . . . . . . . . . . . . . . . . . . . . . . . . . . . . . . . . . . . . . . . . . . . . . . . . . . . . . .104
Exporting an Alias . . . . . . . . . . . . . . . . . . . . . . . . . . . . . . . . . . . . . . . . . . . . . . . . . . . . . . . . . . . . . . . . . . . . .104
Importing an Alias . . . . . . . . . . . . . . . . . . . . . . . . . . . . . . . . . . . . . . . . . . . . . . . . . . . . . . . . . . . . . . . . . . . . .104
Managing Resource Conflicts in Design-time Libraries . . . . . . . . . . . . . . . . . . . . . . . . . . . . . . . . . . . . . . . . . . . .105
Building a Design-time Library on the Command Line. . . . . . . . . . . . . . . . . . . . . . . . . . . . . . . . . . . . . . . . . . . . .106
Chapter 5 Managing Trusted Certificates. . . . . . . . . . . . . . . . . . . . . . . . . . . . . . . . . . . . . . . . . . 107
Overview . . . . . . . . . . . . . . . . . . . . . . . . . . . . . . . . . . . . . . . . . . . . . . . . . . . . . . . . . . . . . . . . . . . . . . . . . . . . . . .108
Storing Certificates Inside a Project . . . . . . . . . . . . . . . . . . . . . . . . . . . . . . . . . . . . . . . . . . . . . . . . . . . . . . . . . . .109
Adding Certificates to Your Project . . . . . . . . . . . . . . . . . . . . . . . . . . . . . . . . . . . . . . . . . . . . . . . . . . . . . . . .109
TIBCO Rendezvous SSL Configuration . . . . . . . . . . . . . . . . . . . . . . . . . . . . . . . . . . . . . . . . . . . . . . . . . . . . 110
JMS SSL Configuration. . . . . . . . . . . . . . . . . . . . . . . . . . . . . . . . . . . . . . . . . . . . . . . . . . . . . . . . . . . . . . . . . 112
Storing Certificates in a Design-time Library . . . . . . . . . . . . . . . . . . . . . . . . . . . . . . . . . . . . . . . . . . . . . . . . . . . . 115

TIBCO Designer User’s Guide
vi | Contents
Chapter 6 Creating an Archive for Deployment. . . . . . . . . . . . . . . . . . . . . . . . . . . . . . . . . . . . . 121
Overview . . . . . . . . . . . . . . . . . . . . . . . . . . . . . . . . . . . . . . . . . . . . . . . . . . . . . . . . . . . . . . . . . . . . . . . . . . . . . . . 122
Enterprise Archive File Size. . . . . . . . . . . . . . . . . . . . . . . . . . . . . . . . . . . . . . . . . . . . . . . . . . . . . . . . . . . . . 122
Creating an Enterprise Archive . . . . . . . . . . . . . . . . . . . . . . . . . . . . . . . . . . . . . . . . . . . . . . . . . . . . . . . . . . . . . . 124
Creating an Adapter Archive. . . . . . . . . . . . . . . . . . . . . . . . . . . . . . . . . . . . . . . . . . . . . . . . . . . . . . . . . . . . . . . . 126
Creating a Process Archive. . . . . . . . . . . . . . . . . . . . . . . . . . . . . . . . . . . . . . . . . . . . . . . . . . . . . . . . . . . . . . . . . 129
Making Changes to a Shared Archive. . . . . . . . . . . . . . . . . . . . . . . . . . . . . . . . . . . . . . . . . . . . . . . . . . . . . . . . . 131
Appendix A Menu Reference . . . . . . . . . . . . . . . . . . . . . . . . . . . . . . . . . . . . . . . . . . . . . . . . . . . 133
Project Menu. . . . . . . . . . . . . . . . . . . . . . . . . . . . . . . . . . . . . . . . . . . . . . . . . . . . . . . . . . . . . . . . . . . . . . . . . . . . 134
Edit Menu . . . . . . . . . . . . . . . . . . . . . . . . . . . . . . . . . . . . . . . . . . . . . . . . . . . . . . . . . . . . . . . . . . . . . . . . . . . . . . 141
View Menu . . . . . . . . . . . . . . . . . . . . . . . . . . . . . . . . . . . . . . . . . . . . . . . . . . . . . . . . . . . . . . . . . . . . . . . . . . . . . 148
Resources Menu. . . . . . . . . . . . . . . . . . . . . . . . . . . . . . . . . . . . . . . . . . . . . . . . . . . . . . . . . . . . . . . . . . . . . . . . . 149
Palettes Menu . . . . . . . . . . . . . . . . . . . . . . . . . . . . . . . . . . . . . . . . . . . . . . . . . . . . . . . . . . . . . . . . . . . . . . . . . . . 152
Multi-User . . . . . . . . . . . . . . . . . . . . . . . . . . . . . . . . . . . . . . . . . . . . . . . . . . . . . . . . . . . . . . . . . . . . . . . . . . . . . . 154
Tools Menu . . . . . . . . . . . . . . . . . . . . . . . . . . . . . . . . . . . . . . . . . . . . . . . . . . . . . . . . . . . . . . . . . . . . . . . . . . . . . 155
Window Menu . . . . . . . . . . . . . . . . . . . . . . . . . . . . . . . . . . . . . . . . . . . . . . . . . . . . . . . . . . . . . . . . . . . . . . . . . . . 158
Help Menu. . . . . . . . . . . . . . . . . . . . . . . . . . . . . . . . . . . . . . . . . . . . . . . . . . . . . . . . . . . . . . . . . . . . . . . . . . . . . . 159
Right-Button Menus . . . . . . . . . . . . . . . . . . . . . . . . . . . . . . . . . . . . . . . . . . . . . . . . . . . . . . . . . . . . . . . . . . . . . . 160
Project Panel . . . . . . . . . . . . . . . . . . . . . . . . . . . . . . . . . . . . . . . . . . . . . . . . . . . . . . . . . . . . . . . . . . . . . . . . 160
Palette Panel . . . . . . . . . . . . . . . . . . . . . . . . . . . . . . . . . . . . . . . . . . . . . . . . . . . . . . . . . . . . . . . . . . . . . . . . 162
Appendix B Toolbar Icons Reference . . . . . . . . . . . . . . . . . . . . . . . . . . . . . . . . . . . . . . . . . . . . 163
Project Icons . . . . . . . . . . . . . . . . . . . . . . . . . . . . . . . . . . . . . . . . . . . . . . . . . . . . . . . . . . . . . . . . . . . . . . . . . . . . 164
Edit Icons . . . . . . . . . . . . . . . . . . . . . . . . . . . . . . . . . . . . . . . . . . . . . . . . . . . . . . . . . . . . . . . . . . . . . . . . . . . . . . 165
Palette Icons . . . . . . . . . . . . . . . . . . . . . . . . . . . . . . . . . . . . . . . . . . . . . . . . . . . . . . . . . . . . . . . . . . . . . . . . . . . . 166
Selection Icons . . . . . . . . . . . . . . . . . . . . . . . . . . . . . . . . . . . . . . . . . . . . . . . . . . . . . . . . . . . . . . . . . . . . . . . . . . 167
Verification Icons. . . . . . . . . . . . . . . . . . . . . . . . . . . . . . . . . . . . . . . . . . . . . . . . . . . . . . . . . . . . . . . . . . . . . . . . . 168
Window Title Bar icons . . . . . . . . . . . . . . . . . . . . . . . . . . . . . . . . . . . . . . . . . . . . . . . . . . . . . . . . . . . . . . . . . . . . 169
Appendix C Predefined Global Variables . . . . . . . . . . . . . . . . . . . . . . . . . . . . . . . . . . . . . . . . . 171
Appendix D Working With Legacy Projects . . . . . . . . . . . . . . . . . . . . . . . . . . . . . . . . . . . . . . . 175
Introduction . . . . . . . . . . . . . . . . . . . . . . . . . . . . . . . . . . . . . . . . . . . . . . . . . . . . . . . . . . . . . . . . . . . . . . . . . . . . . 176
Importing a Project . . . . . . . . . . . . . . . . . . . . . . . . . . . . . . . . . . . . . . . . . . . . . . . . . . . . . . . . . . . . . . . . . . . . . . . 177
Exporting a Project . . . . . . . . . . . . . . . . . . . . . . . . . . . . . . . . . . . . . . . . . . . . . . . . . . . . . . . . . . . . . . . . . . . . . . . 178
Exporting a Server Repository Project. . . . . . . . . . . . . . . . . . . . . . . . . . . . . . . . . . . . . . . . . . . . . . . . . . . . . 178

TIBCO Designer User’s Guide
Contents | vii
Exporting Resources . . . . . . . . . . . . . . . . . . . . . . . . . . . . . . . . . . . . . . . . . . . . . . . . . . . . . . . . . . . . . . . . . . . . . . 182
Importing Resources . . . . . . . . . . . . . . . . . . . . . . . . . . . . . . . . . . . . . . . . . . . . . . . . . . . . . . . . . . . . . . . . . . . . . . 184
Index . . . . . . . . . . . . . . . . . . . . . . . . . . . . . . . . . . . . . . . . . . . . . . . . . . . . . . . . . . . . . . . . . . . . . . . . .187

TIBCO Designer User’s Guide
viii | Contents

TIBCO Designer User’s Guide
| ix
Figures
Figure 1 TIBCO Designer startup panel . . . . . . . . . . . . . . . . . . . . . . . . . . . . . . . . . . . . . . . . . . . . . . . . . . . . . . 3
Figure 2 Startup panel Administration options . . . . . . . . . . . . . . . . . . . . . . . . . . . . . . . . . . . . . . . . . . . . . . . . . 6
Figure 3 The TIBCO Designer window. . . . . . . . . . . . . . . . . . . . . . . . . . . . . . . . . . . . . . . . . . . . . . . . . . . . . . . 8
Figure 4 Project tree in the project panel . . . . . . . . . . . . . . . . . . . . . . . . . . . . . . . . . . . . . . . . . . . . . . . . . . . . 10
Figure 5 Global variables in project panel . . . . . . . . . . . . . . . . . . . . . . . . . . . . . . . . . . . . . . . . . . . . . . . . . . . 10
Figure 6 Palette panel changes depending on current selection . . . . . . . . . . . . . . . . . . . . . . . . . . . . . . . . . . 13
Figure 7 Palette mode vs. non-palette mode . . . . . . . . . . . . . . . . . . . . . . . . . . . . . . . . . . . . . . . . . . . . . . . . . 16
Figure 8 The three-panel view . . . . . . . . . . . . . . . . . . . . . . . . . . . . . . . . . . . . . . . . . . . . . . . . . . . . . . . . . . . . 19
Figure 9 Three-panel view with palettes selected . . . . . . . . . . . . . . . . . . . . . . . . . . . . . . . . . . . . . . . . . . . . . 20
Figure 10 Layout options . . . . . . . . . . . . . . . . . . . . . . . . . . . . . . . . . . . . . . . . . . . . . . . . . . . . . . . . . . . . . . . . . 20
Figure 11 Adding a resource to a project . . . . . . . . . . . . . . . . . . . . . . . . . . . . . . . . . . . . . . . . . . . . . . . . . . . . . 32
Figure 12 Save Project Options for Microsoft VSS. . . . . . . . . . . . . . . . . . . . . . . . . . . . . . . . . . . . . . . . . . . . . . 49
Figure 13 Save Project Options for Perforce Version Control System. . . . . . . . . . . . . . . . . . . . . . . . . . . . . . . 53
Figure 14 XML Canon tab . . . . . . . . . . . . . . . . . . . . . . . . . . . . . . . . . . . . . . . . . . . . . . . . . . . . . . . . . . . . . . . . 57
Figure 15 Browse for an XML Canon category . . . . . . . . . . . . . . . . . . . . . . . . . . . . . . . . . . . . . . . . . . . . . . . . 57
Figure 16 XML Canon Check In Dialog . . . . . . . . . . . . . . . . . . . . . . . . . . . . . . . . . . . . . . . . . . . . . . . . . . . . . . 58
Figure 17 A project checked into XML Canon. . . . . . . . . . . . . . . . . . . . . . . . . . . . . . . . . . . . . . . . . . . . . . . . . . 60
Figure 18 Acquire failed . . . . . . . . . . . . . . . . . . . . . . . . . . . . . . . . . . . . . . . . . . . . . . . . . . . . . . . . . . . . . . . . . . 61
Figure 19 Save Project Options for a Scriptable RCS Adapter . . . . . . . . . . . . . . . . . . . . . . . . . . . . . . . . . . . . 88
Figure 20 SVN Add Resource to RCS . . . . . . . . . . . . . . . . . . . . . . . . . . . . . . . . . . . . . . . . . . . . . . . . . . . . . . . 89
Figure 21 SVN Check In Dialog . . . . . . . . . . . . . . . . . . . . . . . . . . . . . . . . . . . . . . . . . . . . . . . . . . . . . . . . . . . . 89
Figure 22 Trusted Certificate and Identity Resource . . . . . . . . . . . . . . . . . . . . . . . . . . . . . . . . . . . . . . . . . . . 110
Figure 23 TIBCO Rendezvous CM SSL Configuration. . . . . . . . . . . . . . . . . . . . . . . . . . . . . . . . . . . . . . . . . . 111
Figure 24 TIBCO Enterprise Message Service SSL Configuration . . . . . . . . . . . . . . . . . . . . . . . . . . . . . . . . 113
Figure 25 TIBCO Application Flow of Information . . . . . . . . . . . . . . . . . . . . . . . . . . . . . . . . . . . . . . . . . . . . . 122
Figure 26 Adding an Enterprise Archive to your project . . . . . . . . . . . . . . . . . . . . . . . . . . . . . . . . . . . . . . . . 124
Figure 27 Adding an Adapter Archive to your Enterprise Archive . . . . . . . . . . . . . . . . . . . . . . . . . . . . . . . . . 126
Figure 28 Adding a Process Archive to your Enterprise Archive . . . . . . . . . . . . . . . . . . . . . . . . . . . . . . . . . . 129

TIBCO Designer User’s Guide
x | Figures

TIBCO Designer User’s Guide
| xi
Tables
Table 1 General Typographical Conventions . . . . . . . . . . . . . . . . . . . . . . . . . . . . . . . . . . . . . . . . . . . . . . . xvii
Table 2 Startup panel Project options . . . . . . . . . . . . . . . . . . . . . . . . . . . . . . . . . . . . . . . . . . . . . . . . . . . . . . 4
Table 3 Startup panel Administration options . . . . . . . . . . . . . . . . . . . . . . . . . . . . . . . . . . . . . . . . . . . . . . . . 6
Table 4 Revision control system information. . . . . . . . . . . . . . . . . . . . . . . . . . . . . . . . . . . . . . . . . . . . . . . . 62
Table 5 Configuration Commands . . . . . . . . . . . . . . . . . . . . . . . . . . . . . . . . . . . . . . . . . . . . . . . . . . . . . . . 73
Table 6 Supported RCS Commands. . . . . . . . . . . . . . . . . . . . . . . . . . . . . . . . . . . . . . . . . . . . . . . . . . . . . . 75
Table 7 General Tab . . . . . . . . . . . . . . . . . . . . . . . . . . . . . . . . . . . . . . . . . . . . . . . . . . . . . . . . . . . . . . . . . 143
Table 8 View Tab . . . . . . . . . . . . . . . . . . . . . . . . . . . . . . . . . . . . . . . . . . . . . . . . . . . . . . . . . . . . . . . . . . . 144
Table 9 References Tab . . . . . . . . . . . . . . . . . . . . . . . . . . . . . . . . . . . . . . . . . . . . . . . . . . . . . . . . . . . . . . 146
Table 10 File Aliases Tab . . . . . . . . . . . . . . . . . . . . . . . . . . . . . . . . . . . . . . . . . . . . . . . . . . . . . . . . . . . . . . 146
Table 11 Other Tab . . . . . . . . . . . . . . . . . . . . . . . . . . . . . . . . . . . . . . . . . . . . . . . . . . . . . . . . . . . . . . . . . . . 146
Table 12 XML Editing Tab. . . . . . . . . . . . . . . . . . . . . . . . . . . . . . . . . . . . . . . . . . . . . . . . . . . . . . . . . . . . . . 147
Table 13 Specifying Protocol Information . . . . . . . . . . . . . . . . . . . . . . . . . . . . . . . . . . . . . . . . . . . . . . . . . . 179

TIBCO Designer User’s Guide
xii | Tables

TIBCO Designer User’s Guide
| xiii
Preface
TIBCO Designer is an easy to use graphical user interface for designing and creating the
integration project configurations. TIBCO Designer allows you to drag and drop
components into a project and build an Enterprise Archive (EAR) for the project. The
EAR can then be used by TIBCO Administrator™ for deploying and running the
application.
Topics
• Changes from the Previous Release of this Guide, page xiv
• Related Documentation, page xv
• Typographical Conventions, page xvii
• Connecting with TIBCO Resources, page xix

TIBCO Designer User’s Guide
xiv | Changes from the Previous Release of this Guide
Changes from the Previous Release of this Guide
There are no changes from the previous release of this guide.

TIBCO Designer User’s Guide
Preface | xv
Related Documentation
This section lists documentation resources you may find useful.
TIBCO Designer Documentation
The following documents form the TIBCO Designer documentation set:
• TIBCO Designer User’s Guide Read this manual for instructions on using this
product.
• TIBCO Designer Palette Reference includs the base palettes that are always available
from TIBCO Designer.
• TIBCO Designer Release Notes Read the release notes for a list of new and changed
features. This document also contains lists of known issues and closed issues for this
release.
Palettes are used to group configuration objects. Documentation is included with the
palette. You can access the palette documentation in various ways:
Other TIBCO Product Documentation
As a rule, TIBCO Designer is not installed standalone but in conjunction with another
product. When you install a product that uses TIBCO Designer (TIBCO Adapter™ or
TIBCO ActiveMatrix BusinessWorks™), palettes are added to TIBCO Designer.
Documentation is included with the palettes.
You may find it useful to read the documentation for the following TIBCO products:
• TIBCO Administrator™ : TIBCO Administrator allows you to manage users,
machines and applications defined in a TIBCO administration domain. The TIBCO
Administrator graphical user interface enables users to deploy, monitor, and start and
stop TIBCO applications.
• TIBCO Runtime Agent™: TIBCO Runtime Agent is a bundle of TIBCO software and
third-party software that is needed to run many TIBCO applications such as TIBCO
BusinessWorks and TIBCO Adapters.
• TIBCO Hawk®: This is a tool for monitoring and managing distributed applications
and operating systems.
• TIBCO Rendezvous®: Rendezvous enables programs running on many different
kinds of computers on a network to communicate seamlessly. It includes two main
components: the Rendezvous application programming interface (API) in several
languages, and the Rendezvous daemon.

TIBCO Designer User’s Guide
xvi | Related Documentation
• TIBCO Enterprise Message Service™: This software lets application programs send
and receive messages using the Java Message Service (JMS) protocol. It also
integrates with TIBCO Rendezvous and TIBCO SmartSockets® messaging products.
• TIBCO ActiveMatrix BusinessWorks™: ActiveMatrix BusinessWorks is a scalable,
extensible, and easy to use integration platform that allows you to develop integration
projects. ActiveMatrix BusinessWorks includes a GUI for defining business processes
and an engine that executes the process.
• TIBCO® Adapter software: TIBCO Runtime Agent is a prerequisite for TIBCO
Adapter products. You will therefore find TIBCO Adapter product documentation
useful.

TIBCO Designer User’s Guide
Preface | xvii
Typographical Conventions
The following typographical conventions are used in this manual.
Table 1 General Typographical Conventions
Convention Use
ENV_NAME
TIBCO_HOME
TIBCO products are installed into an installation environment. A product installed into
an installation environment does not access components in other installation
environments. Incompatible products and multiple instances of the same product must be
installed into different installation environments.
An installation environment consists of the following properties:
• Name Identifies the installation environment. This name is referenced in
documentation as ENV_NAME. On Microsoft Windows, the name is appended to the
name of Windows services created by the installer and is a component of the path to
the product shortcut in the Windows Start > All Programs menu.
• Path The folder into which the product is installed. This folder is referenced in
documentation as TIBCO_HOME.
code font Code font identifies commands, code examples, filenames, pathnames, and output
displayed in a command window. For example:
Use MyCommand to start the foo process.
bold code font Bold code font is used in the following ways:
• In procedures, to indicate what a user types. For example: Type admin.
• In large code samples, to indicate the parts of the sample that are of particular
interest.
• In command syntax, to indicate the default parameter for a command. For example,
if no parameter is specified, MyCommand is enabled:
MyCommand [enable | disable]
italic font Italic font is used in the following ways:
• To indicate a document title. For example: See TIBCO ActiveMatrix BusinessWorks
Concepts.
• To introduce new terms For example: A portal page may contain several portlets.
Portlets are mini-applications that run in a portal.
• To indicate a variable in a command or code syntax that you must replace. For
example: MyCommand PathName

TIBCO Designer User’s Guide
xviii | Typographical Conventions
Key
combinations
Key name separated by a plus sign indicate keys pressed simultaneously. For example:
Ctrl+C.
Key names separated by a comma and space indicate keys pressed one after the other.
For example: Esc, Ctrl+Q.
The note icon indicates information that is of special interest or importance, for example,
an additional action required only in certain circumstances.
The tip icon indicates an idea that could be useful, for example, a way to apply the
information provided in the current section to achieve a specific result.
The warning icon indicates the potential for a damaging situation, for example, data loss
or corruption if certain steps are taken or not taken.
Table 1 General Typographical Conventions (Cont’d)
Convention Use

TIBCO Designer User’s Guide
Preface | xix
Connecting with TIBCO Resources
How to Join TIBCOmmunity
TIBCOmmunity is an online destination for TIBCO customers, partners, and resident
experts, a place to share and access the collective experience of the TIBCO community.
TIBCOmmunity offers forums, blogs, and access to a variety of resources. To register, go
to http://www.tibcommunity.com.
How to Access All TIBCO Documentation
After you join TIBCOmmunity, you can access the documentation for all supported
product versions here:
http://docs.tibco.com/TibcoDoc
How to Contact TIBCO Support
For comments or problems with this manual or the software it addresses, please contact
TIBCO Support as follows.
• For an overview of TIBCO Support, and information about getting started with
TIBCO Support, visit this site:
http://www.tibco.com/services/support
• If you already have a valid maintenance or support contract, visit this site:
https://support.tibco.com
Entry to this site requires a user name and password. If you do not have a user name,
you can request one.

TIBCO Designer User’s Guide
xx | Connecting with TIBCO Resources

TIBCO Designer User’s Guide
| 1
Chapter 1 Getting Started With TIBCO Designer
TIBCO Designer is an easy to use graphical user interface for creating integration
projects. This chapter and the following chapter introduce TIBCO Designer. TIBCO
Designer is included in the TIBCO Runtime Agent installation package.
In this chapter, you learn about TIBCO Designer basics. In the next chapter, you learn
about creating and managing projects and working with global variables. Product-specific
information is available in the product-specific manuals.
Topics
• Welcome to TIBCO Designer, page 2
• Starting TIBCO Designer, page 3
• TIBCO Designer Administration, page 6
• TIBCO Designer Interface Overview, page 8
• Working With Palettes, page 13
• Customizing the Display, page 19
• Accessing Documentation, page 21

TIBCO Designer User’s Guide
2 | Chapter 1 Getting Started With TIBCO Designer
Welcome to TIBCO Designer
TIBCO Designer allows you to easily create integration projects for your enterprise
computing environment.
TIBCO Designer is available as a graphical user interface to different TIBCO products
and is used by those products for configuration. Depending on the product you installed,
you can use TIBCO Designer to create TIBCO ActiveMatrix BusinessWorks process
definitions or create or modify adapter configurations.
• TIBCO ActiveMatrix BusinessWorks is a scalable, extensible, and easy to use
integration platform that allows you to develop, deploy, and run integration projects.
TIBCO ActiveMatrix BusinessWorks also includes an engine that executes the
process, and a web-based GUI for monitoring and managing run-time components.
• Adapters allow you to configure the interface between an external system, such as an
SAP R/3 application or a database, and the TIBCO ActiveEnterprise™ environment.
Adapters are available as separate products.
• Custom adapters are created using the TIBCO Adapter SDK. You can prepare an
adapter configuration for custom adapters using the Adapter Resources and Adapter Schemas
palettes, which are discussed in TIBCO Designer Palette Reference.
• TIBCO BusinessWorks™ Collaborator gives companies the ability to coordinate
business activities, measure their efficiency, and optimize them over time. The
product facilitates complete visibility into business activities, along with the ability to
collaborate on the modeling and modification of the rules and flows that define those
business activities. TIBCO BusinessWorks Collaborator uses TIBCO Designer for
configuration of FormFlows processes and for preparing Enterprise Archive files.

TIBCO Designer User’s Guide
Starting TIBCO Designer | 3
Starting TIBCO Designer
The following sections describe how to start TIBCO Designer and explain the options
available once TIBCO Designer starts.
To Start TIBCO Designer
• Under Microsoft Windows:
Choose Start > All Programs > TIBCO > TIBCO Designer n.n > Designer n.n
or
Invoke install-path\tibco\designer\n.n\bin\designer
• Under UNIX:
Invoke install-path/tibco/designer/n.n/bin/designer
Startup Options
When you launch TIBCO Designer, the startup panel is displayed:
Figure 1 TIBCO Designer startup panel
TIBCO Designer User’s Guide
4 | Chapter 1 Getting Started With TIBCO Designer
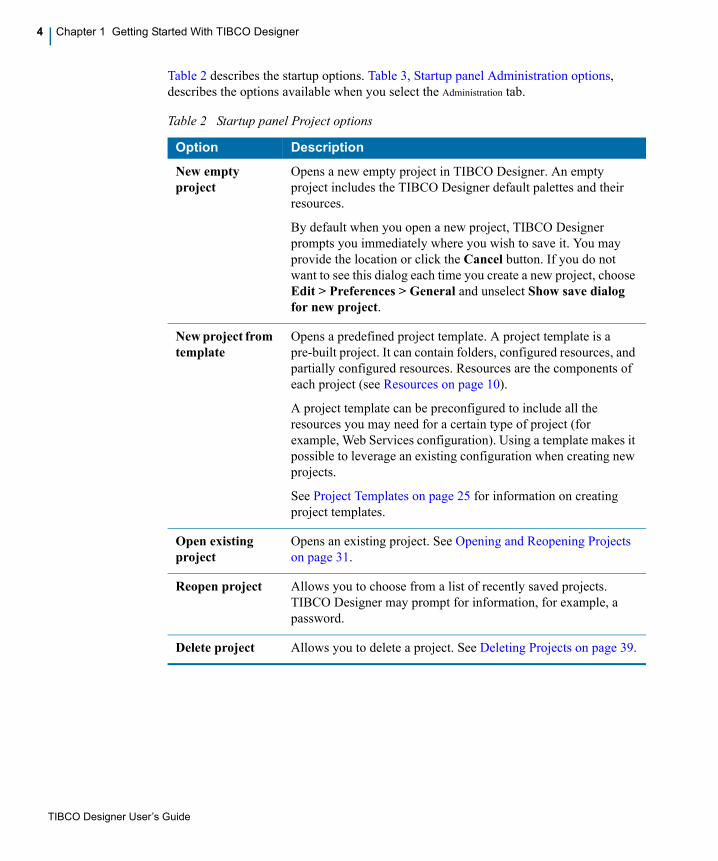
Table 2 describes the startup options. Table 3, Startup panel Administration options,
describes the options available when you select the Administration tab.
Table 2 Startup panel Project options
Option Description
New empty
project
Opens a new empty project in TIBCO Designer. An empty
project includes the TIBCO Designer default palettes and their
resources.
By default when you open a new project, TIBCO Designer
prompts you immediately where you wish to save it. You may
provide the location or click the Cancel button. If you do not
want to see this dialog each time you create a new project, choose
Edit > Preferences > General and unselect Show save dialog
for new project.
New project from
template
Opens a predefined project template. A project template is a
pre-built project. It can contain folders, configured resources, and
partially configured resources. Resources are the components of
each project (see Resources on page 10).
A project template can be preconfigured to include all the
resources you may need for a certain type of project (for
example, Web Services configuration). Using a template makes it
possible to leverage an existing configuration when creating new
projects.
See Project Templates on page 25 for information on creating
project templates.
Open existing
project
Opens an existing project. See Opening and Reopening Projects
on page 31.
Reopen project Allows you to choose from a list of recently saved projects.
TIBCO Designer may prompt for information, for example, a
password.
Delete project Allows you to delete a project. See Deleting Projects on page 39.
TIBCO Designer User’s Guide
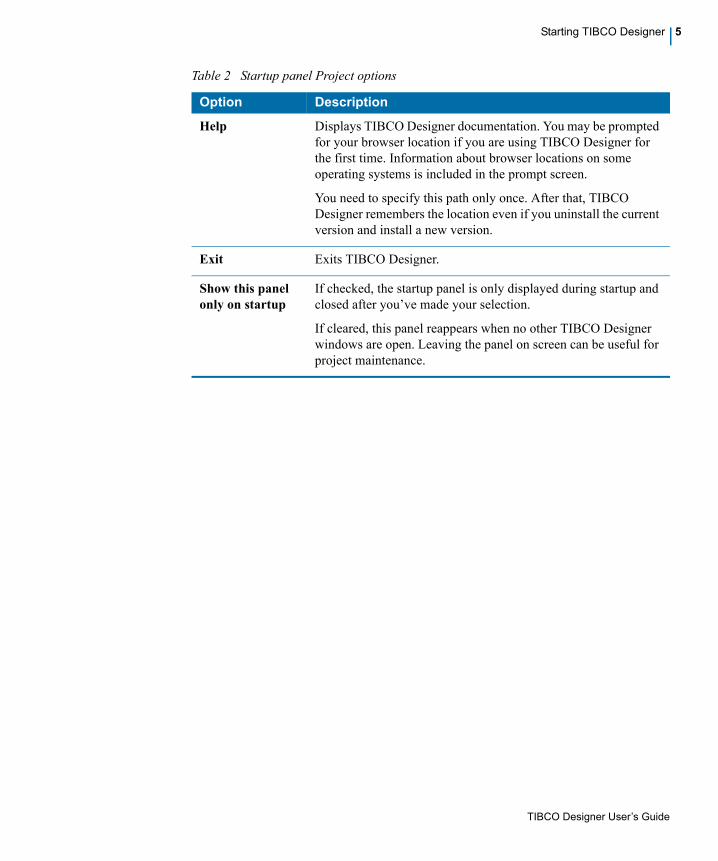
Starting TIBCO Designer | 5
Help Displays TIBCO Designer documentation. You may be prompted
for your browser location if you are using TIBCO Designer for
the first time. Information about browser locations on some
operating systems is included in the prompt screen.
You need to specify this path only once. After that, TIBCO
Designer remembers the location even if you uninstall the current
version and install a new version.
Exit Exits TIBCO Designer.
Show this panel
only on startup
If checked, the startup panel is only displayed during startup and
closed after you’ve made your selection.
If cleared, this panel reappears when no other TIBCO Designer
windows are open. Leaving the panel on screen can be useful for
project maintenance.
Table 2 Startup panel Project options
Option Description

TIBCO Designer User’s Guide
6 | Chapter 1 Getting Started With TIBCO Designer
TIBCO Designer Administration
When you start TIBCO Designer, the startup panel allows you to open projects (see
Startup Options on page 3). You can also use the startup panel to perform some TIBCO
Designer administrative tasks. When you choose the Administration tab, the panel presents
the choices shown in Figure 2:
Figure 2 Startup panel Administration options
Table 3 Startup panel Administration options
Option Description
Convert DAT to
files
Displays a dialog that lets you specify the .dat file you wish to
convert and the folder for the multi-file project. Because a.dat file
is a legacy format, you must convert it to a multi-file project
before you can open a project from TIBCO Designer.

TIBCO Designer User’s Guide
TIBCO Designer Administration | 7
Convert files to
DAT
Displays a dialog that lets you choose a project directory and a
.dat file. When you specify both, TIBCO Designer converts the
multi-file project in the directory to the .dat file.
Configure
preferences
Displays the Preferences dialog. See Preferences on page 134.
Configure
runtime
Allows you to configure the TIBCO Designer runtime
environment. You have these options:
• Extended Class Path—classpath to be used by TIBCO
Designer. You can specify file names or directories. If you
specify directories, all .class, .zip and .jar files are loaded. The
order in which the files are loaded depends on the file
system.
• Palette Path—Location from which TIBCO Designer loads
palettes.
• Maximum Heap Size—Maximum JVM heap size.
• User Directory—Default location for the application to store
files.
• Command Line Arguments—Allows command line
arguments to be passed to TIBCO Designer. Currently -d
(debug) is supported. If you specify -d, the log that is sent to
the console becomes more detailed.
Runtime
environment
Displays TIBCO Designer runtime information. This
information, which includes palette name and version
information and Java property and value information, can be
useful for debugging or during interaction with TIBCO
Technical Support.
Use the Export Runtime Settings command to create a file with
all pertinent information.
Table 3 Startup panel Administration options
Option Description

TIBCO Designer User’s Guide
8 | Chapter 1 Getting Started With TIBCO Designer
TIBCO Designer Interface Overview
The TIBCO Designer interface allows you to perform various functions. This section
describes the TIBCO Designer main window and explains what you see in each of its
panels.
Main Window
Figure 3 illustrates the TIBCO Designer window.
Figure 3 The TIBCO Designer window
The TIBCO Designer window has these components:
• Menu bar and Menus. See Appendix A, Menu Reference, on page 125
• Toolbar icons. See Appendix B, Toolbar Icons Reference, on page 155
• Tabs in the leftmost area allow you to change what is displayed in the panel. See
Customizing the Display on page 19.
Design panel
Configuration
panel
Menu bar
Toolbar
Palette
Projectpanel
panel
Tabs
When something in the design panel or the configuration panel is selected, the panel is
highlighted. This helps you see at one glance where the focus is.

TIBCO Designer User’s Guide
TIBCO Designer Interface Overview | 9
• Four panels, which are (starting in the top left corner and continuing clockwise):
— Project panel (can display the project tree or the project’s global variables)
— Design panel
— Configuration panel
— Palette panel
The following sections explain the contents of each panel.
Project Panel
A project contains resources that implement the enterprise integration. This includes
services (producers and consumers of information), any business logic that may be applied
to that information, and deployment information.
By default, the project panel allows you to view the Project Display or Global Variables
Display. When used in conjunction with other projects, the panel can be used for other
purposes, for example, in conjunction with the TIBCO ActiveMatrix BusinessWorks
tester.
Project Display
With the Project tab selected, the project panel displays the project tree. This includes the
top-level (root) folder and the hierarchy of resources. The hierarchy of folders and
resources corresponds to the hierarchy of folders and files in the project folder.
Figure 4 illustrates an example project, ProcessNewComputer, in the project panel. Multiple
TIBCO products were used to create the integration project: it contains two TIBCO
ActiveMatrix BusinessWorks process definitions (ProcessOrder and ProcessSoap) and a Siebel
adapter (SBLAccount).
You can rearrange the panels and what they display. For example, the project panel and
palettes can be combined to share one set of tabs. See Customizing the Display on page 19
for more information.

TIBCO Designer User’s Guide
10 | Chapter 1 Getting Started With TIBCO Designer
Figure 4 Project tree in the project panel
Global Variables Display
Global variables are associated with each project. To display them, click the Global Variables
tab of the project panel. Clicking the pencil icon displays the global variable editor. See
Working With Global Variables on page 35 for more information.
Figure 5 Global variables in project panel
Resources
Resources are the components of a project. A simple TIBCO Designer resource
corresponds to an object in a TIBCO application, such as an adapter configuration, an
adapter service, a process definition, or an FTP activity.
Resources can be complex and contain other resources, much like a folder can contain
other folders on your computer's file system. For example, an adapter configuration may
contain multiple folders with multiple publisher or subscriber service resources.
Project
TIBCO Designer User’s Guide
TIBCO Designer Interface Overview | 11
Each top-level resource (for example, each adapter configuration) corresponds to a file in
the project’s hierarchy of files in the project directory. This design allows developers to
use a source control system and to check out only the top-level resources they are working
with from a source control system, thus sharing their work.
Most resources have context-sensitive help available for the configuration of that
resource. Right-click on the resource and choose What Is This? from the popup menu for
more information on configuring the resource.
Palette Panel
Palettes organize resources and allow you to add them to your project. You select
resources in the palette panel and drag and drop them into the design panel to add them to
your project.
See Working With Palettes on page 13 for more information.
Design Panel
The design panel displays the current resource selected in the project panel. For resources
that contain other resources, the contents of the selected resource are shown in the design
panel. For example, if you select a folder, its contents is displayed.
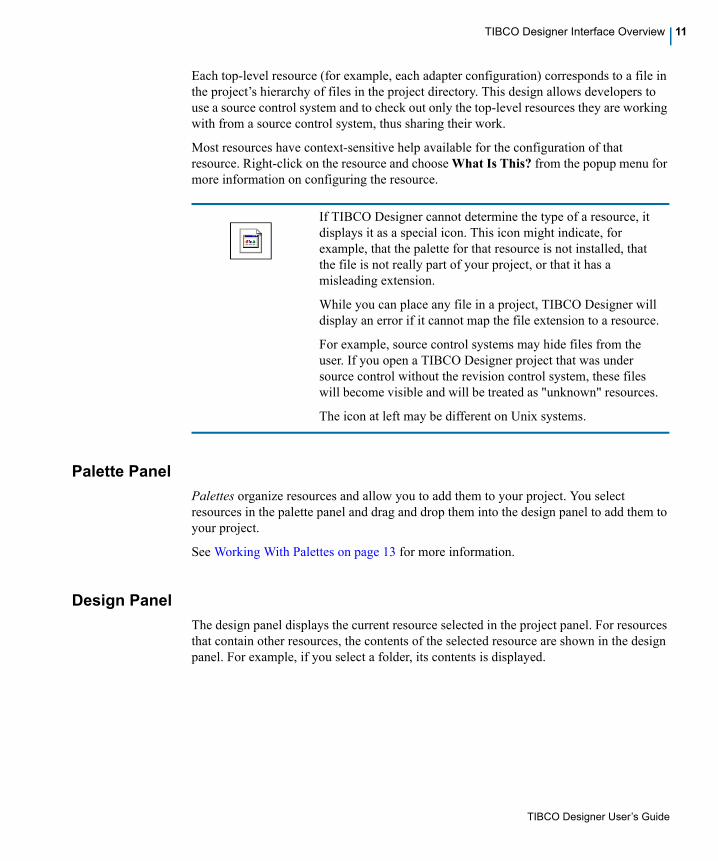
If TIBCO Designer cannot determine the type of a resource, it
displays it as a special icon. This icon might indicate, for
example, that the palette for that resource is not installed, that
the file is not really part of your project, or that it has a
misleading extension.
While you can place any file in a project, TIBCO Designer will
display an error if it cannot map the file extension to a resource.
For example, source control systems may hide files from the
user. If you open a TIBCO Designer project that was under
source control without the revision control system, these files
will become visible and will be treated as "unknown" resources.
The icon at left may be different on Unix systems.

TIBCO Designer User’s Guide
12 | Chapter 1 Getting Started With TIBCO Designer
Configuration Panel
The configuration panel allows you to specify various configuration options for each
resource. The type and the purpose of the selected resource determine the contents of the
configuration panel. Usually there are one or more tabs in the configuration panel that
allow you to access the various configuration options. The tabs organize the configuration
options for the resource.
Click the help icon in the top right corner of the configuration panel for online help on
the current selection.
After you have added the configuration information, you must click the Apply button for
each tab. If you decide you do not want to add the configuration information, click Reset
before you apply any changes to return to the previous values for each field in the tab.

TIBCO Designer User’s Guide
Working With Palettes | 13
Working With Palettes
TIBCO Designer contains a small number of native palettes. In addition, each TIBCO
application you install that uses TIBCO Designer adds one or more palettes during
installation.
Which palettes are displayed depends on:
• the installed TIBCO products
• the resource selected in the project tree
• your preferences.
Current Selection and Palette Panel Display
When the default view is set as your view preference, the current selection in the project
tree determines which palettes are displayed in the palette panel. You can change your
view preferences to change what’s displayed in the palette panel. See Customizing the
Display on page 19 for more information about how TIBCO Designer functions in palette
mode.
Figure 6 Palette panel changes depending on current selection
For example:
• Select the top-level project folder to see a palette for each adapter and some other
palettes for general resources.
• Select the Adapter Services folder of an adapter in the project tree to see a palette of
service resources. Drag any service resource into the design panel to add that resource
to that adapter.
Top-level folder selected Adapter Services folder selected

TIBCO Designer User’s Guide
14 | Chapter 1 Getting Started With TIBCO Designer
Using the Palette Browser
The palette browser allows you to manage palettes easily. You can explore palette groups,
palettes and resource types, and enable or disable specific palettes to display in the palette
panel. The browser includes a search filter that allows you to display only palettes that
match a specific string. Click Palettes > Browse to display the palette browser.
The palette browser displays all available palettes grouped by palette groups in a
hierarchy. Selecting a palette or resource in a palette displays its name, resource id and
description in the right pane.
Clearing the checkbox next to a palette's name in the tree hides that palette in the palette
panel. Selecting the checkbox shows that palette in the palette panel. You must close the
palette browser to view the changes you have made.
By default, all palettes are visible in the palette browser. You can provide a filter in the
Filter string/pattern field to limit the display. The filter uses regular expression matching. That
is, if you enter JMS in the field, only palettes that have JMS in their name, description or
containing palette are displayed. Matching is case insensitive. Entering a new expression
and clicking Filter again performs a new search on all resource types and will not refine
the current search.
To clear the filter expression and display all palettes either click Show all or remove the
expression from the entry box and click Filter again.

TIBCO Designer User’s Guide
Working With Palettes | 15
Showing and Hiding Palettes
Palettes can be hidden by clicking the X icon next to the palette name. For example, the
following diagram shows the palette panel with a large number of palettes displayed. You
can disappear a palette by clicking the X icon.
To redisplay a palette quickly, click the Palettes menu and select the palette to display. For
example, the next diagram shows that the FTP palette is not visible in the palettes panel
(an X does not display next to FTP). After you select FTP, its palette will display in the
palette panel. Note that you can hide palettes using this menu. Each time you select a
palette, it toggles between appearing and disappearing.
Click X to Hide Palette

TIBCO Designer User’s Guide
16 | Chapter 1 Getting Started With TIBCO Designer
Choosing Palette Mode or Non-palette Mode
TIBCO Designer allows you to change the palette panel display to use palette mode or
non-palette mode.
• In palette mode, each resource is shown in the palette it belongs to, and each palette
shows all resources. In that case, unusable resources are grayed out.
• In non-palette mode, resources are displayed directly in the panel, and only currently
usable resources are displayed.
While in palette mode, you can close individual palettes using the close marker (X) on the
right. If you don’t see close markers, choose Palettes > Options> Show Close Boxes. To
hide close markers, choose Palettes > Options> Hide Close Boxes.
To redisplay a closed palette, choose Palettes > Browse, then locate and select the palette.
Figure 7 Palette mode vs. non-palette mode
Non-palette modePalette mode
Only
currently
usable
resources
display
All
resources
display in
each
palette
Close
box

TIBCO Designer User’s Guide
Working With Palettes | 17
To Switch Palette Modes
• Choose Palettes>Options>Switch Palette Modes.
or
• Click the Switch Palette Modes button located in the tool bar.
Displaying Palettes in a Separate Window
You can display the palette panel in a separate window by choosing Palettes > Options >
Show Palettes in New Window. You can also access this menu command from the
right-button menu of any palette in the palette panel.
To restore the palette panel to its location in the main window, close the separate window
in which the palette panel is displayed.
Working With User Palettes
User palettes allow you to save a collection of resources to a predefined location and
either share it with other users or use it yourself at a later time.
To Create a User Palette
1. Choose Palettes > My Palettes > New Palette.
2. Specify the name of the palette.
When you later save your project, the palette is saved to the location specified by the
User Palette Directory General Preference.
3. Drag resources from the project tree or from the design panel into the user palette.
4. When you save your project, the custom palette is then saved to the location specified
by the User palette directory under the General tab in the Preferences dialog.
To Load a User Palette
1. Choose Palettes > My Palettes > Reload Palettes.

TIBCO Designer User’s Guide
18 | Chapter 1 Getting Started With TIBCO Designer
To Delete a User Palette
1. Make sure the palette is loaded.
2. Choose Palettes > My Palettes > Delete Palettes.
You are prompted for the palette(s) you wish to delete.

TIBCO Designer User’s Guide
Customizing the Display | 19
Customizing the Display
You can customize how TIBCO Designer displays panels and palettes. This section gives
an overview of the most frequently used display preferences.
Display preferences and other preferences are saved when you exit TIBCO Designer, even
if you do not save your project. Display preferences are maintained for each user, even if
that user completely uninstalls the product and installs a different version.
Choosing Panel Layout
If you prefer to view either the project tree or the palette panel, but not both in the left
panel, you can set TIBCO Designer to display the three-panel view shown in Figure 8.
The view also uses drop downs, rather then tabs to access the project, global variables or
palettes.
Figure 8 The three-panel view
To Choose the Three-panel View
1. Choose Edit > Preferences > View.
2. Under Layout, select the appropriate icon and click OK.
To return to the default settings, choose Edit > Preferences and click Restore Default
Settings.
Project
panel
Configuration
panel
Design
panel
Drop
downs

TIBCO Designer User’s Guide
20 | Chapter 1 Getting Started With TIBCO Designer
To navigate to palettes in this view, click the Palettes tab on the left (see Figure 9. The next
diagram shows the results of this action.
Figure 9 Three-panel view with palettes selected
Additional layout options are available when you choose Edit > Preferences > View. If
you select the Use tabs or Use drop downs option, you must close and reopen your project to
make the change visible.
Figure 10 Layout options
Select
Palettes

TIBCO Designer User’s Guide
Accessing Documentation | 21
Accessing Documentation
Documentation for TIBCO Designer is available in several ways:
• If you are using Microsoft Windows, you can use the Start menu to access TIBCO
Designer documentation.
• From TIBCO Designer:
— Click Help > Designer Help at any time to view this manual, which discusses how
to use TIBCO Designer regardless of the application you are building.
— Use Help > Help For to access product-specific documentation.
— Right click on most resources and choose the What Is This? menu item to view
specific help for that resource. If information is displayed in the Configuration panel,
you can also click the Help icon for online help.
When you invoke TIBCO Designer help for the first time, you are prompted for the
location of your web browser. You only need to supply this location once. Location
information is included in the prompt.

TIBCO Designer User’s Guide
22 | Chapter 1 Getting Started With TIBCO Designer

TIBCO Designer User’s Guide
| 23
Chapter 2 Managing Projects and Resources
Projects are the key organizational principle for the configuration information you specify
with TIBCO Designer.
This chapter explains how to manage projects and the resources inside them.
Topics
• Overview of Projects, page 24
• Creating Projects, page 26
• Validating Projects, page 27
• Saving Projects, page 29
• Opening and Reopening Projects, page 31
• Adding Resources To Your Project, page 32
• Working With Global Variables, page 35
• Deleting Projects, page 39
• Tips and Tricks for Working With Projects, page 40

TIBCO Designer User’s Guide
24 | Chapter 2 Managing Projects and Resources
Overview of Projects
A project is a collection of resources, including, for example, adapter resources and
process definitions. Together, these resources define the configuration of your integration
project. In the TIBCO Designer window, a project is represented by the top-level (root)
folder in the project panel. The top-level folder is initially named Untitled and is renamed to
the name of the project when you save the project for the first time.
Each TIBCO Designer window contains only one project. If you open a second project,
TIBCO Designer opens a new window.
When you close a project, the startup panel remains available for project maintenance or
for opening a different project unless you selected the Show this panel only on startup
checkbox on that window.
Project Structure
When you save a project, TIBCO Designer creates a hierarchy of folders and files in the
location you choose for the project.
When you create a multi-file project:
• There is one file per top-level resource. For TIBCO ActiveMatrix BusinessWorks, that
may mean one file per process. For adapters, more resources may be considered part
of a top-level resource.
• The project root directory identifies the project. The project root can be located
anywhere in the file system and is determined when you first save the project. All
components of a project are located under this common project root.
• Directories in the file system become folders in TIBCO Designer. However, not all
folders in TIBCO Designer are directories in the file system:
— Folders created from a Folder resource in the General Palette (displays a
multi-folder icon) become folders in the file system.
— Other folders, such as the Adapter Services folder inside an adapter configuration
are logical folders. These folders only exist in memory in the resource that holds
them. The actual data for these elements is stored in the file of the top-level
resource. For example, the Adapter Services data are stored in the Adapter
Configuration file.
When you supply a project location, be sure no other files reside in that folder. TIBCO
Designer removes any existing files before placing the project files into the folder.

TIBCO Designer User’s Guide
Overview of Projects | 25
• TIBCO Designer creates a file named vcrepo.dat in the project root directory when you
first save the project. This file is used to store properties such as display name, TIBCO
Rendezvous encoding, and description. This file can be used for identification in place
of the project root directory and can be used as the repository locator string (repoUrl).
Using a Version Control System
Multi-file projects support the use of different version control systems because they
consist of separate files for each versionable component.
Once the root directory is defined under the control of a version control system, standard
version control system tools can be used. The following version control systems are
supported and discussed separately:
• File Sharing on page 45
• Microsoft Visual SourceSafe on page 48
• Perforce Fast Software Configuration Management System on page 51
• XML Canon on page 55
• ClearCase on page 64
• CVS on page 65
• PVCS Version Manager on page 67
Project Templates
A project template is a pre-built project. It can contain folders for organization, configured
resources, and partially configured resources. You can use a project template as the
foundation for other projects similar in nature. Using a template, you can leverage your
work when performing similar configurations.
This file cannot be used for identification or as the repoURL for TIBCO Adapters
(including custom adapters based on TIBCO Adapter SDK).
Note that for ActiveEnterprise 5.2, the preferred method of deployment is to generate
an EAR file and upload it into TIBCO Designer, not to run the adapter using a
properties file. See Chapter 6, Creating an Archive for Deployment.

TIBCO Designer User’s Guide
26 | Chapter 2 Managing Projects and Resources
Creating Projects
You create a new project using the startup panel when starting TIBCO Designer. You can
also choose Project > New Project from the TIBCO Designer menu bar with TIBCO
Designer already open. In that case, TIBCO Designer opens a new window for the new
project.
TIBCO Designer allows you to create a project from scratch or to create a template-based
project.
• New Empty Project — A new project contains a single AESchemas folder that will be
used for adapter schema resources. See Project Structure on page 24 for more
information.
• New Project from Template — When you save a project as a template (Project >
Save As Template), you can later load that template and customize it to create a new
project. See Project Templates on page 25.
When you create a new project, you are, by default, prompted immediately to save it. See
Saving Projects on page 29 for a discussion of the information you must supply.
TIBCO Designer User’s Guide
Validating Projects | 27
Validating Projects
After you have created a project, you add resources to it and supply configuration
information for your resources.
Before you prepare a project for deployment, it is critical that you validate it. TIBCO
Designer includes reference-checking and other validation facilities that allow you to
make sure a project is internally consistent. This is essential if you intend to run the
project, or hand it to another user.
During validation, each resource always checks for broken references. Many resources
have other resource-specific validation behavior. See Validate Project for Deployment on
page 128 for some additional information on the behavior of resources included with
TIBCO Designer by default.
Validateproject utility
The validateproject utility allows you to validate all project resources on the command line.
The validateproject online help shows the command line syntax and describes each command
option. To use the online help, change directory to TIBCO_HOME/designer/version/bin and
type validateproject. The online help is as follows:usage: ValidateProject [-h] [-u] [-a pathToAliases] project
-h: display this message
-u: show warnings for unused global variables
-a: path to a properties file mapping alias names to library paths (aliasName=/path/to/library/file)
project: the designer project to use.
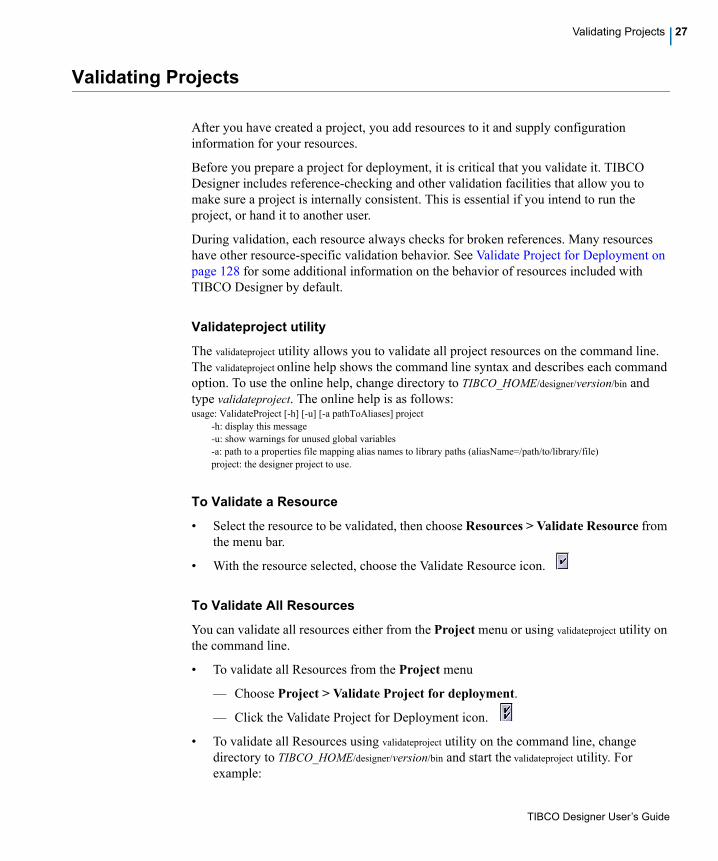
To Validate a Resource
• Select the resource to be validated, then choose Resources > Validate Resource from
the menu bar.
• With the resource selected, choose the Validate Resource icon.
To Validate All Resources
You can validate all resources either from the Project menu or using validateproject utility on
the command line.
• To validate all Resources from the Project menu
— Choose Project > Validate Project for deployment.
— Click the Validate Project for Deployment icon.
• To validate all Resources using validateproject utility on the command line, change
directory to TIBCO_HOME/designer/version/bin and start the validateproject utility. For
example:

TIBCO Designer User’s Guide
28 | Chapter 2 Managing Projects and Resources
ValidateProject c:\myproject
Note that TIBCO Designer handles references to resources as strings. TIBCO Designer
will help keep these references up to date, for example, when you move a resource to a
different location. It is, however, possible to have "broken" references, for example, if you
delete a resource and ignore the warnings displayed by TIBCO Designer. You can use the
validation commands to find broken references.
By default, TIBCO Designer prompts whether you wish to perform reference checking
each time you perform an activity that might result in a broken reference (move, rename,
and so forth). You can change the default behavior using the Edit > Preferences >
References tab.

TIBCO Designer User’s Guide
Saving Projects | 29
Saving Projects
When you save a project, you can save it as a multi-file project, or under XML Canon.
This section explains how to save a multi-file project. See XML Canon on page 55 for
information about using XML Canon.
When you save a multi-file project, you have these choices:
• Project Directory — The directory that will contain the project files. Click Browse to
select the directory.
• TIBCO Message Encoding — Character Encoding used for the communication
between TIBCO product components in this project at design time (debug mode), or if
the project is running as a legacy local file-based project. The communication
transport could be either TIBCO Rendezvous or TIBCO Enterprise Message Service.
You have two choices:
— ISO8859-1 (Latin-1)—Preferred encoding for projects that deal only with English
and other Western European languages that belong to the ISO Latin-1 character set.
If this encoding is used for languages that do not belong to the Latin-1 character set
(such as Japanese, Arabic, etc.), data loss may result.
— UTF-8—Preferred encoding for projects dealing with languages not belonging to
the Latin-1 character set. This includes most languages except for English and
other western European languages.
• Multi-User System — Allows you to use a multi-user system such as file sharing,
Perforce, or Visual SourceSafe. See Working with a Revision Control System on
page 41 for more information.
After you have saved a project to a repository, you can select the project’s Project Settings tab
to:
• View information about the project. The information displayed depends on how the
project was saved.
• View and change the project’s messaging encoding for the data communication
among the components in this project. This is only used in design mode, or when the
project is running as a legacy local file-based project.
TIBCO Designer will remove all the files in this directory when you save the project.
After deployment, the encoding setting of the TIBCO Administration Server will
supersede this encoding. See the TIBCO Administrator Server Configuration Guide
for more information.

TIBCO Designer User’s Guide
30 | Chapter 2 Managing Projects and Resources
To Save a Project
1. In the main window, do one of the following:
— Choose Project > Save.
— Choose Project > Save As and specify the storage directory.
— Click the Save icon .
2. In the dialog that displays, select the Multi-File Project tab and provide the project
name as a directory in the Project Directory field.
3. Click OK.
To Save a Project as a Template
1. Choose Project > Save As Template.
2. Provide the appropriate information, which is the same as discussed in Saving Projects
on page 29.

TIBCO Designer User’s Guide
Opening and Reopening Projects | 31
Opening and Reopening Projects
You can open a project in two ways:
• From the startup panel when you launch TIBCO Designer.
• Choose Project > Open from the TIBCO Designer main window if TIBCO Designer
is already open. In that case, TIBCO Designer will create a new window for your
project.
If you are opening a project under a revision control system, you need to provide the
appropriate information. See Chapter 3, Working with a Revision Control System.
You can reopen a project you opened recently in two ways:
• From the startup panel when you launch TIBCO Designer.
• Choose Project > Reopen from the TIBCO Designer main window if TIBCO
Designer is already open. In that case, TIBCO Designer will display your project in a
new window.
If you need to open a .dat project, you must convert it first:
1. In the startup panel, click the Administration tab.
2. Choose DAT to Files.
3. Supply the name of the project directory when prompted.
You can then open the multi-file project from TIBCO Designer.

TIBCO Designer User’s Guide
32 | Chapter 2 Managing Projects and Resources
Adding Resources To Your Project
Once you have created or opened a project, you can add resources to your project. To add
a resource, you first select it in the palette panel, then drag and drop it into the design
panel.
To Add a Resource to Your Project
1. Select the palette in which the resource can be found. For example, you find an
adapter configuration resource in the palette named after the adapter.
If the palettes are not visible in your palette panel, click the Switch Palette Modes
icon .
2. Select a resource within the palette and drag and release it in the design panel.
The resource instance is displayed in the design panel and also added to your project
tree. The configuration panel allows you to specify configuration information for the
resource.
Figure 11 illustrates adding a resource to a project.
Figure 11 Adding a resource to a project
Drag into
design
panel

TIBCO Designer User’s Guide
Adding Resources To Your Project | 33
If Adding a Resource Results in an Error
Whether adding a resource is possible depends on what is currently displayed in the
design panel.
If you try to add a resource that cannot be added to the current resource, an error results.
For example, if the root folder is displayed in the design panel, you can add an adapter
instance. If any other resource is displayed, you cannot add the adapter instance.
Preventing Certain File Types From Appearing in Projects
You can prevent certain file types from appearing within a TIBCO Designer project by
adding the file type extension to the filteredfiles.txt file. File types listed in filteredfiles.txt will
not be visible in TIBCO Designer projects. This is useful in building an ignore list for file
types you don’t want displayed in your projects. If you are using a revision control system,
adding an ignore list for unwanted file types prevents you from accidentally adding these
to the repository during a commit.
Each line in filteredfiles.txt must start with a token, which is an arbitrary name. The token
must not be repeated in the line. Each entry must be separated by a colon. An entry can use
* as a wildcard. For example, for the following line, sfs.rcs.adapter.tool is the token and *.lck
indicates that any file with the .lck file type extension will not be displayed in a TIBCO
Designer project.
sfs.rcs.adapter.tool:*.lck
To add a file type extension to filteredfiles.txt:
1. Changed directory to TIBCO_HOME\tra\n.n\lib.
You can also add resources in other ways:
• In the palette panel, select the resource and choose Add This To The Project from the
right-button menu.
• In the design panel, right click on an empty area (not on a resource) and select Add
Resource from the right-button menu, then choose the appropriate submenu.
• You can enable resources to be added using double-clicks. Go to Edit > Preferences
and select the View tab. Under Palettes, select Initiate drag-n-drop through
double-clicks.
Ideally, all resources that cannot be dragged into the design panel should be greyed out
(palette mode) or not visible (non-palette mode). For some custom palettes that may not
always be true.

TIBCO Designer User’s Guide
34 | Chapter 2 Managing Projects and Resources
2. Using a text editor, open filterfiles.txt.
3. Add a file type extension to an existing line, or create a new line. If creating a new
line, the first entry must be a token followed by a colon and the file extension. Use an
* to indicate all files of the given file type extension.
4. Save the file and exit.
5. Restart TIBCO Designer.

TIBCO Designer User’s Guide
Working With Global Variables | 35
Working With Global Variables
Global variables provide an easy way to set defaults for use throughout your project.
There are several ways in which they can be used:
• Define a variable using TIBCO Designer, then override the value for individual
applications at deployment time using TIBCO Administrator. You can also override
values for predefined variables, unless the GUI does not allow you to make them
settable later.
• Predefine a variable using TIBCO Designer, then override the value for individual
services (for example, publication service or TIBCO ActiveMatrix BusinessWorks
process) at deployment time using TIBCO Administrator. The values you specify are
then used at runtime.
You can also override values for predefined variables, unless the GUI does not allow
you to make them settable later.
• Predefine the variable using TIBCO Designer, then override it on the command line.
For example, you could assign the value 7474 to the predefined global variable RvDaemon.
You can then use the variable in different sessions in your adapter. If you wish to change
the TIBCO Rendezvous daemon for your adapter, you can globally set it in TIBCO
Administrator to a different value or override it from the command line.
When you want to use the global variable in the fields of a resource, enter the variable
name surrounded by %% on both sides. Some fields in the configuration panel, such as user
name and password fields, allow you to drag and drop global variables into the field.
When the project is deployed and the configured components run, all occurrences of the
global variable name are replaced with the global variable value. For example, a global
variable named RvServiceTest with a value of 7800 would be replaced with 7800.
A number of global variables are predefined in TIBCO Designer. See Appendix C,
Predefined Global Variables for information. You can add definitions of any variables you
need to the predefined variables.
Global Variables Editor
Use the global variables editor to create or modify global variables, mark variables as
settable from TIBCO Administrator, and assign a type to a variable.
To display the global variables editor, in the project panel, select the Global Variables tab
or drop down, then click the Open Advanced Editor (pen) icon. If you select a global
variable, then click the pen icon, the editor opens with the variable selected.

TIBCO Designer User’s Guide
36 | Chapter 2 Managing Projects and Resources
The next diagram shows the global variables editor.
Adding a Global Variable or Global Variable Group
To add a global variable, select the add variable button. A new line for the variable
appears. Type a name for the variable by double-clicking the default value in the name
field.
When creating a global variable group or variable, it is added to the bottom of the list.
When you reopen the global variables editor, the group or variable displays alphabetically
in the list.
Global variable groups are used for organizing variables. Variable groups are especially
useful if multiple developers share a project using a version control system. To add a
global variable group, select the add variable group icon.
Add
Variable
Group
Add
Variable
Delete
Variable
The name MessageEncoding is reserved and cannot be used to name a global variable. A
global variable of this name is created by TIBCO Designer when generating an EAR file.
You must add at least one variable to a group, or the group will not be saved. If you delete
all global variables in a global variable group, the group itself is also automatically
deleted.

TIBCO Designer User’s Guide
Working With Global Variables | 37
Using a Filter
By default, all global variables are visible in the editor. You can provide a filter in the Filter
string/pattern field to limit the display. The filter uses regular expression matching. That is, if
you enter Rv in the field, only variables that have Rv in their name are displayed.
Matching is case insensitive. Entering a new expression and clicking Filter again
performs a new search on all variables and will not refine the current search.
To clear the filter expression and display all variables either click Show all or remove the
expression from the entry box and click Filter again.
Global Variable Attributes
To add or edit a name, value, constraint, or description attribute, click in the Attribute
field. The type attribute has a drop down menu that displays choices. Click in the Type
field to display the menu.
• Name — Provide a name for the variable.
• Value — Provide a value for the variable, depending on the type you select.
• Deployment — Select the Deployment checkbox to make the variable visible and
settable when deploying using TIBCO Administrator. If the checkbox is clear, the
variable is not visible in TIBCO Administrator.
• Service — Indicates that the variable should be included when the Include all service
level global variables option is selected when building the enterprise archive file. A
variable that is settable on a per-service basis can be set for each adapter service or
TIBCO ActiveMatrix BusinessWorks top-level process. Service level variables are
only included in the service archive if the service uses them. This option is used for
TIBCO adapter archives. TIBCO ActiveMatrix BusinessWorks includes all
process-level variables regardless of usage.
• Type — Click in the field to select the variable type, String, Integer, Boolean, or
Password. If Password is selected, the value you provide is obfuscated in the
repository.
• Constraint — For String and Integer types, provide a range of allowed values. The
constraint field for Strings is an enumeration, for example, one, two, three. The constraint
field for Integers is for a range, for example, 1-100. Note that constraints are currently
not implemented in TIBCO Administrator.
• Description — Provide a description of the variable.
If you want to use a service level variable, you must check the Service and
Deployment checkboxes. If a global variable is deployed with the Service checkbox
checked and the Deployment checkbox unchecked, the deployed application will not
find the global variable.
TIBCO Designer User’s Guide
38 | Chapter 2 Managing Projects and Resources
Deleting a Global Variable
Delete a global variable by selecting it and clicking the delete variable icon. You cannot
delete a global variable that is in use. To find where global variables are used, click Tools
> Find Global Variable Usages.
Limiting Global Variables in EAR Files and Design-time Libraries
By default, TIBCO Designer includes all global variables defined in a project when
building design-time libraries and enterprise archive files. All global variables are
included, even if they are not used. You can force TIBCO Designer to include only global
variables reported as dependencies by resources.
To limit global variables you must add the following property to the designer.tra file and
restart TIBCO Designer. If you are using the buildear utility, you must also add the property
to the buildear.tra file.
java.property.EnableGvarReduction=true
After adding the property, the following changes will appear in TIBCO Designer:
• When creating a design-time library, the Export Referenced Gvars Only option will appear as
a checkbox. Select the checkbox to enable the feature.
• When creating an enterprise archive file, the Enable variable reduction option will appear as
a checkbox. Select the checkbox to enable the feature.
Enabling this feature omits global variables that are not reported as referenced by
configuration components. This could create an EAR file that can be deployed but fails at
runtime if a referenced global variable is not available.
Use of this feature is strongly discouraged as not all components can report all global
variables they reference.

TIBCO Designer User’s Guide
Deleting Projects | 39
Deleting Projects
You do not delete projects from the TIBCO Designer main window but from the startup
panel. See Startup Options on page 3.
To Access the Startup Panel
• If TIBCO Designer isn’t running, start it.
• If TIBCO Designer is running, close all windows. The startup panel is displayed
unless Show this panel only on startup has been checked.
To Delete a Project
1. In the startup panel, make sure the Project tab is selected.
2. Click Delete Project.
3. In the panel that appears:
a. Specify the project directory
b. Specify a version control system if the project was used in conjunction with a
version control system.
— For File Sharing, any user with access to a project can delete the project.
— For other version control systems you must make sure that both the (local) project
directory and the directory you specify for the version control system are correct.
You must also be sure to specify a user that has appropriate privileges for deleting
the project.
You cannot delete projects based on XML Canon from TIBCO Designer. To delete such a
project, you must use a WebDAV client.

TIBCO Designer User’s Guide
40 | Chapter 2 Managing Projects and Resources
Tips and Tricks for Working With Projects
This section contains additional information on using multi-file projects.
• Use ASCII project names. You must use an ASCII name for the project when saving
the project from TIBCO Designer. Project names must not use the following
characters: | / \ " ' : ?.
• Avoid naming collision. You cannot place a multi-file project and a single-file (.dat)
project into the same directory.
• Place schema in the AESchemas folder. If you edit your project file in an XML
editor and define schema outside the /AESchemas folder, the schema are placed in a
directory called __NON__DEFAULT__SCHEMA__FOLDER__ in /tibco/public/<type> where type is
the kind of object (that is, class, scalar, union, and so forth).
It is cleaner to have schema files under /AESchemas. In addition, it is required you place
schema files into /AESchemas if you wish to edit your project using TIBCO Designer.
Note that while editing schema files is not prohibited, you do so at your own risk.
• Consider using global variable groups. Use global variable groups to allow multiple
developers to work on global variables simultaneously. Each group has its own file in
the multi-file project. See Working With Global Variables on page 35 for more
information.
Note, however, that an excessive amount of global variables (over 500) can lead to
problems.

TIBCO Designer User’s Guide
| 41
Chapter 3 Working with a Revision Control System
This chapter gives detailed instructions for working with each supported revision control
system. For background information, see the documentation for the revision control
system you have chosen.
Topics
• Overview, page 42
• File Sharing, page 45
• Microsoft Visual SourceSafe, page 48
• Perforce Fast Software Configuration Management System, page 51
• XML Canon, page 55
• ClearCase, page 64
• CVS, page 65
• PVCS Version Manager, page 67
• Scriptable RCS Adapter, page 68
• Tips and Tricks for Using Version Control Systems, page 87

TIBCO Designer User’s Guide
42 | Chapter 3 Working with a Revision Control System
Overview
TIBCO Designer allows multiple developers to work on the same project. Developers can
use file sharing/locking or a revision control system to ensure that the same resource is not
changed by two developers at the same time.
If you wish to use file sharing/locking or a revision control system, you must use a
multi-file project. Different users can then add resources to the project and lock the parts
of the project they are working on. Note that changes from User A don't show up for User
B until User B syncs.
The following revision control options are available:
• File Sharing—Allows you to place the project in a central location, then lock and
unlock resources as needed. See File Sharing on page 45.
• Microsoft Visual SourceSafe—Allows multiple users to take advantage of the Visual
SourceSafe features. See Microsoft Visual SourceSafe on page 48.
• Perforce—Allows multiple users to take advantage of the Perforce software revision
control system. See Perforce Fast Software Configuration Management System on
page 51.
• XML Canon—Allows multiple users to take advantage TIBCO XML Canon. See
XML Canon on page 55.
• Clearcase— See ClearCase on page 64.
• CVS—See CVS on page 65.
• PVCS—See PVCS Version Manager on page 67.
• Scriptable RCS Adapter. See Scriptable RCS Adapter on page 68.
TIBCO Designer creates a file that can be shared and locked for each top-level resource,
such as an adapter configuration or a process definition. It does not create a file for each
resource. As a result, for example, you can lock an adapter configuration but cannot lock
individual adapter services.
TIBCO Designer also creates folders for folders you create in your project. You can lock
each folder as needed.

TIBCO Designer User’s Guide
Overview | 43
You interact with the revision control system directly from TIBCO Designer. TIBCO
Designer also allows you to check who owns the lock for each locked resource.
Icons Used by RCS Projects
To illustrate the state of the resource in a project under revision control, TIBCO Designer
uses icons on top of each resource in the project panel.
If no special icon is displayed, the resource has been checked out and is in the same state
as the corresponding RCS resource.
Deleting RCS Projects
You delete a project that uses a revision control system as follows:
1. In the Startup panel, click the Delete project button (just as for other projects).
2. In the Delete Project dialog that appears, supply the information about the project.
— For projects that use File Sharing, use either the None or File Sharing Revision Control
System and any user name, supply the project location.
— For Visual SourceSafe and Perforce you must make sure that the project listed in
the Project Directory field corresponds to the project checked into RCS.
3. Click OK.
TIBCO Designer may not always have all of the information necessary to distinguish
some situations correctly. For example, TIBCO Designer sometimes is unable to
distinguish a deleted file from the revision control system (RCS) that should be deleted in
your personal copy of the project from a file you added to your copy of the project and
want to add to the RCS.
In such cases, use the RCS client to fix these situations.
A lock icon indicates that the resource was checked into the revision control system. Other
users may be making changes. You need to check out the resource to safely make changes.
A yellow square icon indicates that the RCS does not know about this resource or its state.
If the resource is new, you have to add it to the RCS. If it has been checked in before, it has
to be checked in again.
A red square indicates, on systems that support that functionality, that another user has
locked the resource.
Note that is functionality is not supported for all RC systems.

TIBCO Designer User’s Guide
44 | Chapter 3 Working with a Revision Control System
The project is deleted. For Visual SourceSafe and Perforce, it is deleted in both the local
and the check-in location.

TIBCO Designer User’s Guide
File Sharing | 45
File Sharing
This section discusses using File Sharing as a Revision Control System in the following
sections:
• Preparing for File Sharing on Microsoft Windows on page 45
• Preparing for File Sharing on UNIX on page 45
• Using File Sharing on page 45
• Deleting RCS Projects on page 43
Preparing for File Sharing on Microsoft Windows
The project is located on a shared drive accessible by all TIBCO developers.
Make sure all TIBCO developers have read and write access to that drive.
Preparing for File Sharing on UNIX
The project must be located on a mounted drive accessible by all TIBCO developers. You
then go through these steps:
1. Create a Unix group for the TIBCO developers (for example, tibdev).
2. Create a Unix account for each developer. Each account must have its Primary Group
ID set to the group tibdev.
3. For each account, the umask must be set to 002 to ensure the entire group has write
permission on resources (folder and file) in TIBCO Designer projects. Set the umask in
the .login or .profile file, as follows:
$ umask 002
Using File Sharing
Allowing multiple users to use file sharing for a project involves these tasks:
Task A Create the Project
1. Open TIBCO Designer and open the project (which could be a new empty project).
2. Choose Project > Save > Multi-File Project.

TIBCO Designer User’s Guide
46 | Chapter 3 Working with a Revision Control System
3. In the dialog that appears:
a. Supply the root directory for the project (which will become the project name).
This directory should be on a drive that can be accessed by all developers that
work on the project.
b. Choose File Sharing from the pop-up.
c. Supply your username. Other users will see this username as the owner if you lock
files in the project
Task B User A Acquires Resource and Makes Changes
The creator of the project or another user can now acquire the lock for the project and, for
example, add two folders. Here are the steps:
1. User A selects the project root folder.
2. User A chooses Multi-User > Acquire Resource.
That command is also available from the resource’s right-button menu or from the
Project menu.
3. User A drags two Folder resources into the design panel and names each for the user
who will work with it.
4. User A selects the folder for the second user (User B) and chooses Release Resource
from the right-button menu.
The folder now appears locked in the TIBCO Designer project panel.
5. User A opens the User A folder and adds two resources to it, then selects each
resource and chooses Add Resource to RCS from the right-button menu.
User A can make changes to the User A folder (but not to the User B folder).
6. User A saves the project.
Task C User B Opens Project, Acquires Resource, and Makes Changes
A second user can open the same project and make changes to all folders not currently
locked by another user. For this example:
1. User B opens the project (all project elements are locked).
2. User B selects the User B folder and chooses Acquire Resource from the right-button
menu.
Lock Acquired by User A
Lock Released by User A

TIBCO Designer User’s Guide
File Sharing | 47
User A released the lock for this folder.
3. User B can now make changes to User B folder as desired, and save the project.
User B cannot acquire the lock for the project root folder or for the User A folder because
both are locked by User A.

TIBCO Designer User’s Guide
48 | Chapter 3 Working with a Revision Control System
Microsoft Visual SourceSafe
This section first discusses prerequisites and looks at a usage scenario, then includes
reference documentation to the Version Control dialog in the following sections:
• Visual SourceSafe Setup on page 48
• Using Microsoft Visual SourceSafe on page 48
Visual SourceSafe Setup
To set up your system to work in conjunction with the TIBCO Designer Visual SourceSafe
component, follow these steps:
1. Install a Microsoft Visual SourceSafe 6.0 Client on each machine from which you
wish to use TIBCO Designer in conjunction with a Visual SourceSafe database.
Only the Client Programs component is necessary on the machine where TIBCO
Designer runs.
2. To make the Visual SourceSafe database available, set the ssdir environment variable to
the location of the Visual SourceSafe database. The ReadMess.htm file included with
your client explains how to do this on the command line:
set ssdir=\\server\share\vss
Where \\server\share\vss is the folder where the Srcsafe.ini file in the VSS database is
located.
You can also set this variable permanently using the control panel.
Using Microsoft Visual SourceSafe
Step 1: User A Starts TIBCO Designer and Creates a VSS Project
To create a VSS project, User A follows these steps:
1. User A opens TIBCO Designer and chooses New Empty Project.
Microsoft Visual SourceSafe is not supported under UNIX.
If you do not set this variable, your SourceSafe client cannot find the database where
the shared project is located.

TIBCO Designer User’s Guide
Microsoft Visual SourceSafe | 49
2. In the dialog that appears, specify the following information:
— Project Directory—Location of the project on the local drive.
— Multi-User System—Visual SourceSafe
— User Name—Name of the current user. The user must have been granted access to
VSS during the VSS client installation. Ask your VSS administrator.
— Password—Password for the current user, as specified during the VSS client
installation. Ask your VSS administrator.
— VSS Command—Click Browse to point to the SS.EXE executable on your machine.
Note that you must use SS.EXE, which is the command-line executable for VSS
that is used by TIBCO Designer.
— VSS Project Name—Name of the project in the VSS database. Include the root
directory and other directories, as in the example below.
Figure 12 Save Project Options for Microsoft VSS
Step 2: User A Makes Changes to Project and Checks In the Project
User A can now make changes to the project and check them in as follows:
1. Using the TIBCO Designer GUI, User A adds resources to the project and configures
them.
2. User A saves the project, then chooses Multi-User > Add Resource to RCS.
If a resource has never been added to RCS, you must add. If you make additional
changes, you check in the resource.

TIBCO Designer User’s Guide
50 | Chapter 3 Working with a Revision Control System
After User A has supplied a label for this version, the check-in console, which shows
the check-in information, is displayed.
Step 3: User B Checks Out Resources and Makes Changes
After User A has checked the whole project into VSS for the first time, each resource can
be checked out by each user that has access to VSS.
1. User B opens the project from TIBCO Designer, using the Visual SourceSafe as the
Revision Control system and providing a username and password.
2. User B chooses Multi-User > Project > Synchronize Project to make sure all
resources are loaded.
3. User B selects a resource to be checked out in the project tree, then chooses Check
Out Resource from the right-button menu of the resource.
4. User B can now make changes to the checked-out resource. After all changes have
been made, User B can choose Multi-User > Check In Changes. If User B adds new
resource, each resource must first be added to the RCS using the Add Resource to
RCS menu.
All resources are now locked and can be checked out by other users as needed.
If you check out a resource that contains other resources, they may be checked out when
you check out the top-level resource.
Whether this happens depends on the directory structure TIBCO Designer creates.
While you can add and checkout recursively, check-in and synchronization is always all or
nothing

TIBCO Designer User’s Guide
Perforce Fast Software Configuration Management System | 51
Perforce Fast Software Configuration Management System
Perforce has comprehensive software configuration management capabilities built around
a scalable client/server architecture. Requiring only TCP/IP, developers can access the
Perforce Server through a variety of Perforce clients (Windows GUI, Web, or
Command-Line). Perforce can be deployed quickly and easily, and requires minimal
administration, even for large or distributed sites.
Perforce is supported on a large number of operating systems.
Prerequisites
Before attempting to use Perforce you must ensure the following procedures have been
taken.
• Install the Perforce software. TIBCO Designer does not include or install this
software.
— The Perforce server must be installed and running.
— The Perforce client must be installed on your machine. Only the client is necessary
on the machine where TIBCO Designer runs.
• The Perforce server port must be defined.
• Setup a password for your Perforce account. To do this in Microsoft Windows, select
User > Set Password for UserName. Every Perforce port has a unique password. You
may need to define a password for all the Perforce ports you access normally.
• Select the client you use to use or define a new client with any name. You can define a
new client in the Perforce clientSpecs >New menu.
• Be sure that you have the appropriate permissions to access, create, delete, store, and
modify the files you wish to work with under Perforce.
Using Perforce
Step 1: User A Starts TIBCO Designer to Create a Perforce Project
To create a Perforce project, User A follows these steps:
1. User A opens TIBCO Designer and chooses New Empty Project.
Assigning user name and passwords may be done by the Perforce administrator at
your site.

TIBCO Designer User’s Guide
52 | Chapter 3 Working with a Revision Control System
2. In the dialog that appears, User A specifies the following information:
— Project Directory—Location of the project on the local drive, that is, location where the
project is placed by Perforce when you synchronize.
— Encoding—This field is used to determine the wire encoding that TIBCO
Rendezvous should use for sending and receiving data in this project. This is a
project-wide preference. See TIBCO Adapter Concepts for a discussion of how
TIBCO adapters support Unicode.
ISO8859-1—Default value. Use this option if you ONLY intend to use TIBCO
Rendezvous for English and Western European data.
UTF-8— Select this option if you want to use TIBCO Rendezvous activities for
processing non-Western European data, such as Japanese.
— Multi-User System—Perforce— This selection also enables the Test Configuration
option. Use this option to test the validity of the information you are using to access
Perforce.
— User Name—Name of the current user. This is the same as Owner entered in
Perforce Client Specification.
— Password—Password for the current user, as specified during the Perforce client
installation.
— Perforce Client—This is the same as Client entered in Perforce Client Specification.
— Server—The port on which you access the Perforce server.
— Perforce Command—Click Browse to point to the P4.EXE executable on your machine.
— Timeout (seconds)—Amount of time available to connect with the Perforce server
before a timeout occurs.
\\
If you set your default client in the Perforce native UI you don't need to fill in the user or
server type fields when you access Perforce from TIBCO Designer

TIBCO Designer User’s Guide
Perforce Fast Software Configuration Management System | 53
Figure 13 Save Project Options for Perforce Version Control System
Step 2: User A Makes Changes to Project and Checks In the Project
User A can now make changes to the project and check them in as follows:
1. Using the TIBCO Designer GUI, User A adds resources to the project and configures
them.
2. User A saves the project, then chooses Multi-User > Add Resource to RCS.
If a resource has never been added to RCS, you must add. If you make additional
changes, you check in the resource.
After User A has supplied a label for this version, the check-in console, which shows
the check-in information, is displayed.
Step 3: User B Checks Out Resources and Makes Changes
After User A has checked the whole project into Perforce for the first time, each resource
can be checked out by each user that has access to Perforce.
All resources are now locked and can be checked out by other users as needed.

TIBCO Designer User’s Guide
54 | Chapter 3 Working with a Revision Control System
1. User B opens the project from TIBCO Designer, using the Perforce as the Revision
Control system and providing a username and password, and other required
information.
2. User B chooses Multi-User > Project > Synchronize Project to make sure all
resources are loaded.
3. User B selects a resource to be checked out in the project tree, then chooses Check
Out Resource from the right-button menu of the resource.
4. User B can now make changes to the checked-out resource. After all changes have
been made, User B can choose Multi-User > Check In Changes. If User B adds new
resource, each resource must first be added to the RCS using the Add Resource to
RCS menu.
If you check out a resource that contains other resources, they may be checked out when
you check out the top-level resource.
Whether this happens depends on the directory structure TIBCO Designer creates.
You can add or check in resources recursively.

TIBCO Designer User’s Guide
XML Canon | 55
XML Canon
XML Canon/Developer (XCD) is a comprehensive development platform that allows
organizations to store their XML assets (e.g. XML schemas, DTDs, adjuncts, instance
documents, and stylesheets) in a central repository that facilitates adaptability,
collaboration, and management.
XML Canon uses permissions to control access to the stored files. XML Canon also
provides version control, protecting the development process from duplicate or conflicting
efforts.
Features
The following features, accessible via XML Canon's web interface, are provided for the
XML-based files in your project, such as your XML Schemas, WSDL files and process
definitions.
• Custom Property Association—apply custom metadata to documents or individual
components.
• Document and Component-Level Searching—query for document and components
through a wide array of filters.
• Namespace Management—browse through a listing of target namespaces and see how
a given namespace is used in schema and instance documents.
• XML Document Differencing—track changes between revisions.
• SchemaDOC™—generate a graphical inventory and detailed description of an XML
Schema’s or DTD’s components in a user-friendly HTML format.
• Document/Component Relationship Tracking—track the relationship between
documents and their components and determine where schemas or individual
components (XML Schema elements or types or WSDL message components, for
example) are used within the project.
For more information on XML Canon, see the XML Canon Developer documentation
available as online help with the product and also via the TIBCO documentation library.
The remainder of this section describes the process for specifying XML Canon as the
repository for a project, the typical steps for interacting with XML Canon, and some tips
and tricks that will facilitate the effective use of XML Canon.
XML Canon is an entire persistence system that has some RCS capability but not a
multi-file project per se.

TIBCO Designer User’s Guide
56 | Chapter 3 Working with a Revision Control System
Prerequisites
To use XML Canon as the version control system for TIBCO Designer, you must have:
• the address of the XML Canon server and the port number on which it is running.
• an XML Canon user name and password with the permissions required to work in the
XML Canon category in which the shared project is stored.
Checking In and Acquiring Resources
This section provides the typical steps involved in interacting with the XML Canon
repository, beginning with the initial association of the TIBCO Designer project with an
XML Canon category.
Step 1: Specifying XML Canon as the version control system for a given project
To specify XML Canon as the version control system for a given project, select Project >
Save As to display the Save Project window.When you open a new empty project, the Save
Project dialog appears automatically by default.
Select the XML Canon tab, which requires you to specify these fields:
• Proxy server—You may access XML Canon via a proxy server that does not require
authentication. Not all proxy servers support the WebDAV extensions to HTTP that
XML Canon uses. Make sure the proxy server supports required additional
functionality.
• XML Canon category—the URL (http://hostName:portNumber/categoryName) of an
empty XML Canon category, which will serve as your top-level project folder.
• User name—an XML Canon user name.
• Password—password associated with the user name.
Figure 14 depicts the XML Canon tab filled in with the required information.
This step is performed once for a given project. Each project should be associated with a
unique XML Canon category.
If you click the Browse button for the XML Canon category field, the proxy server you
specified is taken into account. As a result, it is essential that you specify the proxy
server before you click Browse.

TIBCO Designer User’s Guide
XML Canon | 57
Figure 14 XML Canon tab
If you do not know the location of an empty category, click Browse. The Browse for
Project Folder will appear. Enter the URL for the XML Canon server and click Connect.
You will be prompted to enter your XML Canon user name and password. Upon
successful authentication, you will be presented with all of the top-level categories, as
depicted in Figure 15.
Figure 15 Browse for an XML Canon category
Double-click a category (or use the Open button) to view its child categories. New
categories can be created using the new folder icon. When you have selected the category
in which to store the project, click Select Folder.
Some XML Canon users may not have the ability to create a new category. If you are
unable to create a new category, see your XML Canon administrator.

TIBCO Designer User’s Guide
58 | Chapter 3 Working with a Revision Control System
When a URL, user name, and password have been specified on the XML Canon tab, click
OK. The specified XML Canon category will now be used to store the project. See Step 2:
Check in the project to learn how to make the existing resources in the project accessible
to all XML Canon users with the permissions to work within the category.
Step 2: Check in the project
The folders and resources existing within the project prior to Step 1 can be checked into
XML Canon by way of the Check In Changes option of the Multi-User menu. The XML
Canon Check In dialog appears, listing the folders and files that have been added, moved,
modified, or deleted since the project was last checked-in. The XML Canon Check In
dialog is shown in
Figure 16 XML Canon Check In Dialog
Check-in options are controlled with the following buttons:
Global variable settings will appear in the dialog as "defaultVars".
Button Description
Close Closes the window without checking in any files.
Undo Changes Reverts the selected folders or resources to their status prior to
the last acquire-check out.
Check in selected Checks in the changes associated with the selected files or
folders.

TIBCO Designer User’s Guide
XML Canon | 59
A lock icon in the project panel, indicating that the files are not acquired and cannot be
edited, marks checked-in items. Figure 17 depicts a project checked into XML Canon.
Figure 17 A project checked into XML Canon.
Check in all Checks in all of the changes.
Properties XML Canon augments standard WebDAV functionality by
allowing you to specify additional properties when a document
is saved. By default you may specify a comment, a revision
label, and a stage. If the XML Canon Administrator has
configured your server to use custom properties, you may also
specify those custom properties.
To set all properties, you:
• Select a file in the "Check In" dialog, then click
"Properties...", or
• Double-click an item.
Items for which the user has already specified custom properties
are shown in bold in the dialog.
Depending on how the server is configured, it may not be
possible to save changes to XML Canon unless you have
specified extended properties. This can happen for two reasons.
• The "stage" that the document is currently in does not allow
a transition to itself (for example, a "production" document
cannot be modified without taking it out of "production"), or
• The administrator has specified "custom properties" that are
required, and the document may not be saved unless those
properties are specified.
Button Description
If you are unable to check in changes, your XML Canon user profile may not have the
appropriate permission settings. See your XML Canon administrator.

TIBCO Designer User’s Guide
60 | Chapter 3 Working with a Revision Control System
Step 3: Acquiring folders or resources and making changes
Once a project has been associated with XML Canon (see Step 1) and checked-in for the
first time (see Step 2), its resources can be acquired (checked out) by other users with
access to the XML Canon server and with permission to work within the category
associated with the project.
To open a project stored on XML Canon
1. Select the XML Canon tab from the Open Project dialog.
2. Specify (or browse for) the XML Canon category in which the project is stored
3. Supply a user name and password.
Upon successful authentication, the project will be opened.
Folders and resources marked by a lock icon are read-only until acquired.
To acquire a resource
1. Select the resource in the project tree
2. Select Acquire - Check out Resource from the right button menu or the Multi-User
menu.
When a resource is acquired, its lock icon will disappear, indicating that you may edit the
file.
Once a user acquires a resource, other users cannot modify it. (Other users can view the
resource, but cannot make changes to it.) If you attempt to acquire a resource that is under
the control of another user, the message shown in Figure 18 will appear.
Upon opening a project shared through XML Canon, you should synchronize the project
(Multi-User>Synchronize Project). Synchronize often to ensure that your project tree
reflects any resources you have added outside of TIBCO Designer (through a WebDAV
folder or the XML Canon interface, for example) as well as any changes made by other
users.
Use the global variables display to acquire global variables. Global variables are acquired
through the Acquire-Check out Global Variable Group option of the right-button menu.

TIBCO Designer User’s Guide
XML Canon | 61
Figure 18 Acquire failed
Step 4: Checking in (or reverting) the changes made to an acquired resource
Changes made to acquired resources can be checked into XML Canon, following the same
procedure outlined in Step 2.
Reverting Changes
There are two options for returning a folder or resource to its status prior to your
acquisition:
• Select the change(s) within the Check In Changes Dialog and click Undo Changes.
• Select the modified folder or resource within the project panel and select the
Release-Revert Resource option, available via the right-button menu and the
Multi-User menu.
Viewing Revision Control Information
The revision control system (RCS) information for a particular resource can be viewed by
selecting the View RCS Info for Resource option from the right-button menu or the
Multi-User menu. The information available is described in Table 4.
Table 4 Revision control system information
Field Description
Analyzed state This indicates if the resource was analyzed for document
and component level relationships. This applies to XML
Schema, DTD, and WSDL resources only.

TIBCO Designer User’s Guide
62 | Chapter 3 Working with a Revision Control System
Comment Displays any comments added when checking the
resource into XML Canon.
Creation date The date the resource was created.
Display name The name of the resource.
Document flavor The resource type.
Document id The XML Canon internal id for the resource.
Document size The size of the resource in bytes.
Governing namespace Namespace that the document governs, for example, in
XML Schema, the value of the 'targetNamespace'
attribute.
Last modified The time and date of the last modification.
Last modified by The name of the user making the last modification.
Last modified by id The XML Canon internal id of the user making the last
modification.
Lock token Globally unique identifier for the resource being
acquired (locked on the server).
Locked by The user who has acquired the resource.
Mime type The Multipurpose Internet Mail Extension.
Resource type The WebDAV resource type.
Revision name A revision label added when checking the resource into
XML Canon.
Revision number The number of times the resource has been checked into
XML Canon.
Root namespace The default namespace of the resource.
Stage id The XML Canon internal stage id for the resource.
Stage name The XML Canon stage of the resource.
Table 4 Revision control system information
Field Description

TIBCO Designer User’s Guide
XML Canon | 63
Deleting XML Canon Projects
XML Canon-based projects cannot be deleted in TIBCO Designer. To delete a project, use
a WebDAV client.
Tips and Tricks
The following tips will help you use XML Canon effectively as a version control system.
• Synchronize (Multi-User > Synchronize Project) often to ensure your project
reflects the changes made by other users.
• Any conflicts discovered during the synchronization process will be listed along with
instructions for resolving the conflict. You cannot check in any changes until
synchronization conflicts are resolved.
• Because XML Canon automatically treats all of the project’s resources as part of the
Revision Control System, the Add Resource to RCS option of the right-button menu
Multi-User menus is not applicable when working with XML Canon.
• When checking in changes, keep in mind that some changes are dependent upon other
changes. (For example, a new child folder cannot be checked in until its parent folder
is checked in.) If you check in a single change (using the Check in selected button)
with a dependency on another change, the other change will also be checked in.
• Acquisitions are not recursive. When you acquire a folder, its resources and
sub-folders are not checked-out.
• A folder must be acquired if you want to:
a. rename the folder (or one of its resources or sub-folders)
b. move the folder
c. edit the folder’s description
d. delete the folder
Supported lock The WebDAV locks allowed on the resource.
Table 4 Revision control system information
Field Description
You can apply custom metadata to the resources through the DAV tab of the user’s XML
Canon home page. For XML Schemas, DTDs and WSDL files, custom properties can be
specified for individual components as well.

TIBCO Designer User’s Guide
64 | Chapter 3 Working with a Revision Control System
ClearCase
ClearCase tracks the file versions used to build a product release and helps to organize the
work of groups of engineers.
ClearCase requires that a directory element be checked out before any elements within it
can be checked out. This implies:
• The root of a newly created project must be saved in a directory that has already been
checked out in ClearCase. Otherwise the root (and hence the project) may not be
added to the RCS.
• Checking out a non-folder resource will auto-checkout the parent folder resource, if
not already checked out in the RCS.
Creating or Modifying a ClearCase Project
To Create a ClearCase Project
1. Start TIBCO Designer.
2. Select New empty project.
3. In the Save Project dialog, select ClearCase from the Multi-User System combo box.
4. In Project Directory, browse to your ClearCase View and provide a project name. For
example, Z:\<view>\<projectname>.
5. Provide your ClearCase user name.
6. In Cleartool Command, browse to your ClearCase installation and select the ClearCase
executable, cleartool.exe.
7. Select the View Type.
8. Click the Test Configuration button, then click OK if the test configuration is successful.
9. In the Project window, select the project root folder, right click and select Add Resource to
RCS.
10. Select Multi-User>Check in Changes to check in the project into ClearCase.
To Modify a ClearCase Project
1. Open the project
2. Select the project root folder and right click and select Acquire-Check out Resource.
3. After modifying the project, save it, then click Multi-User>Check In Changes.

TIBCO Designer User’s Guide
CVS | 65
CVS
CVS is a version control system that records the history of source files used to build a
software product. CVS also allows engineers to work in their own directory, and merges
each engineer’s work into a source tree.
The following limitations apply when using CVS as an RCS system for TIBCO Designer
5.x:
• By default, CVS does not lock files. All CVS checkouts must be performed with the
CVS -r option. For example:
cvs -r checkout -P myproject
This enables RCS to use watches and enables the RCS adapter to limit editing of
resources to a single user.
• CVS does not handle binary files correctly unless it has been correctly configured.
Before placing a resource under CVS control, verify that the resource's data is not in
binary format. If it is, configure CVS to handle the appropriate resource vfile extension
as binary. If you do not do this, corrupted data will result.
• The CVS RCS adapter has only been tested in server mode using the CVSNT
available from http://www.cvsnt.com/cvspro/. Other servers may work, but have not
been tested.
• The CVS RCS adapter has only been tested with local, pserver and sspi protocols. Other
protocols should work, but have not been tested.
• CVS requires that files be deleted from the file system and committed before they can
be scheduled for deletion. Therefore TIBCO Designer forgets about the resource, and
cannot restore it for you on a revert operation. To restore a deleted file, use your CVS
tools as directed by your CVS documentation.
Working with CVS
The following steps assume you are working on a UNIX platform. If you are working on
Windows platforms, the steps are the same, but the examples apply only to UNIX.
Installing CVS on UNIX
1. Download the installer from http://www.cvsnt.com/cvspro/?lang=EN&complete=1.
2. Set PATH to execute CVS commands on your shell. For example, assuming CVS is
installed under /usr/local/bin:
setenv PATH /usr/local/bin:$PATH
3. Set CVSROOT:

TIBCO Designer User’s Guide
66 | Chapter 3 Working with a Revision Control System
setenv CVSROOT /home/corp/<user>/rcs/cvs
4. Initialize CVS. This creates the CVS repository under CVSROOT:
cvs init
Importing a Project Into a CVS Repository
1. In TIBCO Designer, create a project.
2. Save the project. For example: /home/corp/<user>/cvstest01
3. Close TIBCO Designer.
4. Using a shell, navigate to the project directory. For example:
cd /home/corp/<user>/cvstest01
5. Execute the following commands:
cvs import -m "comment" <project name> vendor release
cvs import -m "cvstest for designer" cvstest01 vendor release
6. Check-out the project to local directory.
7. Using a shell, navigate into the CVS local copy directory. For example:
/home/corp/<user>/cvs_local
cd /home/corp/<user>/cvs_local
cvs -r checkout -P <project name>cvs -r checkout -P cvstest01
8. Now you are ready to open the CVS project in TIBCO Designer.

TIBCO Designer User’s Guide
PVCS Version Manager | 67
PVCS Version Manager
PVCS allows developers to manage software development by controlling access and
revisions to source code. It automates and simplifies access to development objects
including source code, ASCII files, graphics, documentation, and binary data files,
allowing developers to share archive information and manage projects, even in
cross-platform development environments.
Creating or Modifying a PVCS Project
To Create a PVCS Project
1. Start TIBCO Designer.
2. Select New empty project.
3. In the Save Project dialog, select PVCS from the Multi-User System combo box.
4. Provide your PVCS user name and optionally provide a password.
5. Provide the path to your PVCS project name, project database, executable. For
example, for the project database:
C:\Program Files\Merant\vm\common\<Database Name>
6. Click the Test Configuration button, then click OK if the test configuration is successful.
7. In the Project window, select the project root folder, right click and select Add Resource to
RCS.
To Modify a PVCS Project
1. Open the project
2. Select the project root folder and right click and select Acquire-Check out Resource.
3. After modifying the project, save it, then click Multi-User>Check In Changes.

TIBCO Designer User’s Guide
68 | Chapter 3 Working with a Revision Control System
Scriptable RCS Adapter
The scriptable RCS adapter allows you to integrate RCS environments not directly
supported by TIBCO Designer into TIBCO Designer. The scriptable RCS adapter enables
you to perform any required RCS operations in TIBCO Designer based on a custom script
or program that you provide. The level of RCS integration with TIBCO Designer is
flexible and can be suited for your business and project management needs.
The scriptable RCS adapter is simply a pass-through adapter. This means that the
scriptable RCS adapter forwards RCS operation requests from TIBCO Designer to a
script. To accomplish this level of integration the scriptable RCS adapter imposes a
protocol (or interface) on RCS interactions that defines the arguments the script receives
and what it is expected to return as results. It also means that the scriptable RCS adapter is
subject to any limitations imposed by TIBCO Designer on the way that it uses RCS
systems.
The scriptable RCS adapter communicates with your program by calling your script with
specific arguments as defined by the scriptable RCS adapter protocol. In response to a
request your script performs an operation that returns a response (by sending text to
stdout). The response is parsed by the scriptable RCS adapter and displayed to the user in
some specified way.
If your script does not use an RCS API, but forwards requests to an RCS system, it must
perform extensive parsing of the output sent by the system and return output to the
scriptable RCS adapter as specified later in this section. The language used to write your
script has a significant impact on the complexity of the script.
Execution Environment
The script is typically called with a single argument indicating the command or action to
be performed by TIBCO Designer. Commands that provide additional arguments to the
script are indicated in the commands description (See the following sections).
Some RCS operations such as add, delete, and commit typically require a user comment.
In such cases, the argument -comment is provided, followed by a quoted string indicating the
text provided by the user. The general description of the host script is:
script command [-comment 'some text']
On execution, the script's current working directory is set to the TIBCO Designer project's
root folder. Any file arguments required by an operation are passed using the standard
input stream (stdin) of the script. All file paths are fully qualified. If the RCS system
requires paths to be relative, the script implementation can remove the current working
directory from the path provided.

TIBCO Designer User’s Guide
Scriptable RCS Adapter | 69
If the requested operation returns a value, the value is passed using standard output (stdout)
as text. If a command requests the return value to be true or false, the script will echo or print
the textual value of the word true or false to stdout.
The exit value for the script should be zero (0) for normal or successful completion. If
there's an error, the script can return a non-zero exit code, and write a message to standard
error (stderr). In response to non-zero exit codes, TIBCO Designer displays the output
found in stderr in a dialog.
User Authentication
The scriptable RCS adapter doesn't provide a mechanism to authenticate to a tool. The
script can choose from a number of standard ways of storing usernames and passwords
that match the security goals of your organization. It is recommended that you use the
method provided by your RCS system to store usernames and passwords.
Special Files
There are two files that your script should be aware of:
• Files named .folder
• Files using the .substvar file extension
These files are important to scriptable RCS adapters that require parent directories to be
registered with the RCS system [such as Subversion (SVN) or CVS]. If your system
implicitly manages directories based on whether files are added or deleted, you can
probably safely ignore these files and handle them as you would any other file in a project.
If your system requires special handling of directories, the add and delete operations must
handle the parent directory as well. TIBCO Designer does not issue RCS commands for
directories so these files also serve as parent directory notifications.
As can be inferred, an add operation involving these files also implies an add operation for
the parent directory. A delete operation implies a delete of the file followed by a delete of
the parent directory.
There are two general categories of commands sent by the scriptable RCS adapter:
configuration commands and RCS Commands. The next section explains configuration
commands. See page 72 for an explanation of RCS commands.
Configuration Commands
To provide better integration and flexibility, the scriptable RCS adapter sends several
configuration commands to the script. These commands must return additional
information that modifies how TIBCO Designer interacts with the scriptable RCS adapter
and your script implementation.

TIBCO Designer User’s Guide
70 | Chapter 3 Working with a Revision Control System
The configuration commands are given in the next table.
Table 5 Configuration Commands
Command Description
foldersRequireLockForPar
entWritability
Scripts should return true if the RCS system requires
directories to be in editable or checked-out mode before
items can be added or deleted from the directories.
foldersRequireRecursiveL
ock
This callback command implements restrictions on the
editing and reverting of TIBCO Designer resources that
are nested in folders. When the command is configured
to true, TIBCO Designer requires that all folders leading
to the desired resource be unlocked for editing. Similarly,
when reverting, all folders containing the resource will
be reverted and locked together.
specialVFileNames This command is sent early on to the script to get a list of
file names that should be ignored and hidden by TIBCO
Designer.
Each name should be returned in its own line. For
example, SVN adds local RCS information to projects it
controls. This information is stored in .svn directories. A
script adapting SVN would return .svn as an ignored file
name.
Note that the names returned must match exactly the file
names returned by the script. The scriptable RCS adapter
doesn't apply any pattern matching to the specified name.
If a valid project resource matches this name, it will be
hidden from the user.
supportsCommit This command returns true if your script can commit
changes. If false is returned, the commit feature in TIBCO
Designer is disabled and you must use your RCS system
to commit your work.

TIBCO Designer User’s Guide
Scriptable RCS Adapter | 71
supportsLocking RCS systems that support locking keep files locked or
non-editable unless they are checked-out for editing
purposes. Scriptable RCS adapters are required to return
true or to match this behavior.
If the script returns true to this query and the file is
locked, a user cannot edit the file unless the TIBCO
Designer Acquire-Checkout command is applied to the
resource in question. In response, TIBCO Designer sends
the edit command to the script to perform the unlocking.
Similarly, if the script returns true, revert operations will
only be available when the resource is unlocked.
This command is also required to return true even for
RCS systems that don't enforce locking. The example
SVN implementation (see page 75 ) returns true. This
allows the system to revert, but TIBCO Designer will
consider all files to be checked out.
supportsRecursiveLock If the script returns true, and a user selects a container, the
interpretation will edit or revert all contents. The
scriptable RCS adapter forwards such requests as
editRecursively or revertRecursively.
If the script returns false, TIBCO Designer calls the
scriptable RCS adapter (and your script) once per file
and performs the recursion for you. In most cases the
recursive operation performed by the script is much
faster than recursion implemented by TIBCO Designer.
supportsSynchronize This command is designed to be sent early on scriptable
RCS adapter activation to determine if TIBCO Designer
should enable its Synchronzie Project command.
However, it is currently not supported by the scriptable
RCS adapter. All the scripts return false to this request.
The action to synchronize the project is disabled.
wantsCommentOnAdd If the script returns true TIBCO Designer will prompt for
user comments when performing an add operation.
Table 5 Configuration Commands
Command Description
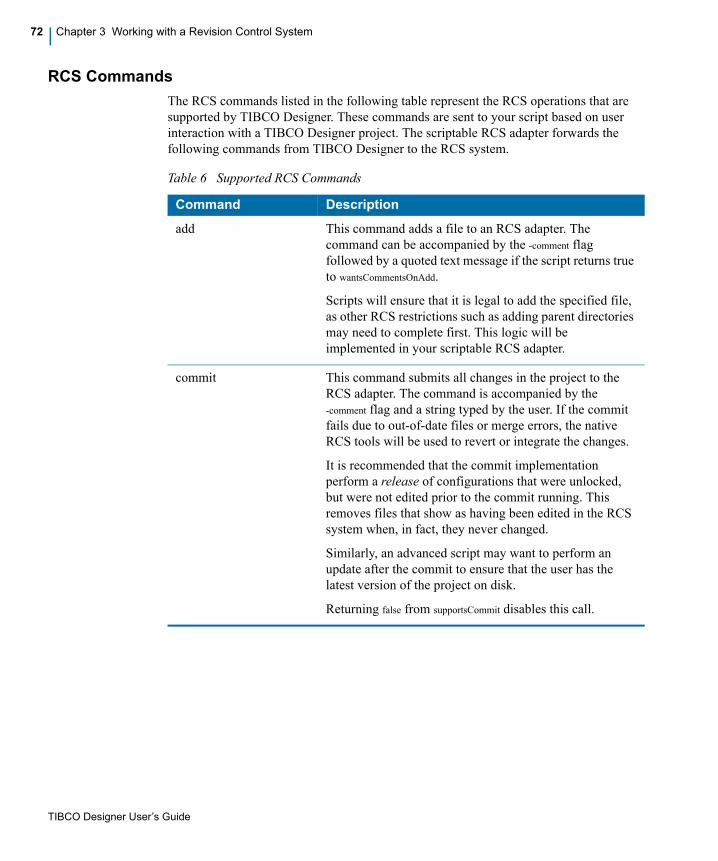
TIBCO Designer User’s Guide
72 | Chapter 3 Working with a Revision Control System
RCS Commands
The RCS commands listed in the following table represent the RCS operations that are
supported by TIBCO Designer. These commands are sent to your script based on user
interaction with a TIBCO Designer project. The scriptable RCS adapter forwards the
following commands from TIBCO Designer to the RCS system.
Table 6 Supported RCS Commands
Command Description
add This command adds a file to an RCS adapter. The
command can be accompanied by the -comment flag
followed by a quoted text message if the script returns true
to wantsCommentsOnAdd.
Scripts will ensure that it is legal to add the specified file,
as other RCS restrictions such as adding parent directories
may need to complete first. This logic will be
implemented in your scriptable RCS adapter.
commit This command submits all changes in the project to the
RCS adapter. The command is accompanied by the
-comment flag and a string typed by the user. If the commit
fails due to out-of-date files or merge errors, the native
RCS tools will be used to revert or integrate the changes.
It is recommended that the commit implementation
perform a release of configurations that were unlocked,
but were not edited prior to the commit running. This
removes files that show as having been edited in the RCS
system when, in fact, they never changed.
Similarly, an advanced script may want to perform an
update after the commit to ensure that the user has the
latest version of the project on disk.
Returning false from supportsCommit disables this call.

TIBCO Designer User’s Guide
Scriptable RCS Adapter | 73
commitPreview This command is sent to the scriptable RCS adapter before
a commit happens. The command will return text that
describes the scope of the commit (such as what files will
be committed). This information is presented to the user
and, if approved, a commit operation follows.
Note that while the preview shows what the commit will
affect, the user cannot change the files that will be sent in
the subsequent commit operation. If there are no files to
commit, your script should return an error code, and write
a message to stderr. An error dialog will be shown to the
user with the message you provide.
delete This command deletes files from RCS control. TIBCO
Designer both sends the request and deletes the files..
The command is followed by the flag -comment and a
user-entered comment. Depending on the RCS system,
this comment may not be registered with the system
because the edit may require a commit. In such cases it is
safe to ignore the comment because it will be supplied
during commit.
edit This command is only sent when the script responds to
supportsLocking with true and a file is locked in the file system.
This means that RCS systems that do not lock files won't
ever receive edit commands, because the files will never
be read-only to the scriptable RCS adapter. When sent, the
scriptable RCS adapter should issue an edit or checkout
command for the file to put it into the appropriate edit
mode and make it writable by the user.
Edit command implementations will check if the file has
been checked out or locked by another user and return an
error in such cases. Similarly, it is valuable to implement
an update edit type approach so that the user always edits
the current version of the file.
Table 6 Supported RCS Commands
Command Description

TIBCO Designer User’s Guide
74 | Chapter 3 Working with a Revision Control System
editRecursively This command is sent when the user wants to recursively
edit the contents of a directory (and the directory itself, if
appropriate). The argument provided is a directory path.
The script should make all files and the directory editable.
This command is called only if the script returns true from
supportsRecursiveLock.
info This command is sent in response to the user selecting the
View RCS Info for Resource command in TIBCO
Designer. The script should return information about the
state of the resource by writing to stdout.
isRevisionControlled This command informs TIBCO Designer whether a file is
under revision control or not. When a file is not under
revision control, TIBCO Designer displays a small yellow
decoration next to its icon on the project tree.
The status command returns true or false on stdout. The
scriptable RCS adapter caches this information for the
session unless the file is deleted from the project. After the
file has been deleted, the request can be made again after
the file is added back to the project.
revert This command is sent in response to the user unlocking the
file. In TIBCO Designer this means to abandon changes
on the file and release it so other users can edit the file.
The file will revert back to its initial contents.
revertRecursively This command is sent when the user recursively reverts
the contents of a directory (and the directory itself if
appropriate). The argument provided is a directory path.
The script should make sure all files and the directory are
reverted.
This command is only called if the script returns true from
supportsRecursiveLock.
update This command ensures that the user has the latest version
of the project on disk.
Table 6 Supported RCS Commands
Command Description

TIBCO Designer User’s Guide
Scriptable RCS Adapter | 75
Example Script Implementation
An example script for the scriptable RCS adapter follows. The script shows an integration
with SVN for UNIX systems. The implementation is in Ruby.
There are two global variables in the script that must be defined to point to the correct
locations on your system. They are as follows:
• SVN. Points to the location of the Subversion revision control system directory.
• SVN_LOG_FILE. Points to the location of the log file for the RCS system.#!/usr/local/bin/ruby
# THIS CODE IS SAMPLE QUALITY CODE TO ILLUSTRATE INTERACTION BETWEEN THE
# SCRIPTABLE RCS ADAPTER AND TIBCO DESIGNER. SUITABILITY OR FITNESS FOR ANY
# OTHER PURPOSE IS NOT GUARANTEED NOR SUPPORTED.
# DEBUG TIP - save input/output to a file. In TIBCO Designer define the
# java property -DDEBUG_RCS_CMD=true, this will print the inputs and
# outputs of the process call.
# Some 'global' variables. Scripts that are deployed should probably
# obtain their configuration information from a file.
$SVN = "/opt/CollabNet_Subversion/bin/svn"
$SVN_LOG_FILE = "/home/tra/work/tmp/svnadapter.txt"
# A method to write errors to the stderr. It is more friendly as it
# provides context information from the script.
def logerr(message)
m = caller.first
$stderr.puts "#{m}: #{message}"
end
# A method to log messages to a file
def debug(message)
if($SVN_LOG_FILE != nil)
out = File.open($SVN_LOG_FILE, "a")
m = caller.first
out.puts "#{m}: #{message}"
out.flush
out.close
end
end
# returns the filename passed via stdin or nil if none
def getFileName()
filename = nil;
if $stdin.closed?
logerr("stdin is closed")
elsif $stdin.eof?
logerr("stdin reached eof!")
else
filename = $stdin.readline.chomp
end

TIBCO Designer User’s Guide
76 | Chapter 3 Working with a Revision Control System
return filename;
end
# Callback to return a list of files that should be ignored by TIBCO Designer
# for svn these are the '.svn' directories. TIBCO Designer will not show these
# files in the project. Return one file name per line, when specifying
# directories, TIBCO Designer will not traverse them, so no need to ommit names
# inside of ignored directories.
def specialVFileNames
$stdout.puts ".svn"
exit(0)
end
# Callback to return whether the RCS system supports file locking.
# For SVN this doesn't quite work because files are always writable.
# From the Svn's adapter perspective ALL files are always checkedout.
# If we return false, revert action is disabled.
# a lock.
def supportsLocking
$stdout.puts "true"
exit(0)
end
# The RCS integration infrastructure doesn't call this method unless you
# return true from supportsLocking AND the file is locked as read-only
# on the file system. SVN doesn't lock files in the file system so this
# method will never be called.
def edit()
exit(0)
end
def editRecursively(folderPath)
logerr("Non supported operation!")
exit(1);
end
# SVN requires that the folder containing a file added to revision control
# be under revision control. We use this to check for the existance of
# a ".svn" directory as this is a cheap check.
def can_add(path)
retVal = false
svnpath = nil
if(File.directory?(path))
svnpath = File.join(path,".svn")
elsif(File.file?(path))
dir = File.dirname(path)
svnpath = File.join(dir, ".svn")
end
return svnpath.nil? ? false : File.exist?(svnpath)
end
# Actual implementation to add files. Folders and substitution
# variables are treated similarly, because groups in substitution

TIBCO Designer User’s Guide
Scriptable RCS Adapter | 77
# variables are just folders with additional '.substvar' files.
def do_add(path)
retVal = false;
fn = File.basename(path)
if(fn == ".folder" || fn.index(".substvar") != nil)
dir = File.dirname(path)
svnpath = File.join(dir, ".svn")
if(File.exists?(svnpath) == false)
parent = File.dirname(dir)
svnpath = File.join(parent, ".svn")
if(File.exists?(svnpath))
process = IO.popen("#{$SVN} add --non-recursive \"#{dir}\"", "r")
line = process.readline
unless line.nil?
if(line.index("A") == 0)
retVal = true
end
if(retVal == false)
logerr("#{line}")
end
end
end
end
end
if(can_add(path))
process = IO.popen("#{$SVN} add --non-recursive \"#{path}\"", "r")
line = process.readline
unless line.nil?
if(line.index("A") == 0)
retVal = true
end
if(retVal == false)
logerr("#{line}")
end
end
else
logerr("Unable to add #{path} to svn. The file is not in an svn managed directory.")
end
return retVal
end
# This is the method that we dispatch 'add' file requests
def add(file)
retVal = false;
if(file == ".folder")
if(do_add(File.dirname(file)))
retVal = do_add(file)
end
else
retVal = do_add(file)
end

TIBCO Designer User’s Guide
78 | Chapter 3 Working with a Revision Control System
exitCode = retVal ? 0 : 1;
exit(exitCode);
end
# Actual method that deletes things
def do_delete(file)
retVal = false
process = IO.popen("#{$SVN} delete --force \"#{file}\"", "r")
line = process.readline
unless line.nil?
if(line.index("D") == 0)
retVal = true
end
if(retVal == 1)
logerr("returned #{line}")
end
end
return retVal
end
# This is the method that we dispatch 'delete' path requests
# Check that the file really needs to be removed from RCS
def delete(comment)
retVal = false;
file = getFileName()
inrcs = do_isRevisionControlled(file);
if(inrcs)
retVal = do_delete(file)
if(retVal)
retVal = do_commit(file, comment)
end
end
if(retVal && inrcs)
fn = File.basename(file);
if(fn == ".folder" || fn.index(".substvar") != nil)
dir = File.dirname(file)
retVal = do_delete(dir)
if(retVal)
retVal = do_commit(dir, comment)
end
end
end
return retVal || inrcs ? 0 : 1
end
# This method returns the status of the project directory
# If there's nothing to check in we set the stderr with a
# message. The exit code of 1, will be interpreted as an error
# and TIBCO Designer will raise a Dialog.
def commitPreview()
retVal = 0;
cwd = Dir.getwd;
process = IO.popen("#{$SVN} status #{cwd}", "r")

TIBCO Designer User’s Guide
Scriptable RCS Adapter | 79
lines = process.readlines
line = lines.join
if(line.length == 0)
$stderr.puts "Nothing to check-in!"
retVal = 1
else
$stdout.puts "#{$SVN} status #{cwd}:\n" << lines.join
end
exit(retVal);
end
# If the user provided a file, then TIBCO Designer had a selection. Only
# commit that file. Otherwise the entire project. Because SVN keeps
# track locally, we auto-commit deletions to try and clean up directories
# that are being deleted, in these cases we pass a specific file.
def do_commit(path, comment)
retVal = false
if(comment == nil || comment.length == 0)
comment = "[no comment supplied]"
end
process = nil
if(path.nil?)
process = IO.popen("#{$SVN} commit --non-interactive -m \"#{comment}\"", "r")
else
process = IO.popen("#{$SVN} commit --non-interactive -m \"#{comment}\" \"#{path}\"", "r")
end
lines = process.readlines
line = lines.join("\n")
if(line != nil && (line.index("Committed revision") != nil || line.index("Deleting") == 0) || line.length == 0)
retVal = true
end
if(retVal == false)
logerr(line)
end
return retVal
end
# The commit driver
def commit(comment)
exit(do_commit(nil,comment) ? 0 : 1);
end
# Performs an svn update recursively or for a single file depending on the
# user selection. Since svn will merge or create conflict files we interpret
# those as errors. A production version of a script would probably want to
# preview the update, and if there are conflicts or merges prevent the update.
# This way the user has a chance of reverting changes. Such implementation is
# left as an exercise.
def update(filename)
foundError = false
recurse = (filename == ".folder" || filename.index(".substvar") != nil)

TIBCO Designer User’s Guide
80 | Chapter 3 Working with a Revision Control System
inrcs = do_isRevisionControlled(filename)
if(inrcs)
process = nil
if(recurse)
process = IO.popen("#{$SVN} update --recursive \"#{filename}\"", "r")
else
process = IO.popen("#{$SVN} update \"#{filename}\"", "r")
end
lines = process.readlines
lines.each do |line|
status = line[0,1]
if(status == "C" || status == "G")
foundError = true
end
end
if(foundError)
$stderr.puts(lines)
end
end
exit(foundError ? 1 : 0)
end
def revertRecursively(folderPath)
logerr("Non supported operation!")
exit(1);
end
# Implementation of revert
def revert(filename)
retVal = false;
recurse = (filename == ".folder" || filename.index(".substvar") != nil)
inrcs = do_isRevisionControlled(filename)
if(inrcs)
process = nil
if(recurse)
process = IO.popen("#{$SVN} revert --recursive \"#{filename}\"", "r")
else
process = IO.popen("#{$SVN} revert \"#{filename}\"", "r")
end
lines = process.readlines.join("")
if(lines.length == 0 || lines.index("Reverted") != nil)
retVal = true;
else
$stderr.puts(lines)
end
else
retVal = true;
end
exit(retVal ? 0 : 1)
end

TIBCO Designer User’s Guide
Scriptable RCS Adapter | 81
# implementation of info
def info(filepath)
svndir = File.join(File.dirname(filepath),".svn")
if(File.exists?(svndir))
process = IO.popen("#{$SVN} info \"#{filepath}\"", "r")
$stdout.puts process.readlines
else
$stdout.puts "#{filepath} is not in a svn manged directory"
end
exit(0);
end
# This callback controls whether folders require a
# recursive lock. If this returns true, a revert will trigger
# a recursive revert going up the project tree. Svn can revert
# individual files or folders.
def foldersRequireRecursiveLock()
$stdout.puts("false")
exit(0)
end
# This method is probably the most important and most frequently called.
# The results are cached by the ScriptableAdapter host. Essentially this
# tells TIBCO Designer whether the file is under revision control or not.
# Caution: TIBCO Designer WILL ask about child files that are in a container that
# is not revision controlled! Other methods call this to determine wether
# they should do any work or not.
def do_isRevisionControlled(filepath)
retVal = true
svndir = File.join(File.dirname(filepath),".svn")
if(File.exists?(svndir) == false)
logerr("The directory containing #{filepath} is not under svn control.")
retVal = false
elsif(File.exists?(filepath))
process = IO.popen("#{$SVN} status \"#{filepath}\"", "r")
lines = process.readlines
line = lines[0]
if(line != nil && line.index("?") == 0)
retVal = false;
end
else
# not yet on disk...
retVal = false;
end
return retVal
end
# The driver for status
def isRevisionControlled(filepath)
status = do_isRevisionControlled(filepath)
$stdout.puts status
exit(0)
end
#The Script always returns false to this command. All updates must be performed using the RCS's tools

TIBCO Designer User’s Guide
82 | Chapter 3 Working with a Revision Control System
def supportsSynchronize()
$stdout.puts "false"
exit(0)
end
def foldersRequireLockForParentWritability()
$stdout.puts "false"
exit(0)
end
# Let TIBCO Designer recurse it for us. Returning true from here
# could improve performance for some edit/revert operations
# at the expense of implementing recursive
def supportsRecursiveLock()
$stdout.puts "false"
exit(0)
end
# if true, TIBCO Designer will ask for comments on add
def wantsCommentOnAdd()
$stdout.puts "false"
exit(0)
end
# if false, TIBCO Designer won't allow commits via the RCS adapter
def supportsCommit()
$stdout.puts "true"
end
# This tells ruby, that this is only executable if the name
# of the program matches the file.
if __FILE__ == $0
require 'getoptlong'
# The script will be called with 1 or 3 arguments. The first argument
# is the name of the command. If TIBCO Designer collected a comment, the
# the option '-comment' is passed along with a quoted string. Depending
# on the script or RCS system, that comment may or may not be usable.
# The name of the file to operate on is passed via stdin. Currently
# rcs adapters only pass one file at a time.
# extract the command $* is the argv in ruby
command = $*.shift
# see if we have a comment flag, if we do extract the comment.
index = $*.index("-comment")
comment = nil;
unless index.nil?
comment = $*[index+1]
end
# if the command is empty put nonsense in it, to prevent dispatching
if command.nil?
command = "..."

TIBCO Designer User’s Guide
Scriptable RCS Adapter | 83
end
case command
when "edit" then edit();
when "editRecursively" then editRecursively(getFileName());
when "add" then add(getFileName());
when "delete" then delete(comment);
when "commitPreview" then commitPreview();
when "commit" then commit(comment);
when "revert" then revert(getFileName());
when "revertRecursively" then revertRecursively(getFileName());
when "update" then update(getFileName());
when "info" then info(getFileName());
when "isRevisionControlled" then isRevisionControlled(getFileName());
when "foldersRequireLockForParentWritability" then foldersRequireLockForParentWritability();
when "foldersRequireRecursiveLock" then foldersRequireRecursiveLock();
when "supportsCommit" then supportsCommit();
when "supportsLocking" then supportsLocking();
when "supportsRecursiveLock" then supportsRecursiveLock();
when "supportsSynchronize" then supportsSynchronize();
when "specialVFileNames" then specialVFileNames();
when "wantsCommentOnAdd" then wantsCommentOnAdd();
else
logerr("Unknown command '#{command}'")
exit(1)
end
end
Working with the Scriptable RCS Adapter
This section explains how to work with the scriptable RCS adapter on UNIX operating
systems using the example SVN script implementation (See page 75). SVN is an
open-source version control system that is not directly supported by TIBCO Designer.
Prerequisites
To integrate SVN into TIBCO Designer using the scriptable RCS adapter, ensure that
following procedures have been taken.
• Install SVN software. Download the installer from
http://subversion.tigris.org/project_packages.html.
— SVN server must be installed and running.
— An SVN client must be installed on the machine where TIBCO Designer runs.
• Get the address of the SVN server and the port number on which it’s running.
• Ensure that you have the appropriate permissions required to work in the SVN server.
• Create an SVN Repository to store your RCS Adapter project data.

TIBCO Designer User’s Guide
84 | Chapter 3 Working with a Revision Control System
• Install Ruby. Ruby is an open source programming language that is used to implement
the example script. See http://www.ruby-lang.org/ for details. Download the installer
from http://www.ruby-lang.org/en/downloads/.
• Create a script or program based on the scriptable RCS adapter protocol. In this case,
the example script is used.
• Grant the executable permission to your script or program.
Creating or Modifying a Scriptable RCS Adapter Project
To Create a Scriptable RCS Adapter Project, follow these steps:
1. Start TIBCO Designer.
2. Select New empty project.
3. In the Save Project dialog, specify the project directory in the Project Directory field.
4. In the Multi-User System drop-down list, select Scriptable RCS Adapter.
5. Provide the path to your script or program in the Script field.
6. Leave the Interpreter field empty when using UNIX systems.
Figure 19 Save Project Options for a Scriptable RCS Adapter
If you are working on Windows operating systems and do not use .bat or .exe as your script,
you must provide the path to the tool used to implement your script or program in the
Interpreter field. For example, C:\ruby\bin\ruby.exe.

TIBCO Designer User’s Guide
Scriptable RCS Adapter | 85
7. Start using the SVN repository that you created by doing a checkout of the RCS
Scriptable Adapter project. For example, execute the following command using a
shell:./svn checkout svn://localhost:9133/ /home/tra/svntest
8. Select the Project root folder, right click and select Add Resource to RCS.
Figure 20 SVN Add Resource to RCS
9. Select Multi-User > Check in Changes to check the project in SVN.

TIBCO Designer User’s Guide
86 | Chapter 3 Working with a Revision Control System
Figure 21 SVN Check In Dialog
To Modify a Scriptable RCS Adapter Project, follow these steps:
1. Open the project.
2. Modify the project, save it, then click Multi-User > Check In Changes.
If a new resource has been added to the project, it must first be added to the RCS using
Add Resource to RCS before checking in the changes.

TIBCO Designer User’s Guide
Tips and Tricks for Using Version Control Systems | 87
Tips and Tricks for Using Version Control Systems
The following techniques will help you use your version control system effectively:
• Check in and synchronize on a regular basis. The information displayed by TIBCO
Designer may not be completely accurate if there are a large number of differences
between the project in TIBCO Designer and the project in VSS.
• Structure your project so each user owns a folder and works in it. When several users
work in the same folder, only the folder owner can add, delete, and rename resources
in that folder.
• Structure your project so that each user owns a folder in the AESchemas area.
• Do not keep the root folder locked. If you do, other users cannot add resources in it
(not even their own folder). Note that this tip does not apply if you are using File
Sharing. Even if User A locks the root folder or any other folder, User B is still able to
add a folder or resource under a locked folder (root or else).
• Do not keep the AESchemas folder locked. If you do, other users cannot add resources
in it (not even their own folder inside AESchemas).
• Sometimes a check-out is recursive (optional or forced), and sometimes you can add
resources to folders even if someone else has checked out that folder.
Do not lock folders unless you have to. Even though the capability of adding to a
locked folder is there, it can still cause problems, for example, if two people attempt to
add a resource with the same name.

TIBCO Designer User’s Guide
88 | Chapter 3 Working with a Revision Control System
TIBCO Designer User’s Guide
| 89
Chapter 4 Sharing Resources with Other Projects
This chapter explains how you can share common resources among projects.
Topics
• Overview, page 90
• Creating an AliasLibrary, page 91
• Creating a Design-time Library, page 94
• Managing Aliases, page 99
• Managing Resource Conflicts in Design-time Libraries, page 101
• Building a Design-time Library on the Command Line, page 102

TIBCO Designer User’s Guide
90 | Chapter 4 Sharing Resources with Other Projects
Overview
TIBCO Designer allows you to create aliases to resources that will be reused in other
projects. To use a resource, a project needs to know where to find it. Since projects are
exported or deployed to different machines and different environments aliases are used to
specify libraries locations. An alias is part of a user’s preferences and is common to all of
that user’s projects. Aliases are managed under the File Alias tab in the Preferences
dialog.
Aliases are used in the AliasLibrary resource and the design-time library panel. The AliasLibrary
resource allows you to load files stored in the file system into your project and share them
with other projects. A design-time library contains resources that can be shared with other
projects.

TIBCO Designer User’s Guide
Creating an AliasLibrary | 91
Creating an AliasLibrary
The AliasLibrary resource allows you to specify aliases to file system resources (such as a
JAR file) that need to be included in your project. Once the resource is configured, other
resources using a standard reference form field can use the AliasLibrary to resolve external
file dependencies that they may have at run or debug time.
The AliasLibrary resource is crucial for resources that depend on external files, such as the
Java Activity in TIBCO ActiveMatrix BusinessWorks. Resources in your project can
reference aliases in the AliasLibrary to resolve external file dependencies that they may have
at runtime or debug time.
When you build an enterprise archive file, the files referenced by the aliases defined in an
AliasLibrary that you include in your project are included in your archive file.
To Create an Alias for an AliasLibrary:
1. Select the top-level folder and locate the AliasLibrary resource.
In palette mode, this resource is in the General palette.
2. Drag the AliasLibrary resource into the design panel.
The AliasLibrary is displayed in the design panel and the configuration panel now allows
you to supply information about the library.
3. Under the Configuration tab, provide a name and description for the AliasLibrary.
4. Click the Aliases tab.
Click the button to select a file or directory to add to the AliasLibrary. The dialog
allows you to pick a Folder or All Files.
If you select a folder, all files in the folder become part of the alias, as well as any sub
folders. This means that all files and directories under the folder become part of the
enterprise archive file when you build it. If a large number of files exist in the folder,
your enterprise archive file will also be large. When the archive file is deployed, all

TIBCO Designer User’s Guide
92 | Chapter 4 Sharing Resources with Other Projects
files in the archive are moved across the network to the remote machines, without
regard to which are actually required for the deployment. It is good practice to include
only the files required for your project.
A warning appears if the folder or file you select exceeds a certain size. The warning
can be customized. See Enterprise Archive File Size on page 116 for more
information.
5. Specify whether aliases within the AliasLibrary should be included in the CLASSPATH,
deployed with the enterprise archive file, or both. This may be required for a TIBCO
ActiveMatrix BusinessWorks Java Activity that loads a jar file in order to find its
executable or supporting code.
— If you select the Classpath checkbox, the JAR file or file represented by the alias
is placed in the CLASSPATH when the enterprise archive file is built. (The Deploy
checkbox must also be selected for deployment.) Note that, at design-time, the
referring resource is responsible for loading these entries itself. TIBCO Designer
does not perform anything with the configuration other than building the enterprise
archive file.
— If you select the Deploy checkbox, the associated file will be deployed. If the
deploy checkbox is not selected, the file will not be deployed. This allows a Java
Activity to specify that a support JAR file is required in the CLASSPATH, but should
not be deployed (the jar may already be available as part of a separate configuration
at runtime, but may be required during debug time).
6. Click Apply.
The alias is added to your file aliases list, which can be viewed by clicking Edit >
Preferences and clicking the File Alias tab.
To Add a Previously Defined Alias to an AliasLibrary
Aliases are managed under the File Aliases tab in the TIBCO Designer Preferences
dialog. Click Edit > Preferences to access the dialog. Before adding a predefined alias to
an AliasLibrary, the alias must be visible in the Preferences dialog. See Creating an Alias on
page 99 for details.

TIBCO Designer User’s Guide
Creating an AliasLibrary | 93
1. Select the top-level folder and locate the AliasLibrary resource.
In palette mode, this resource is in the General palette.
2. Drag the AliasLibrary resource into the design panel.
The AliasLibrary is displayed in the design panel, and the configuration panel now allows
you to supply information about the library.
3. Under the Configuration tab, provide a name and description for the AliasLibrary.
4. Click the Aliases tab.
5. Click the button to locate a previously defined Alias entry.
6. Complete step 5 and step 6 in the previous section.
To Delete an Alias From an AliasLibrary
1. Select the top-level folder and locate the AliasLibrary resource.
2. Click the Aliases tab.
3. Select the entry you want to remove.
4. Click the button. The entry is removed from the AliasLibrary. The alias is still
available from the Preferences dialog.
5. Click Apply.

TIBCO Designer User’s Guide
94 | Chapter 4 Sharing Resources with Other Projects
Creating a Design-time Library
A design-time library allows you to share resources with other project developers that you
have defined in a previous project. This allows you to create shareable resources once, and
then allow other project developers to use them in their projects.
For example, the following resources can be part of a design-time library:
• Schemas (AE or XSD)
• Identities and SSL certificates
• TIBCO ActiveMatrix BusinessWorks processes
• TIBCO Rendezvous, JDBC, JMS, or other TIBCO ActiveMatrix BusinessWorks
shared configurations
A resource in a design-time library can be maintained using a revision control system or
placed in a shared directory. If a resource will be shared by many project developers, the
resource should be managed in a revision control system where users can sync regularly to
get updates. In a smaller environment, resources can be placed in a shared directory and
developers can use email to update each other when there is a change.
If a resource changes, it must be reloaded into your project. The best practice is to
minimize changes to the resource. It should be built and tested, then updated infrequently.
When you build an enterprise archive file from a project that contains a design-time
library, all resources referenced in the library are included in the archive, just as resources
in your local project are included.
To Create a Design-time Library
A LibraryBuilder resource is used to build a design-time library. Complete the following steps
after you have configured the resources for the design-time library.
1. In your TIBCO Designer project, select the top-level folder and locate the LibraryBuilder
resource.
In palette mode, this resource is in the General palette.
2. Drag the LibraryBuilder resource into the design panel.

TIBCO Designer User’s Guide
Creating a Design-time Library | 95
The LibraryBuilder is displayed in the design panel, and the configuration panel now
allows you to supply information about the library.
3. Under the Configuration tab, provide a name for the LibraryBuilder.
4. In the File Location field, provide the absolute path and name for the library file. The
directory should be shared so it is accessible to other developers.

TIBCO Designer User’s Guide
96 | Chapter 4 Sharing Resources with Other Projects
5. Click the Resources tab and click the Browse button to select resources to add to the
LibraryBuilder. The resulting list can be limited to resources matching a filter term
entered in the Filter Name field.
6. Click Apply.
7. Save the project and click Build Library.
8. After creating the design-time library, assign an alias to it. See Creating an Alias on
page 99.
Adding a Design-time Library to a Project
After you have added a design-time library to your project, you can use the resources
defined in it in another project. The resources display in the project view like other
resources but they are dimmed because they cannot be modified.
1. Select the project’s root folder.
2. Click the Design Time Libraries tab.
3. Click Pick or New.
Click Pick if you have an alias defined for the library. Select the file alias for the
design-time library.
Click New and navigate to the location of the design-time library. Provide a name for
the library and click Open.
4. Click Apply.

TIBCO Designer User’s Guide
Creating a Design-time Library | 97
The following diagram shows the project with an imported design-time library.
Updating a Resource in a Design-time Library
To update a resource in a design-time library, delete the alias to the resource, then add it
back.
1. Open the project in which the resource in the design-time library will be updated.
2. Select the project’s root folder.
3. Click the Design Time Libraries tab.
4. Select the File Alias for the resource to update.
5. Click Delete.
6. Click Apply.
7. Click Pick.
8. Select the file alias for the resource to update.
9. Click OK.
TIBCO Designer User’s Guide
98 | Chapter 4 Sharing Resources with Other Projects
10. Click Apply.
Deleting Resources in a Design-time Library
To delete a resource from a design-time library, delete the alias to the resource.
1. Open the project in which the resource in the design-time library will be deleted.
2. Select the project’s root folder.
3. Click the Design Time Libraries tab.
4. Select the File Alias for the resource to remove.
5. Click Delete.
6. Click Apply.
Showing or Hiding Design-time Libraries
You can hide the design-time libraries that you have added to a project. When you hide the
design-time libraries, the resources in the libraries are not available to your project. If you
are using a resource in a design-time library and have hidden the library, when you build
an enterprise archive file, that resource will not be part of the archive.
To Toggle Showing and Hiding Design-time Libraries
1. Click Project > Hide Library Resources.
2. Click Project > Show Library Resources.

TIBCO Designer User’s Guide
Managing Aliases | 99
Managing Aliases
Aliases are used to manage access to AliasLibrary and design-time library resources. The
aliases you create are saved in your user profile and are available to all the projects you
create on your machine. Other developers can export aliases so they can be imported into
other projects.
Creating an Alias
Use these steps to create an alias that will later be used in an AliasLibrary or design-time
library. An alias can also be created directly in an AliasLibrary or LibraryBuilder resource.
1. Click Edit > Preferences.
2. Click the File Aliases tab.
3. Click New.
4. Under the Alias column, double-click and provide an alias name.
5. Under the File Path column, double-click and navigate to the resource location. Select
the name and click Open.
6. Click OK.
The following diagram shows defined alias.

TIBCO Designer User’s Guide
100 | Chapter 4 Sharing Resources with Other Projects
Deleting an Alias
Use these steps to delete an alias. After deleting an alias it is removed from your alias list.
1. Click Edit > Preferences.
2. Click the File Aliases tab.
3. Click Delete.
4. Click OK.
Exporting an Alias
1. Click Edit > Preferences.
2. Click the File Aliases tab.
3. Click Export to save the alias list so others can use it.
4. Navigate to a location in the file system that others can access.
5. Provide a name for the alias.
6. Click Save.
Importing an Alias
1. Click Edit > Preferences.
2. Click the File Aliases tab.
3. Click Import to add a previously exported alias list to your preferences.
4. Navigate to the location of the alias file and select it.
5. Click Open.
6. Click OK.

TIBCO Designer User’s Guide
Managing Resource Conflicts in Design-time Libraries | 101
Managing Resource Conflicts in Design-time Libraries
TIBCO Designer prevents you from creating a resource with a name identical to that used
by another resource already defined in the project. If a resource in a design-time library
has the same name as a pre-existing resource in the project, a conflict arises.
If there is a name conflict, the resource in the local project is always used. If there is a
conflict among the design-time libraries you have loaded, you have these choices:
• You can use the arrows on the left to reorder the libraries. Libraries are ordered
according to when they were imported. The earliest imported library is at the top of
the list. The library at the top of the list has precedence over those lower in the list.
• If reordering does not resolve the conflict, you can re-build the design-time library, or
create another one.
• You cannot rename a resource in a design-time library to break a conflict.
Resources with a conflict are marked so you can easily see them. For example, the
following diagram shows a project that contains conflicting resources. You can use the
menu command Resources > View Library Conflicts to find each conflicting resource.

TIBCO Designer User’s Guide
102 | Chapter 4 Sharing Resources with Other Projects
Building a Design-time Library on the Command Line
The buildlibrary command line tool allows you to build a design-time library on the
command line.
The buildlibrary tool supports the following flags:
• -h To print usage of the tool.
• -s To save the project after the tool completes building the library.
• -lib To specify the URI of the LibraryBuilder resource to build.
• -o To specify the projlib output location (overrides the existing value in the resource).

TIBCO Designer User’s Guide
| 103
Chapter 5 Managing Trusted Certificates
This chapter explains how to manage trusted certificates for TIBCO Designer projects.
Topics
• Overview, page 104
• Storing Certificates Inside a Project, page 105
• Storing Certificates in a Design-time Library, page 110

TIBCO Designer User’s Guide
104 | Chapter 5 Managing Trusted Certificates
Overview
Secure Sockets Layer (SSL) is a protocol that uses public and private keys to secure
communication between parties. When an SSL connection is requested, the initiator (or
client) and responder (or server) perform a handshake where digital identities, or
certificates, are exchanged to ensure that both parties are known. SSL can also be used to
specify an encryption algorithm for the data that is exchanged between the parties.
The name SSL has been replaced by Transport Layer Security (TLS), but SSL is used as a
synonym for TLS in this document. For more general information about SSL, see the TLS
specification at http://www.ietf.org/rfc/rfc2246.txt or view an online tutorial about SSL or
TLS on the web.
The General palette provides the identity resource for use in SSL configurations. Identity
resources contain information that is used to authorize a connection. The identity resource
is described in Identity on page 7 in TIBCO Designer Palette Reference.
Before you can perform SSL configuration, you must make certificates and other identity
resources available to session resources in your project such as TIBCO Rendezvous
sessions and JMS sessions.

TIBCO Designer User’s Guide
Storing Certificates Inside a Project | 105
Storing Certificates Inside a Project
You can store certificates inside your project by importing certificate resources into a
project. Before configuring a session for SSL, you must add a certificate to your project
and create an identity resource.
Projects store trusted certificates in PEM storage format. You can import certificates that
are in PKCS7, and PEM formats (these formats do not store private keys). A new certificate
copy is created when the import completes. If the certificate to be imported is already in
PEM format, a new, identical copy is created.
You cannot import certificates from storage formats that require a password, such as
PKCS12 and KeyStore.
The steps in SSL configuration are as follows:
1. Add the certificates in your project.
2. Configure an identity resource to be used for SSL configuration.
3. Configure a TIBCO Rendezvous or JMS session to use SSL.
Adding Certificates to Your Project
To add a certificate in PEM format to your project:
1. In your TIBCO Designer project, create or select a folder into which you wish to
import the certificate.
2. From the menu bar, choose Tools > Trusted Certificates > Import into PEM
Format.
3. Provide the certificate URL when prompted.
4. From the General palette, drag an Identity resource into the design panel.
5. Click on the Identity resource to open its configuration options panel.
6. Configure your resource. See Identity on page 7 in TIBCO Designer Palette Reference
for more information.
The following diagram shows a certificate and identity resource added to a project. The
certificate and identity resource can be attached to a TIBCO Rendezvous or JMS session.
See TIBCO Rendezvous SSL Configuration on page 106 and JMS SSL Configuration on
page 108 for details.

TIBCO Designer User’s Guide
106 | Chapter 5 Managing Trusted Certificates
Figure 22 Trusted Certificate and Identity Resource
TIBCO Rendezvous SSL Configuration
You can configure secure transports for TIBCO Rendezvous sessions. This leverages the
Secure Daemon feature (using SSL) available in TIBCO Rendezvous 7.0 and later.
The following steps will guide you through an SSL configuration of an Rendezvous
publication service as an example. The procedure is very similar for other services.
To configure a TIBCO Rendezvous session for SSL:
1. Open a project and drag the Generic Adapter Configuration resource to the design panel.
2. Select the Adapter Services folder and drag a Publication Service to the design panel.
3. Select the Advanced folder in the left panel to display resources associated with the
adapter.
4. Expand the Sessions folder.
5. Select the DefaultRVCMSession resource

TIBCO Designer User’s Guide
Storing Certificates Inside a Project | 107
6. Check the Use SSL? option, then click the Configure SSL button. This gives you
access to the SSL Configuration option as is shown in Figure 23.
Figure 23 TIBCO Rendezvous CM SSL Configuration
7. Provide the following information as prompted:
Daemon Certificate
(TIBCO Rendezvous
transports)
File containing one or more certificates from trusted
certificate authorities. This file is checked when
connecting to a daemon to ensure that the connection is
to a daemon that is trusted. This prevents connections to
rogue TIBCO Rendezvous daemons that attempt to
impersonate trusted daemons.
You can retrieve a daemon’s certificate using the
administration interface in TIBCO Rendezvous. See the
TIBCO Rendezvous documentation for more
information about obtaining certificates through the
administration interface. Once retrieved, you can select
a folder in your project and import this certificate into
the folder using the Tools >Trusted Certificates >Import
Into PEM Format menu item.
Identity An Identity resource used to authenticate to the JMS
server or TIBCO Rendezvous daemon. The Browse
button allows you to select from a list of appropriately
configured Identity resources.
For TIBCO Rendezvous transports, only Identity
resources whose Type field is set to Identity File or
Username/Password are listed. See Adding Certificates
to Your Project on page 105.
You can also click the Copy From button to copy a certificate/identity combination
already used by another session.

TIBCO Designer User’s Guide
108 | Chapter 5 Managing Trusted Certificates
JMS SSL Configuration
You can configure secure transports for TIBCO Enterprise Message Service sessions.
To configure a JMS Session for SSL:
1. Open a project and drag a Generic Adapter Configuration resource into the design panel.
2. Select the Adapter Services folder and drag a Publication Service into the design panel.
3. Choose JMS from the Transport Type pop-up, then click Apply.
4. Select the Advanced folder in the left panel to display resources associated with the
adapter.
5. Expand the Sessions folder.
6. Select the DefaultJmsTopicSession resource
7. In the configuration panel. Check the Use SSL? option, then click the Configure SSL
button.
Figure 24 TIBCO Enterprise Message Service SSL Configuration
a. In the Basic tab, provide the following information:
Trusted Certificates
Folder
(JMS Transports)
Location of the trusted certificates on this machine. The
trusted certificates are a collection of certificates from servers
to whom you will establish connections. If the server you
wish to establish a connection presents a certificate that does
not match one of your trusted certificates, the connection is
refused.
This prevents connections to unauthorized servers.
See Adding Certificates to Your Project on page 105

TIBCO Designer User’s Guide
Storing Certificates Inside a Project | 109
b. In the Advanced tab, provide the following information:
8. Click OK when you’re done.
Identity This is an Identity resource used to authenticate to the JMS
server or TIBCO Rendezvous daemon. The Browse button
allows you to select from a list of appropriately configured
Identity resources.
For TIBCO Rendezvous transports, only Identity resources
whose Type field is set to Identity File or Username/Password
are listed.
See Adding Certificates to Your Project on page 105.
Trace If checked, SSL tracing is turned on.
Debug Trace If checked, the SSL debug trace is turned on.
Verify Host Name This field specifies that the host name of the HTTP server should
be checked against the host name listed in the server’s digital
certificate. This provides additional verification that the host
name you believe you are connecting to is, in fact, the desired
host.
If the specified host name is not an exact match to the host name
specified in the server’s digital certificate, the connection is
refused.
Note: If you specify an equivalent hostname (for example, an IP
address), but the name is not an exact match of the hostname in
the host’s digital certificate, the connection is refused.
Expected Host
Name
This name must match the name in the certificate.
Strong Cipher
Suites Only
If checked, only strong Cypher Suites are allowed. See OpenSSL
v3.0 Cipher Suite List on page 182 in TIBCO Designer Palette
Reference for a list of available suites.
You can also click the Copy From button to copy a certificate/identity combination
already used by another session.

TIBCO Designer User’s Guide
110 | Chapter 5 Managing Trusted Certificates
Storing Certificates in a Design-time Library
This section describes how you can create a design-time library that contains trusted
certificates and use the same SSL configuration among multiple projects.
1. In TIBCO Designer, create a project that contains all the resources that you want to
put in the library. It is recommended that you import the certificates you want to
export into a folder.
In the following diagram, a certificate has been added to the Certificates folder by
clicking Tools > Trusted Certificates > Import into PEM Format. An Identity
resource has been dropped in the design panel from the General Resources palette.

TIBCO Designer User’s Guide
Storing Certificates in a Design-time Library | 111
2. Drag a LibraryBuilder resource to the design panel. The resource will be configured to
reference the folder containing certificates you want to export.

TIBCO Designer User’s Guide
112 | Chapter 5 Managing Trusted Certificates
3. Click the Resources tab and select the certificates to export. All resources contained
in the referenced folder are included. Click Project > Save and then click Build
Library.
4. Click Edit > Preferences and then click the File Alias tab. Click New to create an
alias for the design-time library you just built. (See Creating an Alias on page 99 for
details.) Export your alias by clicking Export and saving the alias to a common
directory.
5. Configure another TIBCO Designer project to use the design-time library. Select the
root folder, and then select the Design Time Libraries tab. Click the Add button to

TIBCO Designer User’s Guide
Storing Certificates in a Design-time Library | 113
select the design-time library location. After saving the project, the library contents
become visible.
Clicking File > Save As imports the contents of the library into the project.
Libraries imported by a project are dimmed because library items are read only. You may,
however, override a resource by creating a new resource on top of an imported library
item. The local version always takes precedence. You can specify the location of the
library on your disk and use the correct library regardless of machine or disk layout.

TIBCO Designer User’s Guide
114 | Chapter 5 Managing Trusted Certificates
6. Configure your resources to point to resources contributed by the library.
If you want to replace the contents contributed by a library with same resource names but
different configurations, edit the reference to the library in the Preferences panel to use
different library files. The only requirement is that all resources that are referenced and
their dependencies must be in the replacement library at the same location in the project.

TIBCO Designer User’s Guide
| 115
Chapter 6 Creating an Archive for Deployment
When you are ready to deploy your project, you must generate an Enterprise Archive,
which contains the configuration for the adapter instances and processes you wish to
deploy. You can then use TIBCO Administrator to upload the archive deploy the
associated application on the machine of your choice.
This chapter discusses how to create an archive. Deployment is discussed in the TIBCO
Administrator User’s Guide.
Topics
• Overview, page 116
• Creating an Enterprise Archive, page 118
• Creating an Adapter Archive, page 120
• Creating a Process Archive, page 122
• Making Changes to a Shared Archive, page 124

TIBCO Designer User’s Guide
116 | Chapter 6 Creating an Archive for Deployment
Overview
During development, you save your design to a project repository as needed. When you
are ready to deploy your project to a machine, you need to first generate an Enterprise
archive file (EAR file) from TIBCO Designer.
The EAR file contains information on what you want to deploy. This could be one or more
adapters, one or more TIBCO ActiveMatrix BusinessWorks process engines, or both.
You may define multiple Enterprise Archive resources for a single TIBCO Designer
project. For each archive, you may choose the processes to include.
Figure 25 TIBCO Application Flow of Information
Enterprise Archive File Size
An EAR file can contain local project resources, design-time library resources, and files as
specified in AliasLibrary resources. In addition, the TIBCO Designer classpath may include
references to other files that are included in the EAR file. The EAR file size may become
an issue when you build it in TIBCO Designer, load it into TIBCO Administrator and
deploy it to remote machines.
An EAR file should only include resources that are required to deploy the project. Large
archive files have negative impacts at deployment. If each application in you project uses
different resources, different AliasLibrary resources should be used to support it (rather than
one large AliasLibrary).
Building an archive creates the EAR file, which you can then deploy from TIBCO
Administrator. If you make changes to the business processes or adapter services included
in the archive, you need to rebuild the archive. Saving the project does not affect the
archive.
Design project Archive project Upload archive
and deploy
Run and monitor
application
Multi-file projectEnterprise
Archive (EAR) file
Deployment
configuration
Application (includes
adapter instances and
process instances)
TIBCO Designer TIBCO Administrator

TIBCO Designer User’s Guide
Overview | 117
• You should insure that the machine on which the EAR file is loaded and deployed has
sufficient disk space.
• TIBCO Designer displays a warning when you add a directory to an EAR file, or alias
to an AliasLibrary that references a directory. The EAR file size is typically one fifth of
the warning, due to file compression. The warning reminds you that when referencing
a directory, all files and sub directories in the directory are archived.
You can modify the following property in designer.tra so that the warning appears only
when files of the given size are loaded. The value is in megabytes.
designer.ear.water.mark.size=16
This property specifies when the warning message should appear. For example, if you
change the value to 32, the warning only appears if you are loading a files that are
greater than 32 MB.
If the warning appears, you may need to increase the heap size value in designer.tra so
TIBCO Designer has enough memory to manage the project. At deployment, TIBCO
Administrator copies the EAR file and deployment files to remote machines. If the
EAR file is large, copying files will take extra time.
It is good practice to load only the files you need for your project. For example, if you
require only one JAR file of 500KB that exists in a directory that contains 20 MB of
JAR files, you should create an alias that references only the required jar rather than
the entire directory.

TIBCO Designer User’s Guide
118 | Chapter 6 Creating an Archive for Deployment
Creating an Enterprise Archive
To Create an Enterprise Archive
1. In TIBCO Designer, select a folder and find the Enterprise Archive resource.
In palette mode, this resource is in the General palette.
2. Drag an Enterprise Archive into the design panel.
The archive is displayed in the design panel, and the configuration panel now allows
you to supply information about the archive.
Figure 26 Adding an Enterprise Archive to your project

TIBCO Designer User’s Guide
Creating an Enterprise Archive | 119
3. Provide the following information:
4. If you wish to build the archive now, you can do so by clicking the Build Archive
button. When you click the button, TIBCO Designer creates an enterprise archive (.ear)
file that you can then deploy from TIBCO Administrator.
Otherwise, you can add one or more Adapter Archives and Process Archives to the
Enterprise Archive, then build it. See Creating an Adapter Archive on page 120 and
Creating a Process Archive on page 122
Field Description
Name Name of the Enterprise Archive you are creating.
Description Description of the archive content.
Author Person creating the archive.
Archive Version Version of the archive.
Note: The user assigns this number. TIBCO Designer does not
use this number.
File Location Location where this archive will be saved. Click Browse to
select a different file location than the default. An absolute or
relative path can be given. A relative path is resolved relative to
the directory containing the project.
Include all service
level global
variables
Includes all global variables that have the Service checkbox
selected.
Some adapters don't properly report all their properties, so
TIBCO Designer cannot tell if they are using service level global
variables or not. This checkbox explicitly forces inclusion of all
service-level variables.

TIBCO Designer User’s Guide
120 | Chapter 6 Creating an Archive for Deployment
Creating an Adapter Archive
If adapters are part of your project, you can create adapter archives and add them to the
Enterprise archive. The following example uses a Generic Adapter Configuration. The process
would be the same for an adapter.
To Add a Generic Adapter Configuration Archive
1. Configure the adapter.
2. Select the Enterprise Archive resource in the project panel. If there are any configured
adapters in your project, an Adapter Archive resource becomes available in the palette
panel. If you’re working in palette mode, it is located in the adapter’s palette.
Figure 27 Adding an Adapter Archive to your Enterprise Archive
3. Drag the Adapter Archive into the design panel and specify information in the Configuration
tab, then click Apply:
Name Name of the Adapter Archive.
Description Optional description of the Adapter Archive.

TIBCO Designer User’s Guide
Creating an Adapter Archive | 121
4. After you have selected an adapter, the Advanced tab becomes available and you can
optionally specify the following information, then click Apply.
5. To build the archive, select the Enterprise Archive (which is one level higher in the project
tree) and click the Build Archive button.
Author Optional author of the Adapter Archive.
Adapter Click the browse button (the binoculars) and select the adapter
you wish to associate with the archive. Note that you need to
create a new Adapter Archive for each adapter.
Deployment Plugin Deployment plugin class. This class must be an implementation
of the com.tibco.tra.tsm.plugin.custom.CustomTSMPlugIn interface. TIBCO
Administrator runs this code as part of the deployment process
when it creates the .tra file.
In addition to providing a pointer to this class here, you must
also add a .jar file to the Shared Archive that includes the class so
the class will be in the classpath.
Software Type The type of adapter. This corresponds to the extension of the
adapter project file (multi-file projects). This field is only
available for Generic Adapter Configuration or for adapters that allow
multiple software choices, such as the TIBCO Adapter for Tuxedo.
This value must match the value set by the software’s installer or
specified when custom software was added to the administration
domain.
Update Version
from Adapter
When you build the archive, TIBCO Designer includes the
ActiveEnterprise version of the adapter associated with this
archive by default. If you unselect this checkbox, you can supply
a different version instead.
If the box is unchecked, the deployment ActiveEnterprise
version value could go out of sync with the adapter’s value (the
adapter provides a button to manage the version).
Warning: Supplying a different version can have serious
compatibility consequences.
Minimum Version Minimum version for the adapter. The value of this field is
provided by the adapter and can be changed.

TIBCO Designer User’s Guide
122 | Chapter 6 Creating an Archive for Deployment
Creating a Process Archive
If one or more TIBCO ActiveMatrix BusinessWorks processes are part of your project,
you can create process archives and add them to the Enterprise archive.
To Add a Process Archive
1. Configure the process definition.
2. Select the Enterprise Archive resource in the project panel. If there are any processes that
have process starters in your project, a Process Archive resource becomes available in the
palette panel. If you’re working in palette mode, it is located in the Process palette.
3. Drag the Process Archive into the design panel.
Figure 28 Adding a Process Archive to your Enterprise Archive
4. Specify information in the Configuration tab, then click Apply:
Name Name of the Process Archive.

TIBCO Designer User’s Guide
Creating a Process Archive | 123
5. Click the Processes tab to specify the process definition. To define the process:
a. Click the browse button (the binoculars).
b. Select the process you wish to add to the archive.
c. Repeat the procedure to add multiple processes.
6. Click Apply.
7. To build the archive, select the Enterprise Archive (which is one level higher in the project
tree) and click the Build Archive button.
Description Optional description of the Process Archive.
Author Optional author of the Process Archive.
Be sure to select processes that have process starters or that are dynamically called
sub-processes. Otherwise, the process is never called from TIBCO Administrator.
You can select multiple process definitions by using shift-click or control-click to
make contiguous or discontiguous selections)

TIBCO Designer User’s Guide
124 | Chapter 6 Creating an Archive for Deployment
Making Changes to a Shared Archive
When you create an Enterprise Archive, a Shared Archive is automatically included in the archive
and becomes visible when you select the Enterprise Archive. By default, TIBCO Designer
adds any resources that are referenced by adapter configurations or process definitions for
which you created archives. This may include, for example, custom schema resources,
TIBCO Rendezvous or JMS Connection configurations, JDBC Connection
configurations, and so on.
In some cases, you may wish to add resources that are not automatically included.
To Change a Shared Archive
1. Select the Shared Archive and provide a name and description if desired.
2. Click the Shared Items tab.
— Click the Browse button next to the Include from Local Project field to include items from
the currently loaded project (this should not usually be necessary).
— Click the Browse button next to the Include from Filesystem field to include other items.
3. Click Apply.
4. To build the archive, select the Enterprise Archive (which is one level higher in the project
tree) and click the Build Archive button.
All JDBC connections are included in the Shared Archive automatically when the EAR
includes a process archive.

TIBCO Designer User’s Guide
| 125
Appendix A Menu Reference
This chapter provides a reference description of each menu item.
Topics
• Project Menu, page 126
• Edit Menu, page 132
• View Menu, page 139
• Resources Menu, page 140
• Palettes Menu, page 143
• Multi-User, page 145
• Tools Menu, page 146
• Window Menu, page 149
• Help Menu, page 150
• Right-Button Menus, page 151
Available menu items depend on the currently selected resource. If a menu item is not
included in this list, it belongs to a product such as TIBCO ActiveMatrix BusinessWorks
or a TIBCO adapter.

TIBCO Designer User’s Guide
126 | Appendix A Menu Reference
Project Menu
The Project menu allows you to create, open, close, save, import and print projects in
different formats and to manipulate palettes. To delete a project, return to the Startup panel
and choose the Administration tab.
New Project
Creates a new project. You have two choices:
• New empty project creates a new empty project and displays it in a new TIBCO
Designer window.
• New from template creates a new project from a previously saved project template.
Regardless of the option you choose, you are then prompted for the name of the project
with a Save Project dialog.
See Save on page 127 for additional information about the Save Project dialog.
Open
Opens an already existing project in a new TIBCO Designer window.
By default, TIBCO Designer assumes that the project is read or write accessible and that it
is not managed by a revision control system (RCS).
If your project is under RCS, select the multi-user system under which the project is
maintained. When you select an RCS, TIBCO Designer provides a Test Configuration
option. Use this option to test access to RCS. See Working with a Revision Control
System on page 41.
Reopen
Reopens a recently saved project. A list of projects is available through the submenu.
Reopen may prompt for information, such as a password.
When TIBCO Designer opens a project, it does not load the information for each resource
by default. Instead, information is loaded when it is needed. For example, the information
is loaded when:
• The user opens a folder (which loads the resources inside that folder)
• The user searches for references, or validates a project (this loads the entire project)
To load all information, choose Load Full Project, discussed below.
TIBCO Designer User’s Guide
Project Menu | 127
Close
Closes this project and its TIBCO Designer window. Unless Show this Panel only on Startup was
selected, the startup panel is displayed when you close all projects.
Save
Saves this project. If the project was previously saved, it is saved with the same settings.
If the project was not previously saved, this command brings up the Save Project window.
You must specify the project directory.
• Encoding—This field is used to determine the wire encoding that TIBCO Rendezvous
should use for sending and receiving data in this project. This is a project-wide
preference. See TIBCO Adapter Concepts for a discussion of how TIBCO adapters
support Unicode.
ISO8859-1—Default value. Use this option if you ONLY intend to use TIBCO
Rendezvous for English and Western European data.
UTF-8— Select this option if you want to use TIBCO Rendezvous activities for
processing non-Western European data, such as Japanese.
• Multi-User System—Allows multiple developers to work on the same project and to use
file sharing/locking or a version control system so that the same resource is not
changed by two developers at the same time.
None—Default value. Do not use file sharing.
File sharing—Allows you to place the project in a central location, then lock and
unlock resources as needed. See File Sharing on page 45.
ClearCase—See ClearCase on page 64.
CVS—See CVS on page 65.
Perforce —Allows multiple users to access via Perforce version control. See Perforce
Fast Software Configuration Management System on page 51.
Merant Version Manager (PVCS)—See PVCS Version Manager on page 67.
Microsoft Visual SourceSafe —Allows multiple users to take advantage of the Visual
SourceSafe features. See Microsoft Visual SourceSafe on page 48.
Saving the project as an XML Canon project is also possible. See XML Canon on page 55.
TIBCO Designer will delete any existing files and folders in the folder you designate as a
project folder if you give permission to delete data in that folder.

TIBCO Designer User’s Guide
128 | Appendix A Menu Reference
Save As
Brings up the Save Project dialog, even if the project was previously saved.
Save As Template
Saves the resources included in the current project, including their configuration
information, as a project template.
Validate Project for Deployment
Validate Project for Deployment iterates through the project tree and validates each
resource. Each resource is checked for broken references, undefined global variables, and
resource-specific validation. For some resources included with TIBCO Designer by
default, this includes the following:
• Unused global variables and global variables that are used but not defined (note that
InstanceID and AppName are both used and not defined intentionally).
• Timers indicate if they don't have a session
• The Generic Adapter Configuration and other adapter configurations can have a
version which may limit the supported features. Validation will indicate a problem if
there is one. For example, if you can add a JMS session to a Generic Adapter
Configuration and then change it to Version 4, validation indicates the problem.
• Advisories indicate if they do not have a subject
• Load URLs indicate if they are empty
• File sinks require a file, hawk sinks require an agent name and network sinks require a
session
• DB and ODBC transaction pools require transaction IDs
• Association endpoints require a class
• Many fields for Union and Operation classes require a reference. If there is no class
(that is, the field is blank), a validation error results (not if the class does not exist).
• The message filter requires an implementation value that tells it what library to use in
the SDK

TIBCO Designer User’s Guide
Project Menu | 129
• Endpoints and sessions require the following configuration:
— TIBCO Rendezvous endpoints require a subject
— TIBCO Rendezvous sessions require daemon, network, and service
— JMS endpoints require a destination
— JMS sessions require a factory and url
— RVA sessions require a port and host
— RVCM sessions require a name and ledger
— RVCMQ sessions require a name
Load Full Project
This option loads the whole project, which makes opening the project slower but working
with the project faster.
When TIBCO Designer loads a multi-file project, it does not load the information for each
resource by default. Instead, information is loaded when it is needed. For example, the
information is loaded when:
• The user opens a folder (which loads the things inside that folder)
• The user searches for references, or validates a project (this loads the entire project)
Partial loading makes opening a project faster.
Hide Library Resources, Show Library Resources
When Hide Library Resources is selected, the design-time libraries you have included in your
project are hidden from view. When Show Library Resources is selected, the design-time
libraries are visible in your project.
Import Full Project
Imports a project into the current project, instead of opening it in a new window by itself.
You are prompted with the dialog discussed in Opening and Reopening Projects on
page 31.
Importing projects is useful because it bypasses the step of exporting individual resources
when you want to combine projects.
See Importing a Project on page 169.
Resources on palettes installed by other products, for example, TIBCO Adapters or
TIBCO ActiveMatrix BusinessWorks, have their own validation behavior.

TIBCO Designer User’s Guide
130 | Appendix A Menu Reference
Export Full Project
• Local Repository—Saves as a local repository (.dat) file. Browse for the .dat file to
open it.
• Server Repository—Saves a project as a repository (.dat) file managed by a TIBCO
Administration Server. See Exporting a Server Repository Project on page 170 You
must supply the project name and protocol information. See Table 13, Specifying
Protocol Information.
• ZIP Archive—Exports a project to a ZIP archive.
Import Resources from File, Folder, URL
Imports a resource previously saved from TIBCO Designer. The resource is imported with
any embedded resources. For example, a folder is imported with all resources in it.
Note that you can only import a resource if the current selection allows such a resource.
For example, you can import a Sessions resource if a Sessions folder is selected but not if a
Sessions resource is selected.
TIBCO Designer displays the Import Options dialog which allows you to customize the
resource import. See Importing Resources on page 175 for a description of import options.
Export Resources to File
You can export a resource from a project and import that resource into a different project.
TIBCO Designer displays the Export Resources dialog which allows you to add or remove
dependencies. See Exporting Resources on page 173 for a description of export options.
Print Setup
Displays the Print Setup dialog for your platform.
Prints the current design panel using the Print Setup options.
If you installed a server with a security component, the user specified in the New Project
dialog must have write privileges for the domain to create a new server-based project.
You can set access privileges using TIBCO Administrator. See the TIBCO
Administrator documentation.

TIBCO Designer User’s Guide
Project Menu | 131
Save as JPEG
Saves the currently displayed window as a .jpeg file. This JPEG file can then be used to
document a resource configuration.
Generate HTML Report
Generates an HTML report of the currently selected resource using the specified report
properties.
Exit
Exits TIBCO Designer. Returns to the Startup panel if Show this Panel only on Startup is
unchecked.
This option is not available for the Details display.
Field Description
File HTML file to be generated.
Save Recursively Saves explicit information about any resource that is part of the
selected resource, for example, all resources in a folder.
Include Icons Includes the icons for the resources.
Include Resource
Types
Includes resource type information.
Substitute Global
Variables
Substitutes global variables, that is, uses the variable’s values in
the report.
Show Blank Values Normally empty values are not included in the report. If you
check this option, they are included and marked blank
Open Report in
Browser
Opens the report in an HTML browser after the report has been
generated.
Title Title of the HTML document that will be generated. The title
becomes visible in the browser title bar.
Header (as HTML) Header for the document.
Footer (as HTML) Footer for the document.

TIBCO Designer User’s Guide
132 | Appendix A Menu Reference
Edit Menu
The edit menu contains the following menu commands:
Cut
Deletes the selected resource and places it onto a clipboard so it can be placed in a desired
location in the project tree.
If you cut a complex resource (for example, a Folder or a Generic Adapter Configuration), all
resources inside it are also deleted and placed onto the clipboard.
Copy
Places the selected resource onto a clipboard so a copy can be placed in a desired location
in the project tree.
If you copy a complex resource (for example, a Folder or a Generic Adapter Configuration), all
resources inside it are also placed onto the clipboard.
Extended Copy
Some adapters support extended copy. It copies things like schemas associated with an
adapter or adapter service so that paste includes items that the user didn't directly copy.
Paste
Places the resource currently on the clipboard into the selected location in the project tree.
Delete
Deletes the selected resource. You are prompted for deletion confirmation and whether
you wish to check broken links.
Export to Clipboard
Exports a resource and all referenced resources to the clipboard. This is similar to
exporting to a file, except that no file is used. It is useful, for example, if you are working
with an adapter resource that contains references to schema resources.
This menu command only works if you paste into a location in the project tree.

TIBCO Designer User’s Guide
Edit Menu | 133
Import from Clipboard
Imports a resource that was previously exported using Export to Clipboard.
Find
Displays the Find Resource dialog, which allows you to specify the resource name, category,
and type.
Find/Replace
Displays the Find/Replace Resource dialog, which allows you to find resources and replace
parts of their name.
If you click the b button, the find operation is case sensitive.
case-sensitive

TIBCO Designer User’s Guide
134 | Appendix A Menu Reference
Preferences
Allows you to set preferences for TIBCO Designer. Click Restore Default Settings at any
time to return to the default TIBCO Designer settings. The next tables explain the settings
under each tab.
Table 7 General Tab
Option Description
Display Options Allows you to determine what TIBCO Designer does if you
enter changes in a configuration panel, then select a resource
that would change the configuration panel display. You can set
the panel to:
• Ask user whether to save changes.
• Save changes without asking.
• Discard changes without asking.
User Directories Allows you to set a number of user options:
• User palette directory—Specifies the directory where
TIBCO Designer looks for custom palettes.
• User log directory—Specifies the directory where TIBCO
Designer stores log files.
• Maximum size of log file (in MB)
Startup Options Allows you to determine what TIBCO Designer does upon
startup:
• Load full project
• Open most recent project on startup
• Show save dialog for new project
• Sort folders on loading

TIBCO Designer User’s Guide
Edit Menu | 135
Table 8 View Tab
Option Description
Font Lets you choose the fonts used by TIBCO Designer.
UI Font type—Sets the display font used by TIBCO Designer.
Default is Arial-plain-12.
Script Font type—Font used for certain parts of the TIBCO
Designer display.
Layout Select a layout for the different panels in the TIBCO Designer
window. If you change the following options, you must reopen
your project to see the changed view.
Use tabs—If selected, the layout is as follows:
Use drop downs—If selected, the layout is as follows. Click the
arrow to display navigation choices:

TIBCO Designer User’s Guide
136 | Appendix A Menu Reference
Palettes Minimum Selector Size—Allows you to choose a minimum size
for the palette selectors displayed in the palette panel.
Initiate drag-n-drop through double-clicks—When selected,
double-clicking a resource in the palettes panel adds it to the
design panel. Drag-n-drop is also enabled. When cleared, only
drag-n-drop is enabled.
Table 8 View Tab
Option Description

TIBCO Designer User’s Guide
Edit Menu | 137
Table 9 References Tab
Option Description
Always ask me to perform
reference checks and updates.
Prompts you each time a reference check might be
needed, for example, if a resource is renamed,
deleted, and so on.
Perform automatic reference
checks and updates.
Performs automatic checks and warns you if a
broken reference results from the action to be
performed.
Never perform reference
checks.
Does not perform reference checks.
Table 10 File Aliases Tab
Option Description
File Aliases Lists the file aliases that are part of your project. File aliases
provide references to design-time libraries.
Import Click to import a file reference.
Export Click to export the selected aliases.
New Click to create an alias to a design-time library.
Delete Click to delete the selected aliases.
Table 11 Other Tab
Option Description
Browser path Path of the HTML Browser used to display online
Help.
Text editor path Not currently used.
Java editor path Used by the Java Code activity resource or any other
resources that use a Java editor.

TIBCO Designer User’s Guide
138 | Appendix A Menu Reference
Table 12 XML Editing Tab
Option Description
General Determinism checking—Enables determinism checking for
content models.
Default Encoding—The encoding of the documents
(Schemas, DTDs, XML Documents). For example, if UTF-8
is selected. all documents begin with:
<?xml version = "1.0" encoding = "utf-8"?>
Enable support logging—Displays the full error on screen
instead of displaying a message that there is an error.
XML Schema Editor Show notes panel by default—The notes panel provides an
area where you can add schema level documentation to your
schema as well as document individual declarations and
preview their source. See the XML Tools Palette chapter in
TIBCO Designer Palette Reference.
Show overview panel by default—The overview panel
allows you to control the creation of schemas that use
multiple modules, as well as explore the overall organization
of your schema. See the XML Tools Palette chapter in
TIBCO Designer Palette Reference.
XML Instance Editor Markup icons—Toggles on or off the blue markup icons to
the immediate left of items in the tag structure. You can later
change this setting using the TIBCO Designer GUI.
Content hints—Toggles on or off content hints that are
displayed at half-intensity ('grayed-out') in the edit area to
the right of certain elements or attributes. You can later
change this setting using the TIBCO Designer GUI.
Errors—Toggles whether the errors panel, which displays
errors found when validating a document against a schema,
is displayed by default. You can later change this setting
using the TIBCO Designer GUI.

TIBCO Designer User’s Guide
View Menu | 139
View Menu
For many resources, the View menu presents the following options, which apply to the
design panel.
Large Icons
Displays resources in the design panel as large icons.
Small Icons
Displays resources in the design panel as small icons.
List
Displays resources in the design panel as a list.
Details
Includes additional information about each icon in the design panel.
The menu only applies to the design panel.

TIBCO Designer User’s Guide
140 | Appendix A Menu Reference
Resources Menu
The Resources menu allows you to manipulate resources.
Add Resource
When you select this command, a submenu displays each available palette. For each
palette, a submenu displays each resource.
Validate Resource
Validates that resource. Each resource has its own validation behavior. Validate Project for
Deployment on page 128 lists the validation behavior of resources included with TIBCO
Designer by default.
To validate broken references to or from that resource you need to choose Project >
Validate Project for Deployment.
Inspect Resource
Allows you to view information about the selected resource in a separate small window.
Using this command is especially useful if you want to compare the settings in two
resources. For example, you could compare the Logging parameters set for two different
adapters.
Instead of using this menu, you can also drag and drop resources from the palette to the
design panel. Se eAdding Resources To Your Project on page 32.

TIBCO Designer User’s Guide
Resources Menu | 141
Edit Extended Properties
Allows you to edit extended properties of a resource.
Resources can have both attributes and extended properties. Attributes are displayed in the
configuration panel and can be set from there. Extended properties can be added to
resources, their attributes, and their properties.
When you choose Edit Extended Properties, the following dialog is displayed:
Use the buttons at the bottom of the dialog to add nodes, strings, or string references.
Refresh
TIBCO Designer does not change the display when a change is made to a file on disk in
another application, or when files are added to a folder after the folder was displayed.
Choose Refresh to redisplay the file/folder associated with the selected resource.
This menu item is not available for all resources.
If you add an extended property, it will be included inside its own <extendedProperties>
XML element. If that’s not what you want, consider editing the XML directly.
Extended properties are primarily included for backward compatibility. If at all possible,
design your project to use attributes instead.

TIBCO Designer User’s Guide
142 | Appendix A Menu Reference
Find References In
For a selected resource, displays all resources it references. For example, assume you’ve
defined a schema resource and reference it in the Class Reference field of an adapter’s
publisher service. When you choose Find References In for that adapter, the schema
resource is listed.
This menu item helps you avoid deleting a resource that still points to other resources.
Find References To
For a selected resource, displays all resources that reference that resource. For example,
assume you’ve defined a schema resource and reference it in the Class Reference field of an
adapter’s publisher service. When you choose Find References To for that schema
resource, the publisher service (and associated publisher) are listed.
This menu item helps you avoid deleting a resource that another resource points to.
View Library Conflicts
This option is enabled when you are using design-time libraries. If your local project
contains a resource that conflicts with a resource in the design-time library, use this menu
option to find it. You must first select the library that contains the conflicts. The library
displays the icon to indicate that it contains a resource that conflicts with another
resource.

TIBCO Designer User’s Guide
Palettes Menu | 143
Palettes Menu
Browse
Click to display the palette browser. See Using the Palette Browser on page 14 for
information about using it.
Activities, Adapters, General, Other
Palettes are grouped into one of the above headings. The menu option allows you to show
or hide a palette. If a check mark displays, the palette and its icons display in the palette
panel. If no check mark displays, the palette and its icons do not display in the palette
panel.
My Palettes
Allows you to manage user-defined palettes using the New Palette, Delete Palettes, and
Reload Palettes menu items. See Working With User Palettes on page 17 for more
information.
Options
Allows you to customize the display. Most submenus offers alternating choices.
• Hide Close Boxes/Show Close Boxes—By default, a close box in the right-most
corner of a palette allows you to close that palette. Select Hide Close Boxes to remove
it from the display.
Close box

TIBCO Designer User’s Guide
144 | Appendix A Menu Reference
• Hide Labels/Show Labels—By default, each resource in each palette includes a
label. If you select Hide Labels, the labels are removed.
• Show Palettes in New Window—Displays all palette in a separate window, enlarging
the project panel. To return the palettes to their old location, close the palette window.
• Switch Palette Modes—Alternates between palette mode and non-palette mode. See
Choosing Palette Mode or Non-palette Mode on page 16 for more information.
Show Labels Hide Labels

TIBCO Designer User’s Guide
Multi-User | 145
Multi-User
Add Resource to RCS
If you have created a project or added resources to a project, you can use Add Resource
to RCS to add the project or resource to the version control system.
Acquire - Check Out Resource
This menu item becomes available if you are using TIBCO Designer in conjunction with a
version control system. It allows you to check out a selected resource so you can then
make changes.
Acquire - Check Out Resource Following References
This option checks out the resource and all of the resources it refers to.
Release-Revert Resource
Use this menu command if you have checked out a resource and you do not wish to make
any changes to it (that is, you do not wish to check it in, but you do wish to release the
lock).
View RCS Info for Resource
Displays the revision control system information for the resource.
Check in Changes
Checks in any changes for the selected resource. This command works recursively.
Synchronize Project
Synchronizes the project with the project in the revision control system.
A resource that has been added is not yet checked in. Checking in is a separate step.

TIBCO Designer User’s Guide
146 | Appendix A Menu Reference
Tools Menu
Resource Tools
• Link Resource—Creates a link from one resource to another. You are prompted for the
Source and Target resource.
Links can also be created holding down Control-Shift and by dragging a resource into
a folder or another resource.
• Move Resource—Moves a resource. You are prompted for the resource name and its
now location. This may be useful for unusually large projects.
File Tools
Offers a variety of ways of changing file extensions and moving files. For example:
• Change File Extension For Resource—Allows you to change the file extension for a
selected resource. This is useful if you wish to change the extension of an adapter
resource to load it as a Generic Adapter Configuration resource.
A dialog displays the resource name and extension and allows you to specify the new
extension.
• Change File Extension For All Of Same Type—Allows you to change the file
extension for all resources of the same type as a selected resource.
• Copy A File From The Project—Makes a copy of a selected top-level resource and
saves it to the file of your choice. This is useful if you want to use that top-level
resource in another project.
• Copy A Directory From The Project—Makes a copy of a selected directory and saves
it to the location of your choice. This is useful if you want to use the resources in that
directory in another project.
Find Global Variable Usages
Displays a dialog where you can select a global variable and find each resource that uses
it. Click a found resource to display it in the configuration panel.

TIBCO Designer User’s Guide
Tools Menu | 147
Export As XML Schemas
Converts an AESchema file to an XML Schema file. You are prompted for the name of the
AESchema file you want to convert.
Trusted Certificates
Import into PEM Format. Prompts you for the location of a certificate and adds the
certificate in PEM format to the project. You need a certificate in PEM format to be part of
the project when you want to add the certificate to other resources, for example, to a
TIBCO Rendezvous Session you want to make secure.
Create Project EAR
Creates an Enterprise Archive for the current project. The archive includes an adapter
archive for each adapter and a process archive for each process that has a process starter.
See Chapter 6, Creating an Archive for Deployment, for information about working with
an Enterprise Archive.
Schema Importer
The schema import tool allows you to import resources into a TIBCO ActiveMatrix
BusinessWorks project. See TIBCO ActiveMatrix BusinessWorks Process Design Guide
for details.
Generate Web Service
Allows you to create web services using a process definition or WSDL file. See TIBCO
ActiveMatrix BusinessWorks Process Design Guide for details.
UDDI
Displays the WSIL and UDDI Registry Browser dialog. This dialog allows you to browse
web services or publish the details of your web service. See TIBCO ActiveMatrix
BusinessWorks Process Design Guide for details.
Java Code
Allows you to compile java code for each Java Code activity individually. See TIBCO
ActiveMatrix BusinessWorks Palette Reference for details.

TIBCO Designer User’s Guide
148 | Appendix A Menu Reference
Tester
Displays if TIBCO ActiveMatrix BusinessWorks is installed. Allows you to test a process
instance from TIBCO Designer. Only one test session can run at a time in the same
process instance.
Show Adapter Tester
Displays the Adapter Tester tool, which allows you to select an installed TIBCO Adapter
for which the configuration is currently available and perform testing.
See TIBCO Designer Palette Reference for more information on Adapter Tester.

TIBCO Designer User’s Guide
Window Menu | 149
Window Menu
Show Console
Displays the Console window, which shows informational as well as error messages, as, for
example, the following:
<Project> Window
If more than one project is open at the same time, TIBCO Designer displays each in a
separate window. For each window, a menu choice is added to the Window menu.
The information becomes more detailed if you run TIBCO Designer in debug mode. To do
so, choose the Administration tab in the startup panel and select Configure Runtime, then type -d
into the Command Line Argument field.

TIBCO Designer User’s Guide
150 | Appendix A Menu Reference
Help Menu
The Help menu lets you choose from the following options:
Designer Help
Displays this TIBCO Designer User’s Guide.
Tip of the Day
Displays a Tip of the Day that can help you become a more efficient TIBCO Designer user.
By default, a Tip of the Day is displayed each time you launch TIBCO Designer. You can
change that behavior by unselecting the checkbox in the tip of the day window.
Help For
Allows you to choose a palette for which you want help. As new palettes become available
in TIBCO Designer, they are added to this menu and the appropriate information becomes
available.
About
Displays the TIBCO Designer splash screen, which shows version information.
Runtime Environment
Displays TIBCO Designer runtime information. This information, which includes palette
name and version information and Java property and value information, can be useful for
debugging or during interaction with Technical Support.
Use the Export Runtime Settings command to create a file with all pertinent information.

TIBCO Designer User’s Guide
Right-Button Menus | 151
Right-Button Menus
The right-button menus on individual resources depend on the panel in which you select
the resource.
Project Panel
In addition to the cut, copy, delete, and rename commands, the following commands are
available:
What Is This
Displays online Help for this resource.
Cut, Copy, Paste, Delete, Rename
Standard functionality.
Inspect Resource
Displays a Resource Inspector window which allows you to view information in a single
location and also to easily compare two resources.
Move Resource
Moves the resource selected in the project panel into the resource selected in the design
panel. This is useful, for example, when you want to move a resource into a different
folder.
Link Resource
Creates a reference to the resource selected in the project panel and adds it to the resource
displayed in the design panel.
New Folder
Creates a new folder. Only available if you can add a folder to the current resource,
otherwise grayed out.
Moving a resource moves the selected, potentially configured resource. This differs from
dragging a resource from the palette panel into the design panel, where an instance of the
resource is created.
TIBCO Designer User’s Guide
152 | Appendix A Menu Reference
Add Resource
When you select this command, a submenu displays each available palette. For each
palette, a submenu displays each resource.
Acquire-Check out Resource
Used in conjunction with a version control system. See Chapter 3 on page 41.
Add Resource to RCS
If you have created a project or added resources to a project, you can use Add Resource
to RCS to add the project or resource to the version control system.
Release-Revert Resource
Use this menu command if you have checked out a resource and you do not wish to make
any changes to it (that is, you do not wish to check it in, but you do wish to release the
lock).
View RCS Info for Resource
Displays the revision control system information for the resource.
Expand All / Collapse All
Makes all lower-level resources visible, or collapses the tree to show only top-level
resources.
Toggle Custom Icon Support
If you select this menu item, a field for a custom icon reference becomes available for
each folder resource.
Instead of using this menu, you can also drag and drop resources from the palette to the
design panel.
A resource that has been added is not yet checked in. Checking in is a separate step.

TIBCO Designer User’s Guide
Right-Button Menus | 153
Palette Panel
The right-button menu of the palette panel has these options:
Add This To The Project
Adds the selected resource to the project. This is equivalent to dragging the resource into
the design panel.
What Is This
Displays online Help for this resource.
Show Palettes in New Window
Displays the palette panel in its own window. To make the panel part of the main window,
close the separate window.

TIBCO Designer User’s Guide
154 | Appendix A Menu Reference

TIBCO Designer User’s Guide
| 155
Appendix B Toolbar Icons Reference
The icons in the toolbar let you quickly perform frequent activities. This chapter lists each
icon and explains its functionality.
Topics
• Project Icons, page 156
• Edit Icons, page 157
• Palette Icons, page 158
• Selection Icons, page 159
• Window Title Bar icons, page 161
Available tool bar icons depend on a number of circumstances including the currently
selected resource and whether you’re in test mode or not. If one of the documented
resources is not available for you, it may belongs to a different product than the one you
installed or to a different resource than the one currently selected and you can ignore it.

TIBCO Designer User’s Guide
156 | Appendix B Toolbar Icons Reference
Project Icons
New Empty Project icon — Creates a new project, which is displayed in a new
TIBCO Designer window with a Save dialog. See Creating Projects on page 26.
Open icon — Displays the Open Project dialog, which lets you open a previously
saved project. See Opening and Reopening Projects on page 31
Save icon — Displays the Save Project dialog, which lets you save your project in
the format you wish. Saving Projects on page 29

TIBCO Designer User’s Guide
Edit Icons | 157
Edit Icons
Cut icon — Removes the selected item from the current project and places it on
the clipboard for pasting.
Copy icon — Copies the selected item onto the clipboard for pasting.
Paste icon — Pastes the item currently on the clipboard into the current location.
The item may keep its name, depending on other resources in the target.
Delete icon — Prompts whether you want to delete the selected item and deletes it
if you select Yes. The item is not placed on the clipboard.

TIBCO Designer User’s Guide
158 | Appendix B Toolbar Icons Reference
Palette Icons
Switch Palette Mode icon — Allows you to switch between palette mode and category
mode in the palette panel. See Choosing Palette Mode or Non-palette Mode on
page 16 for more information.
Palette Browser icon — Displays the palette browser dialog where you can select the
palettes to display in the Palettes panel.
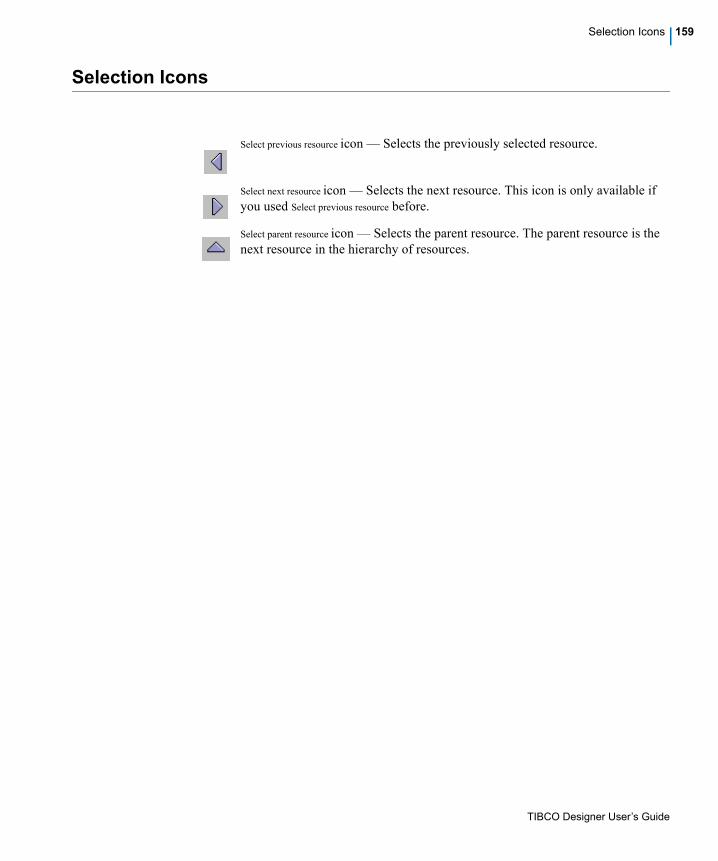
TIBCO Designer User’s Guide
Selection Icons | 159
Selection Icons
Select previous resource icon — Selects the previously selected resource.
Select next resource icon — Selects the next resource. This icon is only available if
you used Select previous resource before.
Select parent resource icon — Selects the parent resource. The parent resource is the
next resource in the hierarchy of resources.

TIBCO Designer User’s Guide
160 | Appendix B Toolbar Icons Reference
Verification Icons
Validate resource icon — Validates the selected resource and displays any issues,
such as references to missing resources.
Vaidate Project For Deployment icon — Validates each resource in the project and
displays any issues. For an overview of some issues, see Validate Project for
Deployment on page 128.

TIBCO Designer User’s Guide
Window Title Bar icons | 161
Window Title Bar icons
The title bar of the project panel and the configuration panel displays the following icons
if appropriate:
The Help icon displays online help for the currently selected resource. The
appropriate document (or documentation set) is displayed, with the page
discussing the resource selected.
The View as image icon (design panel only) takes a snapshot of the current project
panel and displays it in a separate window.
The Expand/Resize to Normal icon (design panel and configuration panel) expands the
design panel so it takes up the whole window. Select it again to return to
multi-panel view.
The Minimize/Resize to Normal icon (configuration panel only) minimizes the
configuration panel. The icon is displayed at the bottom of the enlarged design
panel. If you click again, the configuration panel is resized to normal

TIBCO Designer User’s Guide
162 | Appendix B Toolbar Icons Reference

TIBCO Designer User’s Guide
| 163
Appendix C Predefined Global Variables
The following table lists and explains the predefined global variables. Some global
variables are automatically used within the system when an adapter configuration is
defined.
Variable Description
Deployment Defaults to the TIBCO Designer project name. This value can be
any string value. This global variable is used by the system to
partially define the subject name defined for a service.
This variable is read only.
DirLedger Used by the system when defining the path name of the TIBCO
Rendezvous certified messaging ledger file. The default is the
root installation directory.
DirTrace Used by the system to partially create the path name for log file
used by the adapter. The default is the root installation directory.
Domain The default value for file-based local projects is MyDomain. The
value for server-based projects is the domain to which the
project was saved.
This variable is read only.
HawkEnabled Used by the system to indicate whether TIBCO Hawk is used to
monitor the adapter. True indicates that a Hawk microagent is
defined for the adapter. False indicates the microagent is not to
be used. Default is False.
JmsProviderUrl A JMS provider URL tells applications where the JMS daemon
is located. Setting this value mostly makes sense in early stages
of a project, when only one JMS daemon is used.
JmsSslProviderUrl A JMS provider URL tells applications where the JMS SSL
daemon is located.
RemoteRvDaemon Used by the system to identify the TIBCO Rendezvous routing
daemon. See TIBCO Rendezvous Administration for details
about specifying the routing daemon name.

TIBCO Designer User’s Guide
164 | Appendix C Predefined Global Variables
RvDaemon Used by the system to identify the TIBCO Rendezvous daemon
parameter. The parameter instructs the transport object about
how and where to find the Rendezvous daemon and establish
communication. The default value is 7500, which is the default
value used by the Rendezvous daemon. See TIBCO Rendezvous
Concepts for details about specifying the daemon parameter.
RvNetwork Used by the system to identify the TIBCO Rendezvous network
parameter. Every network transport communicates with other
transports over a single network interface. On computers with
more than one network interface, the network parameter
instructs the TIBCO Rendezvous daemon to use a particular
network for all outbound messages from this transport. See
TIBCO Rendezvous Concepts for details about specifying the
network parameter.
RvService Used by the system to identify the TIBCO Rendezvous service
parameter. The Rendezvous daemon divides the network into
logical partitions. Each transport communicates on a single
service; a transport can communicate only with other transports
on the same service. See TIBCO Rendezvous Concepts for
details about specifying the service parameter.
Default is 7500
RvaHost Used by the system to identify the computer on which the
TIBCO Rendezvous agent runs. See TIBCO Rendezvous
Administration for details about specifying the rva parameters.
RvaPort Used by the system to identify the TIBCO Rendezvous agent
TCP port where the agent listens for client connection requests.
See TIBCO Rendezvous Administration for details about
specifying the rva parameters.
Defaults to 7501.
TIBHawkDaemon Used by the system to identify the TIBCO Hawk daemon
parameter. See the TIBCO Hawk Installation and Configuration
manual for details about this parameter.
TIBHawkNetwork Used by the system to identify the TIBCO Hawk network
parameter. See the TIBCO Hawk Installation and Configuration
manual for details about this parameter.
Variable Description
TIBCO Designer User’s Guide
Predefined Global Variables | 165
TIBHawkService Used by the system to identify the TIBCO service parameter.
See the TIBCO Hawk Installation and Configuration manual for
details about this parameter.
Variable Description

TIBCO Designer User’s Guide
166 | Appendix C Predefined Global Variables

TIBCO Designer User’s Guide
| 167
Appendix D Working With Legacy Projects
This chapter discusses working with legacy projects, that is, file repository or server
repository projects that were used in earlier versions of TIBCO Designer.
Topics
• Introduction, page 168
• Importing a Project, page 169
• Exporting a Project, page 170
• Exporting Resources, page 173
• Importing Resources, page 175

TIBCO Designer User’s Guide
168 | Appendix D Working With Legacy Projects
Introduction
Earlier versions of TIBCO Designer offered three options for saving projects:
• Multi-file Project—The format currently used for TIBCO Designer projects. This
format uses one file for each top-level resource. The top-level resource may contain
other resources. For example, each adapter configuration is represented by one file,
which includes the services inside the file.
Multi-file projects are well suited for development because file sharing and using a
version control system is supported, and because loading them at design-time is
usually faster.
• File Repository—A legacy format that saved the project as a single .dat file.
• Server Repository—A single-file project (.dat file) managed by an Administration
Server.
If you are using TIBCO Administrator for security in conjunction with server-based
single-file projects, the user saving the project must have write permission to add the
project to the server.
Using multi-file projects is recommended. In conjunction with a version-control system,
multi-file projects offer the benefit of easy collaboration by several developers and
backups as needed.
Because many TIBCO developers still work with projects in .dat format, however, TIBCO
Designer includes the following facilities:
• Use the startup panel buttons to convert file to .dat and .dat to file.
• Import a file repository or server repository into an existing project. See Importing a
Project on page 169.
• Import resources from file repository or server repository into an existing project. See
Importing Resources on page 175.
• Export a project as a file repository or server repository. See Exporting Resources on
page 173
• Export resources from a project. See Exporting Resources on page 173.

TIBCO Designer User’s Guide
Importing a Project | 169
Importing a Project
You can import a project using one of the legacy formats into the current project. When
you import a project into another project, you add all the resources in the imported project
into the current project.
To Import a Project
1. Choose Project>Import Full Project.
2. Choose the appropriate tab in the Import Project window and provide the information:
3. Click OK.
TIBCO Designer converts the project to multi-file project, then imports the multi-file
project.
Importing projects can be useful because it bypasses the export step when you want to
combine projects.
Local Repository Import the project from a single repository .dat file.
TIBCO Designer displays the Import Options dialog. See Importing
Resources on page 175 for a description of options.
Server Repository Import the project from a server repository (.dat file managed by
a TIBCO Administration Server).
See Table 13, Specifying Protocol Information, on page 171.
ZIP Archive Import the project from a ZIP file.
Importing projects is mostly appropriate for legacy projects. For newly created projects,
use version control instead to share different project components with other developers.

TIBCO Designer User’s Guide
170 | Appendix D Working With Legacy Projects
Exporting a Project
To Export a Project
1. Choose Project>Export Full Project.
2. In the Export Project window choose from the following tabs and provide the appropriate
information:
3. Click OK.
Exporting a Server Repository Project
To Export a Server Repository Project
1. Choose Project > Export Full Project.
2. Select the Server Repository tab.
3. Choose the desired protocol, specify the protocol information (see Specifying
Protocol Information), then click OK.
When exporting a project as a Local Repository, do not use the name vcrepo in the Project
Name field. This name is reserved and must not be used to name a project. If the name is
used, the project is exported to the directory specified but the files in the directory are
deleted and no warning messaging is displayed before deletion.
Local Repository Export the project to a single repository .dat file. This
format can be convenient if you want to share a single file
with other users. It is also included for backward
compatibility: You can only run an adapter if it has been
saved as a .dat file.
Server Repository Export the project as a server repository (.dat file managed
by a Administration Server). If the repository already
exists, you are prompted to overwrite it.
See Exporting a Server Repository Project.
ZIP Archive Save as read-only ZIP file.
If the label for a field in the dialog is bold, the field must be specified. Other fields are
optional.

TIBCO Designer User’s Guide
Exporting a Project | 171
The table below lists the protocols and the fields that become available.
Table 13 Specifying Protocol Information
RV
Domain TIBCO administration domain to which this project should be
saved.
Project Name Name of the project. Click Load Project List to make a
pull-down list available.
Daemon TIBCO Rendezvous daemon used to communicate with the
TIBCO Administration Server.
Network TIBCO Rendezvous network to be used. Use the default unless
you are an experienced TIBCO Rendezvous user.
Service TIBCO Rendezvous service to be used. Use the default unless
you are an experienced TIBCO Rendezvous user.
Timeout (s) Amount of time (in seconds) available to connect with the
TIBCO Administration Server before a timeout occurs.
Request Subject Prefix This string is used to preferentially search for the project with a
subgroup of several load-balanced Administration Servers.
The string is used to give preference to a group of load balancing
servers over the rest of load balancing servers. Each repository
client and server participating in load balancing may have
optional regional information. If this optional property is set,
servers in load-balancing mode listen on the extra read subject
that incorporates this region. If an optional region subject is set
for a client, the client directs read operations to that subject first.
If no server is available, then the client retries using the regular
(non-prefixed) read subject.
RVA
Domain TIBCO administration domain to which this project should be
saved.
Project Name Name of the project. Click Load Project List to make a
pull-down list available.
Host IP Address IP address of the host used by the TIBCO Rendezvous Agent.

TIBCO Designer User’s Guide
172 | Appendix D Working With Legacy Projects
Port Port used by the TIBCO Rendezvous Agent.
Timeout (s) Amount of time available to connect with the TIBCO
Administration Server before a timeout occurs.
HTTP
Host IP Address Host on which the TIBCO Administration Server is located.
Path Defaults to administrator/repo, the default location where project
repositories are stored.
If you changed this default location, you must change it in this
field as well.
Project Name Name of the project to save.
Port Port for connecting with the TIBCO Administration Server.
Timeout (s) Amount of time available to connect with the TIBCO
Administration Server before a timeout occurs.
HTTP-S
Host IP Address Host on which the TIBCO Administration Server is located.
Path Defaults to administrator/repo, the default location where project
repositories are stored.
If you changed this default location, you must change it in this
field as well.
Project Name Name of the project to save.
Properties File The properties file contains information about parameters used
to make the HTTP-S connection. Examples would be client
certificate file location, keystore password, and so forth.
Port Port for connecting with the TIBCO Administration Server.
Timeout (s) Amount of time available to connect with the TIBCO
Administration Server before a timeout occurs.
Table 13 Specifying Protocol Information

TIBCO Designer User’s Guide
Exporting Resources | 173
Exporting Resources
You can export a resource from a project and import that resource into a different project.
This functionality is useful if you wish to share resources among people working on a
project.
To Perform a Simple Export
1. Select the resource in the project tree
2. Choose Project > Export Resources to File.
3. Specify the location. Resources are exported to a zip file.
To Perform a Customized Export
1. Select a resource in the project tree.
2. Choose Project > Export Resources to File.
3. Specify the location.
4. In the Export Resources dialog
a. Click Browse to select a location.
b. Click the Customize Export checkbox.
c. Click OK.
TIBCO Designer displays a dialog that allows you to add or remove dependencies.
TIBCO Designer checks for dependent resources when the resource is imported.
Using a multi-file project is usually a better approach to project management than
exporting and importing resources.

TIBCO Designer User’s Guide
174 | Appendix D Working With Legacy Projects
• Click the appropriate buttons to customize the export:
— Remove an existing dependency of the current resource if you expect the
dependent resource will not be required upon reload. For example, the resource
being exported above is dependent on the MyBusinessDocument resource. If you
remove that dependency, the resource is not expected when the file is imported. If
you leave that dependency, the resource is expected.
— Add a dependency if you know the current resource needs to be used in
conjunction with another currently loaded resource and you want for TIBCO
Designer to check that resource.
— Click All to highlight and select all dependencies. Then you can Add or Remove
all the dependencies.
5. Click OK.
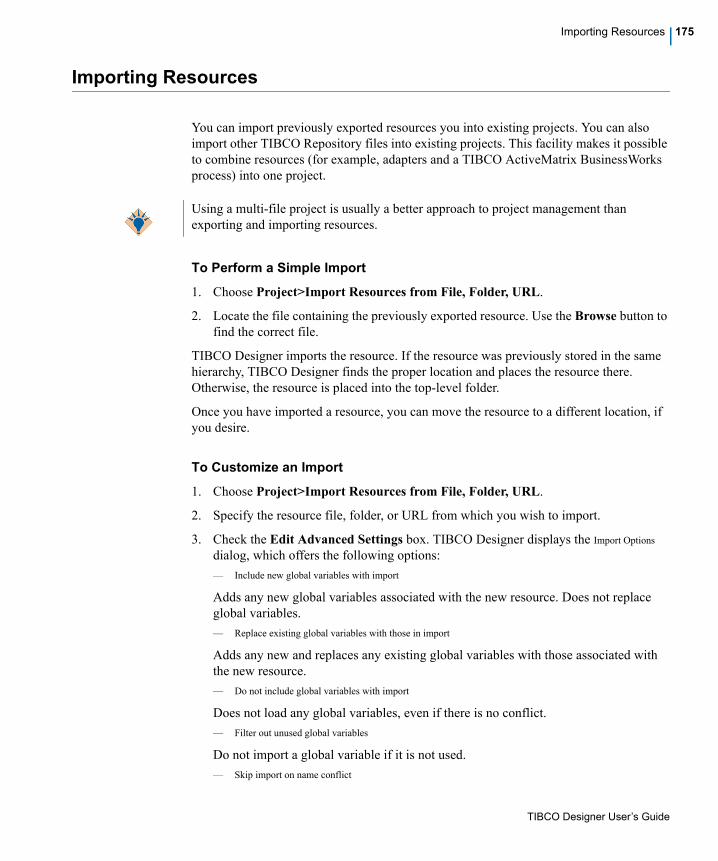
TIBCO Designer User’s Guide
Importing Resources | 175
Importing Resources
You can import previously exported resources you into existing projects. You can also
import other TIBCO Repository files into existing projects. This facility makes it possible
to combine resources (for example, adapters and a TIBCO ActiveMatrix BusinessWorks
process) into one project.
To Perform a Simple Import
1. Choose Project>Import Resources from File, Folder, URL.
2. Locate the file containing the previously exported resource. Use the Browse button to
find the correct file.
TIBCO Designer imports the resource. If the resource was previously stored in the same
hierarchy, TIBCO Designer finds the proper location and places the resource there.
Otherwise, the resource is placed into the top-level folder.
Once you have imported a resource, you can move the resource to a different location, if
you desire.
To Customize an Import
1. Choose Project>Import Resources from File, Folder, URL.
2. Specify the resource file, folder, or URL from which you wish to import.
3. Check the Edit Advanced Settings box. TIBCO Designer displays the Import Options
dialog, which offers the following options:
— Include new global variables with import
Adds any new global variables associated with the new resource. Does not replace
global variables.
— Replace existing global variables with those in import
Adds any new and replaces any existing global variables with those associated with
the new resource.
— Do not include global variables with import
Does not load any global variables, even if there is no conflict.
— Filter out unused global variables
Do not import a global variable if it is not used.
— Skip import on name conflict
Using a multi-file project is usually a better approach to project management than
exporting and importing resources.

TIBCO Designer User’s Guide
176 | Appendix D Working With Legacy Projects
If a resource with the same name exists at the current location, do not import the
resource.
— Overwrite on name conflict
If a resource with the same name exists at the current location, overwrites the existing
resource.
— Try rename in case of name conflict
If while importing a resource a situation arises where at a given level, a resource exists
that has the same name as the resource that must be imported into that level, then the
resource getting imported will be renamed (appropriately) to avoid a name conflict.
4. Make the appropriate selections in the Options tab.
5. Click the Resources tab if you want to exclude any resources that are part of the resource
file you want to import. Cleared items are not imported.
6. Click Apply.
TIBCO Designer imports the selected resource using the specified settings.

TIBCO Designer User’s Guide
| 187
Index
A
Accessing
Startup Panel 39
Accessing Documentation 21
Acquire
Check Out Resource 154
Check out Resource 161
Check Out Resource Following References 154
Acquiring
Resource 60
Adding
a Generic Adapter Configuration Archive 126
a Process Archive 129
a Resource to Your Project 32
Global Variable or Global Variable Group 36
Resource 149, 161
Resource to RCS 154, 161
Resources to a Project 32
C
changes from the previous release of TIBCO Designer
User’s Guide xiv
Changing
a Shared Archive 131
Check in Changes 154
Checking In and Acquiring Resources 56
Choosing
Palette Mode or Non-palette Mode 16
Panel Layout 19
Three-panel View 20
ClearCase 65
Configuration Panel 12
Creating
a ClearCase Project 65
a PVCS Project 70
a User Palette 17
Adapter Archive 126
an AliasLibrary 95
an Enterprise Archive 124
ClearCase Project 65
Enterprise Archive 124
LibraryBuilder Resource 98
Process Archive 129
Project EAR 156
Projects 26
PVCS Project 70
customer support xix
Customizing an Import 184
Customizing the Display 19
CVS 67
D
Deleting
a Design-time Library 102
a Project 39
a User Palette 18
Global Variable 38
Projects 39
RCS Projects 43
XML Canon Projects 63
Design Panel 11
Designer Help 159
Displaying Palettes in a Separate Window 17
Documentation xv
Documentation, Other TIBCO Product xv
Documentation, TIBCO Designer xv

TIBCO Designer User’s Guide
188 | Index
E
Edit Menu 141
Editing
Extended Properties 150
Icons 165
Enterprise Archive File Size 122
ENV_NAME xvii
Exporting
a Project 178
a Server Repository Project 178
Alias 104
As XML Schemas 156
Clipboard 142
Customized 182
Full Project 138
Project 178
Resources 182
Resources to File 138
Server Repository Project 178
Simple 182
Extended Copy 141
F
Features 55
File Sharing 45
File Tools 155
Find and Replace 142
Finding
Global Variable Usages 155
References In 151
References To 151
G
Generate HTML Report 139
Global Variables
Attributes 37
Display 10
Editor 35
H
Help Menu 159
Hiding Design-time Libraries 102, 102
Hiding Library Resources 137
Hiding Palettes 15
HTTP 180
HTTP-S 180
I
Icons Used by RCS Projects 43
Importing
a Project 177
a Project Into a CVS Repository 68
an Alias 104
from Clipboard 142
Full Project 137
Resources 184
Resources from File, Folder, URL 138
Importing a Project 177, 184
Inspect Resource 149, 160
Installing CVS on UNIX 67
L
Link Resource 160
Load Full Project 137
Loading a User Palette 18
M
Making Changes to a Shared Archive 131
Managing Resource Conflicts in Design-time Libraries 105
Microsoft Visual SourceSafe 48
Modifying
a ClearCase Project 65
a PVCS Project 70
ClearCase Project 65

TIBCO Designer User’s Guide
Index | 189
Move Resource 160
Multi-User 154
My Palettes 152
O
Opening a project stored on XML Canon 60
Opening Projects 31
Overview of Projects 24
P
Palette
Icons 166
Menu 152
Panel 11, 162
Perforce 51
Preparing
for File Sharing on Microsoft Windows 45
for File Sharing on UNIX 45
Print Setup 138
Project
Display 9
Icons 164
Menu 134
Panel 9, 160
Structure 24
Templates 25
PVCS Version Manager 70
R
Refresh 151
Release-Revert Resource 154, 161
Reopen 134
Reopening Projects 31
Resource Tools 155
Resources 10
Resources Menu 149
Reverting Changes 61
Right-Button Menus 160
Runtime Environment 159
RV 179
RVA 179
S
Save As 136
JPEG 139
Template 136
Saving
a Project 30
a Project as a Template 30
Projects 29
Selection Icons 167
Show Adapter Tester 157
Show Console 158
Show Palettes in New Window 162
Showing Design-time Libraries 102, 102
Showing Library Resources 137
Showing Palettes 15
Small Icons 148
Starting
TIBCO Designer 3
Starting TIBCO Designer 3
Startup Options 3
support, contacting xix
Switching Palette Modes 17
Synchronizing a Project 154
T
technical support xix
Tester 157
TIBCO Designer Administration 6
TIBCO Designer Interface Overview 8
TIBCO_HOME xvii
Tips and Tricks 63
for Using Version Control Systems 91
for Working With Projects 40

TIBCO Designer User’s Guide
190 | Index
Toggle Custom Icon Support 161
Tools Menu 155
Trusted Certificates 156
U
Using
a Filter 37
a Version Control System 25
File Sharing 45
Microsoft Visual SourceSafe 48
Perforce 52
the Palette Browser 14
V
Validating
a Resource 27
All Resources 27
Project for Deployment 136
Projects 27
Resource 149
Verification Icons 168
View Library Conflicts 151
View Menu 148
Viewing
RCS Info for Resource 154, 161
Revision Control Information 62
Visual SourceSafe Setup 48
W
Window Title Bar icons 169
Working With
CVS 67
Global Variables 35
Palettes 13
User Palettes 17
X
XML Canon 55