Embed Size (px)
Citation preview

5.5 VI Web Client User Guide

Page 2 | © 2014 Video Insight Inc.
5.5 VI Web Client
The web client is a free thin client that allows you to access live and recorded video from any web
browser. There is an optional Active X control that can be used when viewing the Web Client in Internet
Explorer. The Web Client requires IIS to be installed on the IP Server machine. For details on configuring
the Web Client, please see the Administrative Guide.
Logging In
Access your Web Client using <SERVERIP>/videoinsight or the URL provided by your System
Administrator in the browser of your choice.
If security is enabled, you will be asked to enter your User Name and Password provided by your System
Administrator.
If Security is not enabled, then the Web Client will go straight into the Live View page.
Page 3 | © 2014 Video Insight Inc.
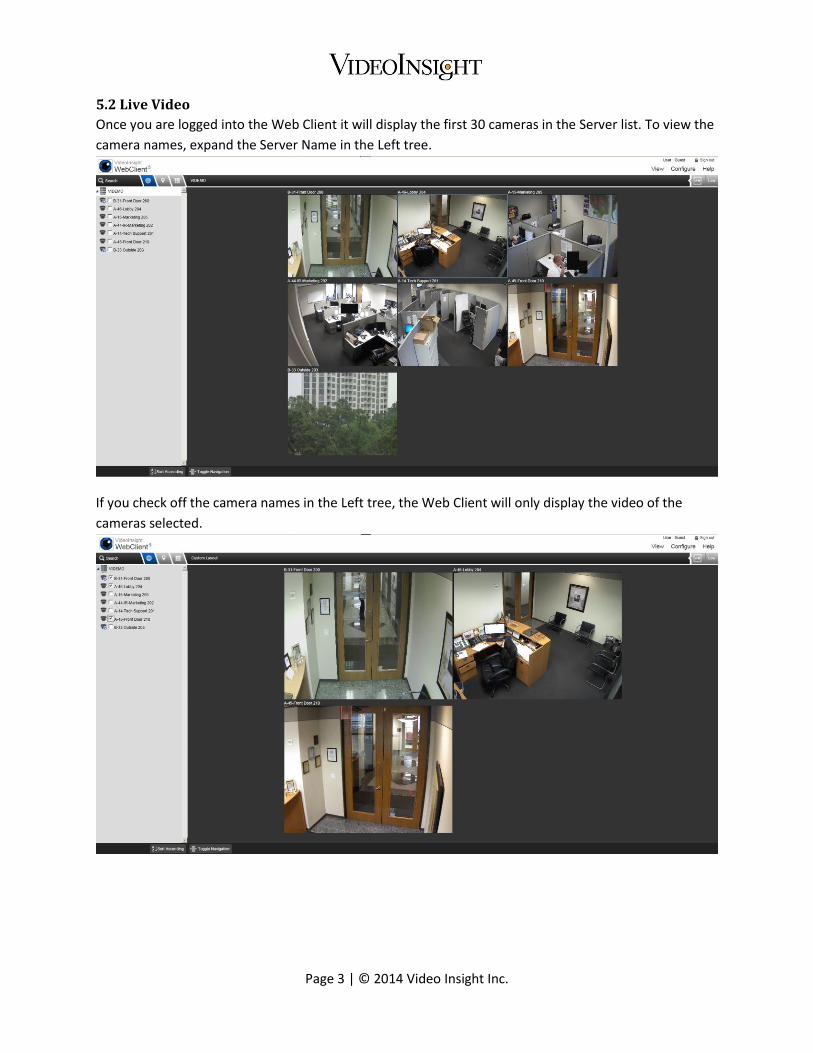
5.2 Live Video
Once you are logged into the Web Client it will display the first 30 cameras in the Server list. To view the
camera names, expand the Server Name in the Left tree.
If you check off the camera names in the Left tree, the Web Client will only display the video of the
cameras selected.

Page 4 | © 2014 Video Insight Inc.
To view a single camera click on the live image of the camera or click on the camera name in the Left
tree, the image from the camera you selected will “pop up” over the other cameras in the layout.
From this view you can perform a digital zoom, move the camera if it is a PTZ, take a snapshot from the
live video, view the video in its true aspect ratio, or view recorded video.
To perform a digital zoom, select the Digital Zoom button (third icon from the left on the toolbar) and
then click and drag from left to right in your area of interest.
Page 5 | © 2014 Video Insight Inc.
You can take a snapshot of the zoomed in image, but unlike the Monitor Station, you cannot move
around in the zoomed in image. To view the full image once again, click the Reset button.
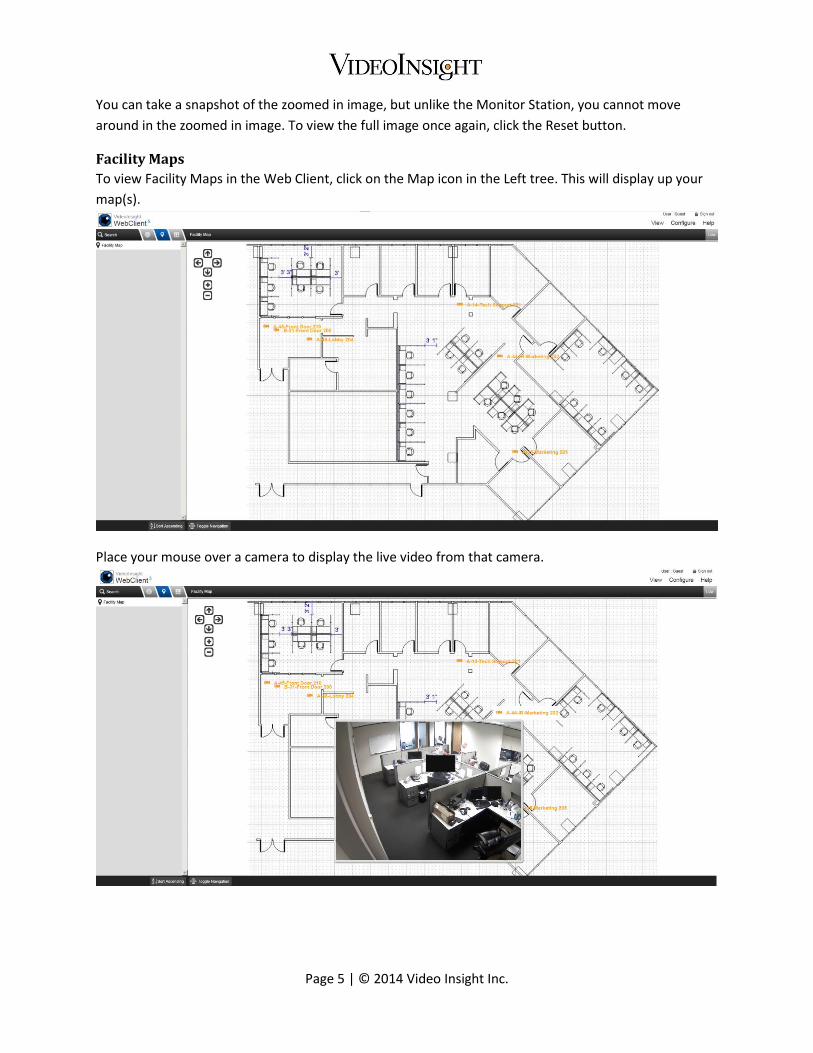
Facility Maps
To view Facility Maps in the Web Client, click on the Map icon in the Left tree. This will display up your
map(s).
Place your mouse over a camera to display the live video from that camera.
Page 6 | © 2014 Video Insight Inc.
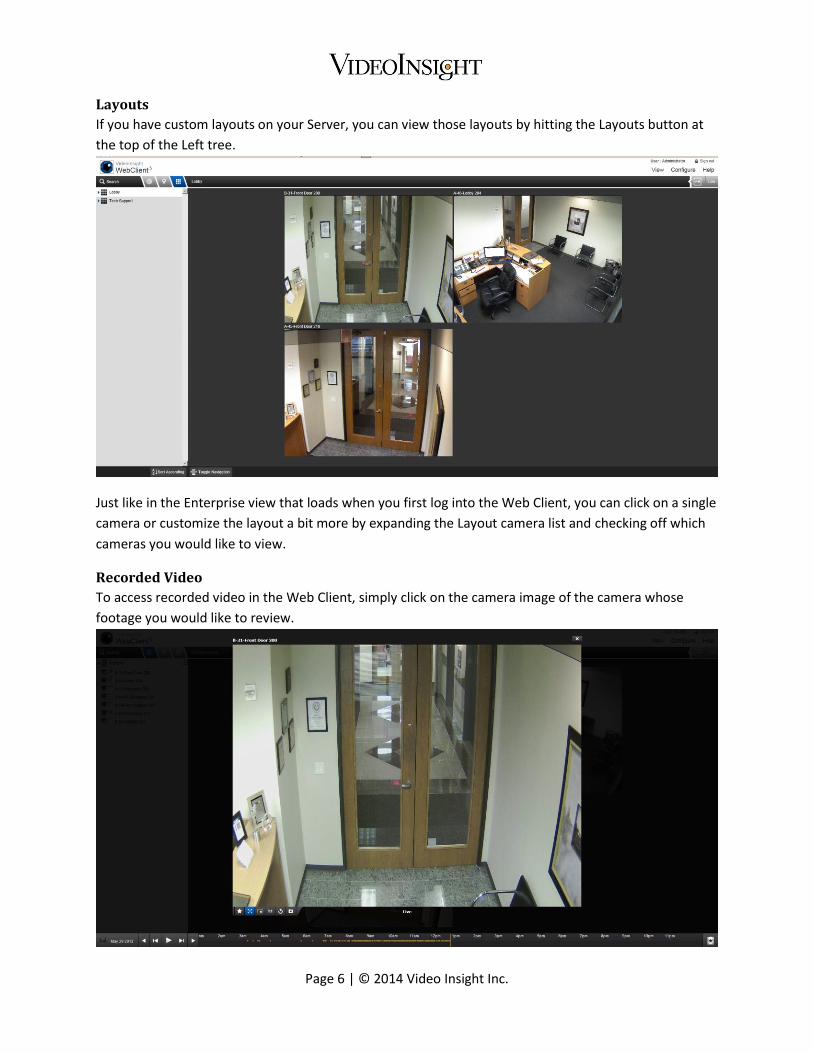
Layouts
If you have custom layouts on your Server, you can view those layouts by hitting the Layouts button at
the top of the Left tree.
Just like in the Enterprise view that loads when you first log into the Web Client, you can click on a single
camera or customize the layout a bit more by expanding the Layout camera list and checking off which
cameras you would like to view.
Recorded Video
To access recorded video in the Web Client, simply click on the camera image of the camera whose
footage you would like to review.

Page 7 | © 2014 Video Insight Inc.
The timeline across the bottom of the image can be used to review the footage recorded for that day.
Drag your mouse along the timeline to select the time you would like to view. The Web Client will load
the recorded video file for that time and start playing it back.
To view recorded video from previous days, click on the date in the lower left hand corner of the image
to bring up a calendar.
Areas that are shaded orange contain recorded video.
Areas that are shaded white do not have any playable recorded footage.

Page 8 | © 2014 Video Insight Inc.
To create a clip, click on the film button at the end of the Timeline, this will pull up the clip/time
selector.
Select the time range you want to download and click the download button.

Page 9 | © 2014 Video Insight Inc.
You will see a progress bar to the right of the recorded video. Once the download is complete, you will
be asked if you would like to Open or Save the video. Choose the appropriate action.
Unlike the Monitor Station, this video is stored in the compression the camera is recording in, so if the
camera is recording H.264 video, then the .avi will require an H.264 codec to play. If you are unable to
playback the clips saved through the Web Client, please see your System Administrator to obtain the
codecs needed for your cameras.
High Speed Mode
High Speed Mode Web Client utilizes the Active X control for Video Insight and requires Internet
Explorer to run. The benefits to using High Speed Mode are that it gives you the exact frame rate,
resolution and compression the camera is streaming to the Server. After the Active X control is loaded,
the Web Client functions the exact same. In High Speed mode you can also DPTZ around live and
recorded video when using the Digital Zoom function of the Web Client. To start using the High Speed
mode, click the Speed button on the top right area of your screen. You will be prompted to download
an ActiveX tool to install. This action usually requires Administrator privileges.