Embed Size (px)
Citation preview
1 Radar calibration at first installation At first installation is necessary to properly calibrate the radar. This includes:
• Heading Line • Transmission Trigger Delay • Antenna Parking Position (only MDS 9 and 10) • Sector transmission off (only MDS 9 and 10)
1.1 Transmission Trigger Delay Tuning the transmission Trigger Delay allows making accurate distance measurement. In practice, you need to align the start of the sweep with the leading edge of the transmission pulse. IMPORTANT: The unit comes with a default tuning value already setup by the factory but to obtain maximum precision you should finely adjust this value. Use the following procedure
• Enter the Transmission Trigger Delay page. Since the STC is automatically turned off when entering this page, the screen appear completely covered with clutter, this is a mandatory condition to allow properly setting the TTD. The screen should appear as follows:

• Set MBS to 0. The black spot in the radar origin will disappear.
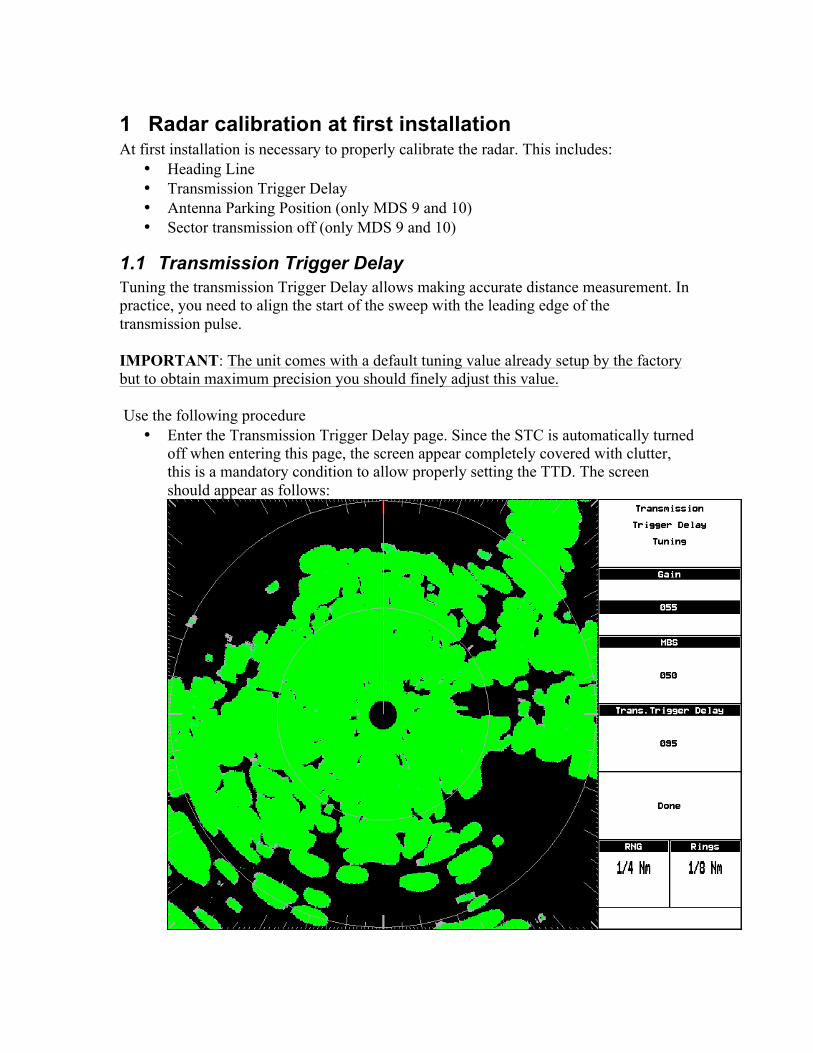
• Slowly decrease the GAIN value until the clutter clears out and you can clearly distinguish a round spot in the radar origin:
• If the Transmission Trigger Delay is properly tuned the spot in the radar origin
should appear as in the picture above. In any case to be sure your TTD is properly tuned try to decrease the Transmission Trigger Delay until a hole start forming in
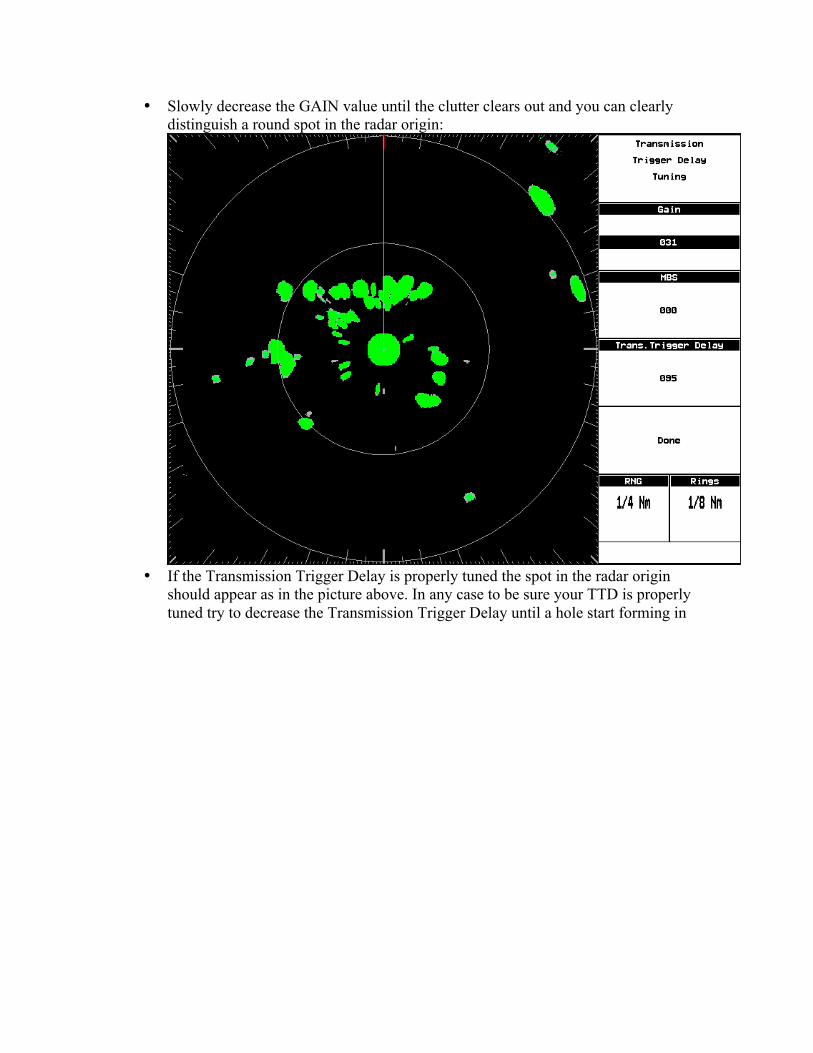
the center of the round spot:
• Now increase the TTD until the hole closes (not more than just the value to make
it close). The increase rate should be very slow: just increase by a single step at the time and wait until you see the effect on the screen. When the hole in the

center of the spot closes you have reached the optimal TTD setting.
• The green spot in the radar origin is the transmission pulse itself. Targets within such range are not detectable because their echoes are completely overwritten by the radar still transmitting. Such spot is called Main Bang. To remove it from the screen it is necessary to properly set the MBS (Main Bang Suppression) control. To do this, increase slowly the MBS. The spot is progressively deleted from the inside toward the
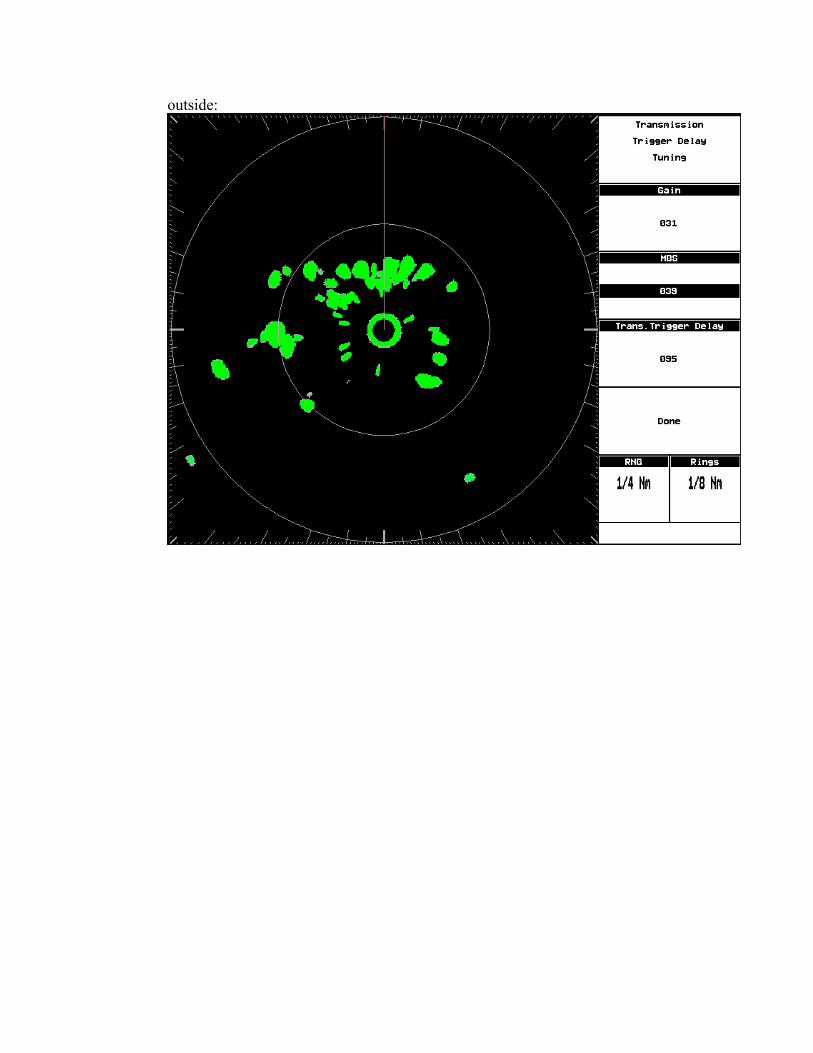
outside:
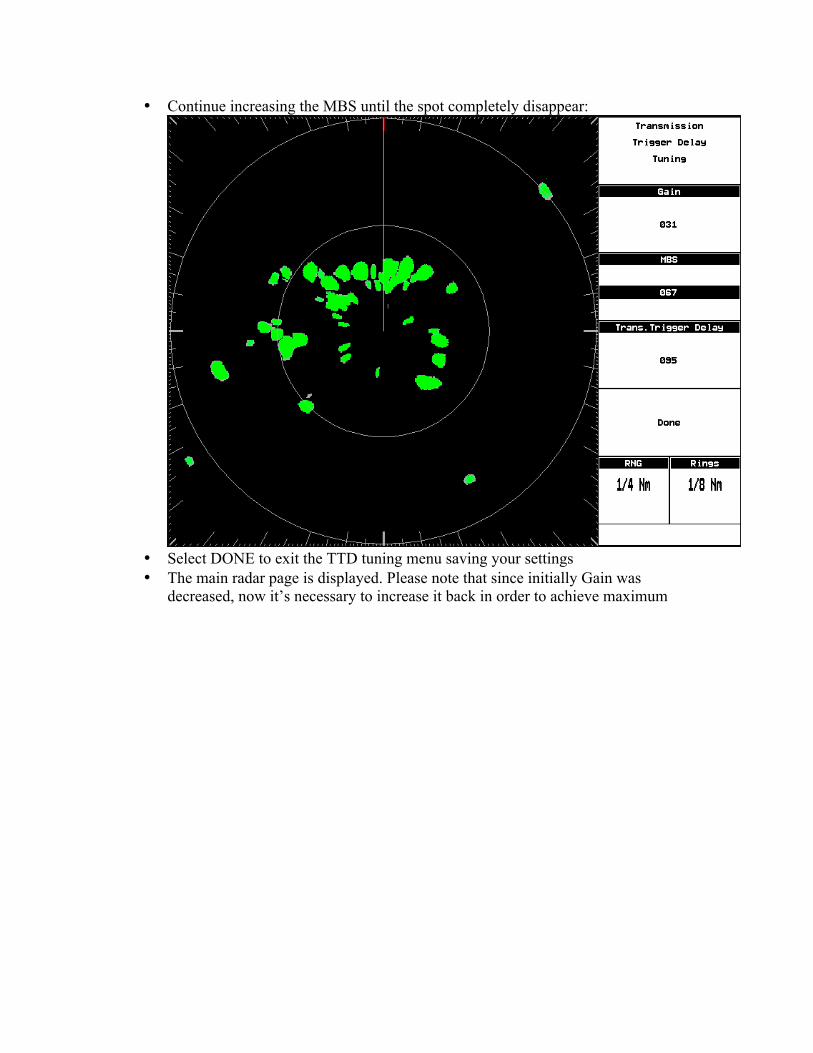
• Continue increasing the MBS until the spot completely disappear:
• Select DONE to exit the TTD tuning menu saving your settings • The main radar page is displayed. Please note that since initially Gain was
decreased, now it’s necessary to increase it back in order to achieve maximum

sensitivity:
Once the calibration has been performed, the calibration data is retained. However if a Clear RAM operation is performed it may be necessary to repeat the calibration.
2 Automatic and Manual Tune (non necessary at first installation)
The Tune control is used to tune the receiver in the Radar antenna for maximum target returns on the display. The radar comes from the factory already tuned so this operation is not necessary at first installation. In general radar tuning may be necessary if any component of the radar is replaced for maintenance. The Radar receiver can be tuned in Automatic or Manual mode. In Automatic Tune mode, the Radar tunes itself automatically on all range scales. It is recommended to execute the Tune function in Automatic mode. This generally ensures that the Radar receiver is always tuned to receive the maximum signal. If you choose the Manual Tune, you will need to adjust it again after 10 minutes, after you have turned on the Radar, since the required setting will change after the magnetron has warmed
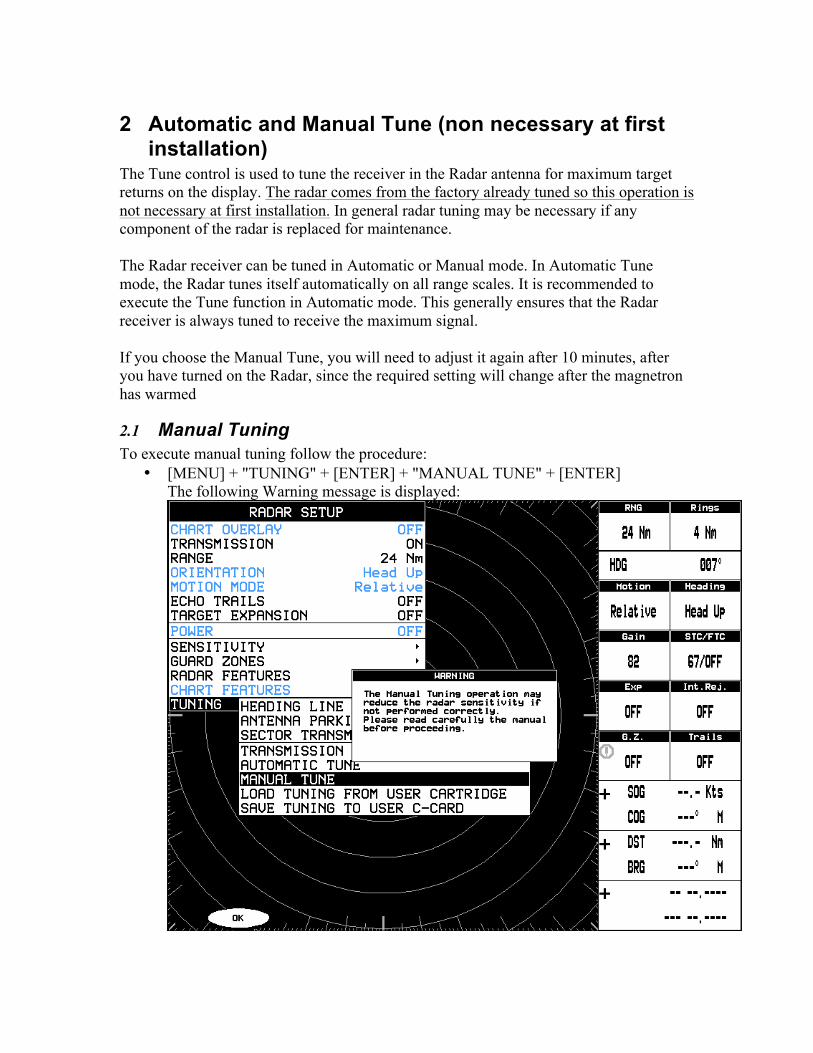
2.1 Manual Tuning To execute manual tuning follow the procedure:
• [MENU] + "TUNING" + [ENTER] + "MANUAL TUNE" + [ENTER] The following Warning message is displayed:
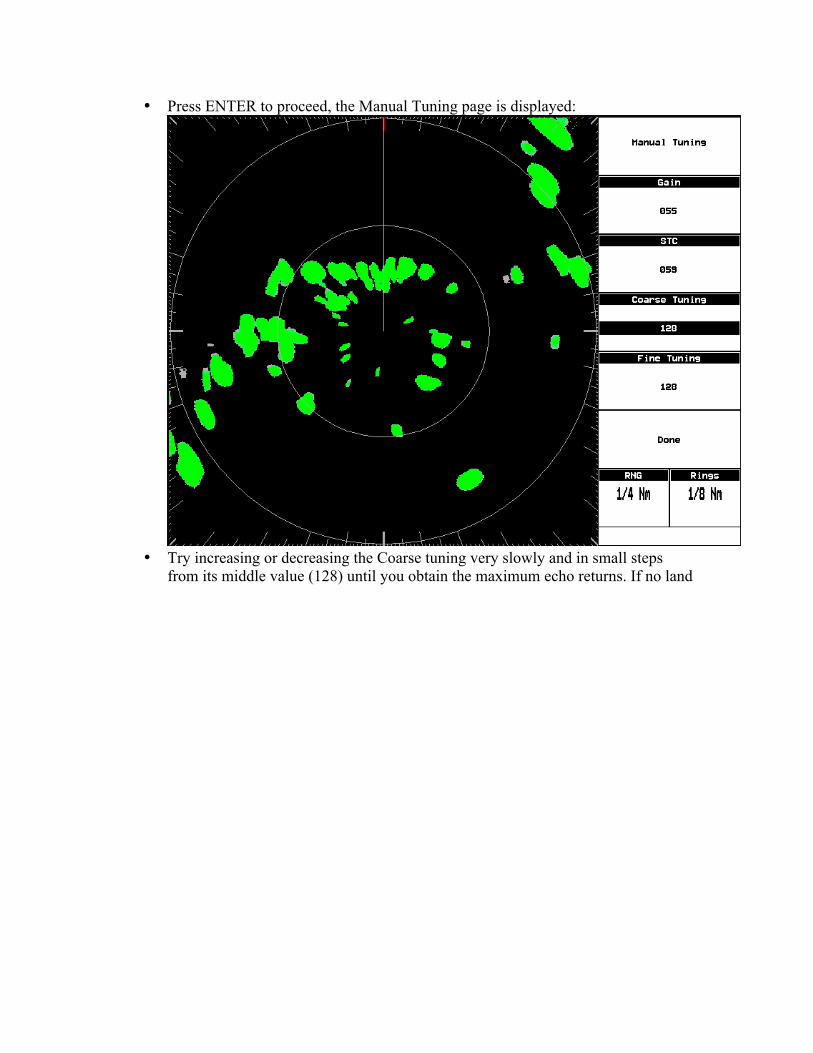
• Press ENTER to proceed, the Manual Tuning page is displayed:
• Try increasing or decreasing the Coarse tuning very slowly and in small steps
from its middle value (128) until you obtain the maximum echo returns. If no land
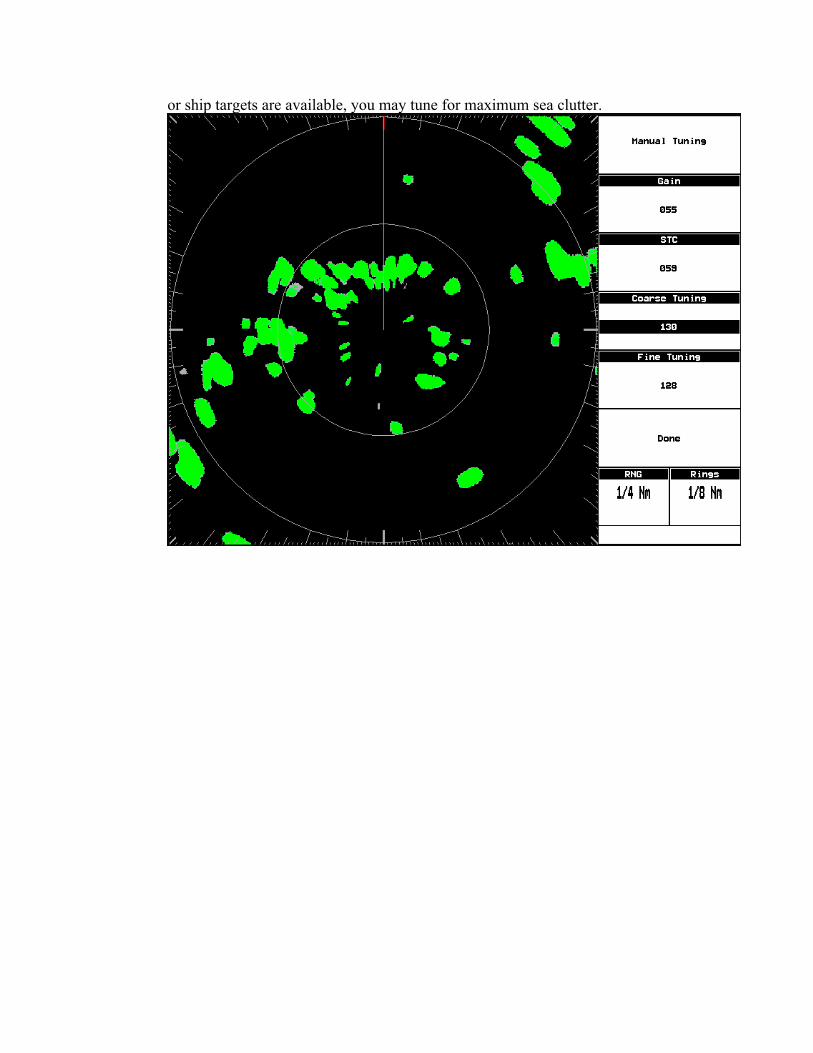
or ship targets are available, you may tune for maximum sea clutter.
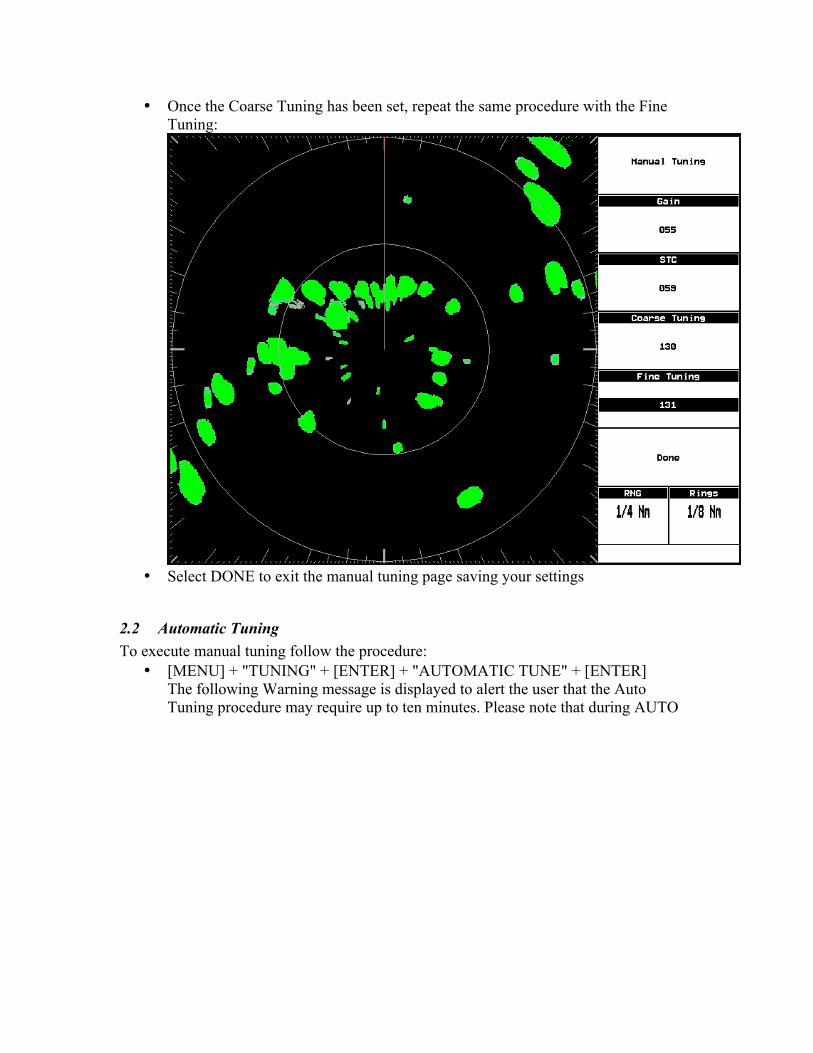
• Once the Coarse Tuning has been set, repeat the same procedure with the Fine Tuning:
• Select DONE to exit the manual tuning page saving your settings
2.2 Automatic Tuning To execute manual tuning follow the procedure:
• [MENU] + "TUNING" + [ENTER] + "AUTOMATIC TUNE" + [ENTER] The following Warning message is displayed to alert the user that the Auto Tuning procedure may require up to ten minutes. Please note that during AUTO
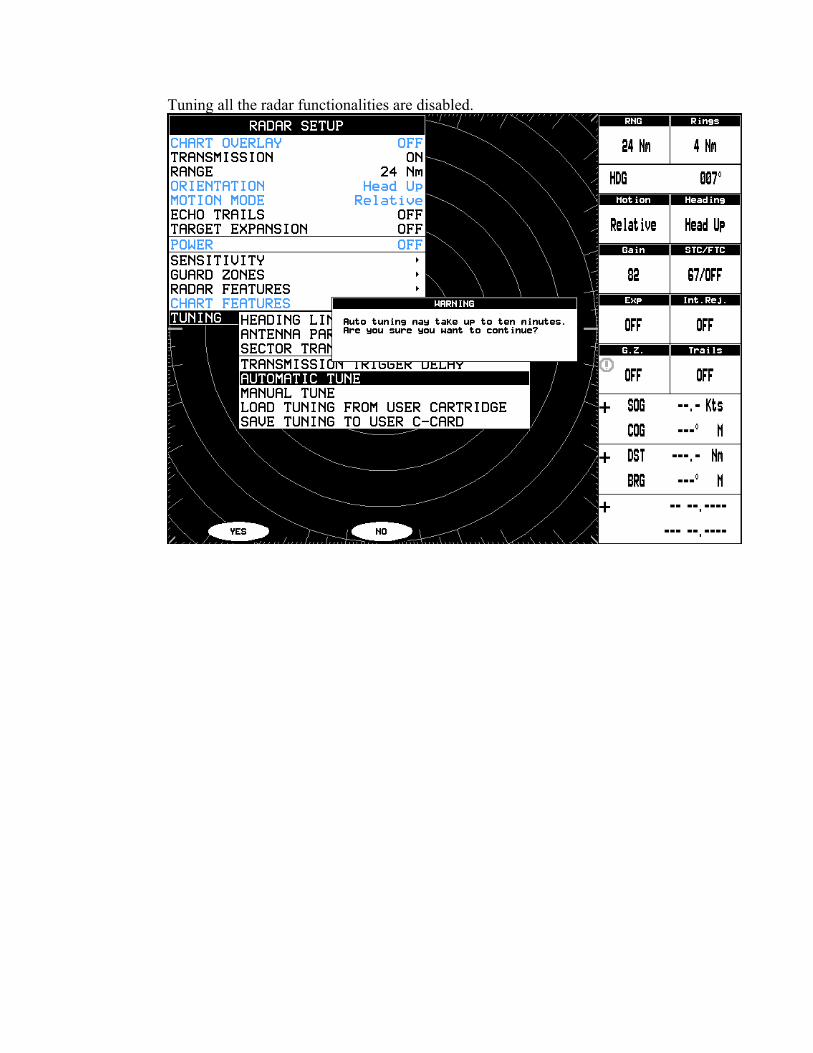
Tuning all the radar functionalities are disabled.
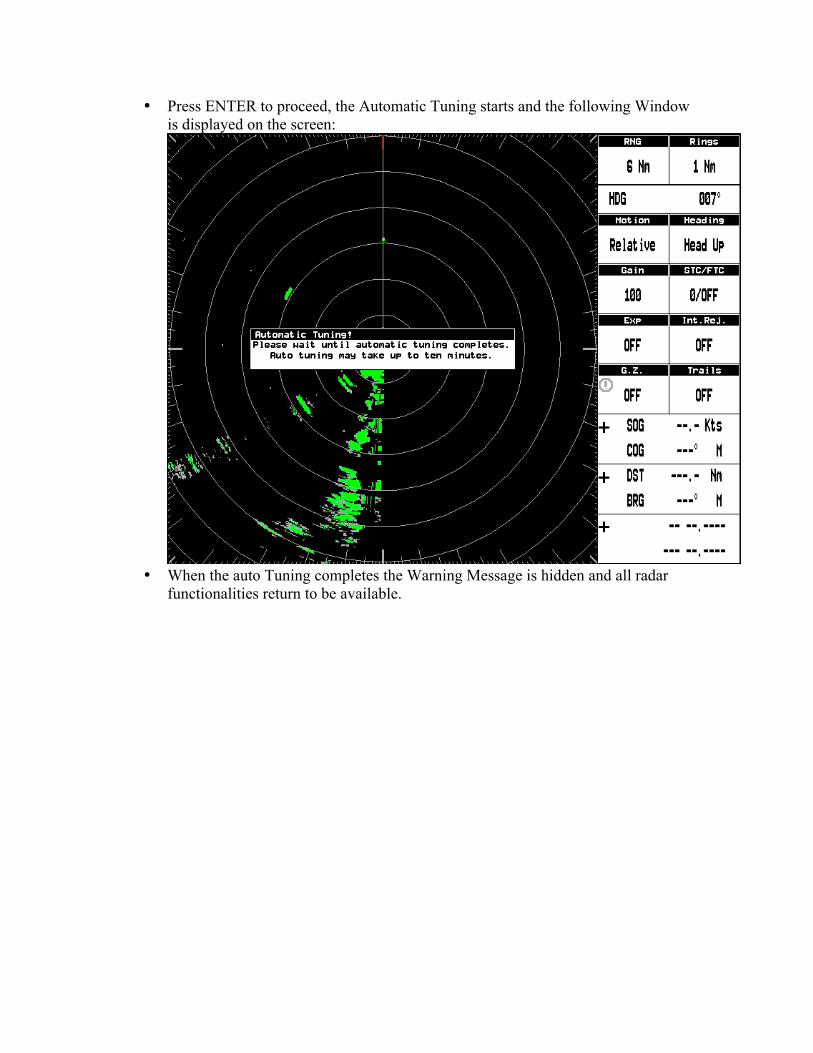
• Press ENTER to proceed, the Automatic Tuning starts and the following Window is displayed on the screen:
• When the auto Tuning completes the Warning Message is hidden and all radar
functionalities return to be available.