Embed Size (px)
Citation preview

~ 4 ~
Contents USER’S MANUAL
50cc - 125cc

USER’S MANUAL Instructions to Users
SIMA, exclusive distributor of MASH products, thanks you for purchasing your City scooter. Your new vehicle will not fail to provide you with all the fun and comfort you expect. This manual contains information on the general structure, functions, operation and maintenance of the City scooter. To prolong the life of your scooter and get the best performance from it, please read this manual carefully, paying particular attention to the break-in section. In addition, be sure to carefully follow all instructions for driving. It's important to make your driving safer and more comfortable. At your dealership, the experienced workshop staff will offer you a range of impeccable services. ● Please leave your vehicle in the designated maintenance shop for a first inspection after traveling the first 500 km. ● All instructions, illustrations, and specifications in this manual are based on the latest product information. Please note that they may differ from your vehicle version, and specifications may change without notice. ● The design and manufacture of this scooter comply with European Union safety standards (CE mark). The maximum speed of the scooter is 80 km / h. DO NOT make any modifications without the advice of a professional and DO NOT use parts that are not original to avoid any danger for the driver and to comply with the requirements of the Highway Code.
READ THIS MANUAL CAREFULLY Please pay special attention to the following symbols and notices: WARNING Caution to avoid damaging the scooter. Failure to observe the instructions may void the warranty. NOTE: Special information about driving and inspecting your scooter, as well as maintenance and adjustment procedures. PAYLOAD : Never exceed the maximum capacity specified in the TABLE OF MAJOR OPERATING SPECIFICATIONS. USE ONLY ON THE ROAD This scooter is designed to be used exclusively on the road

~ 6 ~
Contents USER’S MANUAL
Instructions to Users Precautions ........................................................................................ 7 Motorcycle Vehicle Identification Number (VIN )and Engine Number8 Brief Introduction to the Whole Motorcycle ....................................... 9 Technical Specifications and Performance Parameters ................ 12 Driving instruction ............................................................................ 14 Instrument combinaison .................................................................. 16 Left combination switch ................................................................ 17 Right combination switch ............................................................. 18 Brake levers, side stand and main stand ..................................... 19 Box under seat and rear carrier ..................................................... 20 USB Charger.................................................................................... 21 Ignition lock switch ........................................................................... 22 Fuel tank .......................................................................................... 23 Operation of foot-stepped startup .................................................... 23 Operation of electric startup ............................................................ 24 Parking of the Motorcycle ................................................................ 26
Service and Maintenance
Regular Service and Maintenance .................................................. 28 Requirements on Service and Maintenance ................................... 28
Service and Maintenance in the Run-in Period .............................. 28 Precautions for the run-in period of a new motorcycle ................... 29 Check and Replacement of Lubricant ............................................. 30 Service and Maintenance of the Spark Plug ................................... 31 Service and Maintenance for the Air Filter ...................................... 32 Adjustment of the accelerator handgrip .......................................... 33 Service and Maintenance for the Front Brake ................................ 34 Service and Maintenance for the Rear Brake ................................. 35 Adjustment of the rear braking light ................................................ 36 Adjustment of the idle speed ........................................................... 36 Service and Maintenance for Front and Rear Tires ........................ 37 Service and Maintenance for the Accumulator Cell ........................ 39 Service and Maintenance for Fuse ................................................. 40 Service and Maintenance for the Horn ........................................... 40 Storage of the Motorcycle ............................................................... 41 Cleaning .......................................................................................... 42 Service and Maintenance Interval Table ......................................... 43

USER’S MANUAL Operating Instructions
Precautions
Please read this User’s Manual carefully before operating this product!
Driving safety This manual contains some important information and instructions for safe driving. Please read them carefully before driving your scooter for the first time. If this is the first time you drive this type of scooter, we recommend that you exercise first to maneuver in an isolated and open area until you are familiar with all its functions. It is dangerous to drive with one hand. Always keep both hands on the handlebars and leave your feet on the pedals. Reduce speed before taking a turn; respect speed limits and other rules of the highway code. Wet or uneven surfaces will affect tire grip, braking performance and, in general, steering your scooter. You must reduce your speed accordingly. Annoying turbulence can occur when entering or exiting a tunnel, when you cross a mountain pass or when a vehicle passes you. In such circumstances, you should reduce your speed and remain particularly vigilant. Always wear a helmet, gloves and glasses. On a scooter, safety starts with a good quality helmet. Head trauma can be fatal. Eye protection is also very important. Do not wear loose clothing or clothing that could compromise your safety while driving. Engine exhaust contains carbon monoxide, which is toxic to humans. Only run the engine in well-ventilated areas. Do not let the engine run for a long time while the scooter is stationary. This may cause overheating and damage to the motor. The muffler is very hot, even a good time after turning off the engine. Avoid touching or parking the scooter in dry grass or near highly flammable materials. Any object placed on or suspended from the handlebar will affect the maneuverability and stability of the scooter. Avoid fixing anything on the handlebars. The luggage must be securely attached to the part of the scooter provided for this purpose (if any). Shut off the engine and scooter power to refuel. Refrain from smoking or using a mobile phone while refueling. Any unauthorized modification of the scooter is dangerous.

~ 8 ~
Operating Instructions USER’S MANUAL
Motorcycle Vehicle Identification Number (VIN) and Engine Number
Motorcycle Vehicle Identification Number (VIN) , Engine Number and Quality Certificate, used for obtaining the motorcycle driving license and motorcycle registry
Please fill in appropriate numbers for future reference:
Please fill in appropriate numbers for future reference:
Motorcycle VIN: Engine Number:
① The motorcycle Vehicle Identification Number
(VIN) is printed on the vertical tube of the frame.
③The Engine Number is printed on the left
lower part of the crankcase.

USER’S MANUAL Operating Instructions
Brief Introduction to the Whole Motorcycle
1. Head Light
2. Left front turn light
3. Front storage box
4. Seat cushion
5. Rear carrier (maxi 5 kg)
6. Disc brake
7. Side support
8. Main support
1
2 3
5
6
4
8 7

~ 10 ~
Operating Instructions USER’S MANUAL
Brief Introduction to the Whole Motorcycle
1. Tail light
2. Rear box
3. Right front turn light
4. Rear wheel
5. Silencer
6. Front braking handgrip
7. Front wheel
6
1
5
4
3
2
6

USER’S MANUAL Operating Instructions
Brief Introduction to the Whole Motorcycle
1. Rearview mirror
2. Left handgrip
3. Left combination switch
4. Instrument combination
5. Ignition lock switch
6. Right combination switch
7. Accelerator handgrip
1
2 7
6
5
4
3

~ 12 ~
Operating Instructions USER’S MANUAL
Technical Specifications and Performance Parameters
Item Specification
Displacement 50cc 125cc
Overall dimensions(L*W*H) 1825m×680mm×1145mm 1825mm×680mm×1145mm
Wheelbase 1280mm 1300mm
Minimum ground clearance 115mm 130mm
Complete vehicle shipping mass 92kg 105kg
Maximum payload 75kg 150kg
Engine model 159QMA 152QMI
Engine form Single-cylinder, four-stroke, air-cooled
Engine
Bore×Stoke 39mm×41mm 52.4mm×57.8mm
Working volume of cylinder 49.6mL 124.6mL
Compression ratio 10.2:1 9.0:1
Model of carburetter PD18J PD24J
Air filter Sponge filter element
Method of lubrication Force-feed and splash
Startup way Foot-stepped /electric start-up
Maximum power/corresponding speed 2.10kW/7500r/min 5.5kW/7000r/min
Maximum torque/corresponding speed 2.80N.m/7000r/min 8.0N.m/6000r/min
Minimum idling stabilized speed (1500±100)r/min (1600±100)r/min
Economic fuel consumption 2.0L/100km 2.8L/100km
Travelling system
Model of shock absorber Hydraulic spring combined type
Drive mode Belt drive
Specification/air pressure of tire Front wheel 120/70-12 225kpa Rear wheel 120/70-12 225kpa

USER’S MANUAL Operating Instructions
Technical Specifications and Performance Parameters
Item Specification
Displacement 50cc 125cc
Drive system
Clutch type Dry-type automatic centrifugal
Transmission type Automatic
Front wheel type Aluminum alloy wheel
Continuous transmission ratio 1.5-0.6 2.66 0.866
Fixed transmission ratio 13.33 8.615
Braking system
Front brake Disc brake
Rear brake Disc brake
Electric system
Ignition way CDI
Model of spark plug CR7HSA
Spark plug gap 0.6mm~0.7mm
Specification of accumulator cell 12V9Ah
Fuse 15A
Head Light 12V 35W/35W
Tail light/Braking light 12V 5W/21W
Turning signal light 12V10W×4
Turn signal indication lamp 12V1.7W×2
Instrument light 12V1.7W×2
Front Position Lamp 12V5W
Fuel & oil Fuel tank 6.2L
Engine oil 800mL

~ 14 ~
Operating Instructions USER’S MANUAL
Driving :
Using a single brake can cause the scooter to skid. In a bend, too much braking can cause a loss of grip and cause a fall. Always make sure to slow down gradually while respecting the safety distances. Driving in rainy weather You must be particularly careful when driving in bad weather. When the road is wet, reduce speed and brake earlier. Do not forget that under these conditions, the braking distance is doubled. Stop and parking 1. Return the throttle grip to the OFF position. 2. Simultaneously operate the front and rear brakes. Shut off the engine. 3. Lower the side stand or main stand to park the scooter. 4. Lock the handlebars to prevent theft of your scooter. WARNING Park the scooter on hard, flat ground to prevent it from overturning. If it is necessary to park the scooter on sloping ground, aim the front of the scooter in the upward direction to reduce the risk of the scooter "stumbling" on its side stand and going to bed. Prior inspection For safety reasons and to avoid a breakdown or accident, make a habit of inspecting the vehicle before use. The most complicated problems should be examined by an authorized dealer or garage. The user can however perform some simple checks. 1. Oil level . Check (before any use) that the oil level is above the minimum level: in case of extra work, do not exceed the maximum level. 2. Direction . Check that the handlebar turns evenly in both directions. . Check that the rotation of the handlebar is not limited. . Check the absence of play 3. Throttle grip . Check the amplitude of the rotation . Check that rotation is smooth. 4. Brakes . Check the brake lever clearance.

USER’S MANUAL Operating Instructions
. Check the brake pad wear and the absence of leaks in the circuit.
. Check that the brakes are not too soft. 5. Shock . Check the uniformity of the movement. 6. Tires . Check that the tire pressure is correct. . Check the tread condition of the tires. . Check the tires for wear. 7. Battery . Check the fluid level in the battery (except sealed batteries). 8. Fuel . Check the fuel level. . After starting the scooter, check the fuel level indicator. 9. warning . Check the function of the alarm. 10. Lights ● Check that all lights are working properly. 11. Sidestand and mainstand . Check that both crutches are working properly. WARNING By neglecting the inspection prior to any use of your scooter, you expose yourself to a risk of serious injury or material damage.
~ 16 ~
Operating Instructions USER’S MANUAL
Instrument combination
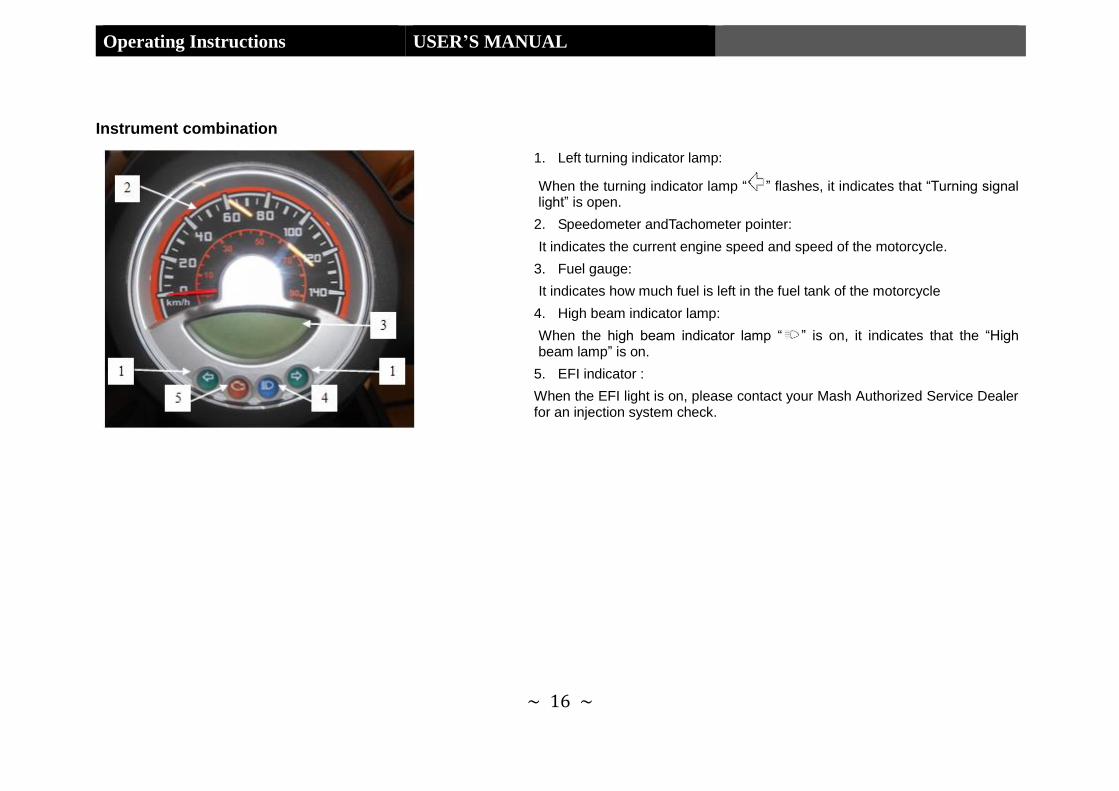
1. Left turning indicator lamp:
When the turning indicator lamp “ ” flashes, it indicates that “Turning signal light” is open.
2. Speedometer andTachometer pointer:
It indicates the current engine speed and speed of the motorcycle.
3. Fuel gauge:
It indicates how much fuel is left in the fuel tank of the motorcycle
4. High beam indicator lamp:
When the high beam indicator lamp “ ” is on, it indicates that the “High beam lamp” is on.
5. EFI indicator :
When the EFI light is on, please contact your Mash Authorized Service Dealer for an injection system check.

USER’S MANUAL Operating Instructions
Left combination switch
1. High beam lamp switch:
When the motorcycle needs to use the “High beam lamp”, turn the lighting switch to the status “ ”.
Low beam lamp switch:
When the motorcycle needs to use the “Low beam lamp”, turn the lighting switch to the position “ ”.
2. Turning signal light switch:
When the motorcycle needs to change its travelling direction, switch to “ ” or
“ ” to turn left r right. When the motorcycle needs to stop turning, simply switch the turning button to the middle.
3. Horn button:
When the motorcycle needs to horn, press the button “ ”.
1
2
3

~ 18 ~
Operating Instructions USER’S MANUAL
Right combination switch
1. Circuit-breaker switch:.
Engine is on“ ”
Engine is off“ ”
2. Warning light switch:
When you want use warning light, tum the warning switch
3. Electric start button:
When the motorcycle needs electric start, press the button “ ”.
1
3
2

USER’S MANUAL Operating Instructions
Front and rear brake levers To operate the front or rear brake, pull the left or right brake lever. The stop light will come on at the same time.
Side stand To place the scooter on its side stand, lower the stand with the right foot. On models equipped with the sidestand switch, lowering the sidestand switch will shut off the engine.
Main stand To place the scooter on its main stand, lower the kickstand using the right foot by firmly holding the crossbar with your right hand, then pull the scooter up and back ensuring that balancing the machine with the left hand on the handlebars.
Front brake Rear brake

~ 20 ~
Operating Instructions USER’S MANUAL
Box under seat: Insert the ignition key and turn
It in the opposite direction clockwise to open the lock. To lock the saddle, lower it until it clicks. Make sure the saddle is locked before driving the scooter.
Rear carrier : The rear package carrier is
designed to support loads up to 5 kilogram.

USER’S MANUAL Operating Instructions
USB charger
Your scooter is equipped with a USB port. The location of this charger turns this Behind the hatch in front of the knees of the driver.

~ 22 ~
Operating Instructions USER’S MANUAL
Ignition lock switch
Caution
* When the motorcycle is parked, please turn the Ignition lock switch to “ ” to lock the direction lock, so as to prevent the motorcycle from being
stolen.
①Ignition lock On:
Turn the ignition lock key to the position“ ”to
switch on the electrical system of the
motorcycle. Don’t remove the motorcycle
key.
②Ignition Lock Off:
Turn the ignition lock key to the position “ ” to
switch off the electrical system of the motorcycle. The
motorcycle key can be removed.
③Direction lock:
Turn the steering gear left to the flameout position.
Turn the ignition lock key to the position “ ”to
lock the direction lock. Remove the ignition lock
key.

USER’S MANUAL Operating Instructions
Seat cushion lock Fuel Level
Seat cushion: Insert the ignition
lock key into the seat cushion lock
and turn it 90º clockwise to open
the seat cushion.
Fuel level control and filling
When the fuel level indicator
reaches the minimum, the fuel remaining in the tank
is limited. It is recommended to refuel as soon as possible.
Open the trapdoor behind the location of the heels of the
Driver, remove the tank cap.
To reshape, align the locking tab of the
tank with the notch of the fuel tank.
Push in the tank cap and turn in the direction of the
clockwise to lock it.
WARNING
The engine must always be shut off during filling.
Gasoline is extremely flammable and even explosive under certain conditions.
Do not smoke and remove any source of flame or sparks from the area where the fuel is
stored or transferred to the tank of the scooter.
Do not overfill the tank. After filling, make sure that the tank cap
is properly closed. Be careful not to spill fuel while filling.
Splashes or fuel vapors are likely to catch fire.
If splashing fuel, make sure the area has dried before starting the engine.
Avoid repeated or prolonged contact with the skin; also avoid inhaling the vapors.
KEEP OUT OF REACH OF CHILDREN.
Use unleaded gasoline SP 98
NEVER USE SP 95 E10

~ 24 ~
Operating Instructions USER’S MANUAL
Operation of foot-stepped startup
The foot-stepped startup of the motorcycle is done in the following steps:
Start the ignition lock to check whether indicator lamps of
instruments of the motorcycle work properly.
Step down the starting arm to its limit, and then reset the starting
arm in time. The starting arm must be reset in time after the
startup of the motorcycle.
Hold the front braking handgrip to prevent
the slipping of the motorcycle.
Turn the acceleration handgrip slightly with your right hand
to add an appropriate amount of fuel to start up the
motorcycle. The motorcycle can be run only after it is
pre-heated.

USER’S MANUAL Operating Instructions
Operation of Electric Startup
The duration of each electric startup should not exceed 5s, and each interval between two electric startups should not be shorter than 10s. If 3 startup attempts fail consecutively, the motorcycle must be checked.
First, insert the key
into the ignition switch
lock, and turn it to the
position “ ”.
Hold the front
braking handgrip,
turn on the electric
startup switch and
perform electric
startup.
Or hold the rear braking handgrip, turn on the electric startup switch
and perform electric startup.
Push the electric startup button with your right thumb, and
meanwhile turn the acceleration handgrip slightly with your
right hand to add an appropriate amount of fuel.

~ 26 ~
Operating Instructions USER’S MANUAL
Parking of the Motorcycle
When the motorcycle needs to be parked temporarily, it should be parked in a relatively safe place. Please pay attention to the following points in parking the motorcycle:
Turn on the
right turning
light to warn
surrounding
vehicles and
pedestrians.
Hold the rear
braking
handgrip to
reduce the
speed of the
rear wheel.
At the same time, hold the front braking handgrip to
reduce the speed of the front wheel.
Turn the ignition lock key to the position “ ”to shut off the ignition system and stop the
motorcycle.

USER’S MANUAL Operating Instructions
Caution
* After parking the motorcycle, the direction lock should be locked
and the ignition lock key should be removed, so as to prevent the
motorcycle from being stolen.
Turn the ignition lock switch to the position ”to
prevent the motorcycle from being stolen.
After parking the motorcycle, put up the side support as
shown in the figure. The front wheel of the motorcycle
must be towards an uphill direction so as to prevent the
slipping of the motorcycle.
Then put up the main support. At the same time, the
front wheel of the motorcycle must be towards an
uphill direction so as to prevent the slipping of the
motorcycle.
~ 28 ~
Service and Maintenance USER’S MANUAL
Regular Service and Maintenance
During the operation of the motorcycle, different levels of loosening and
mechanical wear will occur to each part. Without regular service and
maintenance, the dynamic property, economy, reliability and security of
the motorcycle will be reduced, and the service life of the motorcycle will
also be shortened. Therefore, motorcycle drivers must conduct proper
regular service and maintenance for the motorcycle, so as to ensure best
performance of the motorcycle. Proper regular service and maintenance
can remove faults in time, prolong the service life of the motorcycle,
reduce the maintenance costs and realize the goal of safe driving of the
motorcycle.
Requirements on Service and Maintenance
There are following requirements on the service and maintenance of the Motorcycle:
1. Keep the engine clean, and make sure there is no gas/oil leakage and the engine is easy to start up and has good acceleration property and dynamic property and has no abnormal noise.
2. Ensure that the automatic clutch separates thoroughly and meshes smoothly, and shows no slipping or abnormal noise, and the accelerator handgrip operates flexibly.
3. Ensure handy and flexible operation of the braking handgrip, and ensure that the braking results meet relevant requirements. After the brake is released, the brake should be able to be reset automatically, and show no friction sound. Ensure good lubricating performance of the motorcycle.
4. The front and rear shock absorbers should work properly and reliably. The air pressure of the tire should be normal, and the electrical components at each part should be able to work properly.
5. There is no loose connection on the overall motorcycle. The appearance of the overall motorcycle should be clean and tidy.
6. It is well lubricated and there is no oil leakage at each lubricated part.
7. The connection of the accumulator cell should not be loose. It should be secure and reliable.
8. Tools delivered together with the motorcycle, as well as spare parts should be complete, free from wear or corrosion.
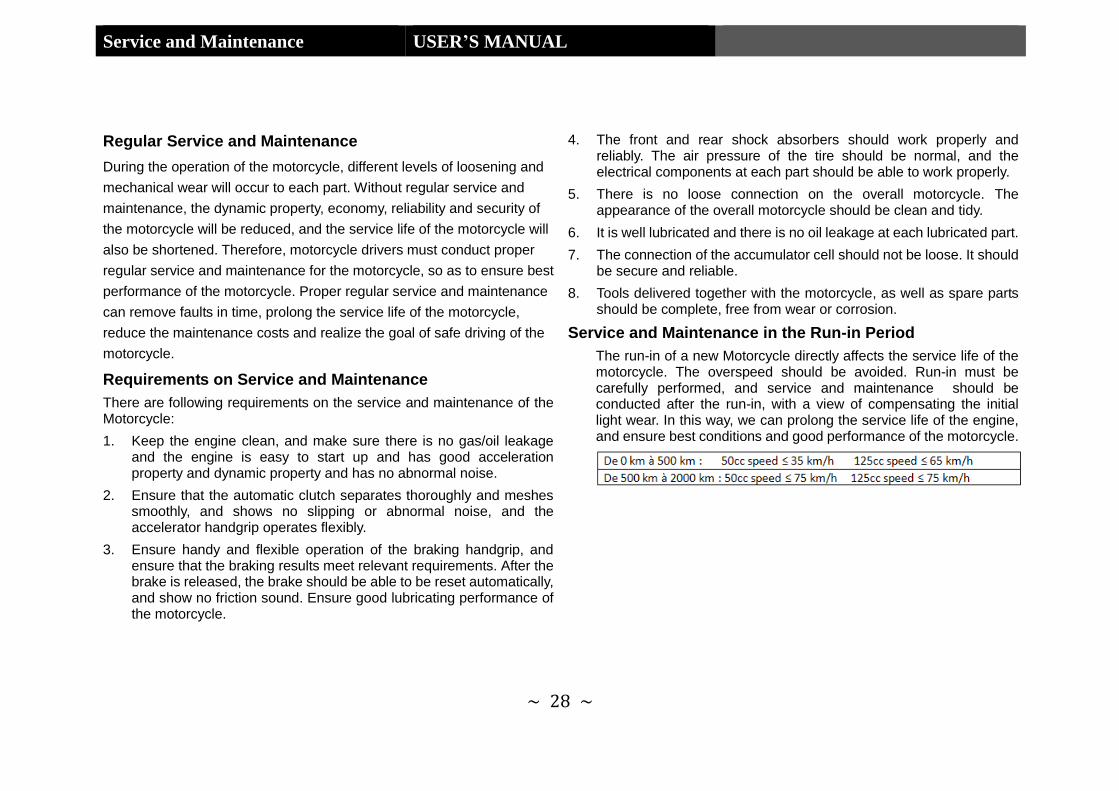
Service and Maintenance in the Run-in Period
The run-in of a new Motorcycle directly affects the service life of the motorcycle. The overspeed should be avoided. Run-in must be carefully performed, and service and maintenance should be conducted after the run-in, with a view of compensating the initial light wear. In this way, we can prolong the service life of the engine, and ensure best conditions and good performance of the motorcycle.

USER’S MANUAL Service and Maintenance
Precautions for the run-in period of a new Motorcycle
1. Within the run-in period, replace the oil every 500km, and clean the oil filter screen.
2. Regularly check whether each connection is loose, and tighten it timely if any loosening is found.
3. Regularly check whether the engine, drive system and braking system is overheated, and whether there is enough lubricating oil on each lubricated part. If any overheat occurs, the cause should be found in time and be removed timely.
4. Regularly check the tightness of the belt, and the free travel of the front and rear brakes, accelerator handgrip and each maneuvering position. Adjust them if necessary.
5. Within the run-in period, run the motorcycle after the engine is well pre-heated. First run it at low speed for 1km~2km, and then run it at high speed.
6. In order to reduce vibration and impact loads, the motorcycle should run on a level road with good road conditions whenever possible.
7. Within the run-in period, overload run should be strictly forbidden. Otherwise, the drive system will wear more faster. Heavy load should be avoided.
8. Avoid emergent and long-time braking.
9. Strictlycontrol the running speed of the motorcycle.
10. Within the run-in period, the load should not exceed 80% of the payload.

~ 30 ~
Service and Maintenance USER’S MANUAL
Check and Replacement of Lubricating Oil
Caution
* Replace the lubricating oil when the engine is in the hot state.
* When the lubricating oil is basically drained off, turn the engine for several times to completely discharge residual lubricating oil.
* Before filling in new lubricating oil, remove the residual dirt from the crankcase with 0.5L gasoline, and then drain the gasoline.
* New lubricating oil must be filtered in the replacement of oil.
* The specification and grade of lubricating oil may be selected from the figure below based on actual local temperature. SF15W/40 gasoline engine oil is recommended.
* Check whether the filter screen, sealing gasket, spring, O-ring and oil drain plug are in good conditions. If not, replace them.
* After replacing the lubricating oil, tighten the oil drain plug and oil fill plug, and check whether there is any oil leakage.
* After replacing the lubricating oil, the idle speed of the engine must be re-adjusted to be within the range of standard values.
First, twist off the oil
gauge and check whether
the lubricating oil
becomes black or
deteriorated.
If the lubricating oil
becomes black or
deteriorated, remove the
drain plug of the engine to
drain the lubricating oil and
replace it.
Level the motorcycle and
fill in oil until the oil level is between the upper and
lower markings.
Upper oil level marking
Lower oil level marking

USER’S MANUAL Service and Maintenance
Service and Maintenance of the Spark Plug
Type of spark plug: Connecting screw, flat seating, with nut
Service of the spark plug:
Take off the spark plug. When the color of the insulator skirt of the spark plug is offwhite, it indicates overheat of the engine. Generally, the engine overheat may be caused by the following reasons:
* The heat value of the spark plug is too small, and it should be replaced with a spark plug with appropriate heat value.
* The spark plug screws in so much that the insulator excessively extrudes into the combustion chamber. It is necessary to adjust the screwing thickness of the spark plug.
* The overheat of the engine is caused by the friction of transmission parts of the engine.
Take off the spark plug. If it is found that the color of the insulator of the spark plug is dark black, or there is serious oil stain or dark black carbon deposit on the surface, the main reason for it is that the gaseous inflammable alkene mixture of the injector is overrich
Take off the spark plug. If it is found that the color of the insulator skirt of the spark plug is brown, it indicates that the engine works properly, and there is nothing wrong with the spark plug.
Cleaning the Spark Plug
Caution
In cleaning the spark plug, make sure not to damage the insulator. It is forbidden to remove the carbon deposit or filth by burning with fire or scrubbing with metal wires.
Side
electrode
The normal skirt of
the insulator of the
spark plug is brown.
First, soak it with spark plug
detergent or gasoline for about
half an hour and then use a
non-metal blade to remove the
carbon deposit surrounding the
spark plug, and finally clean the
spark plug with gasoline.
First, mount the sealing washer
onto the spark plug, and then
tighten the spark plug to place
with hands, and finally tighten
the spark plug with a socket
spanner. Check the electrode gap of the
spark plug with a plug gauge,
and adjust the gap to 0.6mm
-0.7mm.

~ 32 ~
Service and Maintenance USER’S MANUAL
Service and Maintenance for the Air Filter
When the filter element of the air filter is blocked by dust, it may result in increased resistance of the air intake system, overrich gas mixture, reduced power and greater fuel consumption. Therefore, the filter element of the air filter should be cleaned on a regular basis.
Caution
* It is forbidden to use the following cleaning agents to clean paper filter
elements, such as gasoline, low ignition-point solvent, acid, alkaline or organic volatile oil.
Take off the fastening
screws of the air filter
cover, and remove the air filter cover. Check
whether there is too
much dust on the sponge
foam of the filter
element. Take off the
sponge foam.
Wipe off the dust inside the air filter with clean
and dry cloth.
Clean the foam filter element: Take off the foam filter element.
First, soak the foam filter element of the air filter in the detergent,
and then pinch and wash it. After the foam filter element is cleaned
and dried, soak the foam filter element in SAE lubricating oil until
it is saturated. Extrude excessive lubricating oil and mount it.

USER’S MANUAL Service and Maintenance
Adjustment of the accelerator handgrip
Check whether the free travel of the accelerator handgrip is within the specified range, and then adjust it. Please follow the following steps in adjusting the free travel of the accelerator handgrip:
1. First, loosen the locking nut.
2. Then adjust the regulating solenoid.
3. After adjustment, tighten the locking nut.
Service and Maintenance for the Front Brake
This model uses the front disc brake, which is featured by secure and reliable braking, labour-saving and good heat dissipation.
Adjustment of the front disc brake
1. First, use the main support to prop up the Motorcycle, and then it is possible to adjust the free travel of the front brake.
2. Adjust the regulating nut of the front brake to adjust the free travel of the front braking handgrip to 10mm~20mm.
The accelerator handgrip
should work smoothly.
The idling clearance of the handgrip should
range from 2mm to 6mm.
Regulating
solenoid
Locking nut
Adjust the free travel of the front braking handgrip to
10mm-20mm.
~ 34 ~
Service and Maintenance USER’S MANUAL
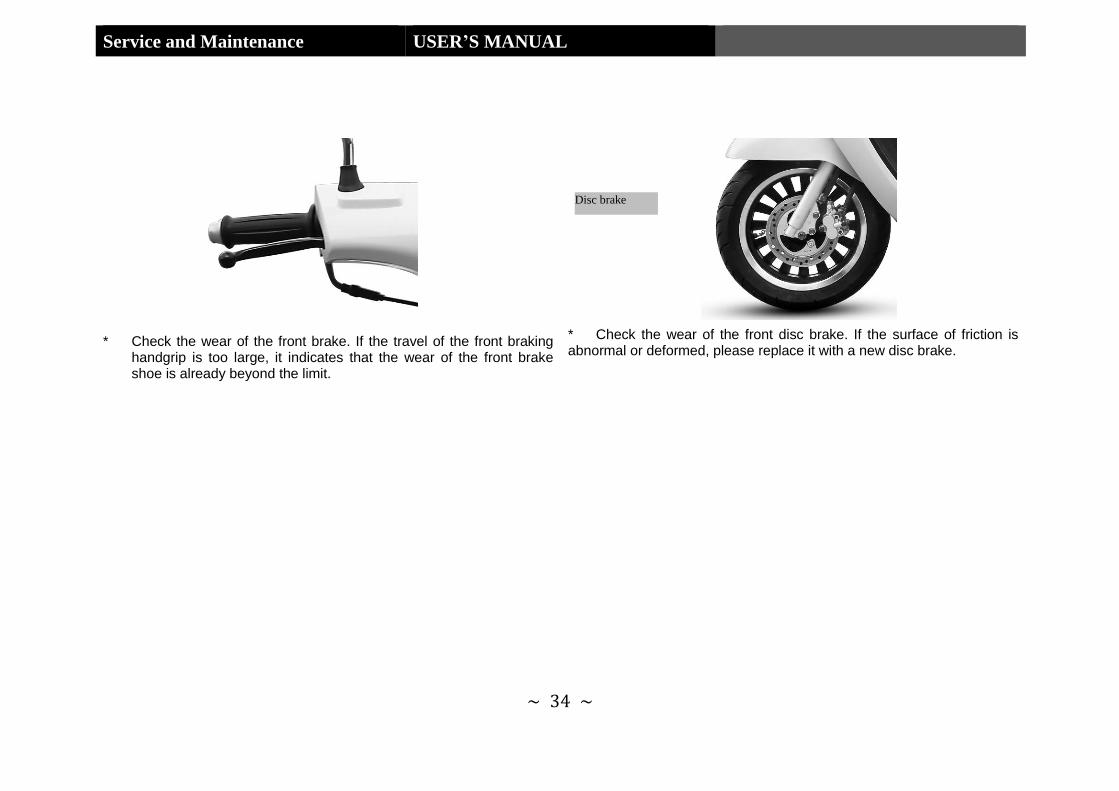
* Check the wear of the front brake. If the travel of the front braking handgrip is too large, it indicates that the wear of the front brake shoe is already beyond the limit.
* Check the wear of the front disc brake. If the surface of friction is abnormal or deformed, please replace it with a new disc brake.
Disc brake

USER’S MANUAL Service and Maintenance
Service and Maintenance for the Rear Brake
Adjustment of the rear disc brake
* First, use the support to prop up the rear wheel of the motorcycle and then adjust the free travel fo the rear brake.
* Grip the rear braking handgrip for several times, and then loosen it. Rotate the rear wheel assembly to check whether the rear wheel rotates freely.
Braking
Your City innovates in this area with a brake distribution system to bring even more efficiency. For this, when you apply the rear brake, the front
wheel will also be braked simultaneously. This system is not an ABS system.
First check the wear of the rear brake shoes. If the travel of the rear braking
pedal is too large to be adjusted, it indicates that the wear of the rear brake
shoe is already beyond the limit.
Use the support to prop up the motorcycle, and adjust the free
travel of the rear braking handgrip to 10mm-20mm.

~ 36 ~
Service and Maintenance USER’S MANUAL
Adjustment of the rear braking light
* Since the braking light of the Motorcycle directly relates to the driving safety of the motorcycle, the conditions of the braking light should be checked from time to time.
* The switch of the braking light is set on the front and rear braking handgrips. When the braking light can not work properly, the braking light switch and the braking light bulb should be checked and replaced.
Adjustment of the idle speed
When the motorcycle flames out during operation or the idle speed is not stable, the idle speed of the motorcycle should be adjusted in the following steps:
* Start the motorcycle first, and the idle speed must be adjusted when the engine of the motorcycle is preheated.
* Adjust the idle speed to the specified value. Rotate the accelerator handgrip to check whether the speed of the engine is stable or whether flameout occurs.
In checking the front and rear braking lights, the turn signal light
housing must be removed before checking and replacing the front
and rear braking light switches.
Front braking light
switch
Rear braking light
switch

USER’S MANUAL Service and Maintenance
Service and Maintenance for Front and Rear Tires
Only when the proper air pressure is used for the tire can we ensure the comfort and stability of the driving of the motorcycle and prolong the service life of the tires and tire casings of the motorcycle.
Tire specification/air pressure
Front wheel
120/70-12 225 kPa
Rear wheel
120/70-12 225 kPa
Removal and Replacement of Front Wheel
* Use the main support to prop up the motorcycle.
* Remove the nut of the front wheel shaft, and take off the front wheel shaft. Take off the front wheel.
Caution:
* After taking off the front wheel, make sure not to grip the front braking handgrip.
* In remounting, the tightening torque of the nut of the wheel shaft: 50N.m~70N.m.
* Adjust the front brake, and make several braking tests. After loosening it, check whether the front wheel rotate flexibly.
Check the air pressure of the tire and check whether the rim
deforms. If any abnormality is found, it should be handled
properly.
Front wheel
shaft

~ 38 ~
Service and Maintenance USER’S MANUAL
Removal and Replacement of the Rear Wheel
* Turn off the ignition lock switch.
* Use the main support to prop up the motorcycle, and take off the silencer.
* Take off the nut of the rear wheel shaft, and remove the rear wheel.
Assembly Precautions
* In reassembly, the torque of the rear wheel shaft nut: 70N.m~90N.m.
* Re-adjust the free travel of the rear braking handgrip to 10mm~20mm.
If the tread wear depth in the middle of the tire casing of the motorcycle reaches the following limit, the tire case should be replaced immediately.
Minimum limit of tread depth
Front wheel 2.0mm
Rear wheel 2.0mm
Caution
* Too low tire pressure will increase the rolling resistance of the tire of the motorcycle and increase fuel consumption. In worse cases, it may cause local delaminating of the tire body and cause tire burst.
* Too high tire pressure will reduce the comfort of riding and fasten the wear of each part.
Silencer
Rear wheel shaft
nut
Check the tread
wear depth of the
tire casing and
whether there is
any crack. If any
abnormality is
founded, the tire
casing should be
replaced
immediately.
USER’S MANUAL Service and Maintenance
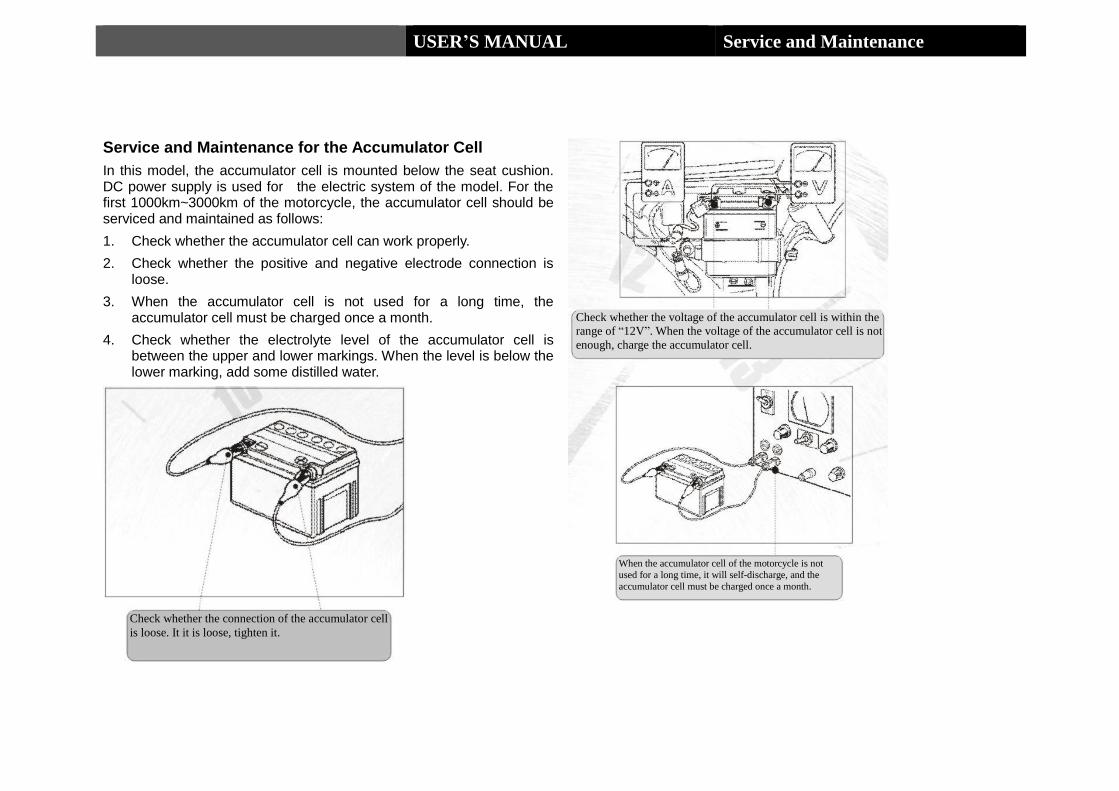
Service and Maintenance for the Accumulator Cell
In this model, the accumulator cell is mounted below the seat cushion. DC power supply is used for the electric system of the model. For the first 1000km~3000km of the motorcycle, the accumulator cell should be serviced and maintained as follows:
1. Check whether the accumulator cell can work properly.
2. Check whether the positive and negative electrode connection is loose.
3. When the accumulator cell is not used for a long time, the accumulator cell must be charged once a month.
4. Check whether the electrolyte level of the accumulator cell is between the upper and lower markings. When the level is below the lower marking, add some distilled water.
Check whether the connection of the accumulator cell
is loose. It it is loose, tighten it.
Check whether the voltage of the accumulator cell is within the
range of “12V”. When the voltage of the accumulator cell is not
enough, charge the accumulator cell.
When the accumulator cell of the motorcycle is not
used for a long time, it will self-discharge, and the
accumulator cell must be charged once a month.
~ 40 ~
Service and Maintenance USER’S MANUAL
Service and Maintenance for the Fuse
The fuse is connected in series in the charging and discharging of the accumulator cell. When the charging current or the discharging current exceeds the specified value, the fuse will automatically break to protect the accumulator cell and electrical components. For this model, the fusing current of the fuse is 15A.
Caution
* After the fuse burns out, we should first find out the reason causing too large current, and at the same time, replace it with a fuse with appropriate specification.
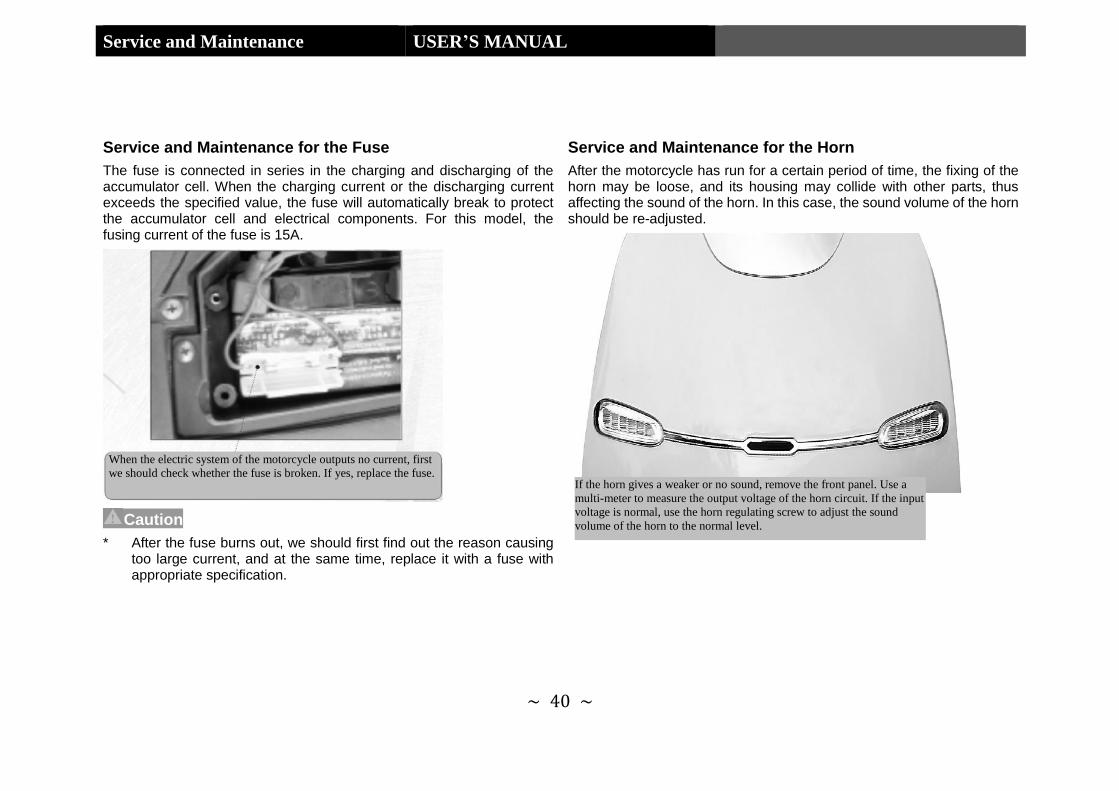
Service and Maintenance for the Horn
After the motorcycle has run for a certain period of time, the fixing of the horn may be loose, and its housing may collide with other parts, thus affecting the sound of the horn. In this case, the sound volume of the horn should be re-adjusted.
When the electric system of the motorcycle outputs no current, first
we should check whether the fuse is broken. If yes, replace the fuse. If the horn gives a weaker or no sound, remove the front panel. Use a
multi-meter to measure the output voltage of the horn circuit. If the input
voltage is normal, use the horn regulating screw to adjust the sound
volume of the horn to the normal level.

USER’S MANUAL Service and Maintenance
Storage of the Motorcycle
Long-time storage:
If the motorcycle needs to be parked for a long-time (more than one month), it should be done in the following steps:
* Drain off all the residual fuel in the fuel tank. Spray the fuel tank with spray-type antirust oil. Mount the fuel tank cover.
* Take off the spark plug. Pour 5mL clean lubricating oil into the cylinder. Tread the starting arm for several times to enable the poured-in lubricating oil to be evenly distributed in the combustion chamber. Install the spark plug.
* Take off the accumulator cell, and store it in a dry, dark and indoor environment. Perform slow charging for the accumulator cell once a month.
* Wash the motorcycle clean, and wipe if dry with soft cloth. Wax the painted surfaces, and apply a film of anti-rust oil to the chromium-plated surface.
* Increase the tire pressure to the specified standard value. Place tie plugs below the tires of the motorcycle to lift the wheels above the ground.
* Well cover the Motorcycle, and park it in a well-ventilated, dry, clean, rainproof and sunproof place, far away from any hazardous substance such as inflammable material or chemical corrosive.
Re-use after Storage
* Clean the Motorcycle. Replace the engine oil if the motorcycle has been stored for more than 4 months.
* Check the accumulator cell. If necessary, use it after it is charged.
* Clean up the antirust oil in the fuel tank, and fill in new fuel /
* Perform overall checkup necessary to be done before driving.

~ 42 ~
Service and Maintenance USER’S MANUAL
Frequent and regular cleaning is an essential part for the maintenance of your bike.
The exposure to natural elements (sea breeze, sea water, salt road, sludge, dust ...)
and anti-slip additives spread over the roads in winter, can be a source of
vulnerability for the components of your motorcycle. Corrosion and rust can occur
even on good quality parts. The proper maintenance and regular cleaning of your
vehicle will extend the original appearance of the vehicle but also, are essential in
order to maintain the guarantee.
Precautions Before Cleaning:
Engine cold, protect the exhaust outlet with a suitable protection (example: plastic
bag) to prevent water from getting inside.
The exposed electrical elements must be covered with a plastic bag. Check that the
covers and caps are correctly positioned.
With a degreaser and a soft brush, remove any stubborn stains from the crankcase,
making sure that they are never applied to the sprockets, drive chain, seals and
wheel axles. . Rinsing residues and degreaser have to be done with clean water.
Cleaning :
Cleaners that are too acidic or aggressive are not recommended for washing the
motorcycle. Especially for the axes, bearings, levers, pivots, wheels and spokes. If
however it is necessary to use for stubborn stains, respect the instructions and time
of application of the product. We recommend spraying an anti-corrosion and
lubrication product on these items after rinsing thoroughly with water.
Plastic parts and windshields (for equipped vehicles) should be cleaned preferably
with water using a soft sponge or soft cloth. Only a mild detergent may be used if
some plastic parts cannot be cleaned properly. Rinse thoroughly the product used:
badly rinsed it could damage the plastic parts. The use of other products on plastic
parts is not recommended (thinner, solvent, gasoline, antifreeze, abrasive cleaner ...).
Caution, Special precautions: Do not use pressure washer or steam jet: Avoid
directing the jet of water close to the following items: instrumentation, cylinders and
brake calipers, under the fuel tank, chain of transmission , steering column bearings,
gaskets, air box, wheel or swing arm bearings, all electrical elements and also the air
vents. Water infiltration could damage these elements.
After use under normal conditions: clean with lukewarm water mixed with mild
detergent using a soft sponge and rinse thoroughly. A damp cloth placed a few
minutes on the parts having more stubborn stains and insects, will allow the dirt to
take off smoothly.
After use in the rain, near the sea or on salt roads: Clean the motorcycle with cold
water and mild detergent: do not use hot water, it will increase the corrosive action of
salt. Protect the vehicle from corrosion by spraying an anti-corrosion and lubrication
product on all metal surfaces, chrome-plated or nickel-plated.
After cleaning:
Dry the body parts with a soft absorbent paper. After being dried with disposable cloth,
the drive chain should be lubricated with a specific lubricant to prevent it from rusting.
It is recommended to rub the chrome or stainless steel elements (including the
exhaust system) with a chrome care product.
An anticorrosion product will spray on all metal surfaces, chrome or nickel plated.
Lubricate all axes, pivots, bolts and nuts.
Apply wax on all painted parts.
Caution, Special precautions:
Never use lubricating or greasy products on the braking elements. This will decrease
braking efficiency and could cause an accident.
Always use a specific degreaser for braking systems.
Cleaning

USER’S MANUAL Service and Maintenance
Inspection and maintenance
The following table shows the interval of regular maintenance in travel
distance or number of months. At the end of an interval, be sure to carry
out the specified inspection, lubrication and maintenance. If your
motorcycle is used with heavy loads, such as high power driving in a dusty
environment, the maintenance shall be carried out more frequently. Your
distributor can give your further guide. The parts of steering gear, shock
absorber, bearings and wheels are critical components, and require
professional skills to repair. In the light of safety, it is advisable to the
inspection and maintenance done by your distributor or qualified
maintenance staff.
Be sure to make regular maintenance thoroughly according to the instructions in
the manual
Note that the maintenance interval is 3000 km.
Do not forget to certify them in the manual provided by your MASH dealer
TABLE OF MAINTENANCE INTERVAL Interval: based on odometer reading or number of months
KM 1000 4000 7000 10 000 Number of months 6 12 24 36
I Battery I I I I
* Butterfly throttle, throttle cable I I I I
* Spark plug I R R R
* Clutch I I I I
* Air Filter C R R R
* Fuel filter I I I I
* Fuel hoses I I I I
Replace every 4 years
* Engine oil and oil filter R R R R
* Oil filter strainer C C C C
* Valve clearance I I I I
* Timing chain I I I I
* Chassis bolt and nut T T T T
* Brake pads front and rear, linings I I I I
* Brake fluid I I I I
Replace every 2 years
* Front fork - I I I
* Rear shock absorbers - I I I
* Wheesl and tyres I I I I
Driving chain or CVT I I I I
Clean and lubricate every 1 000 kms
* Steering I I I I
* Cylinder head nut and exhaust
pipe bolt
T T T T
Caption : Inspection : I Tightening : T Cleaning: : C Replace : R
Precaution
In regular maintenance, it may be necessary to replace one or more parts.
For part replacement, it is advisable to use genuine parts or equivalent products.
No matter if you are experienced in vehicle maintenance or not, the items with *
mark shall be handled by your distributor or qualified maintenance staff. For the
items without such mark, you can do it by yourself according to the instructions.
Warning
After correct running-in of 1000 km, maintenance is mandatory to ensure
the safety of your motorcycle and give it a full play of its performance.

~ 44 ~
Service and Maintenance USER’S MANUAL
Lubrication Table
Reference IPONE : (1) Spray Cables / (2) Multifonction grease / (3) Spray chain
Interval
Item Every 6000 km or 6
months
Every 12000 km or 12
months
Accelerator wire Engine oil or (1) Engine oil or (1)
Clutch wire Engine oil or (1) Engine oil or (1)
Speedometer wire - Grease (2)
Driving chain Lubricate every 1 000 km (3)
Brake cam shaft - Grease (2)
Accelerator grip - Grease (2)
Brake wire Engine oil or (1) Engine oil or (1)
Speedometer gear case
and wheel bearing - Grease (2)
Brake pedal Grease or Engine oil (1)(2) Grease or Engine oil (1) (2)
Steering gear Lubricate every two years or every 7 000 km

USER’S MANUAL Service and Maintenance

~ 46 ~
Service and Maintenance USER’S MANUAL