Embed Size (px)
Citation preview
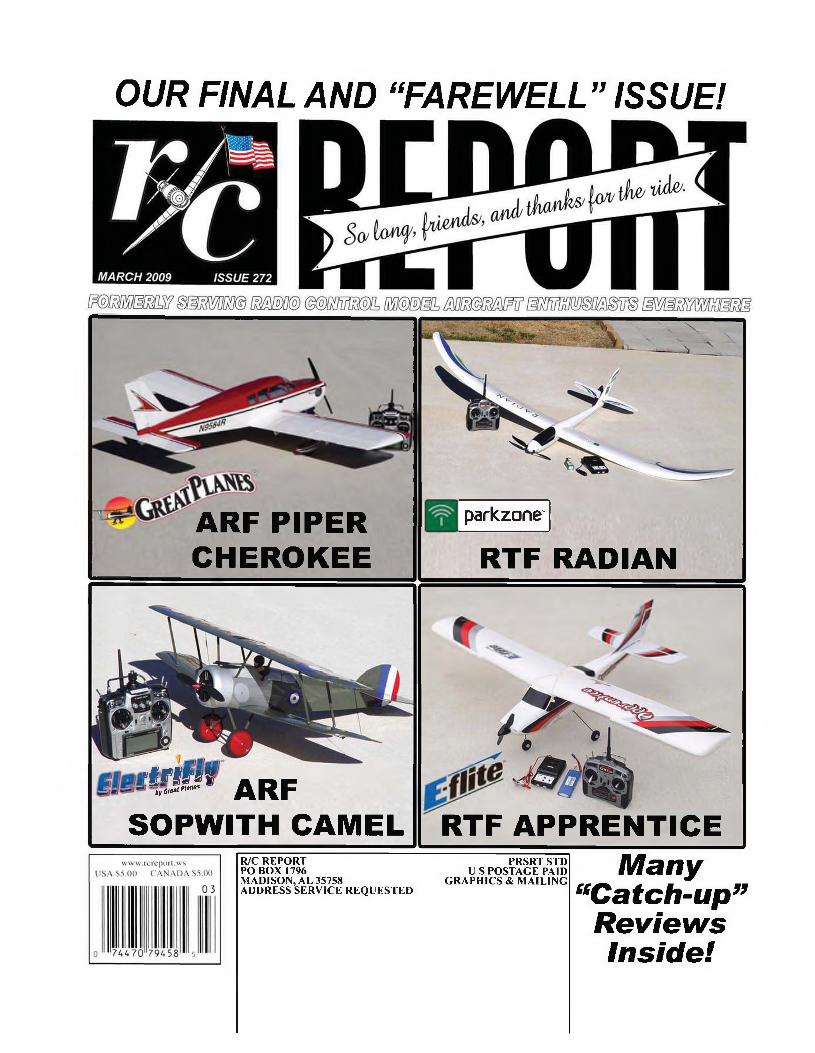
OUR FINAL AND “FAREWELL” ISSUE!
ARF PIPERCHEROKEE
parkzone'
RTF RADIAN
I ' l l ? !by Great Plane ARF
SOPWITH CAMEL RTF APPRENTICER/C REPORT PRSRT STDPO BOX 1796 U S POSTAGE PAIDMADISON, AL 35758 GRAPHICS & MAILINGADDRESS SERVICE REQUESTED
Many“Catch-up”
ReviewsInside!

Don’t get caught red-handed without the hottest heli on the market. E-flite’s Blade® CX3 MD 520N® RTF gives pilots unbelievable micro-heli excitement. This Blade is a micro-sized heli that offers first-time helicopter pilots exceptional stability and incredible control through the coaxial, counter-rotating head design and 3-in-1 control unit. The Blade CX3 also provides better control and locked-in performance thanks to the Heading Lock gyro.
This Blade is covered in a licensed MD 520N scale body with a cool metallic police trim scheme. This indoor heli is 100% factory-assembled, test flown and ready to fly out of the box. Not to mention, most replacement parts, hop-ups and accessories for the CX/CX2 work for the CX3. The CX3 includes a transmitter with Spektrum™ 2.4GHz DSM2™ technology and Spektrum AR6100e receiver. Already have a transmitter? The Blade CX3 MD 520 RTF is a stylish Bind-N-Fly™ heli that’s compatible with a variety of DSM2 aircraft transmitters.
So go ahead and take off with E-flite’s Blade CX3 MD 520N. These won’t sit on the shelves for long. Head over to your nearest dealer or E-fliteRC.com to learn more.
HORIH — E
www.E-FliteRC.com© 2009 Horizon Hobby, Inc. E-flite® products are distributed exclusively by Horizon Hobby, Inc. DSM and DSM2 are trademarks or registered trademarks of Horizon Hobby, Inc. The Spektrum trademark is used with permission of Bachmann Industries, Inc. Spektrum radios and accessories are exclusively available from Horizon Hobby, Inc. Multiple patents pending. MD 520N® is a registered trademark or trademark of MD Helicopters Inc. and is used under license to Horizon Hobby, Inc. For
f additional information or your nearest E-flite dealer, call toll-free 877-504-0233. 14762

From the Editor by "Crash Gordon” Banks..........5
Here’s How... by Walt "Th ’Pen” Wilson............... 16
The BIG Picture by Dick "BadShirt” Pettit....... 22
Radio Ramblings by Tony "Th ’Servo” Stillman....SISparky’s Revolt by Tony “Sparky” Coberly....... 66
Bird on a Wire by Terry “The Hoarder” Dunn....l4The Oily Hand by Brian "T h ' Wiz ” Winch............80
Fun Aerobatics by Ed "Th ’S tik” Moorman....... 108
Readers Write................................................................ 15
R/C Report’s Final Product Test Reports Index......30
Spread Spectrum Radios: How Good Are They?.... 92
Classified Ads............................................................... 116
Advertisers’ Index.......................................................118
Great Planes “Piper Cherokee”.................................. 36
Park Zone “Radian”.................................................... 41
E-flite “Apprentice”..................................................... 44
Hangar 9 1/4 Scale Floats............................................48
Park Zone “Super Decathlon BL”.............................. 52
Hobby Zone “Mini-Cub”............................................. 54
Park Zone “Ember”..................................................... 58
Great Planes 1/4 scale “Sukhoi SU31”.......................60
Electrifly “Sopwith Camel”.........................................68
Precision Aero “Ultimate Flight Stand”....................72
Hangar 9 “Sundowner 50”......................................... 103
COLUMNS
PRODUCT TEST REPORTS
FEATURES
REPORTMarch 2009 Issue 272
4 R/C RE POR T
FREE R/C REPORT STICKERS!Want to show the world which R/C magazine is your favorite? We now have a limited
number of die-cut, self-adhesive, fuel-resistant but not fuel proof, R/C REPORT stickers like that shown above. The large size measures 8" long and 2.1" tall, while the small size is 6" long by 1.5" tall. Both are currently available in black, red, and white. If you’d like to have two stickers in your choice of size and color, send a business size (9.5") SASE with a note specifying your choices of size and color. First come first served, so if your choices have run out, we’ll substitute whatever is left.
Mail your SASE to: R/C REPORT Stickers, P.O. Box 1796, Madison, AL 35758
R / C R E P O R T M A G A Z I N E
PUBLISHER & EDITOR......... Gordon RanksASSISTANT EDITOR.............Heather CelluraOFFICE MANAGER................................... Mina BanksSUBSCRIPTIONS.................... Heather CelluraADVERTISING............................. Gordon Banks
ASSOCIATE EDITORSEd Baggett TonyCoberly Dick Pettit
CONTRIBUTING EDITORSTerry Dunn Bill Fulmer Ed Moorman Tony Stillman Frank Tiano Dick WatzWalt Wilson Brian Winch Peter Young
Main E-mail: [email protected]
R/C REPORT Magazine, now out of business, was published monthly by R/C Report Corp., P.O. Box 1796, Madison, AL 35758.
Editor’s Office: (256)722-5697 Subscription Dept: Closed
Hours were 8:00a to 5:00p Central Time, Monday through Thursday, except from noon to l:00p. daily, and all day Friday, Saturday, Sunday, and national holidays.
Regular subscriptions were $21.00 for one year, $40.00 for two years, or $57.00 for three years. USA First Class and Canada subscriptions (mailed in an envelope, were $42.00 for one year. No other foreign subscriptions were available.
Editorial contributions were welcomed, but were to be accompanied by a SASE of sufficient postage if the material was to be returned. We as- sumedno responsibility for loss or damage thereto. Any material accepted was subject to such revisions as is necessary in our sole discretion to meet the standards and requirements of this publication. Author payments were normally made within 30 days after publication at our current rate of payment (send SASE for further details), and covered the author's and/or contributor's right, title, and interest in and to the material submitted, including but not limited to photos, drawings, charts, plans, and designs, which were considered as text. Any author/designer of an original design construction article, however, could handle their own plans sales under special arrangement.
The act of submitting a contribution constituted an expressed warranty by the contributor that the material was exclusive, original, and/or in no way infringed upon the rights of others. Because we encouraged the publication of personal opinions and fresh ideas, material published did not necessarily reflect the opinions of this publication, the publisher, or the editor! s). All original materials published herein are copyrighted as the property of R/C Report Corp., and may not be reproduced in any manner without the written consent of the publisher or editor. Exception: Nonprofit R/C club newsletters may reprint excerpts
only without authorization, as long as proper credits are included for the author and this publication.
All letters & e-mail were considered as submitted for publication unless otherwise requested. Correspondence to a specific author should have been addressed directly to that person's address when possible. If a personal reply is requested, please include a SASE.
All contests, random drawings, etc., advertised in and/or supported by R/C REPORT were null and void in any area, locality, or state, where taxed or specifically prohibited by law.
Product Test Reports, Reader Reports, New Product announcements, and other articles published in R/C REPORT were not endorsements for or recommendations against the product(s) and/or manufactured s). R/C REPORT publishes the findings and opinions of the authors, based upon their experience(s) with the sample(s) tested.
SM ILEY FACE HUNTERS There’s no more contest, o f course, but we hid 10 Smiley Faces in this issue anyway for those who want to strain their eyes for nothing. A list of their locations is hidden as well!

M arch 2009 S
linesfromthe
editor
the March issue online. Since my editorial in the printed March issue dealt with the magazine going out of business, and the online version is just getting started, I didn’t think it appropriate to begin on such a negative tone. I’ve also revised the back issues list to more accurately reflect the current status of the available supply, and the two pages of classified ads have been edited to remove the items that we know for sure have been sold.
Needless to say, it’s been an interesting and very busy time for me since the printed March issue was mailed. Closing a business sure is a lot more complicated than I thought, and although I should have anticipated it, the man-hours involved have been staggering! More on that later. Also, so many wonderful people have expressed their kind concern about the current welfare of Mina and myself, I wanted to update you on that.
First of all, since the magazine’s remaining assets fell far short of being sufficient to send refunds to every applicable subscriber, I was naturally very concerned about our financial
many generous subscribers, Mina and I are going to be fine. I ’m only guessing at the number, but it sure seems like about half of the subscribers due refunds of over $ 10 have yet to request them, and a truly surprising number have called or written to decline their refund. What’s more, nearly two dozen people have actually sent donations to help (cash, checks, one Wal- Mart gift card, and two Pizza Hut gift cards)! Although I’ve declined cash gifts in the past, I ’ve pretty much had to accept them this time, and I can’t tell you how much they’re appreciated. As I wrote in my printed March issue editorial, the people are the best (and worst) part of this great hobby (and Tom Mekis, of Fenelton, PA, must be one of our rare R/C Saints!).
Yes, there have been a few nasties involved in the refunds, but if you read the printed March issue, you may recall that I begged anyone due a refund of less than $10 to please forgive us that small amount. Well, so far only one person requested a $9.00 refund, so I sent it. I’m assuming that he needs it even worse than we do.
There have been two instances even more disappointing, however.

6 R /C RE POR T
Two people not only requested a refund check, they also asked their credit card companies for a refund. I could be wrong, but it sure seems like they found a way to get double their money back. Furthermore, there’s a $20 fee for credit card charge-backs, so these guys hurt us deeply. I’ve written to each asking them to return or refund the checks I sent them, but neither has responded (and both checks have already cleared our bank). Modelers in general are great people, but as in any group, there are those few exceptions.
Nevertheless, the number of good stories (refund forgiveness and outright donations) is far greater. So, in response to the many letters of concern, I’m more confident than ever now that Mina and I are going to come through this alright. Tony Coberly, by the way, my new boss at RC REPORT Online, has also been generous and helpful by giving me a job! My effo rts to find fu ll-tim e employment have faded from a full-on assault at the end of January, to just making a few phone calls a week by mid-March. My best results so far have been just two phone interviews, both of which died almost immediately after the caller learned that I was over 60 years old.
Anyway, due to the kindness of so many readers, my worries about our personal finances have subsided, but in my tunnel-vision worry about money, I overlooked something else. Have you any idea how long it takes to write thousands and thousands of checks? I somehow overlooked that part of the refund process. Had I thought of it sooner I would have invested in some sort of computer generated checks. A typical refund goes like this: I get a SASE (self- addressed stamped envelope) and refund request from Joe Modeler.
First I look him up in the subscription database, determine the value of each unpaid issue based on how many years he ordered the last time he subscribed or renewed, and then calculate the number of remaining issues. From that I compute the amount of his refund, and then enter that amount along with the date and check number in the computer. Then I turn to the checkbook and fill out the check, stick it in his SASE, and then examine his refund request again to see if anything else is required (free stickers, article reprints, personal questions, etc.). In most cases, the whole process takes at least four minutes each, so I can do no more than about 15 an hour. Working 12 hours a day doing nothing else, I can thus send out sometimes 180 checks a day. I’m making pretty good headway, and the new arrivals have dwindled to no more than 10-12 a day, so I’m hoping to be done with it by the end of April. (When I’m not writing checks, I hang my right arm in a sling! Talk about writer’s cramp!)
Oh yeah... now might be a good time to mention the handful of people who sent refund requests without including a SASE. Guys, I know you shouldn’t have to send a SASE to get your own money back. I totally agree with that. But I’m asking you to do so anyway because I need your help, both with postage, envelopes, and time. And since the vast majority of people have graciously cooperated, the few that have not cooperated are being ignored. As explained earlier, it takes a lot of time to process these refund checks, so I don’t think I’m asking too much. Like so many people have rightfully pointed out, how many other magazines made any refunds at all when they went out of business? I didn’t lose anything to
“Model Shopper” or “Scale R/C Modeler” since I didn’t read either one. But I had subscriptions to "Model Builder” and “R/C Modeler” when they went under, and I never received a refund. I don’t know anyone who did.
So, to be quite frank about it, if someone doesn’t care enough about their refund to provide the self-addressed stamped envelope, then we don’t care enough either.
Other notable examples of refund kindness:
“Send me half and spend the other half at Pizza Hut. I’d like to buy you lunch.”
“Please send a refund only if it comes from company assets. If it has to come from your own pocket, then don’t send me anything.”
“It doesn’t seem fair that someone who’s honest enough to send refunds goes broke, while companies who don’t send refunds get to keep the money. I don’t want to be a part of that, so keep my refund and give it to the (expletive deleted) who demand it.”
Some amusing anecdotes:Many people calculated the
amount of their refund, but some misinterpret the meaning of their expiration date. For example, a request might include a note that his expiration date was 1209, meaning the December issue of 2009, so he’s expecting a 9-issue refund of $11.97 to $14.22. Well, thanks for playing the game, but no. An expiration date of 1209 actually means the 9th month of the year 2012, so that refund check was for 39 issues ($51.87).
Three people so far returned their refund check with similar notes: “Now that I see you really meant it when you offered to send me a refund, I want you to have it back with my compliments.”

M arch 2009 7
J&R Hobby HardwareFasteners & Related Item s for the R/C Modeler
Home of the 500 Bag of Screws! No need to buy 50 or 100!Example: 4-40 x 3/4 = 6 for 500!
Servo Mounting Screws online @ $4.80 per 100, any size or length! Sizes #1x3/8 for small servos (also nice for cowls and canopies),
and #3x9/16 fit nicely in JR larger eyelets!
Large Selection of NYLON screws, including METRIC WING BOLTS and T-NUTS! Assorted Kits including METRICS!
Unique BALL END Hex Screwdriver Bit SetsSAE: 9 pcs for $20.00
Metric: 7 pcs for $15.00FREE Catalog: Call, Write, Email, or Online! ORDERS: 866-206-1955 201 Adrienne Court FAX: 856-227-7827Blackwood, NJ 08012-4512 Online: www.jrhobbyhardware.com
Speaking of advertising, I’ve been asked many times how much pressure we get from advertisers to publish only favorable reviews of their products, and/or how much backlash there is when we publish an unfavorable review. I learned early from a few “ex-editors” that many magazines publish guaranteed favorable reviews in exchange for ad contracts. Some only publish reviews of their advertiser’s products. I don’t mean just in the modeling industry, either.
Several companies called and openly offered lucrative advertising contracts in exchange for favorable reviews. Others wanted the right to see and edit our reviews of their products before they were published. We declined all such offers. And yes, a few companies pulled their advertising immediately after we published a review they didn’t like (often refusing to pay their existing ad bills, too!). But once
the word spread that “R/C REPORT” couldn’t be bought, that sort of thing became increasingly rare, to the point where I can’t even remember the last time it happened.
Many readers think that the giants in our industry are the most likely to do this, since they have the most to lose, plus they buy more ads. So now that “RCR” is closing, and therefor have nothing to lose by telling “The truth, the whole truth, and nothing but the truth ”, I’m going to tell you what I really think of Hobbico (which includes Carl Goldberg, Dynaflite, Electrifly, Fly Zone, Fuji, Futaba, Great Planes, O.S., Supertigre, Top Flite, Tower Hobbies, and more) and Horizon Hobby (E-flite, Evolution engines, JR radios, Hobby Zone, Park Zone, Saito engines, Spektrum radios, Zenoah engines, and more).THEY'VE BOTH BEEN GREAT!
Actually, Hobbico did complain once. It’s easy to remember because it only happened once! On the cover of our January 2003 issue (#198) I used a reader-submitted photo of a pretty lady holding a .40 size Great Planes RV-4. I chose that photo because it was far more “cover suitable” than any photos that accompanied a kit review in that same issue of a Katana Aircraft Models .20 size RV-4. That would have been okay had the cover layout not inadvertently tied the photo to the text about the Katana kit review. Great Planes complained that the cover made it look like the photo of their model was the Katana kit, and they were right. I learned from that mistake, they accepted my apology, and all was forgotten.
And that, ladies and gentlemen (and you too, Bob and Don), was the one and only time that either of the two “giants” of our industry
8 R /C RE POR T
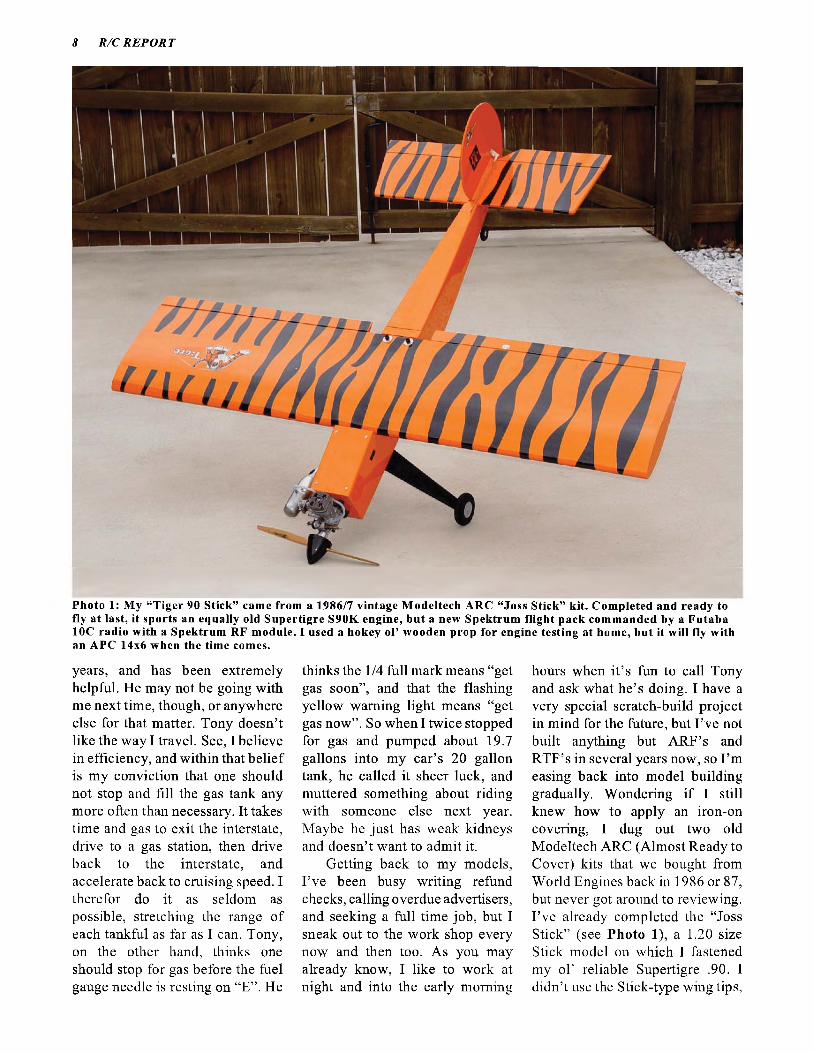
Photo 1: My “Tiger 90 Stick” came from a 1986/7 vintage M odeltech ARC “Joss Stick” kit. Completed and ready to fly at last, it sports an equally old Supertigre S90K engine, but a new Spektrum flight pack com m anded by a Futaba 10C radio with a Spektrum RF module. 1 used a hokey o l’ wooden prop for engine testing at home, hut it w ill fly with an APC 14x6 when the time comes.
years, and has been extremely helpful. He may not be going with me next time, though, or anywhere else for that matter. Tony doesn’t like the way I travel. See, I believe in efficiency, and within that belief is my conviction that one should not stop and fill the gas tank any more often than necessary. It takes time and gas to exit the interstate, drive to a gas station, then drive back to the interstate, and accelerate back to cruising speed. I therefor do it as seldom as possible, stretching the range of each tankful as far as I can. Tony, on the other hand, thinks one should stop for gas before the fuel gauge needle is resting on “E”. He
thinks the 1/4 full mark means “get gas soon”, and that the flashing yellow warning light means “get gas now”. So when I twice stopped for gas and pumped about 19.7 gallons into my car’s 20 gallon tank, he called it sheer luck, and muttered something about riding with someone else next year. Maybe he just has weak kidneys and doesn’t want to admit it.
Getting back to my models, I’ve been busy writing refund checks, calling overdue advertisers, and seeking a full time job, but I sneak out to the work shop every now and then too. As you may already know, I like to work at night and into the early morning
hours when it’s fun to call Tony and ask what he’s doing. I have a very special scratch-build project in mind for the future, but I’ve not built anything but ARF’s and RTF’s in several years now, so I ’m easing back into model building gradually. Wondering if I still knew how to apply an iron-on covering, I dug out two old Modeltech ARC (Almost Ready to Cover) kits that we bought from World Engines back in 1986 or 87, but never got around to reviewing. I’ve already completed the “Joss Stick” (see Photo 1), a 1.20 size Stick model on which I fastened my ol’ reliable Supertigre .90. I didn’t use the Stick-type wing tips,
M arch 2009 9
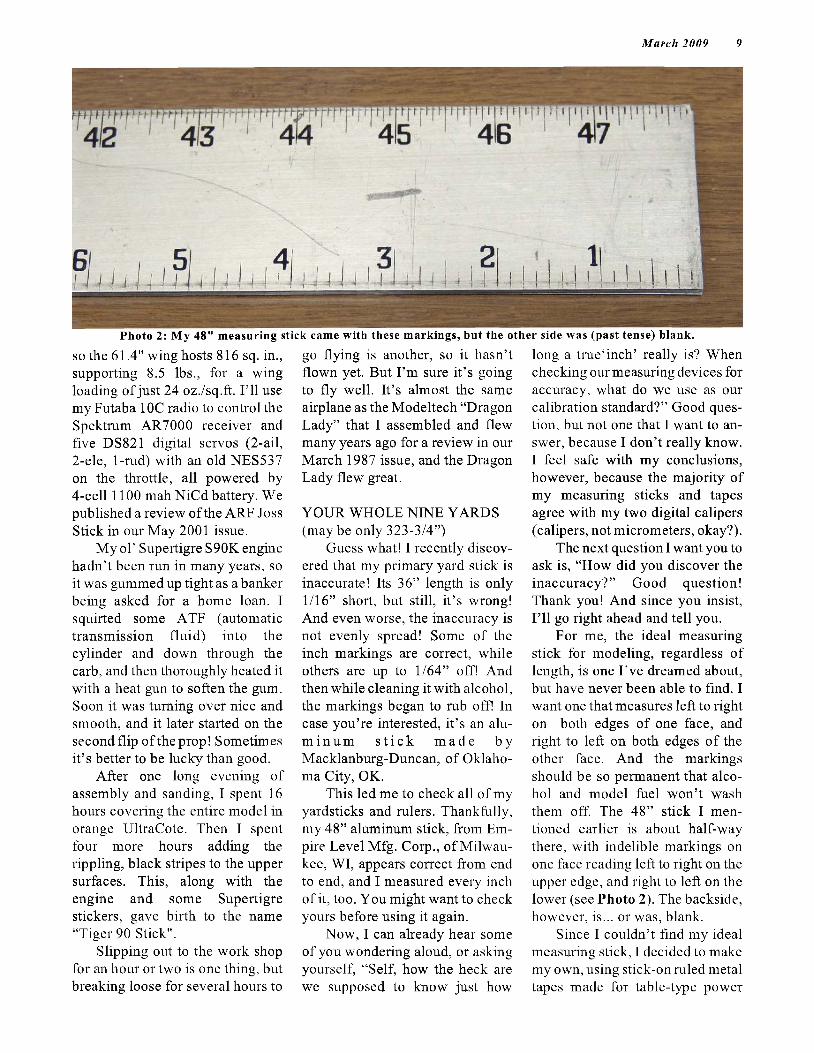
Photo 2: M y 48" m easuring stick came with these m arkings, but the other side was (past tense) blank.
so the 61.4" wing hosts 816 sq. in., supporting 8.5 lbs., for a wing loading of just 24 oz./sq.ft. I’ll use my Futaba IOC radio to control the Spektrum AR7000 receiver and five DS821 digital servos (2-ail, 2-ele, 1-rud) with an old NES537 on the throttle, all powered by 4-cell 1100 mah NiCd battery. We published a review of the ARF Joss Stick in our May 2001 issue.
My ol’ Supertigre S90K engine hadn’t been run in many years, so it was gummed up tight as a banker being asked for a home loan. I squirted some ATF (automatic transmission fluid) into the cylinder and down through the carb, and then thoroughly heated it with a heat gun to soften the gum. Soon it was turning over nice and smooth, and it later started on the second flip of the prop! Sometimes it’s better to be lucky than good.
After one long evening of assembly and sanding, I spent 16 hours covering the entire model in orange UltraCote. Then I spent four more hours adding the rippling, black stripes to the upper surfaces. This, along with the engine and some Supertigre stickers, gave birth to the name “Tiger 90 Stick".
Slipping out to the work shop for an hour or two is one thing, but breaking loose for several hours to
go flying is another, so it hasn’t flown yet. But I’m sure it’s going to fly well. It’s almost the same airplane as the Modeltech “Dragon Lady” that I assembled and flew many years ago for a review in our March 1987 issue, and the Dragon Lady flew great.
YOUR WHOLE NINE YARDS (may be only 323-3/4”)
Guess what! I recently discovered that my primary yard stick is inaccurate! Its 36” length is only 1/16” short, but still, it’s wrong! And even worse, the inaccuracy is not evenly spread! Some of the inch markings are correct, while others are up to 1/64” off! And then while cleaning it with alcohol, the markings began to rub off! In case you’re interested, it’s an alum i n u m s t i c k m a d e by Macklanburg-Duncan, of Oklahoma City, OK.
This led me to check all of my yardsticks and rulers. Thankfully, my 48” aluminum stick, from Empire Level Mfg. Corp., of Milwaukee, WI, appears correct from end to end, and I measured every inch of it, too. You might want to check yours before using it again.
Now, I can already hear some of you wondering aloud, or asking yourself, “Self, how the heck are we supposed to know just how
long a trueflnch’ really is? When checking our measuring devices for accuracy, what do we use as our calibration standard?” Good question, but not one that I want to answer, because I don’t really know. I feel safe with my conclusions, however, because the majority of my measuring sticks and tapes agree with my two digital calipers (calipers, not micrometers, okay?).
The next question I want you to ask is, “How did you discover the inaccuracy?” Good question! Thank you! And since you insist, I’ll go right ahead and tell you.
For me, the ideal measuring stick for modeling, regardless of length, is one I’ve dreamed about, but have never been able to find. I want one that measures left to right on both edges of one face, and right to left on both edges of the other face. And the markings should be so permanent that alcohol and model fuel won’t wash them off. The 48” stick I mentioned earlier is about half-way there, with indelible markings on one face reading left to right on the upper edge, and right to left on the lower (see Photo 2). The backside, however, is... or was, blank.
Since I couldn’t find my ideal measuring stick, I decided to make my own, using stick-on ruled metal tapes made for table-type power

Our Huge Selection Gives You the Best Fit!
MB (3m (DŮM M n i• Propeller Adapters and Gold Plated Connectors Included With All Motors — — — _ S• Mounting Bracket Included With All Outrunner Motors Exclusive Distributor
• Largest Variety to Fit Most Applications WlAXX Products International, Inc.815 Oakwood Rd., Unit D, Lake Zurich, IL 60047, USA
• We have over 80 motors styles and counting! ph: 847-438-2233 f»*: 847-438-2898
Get The M ost For Your Hobby Dollar, Visit Your Local Hobby Shop! WWW.maxxprod.COm

M axx Products is your complete source for Electric Airplane Accessories
Heatsinks - Extruded aluminum heatsinks Fit 12, 20, 28, and 36mm motors.
Prop Adapters - Over 20 types and counting, Collet and set screw type prop adapters and prop savers Fit 2mm, 2.3mm, 3mm, 1 /8 ", 4mm, 5 /32",
5mm, 6mm, & 8mm motor shafts.
1570 Switch ■ This simple switch temporarily disconnects BEC power to the radio system between flights.
Mounts - Heatsink or plain mounts for beam mount Fit 20, 28, and 36 mm motors.
Spinners - 29, 38,44 and 50mm lightweight polished aluminum spinners - Fit 2 to 5mm motor shafts.
Gearboxes - Assorted planetary and offset gearboxes to fit a variety of motors.
Wheels - Fight weight wheels with strong hubsSizes: 1.25", 1.5", 2", 2.5", and 3.00"
• Micro w ire (32AWG) extensions, Y-harness, switch harness fo r small electric airplanes,
• Full line o f Himax Brushless motors and gear motors,
• Full line o f fe rrite motors and high performance cobalt & neodymium motors,Micro servos, micro receivers, and battery packs.
Visit Our Website to See the Complete Line!
Get The M ost For Your Hobby Dollar, Visit Your Local Hobby Shop!
MpfExclusive DistributorMAXX Products International, Inc.815 Oakwood Rd., Unit D, Lake Zurich, IL 60047, USA Ph: 847-438-2233 Fax: 847-438-2898
w w w .m axxprod.com
12 R /C RE POR T
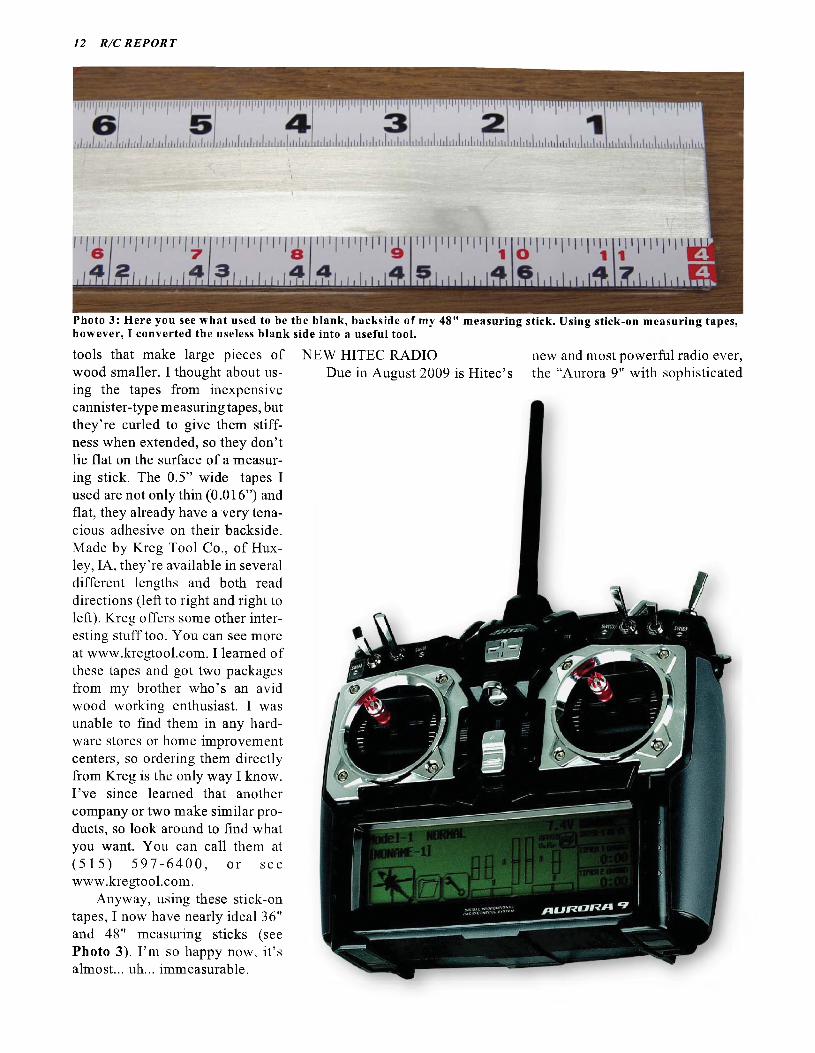
Photo 3: Here you see what used to be the blank, backside o f my 48" measuring stick. Using stick-on measuring tapes, however, I converted the useless blank side into a useful tool.
tools that make large pieces of wood smaller. I thought about using the tapes from inexpensive cannister-type measuring tapes, but they’re curled to give them stiffness when extended, so they don’t lie flat on the surface of a measuring stick. The 0.5” wide tapes I used are not only thin (0.016”) and flat, they already have a very tenacious adhesive on their backside. Made by Kreg Tool Co., of Huxley, IA, they’re available in several different lengths and both read directions (left to right and right to left). Kreg offers some other interesting stuff too. You can see more at www.kregtool.com. I learned of these tapes and got two packages from my brother who’s an avid wood working enthusiast. I was unable to find them in any hardware stores or home improvement centers, so ordering them directly from Kreg is the only way I know. I’ve since learned that another company or two make similar products, so look around to find what you want. You can call them at (515) 597-6400 , or seewww.kregtool.com.
Anyway, using these stick-on tapes, I now have nearly ideal 36" and 48" measuring sticks (see Photo 3). I’m so happy now, it’s almost... uh... immeasurable.
NEW HITEC RADIO new and most powerful radio ever,Due in August 2009 is Hitec’s the “Aurora 9" with sophisticated

M arch 2009 13
folding currency that we might carry in our pocket? Well, thanks to the helpful illustrations in an email from a friend, I now have a better idea, so I thought I ’d share this with you as well.
First let’s look at a simple $ 100 bill, which most of us have seen, I’m sure. It’s now the largest denomination currency in use by the general public.
The Hitec Spectra 2.4 GHz RF m odule will allow the new Aurora 9, as w ell as the existing Hitec transm itters using a rem ovable RF m odule, to enjoy the new power and security of spread spectrum technology. Due in June 2009.
The new Optima 7 (2.4 GHz) receiver is due in June 2009 as well, to be followed later in the year by new Optima 6-ch and Optima 9-ch receivers.
programming power for airplanes, sailplanes, and helicopters. Features include a backlit touchscreen, assignable switches, a 30 model memory, and much, much more. What’s more, it’s an RF-module based transmitter that promises to be fully compatible with Hitec’s existing FM (PPM and PCM) RF modules, and their coming RF modules incorporating 2.4 GHz frequency-hopping spread spectrum technology. In fact, the new2.4 GHz RF modules and a new
7-ch receiver are due in June 2009, with 6-ch and 9-ch receivers to follow. Stay tuned for more aa additional details become available.
ONE TRILLION DOLLARSThere’s been a lot of talk lately
about the government giving big businesses well over a trillion dollars. It’s been said so many times now, the word “trillion” doesn’t sound so shocking any more. But just how much money is that, in
Next is a standard stack of 100 bills, which is $10,000, a size we could easily stuff into our pocket.
A hundred of these 100 bill packs is a cool $1,000,000, but its actual size is not as impressive as one might have guessed. As you can see by the size of the man standing beside it, we could carry this amount in a grocery bag or a small suitcase.
COne hundred of these stacks is,
of course, $100,000,000, and is now a bit more than one man can carry, but note that it fits neatly onto a standard size loading pallet. You could put this into the back of a standard size SUV. (Use mine, if you like.)
14 R /C RE POR T
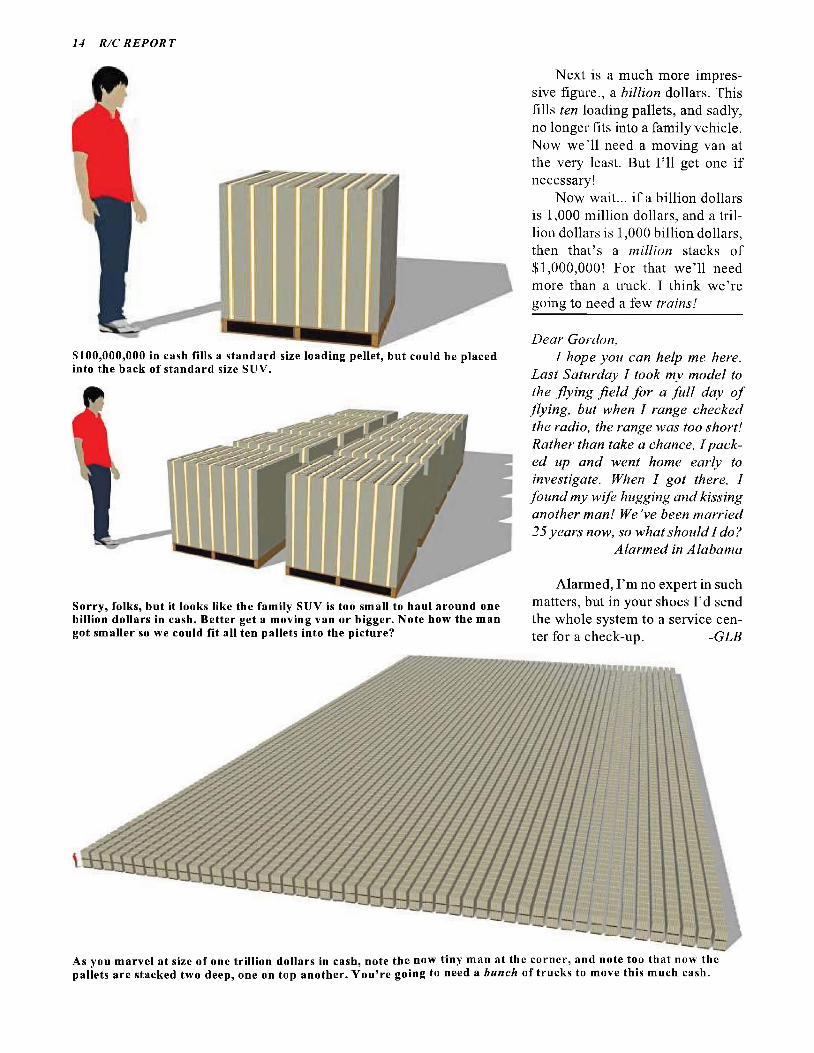
$100,000,000 in cash fills a standard size loading pellet, but could be placed into the back of standard size SUV.
Sorry, folks, but it looks like the family SUV is too small to haul around one billion dollars in cash. Better get a moving van or bigger. Note how the man got smaller so we could fit all ten pallets into the picture?
Next is a much more impressive figure., a billion dollars. This fills ten loading pallets, and sadly, no longer fits into a family vehicle. Now we’ll need a moving van at the very least. But I’ll get one if necessary!
Now wait... if a billion dollars is 1,000 million dollars, and a trillion dollars is 1,000 billion dollars, then that’s a million stacks of $1,000,000! For that we’ll need more than a truck. I think we’re going to need a few trains!
Dear Gordon,I hope you can help me here.
Last Saturday I took my model to the flying field for a fu ll day o f flying, but when I range checked the radio, the range was too short! Rather than take a chance. I packed up and went home early to investigate. When I got there, I found my wife hugging and kissing another man! We’ve been married 25 years now, so what should I do?
Alarmed in Alabama
Alarmed, I’m no expert in such matters, but in your shoes I’d send the whole system to a service center for a check-up. -GLB
As you m arvel at size of one trillion dollars in cash, note the now tiny man at the corner, and note too that now the pallets are stacked two deep, one on top another. Y ou ’re going to need a bunch o f trucks to move this much cash.
READERS WRITEM arch 2009 15
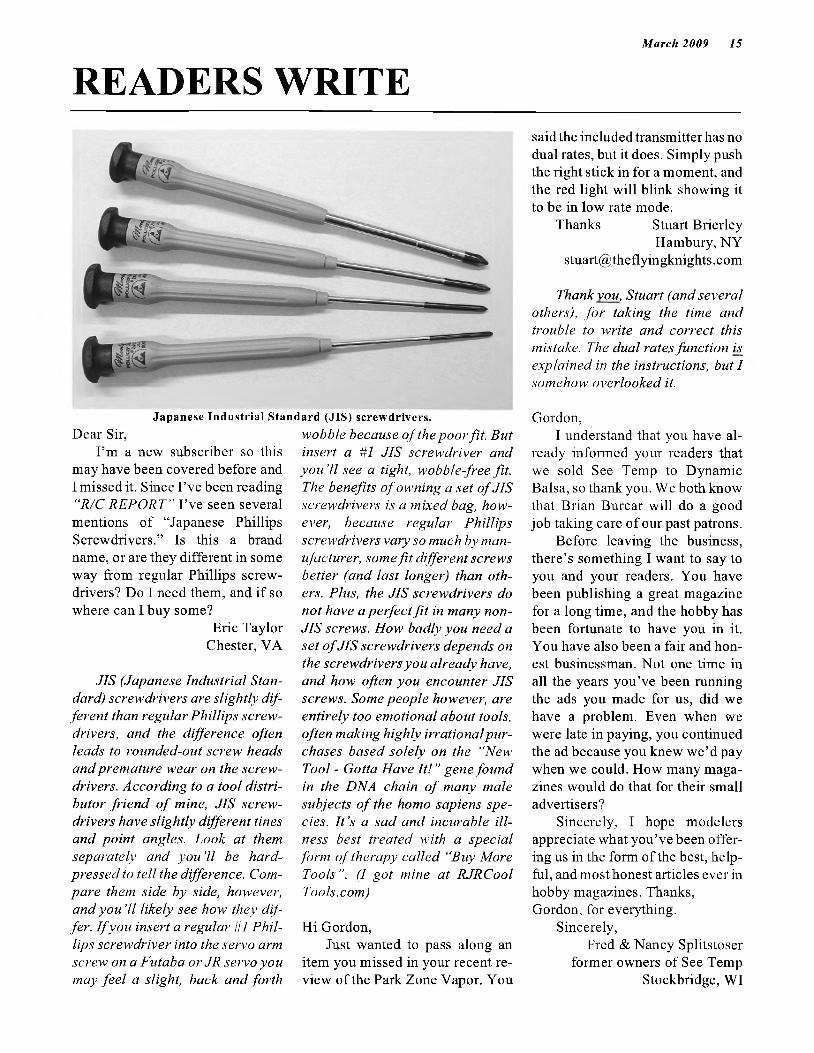
Japanese Industrial Standard (JIS) screwdrivers.Dear Sir,
I’m a new subscriber so this may have been covered before and I missed it. Since I’ve been reading “R/C REPORT” I’ve seen several mentions of “Japanese Phillips Screwdrivers.” Is this a brand name, or are they different in some way from regular Phillips screwdrivers? Do I need them, and if so where can I buy some?
Eric Taylor Chester, VA
JIS (Japanese Industrial Standard) screwdrivers are slightly different than regular Phillips screwdrivers, and the difference often leads to rounded-out screw heads and premature wear on the screwdrivers. According to a tool distributor friend o f mine, JIS screwdrivers have slightly different tines and point angles. Look at them separately and you ’ll be hard- pressed to tell the difference. Compare them side by side, however, and you ’ll likely see how they differ. I f you insert a regular #1 Phillips screwdriver into the setwo arm screw on a Futaba or JR servo you may feel a slight, back and forth
wobble because o f the poor fit. But insert a #1 JIS screwdriver and you ’ll see a tight, wobble-free fit. The benefits o f owning a set o f JIS screwdrivers is a mixed bag, however, because regular Phillips screwdrivers vary so much by manufacturer, some fit different screws better (and last longer) than others. Plus, the JIS screwdrivers do not have a perfect fit in many non- JIS screws. How badly you need a set o f JIS screwdrivers depends on the screwdrivers you already have, and how often you encounter JIS screws. Some people however, are entirely too emotional about tools, often making highly irrational purchases based solely on the ‘‘New Tool - Gotta Have It!” gene found in the DNA chain o f many male subjects o f the homo sapiens species. I t ’s a sad and incurable illness best treated with a special form o f therapy called “Buy More Tools”. (I got mine at RJRCool Tools.com)
Hi Gordon,Just wanted to pass along an
item you missed in your recent review of the Park Zone Vapor. You
said the included transmitter has no dual rates, but it does. Simply push the right stick in for a moment, and the red light will blink showing it to be in low rate mode.
Thanks Stuart BrierleyHambury, NY
Thank you, Stuart (and several others), fo r taking the time and trouble to write and correct this mistake. The dual rates function is_ explained in the instructions, but I somehow overlooked it.
Gordon,I understand that you have al
ready informed your readers that we sold See Temp to Dynamic Balsa, so thank you. We both know that Brian Burcar will do a good job taking care of our past patrons.
Before leaving the business, there’s something I want to say to you and your readers. You have been publishing a great magazine for a long time, and the hobby has been fortunate to have you in it. You have also been a fair and honest businessman. Not one time in all the years you’ve been running the ads you made for us, did we have a problem. Even when we were late in paying, you continued the ad because you knew we’d pay when we could. How many magazines would do that for their small advertisers?
Sincerely, I hope modelers appreciate what you’ve been offering us in the form of the best, helpful, and most honest articles ever in hobby magazines. Thanks,Gordon, for everything.
Sincerely,Fred & Nancy Splitstoser
former owners of See Temp Stockbridge, WI
16 R/C REPORT
HERE’S HOW...
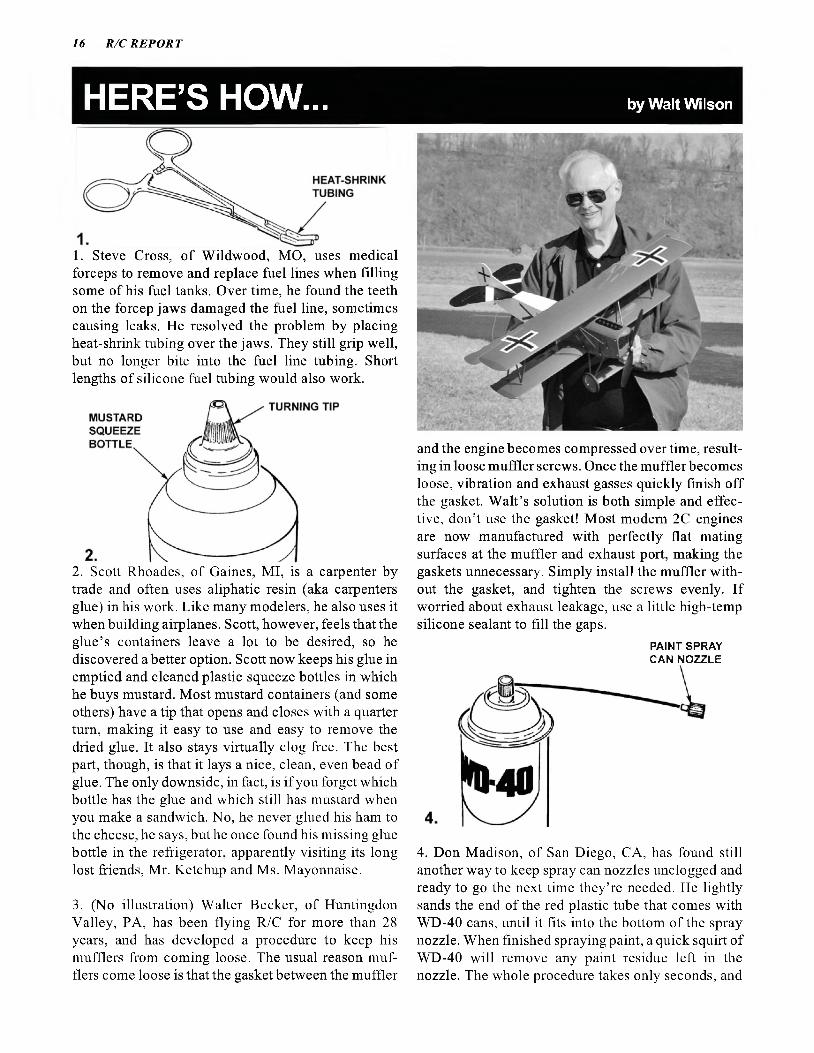
1. Steve Cross, of Wildwood, MO, uses medical forceps to remove and replace fuel lines when filling some of his fuel tanks. Over time, he found the teeth on the forcep jaws damaged the fuel line, sometimes causing leaks. He resolved the problem by placing heat-shrink tubing over the jaws. They still grip well, but no longer bite into the fuel line tubing. Short lengths of silicone fuel tubing would also work.
2. Scott Rhoades, of Gaines, MI, is a carpenter by trade and often uses aliphatic resin (aka carpenters glue) in his work. Like many modelers, he also uses it when building airplanes. Scott, however, feels that the glue’s containers leave a lot to be desired, so he discovered a better option. Scott now keeps his glue in emptied and cleaned plastic squeeze bottles in which he buys mustard. Most mustard containers (and some others) have a tip that opens and closes with a quarter turn, making it easy to use and easy to remove the dried glue. It also stays virtually clog free. The best part, though, is that it lays a nice, clean, even bead of glue. The only downside, in fact, is if you forget which bottle has the glue and which still has mustard when you make a sandwich. No, he never glued his ham to the cheese, he says, but he once found his missing glue bottle in the refrigerator, apparently visiting its long lost friends, Mr. Ketchup and Ms. Mayonnaise.
3. (No illustration) Walter Becker, of Huntingdon Valley, PA, has been flying R/C for more than 28 years, and has developed a procedure to keep his mufflers from coming loose. The usual reason mufflers come loose is that the gasket between the muffler
by Walt Wilson
and the engine becomes compressed overtime, resulting in loose muffler screws. Once the muffler becomes loose, vibration and exhaust gasses quickly finish off the gasket. Walt’s solution is both simple and effective, don’t use the gasket! Most modem 2C engines are now manufactured with perfectly flat mating surfaces at the muffler and exhaust port, making the gaskets unnecessary. Simply install the muffler without the gasket, and tighten the screws evenly. If worried about exhaust leakage, use a little high-temp silicone sealant to fill the gaps.
PAINT SPRAY CAN NOZZLE
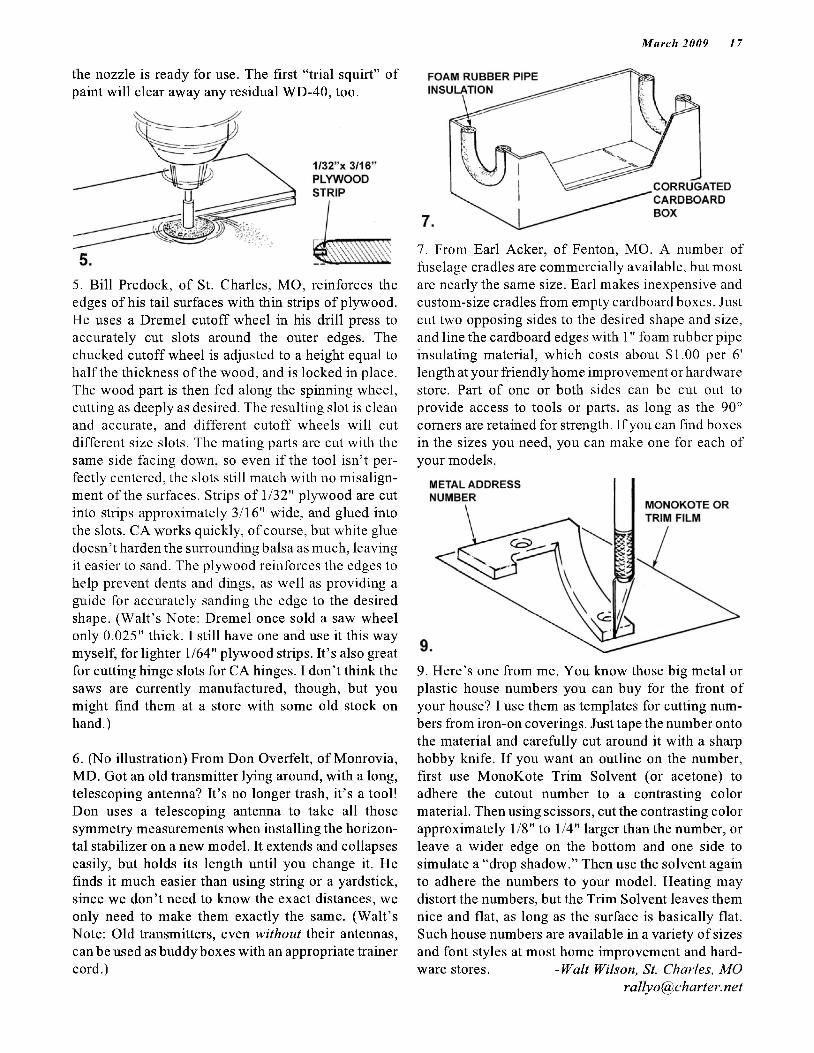
4. Don Madison, of San Diego, CA, has found still another way to keep spray can nozzles unclogged and ready to go the next time they’re needed. He lightly sands the end of the red plastic tube that comes with WD-40 cans, until it fits into the bottom of the spray nozzle. When finished spraying paint, a quick squirt of WD-40 will remove any paint residue left in the nozzle. The whole procedure takes only seconds, and
M arch 2009 17
the nozzle is ready for use. The first “trial squirt” of paint will clear away any residual WD-40, too.
5. Bill Predock, of St. Charles, MO, reinforces the edges of his tail surfaces with thin strips of plywood. He uses a Dremel cutoff wheel in his drill press to accurately cut slots around the outer edges. The chucked cutoff wheel is adjusted to a height equal to half the thickness of the wood, and is locked in place. The wood part is then fed along the spinning wheel, cutting as deeply as desired. The resulting slot is clean and accurate, and different cutoff wheels will cut different size slots. The mating parts are cut with the same side facing down, so even if the tool isn’t perfectly centered, the slots still match with no misalignment of the surfaces. Strips of 1/32" plywood are cut into strips approximately 3/16" wide, and glued into the slots. CA works quickly, of course, but white glue doesn’t harden the surrounding balsa as much, leaving it easier to sand. The plywood reinforces the edges to help prevent dents and dings, as well as providing a guide for accurately sanding the edge to the desired shape. (Walt’s Note: Dremel once sold a saw wheel only 0.025" thick. I still have one and use it this way myself, for lighter 1/64" plywood strips. It’s also great for cutting hinge slots for CA hinges. I don’t think the saws are currently manufactured, though, but you might find them at a store with some old stock on hand.)
6. (No illustration) From Don Overfelt, of Monrovia, MD. Got an old transmitter lying around, with a long, telescoping antenna? It’s no longer trash, it’s a tool! Don uses a telescoping antenna to take all those symmetry measurements when installing the horizontal stabilizer on a new model. It extends and collapses easily, but holds its length until you change it. He finds it much easier than using string or a yardstick, since we don’t need to know the exact distances, we only need to make them exactly the same. (Walt’s Note: Old transmitters, even without their antennas, can be used as buddy boxes with an appropriate trainer cord.)
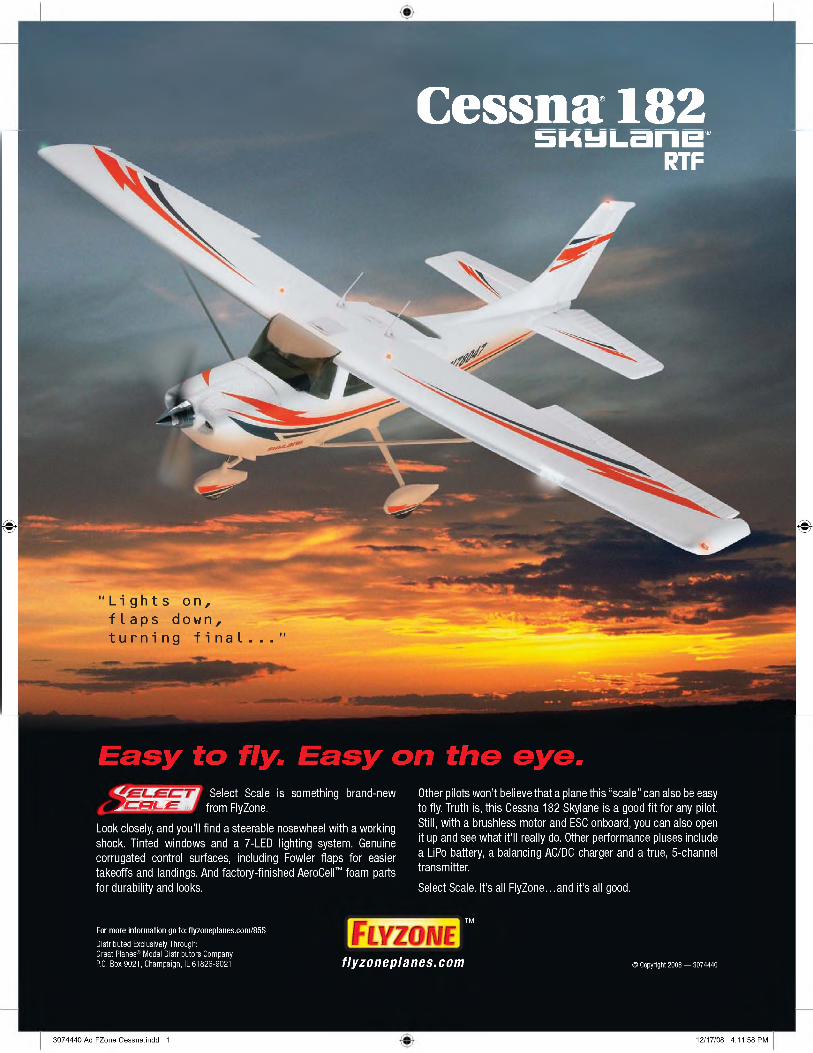
7. From Earl Acker, of Fenton, MO. A number of fuselage cradles are commercially available, but most are nearly the same size. Earl makes inexpensive and custom-size cradles from empty cardboard boxes. Just cut two opposing sides to the desired shape and size, and line the cardboard edges with 1" foam rubber pipe insulating material, which costs about $1.00 per 6' length at your friendly home improvement or hardware store. Part of one or both sides can be cut out to provide access to tools or parts, as long as the 90° comers are retained for strength. If you can find boxes in the sizes you need, you can make one for each of your models.
9. Here’s one from me. You know those big metal or plastic house numbers you can buy for the front of your house? I use them as templates for cutting numbers from iron-on coverings. Just tape the number onto the material and carefully cut around it with a sharp hobby knife. If you want an outline on the number, first use MonoKote Trim Solvent (or acetone) to adhere the cutout number to a contrasting color material. Then using scissors, cut the contrasting color approximately 1/8" to 1/4" larger than the number, or leave a wider edge on the bottom and one side to simulate a “drop shadow.” Then use the solvent again to adhere the numbers to your model. Heating may distort the numbers, but the Trim Solvent leaves them nice and flat, as long as the surface is basically flat. Such house numbers are available in a variety of sizes and font styles at most home improvement and hardware stores. -Walt Wilson, St. Charles, MO

2009 kFRIDAY: 1 -7 P.M. AND SATURDAY: 8A.M.-5 P.M.OVER 1000 TABLES OF MERCHANDISE RAFFLES, R/C FLYING DEMOS INDOOR FLY-IN, BOAT POND, MECA COLLECTO C O N T R O L L IN E F L Y IN G D E M O SRV SITES AVAILABLE ON FAIRGROUNDS
CALL (478)988-6557
T A B L E S : C O N T A C T N O R M D E P U T Y E M A IL : N D E P U T Y @ B E L L S O U T H .N E T P H O N E : ( 4 7 8 ) 3 2 8 -2 6 8 9
FRIDAY, 6 MARCH AND SATURDAY, 7 MARCH
, m
%
ADVANCED TABLE RESERVATIONS AND PAYMENT ARE REQUIRED. MAKE RESERVATIONS EARLY, THE TABLES GO FAST
< θ “ r
Γ
GEORGIA NATIONAL FAIRGROUNDS I -7 5 A T E X IT 1 3 5
P E R R Y , G E O R G IAσ - .
g a r nAMA CLUb # 228
ď E S m u m IN 1972
WWW.GAMARC.COM/GEORGIA
Cessna; 182
Easy to fly. Easy on the eye.Select Scale is something brand-new
( 'Z S ί ^ Τ Γ Γ - ί Ξ ™ from FlyZone.
Look closely, and you'll find a steerable nosewheel with a working shock. Tinted windows and a 7-LED lighting system. Genuine corrugated control surfaces, including Fowler flaps for easier takeoffs and landings. And factory-finished AeroCell™ foam parts for durability and looks.
Other pilots won't believe that a plane this “scale” can also be easy to fly. Truth is, this Cessna 182 Skylane is a good fit for any pilot. Still, with a brushless motor and ESC onboard, you can also open it up and see what it'll really do. Other performance pluses include a LiPo battery, a balancing AC/DC charger and a true, 5-channel transmitter.
Select Scale. It's all FlyZone.. .and it's all good.
For more information go to: flyzoneplanes.com/85S
Distributed Exclusively Through:Great Planes® Model Distributors Company P.O. Box 9021, Champaign, IL 61826-9021 flyzoneplanes.com © Copyright 2008 — 3074440
3074440 Ad FZone Cessna.indd 1 12/17/08 4:11:58 PM
TM
ALMOST-READY-TO-FLY .60-SIZE WARBIRD
Ready for a warbird? Then you're ready for Top Flite's latest ARF — and to join, R/Č style, with the heroic WWII pilots who earned their wings in the Texan military trainer!From its authentic SNJ Navy trim scheme to the scale cockpit interior and realistic wheel covers, this model does the original proud. Gold Edition quality sets it apart from other ARFs. Open the box and you'll find factory-built and covered wood main sections, a fiberglass cowl, well-engineered mechanical retracts and more..The Texan's forgiving airfoil, operational flaps, and steerable tailwheel all ease your move up to scale warbird flight maneuvers. For more information and the location of the dealer nearest you, visit www.top-flite.com or call
j 1-800-682-8948 and mention code number 83L.
T o p F i l t e c o n t i n u e s b u i l d i n g I nquality and realism beyond the point that other manufacturers consider good enough. The included mechanical retracts, for example, offer extra strength for handling even rough landings.
• Wingspan 69 in (1755 imd• Wing Aren 730 li2 (47.1 dnť!• WeMl: 8.5-9.5 Ib (3855-4310 gi• Wing loadm 27-30 oz4t2 (82-91 gAbifl• lenglit 51 h (1295 imfl• Reqiires: 6-channel rann w/8 savns & 2-stroke .61Π0 cel
or 4-stroke .70.91 (11.5-15 cc) engine
' =>' pJ VJjuiJO
McæCfoTE·
sjvAM),
■ ' Μ / '
Distributed Exclusively Through GREAT PLANES® MODEL DISTRIBUTORS COMPANY, P.0. BOX 9021, CHAMPAIGN, IL 61826-9021 ©Copyright 2008 — 3079169*
#3079169 TOP AT-6 Texan Ad.indd 1 7/18/08 11:05:20 AM

ABSOLUTELY THE HIGHEST QUALITY BALSA AT THE LOWEST PRICES AVAILABLE ANYWHERE!
WE USE ONLY TRIPLE AAA MODEL GRADE BALSA NOT THE
CHEAPEST, BUT ALWAYS THE BEST!§ u//cP Vou’r ’ D rea m iJnto^a'Reali ty!
www.balsausa.com
1/32 X 3 ..............0.58 265 1 /1 6 x6 .2 461 /16x3 ......... ..............0.58 266 3/32 X 6 .2.673/32 X 3 ............ ..............0.69 267 1/8 X 6 . . .2.971 /8 x 3 .............. ..............0.82 268 3/16 X 6 .............. ___ 3.403 /1 6 x 3 ............ ..............0.99 269 1/4 x 6 ..................... 4.131 / 4 x 3 . . ..............1 223 /8 x 3 . . 1 54 36" Matched Sheets1/32 X 4 0 87 MS027 3/32 x 4 .1.561/16 X 4 ___ ..............0.87 MS028 1/8 x 4 ------1.923/32 X 4 ..............1.03 MS029 3/16 x 4 . . .2.081 /8x4 ..............1.22 MS030 1/4 x 4 2 423 /1 6 x4 . . . . 143 42" Matched Sheets1 /4x4 1 63 MS089 3/32 x 4 . .1.813/8 X 4 2 56 MS090 1/8 x 4 .................. . . . .2.19
30” Sheets 062063064065066067068069070071072073074075
36" Sheets001 1/32 X 2 0.59002 1 /1 6 x2 0.60003 3/32 X 2 ............................0 71004 1 /8 x 2 .............................. 0.79005 3 /1 6 x2 0.93006 1 /4 x 2 ...............................1.09007 5 /1 6 x2 1 12008 3 /8x 2 1 35009 1 /2x2 ..............................1 71012 1/32x 3 0.70013 1/16x 3 0 70014 3/32x 3 0 77015 1/8x 3 0 99016 3 /1 6 x3 120017 1/4 X 3 1 48018 5 / 1 6 x 3 ............................ 1.73019 3 /8 x 3 180020 1 /2x 3 ..............................2 36021 3 / 4 x 3 ...............................3.49025 1/32 X 4 1 07026 1 /16x4 1 05027 3/32 x 4 1 29028 1 /8 x 4 1.45029 3/16 x 4 1 73030 1 /4 x 4 2 41031 5 /1 6 x4 2.84032 3 /8 x 4 .............................. 3.30033 1/2 X 4 4 46
42" Sheets080 1/32 X 3 0.78
1 /1 6 x3 0.803 /3 2 x 3 ............................ 0.951 /8 x 3 ...............................1143 /1 6 x3 1.37
6" Wide Shoots - 48" Length
MS091 3/16 X 4 MS092 1/4 X 448" Matched Sheets MS052 3/32 x 4 MS053 1/8 X 4 MS054 3/16 X 4 MS055 1/4 x4
2 41.2.58
. .2.08
. .2 44 .2 78 .3.01
081082083084085086087088089090091092093
1/4 X 3 3/8x3 .1/32 X 4 1/16x4 3/32 X 4 1/8x4 3/16 X 4 1/4x4 .3 /8 x 4 ........................... 3.64
1 73 .2 14 1.22 1 22 .1.63 1 68
.2092 54
3/32 X 3/8 3/32 X 1/2 3/32 X 3/4 3/32 X 1 . 1/8 X 1/8
48” Sheets037 1/32 x 3 ............... 0 92
1/16x3 ..................... 0 923/32x3 ..........................1.101/8x3 ............................1.35
038039040
042 1/4x3 .2.03043 5/16x3 .2.40044 3 /8 x 3 ..................... .247045 1/2x3 ....................... .321046 3/4x3 ....................... 4 76050 1/32 X 4 1 82051 1/16x4 1 44052 3/32 X 4 1.76053 1/8 X 4 201054 3/16 X 4 .2.41055 1/4x4 ....................... .2.84056 5 /1 6 x 4 ............ .3.60057 3/8x4 4 48058 1/2x4 5 226" Wide Sheets - 36" Length185 1/16x6 .1.85186 3/32x6 2 03187 1 /8 x 6 224188 3/16x6 ..................... 2 55189 1/4x6 ....................... .3.15190 3/8x6 ..................... 4 26191 1 /2 x 6 566
48"856 160 161 162163164165857166167168169170171172173174175176177
Sticks1/8 X 1 / 8 ........................ 0 .181/8 X 1/4 0.301/8 X 3 /8 .........................0.331/8 X 1 /2 .........................0.423 /16x3 /16 ..................... 0.333/16 X 3 /8 ....................... 0.433/16 X 1/2 0.513 /1 6 x3 /4 ....................... 0.601/4 X 1 /4 .........................0.451/4 X 3 /8 .........................0.521/4 X 1 /2 .........................0.591/4 X 3 /4 .........................0.881 /4 x 1 ............................1.165/16 X 5/16 0.533/8 X 3 /8 .........................0.703/8 X 1 /2 .........................0.853/8 X 3 /4 ......................... 1.041/2 X 1 /2 .........................0.951/2 X 3 /4 ......................... 1.311/2x1 ............................1.53
1/16 X 1 /16 ................... 0 151/16 X 1 /8 ..................... 0 .151/16 X 3 /1 6 ...................0 181/16x1/4 .0 191/16 X 3 /8 .....................0.201/16 X 1 /2 ..................... 0 261/16x3/4........ 0 351/16 X 1 0.433/32 X 3/32 ....................0.183/32 X 1 /8 ..................... 0.193/32 X 3/16 ....................0 203/32 X 1 /4 ..................... 0.23
30" Balsa W ing Skins286 1/16x 10 .....................5.44287 3/32 X 10 6.58288 1/8x 10 7 6736” Balsa W ing Skins289 1/16x 10 .6.58290 3/32 x 10 7 92291 1/8x 10 9.2748” Balsa W ing Skins292 1/16x 10 .10 67293 3/32 X 10 12 77294 1/8x 10 ....................... 15 0436” Sticks124 123831125126832833834835836837127128838839840129841130131132842843133844134135845846136137138139140141847848849850142143144851145146147852853854855
36" Triangles105 1/4 X 1 /4 ......................... 0.46106 3/8 X 3/8 . 0 52107 1/2 X 1/2 . 0 63108 3/4 X 3/4 ..................... 0.87109 1x1 1 10110 1-1/2 X 1-1/2 . 2 04111 2 x 2 ................................3.4236" Trailing Edges100 1/16x 3/4 ..................... 050099 1/8 X 1/2 ..........................0 48101 3/16 X 1/2 . 0 45103 1/4 X 5/8 ........................ 0 49118 1/4x1 0.59102 5/16x3/4 ....................... 0.53119 5 /1 6 x 1 -1 /4 ................... 0.71120 3/8 X 1-1/2 0.87121 1 /2 x 2 ............................1.3636" Tapered A ileron & Elevator Stock - 36" Lengths
.........0.24........... 029........... 040
. .0.46 .0.16
1/8 X 3 / 1 6 ....................... 0 201/8 X 1 / 4 ............................0 231/8 X 3 / 8 ......... .0 241/8 X 1 /2 ............................ 0.321/8 X 3 / 4 ............................ 0.431 /8 x 1 .............................. 0.533/16 X 3 /1 6 .......................0.203/16 X 1 /4 .........................0 273 /16x3 /8 ....................... 0.323/16 X 1 /2 ..........................0.373/16 X 3/4 .0 453 /16x1 ............................ 0.581/4 X 1/4 0 331/4 X 3 / 8 ............................0 421/4 X 1 /2 ............................ 0 441/4 X 3 / 4 ............................ 0.631 /4 x 1 .............................. 0.785 /1 6 x 5 /1 6 ........................0.425/16x 3/8 0 465/16 X 1 / 2 .......................0 585 /1 6 x 3 /4 ..........................0.695/16 X 1 ............................ 0.883/8 X 3 / 8 ............................ 0 543/8 X 1 /2 ............................ 0.603/8 X 3/4 0.823 /8 x 1 ...............................1031/2 X 1 /2 ............................ 0.741/2 X 3 / 4 ............................ 0.911 /2 x 1 1165/8 X 5 / 8 ............................ 0.855 /8 x 1 ...............................1.313/4 X 3 / 4 ............................ 1 133 /4 x 1 ...............................145
224 1/4x1 ........ 0 CO o
225 1/4 X 1-1/4 .......... 1 04226 1/4 X 1-1/2 .......... .......... 1 16227 1 /4 x 2 ................. ........ 1 29211 5/16 X 1-1/4 .......... 0 72228 5/16 X 1 -1 /2 ........ .......... 1 17229 5/16 X 2 . 1 34212 3/8 X 1-1/4 . 0 88230 3/8 X 1-1/2 .......... .......... 1 31231 3 /8 x 2 ................. .......... 1 .51232 3/8 X 2 -1 /2 .......... .......... 1 .60213 1/2 X 1 -1 /2 .......... .......... 0 .91214 1 /2 x 2 ................ . . . 1 3848" Lengths236 1/4x1 ................. .......... 1 .29237 1/4 X 1-1/4 .......... .......... 1 .43238 1/4 X 1 -1 /2 .......... .......... 1 .60239 1 /4 x 2 ................. .......... 1 77215 5/16x1-1/4 . . 1.62240 5/16 X 1-1/2 . 1 63241 5 /1 6 x 2 ............... .......... 1 85216 3/8 X 1-1/4 .......... 1 81242 3/8 X 1-1/2 .......... . 1 79243 3 /8 x 2 ................. .......... 2 .07244 3/8 X 2 -1 /2 .......... 2 23217 1/2 X 1 -1 /2 .......... .......... 1 .84218 1 /2 x 2 ................. .......... 2 .30
Please visjt your local hobby store for more of our fine products If they are not a Balsa USA dealer, have them contact us to become one!
Blocks196 2 X 2 X 2 (Three For) 1 34197 3 X 3 X 3 0.99245 1 X 2 X 6 ...........................0.61246 2 X 2 X 6 ........................... 0.94247 3/4 X 3 X 6 ........................ 0.71248 1 X 3 X 6 ........................ 0.91249 2 x 3 x 6 1 41599 3 x 3 x 6 1.70250 1 x4 x6 .......................... 1.23251 2 x4 x6 1.87252 3 x 4 x 6 ........................ 2.82198 1 x 2 x 12 1.29253 3/4 x 3 x 12 1 27199 1 X 3 X 12 1 80200 1 x4 X 12 ......................2.38201 2 X 2 X 12 1 87202 2 X 3 X 12 ........................ 2.84254 2 x 4 x 12 ..................... 3.48255 3 x 4 x 12 5.25112 1 x2 x 36 3 67113 1 X 3 x 36 5 33114 1 x 4 x 3 6 6.84115 2 x 2 x 3 6 5.36116 2 X 3 X 36 7 96256 3x 3x36 10.90257 3 x 4 x36 18.90Birch Motor Mount Stock748 3/8 X 3/4 X 12 . 0.61749 1/2 X 3/4 x 12 0 72750 5/8 X 3/4 X 12 0 75751 3/4 X 3/4 X 1 2 ................... 0.82
Landing Gear B locks Grooved Bass - 3/8 X 3/4 X 12208 1/8’ 0.56209 5/32 0.56210 3/16'................................ 0.56Hardwood Dowels355 1/8x 36 ..........................0.18356 3/16x36 ........................0.19357 1/4 X 36 0.22358 5/16 x 36 0 30359 3/8 X 36 0 40360 1/8 x48 ................... 0 25361 3/16 X 48 ....................... 0 26362 1/4 x48 0.30363 5/16x48 0 39364 3/8 X 48 0 5036” Basswood Sticks680 1/16 X 1/8 ................ 0 26
1/16x3/16 0.261/16 X 1 /4 .......................... 0.283/32 X 1 /8 .......................... 0.283/32 X 3/16 0.283/32 X 1 /4 ........................0.291/8 X 1 /8 ..........................0.241/8 X 3/16 ..................... 0.291/8 X 1/4 0.34
Miscellaneous Assorted Wood598 Bag-A-Balsa
Sheets & Sticks ........... 5.88698 Bag-A-Blocks
(when ava ilab le )............. 6.65
Hand Selection of Balsa is available in ‘ Hard", 'Medium-, or 'Soft' grades Please specify your selection type and add an additional 25% to the price of the item to be hand selected This excludes: 1/16 sq. & 3/32 sq sticks NOTE: All wood is “Hand selected" only - it is not scale weighed.
681682683684685278 610279280 611 612 281613614615 282283284285
1/8 X 3/8 1/8 X 1/2 1/8 X 3/4 3/16 X 3/16 . 3/16 X 1/4 . 3/16 X 3/8 3/16 X 1/2
42” Basswood Spar Stock623 1/4 X 5/8 1.03624 1/4 X 3/4 .1.21625 5/16 X 5 /8 ................... .1.16626 5/16 X 3 /4 ..................... .1.39641 3/8 X 3 /4 ....................... 1.68642 3/8x1 .2.2736" Basswood Triangles315 3/8 X 3 /8 ....................... .0.62316 1/2 X 1 /2 ....................... .0.87317 3/4 X 3 /4 ....................... .1.1142" Shaped Bass Wing Struts276 3/8 X 5 /8 ....................... 4 25277 1/2 X 7 /8 ....................... .6.37Birch Plywood W ing Skins352 1/64 X 48 X 48 ...............60.00A352 TWO F O R .................. 110.00
Premium Model Grade AAA Poplar L ight Plywood A327 1/8 X 6 X 24 A328 1/4 X 6 X 24 A330 1/8 X 12 X 24 A331 1/4 X 12 X 24 327 1/8 X 6 X 48
1/4 X 6 X 48 1/8 X 12 X 48 1/4 X 12 X 48
32833033112” Birch A ircra ft Plywood B333 1/64 X 6 - 3 ply B334 1/32 X 6 - 3 ply B335 1/16 X 6 - 3 ply B336 3/32 x 6 - 5 ply B337 1/8 X 6 - 5 ply B338 3/16 X 6 - 4 ply B339 1/4 x 6 - 5 ply B340 3/8 X 6 - 7 ply B344 1/64 X 12 - 3 ply B345 1/32 X 12 - 3 ply B346 1/16 X 12 - 3 ply B347 3/32 x 12 - 5 ply B348 1/8 X 12 - 5 ply B349 3/16 X 12 - 4 ply B350 1/4 X 12 - 5 ply B351 3/8 X 12 - 7 ply
.1.71 2.42 .3.28 4.75 3.25 4 74 .6.44 .9.23
2.55 1.67
.1.78
.2.74 2.81 1.66
.2.01
.2 34 4 39 2.79 2 97 4.74 485 .2.77 .3.40 .3.98
040.0.47.0.540.33.0.37046055
1/4 X 1 /4 ..........................0.521/4 X 3 /8 ..........................0.601/4 X 1 /2 ..........................0.703/8 X 3 /8 ..........................0.72
48" Basswood Sticks686 3/32 X 1/8 ........................0.35687 3/32 X 3/16 0.35688 3/32 X 1/4 0.43616 1/8 X 1 /8 ...........................0.33617 1/8x3/16 0.37300 1/8 X 1/4 0 41301 1/8 X 3 /8 ........................ 0.53618 1/8 X 1 /2 ........................ 0.62619 1/8 X 3 /4 ........................ 0.72302 3/16x3/16 0 42620 3/16 X 1/4 0 48621 3/16 X 3 /8 ...................... 0.60622 3/16 X 1/2 ..........................0.72303 1/4 X 1/4 0.65304 1/4 X 3/8 0 78305 1/4 X 1/2 ..........................0.92306 3/8 X 3/8 0 96
24" B irch A ircraft Plywood A333 1/64 X 6 - 3 p ly A334 1/32 X 6 - 3 p ly A335 1/16 X 6 - 3 p ly A336 3/32 x 6 - 5 p ly A337 1 /8 x 6 - 5 p ly A338 3 /1 6 x 6 -4 p ly A339 1/4 x 6 - 5 p ly A 340 3/8 X 6 - 7 p ly A344 1/64 X 12 - 3 p ly A345 1/32 X 12 - 3 p ly A346 1/16 X 12 - 3 p ly A 347 3/32 x 12 - 5 p ly A348 1/8 X 12 - 5 p ly A349 3/16 X 12 - 4 p ly A350 1/4 X 12 - 5 p ly A351 3 /8 x 1 2 -7 p ly
48" B irch A ircraft Plywood333 1/64 X 6 - 3 ply
1/32 X 6 - 3 ply 1/16 X 6 - 3 ply 3/32 X 6 - 5 ply 1 / 8 x6 - 5 ply 3/16 X 6 - 4 ply 1/4 X 6 - 5 ply 3/8 X 6 - 7 ply 1/64 X 12 - 3 ply 1/32 X 12 - 3 ply 1/16 X 12 - 3 ply 3/32 X 12 - 5 ply 1/8 X 12 - 5 ply 3/16 X 12 - 4 ply 1/4 X 12 - 5 ply 3/8 X 12 - 7 ply
Catalogs $3.00
334335336337338339340344345346347348349350351
.4.70
.2.94
.3.15
.5.08
.5.20292.3.604258.37.5.175529.06.9.27.5.13.6.397.56
. .8.99
. .5.47 5.85 .9.75 .9.98 .5.43 .6.80 .8.10 15.73 9.57
.10.23
.17.06 17.47 .9.49 11.90 14 17
WE DON’T USE VOICli
WAIL 0ORDERS ONLY!
(NO Tech Calls Accepted) 1-800-BALSA US 1-800-225-7287
Fax 1-906-863-5878
Customer Service & Tech Support: 1-906-863-6421
or [email protected] Business Hours:
8:00 to 5:00 CST M-F
Email Address:[email protected]
P.O. Box 164 Marinette, Wl 54143
T S T
WWW.BALSAUSA.COM ON THE WEB
24 HRS A DAY!
We accept Visa, MasterCard Discover and personal checks Mich residents add 6% sales tax Handling charge is S9.95 for orders up to S100.00. S10 95 for orders $100.01-5300 00, $12 95 for orders $300 01-5500.00. actual fre ight for orders 5500.01 and up Express shipments. APO, FPO. Canada & Foreign orders pay 54 00 per box handling fee plus actual freight We recommend credit card payment for any orders that are subject to special shipping terms to avoid over or underpayment P rices s u b je c t to change w ith o u t no tice . 15% Restocking Fee on ALL returned items.
22 R /C REPORT
THE BIG PICTURE by Dick Pettit
Iťs already the third month of the year and I can’t seem to keep up with all the things in the works so far. I’ve already made plans to attend the Perry Swap Shop, the 2009 Toledo Expo, and Top Gun 2009, but the list keeps getting longer. I’ve been working on another new kit project, and by the time you read this it should be in the air if all goes well. This one will feature a fully scale-detailed interior, and a paint finish that I’ve never used before. Stay tuned for more details as the project progresses.
This month, I’ll show you a pair of beautiful biplanes, I’ll tell you how to make a specialty tool right in your own work shop, and I’ll show you some preliminary photos of my newest project.
NEED A TAP? MAKE IT!I was working on a project
recently that required me to drill and tap two holes in a piece of nylon. That sounds easy enough, doesn’t it? Well, not if you have to drill and tap the holes to fit a 5mm bolt. I guess I could run around town trying to find a tap and matching drill bit, or I could get on the phone with some of my modeler friends asking if they had what I needed. But then I remembered
another method of tapping holes in moderately soft materials like hardwood, nylon, and plastic. It’s fast, easy, and the supplies are already here in the work shop.
First we need a bolt the same size as the threads we want to tap. Since I was tapping a hole for 5mm threads, I used a 5mm bolt. Look at a drill index and find a suitable pilot drill bit that will still provide enough material in which to tap the threads. I suggest practicing on a scrap piece of material before actually drilling and tapping the final hole. Here’s how to make your own tap: Put a thin cut-off wheel in
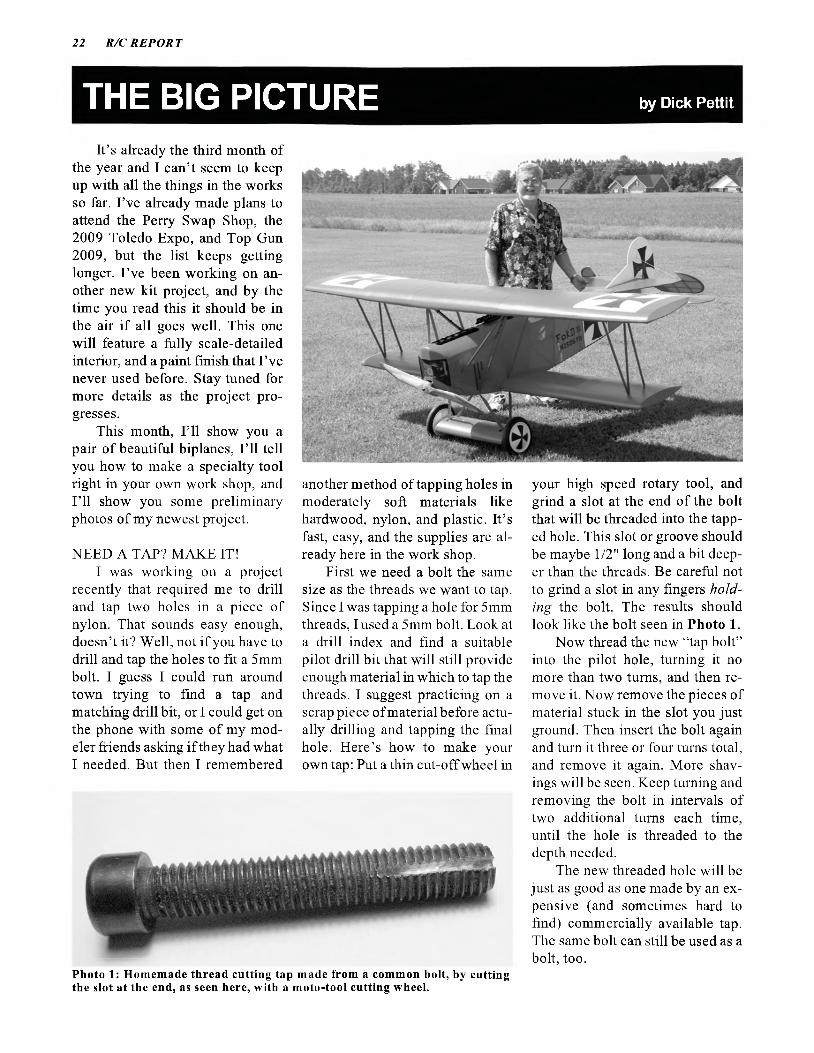
your high speed rotary tool, and grind a slot at the end of the bolt that will be threaded into the tapped hole. This slot or groove should be maybe 1/2" long and a bit deeper than the threads. Be careful not to grind a slot in any fingers holding the bolt. The results should look like the bolt seen in Photo 1.
Now thread the new “tap bolt” into the pilot hole, turning it no more than two turns, and then remove it. Now remove the pieces of material stuck in the slot you just ground. Then insert the bolt again and turn it three or four turns total, and remove it again. More shavings will be seen. Keep turning and removing the bolt in intervals of two additional turns each time, until the hole is threaded to the depth needed.
The new threaded hole will be just as good as one made by an expensive (and sometimes hard to find) commercially available tap. The same bolt can still be used as a bolt, too.
Photo 1: Hom em ade thread cutting tap made from a common bolt, by cutting the slot at the end, as seen here, with a m oto-tool cutting wheel.
M arch 2009 23
★ Pro-Line Aerobatic Aircraft
★ Exclusive Distributor of Palmer Plans and Instructions
★ Exclusive Distributor of Don Smith Plans and Accessories
★ LASERLINE Giant Scale Aircraft Series
609.538 .1388 ★ w w w .precis ioncutk its .com
Symbol o f Excellence’
CLONES, COPIES, AND CHEAP KNOCK-OFFS
The following is a copy of a note I found on a website belonging to a new, up and coming engine importer and distributor. I’ve blanked out his name to prevent the appearance of showing partiality. The only reason I’m even telling you about this is to give you a better understanding of how certain foreign manufacturers “reverse engineer” products, and then sell them for at a low price since they didn’t have to engineer the product.
“A while back, I received some emails from modelers who had noticed our engines on E-bay, selling for Jess than the regular selling cost. I answered them all...
“Yes i t ’s interesting and there’s a good reason. It looks like a XX engine, but i t ’s not. You’ll find me and all the distributors o f the XXengines repeating the same story. XX engines are the most
copied and cloned engines bought through third party companies and sold as their own by other engine sellers. Notice that I did not say ‘manufacturers ’.
“That’s why X X engines had to
actually retool their engine line-up so that these other substandard designs won't be associated with the XX line. This was completed early this year, and these new engines are getting incredible re
— Jerry Cotter’s —Scale Tailwheels available in 1/4 & 1/3 Scale in a choice of
Left or Right forks
-SPECIFICATIONS-Stainless Steel Investment Castings
Fork & Swivel Base CNC Machined Wheel Hub
6061 T6 Aluminum Tire: 1/4 scale — 1 1/2"Tire: 1/3 scale------2"Main Spring; 3 Progressive Leafs
Spring Steel, Black Oxide finish Tiller Bar: Laser cut
.032 Stainless steel Steering Chain & Spring un it:
2 each with 4 oval clips Hub Cap :formed alum.w/lock ring
All necessary mounting hardware included
Prices : 1/4~$78.50 1/3- 98.50 +S&H
Order Contact : B ill R aub
Suggestions & Comments are welcomed by Jerry Cotter a t :
fax (973) 376-5937 att:Jerrye-mail - [email protected]
115 Hunter Ave Fanwood, NJ 07023-1030
Ph. (908) 322-7221 - fax (908) 322-5522e-mail — cirrusvent @ juno.com
24 R /C RE POR T
The math is simple... IMAA BIG FUN!Join TODAY!
Call (785 ) 883-5569 www.fly-imaa.or|
You’ll Receive Four Great Issues of HighFlight Magazine Every Year for only $35 !!
The International Miniature Aircraft Associationis the AMA’s Special Interest Group for Giant Scale R/C
Fly in IMAA Sanctioned Events!
-views. As distributors o f these engines, we are really hesitant o f talking these engines up. But it really is coming to a point that we need to differentiate ourselvesfrom the lower tier (expletive deleted) manufacturers that are giving the quality engine manufacturers like XX, headaches. ”
“Gas engines that modelers think are manufactured by the company selling them are in for a big surprise. Many o f them are not. They are either contracted out,
cloned, copied, forged, or whatever you want to say. There was a seller that actually put a picture o f the RCGF 150cc engine on their website and starting selling them as their own brand!!!”
“I see posts that have guys raving about the deals they got for an engine that should cost 100's more. To be fair, some o f the deals are real and the buyer is the winner. Talking from personal experience, these deals are few and far between. You know why. ”
“The engines that are bought from unknown sellers are junk, made with substandard materials. They ’ll run for a couple o f hours or maybe even a season, and then die. The seller has dozens o f these cloned and copied engines and he is selling them one at a time. The posts on all the popular R/C sites are fu ll o f these stories. So now a happy modeler becomes a (expletive deleted)-off consumer, looking for some kind o f redress. Good luck... go ahead and get some service for them... go ahead. ”
“Over the summer I dealt with a number o f modelers on these issues. I t ’s frustrating and time consuming, but one setwice that I ’m pleased to do, so that I can educate them. ”
“H ere’s the kicker on this. Some o f the sellers, who were hawking the pseudo X X engines, actually gave the buyers the name and number o f our company, so that i f any problems were experienced they could call us for imme-
Wingspan 132 in. Wing Area 3380 sq. in. Length 96 in. Weight 36 lb. (approximate) Recommended Engines 60cc - 80cc Gas
Available Direct From
- B ruce T harpe EngineeringQ 1 * C I _ 8622 E Evans Creek Road, Rogue River, OR 97537
You-Build-lt Kit: $519.95 plus $35.00 shipping in U.S. Optional Carved-Balsa STOL Wingtips (shown) $89.95
Quality-Minded Model Aircraft Kits
www.btemodels.com 1 -800-557-4470

M arch 2009 25
We offer the largest selection of field-proven Giant Scale plans available.... 27 and MORE ON THE WAY!
And NOW..
PT-17 Stearman 7 T $51,00P-40 Warhawk 94“ 55.00AT-6/SNJ Texan 101" 55,00F8F Bearcat 86“ 55.00A6M5 Zero 91“ 55.00Fokker Dr.1 Triplane 63“ 37.00Taube (semi-scale) 88" 37.00Beech D-18/C-45 114" 61.00Beech D17S 86.5’ 59.00P-51 D Mustang 96“ 55.00P-47 Thunderbolt 70" 47.00F9F Panther 72" 51.00P-61 Black Widow 114" 61.00F6F Hellcat 96“ 55.00P-47 Thunderbolt 92" 55.00A -1 Sky raider 700" 55.00P-38 Lightning 114" 61.00SBD Dauntless 100" 55.00Spirit of St. Louis 138” 57.00PT-17Stearman 87" 55.00Turbinator Sport Jet 72" 57,00B-25 Mitchell 101" 57.00B-25 Mitchell 118" 59.00Ju-87B Stuka 100" 55.00DC-3 / C-47 140" 61.00F4U Corsair 93” 55.00Ercoupe 80” 41.00
P-S1PIN-HOLE FREE, SURFACE PRIMER
.COAT APPLIED IN THE MOLD!
CO I— LU COz<_iCL
READY FOR PANEL LINES AND SURFACE
DETAILINGCAST P-40 EXHAUST
ALSO AVAILABLE FOR OUR CORSAIR WARHAWKHELLCAT THUNDERBOLTLIGHTNING STUKA
W E ALSO S TO C K A FULL LINE O F THE M O S T PO PULAR G IA N T
SCALE A C C E S S O R IE SASK ABOUT OUR COMBINATION PACKAGES
M A S T E R C A R D A N D V IS A A C C E P TE D
V
www.ziroliplans.comV /F /7 Z S
PLA N S S H IP P E D RO LLED, T U B E P R O T E C T E D
W IT H IN TH E U .S .FIBERGLASS COMPONENTS
AND CANOPIES AVAILABLE
PLEASE A D D $1 1 .0 0 FO R U P S S H IP P IN G F O R E IG H O R D E R S , PLEASE IN Q U IR E
ILLUSTRA TED CATALOG S5;FR EE W IT H O R D E R
29 EDGAR DRIVE, SMITH TOWN, NY 11787 ph: (631) 467-4765 FAX: (631) 467-1752
diate service. What a great scam. ” “One fella even sent me his
engine. The box was a real XX box (or one heck o f a good copy!!), and the instructions were written in Urdu (honestly!). The ignition system was blue colored (unknown to me or anyone else that I talked with). Now, to the engine. ”
“The engine wasn 7 even close to the look o f our engine. Yes it
had a cylinder head and a carburetor, but the spark plug did not fit the engine. The seller even painted the muffler shiny black. It took me hours to convince the buyer he’d been had. Man, was he ever angry. I did feel for this guy. He eventually bought one o f our legitimate ones. ”
“Right now, with all the proactive stuff that w e’ve been doing on
stemming the doners and copiers, it seems that these guys have switched tactics. Now, w e’re seeing cloned YY engines coming on line. I feel for the guys who think that they will be getting the deal, but instead getting the shaft!”
READER’S FLEETOne of our readers sent me a
photo CD and a letter describing
SEE TEM P PRODUCTSINSTANT TEMPLATE MATERIAL
N o w th in n e r fo r e a s ie r han d lin q , a n d t in te d fo r b e t te r v is ib ilitv !
21-1/2” X 51-1/2” Tem plate Sheets Stainless Steel BrushesEpoxy (Tin Acid) Brushes 4x6 W eight BagsFlexible Aluminum Tubing Velcro Straps
Mixing Cups and Mixing Sticks ...and much, much more.Call (8 1 5 )8 5 6 -2 2 7 2 DYNAM IC BALSA & HOBBY
w w w .d b a lsa .co m LEONORE, IL 6 1 3 3 2

26 R /C RE POR T
Photo 2: Quarter Scale Fleet M odel 2 from H arry Antenucci, o f A lbuquerque, NM.his latest project, a 1/4-scale Fleet Model 1 biplane, built from the popular Concept Models kit. And, wouldn’t you know, it’s been decorated and powered just about the same as the one I just finished. How did he know?
Anyway, here’s the plane (see
Photo 2) and its owner, Harry Antenucci, from Albuquerque, NM. Harry writes:
“I guess (in my mind) a Fleet had a square tail. But when I got to the Tucson Scale Classic, I like to go to the Pima Air Museum and lo and behold they have a round tail
version there. I prefer it to tell you the truth. ”
“All five servos are Futaba, and the rudder and elevator servos are in the tail section. The (Zeno ah) G-38 is swinging a 18x10 Xoar prop. The covering is similar to Kover all (it was given to me years ago). Some knowledgeable people tell me it’s ‘Ceconite’, but I can ’t swear to that. The covering is painted with Minwax polycrylic first (two coats) before the paint. I like the polycrylic because it has no odor (like dope), it cleans up with water, and does the same job. I ’ve been converted! The actual paint is Lowes outdoor water-base paint, and the decals are by Callie Graphics. ’’
“I ’m working on the cylinders now. I ’ve just added the fuel gauge and fuel line on the top center o fPhoto 3: All the wooden parts for my latest kit project

M arch 2009 27
Photo 4: Complete scale interior for the project
the wing. I ’ve had a few flights on it, bat I was having so much fun watching it that, although, I had my camera I neglected to ask anyone to take in-flight photos. I f weather permits I ’ll take some photos
this weekend. There’s only two weeks until the Tucson Scale Classic and I need more stick time with it. ”
Great job, Harry!
SNEAK PEEKI thought Ed tease you with a
few photos of my newest project. Since it won’t be complete for a while yet, my “kit count” for 2008 will remain at two. But that’s still more kits than I’ve built per year in a long time.
Photo 3 shows what the kit contents look like, right from the box. As you can see, there are many individual wood parts to be glued together, and many that have to be cut to size before gluing. Man I love the smell of balsa dust in the morning!
Once a number of these parts have been glued together, the individual structures are sheeted with balsa and then covered with thin fiberglass cloth applied using clear, water base polyurethane to fill the weave. Once the glass and polyurethane have cured, it’s then primed, sanded, primed again, and made
G IA N T SCALE
PERFECT first
TWIN OTTER 130" span 1/6 sea
giant scale multi P L A N S $89.95 + $15.00 sh
built up balsa/ply construction short kit and cowls avialableplease visit
.johnsplansandkits.comby hank harjes
28 R /C RE POR T
φ'
T i » -Photo 5: Plans and accessories for my latest project
ready for paint. I’ll be using some really high tech paint on this model, house paint applied with a spray gun!
After the plane is framed up, there’s a complete scale interior that has to be cut from vacuum formed plastic parts, along with other details that come in the kit. The interior kit comes from Dynamic Balsa. Photo 4 shows these parts prior to cutting, fitting, and installation. They’ll be painted a flat military green before installation, and I have a scale pilot figure to go in the driver’s seat.
I don’t want to reveal anymore details about this project just yet, but it’s progressing nicely. I work on it about two to three hours each evening, and maybe eight hours on the weekends. I can get a lot done
even during the short building sessions. Much of the construction will be done with yellow carpenters glue, but I’ll use Zap and Z-Poxy where necessary.
Finally, these are the plans and accessories that will be used to build the new project (see Photo 5). If you look really close, you may be able to see what the model is supposed to look like.
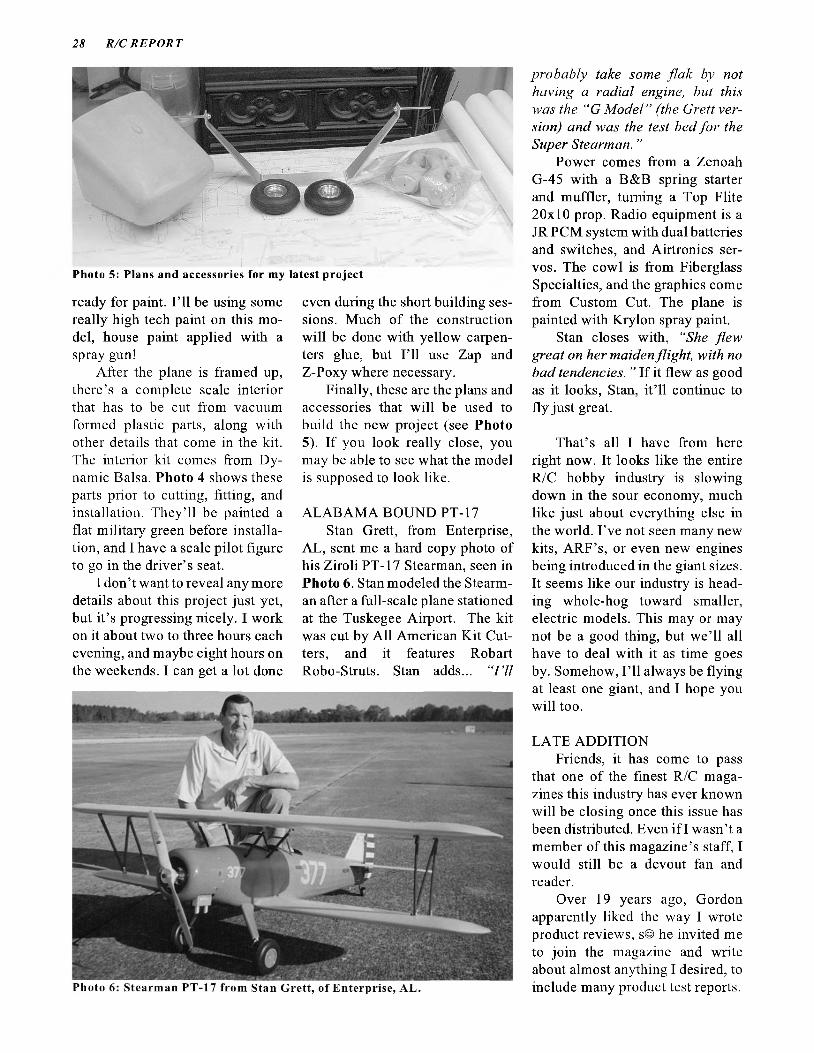
ALABAMA BOUND PT-17Stan Grett, from Enterprise,
AL, sent me a hard copy photo of his Ziroli PT-17 Stearman, seen in Photo 6. Stan modeled the Stearman after a full-scale plane stationed at the Tuskegee Airport. The kit was cut by All American Kit Cutters, and it features Robart Robo-Struts. Stan adds... “I ’ll
probably take some flak by not having a radial engine, bat this was the “G Model" (the Grett version) and was the test bed fo r the Super Stearman. ”
Power comes from a Zenoah G-45 with a B&B spring starter and muffler, turning a Top Flite 20x10 prop. Radio equipment is a JR PCM system with dual batteries and switches, and Airtronics servos. The cowl is from Fiberglass Specialties, and the graphics come from Custom Cut. The plane is painted with Krylon spray paint.
Stan closes with, “She flew great on her maiden flight, with no bad tendencies. ” If it flew as good as it looks, Stan, it’ll continue to fly just great.
That’s all I have from here right now. It looks like the entire R/C hobby industry is slowing down in the sour economy, much like just about everything else in the world. I’ve not seen many new kits, ARF’s, or even new engines being introduced in the giant sizes. It seems like our industry is heading whole-hog toward smaller, electric models. This may or may not be a good thing, but we’ll all have to deal with it as time goes by. Somehow, I’ll always be flying at least one giant, and I hope you will too.
LATE ADDITIONFriends, it has come to pass
that one of the finest R/C magazines this industry has ever known will be closing once this issue has been distributed. Even if I wasn’t a member of this magazine’s staff, I would still be a devout fan and reader.
Over 19 years ago, Gordon apparently liked the way I wrote product reviews, s© he invited me to join the magazine and write about almost anything I desired, to include many product test reports.

M arch 2009 29
Through “R/C REPORT” I have made many friends in the industry, to include major and minor manufacturers and distributors. In most cases, whatever support or parts I needed, I got, with no strings attached.
I have enjoyed the opportunity to see and handle many new and exciting products that would not have been afforded me as just an average modeler. Almost 175 R/C models have been processed through my workshop, with each and every one presenting its own unique challenges and rewards. I have particularly enjoyed answering the question, “How do you build so fast?”
Later I took over the “The BIG Picture” column. Gordon asked me to write something every month about giant models, and like all of our columnists, I was given total freedom in choosing my subjects, and the obligation to be candid and honest at all limes. Soon after assuming the reigns of this already- established column, I decided that there was too little information being published formodelers wanting to ‘move up’ from the .40 and .60 size models to those commonly described as “giants”. So that’s what I set out to do, and with the help of many readers and friends who provided me with photographs and ideas, I..., no, ‘we’ became a regular fixture in every issue.
Then there are the trips I’ve made to some of the nation’s finest flying fields, trade shows, and competition events. I had the chance to participate in both Top Gun and the AMA Nationals, and did pretty well at both. The Toledo Expo, the WRAM Show, and the AMA Convention have also been highlights of my writing career.
While the curtain is coming down on one aspect of my life, another may be just beginning. I’ve been contacted by several other
R/C media outlets asking me to write for them. To some I sent a cordial, “Thanks, but no thanks”, since I have no intentions of abandoning the goals and ideals established by this magazine. I am currently negotiating with others, so you may find my contributions elsewhere in the near future.
I’ll really miss people coming up to me at flying events, trade shows and sometimes just out on the street, telling me that they read and enjoy this magazine and my articles. I usually reply with my standard answer, “Oh, you’re the one?” But it’s truly an honor and a privilege to be read by so many modelers.
Finally, I want to thank Gordon and Mina for the opportunities they’ve given me, and for putting up with some of my weird habits. Working with Gordon has been educational, enlightening, and more than a little fattening. I’ve spoken with numerous modelers who write for other magazines, and some are amazed at the freedoms we have enjoyed at “R/C REPORT”. It’s been great!
My thanks to all the readers who have communicated their requests and suggestions, and to those who reward us with one of the nicest things any modeler could say, “I only bought that model because you said it was good. ”
So now I guess I’ll fly off into the sunset, at least temporarily, taking with me nearly 20 years of fond memories. But just remember, if you see me at the flying field, I’ll be the one in the ugly shirt.
-Dick Pettit 5704 Dedmon Ct.
Durham, NC 27713 [email protected]
Don’t even THINK about gluing a
Foamie together without this
__ Combo!
Quality. Freshness.
. Trusted.
www.zapglue.comWest Warehouse
760 /246 -6462 ww w houseofbalsa.com
Central Warehouse6 30 /58 4 -76 1 6
www.robart.com
East Warehouse863/607-6611
www.franktiano.com

30 R /C RE POR T
R/C REPORT’SPRODUCT TEST REPORTS INDEX
The following listings, in alphabetical order, use the format of: ITEM TESTED, X, (xx), where X, if necessary, stands for what kind o f product (E-engine, K-model kit, R-radio, T-Tool, O-other), and (xx) represents the Issue Num ber o f the latest test o f that item, except that (B l) stands for "Engines Book # l" (n o longer available). Issue #1 was dated August 1986. Products tested more than once are usually listed only under the issue with the latest test. All article photocopies are $3.00 each, postpaid in the USA.
See end o f listing for more inform ation on ordering back issues and/or photocopies o f articles.(Note: M any reviews having had no reprint orders in over two years have been omitted.)
Ace R/C4-120 Bipe, K (94)Cloud Dancer 40, K (120)Cloud Dancer 60, K (135)CVC Charger, (189)Digipulse Charger (122)Smart Charge, Chgr (121) Seamaster 120, K (46)Seamaster 40, K (87)Seamaster 40 ARF, K (232)Super DDVC charger, O (170) Super Digipulse charger, O (175) Super Smart Charge, O (176)
A eroM odel Design'sARF P26 Peashooter K, 189
Aeroplane W orks' P-40D, K (117) Aeroplane W orks' SE-5a, K (120) Aeroworks
ARF Edge 540T #1, K (201)ARF Edge 540T #2, K (201)ARF Stearman PT-17, K (226)
AirtronicsRD6000 Super, R (233)RD8000, R (221)V G6000, R (219)
Art Tech SU-27 Flanker, K (267)B&P Assoc. 4000 mail btry pack, (38) B&P Assoc. NiCd Starter Btry, (10) Balsa USA
EAA Bipe, K (17)Eindecker (giant), K (161)Enforcer, K (32)Ercoupe, K (227)Fly Baby, K (91)Fokker D-VII 1/4 scale, K (219) Fokker D-VII 1/3 scale, K (242) Laker, K (57)M orane Saulnier, K (243)N ieuport 28c, K (247)Northstar, K (29)Phaeton 90, K (56)Phaeton II, K (234)Sopwith Pup (1/4 scale), K (188) Stick 40 Plus, K (80)Stearman (1/3 scale), K (79) Stingray 120, K (105)Taube, K (35)
Taube (giant), K (98)Bruce Tharpe Enterprises
F lyin’ King, K (140)Super F lyin’ King, K (207) Venture 60, K (106)Vortex Delta, K (171)
Carl Goldberg Models ARF Falcon 56, K (266)ARF Skylark 56, K (260)ARF Skylark 70, K (260)Bucher Jungmann, K (119)Eagle 2, K (30)Eagle 2 ARF, K (167)Extra 300, K (68)Falcon III, K (78)Freedom 20, K (47)J-3 Cub, K (55)M ini-Hold ‘Em stand (269) M irage 550, K (35)Sophisticated Lady, K (45) Staudacher 300S, K (144)Sukhoi SU26M , K (99)Super Chipmunk, K (70)Super Floats kit, (55)Super Holdem, O (261)Tiger 2, K (85)Tiger 60, K (105)Tiger 60 Deluxe, K (169)Tiger 120, K (271)Ultim ate Bipe, K (53)
Cerm ark Products ARF Alley Cat, K (241)ARF Banchee E-3D, K (225)ARF Breeze, K (234)ARF Graduate, K (223)ARF Javelin II, K (219)ARF LiF Banchee, K (228)ARF Pitts S2B, K (213)ARF Porterfield, K (132)ARF Sukhoi, K (210)Easy Electro 72, K (134)RTF Bobcat, K (165)SPE 40, E (265)
CH Elec Ign for G-20 (256)CH Electronics Synchro Spark, (175) China M odel Productions A R F ’s
Cessna 310, K (250)
Super Chipmunk 40, K (237)Corsair 50, K (252)Corsair 120, K (252)Tiger M oth 120, K (266)Zeke (Zero), K (254)
Cline & Assoc. Fuel Press. Reg., (91) Concept Fleet 1/6 scale Fleet, K (87) Concept Fleet 1/4 scale Fleet, K (27 I ) Cox Hobbies ARF T-28, K (259)Cox Hobbies ARF W aco YM F, K (255 ) CW M achine’s R/C Quick Stand (208) D&L Designs' Doghouse, K (177)D&L Designs' Gizmo, K (195)Dave Patrick Models
ARF Clipped W ingSuper Cub, K (238)
ARF Edge 540T, K (218)ARF Super Cub, K (222)ARF Ultim ate Bipe, K (173)
Duratrax F lashpoint Thermometer (237) Dymond M odelsports'
ARF Ford Flivver (giant), K (183) Dynaflite M odels
ARF Bird o f Time glider, K (248) Bird o f Time, K (136)Butterfly, K (36)D ecathlon (giant), K (158)F-82 Twin M ustang, K (100)Fly Baby (giant), K (146)Fun Scale Corsair, K (73)Fun Scale P-51 60, K (35)Fun Scale SE5 Giant, K (203)Fun Scale Spitfire, K (69)Fun Scale Spitfire (giant), K (95) PT-19 (giant), K (121)Super Cub (giant), K (140)
Eagle Tree SystemsFlight Data Recorder (221)
E-Flite (ARF electrics)Apprentice, K (272)A scent Glider, K (271)AT-6 Texan, K (264)Brio 10, K (246)Byp Yak, K (252)Cessna 182, K (245)Deuces W ild, K (269)DHC-2 Beaver 25e, K (270)

M arch 2009 31
Diamante 25e, K (257) Electrajet, K (199)Eratix 3D 25e, K (266)F-15 Eagle, K (267)Gypsy, K (231)JN-4 Jenny, K (254)M ini-Edge 540, K (241) M ini-Funtana, K (230) M ini-Ultra Stick, K (243 ) Odyssey Glider, K (194)P-38 Lightning, K (258)P-47 Thunderbolt, K (244) Piper Pawnee, K (262)Power 15 M otor (266)*Power 25 M otor (266)*Power 32 M otor (266)*Power 46 M otor (266)*(*See Sparky’s Revolt column) Power 160 M otor (271)Super Airliner, K (255)T-34 M entor, K (268)Tensor Bipe, K (237)Tribute 3D, K (224)Ultimate 3D, K (224)Ultim ate FX 3D, K (242)YAK 54F 3D, K (233)Summit Peak Charger, O (199)
Electrifly (ARF Electrics) Electrostik, K (271)Equinox Cell Balancer (257) Fokker D.VII, K (269)L-39 Jet, K (267)L-39 Hop-Up (267)M igiet Jet, K (267)Reactor Bipe, K (262)Sopwith Camel, K (272) Synapse EDF ARF, K (262) Synapse EDF RxR, K (262) Triton Charger, (200)Triton Jr. Charger (257)
Evolution Engines .40NT, E (218).46NT, E (218).61NT, E (208)1.00NX, E (220)26GT Gas Eng (236)45GX2 Gas Eng (250)Trainer Power System, E (209)
Experimental AC Models ARF Glasair, K (225)ARF V elocity II, K (225)
Fancy Foam ModelsARF Sukhoi SU-29, K (240)
Flair Products Models Fokker DR-1, K (100) Legionnaire, K (27)M agnatilla, K (51)Puppeteer, K (3&4)SE-5A, K (39)Super Cub, K (69)Tiger M oth, K (160)
Tiger M oth Giant, K (202)FlyZone RTF Models
Cub J-3, K (265)Diablo EDF Trainer, K (262)Diablo Advanced W ing (262)Diablo Dual Power Pod (262)
Fox .19 RC BB, E (B l)Fox .25 RC, E (B l)Fox .25BB RC, E (87)Fox .40 Compact, E (B l)Fox .40 Quickie 500 Special, E (27) Fox .40 Quickie 500 Sport, E (44)Fox .40 RC BB Deluxe ABC, E (B l) Fox .40 RC BB STD, E (18)Fox .40 RC BB STD, E Revised (19) Fox .40 RC Std., E (223)Fox .45 RC BB, E (B l)Fox .45 RC BB (new carb), E (93)Fox .46 RC BB ABC, E (108)Fox .50 RC BB, E (25)Fox .60 Eagle III, E (B l)Fox .60 Eagle IV, E (46)Fox .74 Eagle IV, E (53)Fox 4.2 gas, E (160)Fuji-Imvac Engines
BF25F, E (233)BT24EI, E (256)BT32EI, E (244)BT34B, E (266)BT43EIS, E (235)BT-64A, E (203)
Futaba Products6EX 6-ch Com puter Radio (234)6EX 6-ch Spread Spectrum
Com puter Radio (251)6XA/H, R (125)7CAP FM, R (231)7C FASST. R (260)FP-7NFK FM, R (91)FP-8UAP/F, R (119)9C, R (188)9C Super, R (240)10C ,R (267)10C Hop-Up (267)10C M ore Muscle (268)12FG Super Com puter Radio (254) 12Z Super Radio (243)MSA-10 M ulti-Servo A djustor (269) PA-1 Pilot Assist Link, (127) Skysport 4YF, R (224)TM-7 FASST Upgrade (268)
Global Hobby ARF AT-6, K (150) Global Hobby ARF F4U, K (164) Global Hobby ARF Fokker, K (190) Global Hobby ARF PT-19, K (149) Global Hobby ARF P-47, K (163) Global Hobby Easy Answer glider, (105) Global Hobby EZ Eng Test Stand (221 ) Global Hobby Easy Answer glider, (105) Global Hobby Kwik Fly 40, K (126) Global Hobby Skyraider, K (106)
Graupner (see Hobby Lobby)Great Planes
ARF CAP 231EX, K (142)ARF CAP 580 (.46), K (261)ARF CAP 580, 1/3 scale, K (230) ARF Cherokee 40, K (272)ARF Christen Eagle, K (213)ARF Cosmic W ind, K (233)ARF Curtiss Hawk, K (237)ARF DC-3 Elec, K (216)ARF Extra 300S (79"), K (200)ARF Extra 330S (79"), K (268)ARF F4U Corsair 40, K (141)ARF F4U Corsair, elect. K (252) ARF Fling 2 glider, K (248)ARF Fokker Dr. 1 ,K (196)ARF GeeBee (giant), K (211)ARF Giant Aeromaster, K (245) ARF Giant Big Stik, K (235)ARF Giant Ryan STA-M, K (198) ARF Giant RV-4, K (253)ARF Giant Super Sportster, K (244) ARF Giant U-Can-Do, K (232)ARF J-3 Cub (giant), K (171)ARF Lancair ES, K (205)ARF P-40 W arhawk .15, K (264) ARF P-5 ID Mustang, K (264)ARF PBY Catalina, K (258)ARF Pitts (giant), K (191)ARF PT-19 (giant), K (194)ARF Reactor 46, K (257)ARF Revolver 46, K (258)ARF RV-4, K (190)ARF PT-17 Stearman, K (228)ARF Seawind, K (242)ARF Seawind EP, K (256)ARF Shoestring Racer, K (184)ARF Spacewalker, K (154 & 199) ARF Stuka, K (186)ARF Super Chipmunk, K (225)ARF Super Skybolt, K (251)ARF Super Stearman 120, K (215) ARF Tiger M oth (giant), K (204) ARF Ultim ate Bipe, K (236)ARF Venus 40, K (202)ARF Venus II, K (246)ARF YAK 54, K (247)ARF YAK 55 3D elect, K (229) Aerom aster (giant), K (132)Basic Lite Trainer, K (185)Bench Topper (organizer) (257)Big Stick 60, K (20)CAP232, K (168)Chipmunk, K (185)Corsair 40, K (126)Dazzler, K (151)Easy Sport 40, K (122)ElectriCub, K (31)Electrostreak, K (44)Extra 300S (40), K (145)Extra 300S (60), K (155)

32 R /C RE POR T
Extra 330L 1/3 scale, K (175)F-4 Phantom, K (150)F-14 Tomcat, K (78)F-15 Eagle, K (89)Fun One, K (65)GeeBee Profile, K (155)Giles G-202, K (162)Kontronik Fnn 500-27 m otor (227) Learjet 35A, K (116)P-51D, K (61)Patriot, K (71)Perfect Trainer 60, K (111)Pete'n Poke, K (179)Piper J-3 Cub .20, K (117)Piper J-3 Cub .40, K (98)Piper J-3 Cub .60, K (112)Profile P-38, K (210)Powercore Starter Btry, O (88) PT-40 Trainer, K (129)Real-Flight, O (141)Real-Flight Deluxe, Ο (165) Real-Flight Gen 2, O (181) Real-Flight Gen 2 USB, O (220) Real-Flight Add-On 3, O (195) Real-Flight Add-On 4, O (204) Real-Flight Add-On 5, O (214) SlowPoke, K (161)SlowPoke 40, K (169)Skybolt, K (85)Spectra (elect.), K (60)Spirit Sailplane, K (52)Spirit 100 SP, K (77)Sport Floats .60, K (112)Sportster Bipe, K (16)Super Decathalon, K (54)Super Floats 20, K (117)Super Sportster 40 MK II, K (115) Super Sportster 60, K (107)Super Sportster 90/120, K (26) T-Craft 20, K (178)Tracer 40, K (177)Ultim ate Bipe 40, K (147) Ultrasport 40, K (50)U ltrasport 60, K (58)U ltrasport 1000, K (96)Viper, K (97)
Guanli A-10 Thunderbolt, K (267)Hangar 9 Models
Advance 40 VRTF, K (165)Angle Pro Incidence M eter (250) ARF Aresti 40, K (192)ARF Aspire glider (173)ARF Aspire EP glider (189)ARF A T -6 Texan 67", K (216)ARF B-25 M itchell, K (258)ARF CAP 232 (.40 size), K (196) ARF CAP 232 (80"), K (202)ARF CAP 232 (giant), K (261)ARF Carden Edition YAK 54 (271) ARF Cessna, K (136)ARF Cessna 182, K (147)
ARF Cessna 182 Giant, K (208)ARF Cherokee, K (152)ARF Clipped W ing Taylorcraft,
(giant), K (195)ARF Corsair F4U 65", K (218)ARF Cub (giant), K (171)ARF Edge 540, K (178)ARF Edge 540 Giant, K (229)ARF Extra 260 Giant, K (237)ARF Extra 260 (35%), K (262)ARF Extra 330 (giant), K (219)ARF F-22 Raptor, K (254)ARF Fokker D.VII, K (269)ARF Frenzy 100 K, (263)ARF Funtana 40 3D, K (211)ARF Funtana 90, K (225)ARF FuntanaX 50 elec, K (261)ARF FuntanaX 100, K (257)ARF Giant Elec Cub, (253)ARF Giant Pawnee, K (271)ARF H ellcat 60, K (245)ARF P-40 W arhawk, K (231)ARF P-47 (.60 size), K (239)ARF P-47 (1.50 size), K (240)ARF P-51 Miss America, K (223) ARF P-51 M ustang, K (193)ARF P-51 M ustang Giant, K (209) ARF P-51 M ustang 150, K (255) ARF Pizzaz, K (190)ARF PT-19 (giant), K (162)ARF Pulse XT 46, Glow, K (259) ARF Pulse XT 46, Elec, K (259) ARF ShowTime 4D 90, K (234)ARF Sopwith Camel, K (248)ARF Spitfire 60, K (251)ARF Sukhoi 1/3 scale, K (197)ARF Sundowner 50, K (272)ARF Sundowner giant, K (271)ARF Super Cub Giant, K (206)ARF T -34 M entor, K (254)ARF Tribute 36, K (256)ARF Twist 60, K (250)ARF Twist 150, K (265)ARF Ultra Stick, K (168)ARF Ultra Stick 40, K (185)ARF Ultra Stick 60, K (203)Digital Current M eter, (254)Digital Variable V oltm eter (268) Digital V oltm eter/Tach (256)Flight Pack (flight box) (253)M icro D igital Tachom eter (252)PNP J-3 Cub (.40), K (238)PNP J-3 Cub (1/4 sc), K (260)RTF Alpha Trainer 40, K (200)RTF Alpha Trainer 60, K (221)RTF Easy 2 Trainer, K (144)RTF P-51 M ustang Trainer, K (235) RTF Xtra Easy Trainer, (170)RTF Xtra Easy 2 Trainer, (207)RTF Xtra Easy Fun Options, (170) Easy Fly 40, K (101)
Super Stick 40, K (142)Sure Cycle Charger (203)
HITEC PRODUCTSEclipse 7, R (184)Electron 6 Receiver (231)FunTec Sky Scooter, K (177) FunTec Sky Scooter Pro II, K (206) Optic 6, R (223 & 255)Prism 7X, R (127)
HOBBICO Products12-volt Power Supply (257) Accu-Cycle Elite, (233 & 255)ARF NexStar Trainer, K (229)ARF Sukhoi SU-31, K (226)ARF SuperStar EP, K (228)ARF Ultim ate Bipe, K (86)RTF ElectriStar, K (250)RTF NexStar 40, K (270)Bright Star 40, K (144)Com pression Tester, T (131)Cutting M at 36x24" (230)Dual Peak Charger (257)Expanded Scale Voltm eter (234) Extra 300S ASAP, K (122)Hand Crank Fuel Pump (231)Piezo M ulti-Purpose Gyro (257) Pocket Frequency Scanner (231) Quick Field Charger (230)R/C M ulti-Charger (231)
Hobby Lobby (also see Graupner) Brigadier, K (106)Electro Junior, K (103)Raptor, K (107)Sr. Telemaster, K (75)Telemaster 40, K (17)Telemaster 70, K (56)Telesport, K (84)
Hobby Zone (RTF electric park flyers) Aerobird Challenger, K (222) Aerobird Swift, K (249) Fighterbird(s), K (196)Firebird Commander, K (222) Firebird Com mander II, K (238) Firebird II, K (192)Firebird III, K (261 )Firebird Freedom, K (249)Firebird Outlaw, K (217)Firebird Phantom, K (260)Firebird Scout, K (228)Firebird XL, K (188)M ini-Cub, K (272)Sky Surfer, K (189)Super Cub, K (249)
Jet Joe JJ1400 Turbine, E (267)JR Radios
12X, R (266)F400 FM, R (120)MAX 4 FM , R (90)MAX 5 FM , R (39)MAX 6 FM , R (54)PCMIOSx, R (112)

M arch 2009 S3
PCM 10X, R (157)X-347, R (57)X9303 2.4 GHz SS (256)XF421EX, R (168)XF622, R (97)XF631, R (180)XP6102, R (216)X P6102U ltralite , R (226)XP642, R (131)XP662, R (198)XP7202, R, ((247)XP783Heli, R (118)XP8103DT, R (187)XP9303, R (224)
Kangke ARF Extra 300S, K (176) Kangke ARF M onocoupe, K (204) Kangke ARF Super Kraft W aco, K (227) Kondor M odel Products
ARF Cessna Skymaster, K (229) DHC-2 Beaver, K (239)
Lanier CAP232 (giant), K (172)Lanier Giles G-202, K (148)Lanier Taylorcraft (giant), K (181) Lanier Ultimate Pitts, K (156)Magnum Engines
.10 GP ABC, E (69)
.15 XL ABC, E (148)
.25 PRO ABC, E (35)
.30 XL 4C, Part 1 (173)
.30 XL 4C, Part 2 (175)
.40 GP, E (B l)Pro .45, E (31)XLS46A, E (239).52 XLS, E (211)XL FS-52AR, E (234)XL .70 RFS, E (249)XL FS91AR, E (145)
M aster Airscrew Products Balsa Razor Plane, T (231)Prop Balancer, T (230)
M odeltech ARF Extra 300 .25, K (237) M odeltech ARF M agic, K (204) M odeltech ARF SE-5, K (235) M odeltech Joss Stick, K (178)M oki 1.2, E (133)M oki 1.35, E (187)M oki 1.8, E (82)M oki 2.10, E (187)MR Aerodesign
Giant DHC-2 Beaver, K (270)MTH Hobby Products
ARF Eindecker 40, K (204) M ultiplex ARF Sonic Liner, K (221) M ultiplex M ulti-Charger L N 2010 (228) M ultiplex M ulti-Charger LN5014 (241 ) M ultiplex Royal Evo 12, R (213) M ultiplex RTF M agister, K (227) M ultiplex Twister Jet, K (267)MV VS .40 GFS ABC, E (109)MV VS .77 ABC, E (125)Nick Ziroli P-40D, K (117)
Nitro Models Super Falcon 120, K (267) NRG Research
Adjustable Pitch Prop (240)O.S. .15 FP, E (156)O.S. .15 CV-A, E (222)O.S. .20 FP, E (156)O.S. .25 FP, E (140)O.S. .25 LA, E (162)O.S. .25 FSR, E (B l)O.S. .26 Surpass (4C), E (29)O.S. FS-30 Surpass, E (253)O.S. .35 FP, E (19)O.S. .32F ABC, E (62)O.S. .40 FP, E (40)O.S. .40 FP ABC, E (71)O.S. .40 FX, E (153)O.S. .40 LA, E (135)O.S. .40 Surpass (4C), E (B l)O.S. .46 AX, E (222)O.S. .46 SF, E (102)O.S. .48 Surpass (4C), E (B l & 24) O.S. .50SX Ring, E (205)O.S. .52 Surpass (4C), E (123)O.S. .60 FP ABC, E (66)O.S. .61 FS (4C), E (B l)O.S. .61 FX ABC, E (143)O.S. .61 S F ,E (15 & B l)O.S. .61 SF-P (pump), E (B l & 91) O.S. .70 Surpass II (4C), E (201 & 255) O.S. .91FX, E (177)O.S. .91 Surpass (4C), E (110)O.S. .91S Surpass II (4C), E (175)O.S. 1.08 FSR, E (B l & 38)O.S. 1.20AX, E (249)O.S. 1.20E Surpass (4C), E (230)O.S. 1.20P Surpass (4C), E (45)O.S. 1.60FX, E (182)O.S. FT-160 Twin (4C), E (163)O.S. BGX-1 3500, E (59 & 60)O.S. BGX-1 3500 Relook, with
with CH Electronics CDI Ignition, and with Gas Carburetor, (77)
O.S. W ankel, E (38)Pacific Aeromodels
JI-310 Trainer, K (190)ARF Gee Bee M odel Y, K (200)ARF Knockabout 46, K (255)ARF Knockabout E, K (255)ARF M onocoupe K (258)
Park Zone (RTF elect, park flyers) Cessna 210 indoor, K (258)F-27C Stryker, K (252)F4U Corsair, K (269)FW -190, K (254J-3 Cub (brushed), K (253)J-3 Cub (brushless), K (265)P-51 M ustang, K (230)Radian Sailplane, K (272)Slo-V, K (226)Spitfire, K (251)Super Decathlon, K (227)
Super Decathlon BL, K (272)T-28 Trojan, K (263)Typhoon 3D, K (236)Typhoon2 3D, K (262)Vapor, K (270)
Paul Sw anson’s Burrito, K (220)Paul Sw anson’s Fat Free Taco, K (212) Polks Hobby
ARF DC-3 electric, K (230)Seeker 6 synthetic receiver, R (227) Tracker III 8-ch Radio (235)
PSP Mfg. Engine Test Stand (22 1)PSP Mfg. Fuel Jug Cap System (230) Quadra 40 CDI, E (35)Quadra 52S, E (64)RC Guys ARF Cessna 150, K (247) RCATS Lithium Glow Driver (242) RCATS RC-100 R/C Switch (257) Reid's Quality M odel Products
8-Ball Special, K (99)Clipped W ing Taylorcraft, K (132)
Revolution 52 Gas Eng (243)Robart .15-40 Size
M echanical Retracts, O (96)Robart Presision Incidence M eter (235) RTL Fasteners Hardware Set (234) RTL Fasteners M etric Hdw Set (249) Saito .30 GK, E (171)Saito FG-36 Gas Eng (268)Saito .50, E (113)Saito .56, E (132)Saito .60 Twin, E (89)Saito .65, E (84)Saito .72, E (188)Saito .80, E (36)Saito .82, E (223)Saito .90 Radial, E (181)Saito .91, E (92 & 139)Saito 100 Single, E (188)Saito 100GK, E (241)Saito 100 Twin, E (103)Saito 120S.GK E (122)Saito 125a, E (238)Saito 130 Twin, E (51)Saito 150, E (252)Saito 170 Radial, E (142)Saito 180, E (167)Saito 182 Twin, E (118)Saito 200i Twin, E (193)Saito 220 Single, E (229)Saito 300 Twin, E (47)Saito 325 Radial, E (197)Saito 450 Radial, E (159)Seagull Models
ARF Bling 3D, K (260)ARF Dual Ace Twin, K (243)ARF Edge 540 (64"), K (222)ARF Edge 540 (68"), K (244)ARF Harmon Rocket, K (239)ARF Harrier 3D 40, K (241)ARF Laser 200, K (224)

34 R/C REPORT
ARF Pilatus PC-9, K (213)ARF Spacewalker II, K (217)ARF Zero, K (225)
See Temp Alumaweld Rod (49)See Temp Aluminum Flex Tubing (4 9 ) Sig M anufacturing Co.
ARF Extra 300XS, K (174)ARF Four-Star 40, K ((240)ARF Four-Star 60, K (238)ARF Four-Star 120, K (269)ARF Kadet Sr., K (202)ARF P-51B M ustang, K (264)ARF Rascal Elec 49", K (218)ARF Rascal Nitro 49", K (228)ARF Rascal 110, K (205)ARF Sun Dancer (72"), K (226)ARF Sun Dancer 50, K (250)ARF Waco SRE bipe, K (256)1/3 Scale Spacewalker, (53 & 147) 1/4 Scale Spacewalker II, K (75)1/4 Scale Cub, K (60)120-size floats (269)Astro Hog, K (37)Fazer, K (98)Field Boss Flight Box (154) Four-Star 40, K (42)Four-Star 60, K (142)Four-Star 120, K (84)Gas Passer Flight Box (212)Giant Scale Floats, K (96)Hog Bipe, K (118)Hummer, K (87)Kadet LT-25, K (143)Kadet LT-40, K (108)Kadet Senior, K (61)Kadet Seniorita, K (113)Kougar, K (20)Koverall, O (24)M idStar 40, K (76)Sealane, K (224)Skybolt, K (41)Somethin' Extra, K (184)Tri-Star, K (124)Ultim ate Bipe (profile), K (138) W onder, K (94)
SK .50ABC 2C, E (225)Sky Shark ARF Christen Eagle K (228) Sky Shark ARF P-40N, K (246) Spektrum DX6 Radio (236)Spektrum DX6i Radio (268)Spektrum DX7 Radio (248)Sportsman Aviation
ARF Ryan STA, K (236)Corby Starlet, Giant, K (263)
SR B atteries’s Giant E indecker K (231) Sullivan Products
M icro Starter, O (88)Genesis generator (149)M icro Starter, O (88)Power Pac, O (229)
SuperTigre Engines
.40GS, E (74)G-51, E (261),61S, E (54)■61X RE ABC, E (40)G90, E (130)•90K, E (55)2500 (1.5 c.i.), E (37)3000 (1.8 c.i.), E (B l)3250 (1.98 C.I.), e (124)4500 (2.7 c.i.). E (59)
Thor 45 Gas Eng, (257)ThunderT iger
GP .07 ABC, E (174)GP-42 ABC, E (134)F-54S, E (147)F-91S, E (116)Pro-1.20 2C, E (128)ARF J-3 Cub (giant), K (171 & 209) Champion 45L Combo Plus (166) Fun Tiger Extra, K (172)Fun Tiger G200, K (170)Tiger Stick, K (124)Trainer 2000, K (133)RTF Trainer Mk II, K (169)
TME Auto Trickle Adapter, O (229) TME Charge M inder, O (229)TME Guardian Angel, O (56)TME Simple Smoke Pump, O (94) TME Xtrema Lipo Battery Charger
and W attm eter, T (249)Top Flite Models
ARF B-25 M itchell, K (259)ARF Beechcraft Staggerwing (249) ARF Cessna 310, K (252)ARF P-51D giant, K (212)ARF P-51D Mustang .60, K (265) A T -6 Texan, K (102)Beechcraft Bonanza, K (135)Cessna 182, K (109)Contender, K (192)Corsair (giant), K (153)DC-3/C-47 Douglas, K (149)F4U Corsair, K (73)FW 190-D9, K (182)Hollywood Zero, K (131)M onoKote Trim Poster (229)P-39 A iracobra, K (160)P-40E W arhawk, K (96)P-47 Thunderbolt, K (173)P-5 ID M ustang, K (92)P-51D M ustang (giant), K (143) Piper Arrow II, K (228)R/C Nobler, K (193)Sierra, K (75)Stinson Reliant, K (167)
Tower Hobbies .46 ABC, E (168).61 ABC, E (210)ARF Voyager 40, K (224)Extra Special 40, K (149)Fun-51, K (194)
Kaos 40, K (126)Tuned M uffler for 46 (223)Uproar (.40 size), K (121)Uproar 60, K (197)
Ultrafly ARF U ltra 300S, K (231) Ultrafly ARF F-16, K (232)W ing Mfg. A-26 twin, short kit (19) W ing Mfg. B-25 Pro Series, K (114) W ing Mfg. P-38 Twin, short kit (67) W inged Shadow Systems
How Fast (for airspeed) (257)How High (for altitude) (257)R/C Reporter, O (229)See How (data reader) (257)
W orld ModelsARF CAP232 (giant), K (193)ARF Cub 1/5 scale, K (245)ARF Cub 1/3 scale, (253)ARF F4U Corsair, K (185)ARF Intruder 90, K (146)ARF P-5 ID (giant), K (199)ARF Spitfire (giant), K (224)ARF T-34, K (214)ARF Ultim ate Bipe, K (235)ARF Zero, Giant, K (217)
W orld Models Ent.L-19 Bird Dog, K (269)
W right R/C,Virtual Cockpits, O (259)
Zenoah G-20EI, E (242)Zenoah G-23, E (88)Zenoah G-26EI (271)Zenoah G-38 (gas), E (29)Zenoah G-45 (gas), E (115)Zenoah G-62 (gas), E (99)
SPECIAL ARTICLES12 Handy W ork Shop Tools
Y ou Can Make for Y ourself (230) 2C Engine Rebuilding Pt. 1 (207)2C Engine Rebuilding Pt. 2 (208)4-cell vs 5-cell Rx btry testing (239) A ircraft Flight Trimming Chart (268) Assembling Fuel Tanks (214)Build a Vented Sanding Box (237) Choosing the Right Prop (244)How T o : Removable Tail-feathers (210) Using K it W ood W isely (244)Building a Radio Hour M eter (252)

M arch 2009 SS
COPIES OF ARTICLESPhotocopies o f past articles are $3.00 each, post-paid in the USA. Make sure you're not ordering two or m ore articles
($6.00+) from an available back issue ($5.00). Please specify the name of the article and the issue num ber when ordering.
BACK ISSUES (List updated on March 18, 2009)The following back issues are available for imm ediate shipping, but those accompanied by an asterisk (*) are in very short supply. Please order by issue number, and include $3.00 each, plus $2.00 postage for the first copy, and 75 φ postage for each additional copy, USA and Canada only. Foreign orders other than Canada please include U.S. $12.00 postage for 1-4 copies.
□ #171 Oct 2000* □ #187 Feb□ #172 Nov 2000* □ #245 Dec□ #173 Dec 2000* □ #256 Nov□ #174 Jan 2001* □ #257 Dec□ #175 Feb 2001* □ #258 Jan□ #176 M ar 2001* □ #259 Feb□ #178 May 2001* □ #261 Apr□ #179 Jun 2001* □ #262 May□ #180 Jul 2001* □ #263 Jun□ #181 Aug 2001* □ #264 Jul□ #182 Sep 2001* □ #265 Aug□ #186 Jan 2002* □ #266 Sep
2002* □ #267 Oct 20082006* □ #268 Nov 20082007 □ #269 Dec 20082007 □ #270 Jan 20092008 □ #271 Feb 20092008 □ #272 M ar 20092008*2008 If you need earlier copies, please send2008 (mail or email) a list o f your needs2008 before placing your order. W hat was2008 once a plentiful supply is now a pitiful2008 supply! (Thanks for your orders, guys.)
M ail orders to Gordon Banks, 116 Longleaf Lane, M adison, AL 35758 (Email inquiries to: GLBanks@ knology.net)
Please fill out your name and mailing address below . (Checks and money orders should be made out to Gordon Banks.)
Name
Address
City, State, and Zip

36 R/C RE POR T
PRODUCT TEST REPORTGreat Planes A R F Piper Cherokee
Model Reviewed..................... ARF Piper CherokeeModel Type............ Fun Scale Sport and AerobaticManufacturer...................Great Planes Model Mfg.
(Made in China)Distributor............... Great Planes Model Distr. Co.
P.O.Box 9021 Champaign, IL 61826-9021
(217)398-3630 www.greatplanes.com
Typical Street Price......................................$159.99Wing Span....................................... Advertised: 60"
Measured: 60"Wing Area............................. Advertised: 606 sq.in.
Measured: 609 sq.in.Advertised Weight........................... 6.75 - 7.25 lbs.Airfoil........................................... Semi-symmetricalWing Structure............Built-up balsa and plywoodWing Joiner Method........... Single aluminum tube
(13x0.71", or 330x18mm) Fuselage Structure.. . . Built-up balsa and plywoodFuselage Length............................. Advertised - 46"
Measured - 46.2"Pushrod Type........................... Steel wires (0.075")Pushrods Installed....................... Guide tubes onlyHinges Installed....................... Yes, on all surfacesRecommended Controls. . 4-5 (Ail, El, Rud, Throt,
plus optional Flaps)
Recommended Power............40-46 2C, .52-56 4C,or electric equivalent
Engine Mount Installed.........................................NoEngine Mount Type.............. Two-piece compositeFuel Tank Included....................... 14.2 oz. (420cc)Landing Gear Installed......................................... NoWheels Included..................................... Three 2.5"Assembly Instructions............. 25 pages (8.5x11")
with many illustrationsHardware: Metric or SAE.............................. MixedIncluded in Kit.....................Red plastic 2" spinner,
two-piece composite engine mount, fiberglass cowl and wheel pants, unassembled 14.2 oz. fuel tank kit, one knurled aluminum fuel line stopper, built-in fuselage servo tray, all necessary pushrod materials and connectors, nylon control horns, pre-installed hinges, pre-assembled cockpit assembly with painted interior and pre-installed prepainted pilot bust, pre-formed 5/32" music wire landing gear wires with mounting hardware, nylon nose gear bearings and steering arm, three 2.5" film foam wheels with white plastic rims, wheel collars, two 1/4" nylon wing bolts, two 12" lengths of 3/4" wide Velcro, two ABS plastic “flap locks” for those not using working flaps, lots of nuts and bolts and washers, decal sheet with N-numbers, and two small patches of red & white MonoKote.
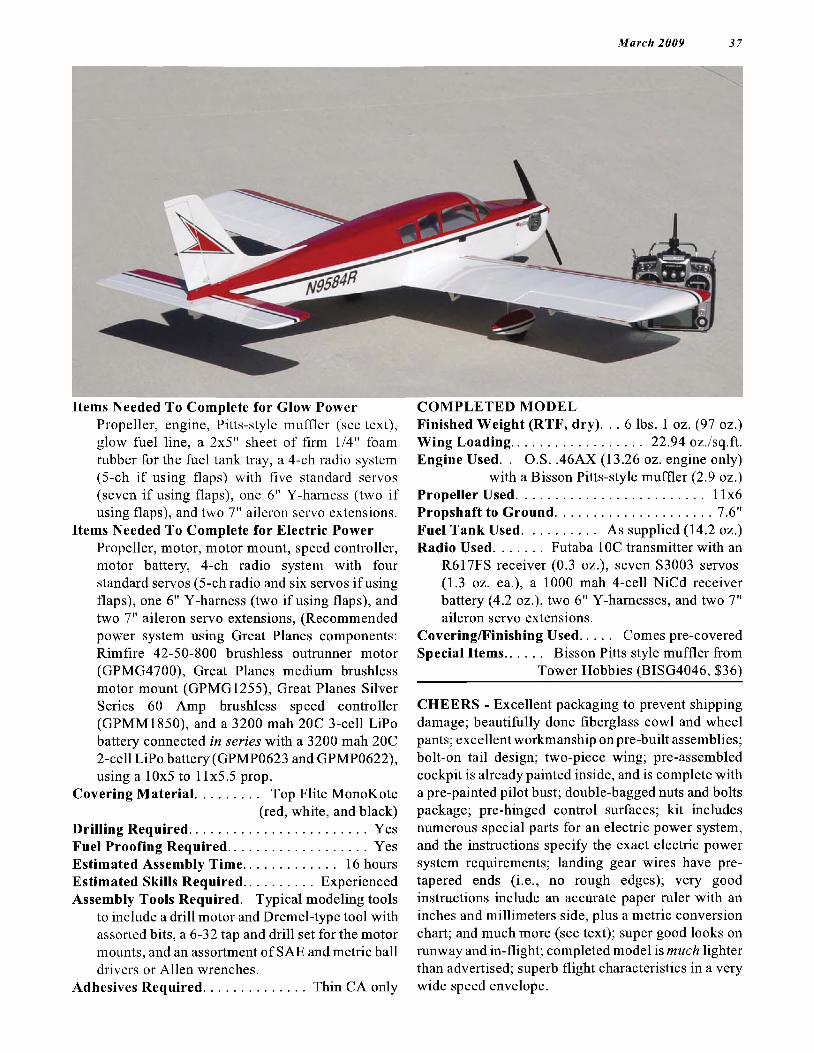
M arch 2009 37
Items Needed To Complete for Glow PowerPropeller, engine, Pitts-style muffler (see text), glow fuel line, a 2x5" sheet of firm 1/4" foam rubber for the fuel tank tray, a 4-ch radio system (5-ch if using flaps) with five standard servos (seven if using flaps), one 6" Y-hamess (two if using flaps), and two 7" aileron servo extensions.
Items Needed To Complete for Electric Power Propeller, motor, motor mount, speed controller, motor battery, 4-ch radio system with four standard servos (5-ch radio and six servos if using flaps), one 6" Y-hamess (two if using flaps), and two 7" aileron servo extensions, (Recommended power system using Great Planes components: Rimfire 42-50-800 brushless outrunner motor (GPMG4700), Great Planes medium brushless motor mount (GPMG1255), Great Planes Silver Series 60 Amp brushless speed controller (GPMM1850), and a 3200 mah 20C 3-cell LiPo battery connected in series with a 3200 mah 20C 2-cell LiPo battery (GPMP0623 and GPMP0622), using a 10x5 to 11x5.5 prop.
Covering Material................. Top Flite MonoKote(red, white, and black)
Drilling Required.................................................. YesFuel Proofing Required....................................... YesEstimated Assembly Time......................... 16 hoursEstimated Skills Required.....................ExperiencedAssembly Tools Required. Typical modeling tools
to include a drill motor and Dremel-type tool with assorted bits, a 6-32 tap and drill set for the motor mounts, and an assortment of SAE and metric ball drivers or Allen wrenches.
Adhesives Required........................... Thin CA only
COMPLETED MODELFinished Weight (RTF, dry). . . 6 lbs. 1 oz. (97 oz.)Wing Loading................................... 22.94 oz./sq.ft.Engine Used. . O.S. .46AX (13.26 oz. engine only)
with a Bisson Pitts-style muffler (2.9 oz.)Propeller Used................................................... 11x6Propshaftto Ground..........................................7.6"Fuel Tank Used.................... As supplied (14.2 oz.)Radio Used.............Futaba 10C transmitter with an
R617FS receiver (0.3 oz.), seven S3003 servos (1.3 oz. ea.), a 1000 mah 4-cell NiCd receiver battery (4.2 oz.), two 6" Y-hamesses, and two 7" aileron servo extensions.
Covering/Finishing Used........ Comes pre-coveredSpecial Items.......... Bisson Pitts style muffler from
Tower Hobbies (BISG4046, $36)
CHEERS - Excellent packaging to prevent shipping damage; beautifully done fiberglass cowl and wheel pants; excellent workmanship onpre-built assemblies; bolt-on tail design; two-piece wing; pre-assembled cockpit is already painted inside, and is complete with a pre-painted pilot bust; double-bagged nuts and bolts package; pre-hinged control surfaces; kit includes numerous special parts for an electric power system, and the instructions specify the exact electric power system requirements; landing gear wires have pretapered ends (i.e., no rough edges); very good instructions include an accurate paper ruler with an inches and millimeters side, plus a metric conversion chart; and much more (see text); super good looks on runway and in-flight; completed model is much lighter than advertised; superb flight characteristics in a very wide speed envelope.
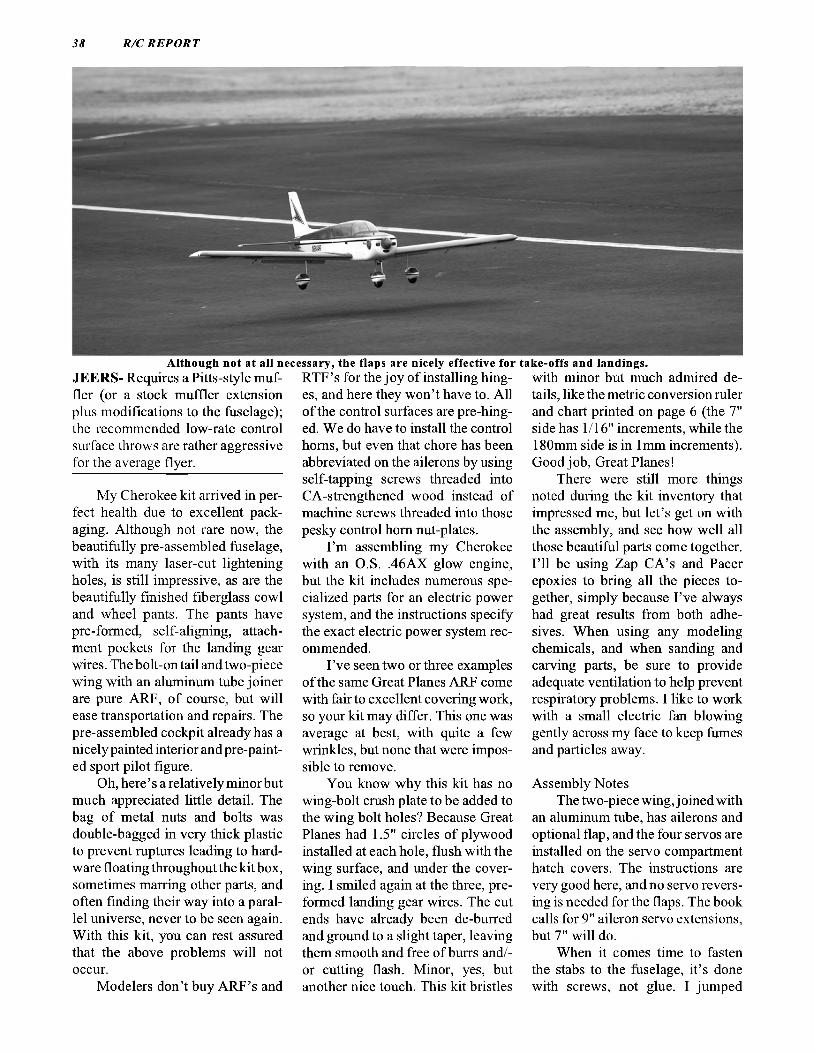
38 R /C RE POR T
Although not at all necessary, the flaps are nicely effective for take-offs and landings.JEERS- Requires a Pitts-style muffler (or a stock muffler extension plus modifications to the fuselage); the recommended low-rate control surface throws are rather aggressive for the average flyer.
My Cherokee kit arrived in perfect health due to excellent packaging. Although not rare now, the beautifully pre-assembled fuselage, with its many laser-cut lightening holes, is still impressive, as are the beautifully finished fiberglass cowl and wheel pants. The pants have pre-formed, self-aligning, attachment pockets for the landing gear wires. The bolt-on tail and two-piece wing with an aluminum tube joiner are pure ARF, of course, but will ease transportation and repairs. The pre-assembled cockpit already has a nicely painted interior andpre-paint- ed sport pilot figure.
Oh, here’s a relatively minor but much appreciated little detail. The bag of metal nuts and bolts was double-bagged in very thick plastic to prevent ruptures leading to hardware floating throughout the kit box, sometimes marring other parts, and often finding their way into a parallel universe, never to be seen again. With this kit, you can rest assured that the above problems will not occur.
Modelers don’t buy ARF’s and
RTF’s for the joy of installing hinges, and here they won’t have to. All of the control surfaces are pre-hing- ed. We do have to install the control horns, but even that chore has been abbreviated on the ailerons by using self-tapping screws threaded into CA-strengthened wood instead of machine screws threaded into those pesky control horn nut-plates.
I’m assembling my Cherokee with an O.S. .46AX glow engine, but the kit includes numerous specialized parts for an electric power system, and the instructions specify the exact electric power system recommended.
I’ve seen two or three examples of the same Great Planes ARF come with fair to excellent covering work, so your kit may differ. This one was average at best, with quite a few wrinkles, but none that were impossible to remove.
You know why this kit has no wing-bolt crush plate to be added to the wing bolt holes? Because Great Planes had 1.5" circles of plywood installed at each hole, flush with the wing surface, and under the covering. I smiled again at the three, preformed landing gear wires. The cut ends have already been de-burred and ground to a slight taper, leaving them smooth and free of burrs and/or cutting flash. Minor, yes, but another nice touch. This kit bristles
with minor but much admired details, like the metric conversion ruler and chart printed on page 6 (the 7" side has 1/16" increments, while the 180mm side is in 1mm increments). Good job, Great Planes!
There were still more things noted during the kit inventory that impressed me, but let’s get on with the assembly, and see how well all those beautiful parts come together. I’ll be using Zap CA’s and Pacer epoxies to bring all the pieces together, simply because I’ve always had great results from both adhesives. When using any modeling chemicals, and when sanding and carving parts, be sure to provide adequate ventilation to help prevent respiratory problems. I like to work with a small electric fan blowing gently across my face to keep fumes and particles away.
Assembly NotesThe two-piece wing, j oined with
an aluminum tube, has ailerons and optional flap, and the four servos are installed on the servo compartment hatch covers. The instructions are very good here, and no servo reversing is needed for the flaps. The book calls for 9" aileron servo extensions, but 7" will do.
When it comes time to fasten the stabs to the fuselage, it’s done with screws, not glue. I jumped
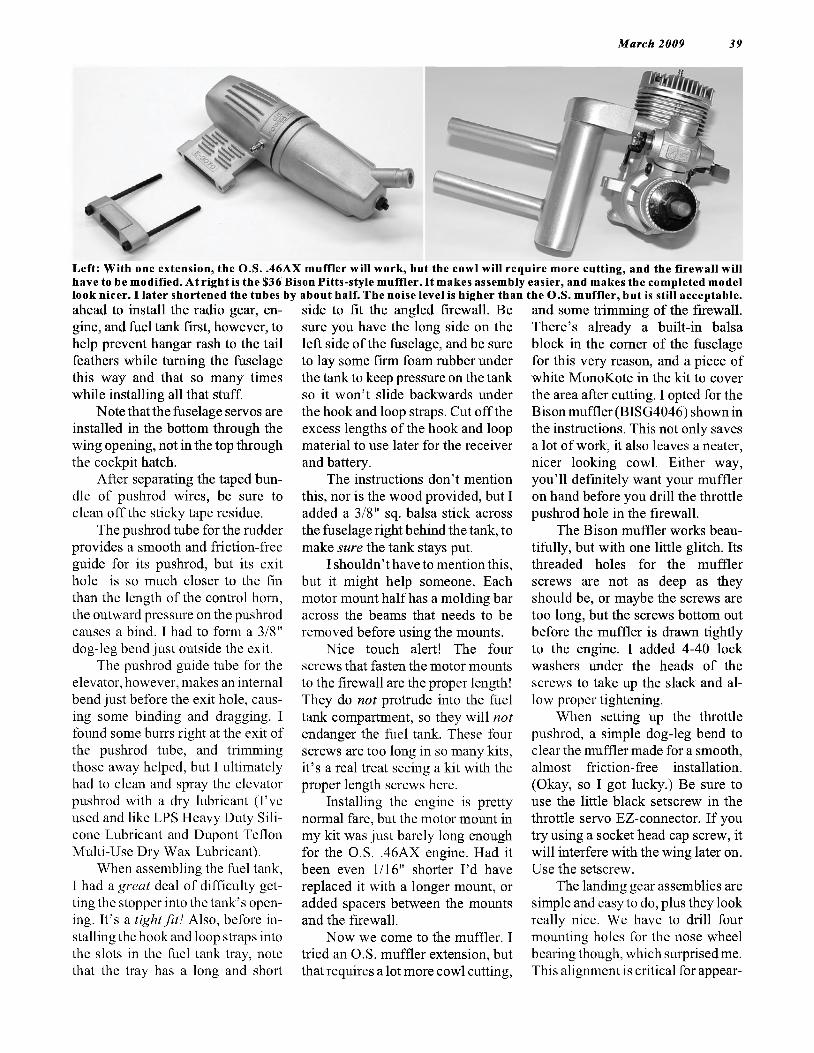
M arch 2009 39
Left: W ith one extension, the O.S. .46AX m uffler w ill work, but the cow l w ill require m ore cutting, and the firewall w ill have to be m odified. At right is the $36 Bison Pitts-style m uffler. It makes assembly easier, and makes the com pleted m odel look nicer. I later shortened the tubes by about half. The noise level is higher than the O.S. m uffler, hut is still acceptable.ahead to install the radio gear, engine, and fuel tank first, however, to help prevent hangar rash to the tail feathers while turning the fuselage this way and that so many times while installing all that stuff.
Notethatthe fuselage servos are installed in the bottom through the wing opening, not in the top through the cockpit hatch.
After separating the taped bundle of pushrod wires, be sure to clean off the sticky tape residue.
The pushrod tube for the rudder provides a smooth and friction-free guide for its pushrod, but its exit hole is so much closer to the fin than the length of the control horn, the outward pressure on the pushrod causes a bind. I had to form a 3/8" dog-leg bend just outside the exit.
The pushrod guide tube for the elevator, however, makes an internal bend just before the exit hole, causing some binding and dragging. I found some burrs right at the exit of the pushrod tube, and trimming those away helped, but I ultimately had to clean and spray the elevator pushrod with a dry lubricant (Tve used and like LPS Heavy Duty Silicone Lubricant and Dupont Teflon Multi-Use Dry Wax Lubricant).
When assembling the fuel tank, I had a great deal of difficulty getting the stopper into the tank’s opening. It’s a tight fit! Also, before installing the hook and loop straps into the slots in the fuel tank tray, note that the tray has a long and short
side to fit the angled firewall. Be sure you have the long side on the left side of the fuselage, and be sure to lay some firm foam rubber under the tank to keep pressure on the tank so it won’t slide backwards under the hook and loop straps. Cut off the excess lengths of the hook and loop material to use later for the receiver and battery.
The instructions don’t mention this, nor is the wood provided, but I added a 3/8" sq. balsa stick across the fuselage right behind the tank, to make sure the tank stays put.
I shouldn’t have to mention this, but it might help someone. Each motor mount half has a molding bar across the beams that needs to be removed before using the mounts.
Nice touch alert! The four screws that fasten the motor mounts to the firewall are the proper length! They do not protrude into the fuel tank compartment, so they will not endanger the fuel tank. These four screws are too long in so many kits, it’s a real treat seeing a kit with the proper length screws here.
Installing the engine is pretty normal fare, but the motor mount in my kit was just barely long enough for the O.S. .46AX engine. Had it been even 1/16" shorter I’d have replaced it with a longer mount, or added spacers between the mounts and the firewall.
Now we come to the muffler. I tried an O.S. muffler extension, but that requires a lot more cowl cutting,
and some trimming of the firewall. There’s already a built-in balsa block in the comer of the fuselage for this veiy reason, and a piece of white MonoKote in the kit to cover the area after cutting. I opted for the Bison muffler (BISG4046) shown in the instmctions. This not only saves a lot of work, it also leaves a neater, nicer looking cowl. Either way, you’ll definitely want your muffler on hand before you drill the throttle pushrod hole in the firewall.
The Bison muffler works beautifully, but with one little glitch. Its threaded holes for the muffler screws are not as deep as they should be, or maybe the screws are too long, but the screws bottom out before the muffler is drawn tightly to the engine. I added 4-40 lock washers under the heads of the screws to take up the slack and allow proper tightening.
When setting up the throttle pushrod, a simple dog-leg bend to clear the muffler made for a smooth, almost friction-free installation. (Okay, so I got lucky.) Be sure to use the little black setscrew in the throttle servo EZ-connector. If you try using a socket head cap screw, it will interfere with the wing later on. Use the setscrew.
The landing gear assemblies are simple and easy to do, plus they look really nice. We have to drill four mounting holes for the nose wheel bearing though, which surprisedme. This alignment is critical for appear-

40 R /C RE POR T
ance, ground handling, and for the steering pushrod, so I think those holes should have been drilled at the factory.
As I came to the end of the instructions, I still had four plywood washers large enough for a 6-32 screw. Three of them are used for the electric version, but some of you might need them as spacers behind the short motor mounts if your engine comes up too short.
This may not be a problem for sure, but I sure didn’t like it! The wing servos’ connectors exit the wing through a pre-cut round hole exactly 4-3/4" behind the wing’s leading edge. So what? Well, the rudder, elevator, and throttle servo aims are 4-3/4" behind the second bulkhead. When the wing is installed on the fuselage, they all come together, and I see a potential for disaster. You might fly like that for years and never have a servo wire jam the elevator servo, or you might fly just once. But even if it’s not a major problem, the fix is so easy, I think it would be silly to overlook it. I simply cut new exit holes for the wing servo connectors, right behind the wing’s spar, 3/4" ahead of the existing holes.
With everything in place but the 4.2 oz. receiver battery, my Cherokee was tail heavy. I placed the battery right about where the instructions recommend, and it was still tail heavy. But after moving it just ahead of the wing’s leading edge, it balanced perfectly. So I wrapped the battery in foam rubber, loosened the fuel tank straps, and stuffed that container of angry electrons right down beside the tank on the left side. I also checked the lateral balance and it was almost perfect, so putting the battery on the side opposite the engine’s cylinder head is a good idea.
With the completed model on the bench, I slid my scales under it and measured... No, that can’t be
right. Wait, I’ll check it again. Hmmm. Same thing. This kit is advertised as weighing 6.75 to 7.25 lbs., figures I’m guessing to differ due to the optional flaps. But my model’s weight doesn’t fall into that range by a long shot. My model, complete with seven servos, a .46 size engine, and a 1000 mah 4- cell NiCd battery, weighs only 6 lbs. and 1 oz. Now wait just a cotton-pickin’ minute here! I’m missing almost a pound! What a rip-off! They advertise seven pounds of airplane but give me only six? (See, you can too complain about goodness if you’re crazy enough!)
Oh wait... I haven’t put the stickers on yet!
FLYING THE CHEROKEEFirst I heard a lot of comments
on how nice the model looks, and I certainly agree. Its clean lines and included pilot figure really give it a nice, realistic look, so we have this really pretty sport scale model that flies like a light, high performance pure sport model.
Secondly, the Great Planes ARF Piper Cherokee 6 needs a hot .46 size engine about as much as I need a 460 HP car! I’m not saying it isn’t fun, mind you, I’m just saying that any decent .40 would give this Cherokee a level of performance well beyond scale. The hotO.S. .46AX, in fact, is fun in this airplane, as Tony made abundantly clear during much of his “Look Ma, I ’m a pylon racer! ” first flight. With a hot .46 in the nose, and a wide-open carburetor, the Cherokee is fast in level flight, and it climbs like a stolen F-15. (If Tony ever gets a pilot’s license and invites you along for a ride... good luck with that.)
It sometimes seems that Tony has only two flight modes, pattern and 3D, and since the Cherokee leans a lot more toward the former than the latter, he was soon flying
basic pattern maneuvers, and pretty dam well, I’ll admit. Loops large and small, rolls fast and slow, inverted passes, rolling circles, and other indications of having way too much fun during a work session. Complain at your own risk, however, because Tony will (and did) set it down well off the end of the runway, and guess who has to go get it?
My only complaint stems from something Tony said without complaint. He found the suggested high and low control surface throws very much to his liking. So just trast me here, because the majority of casual sport flyers will find that level of sensitivity excessive! I often use Tony’s low rates as my high rates!
The condensed version of all this is that the Great Planes ARF Piper Cherokee is light and aerobatic, so it flies slow or fast. Its performance envelope extends flom Rainer-like to racer-like, and it looks good in either role. The flaps work nicely just for the fun of it, but the model lands easily and slowly without them. In fact, if I were assembling this kit again, I’d go without flaps, use a lighter receiver battery, and enj oy the mayb e 4 oz. weight savings (two servos with arms, linkages, control horns, Y-harness, and the lighter battery).
What’s left to say? Frankly, I’m amazed that a kit this good, which results in a model that flies this well, is selling for only $160!
You know that old saying, “I f it sounds too good to be true, then it probably is. ”1 The word “probably” is in there because every now and then we just might stumble across something that sounds too good to be true but isn’t. Take the Great Planes ARF Piper Cherokee kit, for example. -Gordon Banks
[email protected] Tony Coberly
tony@hnsinc. net

M arch 2009 41
PRODUCT TEST REPORT PARK ZONE “ RADIAN”
Model................................................... The “Radian”Model Type........RTF Two-meter electric sailplaneManufacturer.............. Park Zone (Made in China)Distributor................................ Florizon Flobby Inc.
4105 Fieldstone Road Champaign, IL 61822
(212) 352-1913 w w w. horizonhobby. c om
Suggested Retail Price....................... RTF $329.99Typical Street Price........................... RTF $249.99
(PNP version $199.99/$159.99)Wing Span...................................Advertised: 78.74"
Measured: 78.5" tip-to-tip, 81" across the surfaceWing Area............................ Advertised: Not given
Measured: 567.6 sq. in.Advertised Flying Weight............................. 30 oz.Airfoil................................................ Under-camberedWing Structure.................. Two-piece foam with a
carbon fiber joiner tubeFuselage Structure........ Molded foam with plastic
cowl, canopy, and some internal structureFuselage Length........................... Advertised: 44.7"
Measured: 45"Pushrod Type.................Steel wires in plastic tubesPushrods Installed.................................................YesHinges Installed.....................................................YesRadio Included.............. Spectrum DX5e (see text)Recommended Controls........... 3 (El, Rud, Throt)Motor Included................Park Zone 480 (960 KV)
Brushless Outrunner
Motor Mount Installed. . Yes (integral w/fuselage)Motor Mount Type.........................................PlasticSpeed Controller Included. . . . E-flite 30 Amp BLMotor Battery Included............ 3S 1300mahLiPo
(3.57 oz.)Instructions.. . . A 20 page (8.25x11") booklet with
many photos covers assembly, sailplane flying tips, radio setup and use, replacement parts, and more, plus a 4-page Quick Start Guide. An additional 24 page booklet covers the DX5e radio system in mode detail, and yet another sheet covers the E-flite 30 Amp BL ESC.
Hardware: Metric or SAE..............................MetricHardware Included........... Everything required, to
include four dry-cell batteries for the transmitter, LiPo motor battery, and a 2-3S cell-balancing charger
Items Needed To Complete....................... NothingCovering Material............................ None requiredEstimated Assembly Time.. . Less than 10 minutesEstimated Skills Required.......................... Beginner-Drilling Required............................................... NoneAdhesives Required........................................... NoneAssembly Tools Required................................. None
COMPLETED MODELFinished Weight w/3.57 oz. btry)................. 26 oz.Wing Loading....................................... 6.6 oz./sq.ft.Prop/Motor/ESC/Btry/Radio Used. . . As supplied Covering/Finishing Used.......... Stick-on trim only
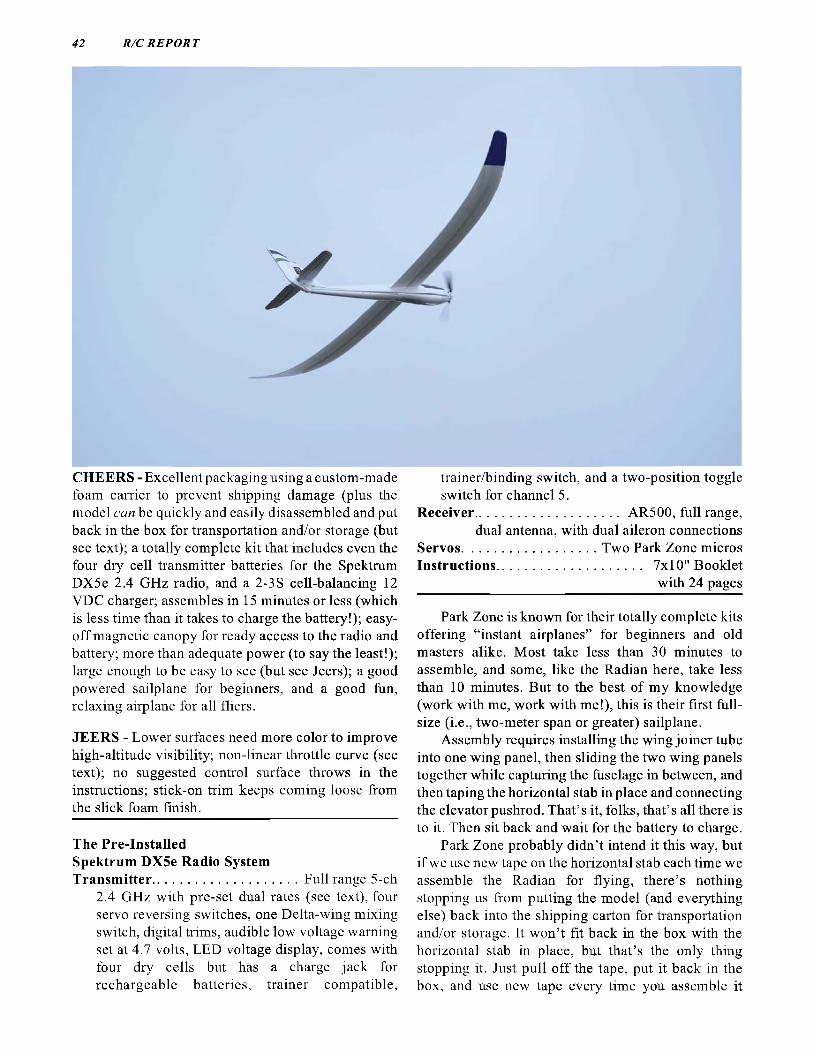
42 R /C RE POR T
CHEERS - Excellent packaging using a custom-made foam carrier to prevent shipping damage (plus the model can be quickly and easily disassembled and put back in the box for transportation and/or storage (but see text); a totally complete kit that includes even the four dry cell transmitter batteries for the Spektrum DX5e 2.4 GHz radio, and a 2-3S cell-balancing 12 VDC charger; assembles in 15 minutes or less (which is less time than it takes to charge the battery!); easy- off magnetic canopy for ready access to the radio and battery; more than adequate power (to say the least!); large enough to be easy to see (but see Jeers); a good powered sailplane for beginners, and a good fun, relaxing airplane for all fliers.
JEERS - Lower surfaces need more color to improve high-altitude visibility; non-linear throttle curve (see text); no suggested control surface throws in the instructions; stick-on trim keeps coming loose from the slick foam finish.
The Pre-Installed Spektrum DX5e Radio SystemTransmitter.......................................Full range 5-ch
2.4 GHz with pre-set dual rates (see text), four servo reversing switches, one Delta-wing mixing switch, digital trims, audible low voltage warning set at 4.7 volts, LED voltage display, comes with four dry cells but has a charge jack for rechargeable batteries, trainer compatible,
trainer/binding switch, and a two-position toggle switch for channel 5.
Receiver.......................................AR500, full range,dual antenna, with dual aileron connections
Servos.................................... Two Park Zone microsInstructions....................................... 7x10" Booklet
with 24 pages
Park Zone is known for their totally complete kits offering “instant airplanes” for beginners and old masters alike. Most take less than 30 minutes to assemble, and some, like the Radian here, take less than 10 minutes. But to the best of my knowledge (work with me, work with me!), this is their first full- size (i.e., two-meter span or greater) sailplane.
Assembly requires installing the wing joiner tube into one wing panel, then sliding the two wing panels together while capturing the fuselage in between, and then taping the horizontal stab in place and connecting the elevator pushrod. That’s it, folks, that’s all there is to it. Then sit back and wait for the battery to charge.
Park Zone probably didn’t intend it this way, but if we use new tape on the horizontal stab each time we assemble the Radian for flying, there’s nothing stopping us from putting the model (and everything else) back into the shipping carton for transportation and/or storage. It won’t fit back in the box with the horizontal stab in place, but that’s the only thing stopping it. Just pull off the tape, put it back in the box, and use new tape every time you assemble it
M arch 2009 43
again for flying, To keep everything in place in the box, I used some hook and loop stops where Park Zone had plastic zip-ties. Simple, no? Assembly and disassembly, by the way, require no tools.
You know what? It just dawned on me that the Radian, like all Park Zone models, would make a good winter building project for someone living real close to the equator.
FLYING THE RADIANI’d agreed to meet Tony at the
RCRC flying site for what was to be our last big flight test session for the magazine. I had the Radian and four other model reviews to complete, so I arrived early to get the planes assembled, photographed, and ready to fly. Once that was done, I sat and waited. And waited. And waited. Not being a particularly patient man, I kept looking at my watch every few minutes, wondering what was keeping Tony. Finally, I could stand it no more. I’d waited nearly seven minutes by then so I was getting bored. So, for no particular reason I can recall other than it being the closest model to me at the moment, I picked up the Radian and tossed it into the wind with the throttle at mid-range. It wasn’t a pretty launch. Immediately after release it descended more than I’d anticipated, so I pulled back on the elevator stick and pushed forward on the throttle stick. It wasn’t a pretty launch. Now it was climbing almost straight up, so I pushed forward on the elevator stick and reduced throttle. It wasn’t a pretty launch.
Once about 100' high I got the Radian settled in at roughly halfthrottle. I soon learned that when the transmitter throttle stick is at the 3/4 position, that’s about halfpower. At that power setting, from level flight, the Radian will loop several times. Why I’d want to loop a sailplane I don’t know, but I did, and it does. I also learned that when you nail the throttle suddenly from low to high power, it first dives a few feet, and then climbs strongly. I also had trou
ble trimming the rudder at first, as if the servo wasn’t coming back to center after making a turn. Strangely, that problem later disappeared.
I tried several times to force the Radian into a stall, but it wouldn’t have any of that. The elevator seems to lose effectiveness early but gradually, so the Radian just keeps on going. The rudder remains effective at any speed.
Before long I was leaning back against a fence post, bumping the rudder every so often just to keep the Radian in sight. This is neat.
I might as well tell you now, I brought five models to the field that day, but took home only four, and the Radian was not among them. But wait until you hear why.
I’ll say that I’d been flying the Radian for 10-12 minutes by the time Tony anived. Since the batteiy was probably getting low by then, I asked him to come steer the thing while I took pictures. He came right over and took the transmitter, so I hurried (foolish me) back to the pit table, grabbed my camera, and quickly recorded maybe a dozen inflight shots. We had five models to fly, so I was anxious to get the flying shots before the battery died. With more than enough photos taken, I put the camera away and told Tony I was done, so go ahead and have fun with the Radian (foolish me). I’d already done a few loops earlier under power, but now Tony was doing them with the power off, simply by diving first to gain enough airspeed. Inverted flight? No, not really. Rolls? Let’s go with “no” on that one, too.
About 15 minutes later, people began to notice and talk about the Radian having been in the air at least 30 minutes. Wayne went over to talk to Tony about it, and the next thing I knew Tony left the flight line, leaving Wayne holding the hansmitter. Thermals were few and short-lived, due to the dark, overcast sky, but Wayne managed to find a few anyway. He also asked what size battery was in the Radian. I did
n’t recall, but I guessed it was the common size 2100 mah. He said he doubted that, since the model had been flying at least 45 minutes by then. He continued flying for a while until Tony took over again. Tony seemed to enjoy hovering it in the wind about 50-75' above the runway. Three or four times I asked if it had any battery left, and each time Tony would nail the throttle and steer the Radian back to a “see ya later” altitude. On his final low pass, when he accelerated again we could hear the motor cutting in and out from the low b attery... but again it climbed to join the hawks soaring curiously overhead. This was getting ridiculous!
As near as we can guesstimate, when Tony finally slid the Radian to a stop in the grass, 60-65 minutes had passed since my hand launch. He suggests, and I agree, that with careful throttle management (climb to 500', glide back to 100', and repeat), a two-hour flight would be well within reason.
We were all impressed, but none more so than my good friend Porter. He came over to me, asked the price, wrote a check, and I showed him how to disassemble it and store it back in the box. Then he put it in his car and left.
Oh, and Wayne was right about the batteiy not being 2100 mah. It’s a 1300. And one of these days when Porter brings his Radian out to fly, we’re going to distract him somehow and slip in a 3300 mah battery. Hey, what are friends for?
Tony, Wayne, and I all have our own Radians now. We bought the PNP versions w/o the transmitter, receiver, and motor battery. Wethus saved $90 by omitting a perfectly good $36 battery with charger, and a great little Spektrum DSM2 $60 5-ch receiver. Smart, huh? (Sigh.) Buy the RTF version.
-Gordon Banks [email protected]
Tony Co berly tony@hnsinc. net

product test report by gordon banks and tony coberly - shown by subrena laten" . v v i · · · : •v v j S ' W - ' ;■· .·«. . . ' " w # ' " ' ; - ·. , · · . * · ...
_____________^ ________ :______________ :_________________________ · : . . . · -____________
mmiii'»111SB!..«.....""
ju te
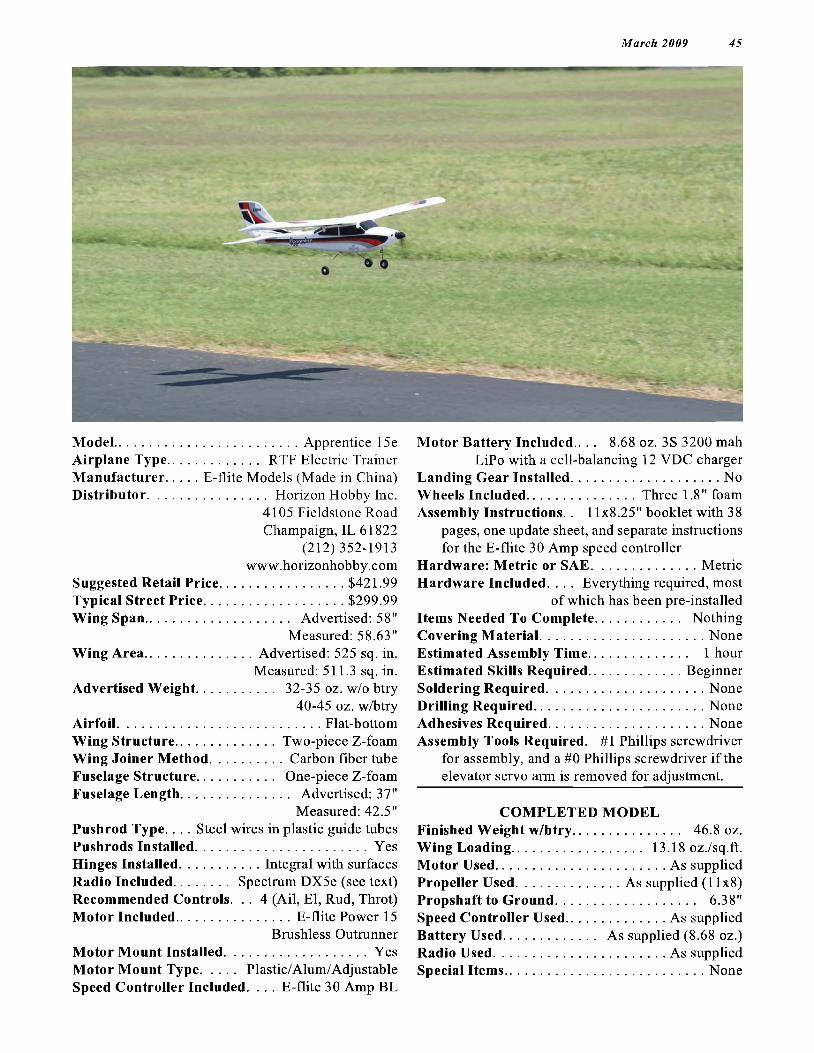
M arch 2009 45
Model................................................. Apprentice 15eAirplane Type........................ RTF Electric TrainerManufacturer........E-flite Models (Made in China)Distributor................................ Horizon Hobby Inc.
4105 Fieldstone Road Champaign, IL 61822
(212) 352-1913 www.horizonhobby, c om
Suggested Retail Price...................................$421.99Typical Street Price....................................... $299.99Wing Span....................................... Advertised: 58"
Measured: 58.63"Wing Area.............................Advertised: 525 sq. in.
Measured: 511.3 sq. in.Advertised Weight..................... 32-35 oz. w/o btry
40-45 oz. w/btryAirfoil.........................................................Flat-bottomWing Structure.............................Two-piece Z-foamWing Joiner Method......................Carbon fiber tubeFuselage Structure...................... One-piece Z-foamFuselage Length............................. Advertised: 37"
Measured: 42.5"Pushrod Type. . . . Steel wires in plastic guide tubesPushrods Installed................................................ YesHinges Installed..................... Integral with surfacesRadio Included.............. Spectrum DX5e (see text)Recommended Controls. . . 4 (Ail, El, Rud, Throt)Motor Included................................ E-flite Power 15
Brushless OutrunnerMotor Mount Installed.........................................YesMotor Mount Type......... Plastic/Alum/AdjustableSpeed Controller Included. . . . E-flite 30 Amp BL
Motor Battery Included.. . . 8.68 oz. 3S 3200 mah LiPo with a cell-balancing 12 VDC charger
Landing Gear Installed......................................... NoWheels Included.............................Three 1.8" foamAssembly Instructions. . 11x8.25" booklet with 38
pages, one update sheet, and separate instructions for the E-flite 30 Amp speed controller
Hardware: Metric or SAE..............................MetricHardware Included. . . . Everything required, most
of which has been pre-installedItems Needed To Complete....................... NothingCovering Material..............................................NoneEstimated Assembly Time........................... 1 hourEstimated Skills Required.......................... BeginnerSoldering Required............................................NoneDrilling Required............................................... NoneAdhesives Required........................................... NoneAssembly Tools Required. #1 Phillips screwdriver
for assembly, and a #0 Phillips screwdriver if the elevator servo arm is removed for adjustment.
COMPLETED MODELFinished Weight w/btryWing Loading................Motor Used.....................Propeller Used...............Propshaftto Ground. . . Speed Controller Used..Battery Used..................Radio Used.....................Special Items..................
................... 46.8 oz.
........ 13.18 oz./sq.ft.
................As supplied
. . As supplied (11x8)
....................... 6.38"
................As suppliedAs supplied (8.68 oz.)................As supplied......................... None

46 R/C REPORT
CHEERS - Superior packaging using a custom-made foam carrier to prevent shipping damage, with straps and bubble-wrap securing everything in place; totally complete kit even includes the transmitter batteries and rubber bands for the wing; includes a spread spectrum radio and a cell-balancing charger; takes under an hour to assemble; very light wing loading; surprisingly powerful motor; attractive appearance;
JEERS - Although much better than usual for E-flite, there were some issues with the instructions (see text); completed model weighs a little more (but not much) than advertised; could not achieve the recommended low and high rates (see text).
The Pre-Installed Spektrum DX5e Radio SystemTransmitter....... Full range 5-ch
2.4 GHz with pre-set dual rates (see text), four servo reversing switches, one Delta-wing mixing switch, digital trims, audible low voltage warning set at 4.7 volts, LED voltage display, comes with four dry cells but has a charge jack for rechargeable batteries, trainer compatible, with a two-position ch-5 toggle switch.
Receiver....... AR500, full range,dual antenna, with dual aileron connections
Servos........... One standard size,three micro size
Instructions........ 7x10" Bookletwith 24 pages
What we have here is a nicely sized basic trainer powered by an almost too-powerful E-flite Power 15 brushless motor fed by an 11.1 volt 3200 mah LiPo. The model comes from the box with everything but the wheels, stabilizers, and wing already installed, al
though there are some adjustments required for the recommended control surface throws. Everything required for flight is included in the box, except a 12VDC source for the battery charger. I spent less than an hour on its assembly, and another 30 minutes setting up the control surfaces (neutrals, recommended throws, etc.). There were a few minor glitches, but it was easy. Here, I’ll show you what little there is to do. Note, however, that the following assembly sequence is my own, and is not as described in the instructions book.
1. Page 4, steps 1-6: Connect the supplied battery and charger to a 12 VDC power source to begin charging the battery. (2 mins)
2. Page 6, steps 1-3: Install the horizontal and vertical stabilizers using two screws and a #1 Phillips screwdriver. Be patient here, as it may take some fiddling to get the pins on the vertical stab to seat fully in the plastic sockets at the bottom of the fuselage. (1 to 5 mins)
3. Page 8, steps 4-5: Connect the elevator and rudder pushrods to the outer holes in the pre-installed control horns. (1 min)
4. Page 9, steps 1-2: Install the nose-gear. Note: I discovered that if you tighten the nose gear retaining screw, it causes excessive binding in the bearing, making the nose gear hard to turn. This leads to very poor rudder servo centering. Tighten the screw slowly just until the nose gear wire turning slack disappears, and then back the screw out 1/4 turn, leaving a tiny amount of turning slack. (1 min)
5. Page 10, step 3: Install the main gear. (1 min)
6. Page 10, stepi: Look into the fuselage and make sure the servos are plugged in properly. Locate the Y-hamess for the ailerons, and position the connectors where you have easy access. (1 min)
7. Using the separate addendum sheet, install the aileron push- rods. (1 min)
8. Page 11, steps 1-5 (totally ignore step 6, it’s already been done, and don’t do any steps after #6 until later): Assemble the wing. Do what the instructions suggest, and practice installing the self-adhesive leading and trailing edge covers before removing the backing paper. Once the adhesive makes solid contact with the wing, it cannot be removed. Position the lower lip first, and then roll the remainder of the cover into place. (2 mins)
9. Page 14, steps 1-4, and ignore step 5 for now) Go get the battery (even if it’s not fully charged yet), and install it as per the instructions. Do not connect the connectors yet. (1 min)
10. Page 16, steps 1-5: Install the four dry cell batteries into the transmitter. (1 min)
11. Page 17, steps 1 -5: Remove the spinner and propeller. (2 mins)
12. Check out the radio. First do pages 20-21, steps 1-2. Then, if using a Mode II radio, do pages 21 - 22, steps 3-5. If using a Mode I radio, do pages 23-24, steps 3-5. (2 mins)
13. Pages 24-28, steps 6-12, continue checking out the radio. (2 mins)
14. Now go back to page 13 and do steps 7-10 to install the wing, using all eight of the supplied rubber bands. (2 mins)
15. Temporarily install the propeller and spinner, and then check and set the CG as described on pages 28-29. Then remove the spinner and propeller again. (5 mins)
16. Perform the radio range test as described on pages 29-30, steps 1-4. (5 mins)
17. Pages 31-34, steps 1-7, check and set the control surface throws. I tried to set the recom-

M arch 2009 47
DALLAIRE 108“ W/S
FF or R /C Assist OLD TIMER .45 to .60 ENGINES 1550 SQ. IN. W ING
Dallaire 108List $179.95 PVHC $139.95
P E H N V A L L E Y E 01837 W est Main St. Lan
(215) 368-0770, Fa Em ail: pvhc.hobbyO
w w w .p en n va lleyh o b
!B Y C E N T E Rsdale PA 19446 X 855-3976 g verizo n .n et iycenter.com
Jetco Thermic "50''
47" W inaSDsm ^Jä Kit JTM - 50
J e tc t / - w 4 A R ^ # ?
JTM - R-327" W ing Span, Rubber
Mini E lectric o r Free flig h tReproduced With permission by Shive Specialties · Lansdale, PA 19446
o r R /C Assist OLD TIMER
Quaker 54‘ .09 to . 15 2-stroke eng List $ 74.95 PVHC $54.95Quaker 84' .29 to .45 2-stroke eng Ust $134.95 PVHC $99.95
Send $2.00 for our 12 p a g e Glider, Rubber and Engine Powered Free Flight and Control Line Airplane Flyer.Scale Flight Model Co. 150 + FF Repros from the 30's & 40's - Burd, Comet, Dallaire, Jasco. Madison. Megow's, Peerless, Star, Scientific.
Plus G ene Dubois, Florio Flyer & Todays Flobbies. Exclusively from PVHC. plus other Manufacturers. $6.00 shipping charge per order.
mended control throws for High and Low rates, but without adjustability in the transmitter, I was unable to do so. There’s only so much you can do when your only adjustment is where to connect the pushrod on the servo arm. With the pushrods already connected in the control horns’ outer holes, there was no adjustment left at that end. I did the best I could and will just have to live with it. By the way, the instructions for the DX5e radio says the dual rates are 100% on high, and 50% on low. In reality, it’s more like 100% on high and 70- 75% on low.
18. Remove the battery and connect it to the charger again until it’s fully charged.
19. Pages 34-36, re-install the spinner and propeller. (2 mins).
The Apprentice is now ready to fly as soon as the battery is charged. I’m going into the house to get rid of some old coffee and get some fresh coffee, and then I’ll be right back. Why don’t you read “Flying Your Apprentice” on page 30 while I’m gone.
Flying the E-flite ApprenticeOur first E-flite Apprentice was
destroyed! Now that’s an unusual opening line for a flight report, isn’t it? Ah, but wait until you hear how it was destroyed, and just wait until you hear who did it!
First of all, it’s a little hard to accept that the Apprentice has only a Power 15 motor in the nose. It is, in a word, peppy. Given full throttle on a paved runway, the Apprentice
w i 11 accelerate quickly and then leap into the air like a sparrow running for its life from a hungry hawk. Given half-throttle on that same paved runway, the Apprentice rolls along and lifts off smoothly looking much like a Sunday pilot out to enjoy flying his Cessna. So let’s just say that the E-flite Apprentice has enough power... and then some.
Okay, now we’re flying. Keep the throttle pinned and use high rates on the control surfaces and you’d think you were flying a military trainer of some kind. It’s quick, it’s maneuverable, and it pretty much goes where the pilot points it. With the throttle pinned, the Apprentice is definitely not a super-docile (aka, boring) little trainer! It will cleanly perform a surprisingnumber of basic maneuvers, and above all, it’s fun!
Apprentice 1, Gravity 0.But isn’t the Apprentice sup
posed to be a RTF electric powered trainer? Oh yeah, that’s right, it is. Sony about that, but we were having so much fun...
Okay, back off the throttle and switch to low rates. No, back off a little more. Come on, more'. Yeah, that’s it! Somewhere around 1/4 to 1/3 throttle, add a little up-elevator trim, and the Apprentice hides the big “S” on its chest, picks up a few thick textbooks under its wing, and dons a pair of spectacles. Now it’s looking more suitable to fulfil its promised academic role. Now it’s poking along nice and slow, and showing signs of genuine positive stability (i.e., self-correcting tenden
cies) like a good trainer should. Well, maybe not quite as positive or self-correcting as the best primary trainers, but if you combine its slow speed with its adequate positive stability, then it makes a pretty nice trainer.
By the way, its aerobatic qualities seem more connected to air speed than control surface movement. Go fast, it performs. Go slow, it acts like a trainer.
Concerned about landing? Not with this one. I don’t know, it almost seems connected to your brain or something. You can fly it right down onto the runway, and it settles smoothly for roll-out. Or you can float it in for a stall landing, and it settles smoothly for roll-out. And either way, you look good.
How good a trainer is it? Good enough for Tony to say, “When you're finished with the review, I ’ll buy this one for my daughter. ” And he did. And sure enough, Cassie was soon flying it all by herself.
How fun and aerobatic is it? Good enough for Tony to bring it out by himself to fly. And good enough to lead him into maneuvers so wild he finally got carried away and buried it in the weeds!
How good is it overall? Good enough for Tony to order a replacement for the one lost in the weeds.
-Gordon Banks glbanks@knology. net
Tony Coberly tony@hnsinc. net
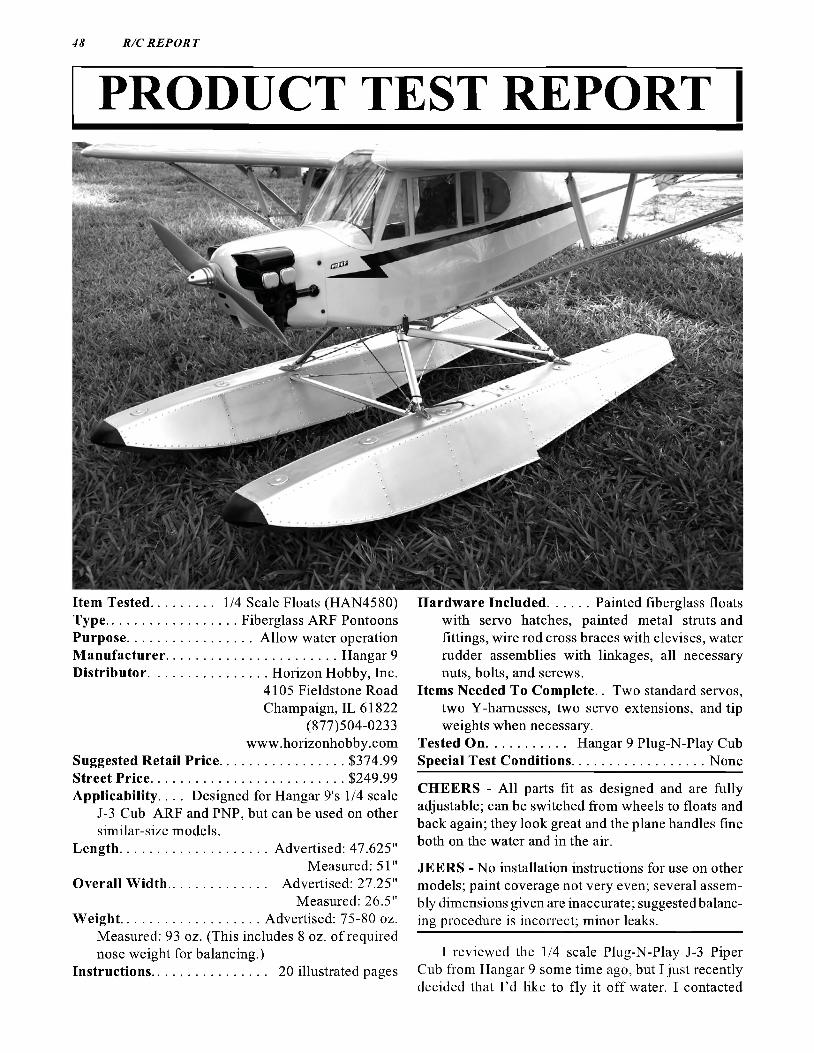
48 R /C RE POR T
PRODUCT TEST REPORT |
Item Tested................ 1/4 Scale Floats (HAN4580)Type...................................Fiberglass ARF PontoonsPurpose................................. Allow water operationManufacturer..............................................Hangar 9Distributor................................ Horizon Hobby, Inc.
4105 Fieldstone Road Champaign, IL 61822
(877)504-0233 www.horizonhobby.com
Suggested Retail Price................................. $374.99Street Price.................................................... $249.99Applicability.. . . Designed for Hangar 9's 1/4 scale
J-3 Cub ARF and PNP, but can be used on other similar-size models.
Length........................................Advertised: 47.625"Measured: 51"
Overall Width.......................... Advertised: 27.25"Measured: 26.5"
Weight..................................... Advertised: 75-80 oz.Measured: 93 oz. (This includes 8 oz. of required nose weight for balancing.)
Instructions............................... 20 illustrated pages
Hardware Included...........Painted fiberglass floatswith servo hatches, painted metal struts and fittings, wire rod cross braces with clevises, water rudder assemblies with linkages, all necessary nuts, bolts, and screws.
Items Needed To Complete.. Two standard servos, two Y-harnesses, two servo extensions, and tip weights when necessary.
Tested On..................... Hangar 9 Plug-N-Play CubSpecial Test Conditions................................... None
CHEERS - All parts fit as designed and are fully adjustable; can be switched from wheels to floats and back again; they look great and the plane handles fine both on the water and in the air.
JEERS - No installation instructions for use on other models; paint coverage not very even; several assembly dimensions given are inaccurate; suggested balancing procedure is incorrect; minor leaks.
I reviewed the 1/4 scale Plug-N-Play J-3 Piper Cub from Hangar 9 some time ago, but I just recently decided that I’d like to fly it off water. I contacted
M arch 2009 49
Horizon Hobby about reviewing their fiberglass 1/4 scale floats, and soon thereafter the big brown airplane truck dropped off a large box at my door. I dragged it into my workshop to check the contents for shipping damage and/or missing parts, but everything was fine.
The floats are molded fiberglass complete with simulated panel lines, rivets, and other scale details. The silver paint, however, had not been applied very smoothly, and in several places there were di I'ferent textures on the surfaces. It looks “okay”, but it could have been better. The pre-assembled struts and braces should need only minor adjustments to have them fit perfectly. All the hardware is there to allow land-based flying or float flying, requiring only a few minutes to switch back and forth. I had to search for the screws that hold down the servo hatch covers, finally locating them inside a package of stmts instead of being in the bag with the other hardware. The instructions book shows all the assembly steps required, so let’s get started.
The first operation is to provide a watertight seal between the hatches and the hulls, using silicone sealer on each hatch, with wax paper between it and the float. Once the silicone cures, the hatches are removed and the excess silicone is trimmed away.
The water rudder assemblies are then mounted to the back of each float, and the pushrods with rubber sealing boots are installed. The servos that drive the rudders are installed next, and the linkages adjusted for smooth operation. This involves using a Y-hamess for the receiver rudder channel, connecting one output to the rudder servo and the other output to still another Y-hamess that will drive each water rudder servo through more servo extensions. I made a custom
Y-harness and extensions, and made sure that the water rudder servos moved in the same direction as the airplane’s rudder. The extensions will be run up one of mounting struts and plugged into the Y-hamess in the fuselage.
The rubber boots on the push- rods limit the movement of the servo arms in one direction, but it all came out perfect for this model. When making a turn on the water, the “outside” rudder should move less than the “inside” rudder, so I adjusted the throws by offsetting the servo arms.
The strut mounting brackets, the struts, and strut braces are then installed and aligned, which takes a while, and although some of the specified lengths are close, they’re not perfect, so plan on making numerous adjustments until everything is just right. One glitch in the instructions occurs when we’re told to leave the screws slightly loose for now, but and then we’re told to use a thread locker on the screws. Thanks, but I’ll wait and use the thread locker when the screws are tightened.
The models main gear assembly must be removed, of course, but be sure to keep all the nuts and bolts for re-attachment later. Two of the necessary blind nuts are already installed in the Cub’s fuselage for the rear float struts, but we have to open the holes with a sharp knife. The front and rear gear mounting brackets can stay in place, but the rears will not be used. I also removed the tail wheel assembly to reduce the amount of nose weight that might be necessary to balance the plane with the floats installed. This was not mentioned in the instructions manual, but I think it’s important.
Once all the metal parts are in place, they don’t look capable of even supporting their own weight, much less a 20 lb. model!
“IF YOU PLAN TO BUILD THE BEST m o d e l , y o u NEED THE BEST PAINT!
“Superior Quality’’ Epoxy Paint System Available in Colors, Clear, & Primer
38 Years o f Extensive Field Performance Provides Outstanding Adhesion and Protection Against R/C Model Fuels
Don Ί Delay! Order Yours Today!Email: [email protected]
Website: www.klasskote.comFor Color Chart and Information, Send SASE
DIVERSIFIED SOLUTIONS, LLC5932 C hicago Ave S, M inneapolis, M N 55417
P h:l-612-243-1234 Fax: 1-612-216-2121
Vanguard Plans 3465 Hampton Court Trussville AL 35173
www.vanvan.uson the web
e-mail vance@ e-z.net
Scale Military Aircraft Plans
ROLLED Plans - Parts, too Curtiss SBC-4 "Helld iver" Grumman OV-1 "M ohawk"Fairev "Firefly·’ Mk4-5 Heinkel He111-H Heinkel H e219"U hu" V u ltee P-66 "Vanguard" W estland "W w ern " S4
NEWDouglas 0-46
US Air Corps Observation Aircraft
110" W ingspan, light, easy to fly, blue and yellow

so R /C RE POR T
When mounting the floats to the Cub, you may need more arms and legs than you have, to hold the floats, struts, braces, and everything else in place over the upside- down fuselage. The structure became stronger and stronger as the hardware was installed and tightened, and once the brace ends were adjusted and tightened, the float assembly was solidly attached.
The servo wires run forward on the top of each float to the front struts, and then up to servo plugs I’d installed earlier. I waterproofed
the plugs with shrink wrap and a dab of silicone sealer.
I then installed the wings and stmts to the fuselage in preparation for balancing. The instructions suggest adding weight to the fuselage to achieve the proper CG, but this is incorrect. If balancing weight is necessary, add it to the floats so that the airplane will still be balanced when you switch back to the wheels.
My installation required 4 oz. of lead in the nose of each float. I prepared an 8 oz. mixture of 5-minute epoxy and lead shot, and poured half into the access holes in the front of each float, while the plane was supported in a vertical position. The lead and epoxy mix then settled into place in the very tip of each float When I checked the CG again, the Cub was balanced exactly where it had been with its wheels.
Adding floats to a model adds weight, of course, but I hadn’t counted on this much! On wheels
my Cub weighed 15.5 lbs. On floats it weighs 20 lbs., and nearly a full pound heavier than the instructions indicated.
Although there are no instructions applicable to any other airplane, any enterprising modeler should be able to figure out what needs to be done. Position the step of the floats either directly below the CG or just slightly behind it. The tops of the floats should be parallel with the aerodynamic chord of the wing, and both floats should be parallel with the fuselage centerline. It may take a little engineering to accomplish this with some models, but it can be done.
Next I checkedto see how long it takes to switch back and forth from floats to wheels, and found that it took me 12-14 minutes each way, depending on how many nuts and screws you drop and then have to look for.
Rick Cawley and I drove to a local lake after work one day, assembled and fueled the Cub, and
MANY MORE PLANS AVAILABLE CATALOG $3.00 (FOREIGN $4.00)
VI NT AG E R/ C P L A N S FRED NOVACK-OWNER
5105 PINE HILL CIRCLE, HOWEL, Ml 48843 www.vintagercplans.com
M arch 2009 51
started the engine. After a radio range check, Rick took the camera and handed me the Spektrum DX7 transmitter. We carried the model to the water, and gently pushed it out onto the lake. With the Cub bobbing gently on the waves, I added a little power and found that the water rudders offer very positive directional control. I pointed the Cub’s nose into the breeze, advanced the throttle, and soon the Cub lifted from the water easily and under full control. After gaining some altitude I cut the power a little and let the big Cub just emise around. The weight of the floats adds a pendulum effect and greater positive stability, so a little more aileron input was needed to make the plane roll in either direction. The drag of the floats also requires a little more power to maintain airspeed, but the Zenoah G20EI had plenty of power for this.
I made some low, slow passes for the camera, and then climbed again for a roll. After a slight dive for more airspeed, the Cub rolled slowly, but always under complete control. It looked absolutely ridiculous, by the way, but a big Cub on floats will roll... eventually.
Soon it was time for the first landing. I simply cut the power a little, lined up with the intended landing area, and allowed the Cub to sink down onto the water. It bounced once and then settled onto the water nicely. The water rudders give positive steering at any significant speed, so bringing it back to the beach was easy.
That first flight used only about 1/4 of a tank of fuel, but I filled it again anyway. Now Rick took over while I used a video camera to record the action. Rick taxied out a little ways, added power slowly, and took off, saying that it needed a lot more up-elevator to lift off than he’d expected. He cruised around a few minutes and then he
Choose from a large selection of Model Hardware AssortmentsSPECIAL PARK FLYER SMALL FASTENER SET $145 .00 Value: $49 .65 (includes organizer!)
Socket Head Servo Screws 24/or $2.35 or 100 fo r $4.90
Nylon In s e rt L o ck N uts 24 fo r $1.95 (2-56,4-40,6-32)
RTL Fasteners 800 S. Battlefield Blvd. #109 Chesapeake, VA 23322-6670
too tried a roll, with results very similar to mine... slow, but successful. Then he made several low and slow passes. “Very nice... totally relaxing. ”
Rick’s first landing was a little smoother than mine, but he always does that. Then he said he really enjoyed the way the Cub flew, and wasn’t surprised at all with the power and control with the floats attached. I felt the same way. Both flights went nicely.
We flew the Cub several more times until the sun got low and the shadows became long. I thanked Rick for his help, and headed home after a perfect day of float flying. The big Hangar 9 floats had done themselves proud.
At home I removed the servo hatch covers and found about a teaspoon of water in each hull. Since there’s no such thing as a perfect seal (unlessyou’re ahungry killer whale), I attribute the minor leak to the hatch covers. Maybe some waterproof tape will fix it.
The Hangar 9 Floats are a perfect match for their 1/4 scale Cubs, and I recommend them to anyone wanting to prepare their plane for the water quickly and easily. Floats add weight and drag to the model, so adequate power is necessary, but in this case, the Zenoah G20EI provided all the power we needed to fly, and to complete some very non-scale maneuvers!
I like the way the Cub flies on the Hangar 9 floats, so I’m likely to come back this weekend for more.
- Dick Pettit [email protected]
An old man went to a wizard to havehim rem ove a curse h e’s been living with for 40 years. “I might be able to help ,” said the wizard, “but I’ll need to know the exact words used to put the curse on you”. W ithout hesitation the old man looked at him and said, “I now pronounce you man and w ife.”
The Original Ultimate Flight Stand
Only $145 .95 / Shipping $18 .00 Order from our website: www.precisian-aero.com
1561 River Highlands Dr. Oconomowoc. Wl 53066
O r call us at: 262.352.6670
Valuin'% V ta n ie ' 'f)tanj (Tratariny D iner Hitter and
'Hud d lle in jon Dru 'ynj3704 Drumm Ave., Independence, MO 64055
(816)478-8330 or [email protected] iper P A - 12 Super C ru ise r 1 0 8 "W S £40.00
C e ssna 140 7 4 - 1 / r W S S30.00
P iper J-3 C ub 83-9/16” W S S3 0.00
Aeronca K 107 -3/4 "W S $40.00
Stits h lu t-R -Bug 6 3 - i/ 2 "W S £30.00
Sp in k s A krom aste r so-i/rws S25.00
P iper Tri-Pacer (1/6 scale) 5 8 - l / r W S $30.00
P iper Tri-Pacer (1/5 scale) 7 1 - f/ 2 "W S $35.00
P iper Tri-Pacer (1/4 scale) 8 8 - l/ 2 "W S $40.00
Send $2.00 for current brochure and order form- If ordering from ibis ad, include $5.00 for envelope postage, or 510.00 for a m ailing tube. (Some cowls available ■ call o r email for prices) See our new website
at w'vw.calvinsclassicpians.com for more information.
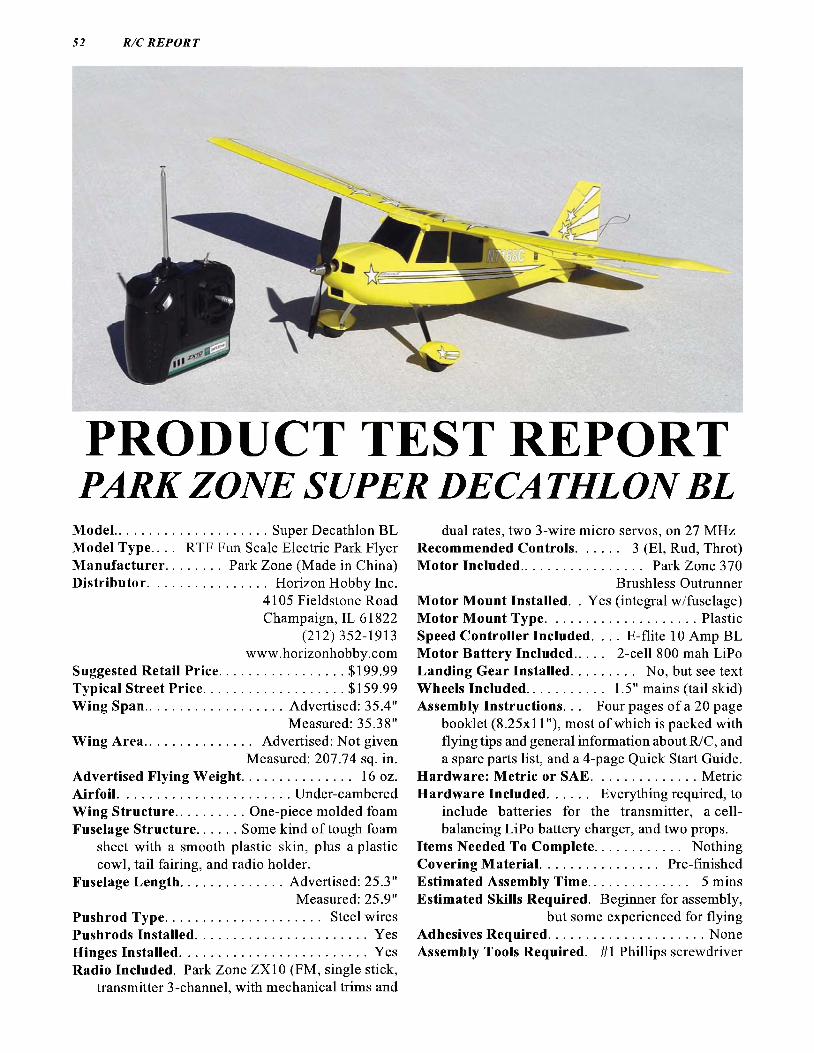
52 R /C REPORT
PRODUCT TEST REPORTPARK ZONE SUPER DEC A THLON BL
Model......................................... Super Decathlon BLModel Type.. . . RTF Fun Scale Electric Park FlyerManufacturer.............. Park Zone (Made in China)Distributor.................................Horizon Hobby Inc.
4105 Ficldstone Road Champaign, IL 61822
(212)352-1913 www.horizonhobby.com
Suggested Retail Price..................................$199.99Typical Street Price......................................$159.99Wing Span.......................................Advertised: 35.4"
Measured: 35.38"Wing Area............................. Advertised: Not given
Measured: 207.74 sq. in.Advertised Flying Weight............................. 16 oz.Airfoil................................................Under-camberedWing Structure..................One-piece molded foamFuselage Structure.......... Some kind of tough foam
sheet with a smooth plastic skin, plus a plastic cowl, tail fairing, and radio holder.
Fuselage Length............................. Advertised: 25.3"Measured: 25.9"
Pushrod Type.................................................... Steel wiresPushrods Installed................................................ YesHinges Installed.....................................................YesRadio Included. Park Zone ZX10 (FM, single stick,
transmitter 3-channel, with mechanical trims and
dual rates, two 3-wire micro servos, on 27 MHzRecommended Controls........... 3 (El, Rud, Throt)Motor Included................................ Park Zone 370
Brushless Outrunner Motor Mount Installed. . Yes (integral w/fuselage)Motor Mount Type.........................................PlasticSpeed Controller Included. . . . E-flite 10 Amp BLMotor Battery Included....... 2-cell 800 mah LiPoLanding Gear Installed................. No, but see textWheels Included.................... 1.5" mains (tail skid)Assembly Instructions. . . Four pages of a 20 page
booklet (8.25x11"), most of which is packed with flying tips and general information about R/C, and a spare parts list, and a 4-page Quick Start Guide.
Hardware: Metric or SAE..............................MetricHardware Included........... Everything required, to
include batteries for the transmitter, a cellbalancing LiPo battery charger, and two props.
Items Needed To Complete....................... NothingCovering Material................................ Pre-finishedEstimated Assembly Time........................... 5 minsEstimated Skills Required. Beginner for assembly,
but some experienced for flyingAdhesives Required............................................NoneAssembly Tools Required. #1 Phillips screwdriver
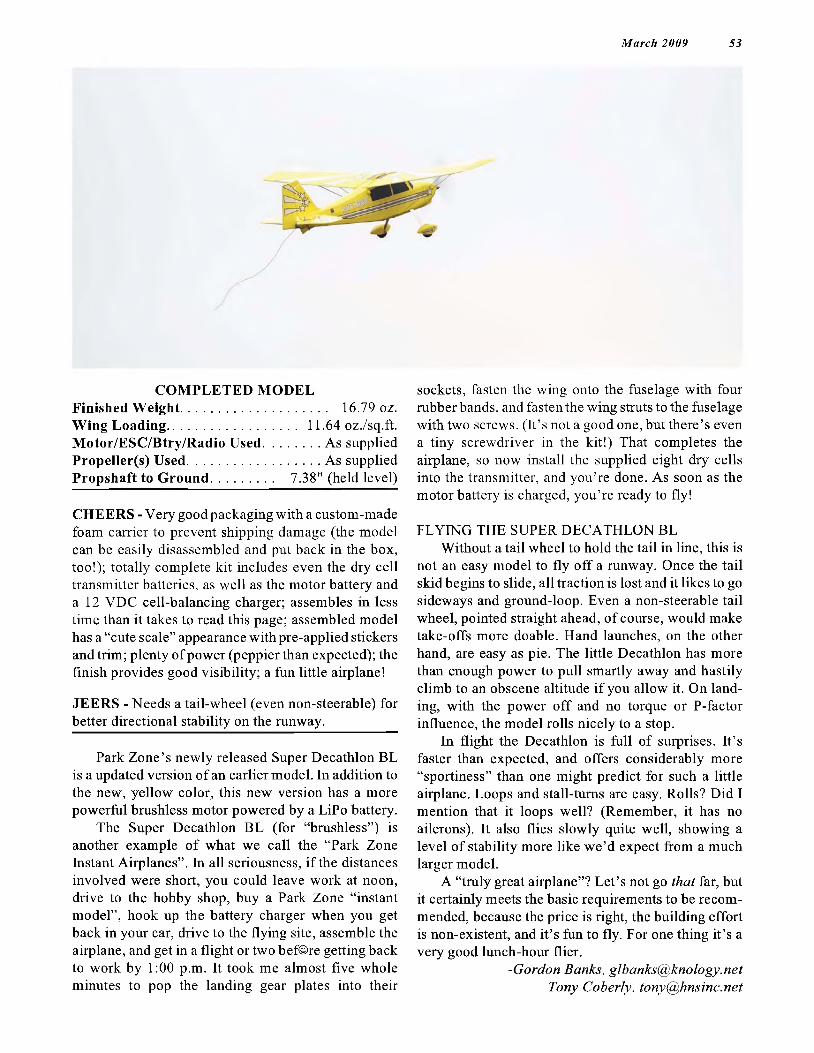
M arch 2009 S3
COMPLETED MODELFinished Weight........................................ 16.79 oz.Wing Loading................................... 11.64 oz./sq.ft.Motor/ESC/Btry/Radio Used................................As suppliedPropeller(s) Used.....................................................As suppliedPropshaft to Ground................. 7.38" (held level)
CHEERS - Very good packaging with a custom-made foam carrier to prevent shipping damage (the model can be easily disassembled and put back in the box, too!); totally complete kit includes even the dry cell transmitter batteries, as well as the motor battery and a 12 VDC cell-balancing charger; assembles in less time than it takes to read this page; assembled model has a “cute scale” appearance with pre-applied stickers and trim; plenty of power (peppier than expected); the finish provides good visibility; a fun little airplane!
JEERS - Needs a tail-wheel (even non-steerable) for better directional stability on the runway.
Park Zone’s newly released Super Decathlon BL is a updated version of an earlier model. In addition to the new, yellow color, this new version has a more powerful brushless motor powered by a LiPo battery.
The Super Decathlon BL (for “brushless”) is another example of what we call the “Park Zone Instant Airplanes”. In all seriousness, if the distances involved were short, you could leave work at noon, drive to the hobby shop, buy a Park Zone “instant model”, hook up the battery charger when you get back in your car, drive to the flying site, assemble the airplane, and get in a flight or two bef@re getting back to work by 1:00 p.m. It took me almost five whole minutes to pop the landing gear plates into their
sockets, fasten the wing onto the fuselage with four rubber bands, and fasten the wing stmts to the fuselage with two screws. (It’s not a good one, but there’s even a tiny screwdriver in the kit!) That completes the airplane, so now install the supplied eight dry cells into the transmitter, and you’re done. As soon as the motor battery is charged, you’re ready to fly!
FLYING THE SUPER DECATHLON BLWithout a tail wheel to hold the tail in line, this is
not an easy model to fly off a runway. Once the tail skid begins to slide, all traction is lost and it likes to go sideways and ground-loop. Even a non-steerable tail wheel, pointed straight ahead, of course, would make take-offs more doable. Hand launches, on the other hand, are easy as pie. The little Decathlon has more than enough power to pull smartly away and hastily climb to an obscene altitude if you allow it. On landing, with the power off and no torque or P-factor influence, the model rolls nicely to a stop.
In flight the Decathlon is full of surprises. It’s faster than expected, and offers considerably more “sportiness” than one might predict for such a little airplane. Loops and stall-turns are easy. Rolls? Did I mention that it loops well? (Remember, it has no ailerons). It also flies slowly quite well, showing a level of stability more like we’d expect from a much larger model.
A “truly great airplane”? Let’s not go that far, but it certainly meets the basic requirements to be recommended, because the price is right, the building effort is non-existent, and it’s fun to fly. For one thing it’s a very good lunch-hour flier.
-Gordon Banks, [email protected] Tony Coberly, [email protected]

54 R /C RE POR T
PRODUCT TEST REPORT Hobby Zone RTF Mini-Cub
Model...................... Piper Super Cub (13.5:1 scale)Model Type.. . . RTF Fun Scale Electric Park Flyer
with Anti-Crash TechnologyManufacturer.......... Hobby Zone (Made in China)Distributor................................ Horizon Hobby Inc.
4105 Fieldstone Road Champaign, IL 61822
(212)352-1913 ww w. horizonhobby. c om
Suggested Retail Price...................................$144.99Typical Street Price....................................... $119.99Wing Span...................................Advertised: 31.75"
Measured: 31.9"Wing Area............................ Advertised: Not given
Measured: 147.12 sq. in.Advertised Flying Weight............................... 7 oz.Airfoil................................................ Under-camberedWing Structure..................One-piece molded foamFuselage Structure............ One-piece molded foam
with a plastic cowlFuselage Length........................... Advertised: 21.5"
Measured: 21.9"Pushrod Type.................Steel wires in plastic tubesPushrods Installed................................................ YesHinges Installed.....................................................YesRecommended Controls........... 3 (El, Rud, Throt)
Radio Included............ Hobby Zone two-stick, FM,27 MHz, 3-channel, with digital trims, a Mode I/Mode II selector switch, and a low-battery power warning buzzer.
Motor Included........... Hobby Zone 180 (brushed)integral with a gearbox
Motor Mount Installed. . Yes (integral w/fuselage)Motor Mount Type.........................................PlasticSpeed Controller Included......... Yes (unspecified)Motor Battery Included....... 2-cell 300 mah LiPoBattery Charger Included. 12 VDC 2-cell, 300 ma
cell balancing type, plus a 120 VAC adapterLanding Gear Installed................. No, but see textWheels Included.................... 1.25" mains, 0.7" tailAssembly Instructions.A 4-page Quick Start Guide,
and a 50-page 5.75x4" booklet covering assembly, battery charging, testing, setup, flying tips, using the Anti-Crash Technology feature, and more.
Hardware: Metric or SAE..............................MetricHardware Included........... Everything required, to
include the four dry cell batteries for the transmitter, a 12 VDC cell-balancing LiPo battery charger with an AC adapter, two propellers, and a 10-min video DVD with assembly and flying tips.
Items Needed To Complete....................... NothingCovering Material................................ Pre-finished
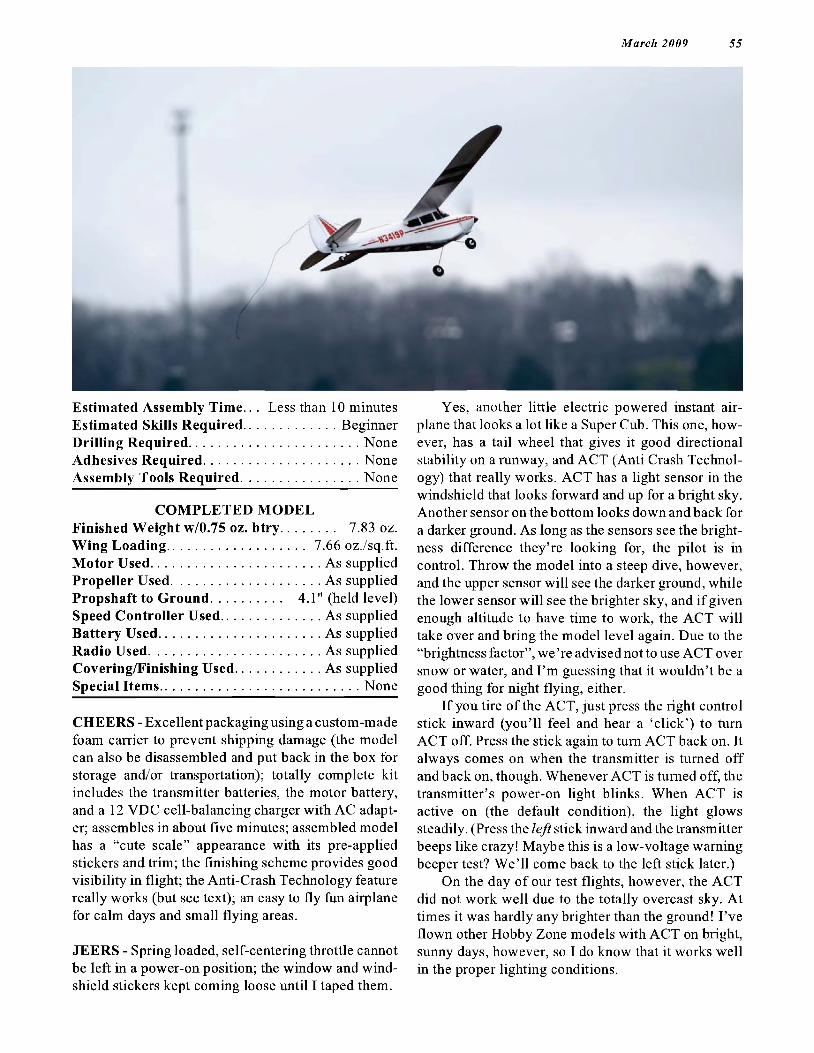
M arch 2009 55
Estimated Assembly Time.. . Less than 10 minutesEstimated Skills Required.......................... BeginnerDrilling Required............................................... NoneAdhesives Required........................................... NoneAssembly Tools Required................................. None
COMPLETED MODELFinished Weight w/0.75 oz. btry.............. 7.83 oz.Wing Loading..................................... 7.66 oz./sq.ft.Motor Used................................................As suppliedPropeller Used...........................................As suppliedPropshaft to Ground................... 4.1” (held level)Speed Controller Used.............................As suppliedBattery Used..............................................As suppliedRadio Used.................................................As suppliedCovering/Finishing Used.........................As suppliedSpecial Items....................................................... None
CHEERS - Excellent packaging using a custom-made foam carrier to prevent shipping damage (the model can also be disassembled and put back in the box for storage and/or transportation); totally complete kit includes the transmitter batteries, the motor battery, and a 12 VDC cell-balancing charger with AC adapter; assembles in about five minutes; assembled model has a “cute scale” appearance with its pre-applied stickers and trim; the finishing scheme provides good visibility in flight; the Anti-Crash Technology feature really works (but see text); an easy to fly fun airplane for calm days and small flying areas.
JEERS - Spring loaded, self-centering throttle cannot be left in a power-on position; the window and windshield stickers kept coming loose until I taped them.
Yes, another little electric powered instant airplane that looks a lot like a Super Cub. This one, however, has a tail wheel that gives it good directional stability on a runway, and ACT (Anti Crash Technology) that really works. ACT has a light sensor in the windshield that looks forward and up for a bright sky. Another sensor on the bottom looks down and back for a darker ground. As long as the sensors see the brightness difference they’re looking for, the pilot is in control. Throw the model into a steep dive, however, and the upper sensor will see the darker ground, while the lower sensor will see the brighter sky, and if given enough altitude to have time to work, the ACT will take over and bring the model level again. Due to the “brightness factor”, we’re advised not to use ACT over snow or water, and I’m guessing that it wouldn’t be a good thing for night flying, either.
If you tire of the ACT, just press the right control stick inward (you’ll feel and hear a ‘click’) to turn ACT off. Press the stick again to turn ACT back on. It always comes on when the transmitter is turned off and back on, though. Whenever ACT is turned off, the transmitter’s power-on light blinks. When ACT is active on (the default condition), the light glows steadily. (Press the left stick inward and the transmitter beeps like crazy! Maybe this is a low-voltage warning beeper test? We’ll come back to the left stick later.)
On the day of our test flights, however, the ACT did not work well due to the totally overcast sky. At times it was hardly any brighter than the ground! I’ve flown other Hobby Zone models with ACT on bright, sunny days, however, so I do know that it works well in the proper lighting conditions.
56 R /C REPORT
xa? e e t e R /c H o
KI NG.N.C.
We Ship UPS
P.O. Box 897 614 South Main st. King, N.C. 27021
Http://www.kingrc.com * [email protected] 336-983-3969 Fax336-983-9810
Assembling the Hobby Zone M in-Cub is a ‘snap’, and I mean that literally, because the only things we have to add, the tail wheel and main gear, both ‘snap’ into place. They also snap right back out so you can put everything back in the box if you want, for transportation and/or storage purposes (helps keep it clean in a dusty workshop!).
There’s also a 10-min video DVD with some assembly tips,
Sturbridge, Massachusetts
Open tr (508)7 days! 347-9350Full Line R/C Hobby Shop
flying advice, and flying footage. It doesn’t replace the instructions book though, so the video is optional, the book is not.
The Hobby Zone 180 size brushed motor with gearbox provides more than enough power for scale-like flight maneuvers for a Cub, and the little 300 mah 2-cell LiPo battery provides enough juice for at least five minutes of high- throttle flight, and nine to ten m i n- utes of gentle cruising time (i.e., lounge chair flying).
A nice feature of the transmitter is its Mode I/Mode I I selector switch. Deeply recessed so it won’t be moved accidentally, this switch makes it easy to choose your desired mode of operation. However, this “nice feature” comes at a price. In either mode, the throttle stick is spring loaded and self-centering! We can’t “set it and leave it” in a power-on position, so we have to constantly hold forward
pressure on the stick to maintain power. I haven’t taken the transmitter apart to look, so I don’tknow if there’s a way to defeat the spring(s). What I did was jam a round toothpick into the gimbal to hold the throttle in place. Quick and dirty, but it works.
The Hobby Zone Mini Cub is fun to fly inasmuch as any easy to fly R/C airplane is fun to fly. It has no bad flight characteristics, it was super easy to assemble, it fits fully assembled into any car I know of (all but the wing fits into the trunk of my Gold Wing motorcycle!), and it’s a dam good value for all that you get with it. It also handles a moderate wind far better than we expected. On this day it was fairly steady, and wasn’t gusting a lot, but it was considerably stiffer than the maximum wind suggested for such models.
So here’s the thing... The Hobby Zone Mini-Cub has a lot going for it in value, and it has no bad flight habits whatsoever. In fact, it was even impressive in its own way, in that it flew and performed better than expected. Other than the spring loaded throttle stick, I have no complaints with it at all. Still, there’s simply nothing about flying the Mini-Cub that made it particularly endearing. Normally that might pass without notice, but in this case I keep remembering this model’s bigger brother, the Hobby Zone 47" span Super Cub. That model had this inexplicable “something” that always made me look forward to flying it. And whatever that “something” was, the Mini Cub doesn’t seem to have it. I like the 32" (13.5:1 scale) Hobby Zone Mini- Cub just fine, but not as much as the 47" (9.2:1 scale) version.
-Gordon Banks [email protected]
Tony Coberly [email protected]
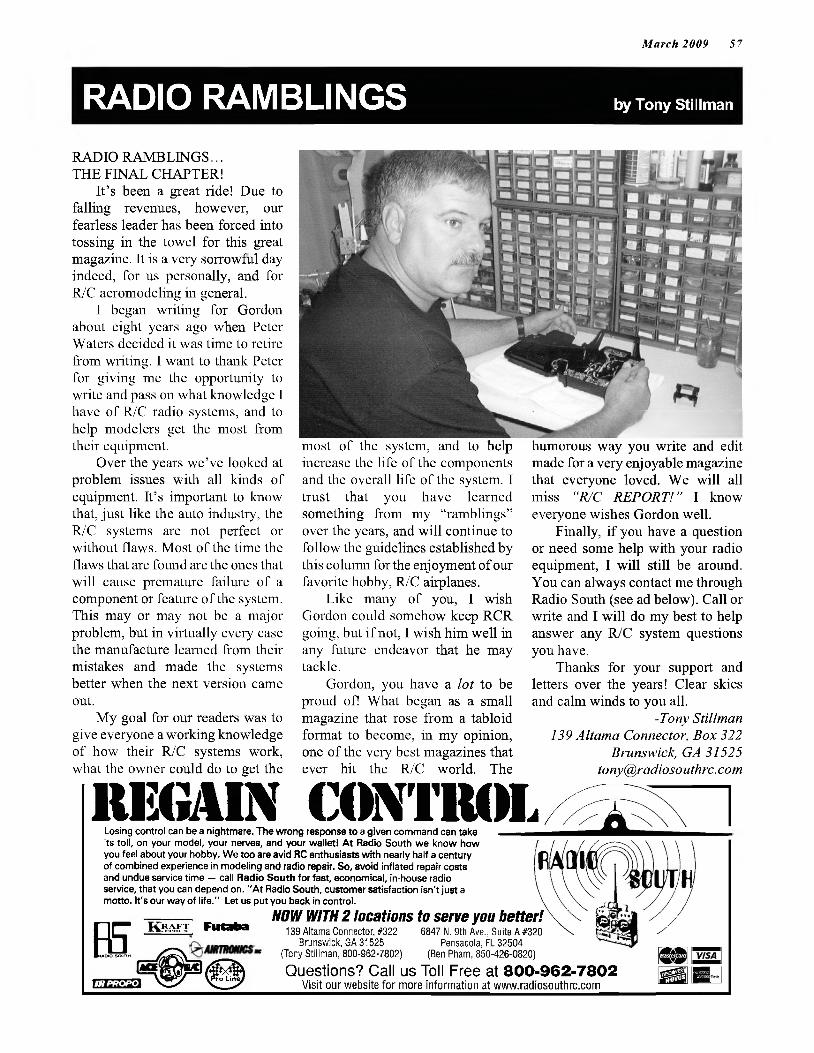
M arch 2009 57
RADIO RAMBLINGS by Tony Stillman
RADIO RAMBLINGS...THE FINAL CHAPTER!
It’s been a great ride! Due to falling revenues, however, our fearless leader has been forced into tossing in the towel for this great magazine. It is a very sorrowful day indeed, for us personally, and for R/C aeromodeling in general.
I began writing for Gordon about eight years ago when Peter Waters decided it was time to retire from writing. I want to thank Peter for giving me the opportunity to write and pass on what knowledge I have of R/C radio systems, and to help modelers get the most from their equipment.
Over the years we’ve looked at problem issues with all kinds of equipment. It’s important to know that, just like the auto industry, the R/C systems are not perfect or without flaws. Most of the time the flaws that are found are the ones that will cause premature failure of a component or feature of the system. This may or may not be a major problem, but in virtually every case the manufacture learned from their mistakes and made the systems better when the next version came out.
My goal for our readers was to give everyone a working knowledge of how their R/C systems work, what the owner could do to get the
most of the system, and to help increase the life of the components and the overall life of the system. I trust that you have learned something from my “ramblings” over the years, and will continue to follow the guidelines established by this column for the enjoyment of our favorite hobby, R/C airplanes.
Like many of you, I wish Gordon could somehow keep RCR going, but if not, I wish him well in any friture endeavor that he may tackle.
Gordon, you have a lot to be proud of! What began as a small magazine that rose from a tabloid format to become, in my opinion, one of the very best magazines that ever hit the R/C world. The
humorous way you write and edit made for a very enjoyable magazine that everyone loved. We will all miss “R/C REPORT'!” I know everyone wishes Gordon well.
Finally, if you have a question or need some help with your radio equipment, I will still be around. You can always contact me through Radio South (see ad below). Call or write and I will do my best to help answer any R/C system questions you have.
Thanks for your support and letters over the years! Clear skies and calm winds to you all.
-Tony Stillman 139 Altama Connector, Box 322
Brunswick, GA 31525 [email protected]
11EG4IN CONTROLLosing control can be a nightmare. The wrong response to a given command can take its toll, on your model, your nerves, and your wallet! At Radio South we know how you feel about your hobby. We too are avid RC enthusiasts with nearly half a century of combined experience in modeling and radio repair. So, avoid inflated repair costs and undue service time — call Radio South for fast, economical, in-house radio service, that you can depend on. "At Radio South, customer satisfaction isn't just a motto. It's our way of life." Let us put you back in control.
FutabaNOW WITH 2 locations to serve you better!
139 Altama Connector, #322 6847 N. 9th Ave., Suite A #320Brunswick, GA 31525 Pensacola, FL 32504
(Tony Stillman, 800-962-7802) (Ben Pham, 850-426-0820)
Questions? Call us Toll Free at 800 - 962-7802Visit our website for more information at www.radiosouthrc.com
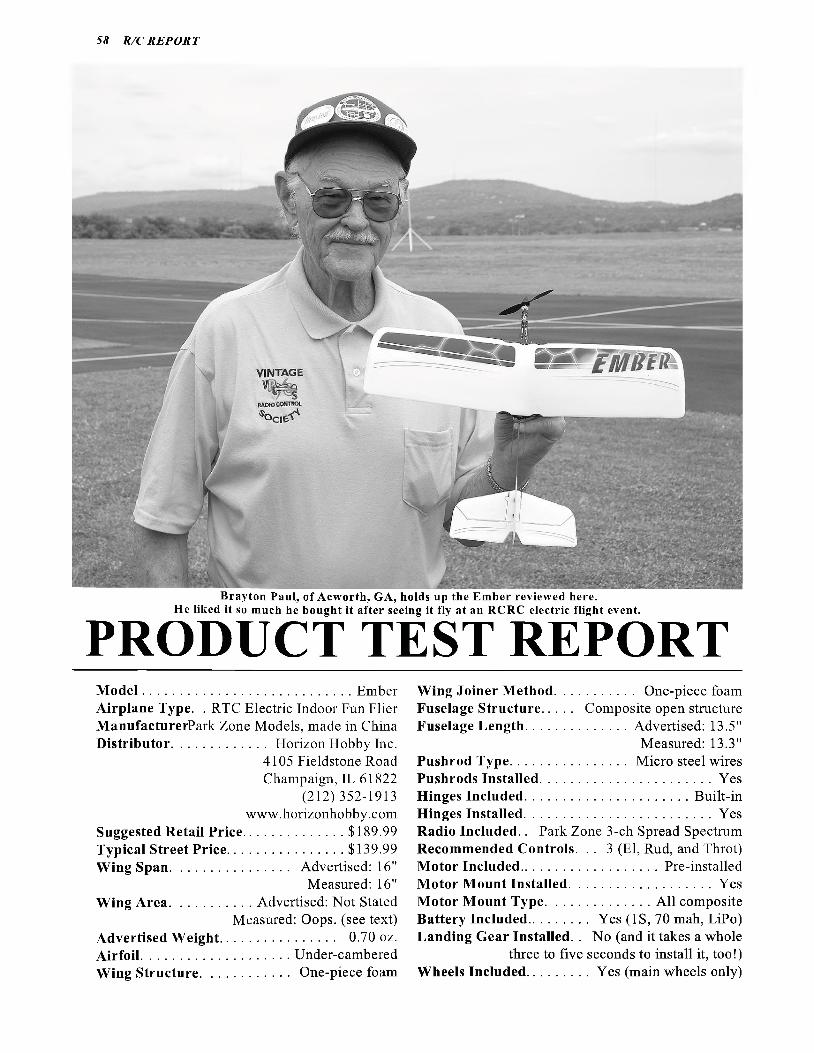
58 R /C RE POR T
Brayton Paul, o f Acworth, GA, holds up the Ember reviewed here.He liked it so much he bought it after seeing it fly at an RCRC electric flight event.
PRODUCT TEST REPORTM odel........................................................ EmberAirplane Type. . RTC Electric Indoor Fun Flier ManufacturerPark Zone Models, made in ChinaDistributor..........................Horizon Hobby Inc.
4105 Fieldstone Road Champaign, IL 61822
(212)352-1913 www. horizonhobby. c om
Suggested Retail Price............................ $189.99Typical Street Price.................................$139.99WingSpan................................ Advertised: 16"
Measured: 16"Wing Area......................Advertised: Not Stated
Measured: Oops, (see text)Advertised Weight............................... 0.70 oz.Airfoil..........................................Under-camberedWing Structure........................ One-piece foam
Wing Joiner Method.................... One-piece foamFuselage Structure........ Composite open structureFuselage Length...........................Advertised: 13.5"
Measured: 13.3"Pushrod Type............................... Micro steel wiresPushrods Installed.............................................. YesHinges Included..............................................Built-inHinges Installed.....................................................YesRadio Included.. Park Zone 3-ch Spread SpectrumRecommended Controls. . . 3 (El, Rud, and Throt)Motor Included.......................................Pre-installedMotor Mount Installed.........................................YesMotor Mount Type............................ All compositeBattery Included................ Yes (IS, 70 mah, LiPo)Landing Gear Installed. . No (and it takes a whole
three to five seconds to install it, too!) Wheels Included................ Yes (main wheels only)
M arch 2009 59
Assembly Instructions. . . . Good, with illustrationsHardware: Metric or SAE........... What hardware?Hardware Included................. Everything requiredItems Needed To Complete....................... NothingCovering Material..............................................NoneEstimated Assembly Time.. . . Five to ten secondsEstimated Skills Required.......................... BeginnerDrilling Required................................................... NoAdhesives Required........................................... NoneAssembly Tools Required................................. None
COMPLETED MODELFinished Weight.......................................... 0.68 oz.Wing Loading..................................... NA (see text)Motor Used.............................As supplied (built-in)Propeller Used........................................ As suppliedPropshaft to Ground......................... NA (see text)Speed Controller Used..........As supplied (built-in)Battery Used.............. As supplied (1 -cell, 70 mail)Radio Used.............................................. As supplied
(Park Zone 3-ch Spread Spectrum) Covering/Finishing Used.. . . As supplied (built-in) Special Items......................................................None
CHEERS - Totally complete and truly Ready To Fly (slide the landing gear wire into place, charge and install the battery, and fly); takes only seconds to assemble (but several minutes to charge the tiny battery); surprisingly stable and smooth flight characteristics; super easy to fly; can be flown outdoors in calm air.
JEERS - Very fragile airframe (but necessarily so)
The Park Zone “Ember” is a tiny, super light, slow flyer designed primarily for indoor flying. It’s an open structure design using linear drive servos powered by two of the tiniest electric motors I’ve ever seen! The entire model, in fact, is an amazing piece of art, centered around a tiny circuit board that somehow includes a 2.4 GHz Spread Spectrum receiver, the speed controller, and two servo amplifiers. Taken from the box, it requires only seconds to slip the pre-assem- bled landing gear into place, a few seconds more to install the supplied dry cell batteries into the transmitter, and yet a few seconds more to install more dry cell batteries into the charger base. Then stick the tiny single-cell, 70 mah LiPo battery into the charger, and you’re only minutes away from flying.
Use those “battery charging minutes” to inspect and admire the Ember’s delicate design and assembly. It really is a fine little piece of mechanical art. Everything is so tiny and delicate, yet fully functional and
flyable. It’s simply amazing what tiny little craftsmen can do these days.
Okay, now the battery’s charged, so it’s time to fly. We were outside, but the air was so calm, you could drop a ping pong ball from 500' and it would fall straight as a shadow. I tossed the Ember into the almost something like what may have been a breeze that might best be called a “whisper”, and watched it climb away with authority. Trimming it for straight and level flight at maybe 2/3 throttle required two clicks of right rudder, but then it was floating around like a male feather looking for a landing spot, but refusing to ask directions. I flew it thataway for a few seconds, and then turned back to make a slow fly by. Or was it a high-speed pass? It’s really hard to tell the difference. Adding more throttle made it climb, but I’ll be darned if I could tell if it was going any faster!
The Ember is not exciting to fly because of any high performance factors, it was fun because it was so incredibly slow, and because of all the complaints from spectators, like “Hey! Slow that thing down!”, and “Good grief that thing’s loud!”, and “Someone swat that big mosquito! ”
How slow is the Ember, and how calm was the air that day? Guys, this is the first, and likely the last, R/C model that I was able to fly and photograph in flight at the same time! Why was I doing both, instead of asking Tony to handle the maiden flight? Hey, I offered to let Tony fly it, but quickly withdrew that offer when he suggested, “L et’s try a 4-cell battery in it! That should make a hot Ember!” (I apologize for Tony, folks, but I think maybe he played around with wall sockets as a child.)
Tiny indoor models are not among my favorites, but the Ember was fun to fly, and it must have been pretty impressive to at least one other person as well. After seeing it fly at the Rocket City Radio Controllers’ electric fly in, Drayton Paul (AMA #686!), a visitor from Acworth, GA, wanted to buy it. He handed me the cash (good indoors and outdoors), and I handed him the Ember. It was sold before I even remembered to determine its actual wing area! (Sorry about that!)
The Park Zone RTF Ember isn’t “hot” like a fire ember, but for pocket-size fun, it sure glows brightly. It even fits, fully assembled, into almost any car! (In the glove box, I mean.) Now there are two newer versions of the Ember available, so if you’re an indoor flier, check ‘em out and see which one is best for you.
-Gordon Banks [email protected]

PERFORMANCE SERIES ARE
a Product test reportb y dick pettit
graphics by heather cellura
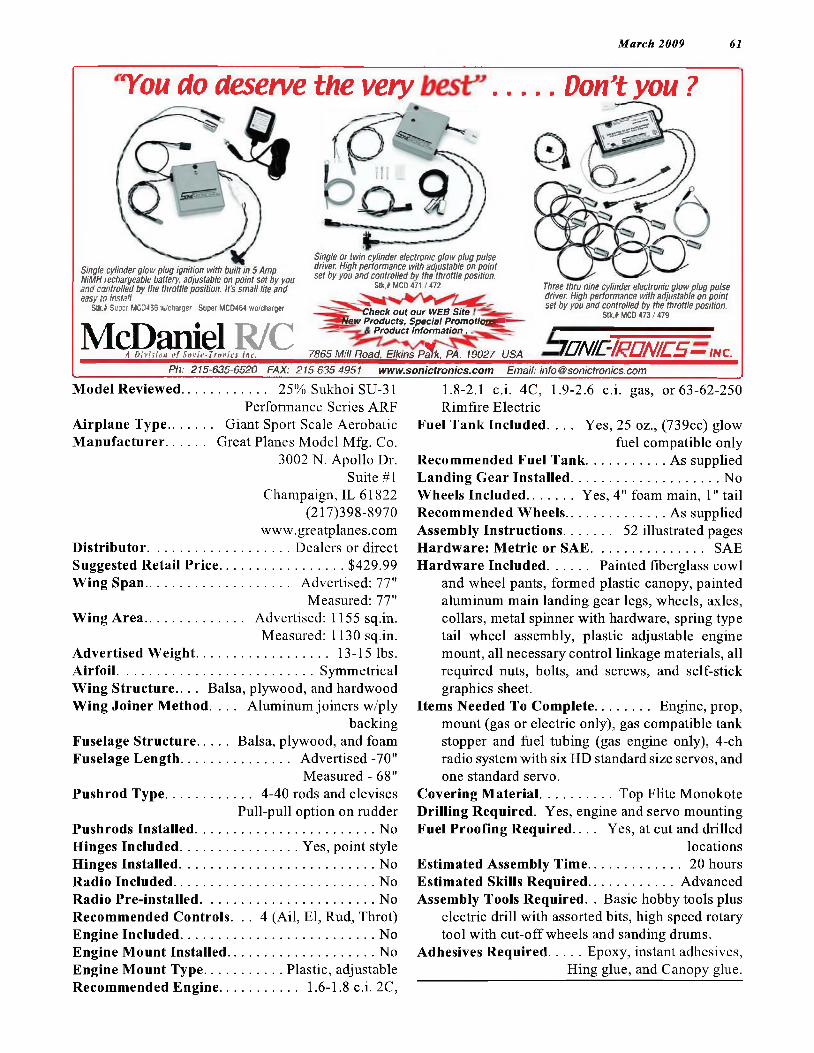
M arch 2009 61
'You do deserve the very ..... Don’t you ?
Single cylinder glow plug ignition with built in 5 Amp NiMH rechargeable battery, adjustable on point set by you and controlled by the throttle position. It's small lite and easy to install.
Stk.# Super MCD466 w/charger Super MCD464 wo/charger
McDaniel R/C__________ A Division o f Soiiic-Trvnics I nr.__________
Single or twin cylinder electronic glow plug pulse driver. High performance with adjustable on point set by you and controlled by the throttle position.
SOt,# MCD 471 / 472
Check out our WEB Site ew Products, Special Promotion^
Product Information .
7865 Mill Road, E lk insP^k. PA. 19027 USA
Three thru nine cylinder electronic glow plug pulse driver. High performance with adjustable on point set by you and controlled by the throttle position.
Stk,# MCD 473 / 478
TUNIC-lRONIOS— INC.Ph: 215-635-6520 FAX: 215 635 4951 www.sonictronics.com Email: [email protected]
Model Reviewed....................... 25% Sukhoi SU-31Performance Series ARF
Airplane Type............ Giant Sport Scale AerobaticM anufacturer.......... Great Planes Model Mfg. Co.
3002 N. Apollo Dr.Suite #1
Champaign, IL 61822 (217)398-8970
www.greatplanes.comDistributor...................................... Dealers or directSuggested Retail Price...................................$429.99Wing Span....................................... Advertised: 77"
Measured: 77"Wing A rea.......................... Advertised: 1155 sq.in.
Measured: 1130 sq.in.Advertised W eight................................... 13-15 lbs.Airfoil....................................................... SymmetricalWing Structure.. . . Balsa, plywood, and hardwood Wing Joiner Method. . . . Aluminum joiners w/ply
backingFuselage Structure........Balsa, plywood, and foamFuselage Length............................. Advertised-70"
Measured - 68"Pushrod Type....................... 4-40 rods and clevises
Pull-pull option on rudderPushrods Installed..................................................NoHinges Included................................Yes, point styleHinges Installed...................................................... NoRadio Included....................................................... NoRadio Pre-installed................................................ NoRecommended Controls. . . 4 (Ail, El, Rud, Throt)Engine Included......................................................NoEngine Mount Installed.........................................NoEngine Mount Type.....................Plastic, adjustableRecommended Engine..................... 1.6-1.8 c.i. 2C,
1.8-2.1 c.i. 4C, 1.9-2.6 c.i. gas, or 63-62-250 Rimfire Electric
Fuel Tank Included. . . . Yes, 25 oz,, (739cc) glowfuel compatible only
Recommended Fuel Tank..................... As suppliedLanding Gear Installed......................................NoWheels Included............Yes, 4" foam main, 1" tailRecommended Wheels...........................As suppliedAssembly Instructions............. 52 illustrated pagesHardware: Metric or SAE.............................. SAEHardware Included........... Painted fiberglass cowl
and wheel pants, formed plastic canopy, painted aluminum main landing gear legs, wheels, axles, collars, metal spinner with hardware, spring type tail wheel assembly, plastic adjustable engine mount, all necessary control linkage materials, all required nuts, bolts, and screws, and self-stick graphics sheet.
Items Needed To Complete.............. Engine, prop,mount (gas or electric only), gas compatible tank stopper and fuel tubing (gas engine only), 4-ch radio system with six HD standard size servos, and one standard servo.
Covering Material................... Top Flite MonokoteDrilling Required. Yes, engine and servo mounting Fuel Proofing Required.. . . Yes, at cut and drilled
locationsEstimated Assembly Time......................... 20 hoursEstimated Skills Required...................... AdvancedAssembly Tools Required. . Basic hobby tools plus
electric drill with assorted bits, high speed rotary tool with cut-off wheels and sanding drams.
Adhesives Required........ Epoxy, instant adhesives,Hing glue, and Canopy glue.

62 R/C REPORT
COMPLETED MODELFinished Weight..................... 14 lbs. 2 oz.(226 oz.)Wing Loading..................................... 28.8 oz./sq.ft.Engine Used................... Fuji BT-43EI-2 (63.9 oz.)Propeller Used.......................................... APC 20x8Propshaft to Ground..................... 13" (held level)Fuel Tank Used.................................... As suppliedRadio Used........... Futaba 9CAP w/FASST module
and 7-ch receiver, six Futaba S3305 HD servos, one Futaba 3001 servo, Radical R/C 5-cell 1650 mah NiMH receiver battery, 4-cell 1650 mah NiMH ignition battery, and two Radical R/C HD charge switches.
Covering/Finishing Used........Top Flite Monokote(Five colors)
Special Items.. DuBro gas compatible tank stopper, fuel lines, Fill-It fueling port and HD servo arms, Great Planes 25% pilot figure, and Tru-Turn low profile spinner adapter.
CHEERS - Very complete kit; all parts suitable for a model of this type and size; very quick and easy assembly; excellent aerobatic flight capability; good 3D performance.
JEERS - No gas engine mounting hardware; covering reacted to heat differently than Monokote; recommended servo arms didn’t fit recommended servos; top hatch mounting suggestion very sloppy; prop bolts with Fuji 43 engine not long enough to work with spinner backplatc.
“The Sukhoi SU-31 is the latest single seater from Sukhoi and its devastating performance was used to win the Breitling Championship in the hands ofYurgis Kairis. It has the highest performance o f any piston engined aircraft made today, and as well as being flown by members o f the Russian aerobatic team, has, since it became commercially available at the end o f 1994 been ordered by the 1994 World Aerobatic Champion, Xavier de Lapparent, as well as the then current Swiss, French, Italian, Spanish, Australian and South African champions. ’’
“Although the SU-31 is physically similar to the SU-26, it is actually really quite different. The main difference being that the entire fuselage, i.e. everything behind the cockpit, is composite rather than tubular steel. This reduces the weight by some 30kgs, which is very significant in an aircraft o f this sort. ”
“In terms o f flying qualities, the SU-31 is designed to be somewhat more unstable than the SU-26, although this is only really a matter o f degree and this makes it much more suitable for free-style flying, and
certainly a great deal easier to snap-roll than the SU-26. ”
“Like all other Sukhois, the SU-31 can use either the 360hp M14P or the 400hp M14PF, although as a practicality more aircraft have the more powerful engine fitted. ”
“The SU-31 has continued the extraordinary competition track record o f the SU-26. winning successive World and European championships in both men’s and women’s categories. ”
When I found out one of the Great Planes 25% scale Sukhoi ARF’s was being sent to me, I did some research on the internet for some background information on the full scale plane. I then noticed that the wing span of the model was only 77" and the wing span of the full scale Sukhoi was 27', making the model a bit smaller that 25% scale. Since I wanted to participate in IMAA events, I did some more research and found out that the latest model of the SU-31 has a wing span of 25', making the model a bit larger than 25% scale. With that out of the way, I eagerly anticipated the delivery of the Great Planes Sukhoi SU-31.
When the shipping box arrived at the shop, I immediately opened it and was marveled at the details and quality of the parts inside. The fuselage is made from laser cut balsa and plywood parts with balsa sheeted foam used on the turtle deck and the canopy hatch. The wings are also made from laser cut wood and have an open framework construction. The painted fiberglass cowl and wheel pants look really nice, and the rest of the plane was covered with Top Flite Monokote. While no wrinkles were visible at first, I’ll still run a heat gun over everything to see what shows up. Also included was a pair of painted metal main landing gear legs, some 4" foam wheels, a nice formed canopy, a number of bags of hardware, and even a set of laser cut wood parts to line the cowl up with the engine. I almost forgot to mention the high quality instructions manual (which is typical from Great Planes), and a sheet of self-stick graphics.
The Great Planes Sukhoi SU-31 has several power options the builder can choose from. I’ll be using a FujiBT-43EI-2 gas ignition engine, mainly because of my familiarity with the operation of these engines. They provide lots of power, they’re relatively light weight, and they’re also very economical in operation. Other choices include 2C or 4C glow engines, plus a number of high-power electric motor and battery combinations. The instructions cover these power choices, but the ultimate decision is left to the builder.
I’ll be using Pacer adhesives to assemble the Great Planes Sukhoi SU-31, including their epoxies, Zap instant adhesives, and Hinge Glue. With these adhe-

M arch 2009 63
sives, and many others you may use, please provide proper ventilation during their use. Also make sure that proper ventilation is used when cutting and sanding fiberglass parts such as the cowl and wheel pants.
The first thing to do is use a heat gun and a soft cloth over the MonoKote. Any areas not tightly bonded to the wooden surfaces will bubble up, much like the wrinkles we see after a new plane is left in the hot sun a while. It’s better to get rid of them at the workshop rather than hying to show off a new model that looks like grandma’s stockings. The covering reacted differently to heat than how I remember MonoKote. The covering used here is said to be MonoKote, but I’ll have to check it with Great Planes. Be very careful when applying heat to the edges of trim pieces or on parts of the covering that have been overlapped. Whatever the covering material is, I rate its application on the Great Planes Sukhoi SU-31 to be very good.
As usual, the next item of business is the installation of the ailerons to the wing panels. This step also includes the servo installation and installing the associated linkages. The Sukhoi uses point style hinges that fit nicely into pre-drilied holes. Rather than using epoxy to secure the hinges, I used Pacer hinge glue, which has always worked perfectly for me. Pacer hinge glue is water based, which makes it easier to clean up if a little is dribbled on the covering. Be extra careful when squirting the glue into the hinge holes because it can go all the way through and drip on the inside of the covering. I always apply glue to the wing holes first, insert the hinges, and place the wing with the hinges pointing down to keep the glue from dribbling back into the wings interior. When the glue has cured,
usually overnight, the aileron is then installed with the trailing edge pointed up for the very same reason. I’m using the same servos recommended in the instructions, Futaba S3305 Ball Bearing Metal Gear units with 124 oz./in. at 6 volts. I also plan to use the recommended Great Planes long servo arms that can be used on any popular modem servo. There’s a plastic insert for Hitec, JR, and Futaba splines that allow this to be done. However, when I tried to replace the stock Futaba arm with the new Great Planes arm, the servo shaft screw hole was too small. I know I could have drilled it larger, but since the instructions recommend both of these servos and these arms, and that they don’t fit one another, I’ll have to mark it as a “Jeer” and use something else.
I chose to use DuBro Heavy Duty long servo arms for an additional servo throw. I soldered some servo extensions and terminated them at the root with locking connectors. The servos were installed in the traditional manner and the linkages were assembled using 4-40 rods and clevises supplied in the kit. Be sure to use the locking nuts on the threaded end of the rods and also use the fuel tubing clevis keepers on all clevises. Since the servos have metal gears, a drop of thread locker on the servo shaft screw won’t hurt anything.
Once this was done, the wing panels are joined using a laminated dihedral brace and Pacer epoxy. The brace is made from two pieces of laser cutplywood and two pieces of aluminum that are epoxied together and allowed to cure. Be sure to scratch the surface of the aluminum parts to give the epoxy something to grab on to. When the brace is cured, check how it fits in the wing pockets, sanding only where it’s a very tight fit. Once satisfied with the fit of the brace and of the
wing root ribs, some 30-min epoxy is mixed and liberally swabbed ©n all mating surfaces. I applied a few pieces of masking tape on the root ends of the wings so any excess epoxy can be easily removed. I pushed the wing panels together with the dihedral brace in place and allowed it to cure.
The wing is now ready to install on the fuselage after a pair of dowels are glued to the leading edge and bolt holes are opened in the covering. There’s also a bolt backup plate that is glued to the underside of the wing to keep the nylon bolts from digging into the balsa sheeting. The bottom wing cover will be added later.
The stabilizer, the elevators, and the rudder are to be added next, but I jumped ahead and installed the main landing gear legs, wheels, wheel pants, and tail wheel assembly. Everything fit exactly as it was supposed to and the wheels turn freely inside the wheel pants. The main gear cover is glued to the fuselage opening with a few dabs of silicone sealer in case it needs to be removed at a later time.
After removing the covering from the stab and the servo slots, with a hot soldering iron tip, the stab is checked for fit, aligned to be level, equidistant to the wing, and epoxied into place. No sanding or adjustments were needed to attain perfect alignment. The elevators are hinged into place in the same manner as the ailerons and the rudder is added too. The servo linkages and control horns are installed for the elevators, but not for the rudder. This is because the builder is given the option of placing the rudder servos either at the tail when using heavier engines or under the wing area when using lighter engines.
The instructions give the builder three options for engine installation, 2C glow, gas power, and
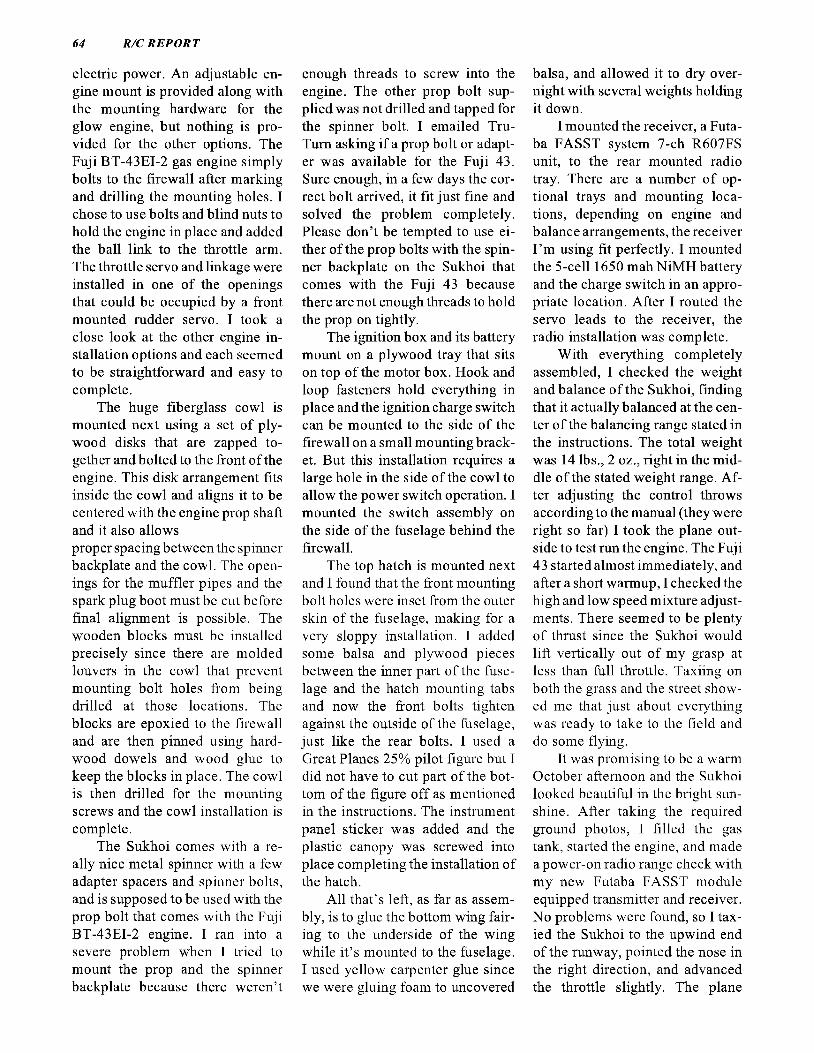
64 R/C RE POR T
electric power. An adjustable engine mount is provided along with the mounting hardware for the glow engine, but nothing is provided for the other options. The Fuji BT-43EI-2 gas engine simply bolts to the firewall after marking and drilling the mounting holes. I chose to use bolts and blind nuts to hold the engine in place and added the ball link to the throttle arm. The throttle servo and linkage were installed in one of the openings that could be occupied by a front mounted rudder servo. I took a close look at the other engine installation options and each seemed to be straightforward and easy to complete.
The huge fiberglass cowl is mounted next using a set of plywood disks that are zapped together and bolted to the front of the engine. This disk arrangement fits inside the cowl and aligns it to be centered with the engine prop shaft and il also allows proper spacing between the spinner backplate and the cowl. The openings for the muffler pipes and the spark plug boot must be cut before final alignment is possible. The wooden blocks must be installed precisely since there are molded louvers in the cowl that prevent mounting bolt holes from being drilled at those locations. The blocks are epoxied to the firewall and are then pinned using hardwood dowels and wood glue to keep the blocks in place. The cowl is then drilled for the mounting screws and the cowl installation is complete.
The Sukhoi comes with a really nice metal spinner with a few adapter spacers and spinner bolts, and is supposed to be used with the prop bolt that comes with the Fuji BT-43EI-2 engine. I ran into a severe problem when I tried to mount the prop and the spinner backplate because there weren’t
enough threads to screw into the engine. The other prop bolt supplied was not drilled and tapped for the spinner bolt. I emailed Tru- Tum asking if a prop bolt or adapter was available for the Fuji 43. Sure enough, in a few days the correct bolt arrived, it fit just fine and solved the problem completely. Please don’t be tempted to use either of the prop bolts with the spinner backplate on the Sukhoi that comes with the Fuji 43 because there are not enough threads to hold the prop on tightly.
The ignition box and its battery mount on a plywood tray that sits on top of the motor box. Hook and loop fasteners hold everything in place and the ignition charge switch can be mounted to the side of the firewall on a small mounting bracket. But this installation requires a large hole in the side of the cowl to allow the power switch operation. I mounted the switch assembly on the side of the fuselage behind the firewall.
The top hatch is mounted next and I found that the front mounting bolt holes were inset from the outer skin of the fuselage, making for a very sloppy installation. I added some balsa and plywood pieces between the inner part of the fuselage and the hatch mounting tabs and now the front bolts tighten against the outside of the fuselage, just like the rear bolts. I used a Great Planes 25% pilot figure but I did not have to cut part of the bottom of the figure off as mentioned in the instructions. The instrument panel sticker was added and the plastic canopy was screwed into place completing the installation of the hatch.
All that’s left, as far as assembly, is to glue the bottom wing fairing to the underside of the wing while it’s mounted to the fuselage. I used yellow carpenter glue since we were gluing foam to uncovered
balsa, and allowed it to dry overnight with several weights holding it down.
I mounted the receiver, a Futa- ba FASST system 7-ch R607FS unit, to the rear mounted radio tray. There are a number of optional trays and mounting locations, depending on engine and balance arrangements, the receiver I’m using fit perfectly. I mounted the5-cell 1650 mah NiMH battery and the charge switch in an appropriate location. After I routed the servo leads to the receiver, the radio installation was complete.
With everything completely assembled, I checked the weight and balance of the Sukhoi, finding that it actually balanced at the center of the balancing range stated in the instructions. The total weight was 14 lbs., 2 oz., right in the middle of the stated weight range. After adjusting the control throws according to the manual (they were right so far) I took the plane outside to test run the engine. The Fuji 43 started almost immediately, and after a short warmup, I checked the high and low speed mixture adjustments. There seemed to be plenty of thrust since the Sukhoi would lift vertically out of my grasp at less than full throttle. Taxiing on both the grass and the street showed me that just about everything was ready to take to the field and do some flying.
It was promising to be a warm October afternoon and the Sukhoi looked beautiful in the bright sunshine. After taking the required ground photos, I filled the gas tank, started the engine, and made a power-on radio range check with my new Futaba FASST module equipped transmitter and receiver. No problems were found, so I taxied the Sukhoi to the upwind end of the runway, pointed the nose in the right direction, and advanced the throttle slightly. The plane

M arch 2009 65
began moving faster and faster, and with just a little up elevator, it was airborne, using only about 1/3 throttle. After trimming, which wasn’t more than a click of down elevator, the Sukhoi responded to the aileron movement quickly and smoothly. I had to look at the transmitter to see if I put the aileron dual rate switch on the high position because the Sukhoi seemed to roll very quickly. Nope, this was all on low rates, so I planned to take it easy for the moment.
Rolls were axial, loops were as big or as small as I wanted, and all the other standard aerobatic maneuvers I attempted looked smooth and stable. I did a two-turn spin and it stopped spinning when the controls were relaxed. I had only planned to fly basic and advanced aerobatic maneuvers at this flying session, saving the all-out 3D flying for the following week at a local flying event. I made a few more low and slow passes for the spectators, and then pointed the nose straight up, pushed the throttle to full power and the Sukhoi headed for the clouds without any hesitation. Just for good measure, I rolled the Sukhoi a few times on the way up, but those rolls didn’t seem to impede the progress of the Sukhoi at all. It looks like the Fuji 43 is a very good power source for this particular plane.
After I could see the plane again, I set up for a landing, which turned out to be a bit long but otherwise uneventful. I taxied the plane to the pit area, stopped the engine, and answered the many questions that the spectators were asking. With the gas tank refilled and after a brief inspection for loose or missing parts, the Fuji 43 was started (on the very first flip I might add) I handed the transmitter over to my ass©ciate test pilot, Rick Cawley, for him to fly and for me to take some more photos.
After taking off at low power, Rick proceeded to roll the Sukhoi at both low speed and low altitude, which looked great, but worried me just a little. Later he said that it looked so good in the air when I was flying it, he knew that a low and slow roll would be nothing out of the ordinary. He then flew around, back and forth, up and down, asking the Sukhoi to do all sorts of basic and intermediate aerobatic maneuvers, to which the plane responded exactly as asked. When full power was added and the nose raised to vertical, Rick rolled the Sukhoi several times, then cranked in a few snap rolls just to be sure that I saw them. He later commented that inverted flight needed practically no down elevator and that knife edge flight needed only a bit of elevator to keep on track.
After landing, Rick said that everything he asked the Sukhoi to do, it responded immediately and precisely, just as I had stated before. He agreed that the Fuji 43EI engine was a really good choice for this particular plane at this weight, but also said that many modelers may want to use one of the many other engine choices out there. We both said that they should at least give the Fuji 43 a chance to prove itself.
After the test flying session was over, I made plans to attend a local IMAA flying event the following weekend to see how the Great Planes Sukhoi performed under the skillful guidance of a more experienced 3D pilot. I watched several pilots fly the Sukhoi for the first time that day, and I was very impressed in the way the plane responded to their commands. While not quite as stable as a larger 3D model, the Great Planes Sukhoi could hold its own in practically every maneuver. Harrier maneuvers were a little on the “rocky” side,
mostly due to the small size and lighter weight of this particular model. Rolling Circles were easy to synchronize with the transmitter and looked really good. Flat Spins, both upright and inverted, were easy to enter and exit, but a rearward CG may help keep them flatter. There was enough excess power to pull the Sukhoi out of a sustained hover at a good rate of speed. Torque Rolls looked really nice, but again were a little shaky due to the relative small size of the model. One pilot even tried a Blender, after my initial objection, but it resulted in a really nice outcome, considering that it was started at a rather low altitude. In all, when under the control of an experienced 3D pilot, the Great Planes Sukhoi SU-31 can be competitive in practically all phases of IMAC competition, but at the other end of the spectrum, it could be used as an educational tool to bring the average pilot with a limited budget up to the competition level in no time.
The Great Planes 25% Sukhoi SU-31 Performance Series ARF is easy to assemble, it requires only slightly larger than standard servos and engine, it’s a reasonable size to transport and store, and it looks great on the ground and in the air. There were some minor problems while assembling the Sukhoi, but none were insurmountable. The recommended Fuji BT-43EI-2 engine starts and rans great, it provides more than enough power for most aerobatic and 3D flying, and it’s reasonably priced.
I recommend this model to intermediate pilots entering the IMAC arena, for learning scale aerobatics. Toss in some all-out 3D stuff too, because the Sukhoi can definitely handle it.
-Dick Pettit [email protected]
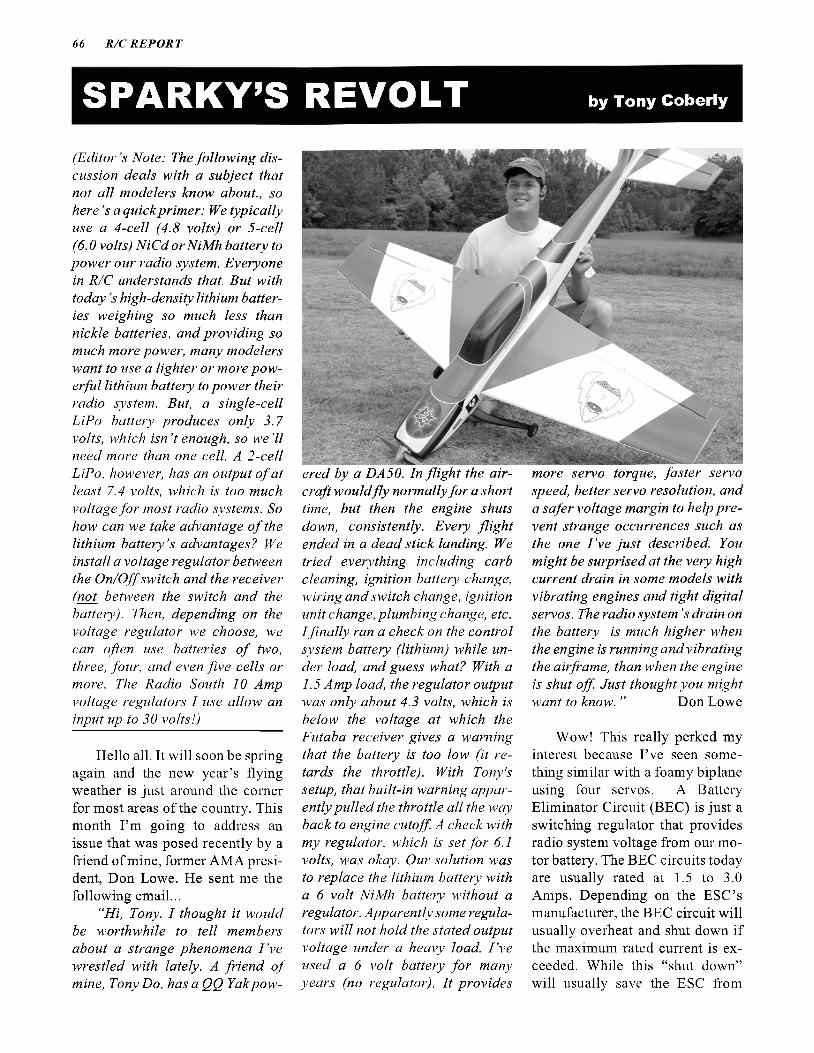
66 R /C RE POR T
SPARKY’S REVOLT by To n y Coberly
(Editor s Note: The following discussion deals with a subject that not all modelers know about., so here’s a quick primer: We typically use a 4-cell (4.8 volts) or 5-cell (6.0 volts) NiCd orNiMh battery to power our radio system. Everyone in R/C understands that. But with today s high-density lithium batteries weighing so much less than nickle batteries, and providing so much more power, many modelers want to use a lighter or more powerful lithium battery to power their radio system. But, a single-cell LiPo battery produces only 3.7 volts, which isn’t enough, so w e’ll need more than one cell. A 2-cell LiPo, however, has an output o f at least 7.4 volts, which is too much voltage for most radio systems. So how can we take advantage o f the lithium battery’s advantages? We install a voltage regulator between the On/Off switch and the receiver (not between the switch and the battery). Then, depending on the voltage regulator we choose, we can often use batteries o f Uvo, three, four, and even five cells or more. The Radio South 10 Amp voltage regulators I use allow an input up to 30 volts!)
Hello all. It will soon be spring again and the new year’s flying weather is just around the comer for most areas of the country. This month I’m going to address an issue that was posed recently by a friend of mine, former AMA president, Don Lowe. He sent me the following email...
“Hi, Tony. I thought it would be worthwhile to tell members about a strange phenomena I ’ve wrestled with lately. A friend o f mine, Tony Do, has a QQ Yak pow
ered by a DA50. In flight the aircraft would fly normally for a short time, but then the engine shuts down, consistently. Every flight ended in a dead stick landing. We tried everything including carb cleaning, ignition battery change, wiring and switch change, ignition unit change, plumbing change, etc. I finally ran a check on the control system battery (lithium) while under load, and guess what? With a1.5 Amp load, the regulator output was only about 4.3 volts, which is below the voltage at which the Futaba receiver gives a warning that the battery is too low (it retards the throttle). With Tony's setup, that built-in warning apparently pulled the throttle all the way back to engine cutoff. A check with my regulator, which is set for 6.1 volts, was okay. Our solution was to replace the lithium battery with a 6 volt NiMh battery without a regulator. Apparently some regulators will not hold the stated output voltage under a heavy load. I ’ve used a 6 volt battery for many years (no regulator). It provides
more servo torque, faster sen>o speed, better servo resolution, and a safer voltage margin to help prevent strange occurrences such as the one I ’ve just described. You might be surprised at the very high current drain in some models with vibrating engines and tight digital servos. The radio system’s drain on the battery is much higher when the engine is running and vibrating the airframe, than when the engine is shut off. Just thought you might want to know. ” Don Lowe
Wow! This really perked my interest because I’ve seen something similar with a foamy biplane using four servos. A Battery Eliminator Circuit (BEC) is just a switching regulator that provides radio system voltage from our motor battery. The BEC circuits today are usually rated at 1.5 to 3.0 Amps. Depending on the ESC’s manufacturer, the BEC circuit will usually overheat and shut down if the maximum rated current is exceeded. While this “shut down” will usually save the ESC from
M arch 2009 67
internal damage, it usually results in a crash, since we no longer have radio control! This is exactly what happened with the little foamy bipe, but luck was on our side that day, and the circuit reset itself just in time to save the model.
The foamy’s four servos pulled1.5 Amps just to hold center, so when flying the current would spike to over 3.0 Amps! There was nothing I could do about the high current since the plane needs the servos. Our only option was to add a regulator capable of more than3.0 Amps. Castle Creations offers a BEC Switching Regulator capable of handling a peak current of 10 Amps, and a continuous current of 7 Amps with 12 volt input. This regulator is smaller than a postage stamp, weighs only 11 grams (0.4 oz.), and its output voltage can be adjusted with the Castle Link USB adapter for a computer. This is a nice little setup that works very well.
Now let’s take a closer look at the problem Don described. Using a lithium battery with a voltage regulator in a larger plane to help reduce weight is becoming routine. We must ensure that out regulator is up to the task, however. In Don’s case, the output voltage from the regulator dropped to 4.3 volts under a 1.5 Amp load. Frankly, I suspect a faulty voltage regulator. I have a BEC that will maintain a full 5.1 volts output even at 5 Amps.
How was the regulator damaged? That’s hard to say, but I do know that we have to choose the right regulator for our airplane. My CC BEC is a good choice for larger electric planes simply because that’s what it was designed for. I used one in my E-flite “Deuces Wild” and have had no problems, but I’d recommend something even more robust for glow or gas powered planes.
What is “more robust”? My recommendation for glow powered planes would be the Radio South voltage regulator. I’ve been using one in my two-meter pattern planes for years and have never had a problem with it. This regulator is capable of an output similar to the CC BEC, but the Radio South unit has a larger heat sink and was designed for planes in the two-meter size range. Radio South regulators are available with output voltages of 5.0, 5.6, 5.8, and 6.1.
Finally, the most robust regulator I have ever used (and highly recommend) is from MAXX Products Int. (see pages 10-11). This6.0 volt regulator is different from the switching regulators already mentioned. This one is a linear regulator that will provide a whopping 15 Amp continuous, and 30 Amp peak cmrent flow. Linear regulators are considerably larger than switching regulators however, due in part to its much larger heat to handle the higher current capacities. I recommend regulators like this for those big planes using engines of 50cc and more.
Now, one more thing about using voltage regulators. When we check our flight pack batteries we usually plug the tester into the charging jack of our receiver switch to read the battery voltage. There’s nothing wrong with that, but as Don mentioned above, the battery voltage was fine, but the regulator’s output was weak. Whenever using a regulator in a basic setup, make sure the power switch is between the battery and the regulator. The electronics in the regulator draw a little current all the time, so if the two are left connected, we can wind up with a dead lithium battery. Plus, you can’t charge the battery through a voltage regulator, so the charge- switch has to be connected directly to the battery.
There are some voltage regulator power systems with built-in fail safe switches and the like, but I’m only talking about regulators added into a radio system between the battery and receiver. Typically, we have first the oversize battery, then the On/Off switch harness, then the voltage regulator, and then the receiver, in that order. This is a good basic setup that will allow us to test our battery voltage between flights, but how will we test the output of the regulator? We could add another charging switch harness between the regulator and receiver, but I don’t really like adding another mechanical device to the mix. I prefer adding a servo extension lead to an unused channel of the receiver (or a Y-hamess to share a receiver connector). This gives me a way to plug in my battery tester while the power is turned on, to see the actual voltage at the receiver. If this voltage is more or less than it should be, I’ll know to suspect a problem with the regulator.
By now you know that this is “R/C REPORT’S ” final issue. I want to thank Gordon for allowing me into the RCR family, and for editing my articles to make them readable. I’ve never thought ofmy- self as a writer (and I still don’t), but I appreciate the opportunity to provide information that hopefully has or will help modelers new to electrics. I’d also like to thank all you readers for your comments, suggestions, and corrections. Keep my addresses handy if you like, because I’ll always be happy to assist anyone with modeling questions.
-Tony Coberly 10017 Strong Drive SE
Huntsville, AL 35803 [email protected]

68 R/C RE POR T
PRODUCT TEST REPORTELECTRIFL Y SOPW ITH CAMEL
Model........................ Sopwith Camel (GPMA1144)Airplane Type.......... Fun Scale Electric Park FlyerManufacturer................ Electrify (Made in China)Distributor............... Great Planes Model Mfg. Co.
P.O. Box 9021 Champaign, IL 61826-9021
(217)398-3630 www.greatplanes.com
Typical Street Price........................................$99.99Wing Span.....................................Advertised: 35.5"
Measured: Top: 35.25", Bot: 36" Wing Area............................ Advertised: 389 sq. in.
Measured: Top: 192.16 sq. in., Bot: 199.4 sq.in.Total: 391.56 sq.in
Advertised Flying Weight................... 21 to 26 oz.Airfoil.........................................................Flat-bottomWing Structure............Built-up plywood and balsaWing Joiner Method.................... One-piece wingsFuselage Structure.. . . Built-up plywood and balsaFuselage Length............................. Advertised: 25"
Measured: 25.25" w/spinnerPushrod Type.................Steel wires in plastic tubesPushrods Installed..................................................NoHinges Included.......................................... CA-typeHinges Installed......................................All but oneRecommended Controls. . . 4 (Ail, El, Rud, Throt)
Motor Included.......................................................NoRecommended Motor. Electrify Rimfire 28-30-950
Brushless OutrunnerMotor Mount Installed..........................................NoMotor Mount Type........... Aluminum tube spacersSpeed Controller Included....................................NoRecommended Controller........ 25 Amp BrushlessBattery Included.....................................................NoRecommended Battery............. 3S 1500mahLiPoLanding Gear Installed......................................... NoWheels Included.............. Two 3" mains (tail skid)Assembly Instructions............. 20 pages (8.5x11")Hardware: Metric or SAE.............................. MixedHardware Included................... Pre-painted plastic
cowl with built-in magnetic mounting ring; prepainted dummy radial engine with additional scale details (see text); fiberglass motor mount with aluminum tube spacers and mounting screws; preformed plastic battery compartment hatch with magnets; two plastic machine guns; one pre-painted pilot figure with neck scarf; clear plastic windscreen for cockpit; two 3" scale wheels with rubber tires; pre-formed strut pieces; main axle tube; numerous pre-cut plywood pieces; plastic scale- detail inspection panels; a small red aluminum spinner; one 4" length of 3/4" wide Velcro; all
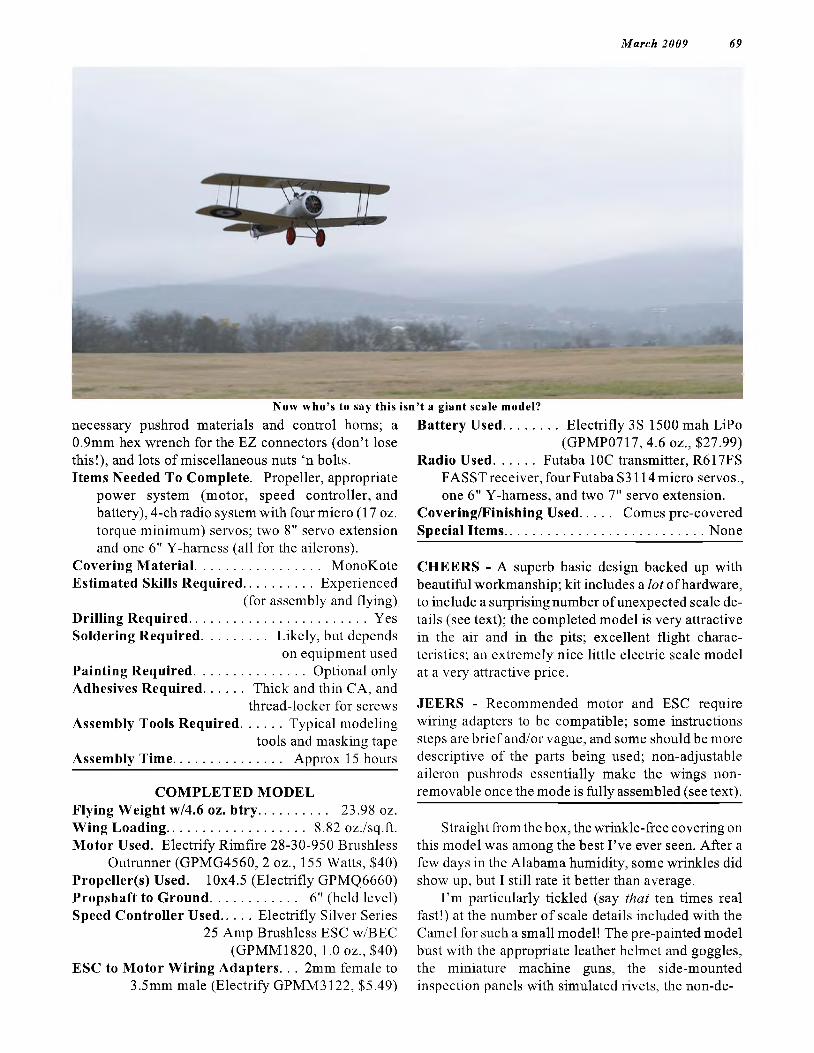
M arch 2009 69
Now w h o’s to say this isn ’t a giant scale model?
necessary pushrod materials and control horns; a0.9mm hex wrench for the EZ connectors (don’t lose this!), and lots of miscellaneous nuts ‘n bolts.Items Needed To Complete. Propeller, appropriate
power system (motor, speed controller, and battery), 4-ch radio system with four micro (17 oz. torque minimum) servos; two 8" servo extension and one 6" Y-hamess (all for the ailerons).
Covering Material.................................. MonoKoteEstimated Skills Required.....................Experienced
(for assembly and flying)Drilling Required.................................................. YesSoldering Required................. Likely, but depends
on equipment usedPainting Required..............................Optional onlyAdhesives Required.......... Thick and thin CA, and
thread-locker for screwsAssembly Tools Required...........Typical modeling
tools and masking tape Assembly Time............................. Approx 15 hours
COMPLETED MODELFlying Weight w/4.6 oz. btry.................. 23.98 oz.Wing Loading..................................... 8.82 oz./sq.ft.Motor Used. Electrify Rimfire 28-30-950 Brushless
Outrunner (GPMG4560, 2 oz., 155 Watts, $40) Propeller(s) Used. 10x4.5 (Electrifly GPMQ6660)Propshaft to Ground....................... 6" (held level)Speed Controller Used........Electrifly Silver Series
25 Amp Brushless ESC w/BEC (GPMM1820, 1.0 oz., $40)
ESC to Motor Wiring Adapters. . . 2mm female to 3.5mm male (Electrify GPMM3122, $5.49)
Battery Used.............. Electrifly 3S 1500 mah LiPo(GPMP0717, 4.6 oz., $27.99)
Radio Used...........Futaba 10C transmitter, R617FSFASST receiver, four Futaba S3114 micro servos., one 6" Y-hamess, and two 7" servo extension.
Covering/Finishing Used........ Comes pre-coveredSpecial Items......................................................None
CHEERS - A superb basic design backed up with beautiful workmanship; kit includes a Jot of hardware, to include a surprising number of unexpected scale details (see text); the completed model is very attractive in the air and in the pits; excellent flight characteristics; an extremely nice little electric scale model at a very attractive price.
JEERS - Recommended motor and ESC require wiring adapters to be compatible; some instructions steps are brief and/or vague, and some should be more descriptive of the parts being used; non-adjustable aileron pushrods essentially make the wings nonremovable once the mode is fully assembled (see text).
Straight from the box, the wrinkle-free covering on this model was among the best I’ve ever seen. After a few days in the Alabama humidity, some wrinkles did show up, but I still rate it better than average.
I’m particularly tickled (say that ten times real fast!) at the number of scale details included with the Camel for such a small model! The pre-painted model bust with the appropriate leather helmet and goggles, the miniature machine guns, the side-mounted inspection panels with simulated rivets, the non-de-

70 R/C RE POR T
Access to the battery is easy, but actually connecting and disconnecting the battery is tedious for big hands in the limited space under the wing.
tailed but scale-shape wheels, and best of all, the nicely detailed 9-cylinder dummy engine with optional pushrod tubes! Guys, we’ve seen giant scale models with less detail than this! I mean, we’re not talking Top Gun here, but it’s still very nice.
The covering work, the parts fit, and the pre-assembly work done at the factory are simply excellent. Except for the cowl, no parts trimming or unusual adjustments were required, other than enlarging servo arm holes to accept the appropriate hardware.
Now, for the benefit of those who decide to assemble their own Electrifly Sopwith Camel, here are just a few assembly notes:
The Camel’s instructions are pretty good overall, but to me there are some oddly sequenced steps (I don’t like to install the tail before installing the other fuselage parts), and some are a bit short on describing the parts (mostly which screws) to be used in that step. Since this kit is not recommended for inexperienced modelers anyway, I suggest using the instructions as a guide, and use your own experience and personal preferences as to when you complete each step. Still, I
recommend completing step 4 on page 8 (install the rudder and elevator servos using the last picture on page 8 as a positioning guide) through step 3 on page 10 (install the motor before installing the tail feathers and pushrods. (Some steps in the instructions have already been done at the factory.)
When installing the rudder and elevator servos (page 8), we’re told to use the long servos arms, and the photos show using the outer holes. Don’t do it! This results in way (way!) too much control surface throw later, so you’ll have to remove a lot of stuff to get back to the servos to fix it. You may even have to reposition the servos! Do yourself a favor now and use the outer holes on the short servo arms. And once you have the servos in place, go ahead right now and energize those two servos and check the control throws (see settings on page 18). Don’t use your transmitter to reduce servo travel any more than absolutely necessary! Remember, when you reduce servo travel, you’re also reducing servo resolution (not good).
By the way, if some small hardware items begin disappearing while you’re working near the
front end of the fuselage, check the magnets around the nose and you’ll probably find what you’re missing.
Also, this kit comes with a0.9mm hex wrench (Allen wrench, L-wrench, whatever). Don’t lose it! You don’t find these at just any hardware store, and you’ll need it to make pushrod length adjustments. I suggest putting a piece of tape half-way along the long arm to improve its visibility factor to help prevent it from wandering off.
The motor installation begins with step 1 at the end of page 9, and goes through step 3 on page 10. Step 4, had it been included, would remind us to install the prop adapter at this time. I used the one that came with the Electrifly motor, adding a drop of thread locker to each screw, and tightening them with a 2mm ball driver.
Now, about those 1mm wires to be installed on the dummy engine to look like pushrod tubes. First of all, know thee now that if you don’t take the time to drill those 36 holes correctly, and get the pushrods properly aligned and parallel, the finished engine may wind up looking worse than it would have without them. Secondly, be sure the wires are pushed all the way up into the tops of the cylinders before you glue them in place. I thought mine were all the way up, but I later had to grind off the bottoms of some when they interfered with the motor.
In step 9 on page 11, the instructions suggest trimming the front of the cockpit hatch for cowl clearance. I found it more practical to lightly sand the interference spots along the rear edge of the cowl instead.
During the aileron servo installation there’s a frustrating, butnon- critical error in the instructions. On page 14, in steps 11 & 12, we’re told to fasten the servo hatch covers in place with four screws each.
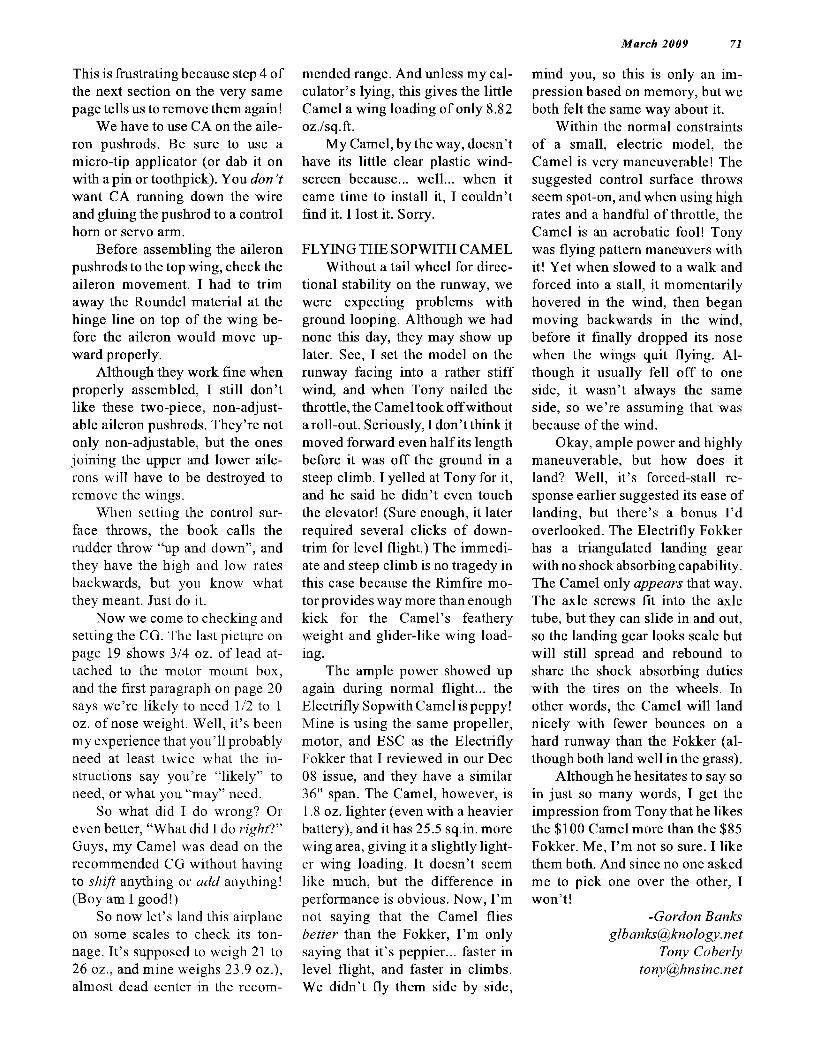
M arch 2009 71
This is frustrating because step 4 of the next section on the very same page tells us to remove them again!
We have to use CA on the aileron pushrods. Be sure to use a micro-tip applicator (or dab it on with a pin or toothpick). You don’t want CA running down the wire and gluing the pushrod to a control horn or servo arm.
Before assembling the aileron pushrods to the top wing, check the aileron movement. I had to trim away the Roundel material at the hinge line on top of the wing before the aileron would move upward properly.
Although they work fine when properly assembled, I still don’t like these two-piece, non-adjust- able aileron pushrods. They’re not only non-adjustable, but the ones joining the upper and lower ailerons will have to be destroyed to remove the wings.
When setting the control surface throws, the book calls the rudder throw “up and down”, and they have the high and low rates backwards, but you know what they meant. Just do it.
Now we come to checking and setting the CG. The last picture on page 19 shows 3/4 oz. of lead attached to the motor mount box, and the first paragraph on page 20 says we’re likely to need 1/2 to 1 oz. of nose weight. Well, it’s been my experience that you’ll probably need at least twice what the instructions say you’re “likely” to need, or what you “may” need.
So what did I do wrong? Or even better, “What did I do right!” Guys, my Camel was dead on the recommended CG without having to shift anything or add anything! (Boy am I good!)
So now let’s land this airplane on some scales to check its tonnage. It’s supposed to weigh 21 to 26 oz., and mine weighs 23.9 oz.), almost dead center in the recom
mended range. And unless my calculator’s lying, this gives the little Camel a wing loading of only 8.82 oz./sq.f't.
My Camel, by the way, doesn’t have its little clear plastic windscreen because... well... when it came time to install it, I couldn’t find it. I lost it. Sorry.
FLYING THE SOPWITH CAMELWithout a tail wheel for direc
tional stability on the runway, we were expecting problems with ground looping. Although we had none this day, they may show up later. See, I set the model on the runway facing into a rather stiff wind, and when Tony nailed the throttle, the Camel took off without a roll-out. Seriously, I don’t think it moved forward even half its length before it was off the ground in a steep climb. I yelled at Tony for it, and he said he didn’t even touch the elevator! (Sure enough, it later required several clicks of down- trim for level flight.) The immediate and steep climb is no tragedy in this case because the Rimfire motor provides way more than enough kick for the Camel’s feathery weight and glider-like wing loading.
The ample power showed up again during normal flight... the Electrifly Sopwith Camel is peppy! Mine is using the same propeller, motor, and ESC as the Electrifly Fokker that I reviewed in our Dec 08 issue, and they have a similar 36" span. The Camel, however, is 1.8 oz. lighter (even with a heavier battery), and it has 25.5 sq.in. more wing area, giving it a slightly lighter wing loading. It doesn’t seem like much, but the difference in performance is obvious. Now, I’m not saying that the Camel flies better than the Fokker, I’m only saying that it’s peppier... faster in level flight, and faster in climbs. We didn’t fly them side by side,
mind you, so this is only an impression based on memory, but we both felt the same way about it.
Within the normal constraints of a small, electric model, the Camel is very maneuverable! The suggested control surface throws seem spot-on, and when using high rates and a handful of throttle, the Camel is an aerobatic fool! Tony was flying pattern maneuvers with it! Yet when slowed to a walk and forced into a stall, it momentarily hovered in the wind, then began moving backwards in the wind, before it finally dropped its nose when the wings quit flying. Although it usually fell off to one side, it wasn’t always the same side, so we’re assuming that was because of the wind.
Okay, ample power and highly maneuverable, but how does it land? Well, it’s forced-stall response earlier suggested its ease of landing, but there’s a bonus I’d overlooked. The Electrifly Fokker has a triangulated landing gear with no shock absorbing capability. The Camel only appears that way. The axle screws fit into the axle tube, but they can slide in and out, so the landing gear looks scale but will still spread and rebound to share the shock absorbing duties with the tires on the wheels. In other words, the Camel will land nicely with fewer bounces on a hard runway than the Fokker (although both land well in the grass).
Although he hesitates to say so in just so many words, I get the impression from Tony that he likes the $100 Camel more than the $85 Fokker. Me, I’m not so sure. I like them both. And since no one asked me to pick one over the other, I won’t!
-Gordon Banks [email protected]
Tony Coberly to ny@hns inc.net

72 R /C RE POR T
PRODUCT TEST REPORT |
The Ultimate Flight Stand (yardstick included for size reference) and at right with the optional Heli Tray (don’t ask).
Item Tested.. . . The Ultimate Flight Stand (PA800) Purpose.............Portable folding stand for field and
sometimes workshop use, to hold a model airplane and associated tools and/or support equipment.
Manufacturer & Distributor......... Precision Aero1561 River Highlands Drive
Oconomowoc, WI 53066 www.precision-aero.com
(262)352-6670Price...................................... $145.95 plus shippingApplicability................... Model aircraft (and more)Folded Dimensions........................... 35.7x24.3x4.5"Erected Dimensions......................... 42.5x24.3x32"Lower Shelf............................ 23.1x18.1", 11" highTop Shelf........................... 24.25x12.6", 25.5" highTotal Shelf Surface Area............Approx 714 sq.in
(Heli Tray adds 312 more) Fuselage Cradle. . 22.5" long, 7" tall sides, with an
adjustable width up to 14.5", and a base 36" highWeight.............................................. Approx. 15 lbs.Instructions.. Comes pre-assembled, but an 8.5x11"
sheet explains folding, unfolding, and finishing.
Materials Used. . Maple framework, Birch plywood shelves, steel and brass hardware, and rubber cradle pads (adjustable and replaceable).
Finish....................................... None (natural wood)Hardware Included.................Everything requiredAvailable Options.. . Wheel Kit (not shown) $25.95
Heli Tray ( 12.7x25", 4.25 lbs.) $25.95 Replacement Pads Kit (eight pieces) $9.95
CHEERS - Comes completely assembled and ready to use (or finish); mostly pre-sanded and ready for user’s choice of finishes; folds and unfolds in seconds; sturdy construction for heavy models and long life; shelves and model cradle are at a good working height; very handy and useful at the field and sometimes even at home in the workshop.
JEERS - Requires extensive disassembly for proper finishing; some screws loosen overtime.
Darnit! Here’s another item that I never wanted or gave much thought until I saw one! This is probably
M arch 2009 73
because we’re so spoiled here at the Rocket City Radio Controllers flying site in Huntsville, AL. We have plenty of assembly tables, in the shade, and with plenty of 120 volt outlets nearby. Well, normally, that is. But whenever the club hosts a big event, the place fills rapidly, and only the distinguished flyers, VIP’s, and early arrivals get the shade. Nobodies and those who habitually arrive late find themselves pitting out on the open grass areas. There they can pitch a tent or canopy for shade, but unless they brought their own table (or one of these deluxe flight stands), they’re left to crawl around on their hands and knees to assemble, disassemble, and work on your model(s). I know, because that’s where I always wind up! Now, though, at least I won’t be crawling around on my hands and knees. I have a cool Ultimate Flight Stand!
How much weight will it support? I don’t know, but it seemed so sturdy, I actually stood on the lower shelf, so I know it will support at least 23.... uh... over 200 lbs. And I’m guessing that the heights of the shelves and fuselage cradles were developed through a lot of use and experimentation, because they’re all at the perfect height for me (6’ tall). Even the top shelf seems the ideal size, because if made any larger you’d have to lean way over it to reach the model. No, too much of this flight stand is “just right” to be a simple coincidence. The shelves are boxed-in with 3/4" tall sides to preventthings from rolling off, too.
In their standard positions, the cradles adjust from 4.5 to 14.5" wide, but the outer L-brackets can be reversed for fuselage widths up to 4" wide. For little electric models I use a smaller model stand (a Goldberg “Mini-Hold ’Em”) on the heli-tray, and I’m developing some custom trays (aka shelves).
The Ultimate Flight Stand comes fully assembled right from the box, and you don’t really have to apply a finish if you don’t want to (I still haven’t painted mine yet!). I intend to, though, to make it fuel resistant as well as making it more attractive.
The stand comes with eight 5" long cushioning pads that consist of a firm rubber tube attached to an aluminum channel. The channel fits snugly onto the 3/8" plywood cradles, so they can be installed, removed, and adjusted at will without tools.
For transporting, the Ultimate Flight Stand folds neatly into a “package” measuring about 36x24x4.5". I lay mine flat on the floor of the cargo area, and place a model or two on top, using its “nooks and crannies” to hold the wheels in place so the model stays put while driving. Double duty!
Now folks, bear with me here, because this may sound a little weird, but I’ve also been using the Ultimate Flight Stand for... well... non-modeling uses. There, I’ve admitted it. I recently set it up right beside a motorcycle while I was adjusting the valves. The stand held tools and parts at an easy reach. I’ve used it twice to hold tools, paint cans, and hardware while I was working on backyard projects. And when Mina saw the latter use, she said she wants to use it to hold “stuff’ during backyard cookouts (but I have to “paint it pretty” first!). The way I see it, sure, it’s a great model airplane flight stand, but it’s also a portable work bench, a temporary work site shelf unit, and more. I’m already dreaming up other uses for it, and I ’m planning some add-ons and custom purpose top trays to expand its usefulness even further. The challenge is to have useful add-ons for some purposes, but without impeding on other uses. For exam-
MODEL BUILDER MagazineCom plete co llection o f m ore than 800 p lans from firs t through las t issues o f MB* m ost with artic le reprints. N ow available. O rder updated 20-page Price L is t Booklet. PPD,$4 US, $5 Can/Mex, o r $7 overseas.A lso 50-page Illustra ted C atalog lp rices and ordering instructions n o t ya ä d ). PPD,$6 US, $8 Can/Mex, o r $10 overseas. SCRATCH BUILDER'S ALMANAC #6 O ver 85 sca le p lans (13 boats) in 1/2-inch (1/24) to 4 -inch (1/3) scale, in FF, CL, RC, gas, rubber, gliders, B ill Northrop and Charlie Sm ith designs, ove r 90 Vintage RC. S B A , ppd. $ 4 US, $5 Can/Mex, $7 overseas.
MasterCard or VISA ($10 Min.)BILL NORTHROP’S PLANS SERVICE
2019 Doral Court, Henderson, NV 89074Ph: (702) 896-2162 (10*4 PT, Mon. - Fri.)
Fax: (702)897-7775
A c tu a lly , the a b o v e M B lis t does n o t in c lu d e 301 p la n s p u b lis h e d fu ll s ize in M B a n d n o t p re v io u s ly o ffe re d in the fu ll-s ize p la n s lis t. T hese a re a m ix tu re o f P eanu ts , P is tach ios , H LG s, B o sto riians , fun flie rs, e ve n a fe w R/C, etc. p o w e re d b y g low , d iese l, C 0 2 , e lec tric , a n d s tra in e d m usc le . . . p lu s n o le ss than 8 5 fa m ilia r a n d /o r o bscu re s c a le v iew s, a ll o f w h ich d isa p p ea re d when the trash m an c a rr ie d a w a y y o u r MB collection. S end $4.00 U.S. ($5.00 Can/Mex., $7.00 overseas) fo r this price list, w ith ordering instructions.
pie, can I add some under-the-shelf brackets for a field-use battery charger that won’t get in the way of the potato salad, buns, mustard, ketchup, onions, relish, chips...
Well great! Now I’m hungry. But I don’t know what else to tell you anyway. The Ultimate Flight Stand works great for all sorts of odd jobs. It’s strong and sturdy, it’s easy to set up and take down, and it’s just mighty handy to have around. One of these days I’m going to take it apart and paint it, too. No, I mean it. -Gordon Banks
glbanks@knology. net
SMILEY FACE HUNTERS There’s no more contest, of course, but we hid 10 Smiley Faces in this issue anyway for those who want them. See page 4.
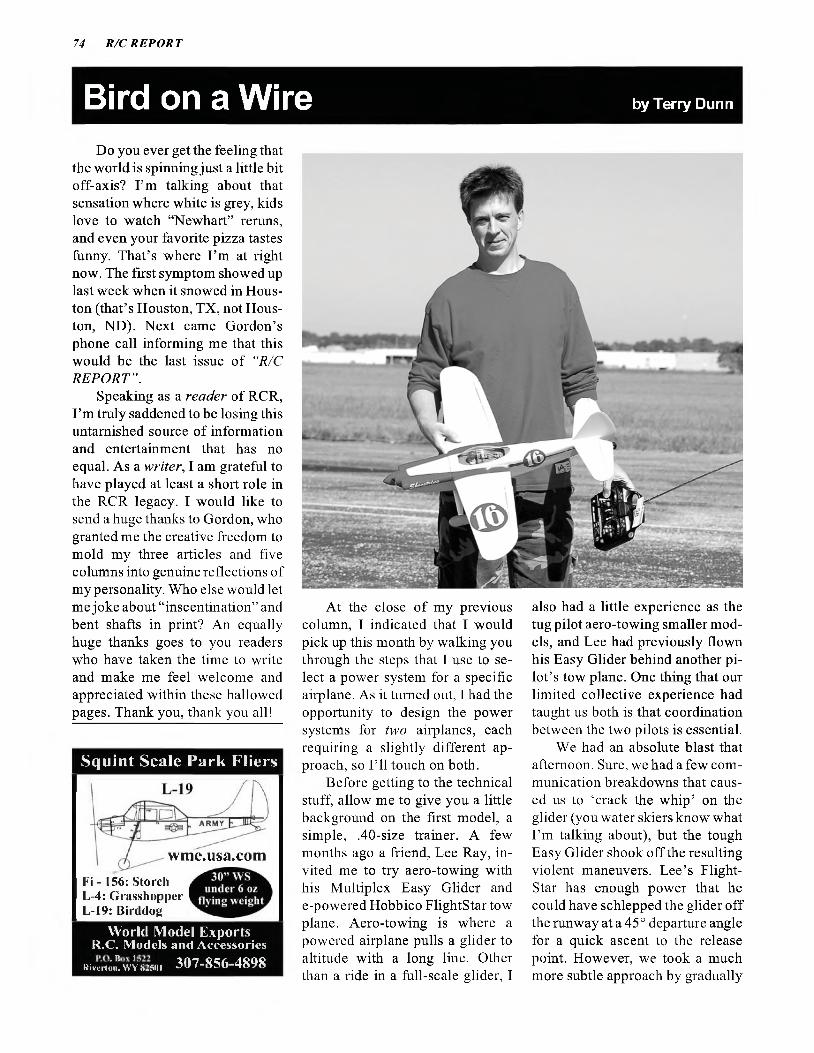
74 R /C RE POR T
Bird on a Wire by Terry Dunn
Do you ever get the feeling that the world is spinning just a little bit off-axis? I’m talking about that sensation where white is grey, kids love to watch “Newhart” reruns, and even your favorite pizza tastes fanny. That’s where I’m at right now. The first symptom showed up last week when it snowed in Houston (that’s Houston, TX, not Houston, ND). Next came Gordon’s phone call informing me that this would be the last issue of “R/C REPORT”.
Speaking as a reader of RCR, I’m truly saddened to be losing this untarnished source of information and entertainment that has no equal. As a writer, I am grateful to have played at least a short role in the RCR legacy. I would like to send a huge thanks to Gordon, who granted me the creative freedom to mold my three articles and five columns into genuine reflections of my personality. Who else would let me joke about “inscentination” and bent shafts in print? An equally huge thanks goes to you readers who have taken the time to write and make me feel welcome and appreciated within these hallowed pages. Thank you, thank you all!
Squint Scale Park Fliers
wme.usa.comFi -156: Storch L-4: Grasshopper L-19: Birddog
World Model ExportsR.C. Models and Accessories
RivmčíwÝKBoi 307-856-4898
At the close of my previous column, I indicated that I would pick up this month by walking you through the steps that I use to select a power system for a specific airplane. As it turned out, I had the opportunity to design the power systems for two airplanes, each requiring a slightly different approach, so I’ll touch on both.
Before getting to the technical stuff, allow me to give you a little background on the first model, a simple, .40-size trainer. A few months ago a friend, Lee Ray, invited me to try aero-towing with his Multiplex Easy Glider and e-powered Hobbico FlightStar tow plane. Aero-towing is where a powered airplane pulls a glider to altitude with a long line. Other than a ride in a full-scale glider, I
also had a little experience as the tug pilot aero-towing smaller models, and Lee had previously flown his Easy Glider behind another pilot’s tow plane. One thing that our limited collective experience had taught us both is that coordination between the two pilots is essential.
We had an absolute blast that afternoon. Sure, we had a few communication breakdowns that caused us to ‘crack the whip’ on the glider (you water skiers know what I’m talking about), but the tough Easy Glider shook off the resulting violent maneuvers. Lee’s Flight- Star has enough power that he could have schlepped the glider off the runway at a 45° departure angle for a quick ascent to the release point. However, we took a much more subtle approach by gradually
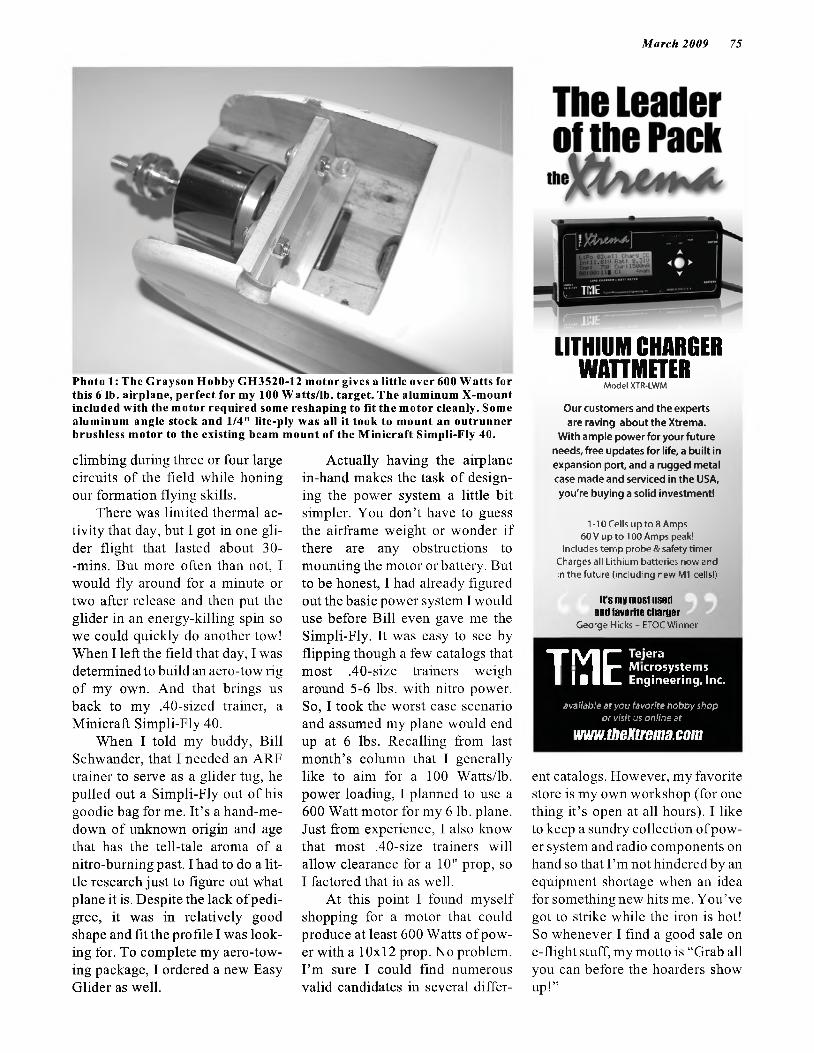
M arch 2009 75
Photo 1: The Grayson Hobby GH3520-12 m otor gives a little over 600 W atts for this 6 Ih. airplane, perfect for my 100 W atts/Ih. target. The aluminum X-m ount included with the m otor required some reshaping to fit the m otor cleanly. Some aluminum angle stock and 1/4" lite-ply was all it took to m ount an outrunner brushless m otor to the existing beam m ount of the M inicraft Simpli-Fly 40.
climbing during three or four large circuits of the field while honing our formation flying skills.
There was limited thermal activity that day, but I got in one glider flight that lasted about 30- -mins. But more often than not, I would fly around for a minute or two after release and then put the glider in an energy-killing spin so we could quickly do another tow! When I left the field that day, I was determined to build an aero-tow rig of my own. And that brings us back to my .40-sized trainer, a Minicraft Simpli-Fly 40.
When I told my buddy, Bill Schwander, that I needed an ARF trainer to serve as a glider tug, he pulled out a Simpli-Fly out of his goodie bag forme. It’s a hand-me- down of unknown origin and age that has the tell-tale aroma of a nitro-buming past. I had to do a little research just to figure out what plane it is. Despite the lack of pedigree, it was in relatively good shape and fit the profile I was looking for. To complete my aero-tow- ing package, I ordered a new Easy Glider as well.
Actually having the airplane in-hand makes the task of designing the power system a little bit simpler. You don’t have to guess the airframe weight or wonder if there are any obstructions to mounting the motor or battery. But to be honest, I had already figured out the basic power system I would use before Bill even gave me the Simpli-Fly. It was easy to see by flipping though a few catalogs that most .40-size trainers weigh around 5-6 lbs. with nitro power. So, I took the worst case scenario and assumed my plane would end up at 6 lbs. Recalling from last month’s column that I generally like to aim for a 100 Watts/lb. power loading, I planned to use a 600 Watt motor for my 6 lb. plane. Just from experience, I also know that most .40-size trainers will allow clearance for a 10" prop, so I factored that in as well.
At this point I found myself shopping for a motor that could produce at least 600 Watts of power with a 10x12 prop. No problem. I’m sure I could find numerous valid candidates in several differ-
LITHIUM CHARGER WATTMETER
Model XTR-LWM
Our customers and the experts are raving about the Xtrema.
With ample power for your future needs, free updates for life, a built in expansion port, and a rugged metal case made and serviced in the USA, you're buying a solid investment!
1-10 Cells up to 8 Amps 60 V up to 100 Amps peak!
Includes tem p probe & safety tim er Charges all Lithium batteries now and in the future (including new M l cells!)
irs my most used and favorite charger
George Hicks - ETOC Winner
T I V 1 F Tejera Η I v - Microsystems I I ■ I L Engineering,Inc.
ava ilab le a t y o u favo rite h o b b y shop o r v is it us o n lin e a t
wvm.theKtrema.com
ent catalogs. However, my favorite store is my own workshop (for one thing it’s open at all hours). I like to keep a sundry collection of power system and radio components on hand so that I’m not hindered by an equipment shortage when an idea for something new hits me. You’ve got to strike while the iron is hot! So whenever I find a good sale on e-flight stuff, my motto is “Grab all you can before the hoarders show up!”
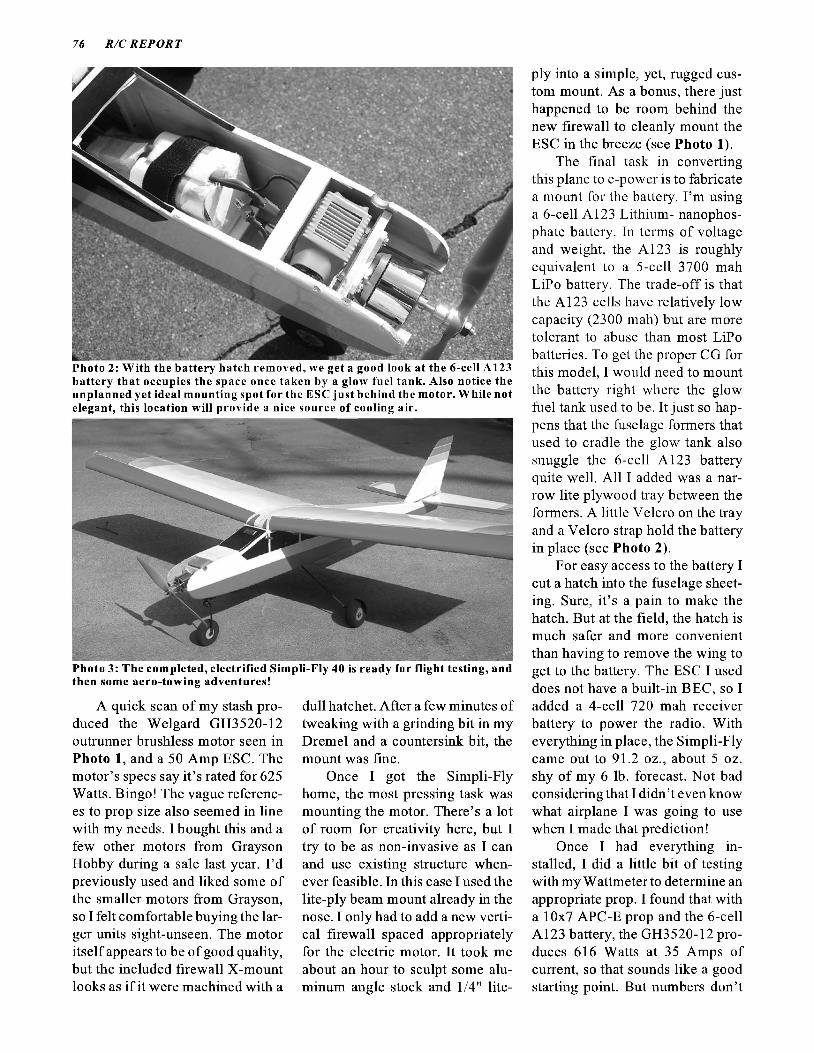
76 R /C RE POR T
ply into a simple, yet, rugged custom mount. As a bonus, there just happened to be room behind the new firewall to cleanly mount the ESC in the breeze (see Photo 1).
The final task in converting this plane to e-power is to fabricate a mount for the battery. I’m using a 6-cell A123 Lithium- nanophosphate battery. In terms of voltage and weight, the A123 is roughly equivalent to a 5-cell 3700 mah LiPo battery. The trade-off is that the A123 cells have relatively low capacity (2300 mah) but are more tolerant to abuse than most LiPo batteries. To get the proper CG for this model, I would need to mount the battery right where the glow fuel tank used to be. It just so happens that the fuselage formers that used to cradle the glow tank also snuggle the 6-cell A123 battery quite well. All I added was a narrow lite plywood tray between the formers. A little Velcro on the tray and a Velcro strap hold the battery in place (see Photo 2).
For easy access to the battery I cut a hatch into the fuselage sheeting. Sure, it’s a pain to make the hatch. But at the field, the hatch is much safer and more convenient than having to remove the wing to get to the battery. The ESC I used does not have a built-in BEC, so I added a 4-cell 720 mah receiver battery to power the radio. With everything in place, the Simpli-Fly came out to 91.2 oz., about 5 oz. shy of my 6 lb. forecast. Not bad considering that I didn’t even know what airplane I was going to use when I made that prediction!
Once I had everything installed, I did a little bit of testing with my Wattmeter to determine an appropriate prop. I found that with a 10x7 APC-E prop and the 6-cell A123 battery, the GH3520-12 produces 616 Watts at 35 Amps of current, so that sounds like a good starting point. But numbers don’t
Photo 2: W ith the battery hatch rem oved, we get a good look at the 6-cell A123 battery that occupies the space once taken by a glow fuel tank. Also notice the unplanned yet ideal m ounting spot for the ESC just behind the m otor. W hile not elegant, this location w ill provide a nice source of cooling air.
Photo 3: The com pleted, electrified Simpli-Fly 40 is ready for flight testing, and then some aero-towing adventures!
A quick scan of my stash produced the Welgard GH3520-12 outrunner brushless motor seen in Photo 1, and a 50 Amp ESC. The motor’s specs say it’s rated for 625 Watts. Bingo! The vague references to prop size also seemed in line with my needs. I bought this and a few other motors from Grayson Hobby during a sale last year. I’d previously used and liked some of the smaller motors from Grayson, so l felt comfortable buying the larger units sight-unseen. The motor itself appears to be of good quality, but the included firewall X-mount looks as if it were machined with a
dull hatchet. After a few minutes of tweaking with a grinding bit in my Dremel and a countersink bit, the mount was fine.
Once I got the Simpli-Fly home, the most pressing task was mounting the motor. There’s a lot of room for creativity here, but I try to be as non-invasive as I can and use existing structure whenever feasible. In this case I used the lite-ply beam mount already in the nose. I only had to add a new vertical firewall spaced appropriately for the electric motor. It took me about an hour to sculpt some aluminum angle stock and 1/4" lite-
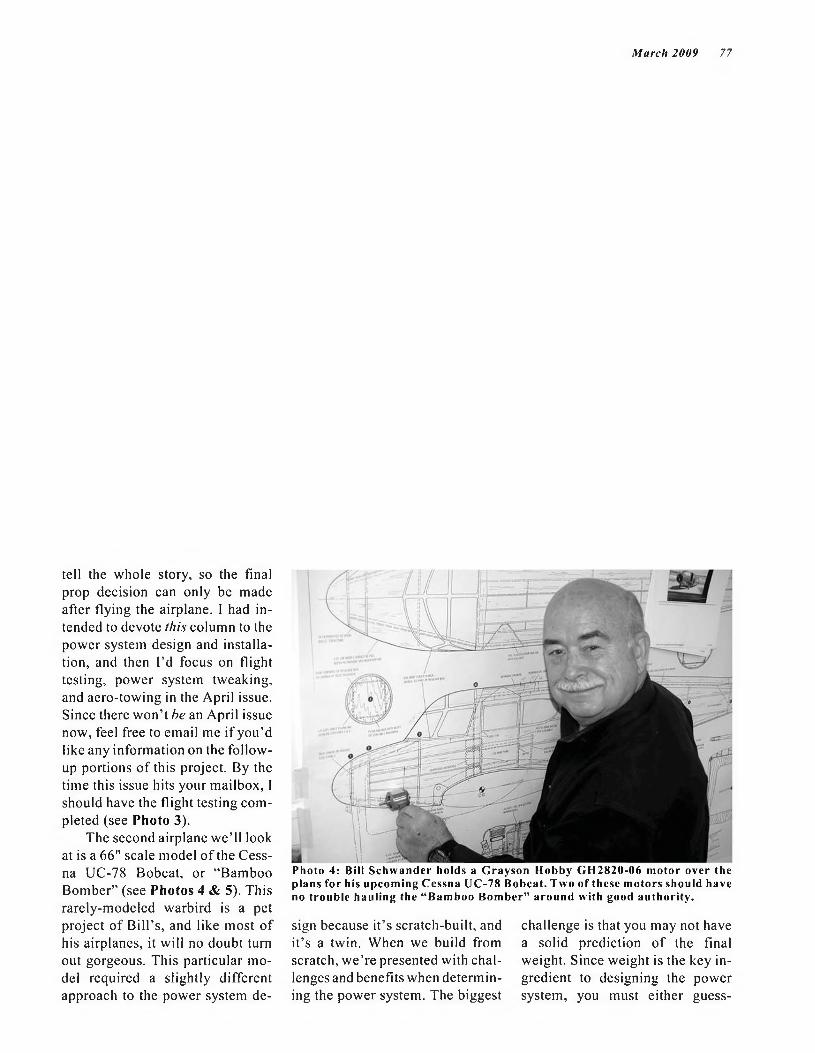
March 2009 77
Photo 4: Bill S ch w an d er holds a Grayson Hobby G H 2820-06 motor over the plans for his upcom ing Cessna UC-78 Bobcat. T w o o f these motors should have no trouble hauling the “ B am boo B o m b er” around with good authority.
tell the whole story, so the final prop decision can only be made after flying the airplane. 1 had intended to devote this column to the power system design and installation, and then I’d focus on flight testing, power system tweaking, and aero-towing in the April issue. Since there won’t he an April issue now, feel free to email me if you’d like any information on the followup portions of this project. By the time this issue hits your mailbox, I should have the flight testing completed (see Photo 3).
The second airplane we’ll look at is a 66" scale model of the Cessna UC-78 Bobcat, or “Bamboo Bomber” (see Photos 4 & 5). This rarely-modeled warbird is a pet project of Bill’s, and like most of his airplanes, it will no doubt turn out gorgeous. This particular model required a slightly different approach to the power system de
sign because it’s scratch-built, and it’s a twin. When we build from scratch, we’re presented with challenges and benefits when determining the power system. The biggest
challenge is that you may not have a solid prediction of the final weight. Since weight is the key ingredient to designing the power system, you must either guess-

78 R/C RE POR T
Photo 5: Bill is to balsa as M ark Twain is to words. Both shape their chosen mediums m asterfully. I wish I had the skills of either. The weight of the partially com pleted Bobcat suggests that it will be lighter than w e predicted. Hooray!
timate the final weight based on experience, or defer selecting the power system until the airplane is at least partially built. Once some of the construction is complete, you can often extrapolate the final weight with some degree of confidence. In the case of this Bamboo Bomber, Bill and I stared at the plans for a few minutes and decided that this would likely be an 8 lb.
airplane. The benefit of scratchbuilding is that you can tailor the airframe to your exact preferences without having to dismantle someone else’s vision of how it should be built.
With an 8 lb. plane we want 800 Watts of power to fly it. But wait... there are two motors on this airplane! Call the folks at MENSA and have them sharpen their pen
cils, we’ve got some serious calculating to do here. Let’s see... (imagine the sound of furious head scratching and frantic scribbling on a huge chalkboard) if we need 800 Watts from two motors, we’ll take the width of the runway to the 4th power, then we divide that by the volume of air in the tires, then of course we must add the Indonesian market price of gold while factoring the inflation adjustment. Okay, I realize I ’m probably getting over your head at this point, so I’ll save you some embarrassment and also protect a few of my precious trade secrets, I’ll just give you the answer. If you want to produce a total of 800 Watts from two motors, each motor must produce 400 Watts. Don’t try to understand these incredibly complex calculations; just take my word for it.
So here we are in the shopping mode again. We’re now looking
1 lR
■ riFTT3ZJTTDid y o u think w e w e r e nothing but nuts and bolts?
<©
WE HAVE OVER 975 PRODUCTS!Including blind nuts, lock nuts, regu lar nuts, lock w ashers, fla t w ashers, socket head screw s, cap
screw s, m achine screw s, sheet m etal screw s, threaded inserts, hex drivers, hex keys, taps,
dies, drills, razor b lades, cleaning brushes, threaded rods, storage boxes, hardw are
assortm ents, and much much more!I ) For fa ir prices on sensible quantities o f j ©
the hardw are you need, call, fax, w rite, or e-m all today for our FREE CATALOG r ( O ^ )
Lebanon, NJ 08833 Ph: 1-800-892-6917Fax: 1-908-236-8721 V www,microfasteners,com'' [email protected]■m- wfj!aj«aii.iess \>SSS-ra,
braSs, "V1- , , . .
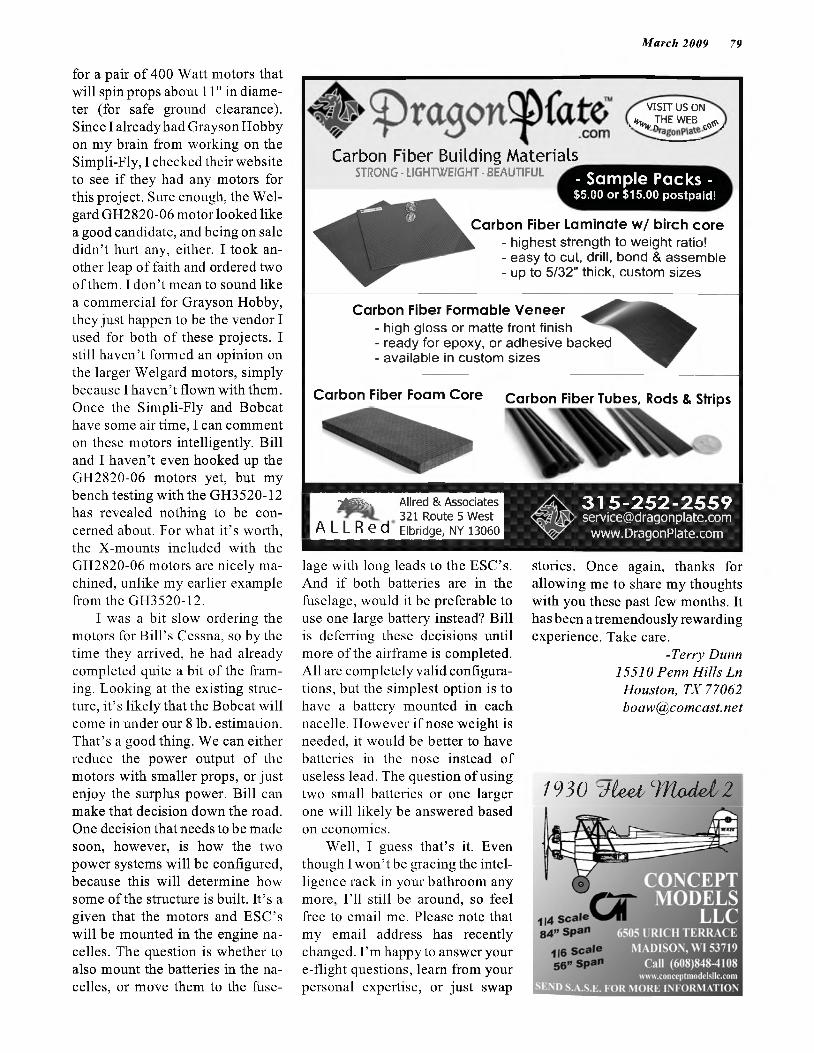
M arch 2009 79
for a pair of 400 Watt motors that will spin props about 11" in diameter (for safe ground clearance). Since I already had Grayson Hobby on my brain from working on the Simpli-Fly, I checked their website to see if they had any motors for this project. Sure enough, the Wel- gard GH2820-06 motor looked like a good candidate, and being on sale didn’t hurt any, either. I took another leap of faith and ordered two of them. I don’t mean to sound like a commercial for Grayson Hobby, they just happen to be the vendor I used for both of these projects. I still haven’t formed an opinion on the larger Welgard motors, simply because I haven’t flown with them. Once the Simpli-Fly and Bobcat have some air time, I can comment on these motors intelligently. Bill and I haven’t even hooked up the GH2820-06 motors yet, but my bench testing with the GH3520-12 has revealed nothing to be concerned about. For what it’s worth, the X-mounts included with the GH2820-06 motors are nicely machined, unlike my earlier example from the GH3520-12.
I was a bit slow ordering the motors for Bill’s Cessna, so by the time they arrived, he had already completed quite a bit of the framing. Looking at the existing structure, it’s likely that the Bobcat will come in under our 8 lb. estimation. That’s a good thing. We can either reduce the power output of the motors with smaller props, or just enjoy the surplus power. Bill can make that decision down the road. One decision that needs to be made soon, however, is how the two power systems will be configured, because this will determine how some of the structure is built. It’s a given that the motors and ESC’s will be mounted in the engine nacelles. The question is whether to also mount the batteries in the nacelles, or move them to the fuse-
VISIT US ON
, \ „ THEWEB c0 >
Carbon Fiber Building MaterialsSTRONG - LIGHTWEIGHT - BEAUTIFUL - Sample Packs -
$5.00 or $15.00 postpaid!
C a rb o n Fiber L a m in a te w / b irch c o re- highest strength to weight ratio!- easy to cut, drill, bond & assemble- up to 5/32" thick, custom sizes
C a rb o n Fiber F o rm a b le V e n e e r- high gloss or matte front finish- ready for epoxy, or adhesive backed- available in custom sizes
C a rb o n Fiber Fo am C o re C a rb o n Fiber Tubes, Rods & Strips
jÉÉjSs, Allred & Associates 321 Route 5 West
A L L R e d Elbridge, NY 13060
315 - [email protected]
www.DragonPlate.com
lage with long leads to the ESC’s. And if both batteries are in the fuselage, would it be preferable to use one large battery instead? Bill is deferring these decisions until more of the airframe is completed. All are completely valid configurations, but the simplest option is to have a battery mounted in each nacelle. However if nose weight is needed, it would be better to have batteries in the nose instead of useless lead. The question of using two small batteries or one larger one will likely be answered based on economics.
Well, I guess that’s it. Even though I won’t be gracing the intelligence rack in your bathroom any more, I’ll still be around, so feel free to email me. Please note that my email address has recently changed. I’m happy to answer your e-flight questions, leam from your personal expertise, or just swap
stories. Once again, thanks for allowing me to share my thoughts with you these past few months. It has been a tremendously rewarding experience. Take care.
-Terry Dunn 15510 Penn Hills Ln Houston, TX 77062 b o aw@comcast. net
1930 "J-teei/ iTlaciei/ 2

80 R /C REPORT
The Oily Hand by Brian Winch
DIAMONDS ARE FOREVER All joy and balloons here for a
moment. At the time of writing this, in Dec 2008, my dear wife (Shirley) and I are thinking of all the years we’ve shared since Dec 19,1958, the day we were married. We’ve been together for around 57 years, as we went out together and were engaged during the seven years before that big day. It’s a shame that so many younger people are amazed at the duration of our time together (and we intend to spend a lot more of the same!), and that they have to ask how we survived(?) so long. The simple answer and one that works for many people like us, is that we care about and respect each other. Shirley would never question any purchase I made for my modeling hobby, and I would never question any purchase she made of clothing, jewelry etc. However, there are two factors to consider that sews it all up nicely. Neither of us would ever even consider a purchase made to the detriment of general living expenses, and (now comes the big one, you blokes) I often bring her many little gifts for no apparent reason. Whenever I go on my distant field trips (modeling, or in earlier days hunting) I always
came home with a few passengers in the form of Teddy Bears of all types and sizes, both new and old collectibles. She is an avid collector of bears, you see, and has hundreds of them on display. Plus, she loves every one of them. My only problem is when I’m getting dressed in the bedroom, I can feel hundreds of beady little eyes looking over the Oily Hand’s nakedness (the perverts!).
Another factor that’s part of our overall scene is the giving of gifts for special occasions. Never give anything that’s “needed” unless it was expressly requested. For example, you may need new
underwear because your old “comfortable” ones have holes or oil stains on the front (from having oily hands when you just gotta go). New underwear is not a suitable present, they’re a necessity. That’s like giving her a new floor broom because the old one is getting worn. Man, I gotta tell ya... give her a broom as a gift and you can kiss your chances of buying (or receiving) new modeling toys good-bye!
This outlook stems from my very young days and some mean family members who always made a big thing about giving me one or two handkerchiefs for birthdays
•Scale Look for WWII and WWI Models • Made of glass-filled nylon for strenth and durability
Propellers
f A S T E R A IR S C R E WW indso r P rope lle r C om pany, Inc.
www.masterairscrew.com · [email protected]
Sizes12.5x516x6,16x8„ 16x10 18x6,18x8,18x10, 18x1220x6, 20x8, 20x12
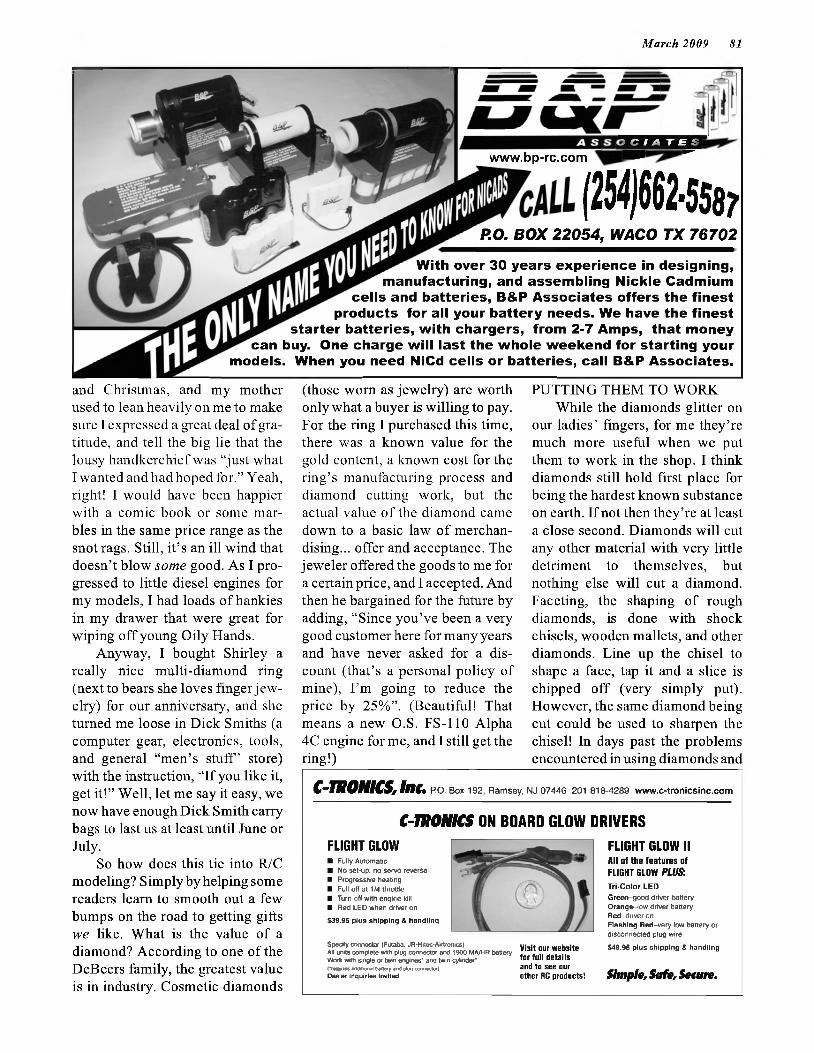
M arch 2009 81
www.bp-rc.com
7
g z x z p
(2 5 4 )6 6 2 -5 5 8 ;P.0. B O X 22054, WACO T X 76702
With over 30 years experience in designing, manufacturing, and assembling Nickle Cadmium
cells and batteries, B&P Associates offers the finest products for all your battery needs. We have the finest
starter batteries, w ith chargers, from 2-7 Amps, that money can buy. One charge will last the whole weekend for starting your
models. When you need NiCd cells or batteries, call B&P Associates.
and Christmas, and my mother used to lean heavily on me to make sure I expressed a great deal of gratitude, and tell the big lie that the lousy handkerchief was “just what I wanted and had hoped for.” Yeah, right! I would have been happier with a comic book or some marbles in the same price range as the snot rags. Still, it’s an ill wind that doesn’t blow some good. As I progressed to little diesel engines for my models, I had loads of hankies in my drawer that were great for wiping off young Oily Hands.
Anyway, I bought Shirley a really nice multi-diamond ring (next to bears she loves finger jewelry) for our anniversary, and she turned me loose in Dick Smiths (a computer gear, electronics, tools, and general “men’s stuff’ store) with the instruction, “If you like it, get it!” Well, let me say it easy, we now have enough Dick Smith carry bags to last us at least until June or July.
So how does this tie into R/C modeling? Simply by helping some readers learn to smooth out a few bumps on the road to getting gifts we like. What is the value of a diamond? According to one of the DeBeers family, the greatest value is in industry. Cosmetic diamonds
(those worn as jewelry) are worth only what a buyer is willing to pay. For the ring I purchased this time, there was a known value for the gold content, a known cost for the ring’s manufacturing process and diamond cutting work, but the actual value of the diamond came down to a basic law of merchandising... offer and acceptance. The jeweler offered the goods to me for a certain price, and I accepted. And then he bargained for the future by adding, “Since you’ve been a very good customer here for many years and have never asked for a discount (that’s a personal policy of mine), I’m going to reduce the price by 25%”. (Beautiful! That means a new O.S. FS-110 Alpha 4C engine for me, and I still get the
PUTTING THEM TO WORK While the diamonds glitter on
our ladies’ fingers, for me they’re much more useful when we put them to work in the shop. I think diamonds still hold first place for being the hardest known substance on earth. If not then they’re at least a close second. Diamonds will cut any other material with very little detriment to themselves, but nothing else will cut a diamond. Faceting, the shaping of rough diamonds, is done with shock chisels, wooden mallets, and other diamonds. Line up the chisel to shape a face, tap it and a slice is chipped off (very simply put). However, the same diamond being cut could be used to sharpen the chisel! In days past the problems
ring!) encountered in using diamonds and
C-7R0NICS,lnt. RO. Box 192, Ramsey, NJ 07446 201 818-4289 www.c-tronicsinc.com
C-TRONICS ON BOARD GLOW DRIVERSFLIGHT GLOW■ Fully Automatic■ No set-up, no servo reversal■ Progressive heating■ Full off at 1/4 throttle■ Turn off with engine kill■ Red LEO when driver on
$39.95 plus shipping & handling
Specify connector (Futaba, JR -H itec-Aiftronics)All units com plete with plug connector and 1900 Μ Α /HR battery W ork with single o r twin engines' and twin cylinder'(•roquiros nckiöorml tonery and plug connoctor)Dealer In qu irie s invited.
Visit our website for full details and to see our other RG products!
FLIGHT GLOW IIAll of the features of FLIGHT GLOW PLUS:
Tri-Color LEDGreen-good driver battery Orange-low driver battery Red-driver onFlashing Red-very low battery or disconnected plug wire
$49.95 plus shipping & handling
Simple, Safe, Seture.
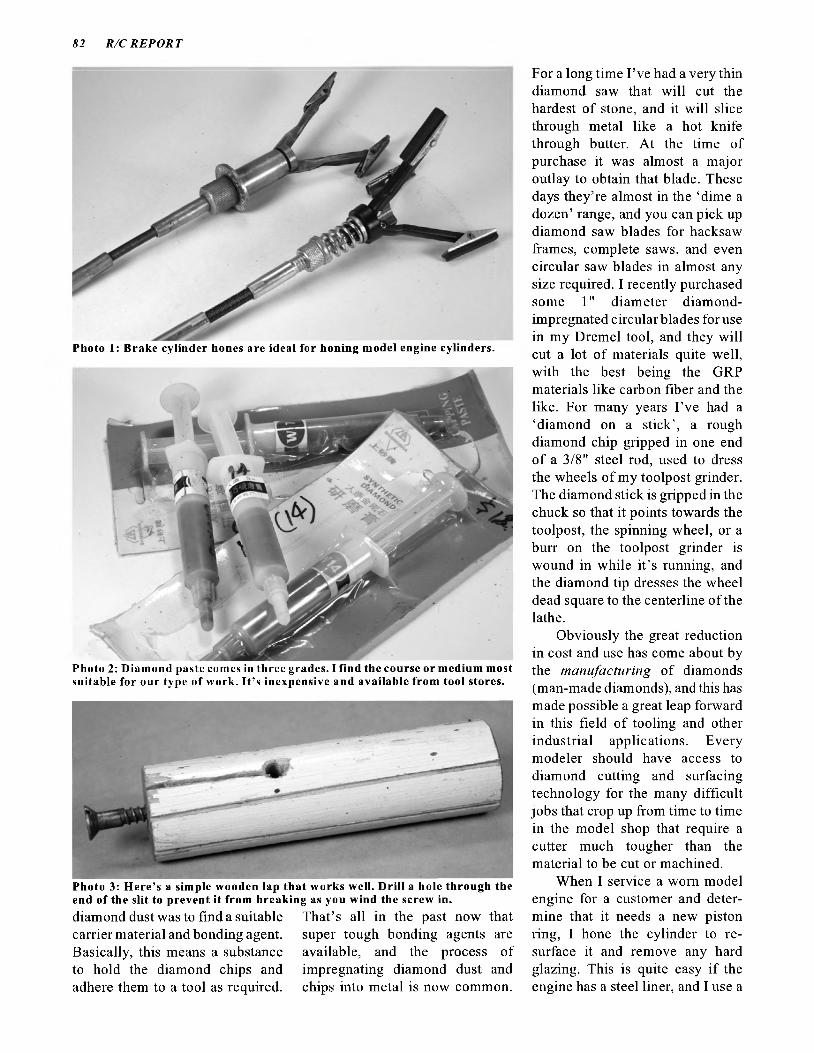
82 R /C RE POR T
For a long time I’ve had a very thin diamond saw that will cut the hardest of stone, and it will slice through metal like a hot knife through butter. At the time of purchase it was almost a major outlay to obtain that blade. These days they’re almost in the ‘dime a dozen’ range, and you can pick up diamond saw blades for hacksaw frames, complete saws, and even circular saw blades in almost any size required. I recently purchased some 1" diameter diamond- impregnated circular blades for use in my Dremel tool, and they will cut a lot of materials quite well, with the best being the GRP materials like carbon fiber and the like. For many years I’ve had a ‘diamond on a stick’, a rough diamond chip gripped in one end of a 3/8" steel rod, used to dress the wheels of my toolpost grinder. The diamond stick is gripped in the chuck so that it points towards the toolpost, the spinning wheel, or a burr on the toolpost grinder is wound in while it’s running, and the diamond tip dresses the wheel dead square to the centerline of the lathe.
Obviously the great reduction in cost and use has come about by the manufacturing of diamonds (man-made diamonds), and this has made possible a great leap forward in this field of tooling and other industrial applications. Every modeler should have access to diamond cutting and surfacing technology for the many difficult jobs that crop up from time to time in the model shop that require a cutter much tougher than the material to be cut or machined.
When I service a worn model engine for a customer and determine that it needs a new piston ring, I hone the cylinder to resurface it and remove any hard glazing. This is quite easy if the engine has a steel liner, and I use a
Photo 1: Brake cylinder hones are ideal for honing model engine cylinders.
Photo 2: Diam ond paste comes in three grades. I find the course or medium most suitable for our type of work. It’s inexpensive and available from tool stores.
Photo 3: H ere’s a simple w ooden lap that works well. Drill a hole through the end of the slit to prevent it from breaking as you wind the screw in.diamond dust was to find a suitable carrier material and bonding agent. Basically, this means a substance to hold the diamond chips and adhere them to a tool as required.
That’s all in the past now that super tough bonding agents are available, and the process of impregnating diamond dust and chips into metal is now common.
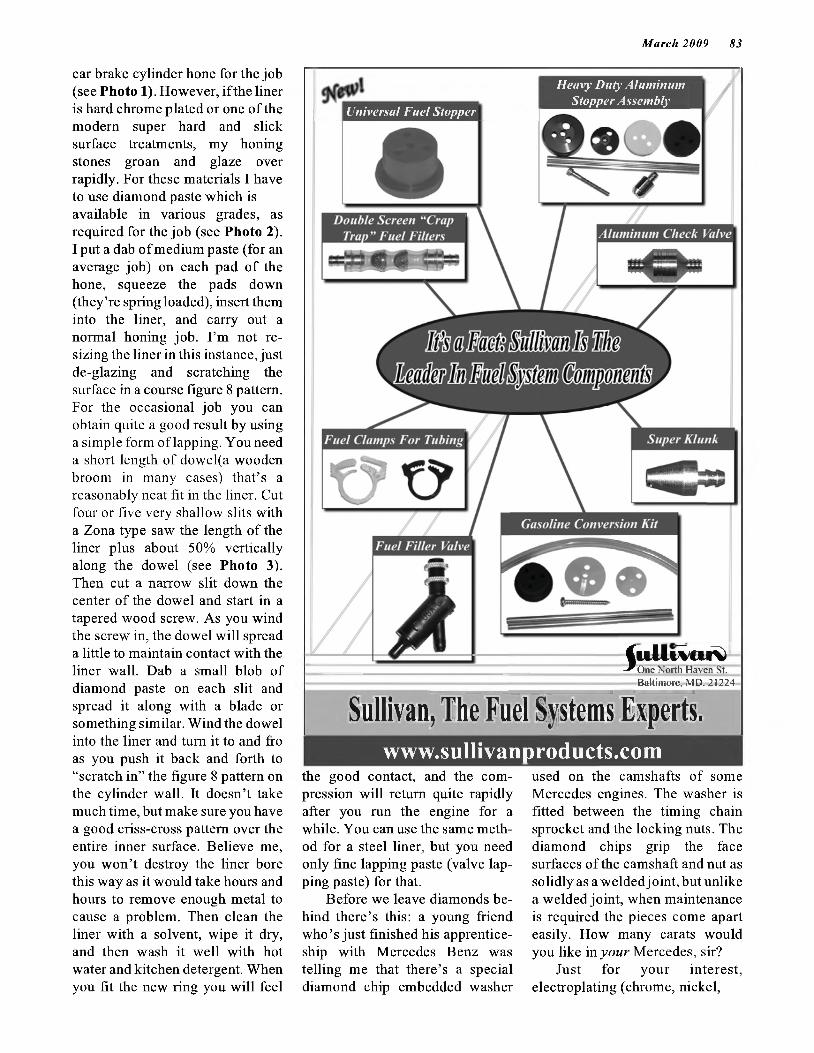
M arch 2009 83
Universal Fuel Stopper
Heavy Duty Aluminum Stopper Assembly
Cullivciri)-^O ne North Haven St.
Baltimore, M D. 2 1224
Sullivan, The Fuel Systems Experts.www.sullivanproducts.com
car brake cylinder hone for the job (see Photo 1). However, if the liner is hard chrome plated or one of the modern super hard and slick surface treatments, my honing stones groan and glaze over rapidly. For these materials I have to use diamond paste which is available in various grades, as required for the job (see Photo 2). I put a dab of medium paste (for an average job) on each pad of the hone, squeeze the pads down (they’re spring loaded), insert them into the liner, and carry out a normal honing job. I’m not resizing the liner in this instance, just de-glazing and scratching the surface in a course figure 8 pattern. For the occasional job you can obtain quite a good result by using a simple form of lapping. You need a short length of dowel(a wooden broom in many cases) that’s a reasonably neat fit in the liner. Cut four or five very shallow slits with a Zona type saw the length of the liner plus about 50% vertically along the dowel (see Photo 3). Then cut a narrow slit down the center of the dowel and start in a tapered wood screw. As you wind the screw in, the dowel will spread a little to maintain contact with the liner wall. Dab a small blob of diamond paste on each slit and spread it along with a blade or something similar. Wind the dowel into the liner and turn it to and fro as you push it back and forth to “scratch in” the figure 8 pattern on the cylinder wall. It doesn’t take much time, but make sure you have a good criss-cross pattern over the entire inner surface. Believe me, you won’t destroy the liner bore this way as it would take hours and hours to remove enough metal to cause a problem. Then clean the liner with a solvent, wipe it dry, and then wash it well with hot water and kitchen detergent. When you fit the new ring you will feel
the good contact, and the compression will return quite rapidly after you run the engine for a while. You can use the same method for a steel liner, but you need only fine lapping paste (valve lapping paste) for that.
Before we leave diamonds behind there’s this: a young friend who’s just finished his apprenticeship with Mercedes Benz was telling me that there’s a special diamond chip embedded washer
used on the camshafts of some Mercedes engines. The washer is fitted between the timing chain sprocket and the locking nuts. The diamond chips grip the face surfaces of the camshaft and nut as solidly as a welded joint, but unlike a welded joint, when maintenance is required the pieces come apart easily. How many carats would you like in your Mercedes, sir?
Just for your interest, electroplating (chrome, nickel,
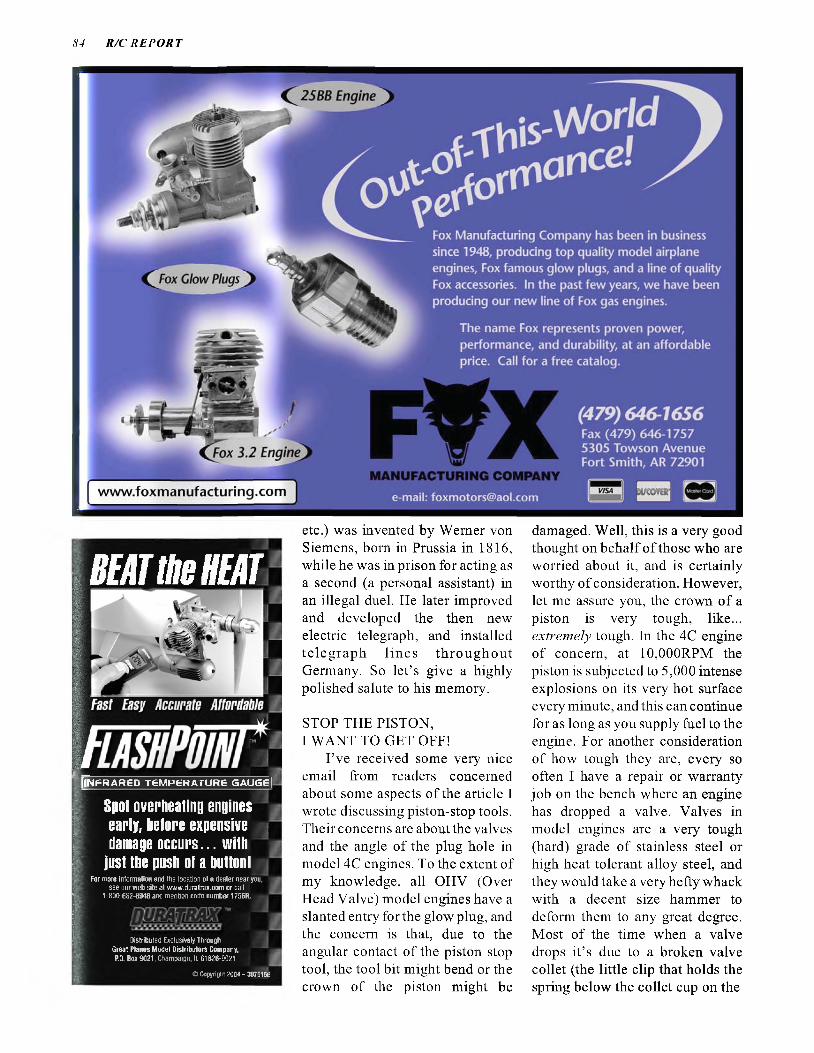
84 R /C REPORT
w w w . fo x m a n u fa c tu rin g .co m
Fox Manufacturing Company has been in business since 1948, producing top quality model airplane engines, Fox famous glow plugs, and a line of quality Fox accessories. In the past few years, we have been producing our new line of Fox gas engines.
The name Fox represents proven power, performance, and durability, at an affordable price. Call for a free catalog.
( 4 7 9 ) 6 4 6 - 1 6 5 6Fax (479) 646-1757 5305 Towson Avenue Fort Smith, AR 72901
e-mail: [email protected]
BEAT the HEAT
.jt· _ ----------------------------------------------- .------- j'|||N FR A R €D T E M P E R A T U R E GA U G E |
Spot overheating engines early, before expensive > damage o c cu rs ... w ith
just the push of a button!For more information and the location of a dealer near you,
see our web site at www.duratrax.com or call 1 -800-682-8948 and mention code number 1756R,
Distributed Exclusively Through Great Planes Model Distributors Company, P.O. Box 9021, Champaign. IL 61826-9021
© Copyright 2004 - 3075156
etc.) was invented by Wemer von Siemens, bom in Prussia in 1816, whi le he was in prison for acting as a second (a personal assistant) in an illegal duel. He later improved and developed the then new electric telegraph, and installed telegraph lines throughout Germany. So let’s give a highly polished salute to his memory.
STOP THE PISTON,I WANT TO GET OFF!
I’ve received some very nice email from readers concerned about some aspects of the article I wrote discussing piston-stop tools. Their concerns are about the valves and the angle of the plug hole in model 4C engines. To the extent of my knowledge, all OHV (Over Head Valve) model engines have a slanted entry for the glow plug, and the concern is that, due to the angular contact of the piston stop tool, the tool bit might bend or the crown of the piston might be
damaged. Well, this is a very good thought on behalf of those who are worried about it, and is certainly worthy of consideration. However, let me assure you, the crown of a piston is very tough, like... extremely tough. In the 4C engine of concern, at 10,000RPM the piston is subjected to 5,000 intense explosions on its very hot surface every minute, and this can continue for as long as you supply fuel to the engine. For another consideration of how tough they are, every so often I have a repair or warranty job on the bench where an engine has dropped a valve. Valves in model engines are a very tough (hard) grade of stainless steel or high heat tolerant alloy steel, and they would take a very hefty whack with a decent size hammer to deform them to any great degree. Most of the time when a valve drops it’s due to a broken valve collet (the little clip that holds the spring below the collet cup on the

M arch 2009 85
KAflON
Λf c á & í z x - _ z z z / y c /L I G H T N I N G S E R I E S
N E WCeramic Lightning Performance
------------Engine Replacement Bearings
·>A&iMOa rur AH
eramic Balls To• Stainless RacesReduce Corrosion
rmnor i if» i inhtpr Weight & More Speed wrings To Prevent Leakage The Popular RC Engines
New 1 & 2 Year Warranty Programs:Call For Details
The Boca Bearing Company continues to bring new innovations to the markets they serve. More choices, attractive prices and impeccable service.
MINIATURE BEARINGS FOR HOBBY & INDUSTRY
755 NW 17th Ave., #107 · Delray Beach, FL 33445
Toll Free Phone: 800-332-3256 · Toil Free Fax: 800-409-9191Email: [email protected]
w w w .b o c a b e a r in g s .c o m
valve stem), or the valve stem breaks where the collet is fitted in a groove. This always happens when the engine is running, and mostly at full song, so the propeller continues until the kinetic energy and momentum is dissipated, or the engine comes to a very abrupt stop when the valve stops the piston before it reaches top dead center. Use your imagination to develop a picture in your mind of an engine
running at 10,000 RPM when a hard steel valve is suddenly dropped into the area above the piston just as the piston is traveling upward at very high speed. Generally the valve stem breaks or bends, the other valve is damaged, the empty valve seat will look like it’s been hit several times with an ax, and the combustion chamber of the head has similar ax scars. The crown of the piston, however, may
have a burr or two raised on its surface. If the valve turned as it dropped, it might drive the stem through the piston, but this is extremely rare. In the majority of cases, in fact, the piston is reusable after a clean-up with a file, Dremel, or a mild cleanup in a lathe. Pistons be tuff stuff, mate! I’d say you’d stand more chance of bending the stop tool than damaging the piston.
The No. 1 Choiceof Competition Modelers
Worldwide!
APC Competition propellers fo r the in te rm e d ia te and advanced s p o r t f ly e r as w e ll as the c o m p e tit io n c o m m u n ity . A dvanced d e s ig ns
u s in g m o d e rn c o m p u ta tio n a l m e th o d s and m a te ria ls . Over 300 p itch / d ia m e te rs ava ilab le ra n g in g fro m s lo w -f ly e r e le c tr ic to
H igh p e rfo rm a n c e G ian t Scale U n lim ite d R acers.
Visit the APC Prop Website fo r p ro d u c t a v a ila b ility and de ta iled in fo rm a tio n on p ro d u c t d e s ig n and fe a tu re s .
w w w .apcp rops . comLanding Products
1222 Harter Ave., Woodland, CA 95776 (530)661-0399
Overnight delivery is available and a ll props are in slock
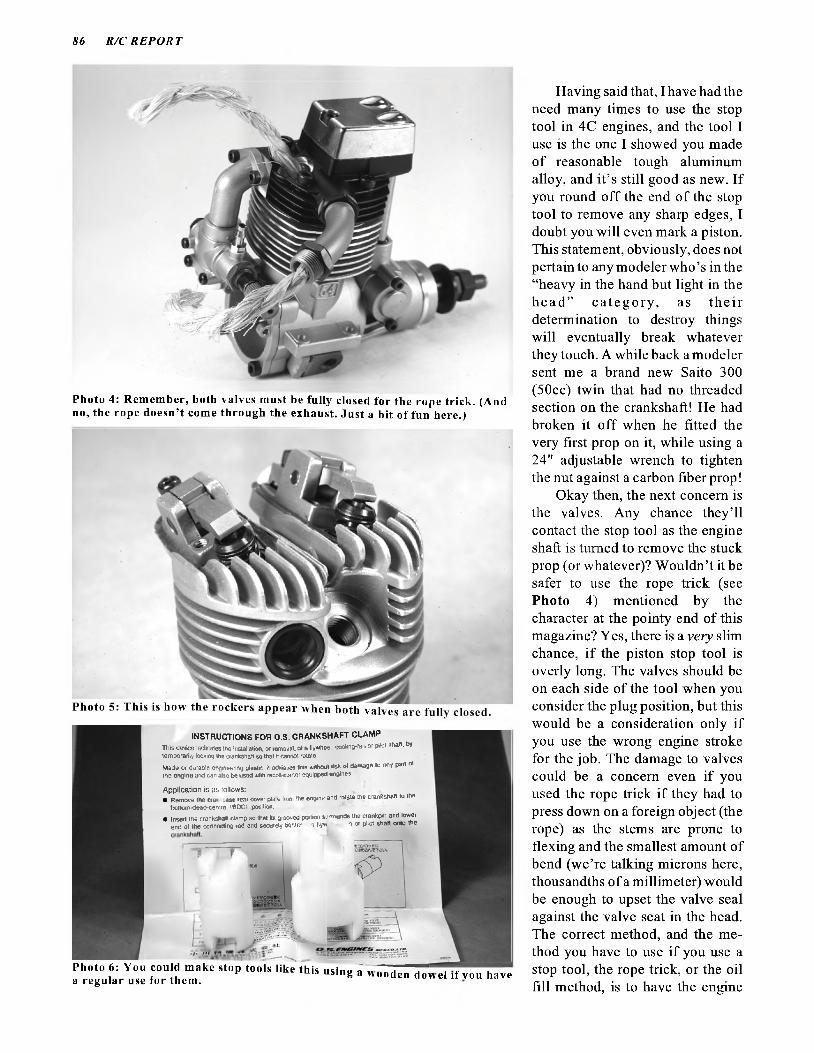
86 R /C REPORT
Photo 4: Rem em ber, both valves must be fully closed for the rope trick. (And no, the rope doesn’t come through the exhaust. Just a bit of fun here.)
INSTRUCTIONS FOR O.S. CRANKSHAFT CLAMPTlira deuice lacftrlales lha installation, of removal, of a llywhoel, cooling-fan or ρϋα! shaft, try temporarily locking the crankshaft so that it cannot rotate.
Made or durable engineering plastic, ft achieves this without risk ol damage to any part ot the engine arvd can also be used with recoil-starter equipped engines.
e iron 'he engine and rotate the crankshaft to theApplication is as Allows:• Remove the crar case rear cover pla
bottom-dead-cemfe (BOO position.
• Insert the crankshaft clamp so that its grooved portion so"nynds the crankpin and lower end of the connecting-rod and securely «ghttr s llyw *i or pitot shaft onto the
Photo 6: You could make stop tools like this usinv Ö. _______ using a wooden dowel if vou havea regular use lor them.
Having said that, I have had the need many times to use the stop tool in 4C engines, and the tool I use is the one I showed you made of reasonable tough aluminum alloy, and it’s still good as new. If you round off the end of the stop tool to remove any sharp edges, I doubt you will even mark a piston. This statement, obviously, does not pertain to any modeler who’s in the “heavy in the hand but light in the h e a d ” category , as the ir determination to destroy things will eventually break whatever they touch. A while back a modeler sent me a brand new Saito 300 (50cc) twin that had no threaded section on the crankshaft! He had broken it off when he fitted the very first prop on it, while using a 24" adjustable wrench to tighten the nut against a carbon fiber prop!
Okay then, the next concern is the valves. Any chance they’ll contact the stop tool as the engine shaft is turned to remove the stuck prop (or whatever)? Wouldn’t it be safer to use the rope trick (see Photo 4) mentioned by the character at the pointy end of this magazine? Yes, there is a very slim chance, if the piston stop tool is overly long. The valves should be on each side of the tool when you consider the plug position, but this would be a consideration only if you use the wrong engine stroke for the job. The damage to valves could be a concern even if you used the rope trick if they had to press down on a foreign object (the rope) as the stems are prone to flexing and the smallest amount of bend (we’re talking microns here, thousandths of a millimeter) would be enough to upset the valve seal against the valve seat in the head. The correct method, and the method you have to use if you use a stop tool, the rope trick, or the oil fill method, is to have the engine

M arch 2009 87
coming up on the firing stroke (combustion stroke) when both valves are closed. To check this, simply remove the rocker cover and observe the position of the rockers, which must be inline with each other and not touching the valve stem (see Photo 5).
Another stop tool I forgot to mention is the type that prevents the engine from rotating by slipping onto the connecting rod. Basically, a dowel with a reasonably neat fit into the crankcase has a slot that fits over the connecting rod. This too works well, and is quite simple to use. O.S. produces a couple of these in nylon that will suit a wide range of engines (see Photo 6).
RECYCLING SPECIALTY ENGINES
What do you do with a perfectly good ducted fan engine when you no longer want to use it in ducted fan models? (See Photo 7.) Bob Geisman of Hunter, NY, wrote to say that he’d switched to electric powered ducted fan models (lured to the dark side, eh?), and he was wondering if his ducted fan engines could be used in some other aspect of R/C, such as sport
BJ's Model Engine Servicetrode nam e o f Flight Star Devices, Inc.
Thh is the place for all your engine repair needs Tune-Up, Overhaul, Crash D am age
W e service all makes and sizes,2 & 4 stroke, gas & glow
«or Briso«»« Parts & Service jbA) Bill jensen
FaCtorA/ Enya, R evolution, 51 H i||sic|e DriveR ’ and SK eng»"*5· Beacon Falls, CT 06403
DEMON-CLEAN" Engine Cleaner Phone & Fax: (203 ) 888-4819 www.bj-niodel-enflines.com Email: [email protected] with an applicable propeller.Even though he’s been attracted to the dark side, at least he hasn’t joined the “trash gang”, that ever increasing band of miscreants (with too much money on their hands) who simply trash good equipment they no longer want or need. Anyway, as to the ducted fan engines, to many modelers they come into a hazy area. By saying hazy, I liken it to that other hazy area of “hopping up” an engine. I have the occasional modeler ask me if I hop up engines. When I ask what they mean by that, the usual answer is, “Oh, you know, making them go faster. ” This doesn’t take any black magic, or even doing things beyond the imagination of those not in the “inner circle” of
engine m odifications. The performance of an engine can certainly be changed to accent one aspect of performance, but it often comes at the cost of other performance attributes. A general overall high performance engine from a reputable manufacturer is sold to you at its peak, all round performance. It will start easily, idle reliably, transition smoothly, run at high RPM to produce good torque or power output, and should last quite a while. Generally speaking, to “hop up” the engine you could fit a carburetor with a larger venturi, change the exhaust port timing, or raise the compression ratio. Any or all of these will change several aspects of performance. The peak RPM might increase, but one or more other performance aspects, such as the starting, idling, transition, or longevity might change, and the change will rarely, if ever, be an improvement. Is there another method of obtaining higher RPM without altering the parts of the engine? There sure is, and it’s very simple... reduce the load on the engine. What do you think Saito and O.S. did to their little .30 size 4C engines to get them to run at22,000 RPM for use in R/C cars? They took off the propeller and fitted a flywheel. And that’s about it other than a modification to the carb to suit the requirements of using them in cars.
Photo 7: This CM B 80 ducted fan engine has the potential to rev very high with a fan or flywheel, but it still runs very nicely with applicable size norm al props, which is what I used when I tested it for a review.

88 R /C R E PO R T
Photo 8: This is the beast that startled me when I was a mere lad who considered a le e (0.06 cu in) engine to be quite adequate for modeling needs.
Photo 9: Great name in days past, Veron produced good modeling equipm ent. These impellers were intended for lc c engines.
So how come a ducted fan engine rans at such high RPM? First, look at the size of the propeller (or impeller). Engines designed for ducted fan use may have modifications such as a more efficient heat sink head, port timing to suit a tuned exhaust, and a carb to suit high RPM operation, but not much more. In some cases there’s a little strengthening of some components such as the conrod, crank pin, and very high speed, extra clearance bearings. They really wring it out when they’re in full song, and the sound is a combination of high RPM and
the scream of the impeller. This puts an image in the mind of modelers that the engine is a super powerful brute that’s trying to get out of the fuselage! As I said, they are howling, and have a bit more power than a sport engine of the same capacity, but the power is coming from the higher RPM.
My first experience with this situation was around 1949.1 had a free flight model of a Lavochkin ducted fan (the real aircraft was jet powered) that had a monster lcc diesel engine in it (see Photo 8). The impeller was a plywood disc with hard gasket card material
blades that were glued into the disc and secured by a ring of wire. When that powerful beast of an engine started, the sound and increase in RPM startled me so much I very nearly dropped the model. As it was I was very glad to launch it so I wasn’t in its close proximity in case something exploded. Only a moderate success but it was different and a bit of enjoyment after all. There was a good bit of interest in ducted fan aircraft not long after this and several manufacturers produced ready made fans for the job (see Photo 9). Problem was, you had to remove part of the model to start the engine with a cord (bootlace), and due to the frailty of the models, more often than not you ripped the engine out of the airframe - particularly if it was an overcompressed diesel engine. Okay, so your ducted fan engine isn’t all that different from a good quality sport engine and can certainly be used for general modeling applications. Actually, ducted fan and heli engines have good application in scale fighter type aircraft that have tight cowls due to the generally larger finning and the heat sink head. It probably wouldn’t sound great in a Tiger Moth, but it might make a good power supply for a screaming Mustang.
MORE BALLOONS (SHUDDER).
As mentioned, it’s celebration time in the Oily Hand domicile at the time of this writing. In March of 2009, the same as the date on the pages in this magazine, it will be time again for the Oily Hand’s birthday. This march I will be 71. Now, some astute readers might remember that I turned 71 in 2008, and will be wondering if a screw or two has vibrated out of the old Oz noggin. Well, the fact is, I hear and read all this nonsense about anti-

PSP Manufacturing 420 Carol Ann Lane Ossian, IN 46777
260-622-6566 Toll Free: 866-622-6566
Fax: 260-622-6679PSP Mfg. Demand The Best!!!
\ Λ / \ Λ / \ Λ / . PSPMFG. C O M
PSPMFG Axles NOW For Aircraft up to 100 lbs. b Ti-Aluminum Axles
SUPER STRONGEasier wheel pants installation, no wheel ___i—— ——collars needed. Cuts weight assembly by about 50%. Duplex-Hybrid, Ti-Aluminum.
We also have Wheel Pant ™Support Brackets and Wheel Collars
Fuel Jua CatOur Fuel Jug Caps are Unique! CNC Machined from solid no spark,
billet brass barstock and are nickel plated.
sW
Engine Test Stand with f Back Mount Adapter Attached.
The Best Engine Break-in Test Stand PERIOD!
PSP MANUFACTURING www.pspmfg.com Demand the Best!!! PSP MANUFACTURING www.psomfQ.com Demand the Best!!estHU
Machined from a irc ra ft a lum inum w ith sta in less stee l com ponents. This is the m ost versa tile and safe stand on the m arket. This Engine Test Stand w ill a cce p t a very w ide range o f engines, from the
sm all .10 size to the Super T igre 4500 and w ith o u r optiona l Back M ount Adapter, the GIGANTIC
tw in 150cc gas burner. The only Engine Test S tand designed w ith one w rench adjustm ents. Now ready fo r vou r RCV 58-CD & RCV 91-CD
m o to rs .ALSO Available. NEW IMPROVED height
adjustable. 360 degrees rotating fuel tank mount.
s # !PSPMFG
MotorMountSpacer
Kits PSP Mfg. Demand The Best!!! tVM/W. PSPA4FG. C O M
Back Mount AdapterFor radial mount engines. CNC Machined to fit the PSPMFG Engine Stand. Using the existing hardware, it is ready for you to drill your mounting holes. You can configure mounting holes for many different engines.
Speciály made for: RCV-SP, 3W,DA-50, DL-50 ZDZ, Zenoah and others.
90 R/C REPORT
aging medications, formulas, and methodology but I don’t see much in the way of results. Sitting in the ‘loobrary’ recently I had a good thought. We should all be aware of the amount of junk generated every day, and the need for recycling, and I thought about the calendar on the wall. Rather than have a new one every year, why not re-use the old one? The day and date is only once removed so that’s no problem, and the great added benefit is that it’s perfect for anti aging. Seeing as how I am now using the ’08 calendar in ’09, it still indicates that I am only 71! And next year I may be 70 and so on, as I have a great collection of calendars going back many years (I hate to throw anything away that might have a future use). (Editor’s Note: Don ’t laugh too quickly at Brian. After all, there are only 14 different annual calendars. Seven are for non-leap years, and seven are for leap years, seven each because a new year must begin on one o f seven days. Since 2008 was a leap year, its calendar won’t be good again for 28 years (2036), but if you saved any 2001 or 2007 calendars, they’ll be accurate again in 2018, 2029, and 2035. Those worn old calendars from 1981, 1987, and 1998 are usable this year (2009) and again in 2015. And save those perfectly good 1999 calendars for 2010, and the 2005 calendars for 2011. Brian knows.)
And since it is that time of the year again, that chunder head, intelligence challenged assistant of mine tried again to bake me a chocolate cake with a difference for my birthday. I certainly do appreciate his kind intention, but I wish he wouldn’t experiment. He’s been studying old nursery rhymes and came upon the old “Sing a song of sixpence... etc., etc... four and twenty blackbirds baked in a pie.” So he decided to bake a cake
with 24 budgerigars in it to give it an Oz slant. Obviously he couldn’t actually “bake” the cake with the budgies inside (but then again, baked budgie... who knows, might be good) so he inflated a balloon, put it in a cake pan, covered it with chocolate cake mix, then put it in the hot oven. He figured that the cake would cook with a hollow formed by the balloon into which he would stow the budgies. (Imagine 24 budgies crapping inside your birthday cake. That’s even worse than the blue bird of happiness crapping on your birthday cake!) Well, I guess you can imagine what happened. The heat in the over expanded the air in the balloon, the balloon eventually exploded, blew the door off the oven, and covered the kitchen in chocolate cake mix. Man, I gotta tell ya, it is one awful big mess. I’ve locked him and the 24 budgies in the kitchen now, and there they will stay until every crumb, dollop of chocolate, and other goo has been removed. And, just as a bonus, they can polish all my cookware while they’re at it. That should give me a week of peace. So what say you and I adjourn to my secret laboratory for this month’s...
APRILWUN DOT ROT DOT CON
This section is devoted to weird ideas, overdevelopment’s, and interventions from my underground workshop. Warning! Note very carefully that these ideas will incur a big risk to your internal well being, your other family members, your bed bugs and maybe even your favorite fondue fork. Before even considering any of these ideas, you should discuss the matter with the first available mental health professional or somebody else who might also be intelligence challenged or as
impaired as yourself if you think this is real. In other words, this is a put on, not a project you can safely attempt. Do not believe anything you read and see here, for nothing in that section is real or wholesome, other than me, that is. And pay no heed to the editorial comments as these are merely a fragment of my imagination.
I live about 20 minutes drive from Lucas Heights, the Atomic Energy Commission where the possums in the trees glow green and have four eyes. I drop in every so often to see what is bubbling in the cauldron, and if necessary to adjust the caesium clock to align with the time indicated by my Boy Scout fob watch (rub the hands together and you can start a fire, too). Last week one of the scientists gave me a paper bag full of old charged particles, and a pop bottle full of stratosphere, which is the atmosphere way above the gravitational pull on earth. The astronauts collect this by holding bottles out the window of the space ship on their way to the satellite stations. The stuff I got is really good as it was collected on the dark side of the moon where all traces of gravitational influence have been eliminated. I mixed the particles and the stratosphere gas with a gallon of modeling dope, and I could feel the can getting lighter and lighter as I stirred. I then painted a thin coat on a hand- launched glider, let it dry, and then hurled it out the window. Up it went like a rocket, and was out of sight in minutes. Wow, this is good stuff! I next used it on an old .40 powered lead sled (a grossly overweight model) and it flew like a featherweight. This is the best anti gravity formula I have tried in ages! I intend to market this stuff, “The Oily Hand Anti Gravity Dope for Dopes”, but it comes with a warning. If your engine is not reli-

M arch 2009 9 j
able and cuts out in flight, say goodbye to your model as without the power to fly it back to the runway, it will just drift upwards and join all the other space junk floating around up there. Watch for the ads if you’re interested.
Just one more sparkling idea from Winch, the well founded Wiz.
MAYDAY! MAYDAY!Well, there I was, sitting in my
window seat enjoying the “R/C REPORT” flight, when Captain Banks suddenly announced the emergency: “Undo your seat belts, folks, the starboard advertiser has just fallen off!” Well now, that upset me a bit, so I adjusted my seat and looked out the window again to see that the starboard wing was indeed at a serious list. Then came, “Bail out! Bail Out! The port advertiser has just fallen off, and the rivets are popping from the fuselage!” Well now, this was very serious stuff, as I had planned on continuing on this great trip until at least my 99th birthday. But now, there I was, my seat pulled out from beneath me with no hope for a parachute. I tell you, this is a serious blow as I had just about learned to understand you blokes and the commands from Captain Banks.
This is a bloody poor show, and I’m so pissed off I think I’ll go outside and swear at my pet funnel- web spider. What’s going to happen now to my underground workshop? Who will yell at my f u z z y - b r a i n e d a s s i s t a n t ? Apparently it’s a done deed with no one to fight, so I’m really going to miss reading all the “good stuff’ from my fellow writers, and the italicized comments from “he who has the last word”.
I am still connected to you blokes on the big island, however, by the umbilical cord of the jelly bean box (E d ito r’s Note:
No Flameouts!
Engine Quitting While Taxing or DownFlight? ____
Sullivan New Onboard Glow Driver will keep the plug hot at all times. This unit features a quick and easy one button set point programming or automatic operation, so the plug receives power at any throttle setting. Ignition set point is permanently stored in memory until changed. The LED indicates burned out plug by flashing on the glow control panel. The Glow Control panel can be mounted on the fuselage side or anywhere inside the plane. Ready to use, just plug to receiver, throttle servo and any 1,2V to 12V battery. No Y-Harness required. At Your Dealer Now!!!
WWW.SULLIVANPRODUCTS.COM
Transla tion: In tern e t and computer.), so my answers and comments will still be available from the same email address. If you want to, take note now and keep in touch.
Thank you, Gordon. It was a great flight while it lasted, and I’ve never enjoyed writing more than for the readers of “R/C REPORT”. Take care, and be well.
-Brian Winch 33 Hillview Parade
Lurnea, NSW Australia 2170
oilyhand@bigpond. net. an
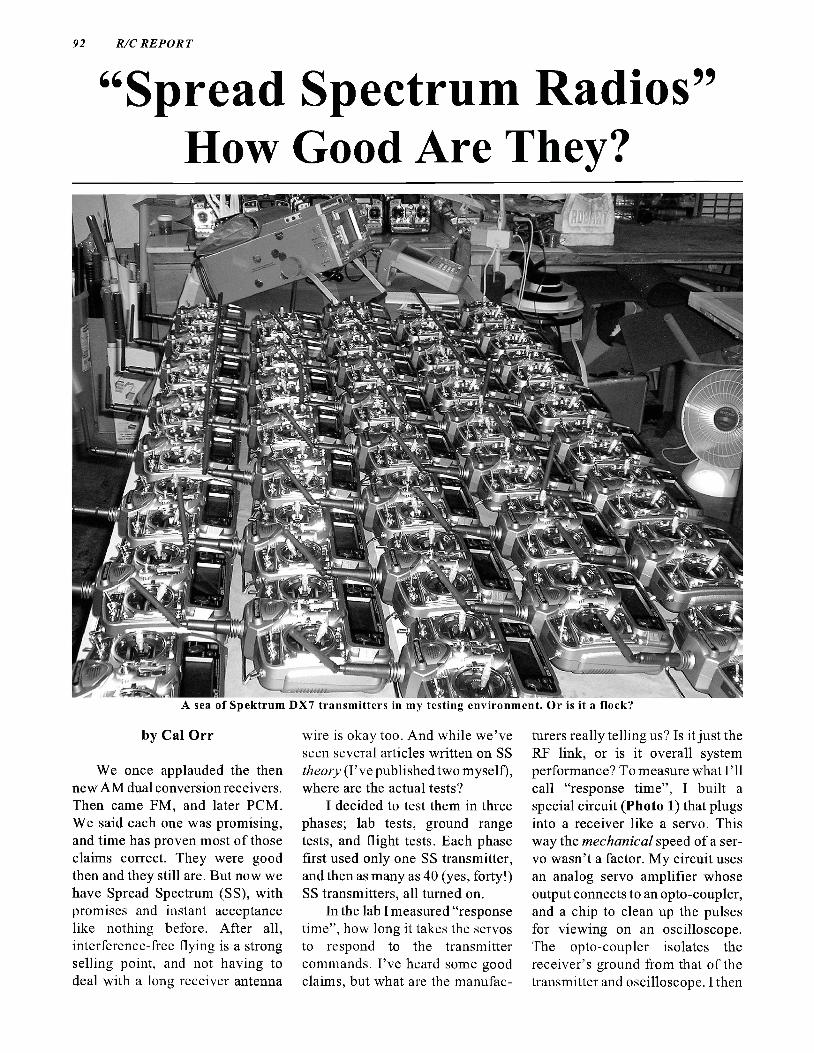
92 R /C RE POR T
“Spread Spectrum Radios” How Good Are They?
A sea of Spektrum DX7 transmitters in my testing environm ent. Or is it a flock?
by Cal Orr
We once applauded the then new AM dual conversion receivers. Then came FM, and later PCM. We said each one was promising, and time has proven most of those claims correct. They were good then and they still are. But now we have Spread Spectrum (SS), with promises and instant acceptance like nothing before. After all, interference-free flying is a strong selling point, and not having to deal with a long receiver antenna
wire is okay too. And while we’ve seen several articles written on SS theory (I’ve published two myself), where are the actual tests?
I decided to test them in three phases; lab tests, ground range tests, and flight tests. Each phase first used only one SS transmitter, and then as many as 40 (yes, forty!) SS transmitters, all turned on.
In the lab I measured “response time”, how long it takes the servos to respond to the transmitter commands. I’ve heard some good claims, but what are the manufac
turers really telling us? Is it just the RF link, or is it overall system performance? To measure what I’ll call “response time”, I built a special circuit (Photo 1) that plugs into a receiver like a servo. This way the mechanical speed of a servo wasn’t a factor. My circuit uses an analog servo amplifier whose output connects to an opto-coupler, and a chip to clean up the pulses for viewing on an oscilloscope. The opto-coupler isolates the receiver’s ground from that of the transmitter and oscilloscope. I then
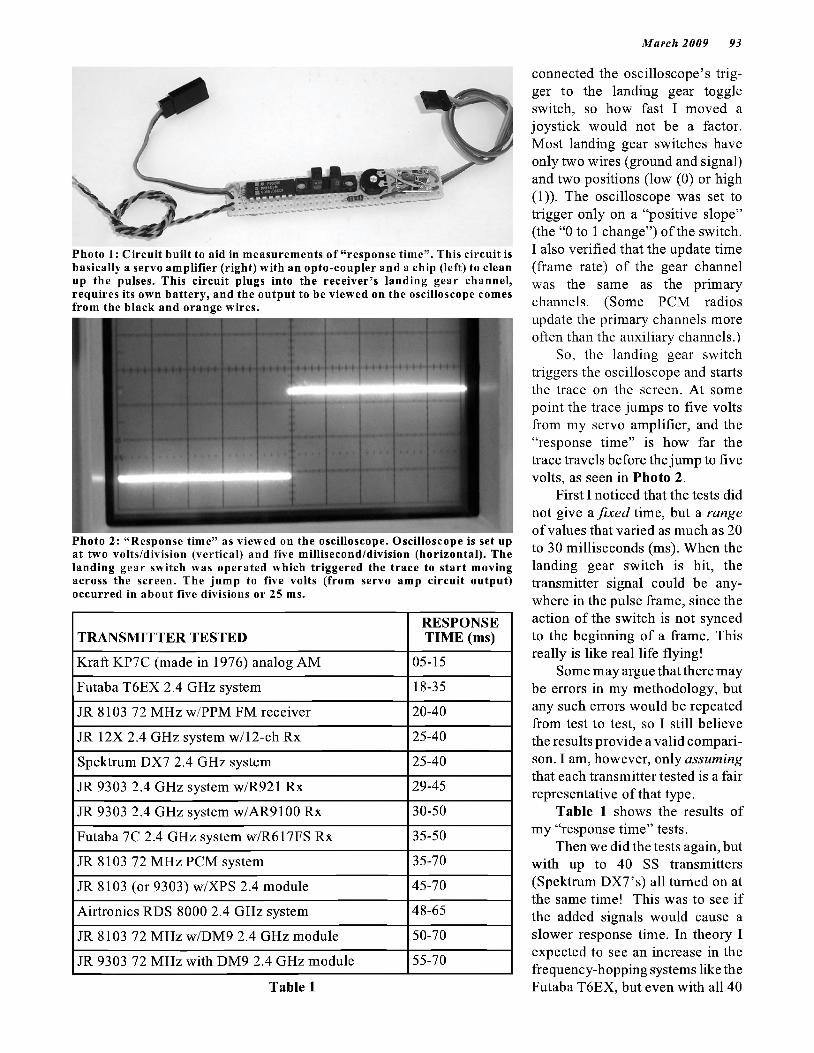
M arch 2009 93
Photo 1: Circuit built to aid in measurements o f “response tim e”. This circuit is basically a servo am plifier (right) with an opto-coupler and a chip (left) to clean up the pulses. This circuit plugs into the receiver’s landing gear channel, requires its own battery, and the output to be viewed on the oscilloscope comes from the black and orange wires.
Photo 2: “Response tim e” as viewed on the oscilloscope. O scilloscope is set up at two volts/division (vertical) and five m illisecond/division (horizontal). The landing gear switch was operated which triggered the trace to start moving across the screen. The jump to five volts (from servo amp circuit output) occurred in about five divisions or 25 ms.
TRANSMITTER TESTEDRESPONSE TIME (ms)
Kraft KP7C (made in 1976) analog AM 05-15
Futaba T6EX 2.4 GHz system 18-35
JR 8103 72 MHz w/PPM FM receiver 20-40
JR 12X 2.4 GHz system w/12-ch Rx 25-40
Spektrum DX7 2.4 GHz system 25-40
JR 9303 2.4 GHz system w/R921 Rx 29-45
JR 9303 2.4 GHz system w/AR9100 Rx 30-50
Futaba 7C 2.4 GHz system w/R617FS Rx 35-50
JR 8103 72 MHz PCM system 35-70
JR 8103 (or 9303) w/XPS 2.4 module 45-70
Airtronics RDS 8000 2.4 GHz system 48-65
JR 8103 72 MHz w/DM9 2.4 GHz module 50-70
JR 9303 72 MHz with DM9 2.4 GHz module 55-70
connected the oscilloscope’s trigger to the landing gear toggle switch, so how fast I moved a joystick would not be a factor. Most landing gear switches have only two wires (ground and signal) and two positions (low (0) or high (1)). The oscilloscope was set to trigger only on a “positive slope” (the “0 to 1 change”) of the switch. I also verified that the update time (frame rate) of the gear channel was the same as the primary channels. (Some PCM radios update the primary channels more often than the auxiliary channels.)
So, the landing gear switch triggers the oscilloscope and starts the trace on the screen. At some point the trace jumps to five volts from my servo amplifier, and the “response time” is how far the trace travels before the jump to five volts, as seen in Photo 2.
First I noticed that the tests did not give a fixed time, but a range of values that varied as much as 20 to 30 milliseconds (ms). When the landing gear switch is hit, the transmitter signal could be anywhere in the pulse frame, since the action of the switch is not synced to the beginning of a frame. This really is like real life flying!
Some may argue thatthere may be errors in my methodology, but any such errors would be repeated from test to test, so I still believe the results provide a valid comparison. I am, however, only assuming that each transmitter tested is a fair representative of that type.
Table 1 shows the results of my “response time” tests.
Then we did the tests again, but with up to 40 SS transmitters (Spektrum DX7’s) all turned on at the same time! This was to see if the added signals would cause a slower response time. In theory I expected to see an increase in the frequency-hopping systems like the Futaba T6EX, but even with all 40Table 1

94 R/C REPORT
Photo 3: Spectrum Analyzer set up to view frequencies 2.40-2.4835 GHz. The two spikes are the frequencies chosen by a single Spektrum DX7 transm itter.
DX7’s turned on, none of the systems showed a noticeable increase! Note that the test transmitter was within a few feet of its receiver, since both were connected to the oscilloscope, and the 40 DX7 transmitters were as close as I could get them to the test radio.
Why 40 transmitters? Our SS band runs from 2.400 to 2.4835 GHz, and is divided into 79 separate 1 MHz frequencies. Since the JR/Spektrum transmitters use two frequencies at once, one might think that 40 transmitters would use up the entire band (and then some). It may seem that 39 such systems could safely be used at one time, but #40 would not link up or operate (thus leaving the first 39 systems alone). This, however, is not the case, as we had as many as 45 SS transmitters operating properly at one time!
Note that all of the DX7 transmitters were charged, and their outputs verified with a spectrum analyzer. (Photo 3 shows the output of one Spektrum transmitter)
Next came ground range tests to see the effects of antenna placement and orientation, and other metal obstacles. I also wanted to see if “up to 40” interfering trans-
Photo 4: Spektrum Flight Log display shows HOOO here, indicating no holds.mitters would cause a ground range reduction. (Most radio manufacturers recommend keeping all internal wiring well away from the receiver antenna(s) in our models, and we made every effort to do so.)
The first ground range tests were made as recommended by the manufacturers, with the model on the ground while the transmitter was carried away. Most manufacturers recommend 30 paces (about 90’) with a reduced output caused by “holding a button”. My spectrum analyzer verified that, during a range test while the button on the back of the transmitter is pressed, the amplitude of the signal was significantly reduced. Every system passed this range test, but I took it even further to see just where control was lost. Sometimes you’ll find a dead spot in the range test, but you can often walk through it to determine the true maximum range. (There should be no dead spots in the first 30 paces, however). We also tested to see if the maximum range was affected by the position of the transmitter’s antenna. In all cases the range was reduced when the transmitter’s antenna was pointed directly at the model. (We see this with 72 MHz systems, too.) Then metal barriers were placed between the transmitter and the airplane; a large metal coffee can, a car, and then a large metal garage door. All of them reduced the maximum range, but never to less than the recommended 30 paces!
Then we did the tests again,
exactly as before, except now with up to 40 DX7 transmitters turned on, all within a few feet of the aii-plane. Again, all systems showed a significant reduction in range as more DX7’s were turned on.
Most systems began showing a loss of range when 10-15 DX7’s came on. In fact, only the JR9303 with the AR9100 “Power Safe” receiver (using/owr remote receivers!) remained steady beyond 30 paces with 40 DX7’s turned on. The other JR/Spektrum systems and the XPS 2.4 module/Rx were a close second. The Futaba T6EX had the least range in this test, yet it was still perfectly acceptable! And keep in mind that this was with 40 other transmitters operating close by! (Note: Consider the number of paces approximate, as every time I perform a range test I get slightly different results.)
Note: The ($360) JR/Spektrum AR9100 “Power Safe” receiver- consists of a power distribution module to which we can connect up to four remote receivers placed at different spots in the fuselage. These four remotes, each in a slightly different RF environment, likely accounts for its superior results in the range tests.
Now it was time to fly the test airplanes in a predictable manner; hold altitude and fly a repeatable oval around the field. Since the receiver might go in and out of hold w i thout the pilot even notic ing, the ovals were flown with constant left and right wing rocking so we could detect any receiver holds. Our pit

M arch 2009 95
Columns: IT==how many Interfering Transmitters were turned On, NUz=Not UsedVolts=Receiver Voltage, A, b, L, andr = the antenna fades each of the four remote receiversF=the number of frames lost, H=the number of times the receiver went into Hold
Flight # IT Volts A b L r F HJR9303 2.4 GHz transmitter and R921 receiverFlight 1 0 6.2 0 8 NU 7 NU 0Flight 2 10 6.1 12 10 NU 5 NU 0Flight 3 20 6.1 5 4 NU 7 NU 0Flight 4 30 6.1 9 19 NU 28 NU 0Flight 5 40 6.1 21 8 NU 8 NU 0Note: I’ve been told that our R921 receiver had a software problem that allowed the frame loss counter to runaway. This has been corrected.
JR9303 2.4 GHz transmitter with AR9100 Power Safe receiver with four remote receiversFlight 1 0 6.3 0 0 0 1 0 0Flight 2 10 6.3 0 1 0 0 0 0Flight 3 20 6.3 0 4 12 16 0 0Flight 4 30 6.2 10 13 14 38 0 0Flight 5 40 6.1 22 20 21 23 0 0
Table 2
area and 40 DX7 transmitters were at the west end of the field, with the pilot about 350 feet away, to allow flying the plane right over the 40 transmitters while the pilot was some distance away. We wanted to see how many interfering trans-mitters we could turn on before the pilot noticed a hold or hit.
The flight tests tended to mimic the ground range tests. The Futaba T6EX seemed to become sluggish or slow with about 20 other transmitters turned on. It took several hits when 30 DX7’s were turned on, and we began feeling unsafe at 35 transmitters.
The JR8103 with a DM9 2.4 GHz module, the Spektrum DX7, anda JR9303 with an XPS module, all had hits when 35-37 DX7’s were turned on, but we had acceptable control even with all 40 on. We also noticed that in some cases turning on an additional transmitter was precisely when a hit was noted by the pilot! Once the number of interfering transmitters remained constant, however, no additional hits were noted.
The same tests were then conducted with a JR 9303 trans
mitter using an R921 receiver (two internal receivers with one remote receiver), and the AR9100 Power Safe System (with all four remote receivers, an amazing package!). We were able to fly both of these systems with all 40 interfering transmitters turned on, but we were unsure if we felt hits or not!
Spektrum offers a device called a “Flight Log” (see Photo 4) that connects to the data port of their 9-ch receivers. After a flight, but before you turn off the power, this device will show seven measurements taken during the flight; receiver battery voltage, the number of antenna fades for each of the (up to four) remote receivers, the number of lost frames, and the number of holds.
We then made five flights each with the R921 and AR9100 receivers, each consisting of three large ovals around the field. The first was with no other transmitters on, then with 10 turned on, then 20, until the 5th flight was with all 40 DX7’s turned on. The results are in Table 2. The column headings are defined at the top of the table.
According to the Flight Log, neither of these receivers ever went
into hold, so we tested the Flight Log to make sure it was working, correctly, and it was.
Several consecutive frame losses will cause the receiver to go into hold, which did not occur. Since about 50 frames of in formation are transmitted every second, our six minute flights used nearly 18,000 frames. According to the data for the AR9100 Power Safe receiver, we had zero holds and lost frames! We see that each of the four remote receivers took hits, but apparently not all at the same time, which is the precise advantage of having four remote receivers. I must say, I am very impressed with this receiver. This is truly the most robust RF link I have seen under such harsh testing. I want one!
ROUND TWOIt is important to note that in
the tests so far, the source of “interference” came from one to forty Spektrum DX7 transmitters, a direct sequence system with redundancy, using two fixed frequencies. In Round Two I repeated the tests as closely as possible, but now using 20 Futaba T6EX 2.4 GHz FASST frequency-hopping trans-

96 R /C RE POR T
Photo 4 shows the table of 40 “interfering transm itters”, now 20 Futaba and 20 Spektrums.
mitters, and 20 DX7 transmitters (see Photo 4). The point was to see if the mixture had a different effect on the one system being flown.
We also got a new Airtronics RDS8000 2.4 GHz system to test, so we tested its response time as described at the beginning of this article, measuring 48-65 ms.
Then we did ground range and flight tests on the following; Airtronics RDS 8000 2.4 GHz system, JR 8103 w/DM9 module and a JR R921 receiver (using two internal receivers and one remote receiver); a JR 9303 transmitter with the DM9 module and an AR9100 Power Safe receiver (using four remote receivers).
In the ground range tests the airplane was on the ground, and the transmitter was walked away. Just 5-10' from the airplane was the table holding the 40 interfering transmitters. This makes a very harsh test! (Nor was it easy on us, having to maintain and monitor so
many transmitters!). Again, all ground range tests were performed with a reduced transmitter output (usually by holding a button), and each system was tested to its maximum range as well as the recommended “30 paces.” First the tests were done with no other transmitters turned on, and then tests with varying mixtures of other transmitters turned on, ten at a time (five Futabas and five DX7’s).
The Airtronics system had a good ground range test, not becoming sluggish until around 60 paces, and a max range around 80 paces, all well above the minimum recommended. But with 20 Futaba transmitters turned on, The Airtronics’ max range dropped to about six paces. With only five Futaba’s turned on, however, the ground range was again 30 paces. With five Spektrum DX7 systems turned on, the Airtronics ground range was about 25 paces.
Still with the Airtronics system we then used a mix of Futaba and Spektrum transmitters, turning them on in groups of ten (five each). With 10 interfering transmitters on, the ground range was about 12 paces. With 20 other transmitters on, ground range was only 1-2 paces. With 30 transmitters on, I had to be right on top of the model to have solid control.
With all other transmitters off, the Airtronics ground range went right back to about 80 paces. Also, if I moved the Airtronics airplane further from the other transmitters, its ground range improved. We are assuming that the Airtronics system we had is typical of its type.)
I then rolled the airplane with the JR R921 Rx into the same spot where the Airtronics airplane had been, just 5-10' from the table of 40 transmitters. Its max range with no other transmitters on was over 120 paces. With all 20 Futaba systems on, the ground range was
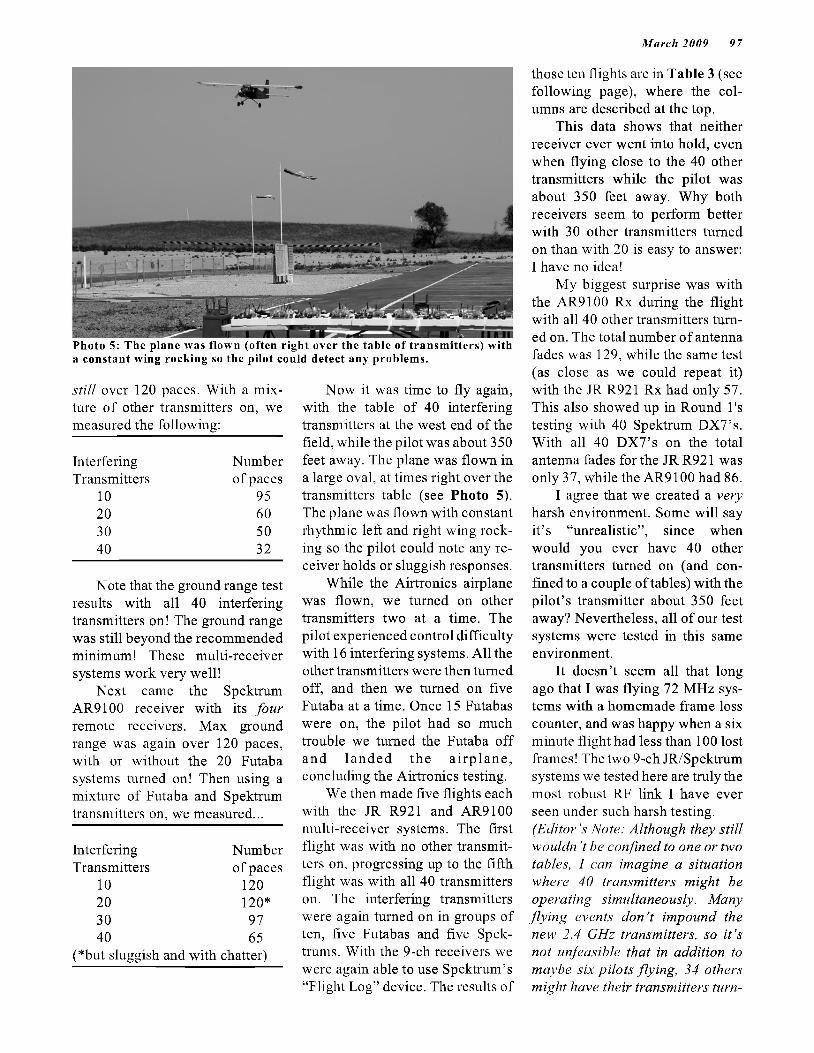
M arch 2009 97
Photo 5: The plane was flown (often right over the table of transm itters) with a constant wing rocking so the pilot could detect any problems.
still over 120 paces. With a mixture of other transmitters on, we measured the following:
Interfering NumberTransmitters of paces
10 9520 6030 5040 32
Note that the ground range test results with all 40 interfering transmitters on! The ground range was still beyond the recommended minimum! These multi-receiver systems work very well!
Next came the Spektrum AR9100 receiver with its four remote receivers. Max ground range was again over 120 paces, with or without the 20 Futaba systems turned on! Then using a mixture of Futaba and Spektrum transmitters on, we measured...
Interfering NumberTransmitters of paces
10 12020 120*30 9740 65
(*but sluggish and with chatter)
Now it was time to fly again, with the table of 40 interfering transmitters at the west end of the field, while the pilot was about 350 feet away. The plane was flown in a large oval, at times right over the transmitters table (see Photo 5). The plane was flown with constant rhythmic left and right wing rocking so the pilot could note any receiver holds or sluggish responses.
While the Airtronics airplane was flown, we turned on other transmitters two at a time. The pilot experienced control difficulty with 16 interfering systems. All the other transmitters were then turned off, and then we turned on five Futaba at a time. Once 15 Futabas were on, the pilot had so much trouble we turned the Futaba off and landed the a irp lane, concluding the Airtronics testing.
We then made five flights each with the JR R921 and AR9100 multi-receiver systems. The first flight was with no other transmitters on, progressing up to the fifth flight was with all 40 transmitters on. The interfering transmitters were again turned on in groups of ten, five Futabas and five Spektrums. With the 9-ch receivers we were again able to use Spektrum’s “Flight Log” device. The results of
those ten flights are in Table 3 (see following page), where the columns are described at the top.
This data shows that neither receiver ever went into hold, even when flying close to the 40 other transmitters while the pilot was about 350 feet away. Why both receivers seem to perform better with 30 other transmitters turned on than with 20 is easy to answer: I have no idea!
My biggest surprise was with the AR9100 Rx during the flight with all 40 other transmitters turned on. The total number of antenna fades was 129, while the same test (as close as we could repeat it) with the JR R921 Rx had only 5 7. This also showed up in Round l's testing with 40 Spektrum DX7’s. With all 40 DX7’s on the total antenna fades for the JR R921 was only 37, while the AR9100 had 86.
I agree that we created a very harsh environment. Some will say it’s “unrealistic”, since when would you ever have 40 other transmitters turned on (and confined to a couple of tables) with the pilot’s transmitter about 350 feet away? Nevertheless, all of our test systems were tested in this same environment.
It doesn’t seem all that long ago that I was flying 72 MHz systems with a homemade frame loss counter, and was happy when a six minute flight had less than 100 lost frames! The two 9-ch JR/Spektrum systems we tested here are truly the most robust RF link I have ever seen under such harsh testing. (Editor’s Note: Although they still wouldn’t be confined to one or two tables, I can imagine a situation where 40 transmitters might be operating simultaneously. Many flying events don’t impound the new 2.4 GHz transmitters, so i t ’s not unfeasible that in addition to maybe six pilots flying, 34 others might have their transmitters turn-

98 R /C RE POR T
Columns: IT--how many Interfering Transmitters were turned On, NU-Not UsedVolts=Receiver Voltage, A, b, L, and r - the antenna fades each of the four remote receiversF=the number of frames lost, H=the number of times the receiver went into Hold
Flight # IT Volts A b L r F HJR8103 w/DM9 2.4 GHz module and JR R921 receiverFlight 1 0 5.4 7 9 NU 0 NU 0Flight 2 10 5.4 4 0 NU 24 NU 0Flight 3 20 5.3 10 5 NU 3 NU 0Flight 4 30 5.3 8 1 NU 5 NU 0Flight 5 40 5.2 20 18 NU 19 NU 0
Note: Due to previous software problems, I no longer trust the “Flight Log’s” frame loss counter.
JR9303 w/DM9 2.4 GHz module and AR9100 Power Safe receiver with all four remote receiversFlight 1 0 6.8 0 2 0 1 0 0Flight 2 10 6.8 0 2 0 0 0 0Flight 3 20 6.7 7 32 8 7 0 0Flight 4 30 6.7 8 5 1 4 0 0Flight 5 40 6.7 37 41 26 25 1 0
Table 3
Photo 6: On final approach to land, the runway is just behind the upper left corner of the GPS unit. The small numbers in the upper right corner of the GPS unit show that I ’m 1.4 miles from the R/C pilot. Just to the left o f the plywood is the altim eter, indicating about 1650'. The airport’s ground altitude is 1450' so I ’m only 200' high. The plywood has three servos and three batteries, one for each system. The AR9000 receiver has a “Flight Log” attached so we can look at lost frames and receiver holds.
ed on while working on their airplanes. Hey... i t ’s possible!)
IN FLIGHT RANGE TESTS I’m often asked, “What’s the
maximum range o f our R/C systems?” And now I also get, “Do the new 2.4 GHz systems have the same range as the 72 MHz systems?”, and “What about the Park Flyer 2.4 GHz systems? ”
Some people drive away from the transmitter with the receiver in a car, or put transmitter on one hill top and the receiver on another, etc. But these are still “ground range tests.” For “flying range” tests, I decided to carry the receiver and servos up in a full-size plane while the transmitter was on the ground, just like when we fly.
I’ve been full scale pilot about 35 years, mostly in a single engine, six passenger Cherokee. All I had to do was to install the receivers, servos, and batteries in the Cherokee, and have an R/C pilot on the ground with the transmitter. I could measure the distance first with a GPS unit, and verify it with the airplane’s Distance Measuring Equipment (see Photo 6).
I wanted to mount at least the receivers outside the Cherokee to prevent its aluminum skin from blocking the transmitter’s signal. I mounted three receivers on a piece of PVC plastic (see Photo 7). I used a JR R790S PCM 72 MHz on ch-49, a Spektrum AR6100 2.4 GHz Park Flyer receiver, and a Spektrum AR9000 2.4 GHz 9-ch
receiver. The PVC was mounted to the side-step of the Cherokee, placing the receivers just below and to the right of the airplane. Wires were then run from the receivers into the airplane where I had the servos and batteries. In most cases, only one connector was plugged into each receiver’s aileron channel. Inside the airplane I used
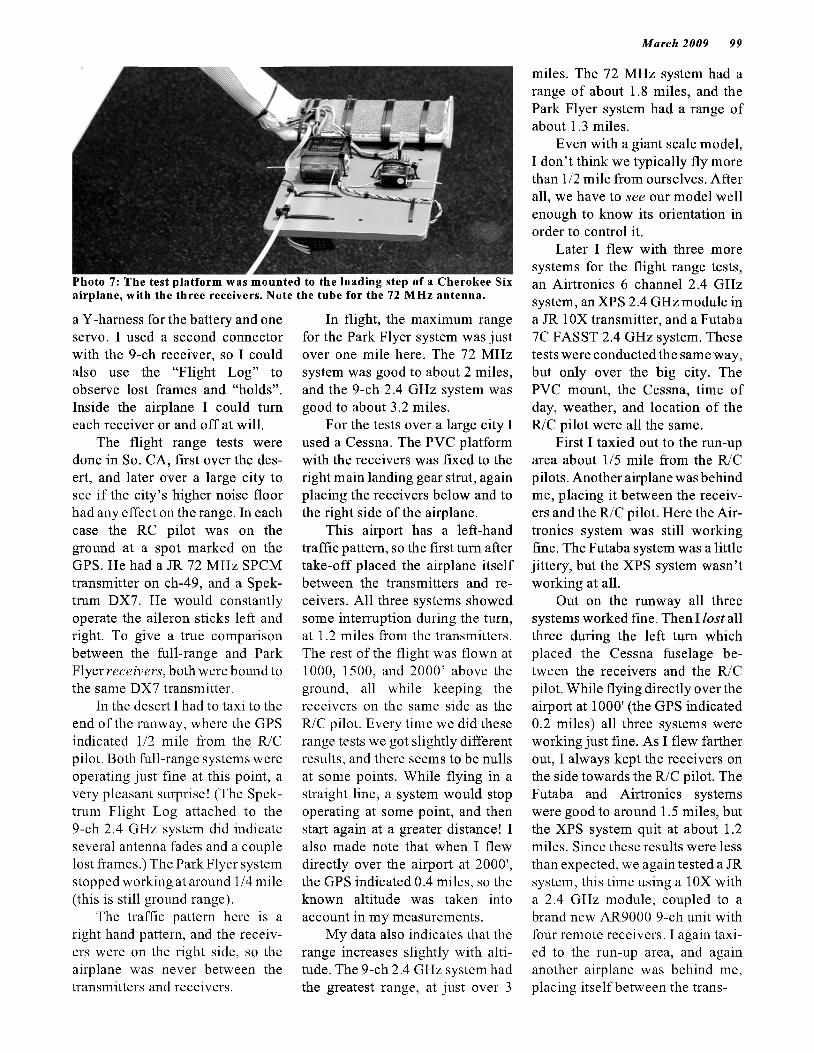
M arch 2009 99
Photo 7: The test platform was m ounted to the loading step of a Cherokee Six airplane, w ith the three receivers. Note the tube for the 72 M H z antenna.
a Y-harness for the battery and one servo. I used a second connector with the 9-ch receiver, so I could also use the “Flight Log” to observe lost frames and “holds”. Inside the airplane I could turn each receiver or and off at will.
The flight range tests were done in So. CA, first over the desert, and later over a large city to see if the city’s higher noise floor had any effect on the range. In each case the RC pilot was on the ground at a spot marked on the GPS. He had a JR 72 MHz SPCM transmitter on ch-49, and a Spektrum DX7. He would constantly operate the aileron sticks left and right. To give a true comparison between the full-range and Park Flyer receivers, both were bound to the same DX7 transmitter.
In the desert I had to taxi to the end of the runway, where the GPS indicated 1/2 mile from the R/C pi lot. Both full-range systems were operating just fine at this point, a very pleasant surprise! (The Spektrum Flight Log attached to the 9-ch 2.4 GHz system did indicate several antenna fades and a couple lost frames.) The Park Flyer system stopped working at around 1/4 mile (this is still ground range).
The traffic pattern here is a right hand pattern, and the receivers were on the right side, so the airplane was never between the transmitters and receivers.
In flight, the maximum range for the Park Flyer system was just over one mile here. The 72 MHz system was good to about 2 miles, and the 9-ch 2.4 GHz system was good to about 3.2 miles.
For the tests over a large city I used a Cessna. The PVC platform with the receivers was fixed to the right main landing gear strut, again placing the receivers below and to the right side of the airplane.
This airport has a left-hand traffic pattern, so the first turn after take-off placed the airplane itself between the transmitters and receivers. All three systems showed some interruption during the turn, at 1.2 miles from the transmitters. The rest of the flight was flown at 1000, 1500, and 2000’ above the ground, all while keeping the receivers on the same side as the R/C pilot. Every time we did these range tests we got slightly different results, and there seems to be nulls at some points. While flying in a straight line, a system would stop operating at some point, and then start again at a greater distance! I also made note that when I flew directly over the airport at 2000', the GPS indicated 0.4 miles, so the known altitude was taken into account in my measurements.
My data also indicates that the range increases slightly with altitude. The 9-ch 2.4 GHz system had the greatest range, at just over 3
miles. The 72 MHz system had a range of about 1.8 miles, and the Park Flyer system had a range of about 1.3 miles.
Even with a giant scale model, I don’t think we typically fly more than 1/2 mile from ourselves. After all, we have to see our model well enough to know its orientation in order to control it.
Later I flew with three more systems for the flight range tests, an Airtronics 6 channel 2.4 GHz system, anXPS 2.4 GHz module in a JR 1 OX transmitter, and a Futaba 7C FAS ST 2.4 GHz system. These tests were conducted the same way, but only over the big city. The PVC mount, the Cessna, time of day, weather, and location of the R/C pilot were all the same.
First I taxied out to the run-up area about 1/5 mile from the R/C pilots. Another airplane was behind me, placing it between the receivers and the R/C pilot. Here the Airtronics system was still working fine. The Futaba system was a little jittery, but the XPS system wasn’t working at all.
Out on the runway all three systems worked fine. Then I lost all three during the left turn which placed the Cessna fuselage between the receivers and the R/C pilot. While flying directly over the airport at 1000' (the GPS indicated 0.2 miles) all three systems were working just fine. As I flew farther out, I always kept the receivers on the side towards the R/C pilot. The Futaba and Airtronics systems were good to around 1.5 miles, but the XPS system quit at about 1.2 miles. Since these results were less than expected, we again tested a JR system, this time using a 10X with a 2.4 GHz module, coupled to a brand new AR9000 9-ch unit with four remote receivers. I again taxied to the run-up area, and again another airplane was behind me, placing itself between the trans-
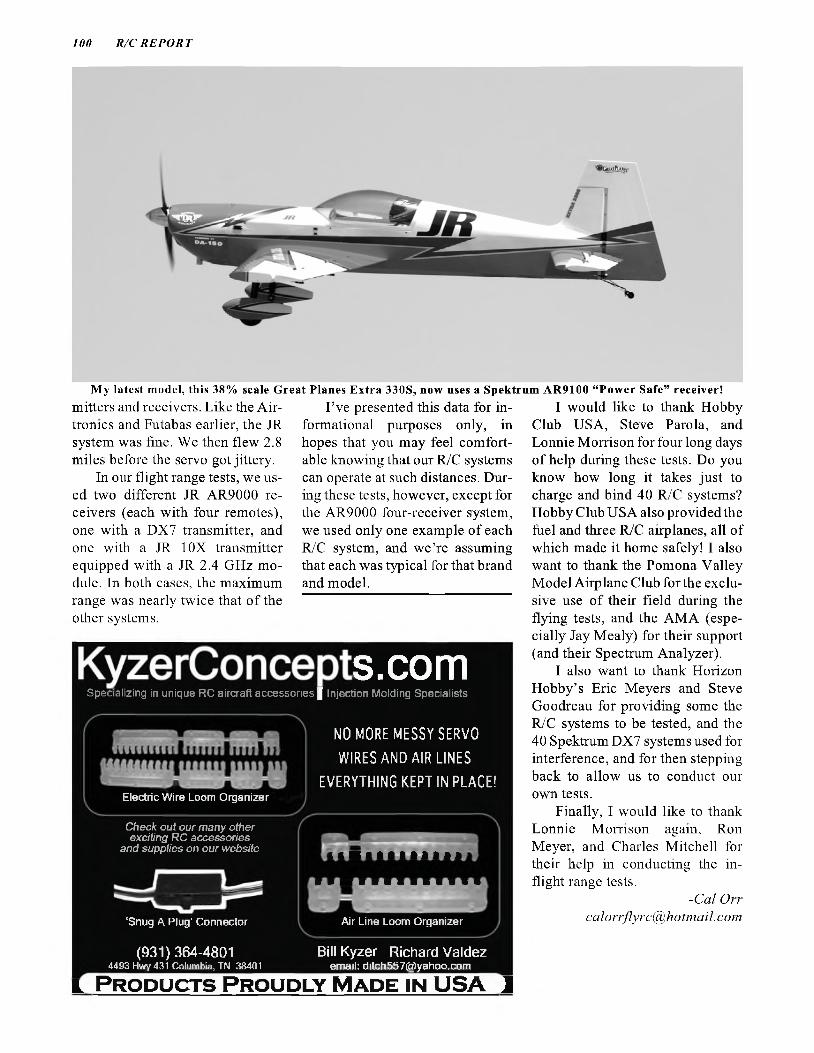
100 R/C RE POR T
M y latest model, this 38% scale Great Planes Extra 330S, now uses a Spektrum AR9100 “Power Safe” receiver!mitters and receivers. Like the Airdromes and Futabas earlier, the JR system was fine. We then flew 2.8 miles before the servo got jittery.
In our fl ight range tests, we used two different JR AR9000 receivers (each with four remotes), one with a DX7 transmitter, and one with a JR 1 OX transmitter equipped with a JR 2.4 GHz module. In both cases, the maximum range was nearly twice that of the other systems.
I’ve presented this data for informational purposes only, in hopes that you may feel comfortable knowing that our R/C systems can operate at such distances. During these tests, however, except for the AR9000 four-receiver system, we used only one example of each R/C system, and we’re assuming that each was typical for that brand and model.
I would like to thank Hobby Club USA, Steve Parola, and Lonnie Morrison for four long days of help during these tests. Do you know how long it takes just to charge and bind 40 R/C systems? Hobby Club USA also provided the fuel and three R/C airplanes, all of which made it home safely! I also want to thank the Pomona Valley Model Air-plane Club for the exclusive use of their field during the flying tests, and the AMA (especially Jay Mealy) for their support (and their Spectrum Analyzer).
I also want to thank Horizon Hobby’s Eric Meyers and Steve Goodreau for providing some the R/C systems to be tested, and the 40 Spektrum DX7 systems used for interference, and for then stepping back to allow us to conduct our own tests.
Finally, I would like to thank Lonnie Morrison again, Ron Meyer, and Charles Mitchell for their help in conducting the inflight range tests.
-Cal Orr [email protected]
s.comSpecializing in unique RC aircraft accessories | Injection Molding Specialists
NO MORE MESSY SERVO WIRES AND AIR LINES
EVERYTHING KEPT IN PLACE!Electric Wire Loom Organizer
C h e c k o u t o u r m a n y o th e r e x c it in g R C a c c e s s o rie s
a n d s u p p lie s o n o u r w e b s ite
‘Snug A Plug’ Connector
(931)364-48014493 Hwy 431 Columbia, TN 38401
Air Line Loom Organizer
Bill Kyzer Richard V aldezemail: [email protected]
L Products Proudly Made in USA J

THE FIRST 20CC FOUR-STROKE GAS ENGINEIS HERE.
TAKING GAS POWER WHERE IT'S NEVER BEEN BEFOREThe wildly innovative FG-20 brings Saito's unmatched reputation for quality and dependability in the four-stroke glow market to gas enthusiasts everywhere. Based on the lightest 1.20-size engine available, it is the perfect choice for all .60- to 1.20-size aircraft.
Perhaps the most amazing detail about this unique powerhouse is the first purpose-designed gasoline carburetor for model engines. Lighter and smaller than other industrial carb designs, it operates with the same ease you have come to expect and its size allows the engine to be conveniently dropped into most airframes.
The impeccable workmanship of the FG-20 results in tremendous operation that can decrease your operating costs by up to 90%*. It also has enough power to swing a 15" x 7" three-bladed prop.
By combining the reliability of gas with the sweet sound of Saito, advanced technology and foresight are once again helping Saito lead the way into the future.
To learn more, visit:
SAITOENGINES.COM SAITO* Decreased operating costs of up to 90% over nitro engine performance. Based on fuel consumption and price per gallon.
H O R IZ O NΗ B B Y
© 2008 Horizon Hobby, Inc. Saito™ products are distributed exclusively by Horizon Hobby, Inc. 14386

From PondThis Aerobatic Pulse is Perfect for the Sport Modeler
E-flite's Pulse XT 25e is a 25-size electric version of the classic Hangar 9 Pulse 40 XT. This is a great low-wing, sport-flying ARF that’s perfect for intermediate pilots and sport fliers who want to fly an airplane that’s more aerobatic than high- wing airplanes. Based on the original Mike McConville design, the Pulse XT 25e offers excellent features such as its lightweight laser-cut balsa construction and bolt-together wing and tail assembly.
The Pulse XT 25e is easy to maintain and quick to assemble. The wing bolts in place, making it easy to transport. The aluminum landing gear comes already painted along with a factory-painted fiberglass cowl and wheel pants.
Depending on your performance desires, you can select from an E-flite® Power 25 or Power 32. The pilot can also opt to fly the Pulse from the water by adding the optional E-flite fiberglass .25-size floats (EFLA500) and utilizing the included aft float mount.
a a iM iw c /n iG e l£C Tr /c f u b h t
FIREWALLThe Pulse X T 25e firewall a cce p ts bo th the Power 25 and Power 32 o u tru n n e r m o to rs , without modification, g iv ing p ilo ts th e opportunity to s e le c t a range of power fo r performance.
E-flite’s Power 25 Brushless Outrunner Motor(EFLM4025A) gives the Pulse XT 25e plenty of power. It should be matched with an E-flite 40A Pro Brushless ESC (EFLA1040), a 3S 11.1V 3200mAh Li-Ρο battery pack (EFLB32003S) and an APC 12x8E prop (APC12080E).
© 2008 Horizon Hobby, Inc. www.E-fliteRC.com E-flite® products are distributed exclusively by Horizon Hobby, Inc. For additional information or your nearest E-flite dealer, call toll-free 877-504-0233. 13659 w w w . E - f l i t e R C . c o m

■V t*f.V
Q M ( M 9

104 R /C RE POR T
Model Reviewed............................... Sundowner 50Airplane Type............................... ARF Sport RacerM anufacturer................ Hangar 9 (Made in China)Distributor.............................. Horizon Hobby Inc.
4105 Fieldstone Road Champaign, IL 61822
(212)352-1913 www.horizonhobby.com
Suggested Retail Price...................................$299.99Typical Street Price....................................... $199.99Wing Span....................................... Advertised: 63"
Measured: 63"Wing Area............................ Advertised: 572 sq.in.
Measured: 575.65 sq.in.Advertised Weight................................... 6 to 7 lbs.Airfoil....................................................... SymmetricalWing Structure............Built-up balsa and plywoodWing Joiner Method. 3/4x17-3/4" aluminum tube Fuselage S tructure.. . Built-up balsa and plywood,
with a fiberglass turtle deck, and a pre-assembled and painted plastic and plywood removable cockpit and hatch cover.
Fuselage Length....................... Advertised - 47.40"Measured - 47.38"
Pushrod Type.......................................... Steel wiresPushrods Installed..................... Guide tubes onlyHinges Included.....................................................YesHinges Installed.......................... All but elevatorRecommended Controls. . . 4 (Ail, El, Rud, Throt )Recommended Engine........... 40-52 2C, .56-82 4C,
or Power 46 (or equivalent) electric motorEngine Mount Installed.........................................NoEngine Mount Type.............. Two-piece compositeFuel Tank Included........................................ 11 oz.Landing Gear Installed......................................... NoWheels Included................ Two 2.5" mains, 1" tailAssembly Instructions. 44 page 8.5x11.25" bookletHardware: Metric or SAE.............................. SAEHardware Included................... Orange plastic 2.5"
spinner; two-piece composite engine mounts with mounting hardware; four 1.88" stand-offs (with 2.25" bolts) for electric motor; pre-pain ted and trimmed fiberglass cowl and wheel pants with fasteners and helmet-head pilot figure; pre-assembled 11 oz. fuel tank with 5.75" fuel lines; two 14" Zip-ties; a pre-assembled and painted plastic and plywood removable cockpit and hatch cover; built-in servo trays; all required pushrod materials and connectors (plus one EZ connector); preinstalled nylon control horns; pre-installed aileron and rudder hinges; CA hinges for elevator; split- elevator joiner wire; pre-painted aluminum main gear with axles and wheel collars; pre-formed and
pre-installed tail wheel assembly; two thumbscrew-type nylon wing bolts; lots of miscellaneous nuts ‘n bolts; two decal sheets; one metric Allen wrench (for the Evolution carburetor).
Items Needed To Complete.. Propeller, 4-ch radio, two 1" long servo arms and four 6-10" servo extensions (or two extensions and one Y-hamess) for the aileron servos; some scrap balsa or plywood to make a fuel tank retainer and a firewall cover-plate (see text), and silicone sealant to fill the unused holes in the firewall.Glow Power: Engine, fuel filler, five servos Electric Power: Motor, ESC, battery, four servos
Covering Material...................................... UltraCoteDrilling Required.................................................. YesFuel Proofing Required.................... Yes (see text)Estimated Skills Required.....................ExperiencedAssembly Tools Required. Typical modeling tools,
to include a power drill with assorted drill bits, and a Dremel-type rotary tool with assorted bits.
Adhesives RequiredThick & thin CA, 30-min epoxy
COMPLETED MODELFinished Weight (RTF, dry). 5 lbs. 14 oz. (94 oz. )Wing Loading................................... 23.51 oz./sq.ft.Engine Used............... Evolution .52NX (18.06 oz.)Propellers Used........... Evolution 11x6, APC 10x7,
and an APC 9x10Propshaft to Ground...................................... 8.75"Fuel Tank Used.......................................As suppliedRadio Used................... Spektrum DX7 transmitter,
Spektrum AR9000 receiver, four JR DS821 digital servos, one JR ST47 servo (throttle), a Spektrum 4-cell 1100 mahNiMH receiver battery, and a JR Deluxe power switch.
Covering/Finishing Used........ Comes pre-coveredSpecial Items............ SonicTronics long servo arms
for the aileron servos
CHEERS - Good packaging to prevent shipping damage; excellent workmanship on pre-built sub- assemblies; beautiful fiberglass cowl, wheel pants, pilot head, and turtle deck; most hinges and all control horns are pre-installed; good quality hardware; instructions include steps for 2C and 4C glow engines and for an electric motor; excellent parts fit; predrilled holes for servo mounting screws; removable cockpit for easy radio access; pre-fitted cowl; quick and easy to assemble; excellent color matching (even the plastic spinner!); very attractive finish; slightly lighter than advertised; flies like a fast sport plane, easy to take-off, fly, and land.
M arch 2009 105
JEERS - Numerous errors in the instructions.
General NotesThe Hangar 9 ARF Sundowner
50 is a sleek, thin-wing pylon racer design that’s reasonably quick and easy to assemble. When completed, it’s a very attractive model that looks fast, fast, fast, even when sitting still! The two-piece wing slides onto an aluminum joiner tube, and each panel is fastened to the fuselage internally with nylon wing bolts. An airplane like this is not intended for beginners, and although there are a few glitches during assembly, I encountered nothing that would foil an experienced modeler. This same design is also available in a giant, 80.5" span for $400 (review in Feb 09 issue).
The kit was packaged well to prevent damage during shipping, using numerous custom-made internal boxes and cardboard separators. Particularly noteworthy in th is kit is the beautiful fiberglass work, to include the cowl, wheel pants, pilot head, and turtledeck (that area of the fuselage behind the pilot’s head). The pre-painted and pretrimmed plastic and plywood cockpit is an easily removable piece granting handy access to the radio compartment and wing bolts.
This is one of those models that pictures somehow fail to show how good-looking the airplane really is. Whoever took the photos for the box-top and ads was a far better photographer than I, but even those fall short of pleasing the eye as does the completed model. I’m not a pylon racer by any means, but this is one pretty airplane!
Most of the assembly steps went very well, and I applaud those who prepared the Hangar 9 instructions for the greatly improved and more logical sequence in which the model comes together. Editing a
previous model’s instructions to reflect the needs of a new design is a proven time-saver, but it requires very careful editing. The Sundowner 50’s instructions are good, but they fall short of earning one of those prizes from the very top shelf. Certain clues, however, point to the all too common problem wherein the factory delivers a production kit somewhat different than the prototype(s) on which the written instructions were based. You and I may get upset when the instructions don’t match parts of the kit, but I doubt that our frustration level even approaches that felt by the distributor. Imagine yourself spending weeks carefully preparing an instructions book based on what’s said to be a sample of the production kit. But then a thousand or so kits arrive that have numerous changes, all or most of which were unauthorized! In this particular case, some of those changes were improvements, but not all.
So, having expressed my sympathy and understanding for the problems instructions writers have to face, now it’s time to point out the boo-boos.
Page 3, Required Tools and Adhesives: To complete the ARF Sundowner 50, you will not need a soldering iron, solder, or Formula 560 Canopy Glue. But in addition to the rest of the list, you will need thick or medium CA, 30-min epoxy, silicone sealant (or something equivalent), and an 11/32" drill bit.
Page 8, step 2: The aileron servo covers have little, laser-etched boxes showing where the servo mounting blocks are to be glued. The size and shape of the boxes indicate placing the blocks on their sides to fill those boxes, but don’t do that! Align the blocks on the edges of the boxes closest to the servo arm cutout, and then glue the blocks in place upright, so that the blocks stand tall. (See, I told you
you’d need epoxy!) If glued on their long sides to fill the little boxes, the blocks won’t be tall enough to accept two servo screws. (It’s perfectly okay to wonder how I came to know this, but you’re never, ever supposed to ask.)
If installing a 2C engine (the 4C engine page and step references are in parentheses here), see page 13 (18). Add to the Required Parts list the 12" clear plastic pushrod tube. Then see steps 1-2: After completing step 1, but before beginning step 2, turn to page 15 (20), step 8 (9). Mark the firewall to show where the sides and corners of the fuel tank will be. Then go back to page 13 (18), step 2. This way you won’t have to remove the engine later to perform step 8 (9). Also, on page 15 (20), step 9 (10), use an 11/64" bit instead of the suggested 5/32" bit. The clear plastic pushrod tube is a hair too big for a 5/32" hole. Next, on page 15 (20) in step 10 (11), instead of leaving 1/16" of the pushrod tube protruding through the firewall, I suggest leaving about 1/4". It’s hard to glue the tube to the firewall without getting glue inside the tube if only 1/16" protrudes. Shoot, you could leave 1/2" and still be okay.
The instructions for installing the fuel tank are... uh... let’s see, how should I put this... Oh, I know... they ’re wrong! If installed with the fuel tank neck fitted through the hole in the firewall, the tank height will be too high and will prevent the cockpit from fitting properly. The tank must remain below the fuselage sides (ignore that higher recess in the former above the fuel tank). But when installed low and with the fuel tank neck behind the firewall, we’re left with that big round hole in the firewall, not to mention all the open bolt holes not used! I chose the latter, with only the brass tubes and

106 R /C RE POR T
fuel lines protruding through the big round hole. I fastened the tank in place with one of the long zip-ties, and added a scrap balsa retainer brace behind the tank. I later made a thin plywood cover to seal off the rest of the hole in the firewall, and filled the unused holes with high-temp silicone sealant.
On page 23, in step 5 of the Throttle Servo Installation, we’re told to slide a little plywood guide onto the throttle pushrod tube, to be glued in place later. Guys, the throttle pushrod is plenty stiff enough as it is, and we don’t need anything that will restrict its movement, so toss that little plywood guide into your scraps box.
Page 27, Wing & Cowling Installation: Apparently this kit was originally designed to have the buyer fit the cowl, tape it in place, drill the mounting holes, and fasten it with the described 1/2" screws. Normal fare for an ARF, right? Well, somewhere along the way, somebody installed a major upgrade after the instructions were published! Now the cowl already has three mounting holes, and the fuselage has matching blind nuts for 4-40 screws! (The screws are in the bag with the spinner, by the way.) So, go ahead with steps 1-5 (although I see no need to attach the wing at this point), skip step 6, and then do step 7 but ignore the wording about “the card stock”. Now fasten the cowl to the fuselage with the three 1/2" 4-40 screws and flat washers. Then do step 8 if you want (but only temporarily), but skip steps 9-12. If you’re installing a 4C engine, go to step 13 on page 30. If using a 2C engine, go to step 14 on page 31.
I couldn’t do it. I just couldn’t do it. Butcher that beautiful cowl,
I mean. It’s just sooooo pretty! Instead of hacking it up to clear the regular muffler, I dug out “The Big Box of Mufflers” to which I ’ve been contributing for 30-some years, looking for a suitable incowl noise killer. Sure enough, I found a brand new Pitt’s-style muffler produced by the late, great John Tatone (founder of J’Tec mufflers and accessories). It was originally a strap-on type, but there was room at the inlet to drill holes to match the Evolution ,52's muffler screw pattern. It took another hour or so to mark the holes, drill ‘em, and tap ‘em, and then re-do the throttle pushrod to clear it, but not having to chop up the cowl made it worthwhile. The Pitts-style muffler has two-outlets, both of which are larger than the stock muffler’s single outlet, so I made a hardwood plug for one outlet, saturated it with thin Zap, and glued it in place using high-temp silicone sealant. Then, since the muffler had no tap for muffler pressure, I drilled a 1/8" hole through the hardwood plug, and installed a
pressure tap. During engine test runs, the one remaining outlet still proved to be too big. It was noisy and there was so little muffler pressure, turning the high speed needle all the way out just barely made the mixture rich enough to run reliably. So, I added a 2" silicone tubing extension to the muffler outlet, and jammed a 1/4" wheel collar into the tubing’s outlet. Now the final outlet’s diameter is about the same as the stock muffler’s (0.256"). That made a world of difference on both scores. It was less noisy and there was enough fuel tank pressure to give a range of adjustment at the high speed needle.
The Sundowner cowl has three openings at the front. The one on the model’s left side directs air to nothing, and since that air will compete with the cooling air for exit area, I blocked off the useless opening. I cut the blocking plate from a paper-thin sheet of Dragon Plate carbon fiber because the pattern has a better appearance than would a smooth, black plate. I left the lower opening alone since its air may help cool the muffler.
Finally, to allow fueling without removing the cowl, I added a T-fitting to the carburetor fuel line, and installed a i‘ed fuel dot on the low side of the right cowling cheek.
I found no error on page 37, step 3, I just want to remind you not to glue the landing gear fairing to the fuselage. Gluing it only to the landing gear plate will allow you to remove the gear for maintenance if necessary. I used a dab of Zap-A-Dap-A-Goo here because the landing gear plate will be flexing a bit during landings, so a brittle glue is not recommended.

M arch 2009 107
On Page 40, in step 3, there’s no real fault here, but do you really want your radio switch up under the wing where it’s hard to see and even harder to reach? Do as you will, but I installed mine just above the trailing edge of the left wing. It was harder to install there, of course, but that’s a one-time job. Reaching the switch to cut it On and Off will be done many times. (Yes, I’m an optimist.)
On page 42, in step 12 (although not actually numbered) the pilot support has an unexplained wedge-shaped base. Trial and error shows that the taller side of the wedge goes to the front.
Now that wasn’t all that bad, was it? Well, okay... the fuel tank installation was a bit of a calamity, but tolerable if you have something from which to make a cover for that big round hole in the firewall, and a brace behind the tank to help keep it in place.
My completed Sundowner 50 weighs just 94 oz,, which is 2 oz. less than the advertised minimum! The muffler I used weighs a little less than the regular Evolution .52 muffler, so maybe that’s why. I was also able to balance the model at the recommended CG point by placing the foam-wrapped battery right behind the fuel tank. Don’t you just love it when everything comes together so well?
With the control surfaces set to the suggested high and low rates, my Sundowner 50 is ready to fly, and I’m eager to see it do just that. I thought about calling Tony Coberly and asking him to meet me at the flying site, but the last time I called between midnight and dawn, he got downright nasty. Some people are moody when called at 2:00 a.m. No, I ’ll wait until the sun comes up. I’m considerate!
6:00 a.m.: “Hello, you'vereached the Coberly residence. We 're not available right now, but
i f you ’ll leave your name and number after the beep, we ’ll get back to you as soon as possible. Unless this is you, Banks, in which case we moved and left no forwarding address. (Beep) ”
He’s just teasing, I’m sure. So it was my turn.
“Hi, this is the Publisher’s Clearing house, and we were calling to inform you that you’d won ten million dollars. But since no one’s at home, we ’ll call someone else. Bye now, and have a nice day. ’’
Flying the Hangar 9 Sundowner 50Almost everyone at the flying
site that day offered a similar comment, “That sure is a good looking airplane. ” And then, while we’re prepping the model for its maiden flight, “How fast is it? ” Well hang around and find out! We’re going to make a trim flight first, but then we’ll attach a Winged Shadow Systems “How Fast” to one wing and see how fast it is.
Now I have to preface the flying report with this: If you’re looking at the Sundowner 50 as a good looking sport model, then we’re okay. But if you’re reading this wondering if it’s an effective racer, then this report may be flawed. The Pitts-style muffler I used to preserve that beautiful cowl may have prevented the engine from making its maximum power. Although the test flights went well, we were left wondering if the engine might have performed better with the stock muffler. The Sundowner 50 flew well with the recommended Evolution 11x6 prop, hitting 82 mph. Then we tried an APC 9x10 prop. The engine did not like this prop, and it took considerable fine tuning, in fact, just to get the engine to take full throttle. It turned out that one click either way from “just right” would kill the engine! But surely that 10" pitch would dig in
at speed and give us an impressive top speed reading, right? But it didn’t. We got only 77 mph. Then we installed an APC 10x7. This one looked faster than anything before, and it was, but only a little (84 mph). But let me add this: not only does the “How Fast” add drag, the rudder had to be trimmed to compensate, adding even more drag. So we’re estimating that all of those speed readings should be about 3 mph faster... maybe more.
But enough about top speed attempts. There may be a lot of pylon racers out there, but their ranks wouldn’t fill a single platoon in a battalion of sport flyers. We who fly for the sheer fun of it, not wanting to compete with anyone, will be more interested in knowing how this very pretty model performs as just that... a great looking sport model.
Can you say “Sportsman Pattern”? The Sundowner 50's sleek lines and modestly sized control surfaces make for smooth and predictable flight characteristics. It’s definitely faster than a flat-nose, thick-wing, .40-size Sweet Stik with a strong .52 2C engine on its nose, but it otherwise flies much the same. With its solid, neutral stability, it’s a “go where you point it” flier that does just what you tell it to do, and it has a nice wide speed envelope that willingly provides plenty of fun at moderate speeds. Imagine a nice, fast, .40-size pattern plane that wasn’t designed for wild, 3D maneuvers, and you’re pretty much looking at the Sundowner 50. So if 85 mph sounds good to you, go for it. If it sounds too fast, reduce throttle! Either way, sport fliers will enjoy owning and flying the Sundowner 50. And did I mention how pretty it is? -Gordon Banks
[email protected] Tony Coberly
tony@hnsinc. net
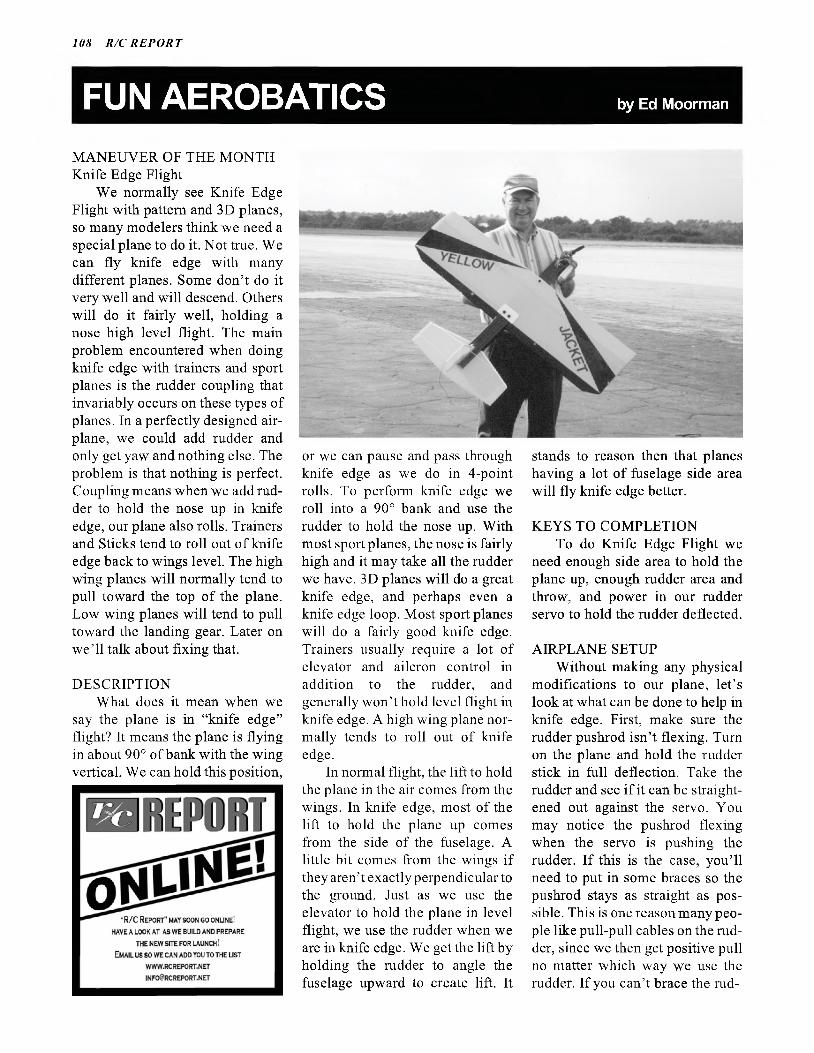
108 R /C RE POR T
FUN AEROBATICS by Ed Moorman
MANEUVER OF THE MONTH Knife Edge Flight
We normally see Knife Edge Flight with pattern and 3D planes, so many modelers think we need a special plane to do it. Not true. We can fly knife edge with many different planes. Some don’t do it very well and will descend. Others will do it fairly well, holding a nose high level flight. The main problem encountered when doing knife edge with trainers and sport planes is the rudder coupling that invariably occurs on these types of planes. In a perfectly designed airplane, we could add rudder and only get yaw and nothing else. The problem is that nothing is perfect. Coupling means when we add rudder to hold the nose up in knife edge, our plane also rolls. Trainers and Sticks tend to roll out of knife edge back to wings level. The high wing planes will normally tend to pull toward the top of the plane. Low wing planes will tend to pull toward the landing gear. Later on we’ll talk about fixing that.
DESCRIPTIONWhat does it mean when we
say the plane is in “knife edge” flight? It means the plane is flying in about 90° of bank with the wing vertical. We can hold this position,
or we can pause and pass through knife edge as we do in 4-point rolls. To perform knife edge we roll into a 90° bank and use the rudder to hold the nose up. With most sport planes, the nose is fairly high and it may take all the rudder we have. 3D planes will do a great knife edge, and perhaps even a knife edge loop. Most sport planes will do a fairly good knife edge. Trainers usually require a lot of elevator and aileron control in addition to the rudder, and generally won’t hold level flight in knife edge. A high wing plane normally tends to roll out of knife edge.
In normal flight, the lift to hold the plane in the air comes from the wings. In knife edge, most of the lift to hold the plane up comes from the side of the fuselage. A little bit comes from the wings if they aren’t exactly perpendicular to the ground. Just as we use the elevator to hold the plane in level flight, we use the rudder when we are in knife edge. We get the lift by holding the rudder to angle the fuselage upward to create lift. It
stands to reason then that planes having a lot of fuselage side area will fly knife edge better.
KEYS TO COMPLETIONTo do Knife Edge Flight we
need enough side area to hold the plane up, enough rudder area and throw, and power in our rudder servo to hold the rudder deflected.
AIRPLANE SETUPWithout making any physical
modifications to our plane, let’s look at what can be done to help in knife edge. First, make sure the rudder pushrod isn’t flexing. Turn on the plane and hold the rudder stick in full deflection. Take the rudder and see if it can be straightened out against the servo. You may notice the pushrod flexing when the servo is pushing the rudder. If this is the case, you’ll need to put in some braces so the pushrod stays as straight as possible. This is one reason many people like pull-pull cables on the rudder, since we then get positive pull no matter which way we use the rudder. If you can’t brace the rud-
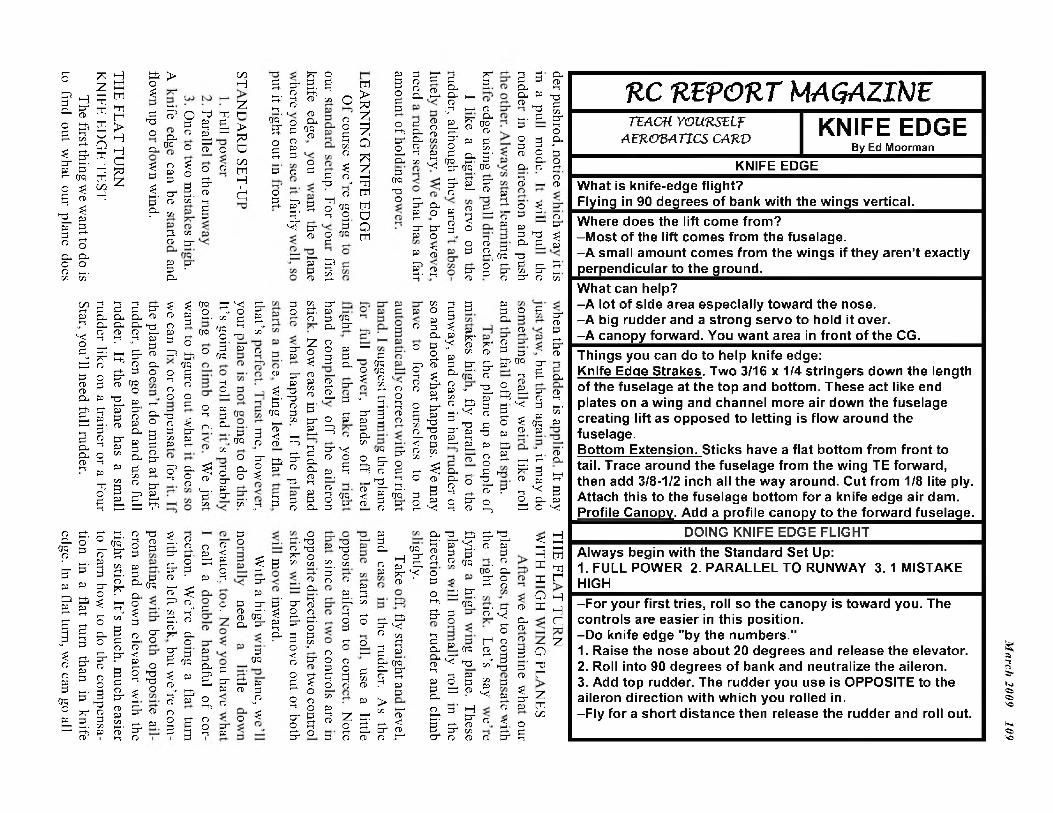
rudder, then go ahead and use lull eron and dow
n elevator with the
THE FLA
T TUR
N
rudder. If the plane has a small
right stick. It’s much, m
uch easierK
NIFE ED
GE TEST
rudder like on a trainer or a Four to learn how
to do the compensa-
The first thing we w
ant to do is Star, you’ll need full rudder.
tion in a flat turn than in knifeto find out w
hat our plane does edge. In a flat turn, w
e can go all
& > o■ζ ,£ δ5 Ο"Ο 3Ο Ο.®j v ® ο
^ ο ί3 § °%, σ' §. 3 ο μΡ* </,
Ρ κι ft σ'
§ ρ*CL·
ιηΗζ*nd ri Μ
η Ερ ^ r iΟ Οο D3-ft
3σ
>föσC/3ΜΗά
& σ', cd ri* ΡHt ^era* 'ο ίΤ § ο ° & § Ρ CD
ri ΟΡ ΡS ^CD go
CDriOPCD
OP PrioP M-J rH p
3**5f
P ^ ri- O•"tσ'ft oPST Siσ 3ft r+
w O £O I § 2 s o
° π í zCD HH
- r i ft w
ffq W2. G £ O m
opiti
σ σ σ'S ft σ 0 ft ft
r i 1—1
O P g r i r i ^^ O- GO O D ri h{ £33- “ >5tiOQriO hHri ri
ri -°ri ri P o* SHKP CD S* HJ
PriO - HHCD
-ri η - *ri rir i CDΓ+
g*33 (g &EP CTQ
S" ^CD ^
rip
P-iCDP
CD3O
OP
riCD
CDCL·OQCDPGOB*OQriCD
P
-iCDOΓ+o 'ti
tt S· o- P σ ftO* i-iα t> ή” -n gΗ-*. P . r i
3 ~ 3 § 3 P*CD O Hj
O - O O - CD ^hH{CD
OCD
PricBP
ori
POQΓ+σ'ft
o % σ rPσ "σ ρ O. ρ g-σ ri ri t/ι p M r i CD GO
r i , CD* E
PP
* CDCL·OCD
ί iCD Ps 50 OrioH{oo
ΓΤCL·O
A 3P o
* r i PrHri
5 rii ri
riOQ
nCDoP
r i .CD <P r iGO Q3ρ ri
3> g*Ht O CD
‘g 0H»« GO
w ‘gO S*
OQ
H{O
O 03^ σo . CL·
'g &2 ρ 2 ^I— , «1P ft
σo
σ'P
V)
I 3ρ σ'<-. g, P ^V)
σ g(IQ ft
f» σ'. Ρ
^ sσ' —'σ σ tra σ|__ V)?Γ< HHρ >-σ
° g* & ^CL· ° Ρ tt ° ^ P3
“ · τ 3 g
go tri t i . Ρo σ α*'Z ° o 2í 3CDP CD (Z) ^P 3 .H .σσ* o £L R?3 ^a «O - ρCD P .
2 qσ o o- σ
(IQσ'
P ^Ρ H - °* Oσ' ^σ -r+ σ ' ρ σσP o ,V)v;2 °Ρ H ) H ri
cSOQ <J tri CD
<D0p O
P OQ OQ CDco ,Ρr-ř- O r+ Or i . tíP CDP O
CD
UM ř_jař ?P P P3 ^ ^ 2. 2 era σ σ'p i t
Ρ Ρ Ρ -
ο Ρ ο
S’ J3 ICD ^ ΡrH
2 ^σ ^COCD r i η- CD< Ρ CD goGO *
- ^ Ο p
σ 3
ÍU
σOQ*
3 3 5ί σ^ S'GOP PCL·CD P ,JCOCD r i
3*^σ*^P H {
“ £2O' .e- oCD-* pHo r i>~i CD
CD
PσCL·
K* gCDr+ riri £LCDod ori Hhjp rip 3*^ aP °
od p
ρ r io g. oΡ HH ricS 3ori
o 3
P
P
σPσpHσ'Pσera σ'
JJ S CL·
σ' ft. ^ P Hj^ σ —ρ ρ 1/1% ffq σ ρ σ
π-*. CDl— l p H O ■
ř g ηP P f?
P ^ 3O O - P ϋ O 'C
►σPσ
σ- OQ
σ'ο
ο►σ►σο
- Ρ
. σ
S. tt σ' &. Εί §CD *
κ ^ri CDCO K-}" r i . CD Or i CL· O? σ' σ IQί Ρ Ρri ri2CD Ροο 2d
3 3
Ο C$ ρ <ri ρΗ-1 f—1-
οσ σ
σ Η
σο
^ 3σ'ρ
σ σ'Ρ - . ·ρ OQCL· σ'
Ρ
& = & ri Ρ
2, σ° σ-ο t rΗ{ Ρ
Ρ0Qri ρCD p
-Ρ
ο ί
Ο. od ο ri ri οGO
ρ ΗCD r i
Ρ ^
GO
σ' σ' 3ί Ο ρ0 pH ρ+03 ri dí* Η{ Ο Ο- a ρ
ί-3 CO Ο -< ri C1> Ρο r i£ ^ ^ ο2 °σ οσ' g.2. σd °
►σ ο2. μ σ σ
ρ Ρ
Ροσρ ΗΗ{Ο
ο
§ öΡ co CD CD
“ Η Ρ
3 2 Η -CD ^ Ρ-*
2- riΡ CD CD
ΡΡriCDΡ
Ρ2. 3-i—1 G0CDΡ r+§ °A ο
OQΗ dOD i— ir i ^CD
r i & r i ^ CD GO
EtP3
2 CTQ r i r i CD r iri ρ
P>^ cSr i ^ r i CD CD - r i
ri od riP* oP ^CD Ρ p *
s 1 (goPoriB- g
-
L ri' OQ*
p H H Hri riCD P
PCD
OQ* r ir i oP H ^
2 P OQrio r i -σ^ σ P2 o σ σ t= pC—
p σ' H σι σ' σ σ. ft P i » σ' ρ ρ
Η» * )—*σ qηΗΟ
G gΡ οG 3Kl Hö
g σ^ ρ
ρ ΗCD
CD <ri
CD r i
Η § G H fflææ
p a
Ηr
Ο ΗC—Ρ
3 Οσ' Η) ρ r
i- Zρ r i
ΟΟoΡ-i
ΗCZ
K Č Κ Έ Ρ Ο Κ Τ M A G A Z I N E
TEACH YOURSELF AEROBATICS CARO KNIFE EDGE
______ By Ed Moorman______
KNIFE EDGEWhat is knife-edge flight?Flying in 90 degrees of bank with the wings vertical.Where does the lift come from?-M ost of the lift comes from the fuselage.-A small amount comes from the wings if they aren’t exactlyperpendicular to the ground.______________________________What can help?-A lot of side area especially toward the nose.-A big rudder and a strong servo to hold it over.-A canopy forward. You want area in front of the CG._______Things you can do to help knife edge:Knife Edge Strakes. Two 3/16 x 1/4 stringers down the length of the fuselage at the top and bottom. These act like end plates on a wing and channel more air down the fuselage creating lift as opposed to letting is flow around the fuselage.Bottom Extension. Sticks have a flat bottom from front to tail. Trace around the fuselage from the wing TE forward, then add 3/8-1/2 inch all the way around. Cut from 1/8 lite ply. Attach this to the fuselage bottom for a knife edge air dam.^Ofil^^anoja^^ddjijffrofile^^canopy^o^he^omarcHuselage^
DOING KNIFE EDGE FLIGHTAlways begin with the Standard Set Up:1. FULL POWER 2. PARALLEL TO RUNWAY 3. 1 MISTAKE HIGH-For your first tries, roll so the canopy is toward you. The controls are easier in this position.-D o knife edge "by the numbers."1. Raise the nose about 20 degrees and release the elevator.2. Roll into 90 degrees of bank and neutralize the aileron.3. Add top rudder. The rudder you use is OPPOSITE to the aileron direction with which you rolled in.-F ly for a short distance then release the rudder and roll out.
March 2009
109

110
R/C
RE
PO
RT
-Beware a snap roll. If you release the rudder quickly, the plane's nose will have a tendency to drop, leaving you nose down. This tends to make people yank in some up elevator. Be cautious doing this especially if you are flying a plane with tapered wings like an Extra. They can snap roll._______Steering:-Steering in knife edge is done with the elevator.-You may need to band to hold altitude in the knife edge turn.-Knife edge banks are the OPPOSITE DIRECTION!
Gaining Altitude:- I f your plane is a good knife edge flier, you just use more rudder to climb.- I f you are already using full rudder, use a knife edge turn. Bank away and use a little extra elevator. No one seems to notice you're climbing back up, just that you are staying in knife edge and making a turn.__________________________Plane tries to roll out of knife edge:Usual for high wing plane."Remove beveled upward wing tips."Add lower half end plates to reduce dihedral effect.
Plane tries to roll inverted in knife edge: Usual for low wing plane with no dihedral. "Try angled upward wing tips.
Pitch during knife edge:Check your wing incidence. The wing and stab should be the same. If you can't adjust either the wing or the stab, try moving both ailerons up or down.Check stab tilt. If your stab is tilted with respect to the wing, you will probably get pitching with rudder. Shim one side of the wing saddle to fix this.________________________________Two Final Methods:-Use computer radio mixing: Mix in aileron and/or elevator (slave) with rudder (master) to counter the roll or pitch in knife edge. Start with a small amount on the first try. -Manually correct for roll and pitch. It takes some practice, but you can get it.
PÍ ^ W s? Q £g *§ o
oÖD<D CD U
æH
a 00g öo .dcfci £Έ d! bo .öpd) r d ^ ert
hJi—I pO c3 Pi ωΟ ωS ÍX—Id
f l1 1O d>
5 ?*0 ^
.S .5*73 *drd <D* Γ—! d d <D d > OO °^ d
d>tZ) d>d<z> ert
d (Z)
£ H
ω Ίr-1
Ca ert
a>g T3 0 d0 §d tZ)ert d>
a εd>
g 3
1 §I i^ öO +3 odo>d>
<Z> ·Crt
I -ö
- §p -
ÖÖ . ω ω ωc 2o 2 a .P!
d>
O —* Tf£ Mž .a +-> >> CO
> ^ coM >->O >>£ s
^ d) rd ÖD o *73 crt d>
d ^ o d-3 dS crt
d> rd
dddoVhcrtOÖD
o od> +->
g .ao
d >> O crt
Ö Sc3 Ό
c
+3 ^
3 s’ (Z)ω ω
0• rH ?Z)rd g* i(Z)d> d> crt Oi—i cd
*73
1 S1 85 oO ^ T3 c3
ÖD.s*od-σd
d>
d>
oc3(Z)+-»d>ÖD-σc3bi)
-φ
3-C
dA4
d>
d>rd+-»O
&O
Λ!mΦ-CCΛ
o bi) ^ d
dd>εood> μ
g ĎD >53 tS d> 'O ^
b i)dd>
d>rd
o "drd do d>(Z) o
*+-»od> o μ
W) s ^d j-ι rd i) a s
dd>
aca
inωξpHΟ
1Η Η <
ω η
Η ^
Ο
<
ω _■ σ3 Ρ S(Η ^Ό Ή ο^ u (Sο ^ Æ■s ^ S'ο α>g e s*3 <ζ>cb fZ) , ert οbp ertΞ ,rH -o
d> r d^ "ö Ť32 3 ^
(Η Od> d•a Sd) ί>
O ert
CC ert ert d)
g z* e
^ d)rd "os ■§ω C ωΛ 4P
ÖÖ ^ C ωocacao
d> d>ert nrd
Ö ^
«> ωbD ^S O'> -p
ο 4P
©"rt-u
Oo
o
dW
ertdIoanertert
o-COh
d>rd

M arch 2009 111
Photo 2: E d’s Little Stick with downward end plates to stop roll with rudder.
anhedral. Photo 2 shows my Little Stick with downward end plates.
The third way to fix roll coupling is to mix it out. If you have a computer radio with mixing capabilities you may have one or mixes available to mix any two channels. If you aren’t sure about mixing, you should learn to use them anyway, because you can do a lot of fun stuff with it. Find someone who’s familiar with your type of radio, and ask him to give you a hand. Basically, you want to mix: rudder (master) to aileron (slave), and select a switch to turn it on and off.
Don’t just guess at a percentage, or start with 5%, as is usually recommended. Turn on the plane and the transmitter, and move the sticks to where you held them to compensate manually. Note the position of the ailerons. Set your mix so when you have the same amount of rudder travel, the ailerons move the correct amount. Now remember the percent just in case you need to do this again.
FIXING PITCH WITH RUDDERFixing the up or down pitch
change when we apply rudder is not so easy. We could change our CG, but we normally find a CG where the plane flies where we like it, and if we get pitch in knife edge... so be it. A harder way is to
move the stab up or down. How much? Who knows? It’s a cut and try thing. The best way to fix this problem is to mix it out by mixing in some down elevator with the rudder. This helps me get around a knife edge loop without too much correction.
Enough with fixing the plane and doing a flat turn, let’s get to the real thing... Knife Edge Flight.
STANDARD SETUP1. Full power2. Parallel to the runway3. One or two mistakes high.
Knife edge can be started flown in either direction, up or down wind.
1. Raise the nose about 20° and release the elevator.
2. Roll into 90° of bank and neutralize the aileron.
3. Add top rudder. The rudder we use is opposite to the aileron direction we used to do the 90° roll. You may also have to hold the aileron and/or the elevator to keep the wing vertical.
Use enough rudder to hold the nose up and maintain level flight. If using a good, fast airplane, this will be less than full rudder.
For your first tries, roll so the canopy is toward you. Being able to see the top of the plane gives you the best perspective of the plane. Fly for a short distance and then exit by releasing the rudder
So Thick, So Strong, Stays where you put it, Won’t ever
Run Away!
Net w t. .70 0*· (20g)
PT-26
Quality.Freshness.
www.zapglue.comW est W areh ouse
760 /24 6 -64 6 2w w w.houseofbalsa.com
Central Warehouse630 /58 4 -76 1 6
w w w robart.com
E ast W areh o u s e863 /607-6611
www, franktiano.com
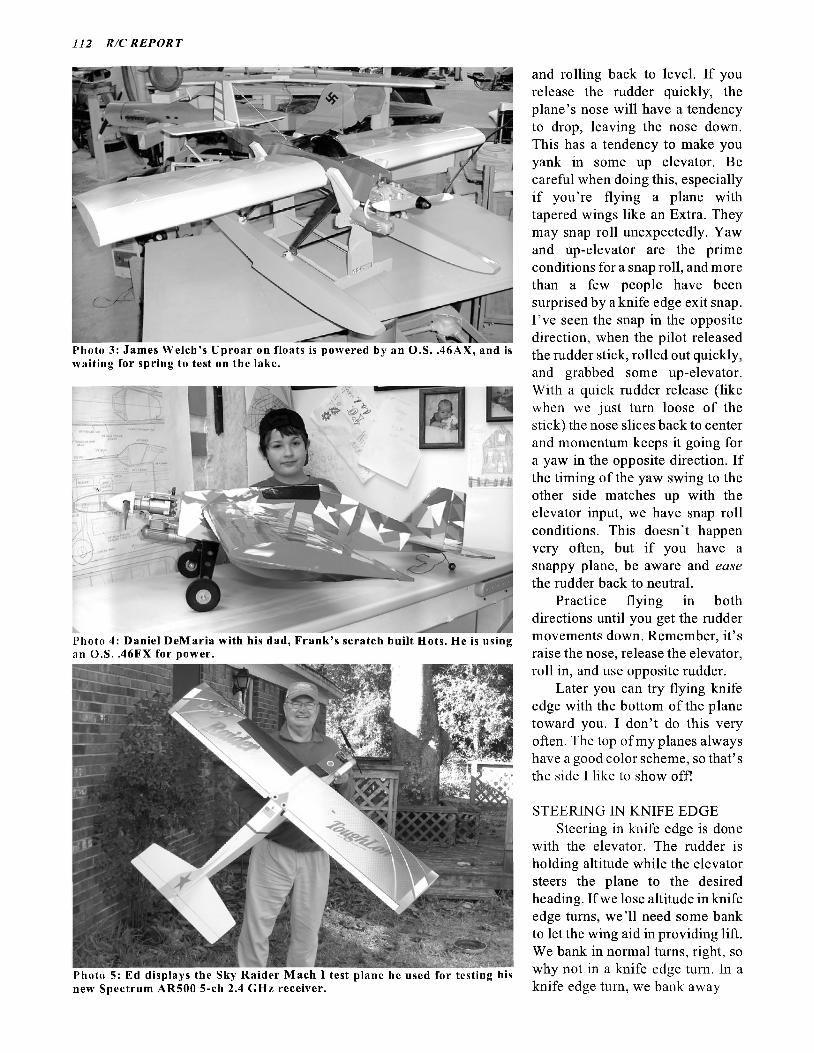
112 R /C REPORT
Photo 3: Jam es W elch’s Uproar on floats is powered hy an O.S. .46AX, and is waiting for spring to test on the lake.
Photo 4: Daniel DeM aria with his dad, Frank’s scratch built Hots. He is using an O.S. .46FX for power.
Photo 5: Ed displays the Sky Raider M ach I test plane he used for testing his new Spectrum AR500 5-ch 2.4 GHz receiver.
and rolling back to level. If you release the rudder quickly, the plane’s nose will have a tendency to drop, leaving the nose down. This has a tendency to make you yank in some up elevator. Be careful when doing this, especially if you’re flying a plane with tapered wings like an Extra. They may snap roll unexpectedly. Yaw and up-elevator are the prime conditions for a snap roll, and more than a few people have been surprised by a knife edge exit snap. I’ve seen the snap in the opposite direction, when the pilot released the rudder stick, rolled out quickly, and grabbed some up-elevator. With a quick rudder release (like when we just turn loose of the stick) the nose slices back to center and momentum keeps it going for a yaw in the opposite direction. If the timing of the yaw swing to the other side matches up with the elevator input, we have snap roll conditions. This doesn’t happen very often, but if you have a snappy plane, be aware and ease the rudder back to neutral.
Practice flying in both directions until you get the rudder- movements down. Remember, it’s raise the nose, release the elevator, roll in, and use opposite rudder.
Later you can try flying knife edge with the bottom of the plane toward you. I don’t do this very often. The top of my planes always have a good color scheme, so that’s the side I like to show off!
STEERING IN KNIFE EDGESteering in knil'e edge is done
with the elevator. The rudder is holding altitude while the elevator- steers the plane to the desired heading. If we lose altitude in knife edge turns, we’ll need some bank to let the wing aid in providing lift. We bank in normal turns, right, so why not in a knife edge turn. In a knife edge turn, we bank away
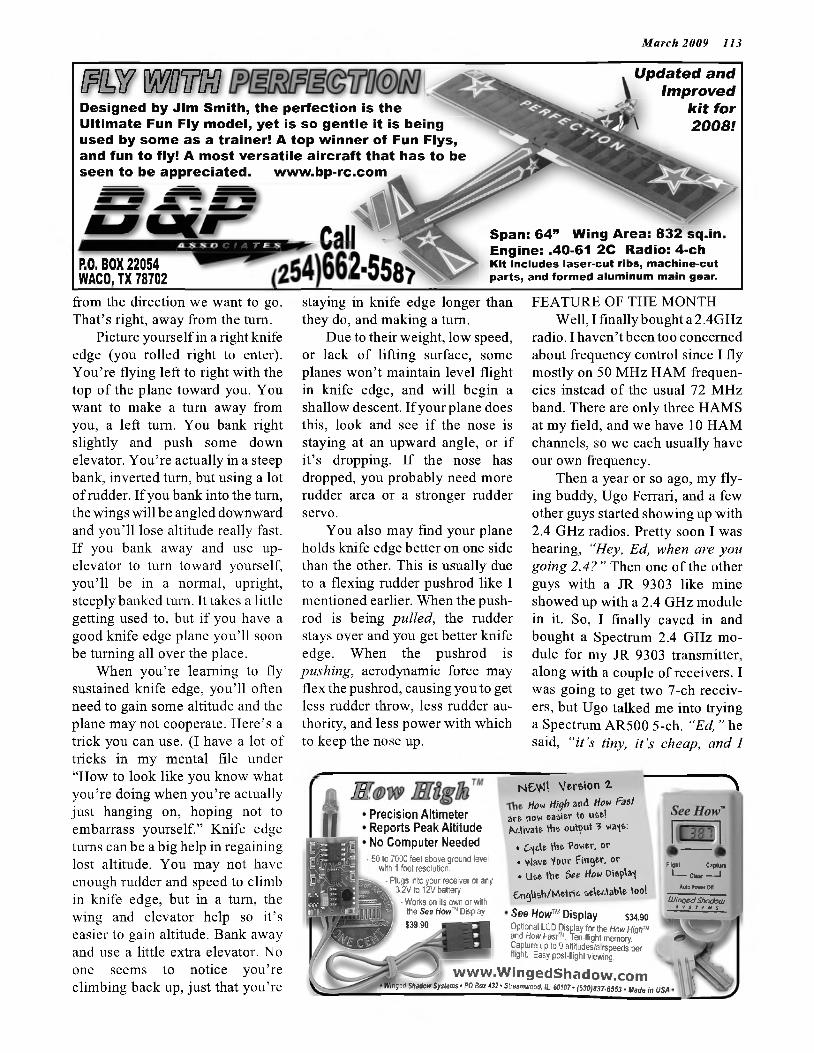
M arch 2009 113
ifív m mDesigned by Jim Smith, the perfection is the Ultimate Fun Fly model, yet is so gentle it is being used by some as a trainer! A top w inner of Fun Flys, and fun to fly! A most versatile aircraft that has to be seen to be appreciated. w w w .bp-rc.com
U pdated and Im proved
k it for 20081
P.0. BOX 22054 WACO, TX 78702
Span: 64” Wing Area: 832 sq.in. Engine: .40-61 2C Radio: 4-chK it includes laser-cut ribs, m achine-cut p arts , and form ed alum inum m ain gear.
from the direction we want to go. That’s right, away from the turn.
Picture yourself in a right knife edge (you rolled right to enter). You’re flying left to right with the top of the plane toward you. You want to make a turn away from you, a left turn. You bank right slightly and push some down elevator. You’re actually in a steep bank, inverted turn, but using a lot of rudder. If you bank into the turn, the wings will be angled downward and you’ll lose altitude really fast. If you bank away and use up- elevator to turn toward yourself, you’ll be in a normal, upright, steeply banked turn. It takes a little getting used to, but if you have a good knife edge plane you’ll soon be turning all over the place.
When you’re learning to fly sustained knife edge, you’ll often need to gain some altitude and the plane may not cooperate. Here’s a trick you can use. (I have a lot of tricks in my mental file under “How to look like you know what you’re doing when you’re actually just hanging on, hoping not to embarrass yourself.” Knife edge turns can be a big help in regaining lost altitude. You may not have enough rudder and speed to climb in knife edge, but in a turn, the wing and elevator help so it’s easier to gain altitude. Bank away and use a little extra elevator. No one seems to notice you’re climbing back up, just that you’re
staying in knife edge longer than they do, and making a turn.
Due to their weight, low speed, or lack of lifting surface, some planes won’t maintain level flight in knife edge, and will begin a shallow descent. If your plane does this, look and see if the nose is staying at an upward angle, or if it’s dropping. If the nose has dropped, you probably need more rudder area or a stronger rudder servo.
You also may find your plane holds knife edge better on one side than the other. This is usually due to a flexing rudder pushrod like I mentioned earlier. When the push- rod is being pulled, the rudder stays over and you get better knife edge. When the pushrod is pushing, aerodynamic force may flex the pushrod, causing you to get less rudder throw, less rudder authority, and less power with which to keep the nose up.
FEATURE OF THE MONTHWell, I finally bought a 2.4GHz
radio. I haven’t been too concerned about frequency control since I fly mostly on 50 MHz HAM frequencies instead of the usual 72 MHz band. There are only three HAMS at my field, and we have 10 HAM channels, so we each usually have our own frequency.
Then a year or so ago, my flying buddy, Ugo Ferrari, and a few other guys started showing up with 2.4 GHz radios. Pretty soon I was hearing, “Hey, Ed, when are you going 2.4?” Then one of the other guys with a JR 9303 like mine showed up with a 2.4 GHz module in it. So, I finally caved in and bought a Spectrum 2.4 GHz module for my JR 9303 transmitter, along with a couple of receivers. I was going to get two 7-ch receivers, but Ugo talked me into trying a Spectrum AR500 5-ch. “Ed, ” he said, “it ’s tiny, i t ’s cheap, and I
Precision Altimeter Reports Peak Altitude No Computer Needed
N&Vt! Version Ί How High and How Fast
art now oasier to U5ft! MivaU tVie output ? «Μ6'·
Λ
• tajete tine Power, or• Wave Vour Finger. or• Ust tVie See How Dispta-)
englisVMotrit seleetabte too!
See How™ Display $34.90 ^O p tio n a l L C D D is p la y fo r th e How Highm and H o w Fast™ . T e n -flig h t m em ory.C a p tu re up to 9 a ltitu d e s /a irsp e e d s p e r flig h t. E asy p o s t-flig h t v ie w in g . V ,
w w w .W in g e d S h a d o w .c o m■nyeď Slmtonr Systems · PO Box 431 · Streunmxx), l i (0107· (6301837-6553 · Made in USA
50 to 7 0 0 0 fe e l a b o ve g ro u n d leve l w ith 1 fo o t re so lu tio n .
- P lu gs in to y o u r re ce ive r o r a ny 3 .2 V to 12 V b a tte ry
- W o rk s on its ow n o r w ith I th e S e e How™ D isp lay
539.90
Flight Capture1----- Clear------- 1
Auto P o w Off
UJinged ShadowS V S T f M S
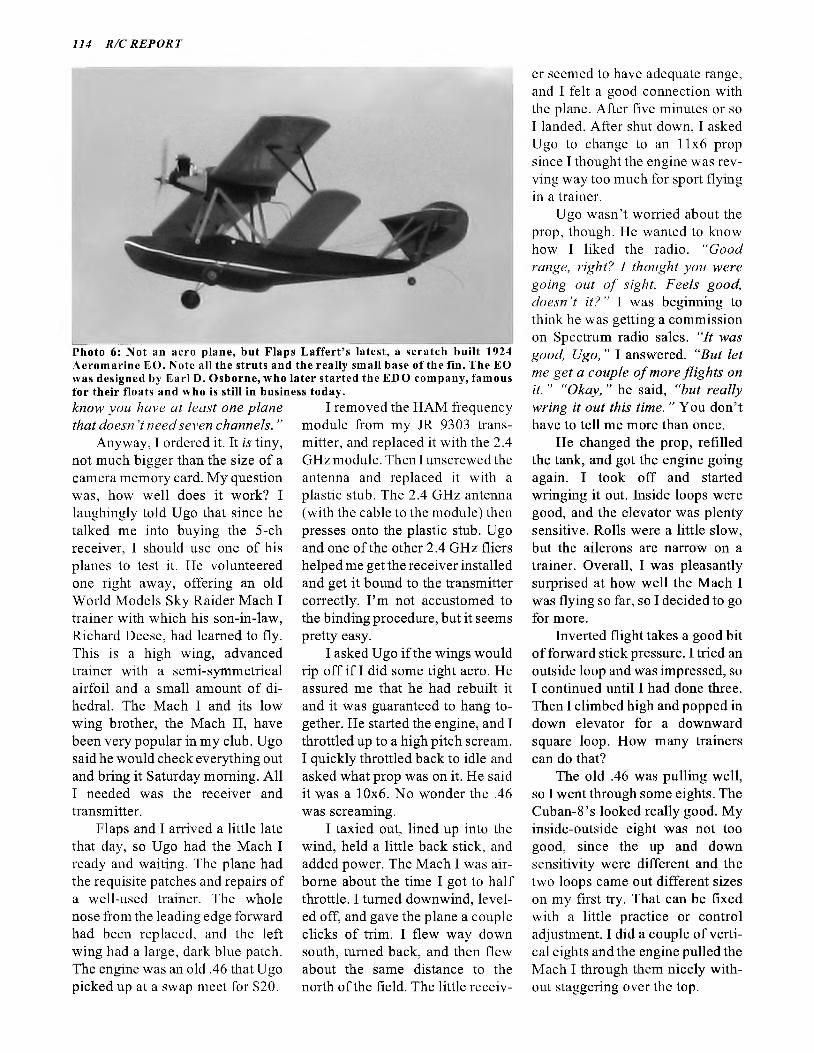
114 R /C RE POR T
Photo 6: Not an aero plane, but Flaps L affert’s latest, a scratch built 1924 Aerom arine EO. Note all the struts and the really small base of the fin. The EO was designed by Earl D. Osborne, who later started the EDO com pany, famous for their floats and who is still in business today.know yon have at least one plane that doesn ’t need seven channels. ”
Anyway, I ordered it. It is tiny, not much bigger than the size of a camera memory card. My question was, how well does it work? I laughingly told Ugo that since he talked me into buying the 5-ch receiver, I should use one of his planes to test it. He volunteered one right away, offering an old World Models Sky Raider Mach I trainer with which his son-in-law, Richard Deese, had learned to fly. This is a high wing, advanced trainer with a semi-symmetrical airfoil and a small amount of dihedral. The Mach I and its low wing brother, the Mach II, have been very popular in my club. Ugo said he would check everything out and bring it Saturday morning. All I needed was the receiver and transmitter.
Flaps and I arrived a little late that day, so Ugo had the Mach I ready and waiting. The plane had the requisite patches and repairs of a well-used trainer. The whole nose from the leading edge forward had been replaced, and the left wing had a large, dark blue patch. The engine was an old .46 that Ugo picked up at a swap meet for $20.
I removed the HAM frequency module from my JR 9303 transmitter, and replaced it with the 2.4 GHz module. Then I unscrewed the antenna and replaced it with a plastic stub. The 2.4 GHz antenna (with the cable to the module) then presses onto the plastic stub. Ugo and one of the other 2.4 GHz fliers helped me get the receiver installed and get it bound to the transmitter correctly. I’m not accustomed to the binding procedure, but it seems pretty easy.
I asked Ugo if the wings would rip off if I did some tight aero. He assured me that he had rebuilt it and it was guaranteed to hang together. He started the engine, and I throttled up to a high pitch scream. I quickly throttled back to idle and asked what prop was on it. He said it was a 10x6. No wonder the .46 was screaming.
I taxied out, lined up into the wind, held a little back stick, and added power. The Mach I was airborne about the time I got to half throttle. I turned downwind, leveled off, and gave the plane a couple clicks of trim. I flew way down south, turned back, and then flew about the same distance to the north of the field. The little receiv
er seemed to have adequate range, and I felt a good connection with the plane. After five minutes or so I landed. After shut down, I asked Ugo to change to an 11x6 prop since I thought the engine was revving way too much for sport flying in a trainer.
Ugo wasn’t worried about the prop, though. He wanted to know how I liked the radio. “Good range, right? I thought you were going out o f sight. Feels good, doesn’t it? ” I was beginning to think he was getting a commission on Spectrum radio sales. “It was good, Ugo, ’’ I answered. “But let me get a couple o f more flights on it. ’’ “Okay, ” he said, “but really wring it out this time. ” You don’t have to tell me more than once.
He changed the prop, refilled the tank, and got the engine going again. I took off and started wringing it out. Inside loops were good, and the elevator was plenty sensitive. Rolls were a little slow, but the ailerons are narrow on a trainer. Overall, I was pleasantly surprised at how well the Mach I was flying so far, so I decided to go for more.
Inverted flight takes a good bit of forward stick pressure. I hied an outside loop and was impressed, so I continued until I had done three. Then I climbed high and popped in down elevator for a downward square loop. How many trainers can do that?
The old .46 was pulling well, so I went through some eights. The Cuban-8’s looked really good. My inside-outside eight was not too good, since the up and down sensitivity were different and the two loops came out different sizes on my first try. That can be fixed with a little practice or control adjustment. I did a couple of vertical eights and the engine pulled the Mach I through them nicely without staggering over the top.

M arch 2009 115
Knife edge and point rolls are only so-so since there’s a lot of rudder coupling, as you’d expect from a high wing plane with dihedral, and some pitch coupling. You can correct for the coupling, but you’re holding a handful of stick. The plane will hold the knife edge position, but it does sink. The rudder is small, but the sinking knife edge might also be attributed to a weak rudder servo, a flexing pushrod, or a nose heavy condition.
You can string a lot of aileron rolls together, correcting with up and down elevator to keep the plane on line. Six or seven in a row are fairly easy. I was even able to do a rolling circle.
I never was able to get a snap or spin. Remember the airplane setups for these maneuvers? You need a good bit of elevator and rudder, and maybe the plane needs the CG moved back some.
Let’s face it, the Mach I wasn’t designed as an aero plane, but overall, I was very impressed with its ability. I was so into doing aero that I forgot about my main goal, checking out the new 5-ch, 2.4 GHz receiver! (It works great!)
BOTTOM LINEThe Spectrum AR500, 5-ch,
2.4 GHz receiver is a gem. I have no complaints whatsoever. It’s inexpensive and it works really well with good range. Basically, I could tell no difference between it and one of my PCM receivers on a HAM frequency. Plus, there’s no frequency pin to worry about.
I’ve been told that you feel more connected with 2.4 GHz, but I didn’t notice this. I normally fly PCM with mostly digital servos. The Mach I has low-cost analog servos, yet it still felt like one of my PCM planes. Maybe the better feel on 2.4 GHz masked the slower response of the analog servos. I’ll have to try the 7-ch receiver in a
P.O. Box 897 , Five Forks Villaae Kino NIC 97021 P h :(336)983-3969 vinage, K'ng^NG
WE SHIP]ny i i noL3 T U r o I
M ö>-
A & w ú /
S E L B H O M E OFLOW PRICES www.kingrc.com [email protected]
Stick with digital servos. I have a couple of planes that need only five channels, so I’m going to order another Spektrum AR500. The first one is going into a Sig Rascal on floats. Thanks, Ugo, for telling me about this little gem. (Editor’s Note: The Spektrum AR500 receiver is the one included with the DX5e radio used in two kit reviews in this issue, and the one in the Park Zone “Radian ” was flown pretty darn far away, with no problems at all.)
“R/C REPORT’S ” FINAL ISSUE Coincidentally, this is my
100th column, and apparently my last. Gordon, fellow columnists, and all you readers... Thanks! It’s been great, and I’m going to miss you all! -EdMoorman
85 12th Street Shalimar, FL 32579
CENTRAL PENN AEROMODELERS ASSOC.29th Annual Radio Control FLEA MARKET
PLACE: LEBANON FAIRGROUNDSIntersection of Cornwall Road and Rocherty Road, _ _n <0 r M aP Lebanon, PA G»'
L a rg e s t in th e U .S .A .41,000 Sq. Ft. Indoors
6 0 2 Tables!!!DATE: Saturday, MARCH 14, 2009
(Regardless of weather)TIME: 9:00 A M, for General Admission
7:00 A.M. for Table Renters Only Open T '
Admission: S7.00 Donation (Under 12 Free)
Tables: $11.00 each (5 It. long)Wall Tables: SI 7.00 each (5ft long)
www.cpaa.us
To Pre-Regisler for tables, send table rent plus S7 per person (payable to CPAA) with SA.SE.lo:
i t 4 CPAA» L i 5257 Deerfield Ave.
M echanicsburg, PA 17050
FOR INFO, CALL FRANK (717) 412-8579

116 R/C REPORT
CLASSIFIEDSCLASSIFIEDS
ABBREVIATIONS2C or 4C. . two or four cycleARC. Almost Ready to CoverARF. . . Almost Ready to Flybtry........ ................ batteryCL or UC ........Control Linecond...... ............ conditionDF......... ..........Ducted Faneng........ .................. engineexc........ .............. excellentFI........... ........Front IntakeH or heli. ............ helicopterign......... ................ ignitionNIB....... ........New, In BoxPPd........ ..............postpaidRC......... . . . . need you ask?RE......... ........ rear exhaustRI.......... .......... rear intakeRTF. . . . . . . . Ready To FlyRx......... .............. receiverSE......... ........ side exhaustS&H.. . shipping & handlingTx.......... .......... transmitterw/ or w/o. . . . with or without
CALENDAR
S MIV
Tια ι υ
WII
T F S1 2 3 4 5 6 78 9 10 11 12 13 14
15 16 17 18 19 20 2122 23 24 25 26 27 2829 30 31
M arch 21, Lexington, NC: Triad A erom odelers’ Annual Swap Meet, 8:00a.m. til 1:00p.m. at the Davidson County Fairgrounds off Hwy BS 85 (behind W affle House). Refreshments, raffle and door prizes. Admission: $5, wives and children free. Tables: $12 (interior), and $15 (wall). V isit www.triadaerom odelers.com or contact Tom Brittain at (336)764-2616
M arch 28, Huffm an (NE H ouston),TX: Jetero R/C C lub’s 13th Anniversary Celebration Fly-in, on club-owned 50 acre site w /100x600' grass runway (4 miles E. o f Huffman, 1 mile N. o f FM 1960 on FM 686). Planning to have one CL circle open, all R/C models welcome, AMA required (available on site thru CD Horrance Cain). No landing
fee, free lunch. Accepting donations to the “B rother-IKE” re-build fund. Contact Horrace Cain after 03/01 for awards and p o s s ib le Sw ap S h o p a re a at cainhd@ aol.com or (281)399-5627
M arch 29, H erm itage, PA: Skylarks o f Sharon’s A nnual Swap Shop and Flea M arket at the Hickory VFW (5550 E. State St.). Admission: $4 se tu p starts at 8:00a.m., only 55 full tables available ($10 per table, includes one admission). Concessions and 50/50 raffle. Send preregistration (highly recommended) w/full paym ent to: Skylarks o f Sharon, 350 Butterfly Ln, Hermitage, PA 16148. V isit www.skylarksofsharon.com or contact Phil Spillman (724)983-1677 (evenings and weekends) or... pspillm an@ roadrunner.com
COMMERCIALCLASSIFIEDS
Join the NATIONAL ASSOCIATION OF SCALE AEROM ODELERS! W e encourage Scale Contests and Scale Fly Ins, and work to promote and advance all phases of scale aeromodeling. W hatever your interest, NASA has something for you. Benefits: NASA M embership Card, Patch, Decal, Scale Resource Guide, Bi-m onthly Newsletter, and NASA W ebsite. Send nam e, address, phone, AM A#, and $20 US, $30 Canada, or $35 Foreign, to Secretary/Treasurer Bonnie Rediske, 128 D am ley Dr., Moon T o w n s h i p , P A 1 5 1 0 8 . www.nasascale.org (12/09)
AIRCRAFT ENTHUSIASTS: W orlds largest collection o f Aircraft “Photo- Studies” (8,200 subjects) and 3-view line drawings (39,000). Catalog on CD 2009/10, w/10 Scale articles, $5.00 ($8) Foreign. B ob’s A ircraft Documentation, 3114 Y ukon Ave., Costa Mesa, CA 92626 (714)979-8058 or... www.bobsairdoc.com (12/09)
FOR BEST DEALS ON PREM IUM K ITS, visit www. stew artaircraft.com and click on model airplane kits. These are first rate models by a m ajor m anufacturer, m any o f them featured in this magazine. Free UPS (03/09)
$$$ for eng., buying and selling! All quantities considered, estates are my speciality. I charge 15%, you get 85%. Send $1.00 to get my list. Bob Boumstein, P.O. Box 390805, Omaha, NE 68139, (402)334-0122 (nights and weekends) (04/09)
NON-COMMERCIALCLASSIFIEDS
FOR SALENIB G reat Planes Giles 202 ARF, 73" span, $250. NIB Hangar 9 Cap 232 M att Chapman white version, 73" span, $225. A ll + UPS. 1/4-scale Patty W agstaff Extra (flown twice), pick-up only, $200. Harold M atthews, 614 Seashore Rd., Cape May, NJ 08204, (609) 884-7815 or crab614@ com cast.net
Two Senior pattern legal models. Jim K im bro’s Deception, scratch-built from kit plans, Great Planes balsa fuselage, foam wing and stab, painted and covered w/M onokote, fixed gear tail dragger, $200. Panzer D-20 by M odel Products (looks a lot like the Intruder), fiberglass and foam, in arc condition, fixed gear tail dragger, $100. Salient Designs Boxer 60 scratch-built from plans, retracts, YS .60 RE, Futaba 1024 PCM , 9-ch radio, painted and covered w/M onokote, needs a timed pipe and it’s ready to fly, $600. M odels haven’t been flown and are pick-up only. Perry Rose, 51 Plainfield Rd., M oosup, CT 06354 (860)564-5533 or proseOz@ snet.net
NIB Zenoah G-38, $250. G-28 radial mount & spring starter, $50. NIB Coverite 21st Century iron #2700, $20. NIB Hobbico sealing iron, $10. New Hostetler plans for the PT-19 at 26% (114" span), $25. New 1911 Sommer M onoplane plans, 88' span, $25. Used Ziroli Stuka plans, 100" span, $15. A11 + UPS. M ilton Peacock, 2313 D aL ib Rd., Finksburg, MD 21048, (410)833-3122
M arch 2009 117
Bring your items to sell or trade. Planes, motors,
radios, accessories - anything hobby-related !
Pineview Baptist Church5614 Highway 53 Harvest, AL 35749 (North of Huntsville, AL)
Directions:From 1-iS take I-56S E - go 14 miTake the AL-255 N (Rideout Rd N) exit 14 - g0 sTurn left at AL- HWY 53 - go about 4.0 mi
GPSLatitude 34° 50' 2 Γ Ν Longitude 86° 4 2 '24"W
2009 Madison County R/C Swap Meet
Date; March 21,2009 Time: 8:30am-1:30pm Vendor Setup: 7:30am
Door prizes, Raffle and Concessions!!
Indoor Facility; All Vendors Welcome!! Admission $5.00, ages 7 and under FREE!!
Tables $7.00 at door, $5.00 in advance.
Raffle Tickets: $1 ea, 6 for $5 ,13 for $10 or 30 for $20
- ^ ^ J im j t e d so call or email to
Event Director:714-3176
eduffey @ knology.net
reserve.
mmWANTED
Piston and liner assemblies for Fox .40 ABC Q500 Special engs. W ill buy damaged whole engines w/good piston and/or liner assemblies. David Keats, 2014 Atlas Dr., Troy, MI 48083, (313) 938-0282 or davekeats39@ yahoo.com
Carl Goldberg Falcon 56 kit (1st version) for .09 to .19 eng. Old m odel magazines in good condition to fill my collection. If you have some old 1950- 1980 issues you would like to sell, I can send you m y “w ant” list. New, unused N oble slide switches for older radios. Don Patterson, 3 508 Tothill Dr., Troy, M I 48084, (248)642-2917 or... rareb ear4 @ com cast.net
NIB Great Planes Stuka. Harold M atthews, 614 Seashore Rd., Cap May, NJ 08204, (609)884-7815 or... crabö 14 @ comcast.net
http://narca.
m i
Ä ä f « * ® ■
Bncfc,'raPhii'ICS
o t t WWYVV. V « V S M . . ." c v s v v m m u v v u v s
m w v m , \ a

A D V E R T I S E R S I N D E X |Allred & Assoc................................................ 79B&P Associates..............................81,113,118Balsa USA....................................................... 21Bill Jensen’s Model Engine Service................ 87Bill Northrop’s Plans Service.......................... 73Boca Bearing Co..............................................85Bruce Tharpe Eng............................................ 24C-Tronics......................................................... 81Calvin’s Classic Plans......................................51Central Penn Aeromodelers’ Flea Market.. .115Cirrus Ventures................................................23Concept Models............................................... 79Custom Cut Graphics & Lettering........110, 117Diversified Solutions....................................... 49Duratrax........................................................... 84Dynamic Models/See Temp............................ 25E-flite Models.............................................2, 102Fly Zone Models.............................................. 19Fox Mfg. Co.....................................................84Frank Tiano Enterprises...................................27Futaba Radios.................................................120Hog Heaven Hobbies....................................... 56IMAA...............................................................24J&R Hobby Hardware........................................7John’s Plans & Kits......................................... 27King R/C.................................................. 56, 115Kyzer Concepts.............................................. 100
Landing Products................................Madison County R/C Swap Meet. . . .
........85
. . . . 117Maxx Products.................................... . . 10, 11Micro Fasteners.................................. ........78Nick Ziroli Plans................................ ........25Penn Valley Hobby Center................. ........47Precision Aero.................................... ........51Precision Cut Kits............................... .........23PSP Manufacturing............................. .........89Radio South........................................ .........57R/C Report Stickers............................ ...........4R/C Report Back Issues...................... .........30RTL Fasteners.................................... ........51Saito Engines...................................... . . . . 101Sig Mfg............................................... ........77SonicTronics....................................... ........61Southeastern Model Show.................. ........18Spektrum Radios................................ . . . . 119Sullivan Products................................ . . 83,91Tejera Microsystems Eng................... ........75Top Flite Models................................ ........20Vanguard Plans...................................... .........49Vintage R/C Plans.............................. .........50Windsor Propeller Co......................... ........80Winged Shadow Systems................... . . . . 113World Model Exports......................... ........74ZAP Adhesives................................... . 29, 111
i.Dp-rc.com
b l i ( 2 5 4 ) 6 6 2 - 5 5 8 ?
P.O. BOX 22054, WACO TX 76702
With over 30 years experience in designing, manufacturing, and assembling Nickle Cadmium
cells and batteries, B&P Associates offers the finest products for all your battery needs. We have the finest
starter batteries, w ith chargers, from 2-7 Amps, that money can buy. One charge will last the whole weekend for starting your
models. When you need NiCd cells or batteries, call B&P Associates.

ACHIEVING A HIGHER EDUCATIONHELPING THOSE WHO HELP OTHERS LEARN TO FLY
At David Scott’s 1st U.S. RC Flight School, hundreds of aspiring RC pilots learn the fundamentals of model flight, from basic takeoff and landing, to advanced aerobatic maneuvers and precise control. In order for David's school to be a success, he needs planes that are in good shape, and more importantly, he and his students need radios that are simple, reliable and can stand up to hours and hours of use.
Spektrum radio systems were the obvious choice, thanks to their 2.4GHz DSM2 -technology. And with simple and easy software programing, the students at v ,1st U.S. RC Flight School can focus on what's important— learning to fly. ' ’
" Í í p e .w t í -'\ I _
Å >
\ J i
The control feel and precision with Spektrum is excellent. Coupled with the piece
o f m ind o f knowing that I ’m protected from interference, Spektrum technology has
increased m y effectiveness as both an instructor and a flyer. Honestly, I never realized
how much time I spent watching out for control interruptions while flying until a ll m y concerns about radio interference were removed upon switching to Spektrum
technology. Bottom line: Flying and teaching have n ever been more fun!
- David Scott, 1st U.S. RC Flight School, www.rcflightschool.com
Whether you're just starting out like the students at 1st U.S. RC Flight School, or you're a seasoned pro like David Scott, Spektrum systems eliminate radio worries so you can enjoy flying.
WWW.5PEKTRUMRC.COM
— ■
SPEKTRUm.Leaders in Spread Spectrum Technology
© 2008 DSM and DSM2 are trademarks or registered trademarks of Horizon Hobby, Inc. Spektrum is used with permission of Bachmann Industries, Inc. Spektrum radios and accessories are exclusively available from Horizon Hobby, Inc. 12447
12447_SPM_HigherEducation_1pgAd_B.indd 1 12/3/07 11:01:59 AM
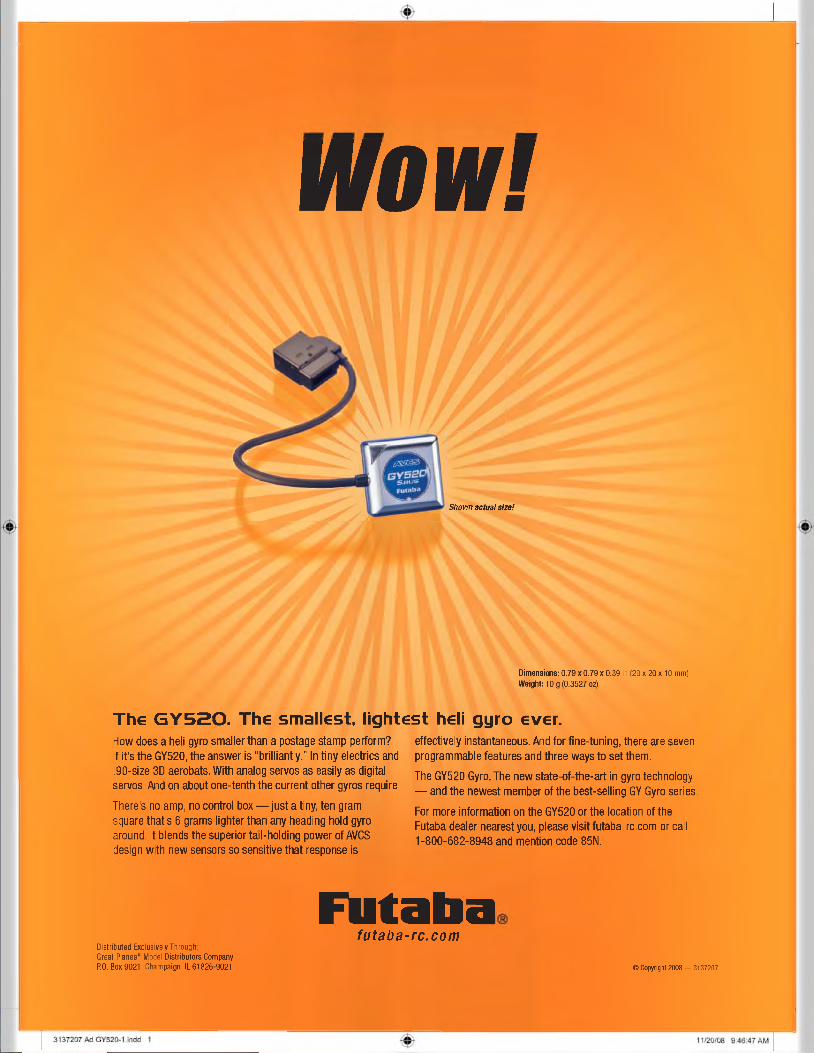
mm
Shown actual size!
Dimensions: 0.79x0.79x0.39 in (20 x 20 x 10 mm) Weight: 10 g (0.3527 oz)
The G Y 520. The smallest, lightest heli gyro ever.How does a heli gyro smaller than a postage stamp perform?If it’s the GY520, the answer is “ brilliantly." In tiny electrics and .90-size 3D aerobats. With analog servos as easily as digital servos. And on about one-tenth the current other gyros require.
There’s no amp, no control box— just a tiny, ten gram square that's 6 grams lighter than any heading hold gyro around. It blends the superior tail-holding power of AVCS design with new sensors so sensitive that response is
effectively instantaneous. And for fine-tuning, there are seven programmable features and three ways to set them.
The GY520 Gyro. The new state-of-the-art in gyro technology — and the newest member of the best-selling GY Gyro series.
For more information on the GY520 or the location of the Futaba dealer nearest you, please visitfutaba-rc.com or call 1-800-682-8948 and mention code 85N.
Futabafu ta b a - rc .c o m
Distributed Exclusively Through;Great Planes1 Model Distributors Company P.0. Box 9021. Champaign. IL 61826-9021 © C o p y rig h t 2008 — 3137207


![output RC N16 [146pag]](https://img.dokumen.tips/doc/110x75/631ddc5c85e2495e150fa703/output-rc-n16-146pag.jpg)


