Embed Size (px)
Citation preview
1

Genie .......................................................16
Is the Internet Turning You Into Haters? ....................................19
What is Cyberbullying? ........................21
Cyberbullying. Let’s Fight It Together! .........................24
Find a Story—Reporters ......................26
Revenge and Stalking ...........................31
Happy, Sad .............................................33
The Movie “Wonder” .............................35
Cyberbullying. What Can Be Done? ..............................37
What Kind of Class Do We Want to Be? .....................................40
Let’s Become Activists! Have Your Say! ......................................43
Interview With a Hero .........................46
Superhero on the Internet...................49
Students Against Bullying Poster ......52
Animalia ..................................................56
Opposite Banks .....................................59
Clash of Freedoms ................................61
Activities focusing on hate speech, cyberhate, trolling, online responsibility ..............69
Ring of Responsibility ...........................70
Piano .......................................................78
Who I See and Who I Don’t See When I Post ....................................82
Social Network Combat ........................84
Teach Your Grandmother How to Use Facebook.............................86
Influencers .............................................89
How Can You Choose the Right Influencer? ...........................91
Suggested activities: Influencers .............................................93
Designing a Campaign for Internet Use Without Addiction ........95
Contents
Digital Detox .........................................97
Becoming an Influencer? .....................100
Media Balance .......................................103
My Online and Offline Self ..............................................108
Password Cracking ...............................110
Discussion About Passwords ..................................116
Safe Password Poster ...........................118
Sending Fake Emails From a “Trustworthy” Address......................120
Identifying Phishing and Spam Emails ...........................................124
Article on Digital Security— Reading Comprehension .....................128
Set Up Your Smartphone .....................130
Sharing Holiday Information on Social Networks ...............................133
Social Network Profile Setup ..........................................135
Identifying True and Fake News.......................................137
Model Conference (on the Most Modern Social Networks) ..........139
Model Conference (on the Most Modern Applications) .................141
The School Wi‑Fi Network ...................143
What Does Encrypted Communication Look Like? ..................145
Simulated Phishing Attack ..................150
Examining the Use of Social Networks at School ..............................152
Incognito Mode .....................................155
Self‑portrait ...........................................157
The Selfie Abyss .....................................159
Me, My Other Self and My Selfie ........161
Instant Internet Celebrity ...................163
CSI Selfie .................................................165
Can You Identify a Lie? .........................167
Who Created Me? ..................................169

CHAPTER IN THE DIGITAL SECURITY HANDBOOK FOR TEACHERS
ACTIVITY IN THE DIGITAL SECURITY HANDBOOK—ACTIVITIES
PAGE OF THE ACTIVITY
MOBILE DEVICE SECURITY Set Up Your Smartphone
Model Conference (on the Most Modern Social Networks)
130
139
Selfies Animalia
My Online and Offline Self
Self-portrait
The Selfie Abyss
Me, My Other Self and My Selfie
CSI Selfie
39
108
157
159
161
165
CYBERBULLYING Genie
Is the Internet Turning You Into Haters?
What is Cyberbullying?
Cyberbullying. Let’s Fight It Together!
Find a Story—Reporters
Revenge and Stalking
Happy, Sad
16
19
21
24
26
31
33
The Movie “Wonder”
Cyberbullying. What Can Be Done?
What Kind of Class Do We Want to Be?
Let’s Become Activists! Have Your Say!
Interview With a Hero
Superhero on the Internet
Students Against Bullying Poster
Animalia
Opposite Banks
Clash of Freedoms
Ring of Responsibility
35
37
40
43
46
49
52
39
59
61
70
Trolling and cyberhate Genie
Is the Internet Turning You Into Haters? Self-portrait
What is Cyberbullying?
Cyberbullying. Let’s Fight It Together!
Find a Story—Reporters
Happy, Sad
Cyberbullying. What Can Be Done?
Let’s Become Activists! Have Your Say!
Interview With a Hero
Superhero on the Internet
Students Against Bullying Poster
Animalia
Opposite Banks
Clash of Freedoms
Ring of Responsibility
16
19
21
24
26
33
37
43
46
49
52
39
59
61
70
SOCIAL NETWORKS Animalia
Piano
Who I See and Who I Don’t See When I Post
Social Network Combat
Teach Your Grandmother How to Use Facebook
Influencers
How Can You Choose the Right Influencer?
Suggested activities: Influencers
Digital Detox
My Online and Offline Self
Sharing Holiday Information on Social Networks
Social Network Profile Setup
Model Conference (on the Most Modern Social Networks)
Self-portrait
39
78
82
84
86
89
91
93
97
108
133
84
139
157
Social networks and digital security
Examining the Use of Social Networks at School
Who Created Me?
152
169
Influencers Animalia
Who Created Me?
Influencers
How Can You Choose the Right Influencer?
Becoming an Influencer?
Instant Internet Celebrity
39
169
89
91
100
163
Real vs. Online world Piano
Suggested activities: Influencers
Designing a Campaign for Internet Use Without Addiction
Digital Detox
Media Balance
My Online and Offline Self
78
93
95
97
103
108
DISINFORMATION, HOAXES AND FAKE NEWS
Media Balance
Identifying True and Fake News
Can You Identify a Lie?
103
137
167
DIGITAL IDENTITY AND PRIVACY Animalia
Who I See and Who I Don’t See When I Post
Social Network Combat
Teach Your Grandmother How to Use Facebook
Self-portrait
The Selfie Abyss
Me, My Other Self and My Selfie
Instant Internet Celebrity
CSI Selfie
Who Created Me?
39
82
84
86
157
159
161
163
165
169
Online, not everyone is who they seem to be
Animalia 39
BROWSER SECURITY Ring of Responsibility
Social Network Combat
Teach Your Grandmother How to Use Facebook
Simulated Phishing Attack
What Does Encrypted Communication Look Like?
Incognito Mode
70
84
86
150
145
155
MALWARE AND OTHER MALICIOUS ACTIVITIES
Sending Fake Emails From a “Trustworthy” Address
Identifying Phishing and Spam Emails
Incognito Mode
120
124
155
SECURITY SOLUTION (ANTIVIRUS)
Sending Fake Emails From a “Trustworthy” Address
120
Internet connection security The School Wi-Fi Network
Article on Digital Security—Reading Comprehension
143
128
PASSWORDS Password Cracking
Discussion About Passwords
Safe Password Poster
The School Wi-Fi Network
What Does Encrypted Communication Look Like?
110
116
118
143
145
12
WHAT IS THE DIGITAL SECURITY HANDBOOK: ACTIVITIES AND WHAT DOES IT CONTAIN? The Digital Security Handbook: Activities (henceforth the “Activities handbook”) contains a series of activities designed by ESET experts, computer science teachers and child psychologists, which present the topics of digital security and safe internet use by children in an engaging and practical form.
The Activities handbook forms an addendum to the Digital Security Handbook, which the user should read before applying these practical exercises and then using both handbooks together. The most recent versions of both handbooks can be found at saferkidsonline.eset.com
Audience
The Activities handbook is intended for primary school teachers (of students aged 6 through 15) who wish to present the topic of digital security in an interesting and engaging manner. The activities have been prepared so that teachers and students can do them without the teachers having to be IT or psychology experts.
The handbook contains activities which can be used as part of different science and humanities classes. Some activities relate to technological security, such as ‘Identifying Phishing and Spam Emails’ or ‘Password Cracking’. These are well-suited for computer science and natural science classes. Other activities focus on responsible and safe behaviour for children on the internet with regard to their own safety and the safety of their loved ones, peers and community, such as ‘Genie’, ‘Interview With a Hero’ or ‘Cyberbullying. Let’s Fight It Together!’ These are well-suited for subjects such as ethics and civics, lessons with the class teacher, field trips and other opportunities for self-development.
These activities can be used by teachers to cover a wide range of media literacy and media education topics.
Both the Digital Security Handbook and the Digital Security Handbook: Activities can also be used by other school professionals, such as school psychologists, special pedagogues, and others, or as a source of inspiration for all.
What does each activity contain?
EACH ACTIVITY IN THIS DOCUMENT CONTAINS A HEADER COMPRISING SEVERAL PIECES OF INFORMATION:
○ The optimal age of the students for whom the activity is intended
○ Activity duration
○ Topics covered by the activity and its connection to the topics included in the Digital Security Handbook
○ Activity objectives
○ Activity difficulty, given on the following scale: low, medium or high. This difficulty rating takes into account the time necessary for the teacher to prepare and how difficult it is to do in class. The difficulty in class, however, can differ depending on the available equipment, student age and other factors specified in the header.
13
○ Tips, i.e. what is recommended for optimally implementing the activity
○ List of aids required for the activity
○ How to prepare before the class
○ Description of individual steps
The text may include the symbol of a triangle with an exclamation mark. This symbol identifies risks associated with the given activity, which the teacher should take into account.
The symbol of a brain identifies parts which are more demanding and may require the most time and the most advanced skills from both teacher and students.
Methodical guide, or what to pay attention to when doing the activities
When starting individual activities, the teacher should set clear rules and explain why it is important to follow them—so that all students can feel safe and take away as much as possible. It is necessary to have a functional and correct debate so that the students can express their opinions and demonstrate their knowledge and experience in an atmosphere of mutual respect. The teacher creates a safe environment by moderating the lesson and ensuring all rules are followed:
○ When someone is speaking, everyone else is quiet and listens;
○ When presenting real-life examples, neither the teacher nor the students use specific names
○ when someone wants to discuss sensitive information, they can do so after the class in a one-on-one session with the teacher or the school psychologist;
○ Nobody should laugh at the opinions and emotions of others;
○ It is all right when someone says something that is not 100% correct. The students are learning, therefore the teacher should encourage them to make a joint effort to find the correct solutions.
○ Students are not obligated to join the debate/activity if they don’t feel comfortable talking about the topic at hand.
We recommend listing the rules on the blackboard as bullet points so they remain visible and the teacher can refer to them at any time.
The teacher should involve all students. Films and videos should only serve as an aid to introduce the topic and initiate discussion, while the main parts should remain experience learning and reflection. The teacher moderates the lesson to ensure experience and emotions merge with knowledge.
14
The teacher should promptly react to the needs of the students and the class. He/she should be prepared to listen to the student, change the plan, use an alternative activity and quickly react to the situation. The described activity plan only serves as a guide; it does not limit what can be done.
The teacher creates links between knowledge and real-world experience. Students remember new information better if they can associate it with what they or someone else has experienced.
The classes should be free from confrontation at all times. When dealing with difficult topics, education is usually more efficient when both the teacher and the students remain in the safe role of learners and avoid dealing with mutual relationships or current or past conflicts. This could lead to pressure which the teacher may not have the room or skills to resolve. When relationships or possible conflicts need to be dealt with, this should be done during a different class or in collaboration with the school psychologist.
When examples are required to clarify the topic at hand, the teacher should use examples from outside the class. This minimises the feeling of confrontation, guilt, and shame. In this way, the children can examine the phenomenon from a safe and neutral position.
The teacher should support peer learning. The older students can prepare activities for the younger ones. The efficiency of peer learning has been repeatedly confirmed.
After each activity or a part of it, the teacher together with the students should reflect on what they have learned, in order to ensure experience and emotions merge with the new knowledge. If the activity only consists of an experience, it will usually only remain an interesting part of the classes, but it will not allow the students to carry the experience over into their everyday lives. The teacher should thus always summarise the lessons learned so the students can better internalise them. To do so, he/she can (usually at the end of the lesson) stimulate the students’ minds using questions such as:
○ How was it for you to take part in this activity?
○ What information was new to you? What have you learnt?
○ Did you learn something about yourselves? Or about the relationships around you? What specifically?
○ If you could impart the knowledge from this lesson to your younger siblings, which part would you definitely not omit?
○ Which piece of knowledge is the most important—one that needs to be passed on?
○ What would you tell your parents or peers if they asked you what you have learnt in this lesson?
○ If, based on this activity, you were to create a motto or a credo for others, what would it be? What hashtag would you assign it?
○ In what real-world situations can you use the new knowledge? What will you do differently?
Recommended websites with useful resources and inspiration for activities for children related to internet opportunities and risks:
https://www.commonsense.org/education/ https://www.webwise.ie/teachers/resources/

16
GenieGenie focuses on the phenomenon of “lack of restraint on the internet”, also called the disinhibition effect (DE), and can be used to introduce the topic of (in)appropriate online behaviour. It is best used as the introduction to the topic of responsible online behaviour and should be followed by other activities focusing on cyberbullying, hate speech and trolling. The Genie activity can be used to introduce all of the mentioned topics.
lack of restraint on the internet cyberbullying hate speech trolling
Age: 11+
Duration: 45 minutes
Objective: Raise awareness of the risks of online communication, reinforce responsible online behaviour, prevention of cyberbullying and hate speech.
Difficulty: medium—requires increased flexibility from the teacher to combine creative work with theoretical knowledge and a thorough debriefing
Groups: 5–6 students
Aids: Flipchart papers, additional sheets of paper, felt-tip pens, video No Hate Speech Movement official campaign video
17
Procedure:
1. Introduction The teacher briefly describes the issue, e.g.: “On the internet, our communication is often different because we are not face-to-face with the other person. We are looking at a display where we only see their name or photograph. Not having a real person “of flesh and bone” in front of us and not seeing their reactions or facial expressions lifts our inhibitions. It is much easier to loosen up, and often you will say something you would never tell someone eye-to-eye. This loss of inhibitions has both its upsides and downsides.
2. Brief discussion with students (ca. 5 minutes) to help them start thinking about the topic: “Have you encountered this phenomenon, its benefits and risks (max. one or two examples per student)?
3. Example of a negative loss of inhibitions on the internet (ca. 5 minutes). The teacher will play a video: No Hate Speech Movement official Campaign video The teacher summarises: “This phenomenon is like a real Genie. When you let him out of the bottle, sometimes your behaviour turns inappropriate or cruel as if you were someone else.”
Before the activity: When preparing for the lesson, the teacher should find positive examples of the disinhibition effect—e.g. testimonies from children or adults on how digital communication helped them open up, seek help and support, loosen up in communication, overcome appearance-based inhibitions, etc. As an example, they can use a printscreen or a video. E.g.:
“It’s so much easier to get friends online than in real life. I wish social networking had been around when I was young and very shy instead of now when I am older and cured of my shyness. For a shy person, being online and meeting people is much less intimidating. Typing online allows you to really think before speaking and they can’t tell how nervous you are. They can’t really see you and you can act like someone you are not. Much easier to start a conversation online than in person, which for shy people causes lots of anxiety. I myself have started so many online friendships by seeing someone’s status and making a comment about it. Try doing that in real life, there is no equivalent.”
“I’m a lot wittier online than I am in real life. See? I just typed out a coherent string of words. Whereas if I were talking to you in person, it would probably go something like ‘Nice to pepper you, I’m Meet!’”
“Thanks to the internet I was able to experience love for the first time, because during puberty the relationship between me and my classmates changed significantly. They all just became walking hormone factories. For teenagers trying to find their place in society it was too difficult to accept the fact that some people living among them are a bit different. Often, I did not speak a single sentence with anyone at school during the day. I was looking forward to going home and chatting with the friends I found online. I know they were not my real friends, many of them didn’t even know I was in a wheelchair, and perhaps that’s why they didn’t have a problem communicating with me. I was glad to have them. I could talk to them about teenager issues which only a true teenager could understand.”
18
4. Example of a positive loss of inhibitions on the internet (ca. 5 minutes). The teacher continues: “A Genie is not always a bad thing.” The teacher asks the students to circulate clippings from articles on how the internet has helped their peers by loosening their inhibitions. The teacher summarises the topic and starts the experience learning portion.
“As you can see, this is a powerful phenomenon. It can do wonders for people or groups of people. Now work in groups, use your imagination, and draw the loss of inhibitions on the internet as a character/super-hero/super-villain—as a Genie that got out of the bottle.”
5. Work in groups of 5–6 students (for about 15 minutes): The teacher asks the students to draw a horizontal line some 5–10 cm above the bottom edge of the paper to separate a piece of paper where, at the end of the activity, they will write the final part of the assignment.
○ The Genie should be drawn as a figure, a living character, a comic book hero, an animated character or at least a schematic or something abstract to give it some kind of shape. The paper should be A3 or A2 sized so that the resulting posters can be presented on a noticeboard.
○ Name the character and assign properties to him The teacher asks the students to write down the Genie’s characteristics and what he does: What powers does he have? What does he do to people? How does he affect them? (both in a positive and negative way) When is his power the strongest and the weakest? How would you “discipline” him to do more good than harm? What do you need to do that?
The results of the group work will be presented by group speakers to the class (10 minutes)
Reflection with the students supervised by the teacher (ca. 5 minutes):
○ What did the students come to realise during the activity? What information was new to them?
○ What behaviours does the loss of inhibitions on the internet (the Genie) cause in people? The teacher leads the students to find their own negative and positive examples from their own life. Which of the students’ common online activities can be affected by the loss of inhibitions on the internet?
○ Which dangerous negative occurrences is the Genie related to? (If necessary, the teacher helps the students summarise the topic to let them more clearly see the loss of inhibitions on the internet in connection with hate speech, flaming, trolling, cyberbullying and cyberstalking.) This can be used as a “forerunner” to further lessons on these risks.
○ What can help you to be less affected by the Genie?
○ Which credo/recommendation from this lesson would you like to communicate to your younger peers so they can face the Genie (more) successfully?
19
Is the Internet Turning You Into Haters?(Video + discussion)
Age: 11+
Duration: 25–50 minutes
Difficulty: low
Objective: Introduce the students to the phenomenon of loss of inhibitions on the internet, convey knowledge about how to be a responsible internet user and how to communicate correctly online.
Aids: Computer with internet connectivity, additional sheets of paper and writing implements, videos: No Hate Speech Movement (6:40 min.), Above The Noise: Is the Internet Making You Meaner? (6:20 min.)
lack of restraint on the internet, cyberbullying hate speech trolling
20
Procedure:
1. Without any introduction, the teacher shows short video(s) which allow the students to discover the issue through a strong initial experience. (10–15 minutes)
2. Then the discussion is moderated by the teacher using the questions below (10–15 minutes):
○ How did you like the videos? What were they about? Which one had the greatest impact on you and why?
○ What do the videos depict?
○ Have you personally encountered similar comments and communication?
○ What is the difference between criticism and hate speech? How should the attacker communicate his/her remarks in a correct manner instead of using hate speech? Can it be said in a different way? How would you rephrase some of the hate speech to make it sound normal?
○ Can you imagine someone saying such horrible things face-to-face? Why/why not? (provides room for debate and learning about the loss of inhibitions on the internet phenomenon)
○ Does abusive online communication affect the victim differently compared to offline communication?
3. (10–15 minutes) Coping with, reacting to, and preventing hate speech. The teacher discusses the topic with the students using the questions below:
○ If and when you have encountered hate speech in your life, how did you cope with it?
○ What is the best course of action?
4. The teacher invites the students to work in pairs and prepare a comprehensible message for their peers (10 minutes): What would you tell your younger peers/siblings, if you wanted them not to use hate speech?
5. At the end of the lesson, the pairs will share their messages with the others.
The teacher should write a few key words from the students’ answers on the blackboard where everyone can see them. They can then discuss with the students about which reactions and strategies appear to be most effective and underline or circle them.
Tip:
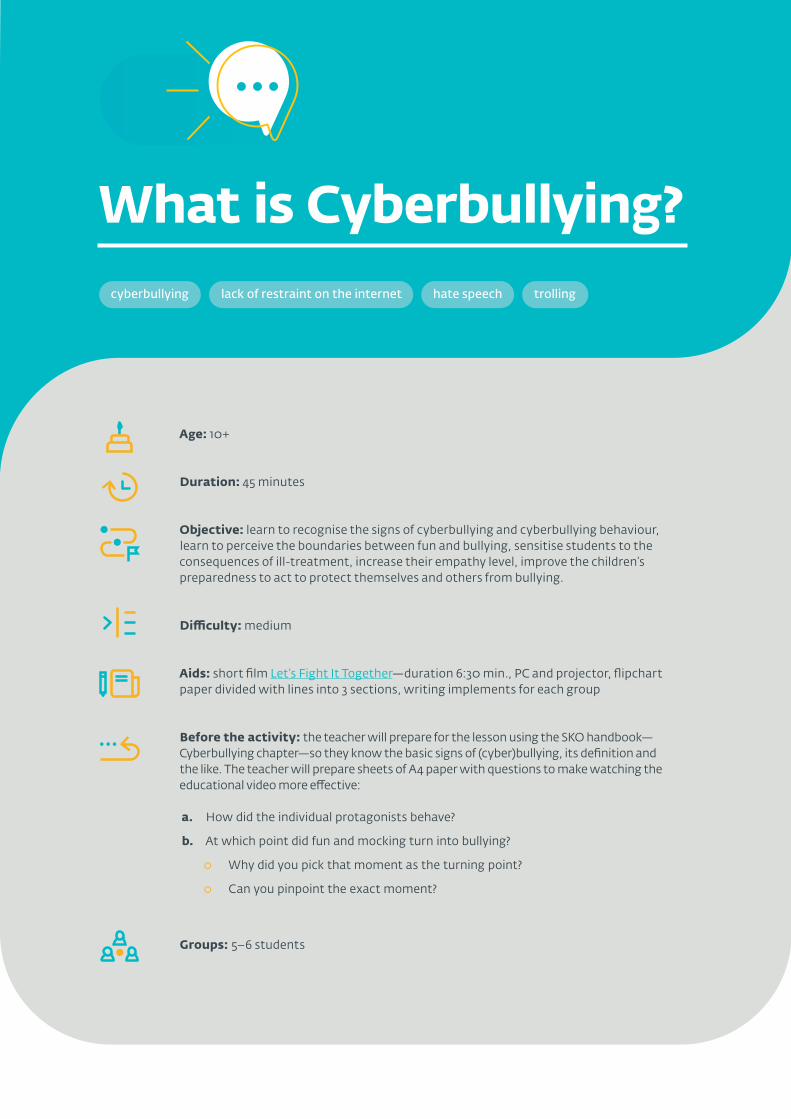
What is Cyberbullying?
Age: 10+
Duration: 45 minutes
Objective: learn to recognise the signs of cyberbullying and cyberbullying behaviour, learn to perceive the boundaries between fun and bullying, sensitise students to the consequences of ill-treatment, increase their empathy level, improve the children’s preparedness to act to protect themselves and others from bullying.
Difficulty: medium
Aids: short film Let’s Fight It Together—duration 6:30 min., PC and projector, flipchart paper divided with lines into 3 sections, writing implements for each group
Before the activity: the teacher will prepare for the lesson using the SKO handbook—Cyberbullying chapter—so they know the basic signs of (cyber)bullying, its definition and the like. The teacher will prepare sheets of A4 paper with questions to make watching the educational video more effective:
a. How did the individual protagonists behave?
b. At which point did fun and mocking turn into bullying?
○ Why did you pick that moment as the turning point?
○ Can you pinpoint the exact moment?
Groups: 5–6 students
cyberbullying lack of restraint on the internet hate speech trolling
22
About the film
The sooner we notice and stop cyberbullying, the fewer its consequences for victims and group relationships. The film shows kids what cyberbullying looks like, what forms it can take and how it can escalate so much that the victim starts thinking about suicide. The film culminates in an unknown aggressor threatening to kill the main character, Joe. He is trying to resolve the situation by himself: he ignores the first signs, deletes messages and attempts to communicate with the aggressor and find out who he/she is. He is trying not to think about it and focus on school, but it is getting increasingly difficult. He doesn’t talk about the cyberbullying with adults, he wants to manage the situation by himself. We can also see how electronic forms of bullying are interconnected with relationships among students, face-to-face—classmates can also turn into aggressors, despite remaining anonymous. The consequences of the cyberbullying propagate from the online world into reality. Joe is ridiculed in the school bus, nobody wants to sit next to him. There is no escape from the cyberbullying, he cannot think about anything else, he stops believing in himself and others and he feels helpless and desperate. He records a message for his vlog hoping the others will realise how much they are hurting him. At the end of the story, we find out how the situation can be resolved. Joe’s mother, together with Joe, brings all the evidence to the school headmaster, who acts immediately and calls the police.
Procedure:
1. (1 minute) The teacher introduces the topic as follows: “Today we are going to talk about peer relationships and how far “fun” can go thanks to digital technologies.” For now, the teacher does not introduce the term cyberbullying, because the students need to think about what is fun and when does it cross a line and start affecting the safety of others and children’s rights.
2. (3 minutes) The teacher lists the rules of the activity in consideration of other people’s emotions. We recommend listing the rules on the blackboard as bullet points so they remain visible and the teacher can refer to them at any time.
3. (7 minutes) The teacher shows the film Let’s Fight It Together without any theoretical introduction, only telling the students they are going to watch a film about what can happen between kids. The teacher asks the students to pay special attention to:
a. How did the individual protagonists behave?
b. At which point did fun and mocking turn into bullying? Why did you pick that moment as the turning point? Can you pinpoint the exact moment?
○ the kids can make brief notes about their observations
4. (3 minutes) Interaction with students after watching the video (students remain at their desks). Questions for all: How do you feel? How did the video make you feel?
The students can share the notes they made while watching the video:
○ At which point did fun and mocking turn into bullying? Can you pinpoint the exact moment? Why did you pick that moment as the turning point?
○ How did the student being bullied feel?
5. (10–15 minutes) Split the students into smaller groups of about 5. Give each group a large flipchart paper and felt-tip pens. Their task will be to divide the paper into 3 sections and write down together:
○ in the first section—students write down their observations about the cyberbullying seen in the film.
○ in the second section—how is bullying different from everyday fun and mocking? Students should list the main traits of peer behaviour which turn it into bullying.
○ For now, the third section remains blank—the students will later use it to write down the “definition of cyberbullying.”
6. (10 minutes) The teacher lets the group speakers present everything they have noticed and the selected main traits they have identified (section one and two on the paper)
○ The teacher writes the main traits on the blackboard/flipchart so everyone can see them
○ The teacher then, together with the students, selects the most important traits, e.g. circles or underlines them to differentiate them from the rest.
7. (5–10 minutes) Group work part 2: The teacher invites the students to write down their own definition of bullying and cyberbullying in section 3 on the flipchart paper: “Using the traits on the blackboard, create your own ‘students’ definition,’ i.e. a simple and comprehensible but sufficiently apt description, which you could use to explain to a younger sibling or student what bullying and cyberbullying means and how it is different from everyday pranks between kids.” Presentation of the “students’ definitions.”
Alternative: Ask the students to write their definitions on a piece of paper and exchange them between the groups. This will be followed by a discussion on which of the “students’ definitions” seems the most apt and why.
Cyberbullying. Let’s Fight It Together!(source: Childnet International, https://www.digizen.org/)
Age: 10+
Duration: 75–90 minutes
Objective: learn to recognise the signs of cyberbullying and cyberbullying behaviour, learn to perceive the boundaries between fun and bullying, sensitise students to the consequences of ill-treatment, increase their empathy level, improve the children’s preparedness to act to protect themselves and others from bullying.
Difficulty: medium
Aids: film on Let’s Fight It Together—duration 6:30 min., 5 video-interviews with the individual film characters, duration 0:15 min.–2:30 min. PC and projector, flipchart paper, writing implements, felt-tip pens for each group
Before the activity: The teacher will study the Cyberbullying chapter from the first part of the Digital Security Handbook for Teachers to learn the definition and basic traits of (cyber)bullying.
cyberbullying lack of restraint on the internet hate speech trolling
25
Procedure:
1. (3 minutes) The teacher introduces the rules of the experience learning activities and writes them down on the blackboard.
2. (7 minutes) If the students have already watched the film Let’s Fight It Together during the previous lesson, they will be reminded of it at the start of the lesson. If they did not yet watch it, they will do so now. It is 6 minutes and 30 seconds long. The teacher makes sure that before watching the video-interviews, the students have their paper ready for taking notes.
3. (10 minutes) The teacher tells the students to notice the personality traits and behaviour of the characters from the video-interviews and note important observations about them. Then, the teacher and the students watch all the video-interviews with the individual film characters in the order listed at Childnet. Experience learning—group work
4. (10 minutes) Having watched the interviews, the teacher divides the students into 5 groups. The groups will draw questions related to the individual characters from the story. Each group will only answer questions pertaining to one assigned/drawn character. The students in the group will discuss the feelings and actions of that character and answer the questions. The teacher should allow sufficient time for the students to write down the answers and create a “character profile” BEFORE the bullying incident, DURING and AFTER it.
5. (2–3 minutes) Give each group 2 to 3 minutes to empathise with their character, because each group will then have to answer questions from their classmates.
6. (20 minutes) Students in each group will then face questions from the other groups. They can either use the questions from the sheets or prepare their own. The teacher lets the students answer and, if necessary, adds any important information.
7. (10 minutes) Discussion How would it feel to be in the shoes of the individual characters? How did the students feel when answering their classmates’ questions? What was easy and what was difficult? What would their respective characters from the video-interviews need the most to “stay cool” and avoid bullying? What would you recommend they do?
8. Final teacher-led reflection (10 minutes) in which the students should form a link between the activity and their lives and derive a comprehensible message and skill for themselves.
○ What did the students come to realise during the activity? What information was new to them?
○ How does the behaviour of the film characters relate to the lack of restraint on the internet (if at all)?
○ Which credo/recommendation from this lesson needs to be communicated to the younger students so they can successfully avoid/face bullying?
26
Find a Story—Reporters cyberbullying lack of restraint on the internet hate speech trolling
Age: 10+
Duration and form:
○ 10–15 minutes—Homework project assignment (assigned during a lesson in the classroom)
○ 30–45 minutes—Homework project in collaboration with parents and close ones
○ 45–90 minutes—Group work in the classroom (later, after the students have prepared their homework assignments)
Difficulty: medium
Objective:
○ Breaking the taboos around discussing the topics of hurting others and bullying.
○ Gaining social support from close ones and treating psychological wounds when someone in the classroom got hurt.
○ Creating a link between students and their close ones when it comes to bullying, dealing with bullying and increasing empathy levels.
○ Helping children prepare to act when they or others are getting hurt.
○ Peer learning and taking responsibility for creating a good atmosphere within the classroom and the school: students take part in preparing learning materials and become the co-creators of education and preventing (cyber)bullying at school.
27
Working with the stories and experiences of others has an anticipated therapeutic effect (not only) for those who are or have been engaged in bullying. In this case, the stories provide a non-confrontational presentation of what they are going through as well as hope that the bullying will stop when they start dealing with it. The stories can also give victims the courage to confide their worries in someone close.
○ Finding out that bullying also affects those who don’t normally talk about it (e.g. someone from the family) has a therapeutic effect on someone who has encountered bullying, but perhaps never told anyone about it. It can give them courage to confide, seek help, and realise that they are not alone. Practical experience has shown that after this activity, children who had experienced bullying sought psychological help (consulting) or asked their parents for help.
○ For students who never encountered bullying in any form, this activity is primarily a tool of prevention and creating social backing for the future.
Basic requirements for the activity: watch the film on cyberbullying, Let’s Fight It Together; the teacher and the students should sufficiently understand the terms bullying and cyberbullying and know the basics of how to deal with it (based on the mentioned film).
The teacher should use this activity as a follow up to at least one of the activities on how to identify bullying and cyberbullying, i.e. when the children know what cyberbullying is, what they should notice, and what their “reporter work” will involve.
Aids: paper and writing implements, scissors, drawing paper, glue
Before the activity: main steps specified in the “Basic requirements to do the activity” + the teacher prepares a homework assignment by printing the wording of the task (specified in Procedure Section 1 below) for a homework project assignment on sheets of A4 paper so the students can use it at home.
Procedure:
1. Homework project assignment. (15 minutes) During the lesson, the teacher gives the students a homework project assignment which they should do together with their close ones. The family or other close persons are involved on purpose. The point of the assignment is to talk about the topic at home to create a kind of bond between the children and the parents when it comes to bullying so that the children have someone to turn to if they encounter problems in the future. The teacher explains the assignment in detail and hands out the sheets of paper with the printed task. Sheet contents:
28
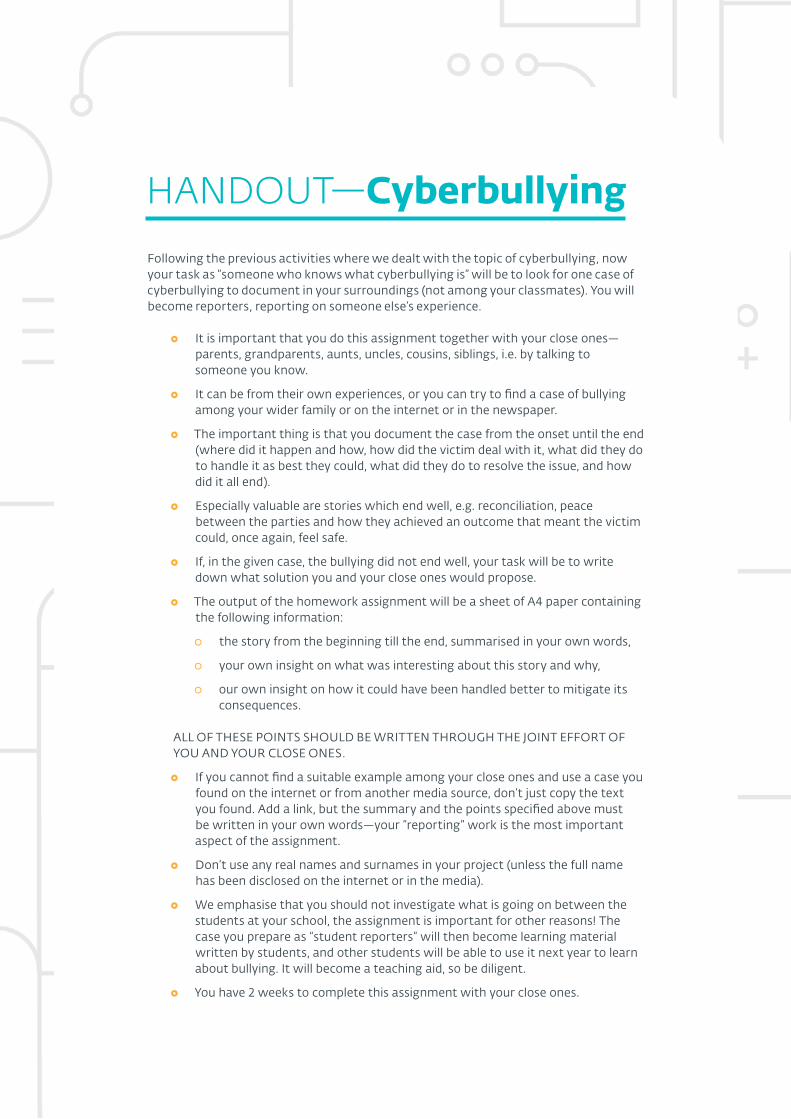
HANDOUT—Cyberbullying
Following the previous activities where we dealt with the topic of cyberbullying, now your task as “someone who knows what cyberbullying is” will be to look for one case of cyberbullying to document in your surroundings (not among your classmates). You will become reporters, reporting on someone else’s experience.
○ It is important that you do this assignment together with your close ones—parents, grandparents, aunts, uncles, cousins, siblings, i.e. by talking to someone you know.
○ It can be from their own experiences, or you can try to find a case of bullying among your wider family or on the internet or in the newspaper.
○ The important thing is that you document the case from the onset until the end (where did it happen and how, how did the victim deal with it, what did they do to handle it as best they could, what did they do to resolve the issue, and how did it all end).
○ Especially valuable are stories which end well, e.g. reconciliation, peace between the parties and how they achieved an outcome that meant the victim could, once again, feel safe.
○ If, in the given case, the bullying did not end well, your task will be to write down what solution you and your close ones would propose.
○ The output of the homework assignment will be a sheet of A4 paper containing the following information:
○ the story from the beginning till the end, summarised in your own words,
○ your own insight on what was interesting about this story and why,
○ our own insight on how it could have been handled better to mitigate its consequences.
ALL OF THESE POINTS SHOULD BE WRITTEN THROUGH THE JOINT EFFORT OF YOU AND YOUR CLOSE ONES.
○ If you cannot find a suitable example among your close ones and use a case you found on the internet or from another media source, don’t just copy the text you found. Add a link, but the summary and the points specified above must be written in your own words—your “reporting” work is the most important aspect of the assignment.
○ Don’t use any real names and surnames in your project (unless the full name has been disclosed on the internet or in the media).
○ We emphasise that you should not investigate what is going on between the students at your school, the assignment is important for other reasons! The case you prepare as “student reporters” will then become learning material written by students, and other students will be able to use it next year to learn about bullying. It will become a teaching aid, so be diligent.
○ You have 2 weeks to complete this assignment with your close ones.

29
Tip:
9. Reporters. A homework project assignment that requires cooperation with members of the family or the student’s close ones (optimum time for preparation at home: 2 weeks)
10. Group work in the classroom (50 minutes). The teacher divides the students into 5 groups—the classroom work requires completed homework assignments.
The teacher randomly distributes the completed homework assignments to the groups. The assignments may, but don’t have to, originate from the group members.
(25 minutes) The teacher lets the children read and evaluate the stories prepared by their classmates according to how well they captured the process and how well they can be used in the learning process. The teacher should emphasise that the students should appreciate if the case has been thoroughly researched and shows that peer relationships have been restored. There are bound to be stories where those involved realise their mistakes, forgive one another and help and support the weak. The students must review all assignments received by their group. The groups should also select the two best assignments, which will become learning material for preventing bullying for the following years.
(15 minutes; ca. 3 - 5 minutes to present the evaluation by each group) The teacher moderates the presentation of evaluations using the following questions:
○ What kind of stories did you read? How were they different and what was similar?
○ What was the most important aspect of the best assignments you selected?
○ Why do you think these particular assignments should become learning materials?
○ What can the selected assignments offer your younger peers when they use them?
○ What can they learn from them?
○ The teacher leaves the selected assignments for some time on the noticeboard focusing on student relationships and bullying, if there is one in the classroom/school. If such a noticeboard is not available, consider establishing one.
○ The teacher should congratulate the authors of the best assignments and consider giving them a good mark or bonus points.
30
The teacher can also praise the assignments verbally and thank the students for their participation in creating learning materials which will become part of the process of education and prevention.
1. (10 minutes) Reflection
The teacher leads a reflection with the students using the following questions:
○ How was it working as a reporter outside the school with your close ones trying to research and prepare these stories about bullying?
○ In your role as a reporter, did you learn something new or interesting?
○ How was it to talk about this topic with your close ones?
○ What valuable information did you learn when reading and evaluating the assignments of your classmates?
○ Did this assignment change your perception of bullying in some way?
○ How was this assignment useful to you?
Alternatives and tips: The teacher can link the output (finished stories) in electronic or paper form with a broader campaign against bullying at school. We recommend that, after obtaining approval from school management and the students themselves, the teachers prepare a broader campaign against bullying and cyberbullying which will also contain these assignments. Whether such campaign will be implemented depends on the possibilities of the given school.
The teacher—and ideally the prevention coordinator—can also post the activity, its output and the students’ thoughts on the classroom Facebook page or a different electronic platform containing useful materials, ideally those found or created by the students. The teacher may also consider creating a single-purpose platform devoted to preventing bullying that will raise awareness and the responsibility of the students for a healthy organisational culture.
31
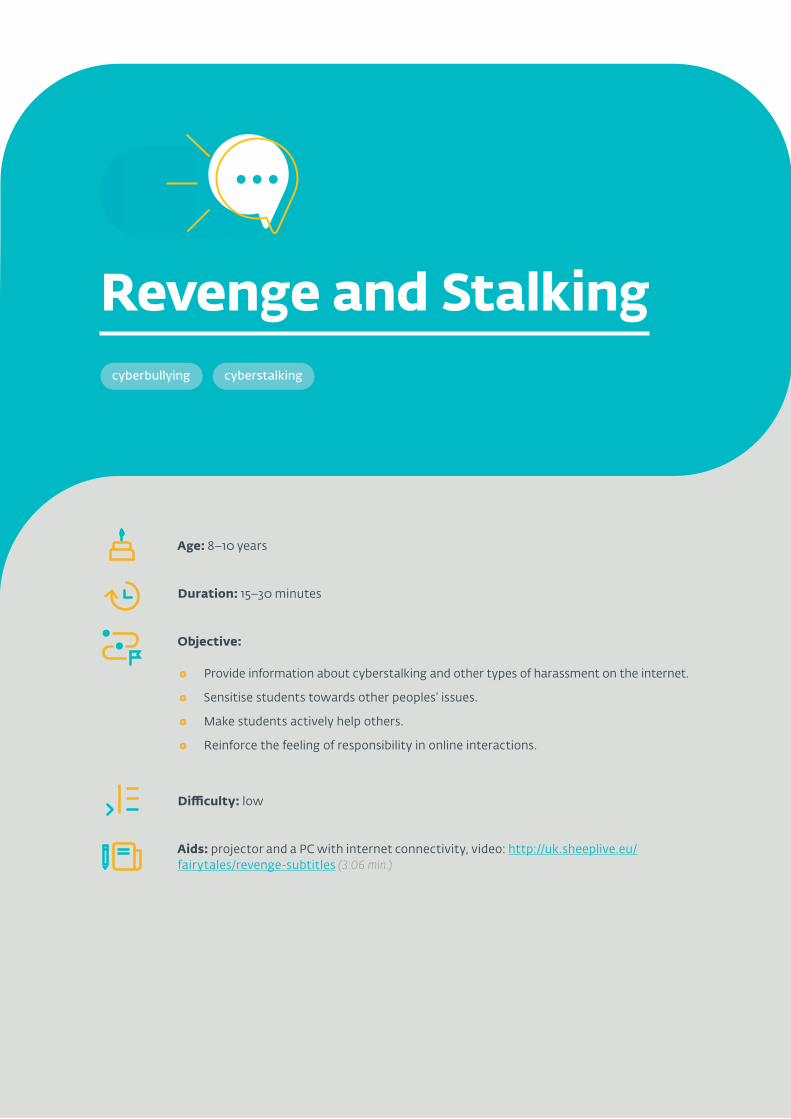
Revenge and Stalking
Age: 8–10 years
Duration: 15–30 minutes
Objective:
○ Provide information about cyberstalking and other types of harassment on the internet.
○ Sensitise students towards other peoples’ issues.
○ Make students actively help others.
○ Reinforce the feeling of responsibility in online interactions.
Difficulty: low
Aids: projector and a PC with internet connectivity, video: http://uk.sheeplive.eu/fairytales/revenge-subtitles (3:06 min.)
cyberbullying cyberstalking
32
Procedure:
1. The students watch the video.
2. The debate is led by the teacher using questions such as:
○ What was the video about?
○ What threat were the sheep or Jano exposed to? What was the problem?
○ How did it all end? What helped resolve the issue?
○ Did you or your close ones encounter similar behaviour? If so, how did you manage to resolve the problem and what lesson did you (or someone else) learn?
○ What did the sheep and Jano learn? Based on that knowledge, what would you recommend that your younger and less experienced classmates, friends or siblings do?
○ From what we have learnt, what specifically will you implement and how exactly?
33
Happy, Sad (inspired by eSlovensko: Cyberbullying)
lack of restraint on the internet cyberbullying hate speech trolling
Age: 8+
Duration: 30–45 minutes
Related: to the following Handbook chapters: Cyberbullying, Hate Speech, Trolling
Objectives:
○ Develop empathy and sensitivity towards your own experiences and those of others.
○ Reinforce the feeling of responsibility in online interactions.
Difficulty: Low
Aids: post-its, flipchart paper/sheet of A2 paper for each group, felt-tip pens, writing implements, glue
34
Procedure:
1. Individual work The teacher hands out several post-its to each student. On the post-its, the students will write down as many situations, experiences or occurrences on the internet which could please, sadden or make their friends angry.
2. Group work The teacher divides the students into smaller groups (4–5 members), providing each group with a flipchart paper and felt-tip pens. The students draw a scale on the paper—a sad/unhappy face on the left and a happy/smiling face on the right (if they wish, they can depict the joy-sadness scale in a different way). Now the group’s task is to place the prepared post-its on the scale depending on which experience would make their friends the happiest or the saddest.
3. Joint discussion between the whole classroom
○ Which experiences on the internet can make people sad or angry?
○ Which experiences on the internet can make people happy?
○ Which experiences are on the left and right side of the scale (the worst and the best experience)?
○ Which of those do the students know from their own experience?
○ Which of them happened to their friends?
○ Were there more positive or negative experiences?
○ What experiences would you like your friends to have?
○ What can you do so that people have as many positive experiences on the internet as possible? Is that something random, or can we influence it?
○ How can they themselves contribute to having a positive experience?
○ Did you contribute to someone having a positive experience or did you prevent someone from having a negative experience on the internet? Can you do something differently in the future?
○ Can the adults or the school help the children have more positive and less negative experiences? If so, how?
The Movie “Wonder”https://www.imdb.com/title/tt2543472/
Age: 10+
Duration: the film is 113 minutes long
Difficulty: Low
Objective: Reinforce empathy and tolerance towards diversity, encourage children to help the weak
Suitable for teaching lessons: considering the length of the film, it needs to be viewed outside regular classes, e.g. in the evening during a field trip or as part of after-school care; additionally, it can be viewed when classes are over (e.g. at the end of the school year after marks have been finalised)
Basic requirements for the activity:
○ Obtain the film, which is not available online for free—it needs to be purchased, e.g. here: https://www.amazon.com/Wonder-Julia-Roberts/dp/B07894ZBDN
○ Ideally, the teacher includes this activity after one of the activities to recognise bullying and cyberbullying, e.g. “What is Cyberbullying,” possibly also “Cyberbullying. Let’s Fight It Together!”
Aids: The movie Wonder, PC and a projector
cyberbullying lack of restraint on the internet

36
The movie depicts the difficult life of a boy with a facial deformity and shows how the people around him react to someone obviously different. Due to him being different, the main hero suffers and is excluded and exposed to bullying. In the end, however, his peers are able to recognise his inner beauty and he finds new friends. The movie depicts the reactions of his classmates and other school children, of aggressors, gangs, and bystanders who all surrender to the pressure of “not being friends with the weirdo.” The movie also shows the bravery of some classmates who don’t succumb to the pressure of bullying, who show interest in the boy and are nice to him. These acts of kindness literally change the main character’s life and inspire his other peers to get to know the unusual boy better and become friends with him. The movie can inspire students and show them how their own kindness can change the lives of other individuals or even entire classrooms or schools.
37
Cyberbullying. What Can Be Done?(Jarmila Tomková)
Age: 10+
Duration: 90 minutes This activity can be done in two successive 45-minute lessons or in two separate lessons which are no more than one week apart.
Difficulty: low
Objective: increase empathy levels, encourage the children to help others, develop the ability to actively defend themselves and others when someone is hurting them
Aids: 2 flipchart sheets and a sheet of A4 paper for each group, larger post-its, felt-tip pens, name tags on which the teacher writes: victim, aggressor, witness, teacher, parent. Use 4–5 such labels as necessary.
cyberbullying hate speech lack of restraint on the internet

38
Procedure:
The students will split into 4–5 groups depending on the number of students in the classroom, however, 4 groups at a minimum. Each group is provided one sheet of A4 paper and felt-tip pens. The teacher explains what is brainstorming—gathering ideas, no matter what kind, without judging whether they are good or bad, and writing them all down. The idea of one group member can inspire another member.
1. Group brainstorming The teacher assigns the task: For an hour, imagine you are students in a class where someone was exposed to cyberbullying. The teacher can remind the students what cyberbullying is or show the video Let’s Fight It Together! The groups will draw one name tag representing one role in the cyberbullying process: the victim, the aggressor, the witness, the teacher or the parent. When there are not enough students, only use one of the “teacher” or “parent” name tags. Your task is to brainstorm in a group to determine how your character can help resolve the cyberbullying problem. At this point, the teacher explains what brainstorming is. The teacher instructs the students to think about the following questions (and writes them down on the blackboard):
○ How does this character feel?
○ What does he/she need to do for an effective solution to the cyberbullying problem? What specific steps should he/she take?
○ Who/what can help them?
For example, they should write down as many ideas for the cyberbullying victim as possible—how do they feel, how can they defend themselves, who to turn to, what could help (e.g. overcoming fear), what can help against the cyberbullying. The group “aggressor” should write down how they feel when they hurt someone, what they should do to undo what has been done, and who can help them to do so, what needs to be done with the cyberbully to prevent a similar situation from repeating. The other groups should do the same. The teacher should encourage the students to write down anything that crosses their minds.
A group brainstorming involving a sensitive topic, such as cyberbullying, can result in covert or openly aggressive dialogue. During the student brainstorming session, the teacher should walk around the classroom and listen to the group discussion to prevent displays of disrespect and aggression among the students.
2. Presentation of group results and discussion When individual groups present their results, the others may add their own suggestions and the presenting group may add any useful ones to their own ideas and write them down.
Following each presentation, discuss with the students in particular what each character needs to do and what can help them to do it. The objective is to think as if you were creating a detailed user manual. Together with all the students, review which solutions could work and could be implemented. Pay attention to unorthodox solutions—students may present a different approach that you might not have thought of.
39
THE PRESENTATIONS SHOULD BE IN THE FOLLOWING ORDER:
1. The victim
2. The aggressor
3. The teacher/parent
4. The witnesses
After presenting the results for the first character, attach the sheet of paper to the flipchart sheet with enough room for the other sheets (e.g. to one of the corners). Gradually, all groups will present their results.
After each presentation, their profiles and recommendations will be attached to the flipchart.
The last group to present their results are the “bullying witnesses.” When the activity is to be divided into two separate lessons, leave the presentations, discussion and other parts for the second lesson.
○ In this situation, what is the task of the others (bystanders, witnesses) in resolving the cyberbullying issue?
○ What can the students do when they see someone is getting hurt?
1. Discussion. Each presentation of a cyberbullying role is followed by a discussion. The teacher together with the students will attempt to identify the most important factors for resolving the issue:
○ restore the victim’s control of the situation and help them process the negative experience;
○ give the victim the feeling that they are not alone;
○ give the aggressor the possibility to fix the problem, don’t just punish them;
○ get others involved in resolving the issue;
○ what is the task of the authorities and of the children;
○ we can only stop/prevent cyberbullying together—each protagonist, from the children, to teachers and parents, all the way to the police—have their roles and responsibilities in the process and all their actions matter.
2. Call to action (reserve enough time for this part—it’s important): “Let’s agree on what we will do should we witness ill-treatment.”
Each student writes on a larger post-it what specifically they would do should they witness (cyber)bullying. Everyone attaches their post-its to the second flipchart paper. This symbolises an individual obligation and readiness to act.
40
What Kind of Class Do We Want to Be?(Iinspired by a tool by Sameer Hinduja and Justin W. Patchin: https://cyberbullying.
org/standing-up-to-cyberbullying-tips-for-teens.pdf)
Age: 10+
Duration: 45 minutes
Objective:
○ Develop the ability to actively defend yourself and others when someone is hurting you, prevention of violence.
○ Prepare clear instructions and steps on how to prevent bullying, which the students commit to follow.
Aids:
○ Sheets of A4 paper to make notes, 5–6 sheets of A3/flipchart paper for the resulting group work, writing implements, felt-tip pens, glue, scissors
○ 1 printed poster in full: https://cyberbullying.org/standing-up-to-cyberbullying-tips-for-teens.pdf
○ 5–6 copies (one for each group) of the printed poster, cut into individual tips. Cover the numbers of the individual tips so they are not visible.
○ 5–6 copies (one for each group) of the printed handout with questions for the reflection (see below)
cyberbullying
41
Basic requirements for the activity: The teacher should include this activity after at least one of the activities to recognise bullying and cyberbullying has been completed, i.e. when all students know what cyberbullying is. The basic requirement thus is completing at least one activity focusing on cyberbullying: “What is Cyberbullying,” or “Cyberbullying. Let’s Fight It Together!”
Procedure:
1. The teacher reminds the students what cyberbullying is and what it can cause. What does it cause in children and bystanders? If it’s been a long time since you did the previous cyberbullying-related activities, at the beginning of the lesson you can watch the video Let’s Fight It Together! Remind the students of the story, what they learned and what they have done so far.
2. The teacher asks the students: Do we want to be a class that is prepared to face these issues? Do we want to be one of the few classes that knows how to prevent bullying? This is not something that just happens. Like every good team, we need a “code” that gives us a rough idea how to do it. Let’s show everyone we know how to do it!
3. Work in groups
a. The teacher introduces group work:
i. The clippings with individual tips are in no particular order. Some are more important than others; it’s not clear which, though. For the strategy against cyberbullying to work, the correct order is perhaps the most important. Let’s talk in our groups about which tips should be included in the instructions. If necessary, you can exclude some of them, or you can come up with new ones. If necessary, write down new tips using a clean sheet of A4 paper, felt-tip pens and scissors.
ii. The teacher instructs the students to: discuss the order in which the tips should be organised so that the instructions are logical and effective to such an extent that they can prevent cyberbullying. Put the clippings on a sheet of A3 paper, but don’t apply glue yet. Raise your hand when your group has finished.
b. Now the teacher hands out the original poster and tells the kids to:
i. Discuss in the group whether and how your order of tips is different. There is no universal order for the tips, so if your order is different, that doesn’t necessarily mean it is wrong. Despite that, some tips should not be omitted and some things should be done in the correct order. Talk with the students about why the order is important. Students should try to justify their own newly-created tips (the teacher should encourage and praise this). The objective is not to copy the original poster, rather to have enough information to create your own.
42
c. The teacher hands out the paper with questions to the groups. Below each question is room for an answer:
i. Which tips do you consider to be the most important and why?
ii. Which tips are the easiest to implement and which are the hardest?
iii. What can you do yourself and what requires help from others—your peers or adults? Can you get the required help? How? Who do you talk to? Who are you going to involve?
iv. What surprised you about the order of the tips? Was it easy to put them in order? Did you have to change something?
v. If you made a new tip, why was it important for you?
vi. Who should see these instructions? Where would you want to place them?
d. The teacher asks the group spokesperson to present the group work, including the answers to the questions.

43
Let’s Become Activists! Have Your Say!
Age: 11+
Duration: 90 minutes
Objective: education aimed at cyberbullying prevention, mobilisation to prevent cyberbullying, mobilisation to help others and stop cyberbullying, increase civic engagement, support the identity of a proactive child wishing to make an impact and create a culture of good relationships
Difficulty: medium—it may be difficult to inspire and coordinate students to do creative work and provide a suitable (quiet) environment to record videos and edit them. Besides the creative work, the teacher must not forget to reflect on what the students have learned to ensure the experience and impressions merge with the new knowledge.
Aids: sheets of A4 paper for each group to write down ideas, video recording equipment (e.g. the teacher’s smartphone).
○ Broadway Kids Against Bullying “I Have A Voice” Music Video https://youtu.be/cRB4e_aEces
○ Inspirational video(s) from the campaign against cyberbullying and hate speech can be found below.
hate speechcyberbullying
44
Basic requirements for the activity: the teacher and the students sufficiently understand the terms bullying and cyberbullying and know the basics of how to deal with it (e.g. based on the film Let’s Fight It Together!); completion of at least one activity: “What is Cyberbullying,” or besides that also “Cyberbullying. Let’s Fight It Together!”
Before the activity: The teacher will prepare examples of celebrities presenting their own story and/or why we should strive for good relationships instead of hurting others, e.g.
○ Pete Alonso (American baseball player) + Gus Kenworthy (British-American freestyle skier, actor, and YouTuber) in the campaign Shred Hate—No Bully https://www.nobully.org/initiative/shred-hate/
○ Cedella Marley in the campaign No Bully: Get Up, Stand Up!, a reference to the lyrics and music of Bob Marley used for a school campaign: https://www.nobully.org/initiative/getup-standup/
○ The teacher selects the inspiration to match the students’ culture, age and interests as closely as possible.
Procedure:
1. At the beginning of the lesson, the teacher shows the video Broadway Kids Against Bullying “I Have A Voice”—to show the students how they can do beautiful and creative things to contribute to bullying prevention and help others.
2. The teacher continues the debate using the following questions:
○ How did the video make you feel?
○ How did the lyrics make you feel?
○ How does it feel to do something for the values of friendship (instead of hurting someone)?
3. The teacher plays inspirational videos (see the links above, or any other the teacher may find—see Before the activity).
4. Discussion/work in groups. The teacher instructs the students to work in groups and think about popular and lesser-known lyrics, music or works of art depicting wrongdoing or showing how to defend justice and build good relationships.
5. The teacher instructs the students to think in groups about whom and what they would like to choose as the artist, personality and motive of their anti-bullying campaign.
6. Write the text that you, as a group, would like to present in a short video (90 seconds)
45
There have been many “anti-bullying” campaigns, but not that many “anti-cyberbullying” ones. Therefore, ask the students to follow-up on an existing anti-bullying campaign by expanding it with their own “anti-cyberbullying” messages (e.g. “Use your wits and heart, use your smartphone for a good cause.”)
7. The teacher instructs the students to work in groups and create a short (max. 90 seconds) video for an anti-cyberbullying campaign featuring their own contents. The teacher directs the students to:
○ create a video screenplay in text form
○ try to act it out (without recording).
8. One group after another will record the video so that everyone in the group participates—each student can say a few words or sentences.
9. The group will introduce its message, artist, and leitmotif and record the video in the classroom using the teacher’s smartphone. The other students will watch (they must remain silent). Even though the students may have fun and the final product may only be average, the important thing is the thinking and the entire process behind it.
10. The teacher and the students will discuss whose thoughts and execution were the most interesting, and they will pick the 1 or 2 best videos, which will be re-recorded the next week with all materials prepared in advance—music, scene, poster of the personality. When recording the selected videos, the students of the given group, the entire class or anyone who volunteered to help can be present.
The final version should be recorded in a separate room where nobody will disturb them. Ideally, it could be a special recording room or studio. The students will remember the experience for a long time.
11. In the discussion, the teacher can ask:
○ How does it feel to make a video campaign for good relationships and against cyberbullying?
○ Why is it important to be an activist for good relationships and against cyberbullying?
○ How do you feel as activists?
○ Who would you show the video you created or the other created videos?
○ Is there potential to expand the activity to the entire school or can the video be submitted to support another existing campaign?
12. Reflection. The teacher helps the students reflect on their activity to ensure the experience and impressions can find a practical application. What new thing did you learn during the activity? How will this work impact your own relationships? Will you do something differently?
Depending on availability, the teacher or the school can divide this activity into two stages or plan a more complex anti-bullying campaign with the students, and this activity will become a part of that campaign.
Tip:
Tip:
46
Interview With a Hero
Age: 10+
Duration: 60 minutes
Objective: Develop the ability to actively defend yourself and others, mobilise help
Difficulty: low
Before the activity: It would be useful if the teacher prepared examples of heroes from history or culture, or examples of their own heroes and their deeds. They can also prepare photographs or certain works/symbols related to the life and work of the hero. The teacher should also prepare an example of “hidden” heroism—a good deed they did or experienced in their surroundings.
Tip: The authenticity of the teacher’s experience (if they present their own examples) can help relax the atmosphere and achieve better results and thinking among the students.
Aids: sheets of paper and writing implements to make notes
trollinglack of restraint on the internet cyberbullying hate speech
47
Procedure:
1. (15 minutes) Discussion “My hero” The teacher discusses with the students what kind of people they consider heroes.
e. Who are the students’ heroes? Whom do they admire? It can be someone from their family or acquaintances, or someone from history or culture (in the beginning, it does not matter whom they choose),
the only unacceptable heroes are those whose actions went against people and society, e.g. terrorists, fascist regime protagonists, etc. In these cases, the teacher must intervene by saying that those people did not contribute anything to humanity and are not good examples of heroes. In order to preserve the constructive spirit of the lesson, the teacher should not get involved in an extensive “anti-hero” debate. The teacher may return to some of the unsuitable examples later in a debate with the student or in cooperation with the school psychologist, or they can think about including an extra lesson on human rights.
f. Why are your heroes famous? What courageous things did they do?
2. (10 minutes) Discussion “Great vs. Small Deeds” The teacher and the student discuss the fact that we usually consider heroes to be people who did some incredible heroic deed. However, heroes can also do small things that only affect those around them, their close ones, strangers, passers-by or classmates, nature, animals, the online community or the online space as such. Someone can become a hero just because they don’t join the majority. When the group is doing something wrong, they dare to remain themselves or express an opposing opinion.
A hero can also be someone who does something every day that improves the lives of those around them. (The objective of this activity is to motivate students to be brave and overcome their fears, because even seemingly insignificant deeds can contribute to a big change.)
3. (5 minutes) Individual work The teacher makes sure all students have some paper to write notes on. The teacher instructs the students: Think about when you did something courageous or heroic. No matter if someone knows about it or whether it was just your own inner heroism.
4. (2 x 10 minutes) Work in pairs The teacher divides the students into pairs. One of the pair will be the hero, the other one a reporter doing a newspaper interview. The reporter makes notes of the hero’s answers so they can later talk about it. After a while, the roles are swapped.
HERE ARE SOME QUESTIONS THE REPORTERS MAY ASK:
○ What courageous or heroic deed did you do?
○ Why did you decide to do it, what were your motives?
○ How did you feel before and after the deed?

48
○ Who was your role model? Who inspired you to do it?
○ What heroic deed would you like to perform in the future? What would it help achieve?
○ Whom would you like to inspire with your actions and to perform what deeds?
5. (10 minutes) Sharing and reflection
○ The student-reporters tell the others what heroic deeds they learned about from their classmates.
○ At the end of the lesson, the teacher should discuss with the students which specific small heroic deeds they can do and who in their surroundings is an example of such deeds.
49
Superhero on the Internet
Age: 8+
Duration: 45 minutes
Objective: develop the ability to actively defend yourself and others, mobilise help
Difficulty: medium
Aids: paper and writing implements to make notes, sheets of paper, coloured pencils and drawing implements
For younger kids ages 8–11: videos from the Animalia series: https://rb.gy/csjpbm or https://rb.gy/csjpbm
For older kids ages 11+: https://rb.gy/csjpbm, one of the scenes where a hero (Superman, Avengers, Batman) protects the weak
Before the activity: The teacher prepares examples of heroes with an analysis of their heroism so they can motivate discussion among the kids. The teacher also may prepare some photographs, but mainly videos of their heroism (the hero in action).
The teacher needs to know at least the basic facts about the classic, action, TV series, or computer game-based heroes. They don’t need to know everything, as the kids will gladly describe the qualities and abilities of their own heroes. Without any knowledge at all, though, it would be difficult for the teacher to engage in discussion with the kids. They would appear unauthentic in what they are saying. The teacher selected for this lesson should thus have sufficient knowledge of the existing heroes, or will need to acquire some knowledge in advance.
trollinglack of restraint on the internet cyberbullying hate speech
50
Procedure:
1. Discussion about superheroes and their abilities The teacher and the students discuss superheroes from stories, movies and fairy-tales:
○ Who is a superhero?
○ It is usually a human or another character gifted with special powers and abilities who protects others from evil and threats. They usually wear a mask and a costume. They don’t need people to know who helped them. Still, they are always where they are needed the most.
○ Which superheroes do the students know?
○ Which superhero is their favourite and why? What powers and abilities does he/she possess?
○ If the students could choose, what super-abilities would they like to possess?
THE DISCUSSION WITH OLDER STUDENTS CAN ALSO COVER THE FOLLOWING TOPICS:
○ Why is it that superheroes are often unpopular and subject to criticism?
○ Heroism does not mean being perfect, rather having a good reason for the “borderline” behaviour used for a good cause and to protect important human values at risk. E.g. the Avengers are not perfect/faultless heroes, and some of their actions and behaviour are
“borderline.” Batman, for example, breaks the law and protects Gotham at the same time. In the Avengers, even positive heroes such as Captain America, Thor and Iron Man tease one-another, sometimes even appearing hostile.
2. The teacher will watch the prepared videos about cyberbullying with the students—Animalia (for the younger kids) and Elias (for the older ones) to move from heroism in general to the topic of cyberbullying and the need to protect (potential) victims from this kind of threat.
3. Working in groups
a. The teacher asks students to work in groups and think about how they could become heroes to their peers by protecting them from the suffering caused by cyberbullying. The students make notes on the paper shared by the entire group.
b. The teacher asks the kids to clarify the answers to the following questions:
○ Why did the hero rise up? To protect someone or something? What values do they protect? Where are these values most at risk and which places does the hero primarily protect? Which people are most at risk and who does the hero primarily protect?
Tip:
51
○ What exactly are their super-powers needed to protect people from cyberbullying?
○ What are the hero’s actions? How exactly does he/she protect people?
a. The teacher asks the students to think about what specifically they could do to protect their peers from cyberbullying. At this stage, the students can think about what they as a group or class could do, and what they as individuals can do.
b. If they feel like it (and there is enough time left in the lesson), they can draw their hero.
4. Group work will be presented and exhibited on the noticeboard
5. Reflection
a. What should the superheroes do to protect children on the internet?
b. Which of those could be done by students without any special super-powers?
c. Is someone who helps others overcome their fears a superhero?
d. Can we all be superheroes and protect our friends on the internet?
The teacher can focus this lesson on cyberbullying/hate speech and on a specific online environment, e.g. cyberbullying/hate speech on social networks or in online gamer communities. In this way the activity becomes more target-oriented.
When focusing on specific online environments, the kids should be divided into groups so that individual groups can work with different online environments. In this case, the assignment would look something like this: What kind of a hero could protect you and your peers
…from the suffering caused by cyberbullying on social networks? …from the suffering caused by cyberbullying in gamer communities?
The structure of this lesson can be modified, depending on the topic the teacher wants to deal with. The topic of heroism can be used to learn about cyberbullying, hate speech, trolling, cybercrime and online safety.
Tip 1:
Tip 2:
52
Students Against Bullying Poster
Age: 10+
Duration: 2 x 45 minutes. The activity consists of two parts:
1. The first part includes the preparation and presentation of the draft promotional material (A4/A3 drawing—45 minutes)
2. In the second part the students prepare the final product—using the drafts, they will use computers to prepare the final electronic version which will be stored in JPEG or PDF format and printed. If there’s no printer in the classroom, the teacher will help the students by printing the posters on another printer.
Objective:
○ Develop the ability to actively defend yourself and others when someone is hurting you.
○ Mobilisation of help and preparedness to act when a student witnesses ill-treatment.
○ Summarisation and affirmation of previous knowledge and standpoints towards cyberbullying, hate speech and trolling.
○ Reinforcement of the individual identity of students and the group identity of the class—as students proactively create good relationships with peers, a good classroom atmosphere and school culture.
○ The students will create and see a usable product of their work that they can be proud of and identify with (identification with pro-social values).
○ secondary objective—practise working with a graphics editor on a computer
cyberbullying hate speech trollinglack of restraint on the internet
53
Difficulty: medium (the most difficult part is the logistics of an activity divided into multiple phases and the necessity to organise several activities across multiple lessons)
Aids: paper and writing to make notes, 2 sheets of A4 paper for the leaflet, 2 sheets of A3 paper for the poster, coloured pencils and drawing utensils, computers with internet access for the students’ group work
Basic requirements for the activity: both the teacher and the students need to understand the terms bullying and cyberbullying and know the basics of how to deal with it; completion of several activities with a focus on cyberbullying, hate speech, trolling.
Tip: This activity can be used to close the lessons on cyberbullying, hate speech, and trolling. Please use this activity as the last one for the given topics.
Procedure:
1. Summarise and appreciate The teacher and the students will remind themselves of and summarise everything they have experienced and learned in the previous activities. When summarising, it has proven useful when the teacher compliments and recognises the students’ previous work and their new knowledge and gives verbal praise to the most active students (hint: the teacher recognises students just by remembering them and mentioning their name, no extra reward is necessary).
2. Group work The teacher divides the students into groups of roughly 5 students. Two groups will be tasked with designing a leaflet and two groups with designing a poster. The poster and the leaflet will both contain:
a. a name (as if it was part of a campaign) + the motto for your stance on bullying,
b. the students’ own definition of (cyber)bullying,
c. the steps which the students consider most important in preventing and/or dealing with (cyber)bullying.
d. If the students deem it appropriate, they can also include a brief call to action for their peers.
e. If the students deem it appropriate, they can also include a hotline number and the contact information for other call centres and organisations that help children.

54
The teacher instructs the students to: Pay special attention to the motto (a) and the steps to be used in preventing and dealing with bullying (c).
The teacher instructs the students to work in groups, i.e. to first discuss everything and agree on what exactly the leaflet/poster should include. The students should use the available sheets of paper for making notes to prepare a draft which they will then transfer to the drawing paper. The drawing paper will be used as the draft for the final promotional material.
The teacher should emphasise the importance of this work, because the final product will be used to present the students’ knowledge and standpoints regarding bullying to the younger students at their school, and possibly other schools too. This should boost student engagement. It was also confirmed that students prefer to work in an informal role as “experts in a field” and they like to participate in peer education.
3. The students will present their work to the other groups, explaining why they chose the elements they did for their presentation and why they consider them the most important.
4. Preparation of the electronic leaflet/poster version With the teacher’s guidance and using the prepared drafts, the students will use digital technologies (DT) to create the final electronic version of their products which will be stored in JPEG or PDF format and printed. If there’s no printer in the classroom, the teacher will help the students by printing the posters on another printer.
○ The students will work in groups of max. 5 members in classrooms with computers.
○ This can be done during their computer science class, as the children will learn to use DT to create the final product. The level of help provided by the teacher depends on the student’s age and skill level.
Tip:

55
Tip:
5. Each group will sign one of the print-outs on the back. The final products can then be presented to parents to show them what the children have been working on and what conclusions they have reached. The students can thus take pride in their design skills as well as their attitudes represented by their work. With this activity, it is important to spread the message outside the school as well. Families can continue discussing the topic at home.
In an ideal case, the products can be presented at school—on noticeboards, in a student journal, on the school website, in local media and in other schools and environments.
Alternative: A class/school-wide competition for the best poster and leaflet.
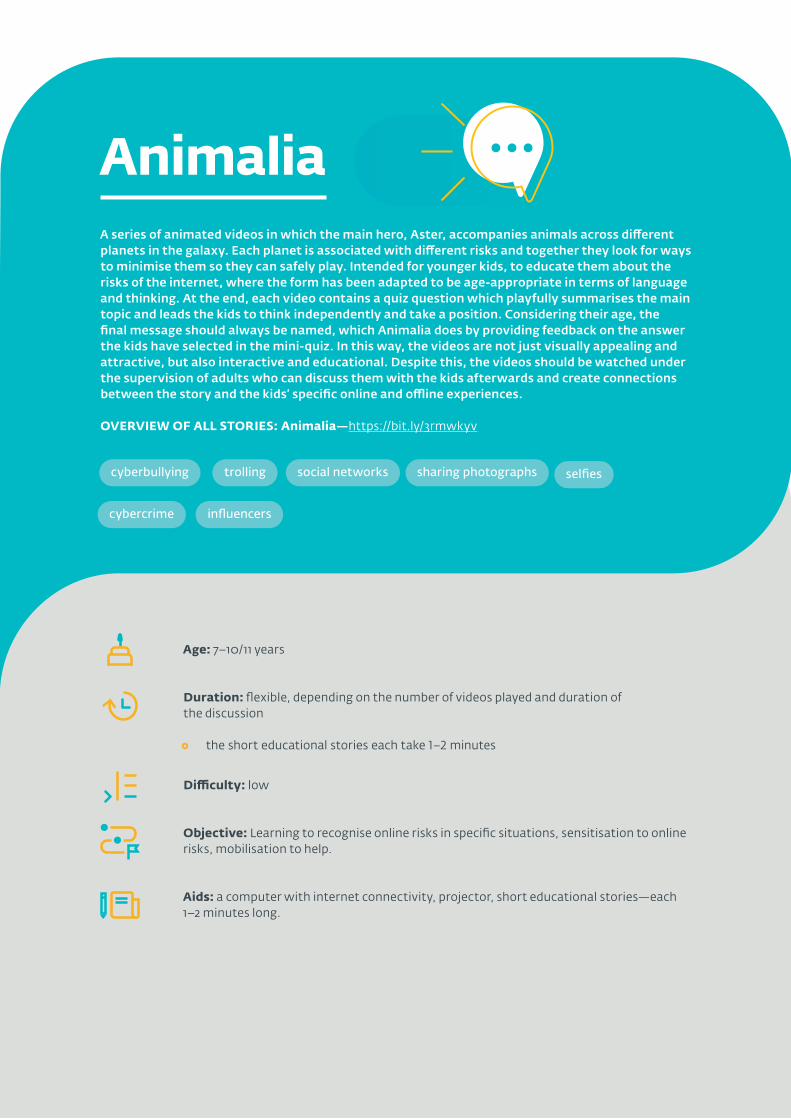
56
Animalia A series of animated videos in which the main hero, Aster, accompanies animals across different planets in the galaxy. Each planet is associated with different risks and together they look for ways to minimise them so they can safely play. Intended for younger kids, to educate them about the risks of the internet, where the form has been adapted to be age-appropriate in terms of language and thinking. At the end, each video contains a quiz question which playfully summarises the main topic and leads the kids to think independently and take a position. Considering their age, the final message should always be named, which Animalia does by providing feedback on the answer the kids have selected in the mini-quiz. In this way, the videos are not just visually appealing and attractive, but also interactive and educational. Despite this, the videos should be watched under the supervision of adults who can discuss them with the kids afterwards and create connections between the story and the kids’ specific online and offline experiences.
OVERVIEW OF ALL STORIES: Animalia—https://bit.ly/3rmwkyv
Age: 7–10/11 years
Duration: flexible, depending on the number of videos played and duration of the discussion
○ the short educational stories each take 1–2 minutes
Difficulty: low
Objective: Learning to recognise online risks in specific situations, sensitisation to online risks, mobilisation to help.
Aids: a computer with internet connectivity, projector, short educational stories—each 1–2 minutes long.
cyberbullying trolling social networks sharing photographs selfies
cybercrime influencers
57
Ideally, the procedure described below (introductory discussion, teacher shows the film, final discussion) should be used with each of the short stories separately so the students can properly focus on the message presented by the individual stories and relate them to their own lives and specific skills. This is much more effective than watching, say, three videos at a time and then discussing them at the end of the lesson. By watching several videos at a time, the impressions and messages of the videos would overlap and mix.
If you want to spend an entire lesson watching the Animalia videos and discussing them, choose 3 specific risks you want to present, prepare the corresponding videos and proceed as described above.
It is not recommended to just watch the videos without any introductory and final teacher-guided discussion. This would significantly reduce the educational potential of the videos.
Procedure:
1. Introductory discussion The teacher will open a brief introductory discussion with the students concerning the risk they are going to learn about, i.e. the one presented in the specific video.
The teacher should make the discussion on friendship general, no specific persons should be mentioned. The teacher should pay attention that students don’t start telling on each other, so the debate does not devolve into complaining about current relationship issues in the class.
2. Animalia mini-quiz The teacher shows the video and stops it when the kids are to pick an answer in the mini-quiz. The teacher asks the kids to write down the answer they think is correct and think about their choice of answer.
Tip:
58
3. Discussion The teacher should discuss with the kids before telling them which option is correct. Why did some of them answer YES? Why did others answer NO? If everyone chose the same answer, the teacher asks the students to think about why someone, perhaps from a different school, might choose the other answer.
4. Mini-quiz evaluation The teacher resumes the playback of the video and selects the answer most students voted for. He/she lets students react to what they have heard and checks how they understood the summary. The teacher then plays the other option in the interactive story and discusses it with the students.
5. Discussion and reflection Have the students experienced a situation similar to that of the animals in the story? Have they ever found themselves in the same role as Aster? If so, how did they handle the situation? How can this story help them in the future? Based on the story, will they be able to help someone? How?
59
Opposite Banks
Age: 8–10 years
Duration: 30 minutes
Difficulty: low
Objective: endorse tolerance and belonging in the classroom, prevent bullying, prejudice and intolerance
Aids: a short film from the series Ovce.sk: 3:06 min.: http://uk.sheeplive.eu/fairytales/opposite-bank-subtitles, computer with internet connectivity, projector
cyberhate cyberbullying discrimination and prejudice
60
Procedure:
1. Introductory discussion The teacher will open a brief introductory discussion with the students on the topic of friendship
○ Who is a real friend? Who are friends? What is the difference?
○ What are the students’ criteria when choosing friends? Do they have to dress similarly or be interested in the same things? Can they differ? If so, how? What is important for you to want to be friends with someone?
○ Is it only important what the other person can offer or are other things also important—e.g. what we can show/teach them?
The teacher should make the discussion on friendship general, and no specific persons should be mentioned. The teacher should pay attention that students don’t start telling on each other, so the debate does not devolve into complaining about current relationship issues in the class.
2. The teacher shows the video
3. Final discussion
○ How did the sheep first behave towards the animals of the forest?
○ How could it make the animals of the forest feel?
○ What finally showed the true colours of all the animals?
○ How did the friendship between all the animals evolve?
○ What did the sheep learn?
○ Did you notice any behaviour similar to that presented in the video in your surroundings?
○ According to you, what should the friendship between people/kids be like?
○ What can you do not to make some kids feel lonely and sad?
Tip:

61
Clash of Freedoms Source: No Hate Speech Movement, Clash of Freedoms activity, Bookmarks manual (pg. 60–65.)
This activity simulates two communities with different views on freedom of expression who have to live together on an island.
Age: 14+
Duration: 90 minutes
Objective:
○ Discover different aspects of cultural diversity and online and offline hate speech.
○ Review how freedom of expression aids the functioning of a democratic society.
○ Discuss the upsides and downsides of freedom of expression.
○ Test your negotiation skills
Difficulty: high—this activity demands excellent skills on the part of teachers and lecturers managing this simulation-based activity. The basic requirements are also more demanding, as the teacher needs to be versed in terms related to civil society, such as: culture, human work, freedom of expression, cultural diversity, employability, etc.
hate speech cyberhate freedom of expression on the internet
racism and discrimination democracy
62
Aids: paper and writing implements to make notes, drawing paper, coloured pencils and other drawing implements, space where the two communities can meet, handouts with information about the two islands (the number should match the number of students) where one-third of students need information about the community of Pastiks and two-thirds need information about the community of Ixprats. The teacher also prints both information sheets for their own use.
Before the activity:
○ The teacher will prepare handouts with information about both islands: Bookmarks pp. 63–64
○ The teacher will prepare handouts for the working groups: Bookmarks p. 65
The teacher needs to have at least average knowledge of the topics of human rights and freedoms, prejudice and discrimination. The necessary information can be found in the Bookmarks manual.
Optimum student requirements: knowledge of some basic civics terms and terminology of living in a society. Considering these requirements, the activity is suitable mainly for older students, e.g. 13–14-year-old students at primary or secondary schools.
Tip: The activity should (ideally) be supervised by 2 teachers, or the first part of the activity can be done with each group separately and the second part in a joint lesson.
Procedure:
1. The teacher explains that the activity will involve a simulation (also explaining what a simulation and role-play is) and briefly explains that the students will simulate the life of two communities—the Ixprats and the Pastiks—with different cultures: “At first, each community inhabited their own island, however, following a natural disaster, they are now forced to live on one island.” The teacher does not yet read the text describing the cultures of the communities, but has it handy.
1. The teacher divides the students into the two communities. The Ixprat community should be larger—about two-thirds of participants. The remaining third of the group will represent the Pastiks.
2. The teacher explains that the first part of the simulation will involve working in separate groups. After 20 minutes, the groups will be brought together.
63
2. Students work in 2 separate groups (15 minutes)
○ One of the groups should be shown to a different room. The teacher for each group should read out the information about the relevant community. The text can be found below (entitled ‘After some time, give participants the following information’).
○ The teacher then hands out copies to students to refer to.
○ In each group (in two separate rooms) the teacher begins the discussion by asking: What do you think about life on your island? Would you like to live there? After some reflection, the following questions should be put to the groups:
PASTIK COMMUNITY
○ What are your concerns about moving to the new island?
IXPRAT COMMUNITY
○ What are your concerns about receiving a large number of immigrants with no knowledge of your culture or traditions?
AFTER SOME TIME, GIVE PARTICIPANTS THE FOLLOWING INFORMATION:
A year has passed since the Pastiks moved to the Ixprat island, and a number of problems have arisen. Tensions between the communities have become increasingly acute and many people are worried about severe social unrest. The president has invited you to form a working group to try to find solutions to these problems. The problems will be introduced shortly.
You will work in teams containing representatives of both islands to find solutions to the problems. Be prepared for the other party to have different opinions. However, people from both islands want to prevent further escalation and they have made an effort to listen to the other party and find the best solutions for everyone.
3. (5–10 minutes) The teachers bring both groups together and ask the group spokesperson to introduce the inhabitants of their respective islands and briefly say what they deem suitable. Do not allow this to occupy more than 10 minutes.
4. Students work in 4–5 separate groups (15 minutes) The teacher divides the students into new smaller and mixed groups so that each group has roughly 2 Pastik and 4 Ixprat members. Give each group one of the problems (HANDOUTS) so each group solves a different problem. Depending on the number of students, if there are more groups, some can solve the same problem. The teacher tells the working groups they have 15 minutes to reach a decision about how to resolve the problem. The teacher explains that any proposal must be put to a vote and needs to be approved by a majority of participants in the working group. Remind them that if they cannot reach an agreement, the tensions on the island will continue! And nobody wants that. Ask the students to try to find solutions to the problems, discuss and make notes.
64
Tips:
Tip:For a more thorough focus on online content, all working groups can be asked to address the same problem (Problem 1, which is set in the online environment and based on the following situation: “An online campaign has been set up to ‘Find a Pastik tongue’ and it has taken the internet by storm”). When all groups work on resolving the same problem, the presentation of the results and the final reflection will be faster.
5. The teacher asks the groups to present their proposals. Reserve 2–3 minutes for questions and feedback from the other groups.
6. Reflection Take the students out of their roles and remind them that the objective of the following discussion is to transfer the knowledge from the role play into their lives and mutual relationships. They should not return to the role play anymore, rather present their own opinions and insights. The students should try not to return to previous debates. In the reflection, the teacher can use the following questions:
○ How did you feel during the activity? What did you like or not like?
○ How easy was it to play your role—and stay in it—when the islanders came together?
○ Was it fair that the Ixprat community effectively had a veto on any proposal, because they were the majority?
○ How can we make sure that the opinions and rights of minorities are fairly represented in real life?
○ Did the activity change any of your views? If so, which in particular, and why?
○ Do you think the activity was depicting problems in society today? Did you find any similarities?
○ How do you think we should deal with the problem of people saying things which are hurtful, intolerant and sometimes dangerous?
○ The descriptions of life on the two islands are relatively long, in order to get the participants into the spirit of their community. They should be read out not as information, rather as a story! The teacher can read the whole story in the provided form, but their presentation should be as engaging as possible.
○ The working group which is assigned Problem 1 (see below) could be asked to focus on the online aspect of the problem. At the very least, they should be directed to consider proposals that take advantage of digital technologies and the internet alongside any offline proposals.
65
○ Before starting work in groups (the simulation), make sure that all participants understand the nature of the task and the time limits. Allow the simulation to run with as little guidance from you as possible. Only interrupt if they seem to have misunderstood, or if tensions or conflict are interfering with the process. In that case, change their focus back to the problem at hand.
○ Participants would benefit from some information on freedom of expression. If there is time available, use some of the information in the Bookmarks manual.
○ If time is short, the descriptions could be shortened and in the final negotiations the working groups could all be given the first problem to discuss (the one set in the online environment).
○ If time allows, you may want to ask participants if there is any message they would like to communicate when they are brought together. These messages could then form the brief introductions which take place in the first 10 minutes of the meeting.
Ideas for action:
○ Participants could research the main immigrant groups in their country. They could find out some of the reasons why people have moved there and look at whether they feel their rights and opinions are respected by the rest of society. Ask them how they are portrayed in the media, both online and offline.
○ You could also invite some representatives from different communities to speak to the group. In organising such meeting, you should closely cooperate with the students (depending on their age, part of the invitation could also be delegated to the students).
○ If your country is not considered a country of immigration, you can check how people who have emigrated from your country are viewed in their destination countries.
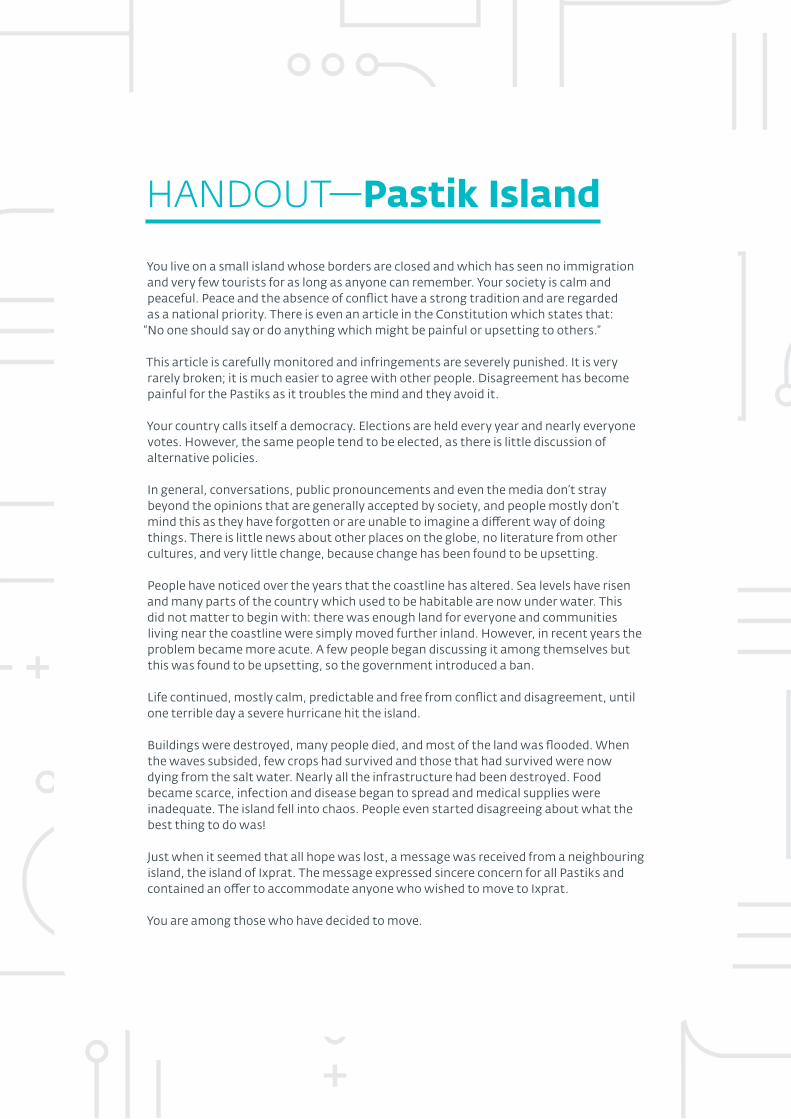
HANDOUT—Pastik Island
You live on a small island whose borders are closed and which has seen no immigration and very few tourists for as long as anyone can remember. Your society is calm and peaceful. Peace and the absence of conflict have a strong tradition and are regarded as a national priority. There is even an article in the Constitution which states that:
“No one should say or do anything which might be painful or upsetting to others.”
This article is carefully monitored and infringements are severely punished. It is very rarely broken; it is much easier to agree with other people. Disagreement has become painful for the Pastiks as it troubles the mind and they avoid it.
Your country calls itself a democracy. Elections are held every year and nearly everyone votes. However, the same people tend to be elected, as there is little discussion of alternative policies.
In general, conversations, public pronouncements and even the media don’t stray beyond the opinions that are generally accepted by society, and people mostly don’t mind this as they have forgotten or are unable to imagine a different way of doing things. There is little news about other places on the globe, no literature from other cultures, and very little change, because change has been found to be upsetting.
People have noticed over the years that the coastline has altered. Sea levels have risen and many parts of the country which used to be habitable are now under water. This did not matter to begin with: there was enough land for everyone and communities living near the coastline were simply moved further inland. However, in recent years the problem became more acute. A few people began discussing it among themselves but this was found to be upsetting, so the government introduced a ban.
Life continued, mostly calm, predictable and free from conflict and disagreement, until one terrible day a severe hurricane hit the island.
Buildings were destroyed, many people died, and most of the land was flooded. When the waves subsided, few crops had survived and those that had survived were now dying from the salt water. Nearly all the infrastructure had been destroyed. Food became scarce, infection and disease began to spread and medical supplies were inadequate. The island fell into chaos. People even started disagreeing about what the best thing to do was!
Just when it seemed that all hope was lost, a message was received from a neighbouring island, the island of Ixprat. The message expressed sincere concern for all Pastiks and contained an offer to accommodate anyone who wished to move to Ixprat.
You are among those who have decided to move.
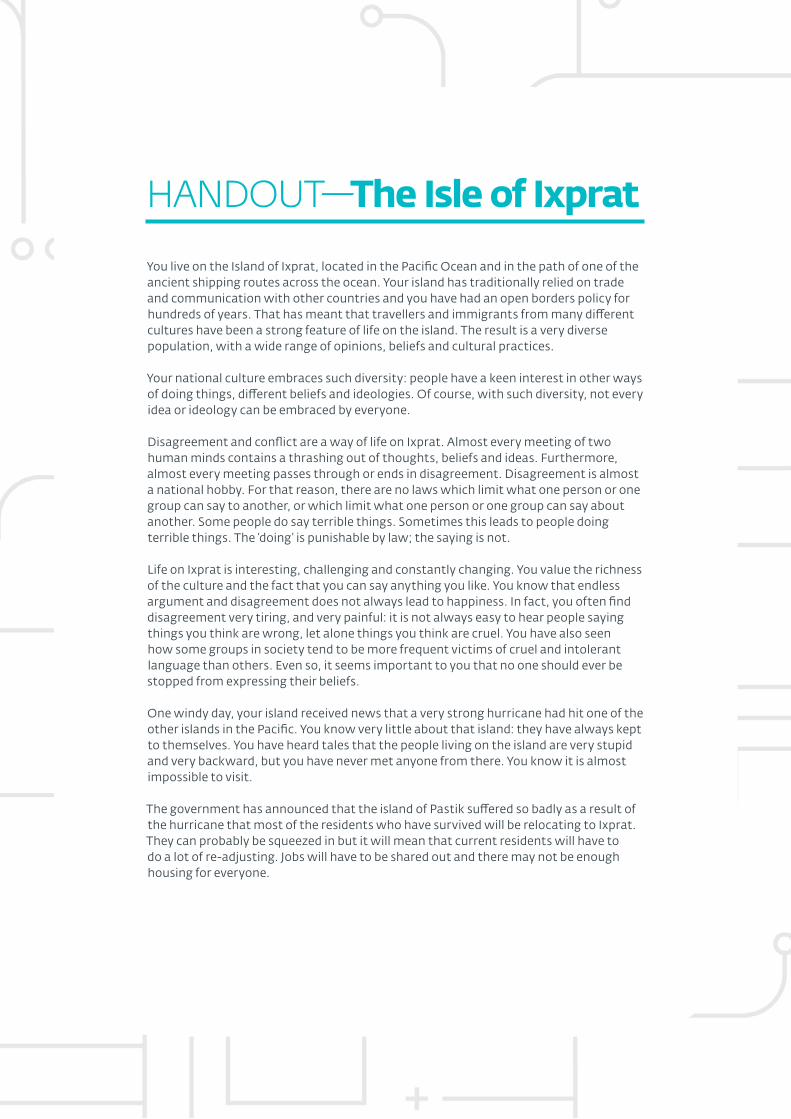
HANDOUT—The Isle of Ixprat
You live on the Island of Ixprat, located in the Pacific Ocean and in the path of one of the ancient shipping routes across the ocean. Your island has traditionally relied on trade and communication with other countries and you have had an open borders policy for hundreds of years. That has meant that travellers and immigrants from many different cultures have been a strong feature of life on the island. The result is a very diverse population, with a wide range of opinions, beliefs and cultural practices.
Your national culture embraces such diversity: people have a keen interest in other ways of doing things, different beliefs and ideologies. Of course, with such diversity, not every idea or ideology can be embraced by everyone.
Disagreement and conflict are a way of life on Ixprat. Almost every meeting of two human minds contains a thrashing out of thoughts, beliefs and ideas. Furthermore, almost every meeting passes through or ends in disagreement. Disagreement is almost a national hobby. For that reason, there are no laws which limit what one person or one group can say to another, or which limit what one person or one group can say about another. Some people do say terrible things. Sometimes this leads to people doing terrible things. The ‘doing’ is punishable by law; the saying is not.
Life on Ixprat is interesting, challenging and constantly changing. You value the richness of the culture and the fact that you can say anything you like. You know that endless argument and disagreement does not always lead to happiness. In fact, you often find disagreement very tiring, and very painful: it is not always easy to hear people saying things you think are wrong, let alone things you think are cruel. You have also seen how some groups in society tend to be more frequent victims of cruel and intolerant language than others. Even so, it seems important to you that no one should ever be stopped from expressing their beliefs.
One windy day, your island received news that a very strong hurricane had hit one of the other islands in the Pacific. You know very little about that island: they have always kept to themselves. You have heard tales that the people living on the island are very stupid and very backward, but you have never met anyone from there. You know it is almost impossible to visit.
The government has announced that the island of Pastik suffered so badly as a result of the hurricane that most of the residents who have survived will be relocating to Ixprat. They can probably be squeezed in but it will mean that current residents will have to do a lot of re-adjusting. Jobs will have to be shared out and there may not be enough housing for everyone.
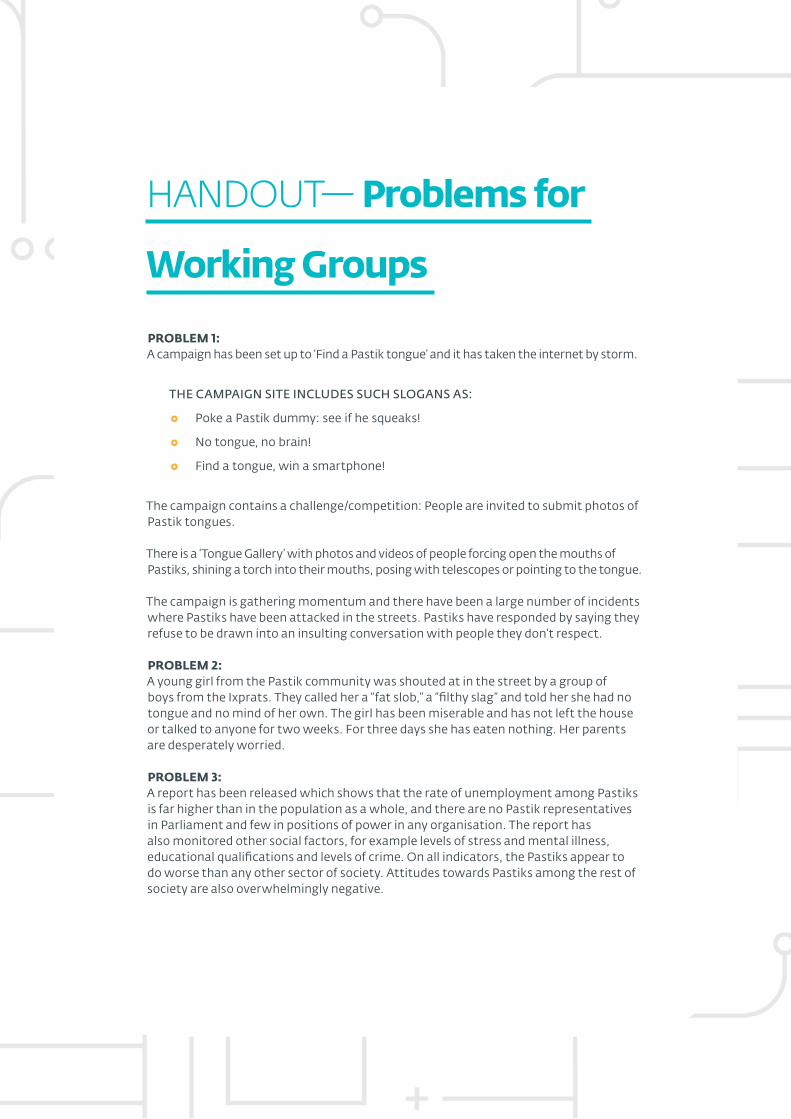
HANDOUT— Problems for
Working Groups
PROBLEM 1: A campaign has been set up to ‘Find a Pastik tongue’ and it has taken the internet by storm.
THE CAMPAIGN SITE INCLUDES SUCH SLOGANS AS:
○ Poke a Pastik dummy: see if he squeaks!
○ No tongue, no brain!
○ Find a tongue, win a smartphone!
The campaign contains a challenge/competition: People are invited to submit photos of Pastik tongues.
There is a ‘Tongue Gallery’ with photos and videos of people forcing open the mouths of Pastiks, shining a torch into their mouths, posing with telescopes or pointing to the tongue.
The campaign is gathering momentum and there have been a large number of incidents where Pastiks have been attacked in the streets. Pastiks have responded by saying they refuse to be drawn into an insulting conversation with people they don’t respect.
PROBLEM 2: A young girl from the Pastik community was shouted at in the street by a group of boys from the Ixprats. They called her a “fat slob,” a “filthy slag” and told her she had no tongue and no mind of her own. The girl has been miserable and has not left the house or talked to anyone for two weeks. For three days she has eaten nothing. Her parents are desperately worried.
PROBLEM 3: A report has been released which shows that the rate of unemployment among Pastiks is far higher than in the population as a whole, and there are no Pastik representatives in Parliament and few in positions of power in any organisation. The report has also monitored other social factors, for example levels of stress and mental illness, educational qualifications and levels of crime. On all indicators, the Pastiks appear to do worse than any other sector of society. Attitudes towards Pastiks among the rest of society are also overwhelmingly negative.
69
Activities focusing on hate speech, cyberhate, trolling, online responsibility
Age: 11+
Use: miscellaneous, e.g. as an introduction to a discussion or inspiration for a class/school campaign
○ Video No Hate Speech Movement official Campaign video, containing testimonials from people who face or have faced hate speech. It is a follow up to the No Hate Speech Movement campaign in the form of a school campaign, regardless of the fact that the official No Hate Speech Movement campaign has already ended.
○ Video Hate-Speech montage (No Hate Speech Movement)
○ Video Teen Voices: Hate Speech Online, produced by Common Sense Education, is a montage of teenager testimonials on their perceptions of hate speech.
○ Campaign Love Music Hate Racism
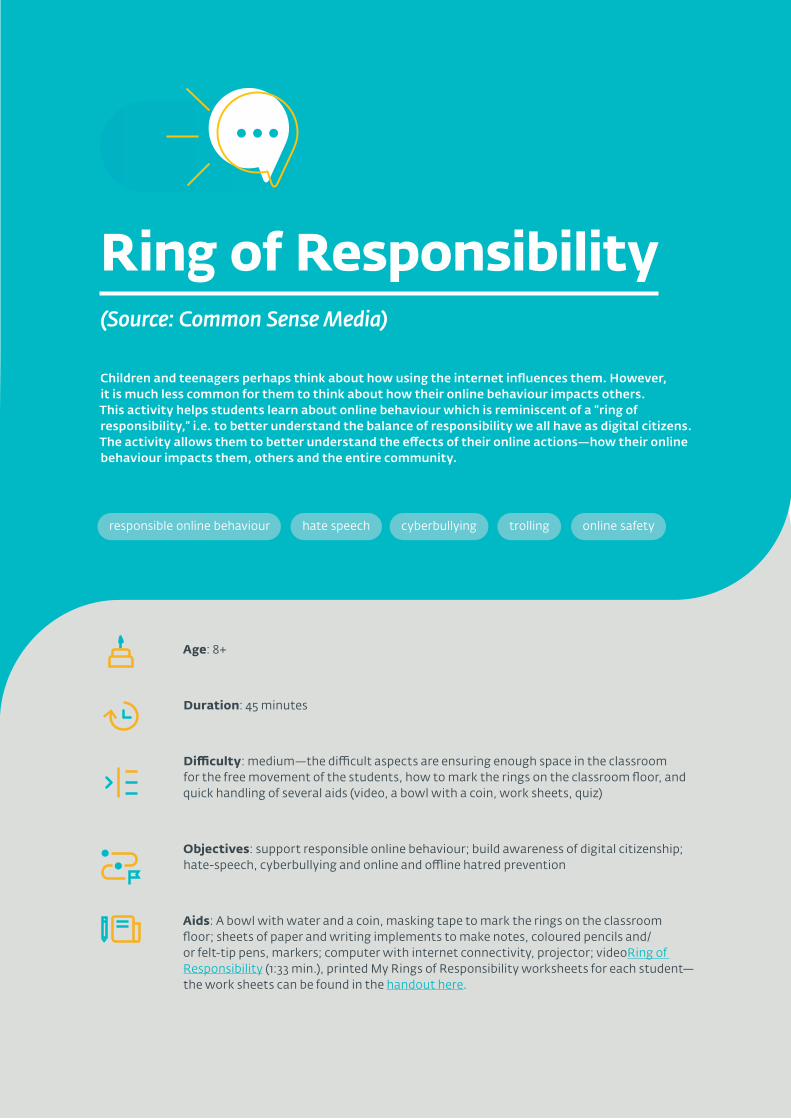
70
Ring of Responsibility(Source: Common Sense Media)
Children and teenagers perhaps think about how using the internet influences them. However, it is much less common for them to think about how their online behaviour impacts others. This activity helps students learn about online behaviour which is reminiscent of a “ring of responsibility,” i.e. to better understand the balance of responsibility we all have as digital citizens. The activity allows them to better understand the effects of their online actions—how their online behaviour impacts them, others and the entire community.
Age: 8+
Duration: 45 minutes
Difficulty: medium—the difficult aspects are ensuring enough space in the classroom for the free movement of the students, how to mark the rings on the classroom floor, and quick handling of several aids (video, a bowl with a coin, work sheets, quiz)
Objectives: support responsible online behaviour; build awareness of digital citizenship; hate-speech, cyberbullying and online and offline hatred prevention
Aids: A bowl with water and a coin, masking tape to mark the rings on the classroom floor; sheets of paper and writing implements to make notes, coloured pencils and/or felt-tip pens, markers; computer with internet connectivity, projector; videoRing of Responsibility (1:33 min.), printed My Rings of Responsibility worksheets for each student—the work sheets can be found in the handout here.
responsible online behaviour hate speech cyberbullying trolling online safety
71
THIS ACTIVITY ALLOWS THE STUDENTS TO:
○ review their own online and offline responsibilities;
○ perceive the “Ring of Responsibility” as a framework for thinking about how the students’ actions impact themselves and other specific people and communities both online and offline;
○ recognise examples of online responsibility towards others.
Before the activity: The teacher will use masking tape to create a large circle as a supersized version of the “Ring of Responsibility” in physical space on the floor/carpet in a classroom (or chalk when you do the activity outdoors).
The teacher prints copies of the working sheets for the students.
Procedure:
1. Warm up: Ring metaphors (5 minutes)
○ The teacher invites the students to gather around him/her. The teacher puts a bowl of water on the ground, tosses a coin in the water, and together with the students watches the rings on the water form and expand.
○ The teacher asks the students: What do the rings remind you of? The students may say something like: An eye, a shooting target, tree rings…
○ The teacher also adds they remind him/her of the Ring of Responsibility and explains the responsibility we have towards others. He/she tells them about our obligations towards others, mentioning one or two practical examples.
2. Learning: Ring of Responsibility (15 minutes) How can throwing a bottle out of the window be similar to what you do or say online? The teacher shows the video Ring of Responsibility and asks: in connection to the video we just saw, how can throwing a bottle out of the window be similar to what you do or say online? Each student takes one step right, then one step forward, then turns right and creates a pair with the student in front of them. Share your ideas with this student regarding how our online behaviour can be similar to the rings made by a bottle thrown out of the window in the real world.
The teacher asks the students to say out loud some of the ideas they have had. Summarise the ideas: throwing out garbage has the same effect online and offline—it impacts the feelings and safety of others, of the community and the entire (online) environment.

72
The teacher shows the Rings of Responsibility to the students and explains what is:
○ Self The ring in the centre of the image represents responsibility to oneself, e.g. taking care of your health and safety.
○ Community The middle ring represents the responsibility we have towards our community, i.e. the people we regularly meet, e.g. our friends, schoolmates and family. These can also be people we don’t know very well, but whom we meet on a regular basis, e.g. the shop assistant in a shop where we regularly buy groceries, or gamers in an online community.
○ World The outer ring represents the responsibility for our surroundings and the world. It includes the people we don’t know but whom our actions can affect.
The teacher divides the students into pairs and assigns each pair one of the letters “A”, “B” or “C.” Ask the students to work in pairs and answer the question corresponding to the letter they were assigned.
a. What responsibilities do you have to yourself? (the Self ring)
b. What responsibilities do you have to the community? (the Community ring)
c. What responsibilities do you have to the world? (the World ring)
73
While the students work in pairs, using the masking tape, the teacher makes two smaller rings within the large one as shown on the “Rings of Responsibility” image.
THE TEACHER ASKS THE PAIRS TO SAY THEIR ANSWERS OUT LOUD. HERE ARE SOME POSSIBLE ANSWERS:
○ Self: I eat healthy food, I tidy up my room, I don’t stay up too late on my computer.
○ Community: I help my neighbours keep the streets clean, I greet my neighbours, I always wait for the green light at pedestrian crossings, I come to school on time.
○ World: I throw garbage in the trash bin and not on the ground, I don’t say dumb or bad things to others on the internet.
3. Research Our online responsibilities (10 minutes).
The teacher asks the students: Have you ever heard the expression “digital citizen?” What comes first to your mind when you hear this expression? (students should share what comes to mind)
THE TEACHER CLARIFIES:
○ a digital citizen is anyone using digital technologies responsibly to learn, create and take part in meaningful activities.
○ as digital citizens we have a responsibility similar to that discussed in the Rings of Responsibility, just in the online environment.
The teacher positions the students around the circles in the middle of the classroom.
If there is not enough space, you can mark three corners of the room as the categories represented by the Self, Community and World rings.
Tip:
74
Tip:
Tip:
THE TEACHER INSTRUCTS THE STUDENTS
I will now read individual actions and you will decide which type of responsibility they represent. Based on your choice you will walk to the ring (corner) representing the respective type of responsibility. If, for example, I say “I never post personal data, such as my name and address, on the internet,” you need to stand in the ring marked Self, because this is a responsibility to yourself – taking care of your safety.
THE TEACHER PRESENTS DIFFERENT ACTIONS:
○ I only use age-appropriate apps and websites (Self)
○ On the internet, I never share things about my friends they don’t want others to know. (Community)
○ On the internet, I don’t share/post information I am not sure is true. (World/Community)
○ I respect others both online and offline (Community/World)
The teacher may note that being responsible to yourself is usually directly or indirectly related to being responsible to the community and society (e.g. when I verify the trustworthiness of the information I share on social networks, I do so with my own trustworthiness and reputation in mind, but also minding the well-being of those whom the contents will reach – a similar example is reporting inappropriate online content to administrators).
The students may find additional examples where their behaviour is responsible on multiple levels.
With older students (13+) you can discuss whether responsible behaviour towards the online community they belong to can, at the same time, be irresponsible behaviour towards oneself. E.g. involvement in risky communities promoting harmful behaviour (self-harm or pro-anorexia communities), or some online communities which, through your support, damage society and eventually the individual (extreme right-wing and radical groups).

75
4. Internalisation: My online responsibilities (15 minutes). The teacher asks students to sit down at their desks and hands out the My Rings of Responsibility work sheets. The handout can be found on the next page. The teacher reads the assignment out loud: Pick 3 colours and use them to colour in the fields in the sheet header so that one colour represents one ring. Then, use the same colours to highlight a statement which, according to you, belongs to that particular ring. The teacher hands out coloured pencils, pens, felt-tip pens and gives the students 5 to 7 minutes to complete the assignment.—The teacher asks the students to present their answers.
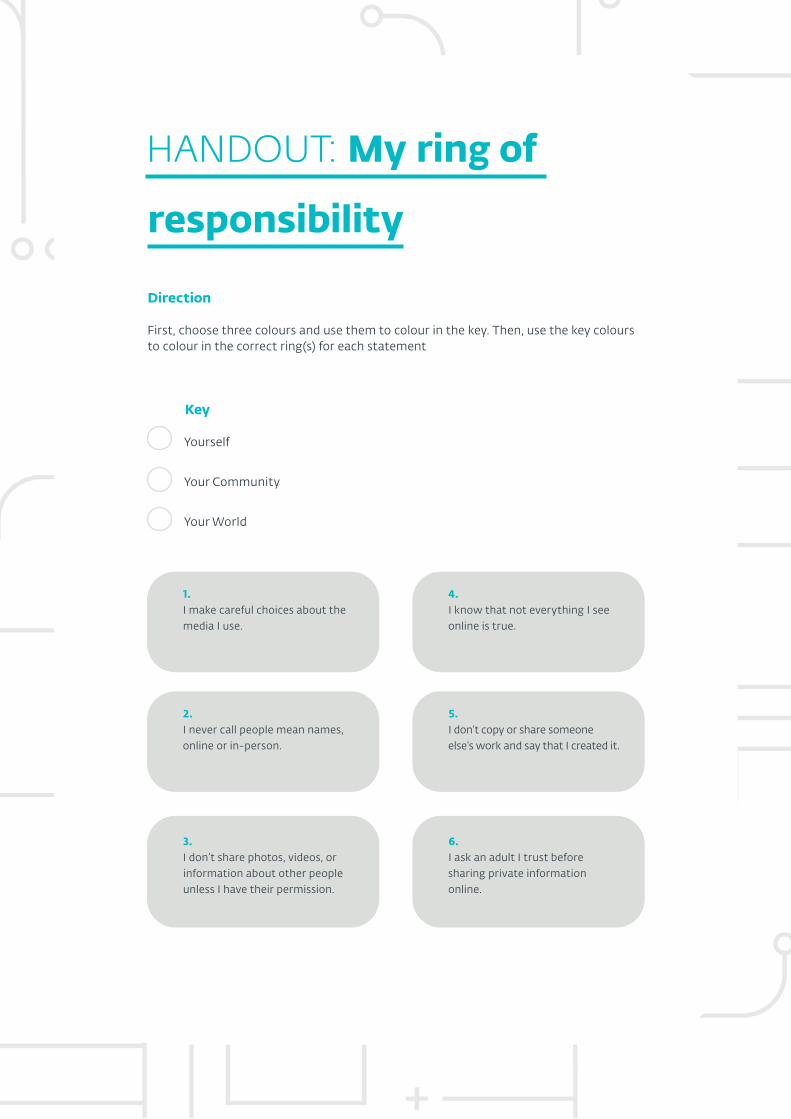
HANDOUT: My ring of
responsibility
Direction
First, choose three colours and use them to colour in the key. Then, use the key colours to colour in the correct ring(s) for each statement
Key
Yourself
Your Community
Your World
1. I make careful choices about the media I use.
4. I know that not everything I see online is true.
2. I never call people mean names, online or in-person.
5. I don’t copy or share someone else’s work and say that I created it.
3. I don’t share photos, videos, or information about other people unless I have their permission.
6. I ask an adult I trust before sharing private information online.

The teacher asks the students to write down, next to each statement, which ring it belongs to and why. If there’s not enough space, the students can write on the back of the sheet. The teacher collects the sheets to evaluate them and, during the next lesson, lets the student know how they did.
If there’s time left at the end of the lesson, the teacher can ask the students to do the quiz for the given lesson.
SAMPLE QUESTIONS FROM THE YOUR RINGS OF RESPONSIBILITY QUIZ:
1. Give an example of your online responsibility towards the community.
2. Ask a person for approval before sharing a photograph that shows that person (Correct answer is A, award 1 point)
3. Pick up trash on the street.
4. Don’t share your email account password.
5. True or false? When I use digital technologies and the internet, I should think only about whether this is safe for me. (False, award 1 point)
6. Which Rings of Responsibility are there and what do they represent?
c. Self, Community, World (Correct answer is A, award 1 point)
d. Me, Self, Family
e. World, Earth, Space
Tip:
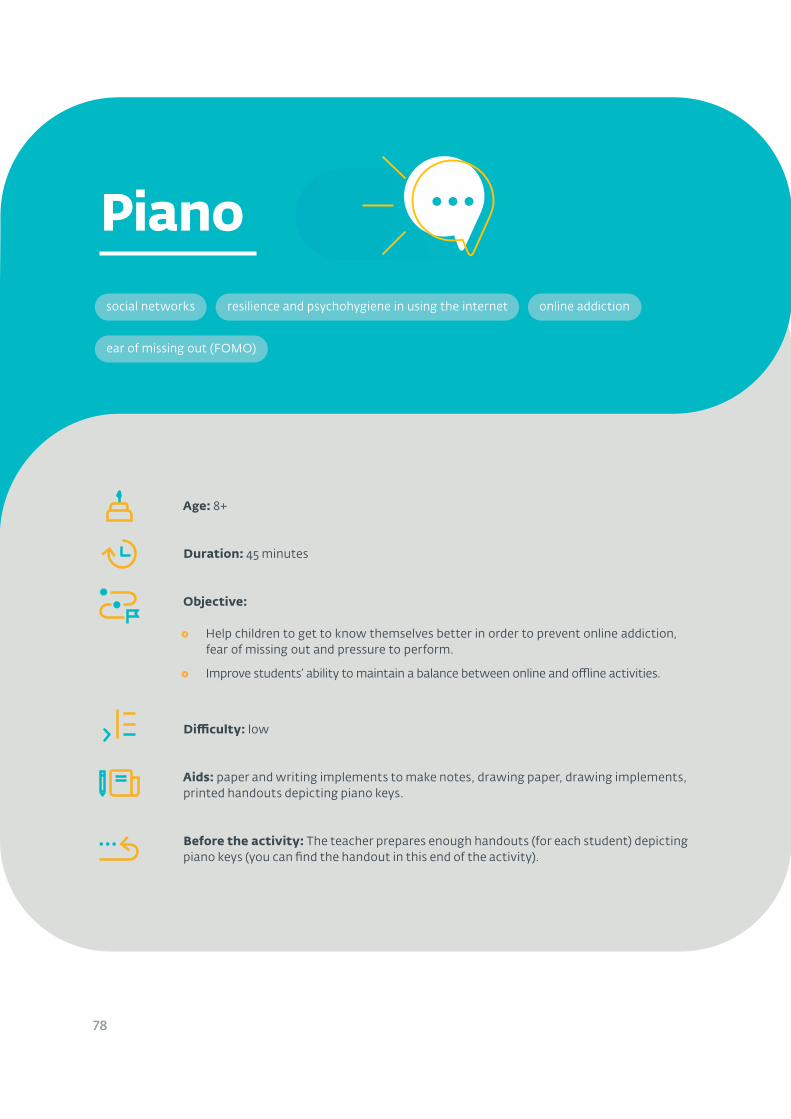
78
Piano
Age: 8+
Duration: 45 minutes
Objective:
○ Help children to get to know themselves better in order to prevent online addiction, fear of missing out and pressure to perform.
○ Improve students’ ability to maintain a balance between online and offline activities.
Difficulty: low
Aids: paper and writing implements to make notes, drawing paper, drawing implements, printed handouts depicting piano keys.
Before the activity: The teacher prepares enough handouts (for each student) depicting piano keys (you can find the handout in this end of the activity).
social networks resilience and psychohygiene in using the internet online addiction
ear of missing out (FOMO)
79
A happy life is like music—it is a matter of well-tuned musical notes, which require multiple keys to play (when playing on a piano). If you only had three keys on the piano you couldn’t do much—this would be very limiting. We also need to know why we strike a particular key and what music we want to play.
Procedure:
1. Introduction
THE TEACHER INTRODUCES THE ACTIVITY: IN OUR LIVES WE ALL DO:
a. what we need or must do—those are our obligations/needs; e.g. chores like taking out the trash,
b. what gives us joy, what we enjoy, what allows us to develop and rest. These activities we enjoy can be:
c. demanding and dynamic—activities which give us satisfaction are often silly, exciting, arousing curiosity, thrilling, fun, quick, and involve lots of fun, laughter, movement, talk and meeting other people, such as: interest groups, sports, video games, visiting friends, parties and other activities involving peers.
d. slow-paced—equal satisfaction can be derived from activities that let us “recharge our batteries” and take a break from the wealth of stimuli that constantly surround us—calm and slow-paced activities let us recover and take a rest, e.g. playing with a pet, doing nothing at home, sleeping, drawing, taking a bath, etc.
2. With each category of activities, the teacher asks students to present examples from their lives.
3. The teacher instructs the students to independently work with 3 categories of keys on their worksheets, i.e. with 3 activity categories: 1. chores, 2. fast-paced leisure-time activities, 3. slow-paced leisure-time activities. The students will assign a colour to each category and use this colour to colour in several keys on the handouts depicting a piano. “Into each piano key, write down an activity which you do because you ‘have to’ and also activities which you need to do to feel happy.”
○ The teacher instructs the kids to write down specific activities, e.g. not just “sports,” rather what they like to do—running, athletics, swimming, football, etc.
○ The teacher should ensure that the kids are equally specific when describing online and offline activities, for example a chat with a friend, meeting my friends outdoors…
Tip:
80
4. Use a marker to outline those keys (activities) which take place online
5. Discussion
○ What is the ratio between the individual types of activities the students have written on their worksheets? Are they OK with it?
○ Is that a healthy ratio?
○ How would they change it if they could? Which activities there should be more of, and which less?
○ Questions for teenagers: It is in our own hands what kind of melody we want to play each day and which activities we fill our days with. Let’s play our own melody which sounds good to us and our close ones and that we can be proud of.
○ The activities we engage in or the ones we desire are usually influenced by our close ones—our family and friends—the media, influencers, the news feed on social networks. To what extent should we let ourselves be influenced? You’d presumably want to create your own melody—to form your own life—depending on what you really want and need and not according to what is presented in the media.
Reflection What did the activity make you realise? Will the students change the mix of their activities in some way? If so, how specifically, how will they make it happen and where will they get the time?
The activity motto should be written on the blackboard or at least mentioned at the end of the lesson:
It is in our own hands what kind of melody we want to play—we do this by selecting which activities we fill our days with.
Alternate Piano activity Pizza slices. Draw your own pie chart depending on how much time you devote to individual leisure-time activities. Are you happy with it? If this chart was, say a pizza, are the individual flavours in balance? Are you missing anything?
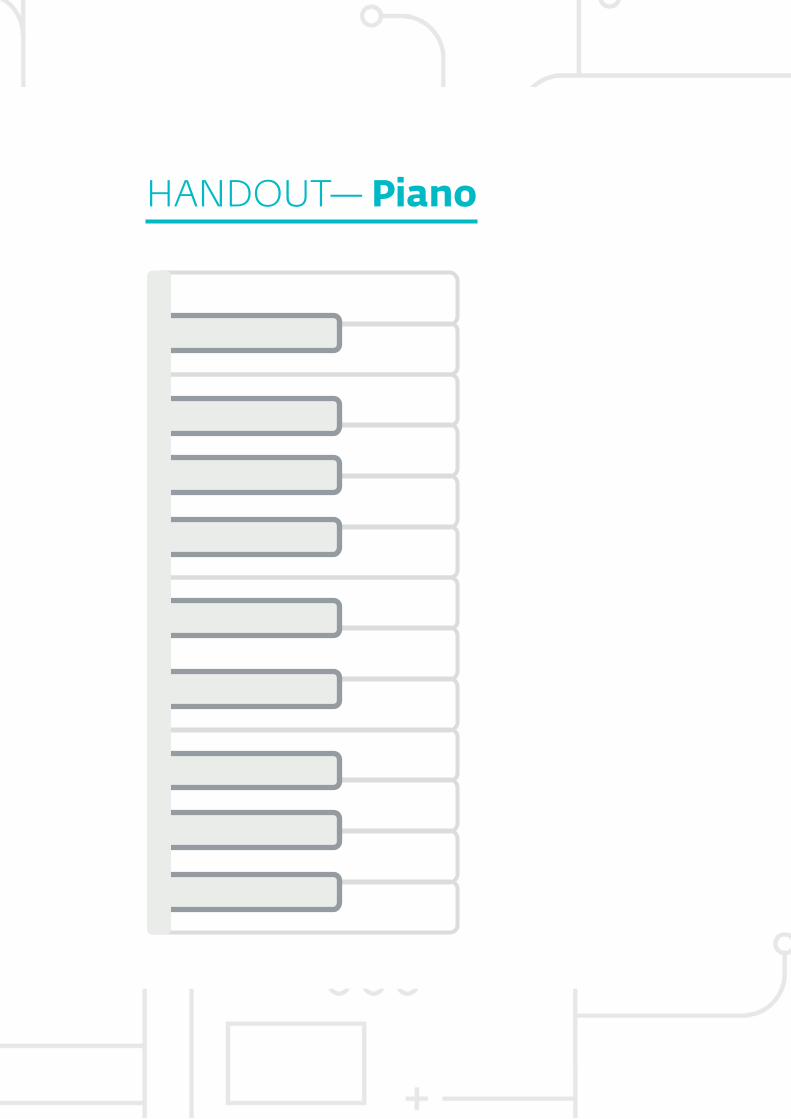
HANDOUT— Piano
82
Who I See and Who I Don’t See When I Post
Age: 10+
Duration: 30 minutes
Objective: Improve skills and raise awareness of safe and responsible sharing on social networks.
Difficulty: low
Aids: papers and writing implements to make notes
social networks responsible internet use responsible sharing on social networks
83
Procedure:
1. Independent work
The teacher notifies the students in advance that they will not have to disclose the names of the friends they have written on the paper. They should rather present the insights they have obtained when doing the exercise, and it is important that for the purposes of this task they use specific names or at least initials (only on paper).
2. The teacher sets clear rules with the students in advance
○ Nobody will say the names on their list out loud, and everyone should approach this activity with discretion.
○ Before the end of the lesson the students will tear up the papers and throw away the pieces (this will prevent a list of popular/unpopular students spreading through the class and possible conflict). The lists should not be collected by the teacher as these are sensitive information.
3. Instructions
a. Close your eyes for a while and imagine the one Facebook friend who always comes to mind first when you plan to share a post. Who is the person you most wish to read the post? Write their name on the paper, their first name or initials will suffice.
b. Think about 10 more people among your FB friends who could be interested in your posts or you wish were interested in them. Write those names down.
c. Now picture the one person among your FB friends who is the most distant to you or the least interesting. Write down their name.
d. Now visualise 10 more such people among your FB friends. Write down their names.
e. Look at your recent activity on your profile. Those who don’t make any posts should imagine what they would share if they did. Or they can imagine they write a blog. ○ Analyse your posts and see how much they target the individual people on your list. ○ How does this match your post visibility settings at the time of their publishing? Is this OK?
4. Discussion: the teacher reminds the students not to mention any names on their lists One usually only has a few close friends he/she feels comfortable sharing his/her thoughts and experiences with. Even among them, it is usually just one person that comes first to mind and to whom the post is addressed. In our busy lives or in our current mood, we often forget that we don’t just share our posts with that one person, rather with tens or even hundreds of others. This is natural. That also means we need to carefully manage the privacy of our posts and be very cautious. Before publishing a post, try imagining those less relevant, more distant friends. Is it OK that they will see the post? Should they know this? Perhaps there is a difference between the posts intended for everyone and those intended just for one or several people. Don’t forget that everything you once shared on the internet remains on the internet even if you delete it.
5. Reflection The teacher asks about what this exercise made the children realise. Will they change anything in their social media habits?

84
Social Network Combat
Age: 10+
Duration: 45 minutes
Objective: Improve skills and raise awareness for the safe and responsible use of social networks.
Difficulty: medium
Aids: paper and writing implements to make notes, green and red paper or post-its of similar colours, several pairs of scissors, at least two tubes of glue.
Before the activity:
○ The teacher will prepare flipchart papers or A2 sheets divided vertically into three sections.
○ The teacher prepares small cards with the names of individual social networks—these can also be represented by labels on a stick, or large name tags.
social networks responsible internet use responsible sharing on social networks
cybersecurity
85
Procedure:
1. The teacher creates an even number of student groups and lets each group draw one of the popular social networks.
2. The teacher creates pairs of opposing teams, e.g.: Facebook vs. Twitter, or Snapchat vs. Instagram. When the teams know their opponent, ask the students in the groups (teams) to prepare arguments: what is their social network typical for, what security settings and what options does it offer, why is their social network better than their opponents’ network, what benefits and risks are associated with their opponents’ network.
3. Group work: the teacher asks the students to work in teams and create an original illustration for their social network in the middle section of the flipchart paper. The other two sections remain empty, prepared for the battle. During the battle, the students will attach green cards with the positives of their own social network on the left side. The other team will attach red cards with arguments against the competitor’s social network on the right side, so each team should try to find as many positives about their own network as possible.
○ The teams will prepare as many red cards with arguments against the competitor’s social network as they can find, because the team with more arguments wins. The resulting score will be determined by deducting the number of red cards on the paper from the number of green cards. Hang the sheets of paper on the wall or the blackboard so there is enough space around them.
4. The battle takes place in front of the entire class. The competing teams will gather in front of their posters (temporarily attached on the wall next to each other). The whole group will stand in front of the posters, not just the group “spokesperson.” All members of the competing teams alternate in presenting their arguments while each team presents one argument at a time (a procedure typical for this type of battle).
○ During the battle, the kids that aren’t competing in that moment (if there are 2 or 3 team pairs) become judges. They will approve whether the (counter)argument is relevant or whether something is repetitive, misleading, etc. Only arguments approved by the class as relevant will be used. The reflection and discussion should primarily focus on the negatives and counterarguments.
Example: a member of the FB team presents the greatest benefit of FB and attaches the related post-it to the flipchart paper. Then he/she presents the argument against the competitor (e.g. Snapchat) and attaches the argument to the competitor’s paper. The arguments may be presented in a humorous manner. Then a member of the Snapchat team presents the greatest benefit of Snapchat by attaching a post-it to their own flipchart paper, followed by an argument against FB which will be attached to the FB flipchart. The teams alternate in presenting their arguments until all arguments have been exhausted. In the end, both teams “act out” a made-up team selfie (as funny as possible)—with or without taking a picture. The team selfies may be exhibited along with the posters on the classroom noticeboard.
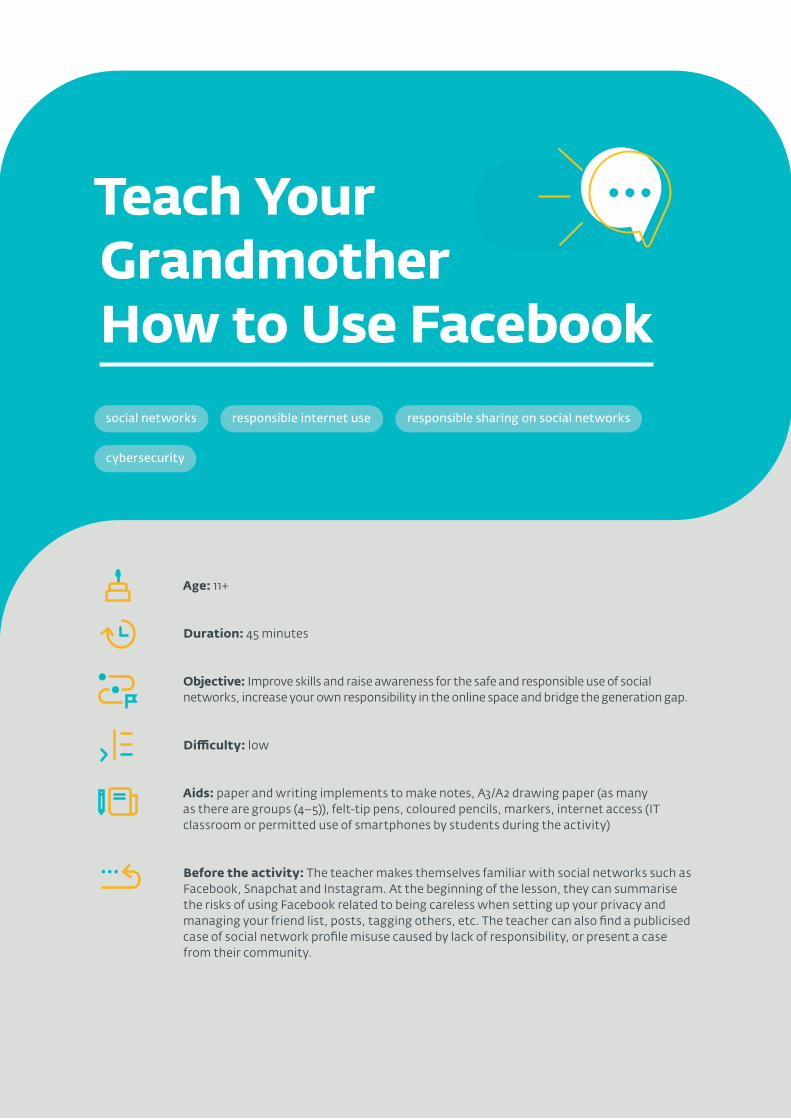
86
Teach Your Grandmother How to Use Facebook
Age: 11+
Duration: 45 minutes
Objective: Improve skills and raise awareness for the safe and responsible use of social networks, increase your own responsibility in the online space and bridge the generation gap.
Difficulty: low
Aids: paper and writing implements to make notes, A3/A2 drawing paper (as many as there are groups (4–5)), felt-tip pens, coloured pencils, markers, internet access (IT classroom or permitted use of smartphones by students during the activity)
Before the activity: The teacher makes themselves familiar with social networks such as Facebook, Snapchat and Instagram. At the beginning of the lesson, they can summarise the risks of using Facebook related to being careless when setting up your privacy and managing your friend list, posts, tagging others, etc. The teacher can also find a publicised case of social network profile misuse caused by lack of responsibility, or present a case from their community.
social networks responsible internet use responsible sharing on social networks
cybersecurity
87
Procedure:
1. The teacher introduces the activity “Imagine that your grandmother, who is about to retire and already misses her colleagues, is planning, despite her previous ignorance of social networks, to set up a profile to stay in touch with everyone. She is also looking forward to being in touch with her family. She won’t feel so lonely and she can pursue her hobbies—politics and world news. She, however, is a complete novice, and you need to give her a set of simple instructions. For her and others in her position, prepare a list of the 15 most important rules to observe when setting up a new profile and using it. Since it’s apparent you know much more about the matter, you don’t want your granny to get into any trouble, do you?”
2. Group work In groups of 5, the students discuss the risks associated with social network use and what their users need to be careful of. The teacher tells the students not to forget that even though some things regarding social media use may appear trivial to them, now they have to teach a complete beginner, so they need to formulate the most basic rules step by step. The teacher asks the students to discuss and write down the risks, and the rules to manage them. For about 15 minutes, the students will discuss and note the most important points, and then they will put them in order of importance. During this lesson the students will be permitted to use smartphones. The teacher facilitates the work in groups.
3. On an A3/A2 sheet of paper, the students then prepare the directions for use, taking into account the sequence and importance of individual steps.
4. Presentation of instructions to the class + discussion
5. Reflection
The teacher can think together with the students: “Who else could make use of these instructions?—Could it be useful to present them to the younger students at school and do a workshop with them?”
This activity could be transformed so that it is managed by the students themselves—it can have the form of peer learning, yet it should remain under the teacher’s supervision.
Alternatives: The instructions can be tailored for using different social networks. Each group can work on preparing instructions for a different social network and then present their guide to the others, as if to educate them. The groups will present a detailed tutorial along with their posters.
Tip:
Tip:
88
Additional questions related to social networks to discuss with the students
○ Which social networks do you use and why?
○ With how many friends, approximately, do you have regular conversations on individual social networks? How many of them do you know in the real world?
○ Whose posts are the most thought-inspiring?
○ Who inspires you on FB and how? Are you happy with it? Do you really want to develop these aspects and is it good for you?
○ Whose posts can lift your mood, or whose posts do you enjoy?
○ Who on FB helps you review and reassess your own opinions?
○ How do you feel if someone disagrees with you? Do you need everyone to agree with you?
○ Are social bubbles and radicalisation on the internet somehow interconnected? (for older kids)
○ How many friends do you have with whom you like to talk and spend time in the real world?
○ Who can you turn to if something bothers you?
○ Is it OK to share everything you post on social networks with everyone? Who should see what? Why?
○ Billie Eilish says social media was “ruining my life” in a new interview. The singer opened up about the impact of negative comments.
89
Influencers
Age: 11+
Duration: 45 minutes
Objective: Improve critical thinking about the media and the ability to assess the impact of media and influencers on student behaviour.
Difficulty: low
Aids: papers and writing implements to make notes
Before the activity: The teacher should become familiar with the current influencers most popular among teenagers (or students in their classes).
social networks influencers
90
Procedure:
1. Individual work The kids will pick one person that inspired and led them by example to something they value in their own life. The teacher tells the students it can be someone in their own life, a close one (grandfather, cousin, a good friend) or a popular personality (athlete, scientist, artist, musician).
○ What specifically did this inspiration help you develop, support or solve?
○ The teachers asks volunteers to share who inspired them.
2. The teacher leads a discussion on “online influencers as a source of inspiration”. Are contemporary online influencers similarly important to the students?
○ Watching influencers can be relaxing, while some influencers have a lot of interesting information and insight.
○ Did online influencers add anything of value to your life?
○ Did they help you develop in some way? If so, how specifically?
3. Did an influencer’s advice ever help you in a difficult situation?
○ Did something an influencer said or wrote help you when you were feeling down?
○ Did you talk about your problems with someone else?
4. In the discussion with the kids, the teacher should emphasise that
○ Specific advice from your favourite influencer may be inspiring, but the fact that it helped you doesn’t mean it will help everyone else in the same way
○ Problems should be discussed with adults too—with parents, teachers, a doctor or another professional—before they escalate.
5. Reflection
○ Did the students realise something new regarding who inspires them and has an impact on them?
○ What role do online influencers play in this? What role do students want influencers—both offline and online—to play in their lives?

91
How Can You Choose the Right Influencer?
Age: 11+
Duration: 45 minutes
Objective: Improve critical thinking about the media and the ability to assess the impact of media and influencers on student behaviour.
Difficulty: low
Aids: paper and writing implements to make notes
social networks influencers critical thinking about the media
92
Procedure:
1. Open the topic Influencing has been an often-discussed topic ever since social networks entered our lives. However, it has always been here in one form or another, even without the internet.
2. Individual work The teacher asks the students to write answers on the paper. The students can decide later whether they want to share their answers with the class, so they can be completely honest.
○ Who among your close ones is an inspiration to you? How specifically? Which of their qualities, abilities or actions has made an impact on you? Why is it that this specific quality, ability or action impacted you (this is telling us something about your own values)?
○ How did this inspiration reflect in your own lives? Where is it visible—what do you do with that inspiration?
○ Whom do you inspire in your life? How, specifically? These can be small things, not just acts of heroism.
○ Which of your hobbies, values and talents are involved in this? Ask the students to be specific (e.g. I have inspired my friend to do sports and hiking instead of hanging out in shopping malls + this involves my values: I care about my health and my hobbies: sports and hiking).
○ Volunteers may share their answers.
○ Reflection: How was it answering these questions? Did you realise something new?
3. Individual work What kind of social media influencer would you be if you were one?
○ The teacher asks the students to think about their hobbies, values and talents in conjunction with the idea of being a social media influencer: “If you had to be an influencer and wanted to tell your audience something real from your life, what would it be? Create a concept of your activity on social media—your topic, credo, the method of communication that suits you.”
○ How could your peers benefit from you being an influencer? What would the world look like if more people held the same values as you?
○ Volunteers may share their answers.
○ Reflection: How was it answering these questions? Did you realise something new?
4. Individual work + discussion Who in the media do you like and why?
○ What does it offer you when you follow their actions?
○ What values does that person promote? How is it significant for you?
○ Do those people offer the public something valuable?
○ Which influencers have captured the masses but don’t really have much useful to say?
○ Why do you need to be able to recognise the values and impact of influencers? (you can use negative messages as an example: dissemination of ideologies instigating hatred)
93
Suggested activities: Influencers
Age: 8+; 11+; 13+
Duration: 30 minutes
Objective: Improve critical thinking about the media and the ability to assess the impact of media and influencers on student behaviour.
Difficulty: low
Aids: paper and writing implements to make notes, computer or other device with internet connectivity, projector
social networks influencers imitating influencers
94
Procedure:
○ Play video and discuss with the class (age 8+) http://uk.sheeplive.eu/fairytales/hands-subtitles (2:30 min).
○ Play video and discuss with the class (age 8+) https://www.youtube.com/watch?v=LE5f-PJ8xL4&feature=emb_logo (1:35 min)
○ Play video and discuss with the class (age 13+) https://www.youtube.com/watch?v=XcLqxp9lAY8&feature=emb_logo (3:32 min)
○ Play video and discuss with the class (age 11+): “Above The Noise”: “Can we trust influencers on YouTube?” https://www.youtube.com/watch?v=trZhY_gXgKQ (9:05 min)
○ Play video and discuss with the class (age 11+): “Social Media and Teenage Self-Esteem” https://www.youtube.com/watch?v=nxolrIIWEMQ (3:48 min)
95
Designing a Campaign for Internet Use Without Addiction
Age: 10+
Duration: 45 minutes
Objective:
○ Raising awareness of excessive internet use and preventing online addiction.
○ Together with the kids, design a school campaign to be led by student activists with the aid of the teacher.
Difficulty: medium
Aids: papers and writing implements to make notes
Tip: this activity can be used as an introduction to a more complex preventive activity for the entire school or for students aged 10 to 14 years.
online addiction and excessive internet use
96
Procedure:
1. Discus the following topics:
○ What is online addiction and what can it cause? Why is the topic of excessive internet use important? What can significantly reduce excessive internet use and contribute to a more responsible and conscientious use of the internet? The teacher states: It was determined (in: Blinka et al. (2016). Online addictions. Grada: Praha) that talking about these topics with students proved effective (it reduced the time spent on online activities), but only when the risks and effects were not described by adults, but by peers, i.e. trained student volunteers. This is mainly because students are closer to the world experienced by their peers than adults.
2. Can the students imagine that a group of other students—“activists for an internet without addiction”—would be formed at their school and trained by a teacher or a school psychologist on what is excessive and addictive internet use? Later on, these activists could lead seminars, different activities or discussions. They would continue to be aided by a teacher or a school psychologist.
3. The teacher divides the students into groups. Working in these groups, the students write answers to the following questions on a piece of paper:
○ Which media and which specific activities should be included in the campaign? These can include, for instance: student vlogs, blogs, posters, memes, badges, a series of articles in a student journal, posters promoting a healthy digital lifestyle, a noticeboard in the school common areas, a competition for the best vlog on internet use without addiction based on one’s own experience.
○ How can you raise awareness among as many students as possible? What should their peers know and how can you best achieve this?
○ For example, vlogs could be shared on the school social network and, with the approval of those involved, also in other media. Is it possible to involve social media to share useful links, e.g. in the form of original educational memes?
○ What should the campaign be called? What will its motto be? What will its hashtag be?
○ When should it start? How long should the campaign last?
○ Who will be the main target group—which grades need it the most?
○ Are there any volunteers to participate in the campaign?
4. Presentation of ideas and discussion
5. Defining specific campaign steps
97
Digital Detox
Age: 10+
Duration: 2 x 45 minutes
This activity consists of two parts. It will take 2 x 45 minutes within one week.
Objective: Help the children to get to know themselves better in order to prevent online addiction, fear of missing out and pressure to perform. Balance between online and offline activities.
Difficulty: medium (the teacher needs to prepare at least 1 story of a person, ideally someone whom the teenagers in the given country know, who has volunteered to do a digital detox with some quick information about why they did it and with what results. The teacher needs to organise this activity in multiple stages—task assignment, “detox” duration, evaluation and reflection.)
Aids: paper and writing implements to make notes, A4/A3 sheets, felt-tip pens and drawing implements
Before the activity: The teacher will prepare examples with stories of people who have intentionally chosen to disconnect from social media for an extended period of time, because they were having a negative impact on their lives.
social networks resilience and psychohygiene in using the internet online addiction
fear of missing out (FOMO)
98
Procedure:
1. The teacher opens the lesson using an example of how a celebrity or someone else (age appropriate) stopped using social networks, including the reasons “why” and how it changed their life.
○ The teacher discusses with the students whether it’s easy for them to exist without constantly checking and making posts on social networks. What could a break from social networks give them? How could they use the free time and increased attention span?
2. The teacher introduces a challenge for “one day without social networks.” The students can vote on how long this “break” should be, in order to really test how difficult it is to exist without social networks. Maybe they will agree that it would be easy to go one day without social networks, but difficult for a longer period of time. The teacher should try to extend the “break” to something more challenging, e.g. two days, or a week.
○ When giving this assignment the teacher should discuss with the students whether they think it is easy or not and what they would miss the most.
3. Group work: In groups of 5, the students prepare a manual regarding what will help with the social network detox, e.g. mentally prepare for it; disable smartphone notifications; spend more time doing other activities to stay busy, etc.
4. Students will present their Social Media Detox Manuals to the class and may even leave them on display on the classroom noticeboard. At the end of the lesson, the teacher should give the students encouragement, stating that he/she believes that the prepared manuals will help them.
5. The students should make brief notes (on a sheet of paper) during the detox on what was difficult, what was easy and what helped. The teacher should emphasise that next week they will check how the activity went and review whether the manuals they made can be used in real life or whether something should be added, removed or changed.
6. Review one week later (30–45 minutes):
○ During the next lesson, the students will discuss how the detox went and whether it was easy not to check or add posts on social media during the agreed time.
○ The teacher may ask: Are social media useful to you, or are you their “slave”? What kind of relationship would you like to have with social media and how would you like to use them? Which rules of psychohygiene would you like to apply in the long term and why?
7. Group work: Review the original Social Media Detox Manuals
○ Students work in the same/similar groups as last week to modify the original manual according to what they learned and what proved feasible/useful.
○ The teacher instructs the students to discuss whether the originally proposed rules matched their actual needs, what surprised them and what they discovered.
99
Tip:
8. In the debriefing the students will present the group work (the revised manuals) and share insight on what the experiment has taught them. They can also talk about whether the “revised” manuals could be of use to their peers and how they can disseminate them.
9. The teacher and the students will choose a suitable place to exhibit the revised manuals.
The teacher may inspire the students by challenging them to continue the Social Media Detox activity at the school level by means of peer learning, i.e. using the revised Social Media Detox Manuals and, under the supervision of the teacher/school psychologist, they can do a similar activity with their younger schoolmates. This will reinforce the competences of the students lecturing their peers, as well as their internal commitment to the presented values and rules.
100
Becoming an Influencer?
Age: 11+
Duration: 45 minutes
Objective: Support critical thinking about social media.
Difficulty: low
Aids: writing implements and sheets of paper to make notes, one larger paper for each group
Before the activity: The teacher prints or writes down the text of the assignment (available below) so that half the groups receive the example of the boy (YouTube) and half the groups the example of the girl (Instagram).
influencers social networks
101
Text of the assignment:
Imagine having a dialogue with your sibling who wants to become an influencer—what risks would you advise them of? You are not entirely convinced this is a good idea and there are many good reasons to think that. Besides that, you already know a thing or two about social media, so you decide to have a talk with them. You don’t want to hurt their feelings, but you want to give them enough information to make them aware of the existing risks.
a. Imagine you have a talented younger brother, who, at primary school, was a bit of an outsider. That made him quite sensitive to the reactions of the people around him. In the end, however, he discovered that he can win the favour of his peers not in direct contact, but instead through a camera. He makes short films about skaters and attempts some tricks on his rollerblades and skateboard. By recording his friends, he partially won their favour. This makes sense to him and he feels like he wants to commit to this.
b. Imagine you have a sister you get along well with, and you know she loves selfies. You admit she looks quite good and her selfies look like something straight out of a magazine. She is also very active on Instagram. If she’s not just making a post, she is presumably checking her profile and enjoying the likes she gets. On the other hand, there were some nasty comments too and she was quite disconcerted by them. You can see that she enjoys making posts and selfies, but you begin to worry when you learn she is going to make a series of exclusive photographs to boost her popularity and possibly start a partnership with some company. She wants to become an influencer.
Procedure:
1. The teacher discusses the topic with the students using the questions below
○ Is it tempting to become an influencer? Why or why not do this?
○ What does the work of an influencer entail?
○ What are the disadvantages of being an influencer?
○ Is this job suited for everyone? Who is it (not) for? Who should not do it at all, or under what circumstances should they (not) do it?
2. Working in groups
○ The teacher divides the students into groups of 5 or 6. The teacher hands out the prepared assignments and asks the students to work in groups and:
a. Discuss the situation of their sibling as described in the assignment.
○ What does your sibling really desire when they think about the career path of an influencer?
○ Could they be vulnerable if they choose this path? If so, how?
○ The students write down their observations on the large sheet of paper.
102
b. Discuss the specific risks of this career path.
○ What are the negatives of this career path and what do they need to consider before committing to it?
○ Discuss how to best communicate to the sibling what is on your mind. Do you see other options (besides becoming an influencer) for them to achieve what they desire, e.g. finding more friends offline and feeling good about being part of a community of peers?
3. Working in groups
○ The teacher asks students to make a large poster depicting the situation. Draw your sibling and write down as bullet points their qualities, skills, desires and motives (here the students can use their imagination to give the character more complexity). Underneath the character, draw a comic bubble with arguments you consider important to:
○ Show understanding, provide detailed information about the upsides and downsides of their plan, recommend what else they can do to achieve what they desire.
4. Presentation of the results to the class + discussion
5. Reflection
○ What did the students learn by doing this activity? Have their perceptions of influencers changed in some way? Have their perceptions of the careers of influencers changed in some way?
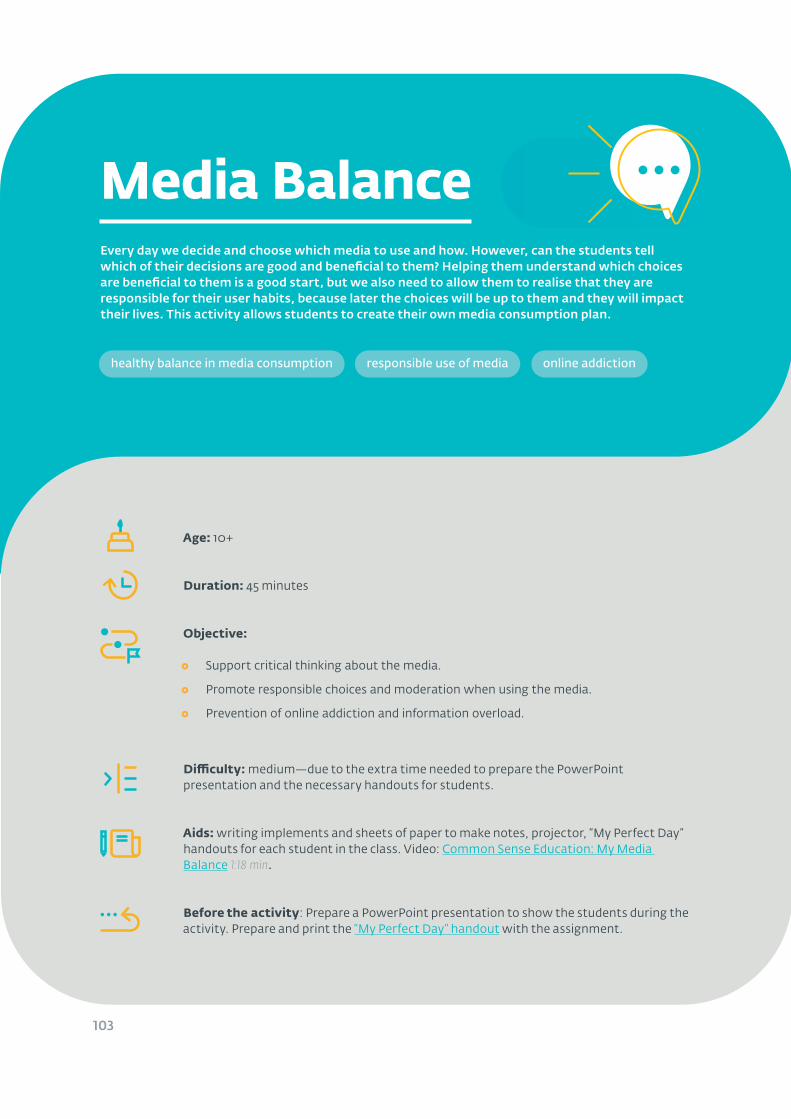
103
Media BalanceEvery day we decide and choose which media to use and how. However, can the students tell which of their decisions are good and beneficial to them? Helping them understand which choices are beneficial to them is a good start, but we also need to allow them to realise that they are responsible for their user habits, because later the choices will be up to them and they will impact their lives. This activity allows students to create their own media consumption plan.
Age: 10+
Duration: 45 minutes
Objective:
○ Support critical thinking about the media.
○ Promote responsible choices and moderation when using the media.
○ Prevention of online addiction and information overload.
Difficulty: medium—due to the extra time needed to prepare the PowerPoint presentation and the necessary handouts for students.
Aids: writing implements and sheets of paper to make notes, projector, “My Perfect Day” handouts for each student in the class. Video: Common Sense Education: My Media Balance 1:18 min.
Before the activity: Prepare a PowerPoint presentation to show the students during the activity. Prepare and print the “My Perfect Day” handout with the assignment.
healthy balance in media consumption responsible use of media online addiction
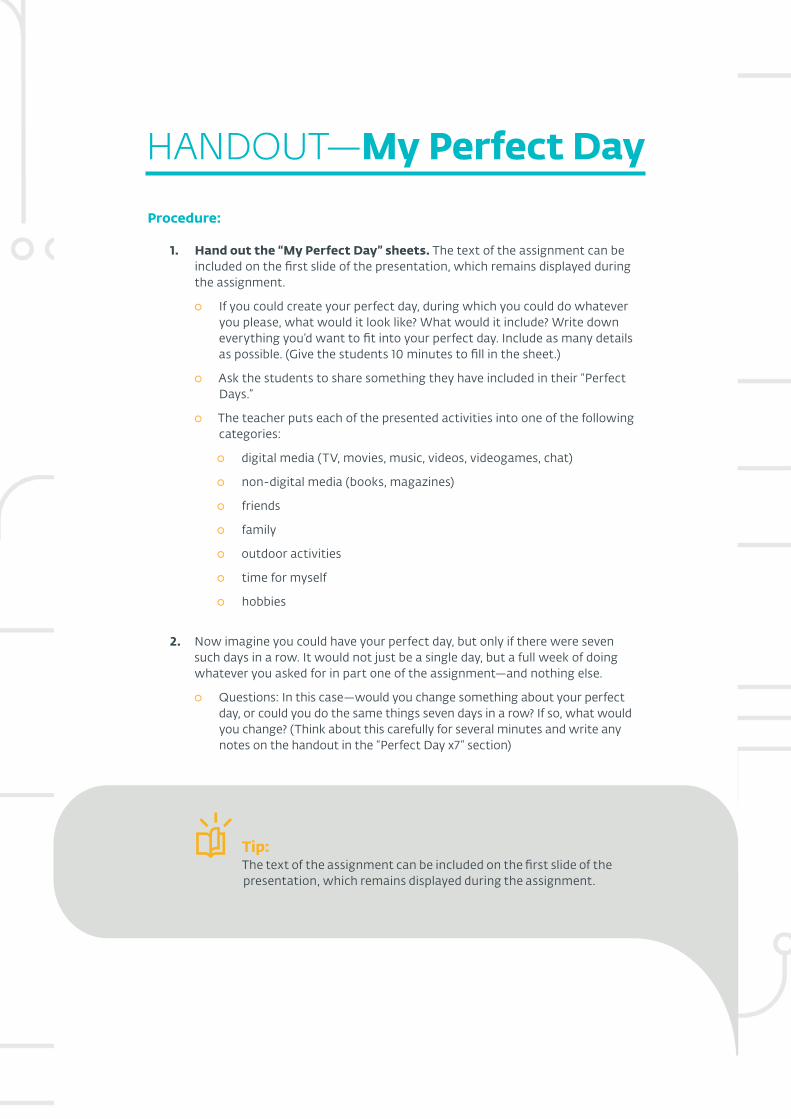
HANDOUT—My Perfect Day
Procedure:
1. Hand out the “My Perfect Day” sheets. The text of the assignment can be included on the first slide of the presentation, which remains displayed during the assignment.
○ If you could create your perfect day, during which you could do whatever you please, what would it look like? What would it include? Write down everything you’d want to fit into your perfect day. Include as many details as possible. (Give the students 10 minutes to fill in the sheet.)
○ Ask the students to share something they have included in their “Perfect Days.”
○ The teacher puts each of the presented activities into one of the following categories:
○ digital media (TV, movies, music, videos, videogames, chat)
○ non-digital media (books, magazines)
○ friends
○ family
○ outdoor activities
○ time for myself
○ hobbies
2. Now imagine you could have your perfect day, but only if there were seven such days in a row. It would not just be a single day, but a full week of doing whatever you asked for in part one of the assignment—and nothing else.
○ Questions: In this case—would you change something about your perfect day, or could you do the same things seven days in a row? If so, what would you change? (Think about this carefully for several minutes and write any notes on the handout in the “Perfect Day x7” section)
The text of the assignment can be included on the first slide of the presentation, which remains displayed during the assignment.
Tip:
105
○ Share your insight with the classmate sitting next to you or choose someone to share with.
3. The teacher then asks the students to read aloud whether and what they needed to change about their “Perfect Days” so that they could cope with a perfect week.
○ Students whose perfect days only included a few activities or who forgot to include something important (e.g. family activities or time for myself, outdoor activity) should consider whether they wouldn’t miss them.
4. Ask the students to think about how they feel about the balance images on their handout sheets. Students can make notes under the pictures. After about 2 minutes, ask the students to share their thoughts in pairs.
○ The teacher helps the students find out that balance is a state when all elements, despite their different sizes, are equally represented. This requires something like scales—the elements (activities) need to be distributed so that the scales don’t tip to either side. And we need to pay attention because it could easily happen that we only put a load on one side of the scales. Discuss how this relates to the perfect day and how it can be modified so it can be turned to an entire week.
○ When discussing and summarising the results, the balance definition can be played back on one of the presentation slides.
6. What is media balance? (15 minutes)
○ Today we are going to talk about balance in connection with media consumption. That means we want to know how we use the digital tools (laptops, tablets, smartphones, TV) and the non-digital tools (books, journals). The teacher shows the video Common Sense Education: My Media Balance 1:18 min.
○ According to the video, what is media balance? Share your insight with the classmate sitting next to you. To encourage productivity, show the students the presentation slide containing the following categories and tell them how each element impacts how we feel:
○ Define media balance as the use of media in a way that gives you a good feeling and balances with other activities (family, friends, school, hobbies, etc.)
○ Tell the students to: Think once again about the Perfect Day you described at the beginning. Was it media-balanced or not? Why?
The teacher sorts the shared insights into categories:
○ digital media (TV, movies, music, videos, videogames, chat)
○ non-digital tools (books, magazines)
○ friends
○ family
○ outdoor activities
○ time for myself
○ hobbies
MY PERFECT DAY
1. If you can create your perfect day when you could do whatever you please, what would it look like? Write down everything you’d want to fit into your perfect day. Include as many details as possible:
2. Perfect day x7 Do you need to change something (if yes, what?) to be able to run seven days like that in a row?
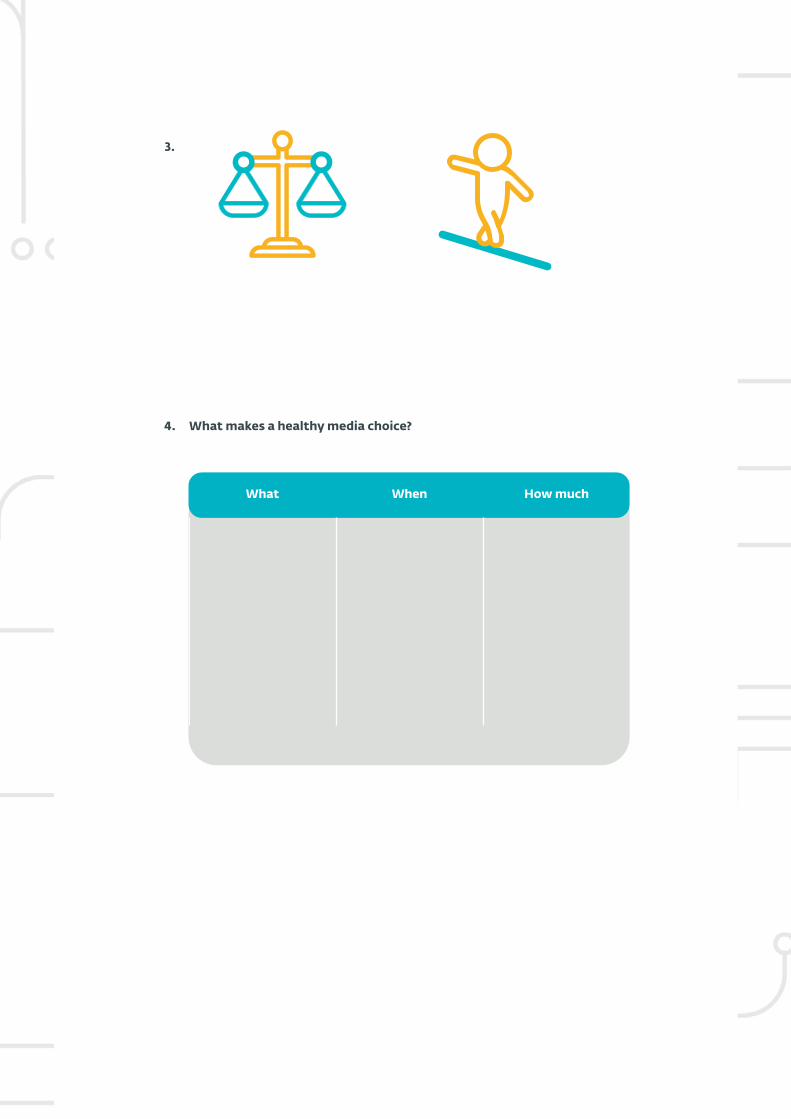
3.
4. What makes a healthy media choice?
What When How much

108
My Online and Offline Self(Video + Discussion)
Age: 11+
Duration: 30 - 45 minutes
Objective: Improve critical thinking about media, safe and healthy media consumption, a healthy self-perception.
Difficulty: low
Aids: paper and writing implements to make notes, computer or another device with internet connectivity, projector, videos listed below.
social networks self-presentation on social media selfies influencers
109
Procedure:
1. Watch the video together
2. Discuss
My Online and Offline Self. How to balance them? Video https://www.youtube.com/watch?v=SZAkZ4TzSEA (3:10 min.)
How do we present ourselves online (Common Sense Education: Teen Voice) https://www.youtube.com/watch?v=DKj9bdGSVww (3:14 min.)
Teenagers are discovering and creating their own identity and many use social media as a space to experiment and test “Who am I? Who do I want to be? How do I feel better?” However, when teenagers have multiple social media accounts, it can become difficult to discern what is real and what is not. In this video, teenagers describe how they present themselves to their peers and the viewers can make up their mind what it means to “be yourself on the internet.”
Who are you on social media? (Common Sense Education: Teen Voice) https://www.youtube.com/watch?v=cLFMBT1Ayls (5:28 min.)
On social media, teens can choose how they present themselves to the world. They might take a pic and share it in the moment—at other times they might carefully stage and post only the photos they think are best. In this video, you’ll hear from teens who are reflecting on how they make some of these choices as they curate their social media lives. As your students watch, encourage them to discuss and think critically about the self they’re presenting on social media, and the self they’re aiming to be.
110
Password Cracking
Age: 8+
Duration: 45 minutes
Objectives:
○ Show how easily and quickly some passwords can be cracked.
○ Try to create a secure password which cannot be cracked in a matter of seconds.
Difficulty: High (special tools need to be downloaded, the procedure studied and tested before the lesson)
Aids: computer, digital blackboard or other presentation device
Passwords and their security
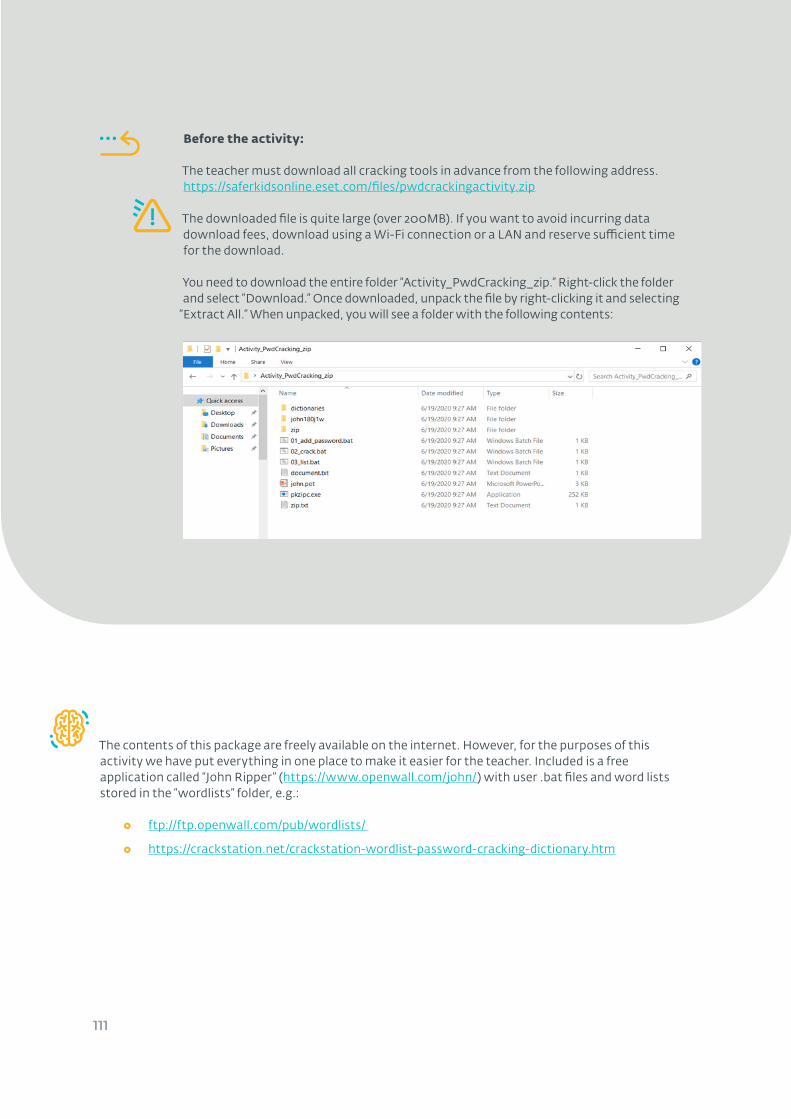
111
Before the activity:
The teacher must download all cracking tools in advance from the following address. https://saferkidsonline.eset.com/files/pwdcrackingactivity.zip
The downloaded file is quite large (over 200MB). If you want to avoid incurring data download fees, download using a Wi-Fi connection or a LAN and reserve sufficient time for the download.
You need to download the entire folder “Activity_PwdCracking_zip.” Right-click the folder and select “Download.” Once downloaded, unpack the file by right-clicking it and selecting
“Extract All.” When unpacked, you will see a folder with the following contents:
The contents of this package are freely available on the internet. However, for the purposes of this activity we have put everything in one place to make it easier for the teacher. Included is a free application called “John Ripper” (https://www.openwall.com/john/) with user .bat files and word lists stored in the “wordlists” folder, e.g.:
○ ftp://ftp.openwall.com/pub/wordlists/
○ https://crackstation.net/crackstation-wordlist-password-cracking-dictionary.htm
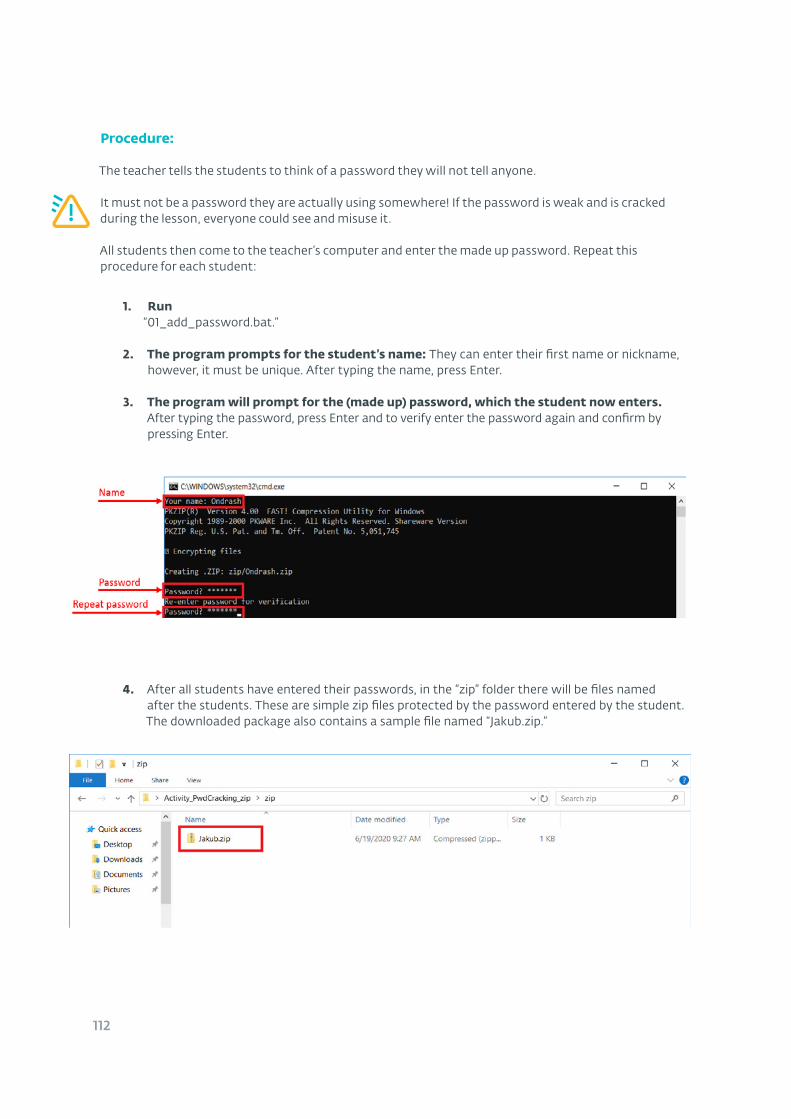
112
Procedure:
The teacher tells the students to think of a password they will not tell anyone.
It must not be a password they are actually using somewhere! If the password is weak and is cracked during the lesson, everyone could see and misuse it.
All students then come to the teacher’s computer and enter the made up password. Repeat this procedure for each student:
1. Run “01_add_password.bat.”
2. The program prompts for the student’s name: They can enter their first name or nickname, however, it must be unique. After typing the name, press Enter.
3. The program will prompt for the (made up) password, which the student now enters. After typing the password, press Enter and to verify enter the password again and confirm by pressing Enter.
4. After all students have entered their passwords, in the “zip” folder there will be files named after the students. These are simple zip files protected by the password entered by the student. The downloaded package also contains a sample file named “Jakub.zip.”
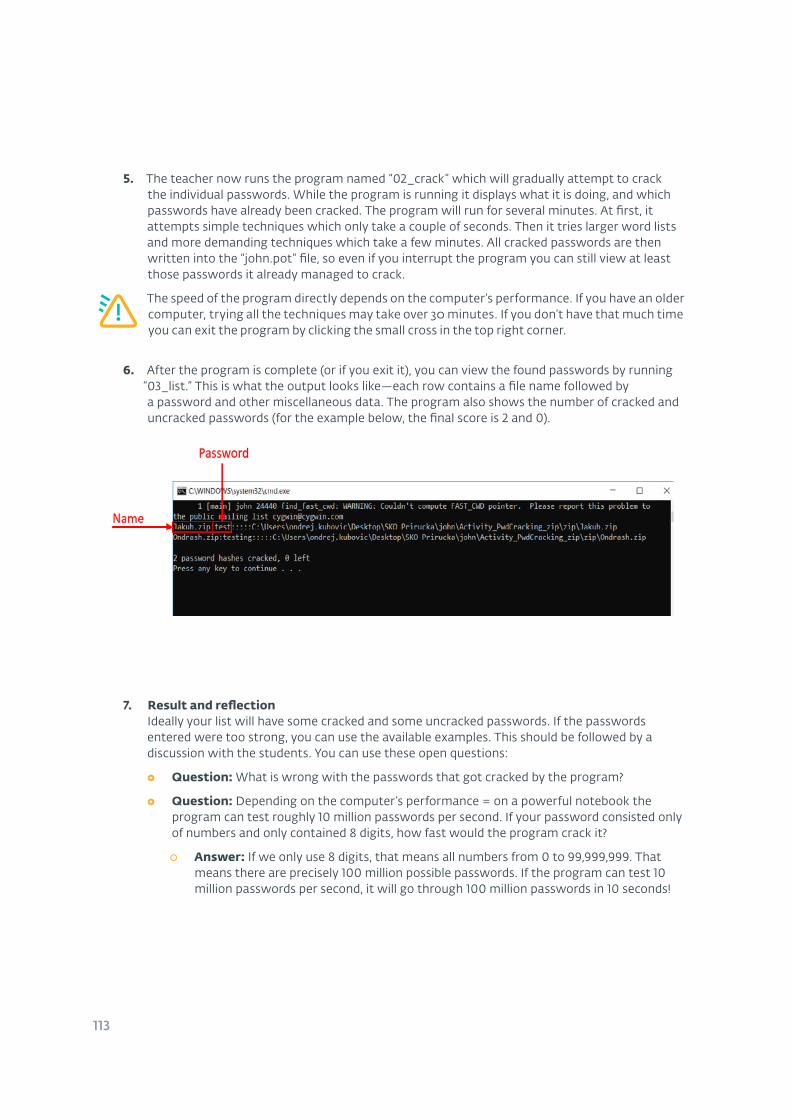
113
5. The teacher now runs the program named “02_crack” which will gradually attempt to crack the individual passwords. While the program is running it displays what it is doing, and which passwords have already been cracked. The program will run for several minutes. At first, it attempts simple techniques which only take a couple of seconds. Then it tries larger word lists and more demanding techniques which take a few minutes. All cracked passwords are then written into the “john.pot” file, so even if you interrupt the program you can still view at least those passwords it already managed to crack.
The speed of the program directly depends on the computer’s performance. If you have an older computer, trying all the techniques may take over 30 minutes. If you don’t have that much time you can exit the program by clicking the small cross in the top right corner.
6. After the program is complete (or if you exit it), you can view the found passwords by running “03_list.” This is what the output looks like—each row contains a file name followed by a password and other miscellaneous data. The program also shows the number of cracked and uncracked passwords (for the example below, the final score is 2 and 0).
7. Result and reflection Ideally your list will have some cracked and some uncracked passwords. If the passwords entered were too strong, you can use the available examples. This should be followed by a discussion with the students. You can use these open questions:
○ Question: What is wrong with the passwords that got cracked by the program?
○ Question: Depending on the computer’s performance = on a powerful notebook the program can test roughly 10 million passwords per second. If your password consisted only of numbers and only contained 8 digits, how fast would the program crack it?
○ Answer: If we only use 8 digits, that means all numbers from 0 to 99,999,999. That means there are precisely 100 million possible passwords. If the program can test 10 million passwords per second, it will go through 100 million passwords in 10 seconds!
114
○ Question: If the password consists of common words, it too is easy to crack. How does the program do it?
○ Answer: Cracking a long word by simply testing all letter combinations would take too long. The program, however, uses the so-called dictionary technique, where it automatically tests all words from an existing list (e.g. all standard words) and their variations (e.g. words starting with upper case letters or words written backwards, etc.).
○ Question: What should a password look like if we don’t want the program to crack it any time soon?
○ Answer: Here are some basic rules:
○ It has to be long enough so it cannot be cracked by testing all combinations (the so-called brute-force attack).
○ It must not be a simple combination of letters and numbers which can be found somewhere, so it cannot be cracked using the dictionary technique.
○ These conditions, however, only specify what the password should not look like. They are not instructions for creating a secure password. A secure password, for example, is one that consists of 20 randomly generated characters. However, such a password is very difficult to remember. If you use a password manager, you can use such passwords. However, if you need to remember the password, a simpler method is to create one consisting of several random words.
○ Example: HorseHouseSchoolWorkFatherSki. It is easy to remember 6 words, however, cracking a password consisting of these 6 words is too demanding even for a super-powerful computer. If you want an even more secure password, you can increase the number of words or you can introduce grammatical mistakes (this significantly reduces the usefulness of the dictionary technique). Using the previous example, we could use: HorsTHouseSchoolWoREkFatherSkiO
Final notes:
○ This activity can be included at the end of the lesson and the teacher can let the tool run longer (until the start of the next lesson), which increases the number of cracked passwords.
○ Or he/she can limit the number of characters to say 6 lower case letters. This will significantly speed up the cracking process.
○ For the sake of speed and practicality, the teacher can present the entire process—including protecting the file with a password and cracking it—to the class using a digital blackboard.
○ This demonstration does not mean that all passwords can be cracked this quickly. There can be situations when the process is much slower. If, for example, the attacker wants to log in to a social network account, after entering a couple of passwords the server will block them (e.g. the server may only permit 10 login requests per minute). Or, if we look at a phone—if the attacker tries to guess the PIN code and enters the wrong one multiple times, the phone will be locked.
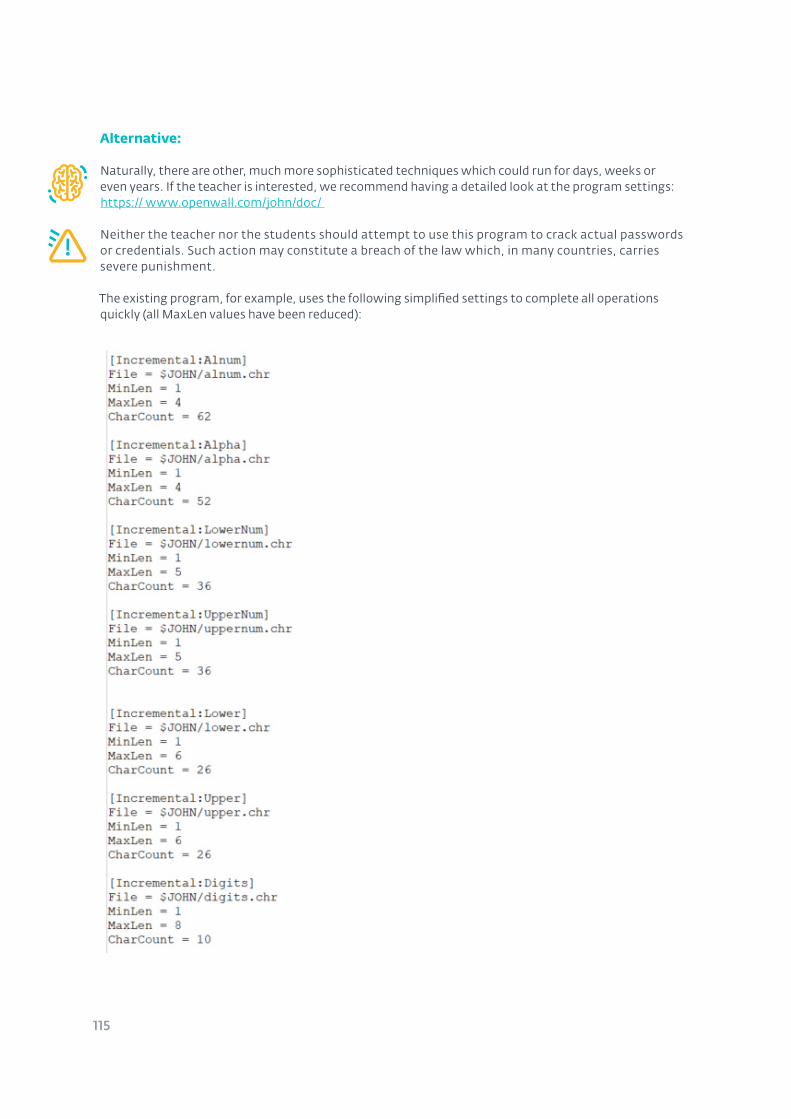
115
Alternative:
Naturally, there are other, much more sophisticated techniques which could run for days, weeks or even years. If the teacher is interested, we recommend having a detailed look at the program settings: https:// www.openwall.com/john/doc/
Neither the teacher nor the students should attempt to use this program to crack actual passwords or credentials. Such action may constitute a breach of the law which, in many countries, carries severe punishment.
The existing program, for example, uses the following simplified settings to complete all operations quickly (all MaxLen values have been reduced):
116
Discussion About Passwords
Age: 8+
Duration: 45 minutes
Objectives:
○ Try to create a secure password which cannot be cracked in a matter of seconds.
Difficulty: Low
Aids: sheets of paper, pens
Before the activity: Read the activity description and study the rules for creating strong passwords so that you, as a teacher, can guide the students and answer their questions. We recommend reading the answer to the question “What should a password look like if we don’t want the program to crack it any time soon?” in the “Password Cracking” activity.
Passwords and their security
117
Procedure:
This activity is similar to “Password Cracking”. However, in this case no password cracking is involved; the class only discusses password safety.
1. At the start of the lesson, the teacher asks the questions below and lets the students write down their experience and ideas:
○ Where are passwords used?
○ Which websites/services are important and should be particularly well protected?
○ What can happen if an attacker obtains my password and what is the worst-case scenario?
2. Then the students are asked to write down a good password on a sheet of paper.
It is imperative that they don’t write down any of their actual passwords, as the teacher and classmates would then know them and they would not be secret any more.
3. The teacher collects the passwords proposed by the students and they discuss the rules for creating a strong password:
○ It is secret. No one besides the owner should know the password. An exception to this is when a group of people need to know one common password (e.g. the alarm code for their house), however, even here every person could have their own code.
○ It is unique. You should not use the same password for different websites/services. By doing that you run the risk of an attacker gaining access to all your services should your password leak from one location. For example, if attackers obtain the password to your Facebook account and you use the same password for your email, they could breach both accounts.
○ It is long. It must be impossible to break the password by trying all combinations (the so-called brute-force attack). If your password is too short, it is easy to test all possible combinations. For example, there are just over 10 million 5-letter passwords (lowercase characters without diacritics). Does that look like a lot to you? A computer can test all of them in a few seconds.
○ It contains various characters. Just like using more letters, using various characters significantly increases the number of different combinations, making this password more difficult to guess using brute-force attacks.
○ It is impossible to guess. The password must not be a common word or phrase or something directly related to you. For example, John Smith living at Safe Avenue 13, New York, certainly should not use passwords such as: “JohnSmith,” JohnSafe13,” “Safe13,” SmithYork,” etc. Equally, passwords should not be words which are easy to guess, such as
“head,” “mypassword,” etc.
4. The teacher chooses three to five of the passwords proposed by the students and writes them on the blackboard (or he/she can make up some bad examples). Together with the students, they will analyse which of the rules specified above have been met. If the students haven’t memorised the rules yet, mention a few cases where attackers caused a lot of damage to users by stealing their passwords.
5. At the end of the activity, the students can create new passwords and a few students, picked at random, will read their passwords aloud to verify that they understand the rules.

118
Safe Password Poster(and Other Topics)
Age: 10+ (if the students have previously dealt with password security)
Duration: 45 minutes
Objectives:
○ Try to create a secure password which cannot be cracked in a matter of seconds.
○ Give the students materials using which they can share knowledge with their schoolmates in a playful form.
Difficulty: Low
Passwords
119
Procedure:
1. The teacher asks students to search the internet for rules for creating strong passwords and to study them. The students then select what they think are the three most important rules and make a poster out of them. (15 minutes)
2. After being checked by the teacher (to assess whether the chosen rules are important), the poster can be finalised, printed and hung on a classroom/school noticeboard. The objective is to teach the students in a playful form how to create safe passwords and to share this knowledge with other schoolmates. (30 minutes or longer, depending on how much time is needed to finish the graphical layout)
Alternative:
This activity can also be used with another assignment focusing on online safety recommendations when using social networks, chat or, in the case of older students, online banking.
120
Sending Fake Emails From a “Trustworthy” Address
Age: 8+
Duration: 25 minutes
Objectives:
○ Show the students how easy it is to send a fake email.
○ Teach the students what to notice about emails and how to spot fake ones.
Difficulty: Medium (the teacher needs to study the procedure, find suitable tools, prepare a fake email and test the activity at their school)
Before the activity: The teacher learns how to send emails with a fake sender address. There are multiple online services that allow this, e.g. https://emkei.cz/ or http://anonymailer.net/, or finds a different one online. The made-up sender name, the email contents and subject should be prepared in advance and only copied into the online form during the lesson. The teacher can also prepare the list of student email addresses to which they will send the created fake email, or they can set up a new email address to present the activity to the class.
malware and other malicious activities social engineering
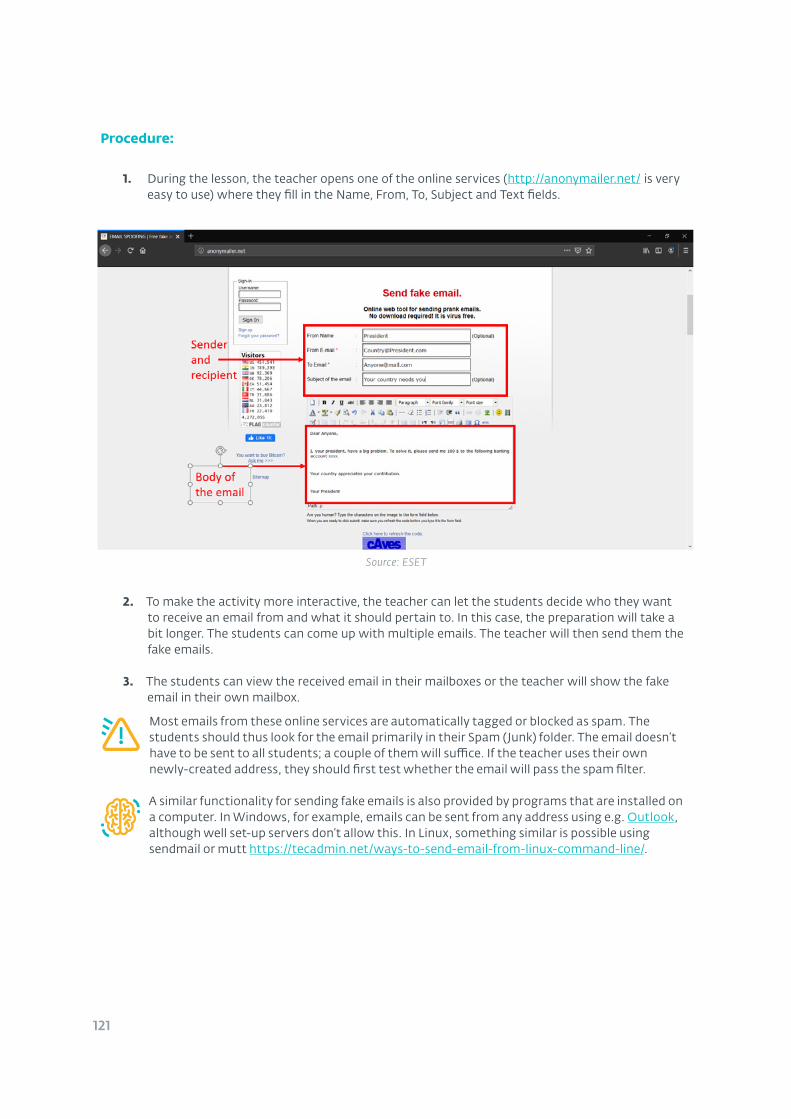
121
Procedure:
1. During the lesson, the teacher opens one of the online services (http://anonymailer.net/ is very easy to use) where they fill in the Name, From, To, Subject and Text fields.
Source: ESET
2. To make the activity more interactive, the teacher can let the students decide who they want to receive an email from and what it should pertain to. In this case, the preparation will take a bit longer. The students can come up with multiple emails. The teacher will then send them the fake emails.
3. The students can view the received email in their mailboxes or the teacher will show the fake email in their own mailbox.
Most emails from these online services are automatically tagged or blocked as spam. The students should thus look for the email primarily in their Spam (Junk) folder. The email doesn’t have to be sent to all students; a couple of them will suffice. If the teacher uses their own newly-created address, they should first test whether the email will pass the spam filter.
A similar functionality for sending fake emails is also provided by programs that are installed on a computer. In Windows, for example, emails can be sent from any address using e.g. Outlook, although well set-up servers don’t allow this. In Linux, something similar is possible using sendmail or mutt https://tecadmin.net/ways-to-send-email-from-linux-command-line/.
122
Tip:The teacher can craft and send the fake emails before the lesson and only show students how they did it afterwards. In this way, students will first see the email from “the president” or some popular person in their email and only find out after that it was faked.
REFLECTION USING QUESTIONS, SUCH AS:
○ Question: How come I have received an email from “[email protected]”?
○ Answer: The protocol for sending an email is old and does not verify the sender’s identity. In practice, this means that anyone can send you an email with just about any header.
○ Question: Can the attackers bypass an antivirus or antispam system?
○ Answer: Skilled/experienced attackers can prepare a better spam email which will pass some spam filters. Most similar fakes (mostly from the presented online services), however, will end up in the Spam folder, because existing technologies can efficiently filter them out.
○ Question: How do I verify that an email really originates from a certain address?
○ Answer: There is no sure-fire method to do so. First of all, recipients should focus on the email header, which can contain mistakes or typos. The header information can also reveal whether the email was sent during non-standard hours or from a different domain than the sender’s address. For more information see this text. To find out more, just google “how to verify email sender.”
○ Question: What else should you pay attention to with spam?
○ Answer: You need to focus on where the email is trying to redirect you. Be especially careful if the email demands an action from you (click here, download attachment, submit data, pay, etc.). These emails often contain suspicious links, the target of which can be revealed by hovering the mouse cursor over the link (without clicking on them!). In this case most email applications display the address to which the link points. If the domain looks suspicious don’t click on it.
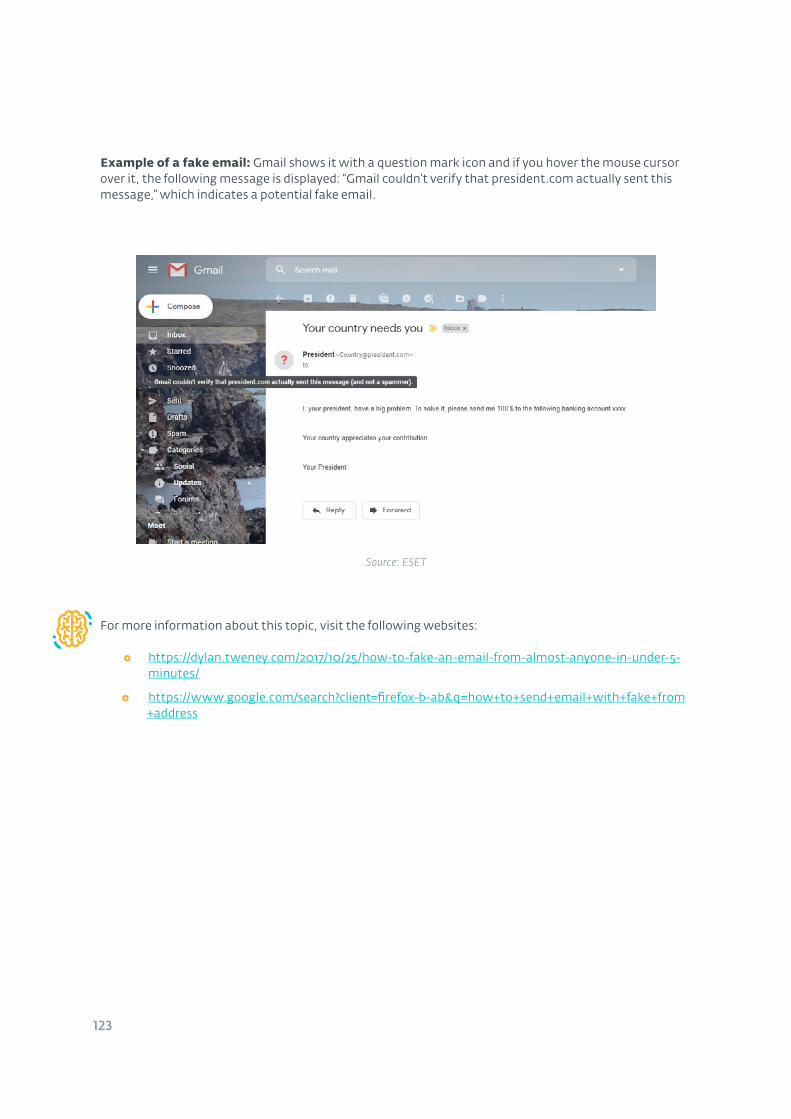
123
Example of a fake email: Gmail shows it with a question mark icon and if you hover the mouse cursor over it, the following message is displayed: “Gmail couldn’t verify that president.com actually sent this message,” which indicates a potential fake email.
Source: ESET
For more information about this topic, visit the following websites:
○ https://dylan.tweney.com/2017/10/25/how-to-fake-an-email-from-almost-anyone-in-under-5-minutes/
○ https://www.google.com/search?client=firefox-b-ab&q=how+to+send+email+with+fake+from+address
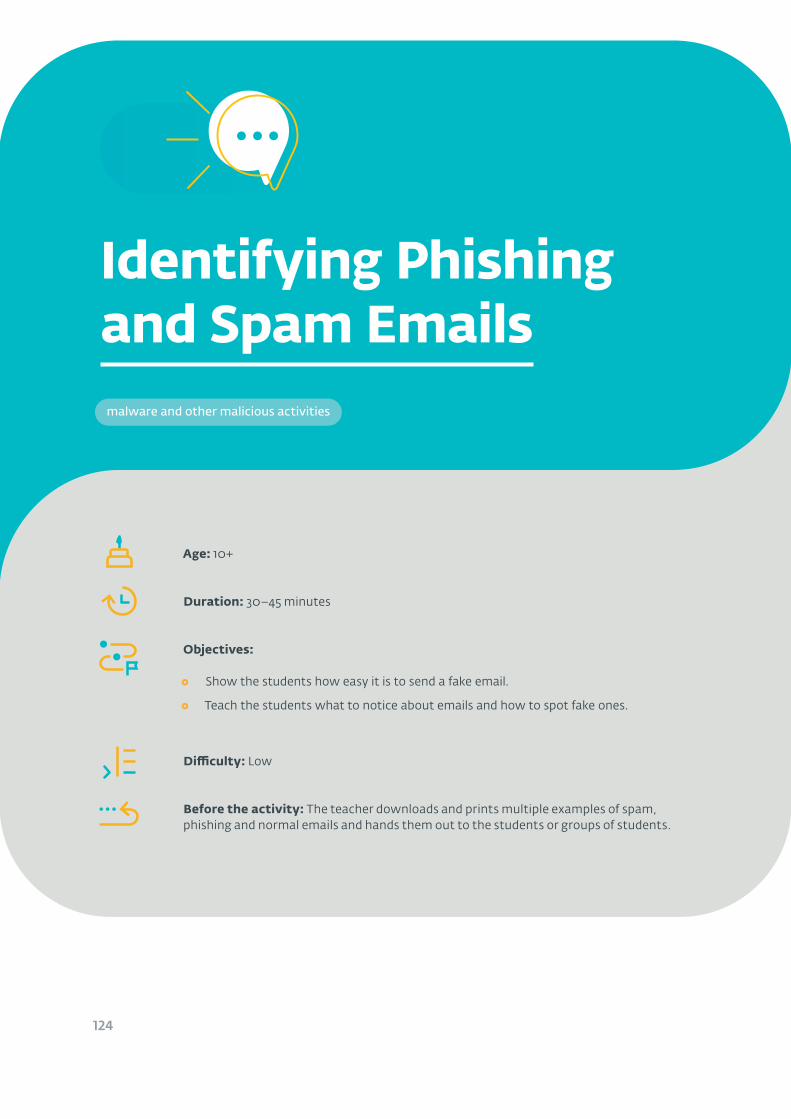
124
Identifying Phishing and Spam Emails
Age: 10+
Duration: 30–45 minutes
Objectives:
○ Show the students how easy it is to send a fake email.
○ Teach the students what to notice about emails and how to spot fake ones.
Difficulty: Low
Before the activity: The teacher downloads and prints multiple examples of spam, phishing and normal emails and hands them out to the students or groups of students.
malware and other malicious activities
125
Premises:
1. The objective of phishing is to obtain data (e.g. credentials, name and password, internet banking/social network access, credit card information, etc.). The attacker can either ask for this data in the email, or, more commonly, redirect the user to a website where such data will be entered. Sometimes it is difficult to determine whether an email is a phishing attempt just by looking at it, which is why you should always check links by hovering the mouse cursor over them (without clicking) to see where the link points to.
2. Spam is basically any unsolicited electronic mail. Usually these are adverts for things you don’t need, or other similar offers.
3. An authentic email. In case of newsletters and advertisements, it can be difficult to determine what is spam and what is an authentic email. If you have voluntarily registered to receive such newsletters, then it is not spam. However, if you receive them without registering, then it is spam. All newsletters sent by legitimate servers therefore contain a link allowing you to unsubscribe. When you click the unsubscribe link, you will not receive any more newsletters. On the other hand, spammers either don’t include this option, or ignore your unsubscribe attempts, which only leaves you the option to move their messages to spam or filter them in your email client.
Procedure:
1. The teacher downloads examples of emails. They print them on a sheet of paper and hand them out to the students (groups).
2. The students examine the emails and mark them as phishing, spam or authentic (legitimate email). They can do so using coloured post-its, felt-tip pens, etc.
3. Together with the teacher, the students find out which email was a phishing attack, which was spam and which was authentic. The exercise can also include borderline examples (e.g. newsletters) that illustrate how difficult it sometimes is to differentiate between authentic and malicious email.
Debriefing:
○ The teacher can print examples from their own mailbox.
○ The students can work individually, but working in groups has the benefit of allowing them to share opinions with classmates.
○ When sorting the printed examples, the students can only see the text of the email. This, however, is not always enough to make the right decision. At first sight, the more sophisticated emails look almost identical to authentic ones. The attacker may, for example, only change the link which the message recipient is to click. So instead of redirecting you to “help.com” you will be redirected to “heIp.com.” Despite looking the same, in the first instance the “l” is a lower case
“L” and in the second instance the “I” is a capital “i.” If you click the second link, you will be taken to “heip.com.” To be able to differentiate between these emails, you need to have an actual electronic message where you can check the URL (as described below).
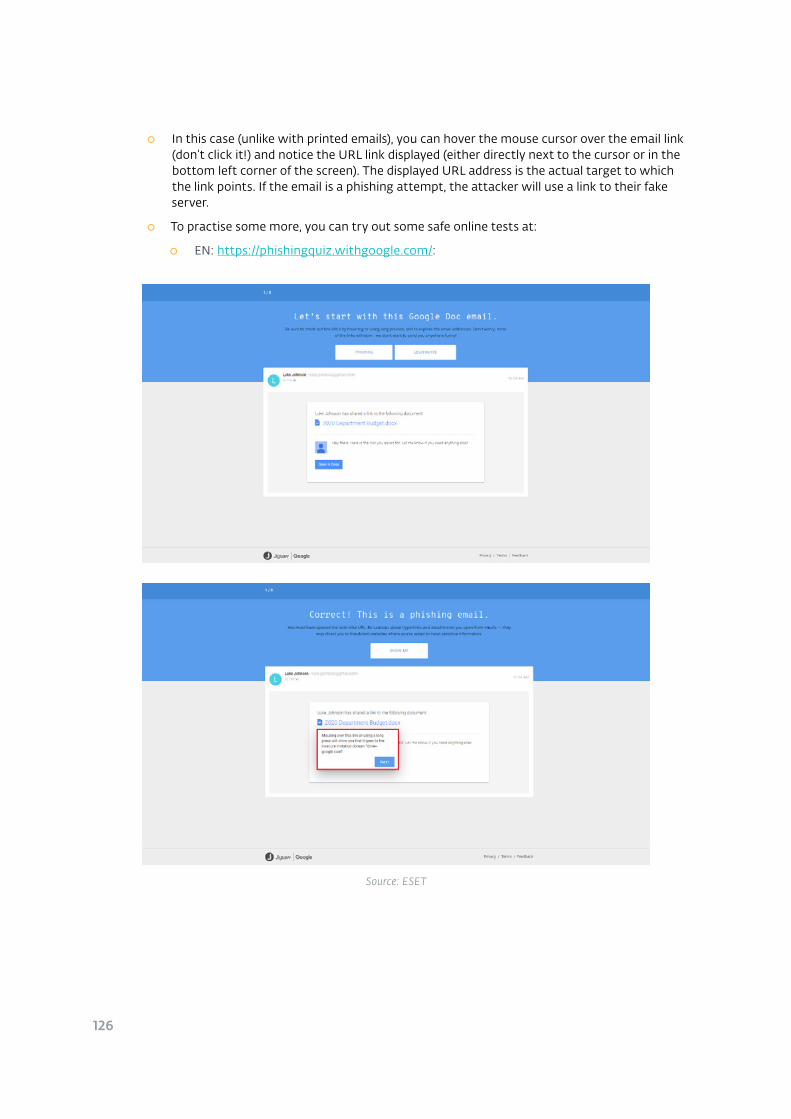
126
○ In this case (unlike with printed emails), you can hover the mouse cursor over the email link (don’t click it!) and notice the URL link displayed (either directly next to the cursor or in the bottom left corner of the screen). The displayed URL address is the actual target to which the link points. If the email is a phishing attempt, the attacker will use a link to their fake server.
○ To practise some more, you can try out some safe online tests at:
○ EN: https://phishingquiz.withgoogle.com/:
Source: ESET

127
Alternative 1:
Students can only differentiate between spam and legitimate email. This is an easier option, because sometimes it is very difficult to differentiate phishing from spam.
Alternative 3:
The exercise can also be done in electronic form (via an interactive blackboard or presentation) and the students can vote in each case by a show of hands: “Those who think this is spam, raise your hands.” This is a simpler yet less interactive version of the activity, which limits student debate.

128
Article on Digital Security—Reading Comprehension
Age: 10+
Duration: 20–45 minutes (depending on the choice of article and number of created questions)
Objectives:
○ Improve the students’ knowledge of the most recent digital security information.
○ Teach the students to work with a technical text and comprehend it.
○ Develop critical thinking and argumentation skills.
Difficulty: Medium/high (depending on the choice of article and number of created questions)
Before the activity: The teacher finds and studies an article on a specific topic and prepares a series of questions in advance.
May refer to any chapter depending on the topic of the selected article
129
Procedure:
1. Before the lesson, the teacher picks an article pertaining to internet security. They study the article and prepare a series of questions related to it.
2. During the lesson they tell the students to read the article and answer the prepared questions. The students may work in groups.
How can you find suitable articles? E.g. by searching for “vulnerability, exploit, malware” on zdnet.com.https://www.zdnet.com/search/?q=vulnerability
It may be difficult to create suitable questions. The article selection and question preparation can take up to several hours. If this is your first time doing this activity, ask your colleagues to comment on the questions. For starters, we recommend choosing timeless issues that can be used for other groups as well.
Example:
FOR THIS ARTICLE… https://www.theguardian.com/technology/2018/dec/14/facebook-admits-bug-app-developers-hidden-photos
…YOU COULD ASK:
○ Which social network had a data leak problem? [Facebook]
○ Which user data was at risk? [photographs]
○ Who was able to access the data? [third party applications]
○ Approximately what percentage of all Facebook users were affected by this? [about 0.3%—to answer this, it is not enough to read the article, where 6.8 million users are mentioned, one also needs to look up how many users Facebook had back in December 2018 (about 2.27 billion)]
○ Open question to discuss: If you were among the affected users, what is the worst thing that could happen to you?
○ Find a different security problem which this social network has suffered from in the past.
3. Based on what they read, the students can prepare their own sets of questions. The teacher and the rest of the class will try to answer them using the information from the article. The teacher should also discuss with the students what made them ask these questions.
At the end of the lesson, older students (13+) may discuss which online security related topic would be worth discussing with their peers. The teacher may give them an assignment to prepare an article and a set of questions for their peers and they can have a similar discussion with another class in collaboration with the teacher.
Tip:
130
Set Up Your Smartphone
Age: 10+
Duration: 45 minutes (may also take less time, depending on how skilled the students are)
Objectives:
○ Increase the security of the students’ phones and mobile devices.
Difficulty: Medium (depending on the students’ phones; for lesser known manufacturers it may be difficult to find the right procedure)
Before the activity: The teacher should study how to adjust the settings described in this activity, ideally for both the iPhone and the most recent versions of Android. The teacher asks students to bring their own mobile phones or tablets to the lesson. If a student doesn’t own a phone, they can work in pairs with their classmates.
The teacher should consider whether to use this activity in classes where students come from significantly different social and economic backgrounds. Comparing mobile phones among students can accentuate the differences and attract unwanted attention to disadvantaged students with older or no phones. This can be resolved by working in pairs or using devices provided by the teacher.
Mobile device security
131
Procedure:
1. The teacher will briefly show the class where to find the individual settings and why is it important to use the correct settings. They can do a practical demonstration with their own device or they can look up tutorials available on YouTube, or on Apple and Android websites. They should mainly be dealing with the following three settings:
○ Screen lock
○ The “Find my device” or “Find my iPhone” feature
○ Permissions and access for individual applications
2. The students will modify these basic security settings on their devices under the teacher’s supervision. The students may accidentally lock themselves out of their devices or use the wrong settings (e.g. they may withdraw permissions thus disabling some app functionality). The teacher should advise students of these risks in advance and provide active advice on how to prevent such issues. Each phone may have the settings in a different place, or they may be named differently.
3. The class, supervised by the teacher, evaluates whether the rights and permissions of different apps are adequate (social networks, maps, camera, etc.) and whether today’s users are aware of what information they share with service providers.
Additional information:
Screen lock—it is important to set-up a PIN, password or biometric phone unlock so that no phone functionality is available without the owner’s (student’s) consent and verification. Students should remember their PIN/password well to avoid locking themselves out of their device. If the students work in pairs, the PIN/password must be known only to the student owning the device. Their classmate, however, can watch the entire set-up process and only give privacy to the classmate when the secret code is being entered.
The “Find my device/iPhone” feature allows you to find, locate and remotely wipe a device using the internet in case of loss or theft.
Permissions and access for individual applications. Numerous applications require GPS, location, microphone, images or camera access. However, is this always necessary? If not, these permissions can be modified in the app settings. The modifications can be reversed at any time, so there is no threat of permanently disabling an app. Teacher can show students how to adjust these (app) settings.
132
ANDROID PROCEDURE:
https://support.google.com/android/answer/9431959?hl=en https://support.google.com/googleplay/answer/6270602?hl=sk
iOS PROCEDURE:
https://support.apple.com/en-us/HT203033
FOR OLDER STUDENTS USING MOBILE PAYMENTS (SECONDARY SCHOOLS):
Students can check whether NFC (Near Field Communication) is enabled on their device. It should always be off and only turned on when you really need it—e.g. at a cash desk, or when withdrawing money from an ATM.
○ Question: What could happen when NFC is on?
○ Answer: When an attacker comes close enough to your phone, they can force a payment similar to a contactless payment in a store. Each application has a different security level: some banks require a PIN code only when making a payment in excess of a certain amount, so payments of, say, less than 50 euros don’t require any authorisation. With an unlocked screen, Google Pay does not require any authentication, so if you have an unlocked phone in your hand and someone comes near it, hundreds of euros can be deducted from the account in a matter of seconds.

133
Sharing Holiday Information on Social Networks
Age: 10+
Duration: 45 minutes
Objectives:
○ Teach students what to be careful about when sharing information on social networks.
Difficulty: Low
Before the activity: Based on the Digital Security Handbook, the teacher prepares a set of recommendations on how to safely (or not) share content on social networks.
Different social networks implement different age restrictions for their users. The teacher should ensure that no such restrictions are broken when doing this activity.
Social networks
Procedure:
1. The teacher asks the students to describe, on a piece of paper and in as much detail as possible, the appearance of 5 to 10 posts (photographs, filters, (mini)videos, posts, Instastories) that they would share on their social network profile before, during and after a two-week holiday in an exotic destination of their choice. The students may work in groups to prepare more detailed descriptions and more posts. (15 minutes)
2. The teacher collects the completed assignments.
3. The students then familiarise themselves with the rules of safely sharing information on social networks. It is important to preserve this sequence (first create the posts then introduce the rules) so that the students prepare the posts the way they usually do on their own profiles. At this point, the students may also watch the recommended videos listed below. (10 minutes—ideally including the video)
4. Subsequently, the class compares the rules with several randomly picked series of posts prepared in the first part of the activity. Jointly they identify the potential risks and correct procedures associated with the prepared contents. (max. 20 minutes)
5. The teacher helps the students summarise the rules they have learned and the things they should be mindful of when posting on social networks. They can use the following questions:
○ Did the posts include information about the user being away without the possibility to check on their property?
○ Would the students share their IDs, plane or other tickets, and other sensitive documents?
○ Did the posts include information about other family members which could be misused when leaked (e.g. that parents/siblings will also be away)?
○ Did the posts include specific times of departure, transfers during the holiday and the return?
○ Did the posts include too many other sensitive and personal details, e.g. regarding valuables, equipment or jewellery which the students plan to take with them?
○ Did the posts contain shots which the student could regret later, or which could damage their reputation when looking for a job/volunteer work/relationship?
EN: During the lesson, we recommend reading the following article on how thieves use social networks to plan burglaries: https://www.getsafe.com/how-burglars-use-social-media/
As an alternative, you can watch this video (2:31 min.) portraying the robbery of Kim Kardashian in her hotel room, which thieves identified based on the information she published on her social network profile: https://www.youtube.com/watch?v=UzWYIy2gACg
Tip:
135
Social Network Profile Setup
Age: 11+
Duration: 45 minutes
Objectives:
○ Teach students what to be careful about when setting up their social network profiles.
Difficulty: High (the teacher has to create multiple simulated profiles and fill them with content)
Before the activity: With alternative 1, the teacher has to create two or three fictitious profiles on a social network which use different settings (public/private, different location sharing permissions, different data categories and their visibility to visitors). These profiles also need to be filled with test content, including several photographs, posts or videos—ideally over a longer period of time to appear realistic.
With alternative 2, the teacher needs to carefully check the settings and contents of their own profile, as it will be presented to the entire class. Before the lesson the teacher should also check how their profile is visible to others (using the “View As” feature—see below).
social networks

136
Source: ESET
Procedure:
Alternative 1:
1. Using the fictitious profiles, the teacher will show the students specific examples of what others can see with different profile settings (when the users are friends, when the account is private/public, etc.).
2. When the students are older and the social network in question is Facebook, the teacher may use the test account to maintain several conversations and then download all profile data under Settings/Download my information.
3. In the downloaded file, the class can view what information the social network keeps about them and point out that to a certain extent the user loses control over what has once been shared on the internet.
Alternative 2:
1. The teacher opens their (or the fictitious) Facebook profile.
2. They enter the Settings - Timeline and Tagging, where they select the option to view their profile via the “View As” feature (see the image above). In this mode, they can browse their entire profile and show the students what is visible from the outside with the given setting. They can also go back to the profile settings, modify them and use “View As” again to show the difference.
137
Identifying True and Fake News
Age: 8+
Duration: 45 minutes
Objectives:
○ Teach students how to identify fake news.
○ Develop critical thinking.
Difficulty: medium
Before the activity: The teacher finds and prepares several news items and sorts them into categories.
social networks
138
Procedure:
1. The teacher selects a couple of contemporary hoaxes as well as true pieces of information (roughly 10 published over the last month). The message can also be a shared Facebook post or an email shared and forwarded by other people.
2. The students work individually or in groups and evaluate which news items are believable. To verify them, they can use the internet and sources they trust.
3. The students and the teacher together analyse which news items were true and which fake, and show what gave the fake ones away. In doing this activity, the teacher can show the students (un)suitable sources of information (disinformation websites) and compare them to reliable sources (international organizations, reliable media organizations).
The students can find other examples, print them from their original source and discuss and verify them with their classmates and the teacher.
139
Model Conference (on the Most Modern Social Networks)
Age: 10+ (depending on the students’ maturity and their ability to use presentation tools)
Duration: 45 minutes + 45 minutes
Objectives:
○ In a playful form, give the students an overview of the existing social networks.
○ Practise creating presentations and working with specific software tools.
Difficulty: Low
Before the activity: The teacher should at least study some general information about individual social networks and categorise them for group work during the lesson. This kind of preparation is not mandatory, as the teacher can also use the students to provide information about individual social networks.
social networks
140
Procedure:
1. During the first lesson, the teacher divides the class into several groups and each group selects one social network to work with.
2. The students’ task will be to prepare a presentation/report in which they introduce the given network to the others. Several groups in the class can present the same network.
3. The teacher may select certain areas and divide them among the groups (e.g. security settings, sharing tools, old content management, etc.) which they will study and present to their classmates.
4. The next lesson will be a model conference where all groups will present the social network they have chosen. The teacher doesn’t have to know that social network at all; they will learn about it from the students’ report and can ask “rookie” questions about how things work in the given service.
141
Model Conference (on the Most Modern Applications)
Age: 10+ (depending on the students’ maturity and their ability to use presentation tools)
Duration: 45 minutes + 45 minutes
Objectives:
○ In a playful form, give the students an overview of the existing modern applications.
○ Practise creating presentations and working with specific software tools.
Difficulty: Low
Before the activity: The teacher should study general information about the selected type of applications and divide them for group work during the lesson. For example, these can be chat apps, photograph editing apps, security apps, news apps, etc., which the students will focus on during the lesson. Before the lesson, the teacher should study the basic descriptions, features, possibilities, uses, data collection, privacy and security settings, so they can react to the students’ information.
Mobile device security social networks
142
Procedure:
1. During the first lesson, the teacher divides the class into several groups and each group selects one application to work with.
2. The students’ task will be to prepare a presentation/report in which they introduce the given application to the others. Several groups in the class can present the same application.
3. The teacher may select a certain area of focus (e.g. security settings) or give the choice to the students, which will allow them to compare multiple aspects in individual presentations.
4. The next lesson will be a model conference where all groups will present the application they have chosen. The teacher should have at least a basic understanding of the app but should also stay open to new information presented in the students’ report. The teacher moderates the
“conference” and, following each presentation, encourages others to ask questions they would like to know the answers to. After each presentation, the teacher encourages discussion and asks questions so that the students learn as much about the application as possible.
143
The School Wi-Fi Network
Age: 14+
Duration: 45 minutes
Objectives:
○ Teach the students what a properly set-up Wi-Fi network should look like and how to safely use it.
Difficulty: High (requires excellent technical knowledge of Wi-Fi network settings and proper wariness when presenting them to students)—suitable for secondary schools
Before the activity: The teacher must ensure they know the basics of safe password creation and internet connection security. The can refer to the Digital Security Handbook as well as other reliable sources (such as this guide by the United States Department of Defense).
connection securitypasswords
144
Procedure:
1. Together with the students, the teacher brainstorms the rules which should apply to school Wi-Fi networks—correct set-up, suitable name (SSID) and strong password, rules and reasons for regular password changes, what the students can/cannot do and what they are/aren’t allowed to do when using the school Wi-Fi network.
In more tech-savvy classes, the teachers may involve the school Wi-Fi administrator and check whether the school routers use updated firmware and a strong password (the admin must not show the password to the administration interface, but they should be able to describe how long and complex it is) and they can go over the router settings (creating subnets, address filtering, MAC address-based device blocking, etc.).
2. The teacher and the students discuss the individual proposals and together select the most important rules to include on a poster.
3. The selected rules are then arranged on the poster or an electronic leaflet. The poster/leaflet may be designed by students individually or in groups. At the end of the lesson, everyone will vote on the best design. The winning design (after approval by the school headmaster) can be presented on the school noticeboard.
Alternative:
Similarly, students can also create rules for other areas, such as behaviour on the internet, social network use or password creation (see the “Safe Password Poster” activity).
What Does Encrypted Communication Look Like?
Age: 12+
Duration: 45 minutes
Objectives:
○ Explain to students the difference between unencrypted (http) and encrypted (https) communication.
○ Use practical examples to show students how simple it is to intercept the contents of unencrypted communication.
Difficulty: High (in demonstration form at primary schools, as part of education at secondary schools—the teacher has to download the required tools and learn how to use them, including the data description)
Before the activity: The teacher downloads and installs “PC Wireshark” (https://www.wireshark.org/)—a tool for monitoring network traffic1 and tries using it according to the instructions below. Should the teacher wish to present other, more complicated, features of the program, much more detailed sets of instructions are available on the internet.
1 For computers running Linux, the available alternative is “tcpdump.”
connection securitypasswords
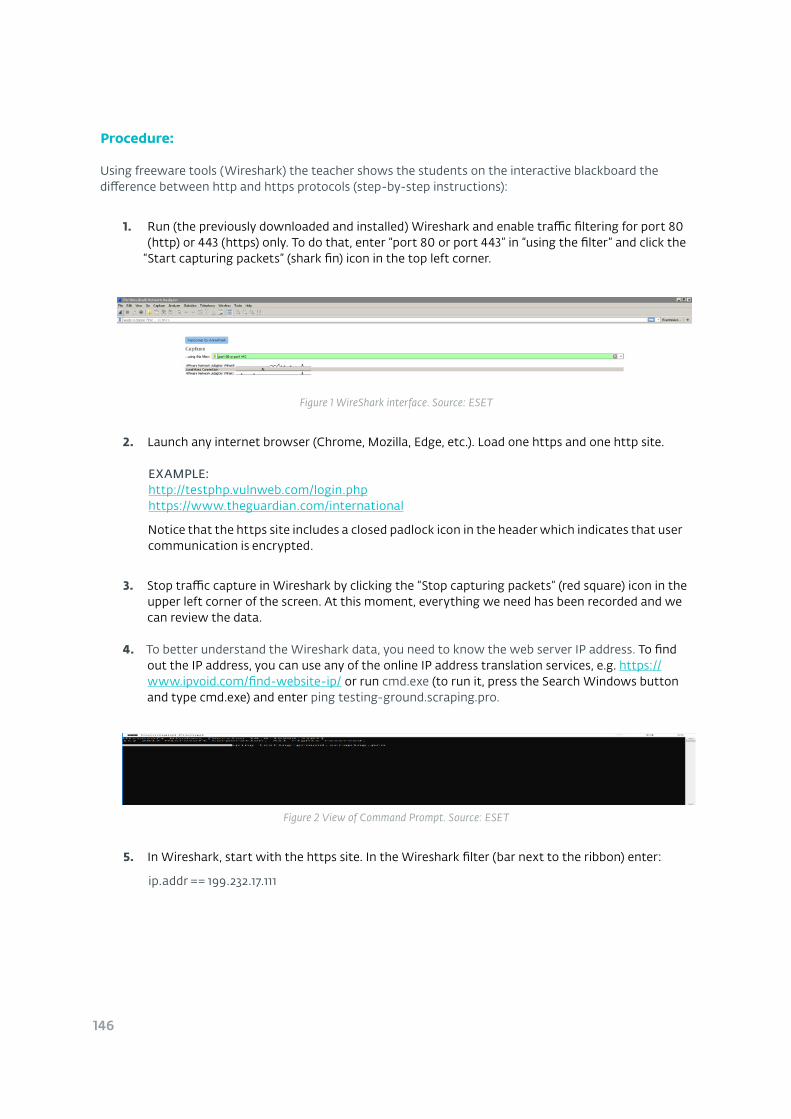
146
Procedure:
Using freeware tools (Wireshark) the teacher shows the students on the interactive blackboard the difference between http and https protocols (step-by-step instructions):
1. Run (the previously downloaded and installed) Wireshark and enable traffic filtering for port 80 (http) or 443 (https) only. To do that, enter “port 80 or port 443” in “using the filter” and click the
“Start capturing packets” (shark fin) icon in the top left corner.
Figure 1 WireShark interface. Source: ESET
2. Launch any internet browser (Chrome, Mozilla, Edge, etc.). Load one https and one http site.
EXAMPLE: http://testphp.vulnweb.com/login.php https://www.theguardian.com/international
Notice that the https site includes a closed padlock icon in the header which indicates that user communication is encrypted.
3. Stop traffic capture in Wireshark by clicking the “Stop capturing packets” (red square) icon in the upper left corner of the screen. At this moment, everything we need has been recorded and we can review the data.
4. To better understand the Wireshark data, you need to know the web server IP address. To find out the IP address, you can use any of the online IP address translation services, e.g. https://www.ipvoid.com/find-website-ip/ or run cmd.exe (to run it, press the Search Windows button and type cmd.exe) and enter ping testing-ground.scraping.pro.
Figure 2 View of Command Prompt. Source: ESET
5. In Wireshark, start with the https site. In the Wireshark filter (bar next to the ribbon) enter:
ip.addr == 199.232.17.111
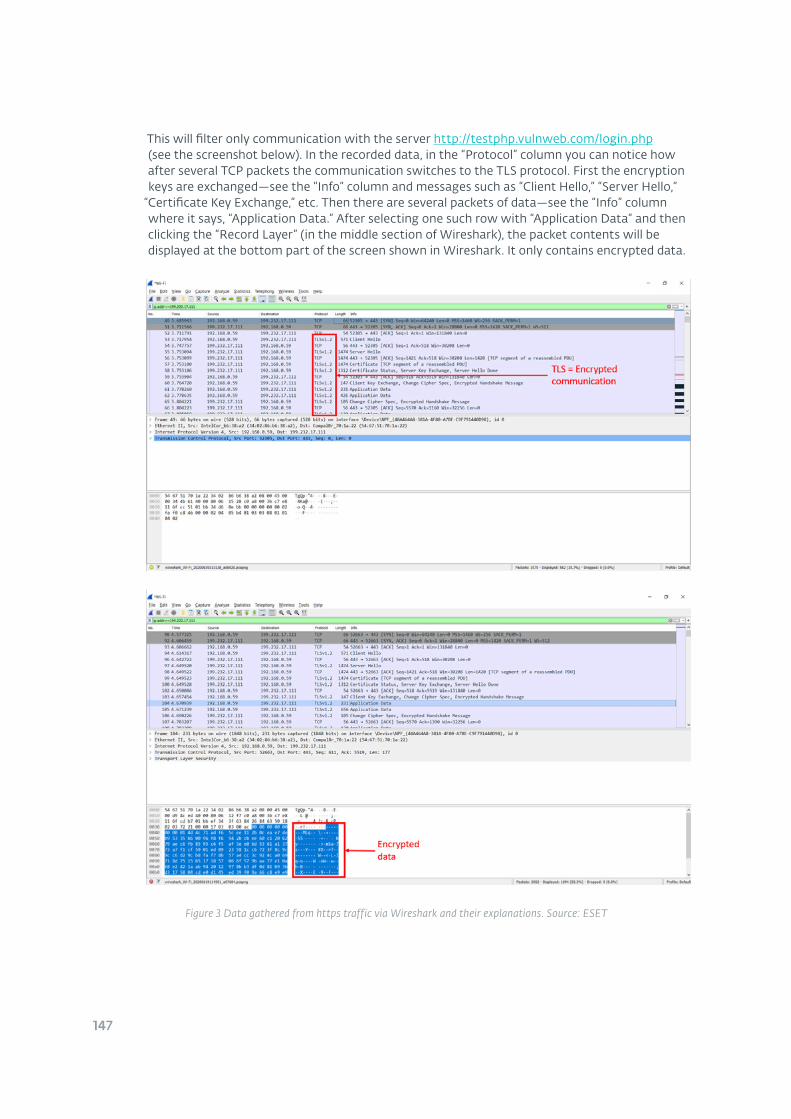
147
This will filter only communication with the server http://testphp.vulnweb.com/login.php (see the screenshot below). In the recorded data, in the “Protocol” column you can notice how after several TCP packets the communication switches to the TLS protocol. First the encryption keys are exchanged—see the “Info” column and messages such as “Client Hello,” “Server Hello,”
“Certificate Key Exchange,” etc. Then there are several packets of data—see the “Info” column where it says, “Application Data.” After selecting one such row with “Application Data” and then clicking the “Record Layer” (in the middle section of Wireshark), the packet contents will be displayed at the bottom part of the screen shown in Wireshark. It only contains encrypted data.
Figure 3 Data gathered from https traffic via Wireshark and their explanations. Source: ESET
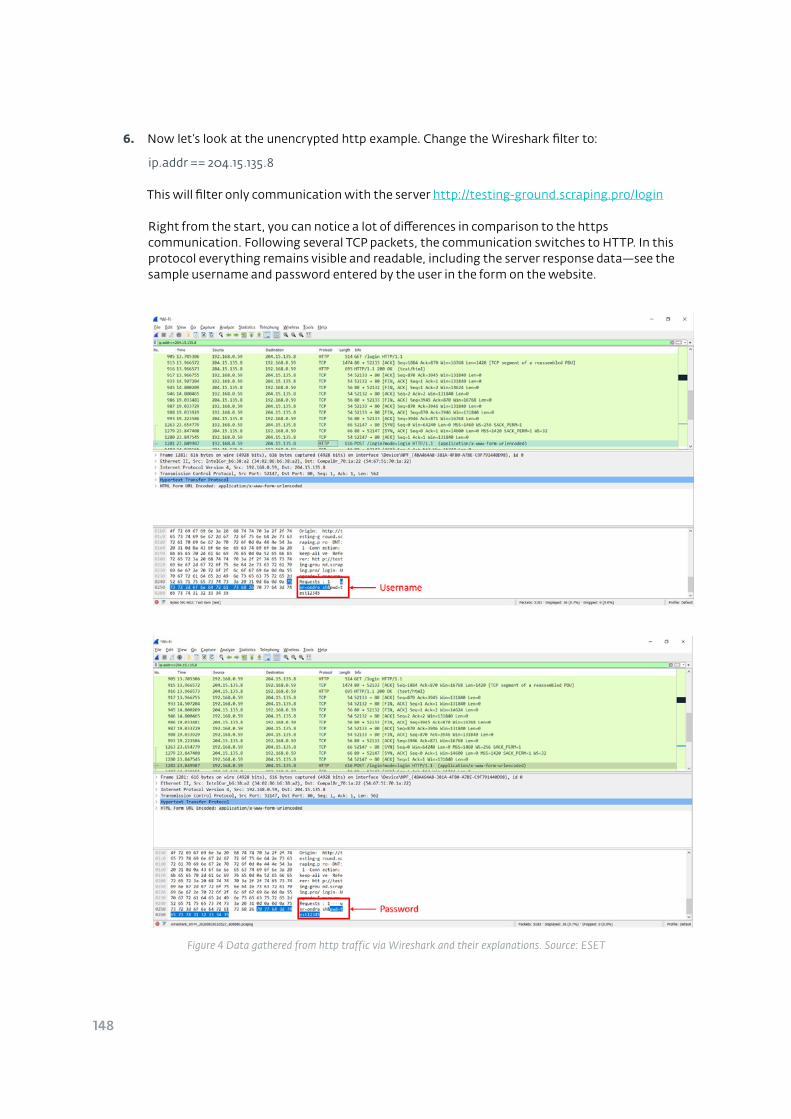
148
6. Now let’s look at the unencrypted http example. Change the Wireshark filter to:
ip.addr == 204.15.135.8
This will filter only communication with the server http://testing-ground.scraping.pro/login
Right from the start, you can notice a lot of differences in comparison to the https communication. Following several TCP packets, the communication switches to HTTP. In this protocol everything remains visible and readable, including the server response data—see the sample username and password entered by the user in the form on the website.
Figure 4 Data gathered from http traffic via Wireshark and their explanations. Source: ESET

149
7. The teacher and the students summarise what they have seen and prepare a short guide regarding what you should pay attention to when visiting a website. At the same time, the class can jointly prepare rules on how (not) to behave when using an unencrypted website (http).
Important note: The fact that data is in binary form (i.e. not readable to the naked eye) does not mean it is encrypted. Http traffic can also contain binary data, e.g. an unencrypted binary image or video file.
150
Simulated Phishing Attack
Age: 14+
Duration: 45 minutes (or less if the class can prepare the email faster) + 45 minutes (the evaluation can also be faster, but the activity still needs to be divided into two lessons)
Objectives:
○ Experience first-hand how email threats are created and what they look like. This will help the students better remember what they should notice about fake emails and how to avoid them.
Difficulty: High (the teacher must use knowledge from other activities and show a great deal of creativity. The teacher must also ensure that the collected answers don’t end up in the wrong hands so that the students don’t use them as an inspiration for their own
“leisure time activities.” Ideally, there should be two teachers doing this activity with the class. This activity is only recommended for teachers who have known the given group of students for an extended period of time and are able to estimate the risk level.)
Before the activity: Before the lesson, the teacher can create a mailbox to use during the activity. They can also prepare email templates using which students will create their own versions of phishing mails. Evaluating the replies received and their anonymisation will take place outside of class so that the students cannot obtain any sensitive data from their classmates.
To simplify the process of organisation, when dividing students into groups two teachers can work together.
browser security malware and other malicious activities
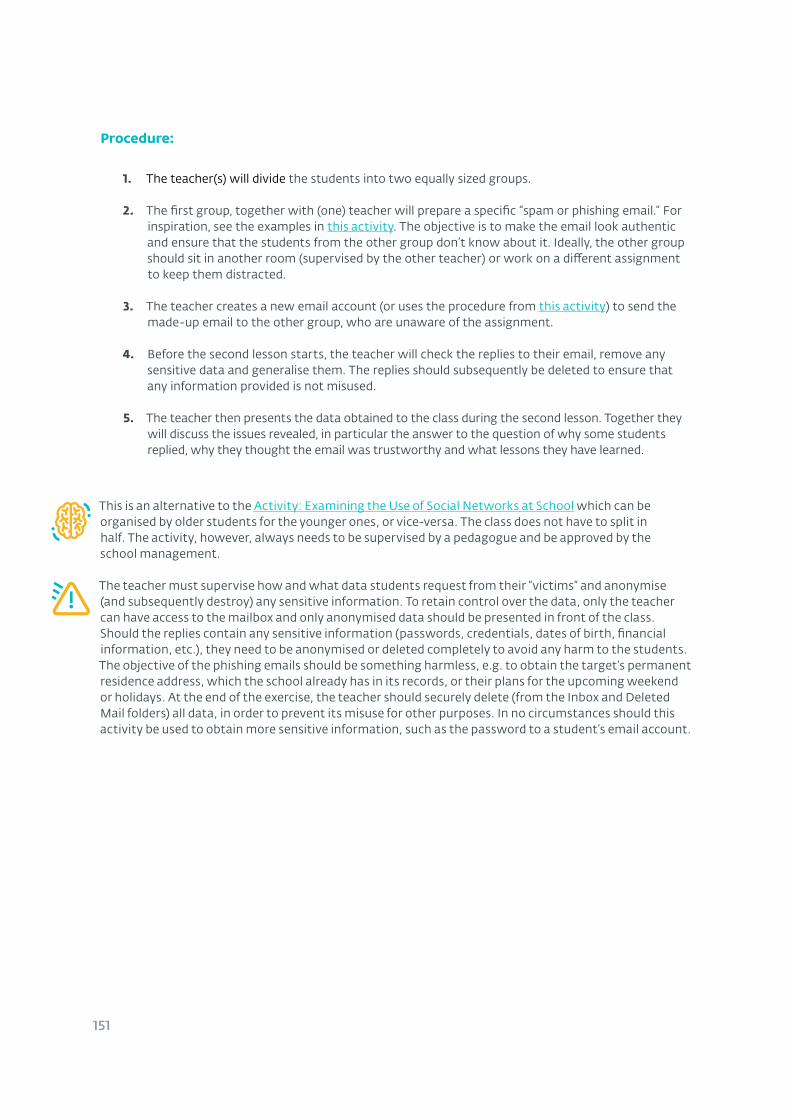
151
Procedure:
1. The teacher(s) will divide the students into two equally sized groups.
2. The first group, together with (one) teacher will prepare a specific “spam or phishing email.” For inspiration, see the examples in this activity. The objective is to make the email look authentic and ensure that the students from the other group don’t know about it. Ideally, the other group should sit in another room (supervised by the other teacher) or work on a different assignment to keep them distracted.
3. The teacher creates a new email account (or uses the procedure from this activity) to send the made-up email to the other group, who are unaware of the assignment.
4. Before the second lesson starts, the teacher will check the replies to their email, remove any sensitive data and generalise them. The replies should subsequently be deleted to ensure that any information provided is not misused.
5. The teacher then presents the data obtained to the class during the second lesson. Together they will discuss the issues revealed, in particular the answer to the question of why some students replied, why they thought the email was trustworthy and what lessons they have learned.
This is an alternative to the Activity: Examining the Use of Social Networks at School which can be organised by older students for the younger ones, or vice-versa. The class does not have to split in half. The activity, however, always needs to be supervised by a pedagogue and be approved by the school management.
The teacher must supervise how and what data students request from their “victims” and anonymise (and subsequently destroy) any sensitive information. To retain control over the data, only the teacher can have access to the mailbox and only anonymised data should be presented in front of the class. Should the replies contain any sensitive information (passwords, credentials, dates of birth, financial information, etc.), they need to be anonymised or deleted completely to avoid any harm to the students. The objective of the phishing emails should be something harmless, e.g. to obtain the target’s permanent residence address, which the school already has in its records, or their plans for the upcoming weekend or holidays. At the end of the exercise, the teacher should securely delete (from the Inbox and Deleted Mail folders) all data, in order to prevent its misuse for other purposes. In no circumstances should this activity be used to obtain more sensitive information, such as the password to a student’s email account.
152
Examining the Use of Social Networks at School
Age: 13+
Duration: Several lessons
Objectives:
○ Find out what to pay attention to in email communication.
○ Practise working with data.
○ Practise using tools for creating presentations.
○ In a presentation, show other students what mistakes people make when using social networks, or which tools they use (in)correctly (network settings, post sharing, etc.).
Difficulty: High (school-wide activity, requires the consent of the school management, demanding organisation with an emphasis on protecting sensitive data)
Before the activity: No pre-lesson preparation necessary.
Social networks
153
This is a long-term project/activity/experiment which needs to be implemented with the approval of the school management. It can take in excess of one month.
Within the school, the students will do research to find out what kind of information is shared by their schoolmates on social networks. The outcome will be a practical demonstration of the risks and the education of all students at the school.
Activity prerequisites: It is important that students know social networks and their risks. See previous activities, such as Sharing Holiday Information on Social Networks.
Procedure:
1. The teacher prepares an activity for three classes:
2. The first class will create multiple fictitious social network profiles. Ideally, they should use the 2–3 social networks which are the most popular at their school. The accounts should contain fictitious data (name, photograph, email, phone number, etc.). Under the teacher’s supervision, they will use these accounts to look up and contact other students (from other classes). Their objective will be to obtain user information (address, curricular and extra-curricular activities, list of friends, etc.) and create as wide a network of friends within the school as possible. The students can acquire the information directly from public profiles or send friend requests. If these requests are confirmed, they can then collect (under supervision) some information available on individual profiles.
The teacher must ensure the safety of the collected data, its anonymisation, and ethical handling of it. After the experiment, the teacher must destroy all the sensitive information that has been acquired.
3. Supervised by a teacher, the second class will evaluate the information collected by the first group. They should focus primarily on characterising the mistakes and identifying best practices to be used by their schoolmates (e.g. refuse to accept friend requests from strangers, ask specific questions, set their profile as private, etc.).
Typical mistakes:
○ The user has a publicly accessible photograph of their home and address on their profile.
○ The user accepts a friend request despite not knowing the sender at all.
○ The user shares too much sensitive data and information on their profile, or shares their location data and leisure-time activities.
154
Typical good behaviour:
○ No sensitive information in the user’s profile is public.
○ In response to the friend request, the user asks how they know each other and does not fall for the made-up answer sent by the fake account (e.g.: “We go to the same school and we met at lunch a week ago.”), and thus refuses to add the fake profile as a friend.
4. Based on the data prepared by the second group, the third group prepares and creates presentations for the other classes. After agreeing with the teacher, they can come to those classes and show them how the students in that class did in the research (the data needs to be anonymised and only used under the supervision of the teacher). The impact of such presentations is much stronger compared to a general debate about risks, because the students see the specific mistakes that are made by people around them.
5. The school-wide results can be presented on the school noticeboard or made into a poster with graphs and similar visual tools. This poster should either be created by one of the three groups involved in the activity or each group can create their own poster and the best one can be selected.
The teacher must supervise how and what data the students are collecting, how they are using it and what will be shown in the presentations. Some sensitive information needs to be anonymised or deleted completely to avoid harming specific students.
The teacher must also make sure that when presenting results in classes, the lesson ends with the appropriate reflection. That means that everyone should be clear about the objectives, benefits and lessons offered by the activity. Otherwise it could stir up animosity between the students and erode trust and safety at the school.
155
Incognito Mode
Age: 13+
Duration: 30–45 minutes
Objectives:
○ Learn what incognito mode is and find out what level of “protection” it provides the user.
○ Design and implement a hypothesis verification procedure. Evaluate the obtained input and derive facts.
Difficulty: Low (ideally in a computer science classroom)
Before the activity: No pre-lesson preparation necessary.
browser security malware and other malicious activities
156
Procedure:
1. During the lesson, the students have to find as much information as possible on the internet about incognito mode (individually or in pairs, depending on the number of available computers), about what data it collects and how it works.
2. The students then enable incognito mode in their browser to test whether they will be able to automatically2 log in to a social network or use saved passwords. They can also watch videos on YouTube or other available services and compare them with what the service offers when they log in using normal mode.
Students should not enable the “Remember passwords” feature on school computers. By doing so they could jeopardize the safety of their data and of anyone using the device after them.
3. If students have worked in groups, at this point they can create new groups and compare their findings. Working in the new groups they can compile a list of theoretical and practical knowledge about incognito mode and discuss it with the teacher and the rest of the class.
4. At the end of the activity the class should know what incognito mode is, what it is used for and that it does not ensure anonymity, rather just collects/uses less data about the user. The class can also create a poster or a presentation for other schoolmates.
Suitable tools:
https://support.mozilla.org/en-US/kb/common-myths-about-private-browsing https://en.wikipedia.org/wiki/Private_browsing https://spreadprivacy.com/is-private-browsing-really-private/
2 With certain settings (auto sign-in), Twitter, for example, can recognise the user even when they use incognito mode and allow them to log in. This can be used as proof that the service can guess whose device is attempting to log in.
157
Self-portrait
Age: 10+
Duration: 45 minutes
Objectives:
○ Compare the risk of creating an improper selfie with other activities in the real world.
○ Learn what you need to notice when creating a selfie or other digital content.
Difficulty: Low
Before the activity: The teacher will study what to notice when analysing photographs (background, foreground, suitable and unsuitable objects and situations, location, metadata, etc.). They will use this knowledge in individual parts of the activity.
Social networks selfies digital identity privacy
158
Procedure:
1. During the lesson, the students find as many self-portraits and portraits of people as possible. These should be mainly paintings or older photographs, not selfies made using a smartphone. (10 minutes)
2. The class and the teacher then analyse the individual images and talk about what is in the foreground and background and why the author/artist used those objects. (10 minutes)
3. The students will look for selfies of famous people, artists and celebrities (10 minutes). The teacher can limit the search to looking for selfies made at home, at work or on holidays.
4. The class will evaluate the contents of these selfies and whether they contain any unsuitable information, details or objects. They compare them with the self-portraits and portraits from the first part of the activity, in particular in terms of the intentional placement of persons, objects, etc. (15 minutes)
159
The Selfie Abyss
Age: 13+
Duration: 30—45 minutes, or a homework assignment
Objectives:
○ Compare the risk of creating an improper selfie with other activities in the real world.
○ Learn what you need to notice when creating a selfie or other digital content.
Difficulty: Low
Before the activity: Study the Selfies chapter from the Digital Security Handbook and prepare an assignment for the students using the statistics described therein (or its updated version).
social networks selfies digital identity
160
Procedure:
1. In order for the students to realise how big the risk of taking selfies in risky situations actually is, the students will look for phenomena, activities and locations with a statistically lower risk of death and injury than selfies.
EXAMPLE:
○ attacks by wild animals (snake/spider bites, shark attacks)
○ extreme sports (parachute jumps, motorbike racing, skateboarding, snowboarding, surfing, swimming in the sea, etc.)
○ reportedly dangerous cities and locations (the Bronx in New York City, Mexico City, Rio de Janeiro, Johannesburg, Mount Everest, Annapurna, etc.)
2. The class will jointly analyse and evaluate the information they find out. Under the teacher’s supervision, they can use the data to create a kind of chart of dangerous activities, highlighting the risks connected with making a selfie.
3. The learnt statistics, comparisons, safety recommendations or a “motto” can then be turned into a presentation, poster or a different interactive format. Such further processing of the information can be part of a homework assignment.
161
Me, My Other Self and My Selfie
Age: 10+
Duration: 40 minutes
Objectives:
○ Compare the risk of creating an improper selfie with other activities in the offline world.
○ Learn what you need to notice when creating a selfie or other digital content.
Difficulty: Medium (requires preparation of specific material before the lesson)
Before the activity: The teacher prepares one suitable and one unsuitable selfie. They can use photographs from their own collection or create new ones. The unsuitable selfies can have something that looks like a sensitive document in the background, or a password or login credentials on a post-it; the teacher can be holding concert tickets with a QR code in their hand (can be generated via free online tools) which can be linked to a meme or a fun article, should the children actually attempt to scan it; or they can disclose the location where the selfie was taken.
The teacher will prepare a handout (checklist) with mistakes and unsuitable procedures to look for. The students can use it in their own analysis.
social networks selfies digital identity privacy
162
Procedure:
1. The students will find 10 to 20 recent selfies in their own phone (ideally taken in different locations and situations). (10 minutes)
2. Using the prepared examples, the teacher will present the dos and don’ts of selfies to give the students a frame of reference. At the end of this activity the teacher will distribute the prepared handouts. (10 minutes)
3. Students then analyse their own selfies by listing on a sheet of paper what they found in the foreground and in the background, whether the location can be derived from the photograph (e.g. there is an observation/church tower, or another distinct building in the background) or the time the selfie was taken, possibly other private information (hobbies, QR code, address, ID number, etc.). (15 minutes)
4. The students then describe (in general terms, to avoid disclosing any private information) what information that could be of value to an attacker they found in their selfies (location, sensitive documents, shots of the exterior door or the locks from inside a flat, etc.). The objective here is to realise the risks of unknowingly sharing sensitive information. (10 minutes)
If the teacher wishes to present specific examples of when unsuitable photographs (not just selfies) or shared data have caused problems, they can use the following examples:
Strava uncovers location of secret military bases. https://www.nytimes.com/video/world/middleeast/100000005705502/big-data-big-problems-how-stravas-heat-map-uncovers-military-bases.html
Soldiers shared their geolocations in an app tracking their beer consumption. https://www.bellingcat.com/news/2020/05/18/military-and-intelligence-personnel-can-be-tracked-with-the-untappd-beer-app/
163
Instant Internet Celebrity
Age: 10+
Duration: 35–40 minutes
Objectives:
○ Show practical and often popular examples of the risks and possibilities of having online celebrity status.
Difficulty: Low
Before the activity: The teacher can do a brief survey of interesting and viral cases to use as examples.
social networks selfies digital identity cyberbullying
164
Procedure:
1. Students should find examples of people who have published their photograph on social networks which later turned into a meme. They can also find information about how the unexpected popularity improved or negatively affected their lives and how they reacted to it. (15 minutes)
a. Because these cases are easy to find, the teacher can turn the activity into more of a competition by having the students vote for the best-found meme. (5 minutes)
2. The class will discuss how this usually happens and why the videos/photographs turned viral and how they would react in a similar situation—e.g. public embarrassment, a slip of the tongue, a weird expression on a published photograph. They should also discuss whether such photographs/videos should be published, and the possible implications for a classmate’s/friend’s psyche. (15–20 minutes)
EXAMPLE:
https://www.youtube.com/watch?v=Mh4f9AYRCZY https://www.theguardian.com/media/2017/dec/20/robert-kelly-south-korea-bbc-kids-gatecrash-viral-storm
165
CSI Selfie
Age: 11+
Duration: 30–45 minutes
Objectives: Learn what you need to notice when creating selfies and other digital content.
Difficulty: Medium (fictitious profiles need to be created)
Before the activity: The teacher identifies profiles suitable for analysis. Ideally, this might be an influencer or celebrity who is not widely popular among younger people. Alternatively, the teacher can create a fictitious profile and fill it with suitable information. For improved interactivity, the students can create a presentation to which they will copy photographs and link to them using lines or other symbols denoting relationships.
social networks and digital security privacy digital identity
166
Procedure:
1. The teacher divides the class into several “police” investigation teams or teams of detectives.
2. The students then review a profile on a social network and all its posts and available information. (10 minutes)
3. The individual teams will create an information map marking information that should not have been published on the internet and may create problems. (15 minutes)
4. Result—the individual teams present their findings to the class along with recommendations on what that person should do. (10 minutes—according to the number of groups)
167
Can You Identify a Lie?
Age: 10+
Duration: 30–45 minutes
Objectives:
○ Students will learn to identify hoaxes.
○ Students develop critical thinking.
○ Students learn to verify and assess whether information is true.
Before the activity: Students should know what hoaxes are and recognise their traits, and should know how to verify information.
hoaxes fake news disinformation
168
Procedure:
1. Hoax—work in groups to create a hoax, the objective of which will be to evoke a negative emotion in the recipient and make them spread it further. Students exchange the created hoaxes and their task is to find out what emotions the hoax does/does not evoke in them. They should also try to identify the traits of a hoax and the believable information. The teacher can use such messages in another classroom to check how believable they are to impartial audiences and to make the students look for signs of untrustworthiness.
2. A brief discussion on how the students did when identifying hoaxes (emotions, believability).
3. Fake news—work in groups and create one true and one fake piece of news (it can contain a photograph or a photomontage). When preparing the news, use the internet and digital technologies (graphics editor). Exchange the news and identify the traits of fake news and which information is believable. When assessing the news use digital technologies and the internet. The teacher can use such messages in another classroom to check how believable they are and to make students look for signs of untrustworthiness.
4. Brief discussion about how the students did when identifying true and fake news, about the difference between hoaxes and fake news and which are more difficult to spot. The teacher has to ensure that the hoaxes/fake news fabricated during the lessons are not distributed further by the students. The teacher also needs to ensure that students are mature enough and won’t use the lesson as an inspiration for malicious activity in their leisure time.
169
Who Created Me?
Age: 13+
Duration: 15–20 minutes
Objectives:
○ Students will learn what information about websites is available.
○ Using practical examples, the students will observe the traits of suspicious websites.
Before the activity: The teacher will find several popular legitimate websites (e.g. www.nytimes.com, theguardian.co.uk) and fake news websites (https://en.wikipedia.org/wiki/List_of_fake_news_websites) to show how to find out who registered each website and using what service, who is responsible and what is the contact address. The teacher should check this information in advance using www.whois.com or lookup.icann.org.
The teacher should be prepared to explain what the individual information on the looked-up sites means, and be ready to explain terms like registrar, registrant, etc.
digital identity digital footprint online not everyone is what they seem to be
safety on the internet
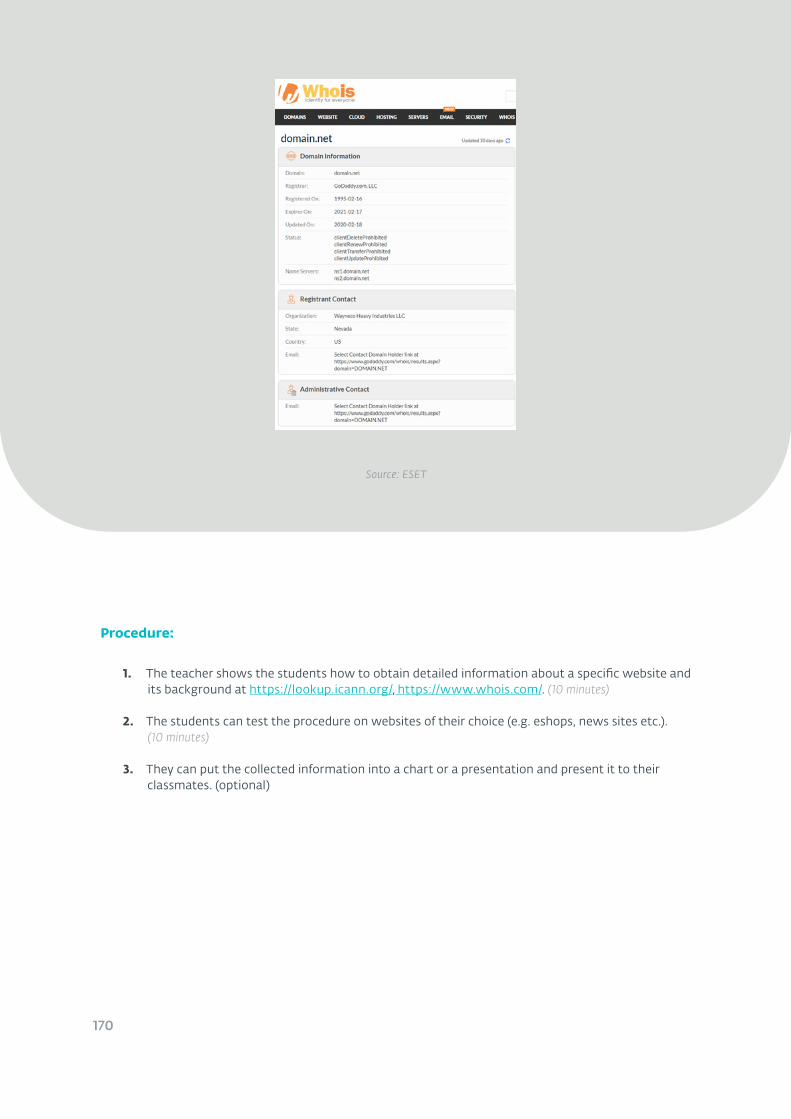
170
Source: ESET
Procedure:
1. The teacher shows the students how to obtain detailed information about a specific website and its background at https://lookup.icann.org/, https://www.whois.com/. (10 minutes)
2. The students can test the procedure on websites of their choice (e.g. eshops, news sites etc.). (10 minutes)
3. They can put the collected information into a chart or a presentation and present it to their classmates. (optional)
The information in this publication is provided for information only, is subject to change without notice, and should not be construed as a commitment by ESET spol. s r.o. ESET, spol. s r.o. assumes no responsibility or liability for any errors or inaccuracies that may appear in this publication.
ISBN 978 – 80 – 973884 – 0 – 9

ISBN 978 – 80 – 973884 – 0 – 9