Embed Size (px)
Citation preview
User’s Manual
EIZO Video Wall Plugin for Milestone XProtect
Version 1.0
2
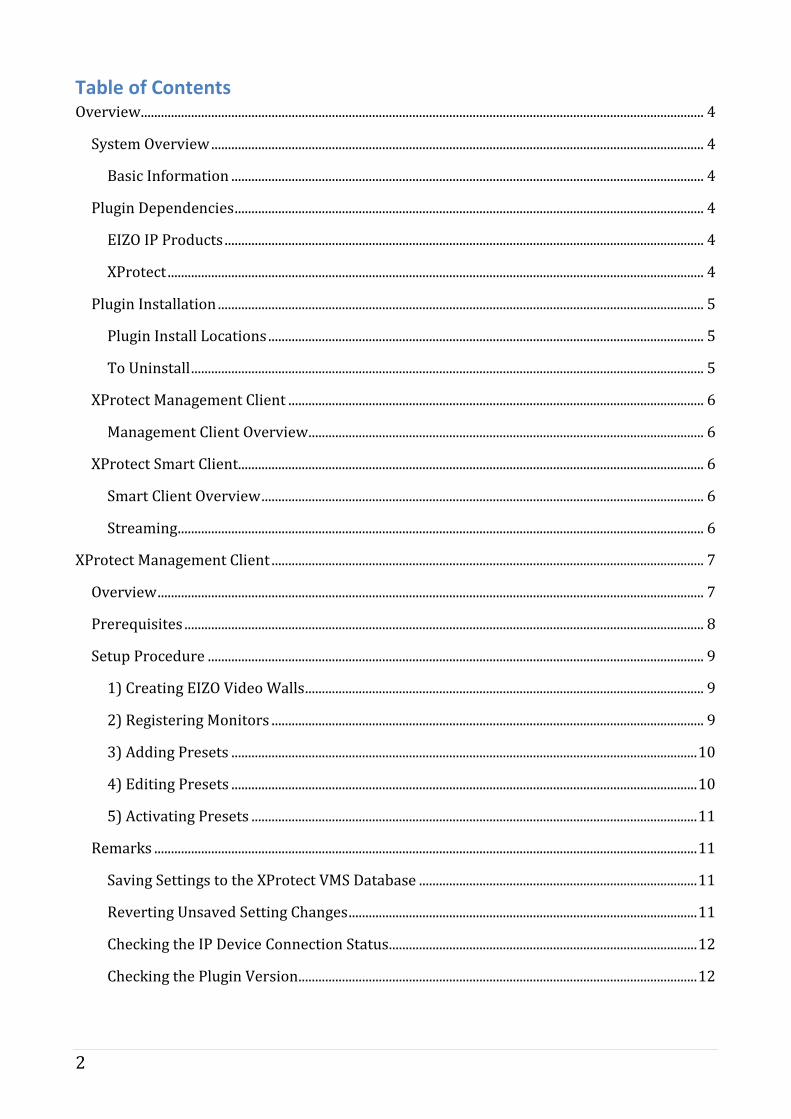
Table of Contents Overview........................................................................................................................................................................ 4
System Overview ................................................................................................................................................... 4
Basic Information ............................................................................................................................................. 4
Plugin Dependencies ............................................................................................................................................ 4
EIZO IP Products ............................................................................................................................................... 4
XProtect ................................................................................................................................................................ 4
Plugin Installation ................................................................................................................................................. 5
Plugin Install Locations .................................................................................................................................. 5
To Uninstall ......................................................................................................................................................... 5
XProtect Management Client ............................................................................................................................ 6
Management Client Overview ...................................................................................................................... 6
XProtect Smart Client........................................................................................................................................... 6
Smart Client Overview .................................................................................................................................... 6
Streaming ............................................................................................................................................................. 6
XProtect Management Client ................................................................................................................................. 7
Overview ................................................................................................................................................................... 7
Prerequisites ........................................................................................................................................................... 8
Setup Procedure .................................................................................................................................................... 9
1) Creating EIZO Video Walls ....................................................................................................................... 9
2) Registering Monitors ................................................................................................................................. 9
3) Adding Presets ........................................................................................................................................... 10
4) Editing Presets ........................................................................................................................................... 10
5) Activating Presets ..................................................................................................................................... 11
Remarks .................................................................................................................................................................. 11
Saving Settings to the XProtect VMS Database ................................................................................... 11
Reverting Unsaved Setting Changes ........................................................................................................ 11
Checking the IP Device Connection Status ............................................................................................ 12
Checking the Plugin Version ....................................................................................................................... 12
3
XProtect Smart Client ............................................................................................................................................. 13
Overview ................................................................................................................................................................. 13
Basic Functionalities .......................................................................................................................................... 14
Registering a Mimic Template To a View Screen ............................................................................... 14
Adding a Camera ............................................................................................................................................. 14
Changing a Layout .......................................................................................................................................... 15
Activating a Preset ......................................................................................................................................... 15
Restoring the Default Presets .................................................................................................................... 15
Getting Current IP-monitor Device Layouts ......................................................................................... 15
Activating a View Template Layout ......................................................................................................... 16
Removing a Mimic Template From a View ........................................................................................... 16
Switching Between EIZO Video Walls .................................................................................................... 16
Advanced Functionalities ................................................................................................................................. 17
Enabling Synchronization Monitoring ................................................................................................... 17
Checking a Device’s Status .......................................................................................................................... 18
Map ....................................................................................................................................................................... 18
Event Rules ....................................................................................................................................................... 18
Remarks .................................................................................................................................................................. 18
Checking the Plugin Version ....................................................................................................................... 18
Open Source Software License ............................................................................................................................ 19
Trademark .................................................................................................................................................................. 19
4
Overview
System Overview
Basic Information
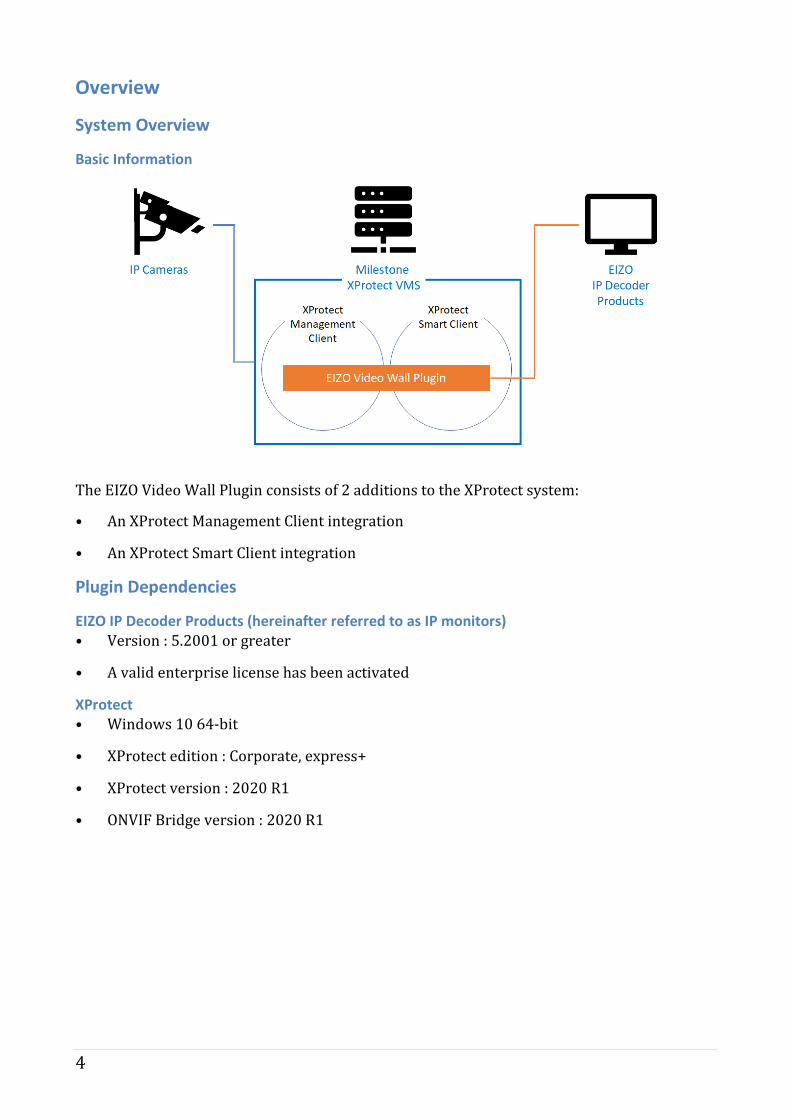
The EIZO Video Wall Plugin consists of 2 additions to the XProtect system:
• An XProtect Management Client integration
• An XProtect Smart Client integration
Plugin Dependencies
EIZO IP Decoder Products (hereinafter referred to as IP monitors) • Version : 5.2001 or greater
• A valid enterprise license has been activated
XProtect • Windows 10 64-bit
• XProtect edition : Corporate, express+
• XProtect version : 2020 R1
• ONVIF Bridge version : 2020 R1
5
Plugin Installation
Please check the EIZO website for information on how to obtain the installer.
Plugin Install Locations - C:\Program Files\VideoOS\MIPPlugins - C:\Program Files\Milestone\MIPPlugins
Note:
The user must choose from the above install locations and should check that a new folder named EIZOVideoWallPlugin appears at the end of the path.
eg: C:\Program Files\VideoOS\MIPPlugins\EIZOVideoWallPlugin
Note:
The XProtect Event Server must be restarted after installation.
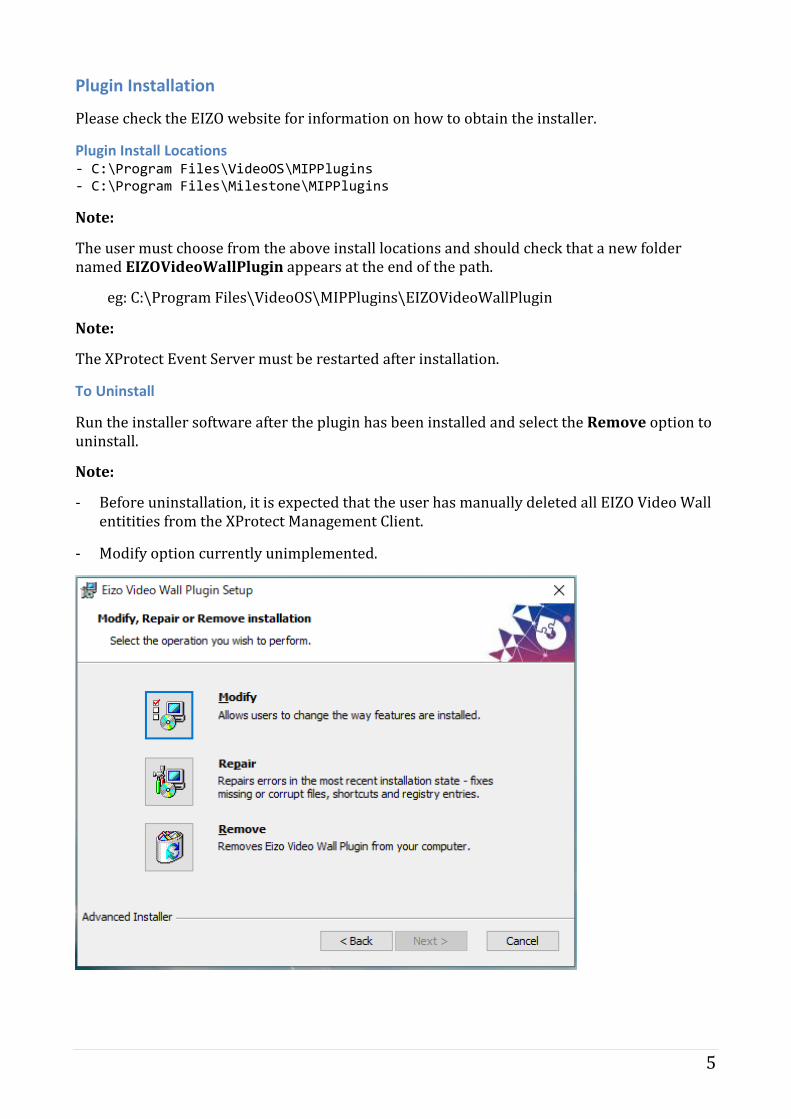
To Uninstall
Run the installer software after the plugin has been installed and select the Remove option to uninstall.
Note:
- Before uninstallation, it is expected that the user has manually deleted all EIZO Video Wall entitities from the XProtect Management Client.
- Modify option currently unimplemented.
6
XProtect Management Client
Management Client Overview
A new EIZO Video Wall section has been added to the Site Navigation.
Allows for:
• Registering EIZO IP-monitor devices to XProtect video-walls
• Arranging multiple IP-monitors in a video wall layout
• Creating presets for IP-monitors layouts
• Registering cameras to IP-monitors
XProtect Smart Client
Smart Client Overview
A new content item has been added to the System Overview pane.
EIZO Video Walls - the EIZO Video Wall for controlling IP-monitor devices.
Allows for:
• Monitoring video-walls with IP-monitor devices
• Getting layouts and registered cameras from IP-monitors
• Managing errors and alerts
Streaming
Server
The Milestone ONVIF Bridge is required as the streaming gateway server.
Streaming Protocol • RTP over UDP
• RTP over RTSP
Video Codec • H.264
7
XProtect Management Client
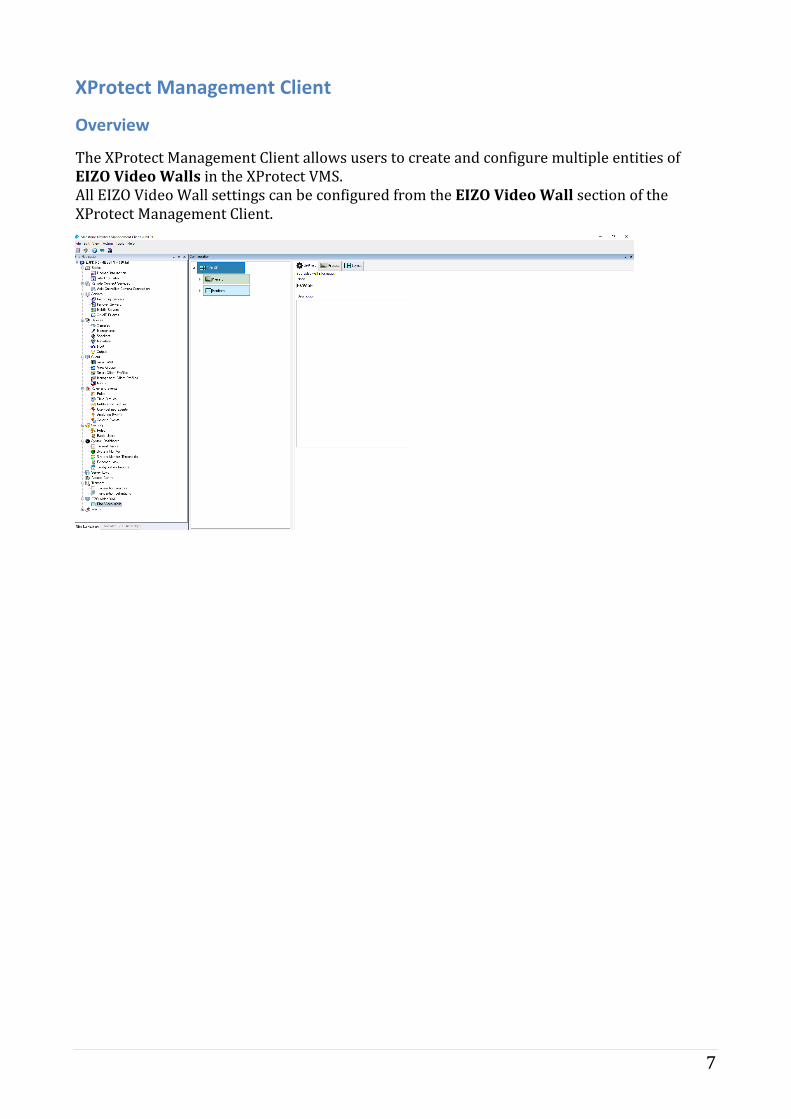
Overview
The XProtect Management Client allows users to create and configure multiple entities of EIZO Video Walls in the XProtect VMS. All EIZO Video Wall settings can be configured from the EIZO Video Wall section of the XProtect Management Client.
8
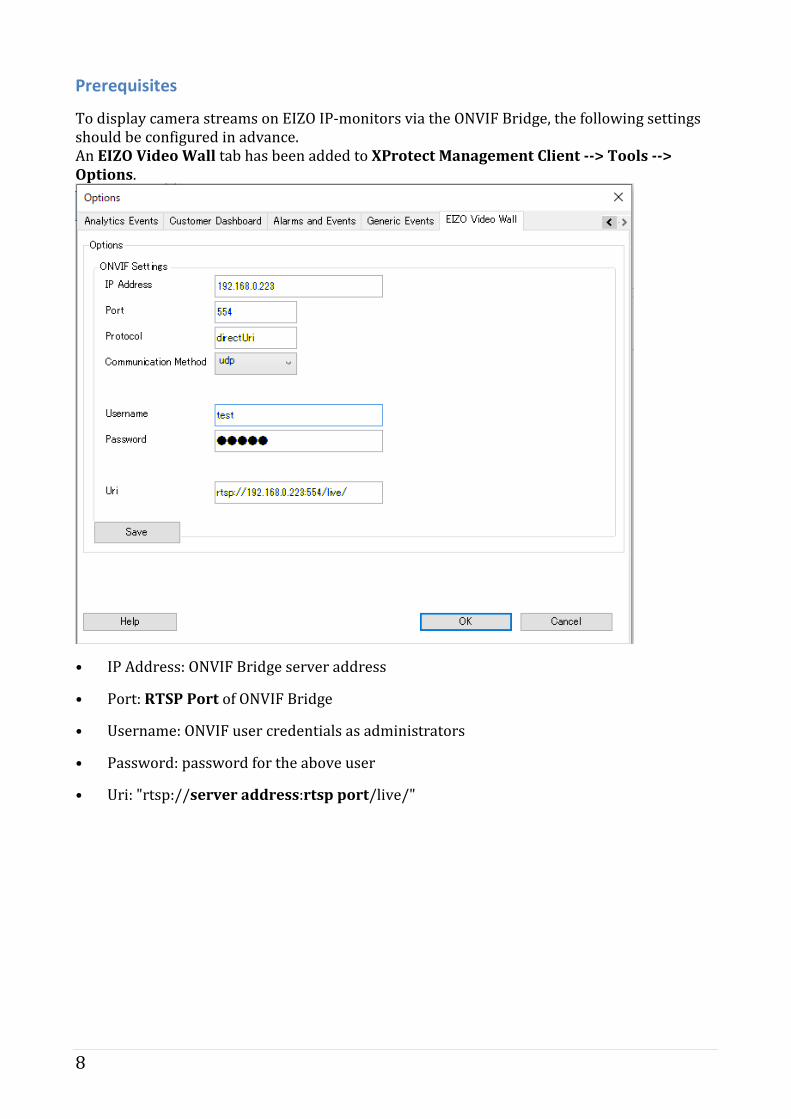
Prerequisites
To display camera streams on EIZO IP-monitors via the ONVIF Bridge, the following settings should be configured in advance. An EIZO Video Wall tab has been added to XProtect Management Client --> Tools --> Options.
• IP Address: ONVIF Bridge server address
• Port: RTSP Port of ONVIF Bridge
• Username: ONVIF user credentials as administrators
• Password: password for the above user
• Uri: "rtsp://server address:rtsp port/live/"
9
Setup Procedure
1) Creating EIZO Video Walls
An EIZO Video Wall is an entity used to remotely control EIZO IP-monitor devices via XProtect. This entity may include multiple mimic templates and presets used to manage the registered devices. Create an EIZO Video Wall by right clicking on the Configuration pane and selecting Add EIZO Video Wall. A new Video-Wall will be created with configurable Presets and Monitors.
2) Registering Monitors
A Monitor entity refers to the mimic template of an EIZO IP-monitor device, which can be used to configure cameras and screen layouts remotely. A new monitor can be created by right clicking the Monitors entity in the EIZO Video Wall and selecting Add Monitor. The following information is required in order to register a device.
Field Description Name The name of the EIZO IP-monitor (optional). IP Address The IP Address of the EIZO IP-monitor. Username The username used to log into the EIZO IP-monitor. Password The password used to log into the EIZO IP-monitor. Port The port for HTTP or HTTPS connections (must match the port set
on the device) Synchronization Monitoring
Allow all of the Smart Clients to check if the live screen settings of the IP-monitor match the Video-Wall settings.
Fullscreen Display the EIZO IP-monitor as fullscreen.
It is also possible to change the settings under the Monitor's Settings -> Edit tab after adding an IP-monitor.
Registration Conditions: • The device version must be 5.2001 or greater.
• The device must have an activated Enterprise License.
• The HTTP authentication method on the device must be set to Digest.
IP monitors will not be registered to the video wall if:
- A connection to the device cannot be made (eg: mismatched IP address or port setting)
- The username / password combination fails to authenticate
10
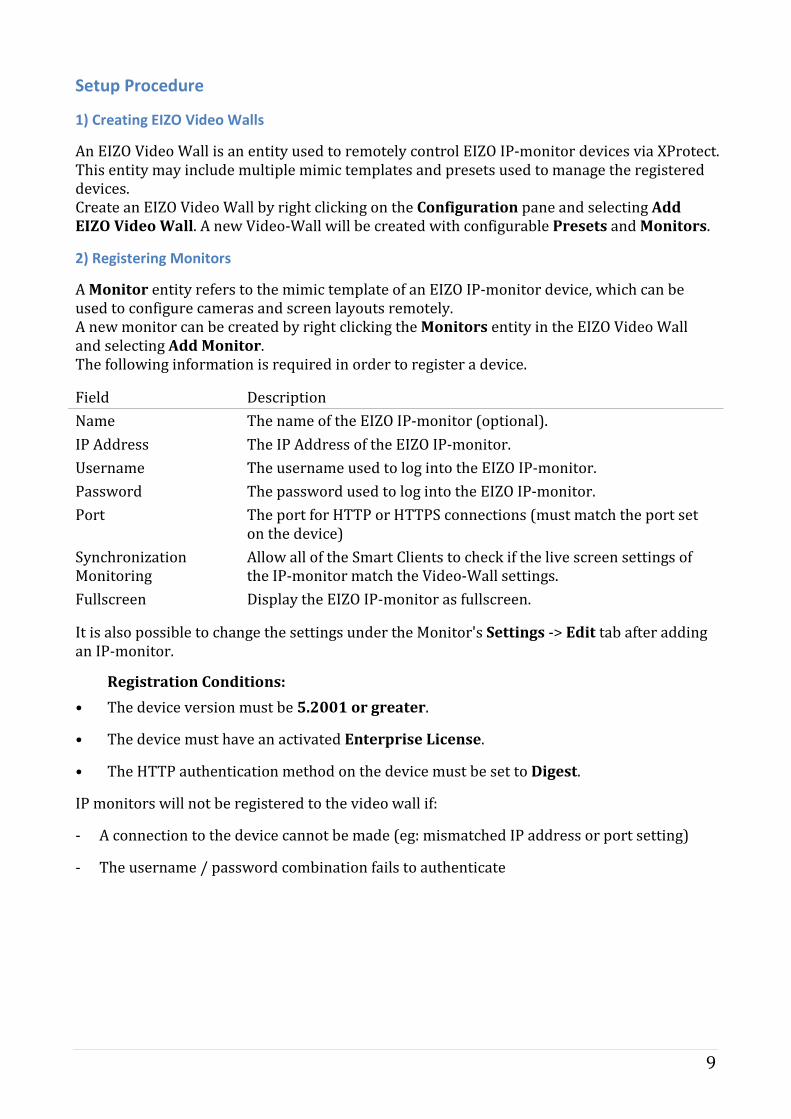
3) Adding Presets
Presets are used to define screen layouts and camera positionings for EIZO IP-monitor devices. A new preset can be created by right clicking the Presets entity in the EIZO Video Wall and selecting the Add button.
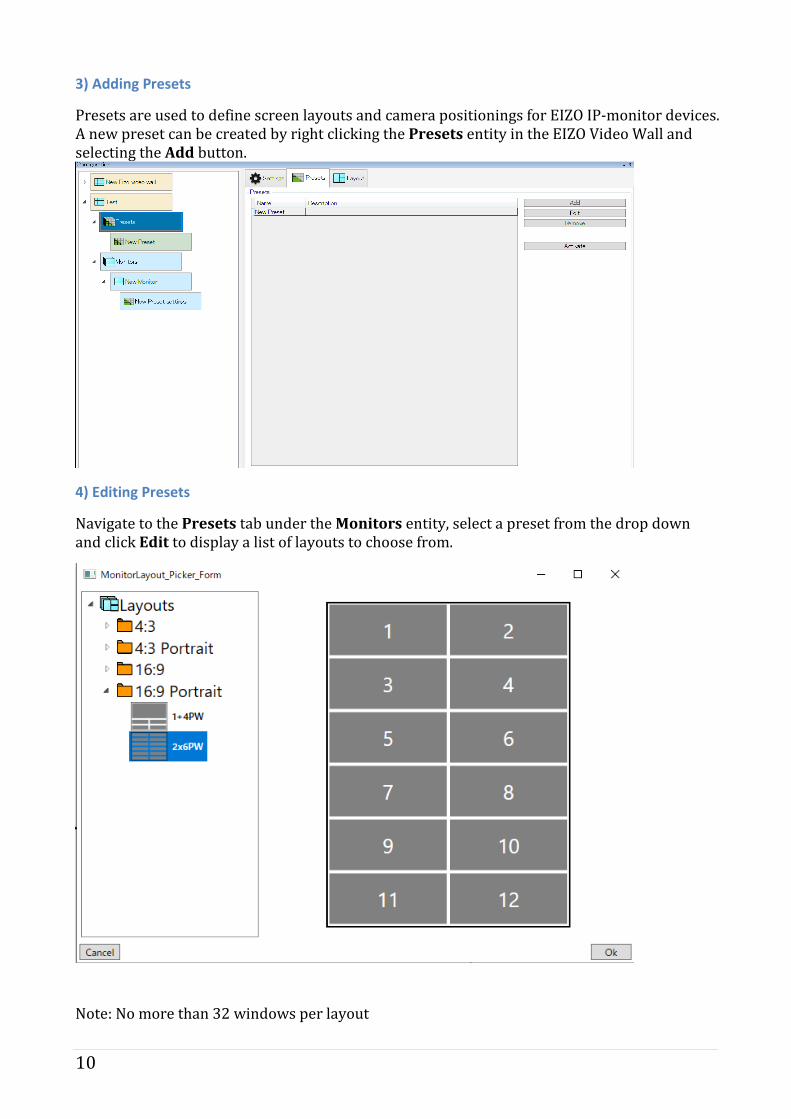
4) Editing Presets
Navigate to the Presets tab under the Monitors entity, select a preset from the drop down and click Edit to display a list of layouts to choose from.
Note: No more than 32 windows per layout
11
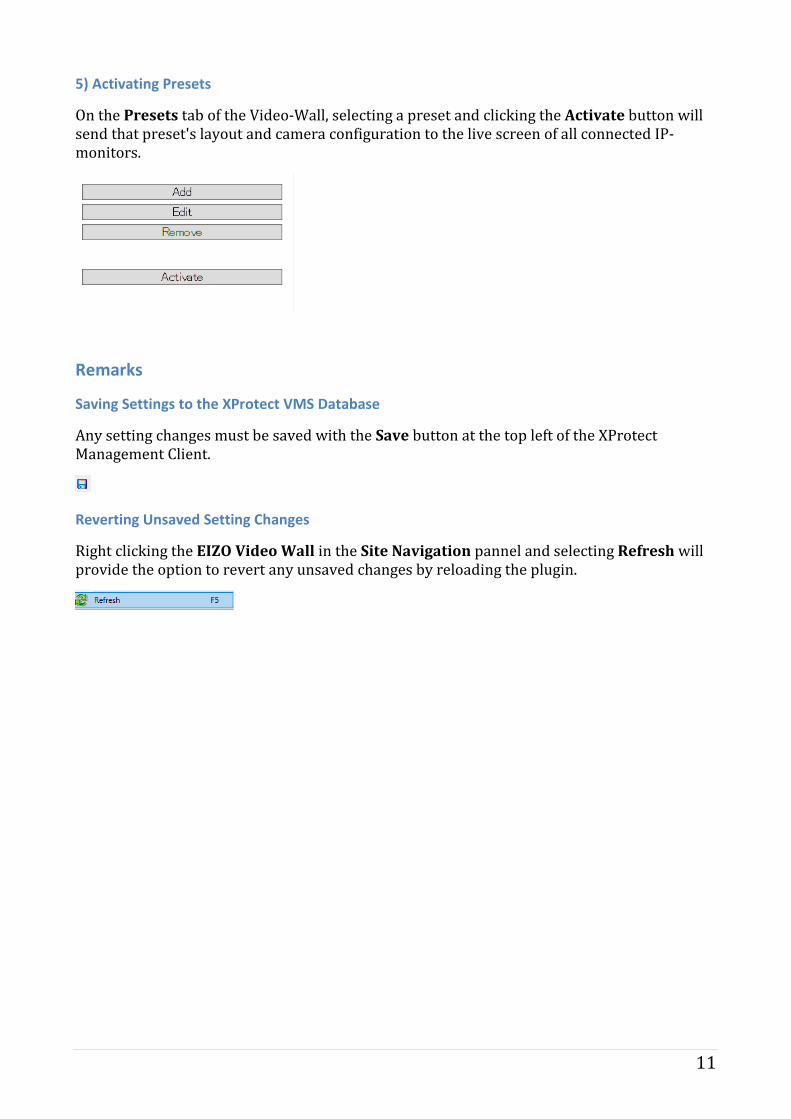
5) Activating Presets
On the Presets tab of the Video-Wall, selecting a preset and clicking the Activate button will send that preset's layout and camera configuration to the live screen of all connected IP-monitors.
Remarks
Saving Settings to the XProtect VMS Database
Any setting changes must be saved with the Save button at the top left of the XProtect Management Client.
Reverting Unsaved Setting Changes
Right clicking the EIZO Video Wall in the Site Navigation pannel and selecting Refresh will provide the option to revert any unsaved changes by reloading the plugin.
12
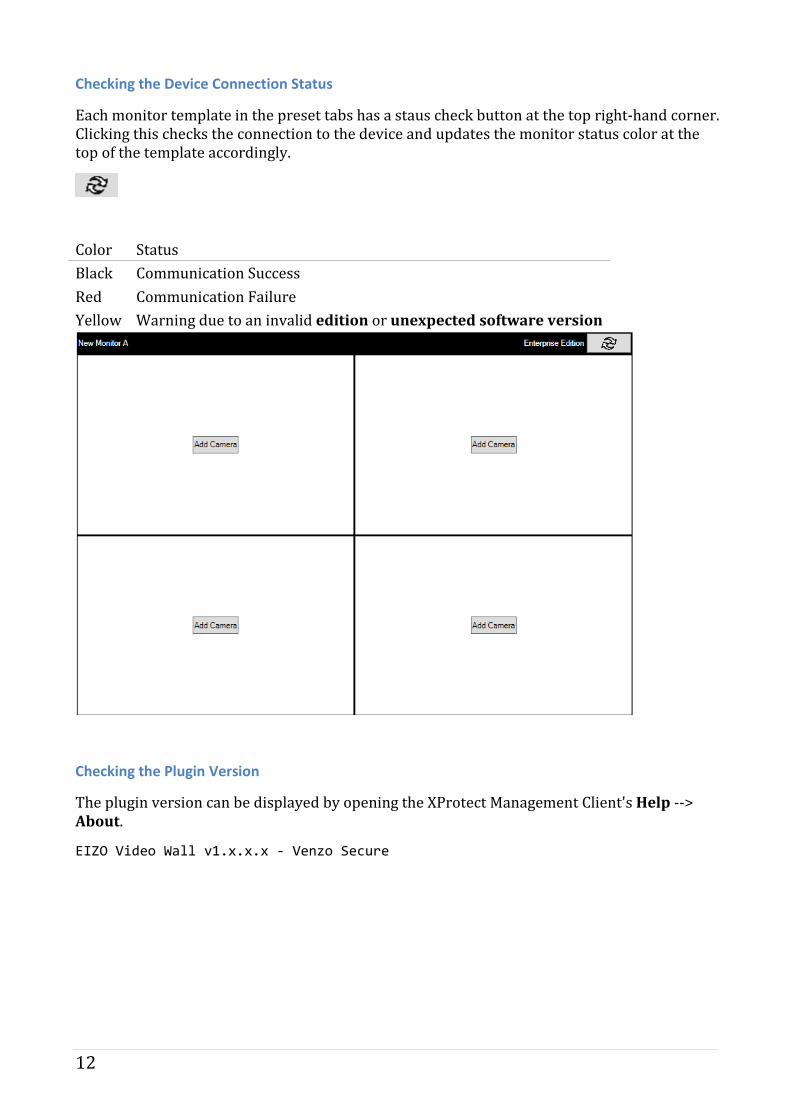
Checking the Device Connection Status
Each monitor template in the preset tabs has a staus check button at the top right-hand corner. Clicking this checks the connection to the device and updates the monitor status color at the top of the template accordingly.
Color Status Black Communication Success Red Communication Failure Yellow Warning due to an invalid edition or unexpected software version
Checking the Plugin Version
The plugin version can be displayed by opening the XProtect Management Client's Help --> About.
EIZO Video Wall v1.x.x.x - Venzo Secure
13
XProtect Smart Client
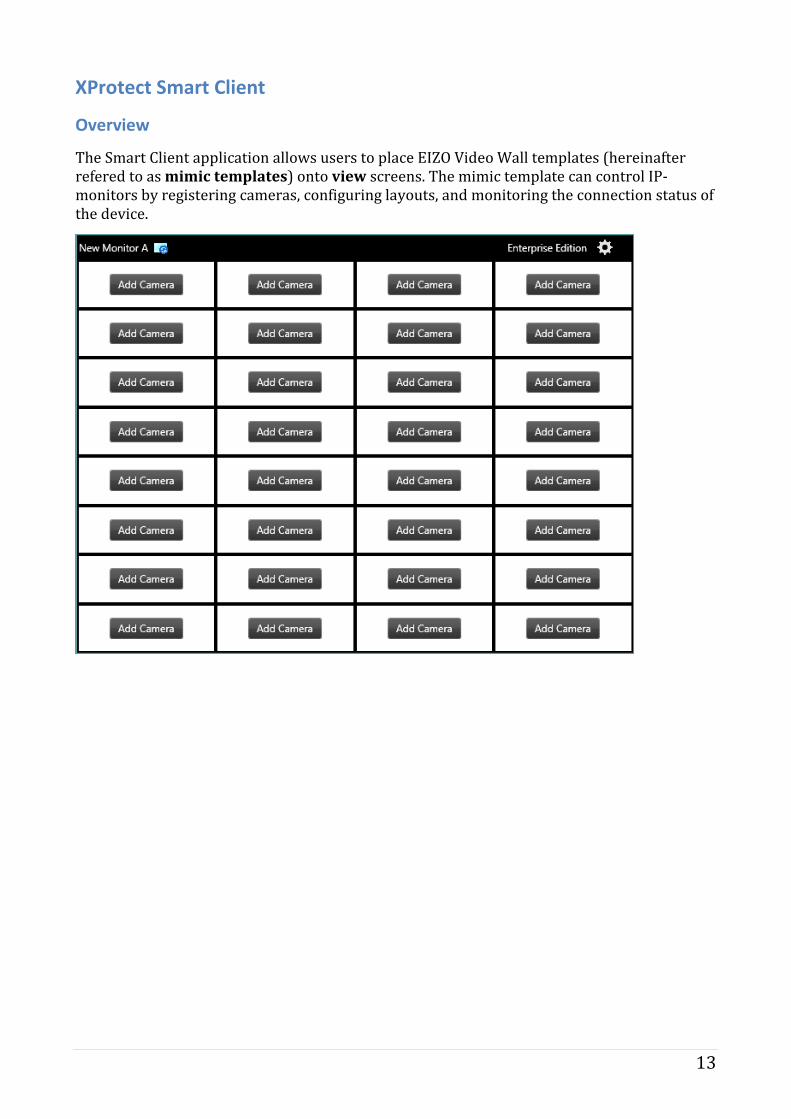
Overview
The Smart Client application allows users to place EIZO Video Wall templates (hereinafter refered to as mimic templates) onto view screens. The mimic template can control IP-monitors by registering cameras, configuring layouts, and monitoring the connection status of the device.
14
Basic Functionalities
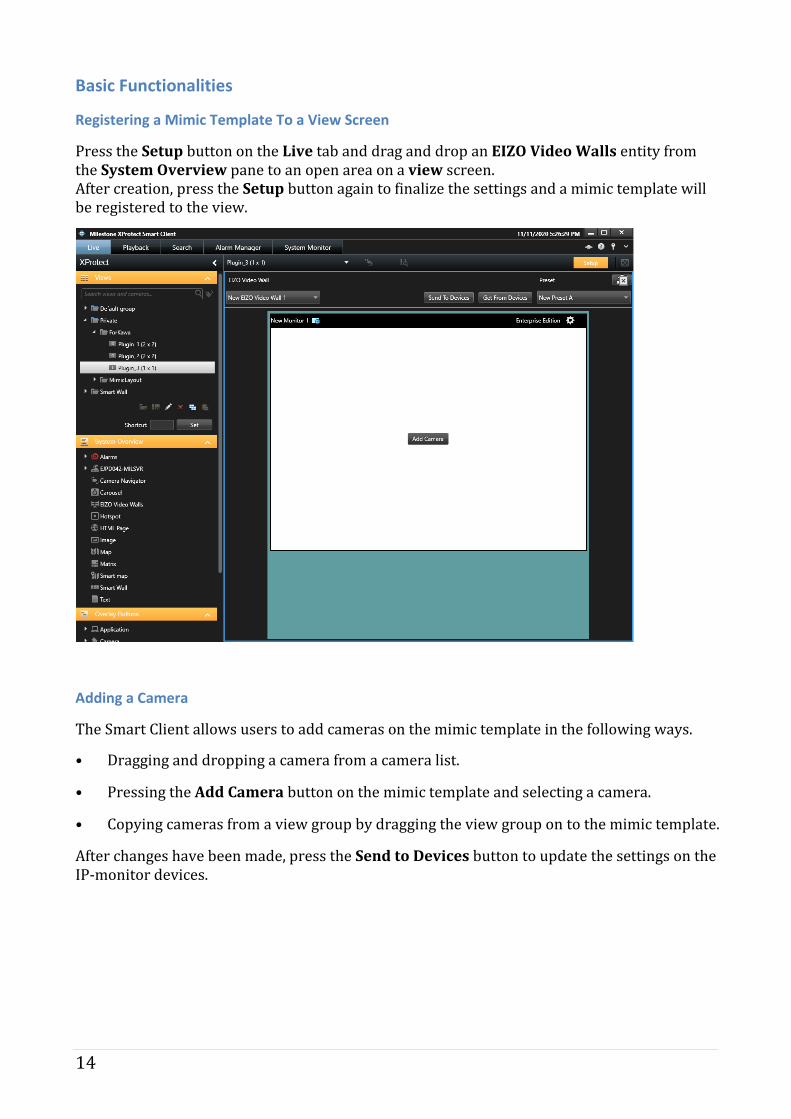
Registering a Mimic Template To a View Screen
Press the Setup button on the Live tab and drag and drop an EIZO Video Walls entity from the System Overview pane to an open area on a view screen. After creation, press the Setup button again to finalize the settings and a mimic template will be registered to the view.
Adding a Camera
The Smart Client allows users to add cameras on the mimic template in the following ways.
• Dragging and dropping a camera from a camera list.
• Pressing the Add Camera button on the mimic template and selecting a camera.
• Copying cameras from a view group by dragging the view group on to the mimic template.
After changes have been made, press the Send to Devices button to update the settings on the IP-monitor devices.
15
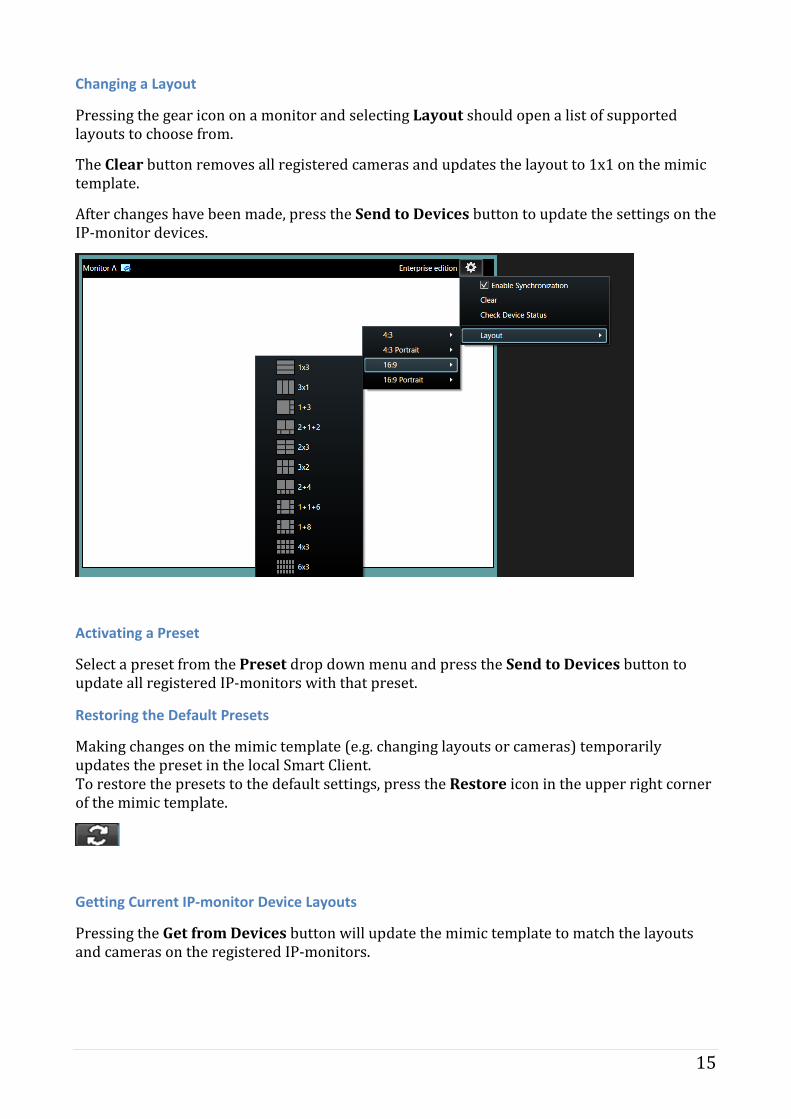
Changing a Layout
Pressing the gear icon on a monitor and selecting Layout should open a list of supported layouts to choose from.
The Clear button removes all registered cameras and updates the layout to 1x1 on the mimic template.
After changes have been made, press the Send to Devices button to update the settings on the IP-monitor devices.
Activating a Preset
Select a preset from the Preset drop down menu and press the Send to Devices button to update all registered IP-monitors with that preset.
Restoring the Default Presets
Making changes on the mimic template (e.g. changing layouts or cameras) temporarily updates the preset in the local Smart Client. To restore the presets to the default settings, press the Restore icon in the upper right corner of the mimic template.
Getting Current IP-monitor Device Layouts
Pressing the Get from Devices button will update the mimic template to match the layouts and cameras on the registered IP-monitors.
16
Activating a View Template Layout
Dragging and Dropping a view template from the Views pane to the mimic template will update the layout to match the view.
After changes have been made, press the Send to Devices button to update the settings on the IP-monitor devices.
Note:
Other than cameras, it is not possible to copy entities (such as maps and web pages) from a view template into the mimic template.
Removing a Mimic Template From a View
Enter setup mode by pressing the Setup button. Left click the X at the top right-hand side of an EIZO Video Wall template to remove the mimic template from the view.
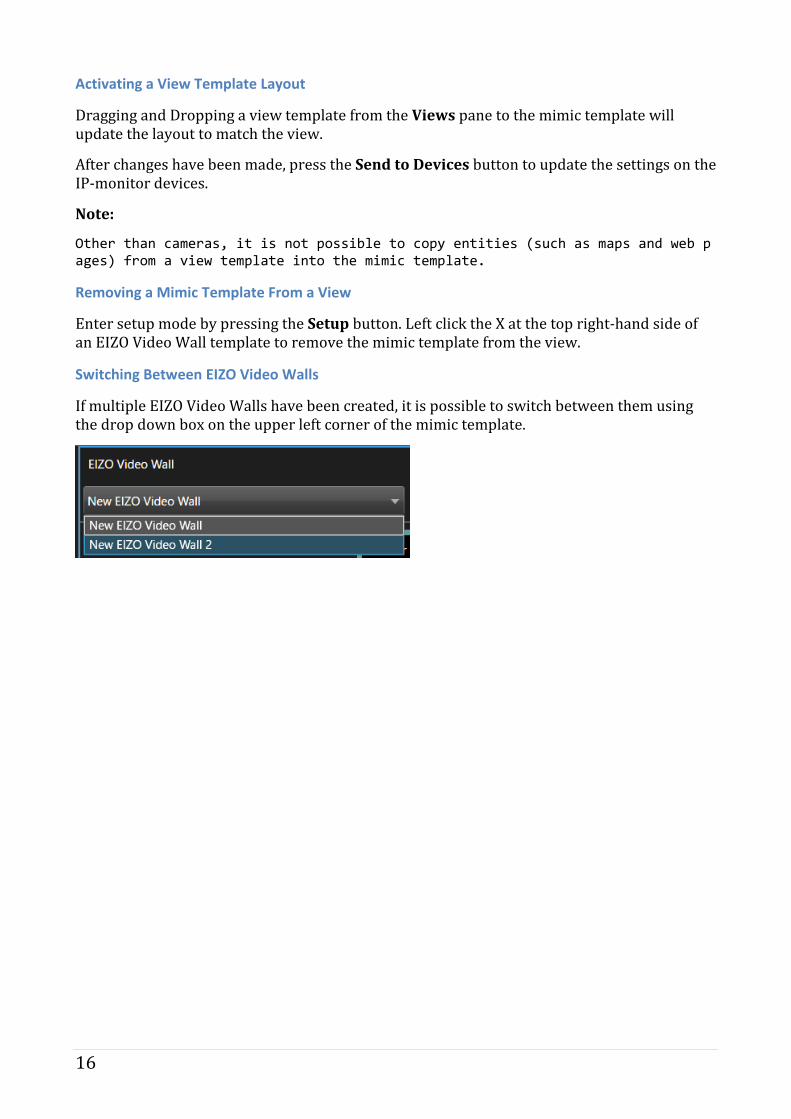
Switching Between EIZO Video Walls
If multiple EIZO Video Walls have been created, it is possible to switch between them using the drop down box on the upper left corner of the mimic template.
17
Advanced Functionalities
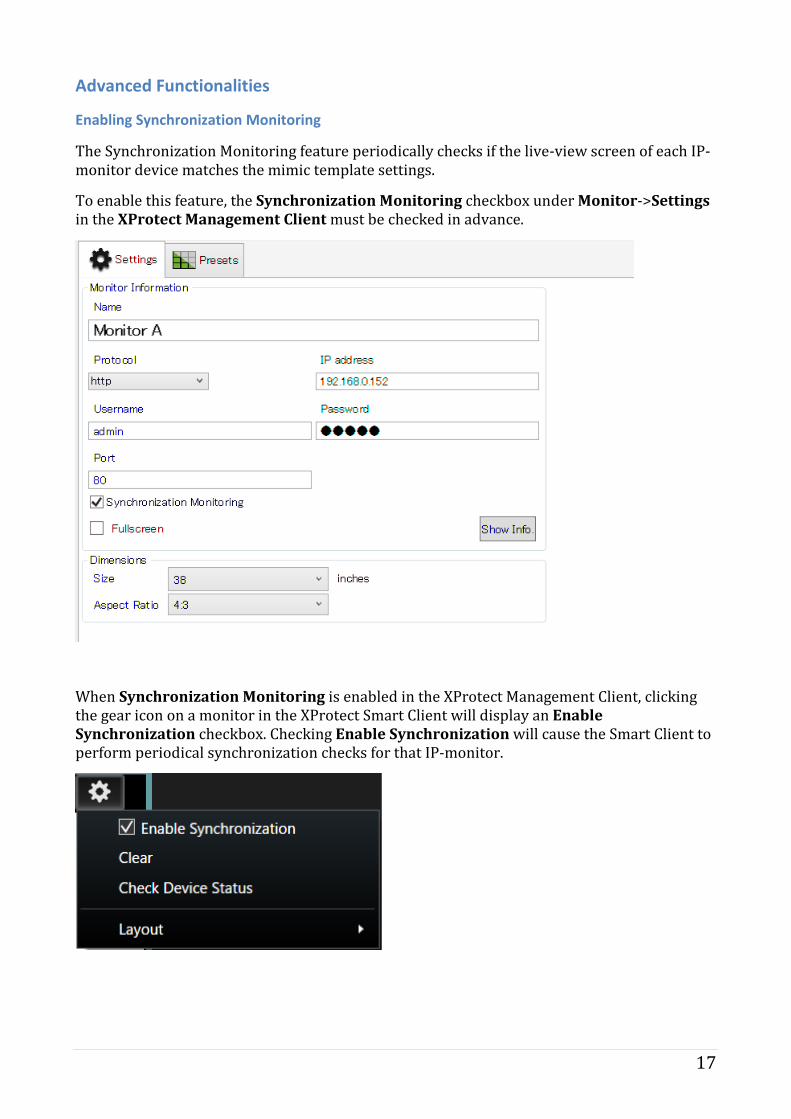
Enabling Synchronization Monitoring
The Synchronization Monitoring feature periodically checks if the live-view screen of each IP-monitor device matches the mimic template settings.
To enable this feature, the Synchronization Monitoring checkbox under Monitor->Settings in the XProtect Management Client must be checked in advance.
When Synchronization Monitoring is enabled in the XProtect Management Client, clicking the gear icon on a monitor in the XProtect Smart Client will display an Enable Synchronization checkbox. Checking Enable Synchronization will cause the Smart Client to perform periodical synchronization checks for that IP-monitor.
18
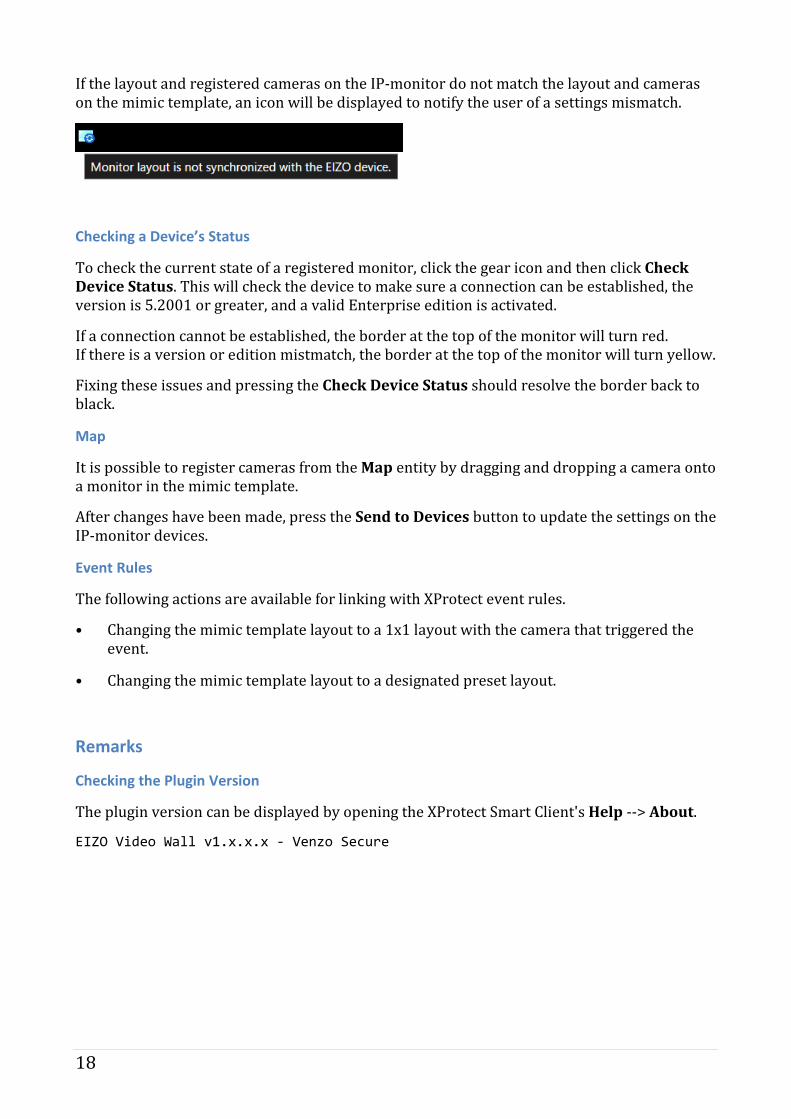
If the layout and registered cameras on the IP-monitor do not match the layout and cameras on the mimic template, an icon will be displayed to notify the user of a settings mismatch.
Checking a Device’s Status
To check the current state of a registered monitor, click the gear icon and then click Check Device Status. This will check the device to make sure a connection can be established, the version is 5.2001 or greater, and a valid Enterprise edition is activated.
If a connection cannot be established, the border at the top of the monitor will turn red. If there is a version or edition mistmatch, the border at the top of the monitor will turn yellow.
Fixing these issues and pressing the Check Device Status should resolve the border back to black.
Map
It is possible to register cameras from the Map entity by dragging and dropping a camera onto a monitor in the mimic template.
After changes have been made, press the Send to Devices button to update the settings on the IP-monitor devices.
Event Rules
The following actions are available for linking with XProtect event rules.
• Changing the mimic template layout to a 1x1 layout with the camera that triggered the event.
• Changing the mimic template layout to a designated preset layout.
Remarks
Checking the Plugin Version
The plugin version can be displayed by opening the XProtect Smart Client's Help --> About.
EIZO Video Wall v1.x.x.x - Venzo Secure
19
Open Source Software License Json.NET 12.0.3
#### SPDX identifier MIT #### License text MIT License Copyright (c) _____ Permission is hereby granted, free of charge, to any person obtaining a copy of this software and associated documentation files (the "Software"), to deal in the Software without restriction, including without limitation the rights to use, copy, modify, merge, publish, distribute, sublicense, and/or sell copies of the Software, and to permit persons to whom the Software is furnished to do so, subject to the following conditions: The above copyright notice and this permission notice shall be included in all copies or substantial portions of the Software. THE SOFTWARE IS PROVIDED "AS IS", WITHOUT WARRANTY OF ANY KIND, EXPRESS OR IMPLIED, INCLUDING BUT NOT LIMITED TO THE WARRANTIES OF MERCHANTABILITY, FITNESS FOR A PARTICULAR PURPOSE AND NONINFRINGEMENT. IN NO EVENT SHALL THE AUTHORS OR COPYRIGHT HOLDERS BE LIABLE FOR ANY CLAIM, DAMAGES OR OTHER LIABILITY, WHETHER IN AN ACTION OF CONTRACT, TORT OR OTHERWISE, ARISING FROM, OUT OF OR IN CONNECTION WITH THE SOFTWARE OR THE USE OR OTHER DEALINGS IN THE SOFTWARE.
Trademark Microsoft, Windows, Internet Explorer, Microsoft Edge and .NET Framework are registered trademarks of Microsoft Corporation in the United States and other countries.
ONVIF is a trademark of ONVIF Inc.
XProtect is a registered trademark of Milestone Systems A/S.
EIZO, the EIZO Logo, ColorEdge, CuratOR, DuraVision, FlexScan, FORIS, RadiCS, RadiForce, RadiNET, Raptor and ScreenManager are registered trademarks of EIZO Corporation in Japan and other countries.
ColorEdge Tablet Controller, ColorNavigator, EcoView NET, EIZO EasyPIX, EIZO Monitor Configurator, EIZO ScreenSlicer, G-Ignition, i•Sound, Quick Color Match, RadiLight, Re/Vue, SafeGuard, Screen Administrator, Screen InStyle and UniColor Pro are trademarks of EIZO Corporation.
All other company names, product names, and logos are trademarks or registered trademarks of their respective owners.

20
03V28720A1 UM-VIDEOWALL-EN www.eizoglobal.com
Copyright © 2020 EIZO Corporation. All rights reserved. 1st Edition - November, 2020